How to Draw a Penguin Step by Step
This post is about how to draw a penguin easy.
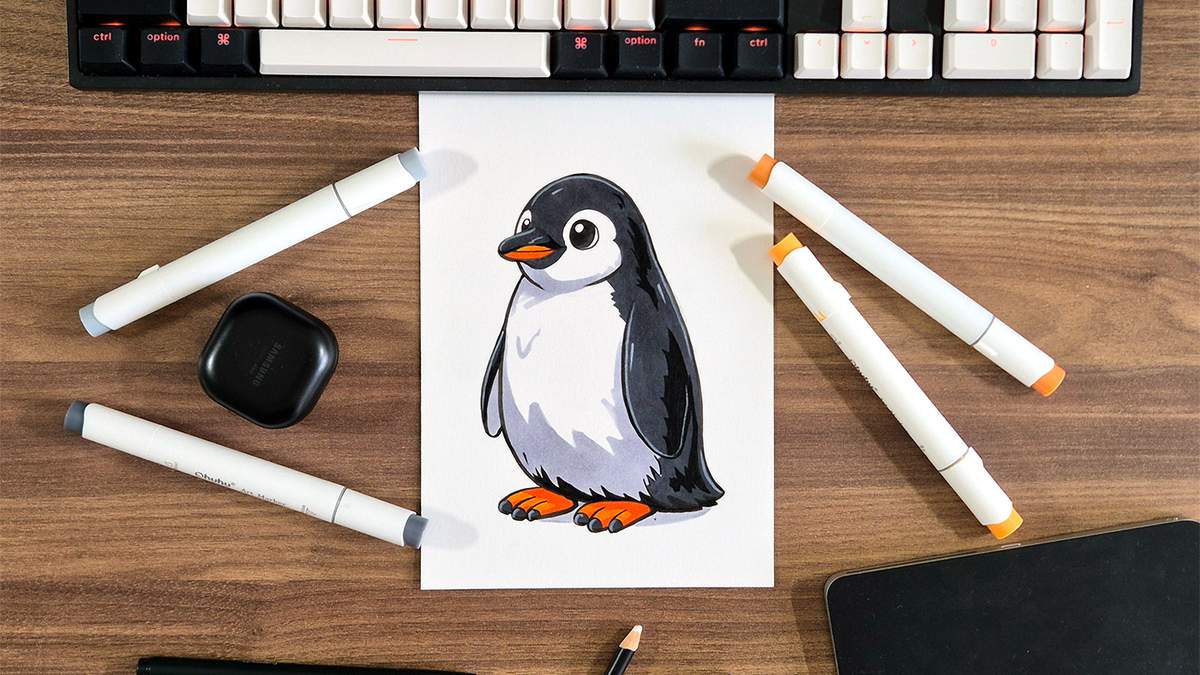
Want to learn how to draw a cute penguin from scratch? In this penguin drawing tutorial, I will show you the exact process of drawing a penguin so you can follow along and create your very own cute penguin drawing.
I've broken the whole process up into 10 sections (the main steps of this guide), and each section is broken up into a bunch of smaller, easy-to-follow steps. Each step contains plenty of pictures that show you exactly what to do.
One thing to keep in mind: if this is one of your first drawings or the first time you're drawing a penguin, don't worry about making it perfect. Penguins can look many ways. They can be slim. They can be fat. They can be small. They can be tall. They can be wide. Some have differently shaped heads or weird feet. Just try your best and learn. That's how you get better.
Now, let's get started with our cute penguin drawing, shall we?
I just wanted to let you know that this post contains affiliate links, and any purchases made through these links will result in a small commission for me and won't cost you anything extra.
In This Guide
- Drawing supplies and colors I used to make this penguin drawing
- Sketching a penguin from scratch
- Outlining your penguin sketch
- Coloring your penguin drawing with markers
- Adding details with a white pencil
- More step by step guides you'll enjoy
Drawing Supplies and Colors I Used
To sketch this penguin, I used a regular graphite pencil with an eraser. And to lighten my sketch, I used a kneaded eraser. They are really great for this. You just roll them across your sketch, and it will lighten your lines.
I made this drawing on Canson Illustration Manga paper (my favorite paper for using alcohol markers).
To outline the penguin sketch, I used a black Tombow Fudenosuke brush pen.
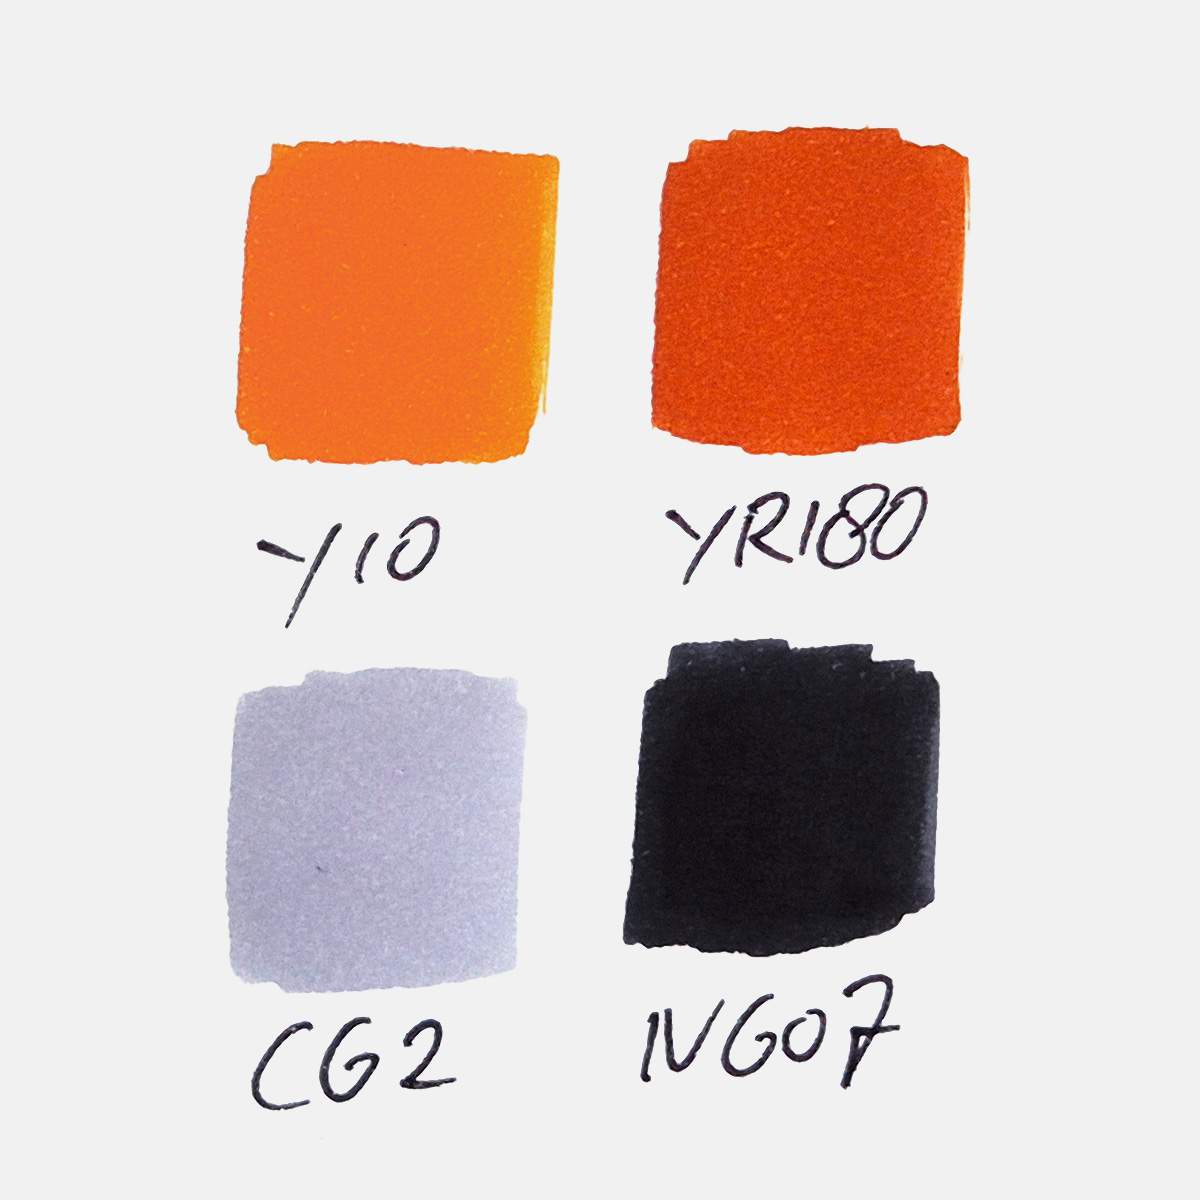
And to color this penguin drawing, I used Ohuhu Honolulu markers. I used 4 colors in total: Apricot (Y10), Lipstick Orange (YR180), Cool Grey II 2 (CG2), and Neutral Grey 7 (NG07).
You can buy these colors separately or as part of the 320 set. You can also buy them on Amazon if you prefer.
I believe Ohuhu changed all the color codes of their markers, so I have no clue which ones are which. These are the ones that I have, which probably have the old color codes...
I've added an image below with all the color swatches so you can match your markers to the ones I used if you already have some.
I also used a white Derwent Chromaflow colored pencil from my 24 set.
How to Draw a Penguin Step by Step
I've broken the drawing process for this penguin drawing up into 3 parts: the sketching, the outlining, and the coloring and details.
For the first part, the sketching, I marked all the newly sketched lines in red, so you can easily spot what to sketch next.
Let's start with the first part of the sketching process: the penguin's head.
Step 1: Sketch the Penguin's Head
When sketching animals and anime characters, or anything really that has a head, I like to start with the outline of the head.
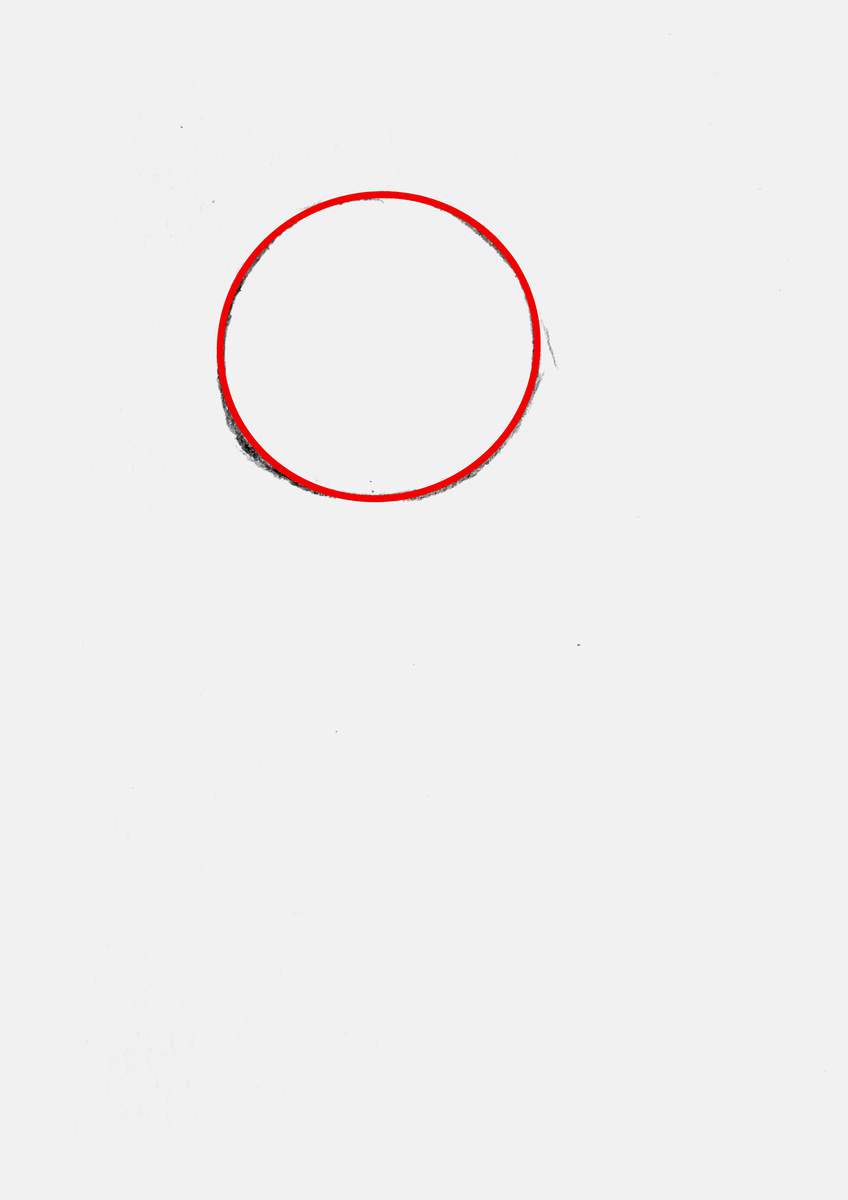
For this penguin drawing, this step is super simple. The outline of the head is just a circle towards the top left of the paper.
Don't worry, the circle doesn't need ot be perfect. It just has to look somewhat circular.
I made the red circle in Photoshop, but you can see that my sketch line doesn't follow it exactly. It's a little more wonky, and that's okay.
Step 2: Add the Blob-Shaped Body of the Penguin
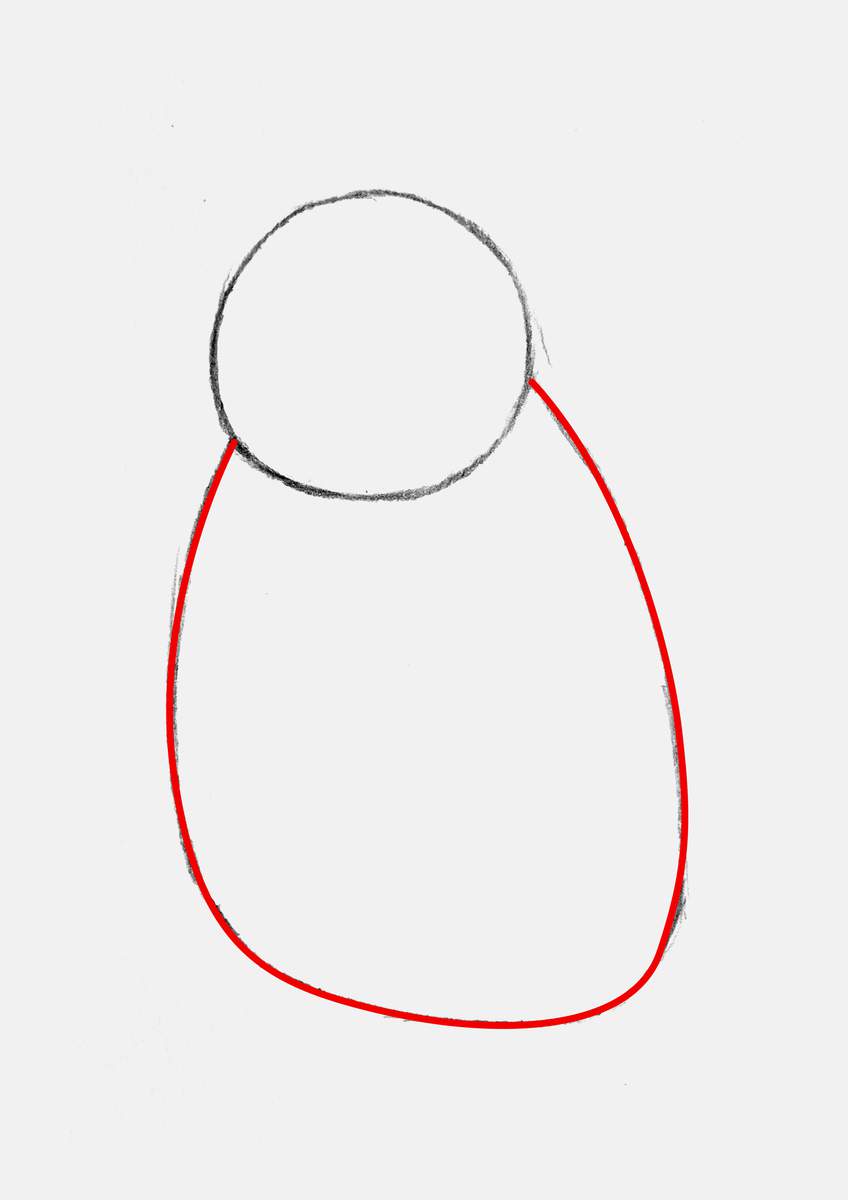
With the outline of the head in place, we can add the outer edge of the penguin's body.
I don't really know what word to use to describe this shape, so let's stick to a potato shape with a flattened bottom.
Again, you don't have to be perfect with this shape. Your penguin might be slimmer or thicker depending on what you like.
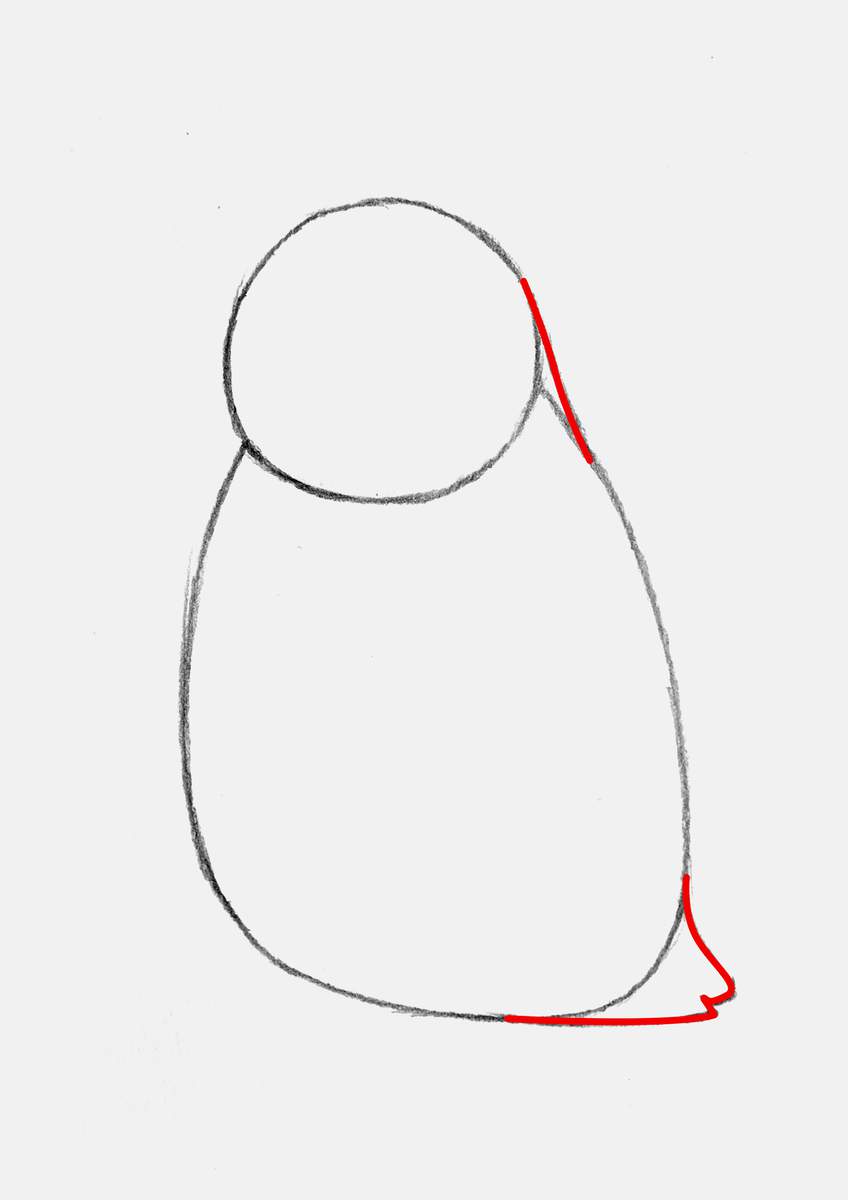
Step 3: Draw the Tail
Next, I added the tail to the bottom right of the body, and I smoothed out the neck.
Step 4: Sketch the Penguin's Feet
Next up are the penguin's feet.
I started with the outline without the toes for now.
On the left, the foot is covered at the top by the penguin's body. This foot is made up of a hockey stick shape on the left and a straight-ish line on the right, with some space in between for the toes.
The right foot isn't covered on the top, so this one is a continuous line with the hockey stick shape on the left that curves right over the top edge of the foot and into a straight line on the right.
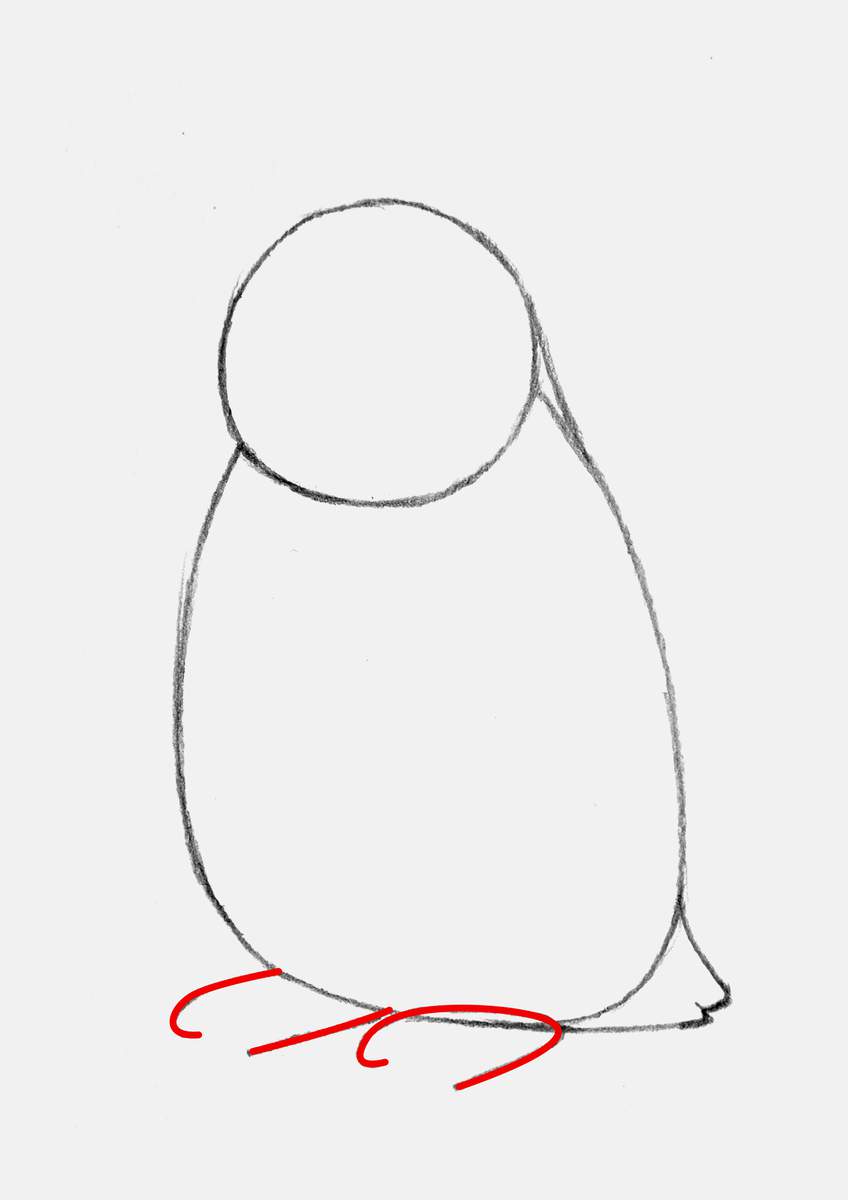
Next, I added two rounded hook shapes, the toes, on each foot.
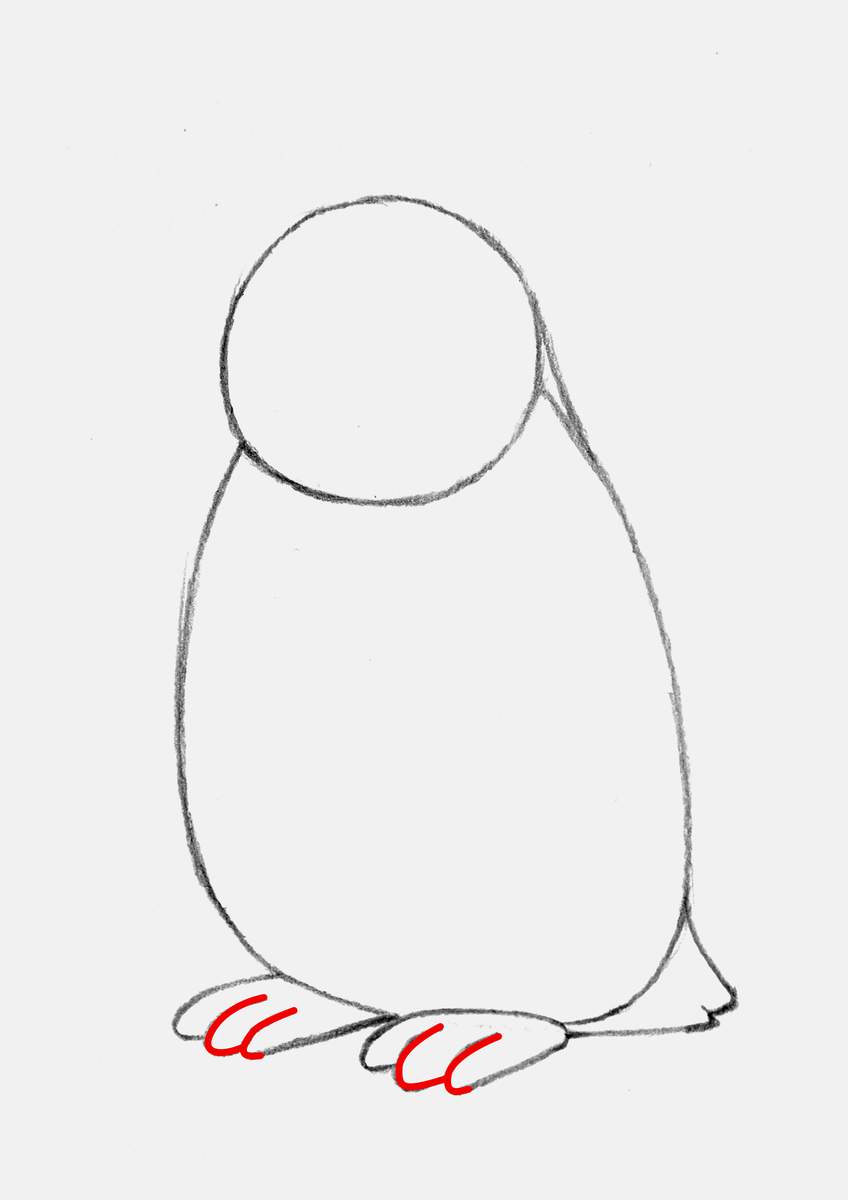
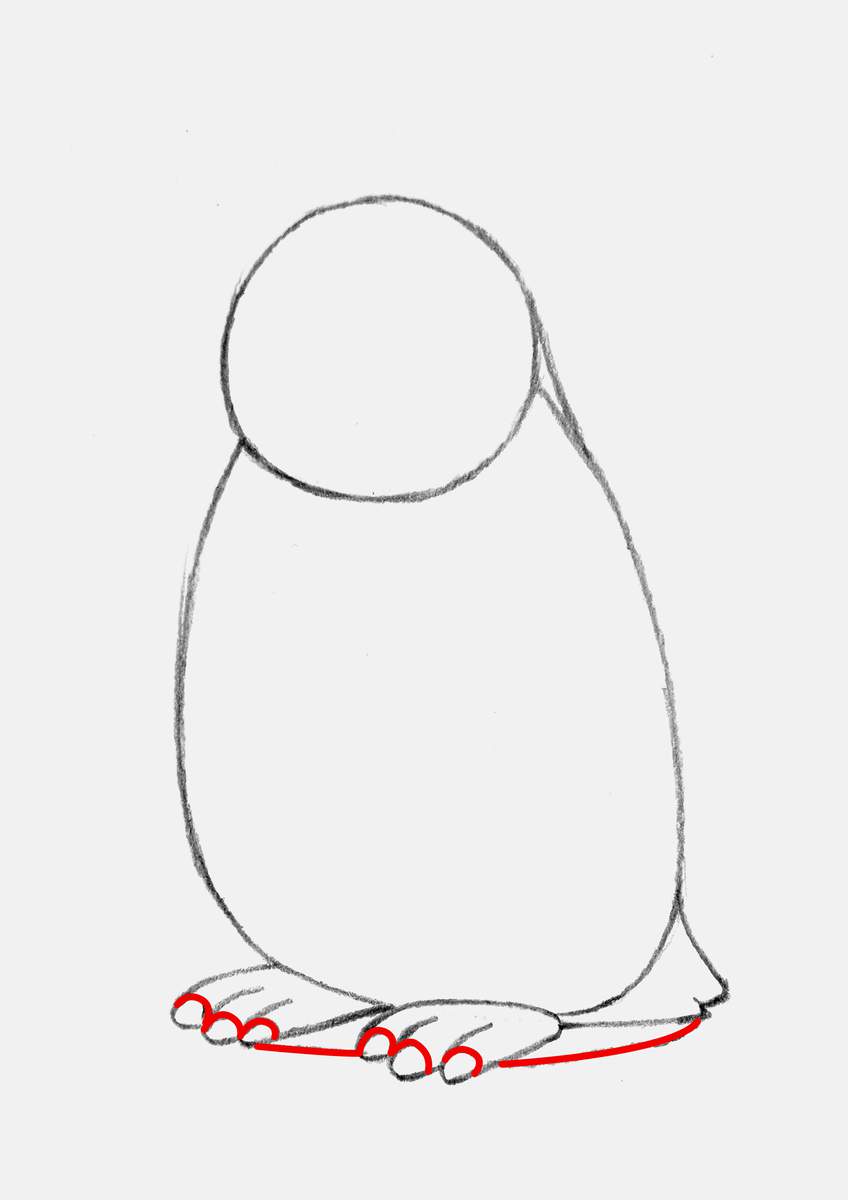
Lastly, I added some arches to mark the nails.
I also added the outline for the shadow of the penguin.
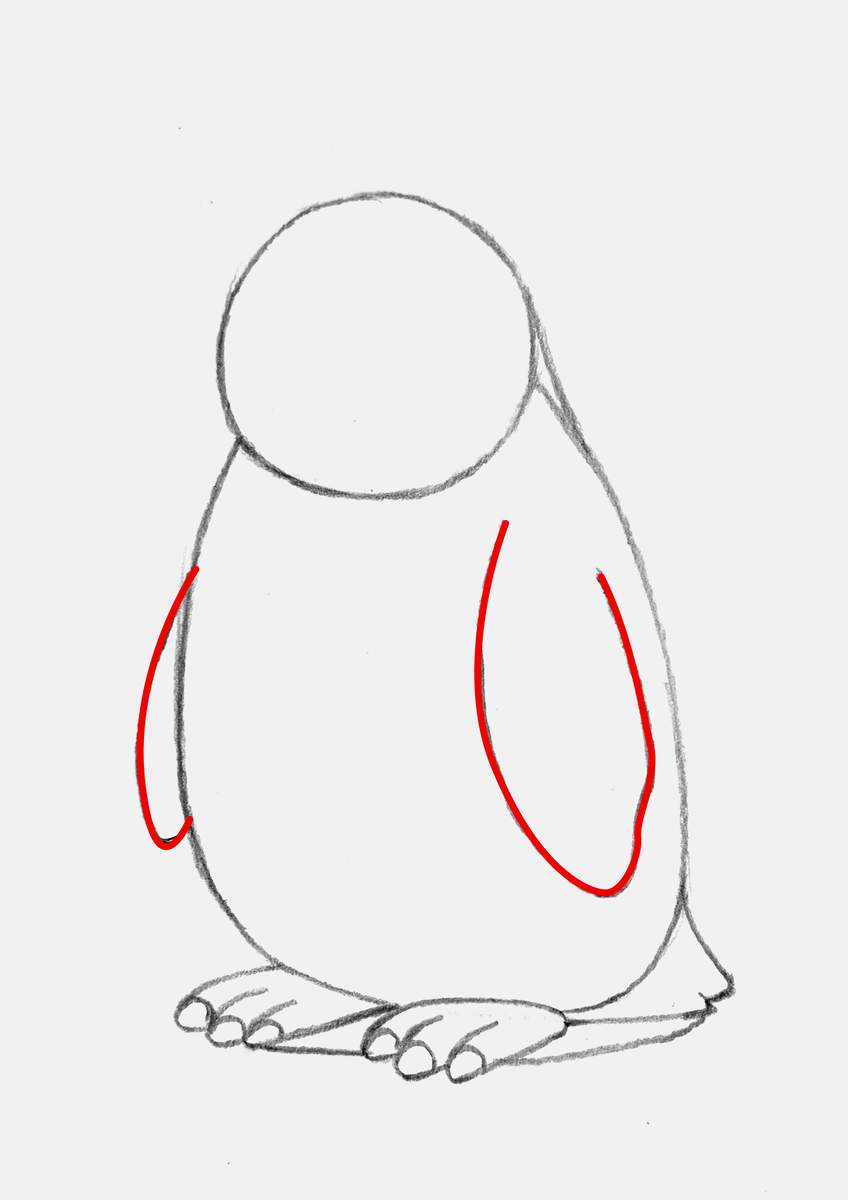
Step 5: Add the Flippers of the Penguin
After that, I added the flippers.
The one on the left is partially covered by its body, which makes the shape a little simpler. It's a curve with a sharper curved part at the bottom.
The right flipper is more like an oval with a little indent on the bottom right.
Step 6: Draw the Penguin's Face
With everything else almost done, we can continue the penguin's head.
I started with the beak. It's shaped like a rounded pine tree that's pointing to the left.
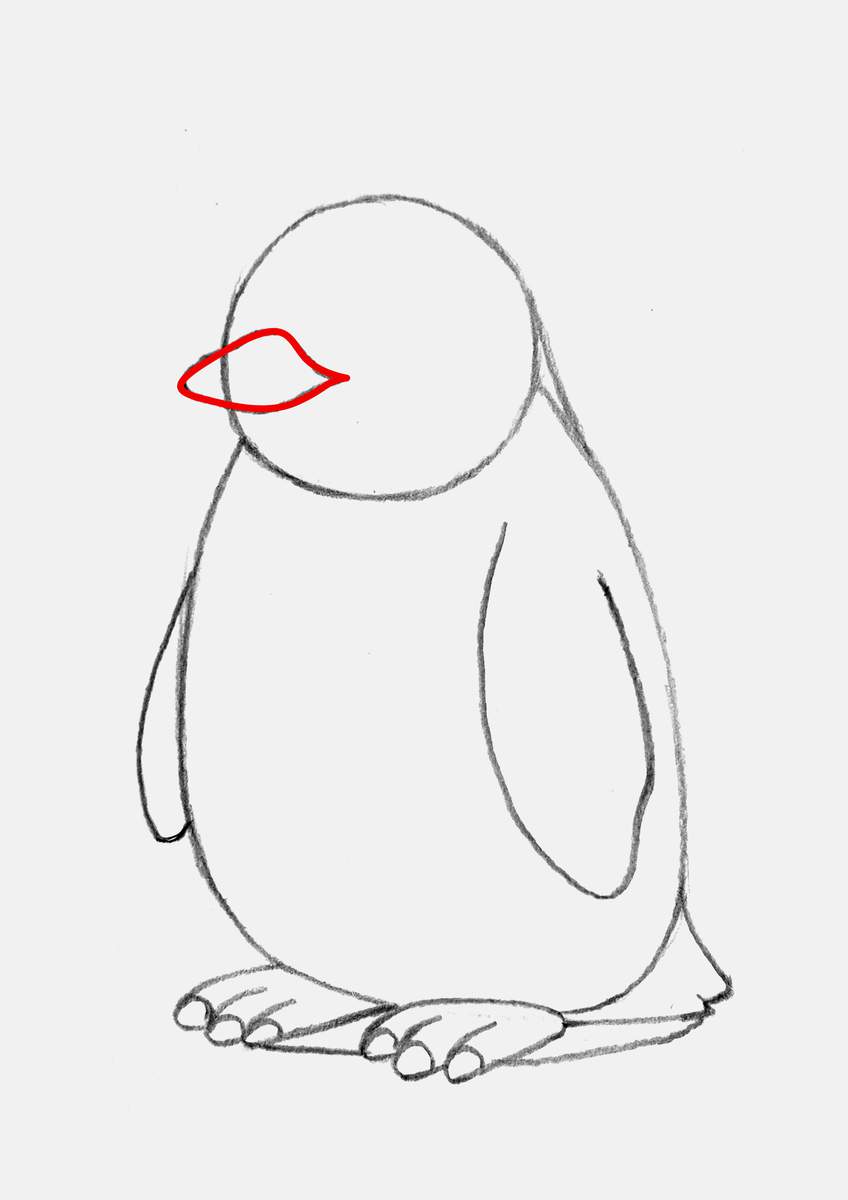
From the edges of the beak, I started the fur pattern on the penguin's face. I first sketched the edge between the black and the white fur around the eyes.
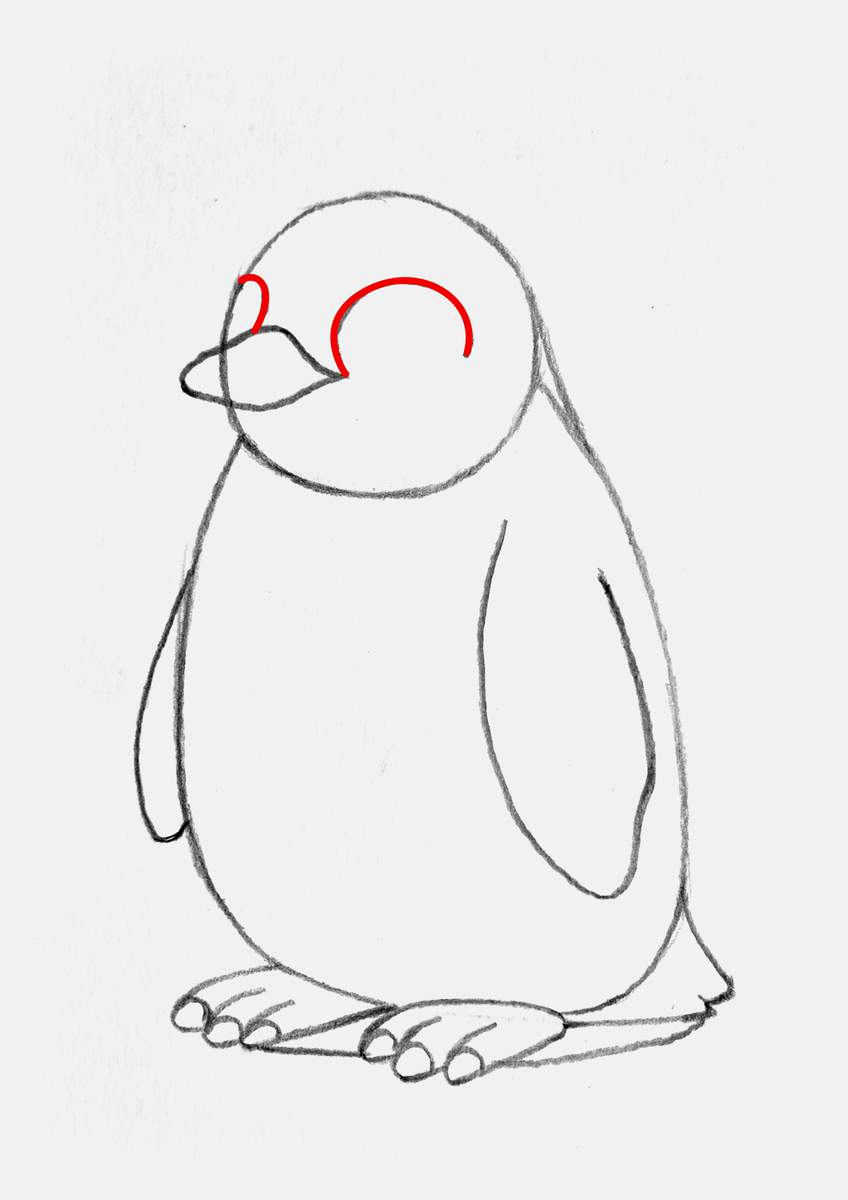
And then, I added the fur edge below the beak and on its cheek.
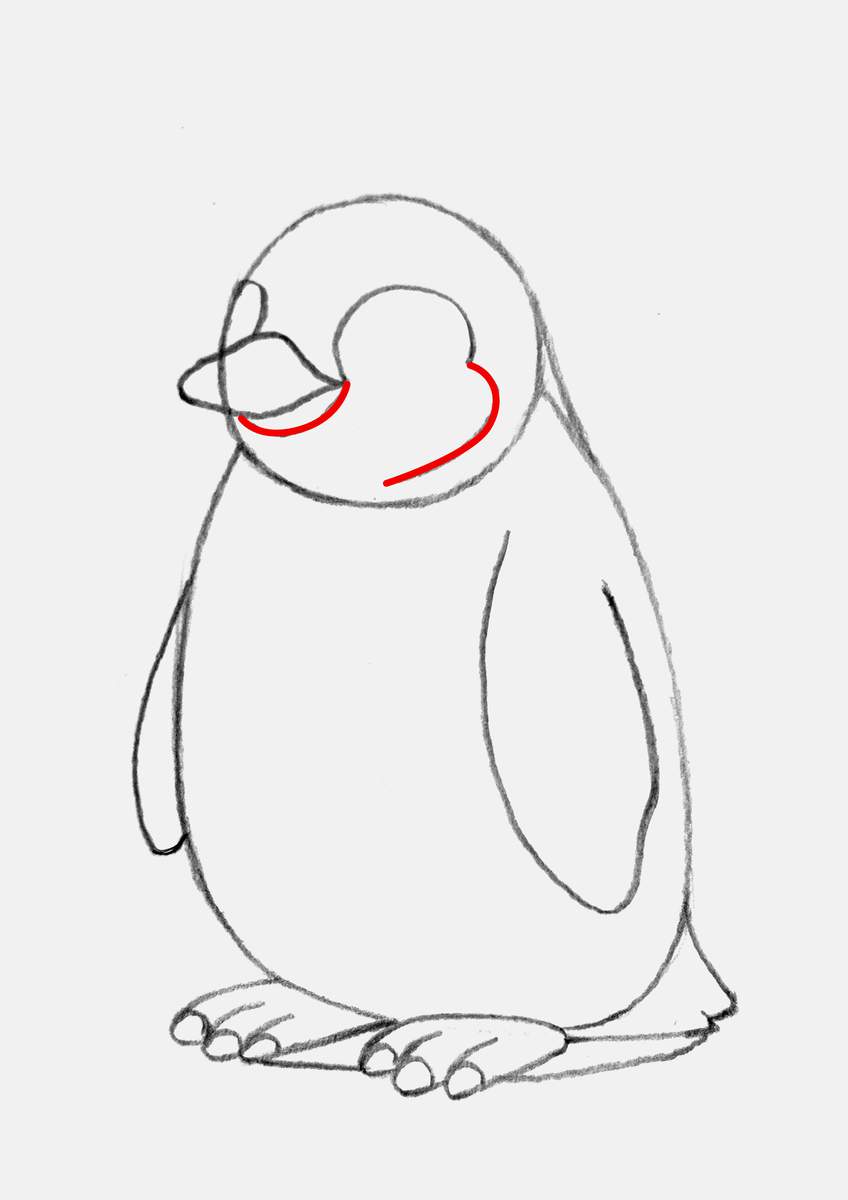
To finish the penguin's beak, I added the beak line and a divider line between the black and the orange parts.
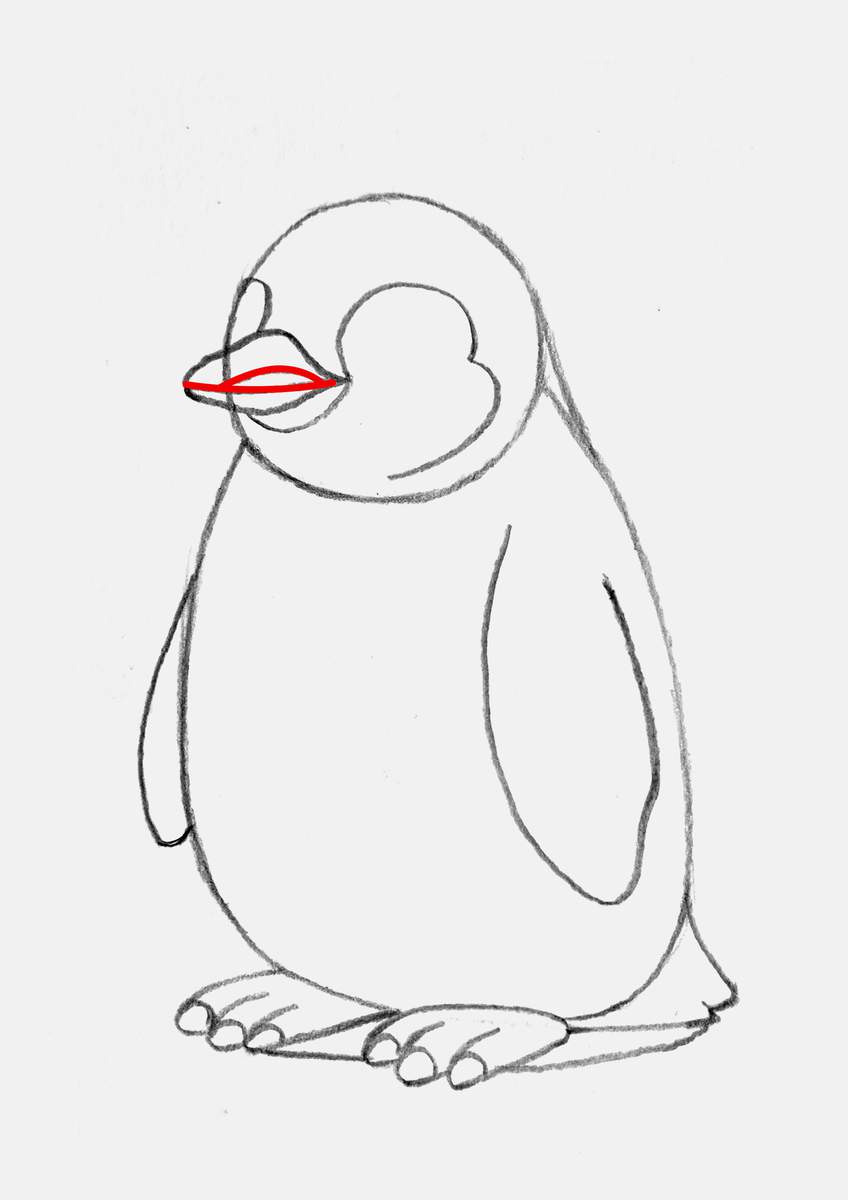
After that, I added both eyes. The eye on the left is partially hidden and is more ellipse-shaped. The one on the right is more like a circle.
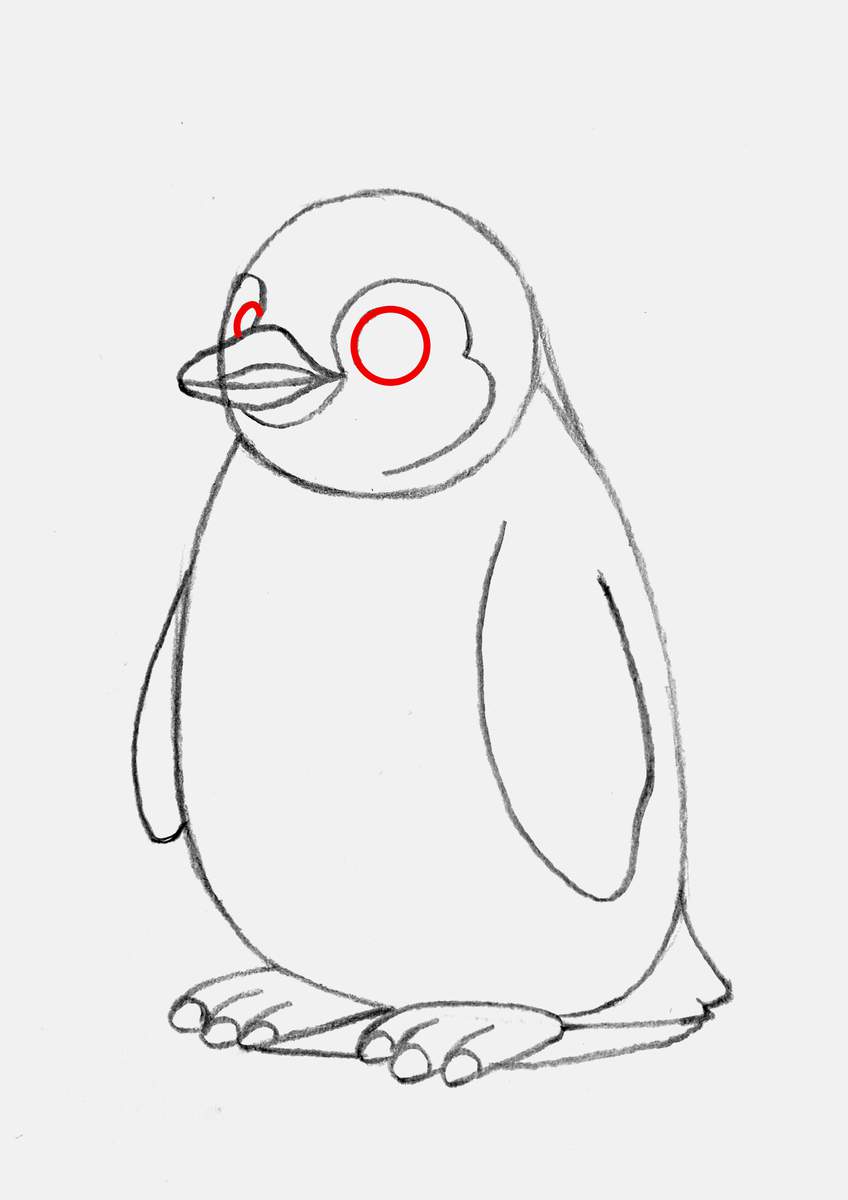
And to complete the eyes, I added the pupils, and on the eye on the right, I added a line to mark a light reflection.
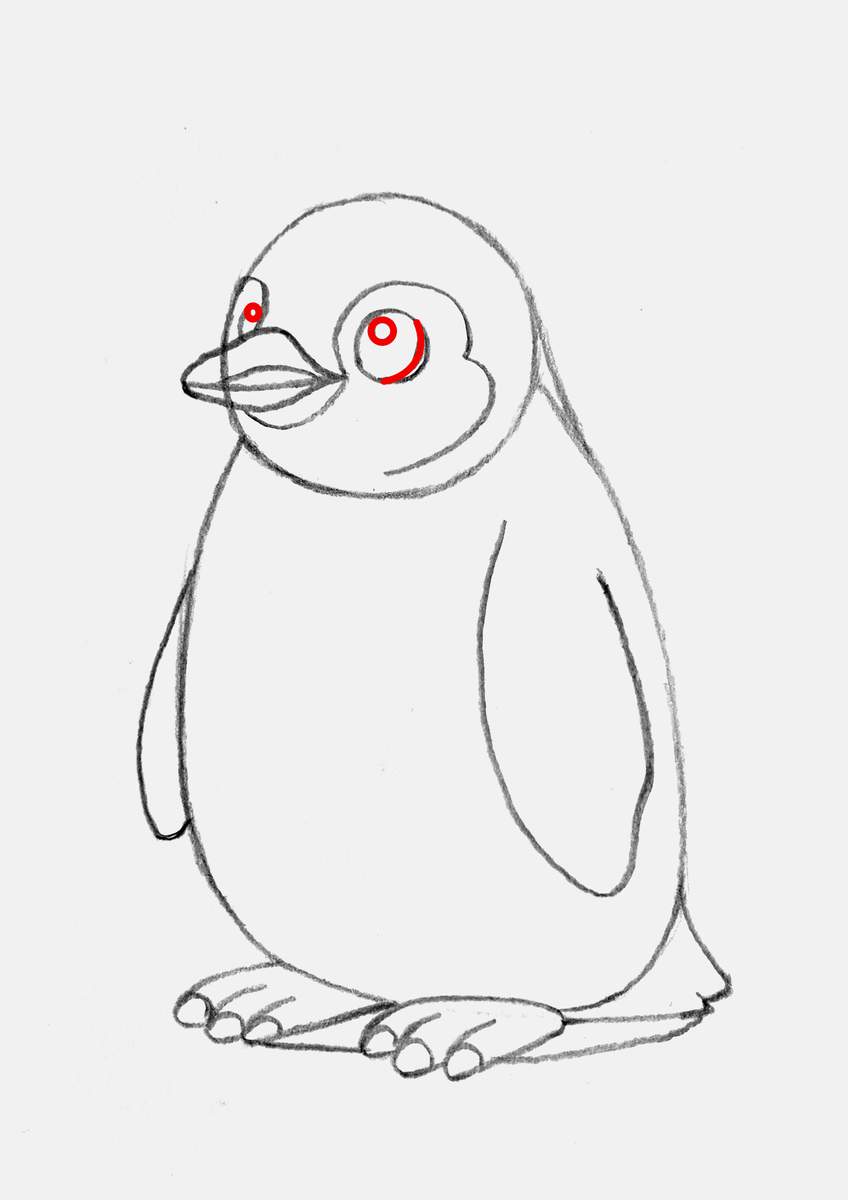
With the penguin's face all done, I erased all the construction lines we no longer need. I would also erase the part of the head that overlaps with the beak, but I forgot, so I did that in the next step.
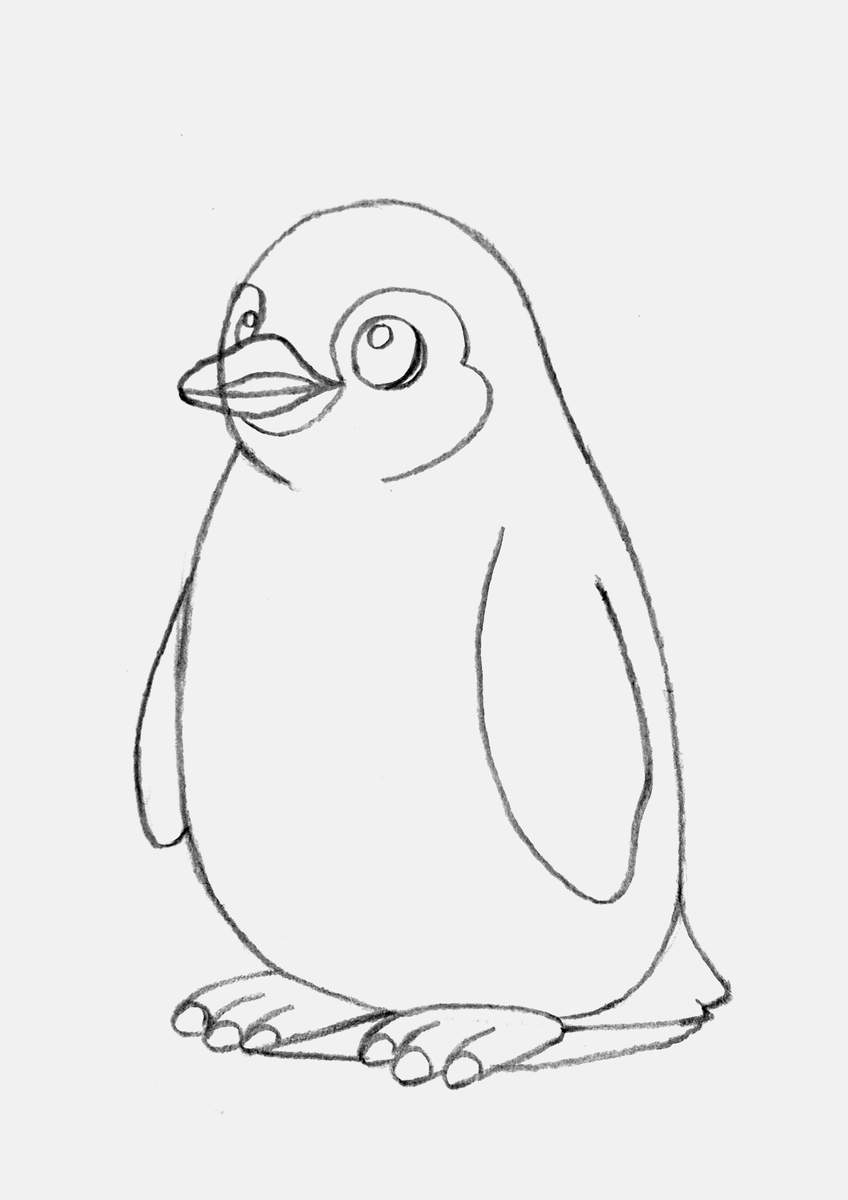
Step 7: Sketch the Fur Pattern of the Penguin
The sketch of the penguin is now almost done. There is just one more thing to do: add the rest of the fur pattern.
I added this zigzag line across the side and bottom of the penguin's body to mark the edge between the white fur on the left and the black fur on the right.
I also added a line on the flipper on the left, but I forgot to mark it in red, I just noticed.
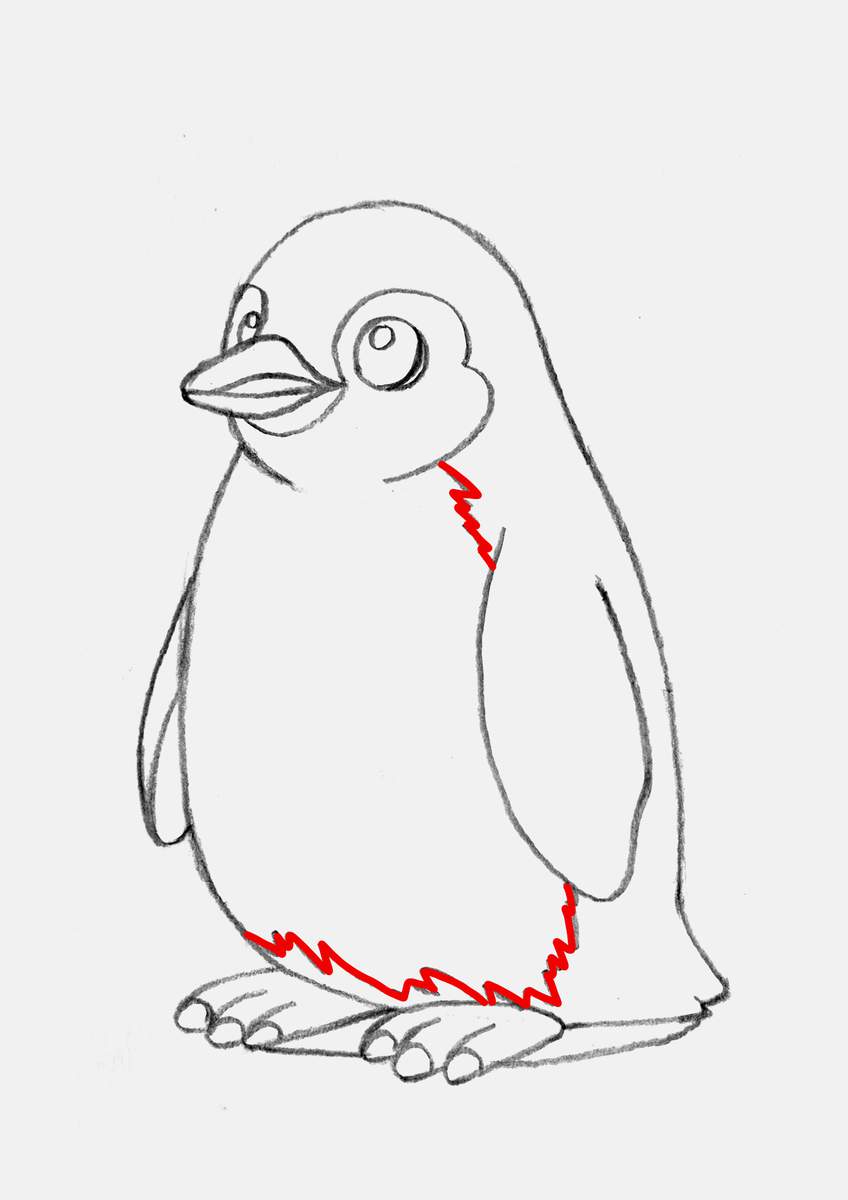
And that's the penguin sketch all done!
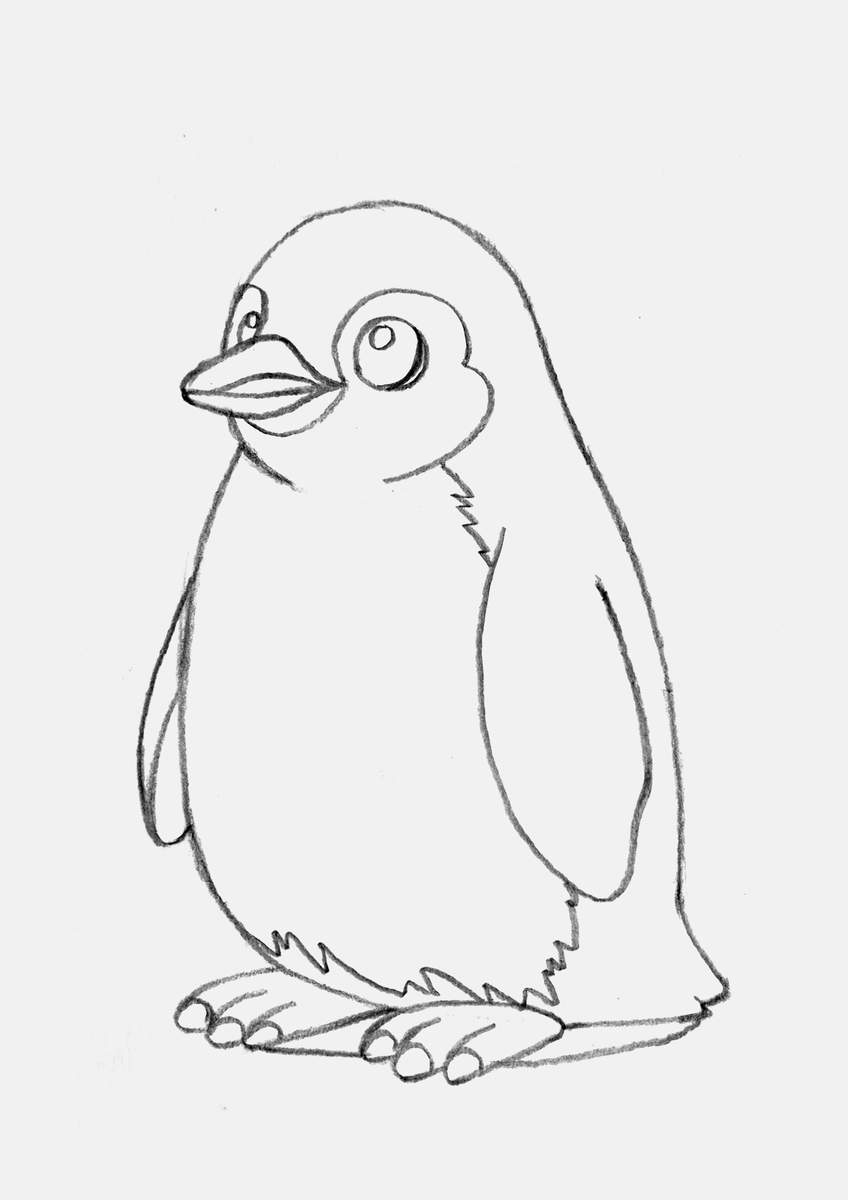
Step 8: Outline Your Penguin Sketch
With the sketch all complete, we can outline it with a brush pen.
You can use a brush pen, but I find that it looks better and more dynamic with a brush pen. I like to use my Tombow Fudenosuke brush pen for this.
Before I outlined the sketch, I first lightened the sketch. If I try to erase the sketch afterwards, it also lightens my outline, and I don't like that.
When outlining the penguin sketch, there is one thing I didn't outline: the fur pattern. I think it looks better without a line. I also didn't outline the shadow for the same reason.
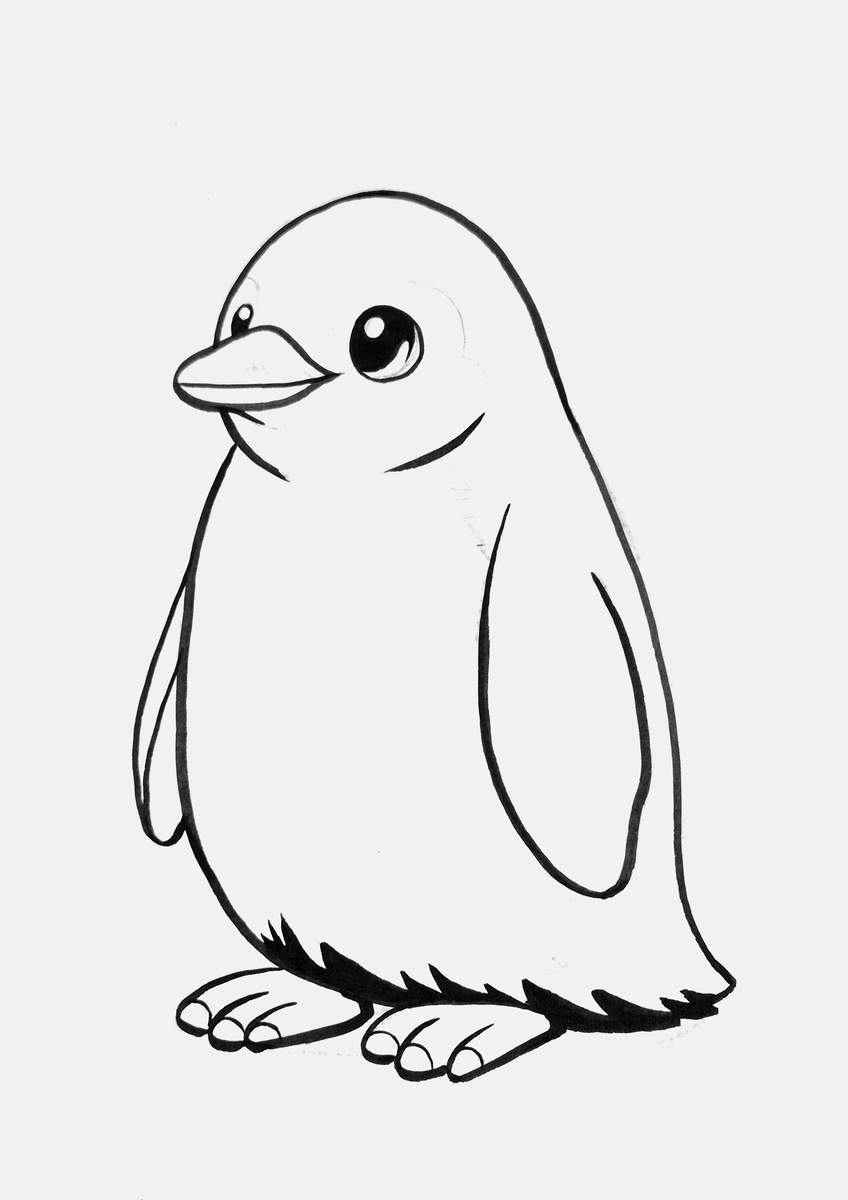
Step 9: Color Your Penguin Drawing with Markers
Now, it's time for my favorite part of any drawing: the coloring.
To color my drawings, I like to use alcohol-based markers. The ones I use are the Ohuhu Honolulu markers.
I started by coloring all the orange parts first, aka the feet and the beak. And to do that, I used a color called Apricot (Y10).
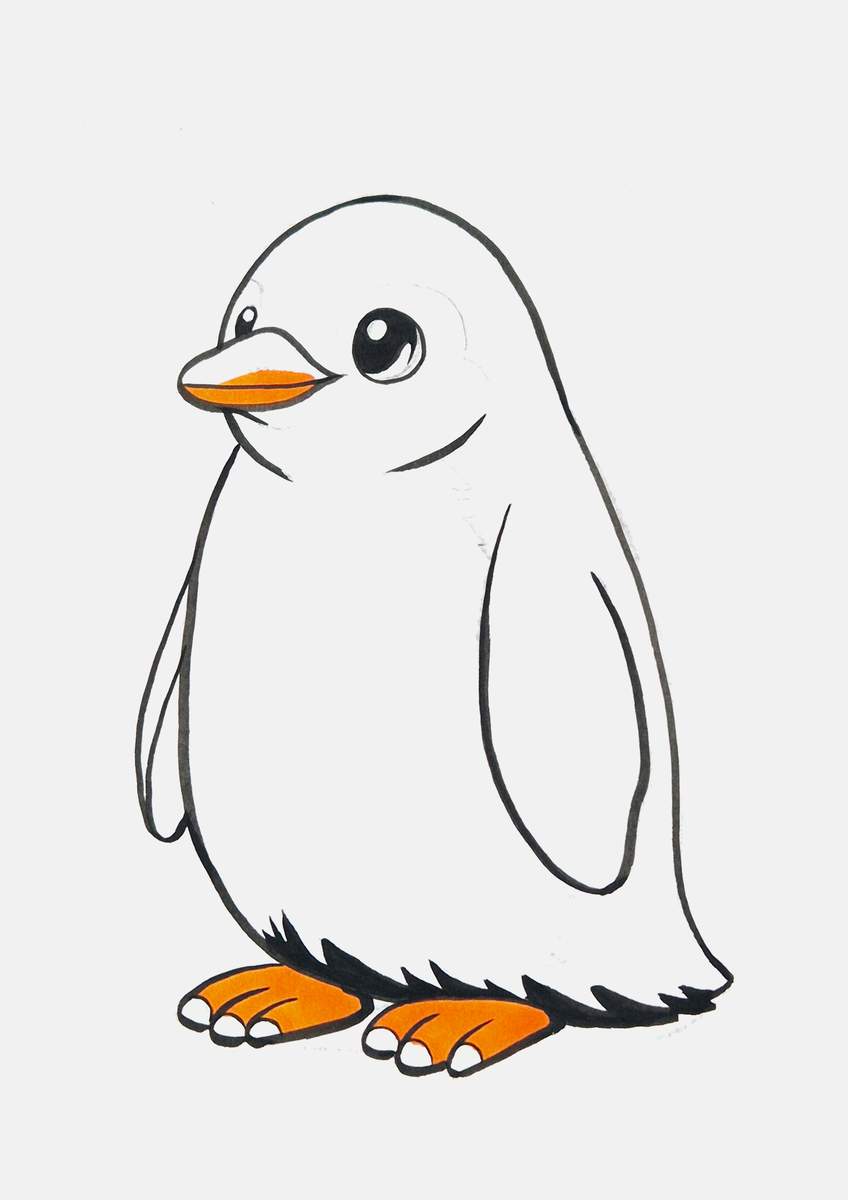
Next, I added darker orange shading on the bottom half of the beak and the top and right edges of the feet and toes. I used a color called Lipstick Orange (YR180) to color these parts.
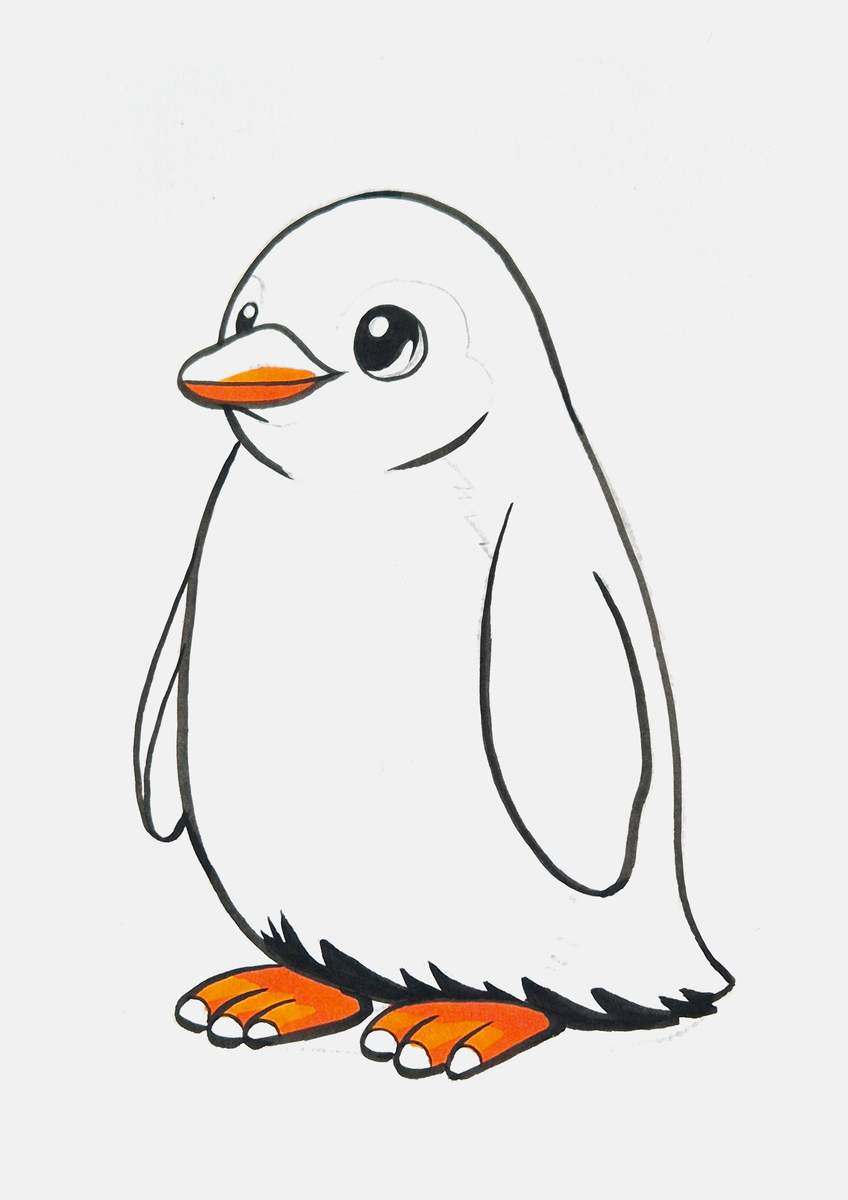
After that, I colored all the black fur and the toes with a dark grey marker called Neutral Grey 7 (NG07).
I forgot to color a part of its eye, but you can see how that looks in the next step.
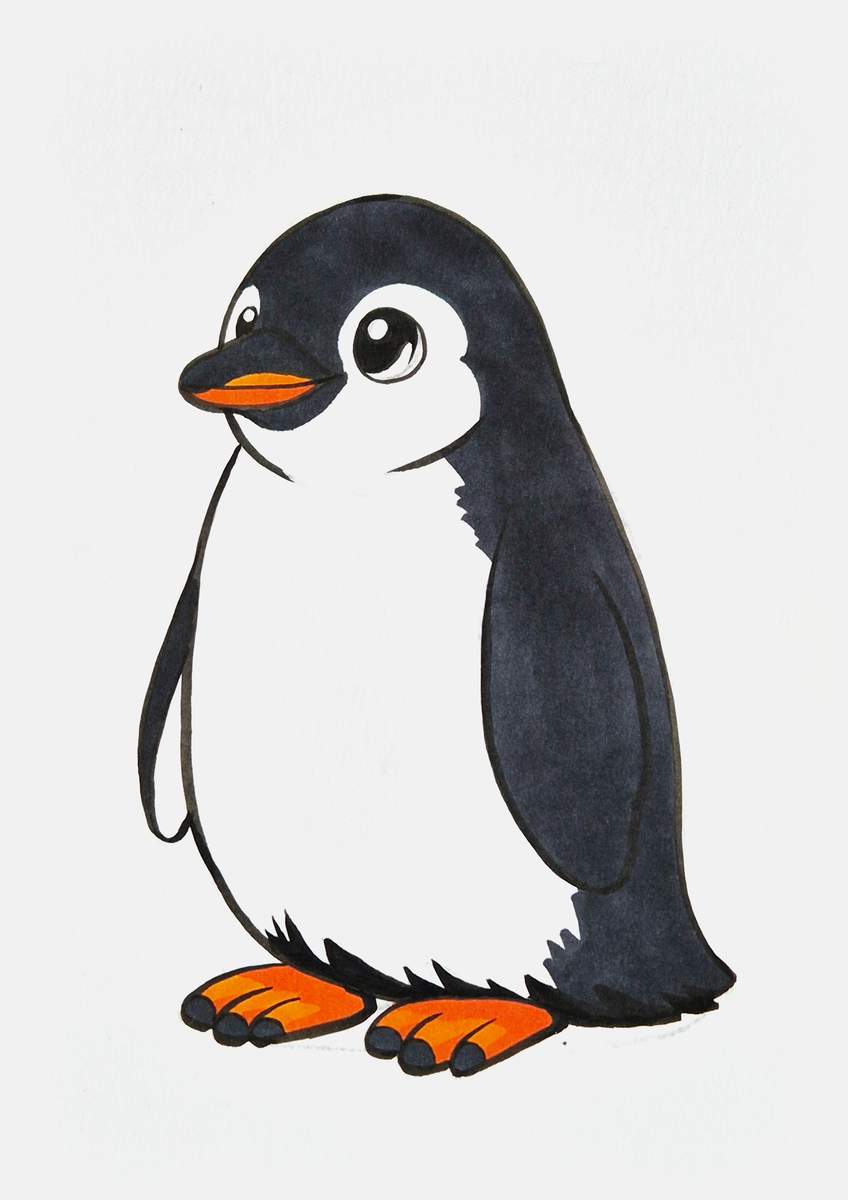
Then, I added light grey shading on the white fur. I tried to create a very simplified fur-like texture. The color I used for this is called Cool Grey II 2 (CG2).
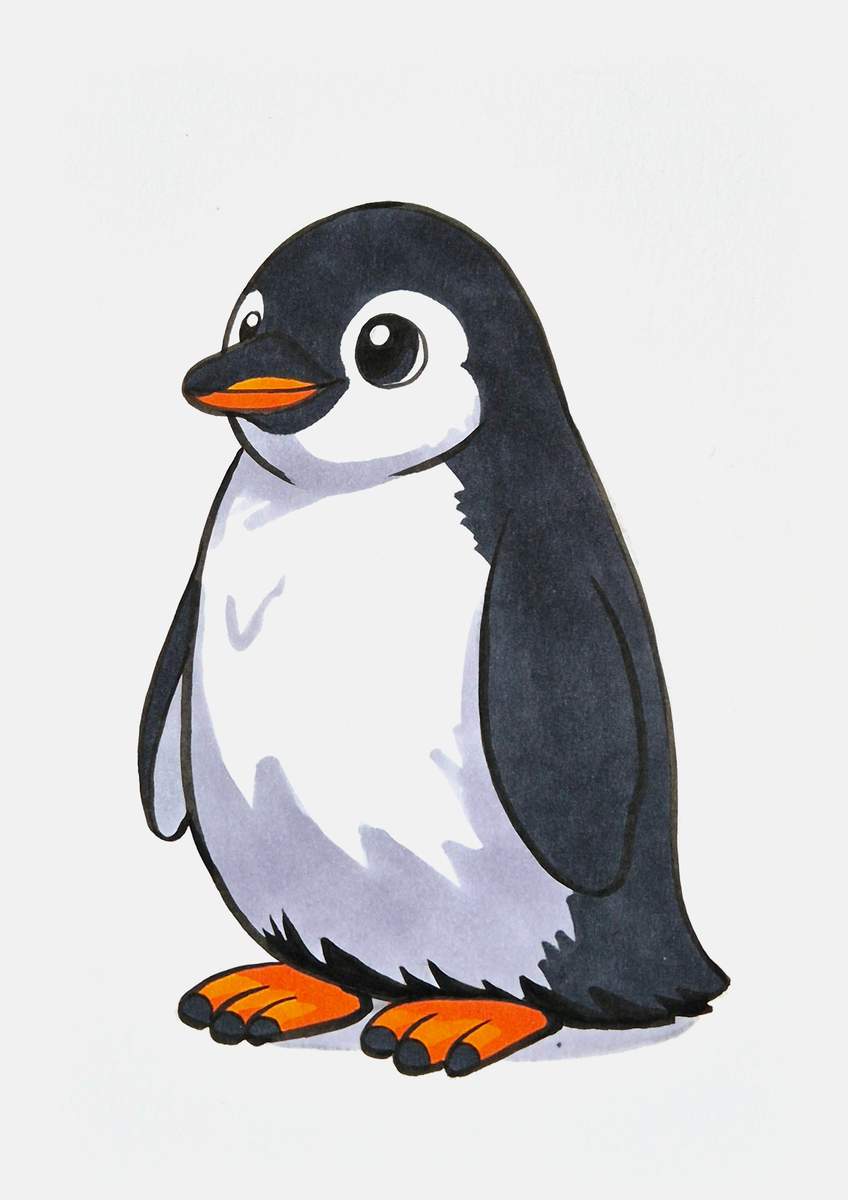
Lastly, I also added some black shading on the dark fur with the Fudenosuke brush pen.
Again, I tried to create a fur-like texture with these pointy bits.
I added black shadows on the right side of the beak, the right edge of the flippers, on its neck, and on/above its tail.
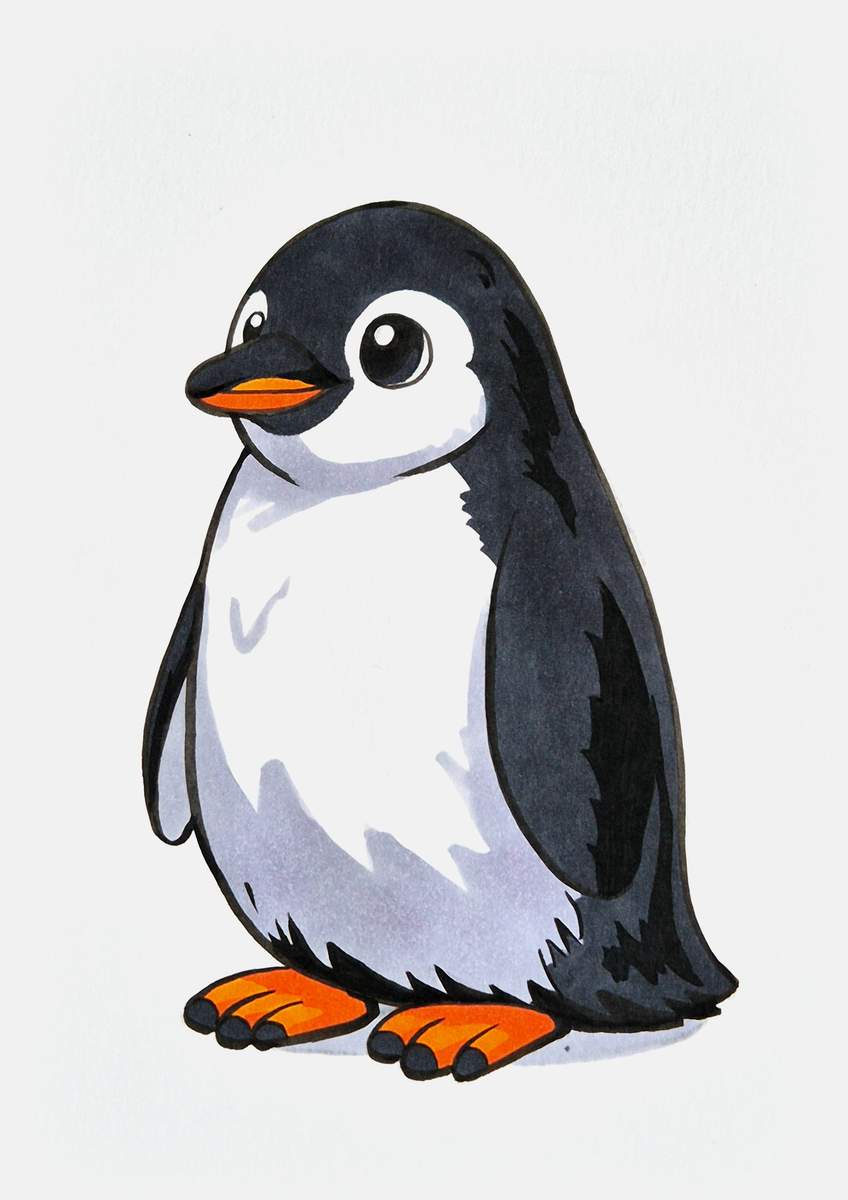
Step 10: Add a Few Highlights with a White Pencil
The penguin drawing is now almost done, but I wanted to do one more thing: add some white highlights and details.
I just used a white Derwent Chromaflow pencil to do this.
I added highlights on the edges of the flippers, the head, its back, the tail, and the beak.
Adding just a few highlights and details like this makes the drawing look so much more finished, in my opinion.
What do you think?
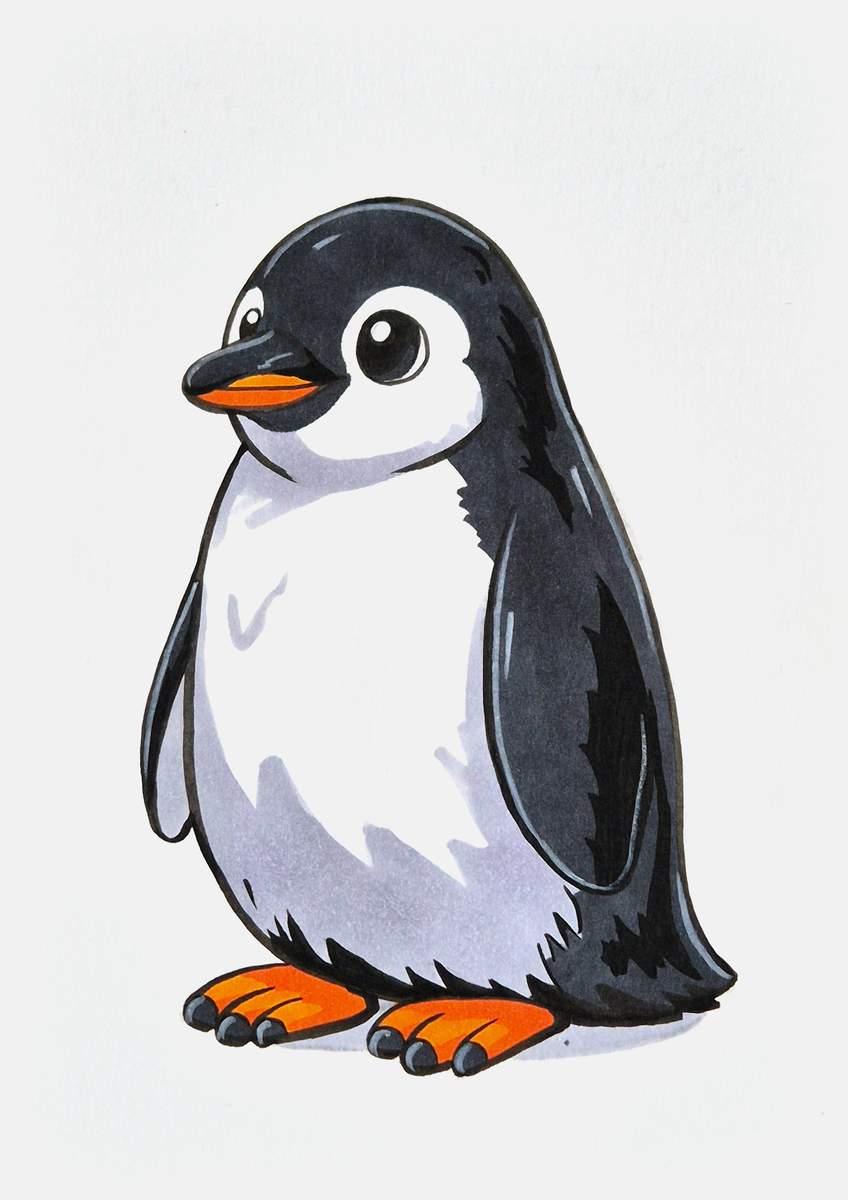
And that is the whole drawing process to make a penguin drawing from scratch.
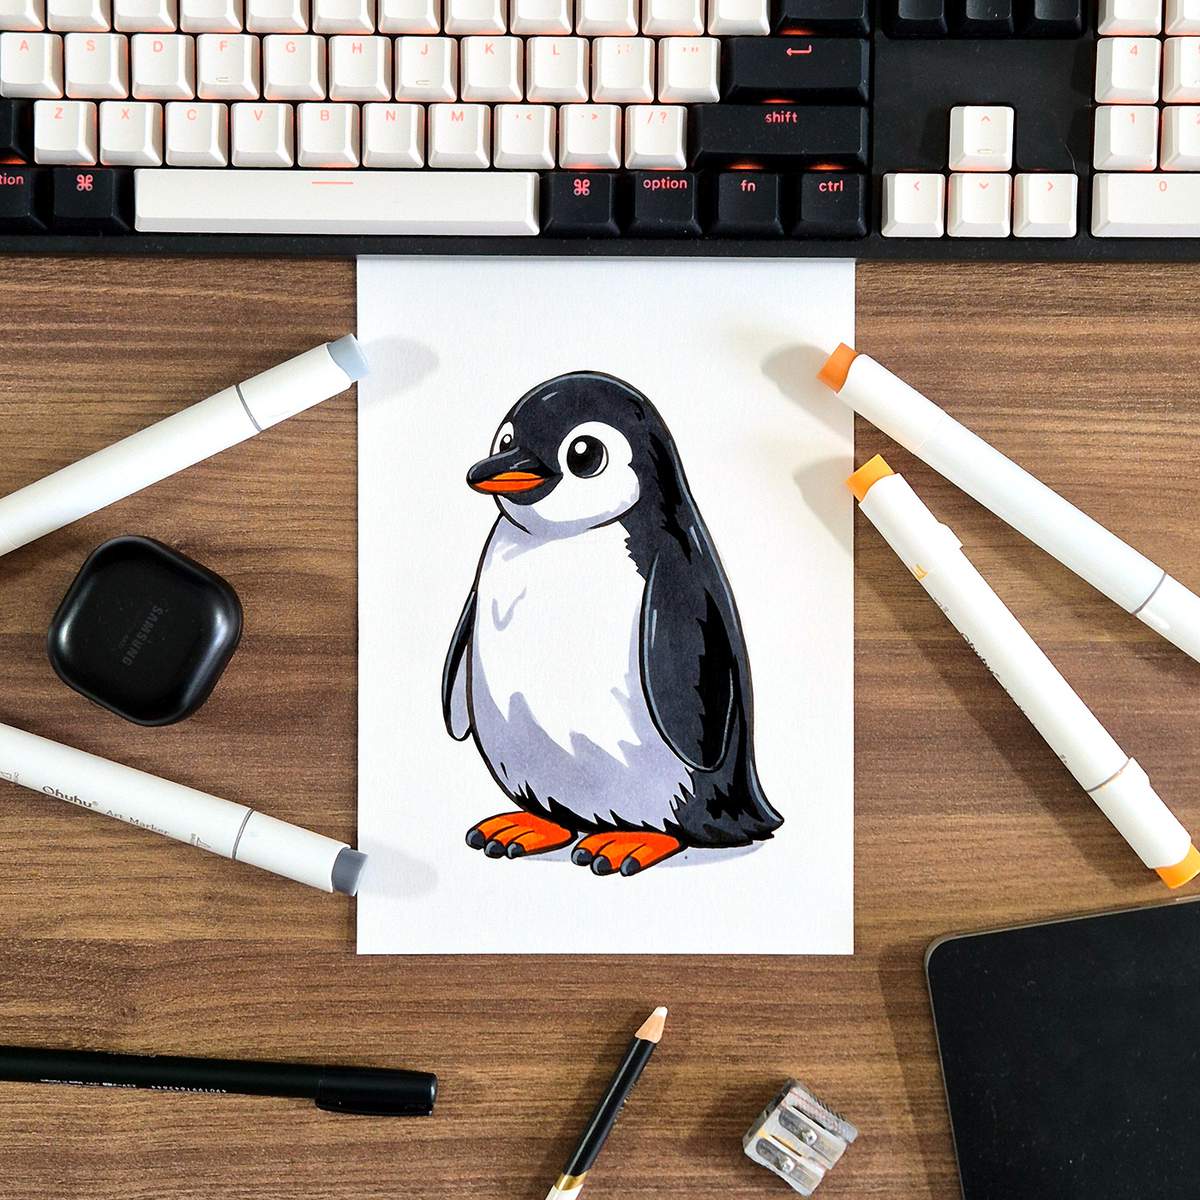
I hope you enjoyed following along with me in this step-by-step penguin drawing tutorial. How did yours turn out?
If you enjoyed this drawing guide, you might also like my other step by step guides, like these animal guides or these Christmas and winter tutorials. I especially like this snowman guide.
Articles You Might Also Like

I love bringing cars to life with alcohol markers and colored pencils.
Whether you're just starting out or looking to improve your skills, I'm here to help!
Click here to learn more about me.


Be the first to comment!
Comments
There are no comments yet.