How to Draw a Dodge Challenger SRT Hellcat | Easy Step-by-Step Tutorial
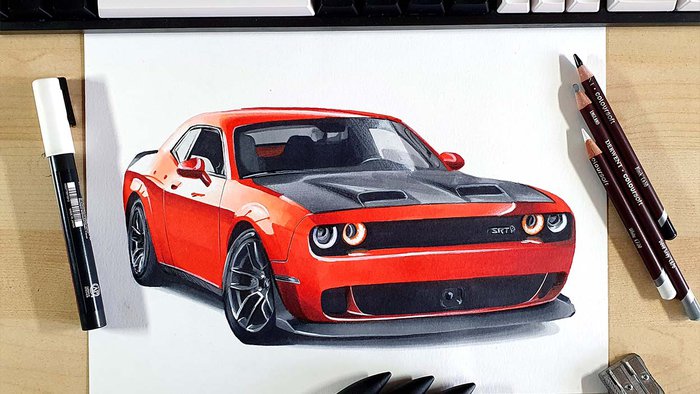
In today's tutorial, I'm going to show you how I drew this Dodge Challenger SRT Hellcat in a beautiful bright reddish-orange color.
I've wanted to draw a car in this color ever since I bought a marker in this exact color a few years back, but I never got to it. Until today!
This drawing turned out so well!
So, read on to find out how I made it!
Disclaimer: In the name of full transparency, please be aware that this blog post contains affiliate links and any purchases made through such links will result in a small commission for me (at no extra cost for you).
Drawing Supplies I Used in this Tutorial
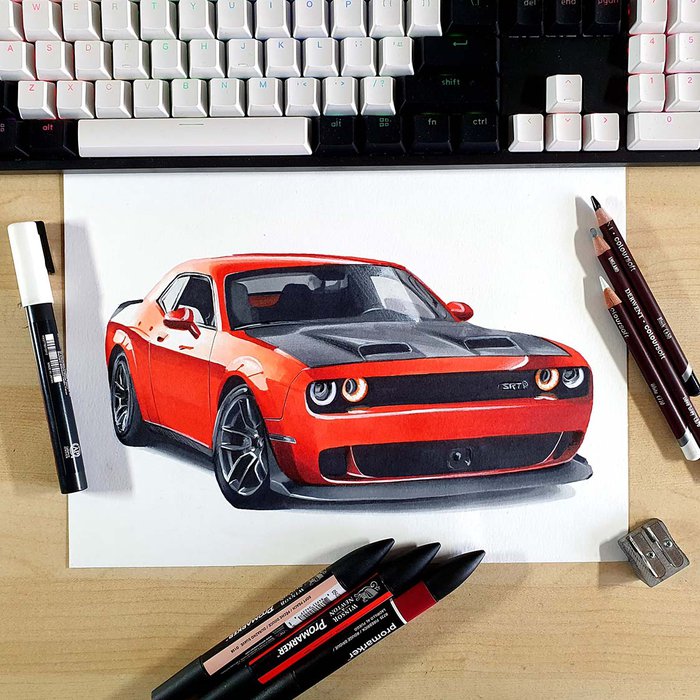
To draw this Dodge Hellcat, I used the following art supplies:
- A graphite pencil, a ruler, a kneaded eraser, and a regular eraser;
- Winsor & Newton Promarkers in the colors Ice Grey 1 (IG 1), Ice Grey 2 (IG2), Ice Grey 4 (IG4), Ice Grey 7 (IG7), Blue Black (XBB), Black (XB), Lilac (V327), Violet (V245), Saffron (O739), Bright Orange (O177), Soft Peach (O138), Mandarin (O277), Orange (R866), Firebrick (R735), and the Colorless Blender (BL);
- Derwent Coloursoft pencils in the colors White, Dove Grey, and Black;
- And a white Posca PC-3M.
Reference Photos I Used to Draw this Dodge Challenger Hellcat
To make this drawing, I used 3 reference photos. 1 for the proportions and the perspective, 1 for the lighting and the reflections, and 1 for the color.
I used the photo below for the perspective.
I used this photo for the reflections.
And I used this photo as a color reference.
How to Draw a Dodge Challenger SRT Hellcat?
To make a realistic drawing of a Dodge Challenger SRT Hellcat, I first gathered a few reference photos for the perspective, proportions, lighting, reflections, and color.
After that, I created a sketch of the outline of the car using the grid method.
Next, I color the car with alcohol markers starting with the black and the grey parts, before moving on to the main body of the car.
Lastly, I added some details with colored pencils and highlights with a Posca paint marker.
Step 1: Sketch the Basic Outline of the Dodge Challenger
To start off the drawing, I first sketched the basic outline of the car.
This can be quite a challenge. That's why I like to use the grid method to make it a bit easier and quicker. But if that's not your cup of tea, there are other techniques you can use or you could of course freehand it.
To use the grid method, I first resized the reference photo to be the same size as my paper which is A4. Then, I overlayed a grid of 15 by 10.5 squares on the photo. By making the grid this size, each square is a nice round number of 2 by 2 cm.
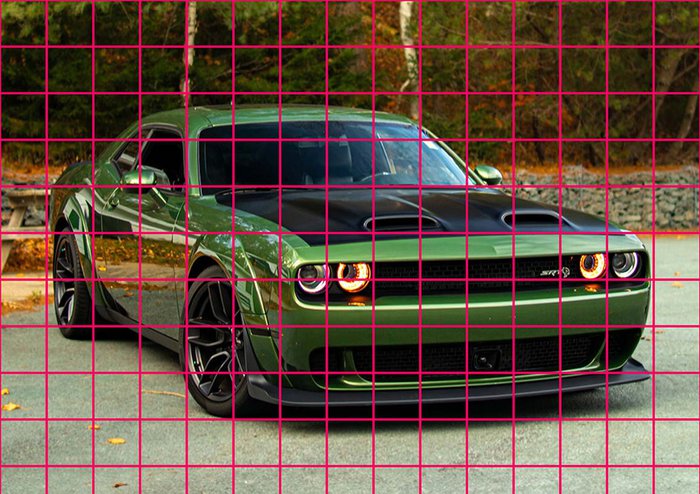
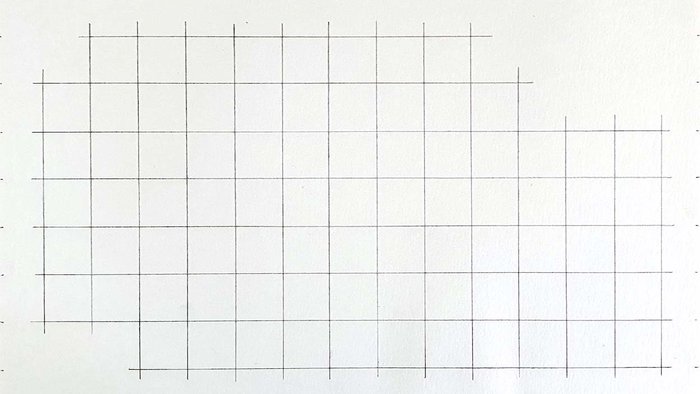
After that, I recreate that same grid on my piece of paper.
I start by marking where each grid line (horizontal and vertical) will be with a distance of 2 cm between the lines.
Next, I use my ruler to draw each line.
I only sketched the lines that I needed for the sketch, but it's easier to just sketch each square.
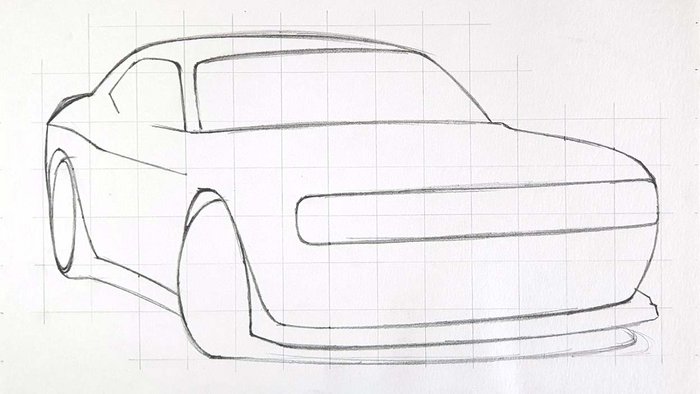
After all that preparation, it's finally time to start sketching the basic outline of the car.
I like to start at the rear of the car and work my way up and around the car.
I also sketch the wheels before I sketch the wheel arches.
I used to do it the other way around, but sometimes the wheels would get a little squished as I didn't leave enough space for them.
It's really important that you take your time when sketching the basic shape of the car as mistakes are quite hard to fix later on.
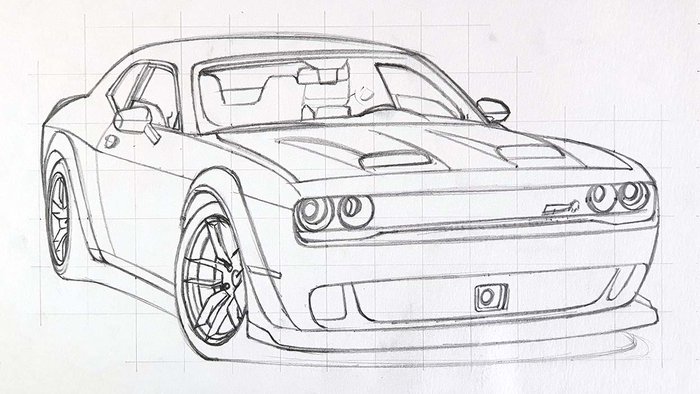
Step 2: Sketch the Details of the Challenger Hellcat
Now that the basic shapes are in, it's time to add all the details.
There is no specific order I do this in other than leaving the wheels for last, 'cause they are a little intimidating...
I just start somewhere and carefully look at the reference while sketching all the details.
Step 3: Color All Pure Black Parts of the Challenger
Now that the sketch is all done, we can finally move on to coloring the Dodge.
I like to start by coloring all pure black parts as this makes the drawing look a lot less overwhelming and difficult.

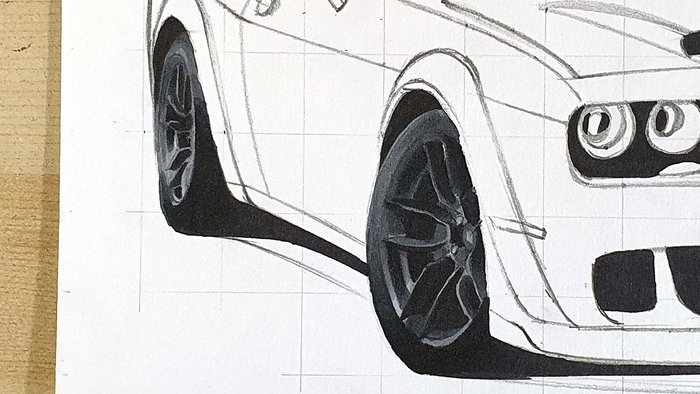
Step 4: Color the Wheels of the Dodge Challenger
Next up, I color the wheels straight away.
As I said before, the wheels are slightly intimidating. So instead of leaving them for last, I color them first.
I first colored the lightest parts of the wheels, which include the center and the bottom left of each wheel. And to do this I used the Ice Grey 2 marker.
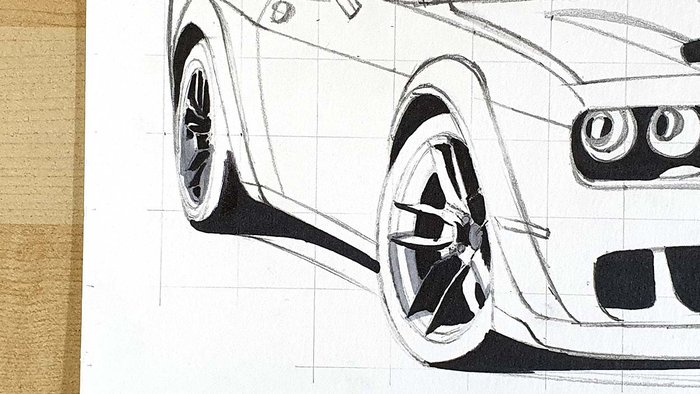
After that, I colored the second lightest parts with Ice Grey 4. These parts include the top left of the tires and the remainder of the spokes and rims.

Lastly, I used Ice Grey 7 and Blue Black to color the darkest parts: the tires (especially the bottom), the inside edges of the spokes, and the rim edges.
Step 5: Color the Shadow Underneath the Dodge
Next, I colored the shadow underneath the car.
I first colored the whole shadow with Ice Grey 1.
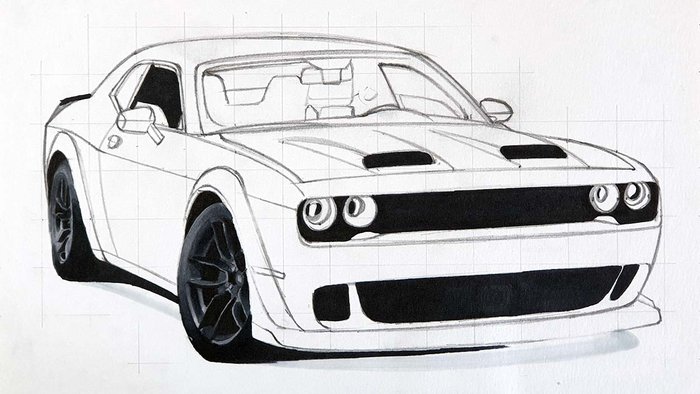
After that, I used Ice Grey 4 to color the part in between the light grey and the black.
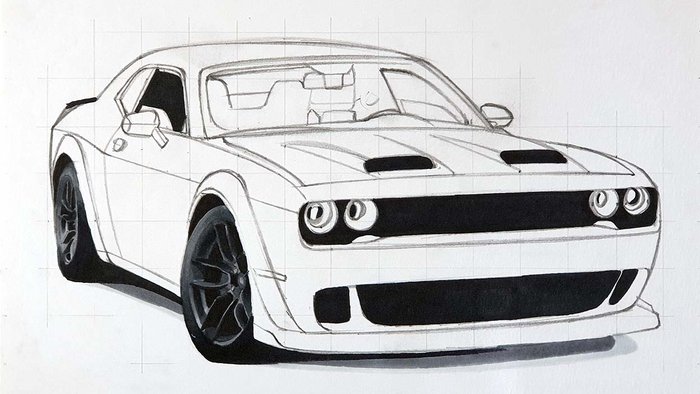
And lastly, I blended the different shades of grey together.
To blend the IG4 into the IG1, I used Ice Grey 1 to go over the edge. And to blend IG4 into Black I used Ice Grey 7 to color over the edge and blend it.

Step 6: Color the Splitter of the Hellcat
Next up, I colored the front splitter.
I started by coloring the whole splitter with Ice Grey 4.
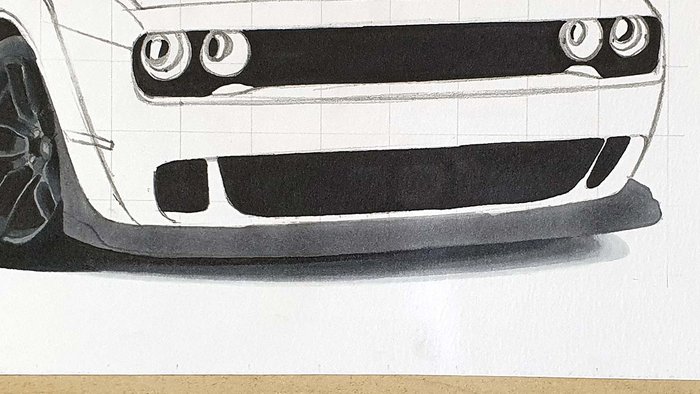
After that, I used Ice Grey 7 to add some darker spots and I blended those out with Ice Grey 4.

Then, I used Blue Black to add some even darker tones to the splitter, mainly right toward the bumper and on the left.
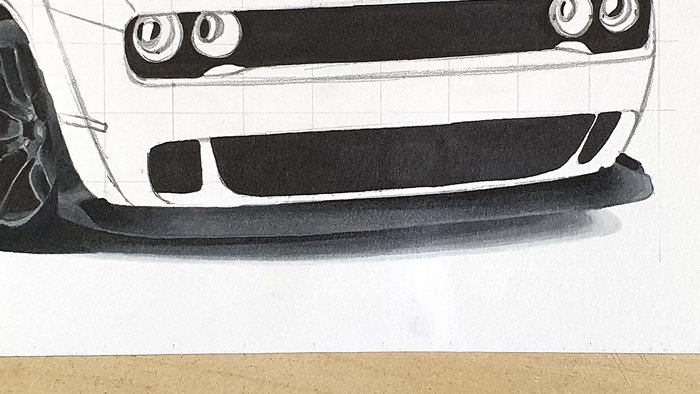
Lastly, I colored the front marker light on the left with Ice Grey 4 for the right half and Ice Grey 7 for the left half.
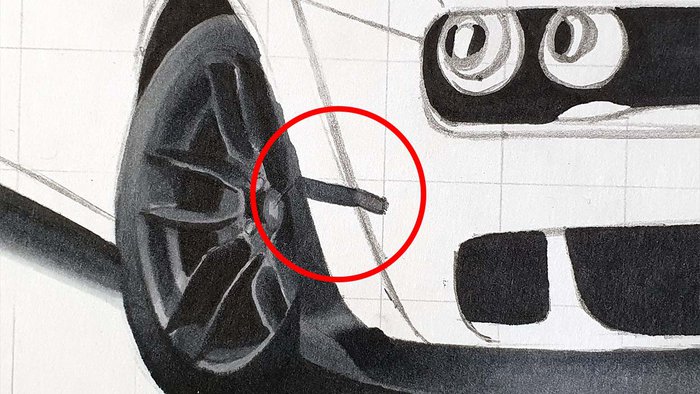
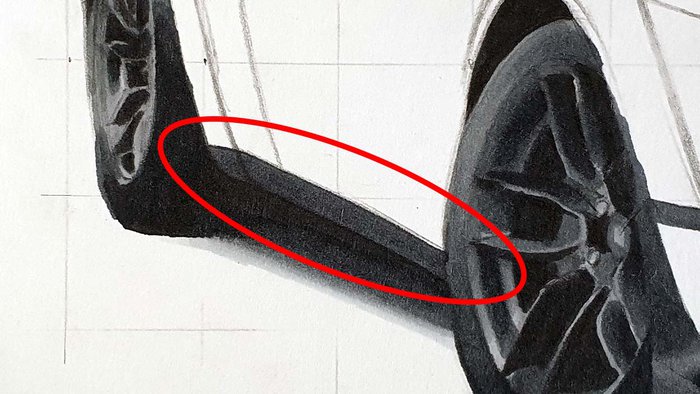
Step 7: Color the Side Skirt of the Challenger Hellcat
After that, I colored the side skirt. And for that, I used Ice Grey 7.
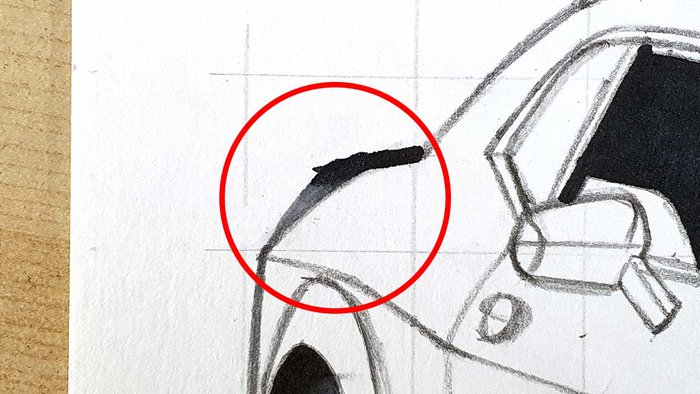
Step 8: Color the Lip Spoiler of the SRT Hellcat
Next up, I colored the lip spoiler on the rear of the car.
I colored the left half with Ice Grey 4 and I colored the right bit with Blue Black.
Step 9: Color the Side Windows of the Dodge Challenger
After that, I started coloring the side windows.
I first colored the windows and the window frames with Ice Grey 1.
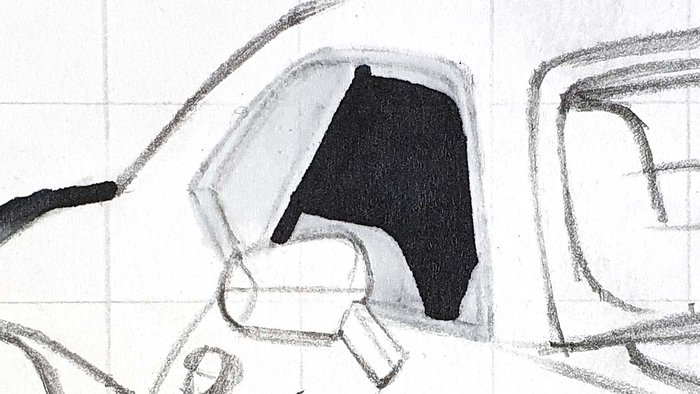
Next, I used Ice Grey 4 to color the window triangle on the right and the bit of headlining that's just about visible on the top.

Step 10: Color the Headlights Dodge Challenger
Next up are the headlights.
I first colored the center of each of the 4 lights with Ice Grey 4.
I made a mistake while doing this with the left light on the right side. I thought the circle was way larger than it actually was...
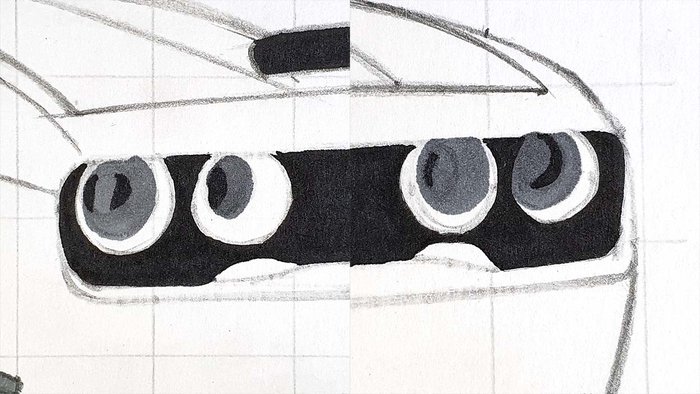
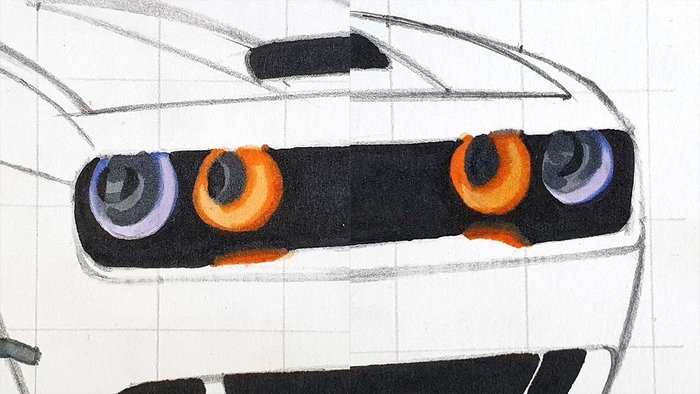
Next, I used Lilac to color the light on the outside and I used Saffron to color the 2 lights closer the the center.
And with the paper I'm using I can actually rectify my mistake from earlier. I just colored over the grey a few times until it lightened enough to show the light orange.
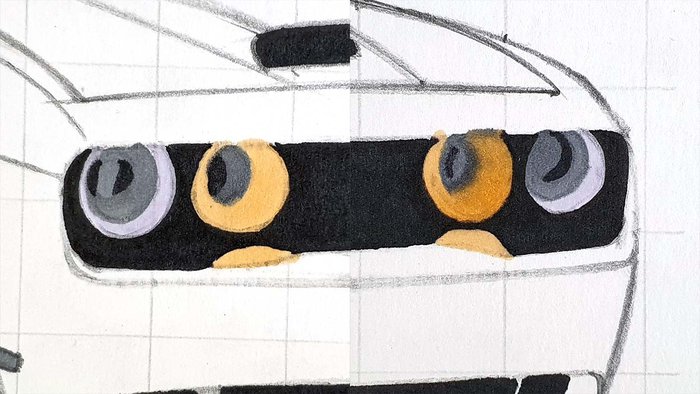
After that, I used Violet to add a darker edge to the Lilac lights and I used Bright Orange to do the same for the light orange lights. I also used Bright Orange to add a light reflection on the top of the bumper.
I also used Ice Grey 7 to darken some bits in the headlights and to blend to orange reflection on the bumper into the Black.
Step 11: Color the Windshield and the Interior of the Challenger
After that, I colored the windshield and the interior.
I started by coloring most of the interior and windshield with Ice Grey 7.

Next, I used Ice Grey 2 to color the rear window, the rearview mirror, the right side window, and a reflection on the windshield.
I also used Ice Grey 4 to the right A-pillar and the part where the reflection on the windshield and the right window overlap.

Lastly, I used Blue Black to darken the middle of the interior and the top left and bottom left edge of the windscreen.

Step 12: Color the Hood of the Dodge Challenger Hellcat
Next up, I colored the hood of the Challenger Hellcat.
I started by coloring the darkest parts with Ice Grey 7 and the lightest parts with Ice Grey 2.

After that, I used Ice Grey 4 to blend the edges and to add some vague reflections.

Step 13: Color the Main Body of the Dodge Hellcat
Now it's finally time to add some bright colors to the drawing.
I first colored the dark parts of the body with Orange.
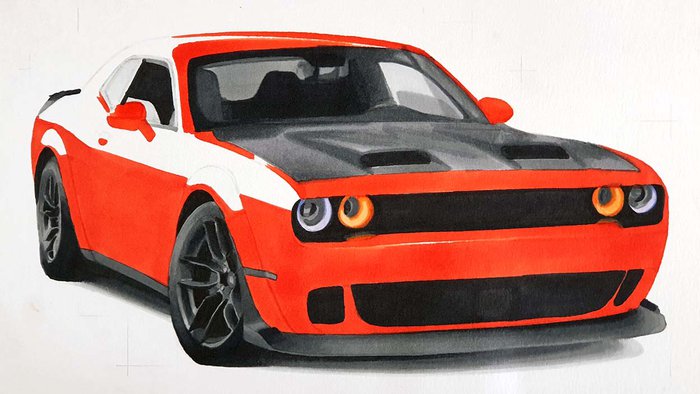
After that, I colored the lightest parts with Soft Peach and I blended the edges into the white of the paper with the colorless blender.
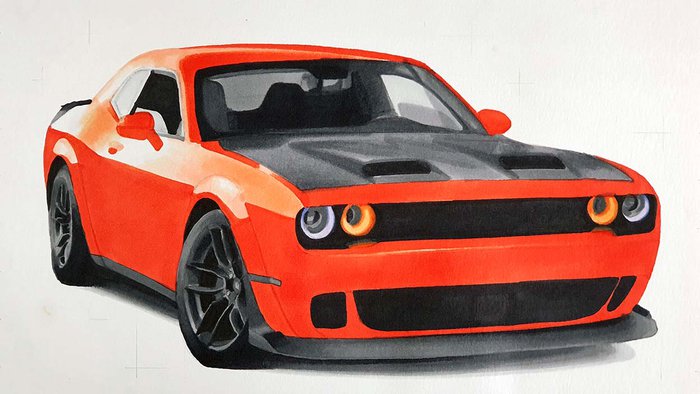
Next up, I used Mandarin and blended that into the Soft Peach on the roof and to the left of the headlights.

Lastly, I used Firebrick to add some deeper darker reddish-orangy tones to the body of the car.
I mainly used it on the right and the far left of the front bumper. A bit on the edge of the roof. On the mirrors. On the hood. And on the horizon line on the side of the car.
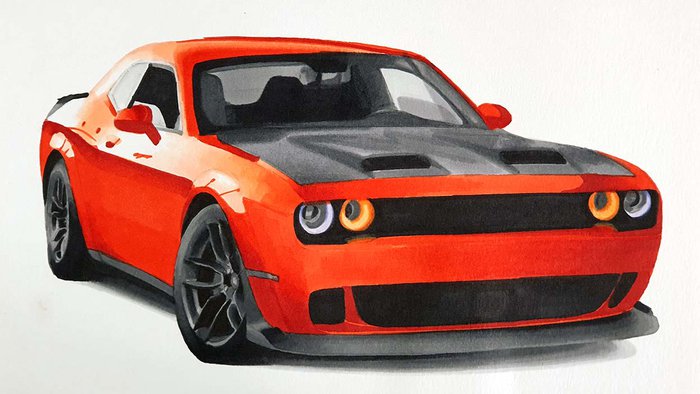
Step 14: Add Details with Colored Pencils to the Dodge Challenger
The car is now fully colored, but it's lacking fine details.
To add the details I like to use the White, Dove Grey, and Black Derwent Cooursoft pencils.
I used the white and the grey pencils to refine the spokes of the wheels as well as adding lighter edges on the front splitter and the hood.
And I used black to detail the window frames.
I added more details all around the car, but these are the most important.
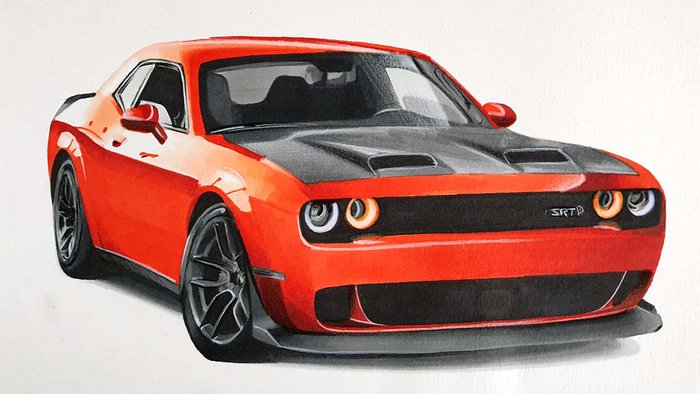
Step 15: Add White Highlights to the Challenger SRT Hellcat
To finish the drawing off, I added some white highlights all over the car where it would make sense.
I added highlights in the headlights, on the wheels, and a few here and there.
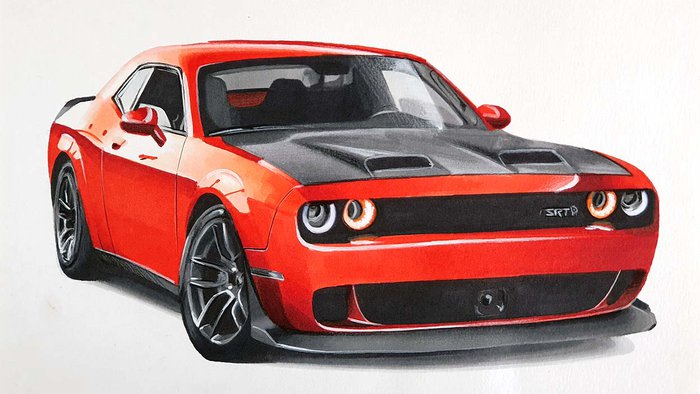
And That's How I Draw Cars Like The Dodge Challenger SRT Hellcat
It's done!! This drawing is one of my favorites I've made so far for a tutorial!
I hope you found this helpful! If so, I'd really appreciate it if you'd share this tutorial with other people who might like it. It would help me out a lot!
And if you followed along with my tutorial and decide to share your drawing, please tag me on Instagram (@luukminkman). I'd love to see it!
Have a nice day!



Be the first to comment!
Comments
There are no comments yet.