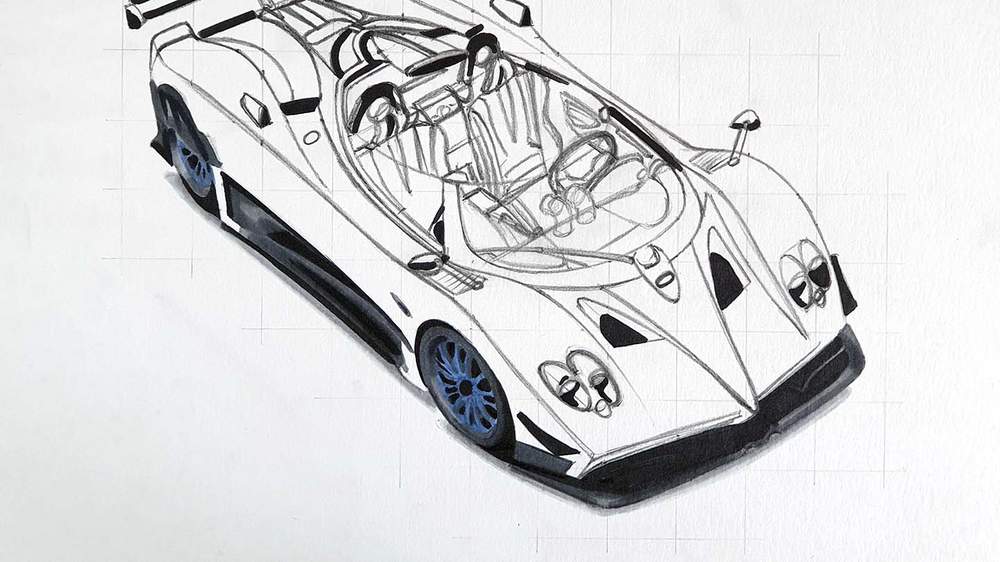
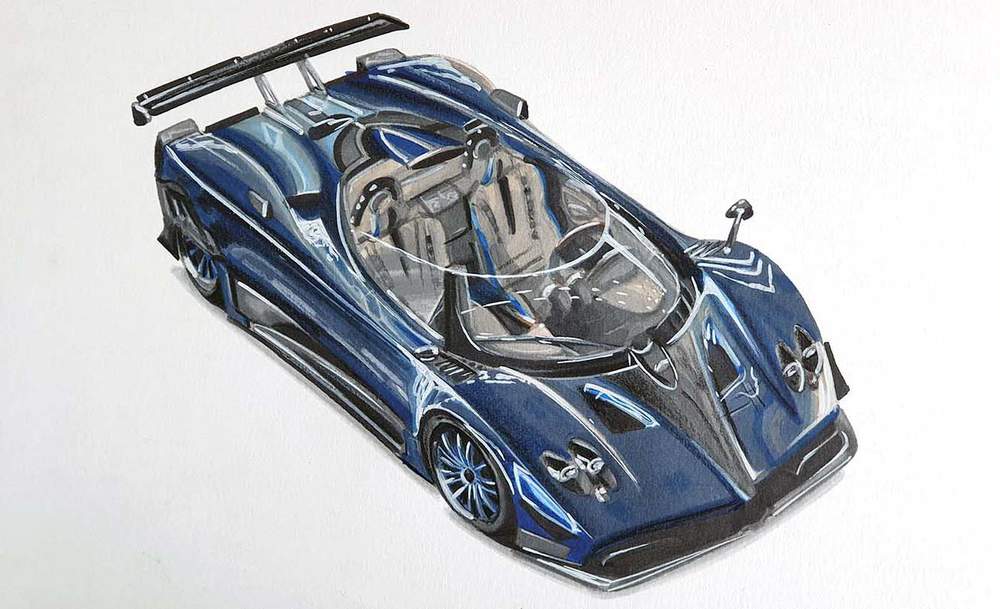
Exactly How I Drew This Pagani Zonda HP Barchetta
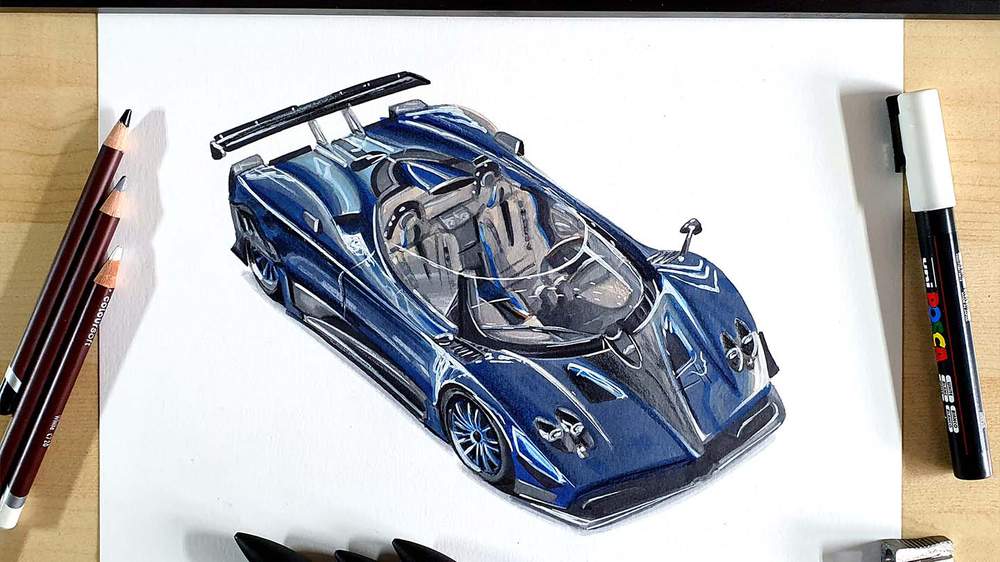
In this week's tutorial, I'm going to show you how I drew this Pagani Zonda HP Barchetta.
This tutorial is a bit longer than the other tutorials I've made as this car is so incredibly detailed.
Now, let's get started!
Disclaimer: In the name of full transparency, please be aware that this blog post contains affiliate links and any purchases made through such links will result in a small commission for me (at no extra cost for you).
Drawing Supplies I Used to Draw This Pagani
To draw this Pagani Zonda HP Barchetta, I used the following art supplies:
- A graphite pencil, a ruler, a kneaded eraser, and a regular eraser;
- Winsor & Newton Promarkers in the colors Ice Grey 1 (IG1), Ice Grey 2 (IG2), Ice Grey 4 (IG4), Ice Grey 7 (IG7), Blue Black (XBB), Black (XB), Warm Grey 2 (WG2), Warm Grey 3 (WG3), Manga O248, Cacao O535, Cobalt Blue B637, Egyptian Blue B944, Indigo Blue V234, and Midnight BlueB624;
- Derwent Coloursoft pencils in the colors White, Dove Grey, and Black;
- And a white Posca PC-3M.
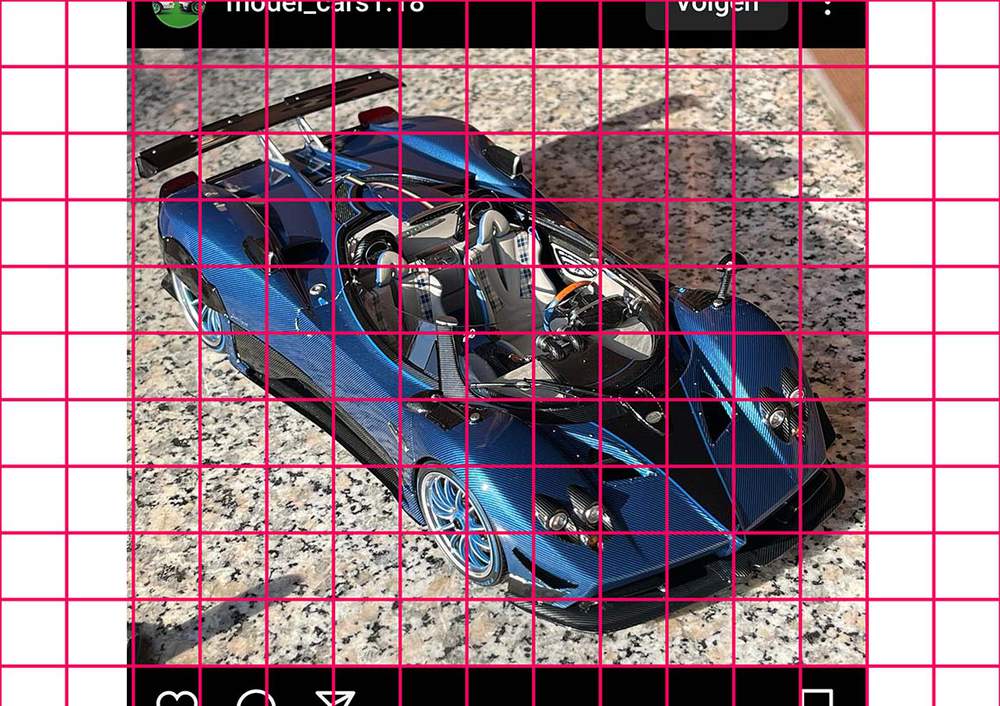
Reference Photos I Used in This Tutorial
To create this drawing, I used 2 reference photos. 1 for the proportions and perspective and 1 for the reflections and lighting.
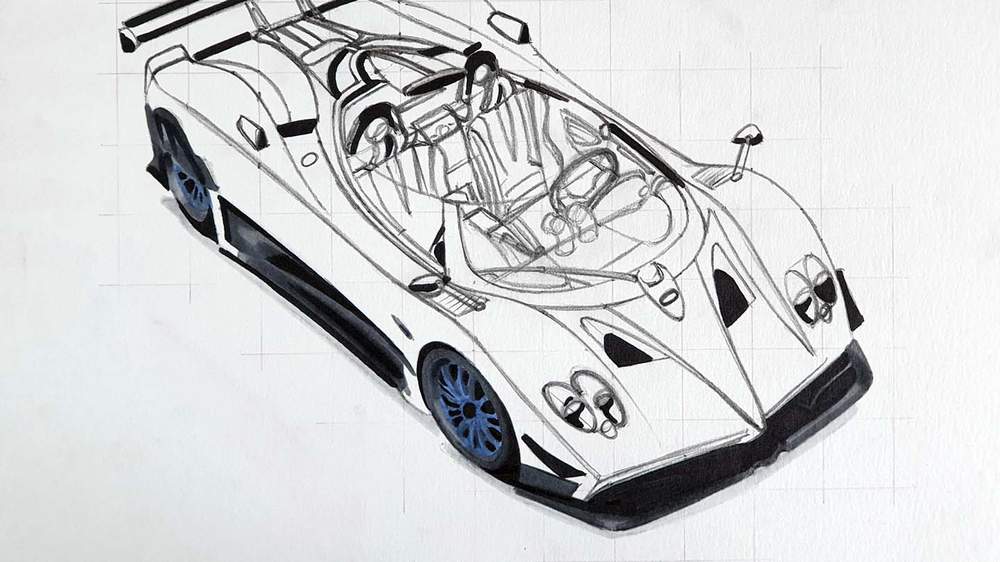
Here's How I Draw a Pagani Zonda HP Barchetta
To draw this Pagani Zonda HP Barchetta, I first gathered a few reference photos. Then I sketched the outline and all the parts using the grid method. After that, I colored the whole car using Promarkers and I added details and highlights to finish it off.
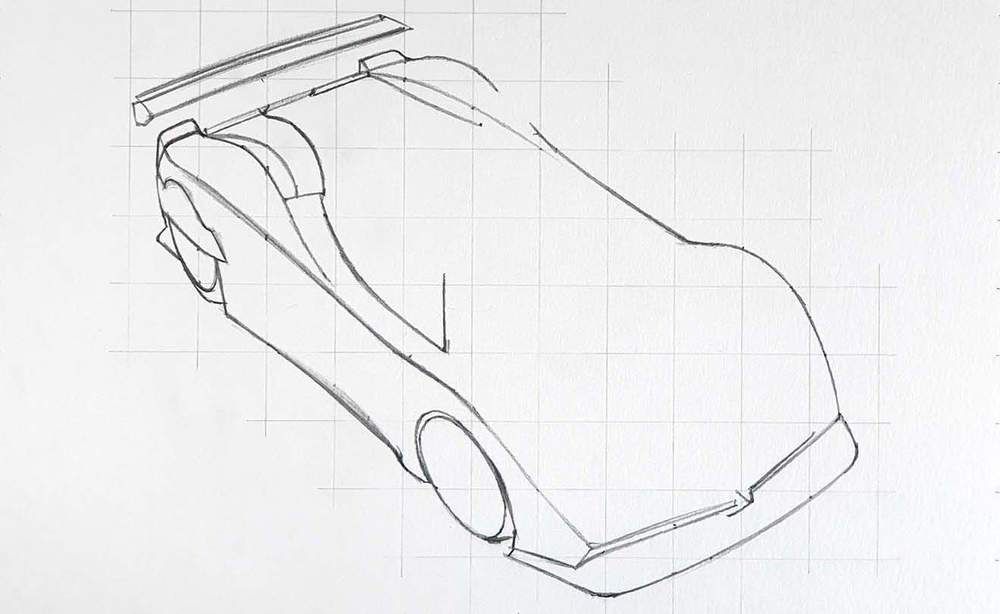
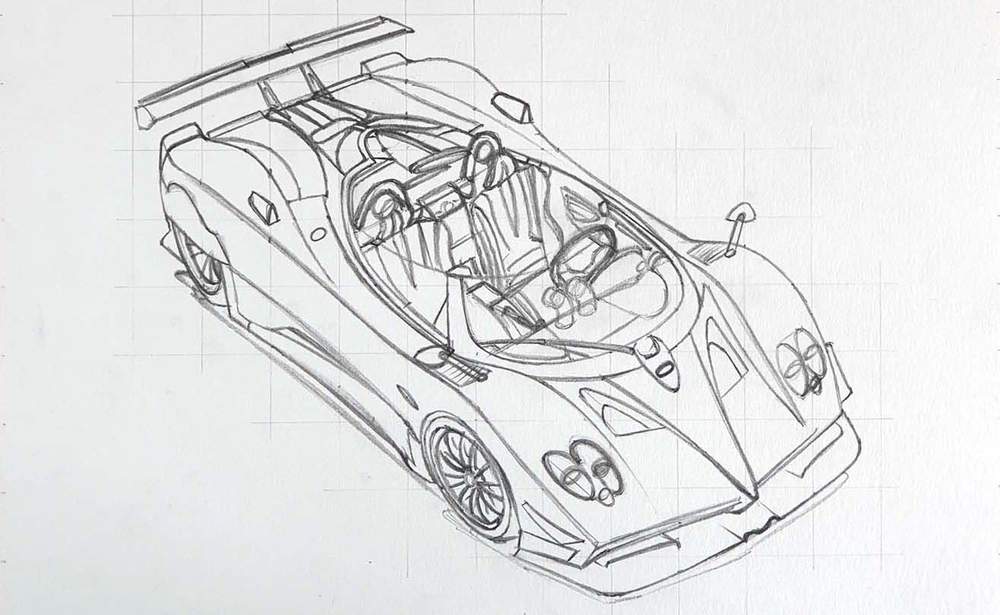
Step 1: Sketch the Outline of the Pagani Zonda
The first step of drawing this Pagani Zonda HP Barchetta is to sketch the outline.
Now, this can be quite difficult and takes a lot of time to get it to look right.
Luckily there are a few techniques you can use to make it a lot easier and quicker.
I like to use the grid method, so that's what I'll be using in this tutorial.
I first resize the reference photo to have the same aspect ratio as my paper. After that, I overlay a grid of 15 by 10.5 squares on top of it.
Then, I recreate that grid on my paper with squares of 2 by 2 cm which fits pretty well on A4-sized paper.
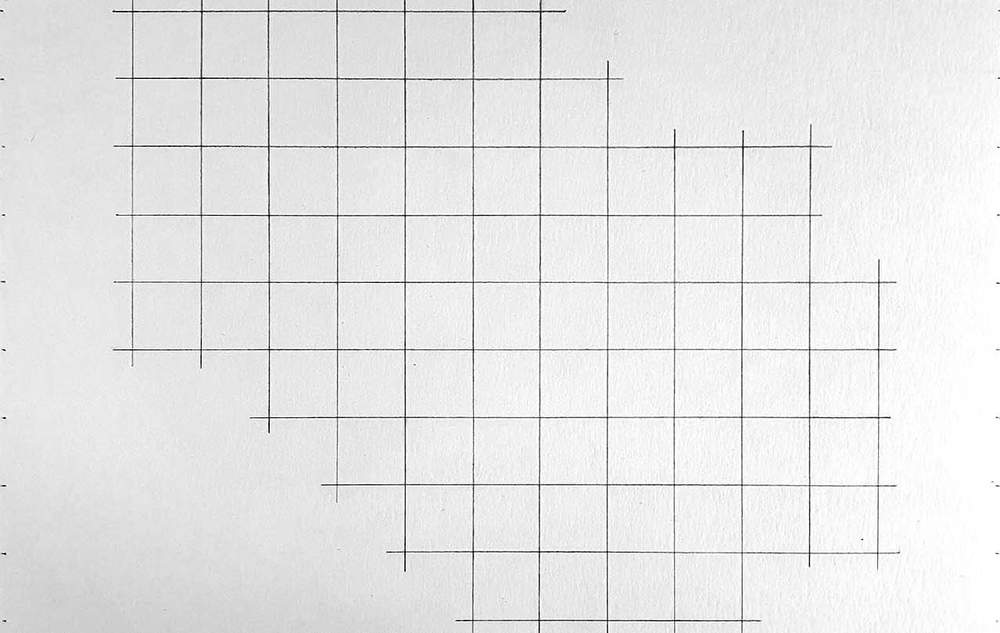
Now it's time to start sketching and with the grid now in place it's a lot easier to get the proportions correct.
I start by sketching the basic outline. After that, I add in all the parts and details until it's done.
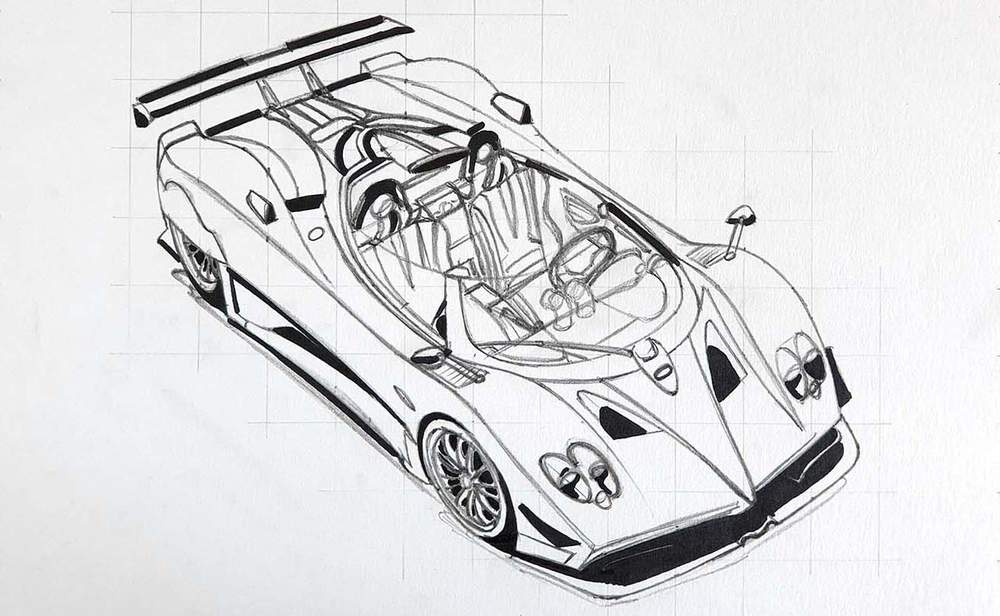
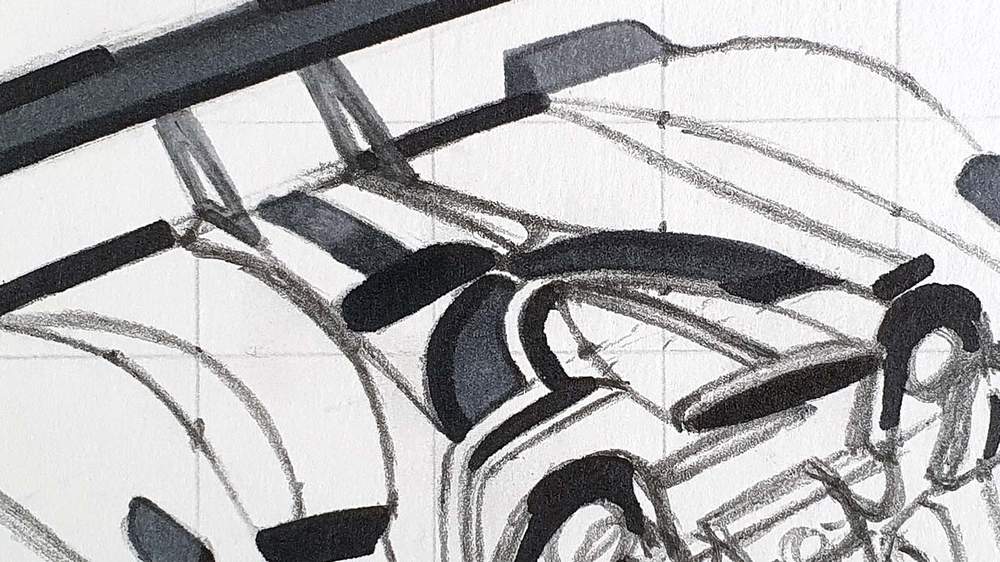
Step 2: Color All Pure Black Parts
Now that the sketch is done it's time to color the Zonda HP Barchetta.
I like to start by coloring all pure black parts. This makes the drawing look less complicated.
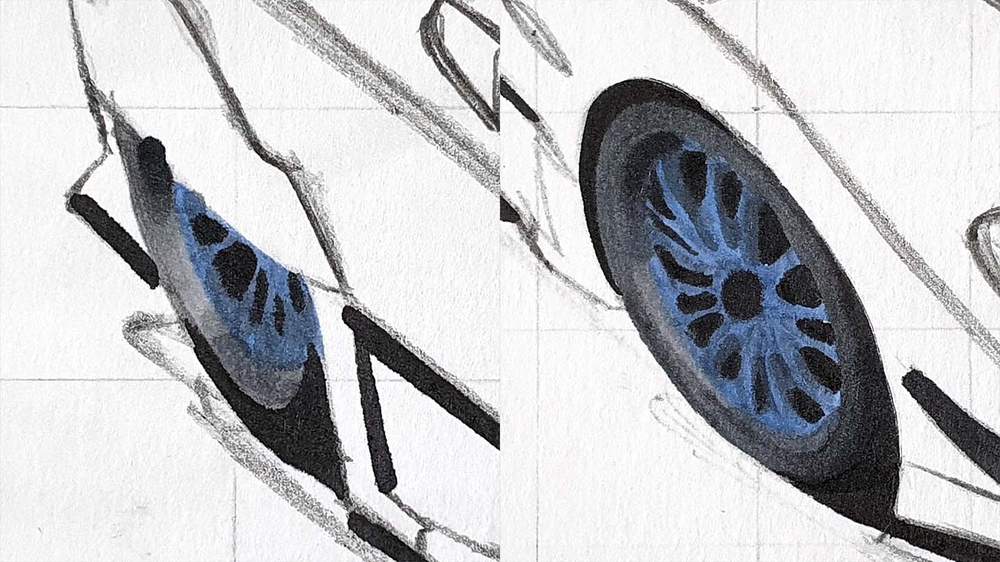
Step 3: Color the Wheels of the Zonda HP Barchetta
Next up are the wheels.
I first colored the edge of the rims of both wheels with Ice Grey 2 and I colored the Spokes with Cobalt Blue but I later recolored them with Egyptian Blue.

Next, I added some darker tones to the top and the bottom of the rims with Ice Grey 4 and Ice Grey 7. I also colored the front wheel with Ice Grey 7.
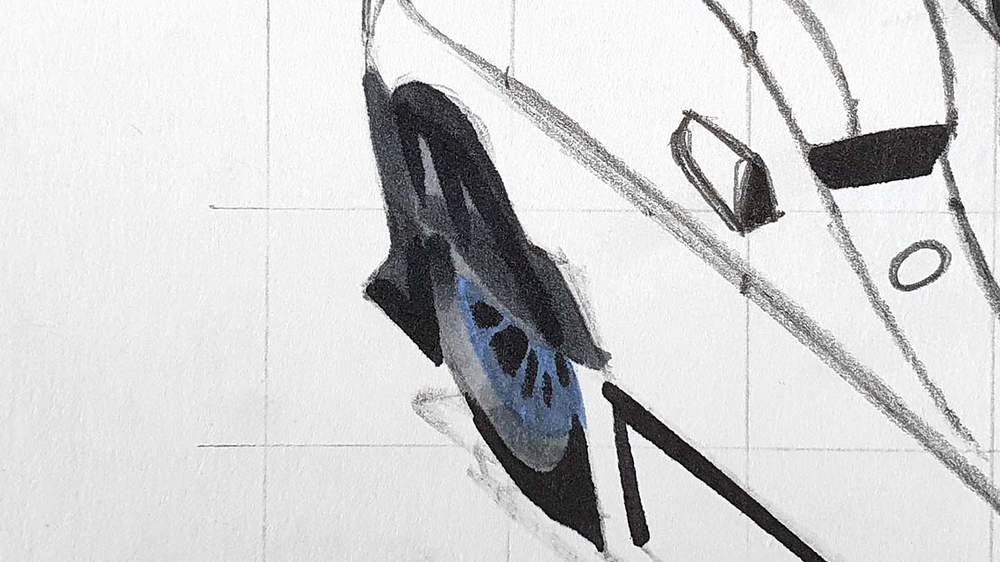
Step 4: Color the Rear Wheel Cover of the HP Barchetta
After that, I colored the thing that covers the top half of the rear wheel and the bit of the rear diffuser behind the rear wheel.
I started by coloring both parts with Ice Grey 2.

After that, I darkened the diffuser and the wheel cover except for the center with Ice Grey 7. Lastly, I added some Blue Black reflections on the wheel cover.
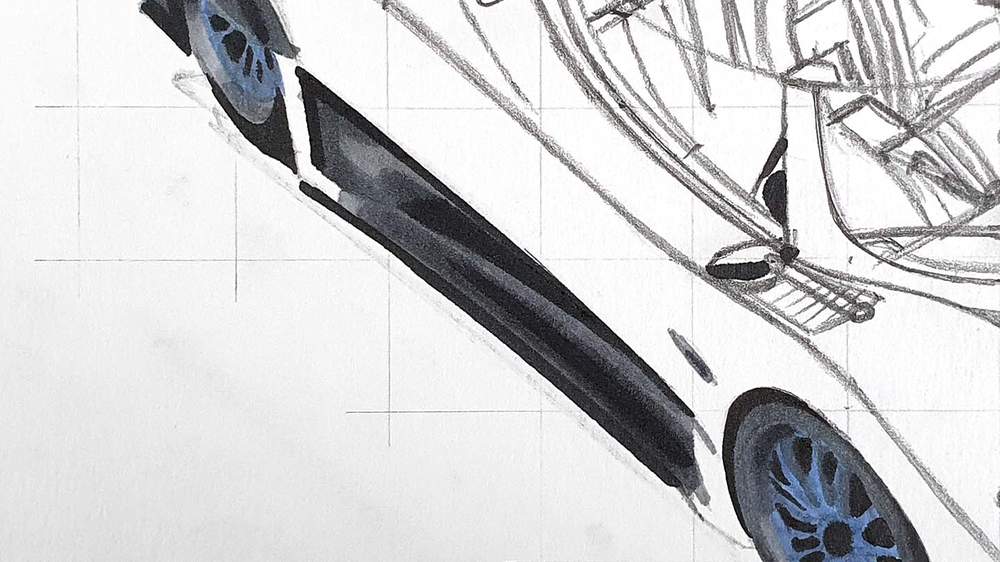
Step 5: Color the Lower Side of the Pagani Zonda
Next, I colored the side skirt and the lower half of the side.
I first colored both parts with Ice Grey 4.
After that, I darkened the middle of the side skirt, leaving a lighter edge around it. I also darkened the top and the left of the side bit of the car.
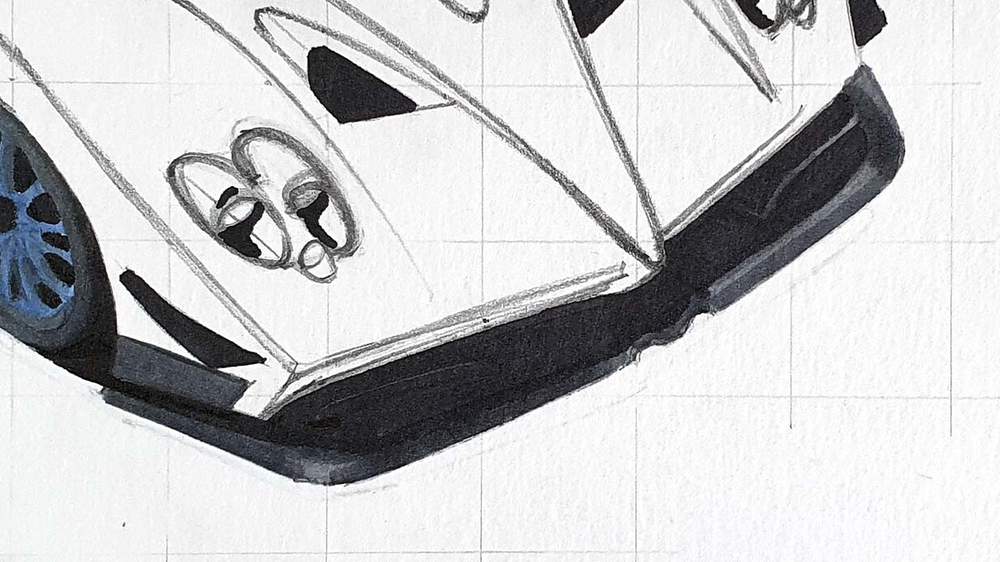
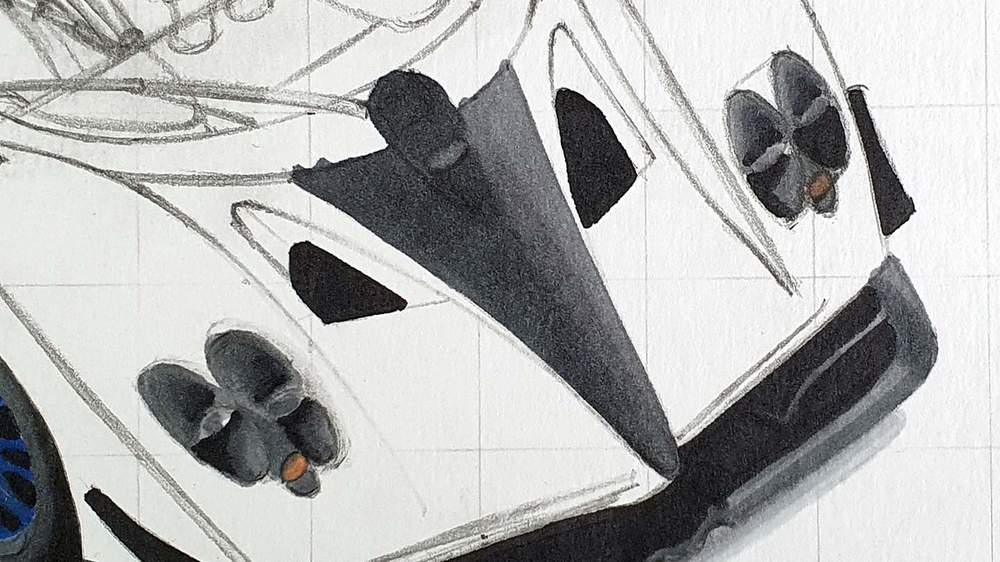
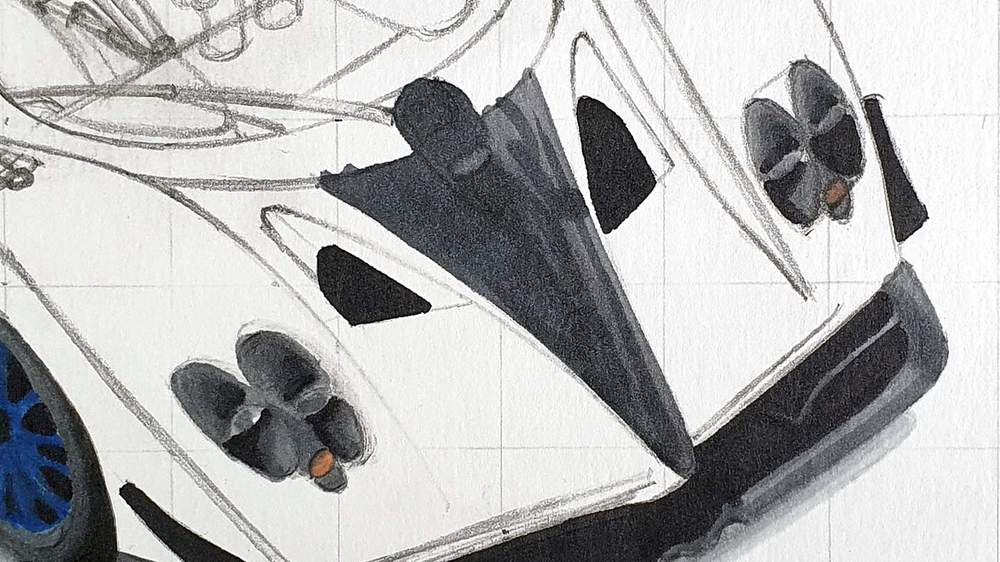
Step 6: Color the Front Splitter of the Zonda HP Barchetta
Next up I colored the front splitter.
I first used Ice Grey 4 to color the whole bit and I used Ice Grey 7 to color the rectangular bit just in front of the front wheel.
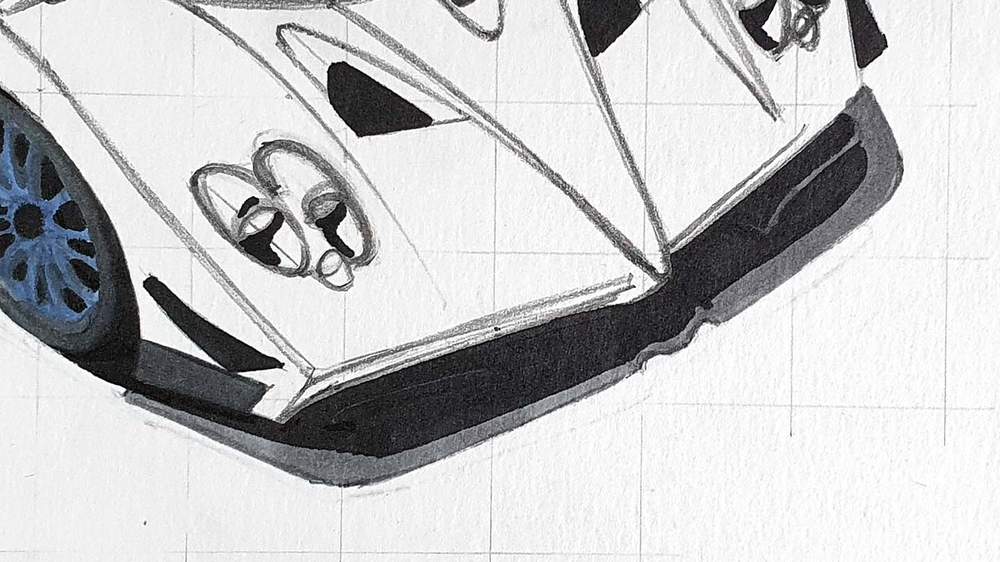
After that, I used Ice Grey 7 to darken most of the splitter but left a few lighter bits to show through.
Step 7: Color the Shadow Beneath the Zonda
Next, I colored the shadow starting with Ice Grey 1.
After that, I colored the parts where the shadow is close to the car with Ice Grey 4 and blended that into the IG1 with Ice Grey 2.
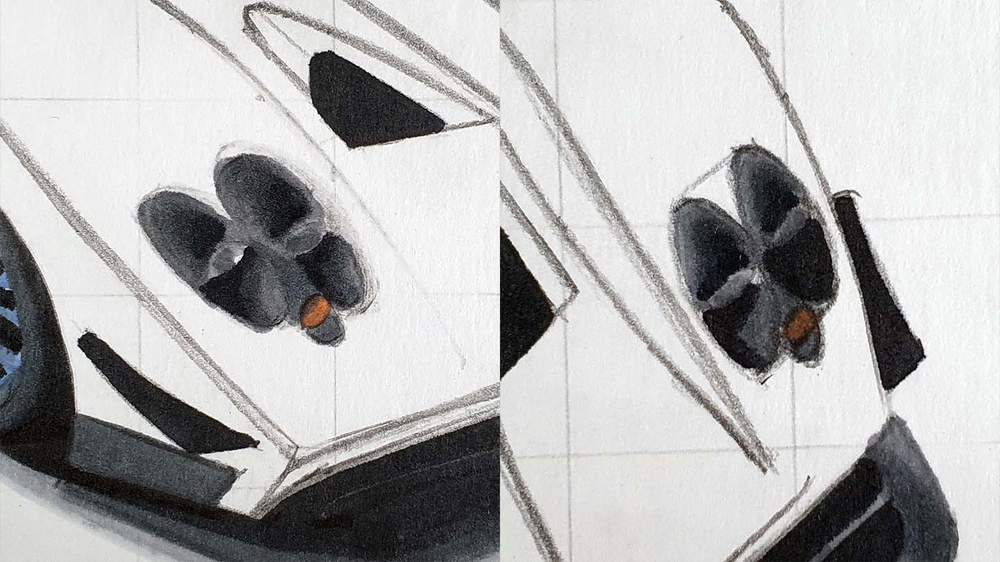
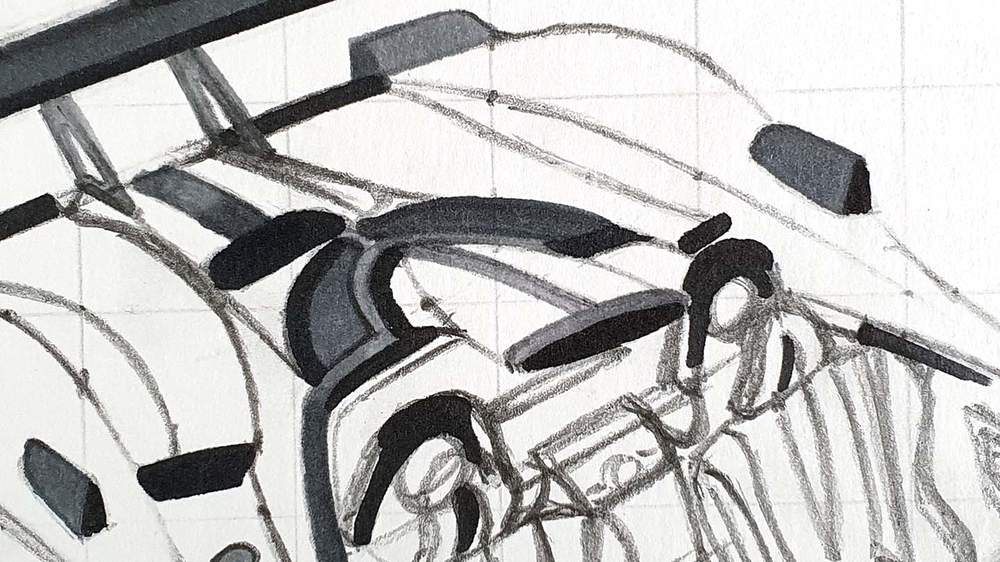
Step 8: Color the Air Intakes above the Rear Wheels
After that, I colored both air intakes above the rear wheels with Ice Grey 7.
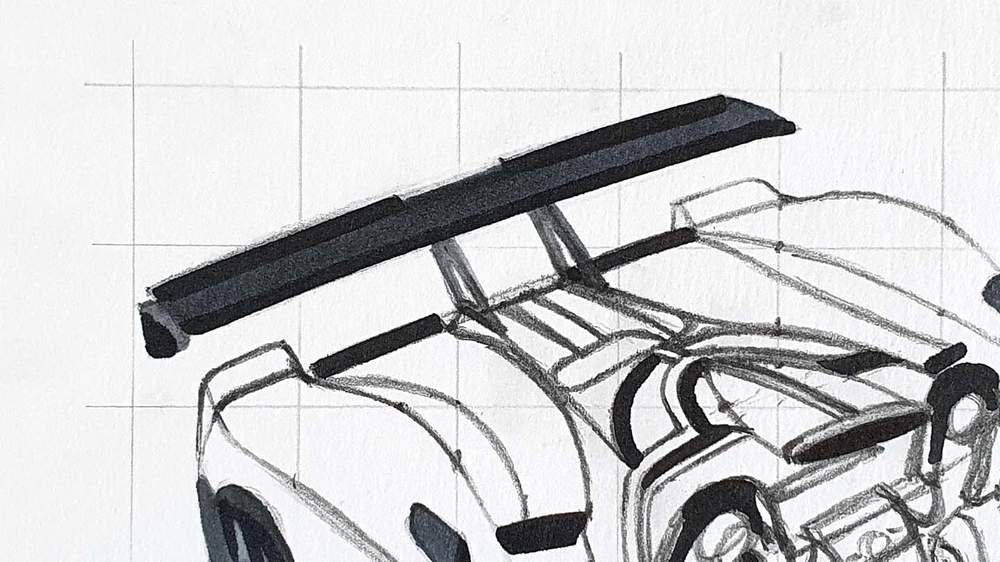
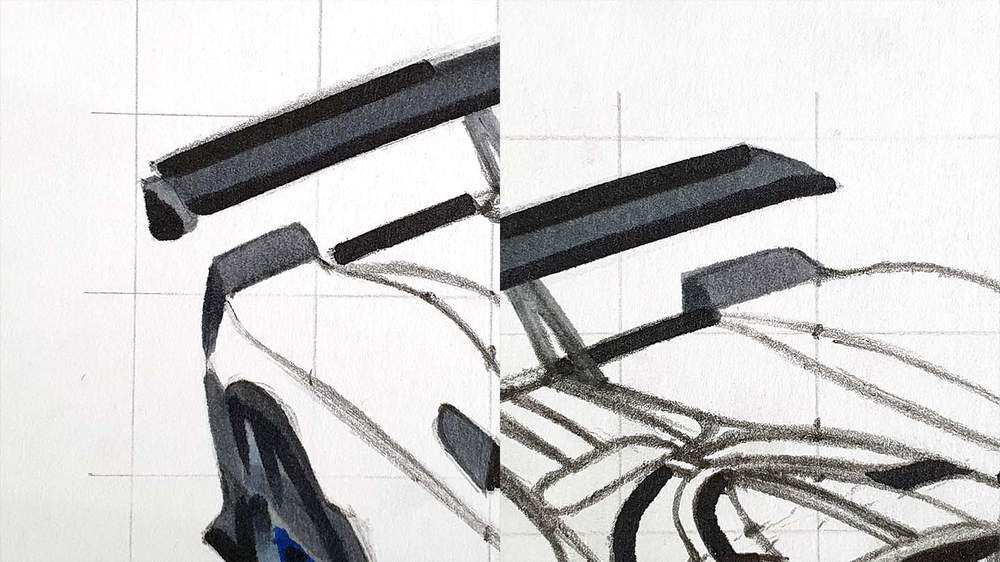
Step 9: Color the Rear Wing of the HP Barchetta
Next, I colored the rear wing of the Pagani.
I colored the top of the left endplate and the wing holders with Ice Grey 2 and the rest with Ice Grey 7.
Step 10: Color the Headlights of the Pagani Zonda
Next up I colored both headlights.
I first colored both of them with Ice Grey 2 but left a few white highlights.

Next, I used Ice Grey 4 and 7 to add some darker tones and depth to the headlights. In a few places, I used a bit of Blue Black too.
I also colored the blinkers with Mango
Step 11: Color the V-shaped Nose of the Zonda
After that, I colored the v-shaped nose bit.
I first colored the logo and the right side of the nose with Ice Grey 4. Then, I colored the rest with Ice Grey 7.
Lastly, I added a few reflections to the right side of the nose with Ice Grey 7.
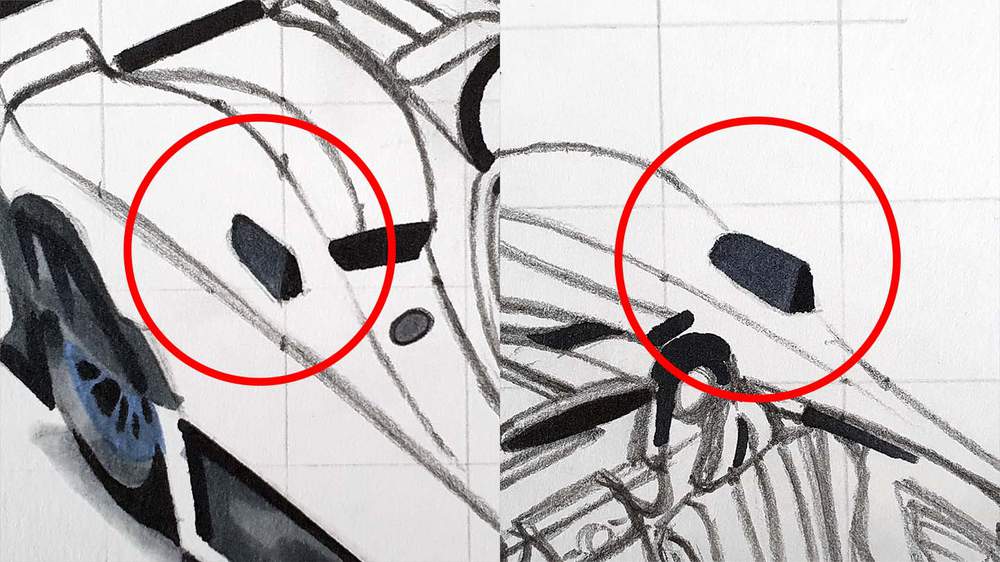
Step 12: Color the Wing Mirrors and the Air Vents
Next, I colored the wing mirrors and the air vents just behind them.
I first colored all of them with Ice Grey 4.
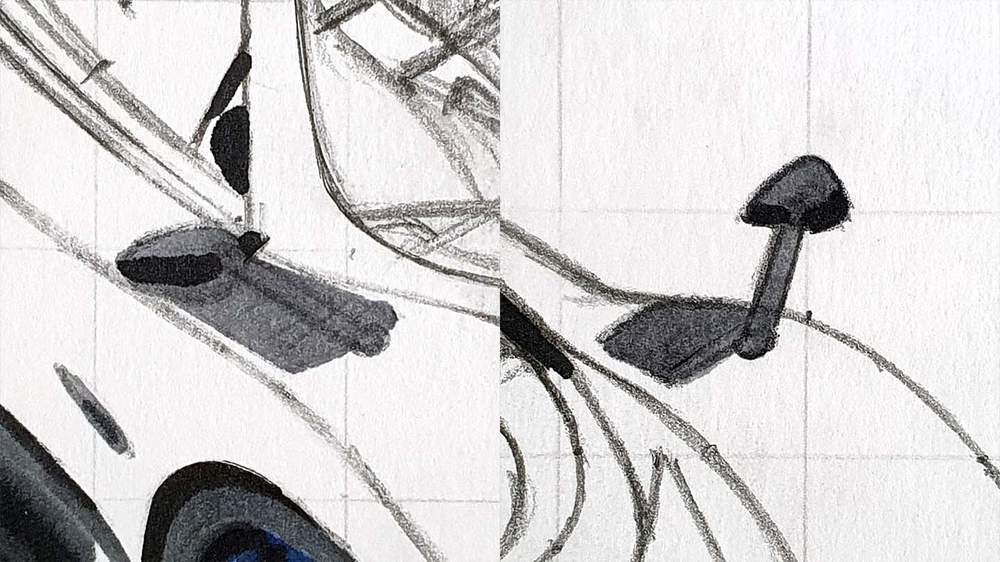
After that, I used Ice Grey 7 and Blue Black to add some dimension to them and I added the vent slats with Blue Black.

Step 13: Color the 2 Ducktails of the HP Barchetta
Next up I colored the 2 ducktail spoilers.
I colored the side of them with Ice Grey 7 and the top with Ice Grey 2.
Step 14: Color the Grey Parts of the Rear Deck
After that, I colored the rear deck.
I colored the left side of the C-shape with Ice Grey 4 and I colored the right side with Ice Grey 7.
I also colored the grey bit to the left of that. First with Ice Grey 2 and then I darkened the left and the right of it with Ice Grey 7.
Step 15: Color the Grey Edge Around the Interior
Next, I colored the grey edge around the interior/windows.
I first colored it with Ice Grey 2 and then I darkened the left bit with Ice Grey 7.
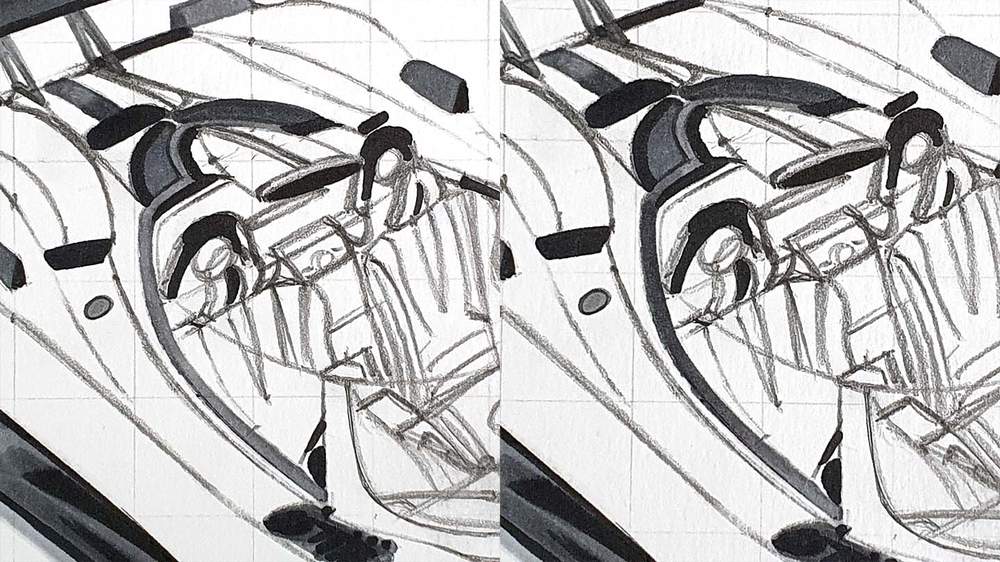
Step 16: Color the Air Intake above the Seats
After that, I colored the lighter stripe across the intake above the seats and the front edge of the air intake with Ice Grey 2.
Step 17: Color the Interior of the HP Barchetta
Now it's time for the part I was scared of the most: the interior.
Normally you can just see a silhouette of it through the windshield, but now you can almost see the whole thing and I had never before colored an interior like this.
I first colored the blue bits so that I wouldn't accidentally color them with the grey tones.
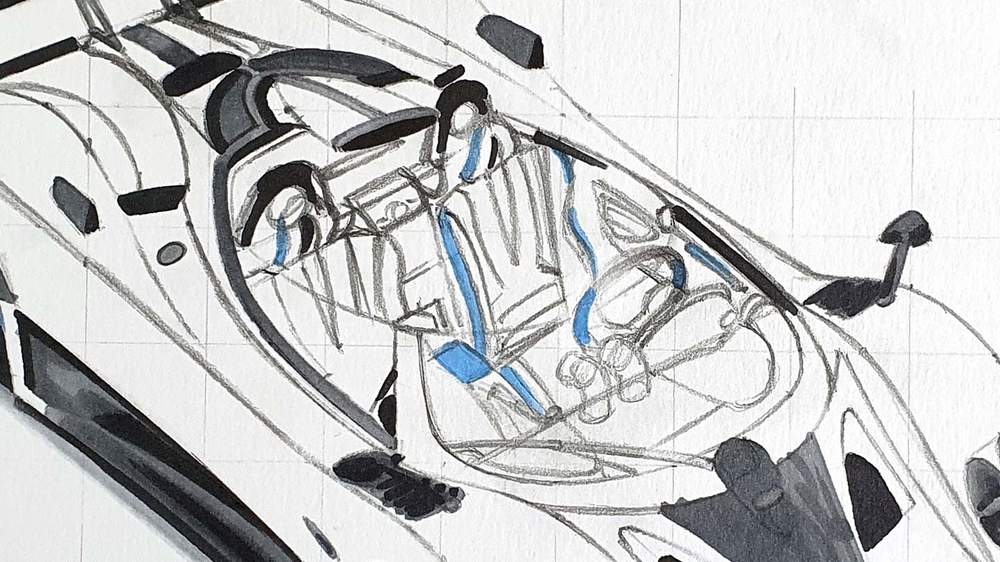
Next, I colored all light-colored leather bits with Warm Grey 2 and I colored the rest with Ice Grey 2, Except for the top and bottom of the steering wheel. For that I used Firebrick.
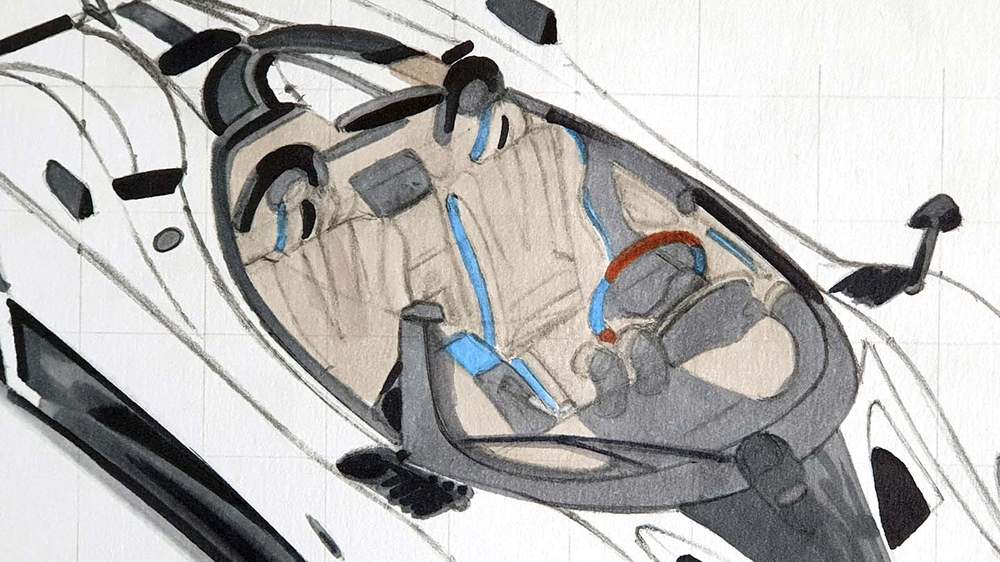
Next, I used Ice Grey 2 to darken some parts of the leather bits and I used Ice Grey 4 to add some darker tones to the rest of the interior and the windshield.

Lastly, I used Ice Grey 7 and Blue black to add more depth to the interior and the windshield surroundings. I also used Egyptian Blue to darken some of the Blue Parts.
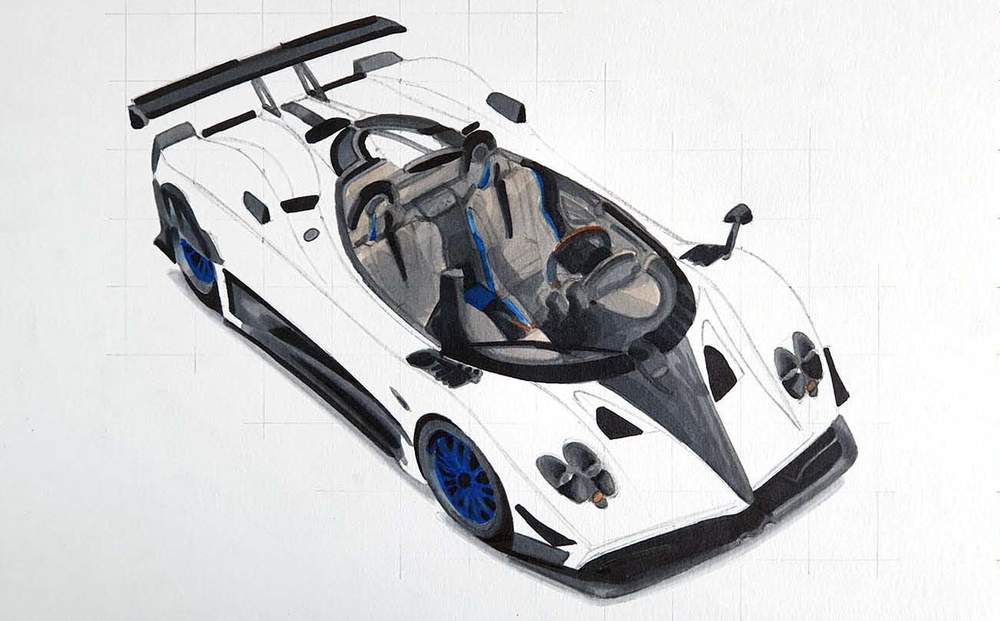
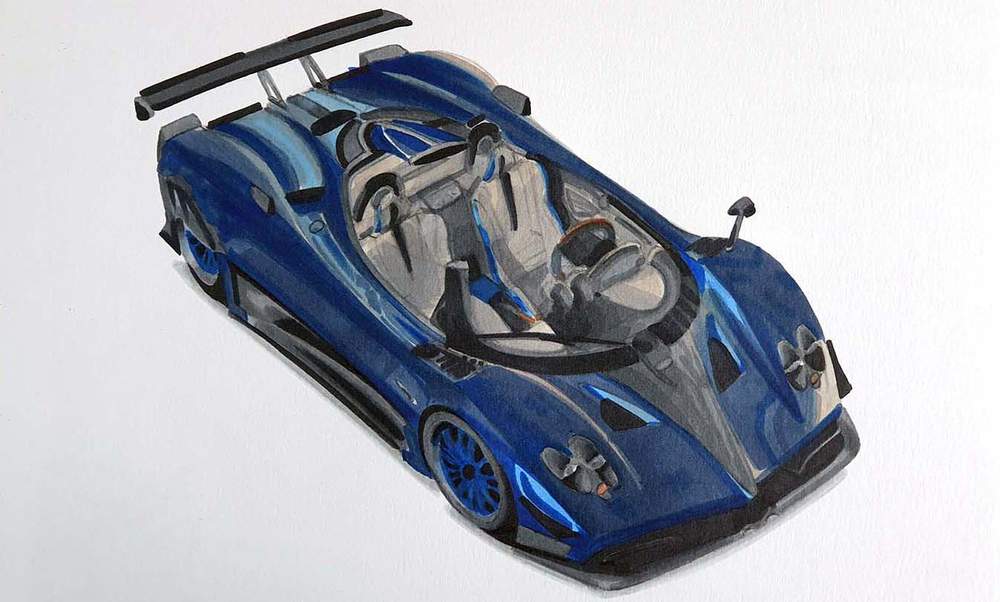
Step 18: Color the Main Body of the Zonda HP Barchetta
Not that the interior i out of the way, it's time to start coloring the main body.
I started by coloring the lightest parts first. For the light parts that reflect the buildings I used Warm Grey 2 and for the other light parts I used Cobalt Blue.

After that, I colored the remainder with Midnight Blue and I blended some of the edges between the dark blue and the grey with Ice Grey 3.

Lastly, I used Egyptian Blue to add some saturation in some places and I added a ton of reflections and I used Indigo Blue to darken some spots.
I also used Cobalt Blue to color over the light grey building reflections, but I regret doing that...
Step 19: Add Details with Colored Pencils
The whole car is now colored, but it lacks some details. To add all the tiny details that'll make the drawing look better, I used White, Dove, Grey, and Black Derwent Coloursoft colored pencils.
I added the light front edges to all the spokes and I refined their shape.
I also added a white line to indicate the top of the windshield and I added a ton of highlights all around the car. In some places I used black to add in some more dark tones.
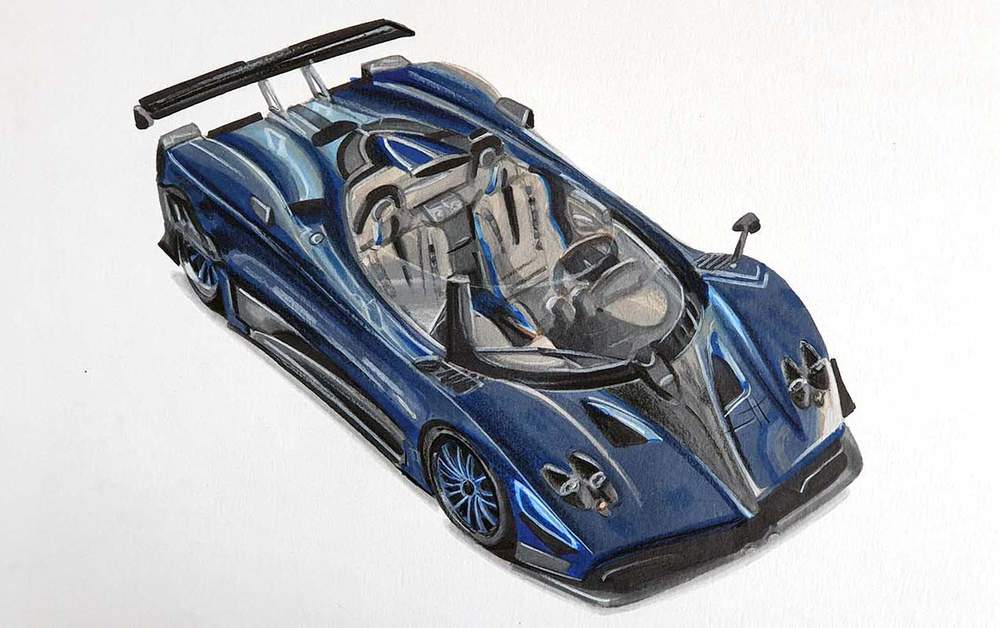
Step 20: Add White Highlights to the Pagani Zonda
To make this drawing fully come to life, I added some bright white highlights with the Posca PC-3M paint marker.
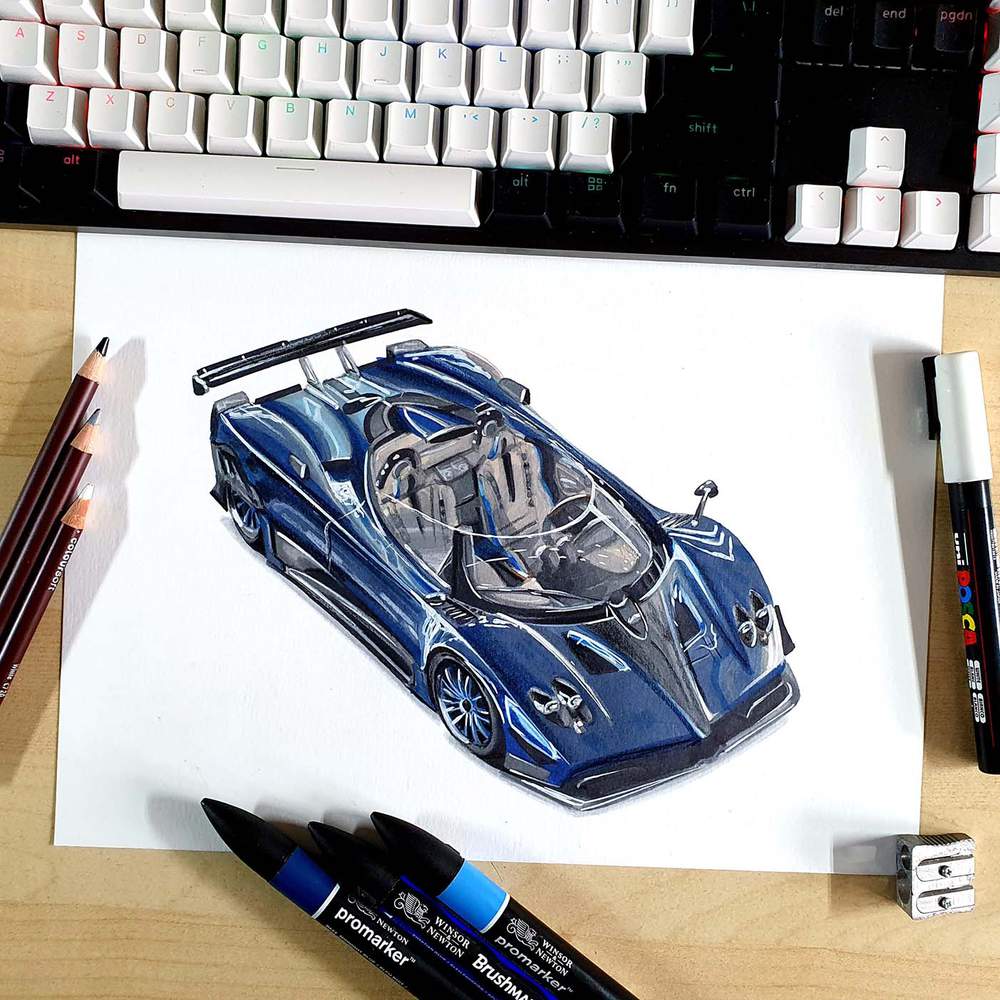
And That's How I Drew This Pagani Zonda HP Barchetta
This is just one way you can draw cars like these, but this is what works best for me and doesn't take a ton of time. I made this drawing in only 4 hours.
If you found this helpful, please share it with someone who might also want to know how to draw cars like these. It would help me out a lot.
Thank you!
Articles You Might Also Like

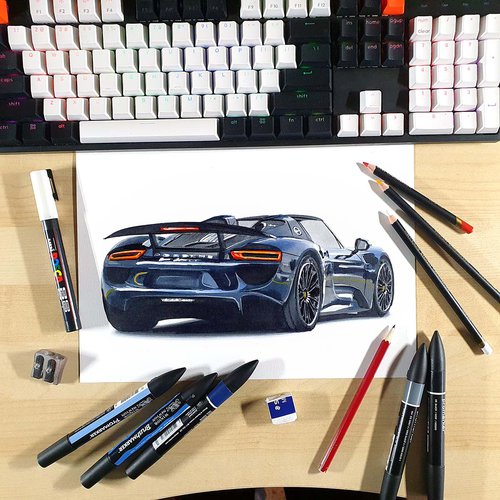
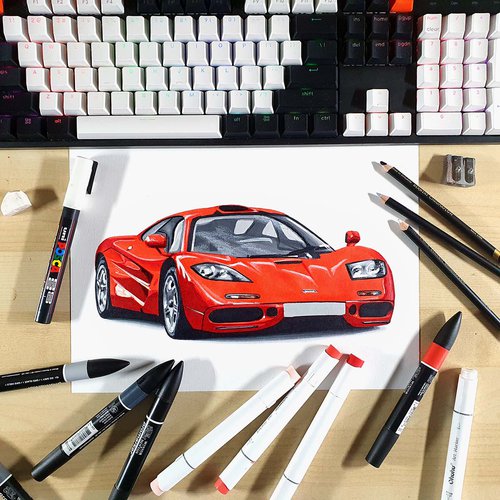
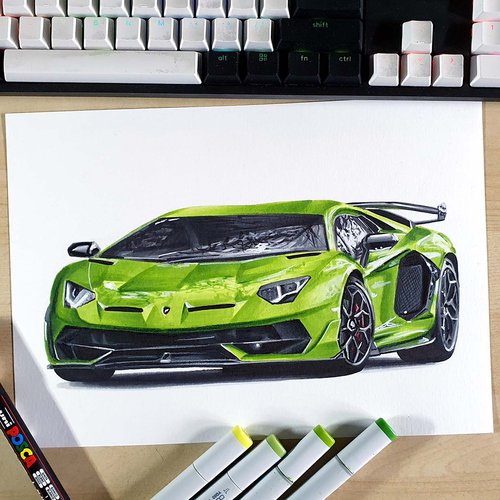

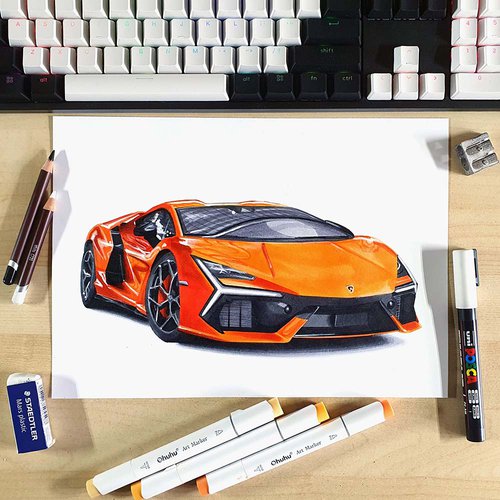

I love bringing cars to life with alcohol markers and colored pencils.
Whether you're just starting out or looking to improve your skills, I'm here to help!
Click here to learn more about me.


Be the first to comment!
Comments
There are no comments yet.