Draw a Porsche 911 GT3 RS Like a Pro: Easy Tutorial for Beginners
.jpg__1000x1000_q65_subsampling-2.jpg)
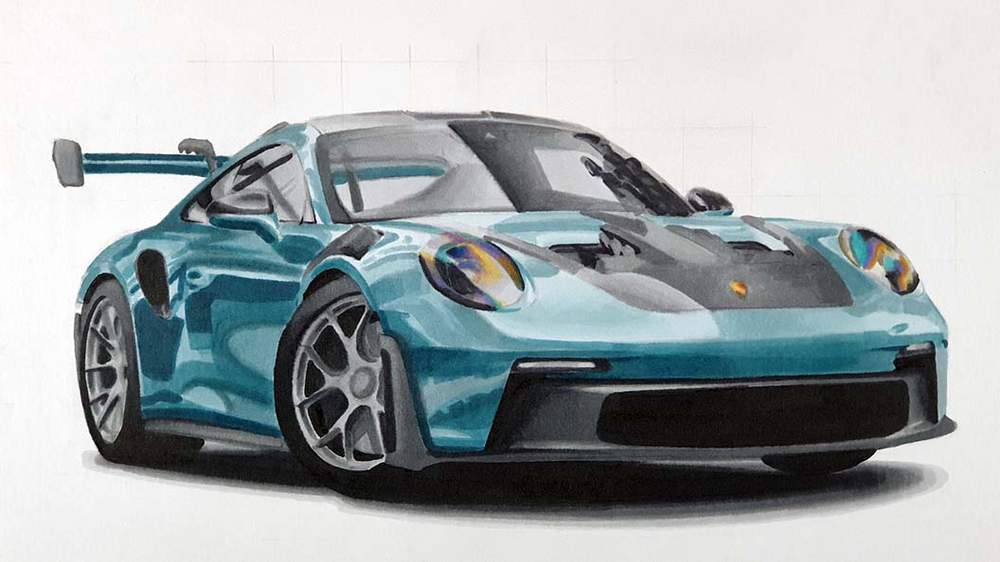
In today's car drawing tutorial, I'm going to show you how to draw a Porsche 992 GT3 RS, the latest generation Porsche 911 GT3 RS.
This drawing isn't as difficult as it might seem at first. I've broken everything up into many easy-to-follow steps so you can draw one just as well as I did (hopefully).
Disclaimer: In the name of full transparency, please be aware that this blog post contains affiliate links and any purchases made through such links will result in a small commission for me (at no extra cost for you).
Let's get started!
In This Guide
- Drawing supplies & colors I used
- Reference photos I used
- How to sketch a Porsche 911 GT3 RS using the grid method
- Coloring the Porsche 911 GT3 RS step by step
- Add details & highlights to your Porsche drawing
- More car drawing guides you'll like
Art Supplies I Used for this Tutorial
For this drawing, I used the following art supplies:
- A4-sized Canson Illustration Manga paper;
- A graphite pencil and a ruler;
- Ohuhu Honolulu markers in the colors Neutral Grey 02 (CG020), Neutral Grey 03 (CG030), Neutral Grey 05 (CG050), Neutral Grey 07 (CG070), Black (120), Jade Green (G320), Mineral Green (G330), Dolphin Blue (BG5), Teal (BG8), Yellow Dahlia (Y260), Marigold (YR2), Pearl Violet (V050), Blue Bell (V370), Turguoise Green Light (PB10), and Terra Cotta (YR5). (Also available individually here.);
- Derwent Coloursoft pencils in the colors White, Steel Grey, and Black;
- A white Posca PC-3M.

Reference Photo I used for this Tutorial
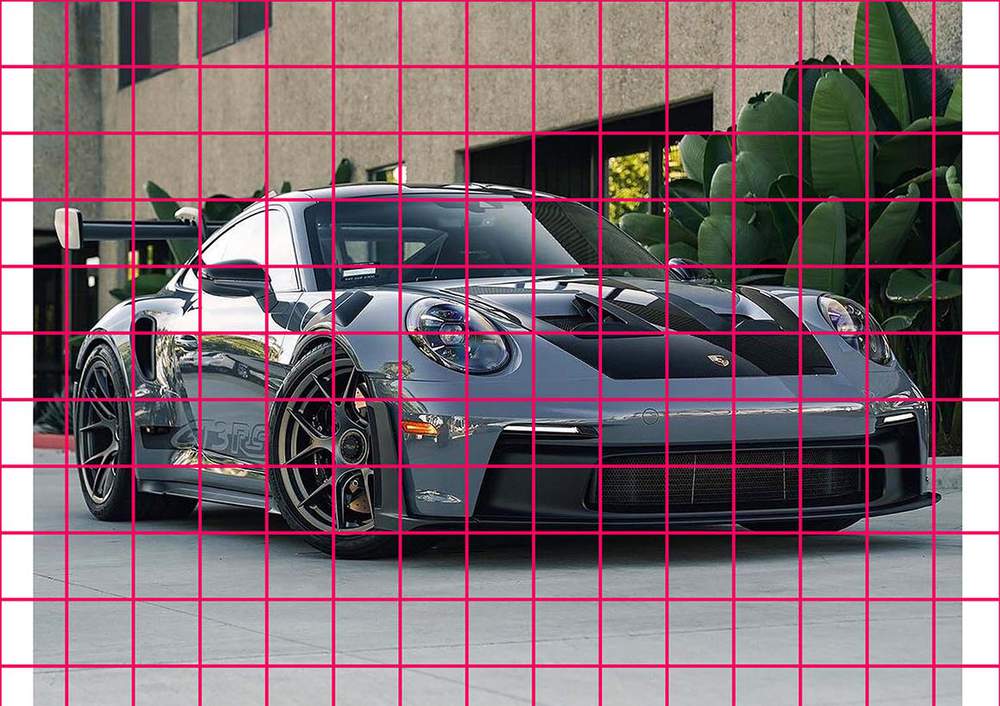
For this tutorial, I used the following photo shared by @protectivefilmsolutions on Instagram to get the proportions of the Porsche 992 GT3 RS correct.
If you want to know what to look for when deciding what reference photos to use, I highly recommend you check out this guide.
How to Draw a Porsche 911 GT3 RS?
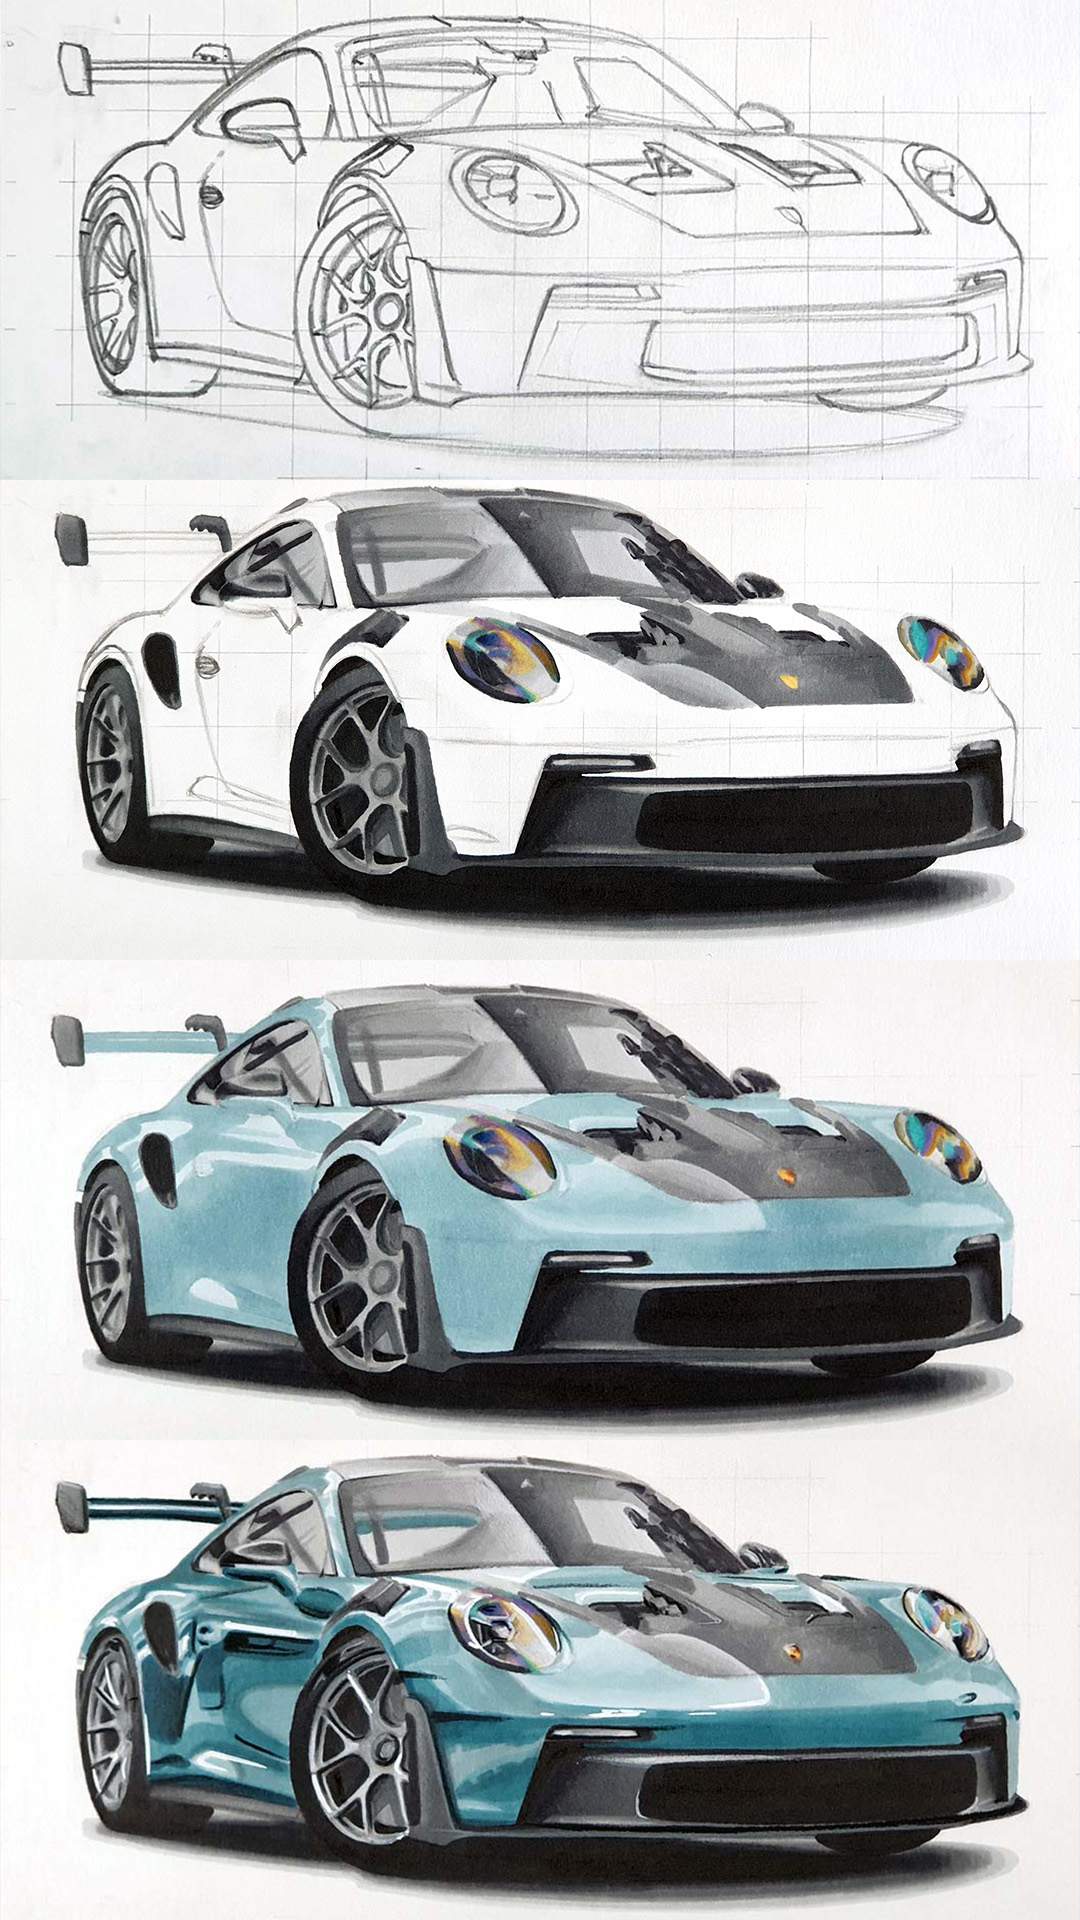
To draw a Porsche 911 GT3 RS, I started by making a sketch. Then I colored all black and grey parts with alcohol markers. Next, I colored the main body in a beautiful greyish green. And to finish it off I added a few details and white highlights.
Step 1: Sketch the Outline of the Porsche 911 GT3 RS
The sketch is by far the most important part of your drawing if you want it to look realistic and it can be quite difficult. Luckily there are many shortcuts you can take to make it easier to make an accurate sketch.
I use the grid method for example. I place a grid over the reference photo using Photoshop and then I draw that same grid on my paper.
You can also use my grid overlay tool to easily add a grid overlay on your reference photo.
The grid divides it into many squares so I only need to focus on one square at a time instead of the whole photo.
Now it's time to start sketching. I usually start on the left and draw clockwise if that makes sense.
I start with the basic shape of the car. When that's done I start adding in all the details.
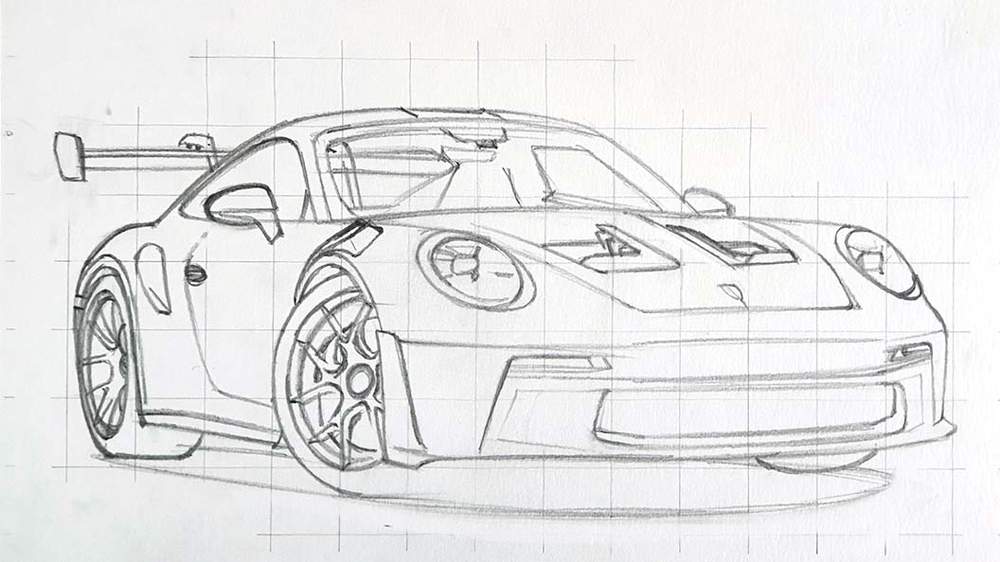
Before you start coloring with markers, make sure to erase your sketch until you can just about see it to prevent the sketch from showing through in the end.
Step 2: Color All Pure Black Parts
Sometimes the sketch looks pretty overwhelming. So what I like to do then is to color all pure black parts. For some reason, this makes the drawing look a lot less complicated for me.
To color the pure black parts, I use the Black (120).

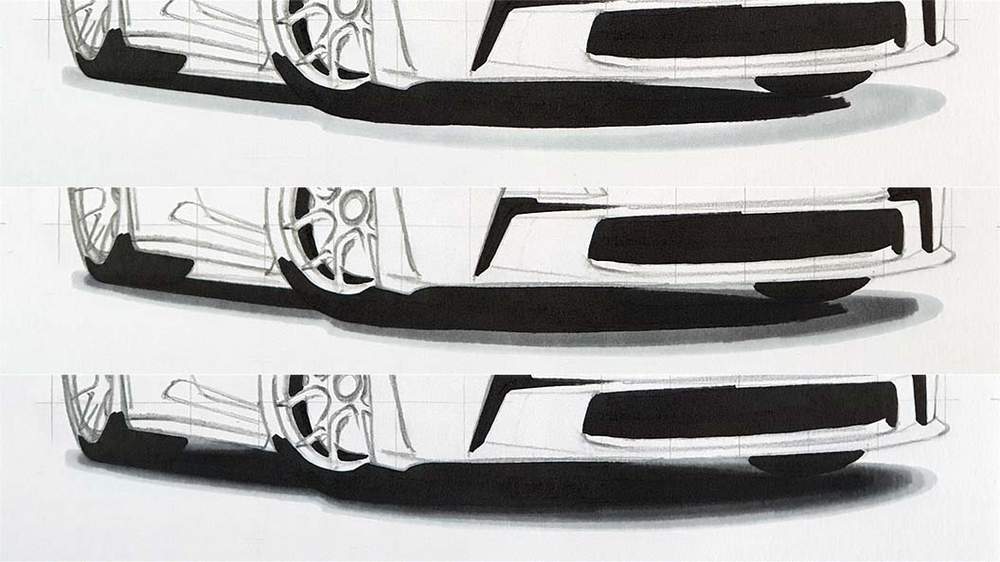
Step 3: Color the Shadow of the GT3 RS
Next up is the shadow.
I first colored the whole shadow with Neutral Grey 02 (CG020). Then I colored the inner part with Neutral Grey 05 (CG050), leaving a small border of Neutral Grey 02 (CG020) around it. Lastly, I colored the inside of the shadow with Black (120) and blended the different shades of grey together.
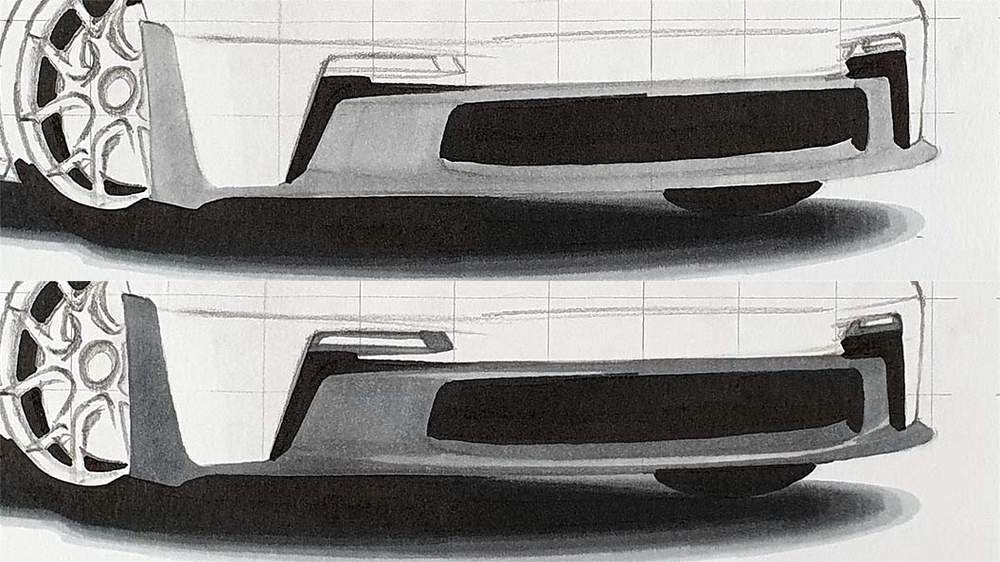
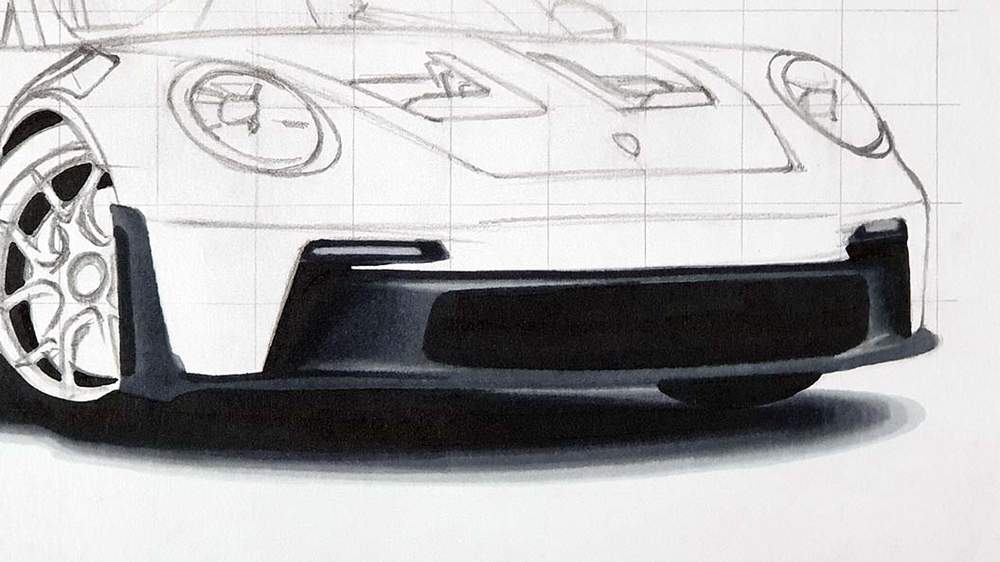
Step 4: Color the Front of the Porsche
To color the plastic bits around the front, I started by coloring everything with Neutral Grey 03 (CG030), at least that was my intention. I forgot to color the blinkers (I believe that's what they are).
Then I darkened most parts with Neutral Grey 05 (CG050), except a line at the bottom and toward the top of the black grill.
And lastly, I added some Black (120) in the darkest parts and blended that into Neutral Grey 05 (CG050) using Neutral Grey 07 (CG070).
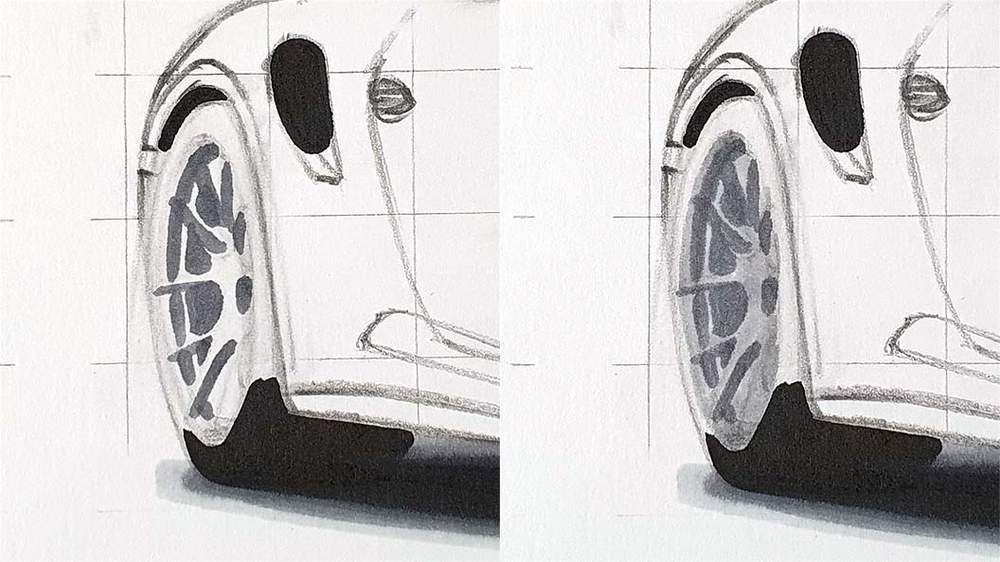
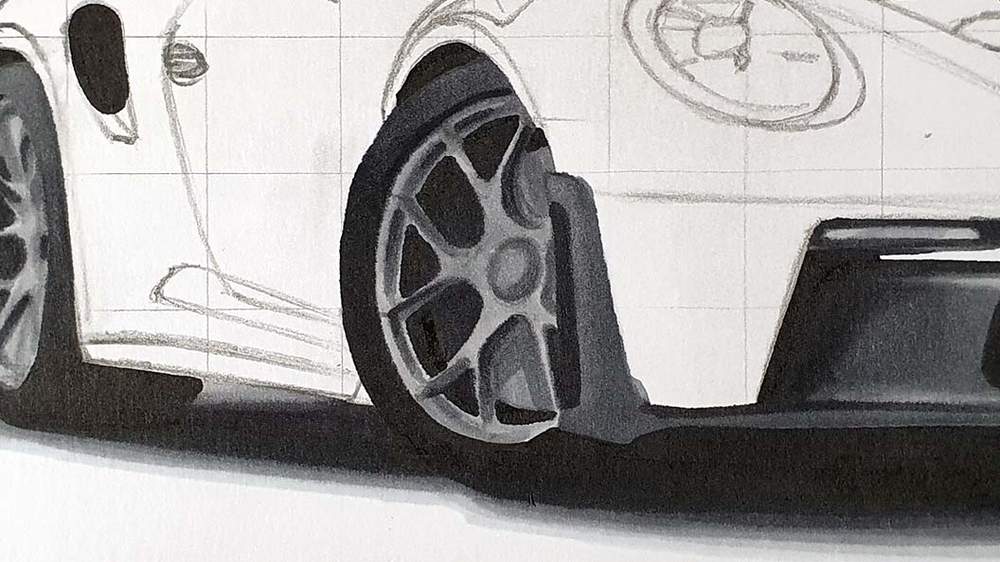
Step 5: Color the Wheels of the Porsche 992 GT3 RS
I first colored the rear wheel, starting with Neutral Grey 05 (CG050) to color the darkest parts. Then I colored the rest using Neutral Grey 03 (CG030). Next, I darkened most of the dark parts using Neutral Grey 07 (CG070) and Black (120). Finally, I colored the tire, Neutral Grey 07 (CG070) at the top blended into Black toward the middle.
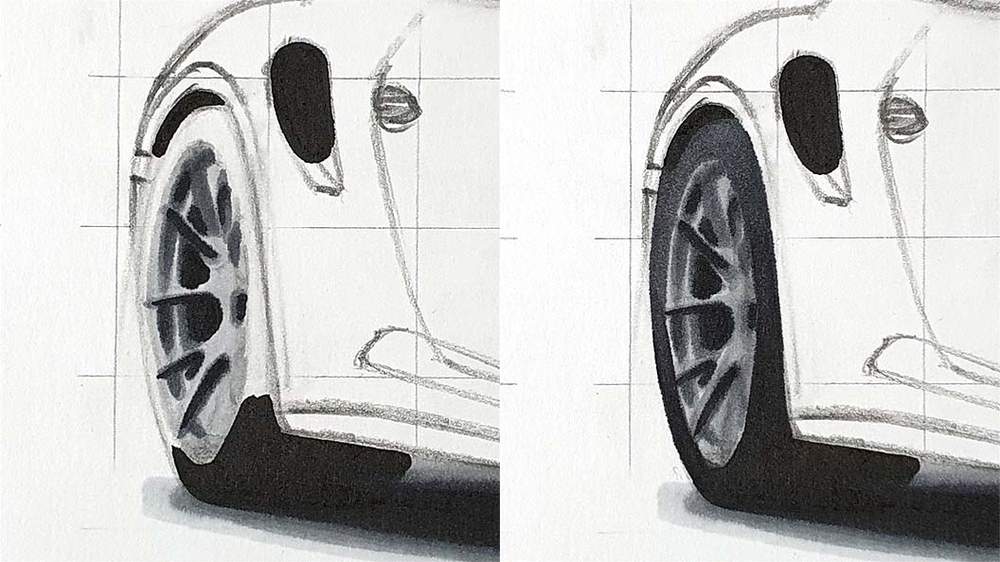
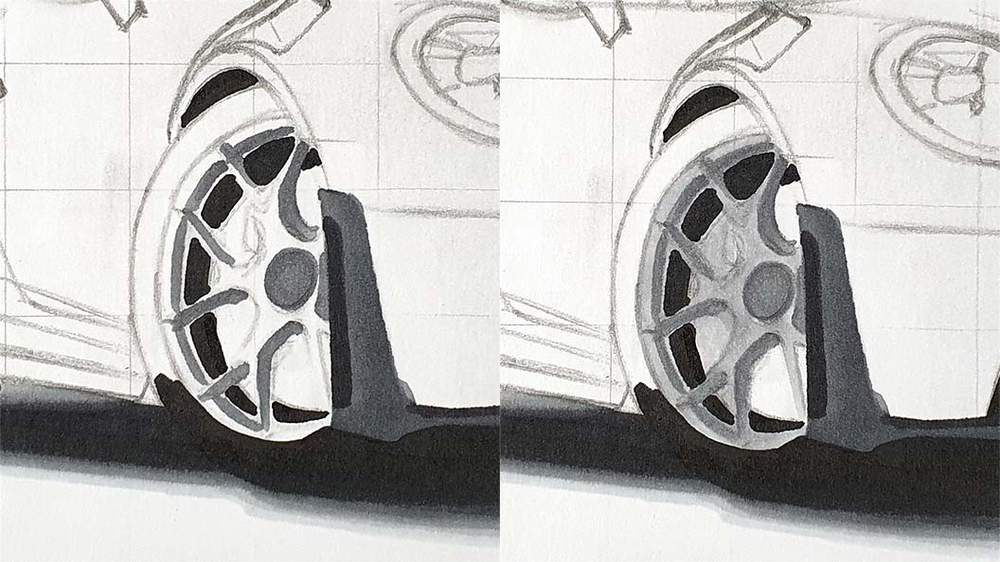
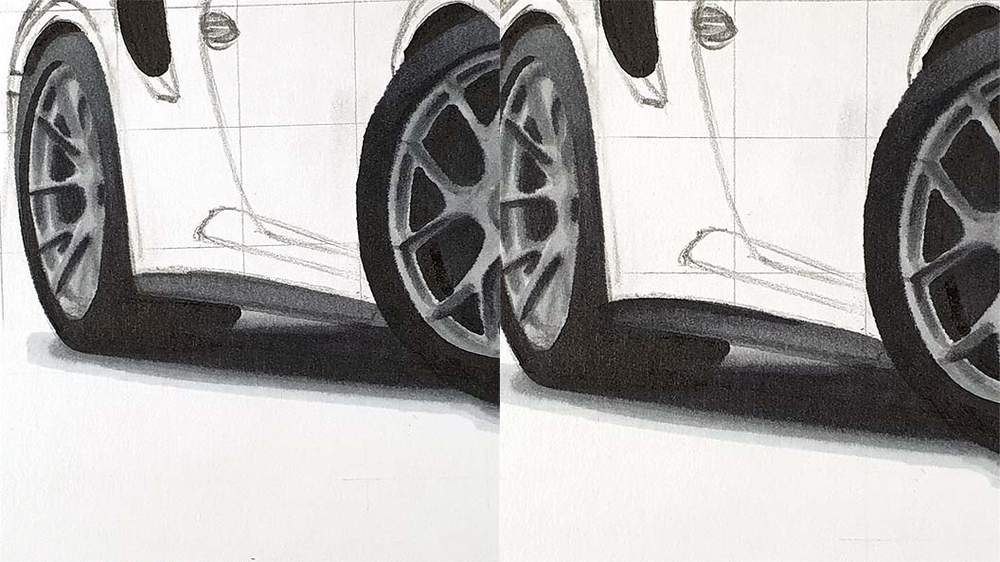
Next, I colored the rear wheel, and once again, I started by coloring the dark parts with Neutral Grey 05 (CG050), except the brake caliper and disk for some reason. Then I colored the remainder with Neutral Grey 03 (CG030).
After that, I made the darker parts darker using Neutral Grey 07 (CG070) and Black (120). Lastly, I colored the tire. Again, Neutral Grey 07 (CG070) at the top blended into Black toward the middle.
Step 6: Color the Side Skirt
The side skirt is pretty dark, so I immediately colored it with Neutral Grey 05 (CG050), and then I added some darker tones using Neutral Grey 07 (CG070) and Black.
Step 7: Color the Side Air Intake
The side intake is nothing special. I just outlined it with Neutral Grey 07 (CG070) and colored the part below it. Then I added some black to the bit below the pure black, but leaving a tiny line of grey.
Step 8: Color the Canard Behind the Rear Wheel
I colored it Neutral Grey 07 (CG070).
Step 9: Color the Headlights of the Porsche 911 GT3 RS
Now it's time for a fun step!
Headlights can be a little daunting as they are very detailed and contain a lot of reflections. But for now, we're going to keep it simple. We won't worry about the details yet, they'll be added later on.
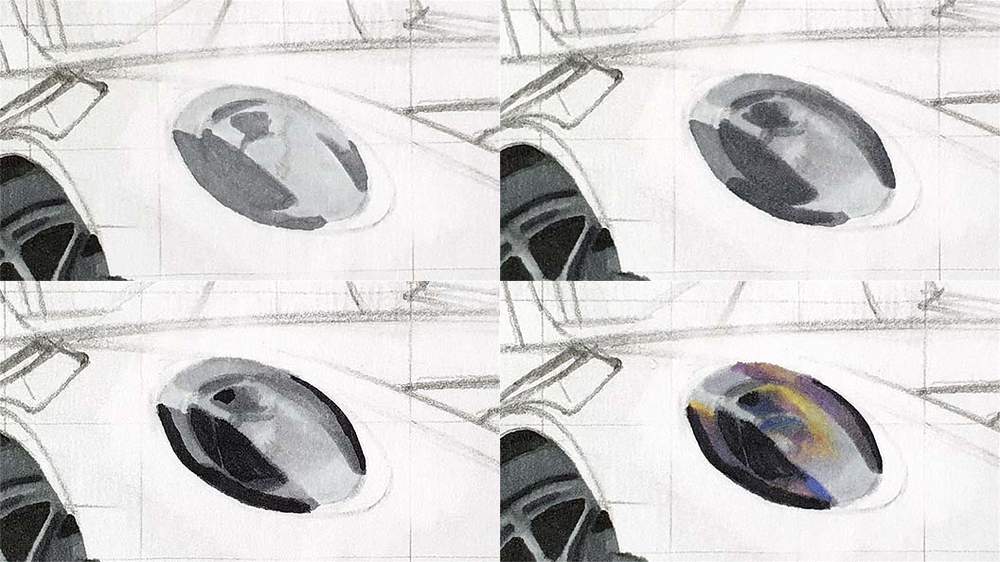
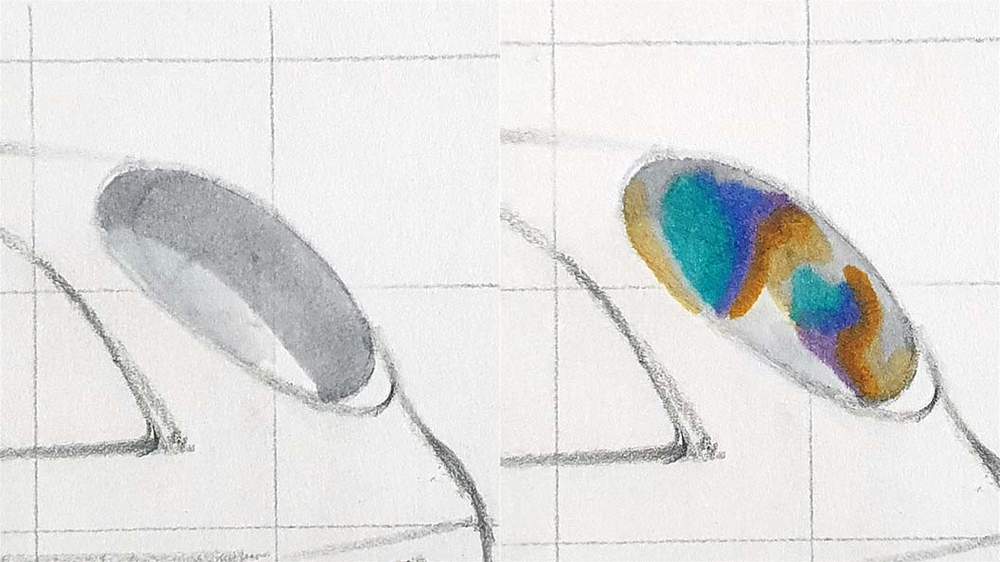
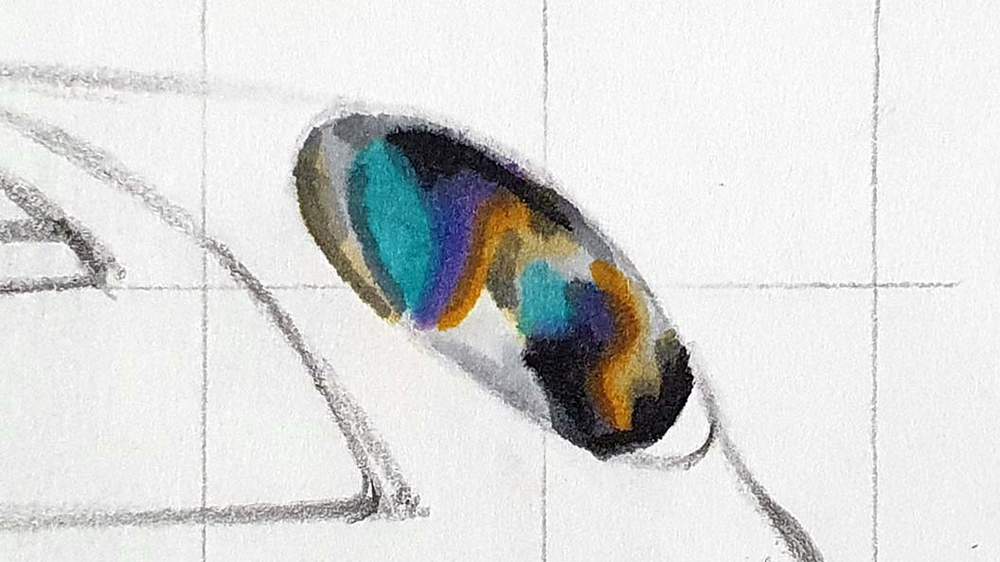
I started by coloring the left headlight. I colored the light parts with Neutral Grey 03 (CG030) and the darker parts with Neutral Grey 05 (CG050).
Then I darkened some of the darker parts with Neutral Grey 07 (CG070) and then I darkened a few more parts with Black.
Lastly, I added some beautiful colors, some Yellow Dahlia (Y260), Pearl Violet (V050), Blue Bell (V370), and Marigold (YR2). Later on, I also added some Turguoise Green Light (PB10) in some parts.
Next, I colored the right headlight.
This time, I colored the very light parts Neutral Grey 02 (CG020) and the darker parts Neutral Grey 03 (CG030).
Then I added some colors, some Yellow Dahlia (Y260), Pearl Violet (V050), Blue Bell (V370), Marigold (YR2), and Turguoise Green Light (PB10).
And lastly, I added some Neutral Grey 07 (CG070) and Black (120) to the darkest parts.
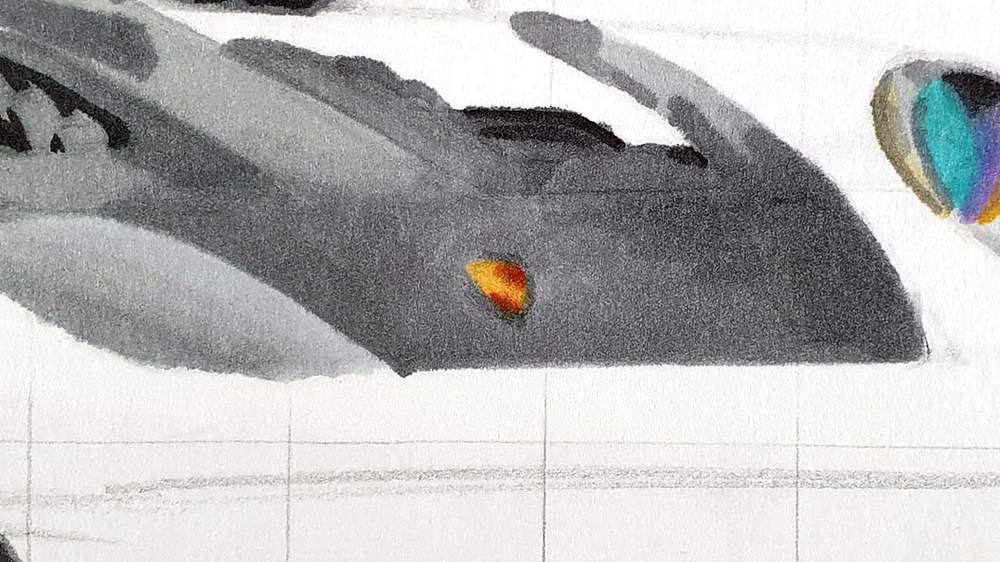
Step 10: Color the Hood of the GT3 RS
I started off by coloring the logo with Yellow Dahlia (Y260) and I colored the left part of the hood with Neutral Grey 02 (CG020).
Next, I colored the remainder of the hood with Neutral Grey 03 (CG030), except for the fins and vents. I also darkened some parts of the Neutral Grey 02 (CG020) with Neutral Grey 03 (CG030).
Then I colored the vents and ins with Neutral Grey 05 (CG050), as well as the bottom right and a bit on the bottom left, and I blended that into the lighter grey.
Lastly, I darkened the edge to the left of the logo with Neutral Grey 07 (CG070) and I added some vague reflections to the bottom right with Neutral Grey 07 (CG070) as well. I also darkened some parts of the vents, and I used some Black (120) for the really dark parts.
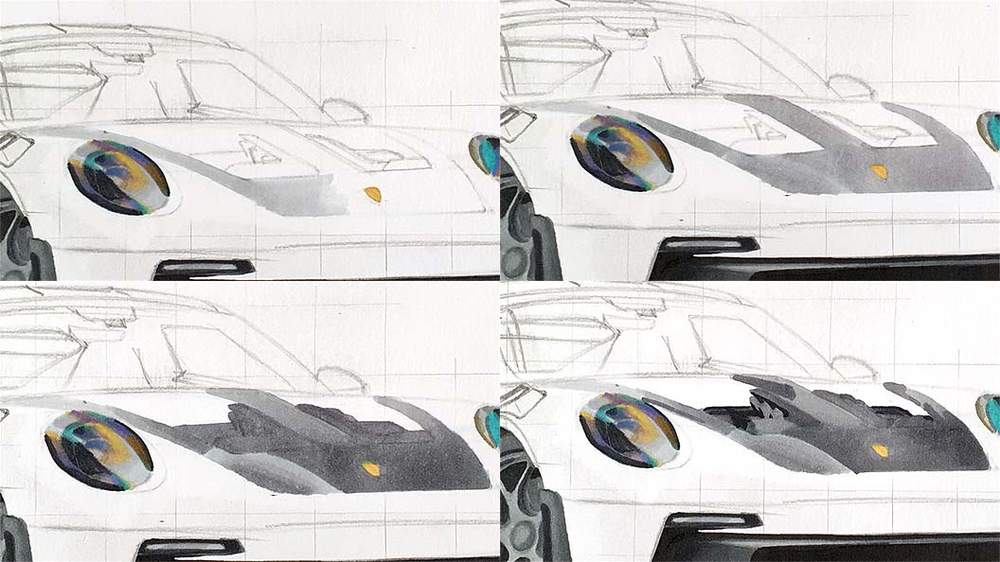
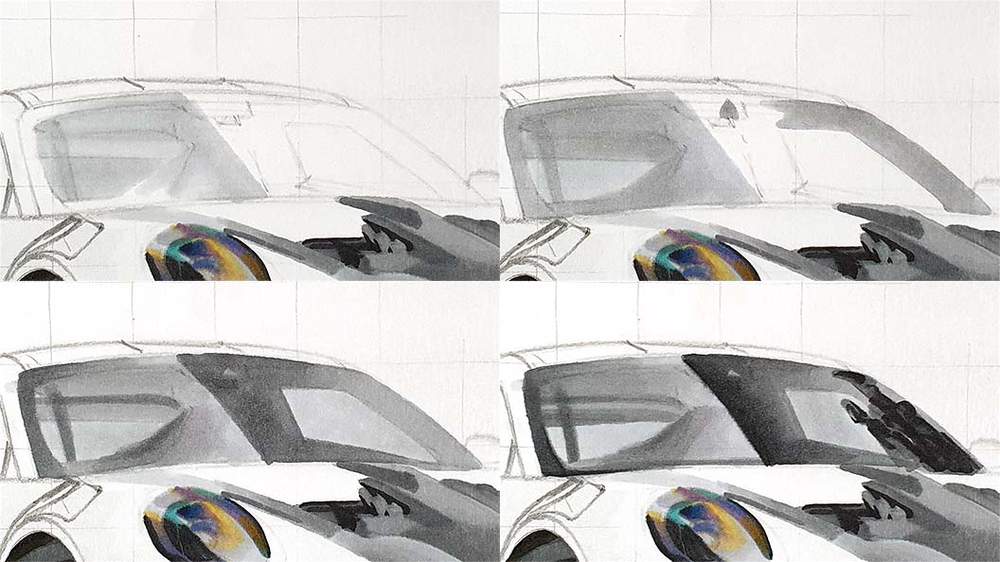
Step 11: Color the Windshield
The windshield is split by a reflection. I colored everything to the left of the reflection with Neutral Grey 02 (CG020).
Next, I darkened some of the parts on the left with Neutral Grey 03 (CG030), and I added some Neutral Grey 03 (CG030) to the A-pillar on the right.
Then I added some Neutral Grey 05 (CG050) to the darkest part on the left side, and I darkened the left side of the right part (hope that makes sense...). I also colored the side window on the right with Neutral Grey 02 (CG020).
Lastly, I added some Neutral Grey 07 (CG070) and Black (120) to the darkest parts, and I added a tree reflection on the right side of the windshield. I also added some Neutral Grey 07 (CG070) on the far left of the windshield.
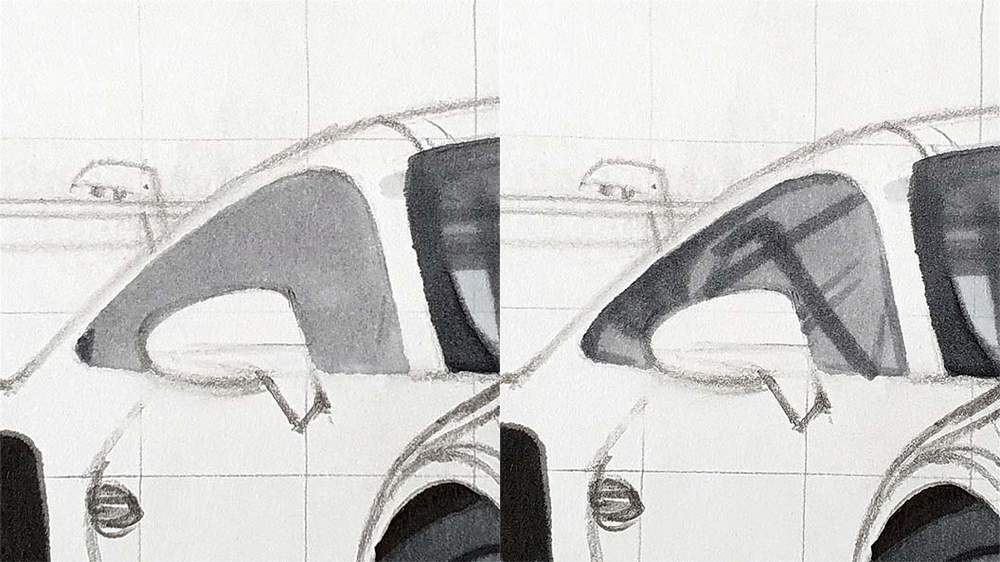
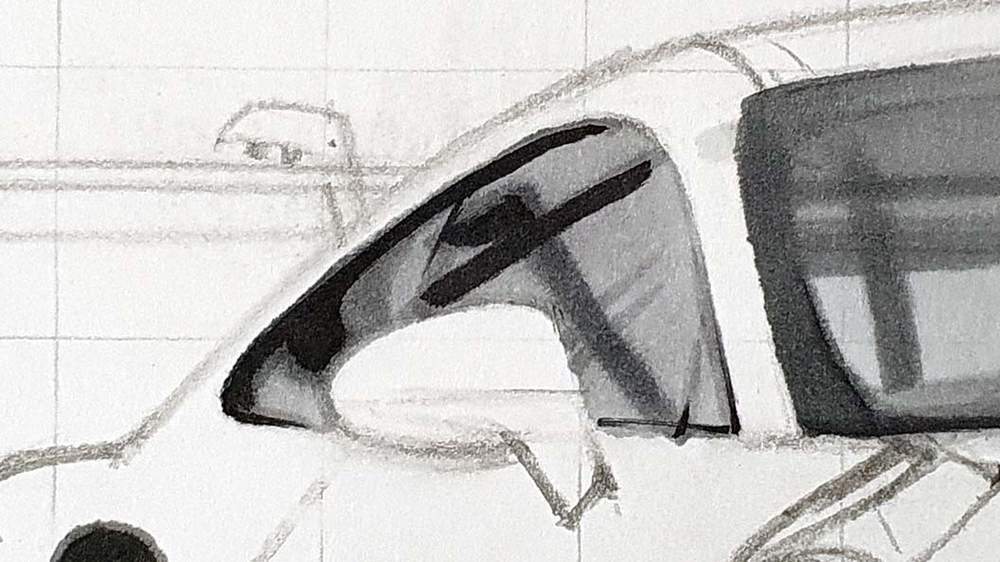
Step 12: Color the Side Window
I started by coloring the full side window with Neutral Grey 03 (CG030).
Then I added some reflections and lines with Neutral Grey 05 (CG050) and Neutral Grey 07 (CG070).
And lastly, I darkened some parts with Black (120).
Step 13: Color the Roof
To color the roof, I started by coloring it fully with Neutral Grey 02 (CG020).
Next, I added some Neutral Grey 03 (CG030) to most of the top part.
And finally, I added some darker parts, mostly toward the top right, using Neutral Grey 05 (CG050). I also colored the fin to the top left of the roof using Neutral Grey 05 (CG050).

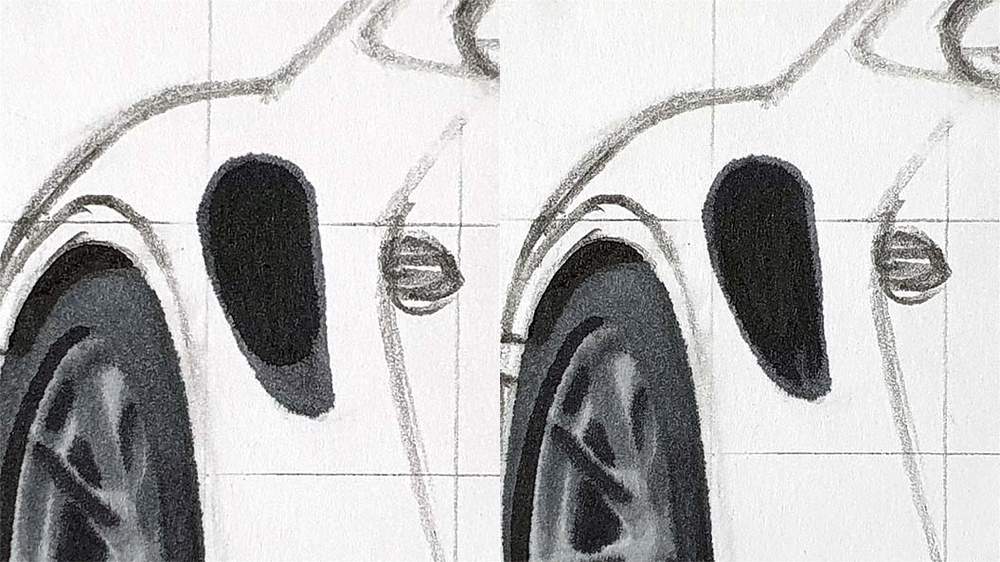
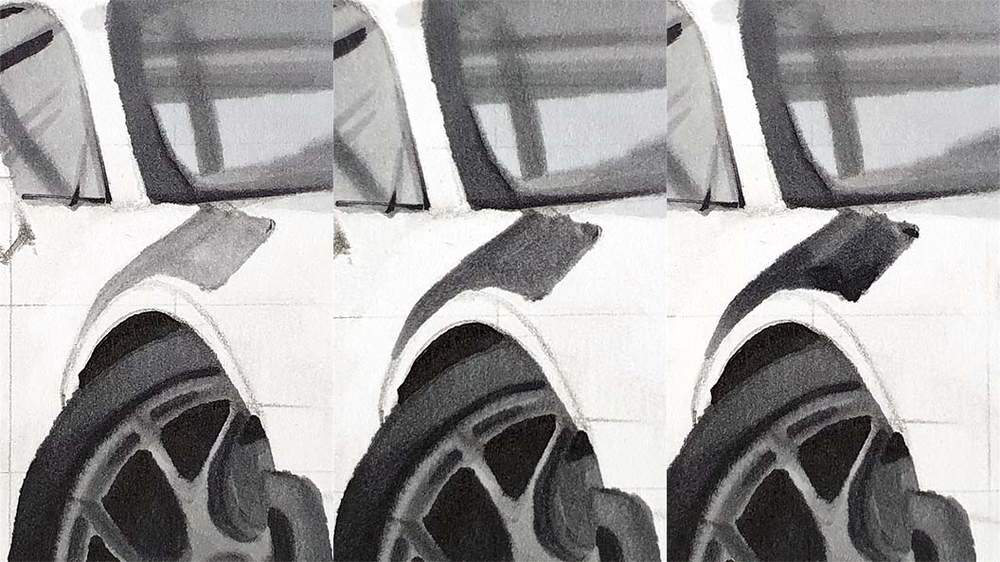
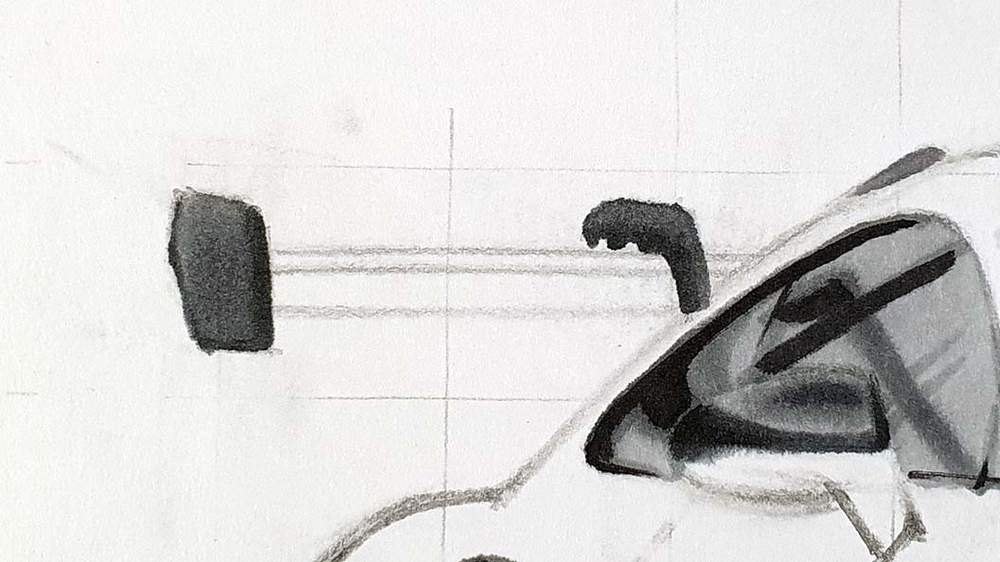
Step 14: Color the Vents Above the Front Wheel
I first colored the vents with Neutral Grey 03 (CG030).
Next, I layered some Neutral Grey 05 (CG050) over it to darken most of it, but leaving some parts lighter.
Lastly, I darkened some parts even more with Neutral Grey 07 (CG070) and Black (120).
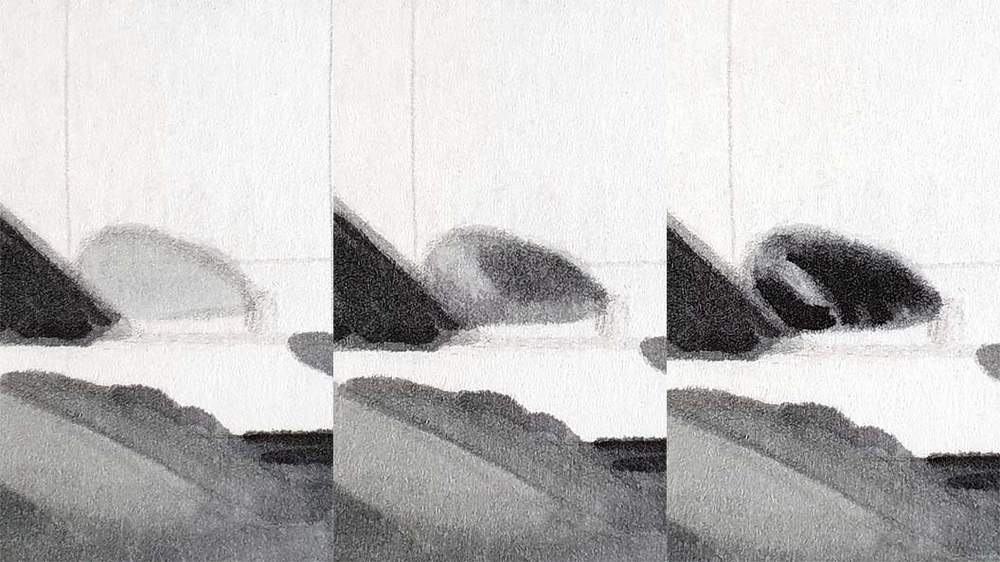
Step 15: Color the Door Mirrors
I started by coloring the top half of the left mirror with Neutral Grey 02 (CG020).
Then I darkened the bottom left and the top right, but not all the way to the edge, using Neutral Grey 03 (CG030).
Next, I darkened those parts using Neutral Grey 05 (CG050).
And finally, I darkened the bottom left even more using Black (120), and I added a line to the far right. I also darkened the spot on the top right using Neutral Grey 07 (CG070).
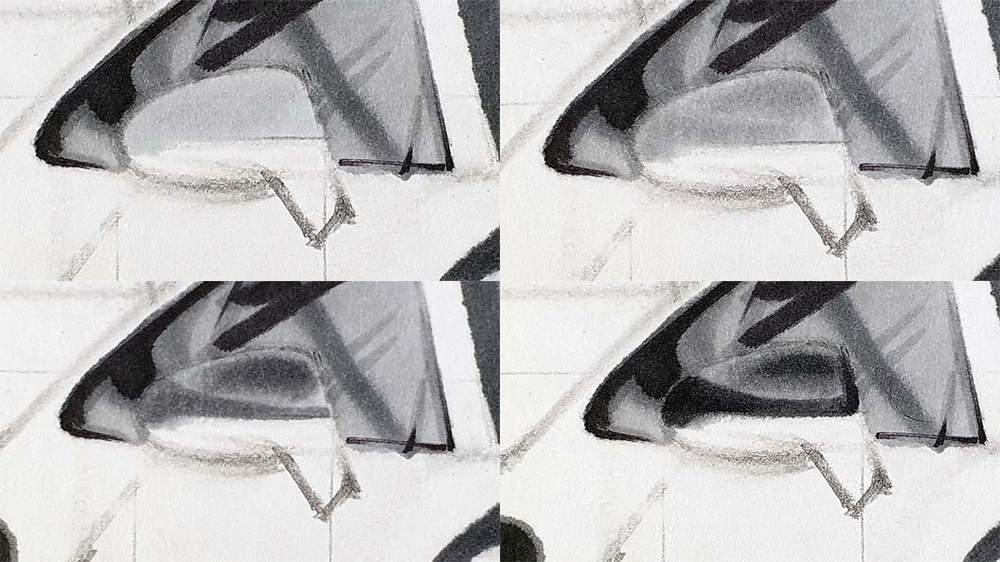
Then I colored the right mirror, starting with Neutral Grey 02 (CG020).
Next, I made the bottom darker using Neutral Grey 03 (CG030), and I darkened the right side using Neutral Grey 05 (CG050).
Lastly, I added some Black (120) to the bottom left and the right side.
Step 16. Color the Wing Stands and Endplates
I started by coloring both the wing stand and the endplate with Neutral Grey 05 (CG050).
Then I darkened the bottom and left part of the wing stand with Neutral Grey 07 (CG070). I also added a darker line to the bottom and the right of the endplate, also using Neutral Grey 07 (CG070).
Step 17: Add the Red to the Logo
Earlier when coloring the hood, I forgot to complete the logo, so we're doing that now.
I added some Terra Cotta (YR5) to the top right and bottom left, but left a circle in the middle of the lighter Yellow Dahlia (Y260).
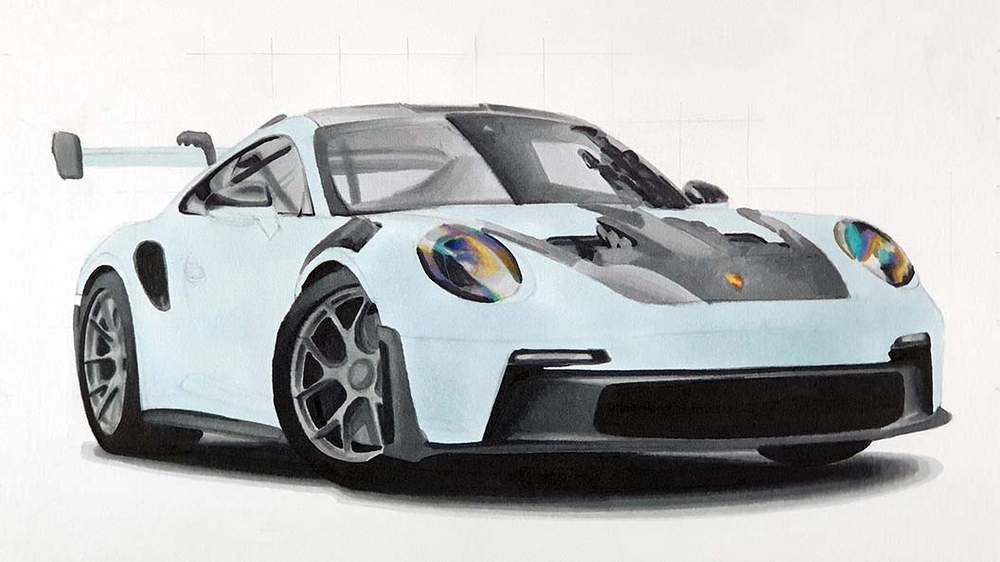
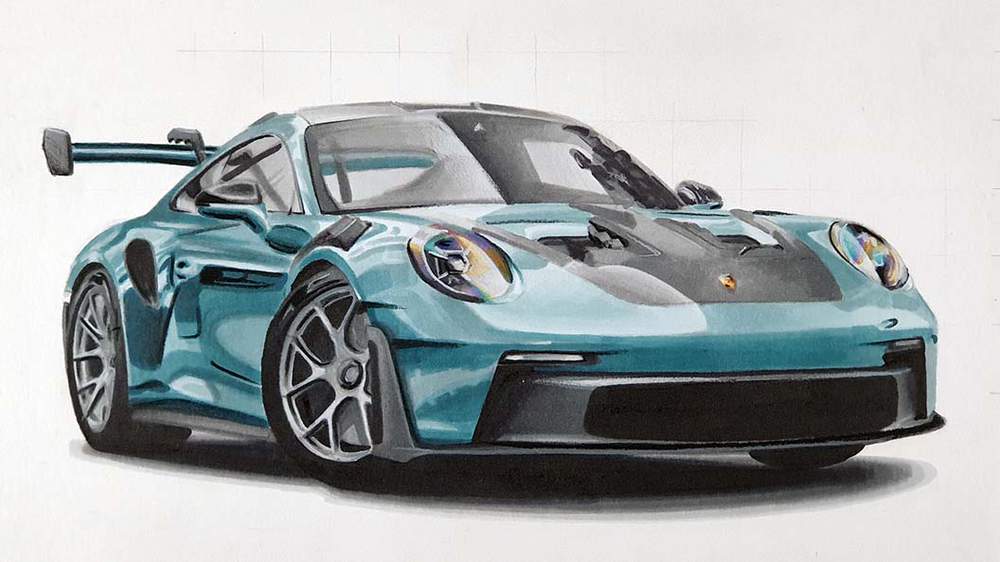
Step 18: Color the Main Body of the Porsche 992 GT3 RS
It's time to add some color!
We're going to color the Porsche 911 GT3 RS a beautiful grey-green color. I wanted to draw a car in this color for a while now, and this seemed like the perfect one for this color.
I first colored the full main body using Jade Green (G320).
Then I added a lot of darker reflections with Mineral Green (G330). I kept most of the reflections sharp, but just below and to the right of the left headlight, I blended it into the Jade Green (G320).
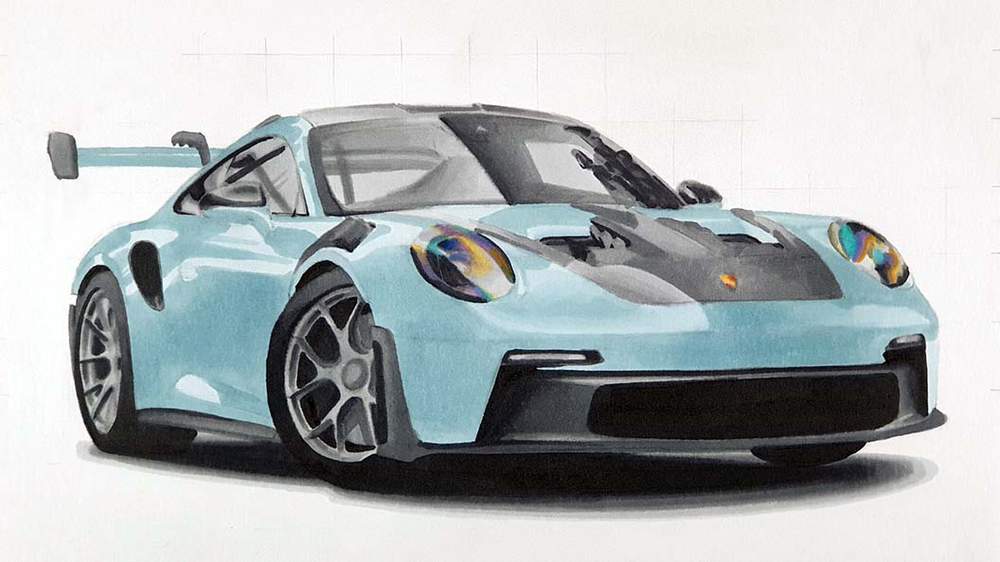
Next, I added even more reflections using Dolphin Blue (BG5). It might seem overwhelming, but just take your time and keep it simple. You can always add more reflections.
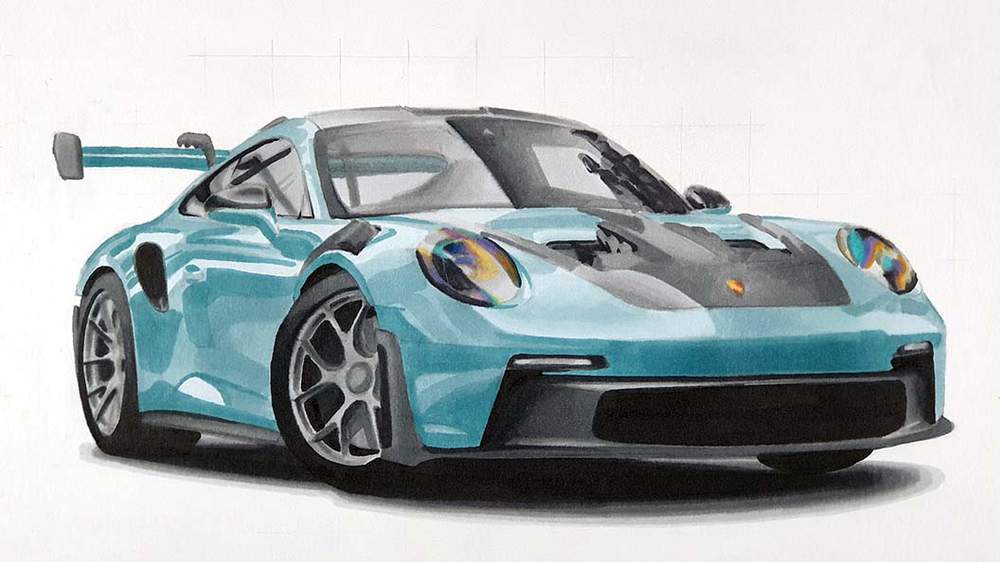
After that, I used Teal (BG8) to darken just a few parts. Around the fin, just in front of the front wheel, the bottom side part, and a few reflections on the side, and the darker parts of the wing.
Finally, I layered some Neutral Grey 07 (CG070) on top of most of the parts I colored Teal (BG8). I also darkened some reflections here and there as it was looking a bit too light in my opinion.
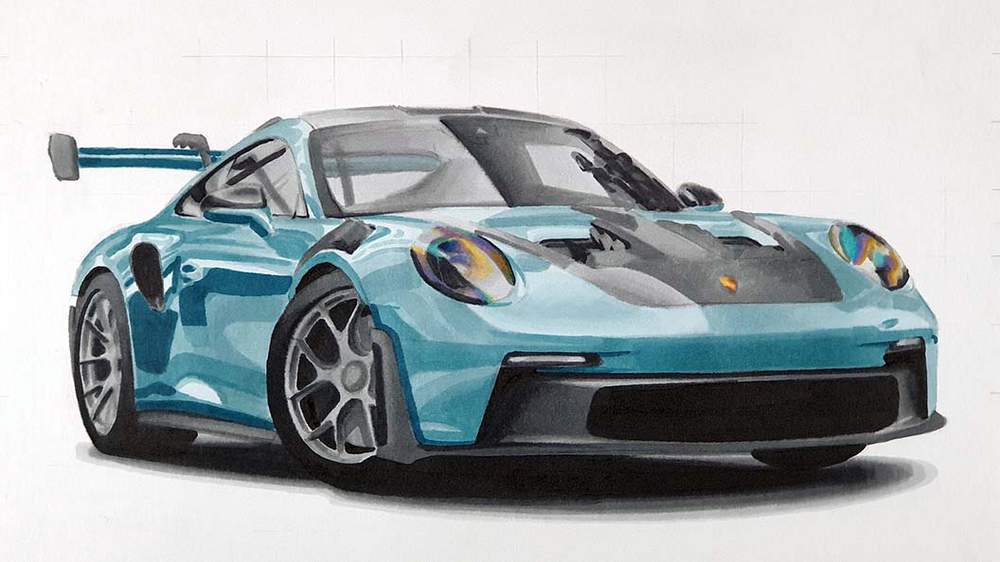
Step 19: Add Details with Colored Pencils
In this step we're going to refine the drawing a bit and add in those details we left out earlier.
I used a White and a Black colored pencil to add in the details of both headlights. I also refined the air outlets above the front wheel using a Black pencil.
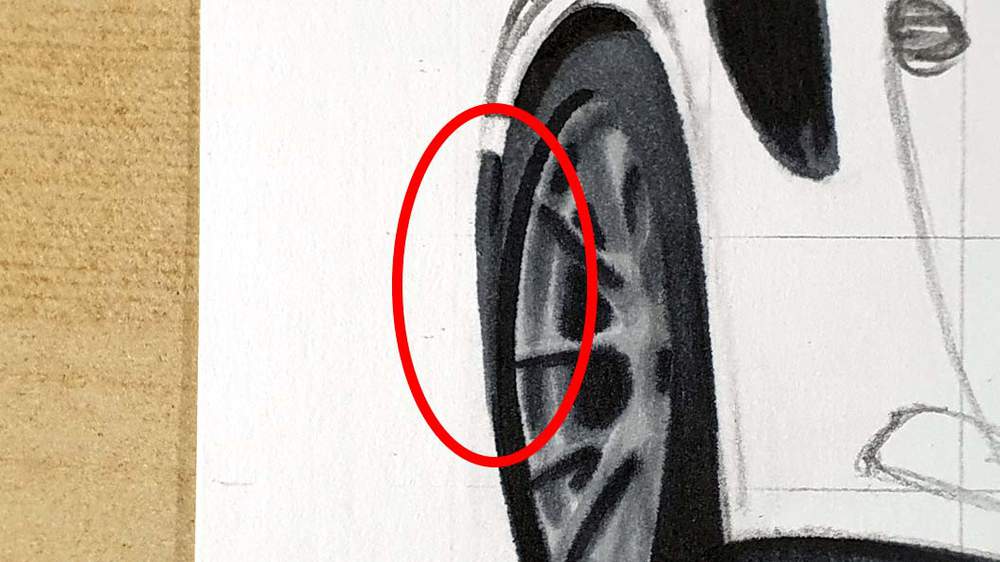
Then I added some details to the tires and I refined the spokes of both wheels with White and Black.
Next, I added some Black reflections on the side, just a few, and I darkened the dark parts of the wing and the underside of the left door mirror.
I wanted to make some close-up photos, but I forgot...
Step 20: Add Pure White Highlights
The drawing looks very good already, but to give it that finishing touch we're going to add some bright white highlights using the Posca PC-3M.
I added just a few highlights on both wheels, as well as on the side of the car and the left side of the wing. I also added some highlights in both headlights and a few on the front of the car.

Your Porsche 911 GT3 RS Drawing is Done!
After a few hours of drawing it is finally done! And holy cow it turned out well!
I hope yours turned out as well as mine and if you decide to share it on Instagram, make sure to tag me (@luukminkman). I'd love to see how yours turned out!
One last thing, I'd really appreciate it if you could share this article with someone you think might also like it. It would help me out a lot.
.jpg__1000x1000_q65_subsampling-2.jpg)
Articles You Might Also Like

I love bringing cars to life with alcohol markers and colored pencils.
Whether you're just starting out or looking to improve your skills, I'm here to help!
Click here to learn more about me.


Add a comment
Comments
thank you for such a easy and understandable way of drawing....helps a lot.....keep it up
very nice drawing man keep it up
this is so cool!!