Koenigsegg Jesko Attack Drawing Tutorial | Easy AND Realistic Step-by-Step Guide
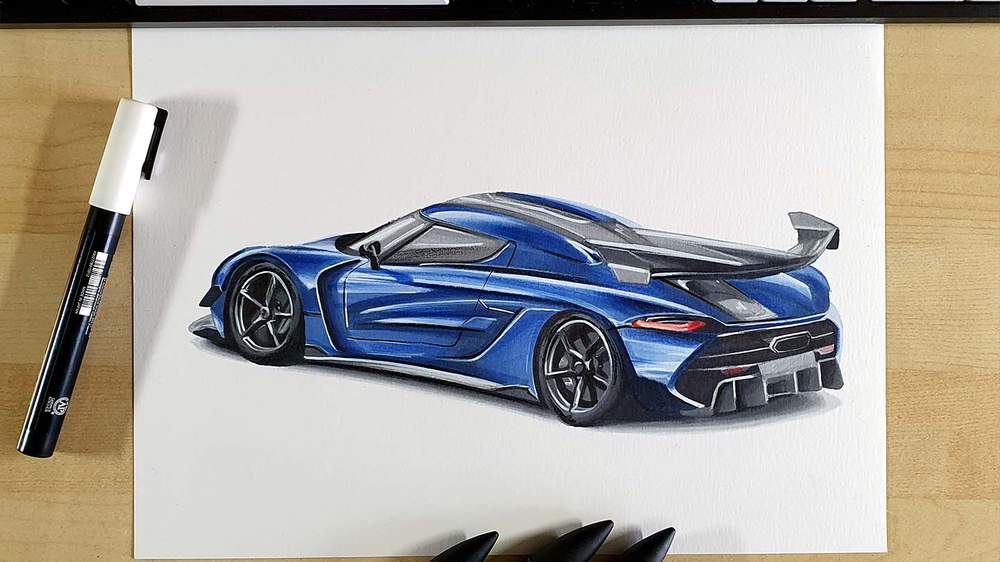
In this step-by-step car drawing guide, I'm going to show you how I drew this beautiful piece of engineering: the Koenigsegg Jesko Attack!
Disclaimer: In the name of full transparency, please be aware that this blog post contains affiliate links and any purchases made through such links will result in a small commission for me (at no extra cost for you).
Let's get started!
Drawing Supplies I Used in this Tutorial
To draw this Koenigsegg Jesko Attack, I used the following art supplies:
A graphite pencil, a ruler, a kneaded eraser, and a regular eraser;
Ohuhu Honolulu markers in the colors Neutral Grey 02 (CG020), Neutral Grey 03 (CG030), Neutral Grey 05 (CG050), Neutral Grey 07 (CG070), Neutral Grey 7 (NG07), Black (120), Cream (YR240), Rose Buvard (R12), Cadmium Red (R160), Lipstick Red (R170), Geranium (R8), Light Blue (B250), Vivid Blue (B270), and Antwerp Blue (B290);
Derwent Coloursoft pencils in the colors White, Dove Grey, and Black;
And a white Posca PC-3M.
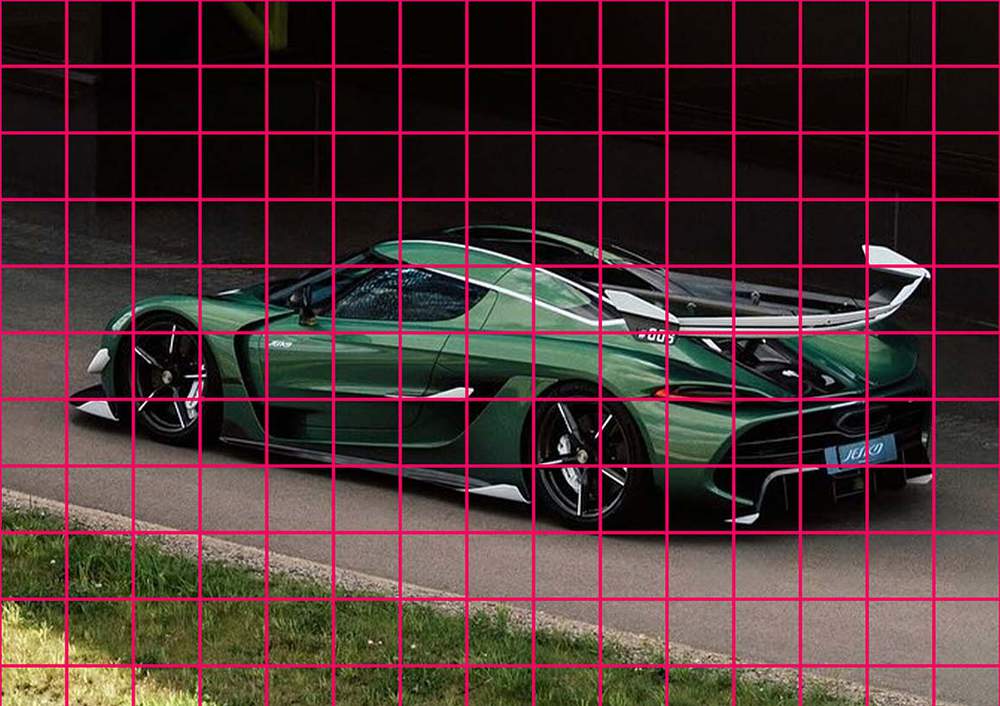
Reference Photos I Used for this Drawing
To create this drawing I first gathered a few reference photos.
I used the reference photo below (9th slide) as a guide for the perspective and proportions.
And I used this photo (slide 9) as a guide for the reflections and lighting.
How Do You Draw a Koenigsegg Jesko Attack?
To draw a Koenigsegg Jesko, I first gathered a few reference photos. Next, I started sketching the outline of the car using the grid method. After that, I colored the car part-for-part with Alcohol markers. And finally, I added some details with colored pencils and a few highlights with a white Posca paint marker.
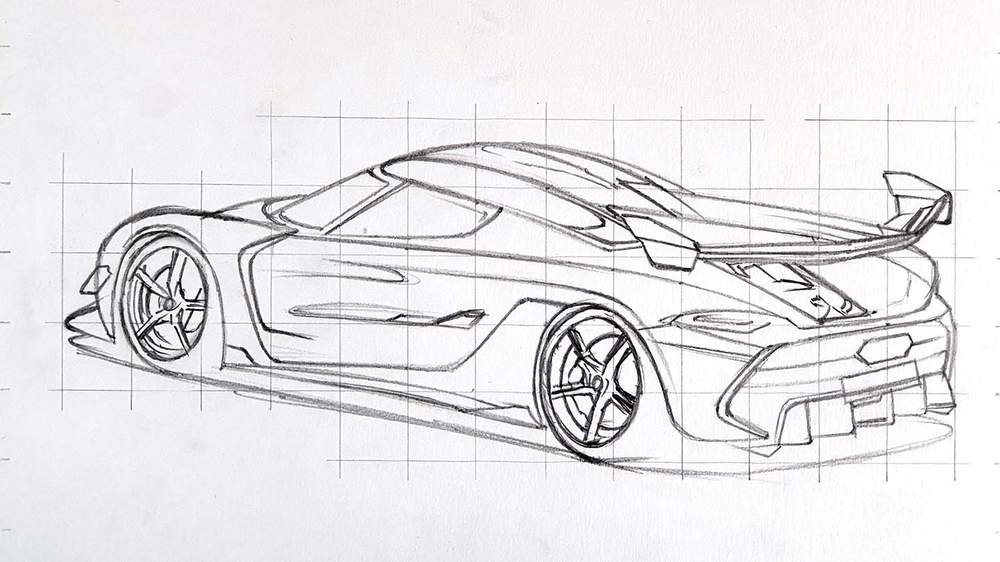
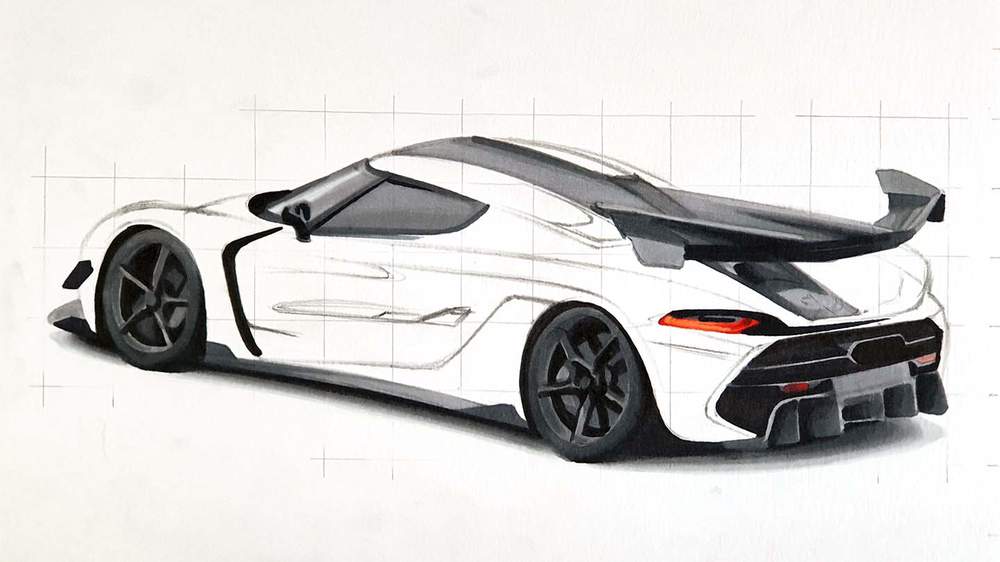
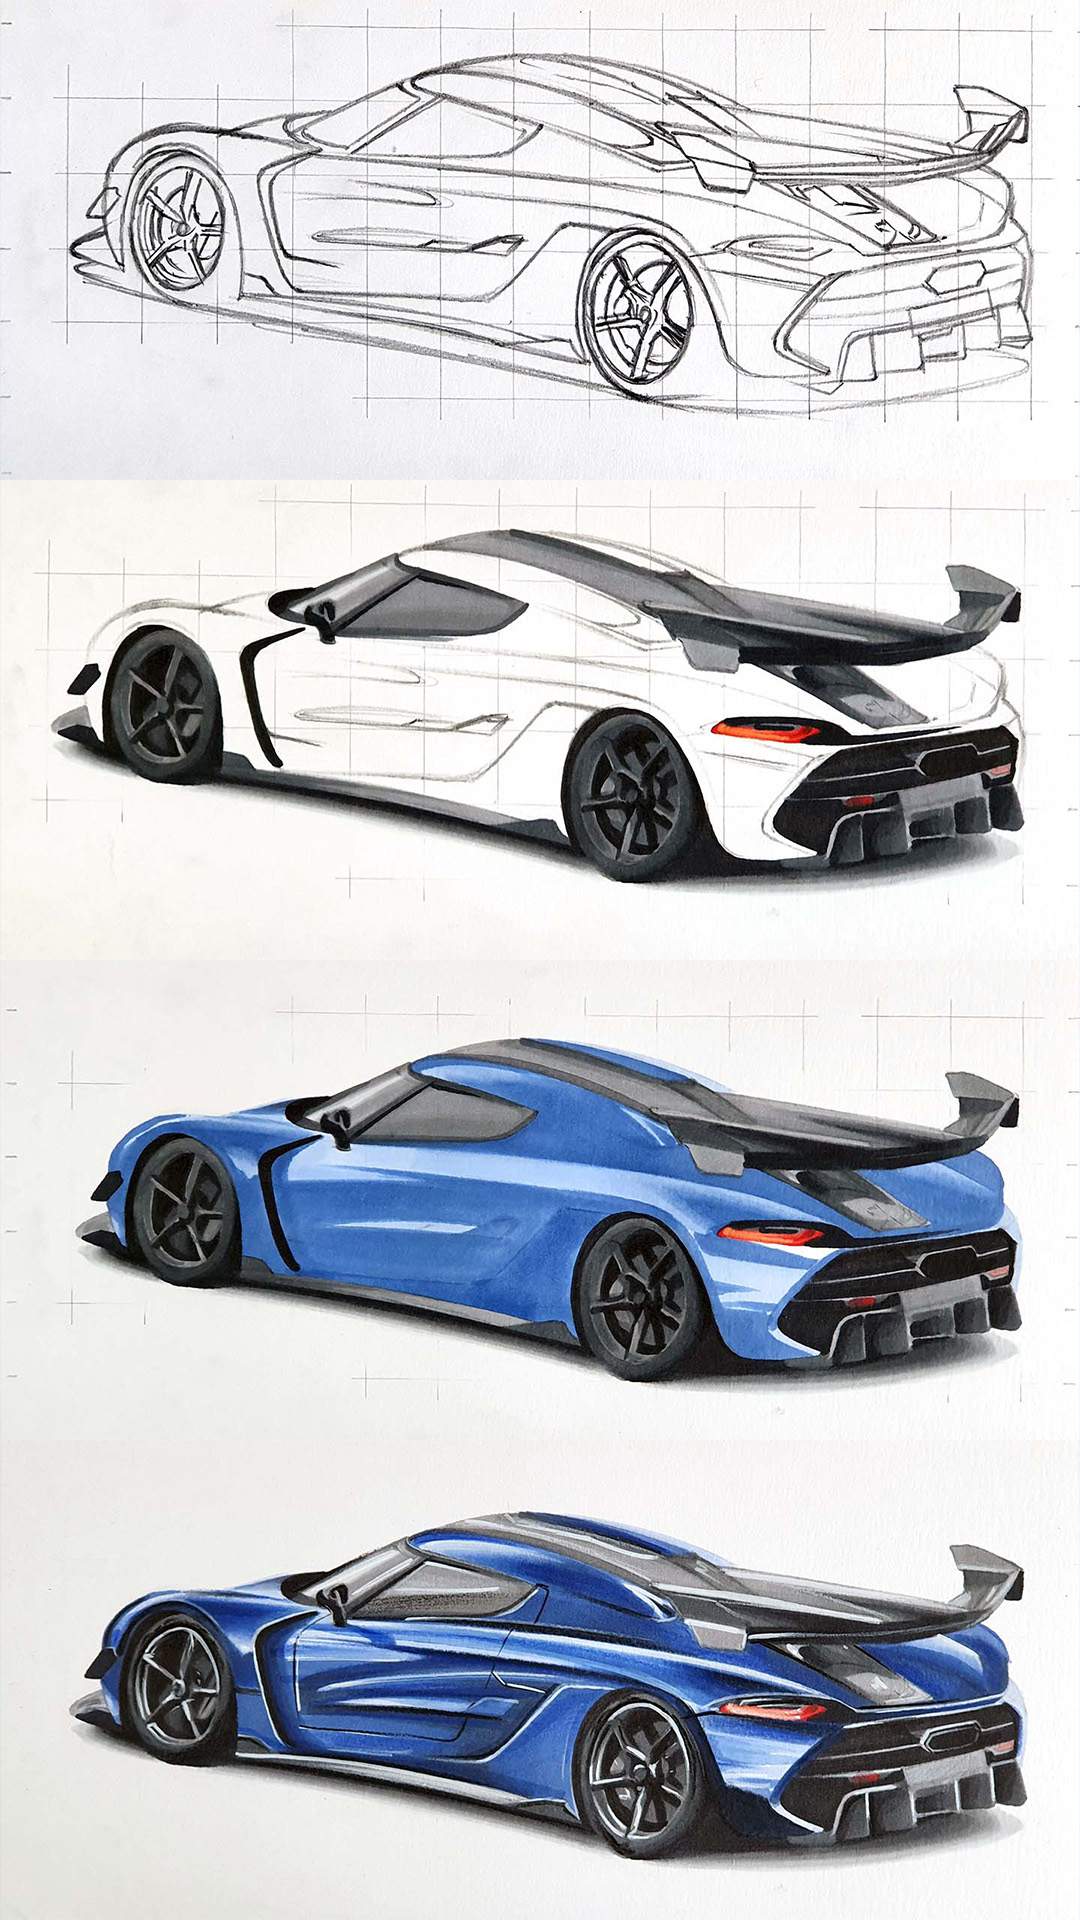
Step 1: Sketch the Outline of the Koenigsegg Jesko
As with any drawing, I start by making a details sketch of the car. This is the first most important part if you want to create a realistic-looking car drawing, but it's also one of the most difficult ones.
Luckily, there are a few techniques you can use to make creating an accurate sketch easier. In this tutorial, I'll be using the grid method. You can find more about this technique here.
I first resize the reference photo to be A4-sized, which is the size of my paper, and then I add a grid on top of the photo using Photoshop.
Next, I sketch that same grid with the same amount of squares on my piece of paper. Each square is 2 by 2 cm and I try to make the grid as precise as possible otherwise the sketch will look a bit wonky.
Once I've done that I rolled my kneaded eraser over the grid to lighten the lines.
Now it's time to start sketching the car. I like to start with the outline and the bigger shapes of the car first and then add all the details like the headlights and the spokes of the wheels.
Step 2: Color All Pure Black Parts
I always find it a bit difficult to start coloring once the sketch is done. So to make it a little easier I first color all the pure black parts with the Black (120) marker. By doing this the drawing already looks so much less complicated.
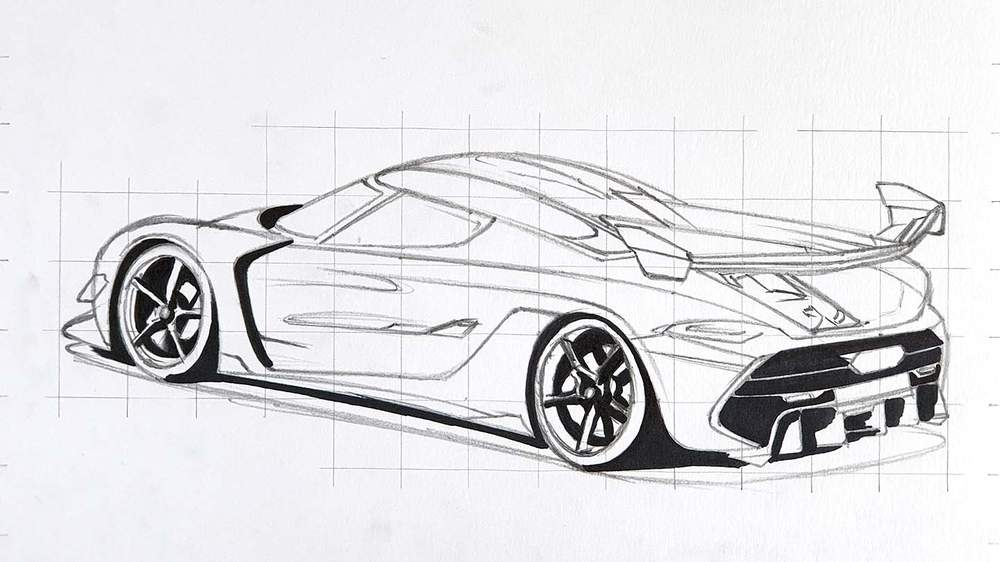
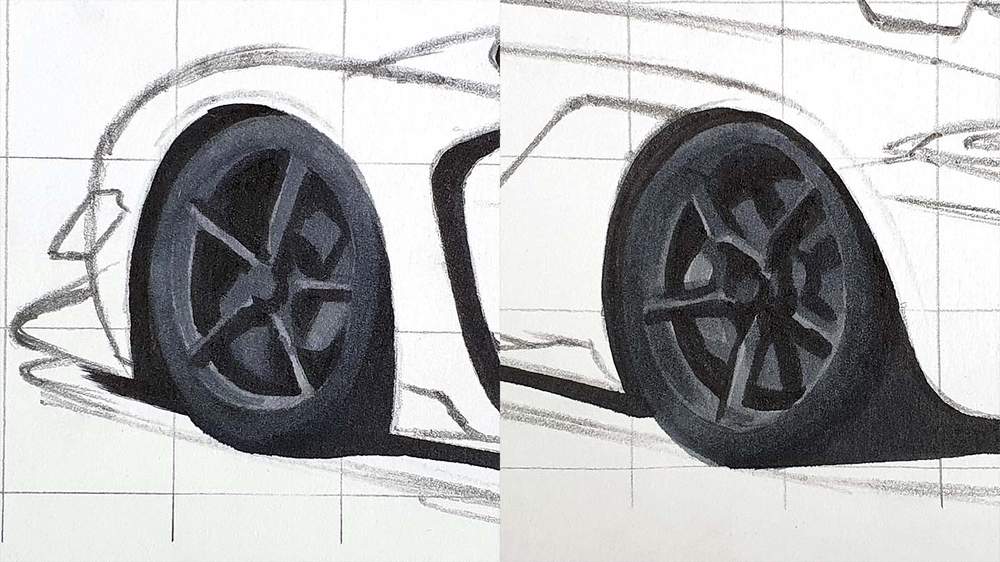
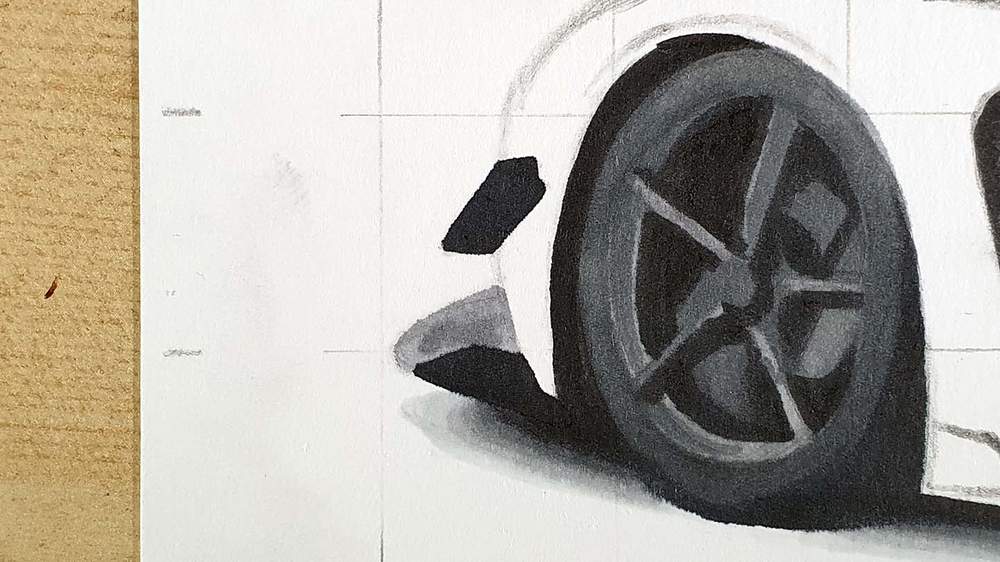
Step 3: Color the Wheels of the Koenigsegg Jesko Attack
After that, it's time to get the most difficult parts done: the wheels.
They are actually not as bad to draw as you might think and you can cover up a lot of the mistakes with colored pencils later.
I first colored both wheels fully with Neutral Grey 05 (CG050).

After that, I added some darker tones and gave the spokes a bit of dimension with Neutral Grey 07 (CG070) and Neutral Grey 7 (NG07). And that's the wheels already done.
Step 4: Color the Shadow of the Koenigsegg
Next up is the shadow underneath the car.
I started by coloring the outside edge of the shadow with Neutral Grey 02 (CG020).
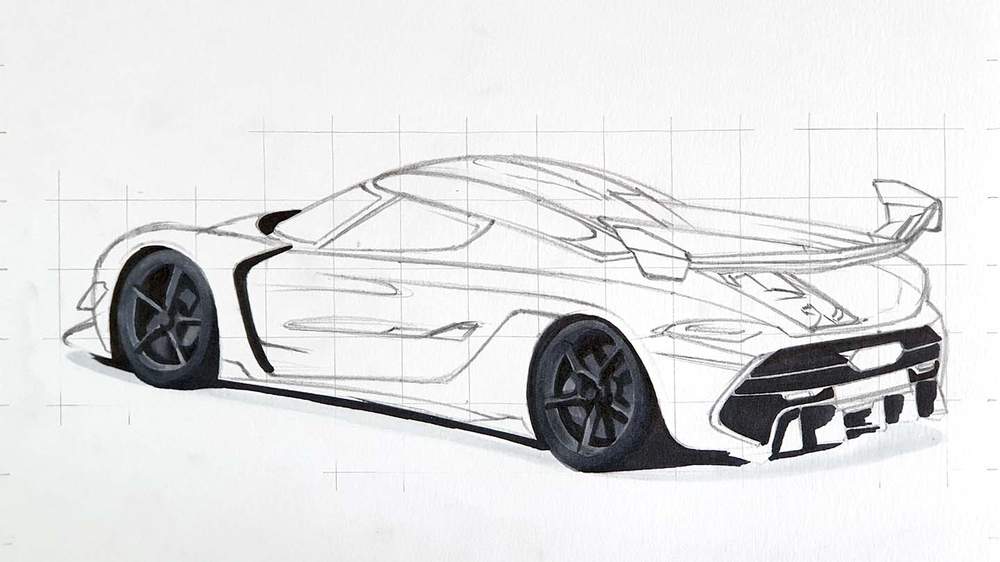
Next, I used Neutral Grey 05 (CG050) to color the bit in between the black and the light grey.
Lastly, I used Neutral Grey 03 (CG030) to blend the Neutral Grey 05 (CG050) into the lighter Neutral Grey 02 (CG020) bit, and I used Neutral Grey 07 (CG070) to blend the Neutral Grey 05 (CG050) into the Black (120).
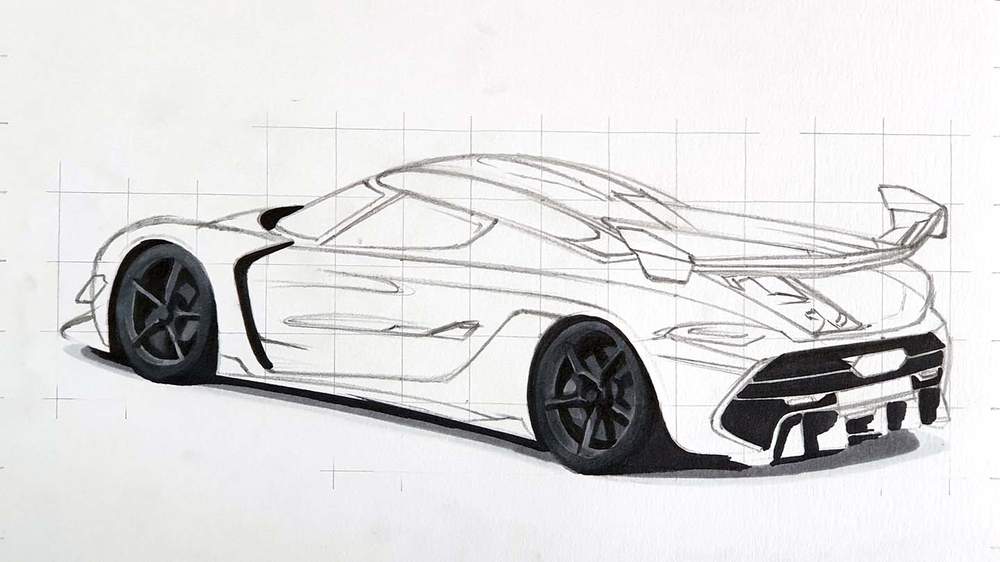
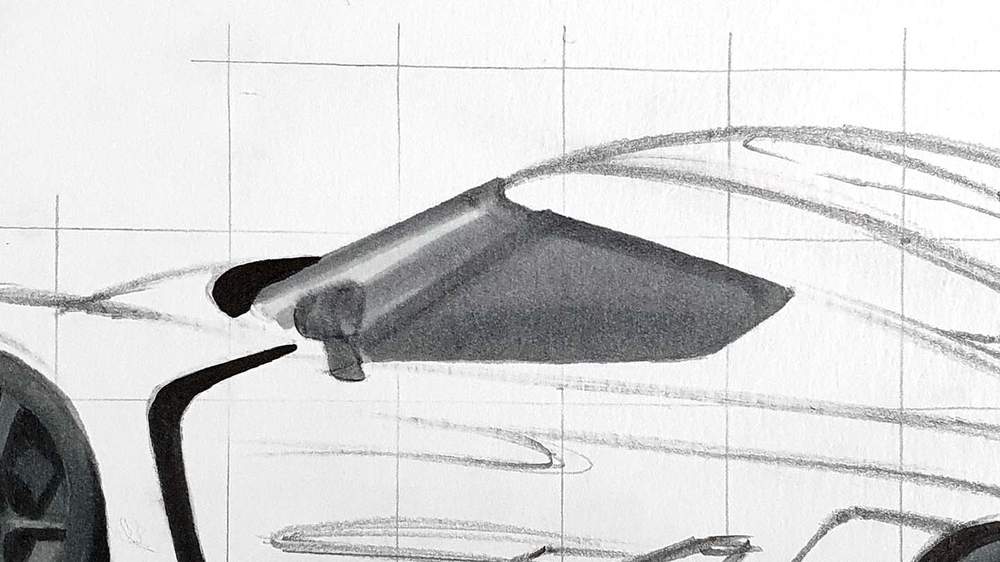
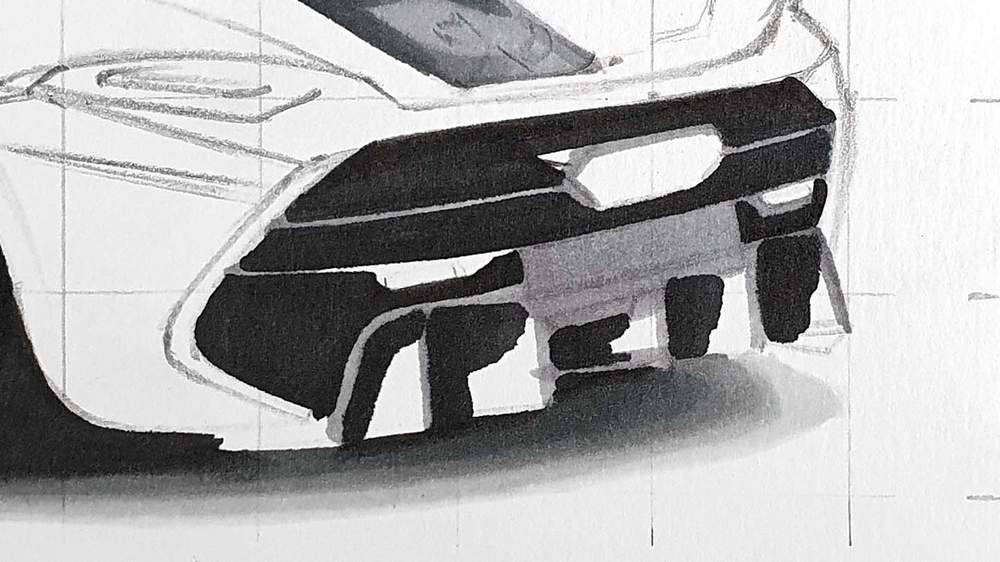
Step 5: Color the Splitter and the Canard
After that, I colored the front splitter and the canard.
I colored the splitter with Neutral Grey 03 (CG030) and added some darker spots with Neutral Grey 05 (CG050). I also colored the fin on the splitter and the canard with Neutral Grey 7 (NG07).
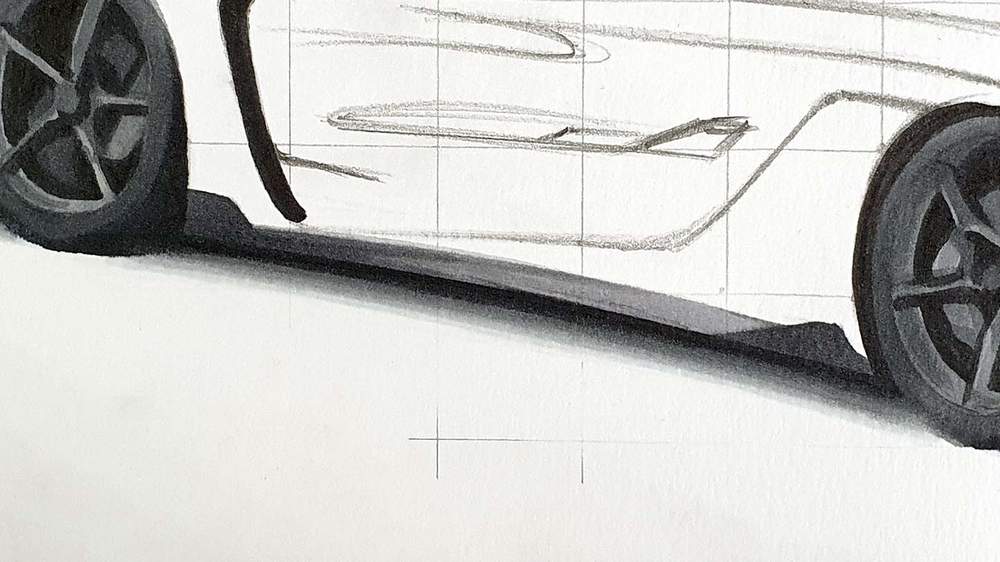
Step 6: Color the Side Skirt of the Jesko
Next up is the side skirt.
I started by coloring the whole side skirt with Neutral Grey 03 (CG030), and I colored the fins on both ends with Neutral Grey 07 (CG070).

After that, I darkened the left bit of the side skirt with Neutral Grey 07 (CG070) and blended that to the right into Neutral Grey 05 (CG050) and then Neutral Grey 03 (CG030).
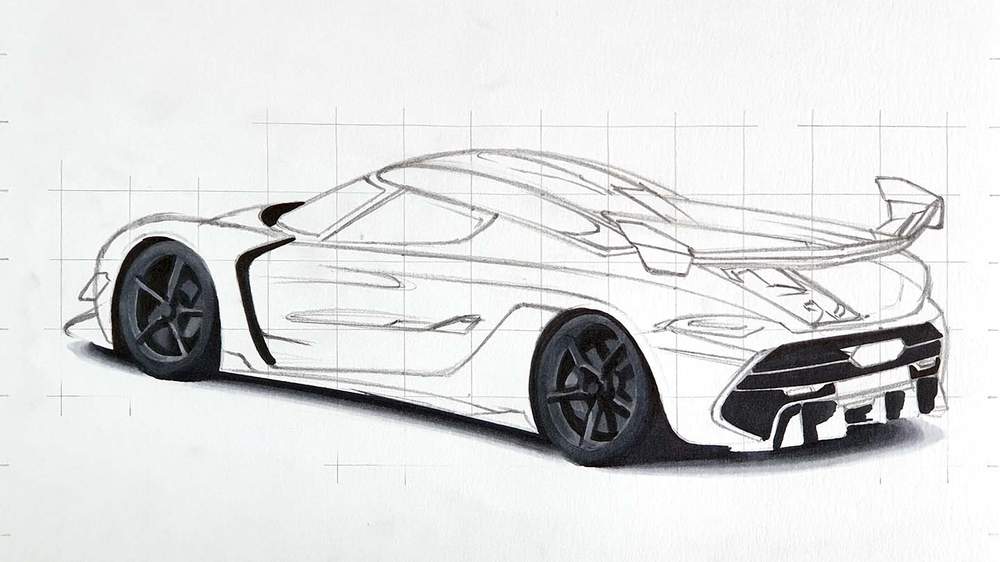
Step 7: Color the Windows and the Door Mirror
Next, I colored the windshield, the side window, and the door mirrors.
I first colored the windshield with Neutral Grey 02 (CG020). Then I colored the side windows, the top of the mirror cap, and the mirror itself with Neutral Grey 03 (CG030). I also the part of the windshield just in front of the side window and the left edge of the windshield with Neutral Grey 03 (CG030).

After that, I used Neutral Grey 05 (CG050) to darken the bottom half of the side window, and I outlined the side window. I also darkened the left edge of the windshield, and I colored the remainder of the mirror.
Lastly, I used Neutral Grey 07 (CG070) and Neutral Grey 7 (NG07) to color the window sills and the darker spots of the door mirror.

Step 8: Color the Roof of the Koenigsegg Jesko
After that, I colored the grey roof part.
I first colored it with Neutral Grey 03 (CG030), and then I darkened the top and the right with Neutral Grey 05 (CG050).
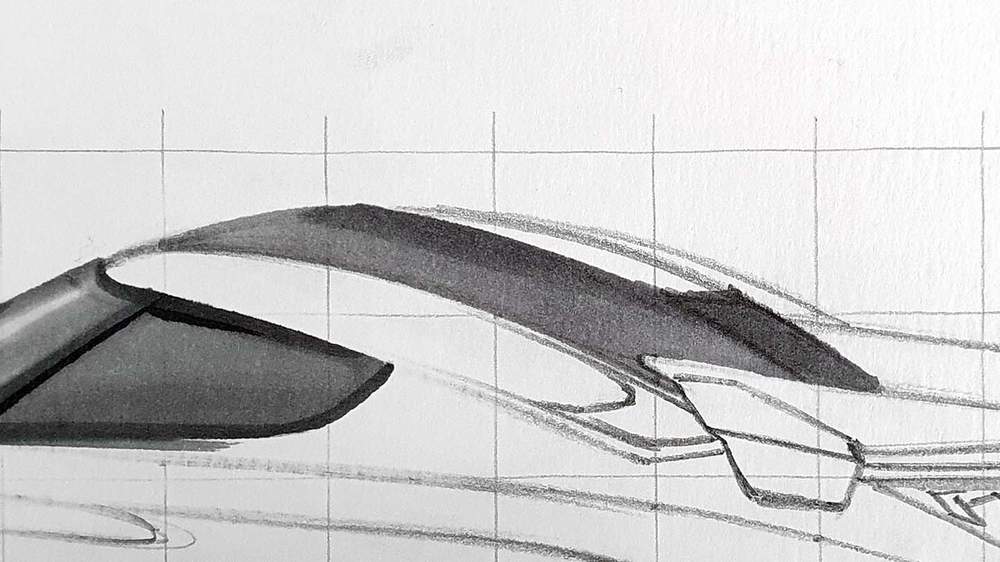
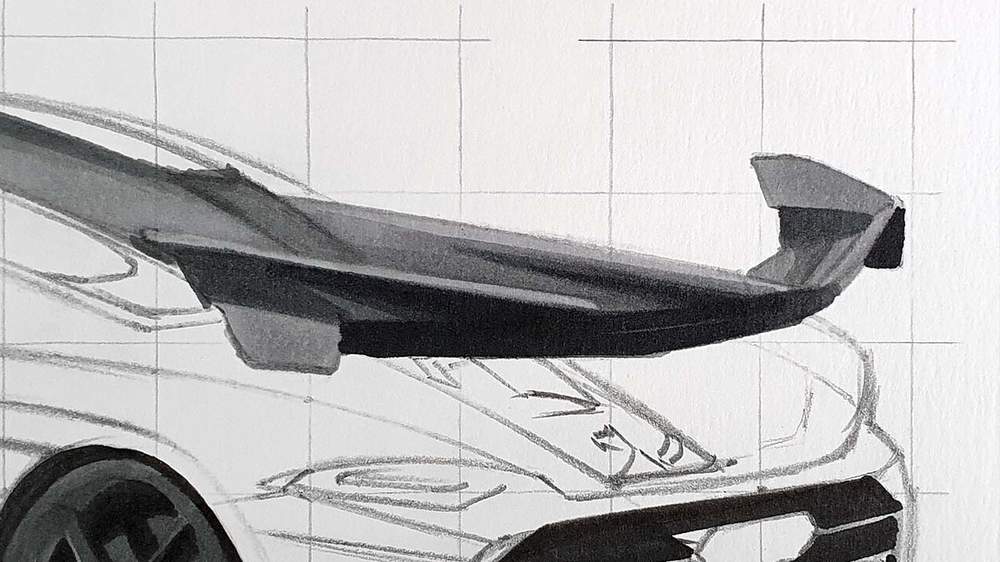
Step 9: Color the Giant Wing of the Jesko Attack
Now it's time to color the ginormous wing of the Jesko Attack.
I first colored the top half of the right endplate and the top of the right half of the wing with Neutral Grey 05 (CG050). And I colored the bottom half, the underside of the wing, and a bit of the right wing holder with Neutral Grey 07 (CG070).

Next, I colored the remainder with Neutral Grey 03 (CG030).
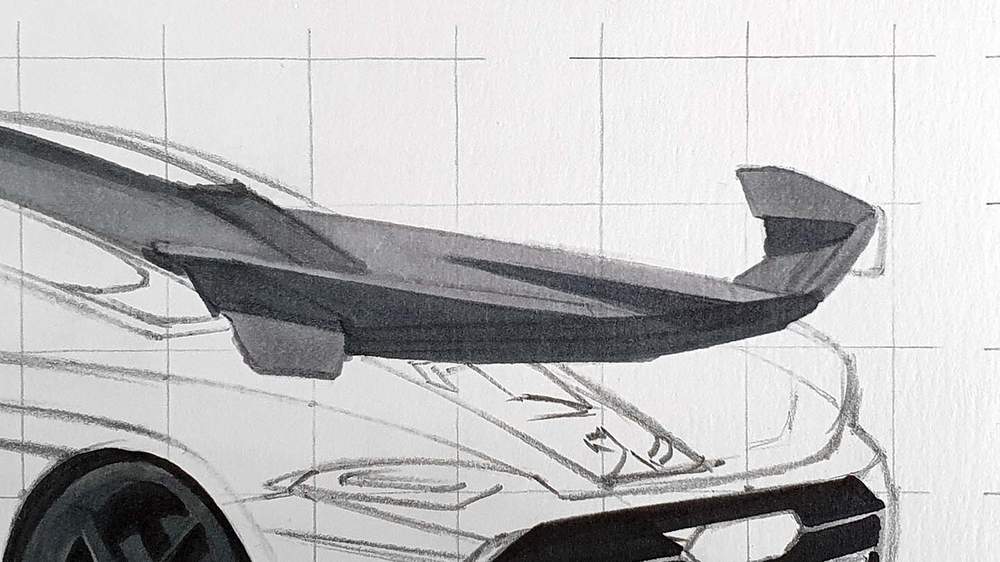
And finally, I used Neutral Grey 7 (NG07) to darken the bottom of the wing more, and I colored the bottom right part of the right endplate. I also used Neutral Grey 7 (NG07) to make the dark parts of the wing holders darker.
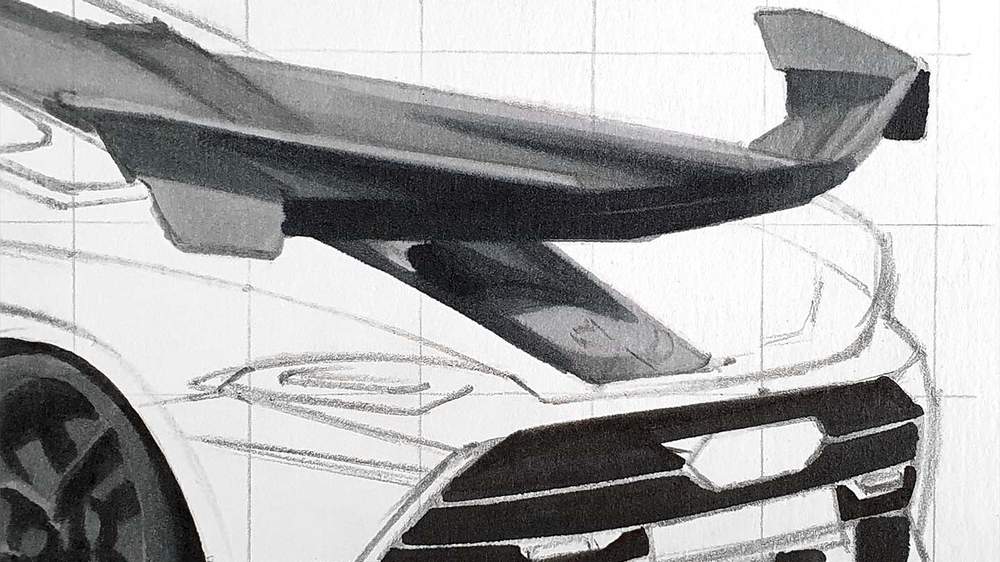
Step 10: Color the Rear Window and the Surroundings
Next, I colored the window bit beneath the wing. Not sure exactly how to call it...
I first colored that window bit with Neutral Grey 03 (CG030) but left the darker parts uncolored for now.
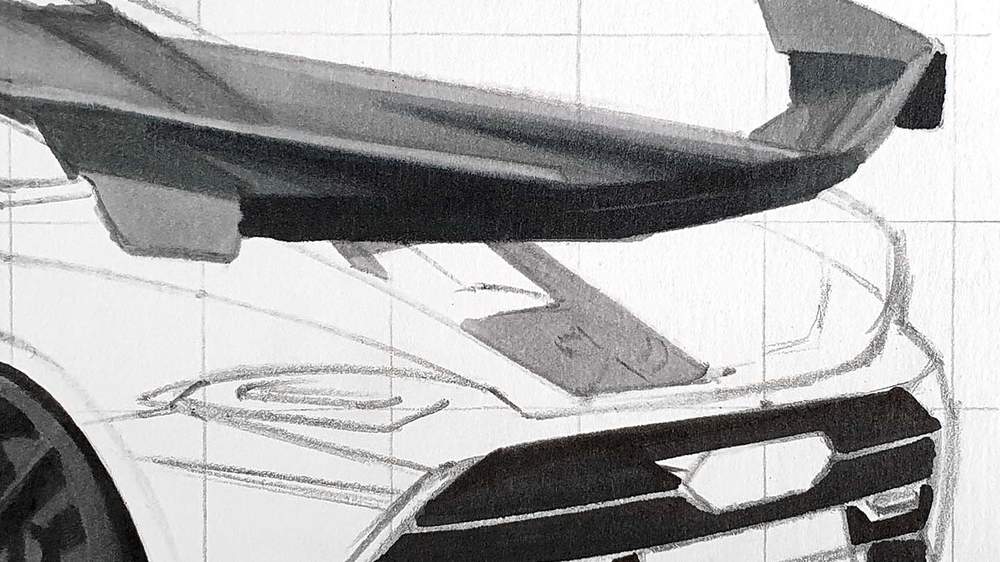
After that, I colored the darker parts with Neutral Grey 07 (CG070).

Lastly, I used Neutral Grey 05 (CG050) to blend the Neutral Grey 07 (CG070) into the lighter grey, and I used Neutral Grey 7 (NG07) to darken the top left bit.
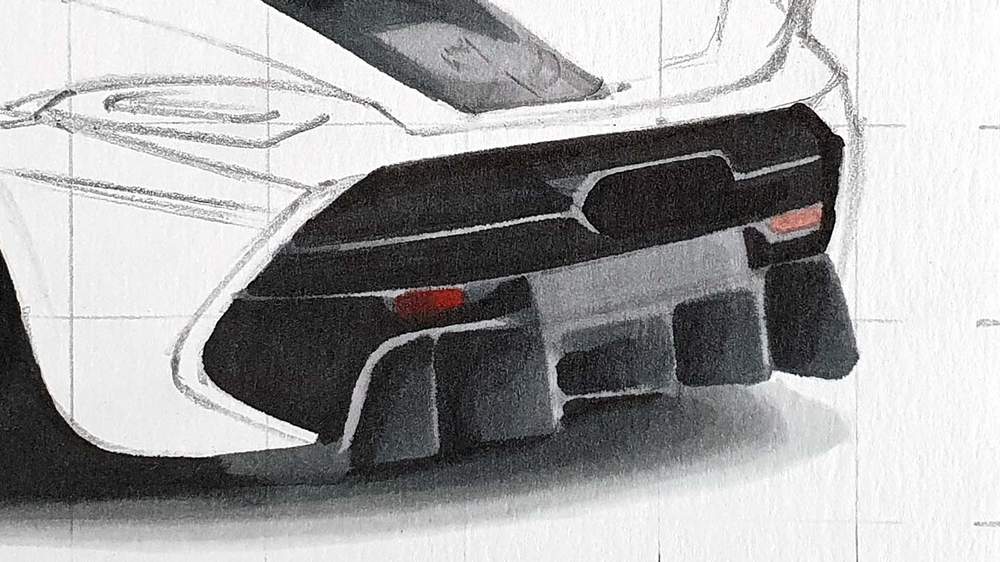
Step 11: Color the Rear of the Jesko
Next up, it's time to color the rear of the Koenigsegg Jesko.
I started by coloring the edge of the exhaust, the edges of the diffuser fins, the horizontal lines next to and below the exhaust, and the license plate with Neutral Grey 03 (CG030).
Next, I used Neutral Grey 07 (CG070) to color the inside of the diffuser and a small part to the left of the plate. I also used Black (120) to color the inside of the exhaust.

Lastly, I colored the reflectors. For the left one, I used Lipstick Red (R170) and darkened the left half with Geranium (R8). For the right one, I used Rose Buvard (R12).
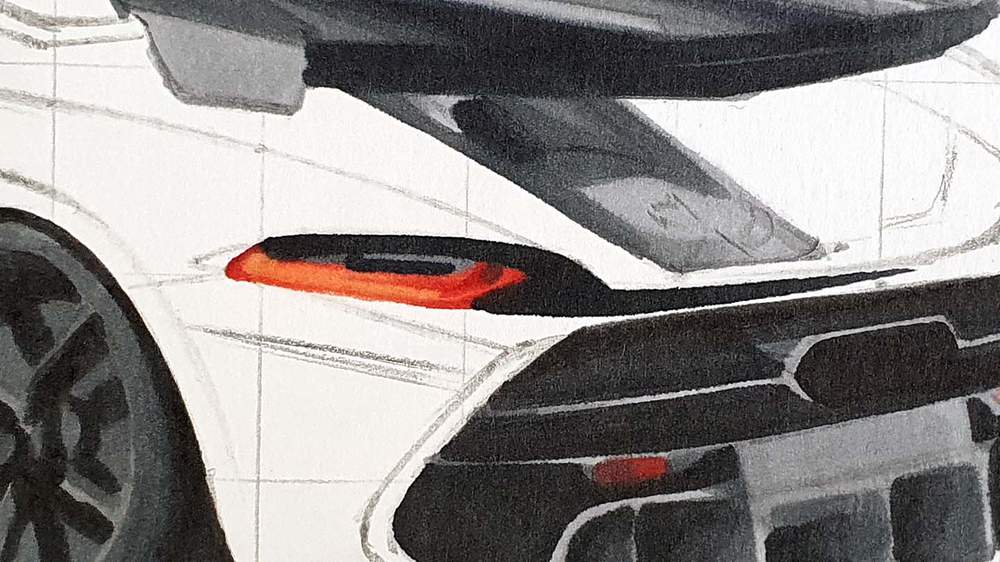
Step 12: Color the Tail Light of the Koenigsegg
The last part before drawing the main body is the tail light.
I first colored the light bit with Cream (YR240) and then outlined it with Cadmium Red (R160).

Next, I used Lipstick Red (R170) to add a few details and I used Neutral Grey 05 (CG050) to color the part above the light.
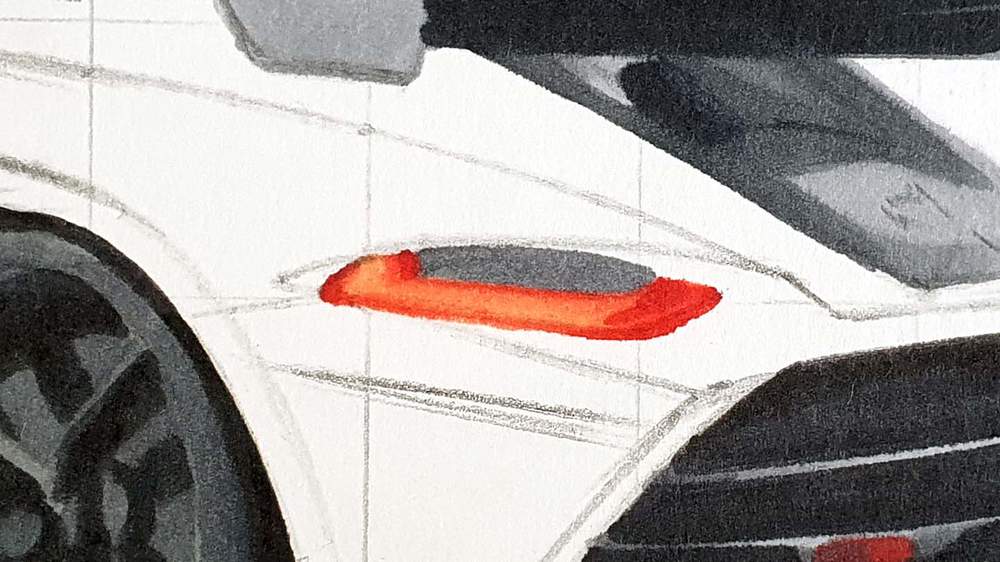
Finally, I used Neutral Grey 7 (NG07) to color the remainder, and I added some darker details.
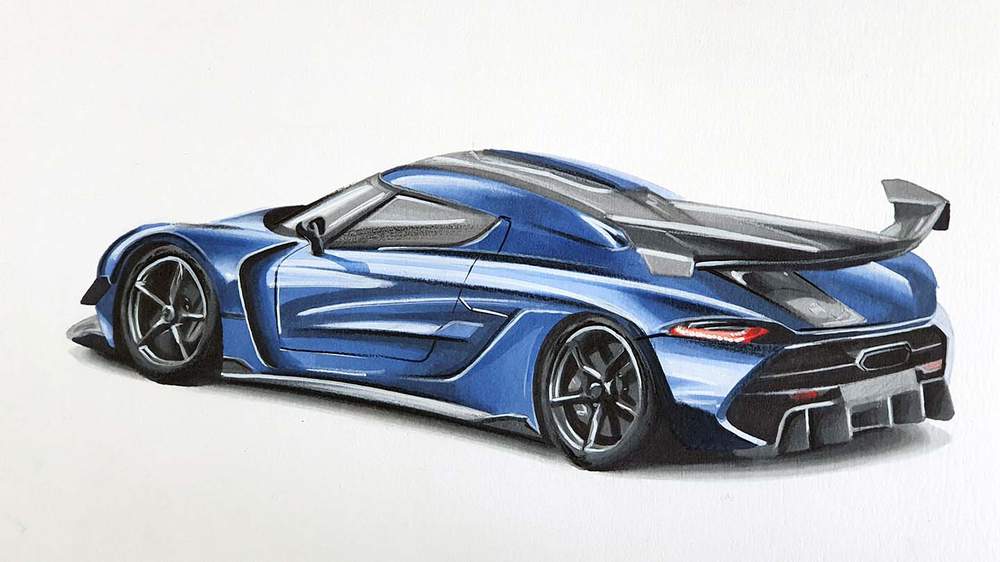
Step 13: Color the Main Body of the Koenigsegg Jesko
Now it's time to color the main body of the Koenigsegg Jesko. I chose to color it dark blue, but you can use any other color gradient you like.
I started by coloring the lightest parts with Light Blue (B250).

After that, I colored the rest with Vivid Blue (B270). I also darkened some of the light parts and blended those edges with Vivid Blue (B270).
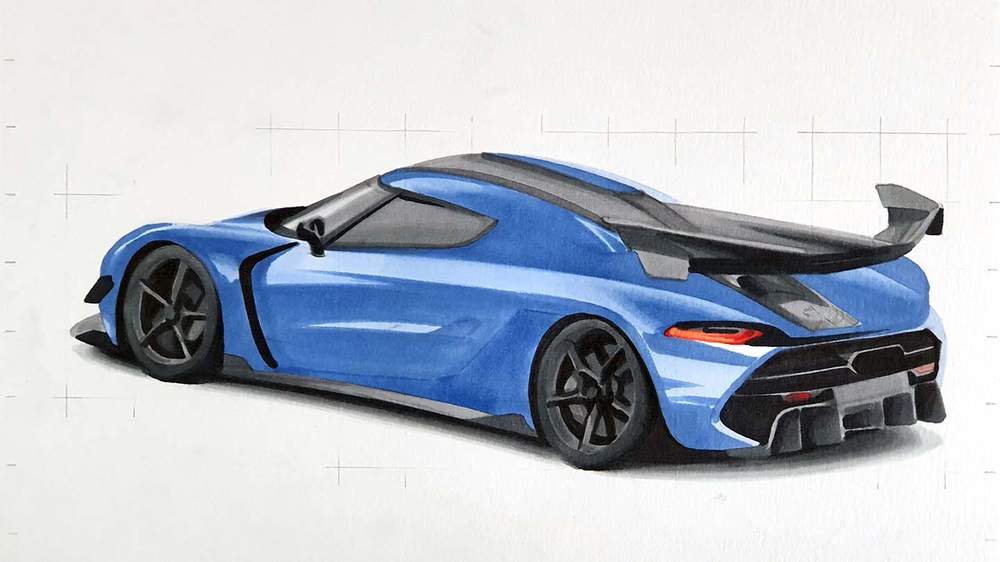
Lastly, I used Antwerp Blue (B290) to give the paintwork of the car more depth by making the darkest spots darker.
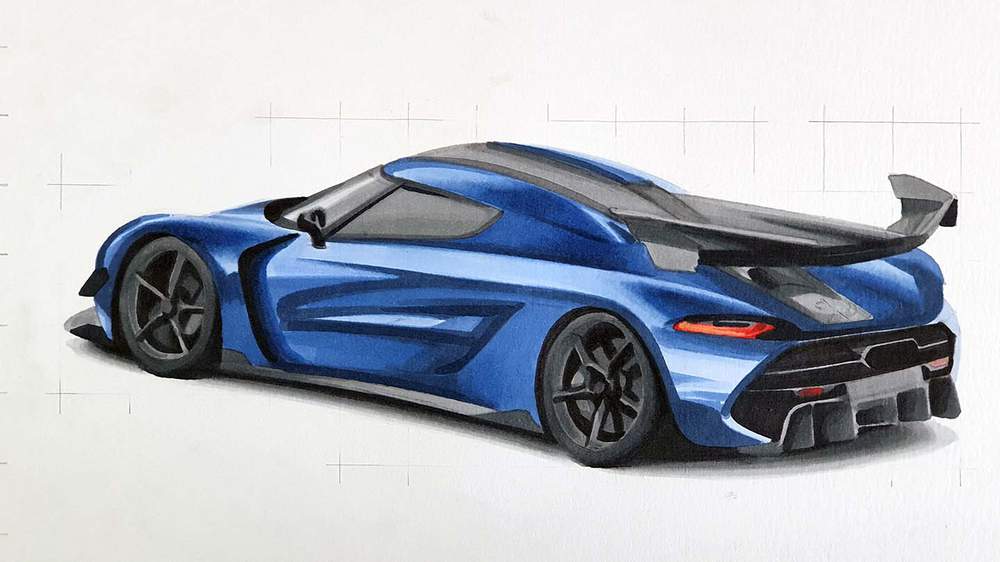
Step 14: Add Details to the Koenigsegg Jesko Attack
The car is now fully colored but it lacks details. That's what we're going to add in this step. And for that, I used the White, Dove Grey, and Black Derwent Coloursoft pencils.
First of I refined the wheels and the spokes by adding a few highlights with White and Dove Grey.
After that, I went around to the car and added highlights on the edges of some body panels and created some light reflections.
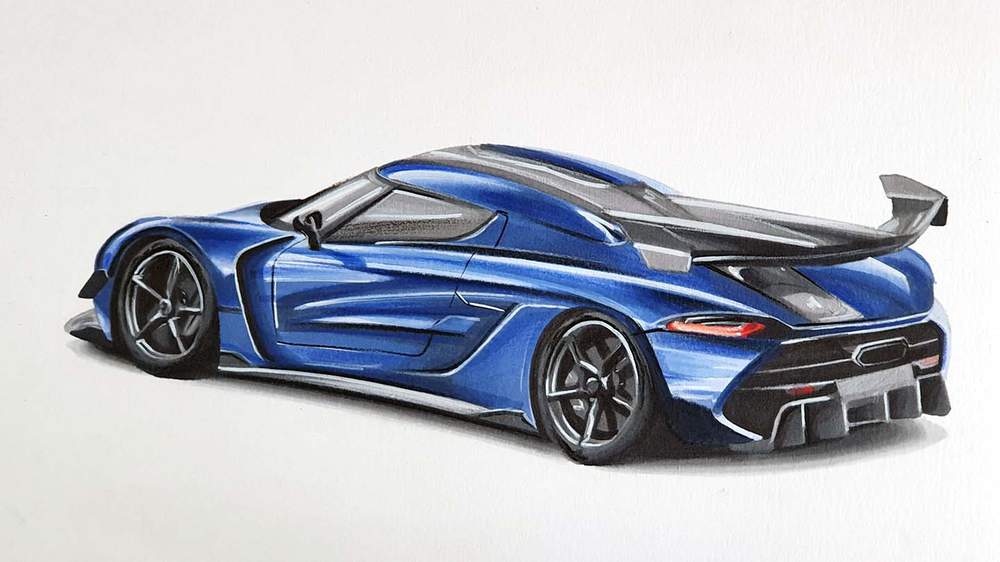
Step 15: Add White Highlights to the Jesko Attack
To finish the drawing off I added some bright white highlights with the white Posca PC-3M paint marker.
I also added the panel gaps as I forgot to do them in the previous step...
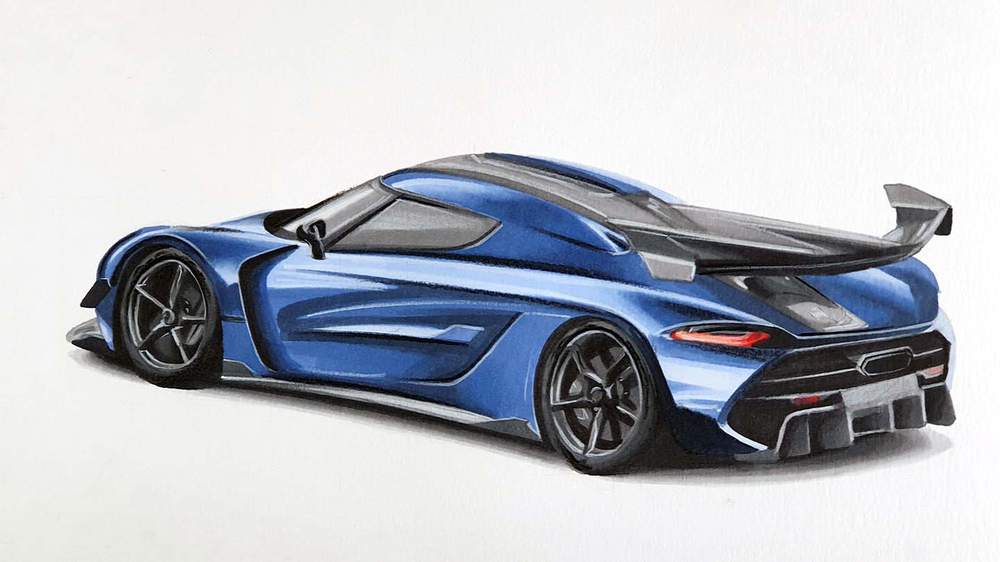
Step 16: Darken Some Parts of the Body a Bit
The car is now done, but after letting it be like this for a few days, I wasn't satisfied with the result.
In my attempt to make it look better, I darkened most of the Light Blue (B250) parts with Vivid Blue (B270) except for the light highlights.
By doing only this, it already looked a lot better and good enough to call it done!
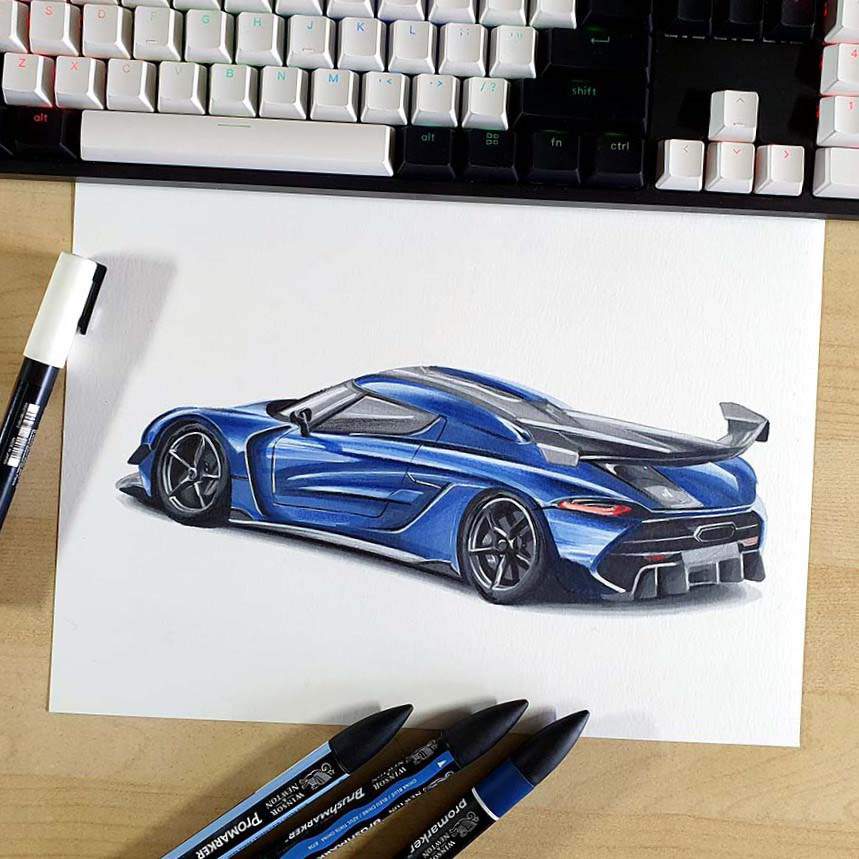
And That's How I Draw a Koenigsegg Jesko Attack
I hope you found this helpful. If so, I'd really appreciate it if you could share this with someone who might also like it. It would help me out a lot. Thank you!
And if you decided to follow along, I'd love to see how your drawing turned out. So if you share it on Instagram, make sure to tag me (@luukminkman).
Thank you for reading this tutorial!
If there is a car you want me to make a tutorial for, leave a comment below!
.jpg__1080x1920_q65_subsampling-2.jpg)
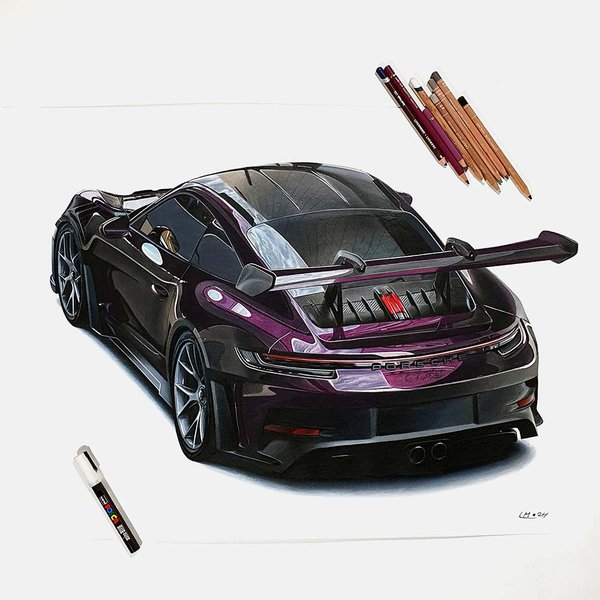
Articles You Might Also Like
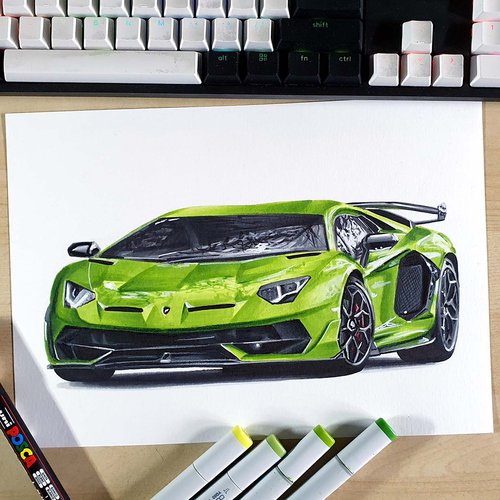
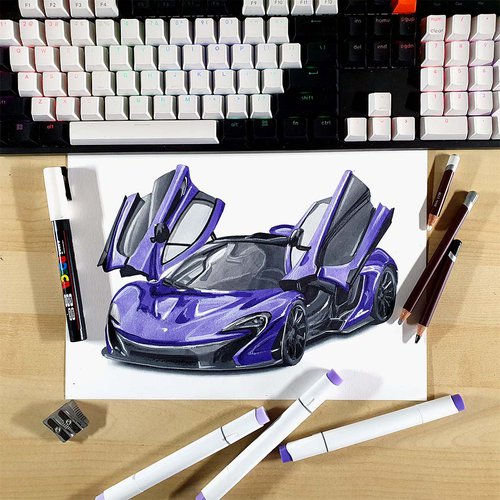

I love bringing cars to life with alcohol markers and colored pencils.
Whether you're just starting out or looking to improve your skills, I'm here to help!
Click here to learn more about me.


Be the first to comment!
Comments
There are no comments yet.