How to Use Linear Perspective in Drawing

I first learned about linear perspective when I was 8 or so. My parents had bought me a book about M.C. Escher and in there the concept of perspective was described. I found it really fascinating, and I still do.
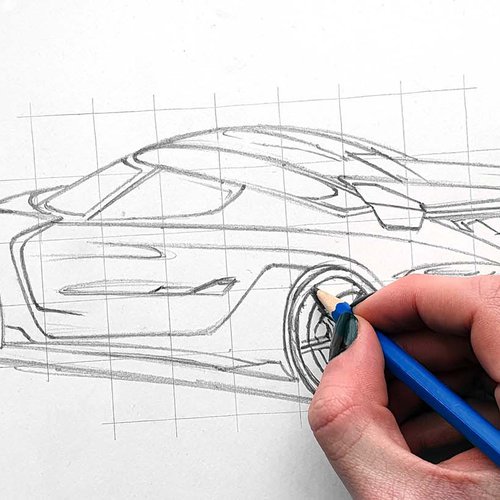
Linear perspective has been really useful ever since, for example when I was studying Industrial Design it made sketching products and many other things a lot easier.
Today I want to share this knowledge with you and teach you how you can use it too to make amazing and proportionally correct drawings.
What is Linear Perspective?
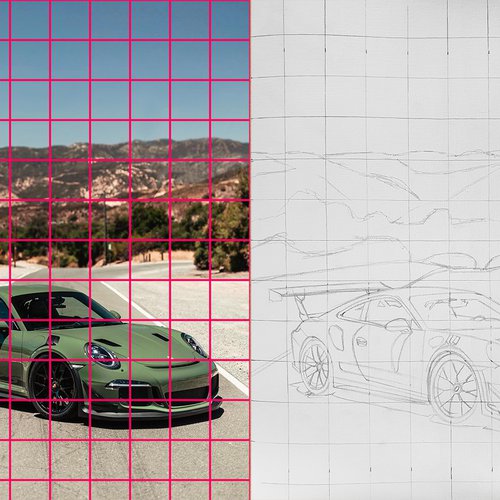
Linear perspective is a drawing technique used to draw proportionally accurate 3-dimensional scenes and objects on a 2D surface. It's mostly used in architecture and urban drawings. This drawing technique relies on the convergence of parallel lines humans perceive as those lines extend in the distance.

Some key elements of linear perspective are:
Vanishing Points: In linear perspective, all parallel lines that recede into the distance converge toward one or more vanishing points depending on the type of perspective. A vanishing point is where all of these lines appear to meet.
Horizon Line: The horizon line is a line that represents the viewer's eye level which is usually placed at the height of the viewer's eyes, but it can be placed anywhere to make interesting compositions. It serves as a reference for determining where to place the vanishing points and the angles of the converging lines.
Orthogonal Lines: Orthogonal lines are diagonal lines that connect points on the 3D object to a vanishing point and they help create a sense of depth by converging toward a vanishing point.
Linear perspective comes in many forms with one-point, two-point, and three-point perspective being the most common ones.
1-Point Perspective
In one-point perspective, all lines converge to one vanishing point on the horizon line.
Rectangular shapes like boxes and buildings have lines and shapes that are parallel in reality, but in perspective, these lines will seem to converge toward the vanishing point in your drawing.
Objects that are below the horizon line will have lines converging up toward the vanishing point and objects above the horizon line will have lines that converge down to the vanishing point.
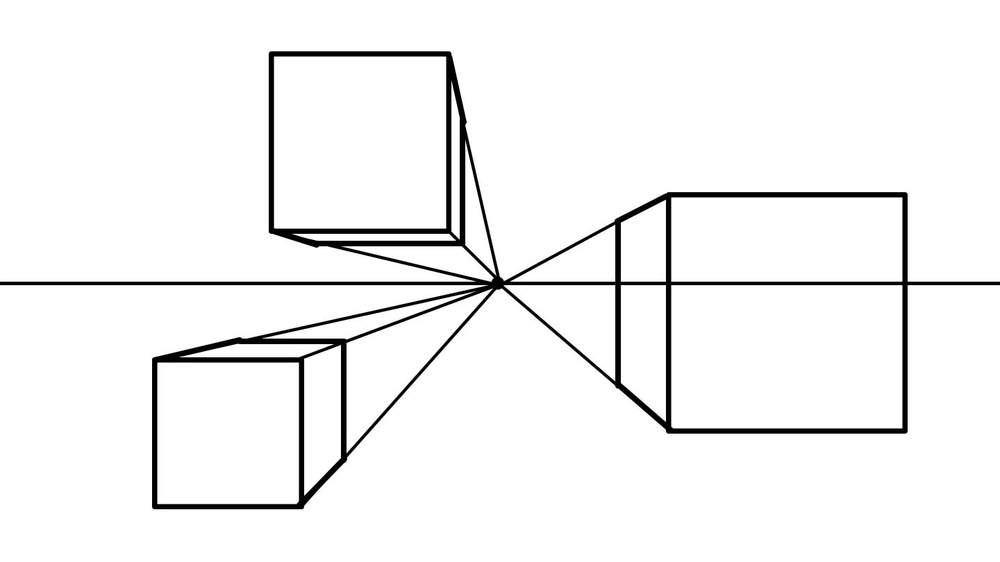
When drawing one-point perspective there is always one side of the object you're drawing facing directly to the viewer which will remain its regular shape while the sides converge toward the vanishing point. Compositions like this are often referred to as "flat views".
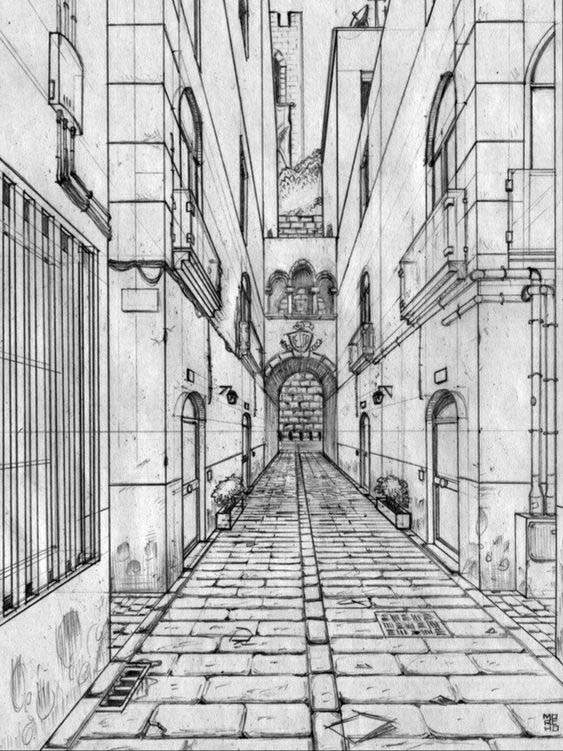
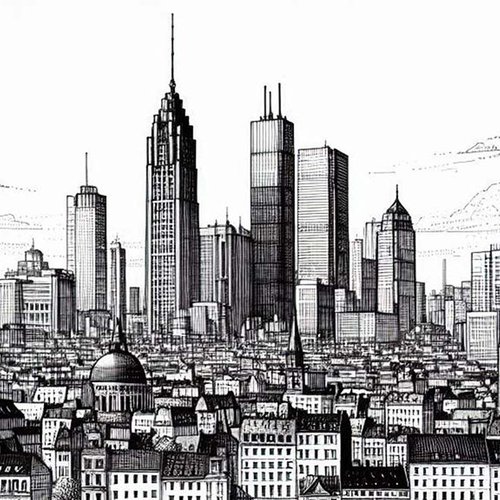
One-point perspective is often used in scenes with a central focal point such as a long railroad, a tunnel, or a hallway. Architecture, cityscapes, and interior spaces are common subjects for drawing one-point perspective.
2-Point Perspective
In two-point perspective, parallel lines that recede into the distance converge toward two vanishing points instead of one. The placement of these points depends on the viewer's line of sight, they are often placed on either end of the horizon line.
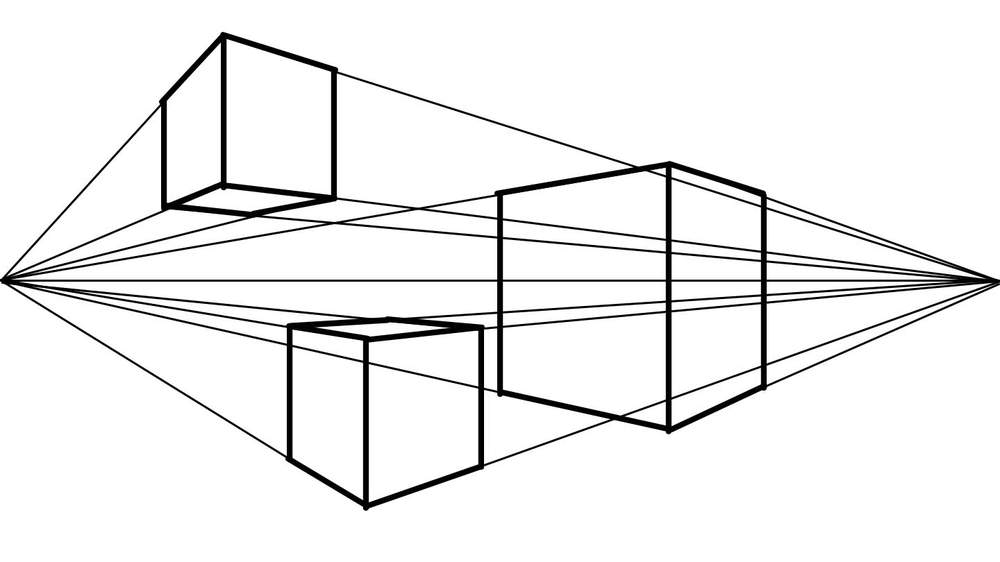
Whereas one-point perspective is used for flat views, two-point perspective is used when the viewer's line of sight is at an angle to the front of an object or a scene. Where one-point perspective has one side that remains its regular shape, in two-point perspective both sides of the object you're drawing will stretch and converge into a vanishing point.
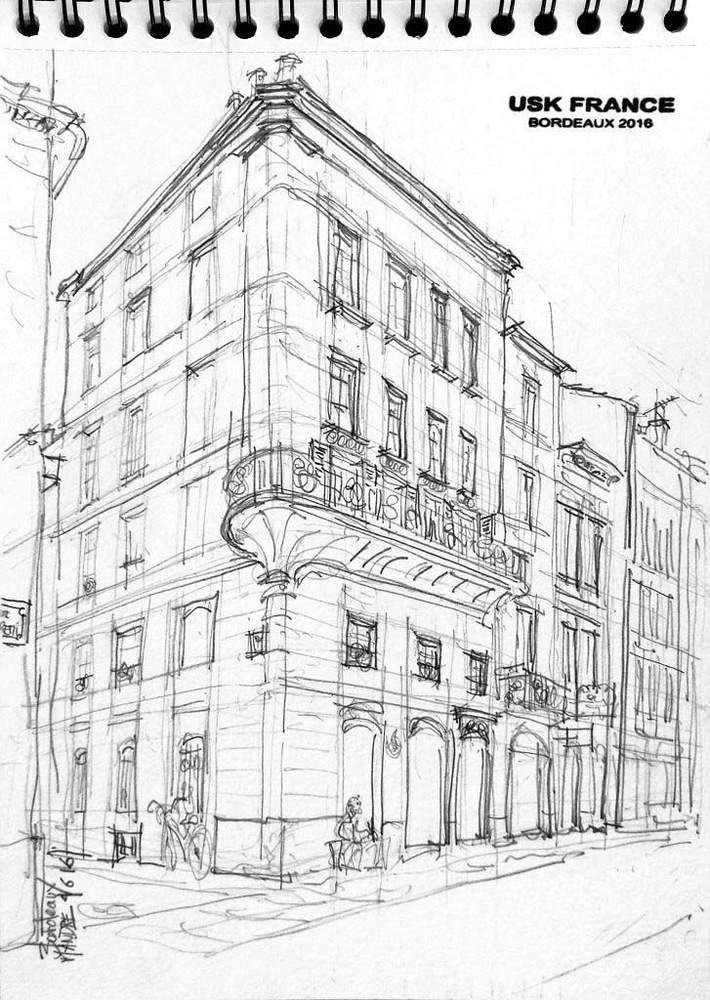
Two-point perspective is commonly used for drawings with a diagonal orientation, for example, street corners, a building that faces one corner towards the viewer, or any other scene where the line of sight is not directly facing an object.
3-Point Perspective
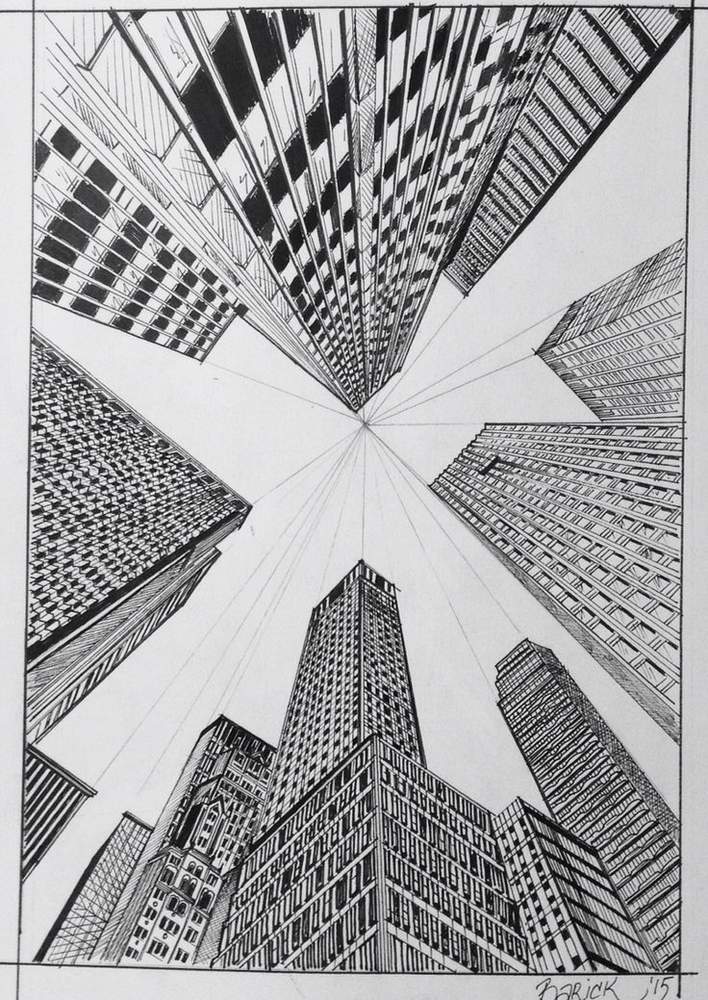
Three-point perspective has three vanishing points where the orthogonal lines recede towards. Two points are on the horizon line, like with two-point perspective, and the other vanishing point is either above (worm's eye view) or below (bird's eye view) the horizon line.
Where one and two-point perspectives still have perfectly vertical lines, three-point perspective doesn't. With three-point perspective, all vertical lines recede toward the third vanishing point.
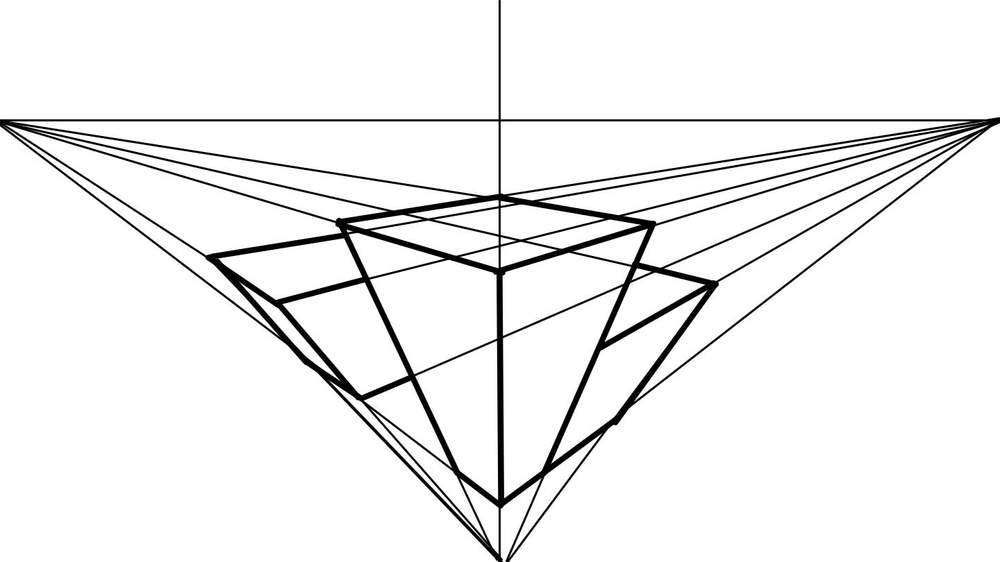
Just like two-point perspective, three-point perspective is also used when the viewer's line of sight is at an angle to the object you're drawing. But with three-point perspective, the viewer's point of view is at an extreme angle, either from really low or from really high.
Common subjects for three-point perspective drawings are looking up at a tall building, a drone shot from a cityscape, or a really deep canyon.
This technique adds a heightened sense of drama and depth, making it suitable for dynamic and visually striking compositions.
4 & 5 Point Perspective
Besides one, two, and three-point perspectives, four and five-point perspectives also exist. These are both even more extreme than three-point perspective.
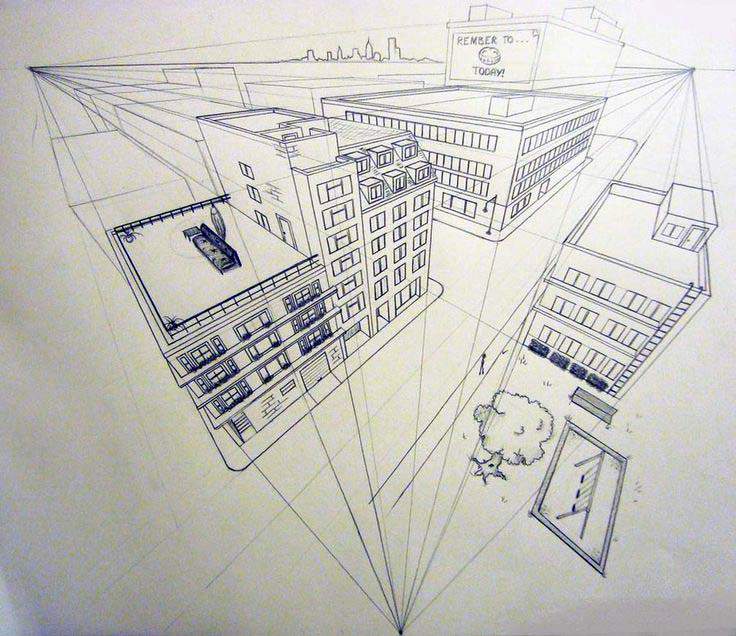
4-Point Perspective
Where three-point perspective has a vanishing point either below or above the horizon line, four-point perspective has one vanishing point above and one below the horizon line in the same vertical line.
With four-point perspective, the orthogonal lines that recede toward the top or bottom vanishing points are now curved whereas these lines were straight for three-point perspectives. This makes four-point perspective a bit more tricky to draw.
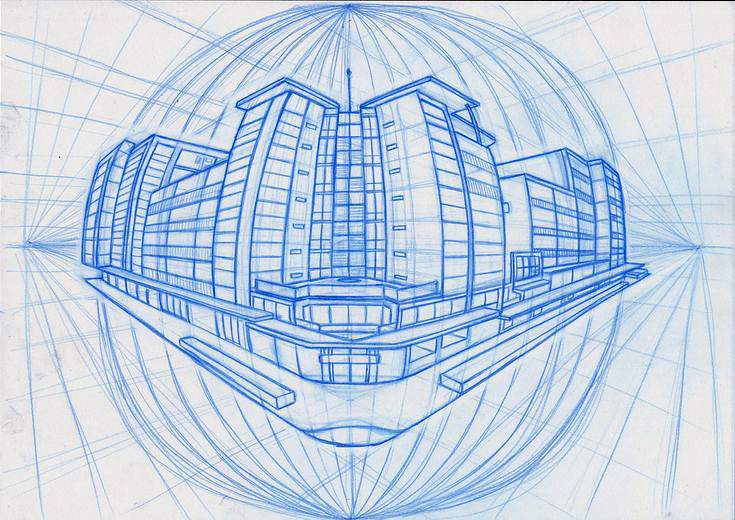
5-Point Perspective
Five-point perspective is even more extreme than four-point perspective. With five-point perspective, there's an extra vanishing point right where the horizon line the the vertical line intersect.
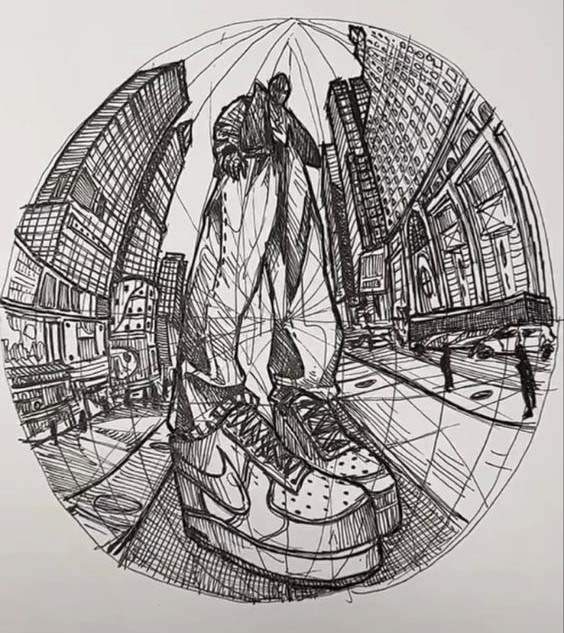
This view is also called the fish-eye view and you've probably seen this type of perspective before when watching a 360° video.
Techniques for Drawing in Perspective
Evenly Space Horizontal Lines
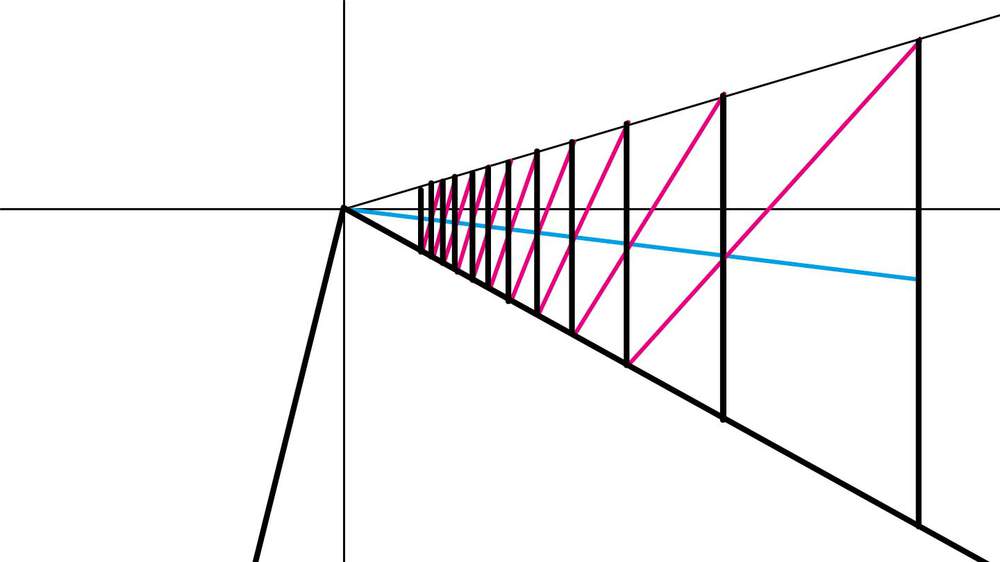
When drawing subjects that contain evenly spaced horizontal lines like a road with lampposts there is a trick to make them look evenly spaced as they converge toward the vanishing point.
You start by drawing 2 horizontal lines that represent the lampposts at the side of the road. The spacing doesn't matter. Next, you're going to draw a diagonal line from the top of the closest lamppost down and through the center of the second lamppost until you hit the line that indicates the side of the road. The point where the diagonal line intersects with the side of the road is the point where the 3rd lamppost should be to look evenly spaced.
Dividing a Plain in Two Parts
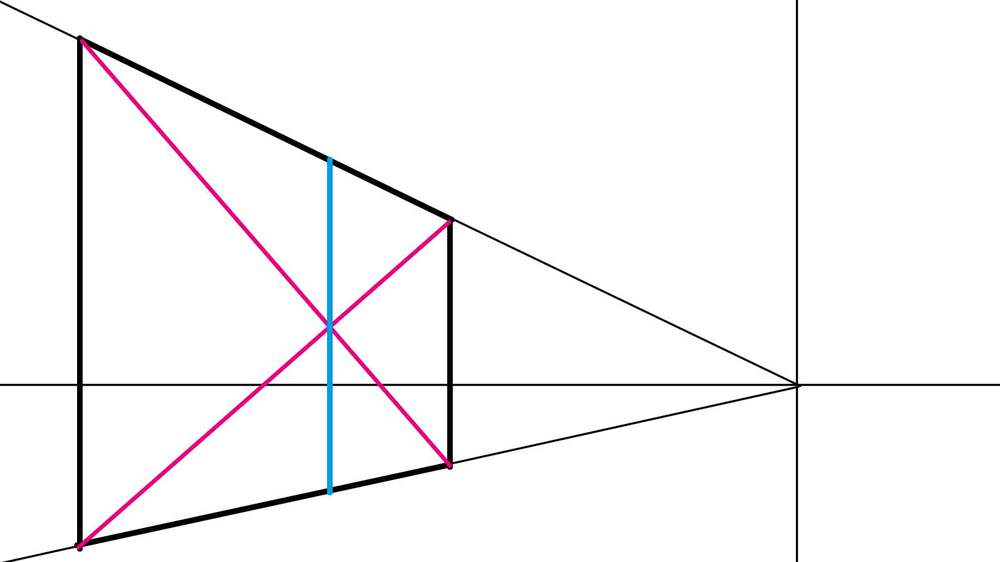
When drawing using linear perspective there is a way you can easily divide a plain into 2 equal-looking sides.
To do this you start by determining the plain you want to divide. Then you draw a cross on the plain through opposite corners. Then right where these two lines intersect you draw a horizontal (or vertical) line. This line should be dividing the plain into two equal-looking parts.
Dividing a Plain in Thirds
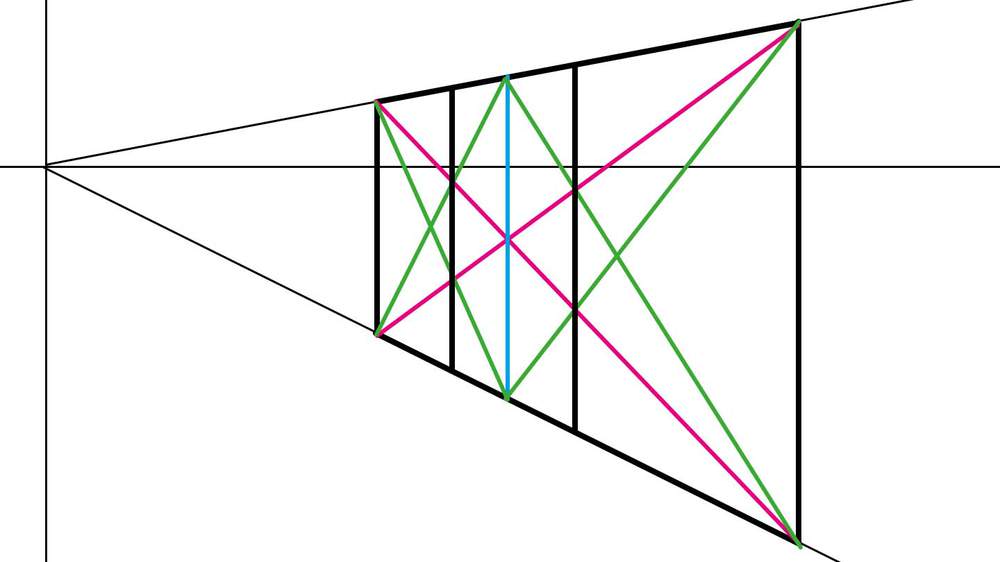
When drawing using linear perspective there is also a trick to perfectly divide a plain into 3 parts.
To do this you first determine the plain you want to divide. Then you draw 2 diagonal lines through opposite corners. Next, you draw a vertical (or horizontal line) through the point where these lines intersect.
After that, you draw two diagonal lines on either side of the plain. Now you look for where these diagonal lines intersect with the first diagonal lines you drew and draw a horizontal line through these points.
These last two lines divide your starting plain perfectly into three parts.
Articles You Might Also Like


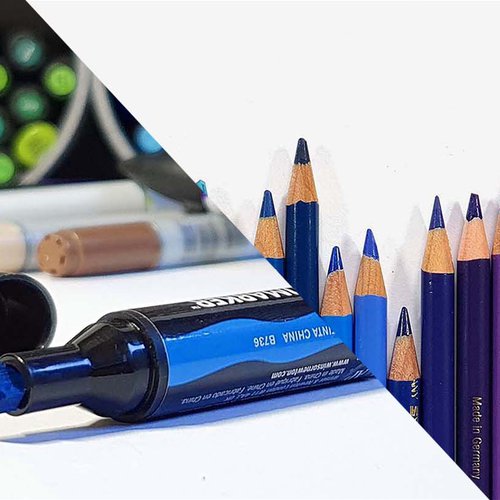

I love bringing cars to life with alcohol markers and colored pencils.
Whether you're just starting out or looking to improve your skills, I'm here to help!
Click here to learn more about me.


Be the first to comment!
Comments
There are no comments yet.