Realistic Rolls Royce Phantom Drawing Tutorial Step by Step
This post is about how to draw a Rolls Royce Phantom step by step with markers.
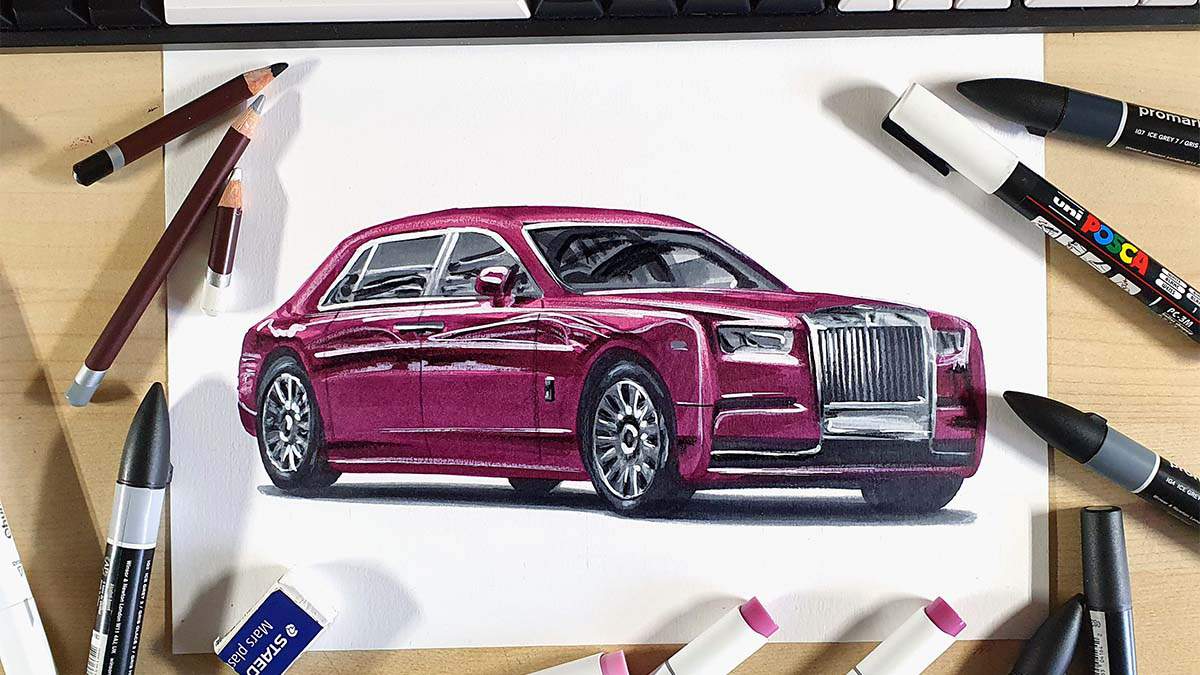
In this week's car drawing tutorial, I'll show you how to draw this beautiful and elegant Rolls Royce Phantom.
Now, drawing any car realistically won't be easy, but I tried my best to break the whole process up into simple-ish steps and explain each step in detail, so you can, hopefully, follow along and learn how to draw a realistic Rolls Royce Phantom.
One thing to remember: if this is your first realistic car drawing, don't focus too much on it being perfect. When I started out drawing cars 10 years ago, my drawings were far from perfect, but I learned a lot from each drawing that I made. And in this guide, I will show you all the techniques and the workflow that I learned that allowed me to draw realistic cars.
Now, let's get started on this Rolls Royce drawing!
I just wanted to let you know that this post contains affiliate links, and any purchases made through these links will result in a small commission for me and don't cost you anything extra.
In This Guide
- Where to find reference photos for your car drawings
- Drawing supplies and colors I used to draw this Rolls Royce
- Sketching the Rolls Royce using the grid method
- Coloring the Rolls Royce Phantom with markers
- Adding details and highlights to complete the Rolls Royce drawing
- More car drawing guides you'll like
How Do You Draw a Rolls Royce Phantom?
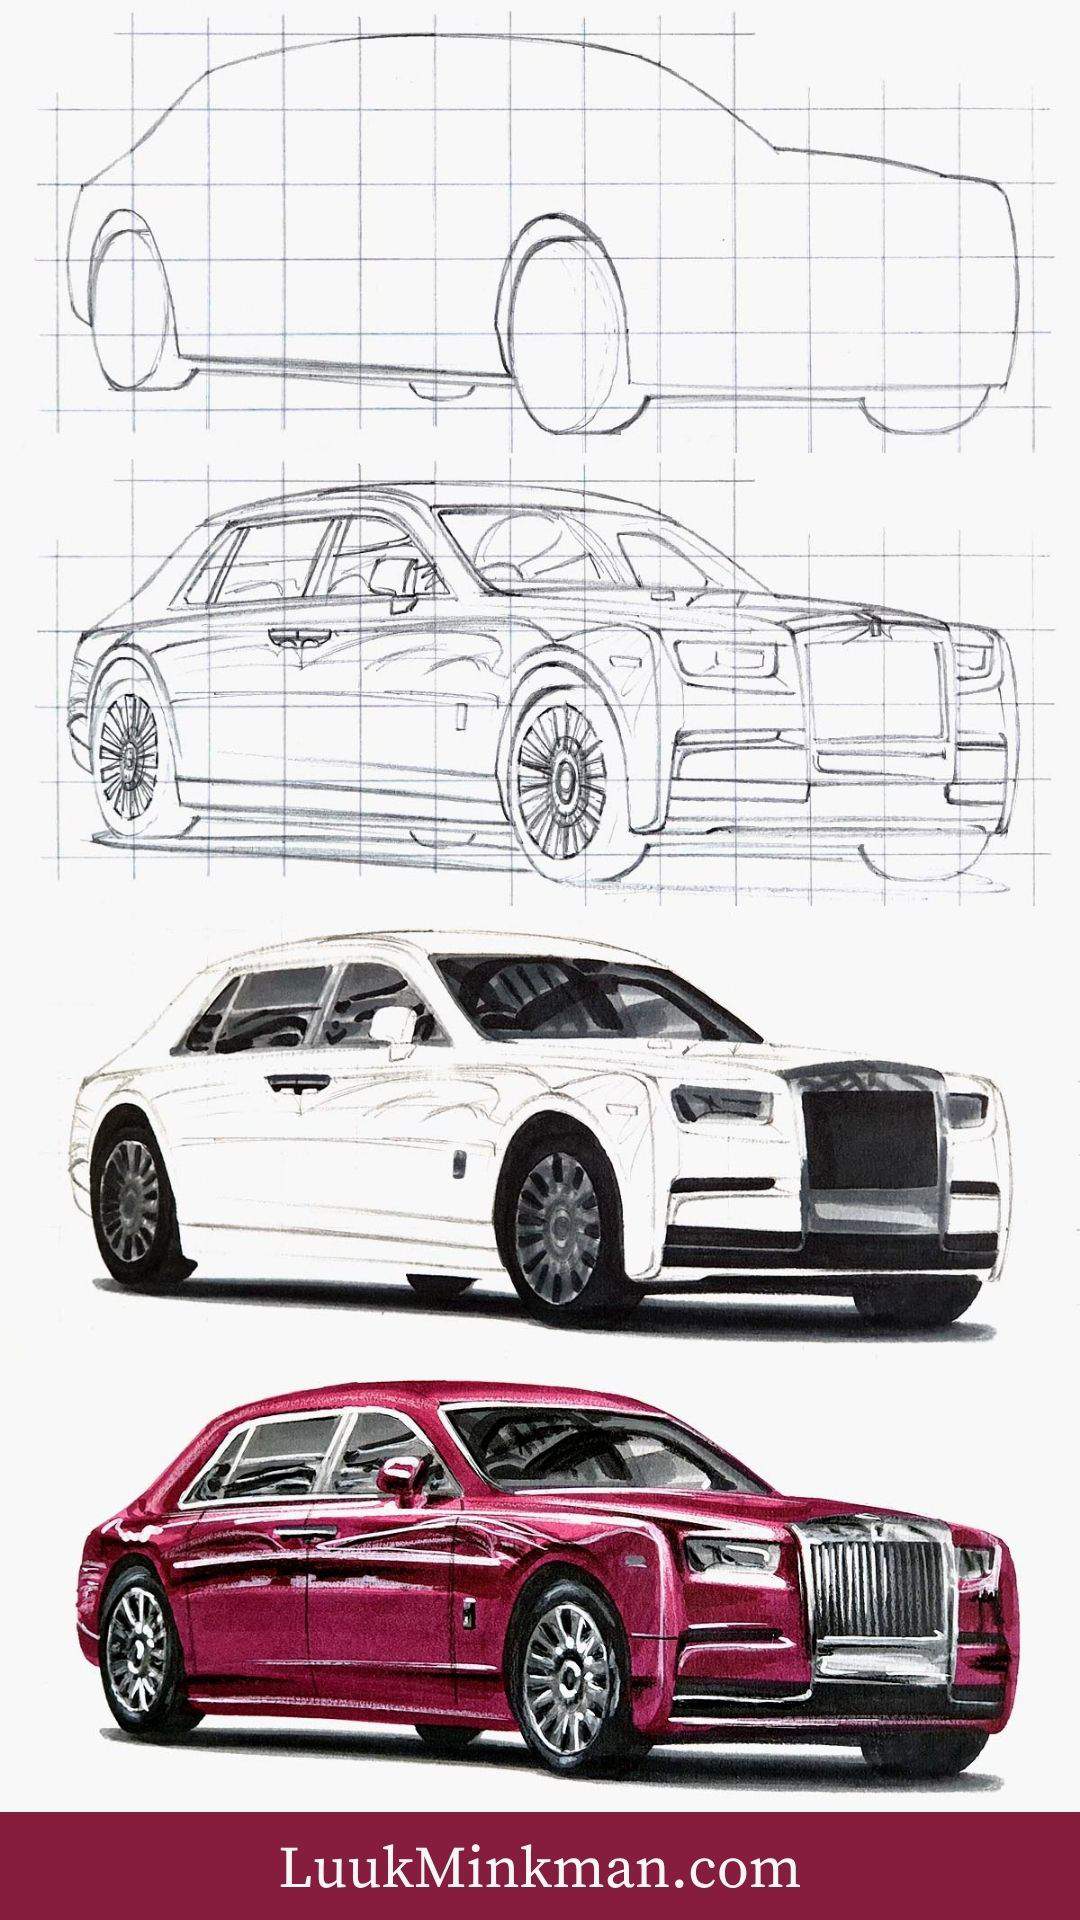
To make a realistic Rolls Royce Phantom drawing, you first need to look for reference photos. Once you find one that you like, you can start sketching it using the grid method to make it a little bit easier. After that, you color in your drawing using markers. Lastly, you add a few details using a white, grey, and black colored pencil, and you add a few highlights with a white paint marker.
1. Look for Reference Photos of Rolls Royce Phantoms
To make this Rolls Royce Phantom drawing, I first started to look for reference photos. Unsplash and Pexels are great places to find good reference photos.
I found this one on Unsplash, and this is the one I'll be using during this tutorial.
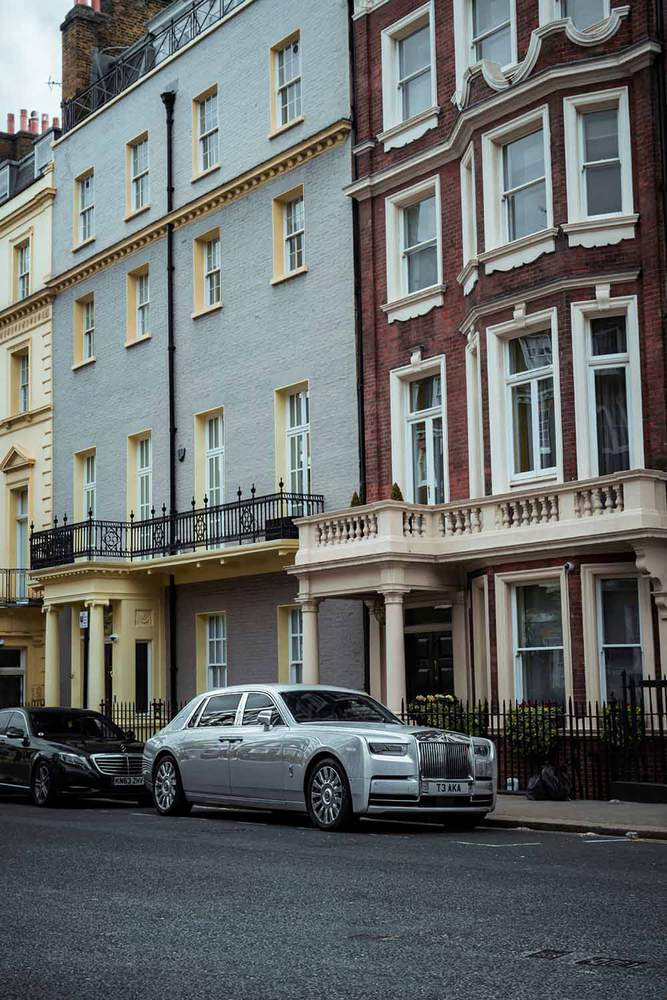
I ended up changing the color of the car to this beautiful deep reddish purple as the grey looked very boring. You don't have to stick to the reference photo you choose. Changing it up a bit is always more fun, but following the reference precisely is easier.
2. Gather Your Art Supplies
Next up, I gathered my drawing supplies.
I wanted to keep the drawing process very straightforward, so I used alcohol markers instead of colored pencils for this one.
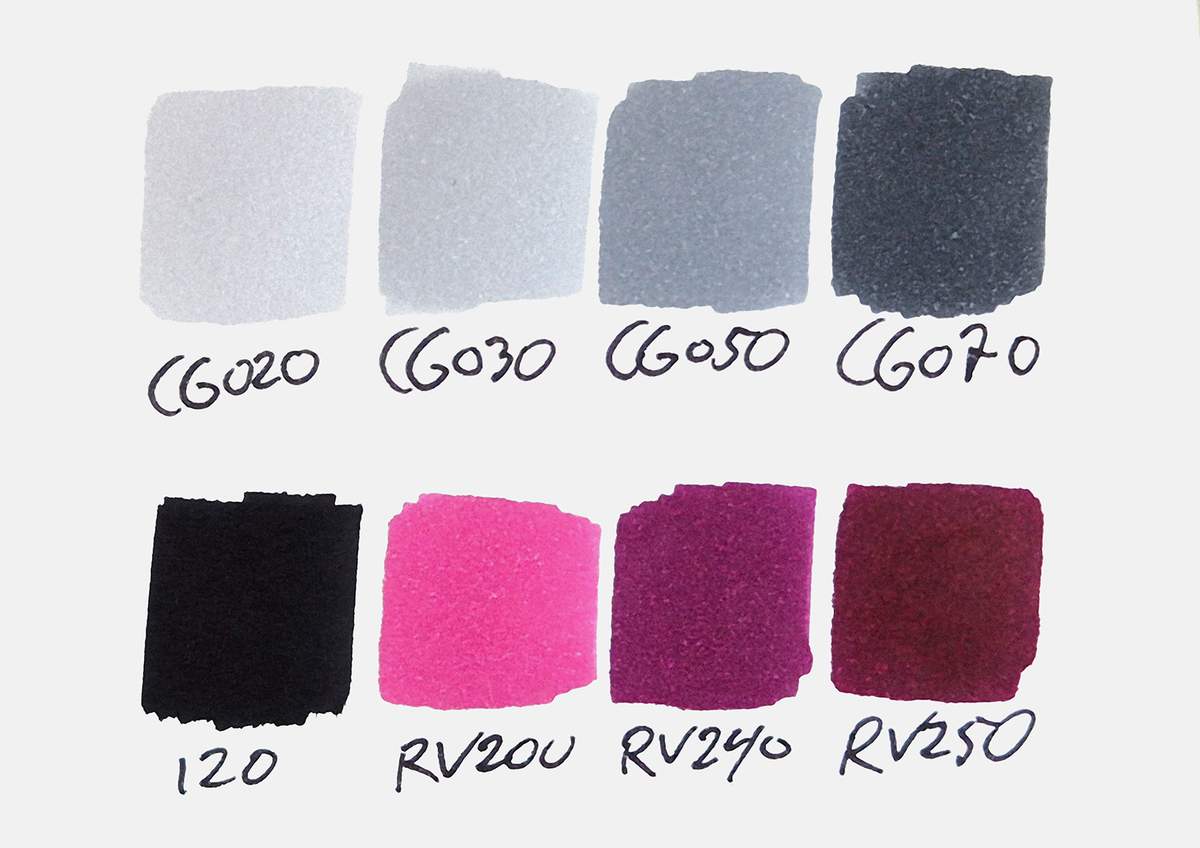
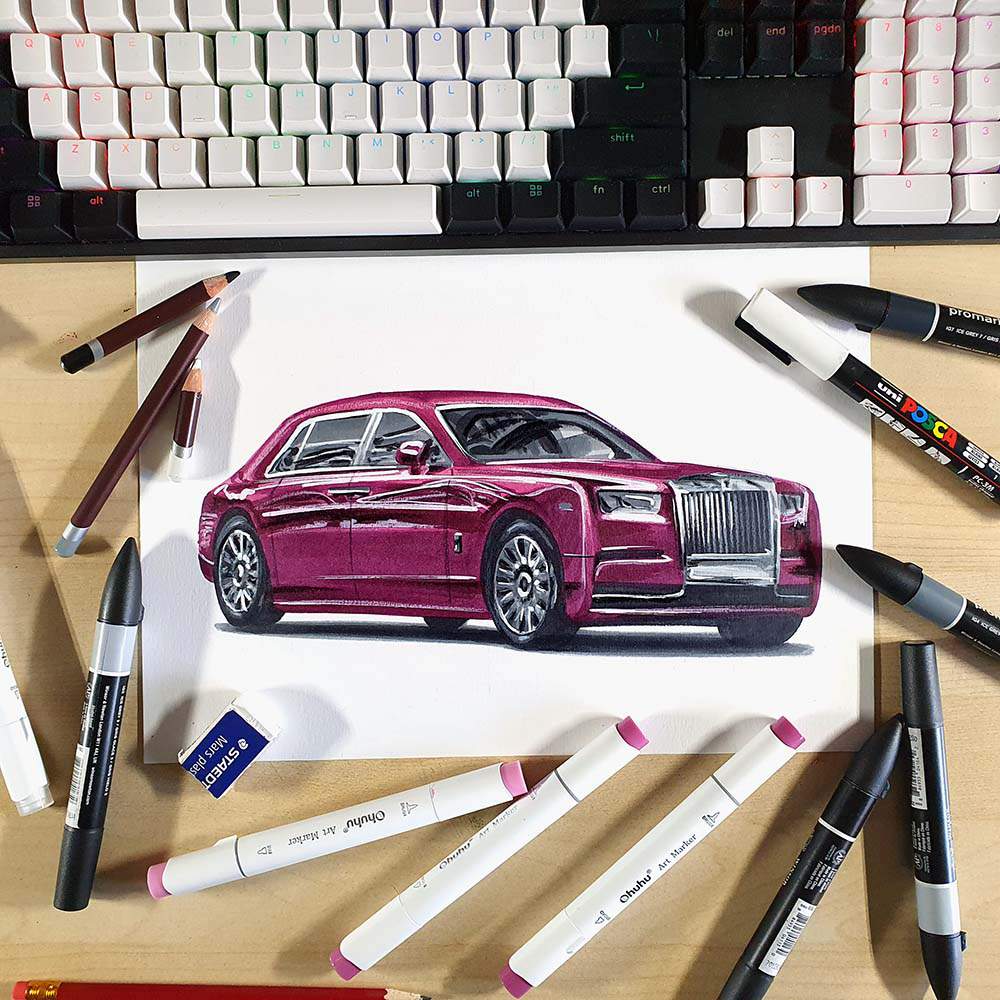
I used the Ohuhu Honolulu Markers in the colors Neutral Grey 02 (CG020), Neutral Grey 03 (CG030), Neutral Grey 05 (CG050), Neutral Grey 07 (CG070), Black (120), Dark Orchid (RV200), Bronze Purple (RV240), and Peony (RV250). I also used the Colorless Blender. You can buy these colors as part of the 320 set or buy them separately here. You can also buy them on Amazon if you prefer.
I've included an image of all the colors I used below so you can match your markers to the ones I used if you already have some.
To add details to the drawing, I used the White, Platinum, and Black Derwent Chromaflow colored pencils.
To add highlights to the drawing, I used a white Posca PC-3M paint marker.
I also used an HB graphite pencil, a ruler, a kneaded eraser (to lighten my sketch before coloring), and a regular eraser.
And I made this drawing on A4-sized Canson Illustration Manga paper. You can use any marker paper, but I prefer this one as the ink dries very evenly on it and it's over 200gsm.
3. Sketch the Outline of the Rolls Royce Phantom
Sketching a car like the Rolls Royce Phantom accurately can be quite difficult.
That's why I like to use the grid method. You can read more about this technique and how to use it here. If you're new to this method or don't know how to use it, I highly recommend you check out this guide first before attempting to sketch this Rolls Royce.
I first resized the reference photo to the same size as my paper, which is 29.7 by 21 cm or 3508 by 2480 pixels.
Next, I overlaid a grid of 15 by 10.5 squares on top of the photo and marked which squares contained parts of the car. I made the grid 15 by 10.5 as this results in a grid of 2 by 2 cm, which is easy to measure and sketch.
With my grid overlay tool, you can easily add a grid overlay to your reference photo.
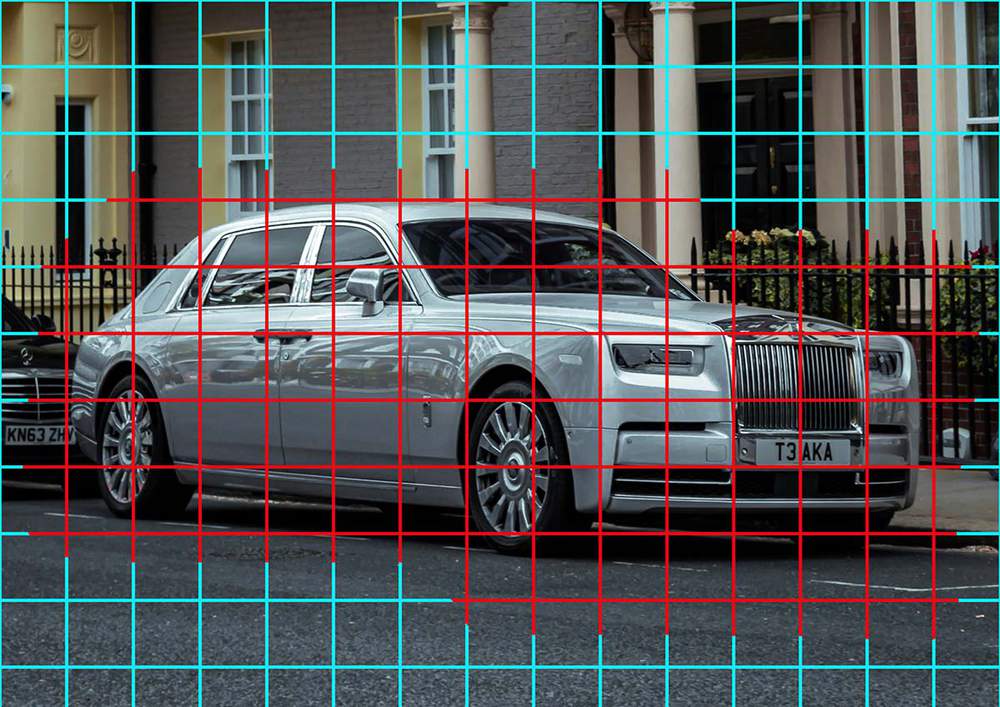
After that, I recreated that same grid on my paper, but only the squares that have car parts in them.
Each grid line is 2 cm apart, starting from the top left.
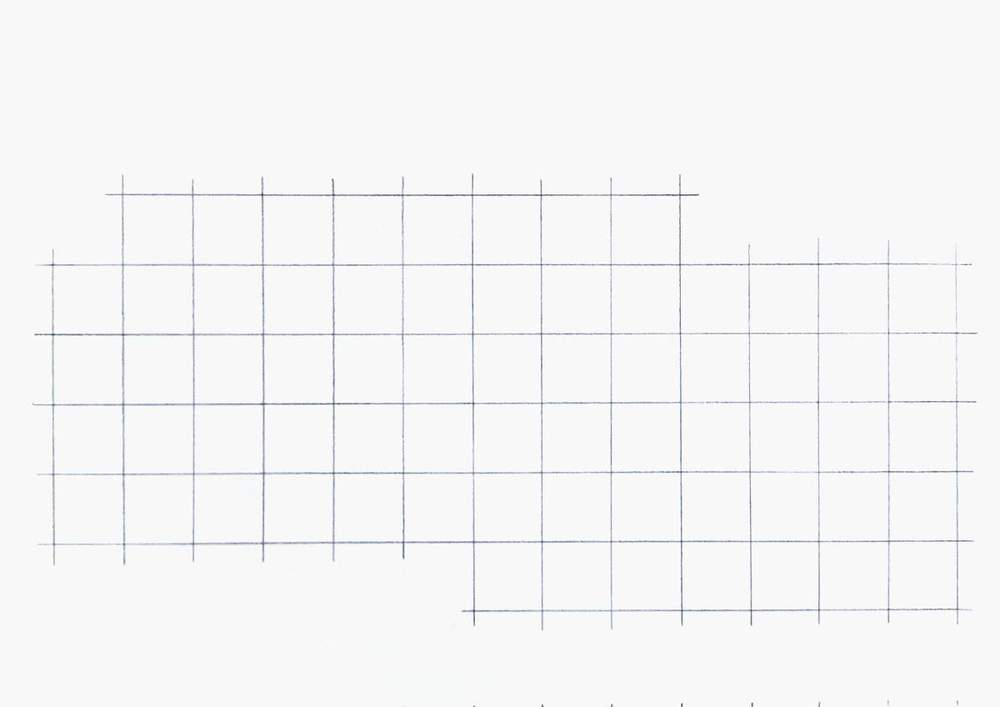
As you might notice, I did only sketch the squares needed to sketch the Rolls Royce, but if you're new to this method, I recommend you sketch every line. This is a lot easier than sketching only the ones you'll need.
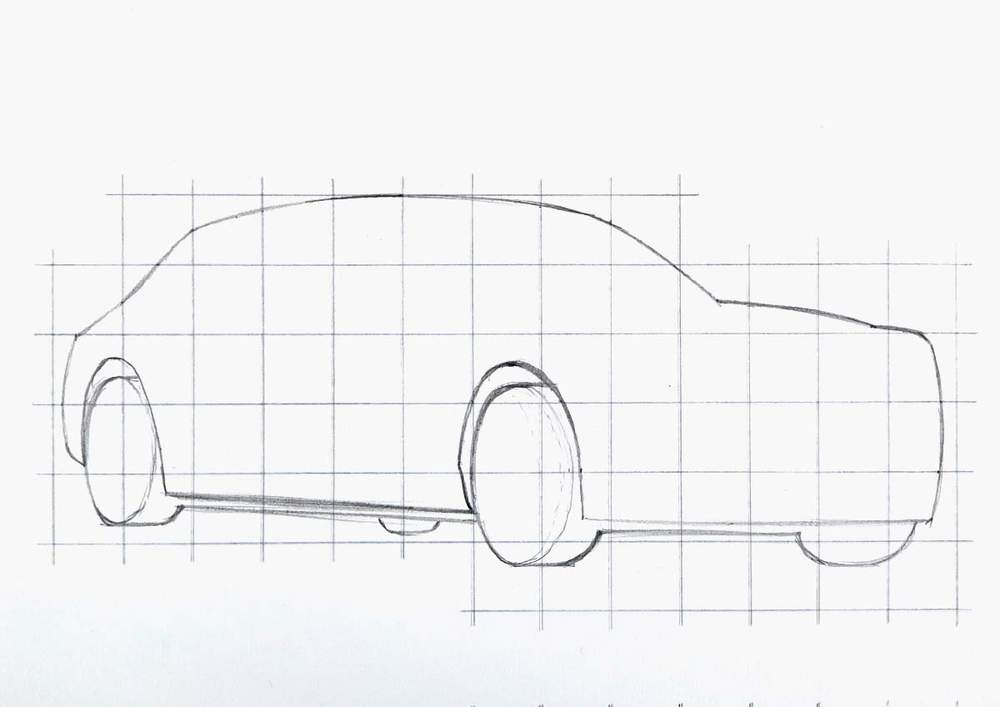
Now that the grid is done, it's time to start sketching the car, using the grid as a guide.
I started by picking a random piece of the outline.
I looked at the reference photo with the grid overlay and marked where it starts, where it ends, and where it crosses grid lines. Then I sketched the line in one quick movement. This will result in cleaner and generally more accurate sketch lines
I repeated these steps for each section of the outside edge of the car until I had sketched the whole outline, which looks like this.
4. Sketch the Parts and Details of the Rolls Royce Phantom
After that, I sketched all the parts and details of the Rolls-Royce Phantom.
I first sketched the more basic and bigger parts like the windows and the front grill. And to sketch these parts, I used the same steps and techniques as I did for the outline of the car.
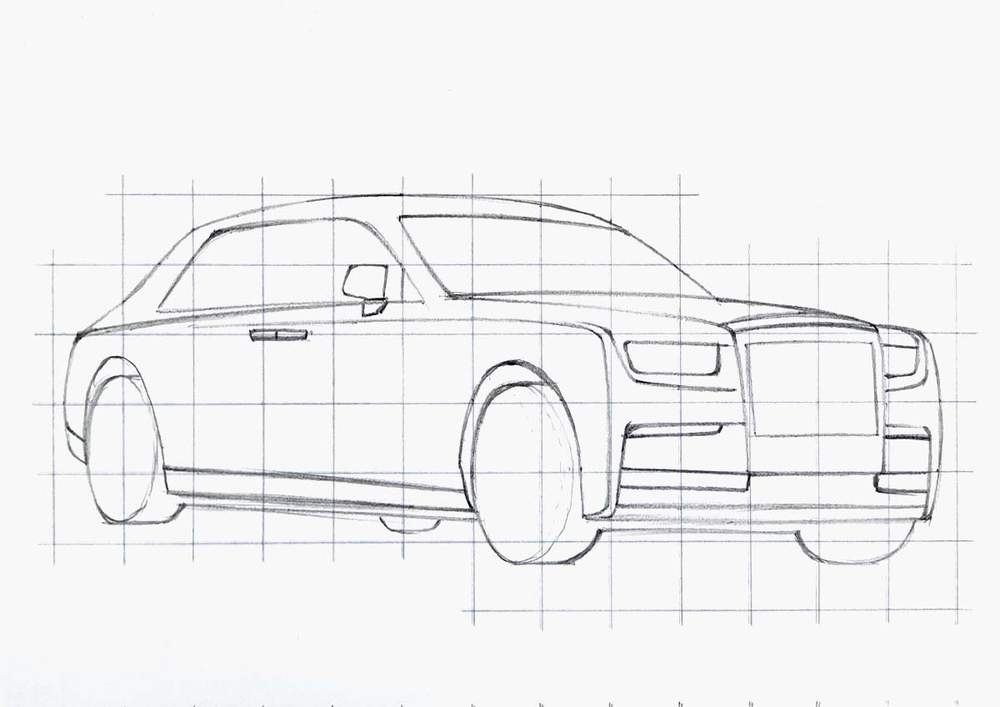
Then, I sketched all the smaller details.
The details don't cross grid lines as much as the bigger parts, but since we've already sketched the bigger parts, we can start to use them as guides, too. To do this, you look at your reference photo with the grid overlay and look at how each smaller part is positioned relative to the bigger parts, then you mark some key points like the corners, and then you sketch it.
After you've sketched it, you might find that some parts are not completely right or are just off. What I do is I look at where it should have been or how it should have been shaped, then I erase what I sketched and resketch it in the right place, hopefully.
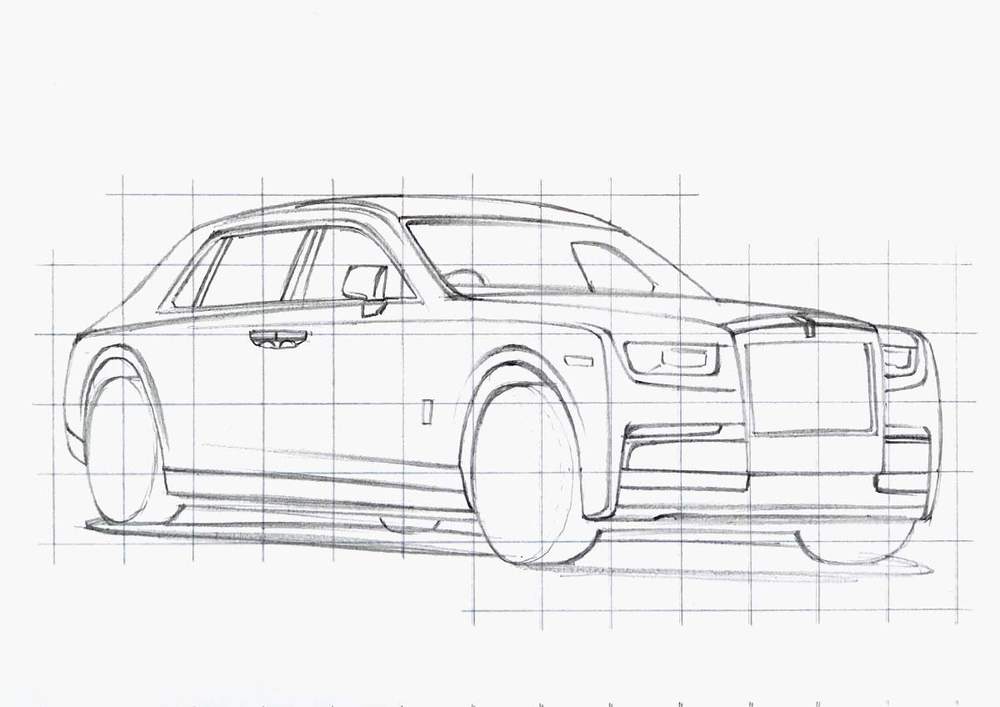
Next, I sketched the wheels.
The wheels might look very intimidating. They are super overwhelming with all the spokes so close to each other. But sketching these wheels is actually pretty easy if you break it up into simple steps. I'll show you my process.
I started by sketching the outside rim, and I marked where the center was and sketched 2 ellipses around it.
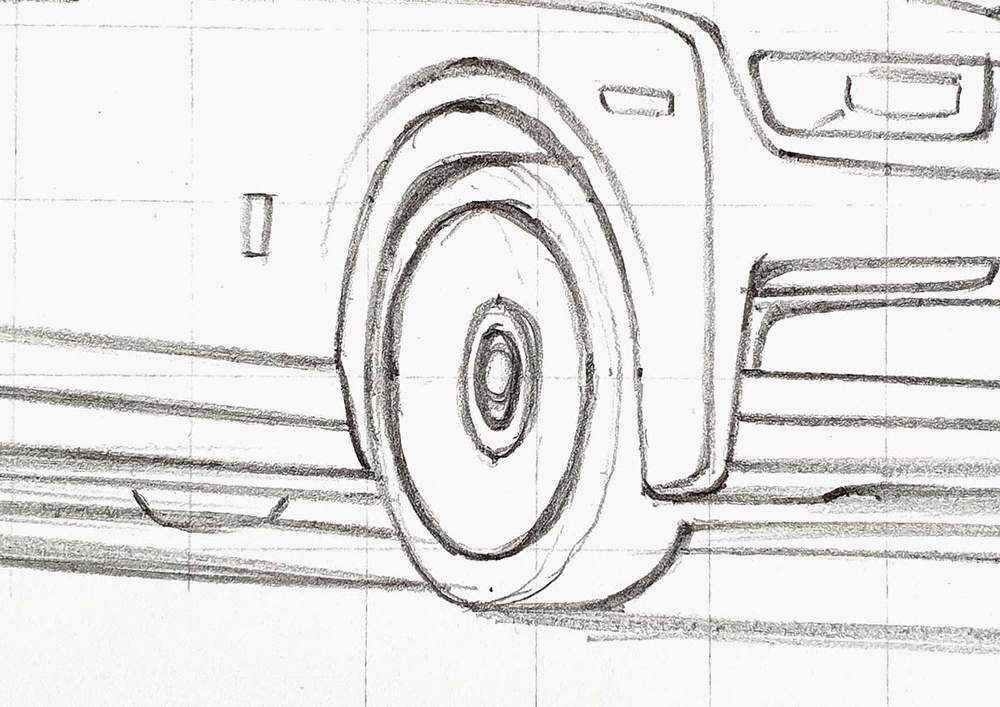
After that, I marked where each spoke would connect to the outside rim.
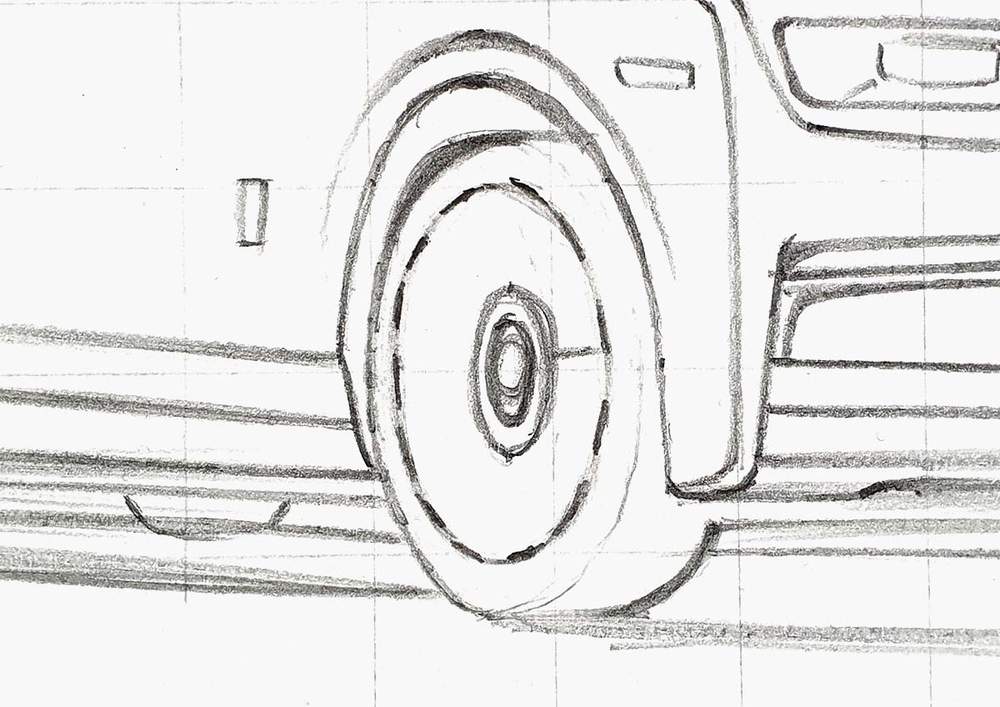
Then, I connected each edge of each spoke to the center ellipse with all the edges pointing straight toward the center of the wheel.
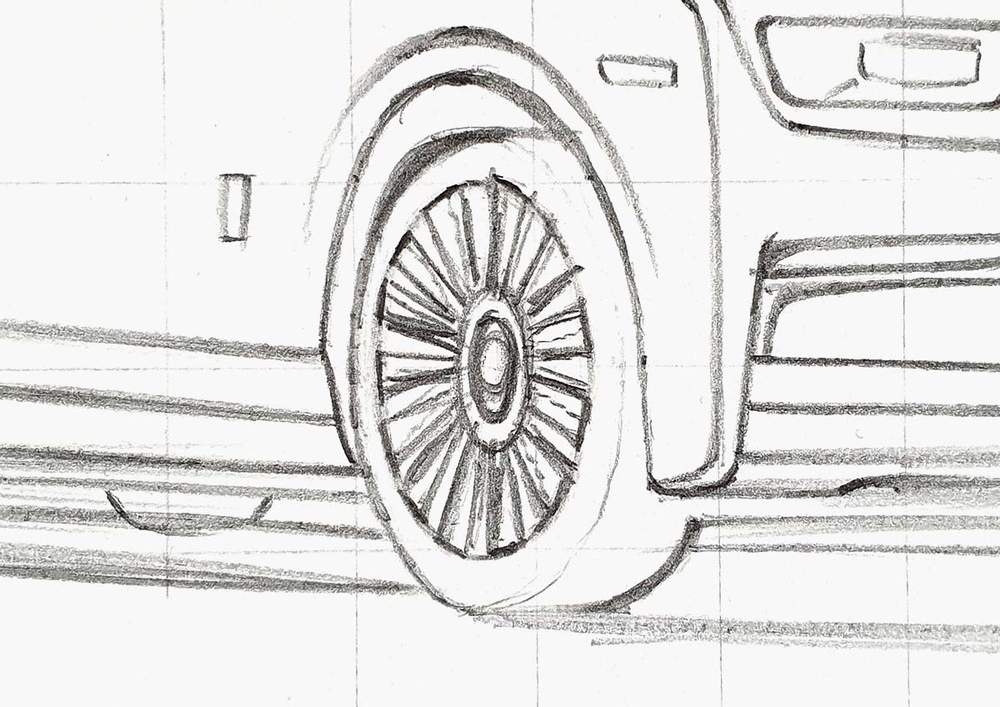
Lastly, I added a bigger ellipse around the center.
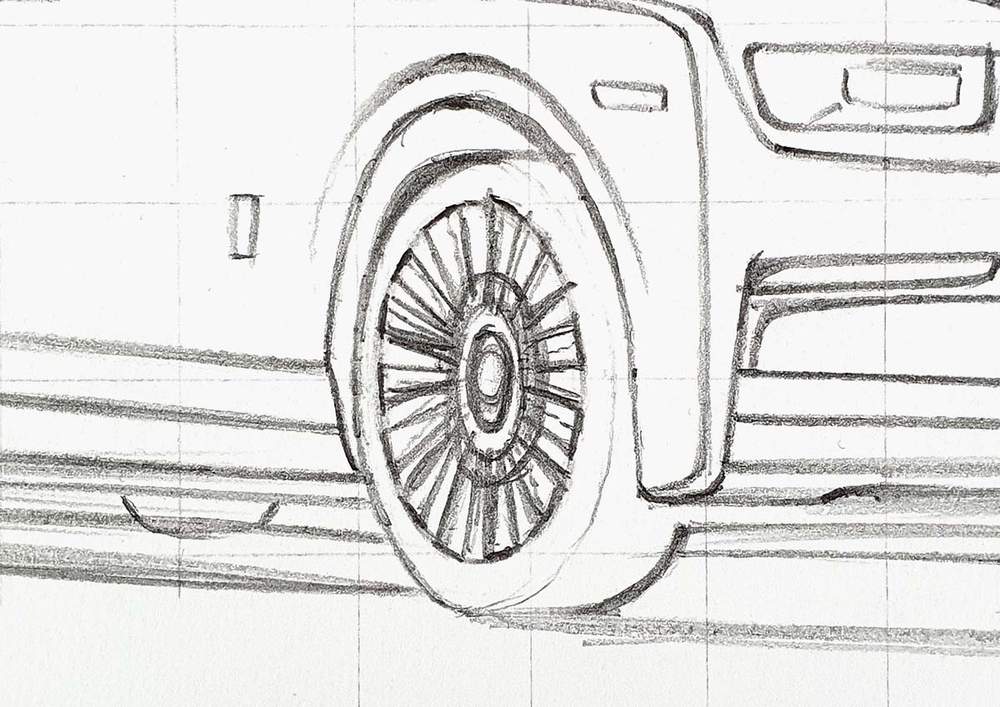
Then I repeated these steps for the rear wheel.
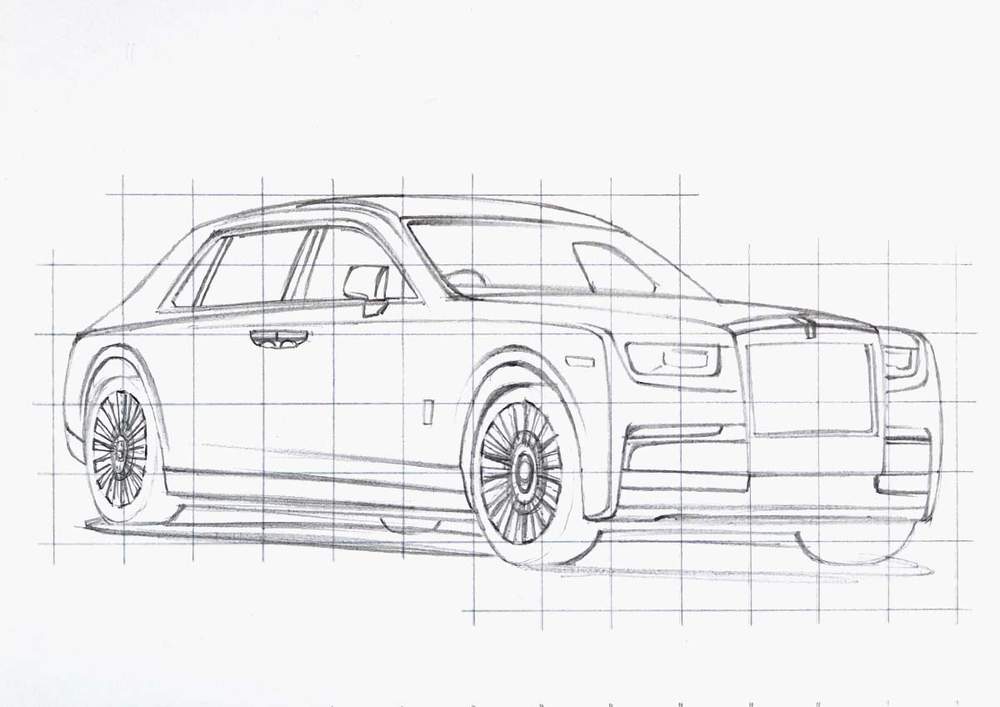
And that's the wheels all done. Now, wasn't that easier than you thought?
To finish the sketch, I lightly sketched in the reflections on the bodywork. To do this, I just looked at the reference photo and recreated all the reflections I saw there.
If you find it difficult to position each reflection perfectly, just remember this: reflections are already distorted. If you sketch them in completely different places, they probably will still look good and convincing. One thing that is important, however, is that the reflections react to body lines. Every time there is a sharp line in the bodywork, you'll notice that the reflections sort of get squished or just stop right at that edge.
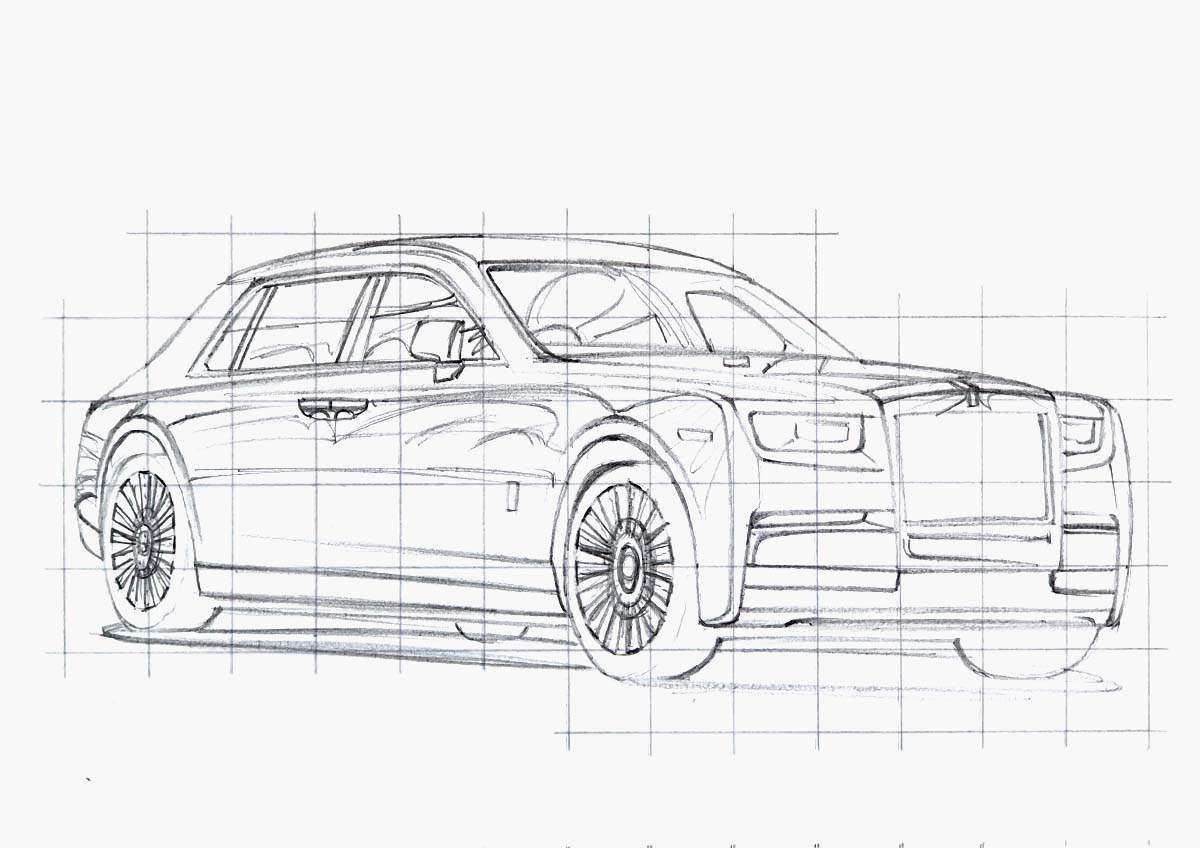
5. Color All Black Parts of the Rolls Royce Phantom
Now that the Rolls-Royce Phantom is fully sketched, it's time to start coloring it. My favorite part and maybe also the most scary one, since everything you color with markers is permanent. But with the paper and the markers I use, most mistakes can be hidden.
Oftentimes when I've finished the sketch, I feel slightly overwhelmed by all that I have to color, which stops me from actually coloring it. To combat this, I color the simplest part first: all the pure black parts.
I did mess up the spokes of the rear wheel a bit as I did not pay enough attention to which parts of the wheel I should color and which ones to leave blank for now... But there's nothing you can't fix with colored pencils later on. You probably didn't even see it in the finished drawing, did you? That's because I hid it super well.
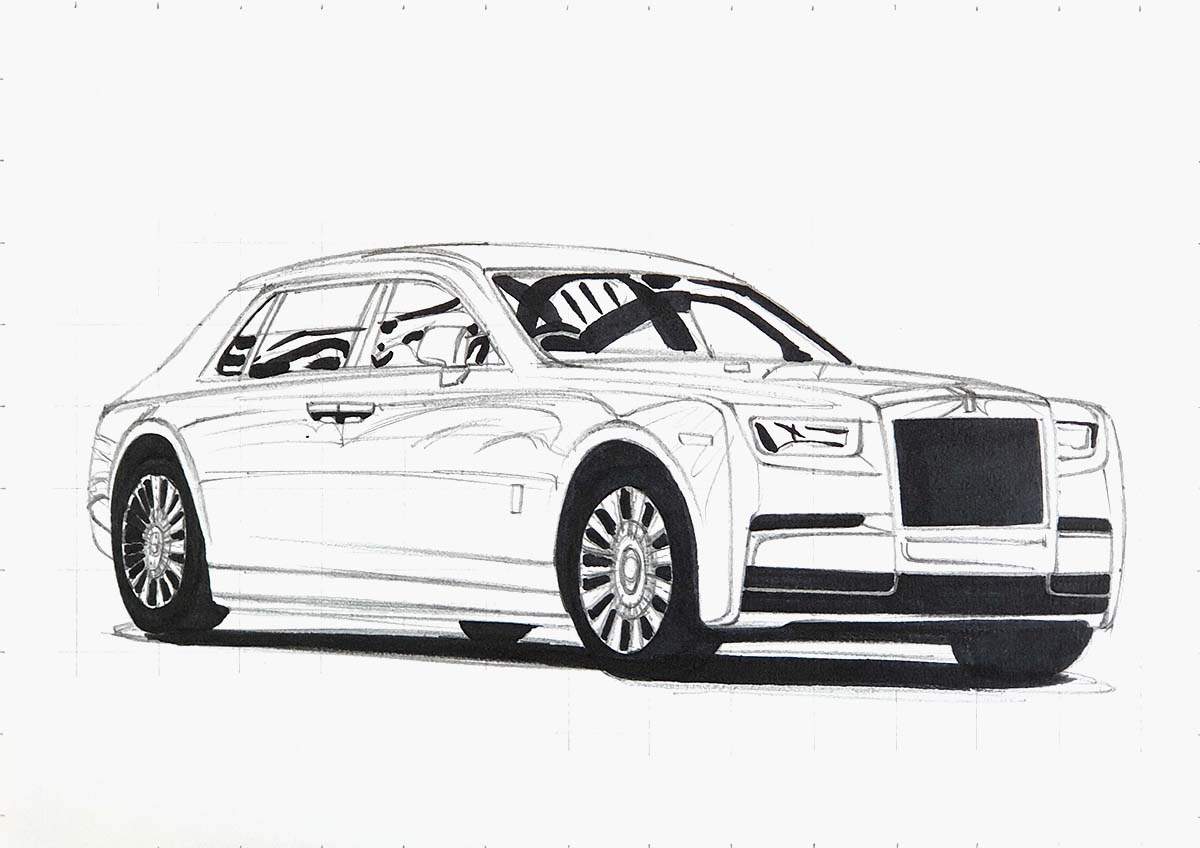
For the rest of the drawing, every time I want to color something in, I first lighten that part of the sketch with my kneaded eraser. This prevents the sketch lines from showing through the drawing in the end.
6. Color the Wheels of the Rolls Royce Phantom
Next up, I colored the wheels, and now that all the black parts (and more...) are already colored, they've become a lot easier.
I started by coloring them both with Neutral Grey 03 (CG030).
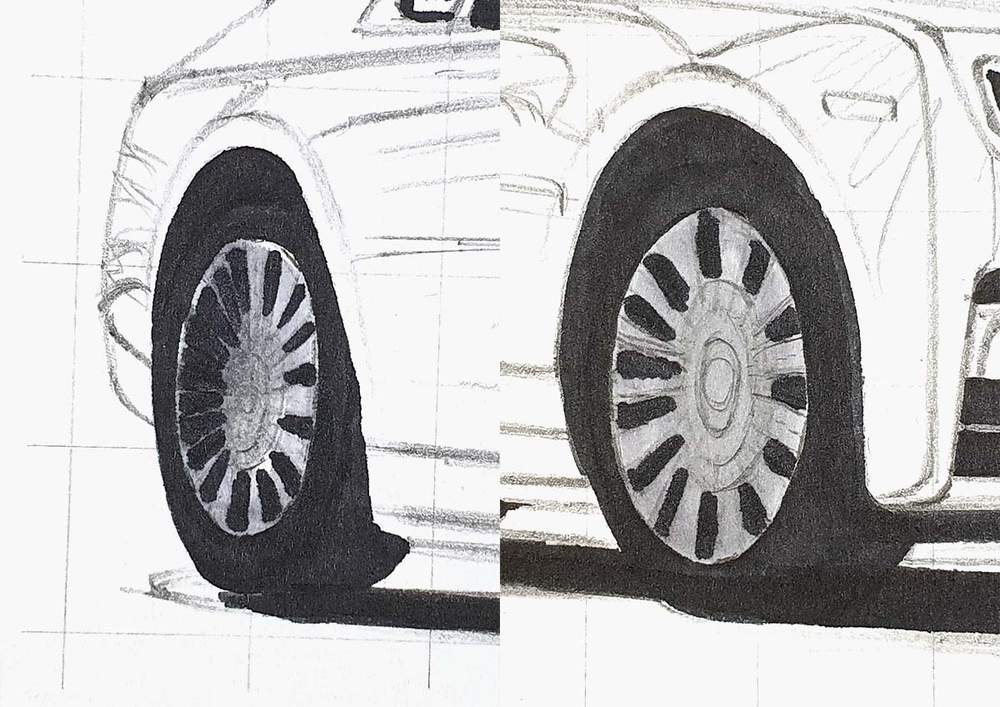
After that, I added some dark reflections on the chrome wheels by just scribbling the Neutral Grey 05 (CG050) marker over the wheels.
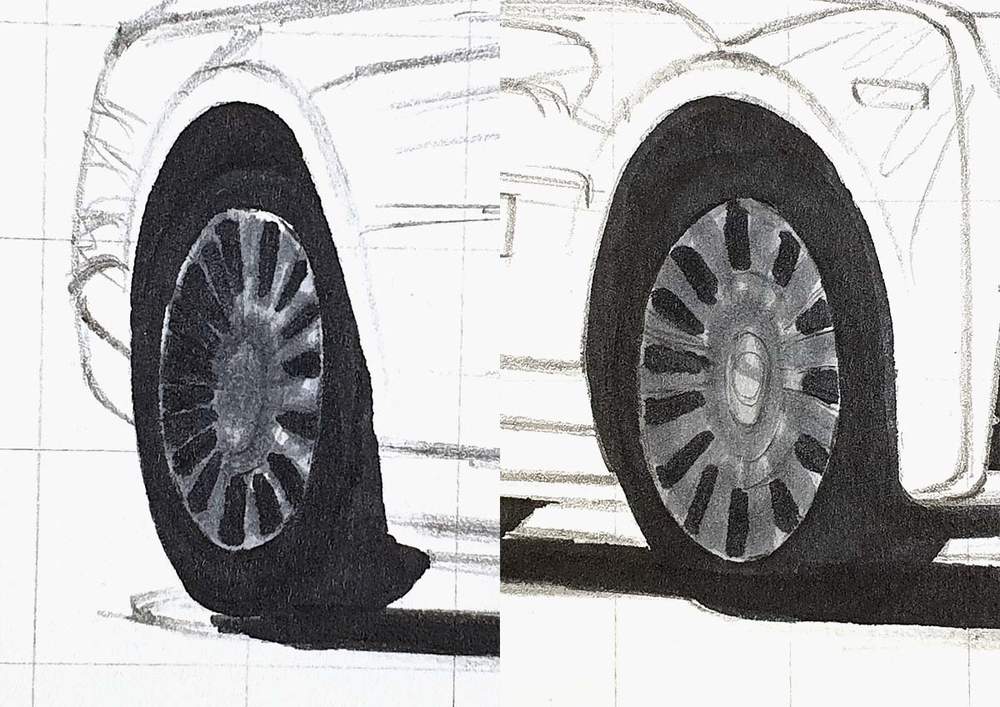
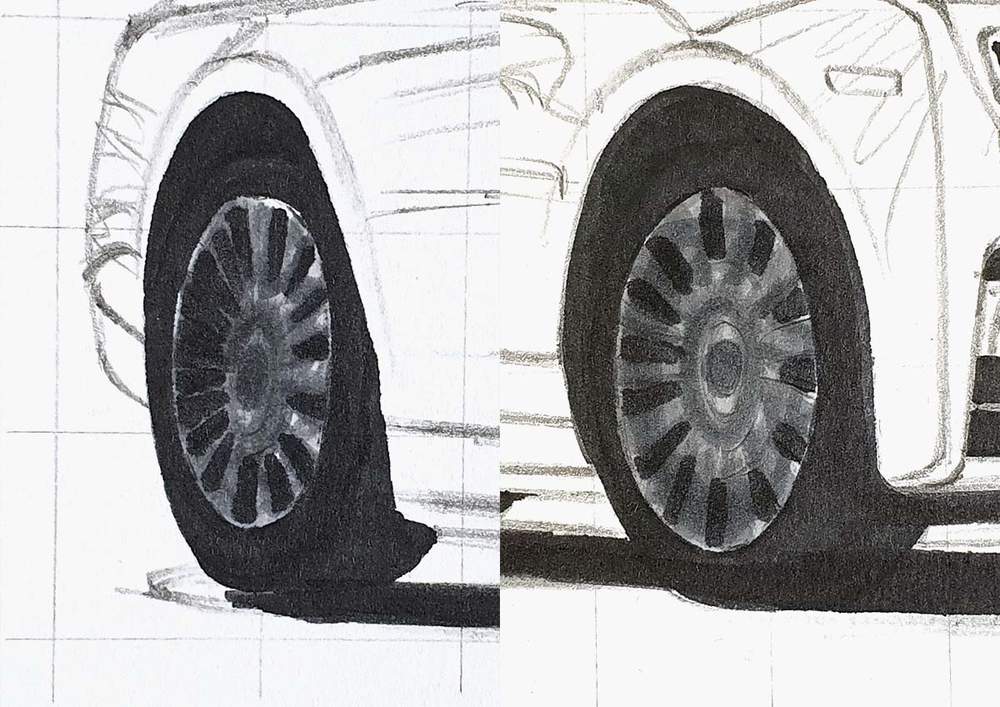
Lastly, I used the Neutral Grey 07 (CG070) marker to also scribble a bit over the wheels, but not as much this time. I also added some darker shadows around the center of both wheels.
7. Color the Shadow Below The Rolls Royce Phantom
Next is the shadow.
I forgot to take photos of each step...
But what I did was, I first colored the outer edge of the shadow with Neutral Grey 02 (CG020).
Then I used Neutral Grey 05 (CG050) to color the bit between the black and the Neutral Grey 02 (CG020).
After that, I used Neutral Grey 07 (CG070) to blend the black into the grey by coloring over the edge where the 2 colors meet. I used Neutral Grey 05 (CG050) to blend the Neutral Grey 07 (CG070) into the Neutral Grey 05 (CG050). And I used the Neutral Grey 02 (CG020) to blend the Neutral Grey 05 (CG050) into the Neutral Grey 02 (CG020).
Lastly, I used the Colorless Blender marker to blend the Neutral Grey 02 (CG020) into the white of the paper.
I hope you were able to follow that. I listed so many color names... But the general idea is: color the shadow from light to dark and then blend the colors with the lighter marker. And when you're done, it looks something like this.
Honestly, if you prefer, you can also make the whole shadow fully black, and you don't need to blend each layer together. I sometimes find it more fun to keep the layers visible.

8. Color the Front Grill of the Rolls Royce Phantom
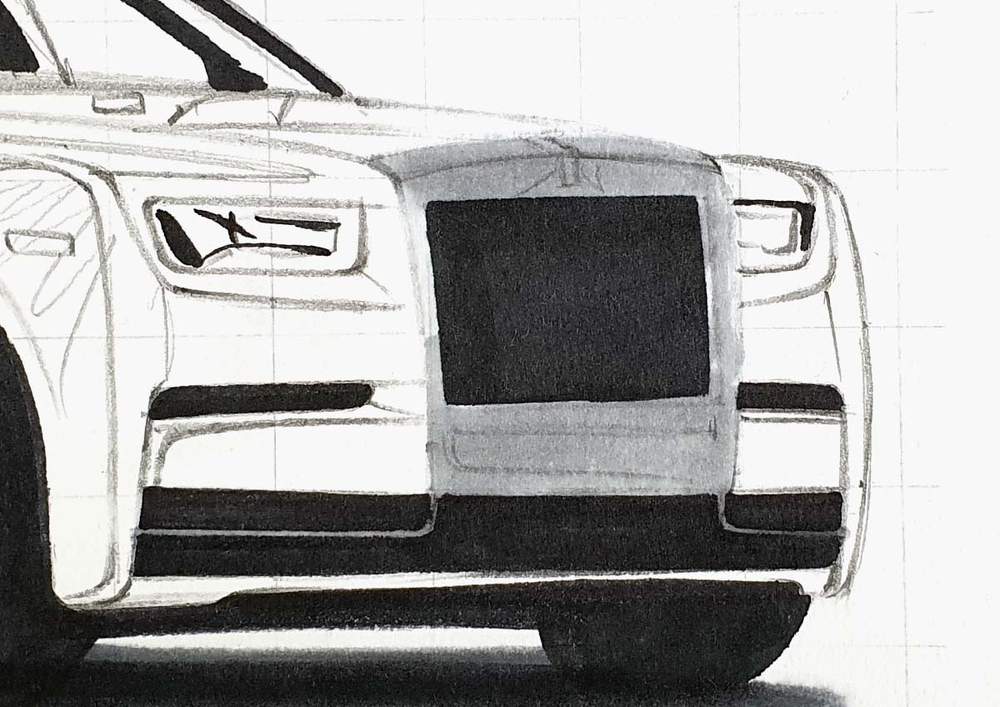
After that, I colored the grill surround piece.
I first colored it with Neutral Grey 02 (CG020).
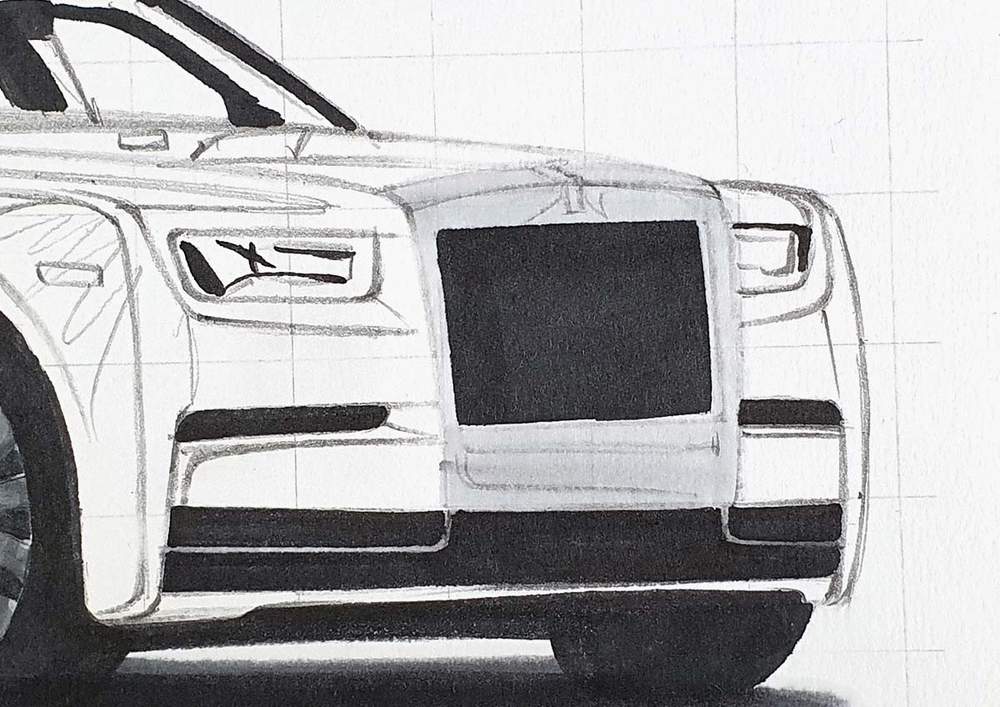
Next, I used Neutral Grey 03 (CG030) to darken the top, the right, and the bottom.
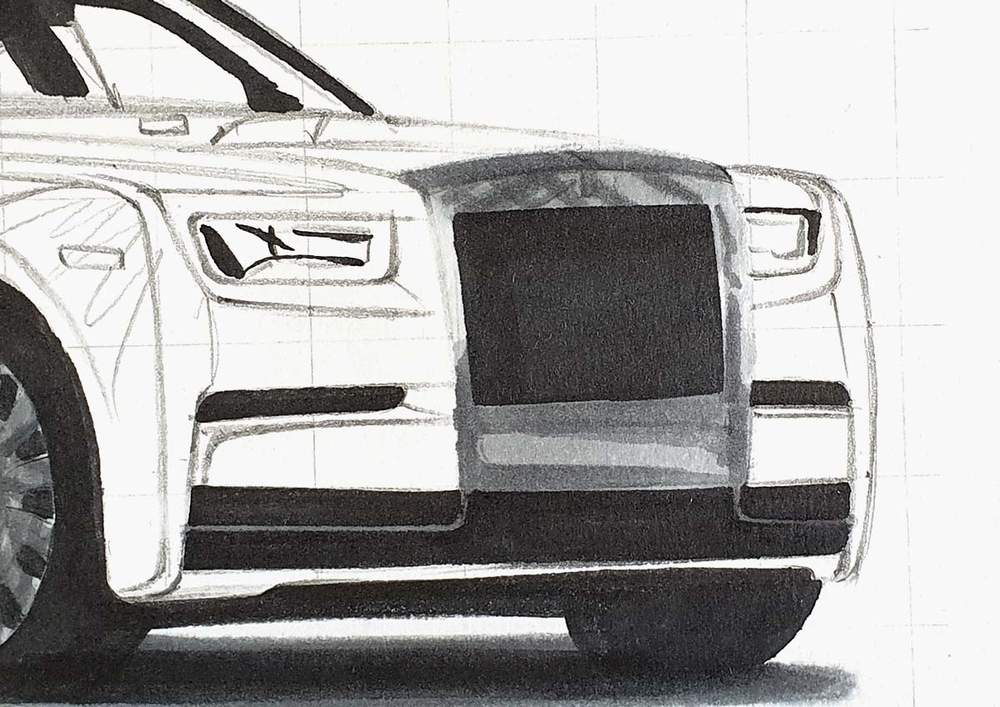
Then, I used Neutral Grey 05 (CG050) to add in the reflections.
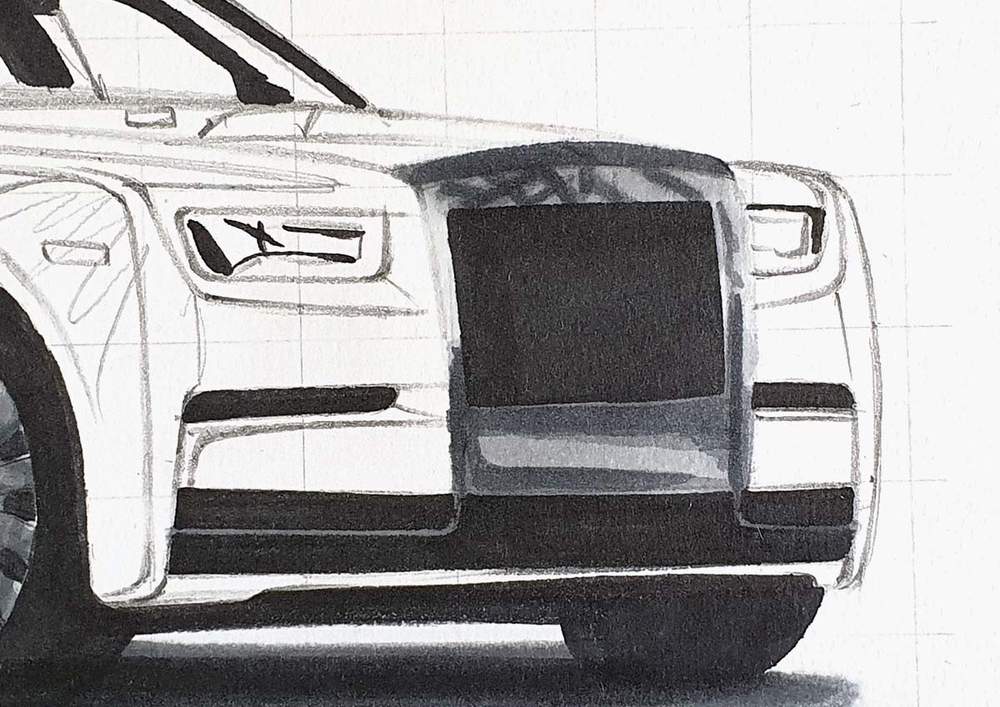
Lastly, I used Neutral Grey 07 (CG070) to darken most of the reflections.
9. Color the Headlights of the Rolls Royce Phantom
Next up, I colored the headlights of the Rolls Royce Phantom.
I first colored both headlights with Neutral Grey 03 (CG030).
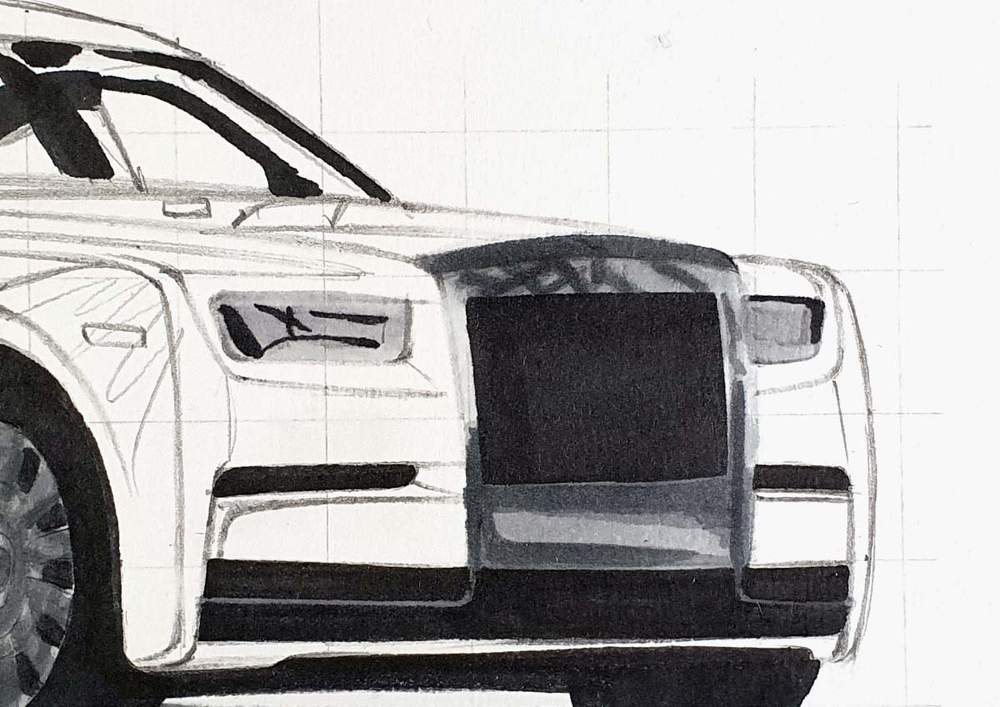
After that, I used Neutral Grey 05 (CG050) to color everything but the bottom edge of both lights.
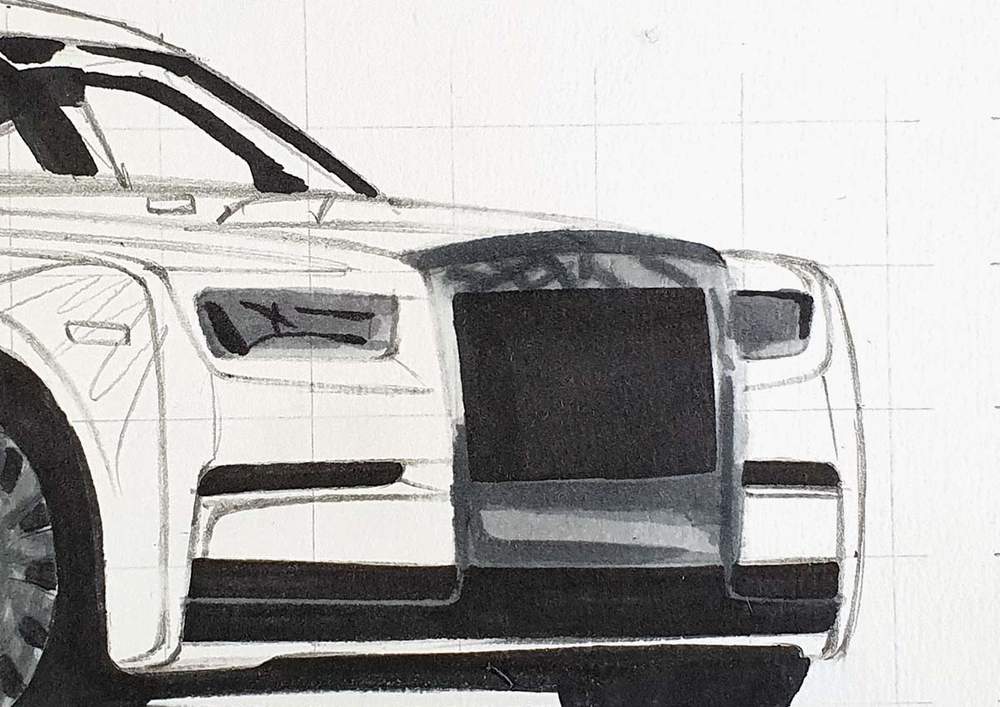
Lastly, I used Neutral Grey 07 (CG070) to add more dark grey to the top of the left headlight and the center of both headlights.

10. Color the Side Windows of the Rolls Royce Phantom
After that, I colored the side windows.
I colored the window sills with Neutral Grey 02 (CG020), and I used Neutral Grey 03 (CG030) for the bottom half of the windows.
I also used Neutral Grey 03 (CG030) to darken some parts of the window sills, especially the bottom sills.
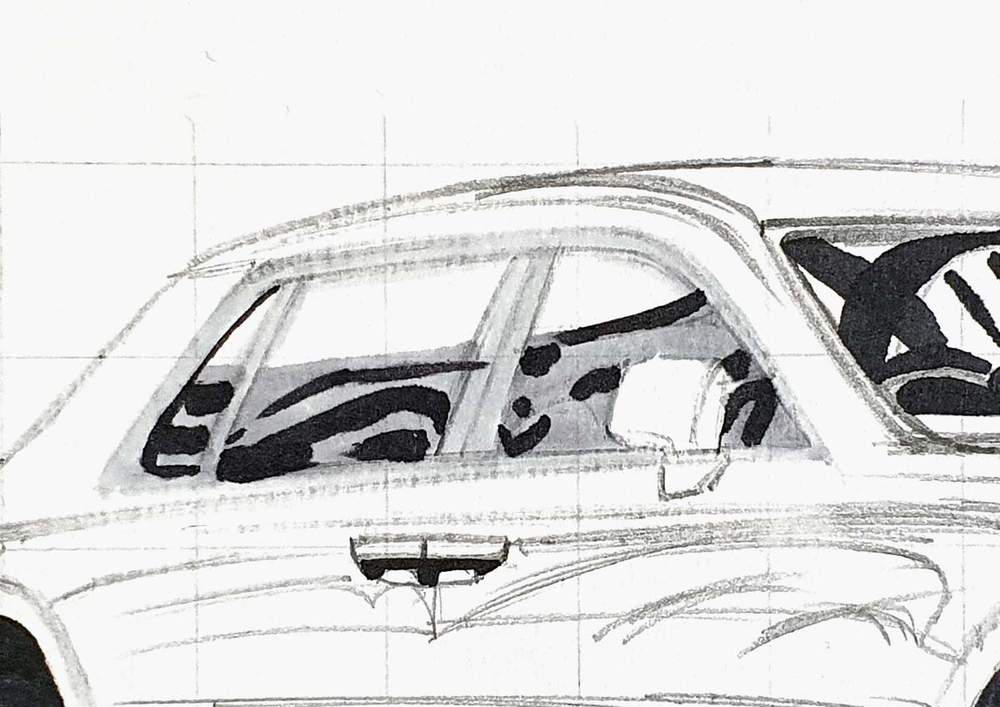
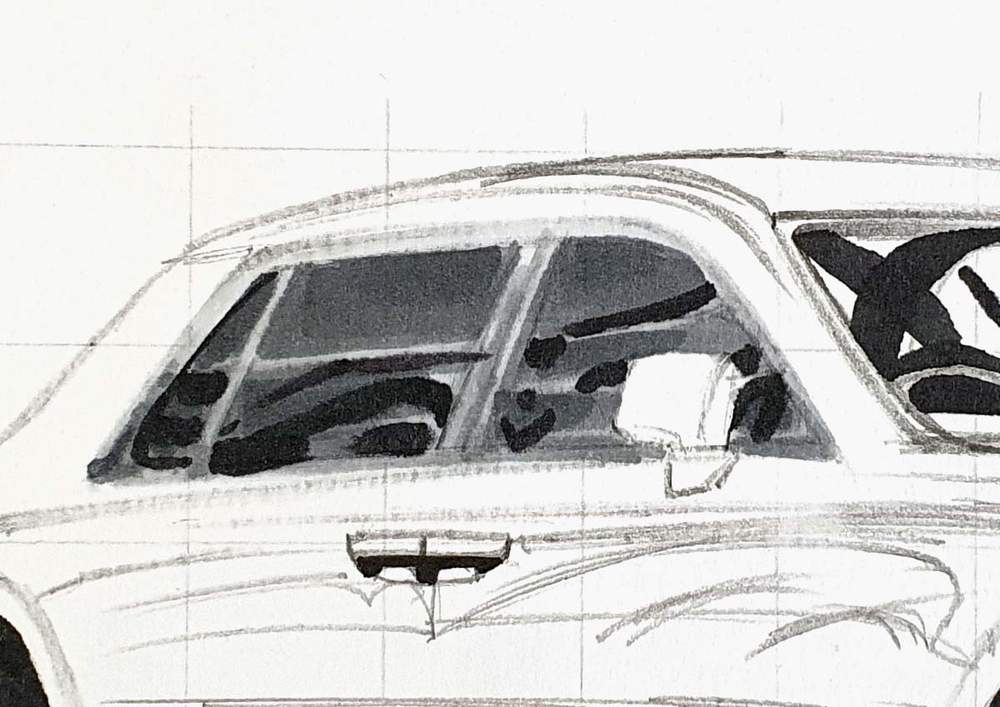
Next, I used Neutral Grey 05 (CG050) to color the remainder of the windows and to add some dark strokes in the reflections on the bottom half of the windows.
I also used Neutral Grey 05 (CG050) to add some dark reflections on the bottom half of the window sills.

Lastly, I used Neutral Grey 07 (CG070) to add some darker tones to the top of the windows and the left of the reflections. I also added a dark reflection on the bottom left sills.
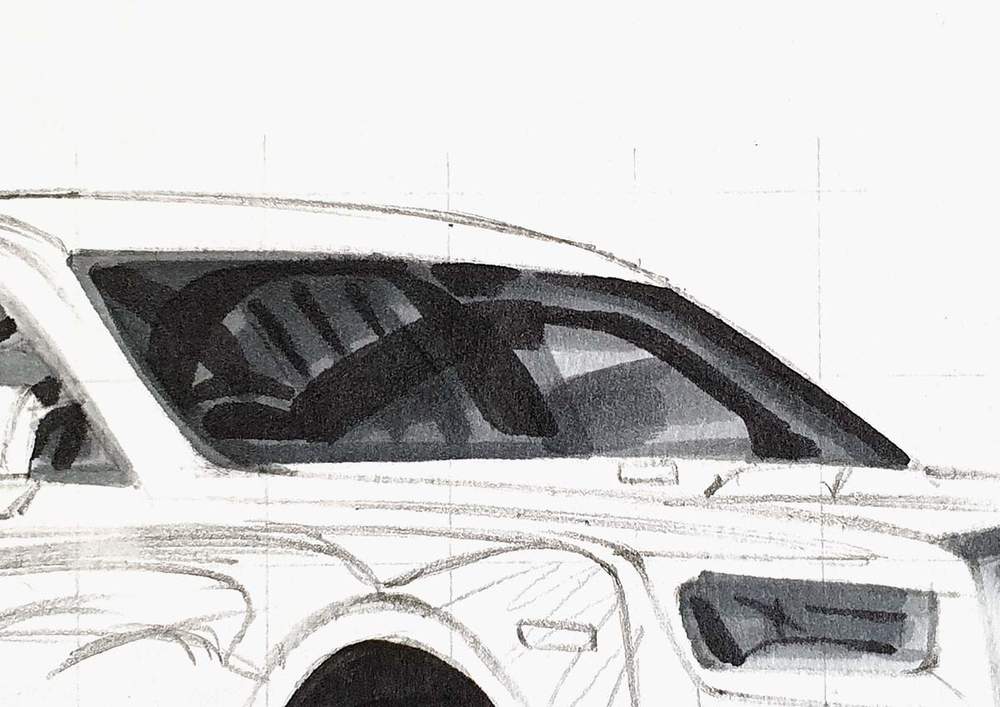
11. Color the Windshield of the Rolls Royce Phantom
Next up, I colored the windshield of the Rolls Royce Phantom.
I first colored the side window with Neutral Grey 03 (CG030), and I colored the rest with Neutral Grey 05 (CG050).
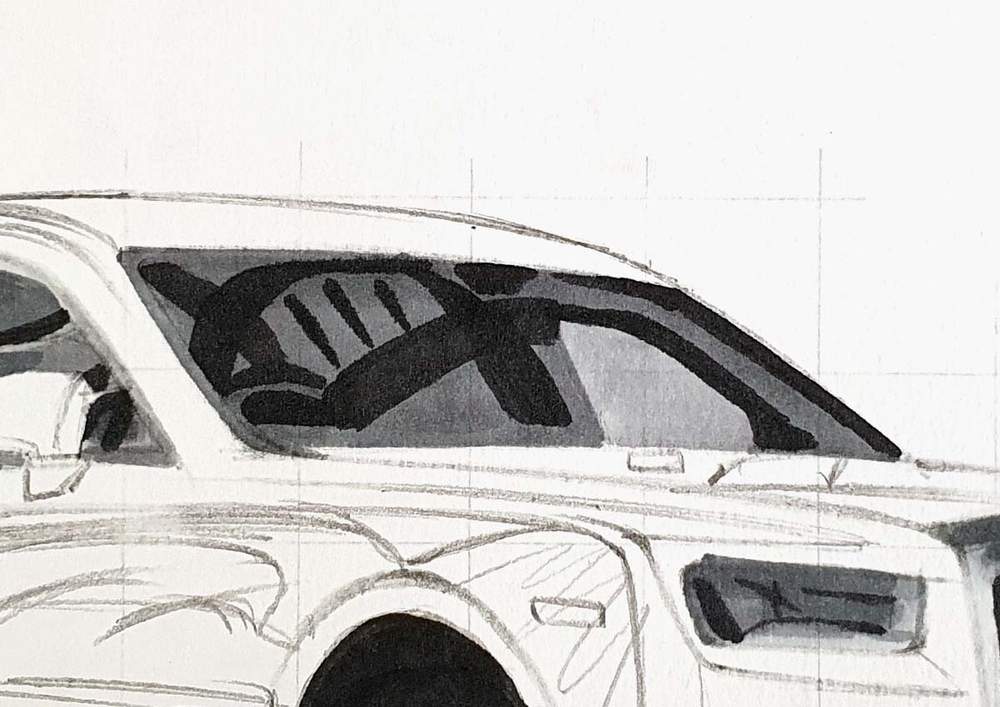
Then, I used Neutral Grey 07 (CG070) to add tons of reflections all over the windshield.
12. Color the Rolls Royce Logo and the Door Handles
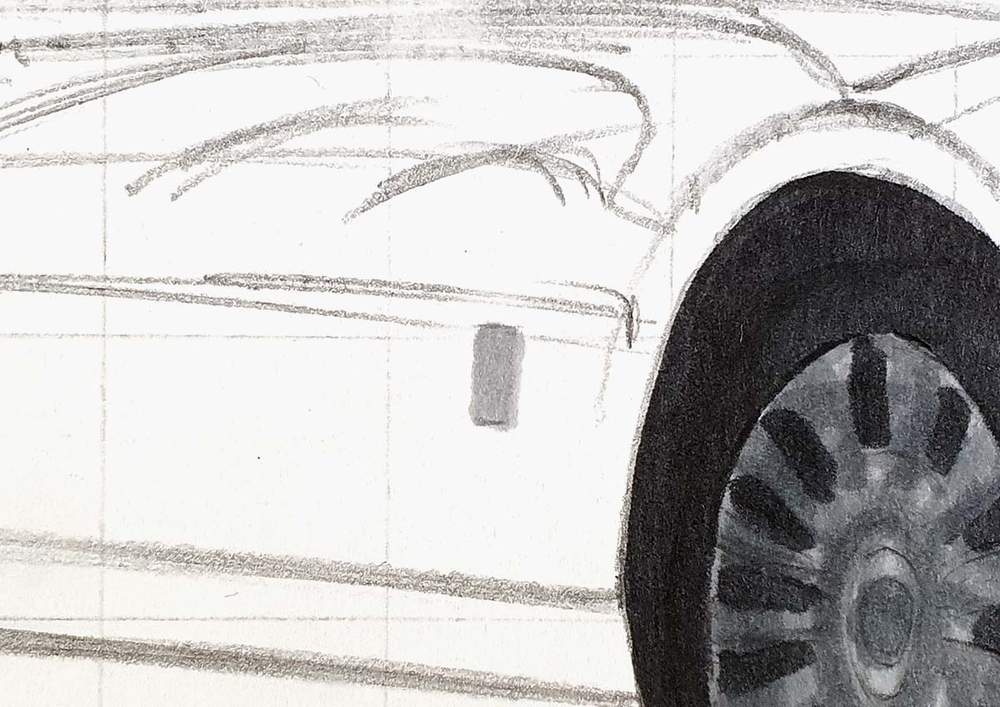
I first colored the logo on the side of the Rolls Royce Phantom with Neutral Grey 03 (CG030).
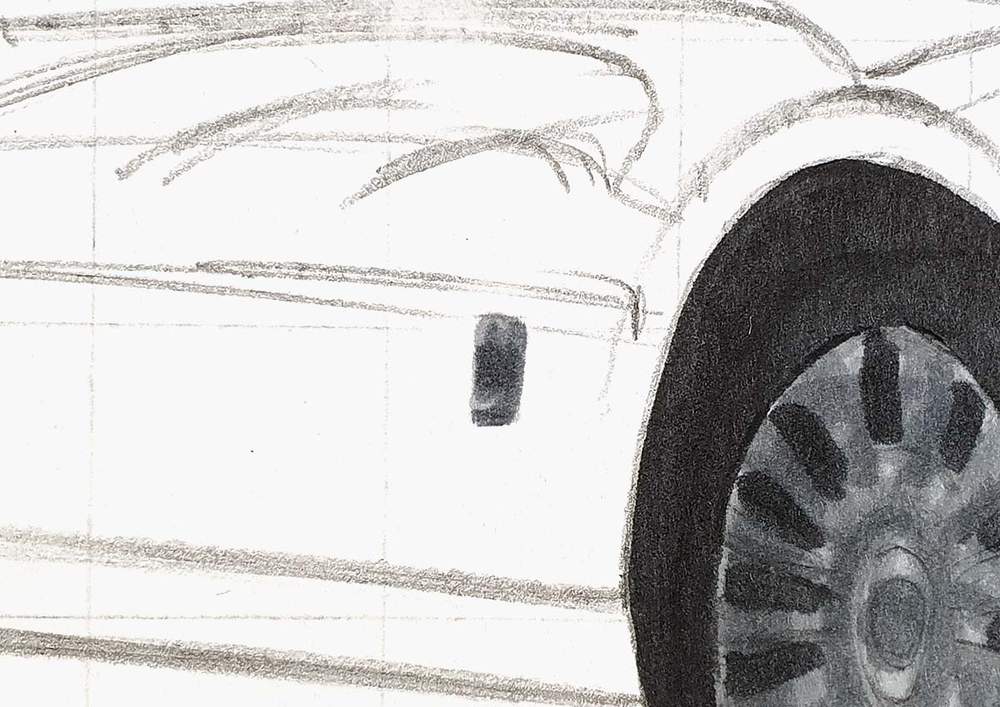
Then, I used Neutral Grey 07 (CG070) to color the bottom and right edge as well as the center.
After that, I colored the door handles with Neutral Grey 03 (CG030).

And to finish them off, I used Neutral Grey 07 (CG070) to color the top half.
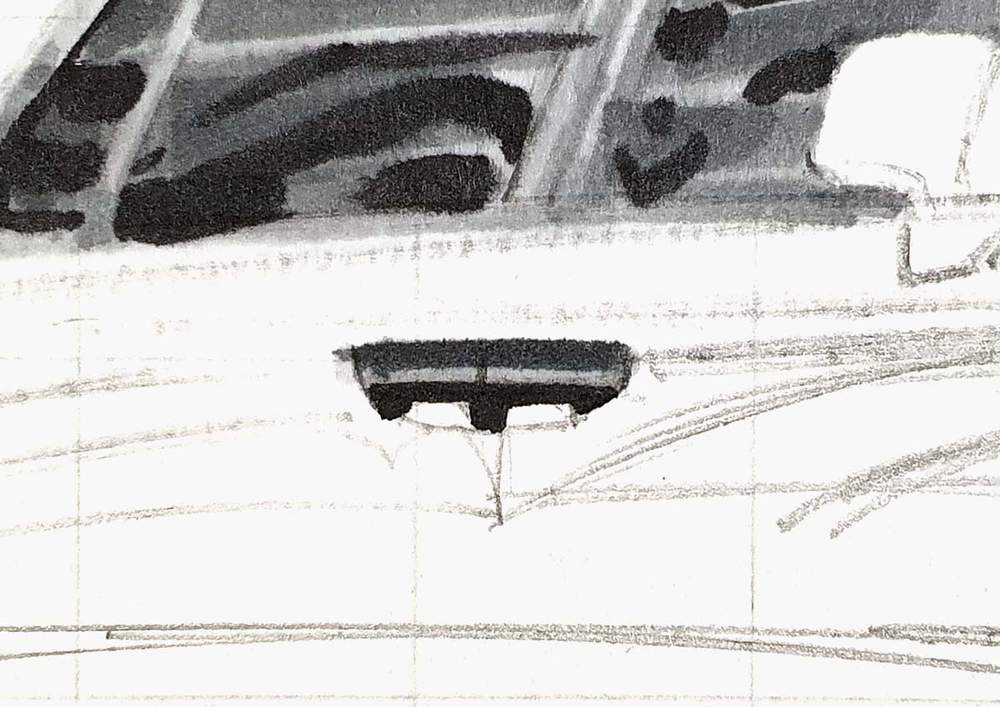
And with that, all the black and grey parts of the Rolls Royce Phantom are done!

13. Color the Main Body of the Rolls Royce Phantom
Now that all the grey parts are done, it's time to move on to the main body of the Rolls Royce Phantom.
I started by coloring the lightest parts of the car, which are mainly the top half, with Dark Orchid (RV200).

Next, I used Bronze Purple (RV240) to color the rest of the car and to add a ton of reflections on top of the lighter purply pink.

Lastly, I used Peony (RV250) to add in the darkest purple-red tones, which are mainly in the reflections on the side of the car.
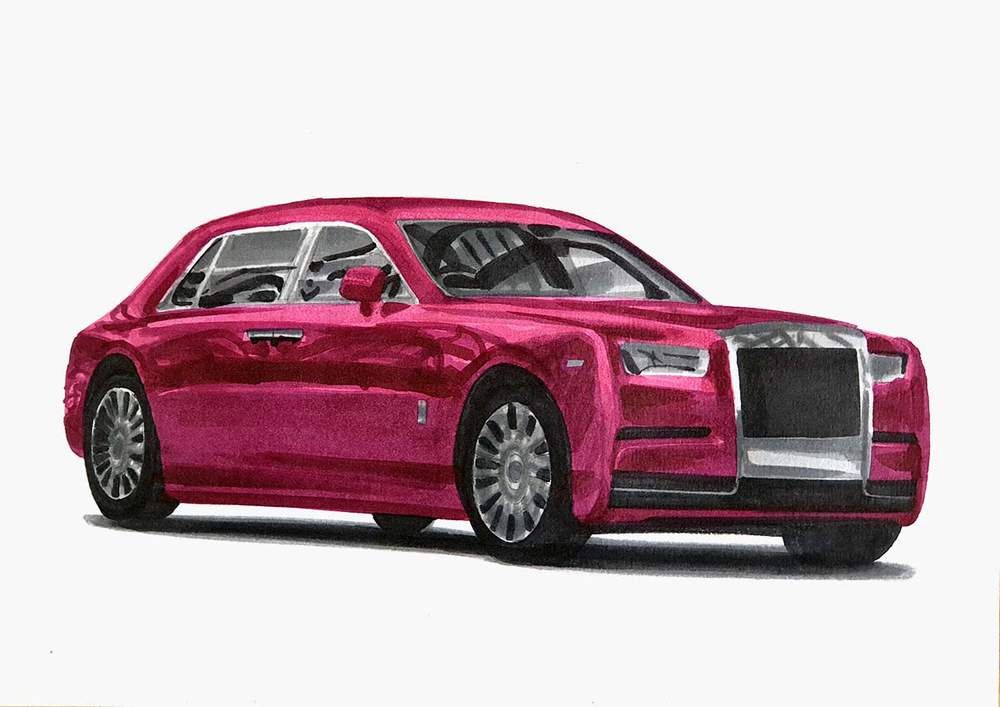
And that's all it took to color the main body of this Phantom, though it's not finished.
14. Add Details to Your Rolls Royce Phantom Drawing
The Rolls Royce Phantom drawing is now fully colored, but it looks a bit dull. There are a ton of details missing.
To add in those details (and to fix my mistakes), I used 3 colored pencils: a white, a grey, and a black one.
I used the white pencil to add highlights on the panel edges, the body lines, and for the reflections on the body and the grill.
I used the grey pencil to refine the spokes and the wheels and to hide my mistakes in the rear wheel. I also used it to add the slats to the front grill.
Lastly, I used the black pencil to refine the shadows in between the spokes and to add panel gaps and edges.
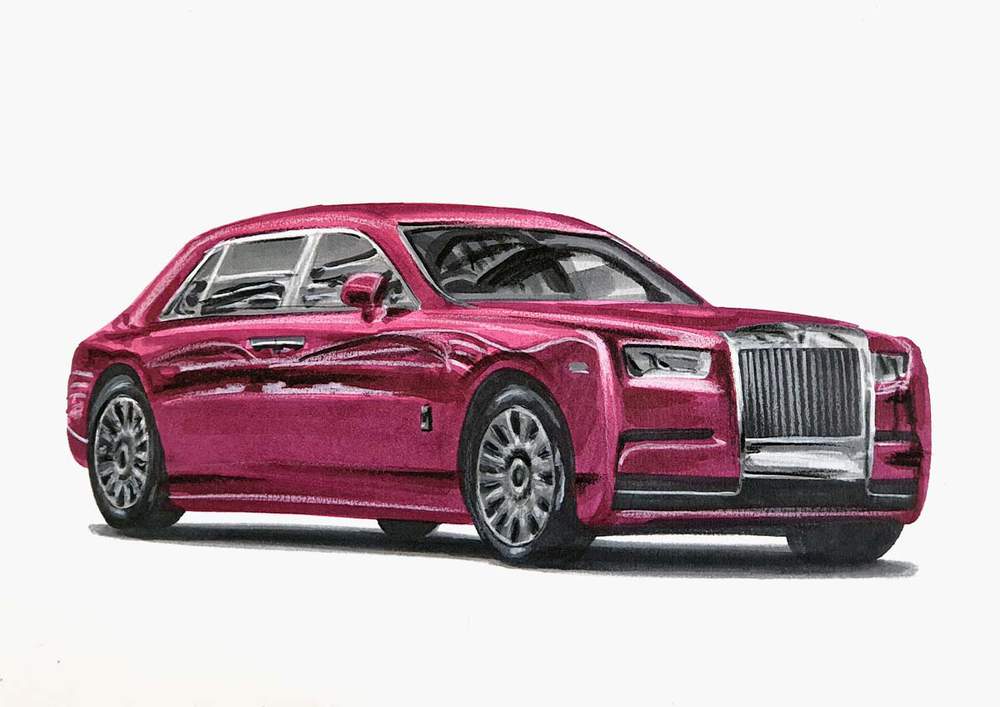
The Rolls Royce drawing already looks a lot better by adding these simple details with just 3 colored pencils.
15. Add Highlights to Your Rolls Royce Phantom Drawing
To finish the drawing off, I added pure white highlights on the Rolls Royce Phantom with a white Posca PC-3M paint marker.
I looked at the reference photo where the car has highlights and replicated them in my drawing.
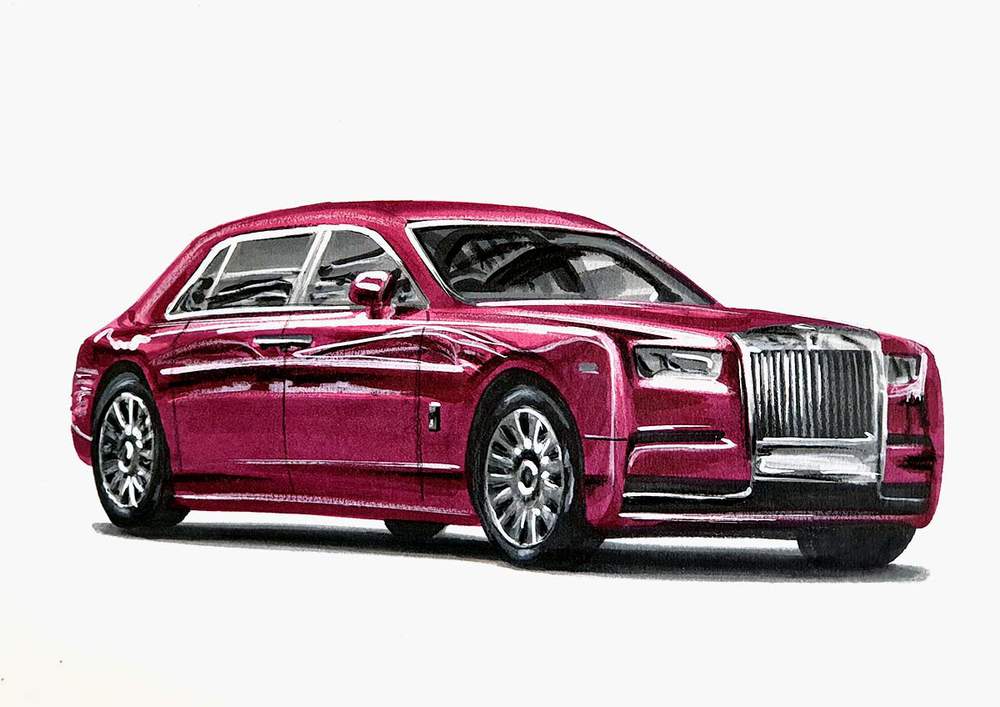
And That is How You Draw a Rolls Royce Phantom
I hope you liked this tutorial and were able to follow along to create your own Rolls Royce Phantom drawing.
Let me know how it went!
Thank you for reading (and following along if you did)!
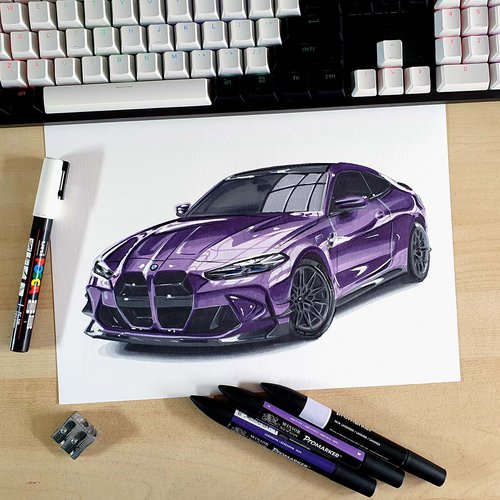
If you enjoyed this Rolls Royce drawing guide, you might also like my other step-by-step car guides. I especially like this BMW M4.
Articles You Might Also Like


I love bringing cars to life with alcohol markers and colored pencils.
Whether you're just starting out or looking to improve your skills, I'm here to help!
Click here to learn more about me.


Be the first to comment!
Comments
There are no comments yet.