How to Use the Grid Method for Sketching Accurate Proportions
This post is about how to use the grid method to sketch accurate and realistic proportions.
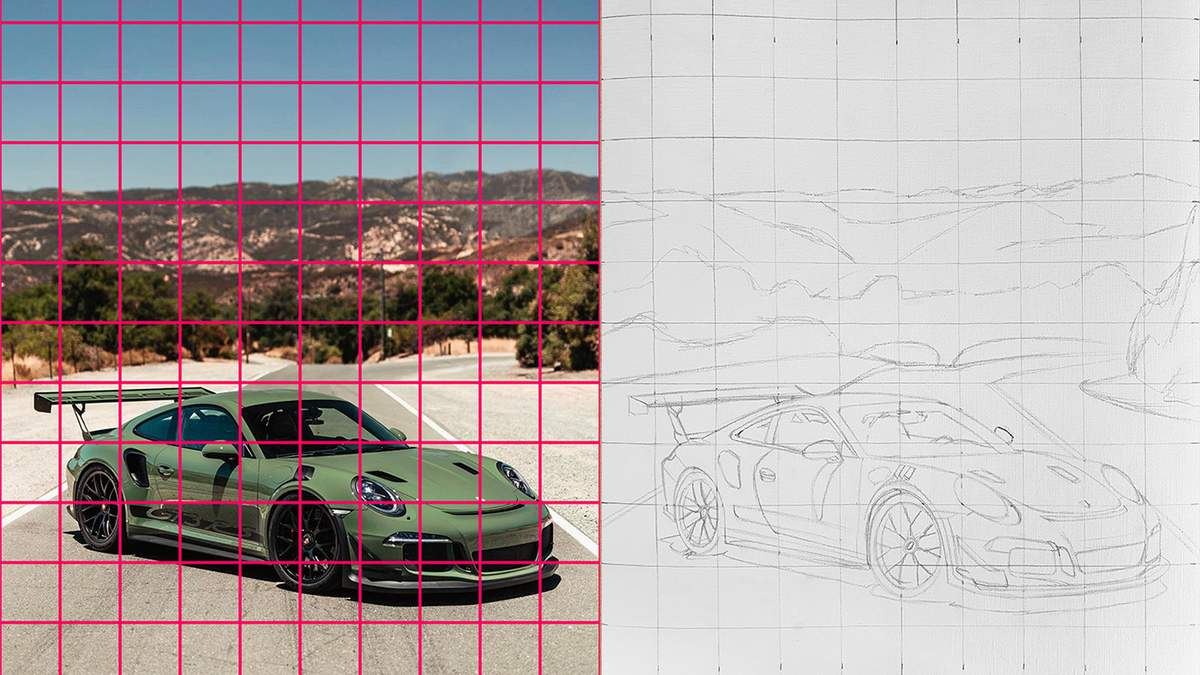
Drawing proportions can be very hard. At least I find it hard, but I want to be better at it.
I knew about a technique called the grid method for a long time now, but I never used it as it seemed too time-consuming and complex. I always remembered in the back of my mind how the first time I used it went. I think you can guess how that went...
From then on, I thought I was just bad at sketching, and I would avoid it by tracing. It was easy and somewhat time-efficient, but definitely not always fun. I used my iPad to trace, but to use it I always needed to wait until it was dark enough. I would zoom in on the photo I was tracing, but when drawing I often would accidentally touch the screen, resetting the zoom...
But since 2019 or so, I've been enjoying the grid method a lot. For me, this made sketching a lot more fun. It does take some practice, but definitely not as much as freehanding does.
So what is the grid method exactly and how do you use it?
In This Guide
- What is the grid method?
- How big should the squares in your grid be?
- How do you add a grid to your reference photo?
- How do you sketch the grid on your paper?
- How do you use the grid to sketch accurate proportions?
- More guides you'll like
What is the Grid Method?
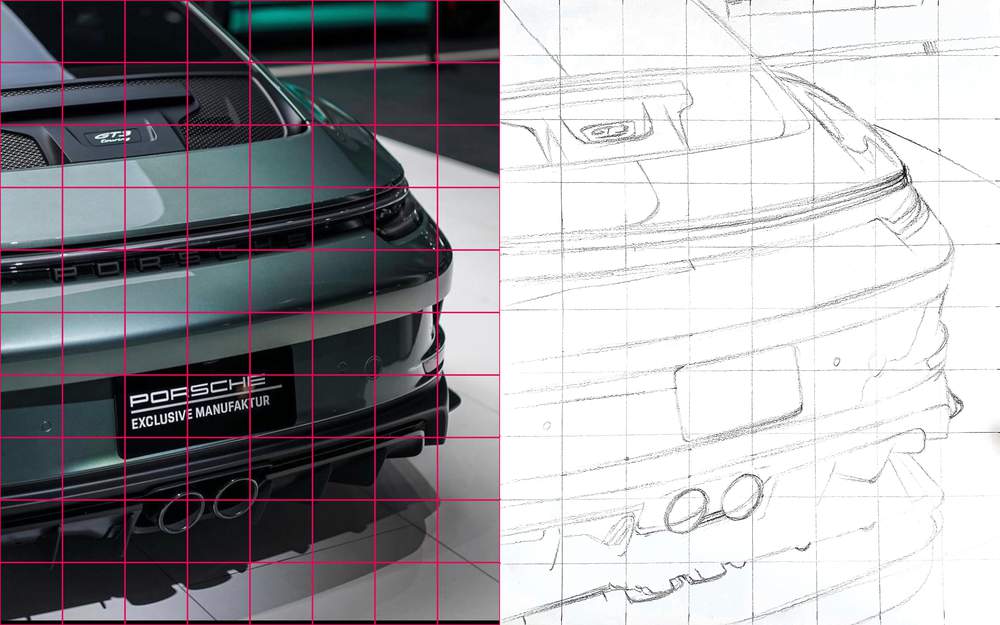
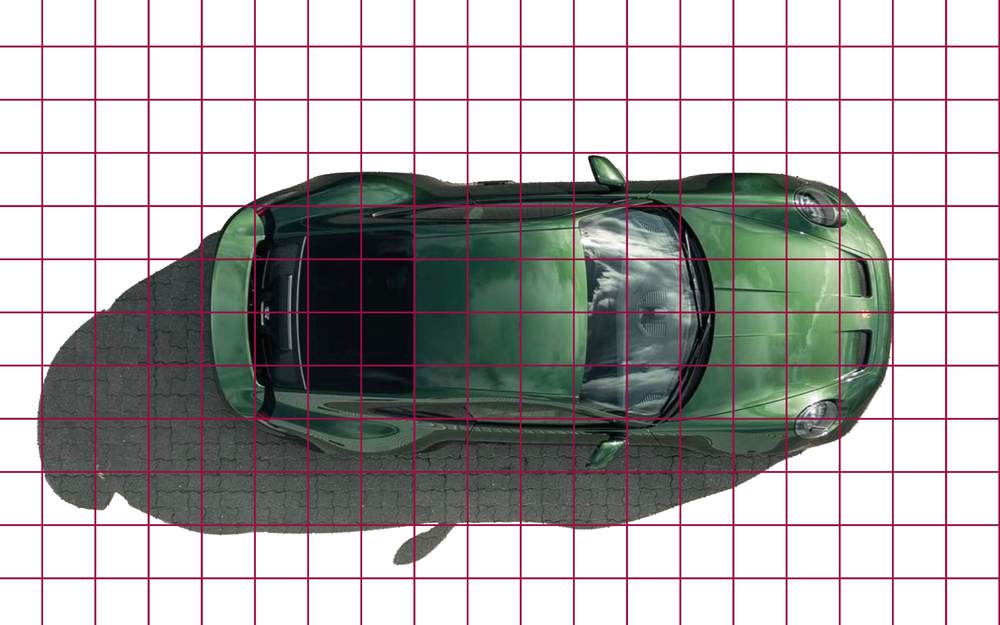
The grid method is a tool you can use to make drawing accurate proportions a lot easier. To use the grid method, you draw a grid on your reference photo and replicate that same grid onto your piece of paper. This divides complicated photos or subjects into many comprehensible squares. You can now focus on each square instead of the whole picture, which is easier than trying to sketch the whole subject at once. If your subject is very detailed or complicated, you can make a denser grid with more squares to make it easier to sketch it accurately. And if you have a relatively easy subject, you don't need a grid with many squares.
How Big Should Your Grid Be?
Choosing the right grid size is mostly about finding a balance between accuracy and usability.
Smaller squares give you more guidance, which is especially useful when your subject has lots of small details. Larger squares give you less guidance, but they're easier to work with because you don't have to constantly count tiny squares.
So, here's a general rule:
- Complex subject --> smaller squares
- Simple subject --> bigger squares
- Smaller drawing --> smaller squares
- Bigger drawing --> bigger squares
There is one important exception: if your paper gets very large, you may find it difficult to sketch accurately even though the drawing itself is large. In that case, you might want to use slightly smaller squares to give yourself more guidance. That's what I do with my largest drawings.
One thing I also like to keep in mind is how the squares will fit on my paper. Let's say my drawing is 30 by 42 cm. It wouldn't make sense to make the squares 2.5 cm. Instead, I use 3 by 3 cm squares for that paper size, as both 30 and 42 are divisible by 3. This results in a nice round number of squares. You can use this same technique for inches too.
Now, How Do You Choose?
You don't need to calculate the perfect grid size. Start with the simple rules above and adjust from there.
If you're unsure, err on the side of slightly larger squares. It's easier to work with a grid that is a little too large than one that is so dense that you constantly lose track of where you are.
And if you find that you're struggling to place smaller details accurately, make the squares smaller next time.
The goal isn't to use as many squares as possible. The best grid is the smallest grid that gives you useful guidance without becoming difficult to work with.
How Do You Add a Grid to Your Reference Photo?
There are two ways to add a grid to your reference photo: 1. You print your reference photo, or 2. You use a grid overlay tool that lets you add a grid to your photo.
Printing your photo is more difficult and takes more work than if you were to use a grid overlay tool.
To print your photo, you need to make it as big as your drawing or at least make the size proportional. Making the photo the same size as your drawing is the easiest. You then just sketch the same grid on your reference photo as on your drawing paper.
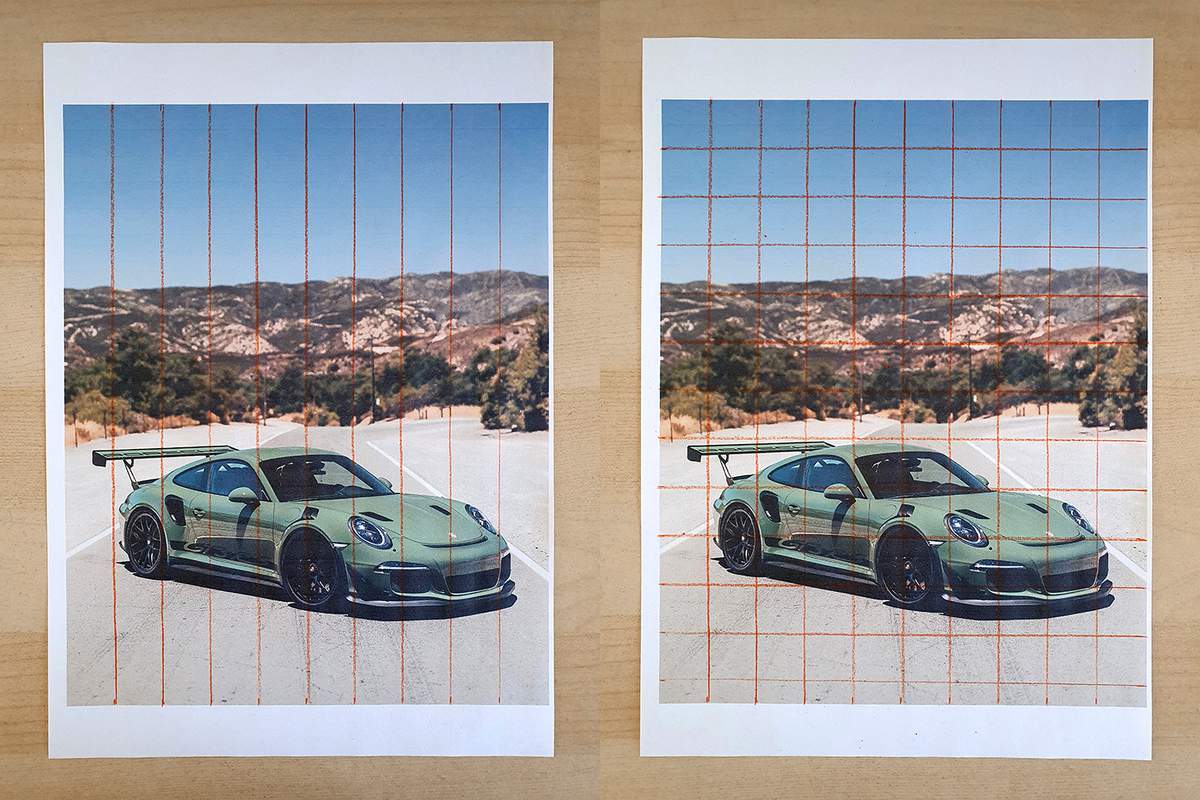
However, if your drawing is bigger than you can print, then it gets a little tricky. The best thing that you can do is make the size 0.5 times the size of your paper, or if that's not enough, make it 0.33 or 0.25 times the size of your paper.
This is where it gets tricky. Now your reference and your drawing aren't the same size, so the grid squares are different too. That's why I like to use simple ratios like 0.5 or 0.25. Let's say you printed the photo half as big as your drawing and the grid you planned on making is 1 by 1 inch. Now the grid you need to sketch on your reference photo becomes 0.5 by 0.5 inches.
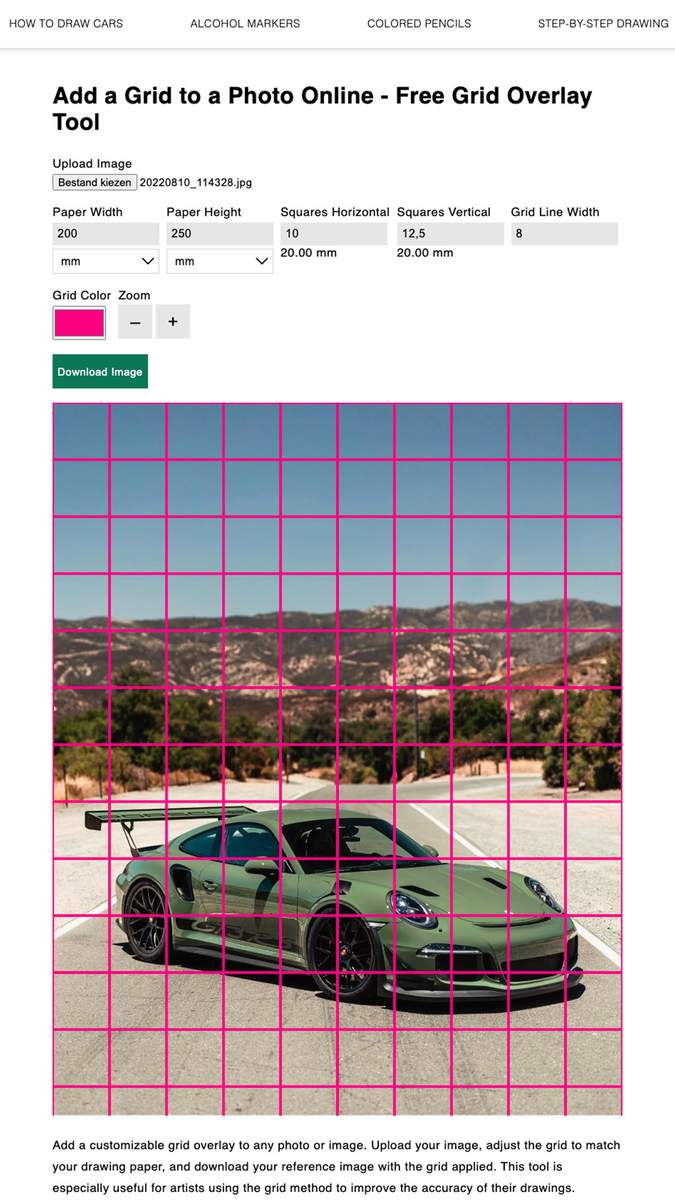
To make things simpler, I like to use a grid overlay tool. I made the one I linked myself, as I didn't like any of the other tools out there.
To use it, you just upload a photo, enter the dimensions of your paper, set the square sizes, and download the photo. It's that simple.
How Do You Sketch the Grid on Your Paper?
Now that you know how big the squares in your grid need to be and you've added a grid overlay to your reference photo, it's time to recreate that grid on your drawing paper.
This is by far the most important part. You need to do this pretty precisely. Otherwise, your proportions will still be off.
The grid we're going to sketch is made up of vertical lines and horizontal lines that are the width of a square apart. Below, I'll show you an example of what I do. It's A4 paper, and the squares are 2 by 2 cm, meaning the lines are all 2 cm apart, starting in the top left. The last part is especially important if your squares don't fit perfectly on your paper.
A4 is 29.7 by 21, which means that I can fit almost 15 squares horizontally and 10.5 squares vertically. To make my life easier, I just make the far right column of squares slightly narrower than 2 cm. How much is 0.3 mm anyway?
And for the bottom row, they are all just half squares.
Now, how do you sketch your grid onto your paper?
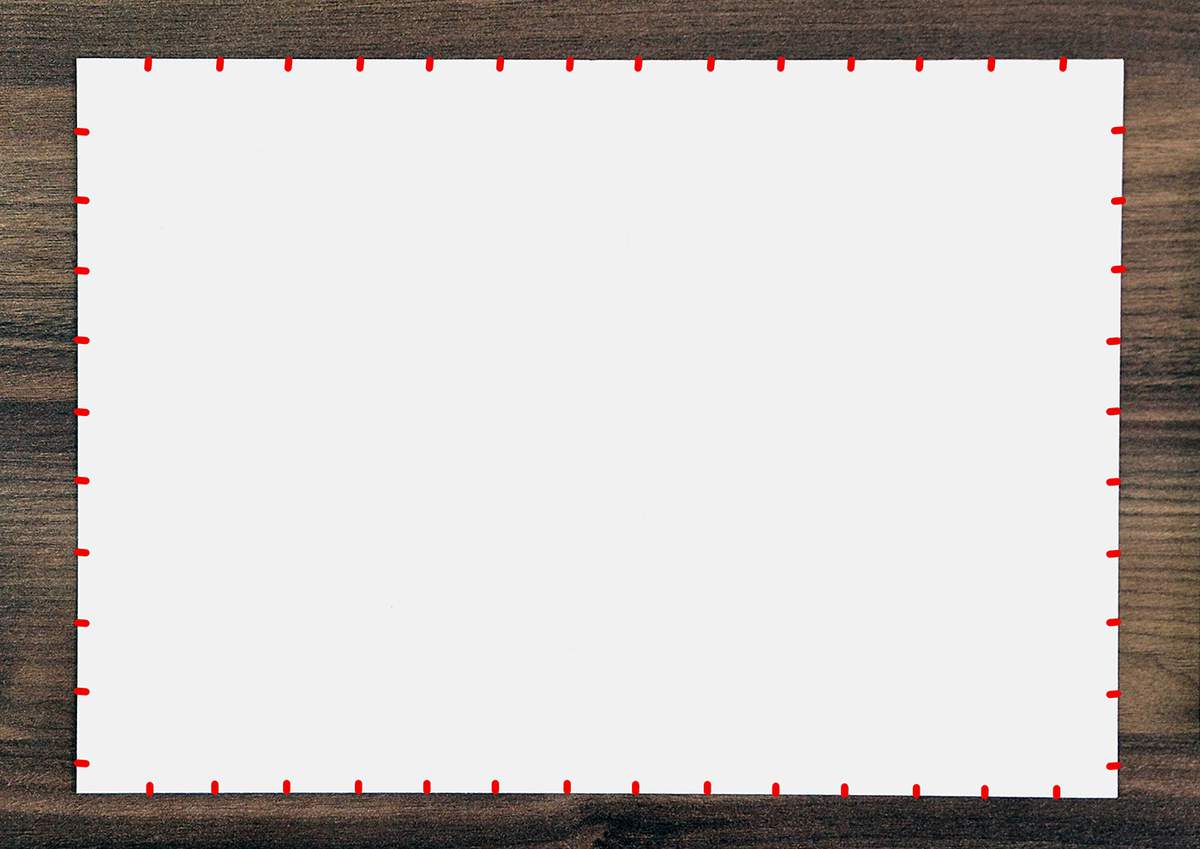
I start by adding marks on the sides of the paper, all 2 cm apart, starting from the top left. To make them easier for you to see, I marked them in red.
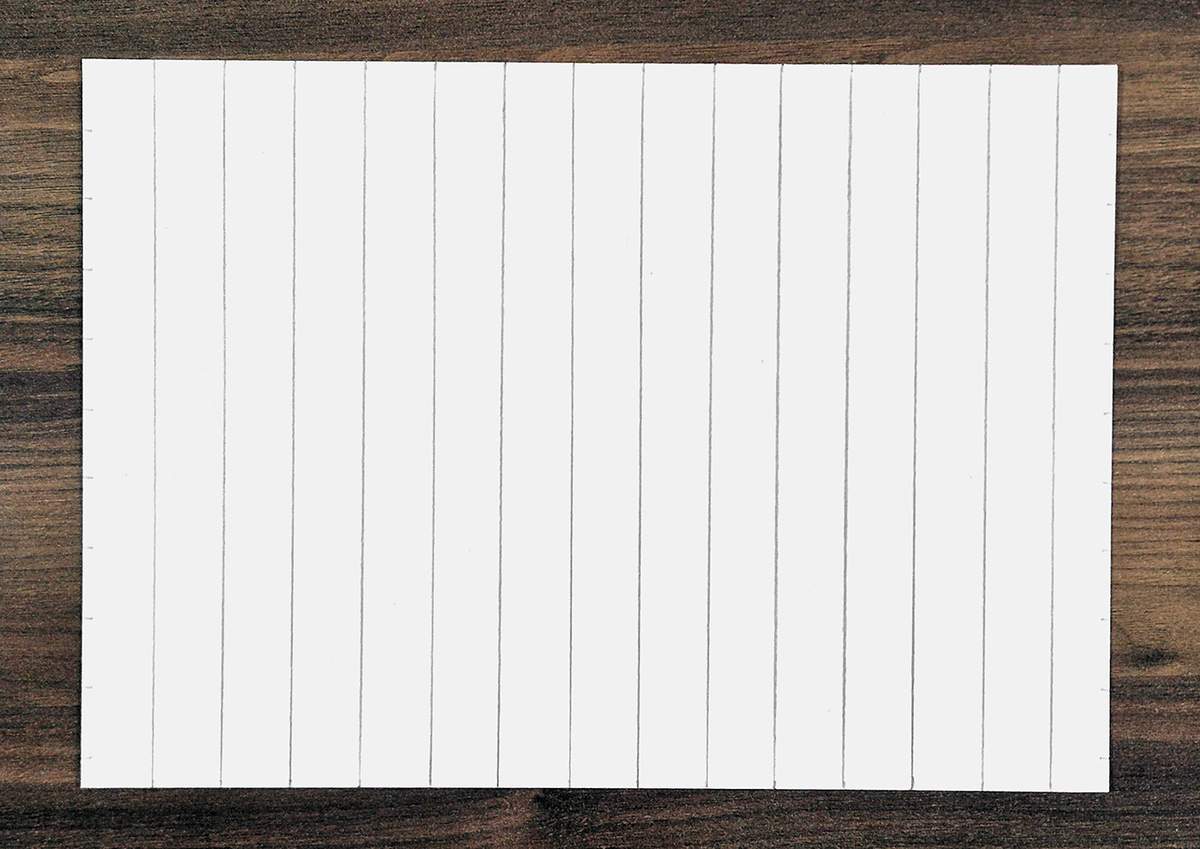
Then, I sketch all the vertical lines by connecting the marks on either side.
Then, you guessed it, I sketch the horizontal lines by connecting the markings on the other opposing sides.
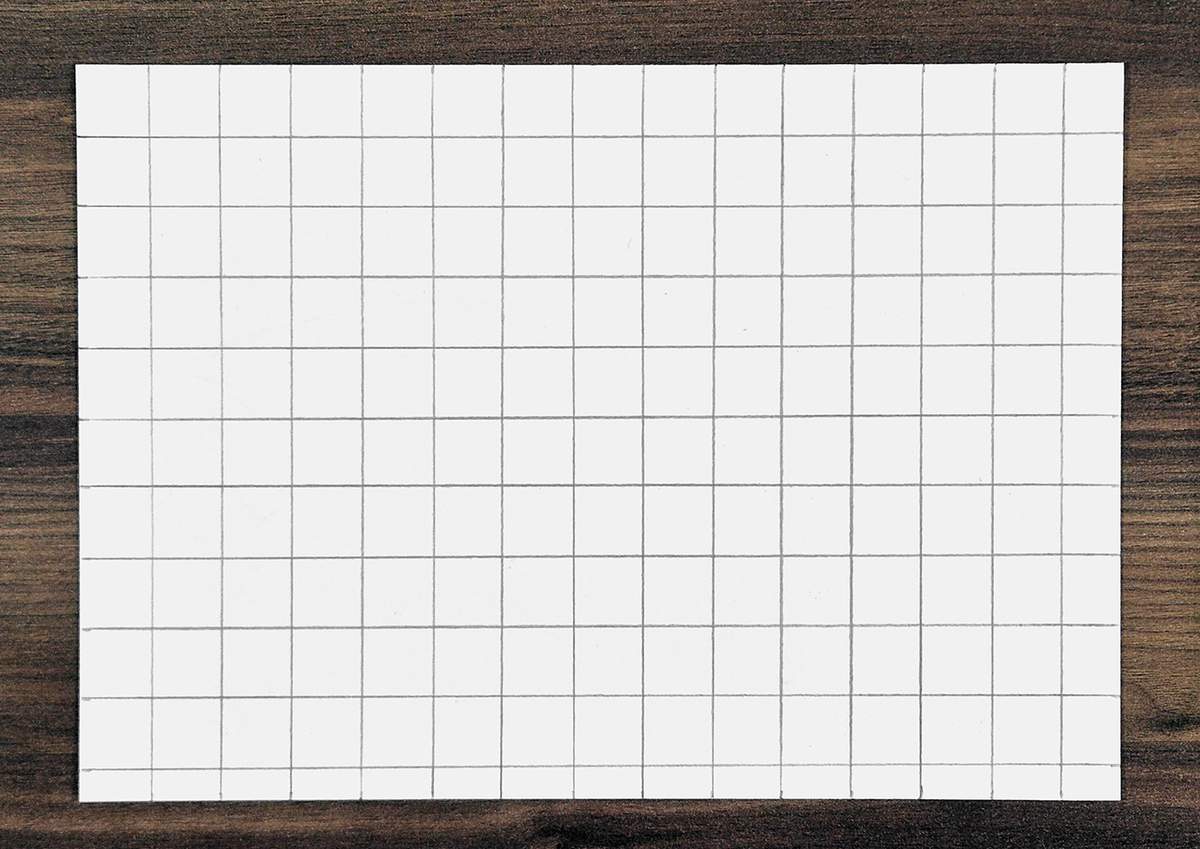
You could do this the other way around too if you prefer. I just happen to always start with the vertical ones.
One thing to keep in mind: when sketching the grid, make sure you don't press too hard. Your grid doesn't need to stand out. It can be very light. If you make it too dark, however, you won't be able to fully erase it after you're finished sketching. In my example, I used pretty dark lines to make sure they show up well in the photos, but I recommend you use very light pressure.
How Do You Use the Grid to Sketch Your Subject?
You have now chosen a grid size for your drawing, added the grid overlay to your reference photo, and sketched the grid onto your drawing paper. But how do you use the grid to sketch more accurately?
To explain how to use the grid, I will use an example of sketching a car.
We already added the grid onto the photo and sketched the same grid onto our paper.
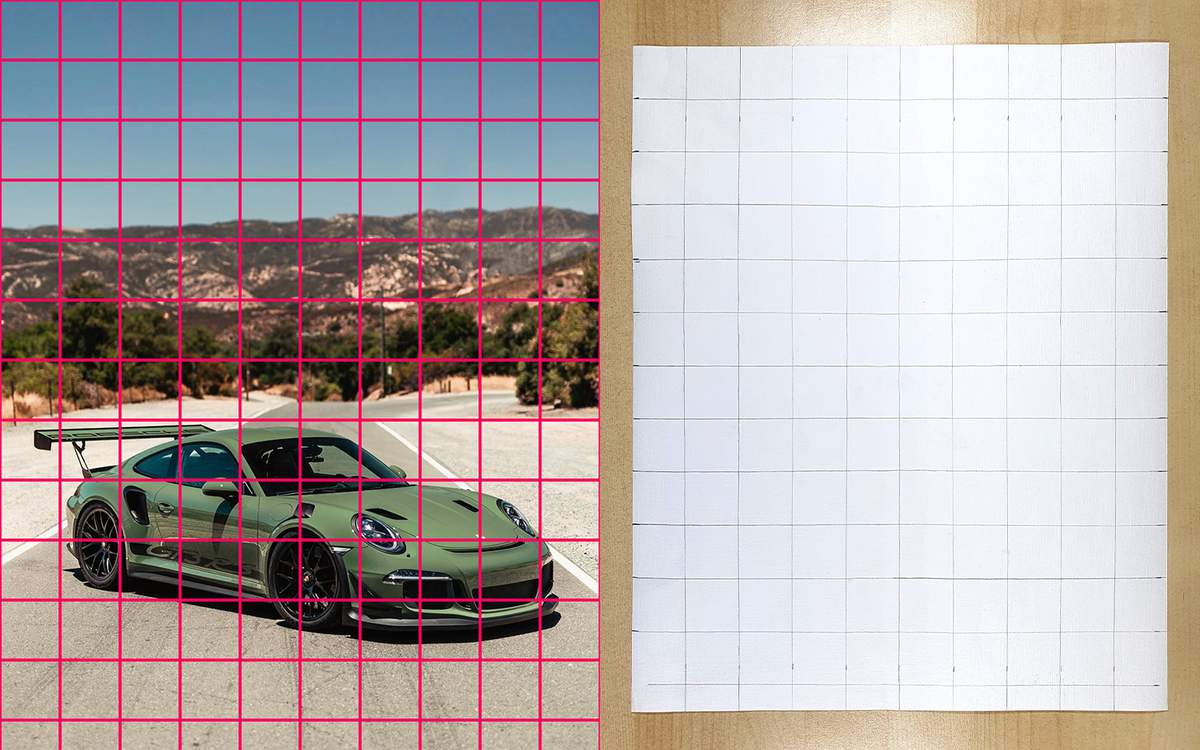
During the sketching process, it's super important that you constantly look at your reference. Look for places where the lines of your subject cross grid lines, and then mark the spots on the lines. This is super useful.
You can also focus on one square and see how the position of the things in that square relates to the square itself. For example, when a line ends in a square, I often look at it like: it ends 1/3 from the right and it's vertically in the middle. Then I will mark that spot.
When sketching, I like to start on the left, as I am right-handed. This prevents smudging the parts I already sketched. If you're left-handed, starting on the right is better to prevent smudging.
When starting the sketch, the first thing I think about is what to start with. This can be paralyzing, but I have a simple strategy you can apply.
For my car drawings, I always start with the outline, and I start on the left side, as I said before. That's already a great start to figuring out what to sketch first.
Then, I go one step further. What line is relatively simple to sketch first? This is often a long line and not a tiny one. I tend to look for a line that crosses at least two grid lines. I then mark where the line crosses those grid lines. I also look at where the line starts and ends and mark those points. Then I sketch the line. This is how I started the big wing on the back of the car.
Now that the first line is done, it's easier to continue with the rest, as you now have another reference point in your sketch. So, the more lines you add, the easier it will become.
Your subject might not have any big lines, and that's okay. If that's the case, just look for a line that crosses one grid line, mark that spot and the starting and ending points, and then sketch the line.
Here is what the start of my sketch looks like.
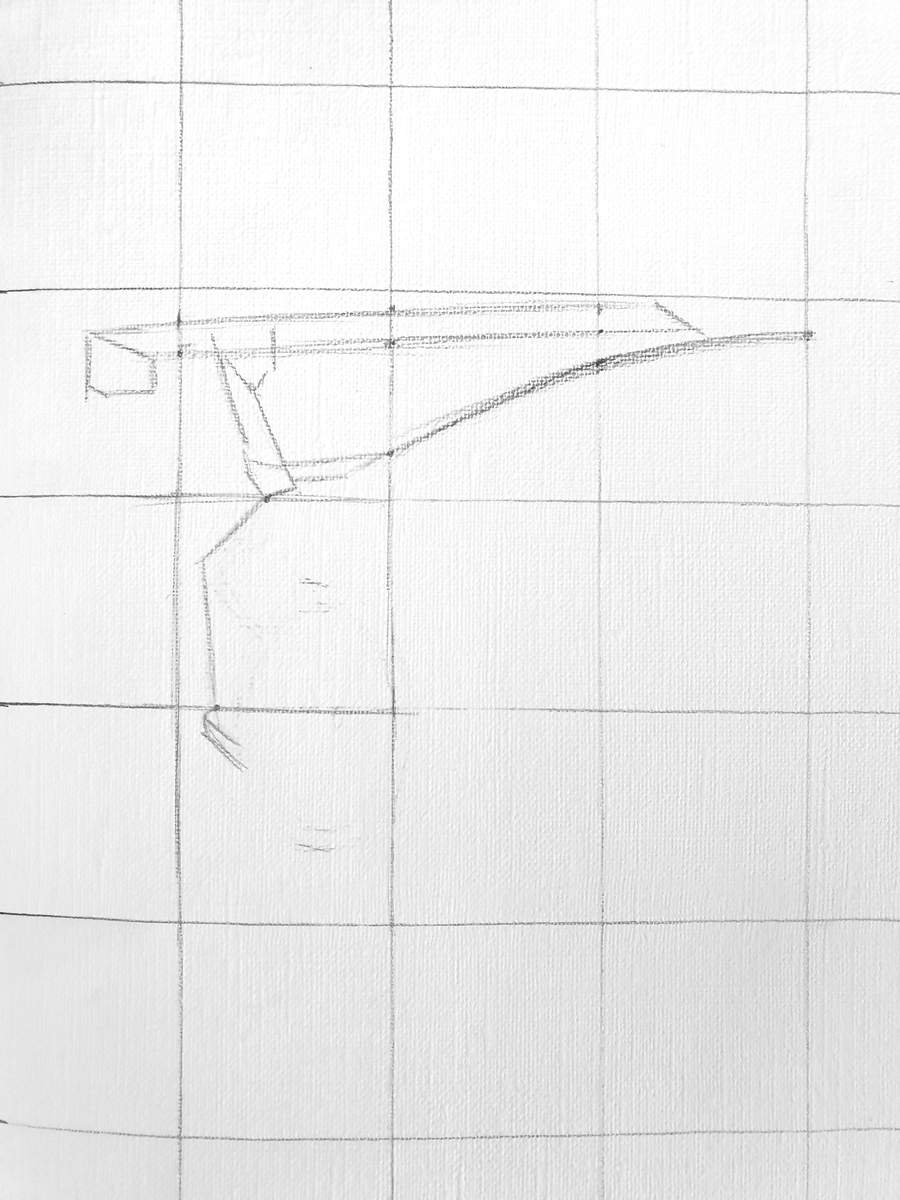
I started on the far left with the two straightest lines. In the reference, they are actually connected by a curve, but to keep things simple, I made them straight with a sharp-ish corner.
Now, I will show you an example of how marking the intersections with the grid makes sketching the line easier.
With the back part of the car done, I continued working on the roofline. This is one long curved line. I find it important to get the curve as accurate as possible. So what I do is I look at the reference, look at where this roofline crosses grid lines, and then I mark the spots where the grid and the roofline intersect. In the image below, I marked those spots in red. (I just do it with my pencil, but I Photoshopped it to make it easier to see.)
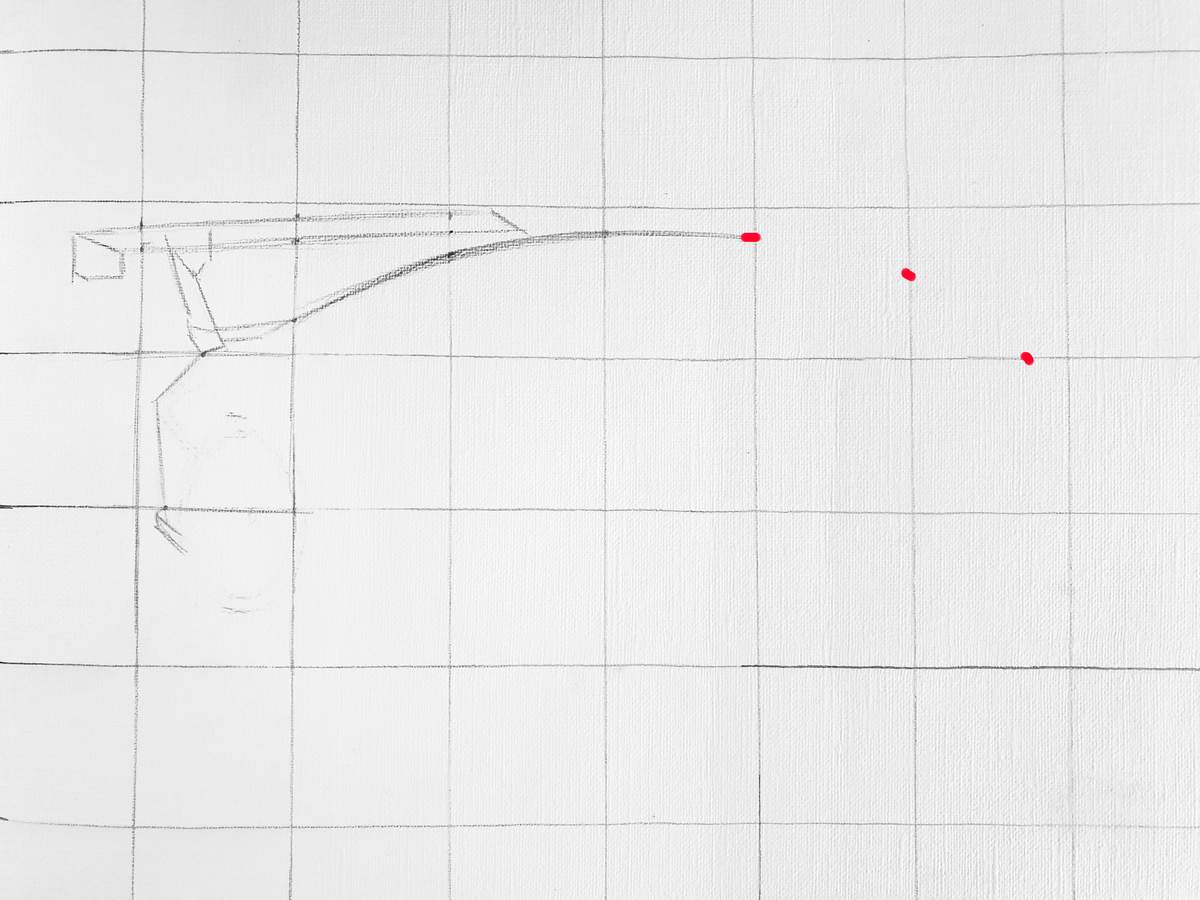
With these points marked, it's a lot easier to sketch the line.
You can also just sketch the line without marking any points, but I find it way easier to be accurate when I do mark the intersections first.
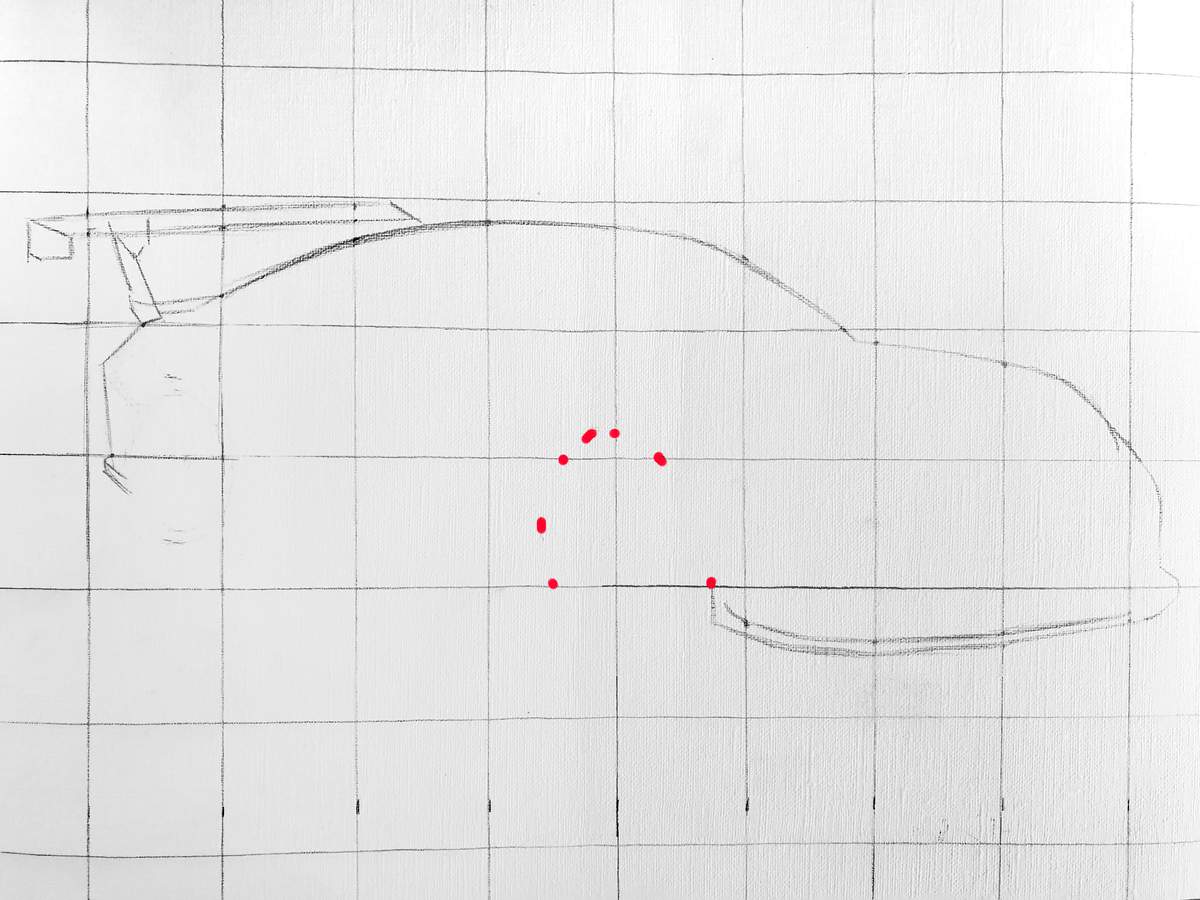
Ellipses and circles are pretty hard shapes to get right. So to make them easier, I mark a few more points than I would with simple lines.
In the image above, you can see that I marked all the points where the ellipse shape of the wheel arch intersects with the grid. But you might also notice that I added two more points: the very top and the far left. By adding these two points, sketching the ellipse gets so much easier. The same goes for full ellipses and circles. You just mark where the top, right, bottom, and left edges are, and then you sketch the shape.
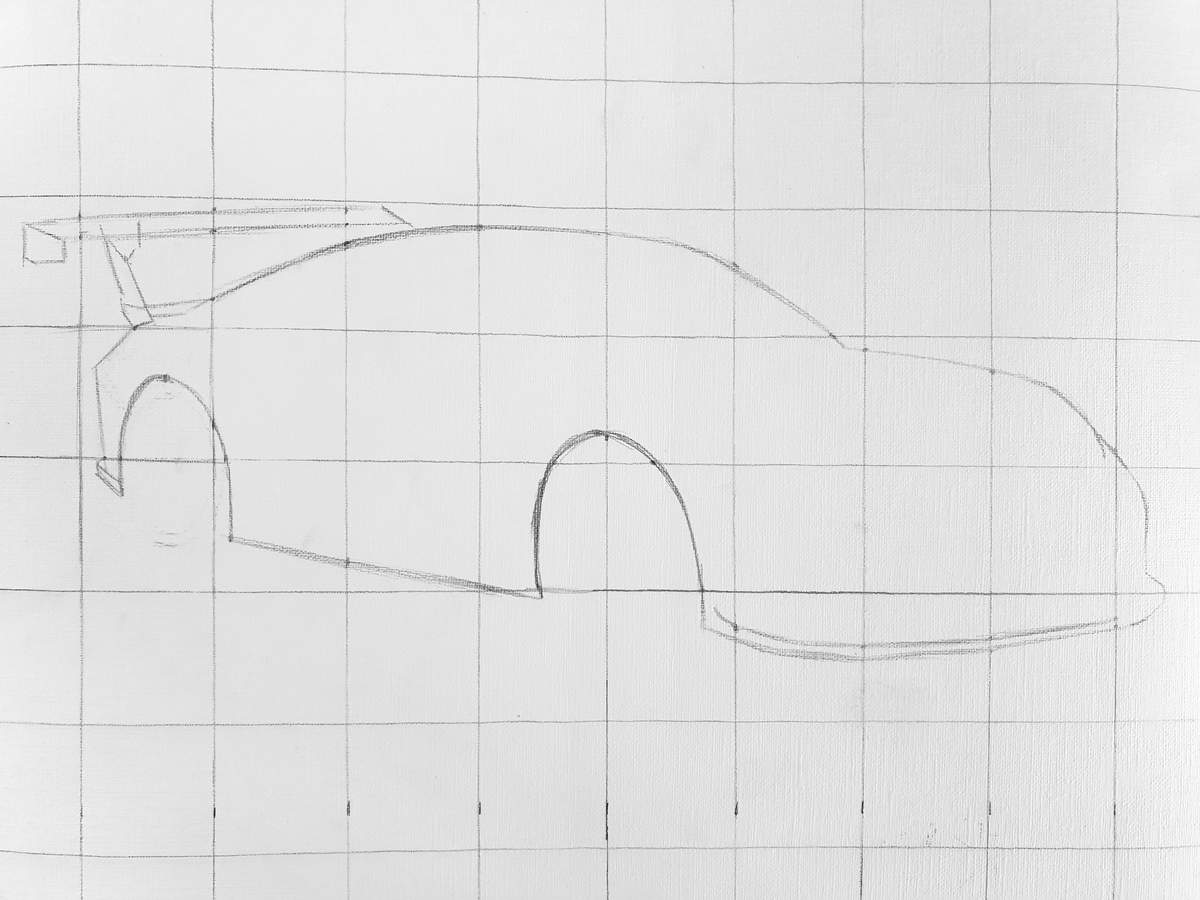
After I've done the whole outline, I sometimes refine it a bit. I make the lines look cleaner, fix a few small things, add rounded corners, etc. For this sketch, I just left the outline as is.
I then start working on adding all the parts to the car, starting off with the biggest ones: the windows.
Now that the roof is already in place, deciding where the top of the windows are is a little easier. You just look at the distance between the roof and the top edge of the windows and use that as a guide when sketching the outline of the windows.
Since the windows are quite big, they also cross some grid lines. So the first thing I do is I again look at the reference, find the points where the outlines of the windows cross the grid lines, and then I mark those points in my sketch.
I also like to mark rounded corners and sharp corners. These often are not directly on a grid line, so I pay extra attention to how they fit inside the square.
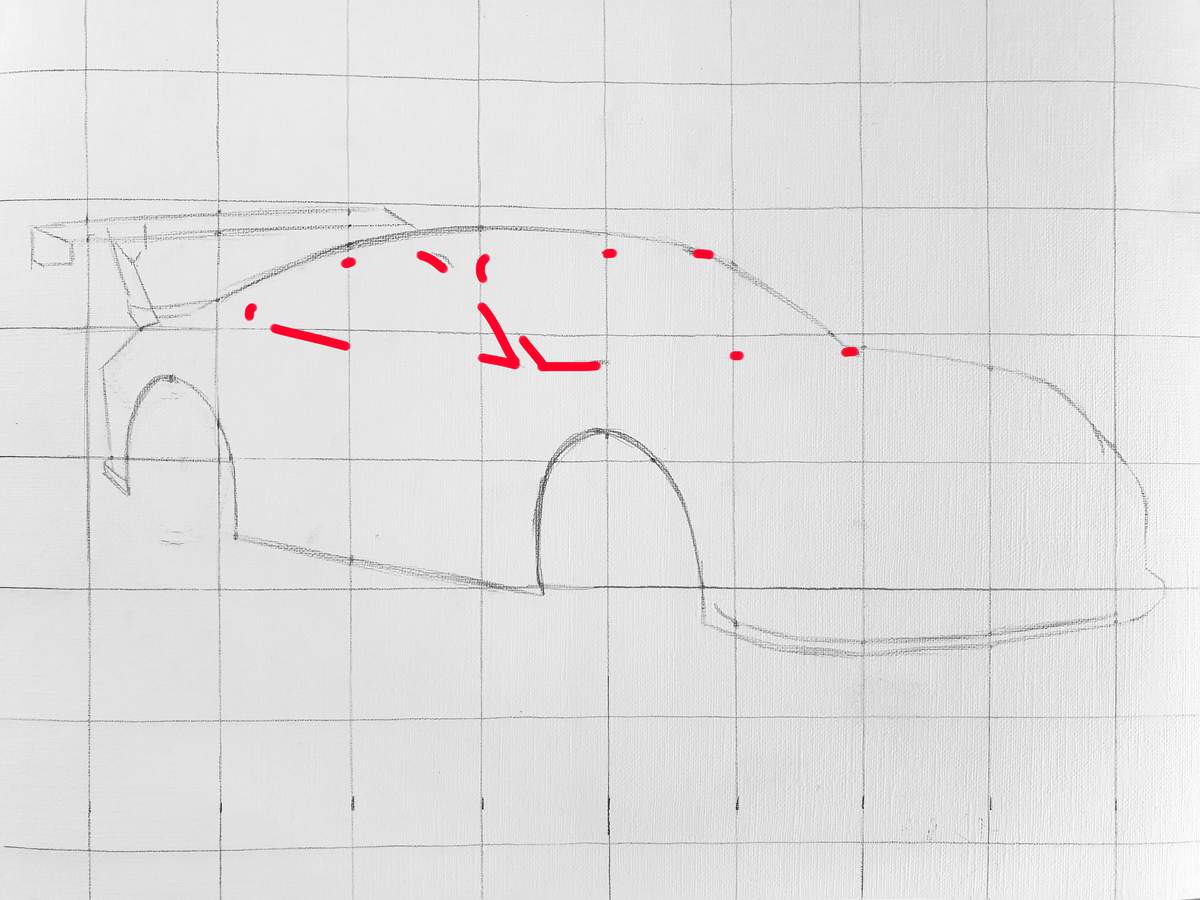
Then, I sketch the outline of the windows using the marked points as a guide.
For the smaller parts of the car, I tend to use the grid a little less. I still look for where those parts cross the grid, if they do. But especially for the smallest parts, they cross just one grid line or none at all. That's where I start to use the relative position of that part and compare it to another part and to how it fits inside the grid squares. If the part has sharp corners or rounded corners, I will mark them as accurately as I can within the square and then use them as a guide to sketch it.
This part does take the longest, but it's important to take your time to sketch every part in the right place.
After adding all the parts and details to my car sketch, it looks like this:
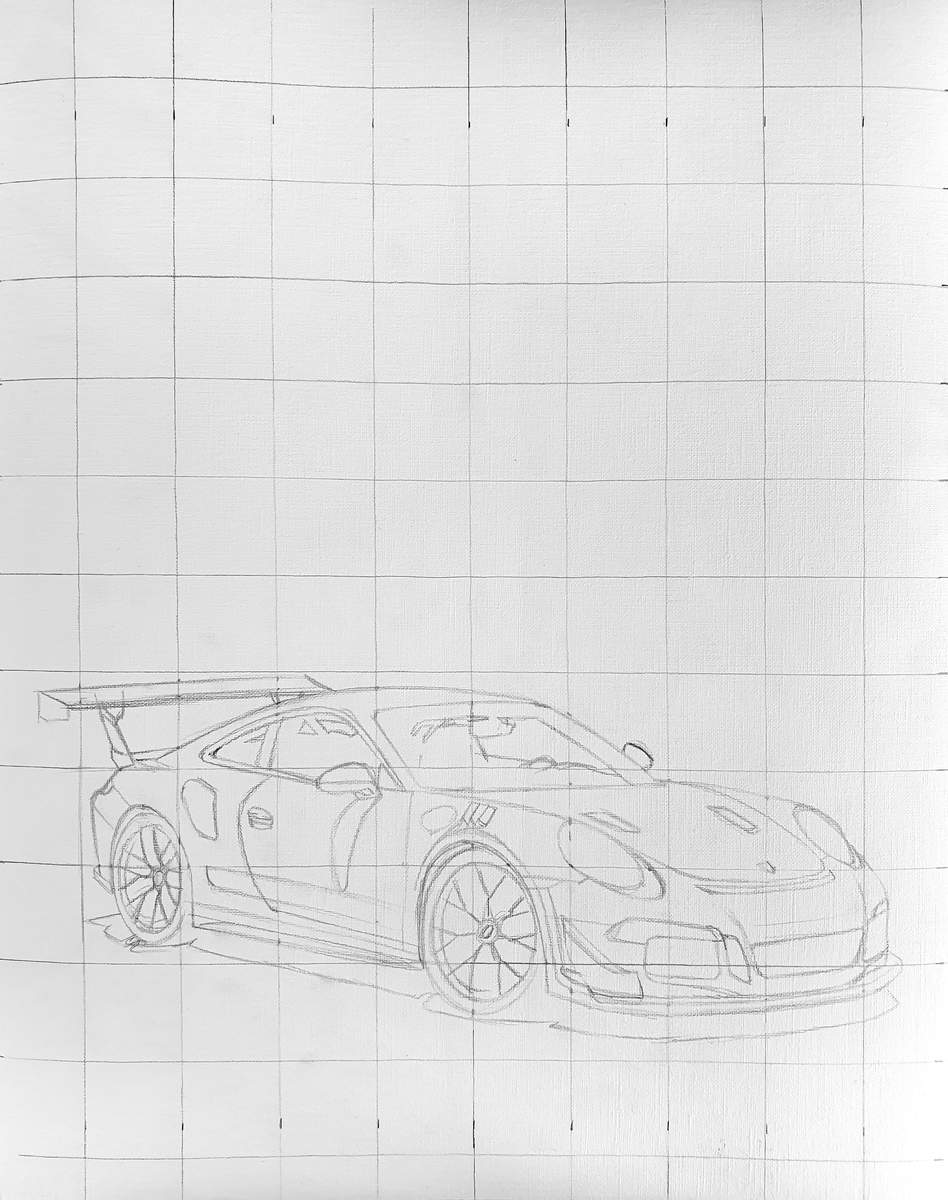
The main subject of my sketch is now done, but there is also a background.
My background is pretty easy. It's just a bunch of mountain outlines and a road. With organic things like mountains, landscapes, and plants, you have lots of margin for error. Mountains look a million different ways, as do plants and landscapes. I still like to be precise, but for things like these it's less important.
For the mountains in the background, I just sketched a rough outline of the top edges. I also roughly marked where the trees are, and I sketched the side of the road. And that's it for my sketch.
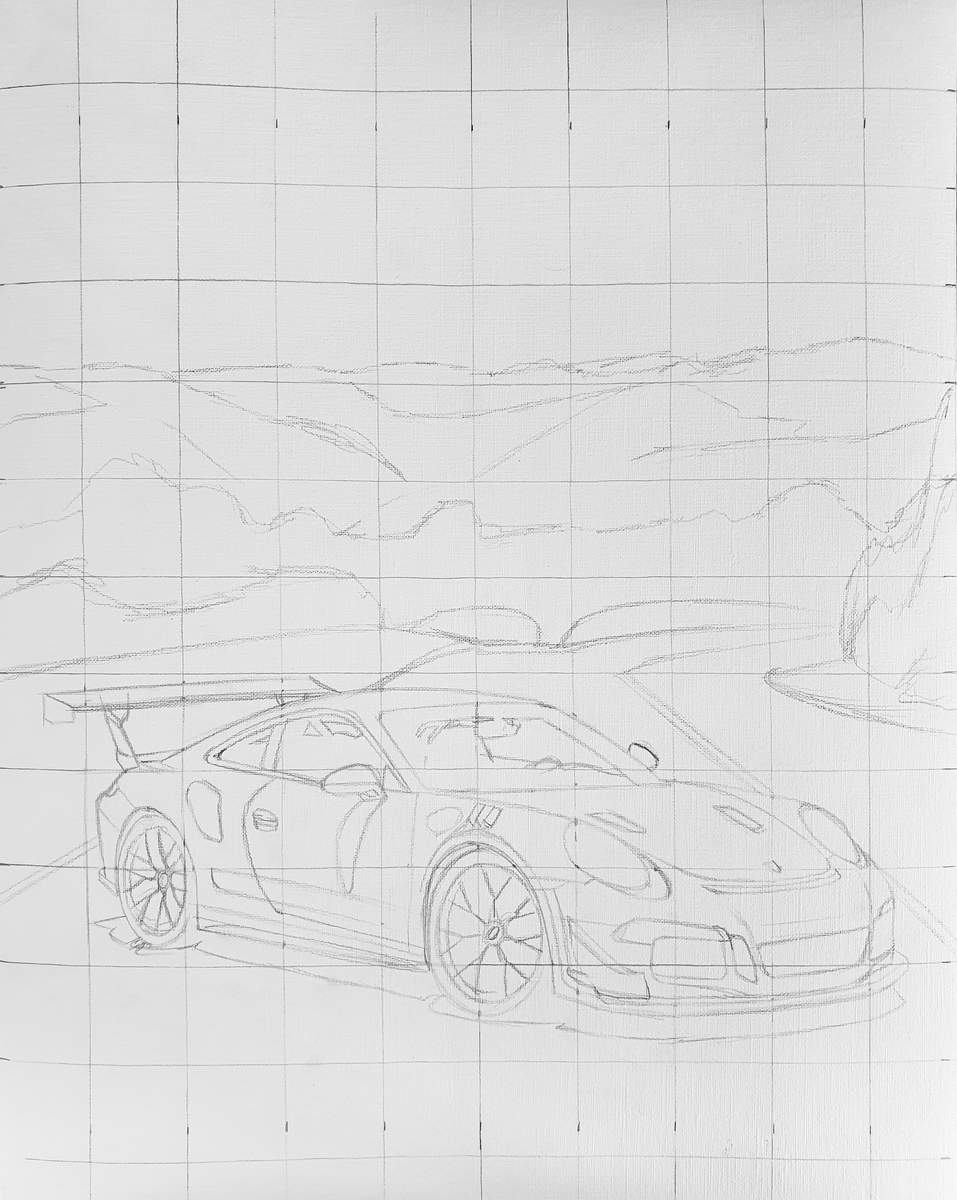
This way of sketching is not just for sketching cars. You can use this method for anything. The principles remain the same.
If, for example, you were sketching a beautiful flower, you would also start with the outlines of the flower. You would outline the center of the flower and the petals. Then you might add the outline for the stem, and after that, the leaves on the stem. Next, you might add details like the stamens or the veins in the leaves. These are essentially the same steps I took to make my car sketch.
Frequently Asked Questions About the Grid Method
Is the grid method cheating?
No. The grid method is simply a drawing technique that helps you understand where different parts of your reference image should go. You're still doing the drawing yourself, including the shading, details, and other parts of the process.
It's particularly useful when you're learning how to draw from reference photos because it helps you focus on one small section at a time instead of trying to reproduce the entire image at once.
Why does my drawing still look wrong when I use a grid?
A grid can help you place things in the correct locations, but it doesn't automatically make the drawing accurate.
You still need to carefully compare the shapes, angles, proportions, and boundaries within each square. It's easy to focus on copying individual lines without noticing that a curve is slightly too shallow or that an object enters the square at a different angle.
If your drawing looks slightly off, try spending more time comparing the reference and your sketch within each individual square rather than looking at the whole drawing at once.
Is the grid method good for beginners?
Yes. The grid method can be particularly helpful for beginners because it breaks a complicated drawing into smaller, more manageable sections.
Instead of asking yourself, "How do I draw this entire thing?", you can focus on one square at a time. Once you've copied all the shapes within the squares, the complete drawing gradually comes together.
Articles You Might Also Like

I love bringing cars to life with alcohol markers and colored pencils.
Whether you're just starting out or looking to improve your skills, I'm here to help!
Click here to learn more about me.


Add a comment
Comments
I really appreciate it all bro it's def helped bring my pieces to another level. I've used the grid method to draw only once before I found your stuff and it turned out alright, but after I found you ive seen a massive difference. Thanks!
It is helpful 😄 I tried it and I'll show you the sketch very soon