How To Draw A Black Cat - Easy & Cute Step-By-Step
This post is all about how to draw a simple and cute black cat with markers.
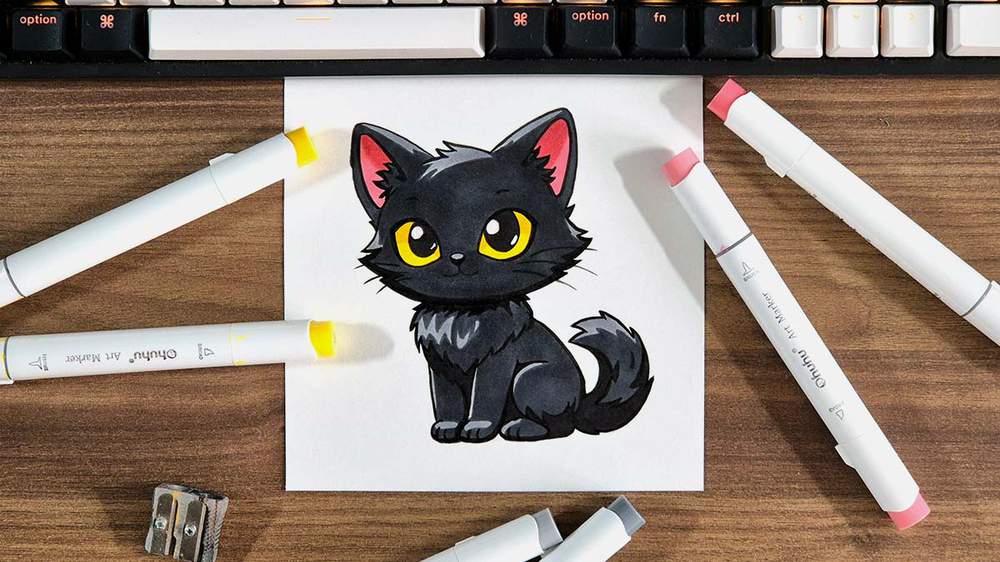
Looking for a guide on how to draw a cute black cat? In this step-by-step drawing guide, I'll show you exactly how to draw a cartoon-style cute black cat.
This guide is perfect if you want to learn how to black cat for Halloween or if you just want to create a cute cat drawing.
This black cat drawing guide is broken up into 12 steps. The first 8 cover how to sketch a cute cartoon-style cat from scratch using some guide lines. Step 9 covers the outlining and why you should use a brush pen instead of a fineliner, and steps 10 to 12 cover the coloring of the yellow eyes, the ears, and, of course, the black fur.
Each step has clear descriptions and multiple supporting photos with highlighted lines, so you always know exactly what to draw where.
Also, if you're new to drawing, don't expect yourself to be great at it. Getting good takes time, and you're gonna make lots of mistakes along the way. I certainly did (and still do). Try to have fun and don't strive for a perfect black cat drawing. Imperfections only show that you're a human being, and I think that that's a good thing.
Now, let's get started and create this super cute black cat drawing!
I just wanted to let you know that this post contains affiliate links, and any purchases made through these links will result in a small commission for me and don't cost you anything extra.
In This Guide
- Drawing supplies & colors I used
- How to sketch a cute black cat
- Outlining the black cat with a brush pen
- Coloring the black cat with markers
- More drawing guides you'll enjoy
Drawing Supplies & Colors I Used
To sketch the cute black cat, I used a regular graphite pencil with an eraser. And to lighten my sketch, I used a kneaded eraser. These are really great for this.
And I made this drawing on Canson Illustration Manga paper (my favorite paper for using alcohol markers on).
To outline the cute cat sketch, I used a black Tombow Fudenosuke brush pen.
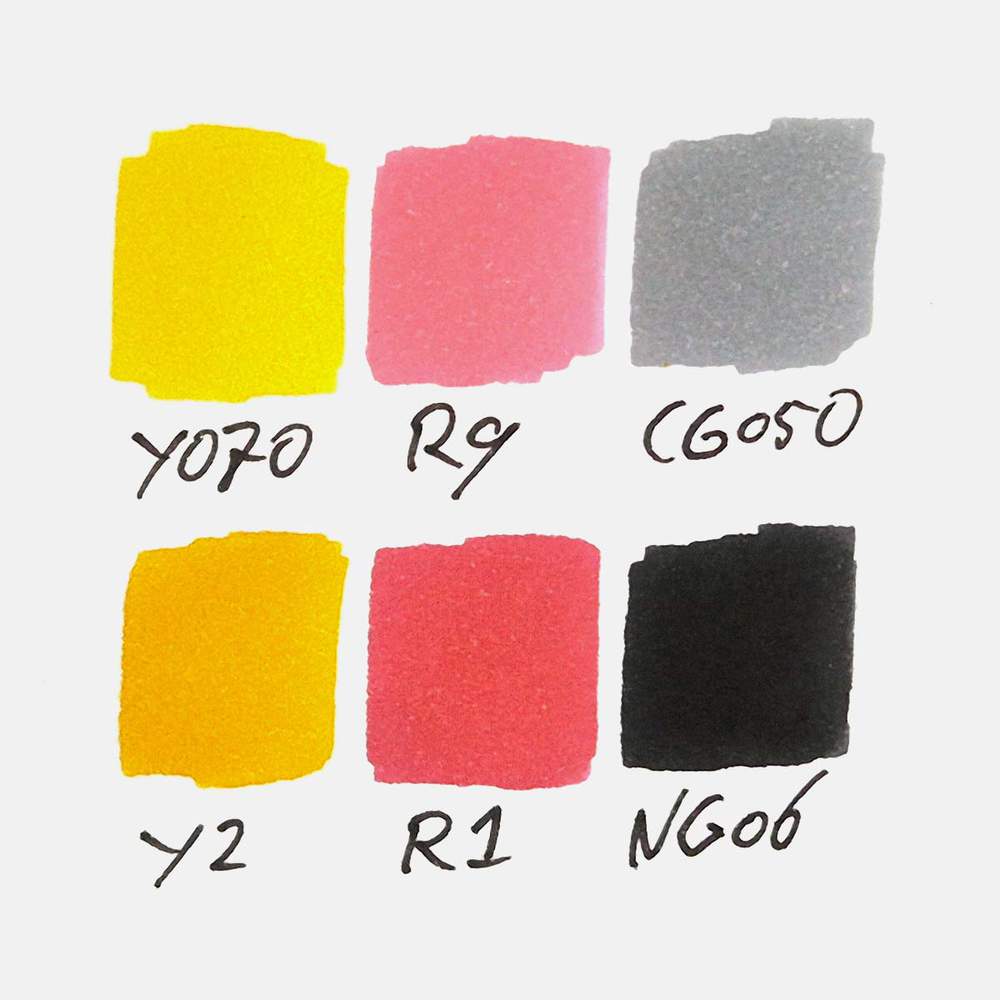
And to color this black cat, I used Ohuhu Honolulu markers. I used 6 colors in total: Acid Yellow (Y070), Sunflower (Y2), Pastel Rose (R9), Coral Pink (R1), Neutral Grey 05 (CG050), and Neutral Grey 6 (NG06).
You can buy these colors separately or as part of the 320 set.
I've added an image below with all the color swatches so you can match your markers to the ones I used if you already have some.
How To Draw A Black Cat
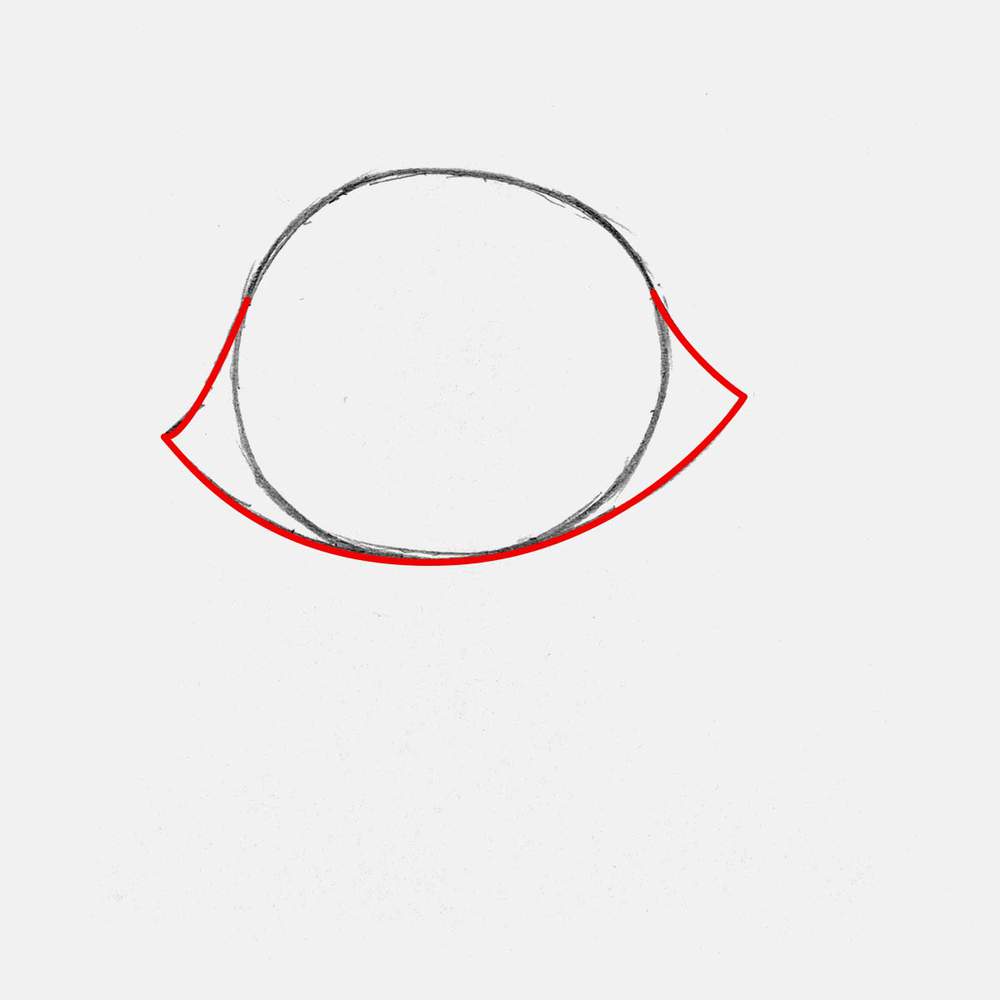
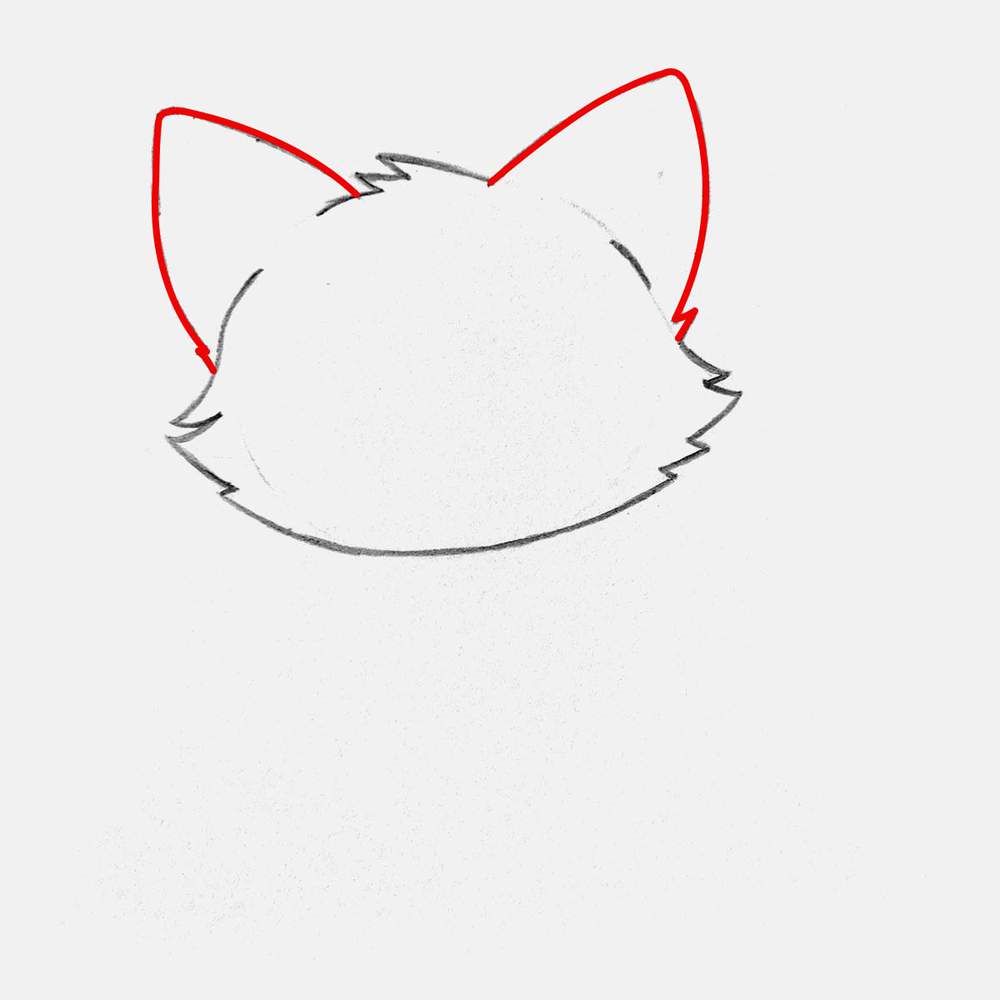
For the sketching process of this black cat drawing, I highlighted all the changes at each step in red so you can easily see what to add.
Step 1: Sketch A Big Circle For The Cat's Head
To start sketching the black cat, I drew a large circle above the center of my paper. It doesn't have to be perfectly round, just somewhat round. This circle will help us as a guide for the shape of the head. I made this circle quite large, as everyone knows that larger heads make animals more cute.

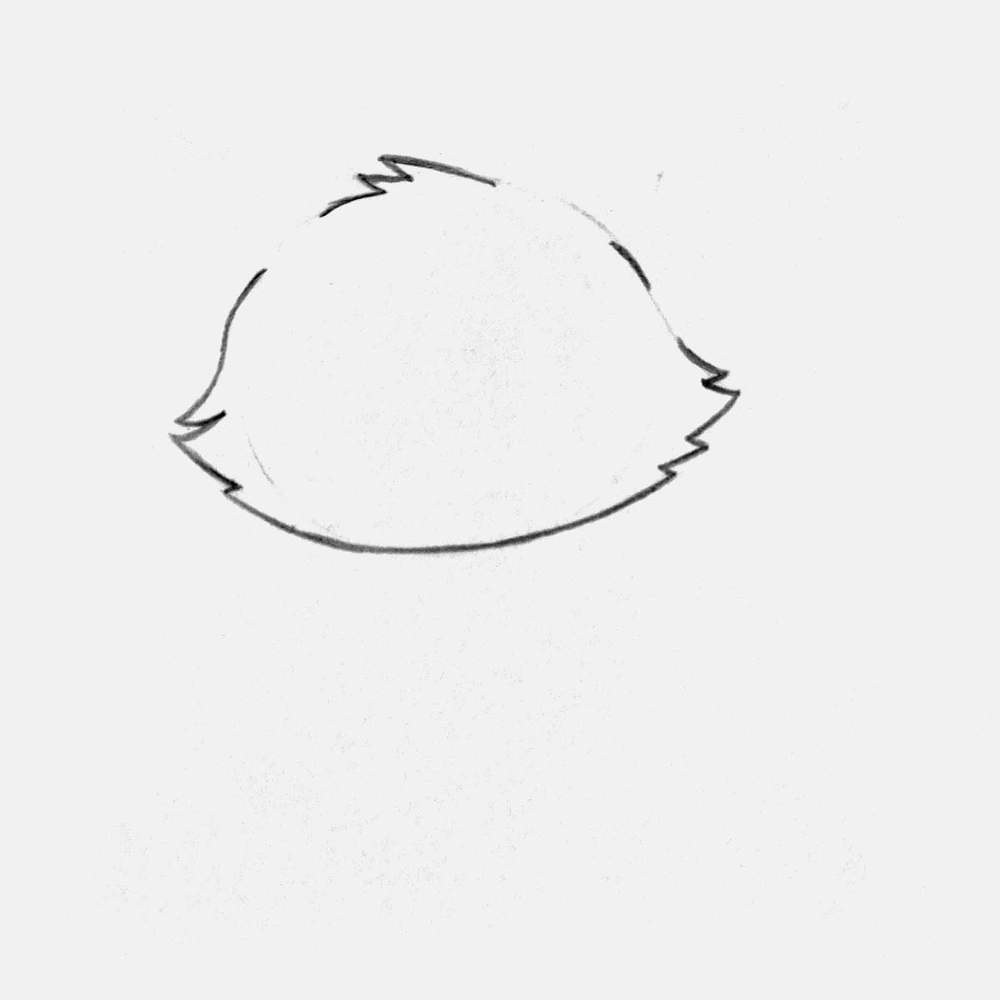
Step 2: Add The Fluffy Cheeks Of The Cat
After that, I added the big fluffy cheeks of the black cat. I started with these simplified pointy shapes on either side of the cat's head.
Next, I added the jagged fur texture on the cheeks, and I also added a few sticking-out fur strands on the top of the black cat's head.
You don't need to copy me exactly. Fur can point in all directions, and there can be long strands and short strands. Just do whatever feels right, and it'll probably look good and natural.
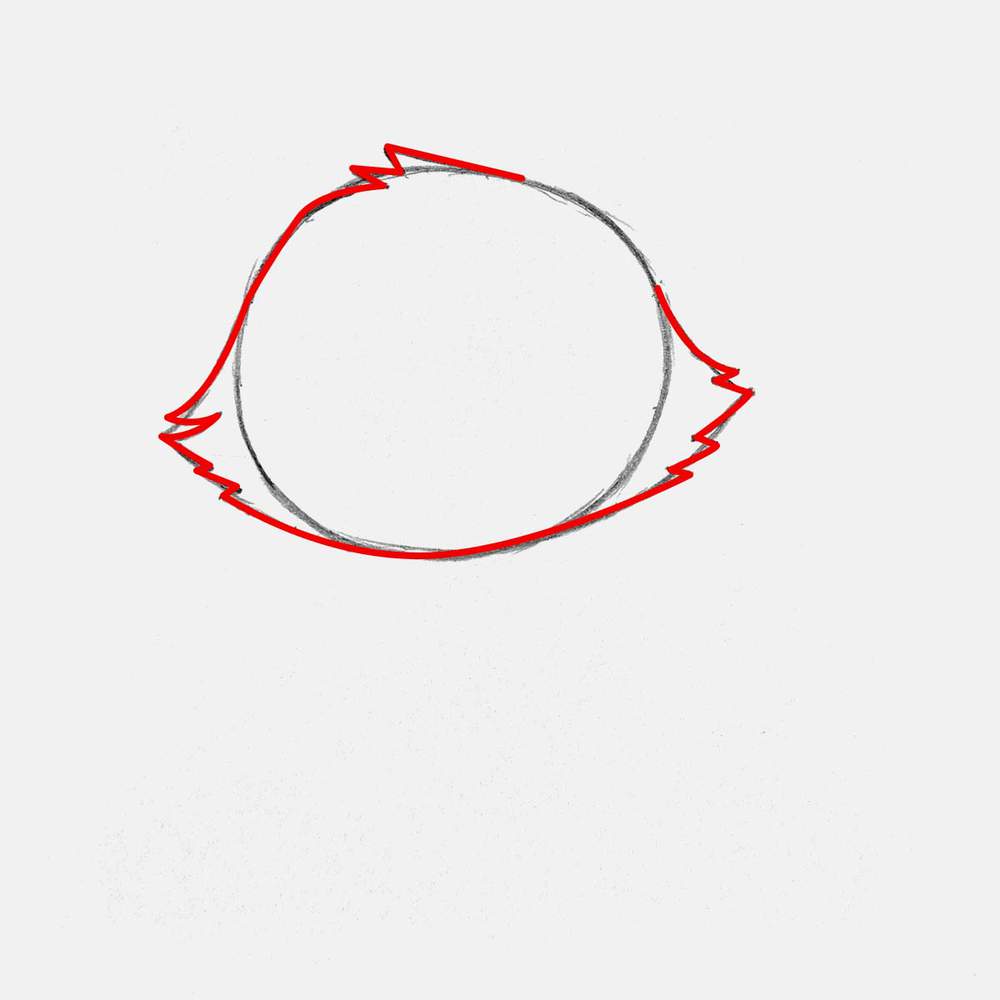
After adding the fur texture on the outline, I erased the construction lines, which is most of the circle from step one.
You'll notice that I also erased some parts of the top edge of the cat's head. Those are the spots the ears will attach to in the next step.
Step 3: Add The Big & Pointy Cat Ears
With the shape of the head now more or less done, I added the two big ears of the black cat. They look like big slightly curved triangles with a rounded point.
I also added a small bit of fur sticking out at the bottom of each of the ears, otherwise, it looked so clean.
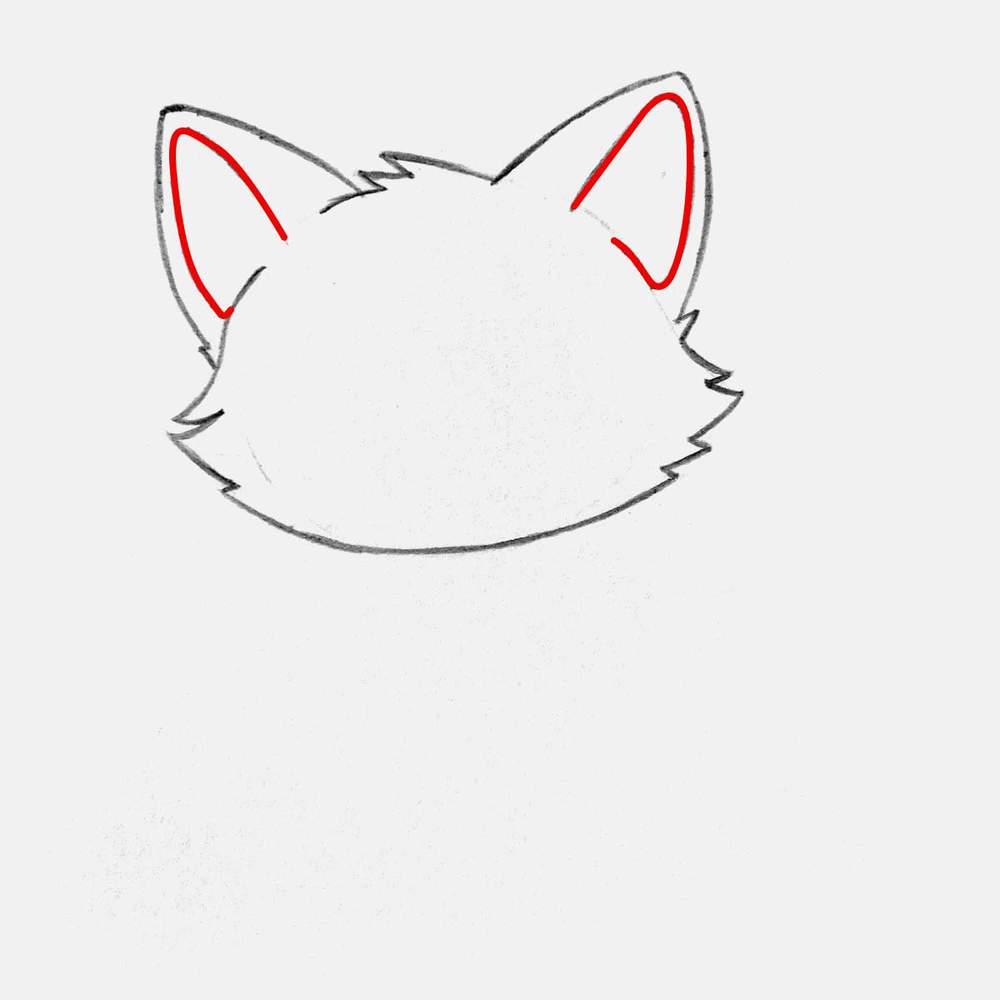
Then, I added the inner edge of the ears to separate the black outer edge and the pink insides. Since the ears of the cat point forwards and outwards, the insides of the ears are located more towards the outwards edges, leaving some room on the inwards-pointing edges, if that makes sense...
The edge of the insides of the ears is slightly more rounded than the outline of the ears themselves.
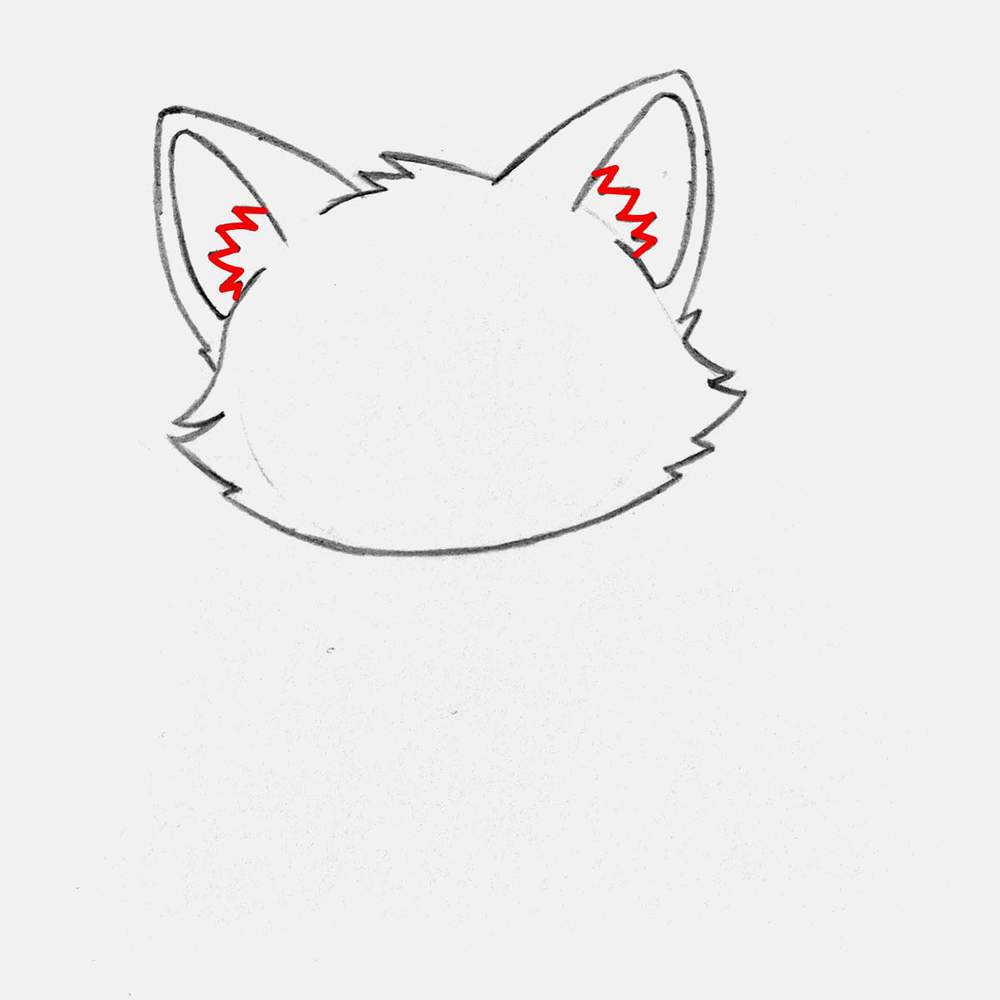
To complete the ears, I added some fur sticking out from the inside.
Step 4: Sketch The Mouth, Nose, Eyes, And Whiskers Of The Black Cat
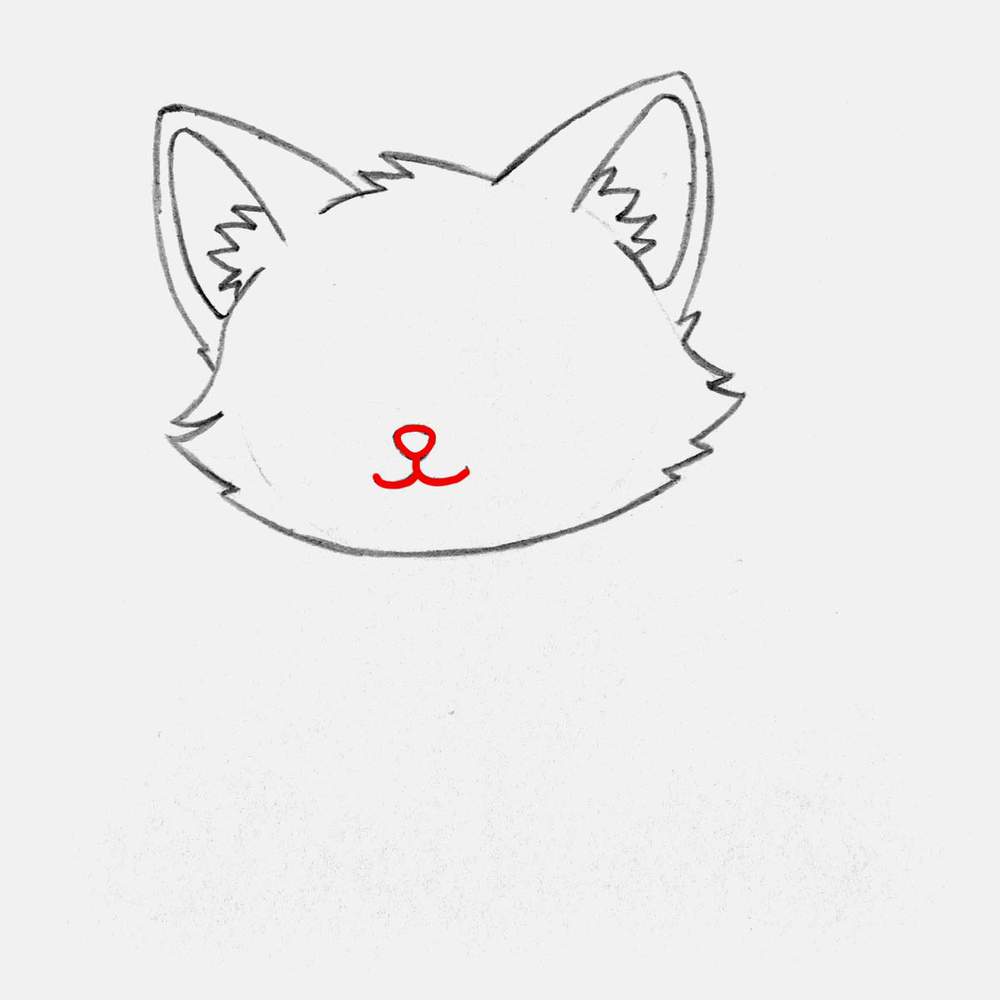
After adding the ears, I sketched the nose and the mouth of the black cat. The nose is a small upside-down triangle towards the bottom of the head and has rounded corners. The classic cat mouth shape is made up of two round hook shapes that attach to the bottom tip of the nose.
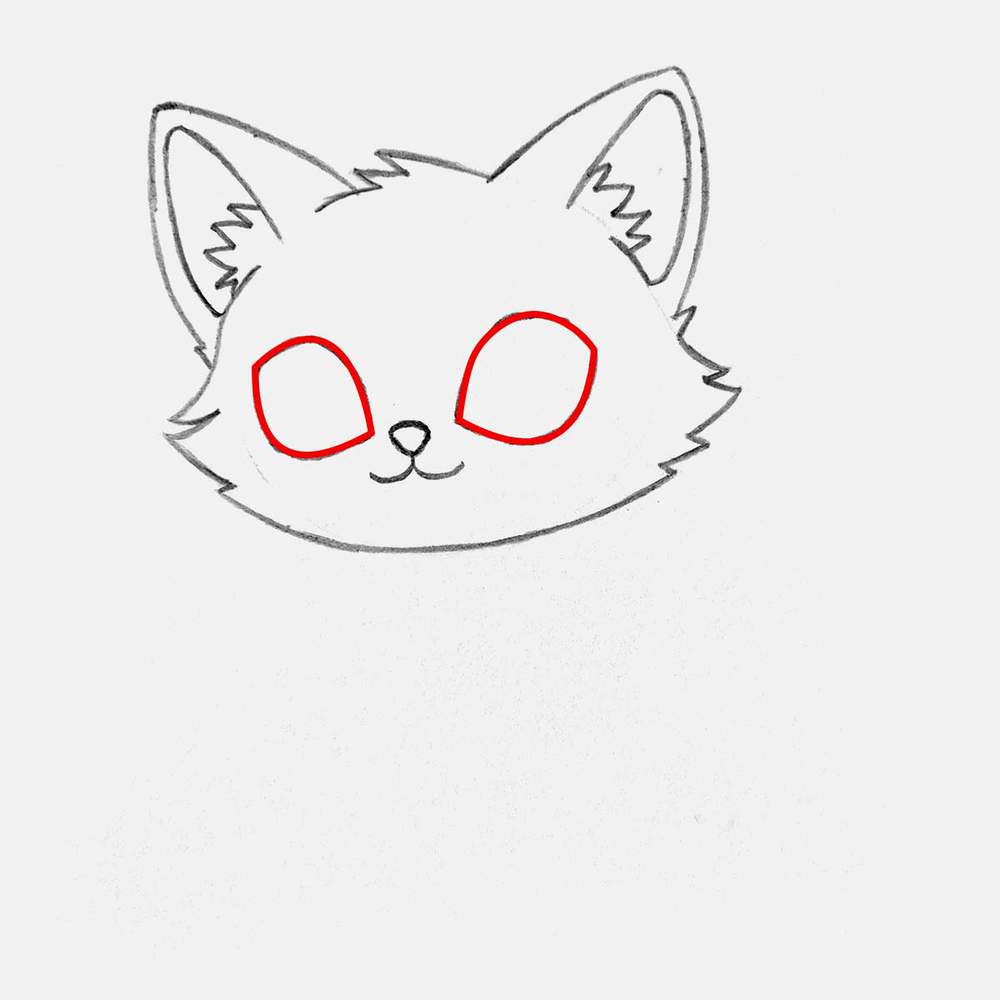
Then, I added some huge eyes, as big eyes make animals look cuter, of course. I made the eyes shaped kinda like wide almonds or avocado seeds with the inner corner lower than the outer corner.
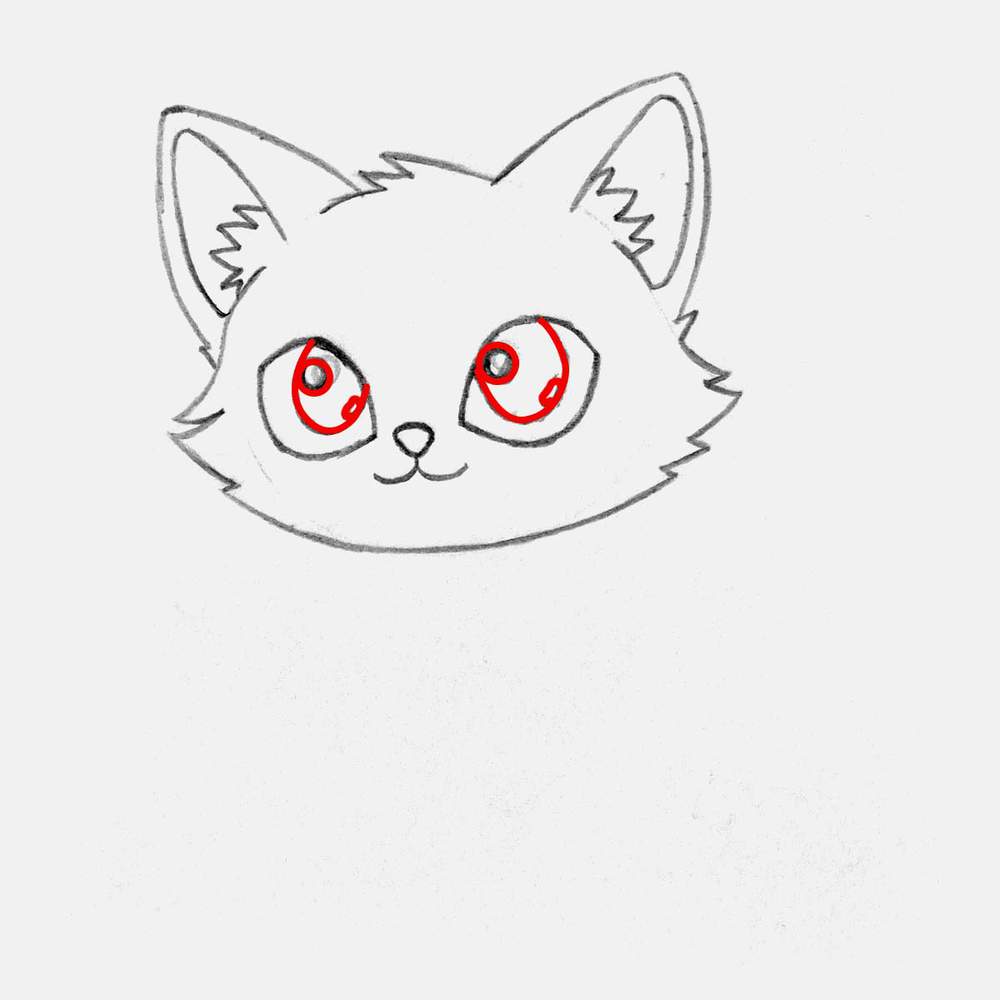
Next, I added big round pupil shapes at the top of both eyes with a big round highlight in the top left and a smaller one in the bottom right.
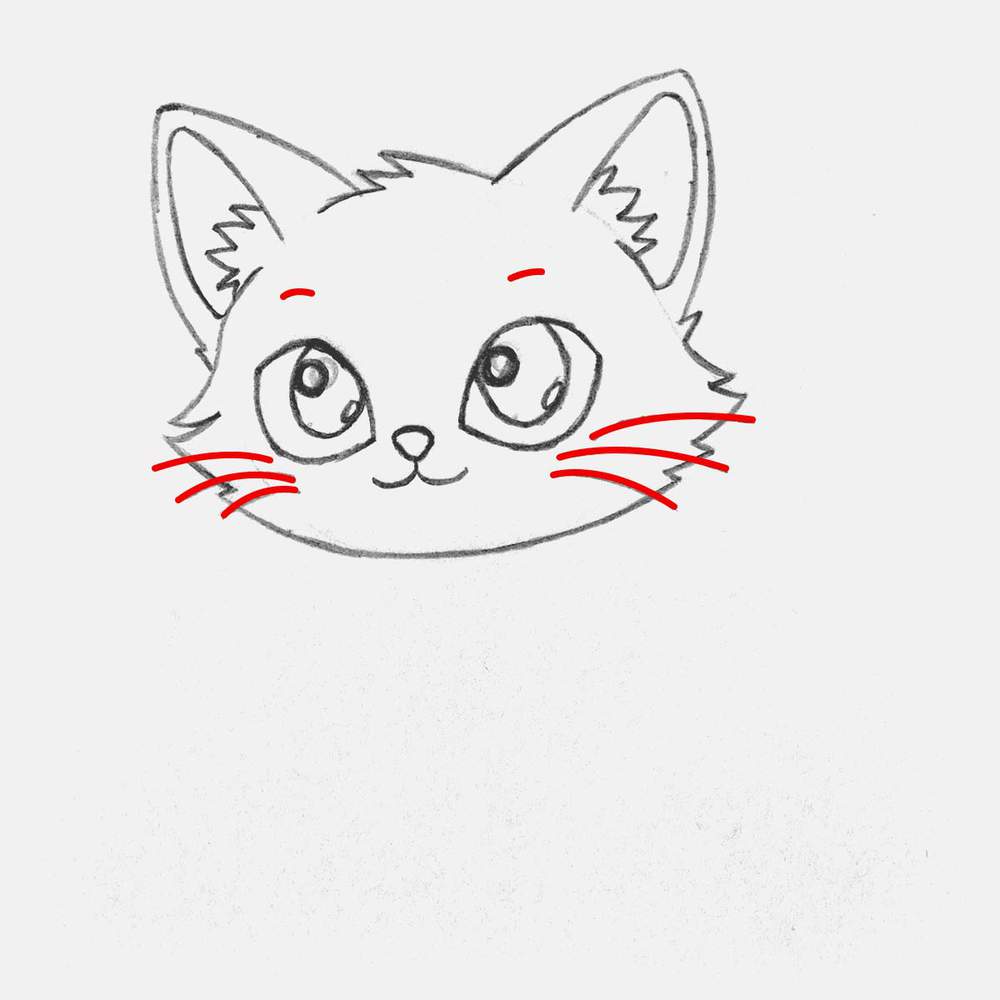
And to finish the sketch of the head of the black cat, I added three whiskers on each cheek and two small eyebrows above the eyes.
Step 5: Sketch The Furry Chest Of The Black Cat
With the head of this cute cat now all done, we can work on the rest of its body, starting with the chest.
The chest has this longer fur compared to the rest of its body. I first outlined the whole chest with 2 curved lines coming down into a point. This is the shape of the chest.
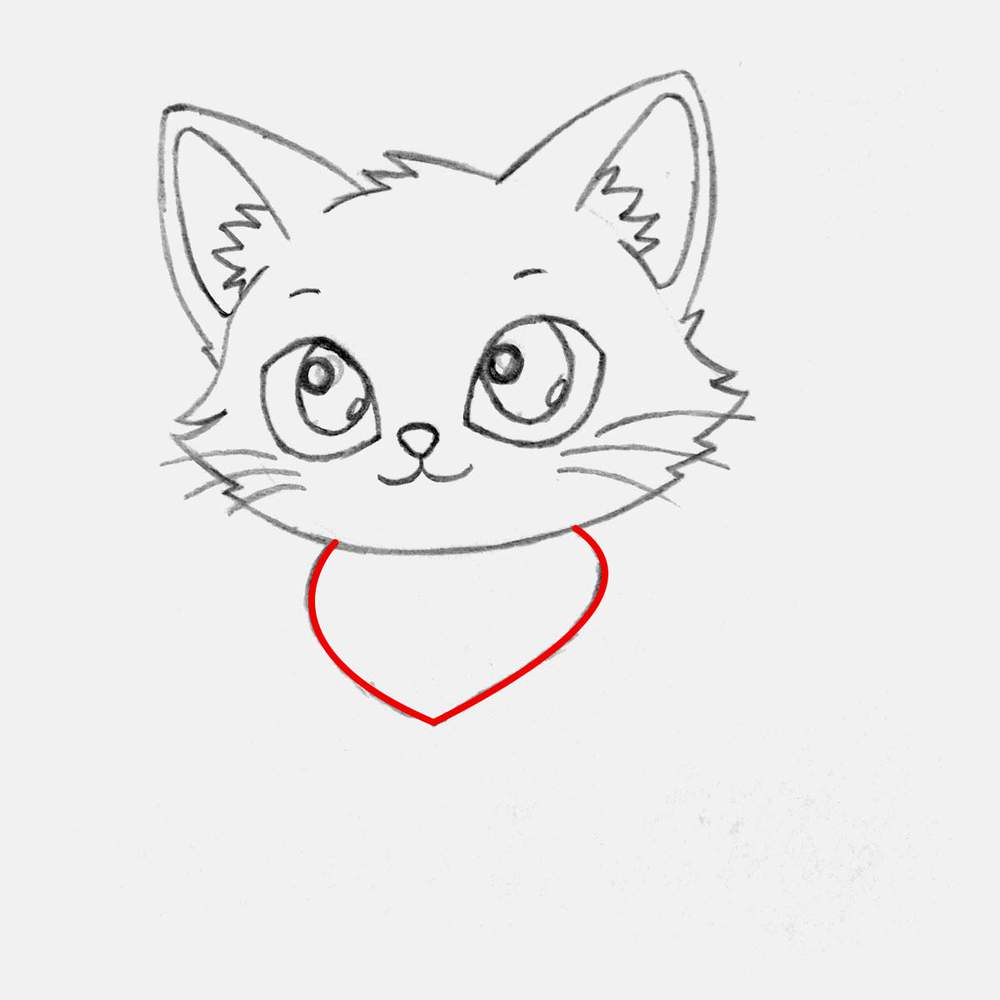
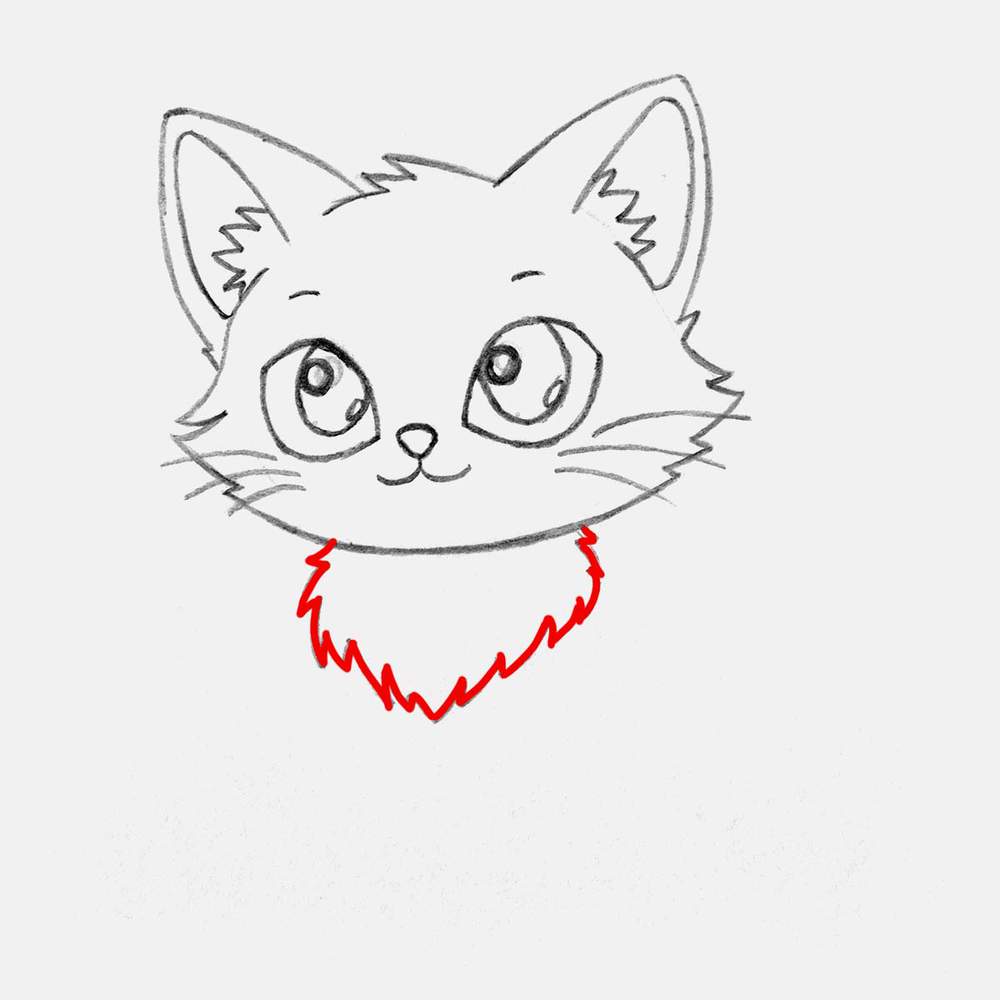
Next, I used the chest shape and converted it into a furry outline texture. I made the fur follow the shape of the chest and point down towards the bottom corner. But to make it not look too perfect and unnatural, I added some longer and some shorter fur strands, and I made a few fur bits at the top point slightly more upwards instead of down. This makes it look more playful and less clinical, which I like.
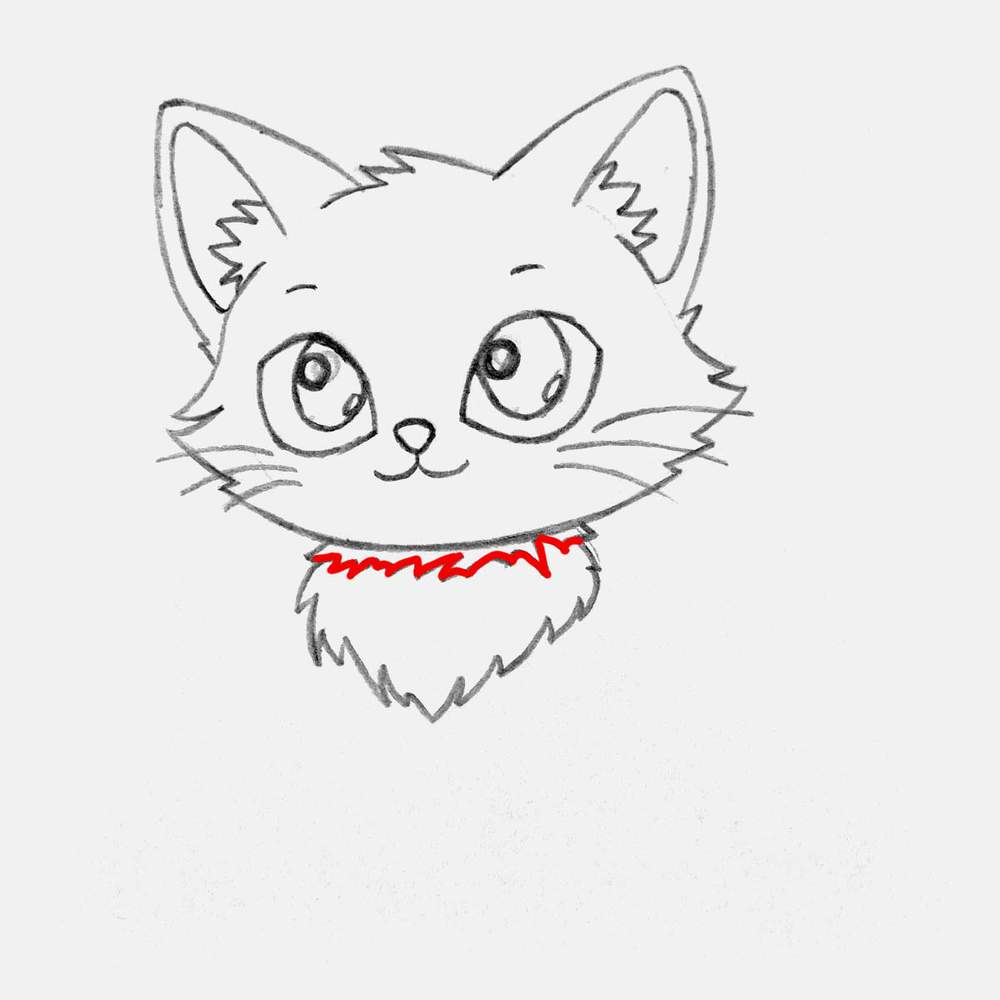
To complete the chest, I added another fur texture bit just below the cat's chin. This is where the super dark shadows will be.
Step 6: Draw The Basic Shape Of The Cat's Body
After drawing the cat's chest, we can now add the rest of the body of the cat and attach it to the chest.
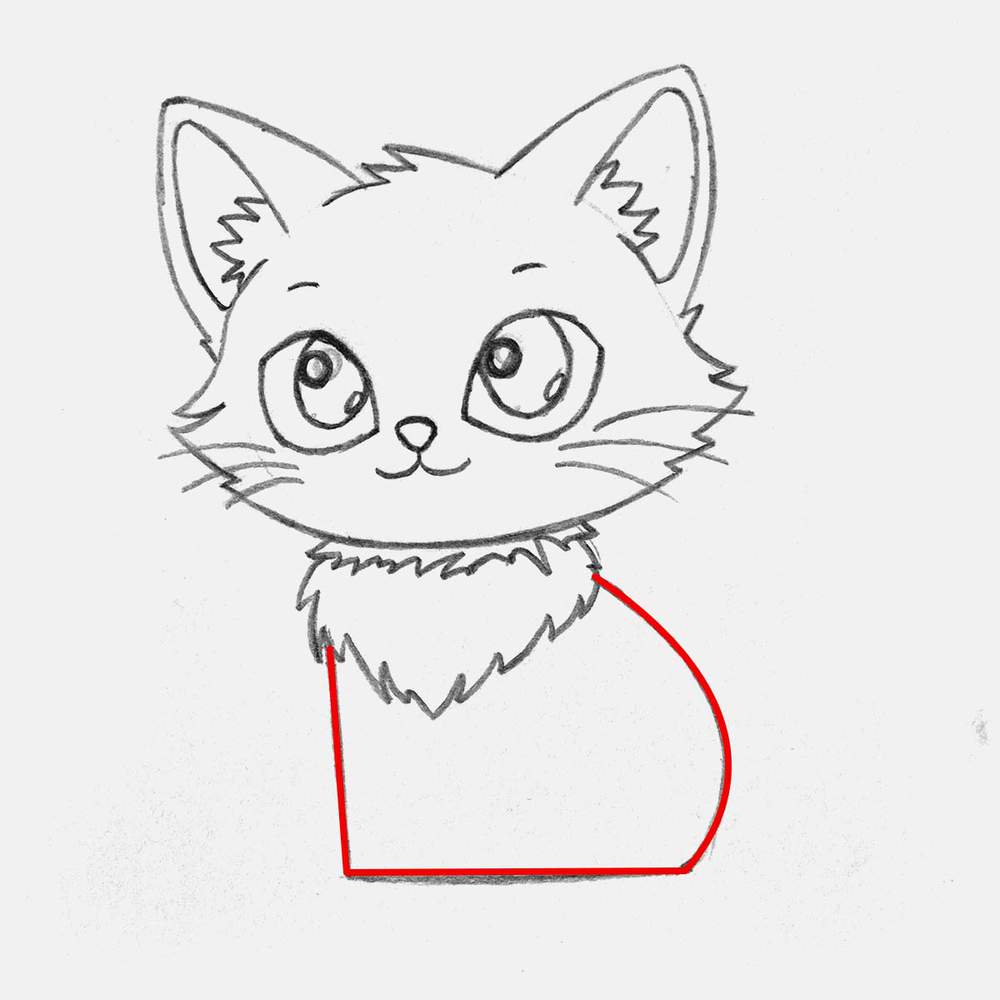
I find drawing the legs a bit difficult, so I like to start with a basic shape of the whole body of the cat instead. This marks where the outer edge of the body is and makes it easier to add the legs to it.
The front is just one straight and vertical line. The bottom edge is one straight and horizontal line. The cat's back is a curved line as the cat is sitting down. The back is less curved on the top and more curved towards the bottom/back of the cat.
Step 7: Sketch The Legs Of The Black Cat
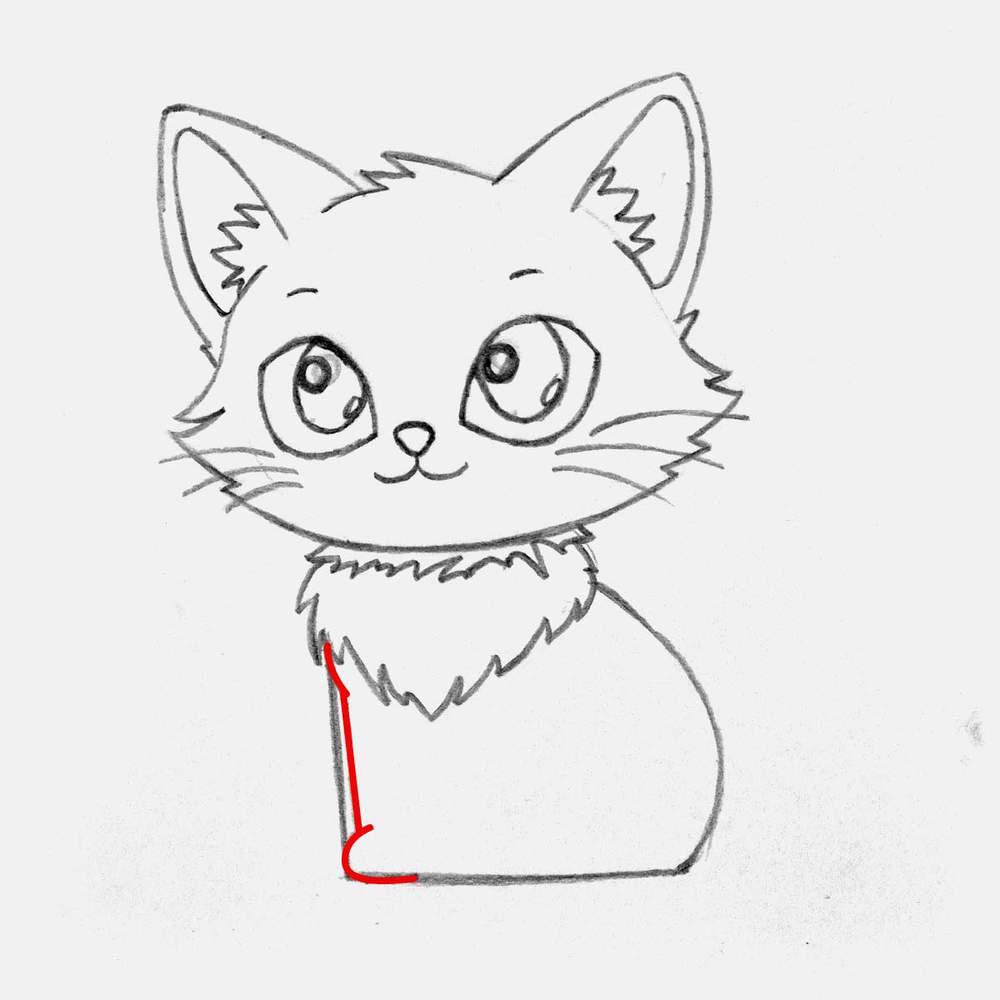
With this shape in place, it's now a lot easier to add the legs. I started by adding the left front leg. I sketched a tiny curve at the top for the shoulder of the cat. Then, I added a straight line parallel to the front edge of the body. And lastly, I added its small rounded paw.
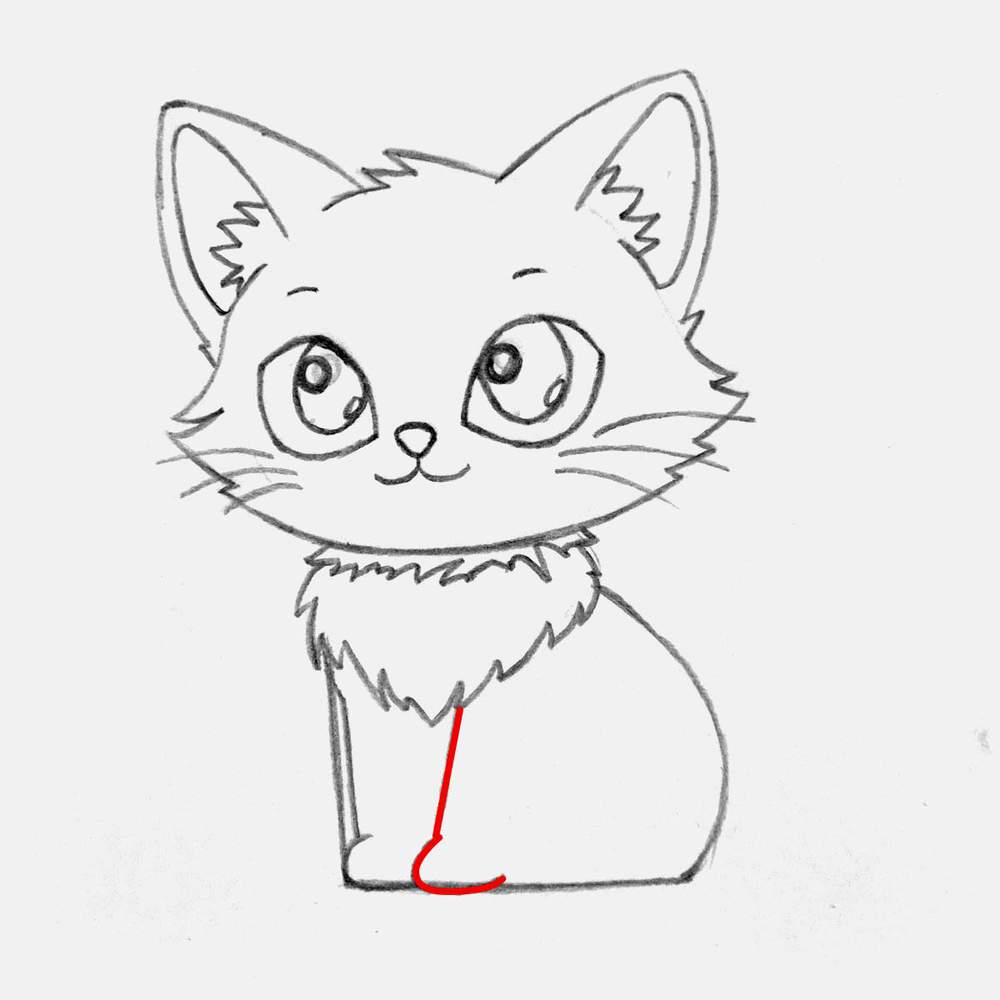
Next, I added the right leg, which is made up of one straight line that points slightly diagonally down towards the front leg, and I sketched the rounded paw at the bottom.
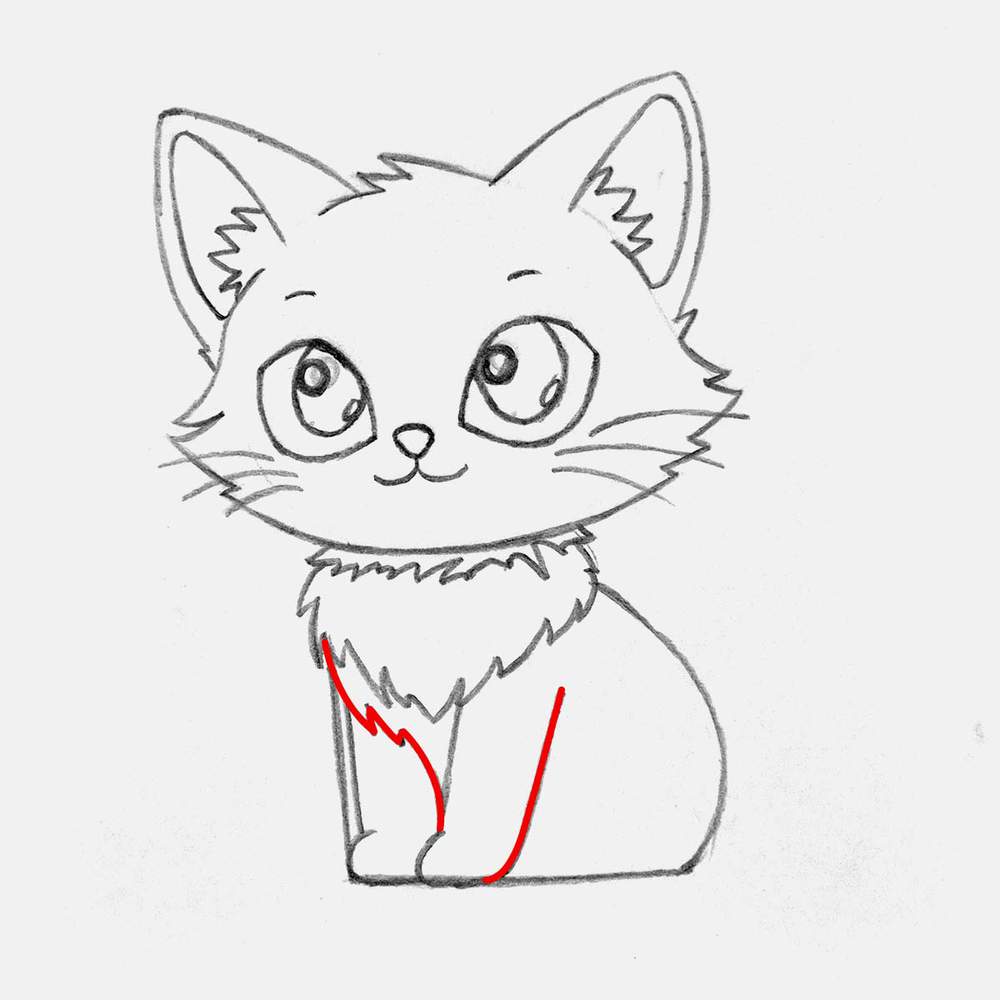
To complete the sketch of the front legs, I added a little bit more chest fur overlapping the top right of the left leg, and I added the right edge to the right leg.
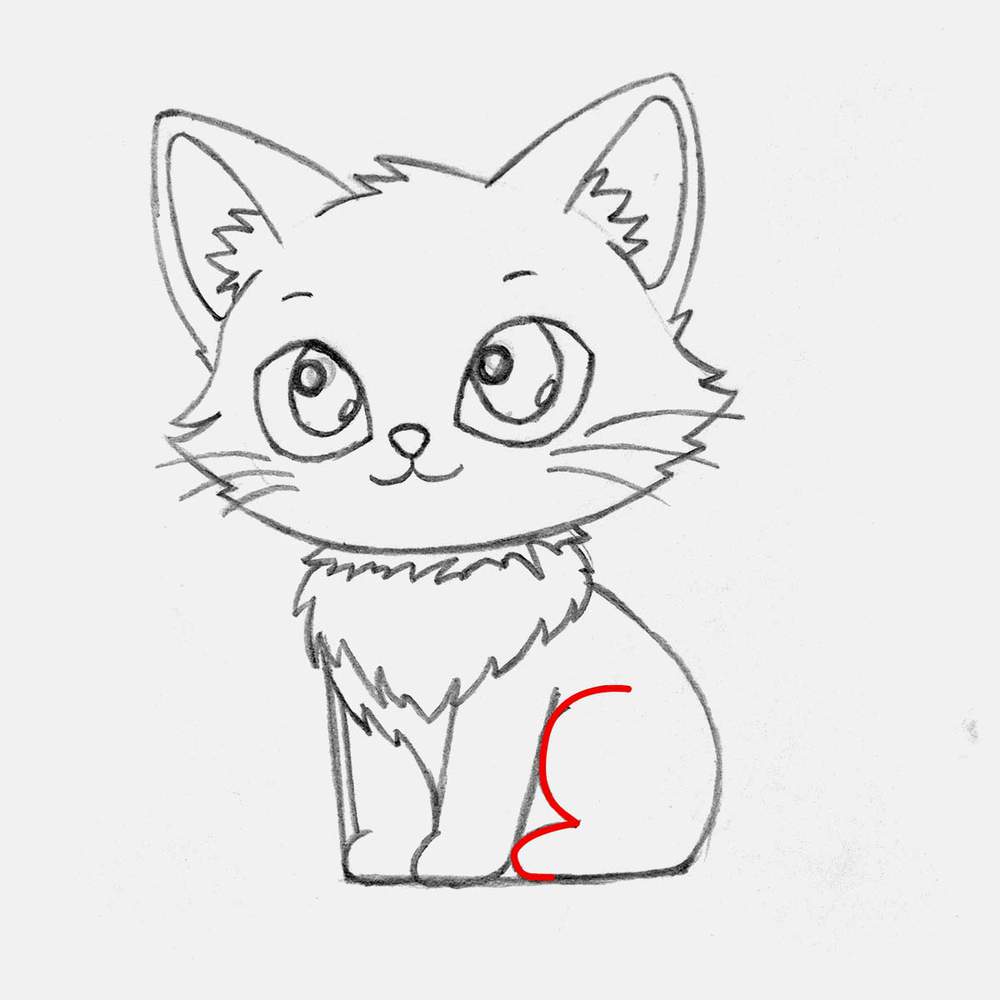
After sketching the front legs, I drew the back leg. Since the black cat is sitting and we can only see one side of it, we only need to draw one back leg. This makes our life a little easier.
The cat's back leg has a big round knee shape that touches the right front leg. Below this large half circle shape, I added the rounded paw again. Looking at the overall shape of what we just drew, it looks a bit like a mirrored 3.
To complete the back leg, I added a fur texture to the bottom right. I also added a little curved swoosh line connecting the top of the front leg to the top of the knee ot the back leg, and I marked the part of the paw that will be lighter than the surrounding area.
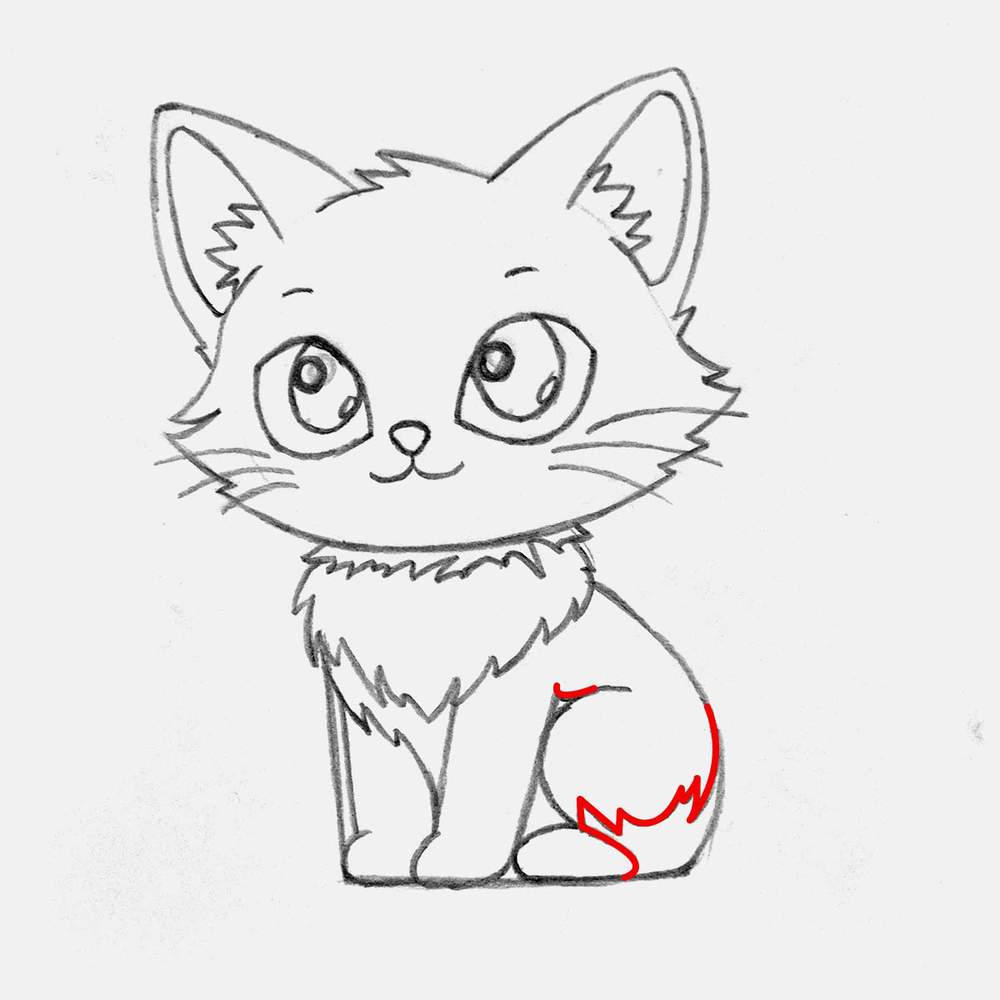
And to finish off the legs and the paws, I added the toe lines. I drew two on each paw and made them slightly curved.
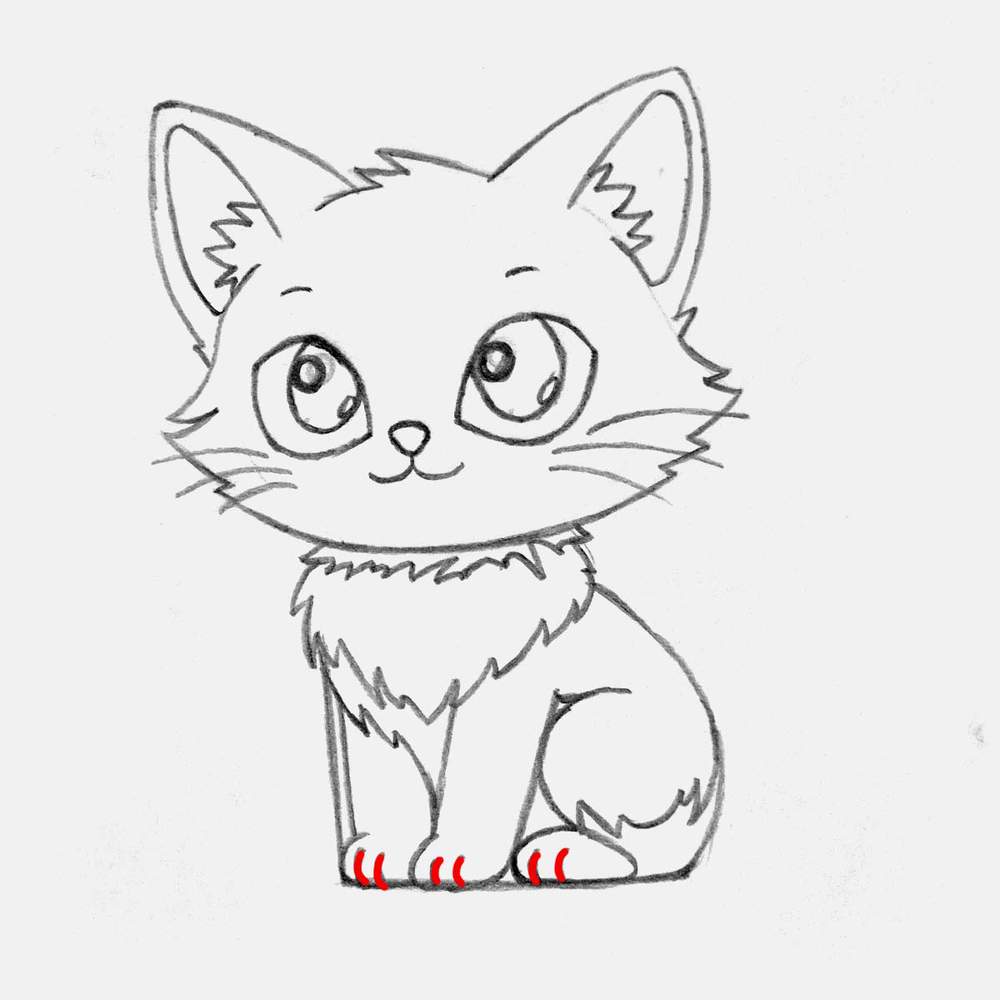
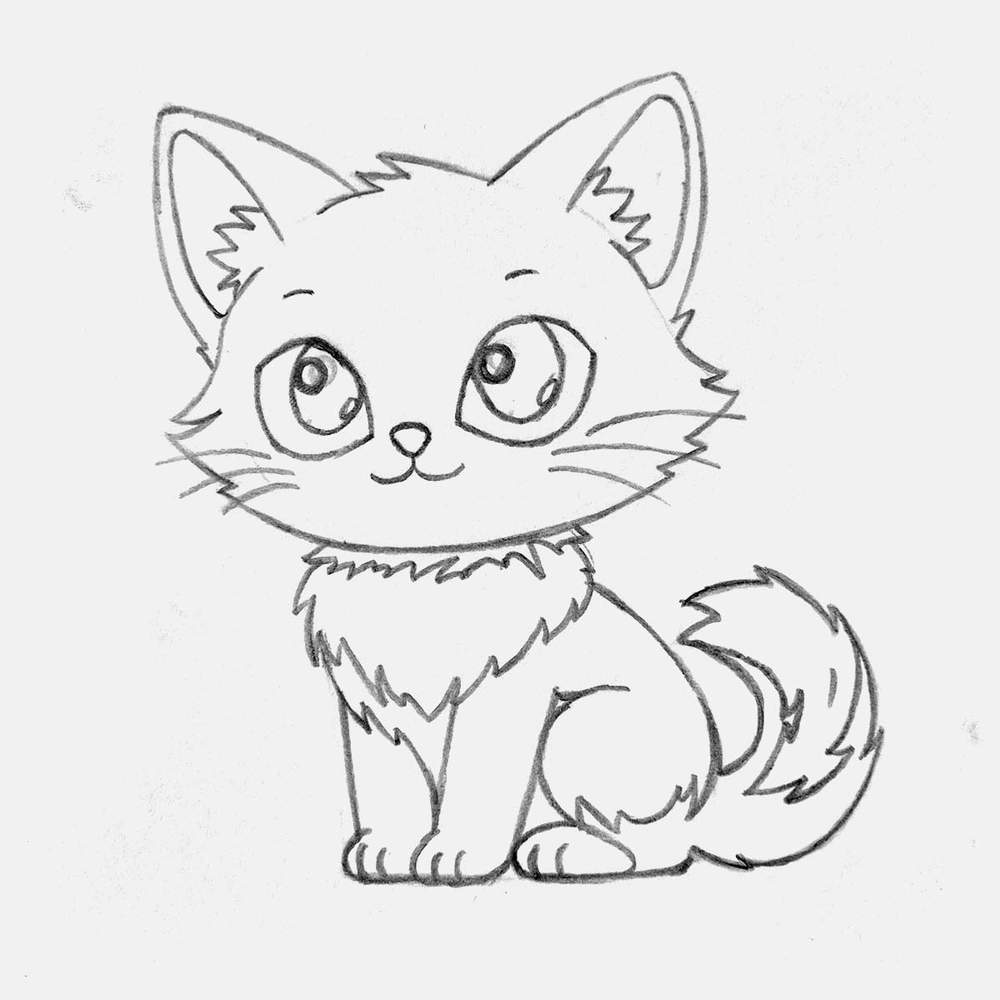
With all the guide lines erased, the cute black cat sketch looks like this:
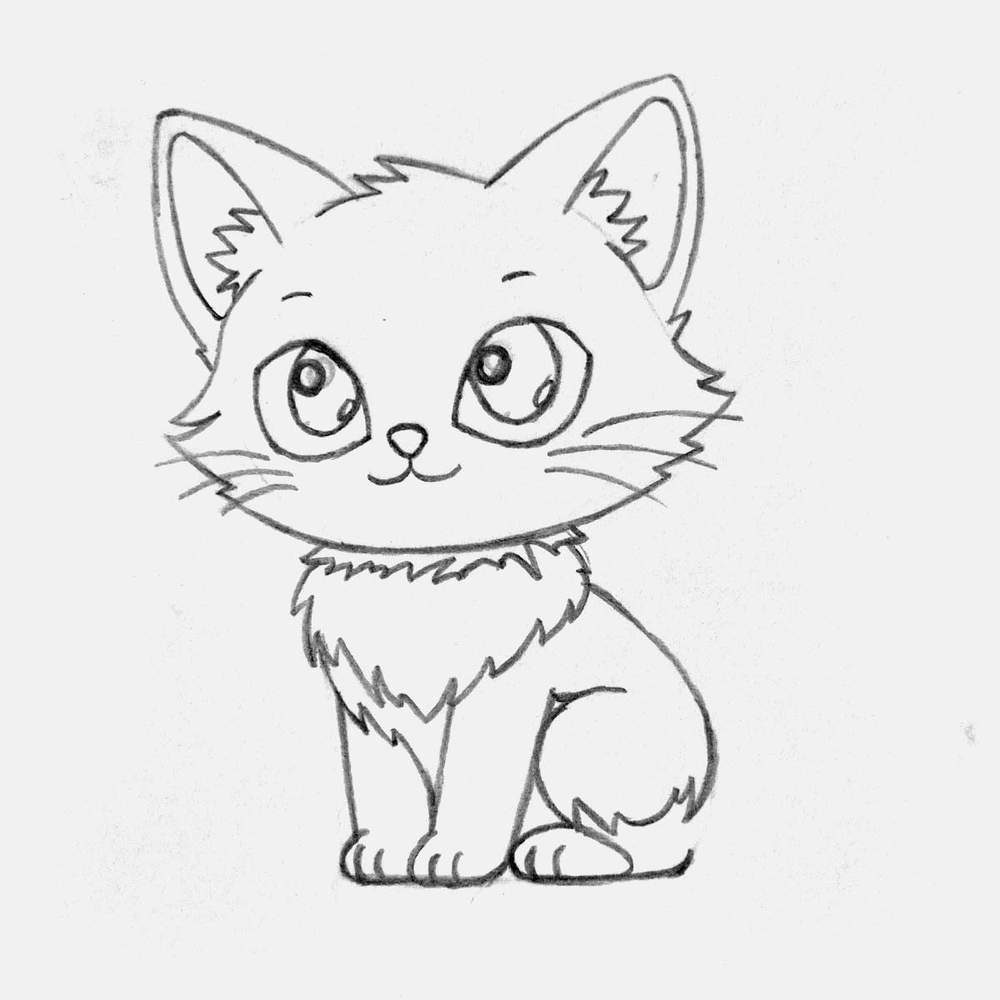
Step 8: Add The Big Fluffy Tail Of The Black Cat
The sketch of the cute black cat is almost done. There is just one small thing missing: the big fluffy tail.
When erasing the guide lines for the body, I also erased the part where the tail would attach to the back of the cat. When we add the tail here, it will actually look like it's connected and not randomly stuck to it.
To sketch the tail, I drew two curved lines. The inside line is the shortest and curves a lot. The outer edge of the tail connects to the inside line and completes this crescent moon shape. I made the tail quite thick as I planned on making it look very fluffy.
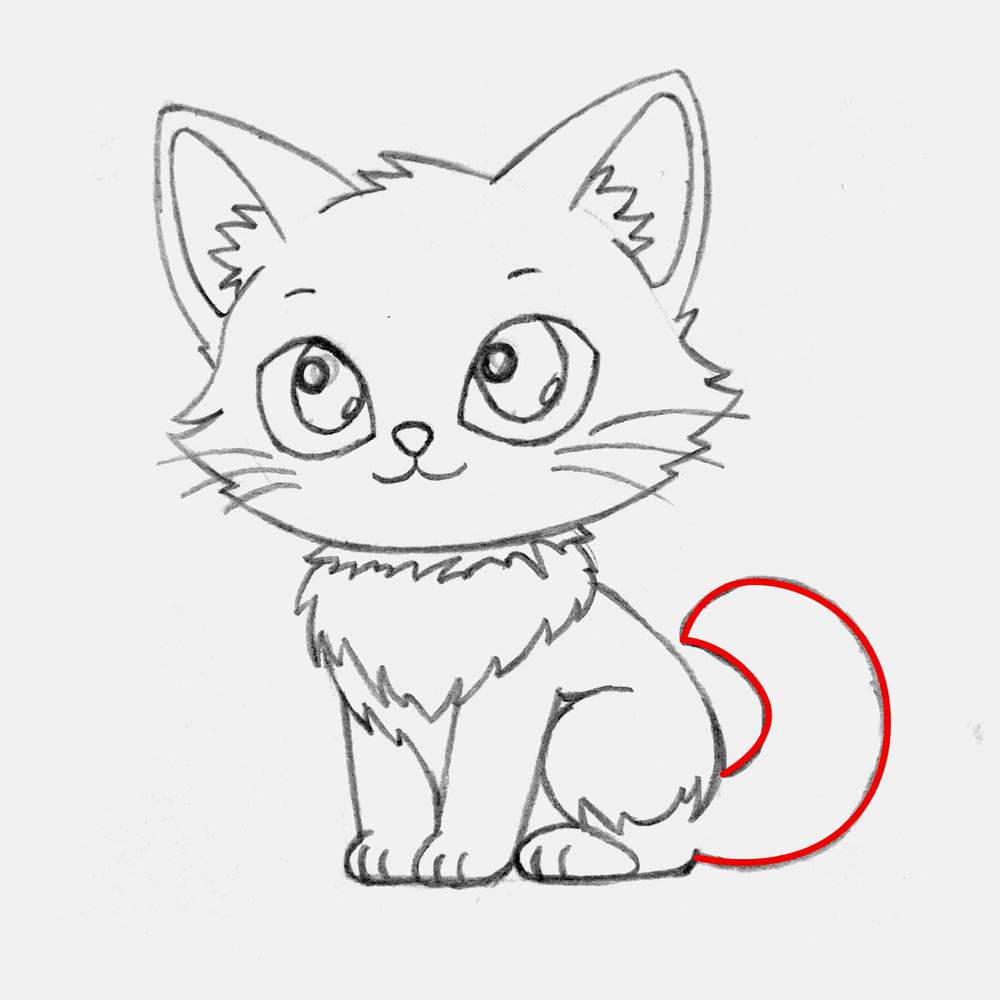
To add some fluff to the tail, I added a jagged fur pattern around the outer edge. I used quite big jagged lines to make it look extra fluffy.
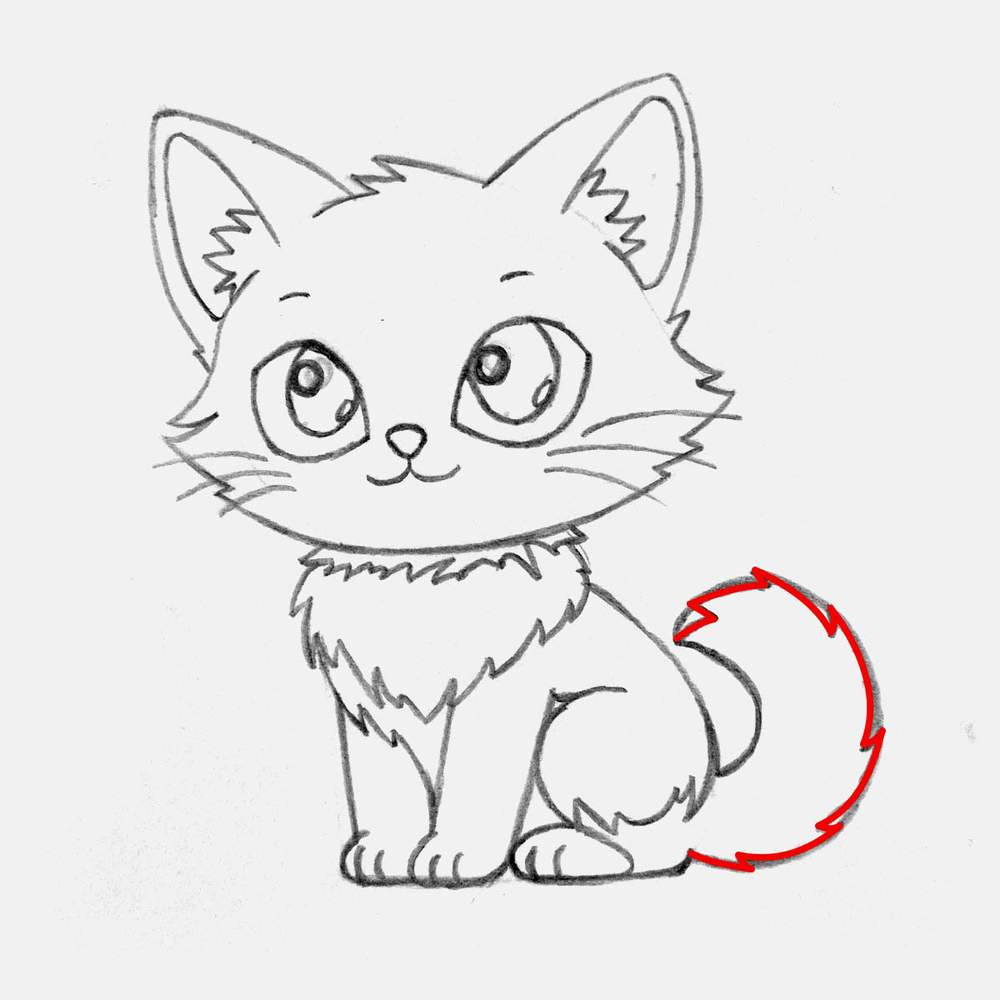
And to complete the fur texture, I added some more jagged lines on the tail to give it an even more fluffy look.
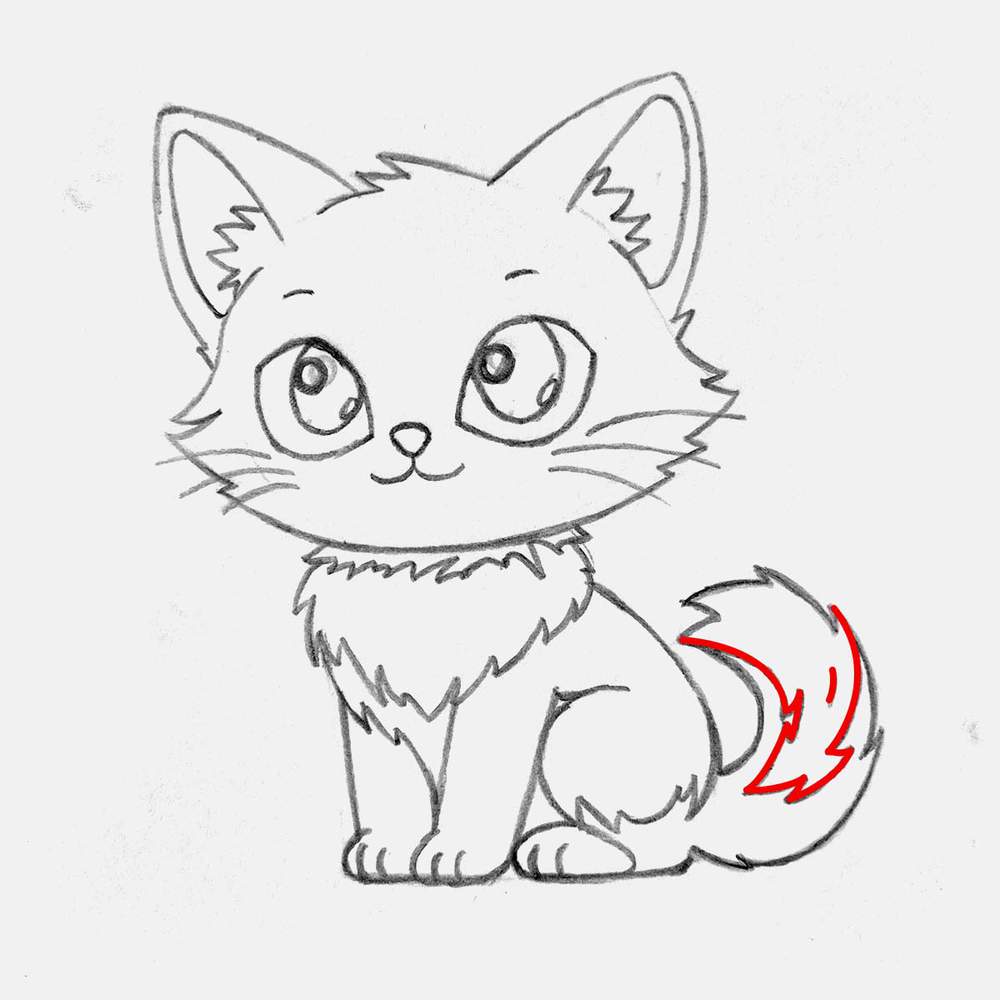
With the fluff added to the tail, we have completed our cute black cat sketch! Although there is no black yet.
Step 9: Outline The Black Cat Drawing With A Black Brush Pen
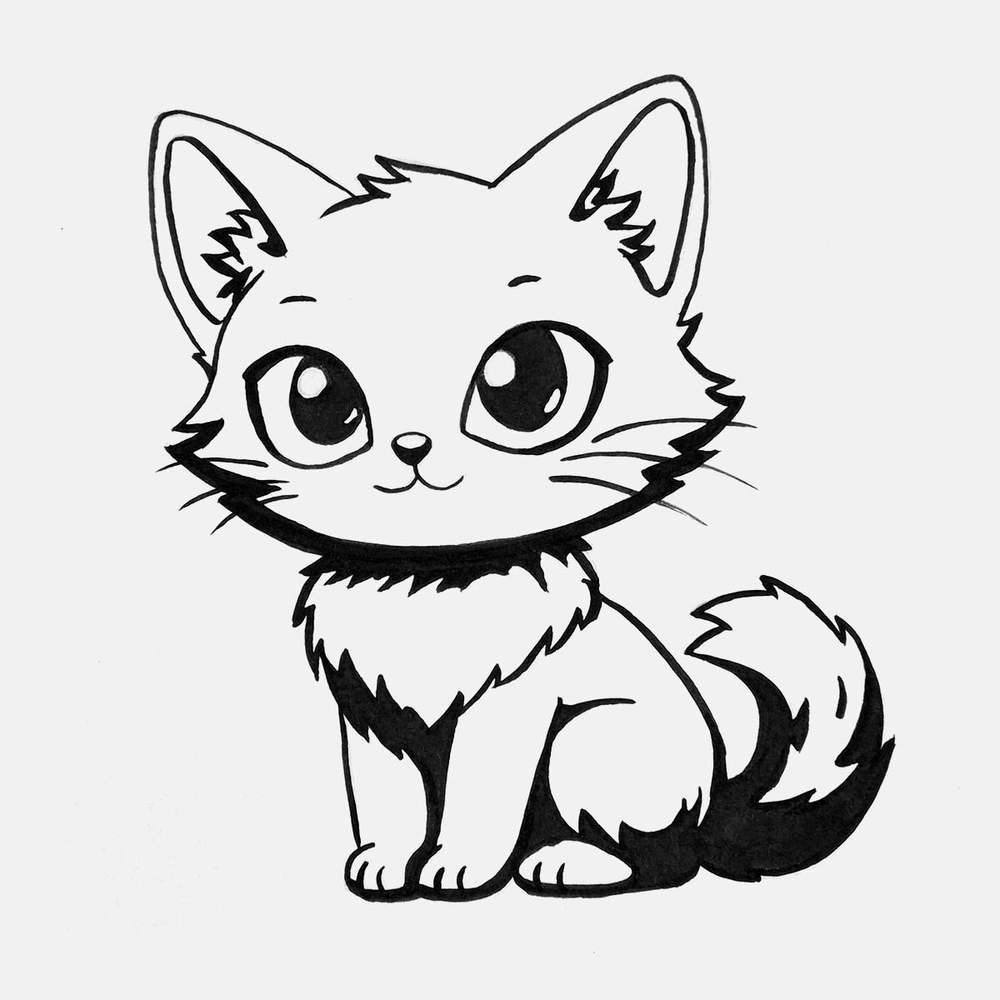
To prepare the sketch of this cute cat to be turned into a cute black cat, I outlined the full drawing with a black pen. To create the fluffy texture, I really like to use a brush pen instead of a regular fineliner, as the brush makes it super easy to create these jagged lines.
My favorite brush pen is the Tombow Fudenosuke brush pen. I use it all the time in my drawing, and I love how it draws. When using alcohol markers later on, you do need to be a little careful as the alcohol-based ink can smudge the black ink if the brush pen if you color over it.
To outline the cat sketch, I first lightened the sketch with my kneaded eraser by just rolling it over the sketch. Then, I just drew over every line we just sketched with the brush pen.
When creating the sketch, I had already marked some parts that were going to be colored black, aka the shadows. For example, I made the bottom edge of the head way thicker than the rest of the outline to show that there is a shadow. I also colored the fluff bit below the chin black, as well as some more parts.
When coloring the pupils of the eyes, I made sure to keep the eye shine (the bright white reflections) white. If you do accidentally color over them, you can add them back in with a paint marker like this Posca PC-3M one that I love to use for highlights.
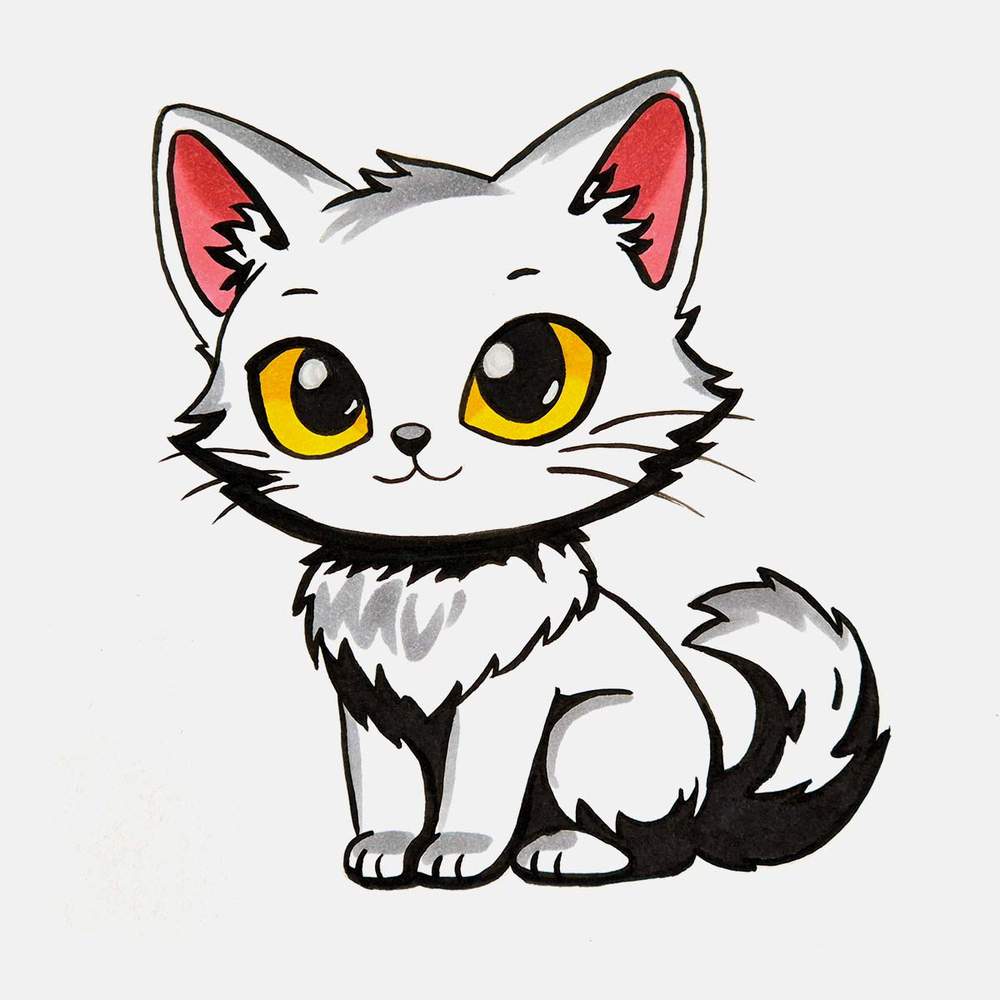
With all that said, here is the outlined cute black cat drawing:
Step 10: Color The Yellow Eyes Of The Black Cat
Alcohol markers are, in my opinion, the best markers to use for coloring. You can quickly color large areas, and the ink dries very smooth if you use the right paper and technique.
For my drawings, I like to use the Ohuhu Honolulu markers. They are pretty affordable compared to other well-known brands, and you can buy individual colors and refills.
After outlining the black cat, the eyes were the first things I colored. Since we're drawing a black cat, I made the eyes a bright golden yellow. This suits the black cat super well.
I first colored both eyes with a regular yellow color called Acid Yellow (Y070). Again, be careful not to color too much over the black ink. Otherwise, it will smudge into the yellow.
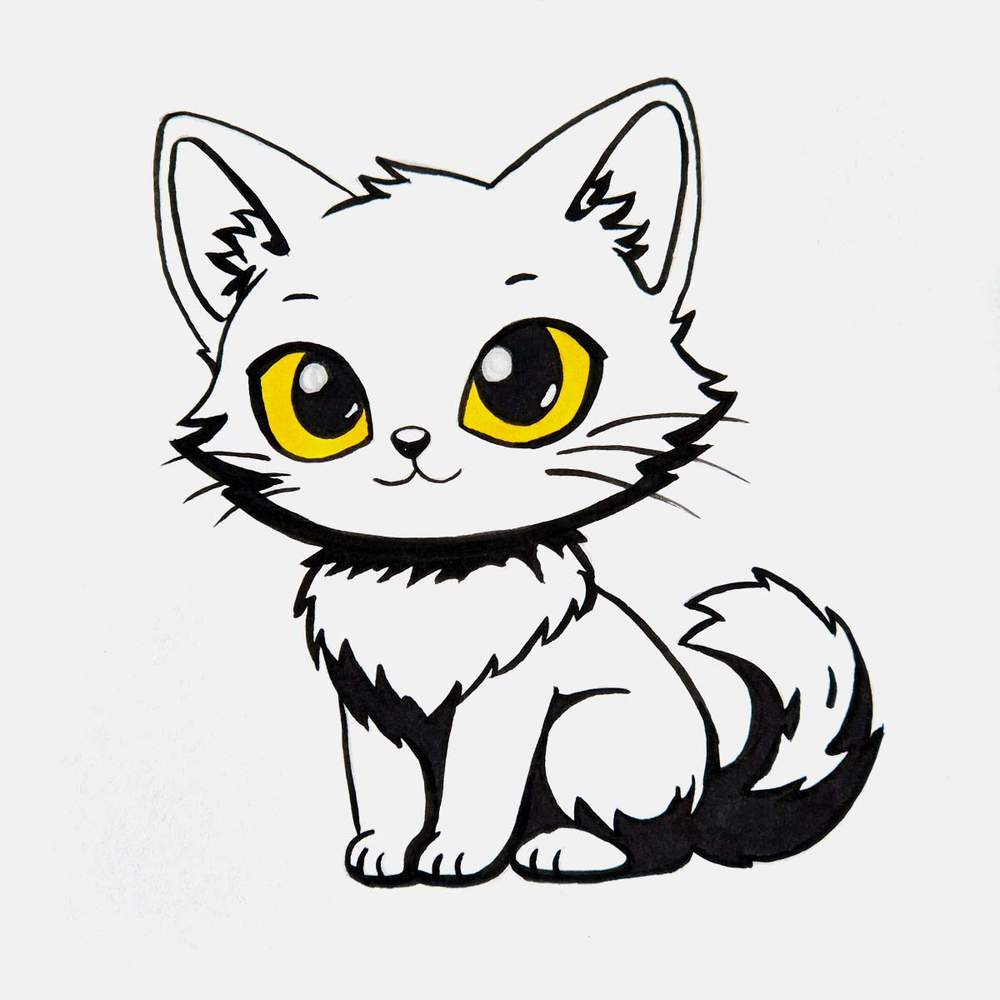
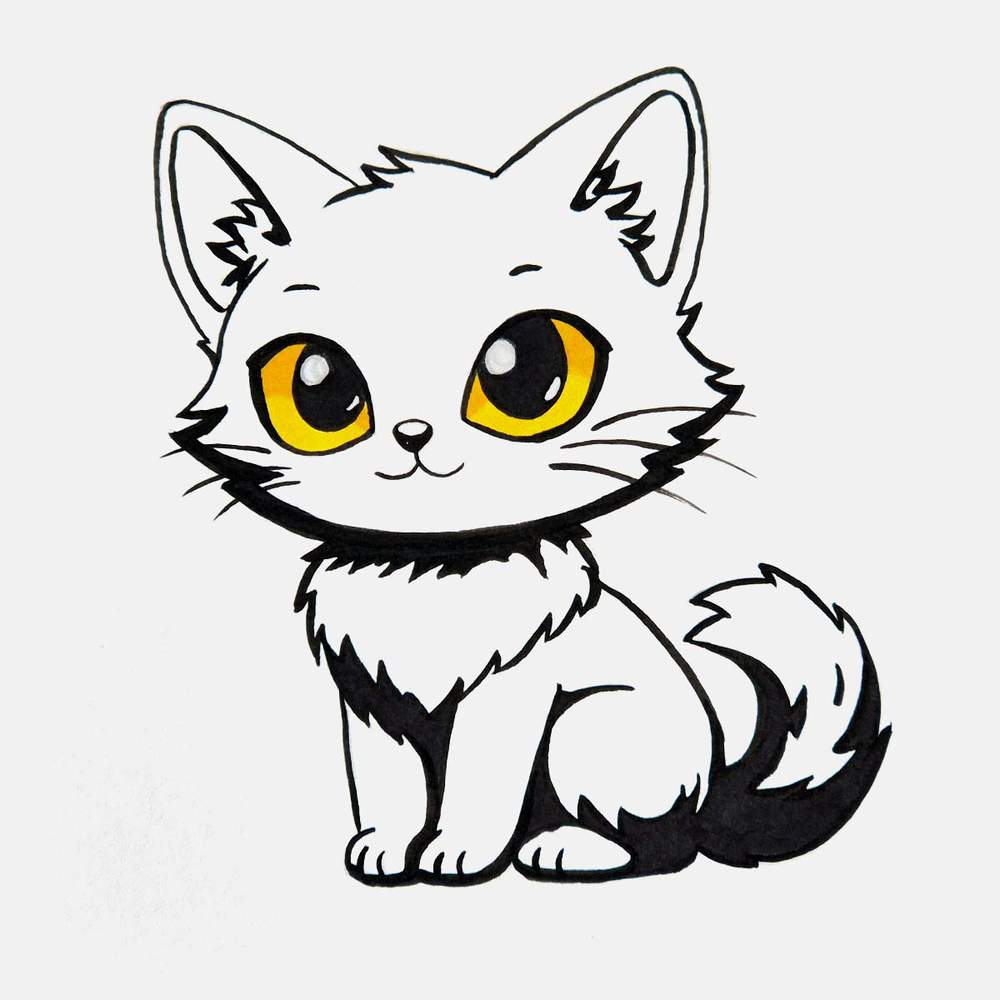
Next, I added some darker golden shading to the top half of the yellow cat eyes. To do that, I used a color called Sunflower (Y2).
Step 11: Color The Ears Of the Black Cat
After the yellow eyes, I colored the pink parts of the ears of the black cat. I first colored both ears with Pastel Rose (R9).
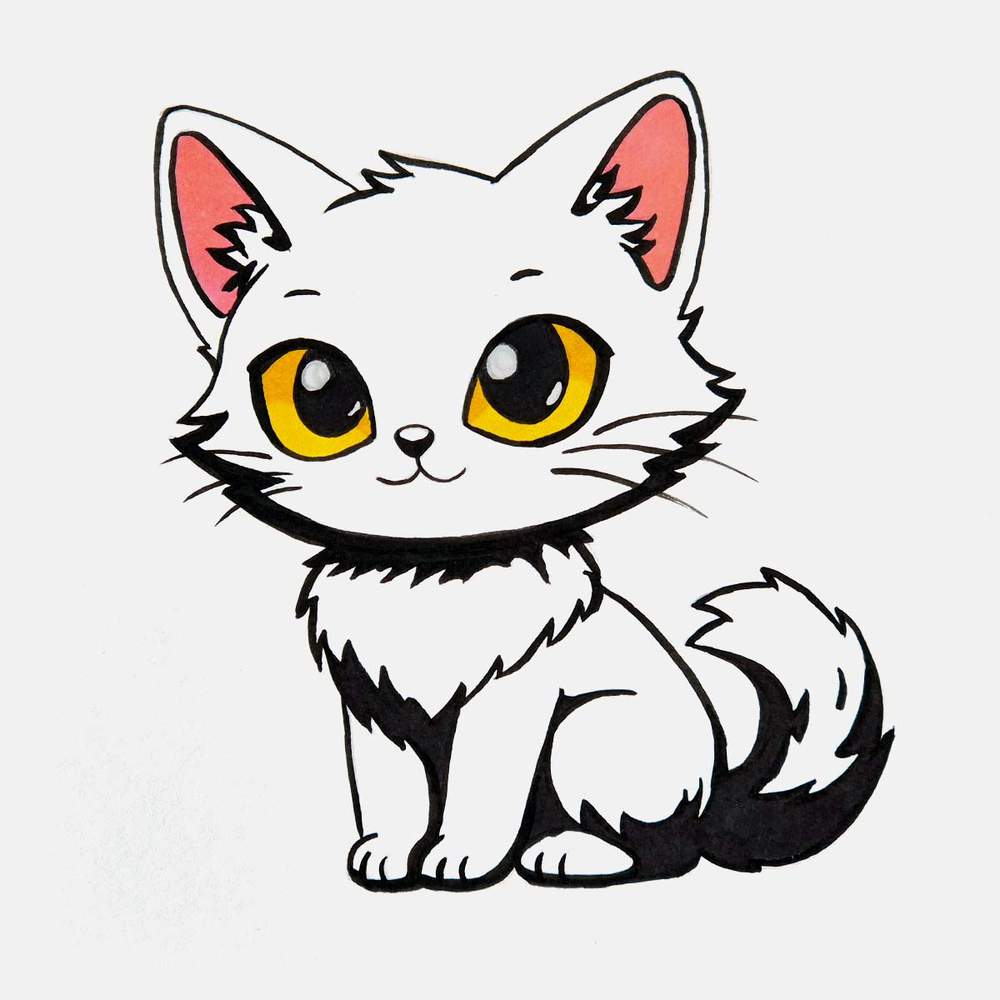
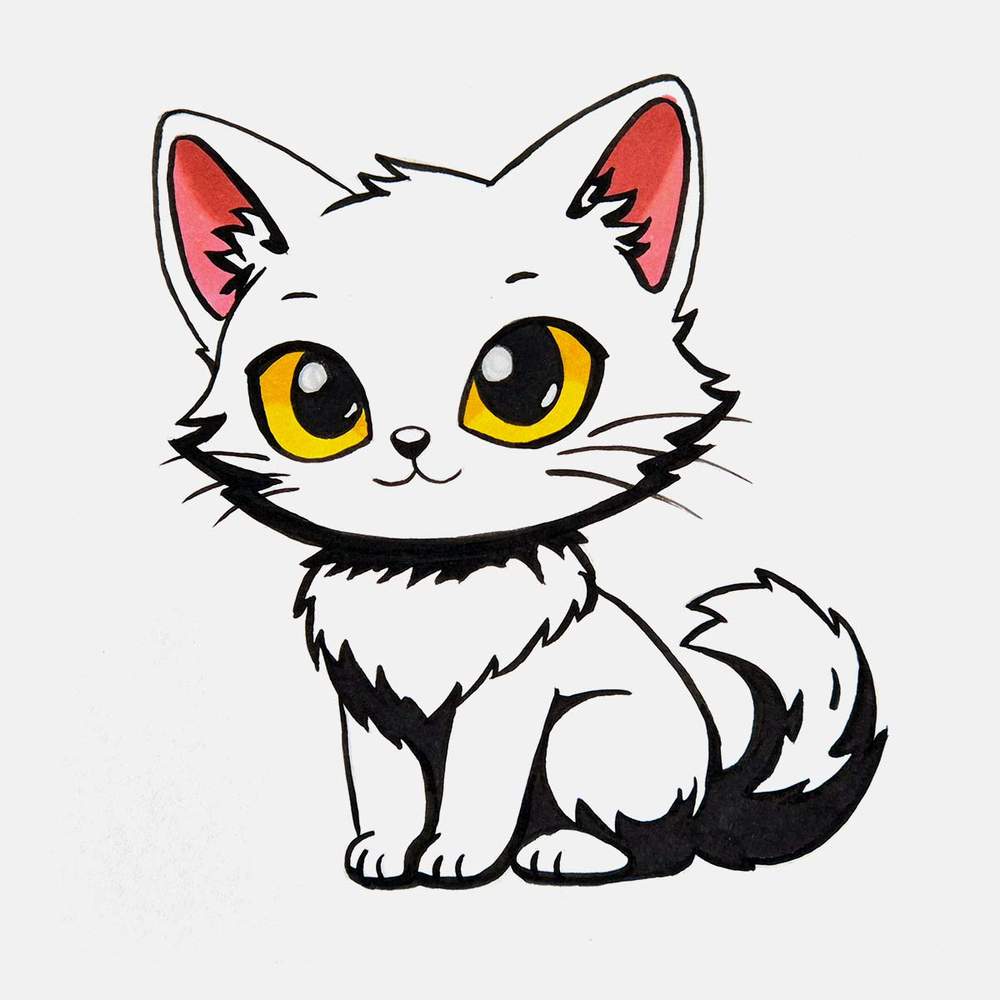
And then, I added some darker pink shading to the inner edges with Coral Pink (R1).
Step 12: Color The Black Fur Of The Black Cat
With the eyes and the ears colored, it's finally time to make this a black cat drawing. To color this black cat, I'm actually not going to use a black marker. I'll be using a medium grey and a dark grey. We already colored all the black parts in when outlining this cat drawing.
Before coloring all the dark fur of the black cat, I marked out where the highlights are going to be. I did that by coloring those parts with a medium grey marker or Neutral Grey 05 (CG050) in this case. This color turned out a little light, so you could also use a darker color like Cool Grey 07 (CG070) if you like the highlights to not stand out as much. I decided to just leave it as is.
I added some highlighted fur on the top of the head, the top edge of the ears, the top of the fluffy cheeks, the chest fur, the front edge of all legs, the top edge of the paws, the tip of the nose, and the tip of the fluffy tail.
To color all these highlighted fur parts, I used some jagged lines to make it look more like fur.
At last, we're going to draw the dark fur of the black cat. I used a dark grey called Neutral Grey 6 (Ng06) to color all the remaining fur. I did add a second layer as the first layer dried a bit uneven. It's still not perfect, but it looks good enough, I think.
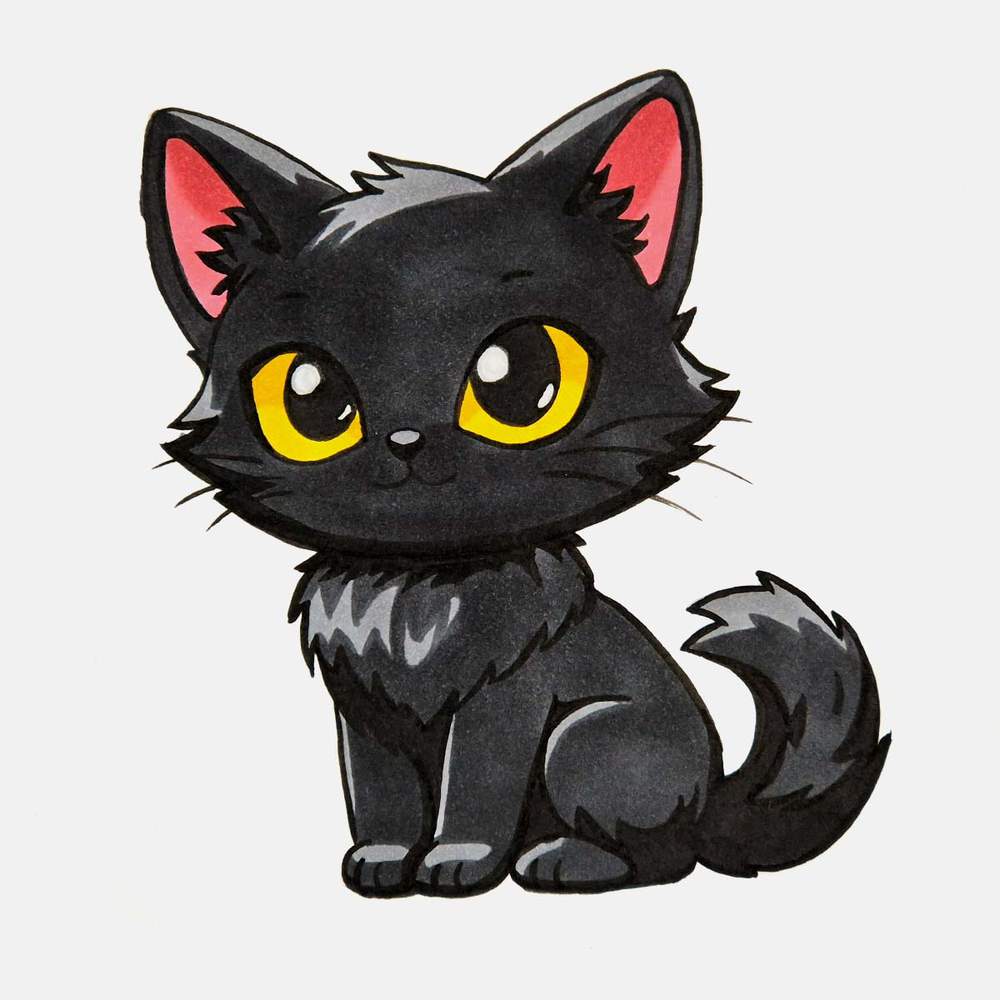
And that's how you draw a cute black cat step by step from scratch with markers.
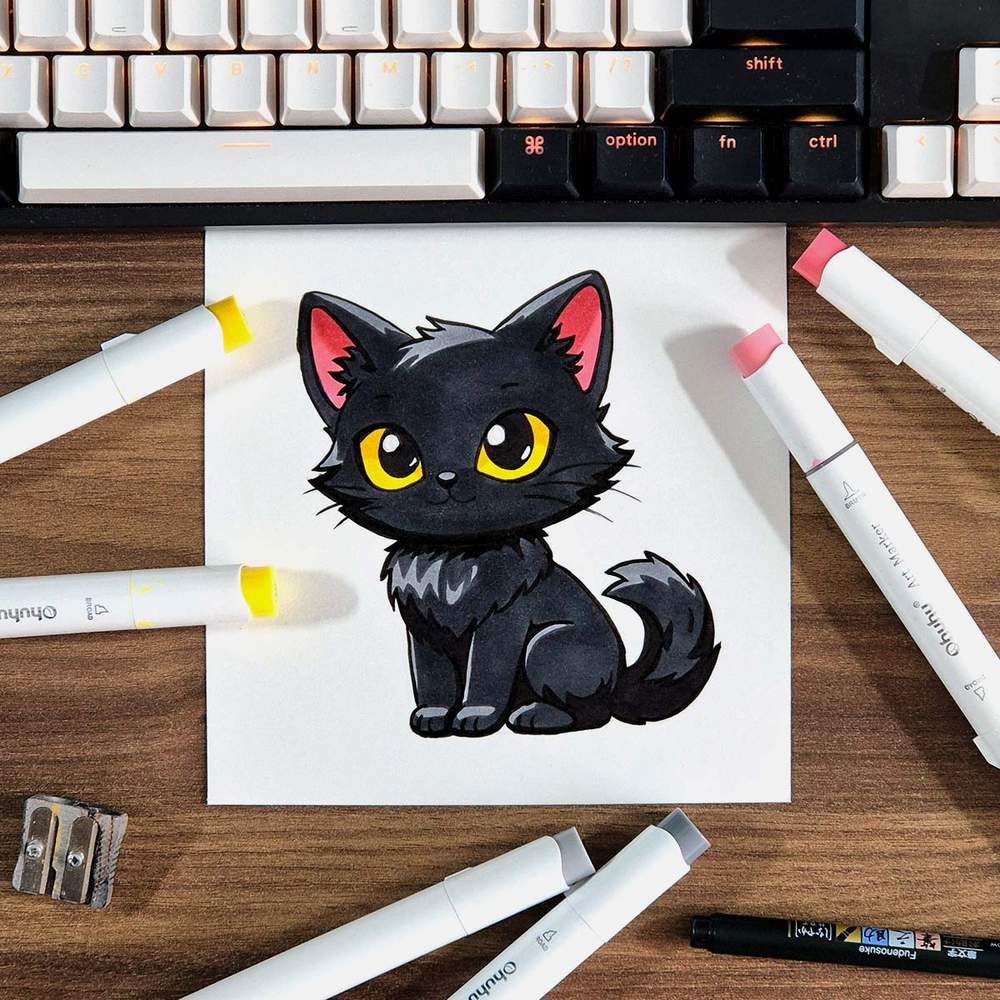
This black cat drawing turned out so well, and it looks super cute. I hope you enjoyed this black cat drawing guide. Thank you for following along with me.
If you liked this step-by-step drawing guide, you might also like my other guides. I've made more cute guides, but also many others. Make sure to check them out or click any of the linked posts below.
Thank you once again, and I'll see you in the next drawing guide!
Articles You Might Also Like

I love bringing cars to life with alcohol markers and colored pencils.
Whether you're just starting out or looking to improve your skills, I'm here to help!
Click here to learn more about me.


Be the first to comment!
Comments
There are no comments yet.