How to Draw a Cute Bunny (Easy Step-by-Step Guide for Beginners)
This guide is all about how to draw a super cute and easy bunny for beginners.
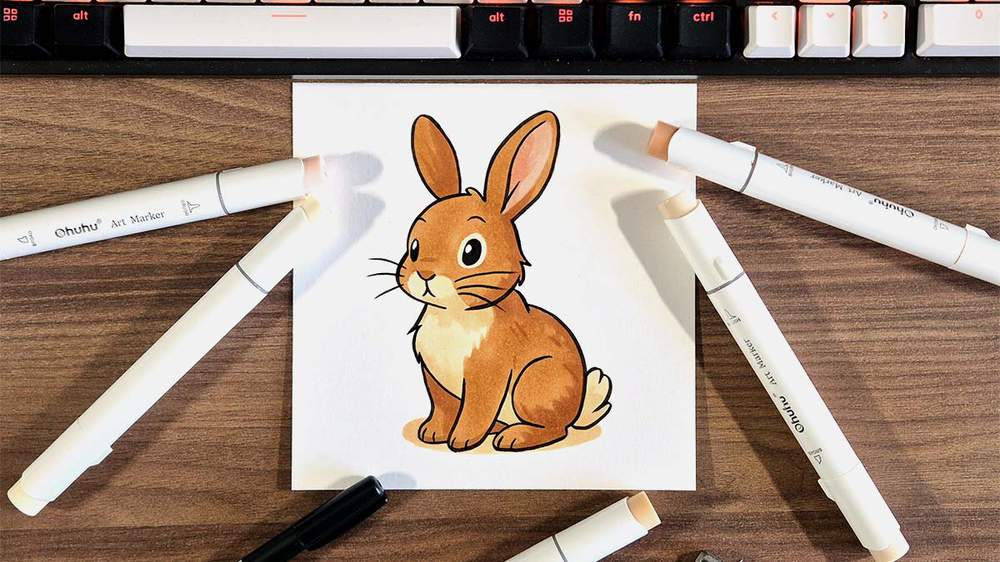
Want to learn how to draw a cute bunny step by step? In this easy bunny drawing tutorial, I'll show you exactly how to sketch, outline, and color a simple bunny drawing, even if you're a complete beginner.
This beginner bunny drawing guide is perfect if you're drawing for Easter, for fun, or just want to practice a cute cartoon bunny drawing. I'll walk you through sketching, outlining, and coloring using alcohol markers, with clear explanations and plenty of images to help you follow along.
I'll also show you how to draw soft, fluffy fur using simple sketch lines, so your bunny looks extra cute and alive.
Disclaimer: In the name of full transparency, please be aware that this blog post contains affiliate links and any purchases made through such links will result in a small commission for me (at no extra cost for you).
In This Guide
- Art Supplies I Used
- Sketching the Bunny
- Outlining the Bunny
- Coloring the Bunny
- More step-by-step guides you'll like
Art Supplies I Used
To sketch the bunny, I used a regular graphite pencil and an eraser.
And I drew it on Canson Illustration Manga paper, which works really well with alcohol-based markers. But if you're not planning on coloring it with markers, you can just use printer paper.
To outline the sketch, I used a black Tombow Fudenosuke Brush Pen.
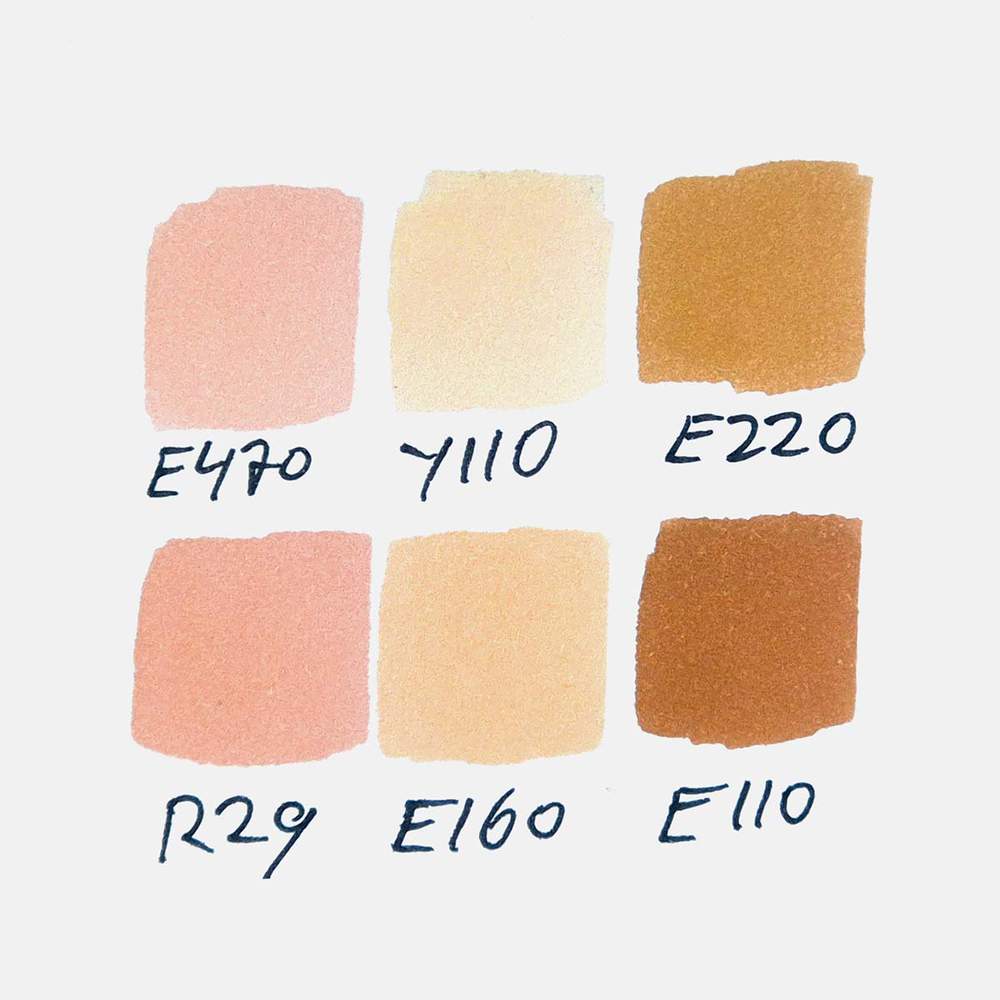
And to color the bunny drawing, I used Ohuhu Honolulu markers. I used 6 colors: Tea Rose (E470), Pear Color (R29), Grayish Yellow (Y110), Soft Sun (E160), Sand (E220), and Dark Suntan (E110).
You can buy these colors separately or in the 320 set.
How to Draw a Cute Bunny Step by Step
In this step-by-step bunny drawing tutorial, I'll show you exactly how to draw a rabbit easy using simple shapes and beginner-friendly techniques.
Part 1: How to Sketch a Bunny (Easy Shapes for Beginners)
In this part of the easy bunny drawing tutorial, we'll focus on sketching the basic shapes to build a solid foundation for your bunny drawing.
To draw a bunny, I will first explain how to sketch it. For this part, the only thing you'll need is a regular graphite pencil, like the ones I'm using. You might also need an eraser if your pencil doesn't have one.
Every time I added a new sketch line or made changes to existing lines, I marked them in bright red. This makes it easier for you to see what changed.
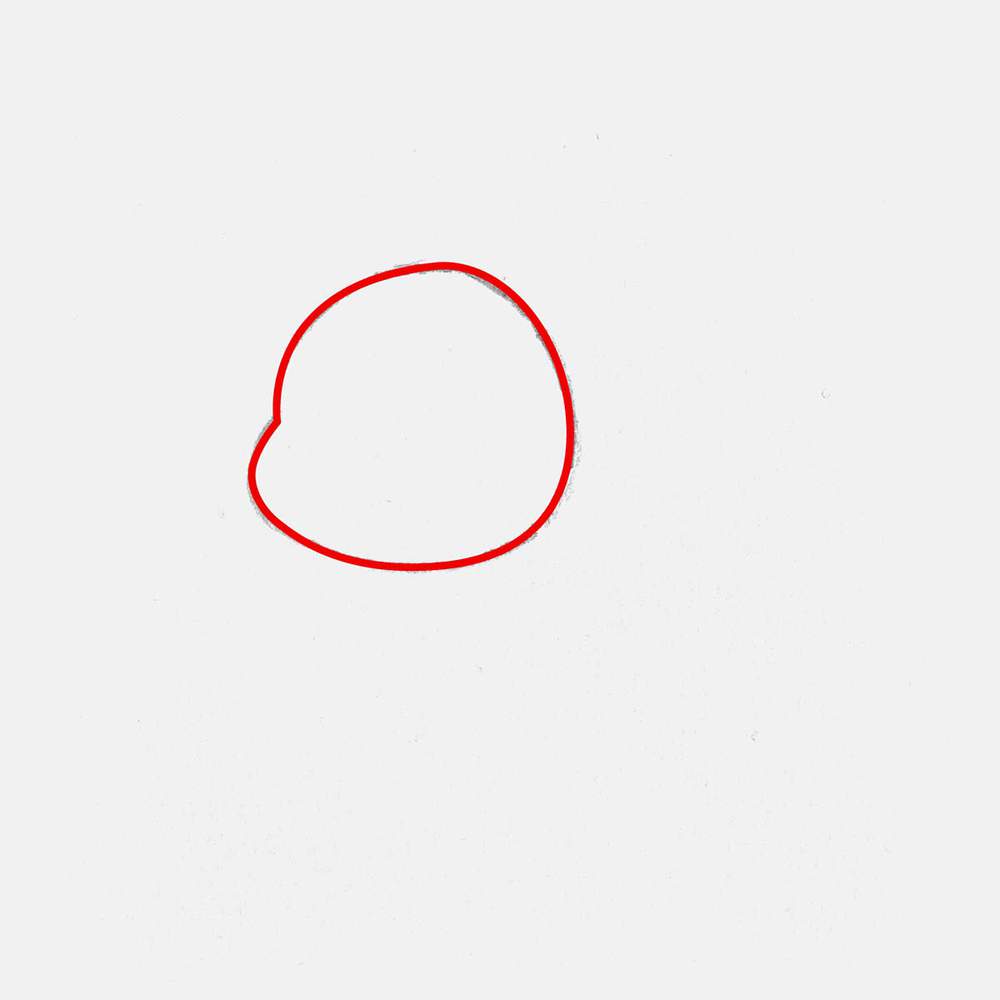
Step 1: Sketch the Bunny’s Head (Start with a Simple Circle)
Let's start by sketching the head.
This is the first step in learning how to draw a bunny, and starting with simple shapes makes it much easier.
I added a round-ish shape somewhere just above the center of the paper and slightly to the left. I also gave the bunny a round cheek on the bottom left side of its head.
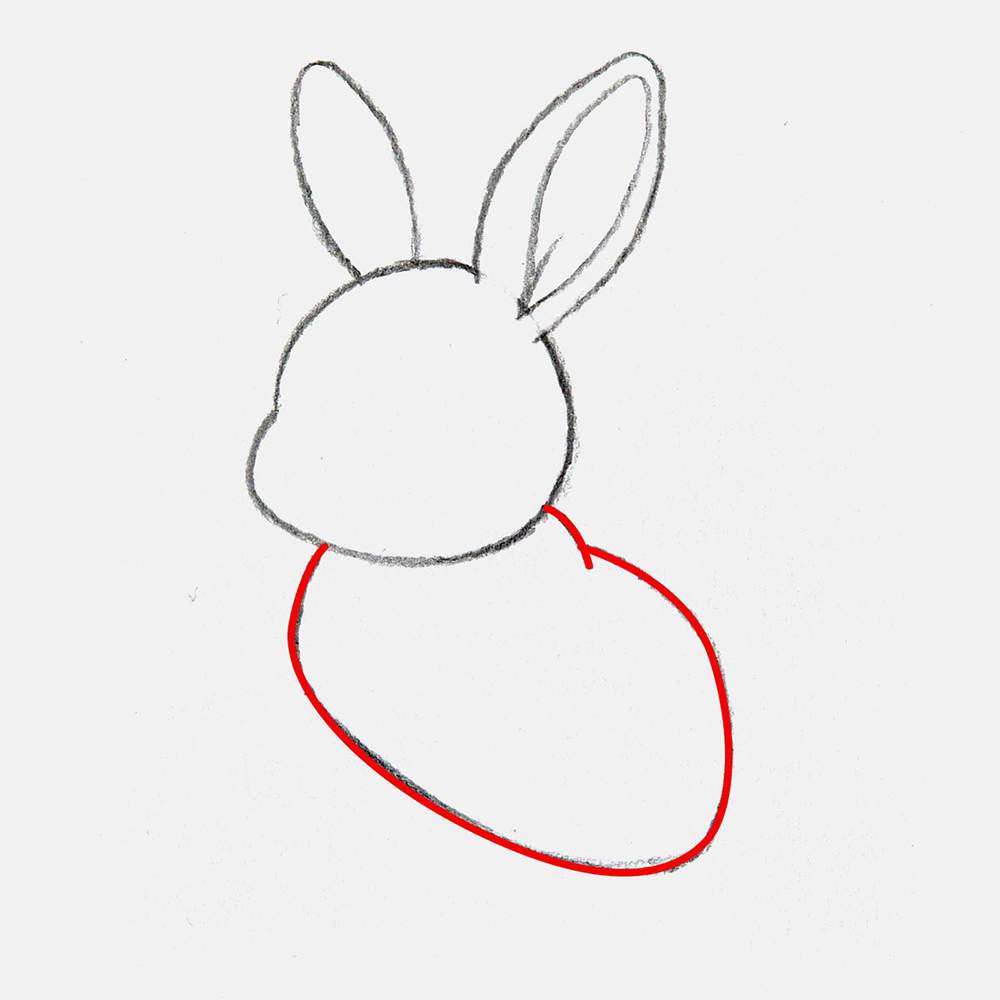
Step 2: Draw the Bunny’s Ears
With the basic shape of the head now done, I sketched the outline of the 2 big ears of the bunny. These are big pointy ovals on top of the bunny's head and slightly apart.
These large ears are a key feature in any cute bunny drawing, so feel free to make them slightly oversized for extra cuteness.

As the ear on the right is pointing towards us, I also sketched the inside of this ear. It, again, looks like a pointy oval, but this time with an extra short line on the bottom of the inside.

Step 3: Sketch the Bunny’s Body Shape
Next, I sketched the body of the bunny, which looks a lot like a wonky potato shape stuck to the bottom of the head.
I added a little fluffy bump on the top of its back, where the neck kinda folds the fur.
Using simple shapes like this is a great trick when you're learning how to draw a rabbit easy.
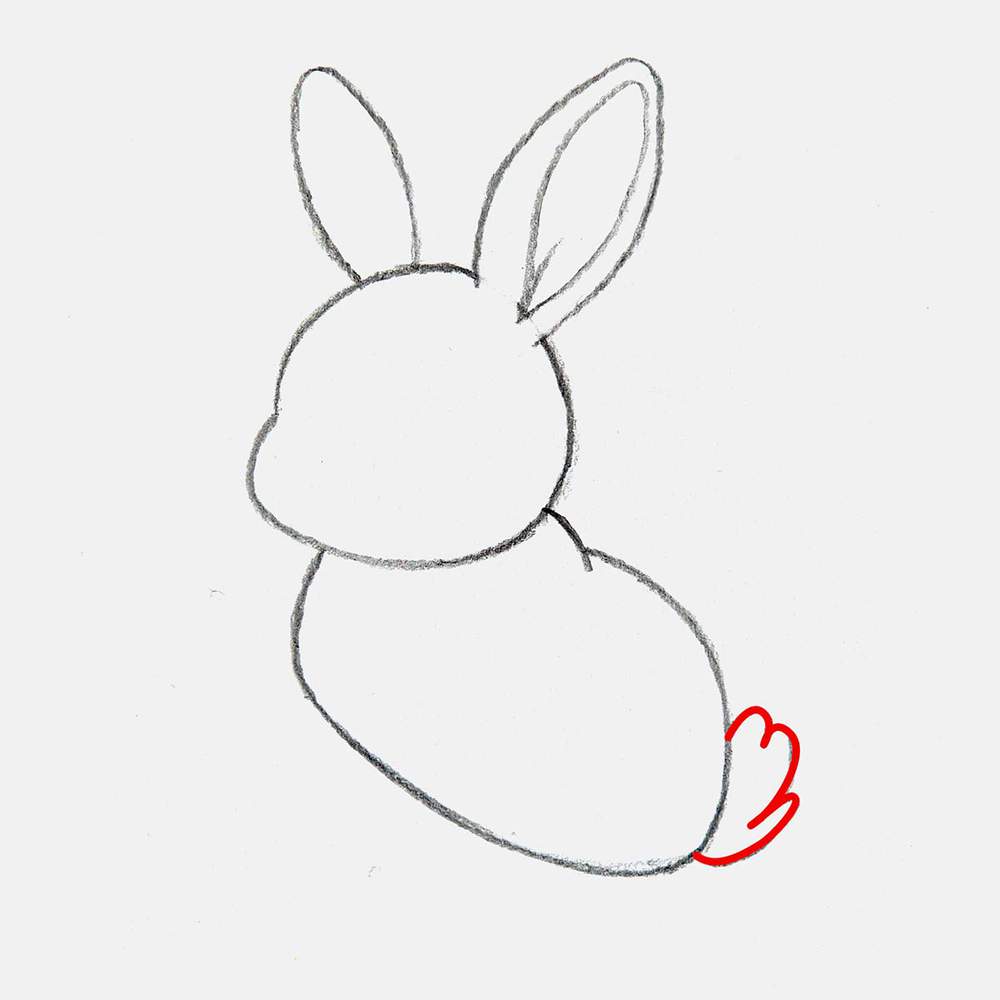
Step 4: Add a Fluffy Bunny Tail
After sketching the body, I added a little fluffy tail on the bottom right. I constructed it from 3 arch-like shapes to make it look soft and fluffy.
Step 5: Draw the Bunny’s Legs
Then, I added the legs, starting with the front legs. I first added the leg on the right.
The right edge of this leg starts in the center of the body and vertically lines up with the rightmost edge of the head. I sketched this line diagonally down and shaped it kinda like a hockey stick, pointing to the left.
Then, I sketched the left edge, which starts slightly down from the top of the right edge, goes straight down, then curves slightly left before it curves down into the hockey stick shape to complete the right leg.
After that, I added an upside-down hook shape for its other front leg.

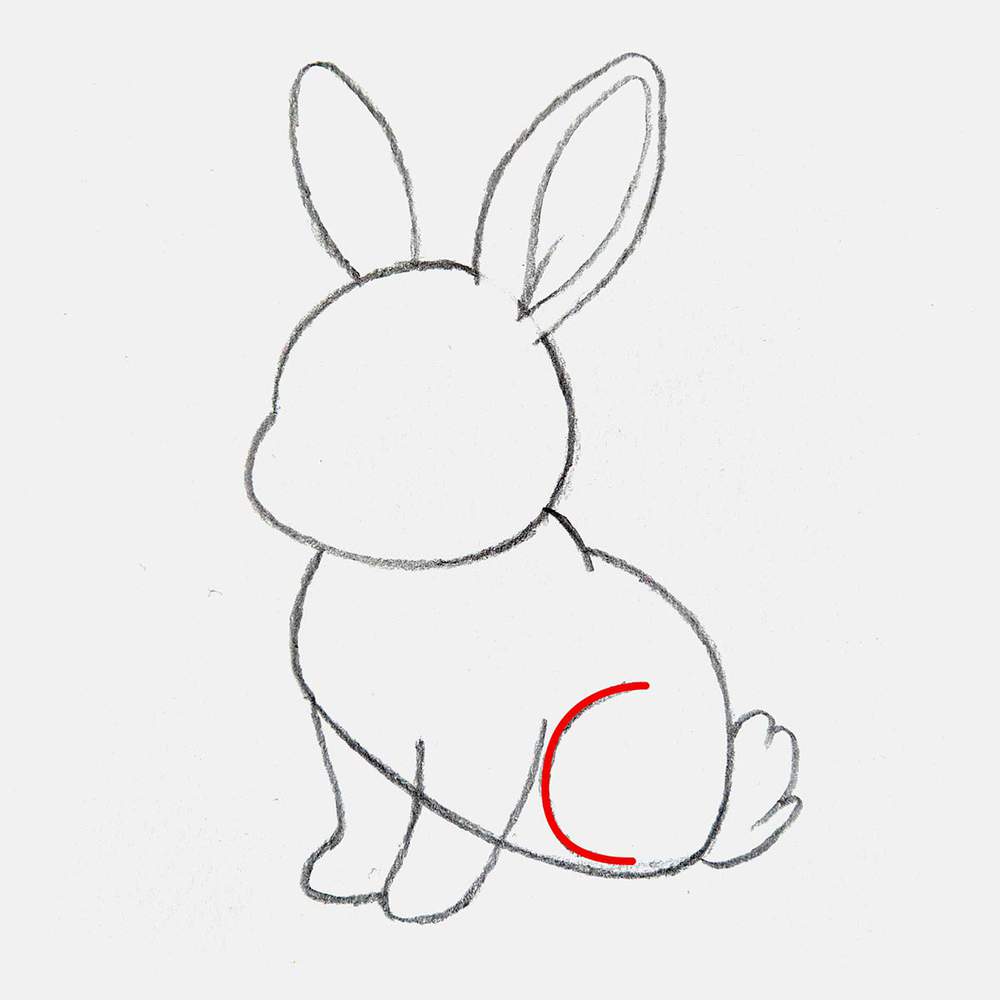
With the front legs now done, we can add the hind legs of the bunny.
I started by sketching half a circle for the thigh, which almost touches the front leg.
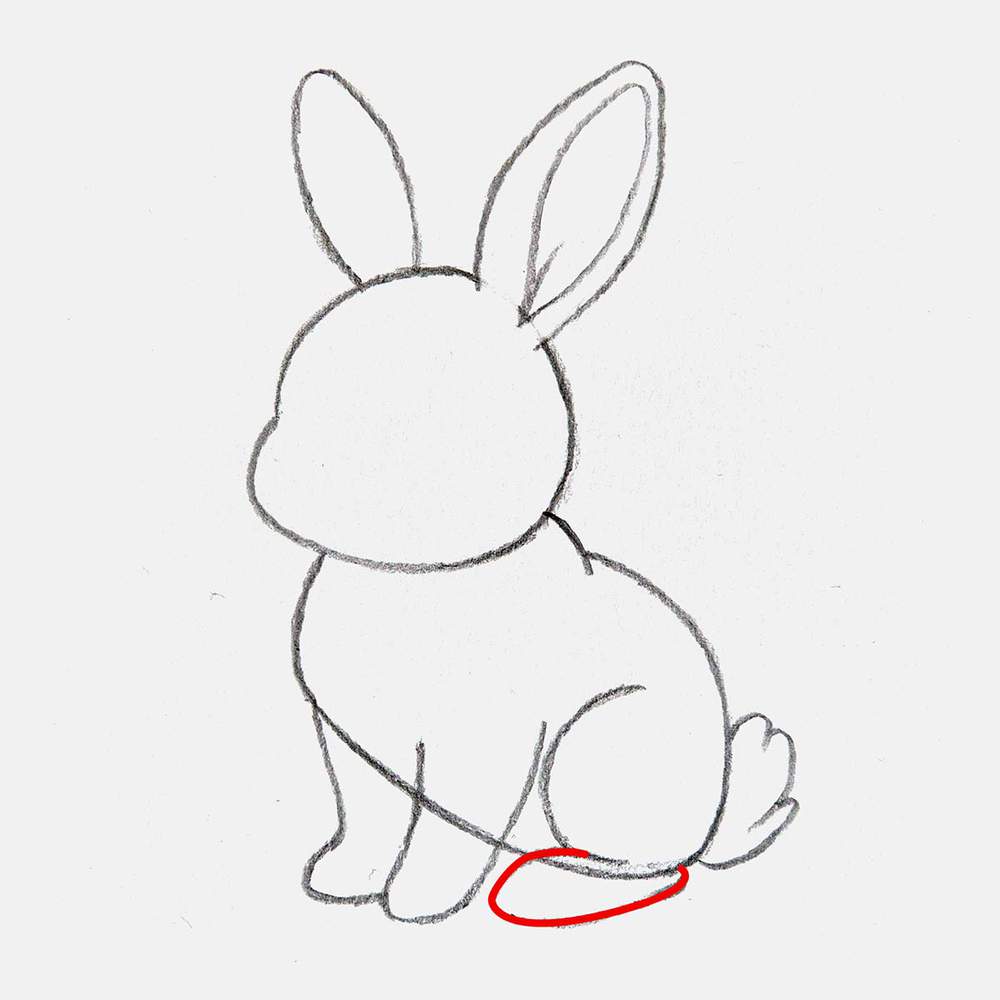
Then, I added this wonky oval-like shape to the bottom. It's thicker on the left, where the toes will be, and thinner on the bottom right.
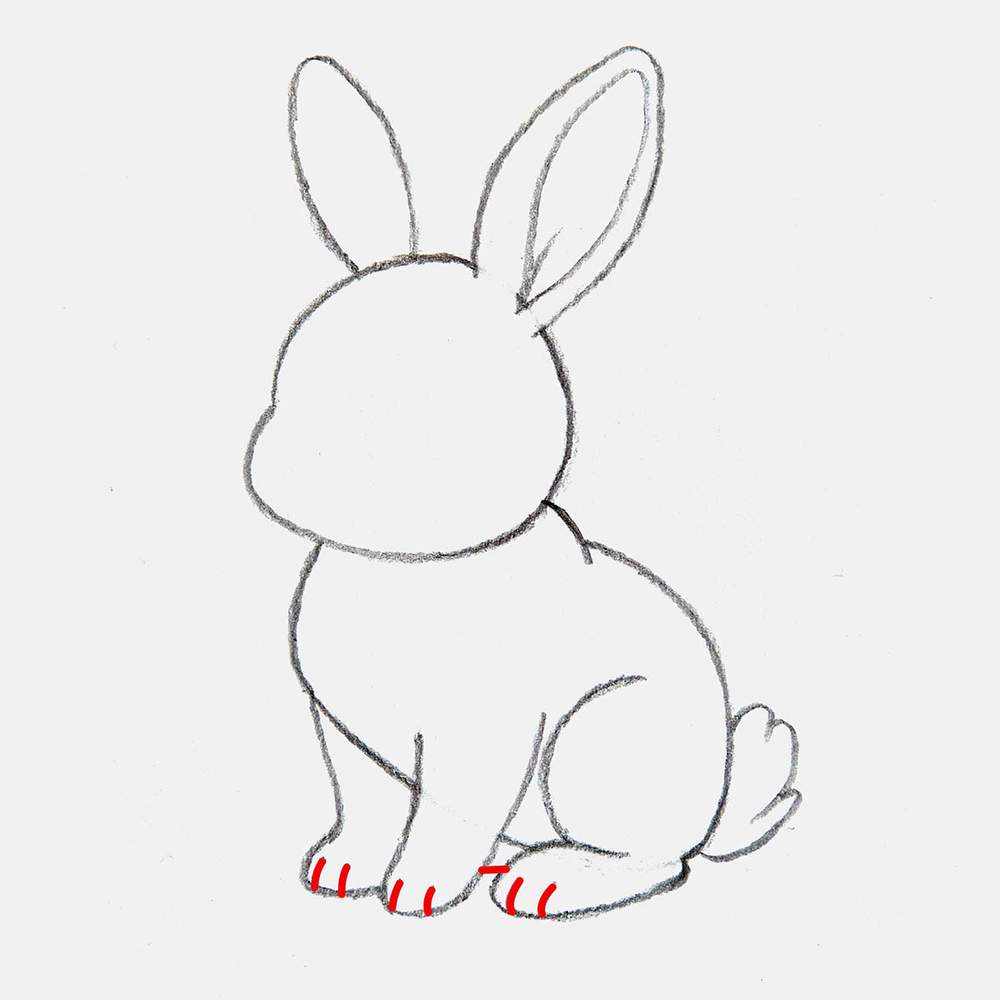
Lastly, I added lines to separate the toes of the bunny, and I added this small line of the bottom edge of the other hind leg in between the front leg and the hind leg we just sketched.
Step 6: Add Fluffy Fur Texture to the Outline
The outline of the bunny looks very smooth and not furry at all. Let's change that.
To make it look like the bunny actually has fur, I added a little fluff bit on his head right between his ears. I added 2 pointy fluff bits to the back edge of its head and 1 to its chest.
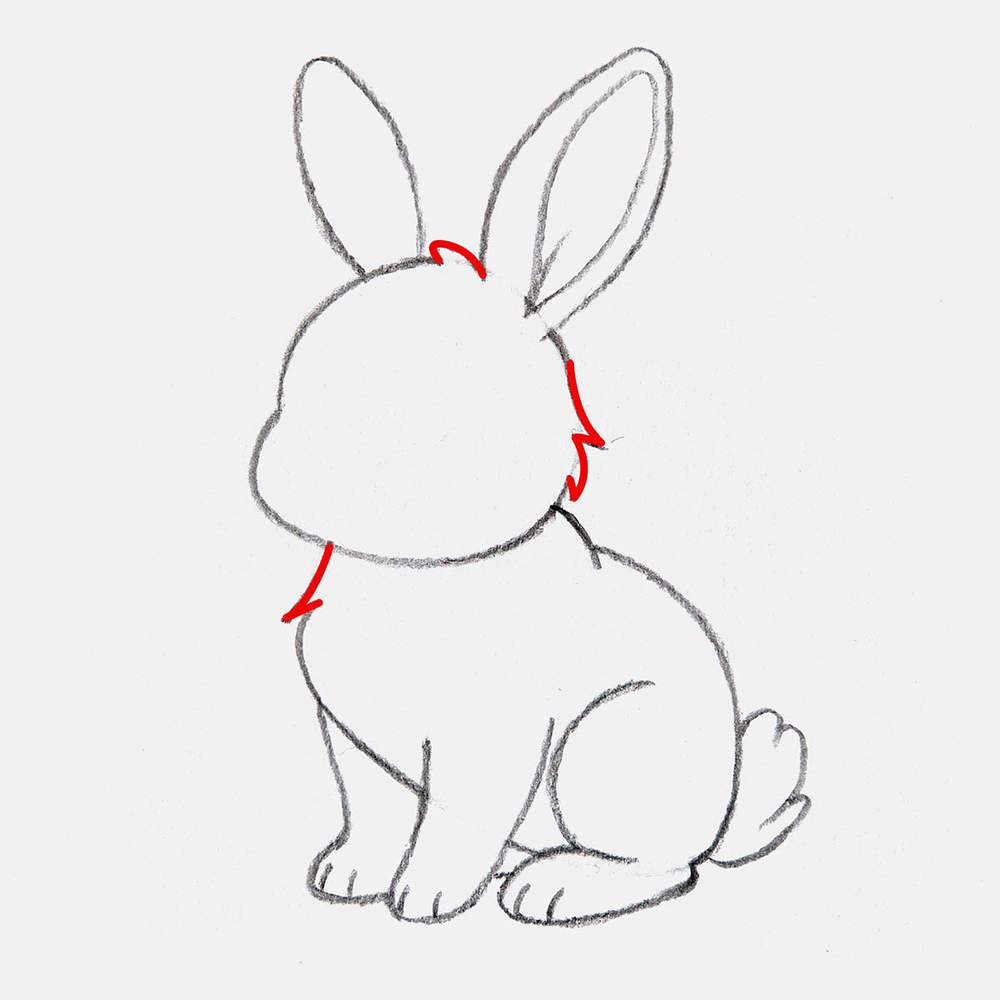
That's better.
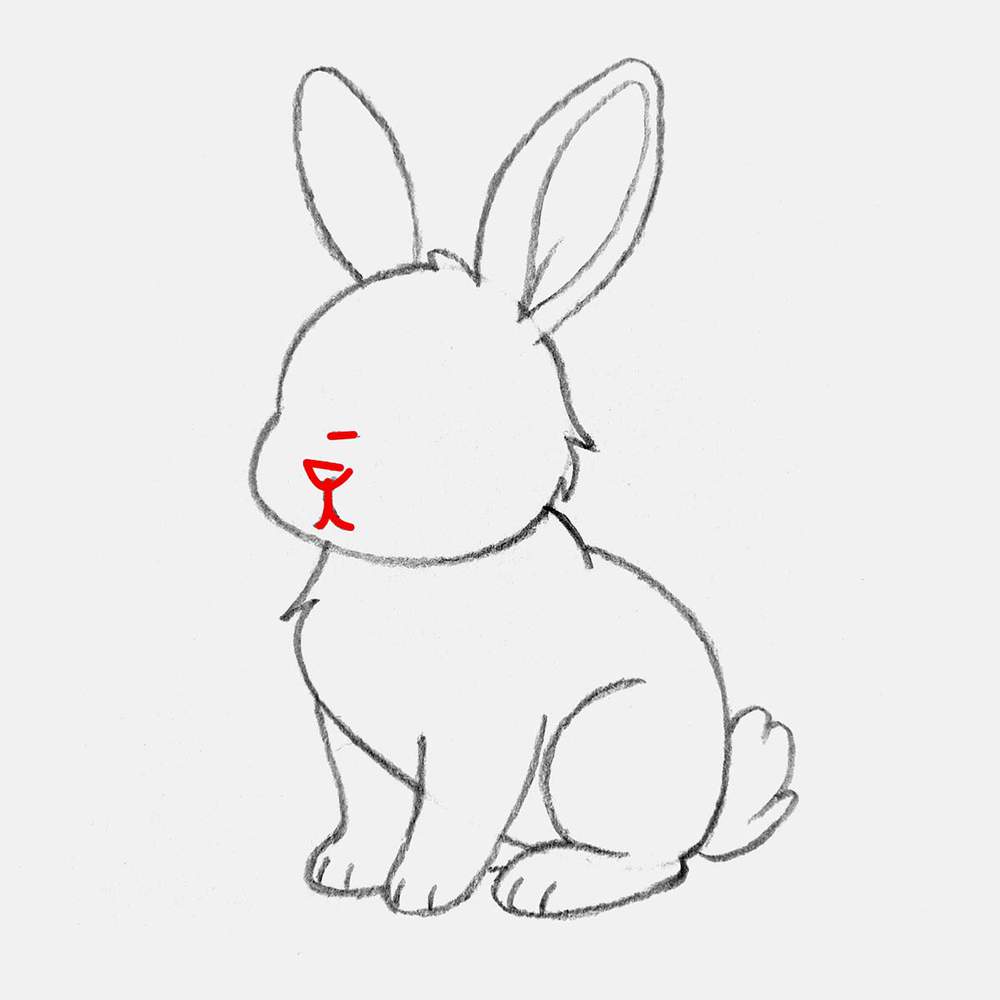
Step 7: Draw the Bunny’s Face (Eyes, Nose & Whiskers)
With almost everything else now done, we can focus our attention on the face of the bunny.
The face is what really defines your cartoon bunny drawing and gives it personality.
I started with the easiest parts first, which are its nose and mouth. The nose is just a simple, rounded upside-down triangle, which is positioned right above where the left edge of the neck connects to the head, and horizontally in the middle of the cheek we sketched in step 1.
Its mouth connects straight to the bottom tip of the nose and looks like 2 overlapping hockey sticks where the bottom ends point in opposite directions.
I also added this small horizontal line above the nose to show where the top edge of the bunny's snout is.
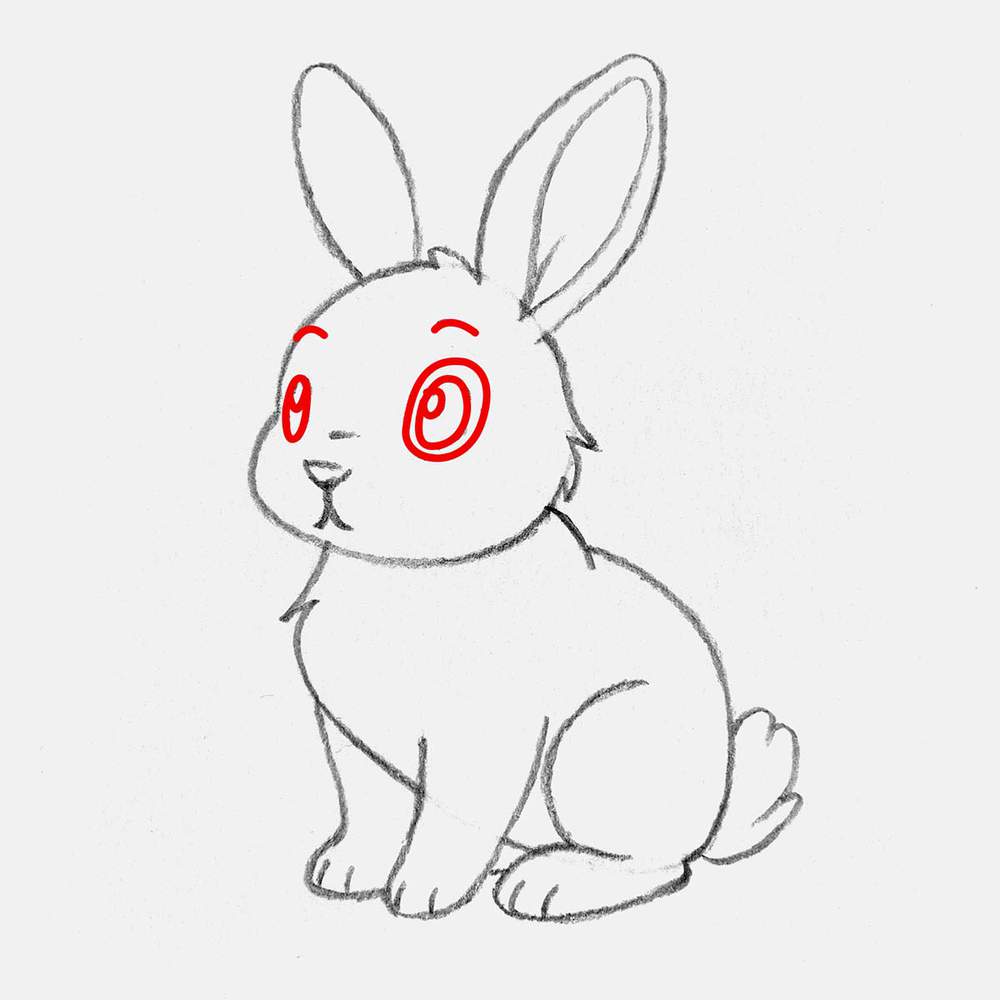
Next, I added the eyes and the brows.
The left eye is a narrow oval, approximately the same height as the nose and the mouth combined.
The right eye is the same height as the left eye, but it's a bit wider.
In each eye, I added a small circle to the top left for the pupils, and I added a bigger oval shape around the right eye, which will become a lighter fur patch.
I also added the brows, which look like a short curved line above the eyes.
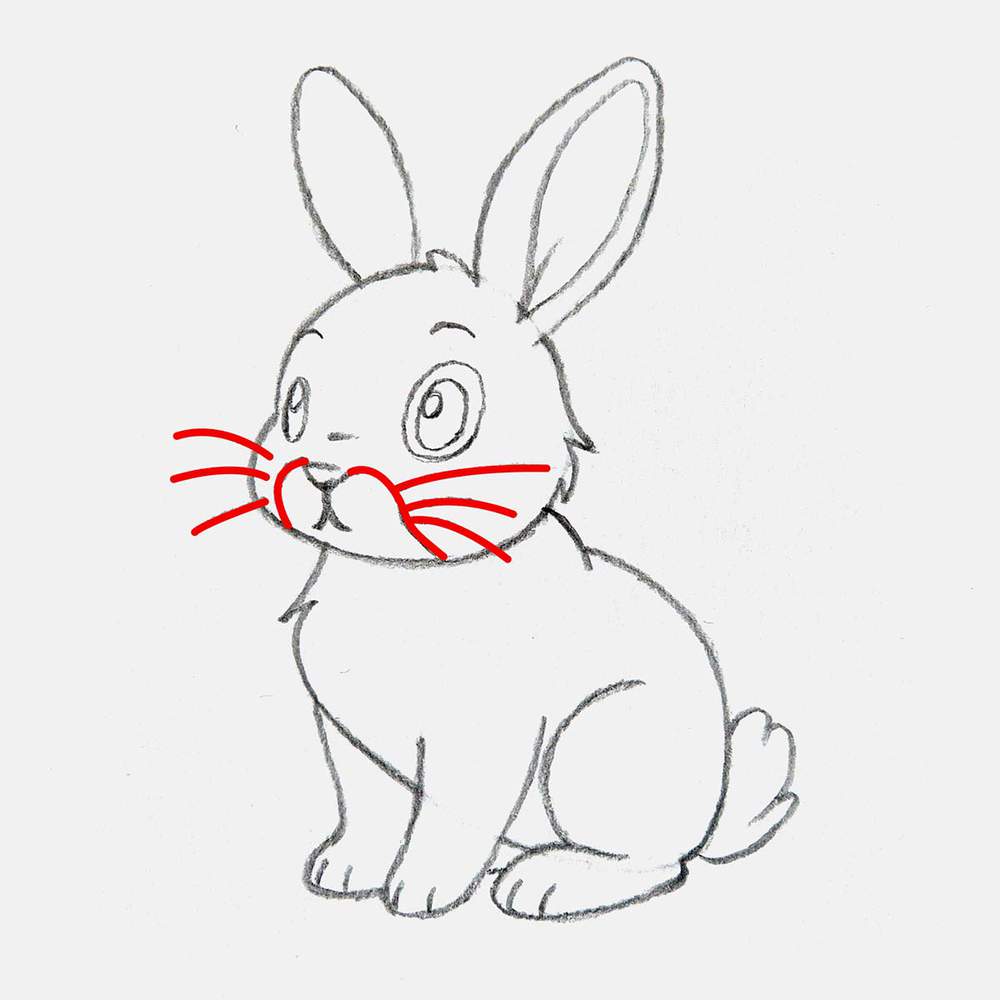
To complete the face of the bunny, I also added the whiskers (3 on each cheek) and the fur patch on the snout.
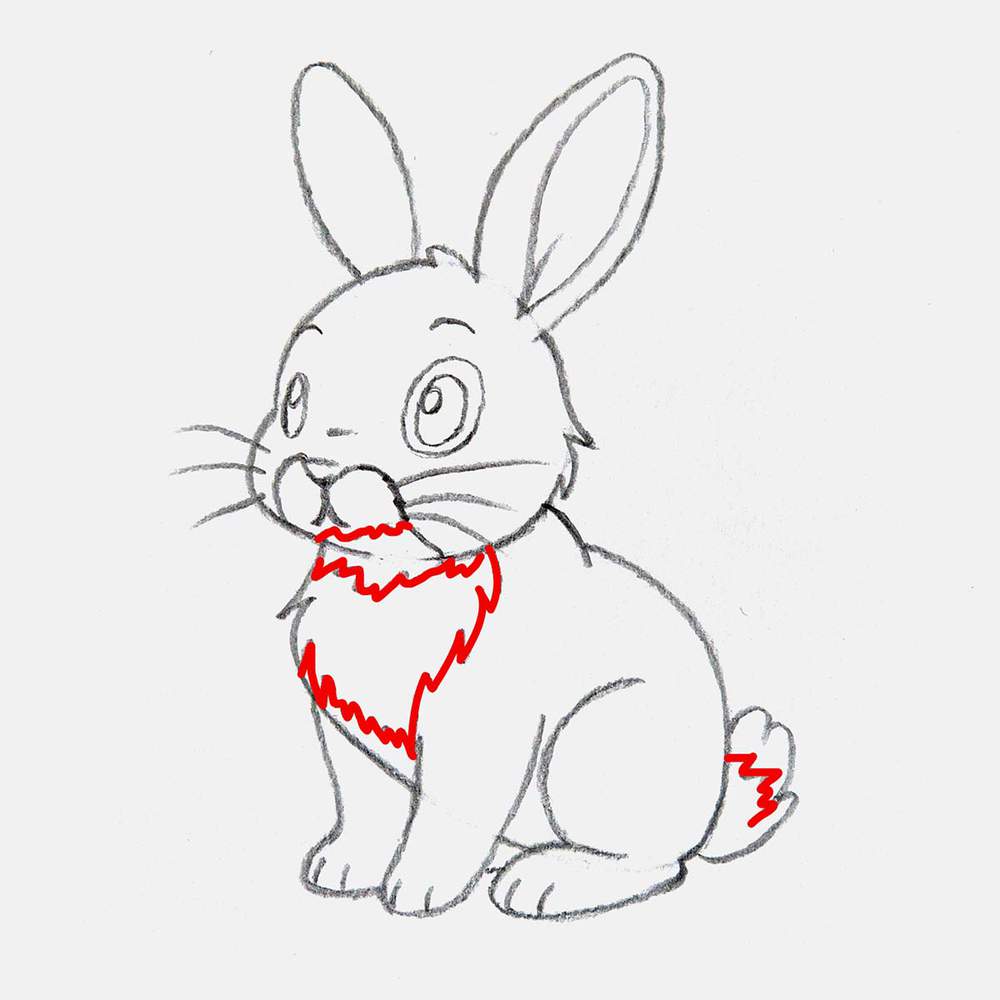
Step 8: Sketch the Bunny’s Fur Patterns
To finish off the sketch of this cute bunny, I added some outlines for the different colored fur patches and the shading on them. To make them look like fur, I sketched them jagged and fluffy.
These details will make your easy bunny drawing look more interesting once we start coloring.
And that's the bunny all sketched!
Here's how my sketch turned out:
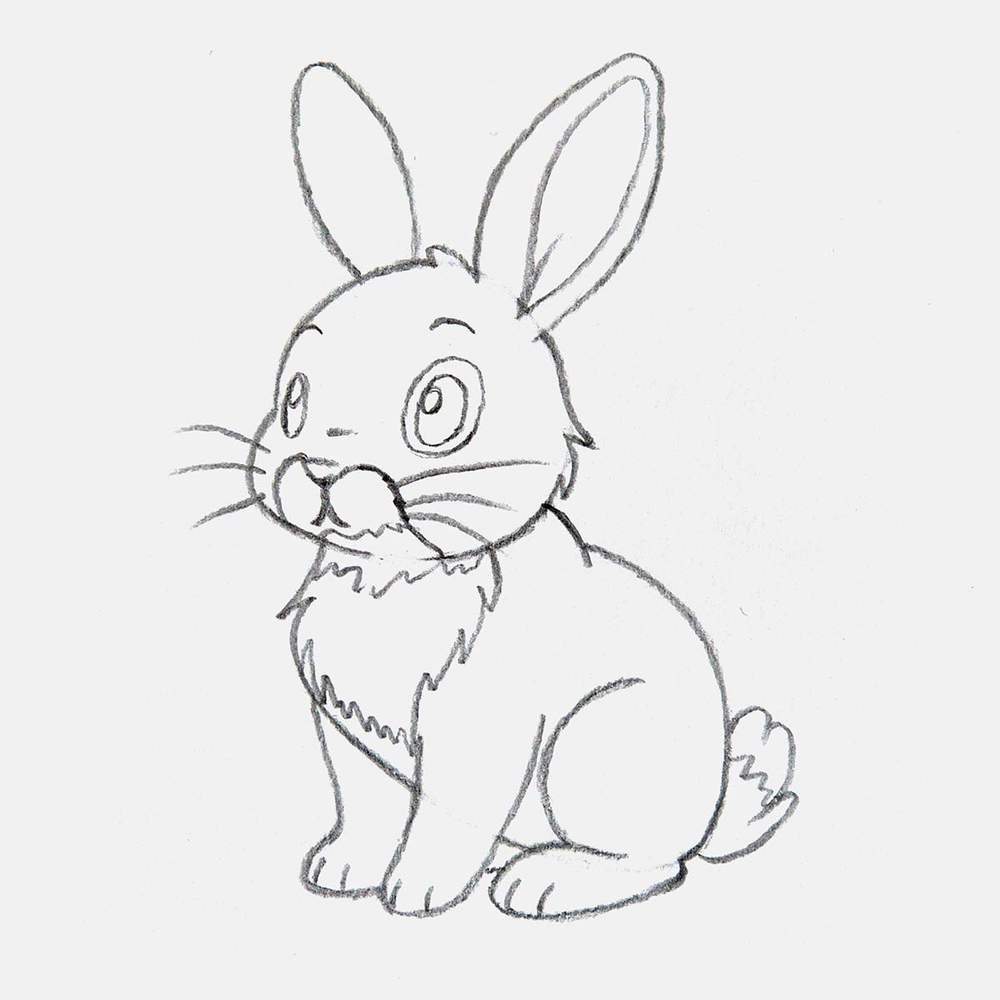
It already looks good! And if you don't feel like coloring it, you don't have to. You can call it done here or add some light shading with an HB pencil.
Part 2: How to Outline Your Bunny Drawing
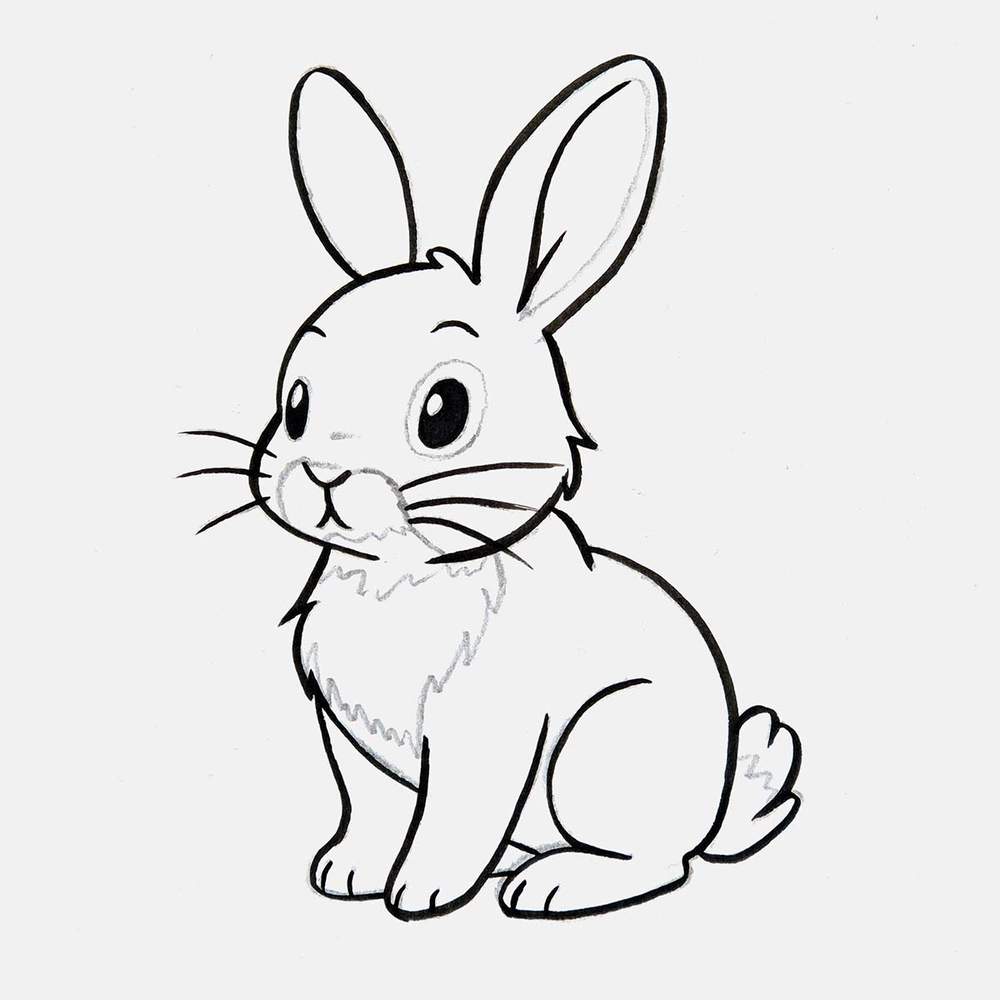
Step 9: Outline Your Bunny Drawing with a Pen
After sketching and before coloring, I like to outline my drawings, especially when they're more cartoony, like this cute bunny drawing.
Outlining helps clean up your bunny drawing and makes it stand out more, especially for a cartoon style.
To do this, I used a black brush pen. With a brush pen like the Tombow Fudenosuke pen (which I'm using), you can vary the line width and create pointy, fur-like lines. This works really well for drawing animals like this bunny.
Also, note that I didn't outline the fur patches. They look better if they do not have a hard, dark outline.
Part 3: How to Color a Bunny with Markers
Again, you could leave it as a fun and simple outline drawing and stop here, but I like to color my drawings.
Coloring is what really brings your bunny drawing to life, especially when using alcohol markers.
(If you do stop here and don't color it, it will look better if you also outline the fur patches.)
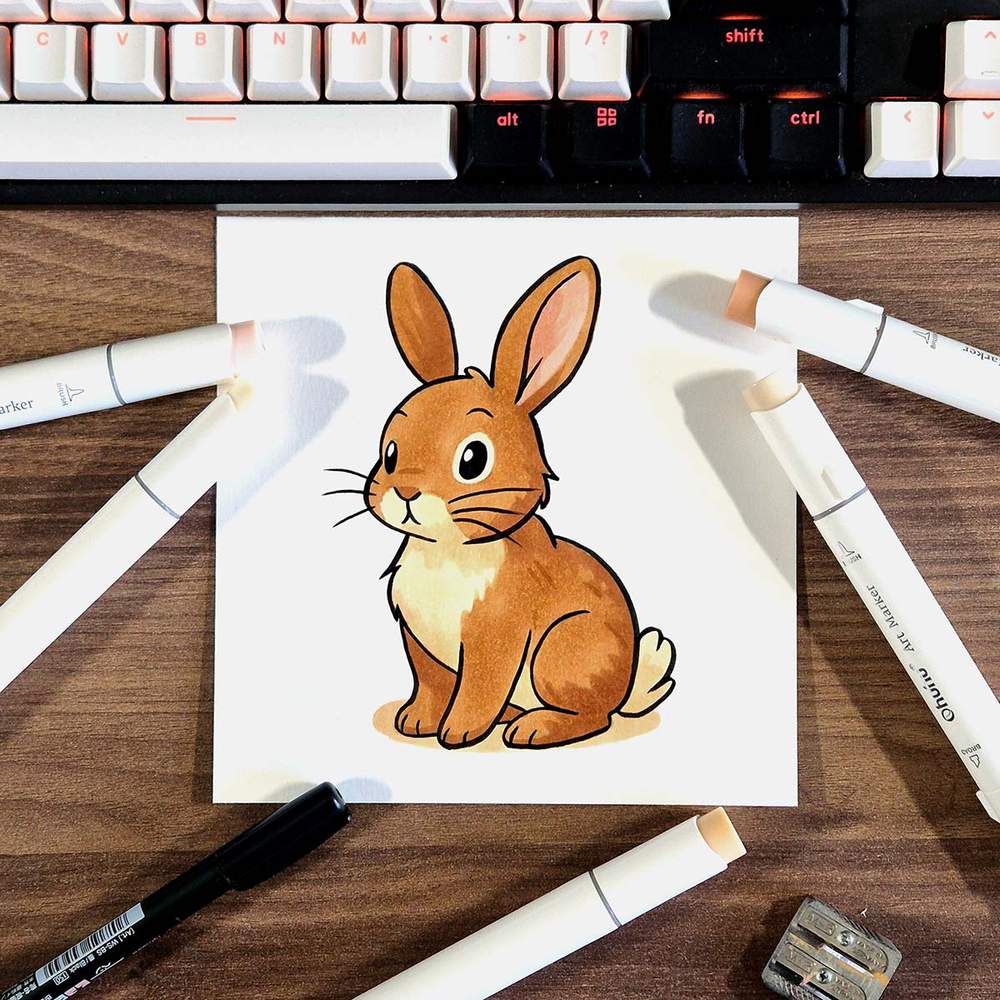
To color this adorable bunny, I used my favorite markers, the Ohuhu Honolulu markers. These markers are available in plenty of colors and have a wide chisel tip and a soft brush tip.
For this drawing, I only used 6 colors:
I divided the coloring part into 2 steps: first coloring the base tones, then adding shading.
Step 10: Color the Base Colors of the Bunny
To color the bunny, I first colored the lighter base tones.
I used Tea Rose (E470) to color the inside of the right ear, Grayish Yellow (Y110) to color the light fur patches and the belly, and Sand (E220) to color the brown fur.
Step 11: Add Shading to Your Bunny Drawing
With the base colors now done, I added shadows by shading with darker tones.
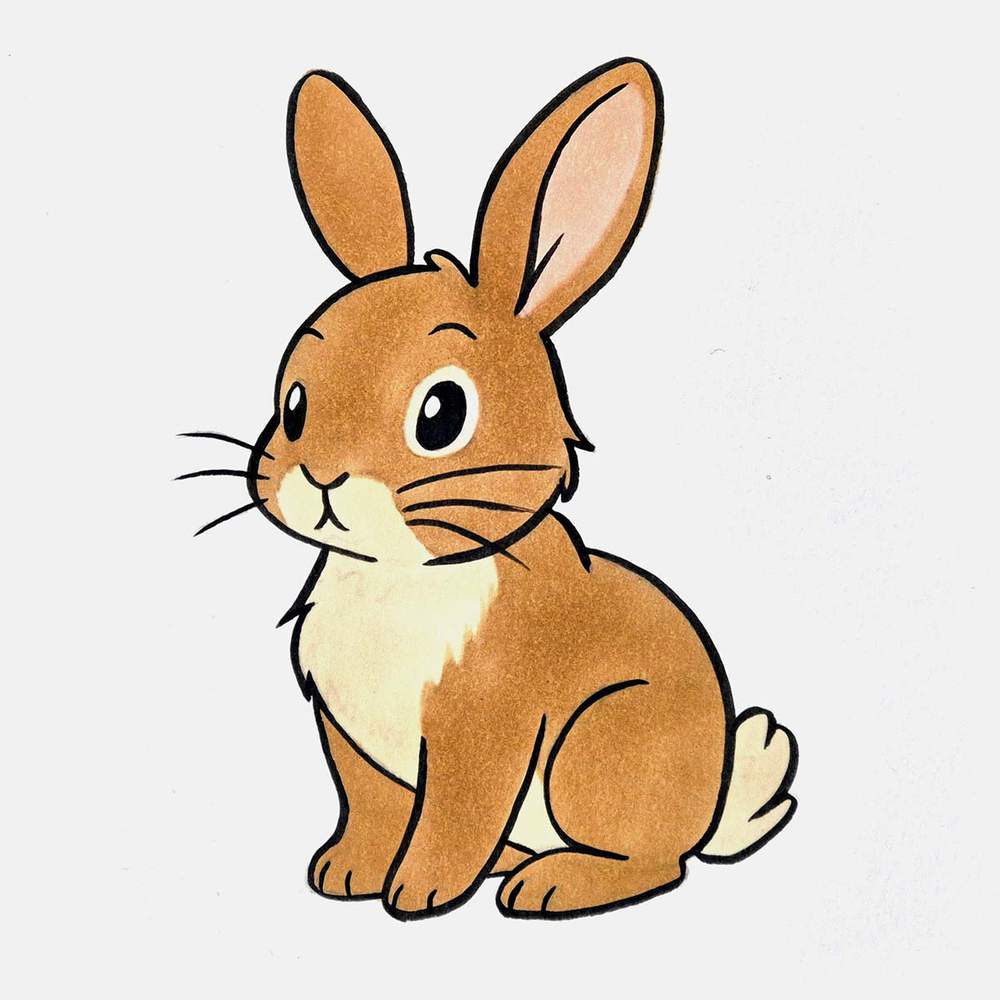
I shaded the inside of the ear with Pear Color (R29), the light fur with Soft Sun (E160), and the brown fur with Dark Suntan (E110).
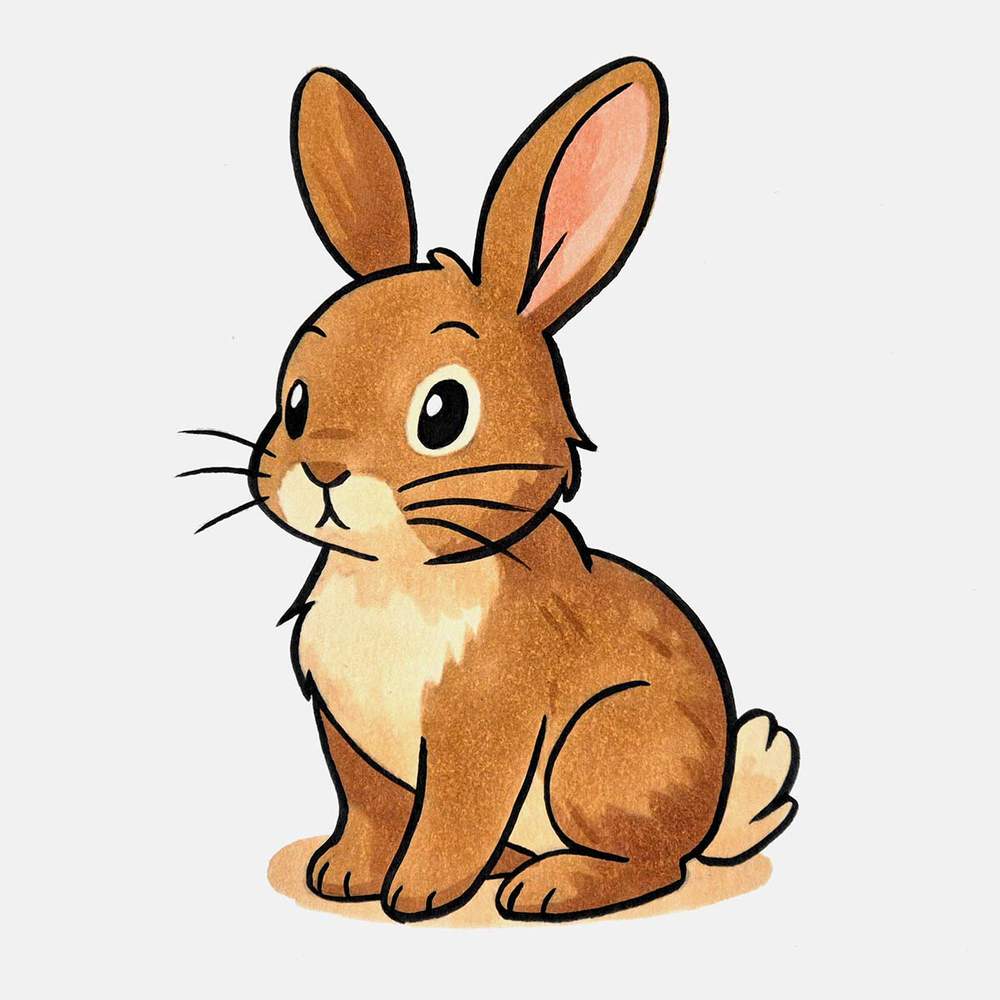
And that’s how you draw a cute bunny step by step!
If you followed along, you now have a simple and adorable bunny drawing you can be proud of, whether you kept it as a sketch or fully colored it with markers.
If you're practicing, try drawing the bunny again with slightly different poses, ear positions, or expressions. Small changes like that are a great way to improve your drawing skills quickly.
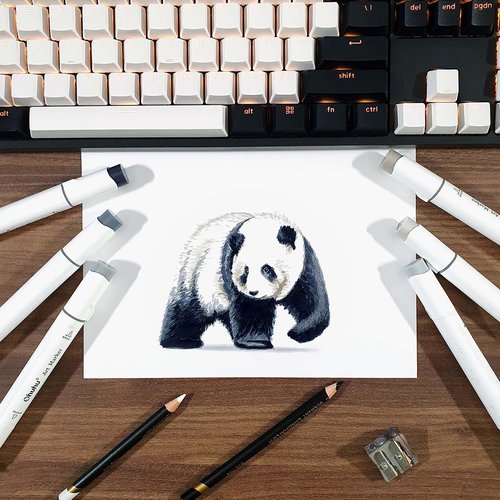
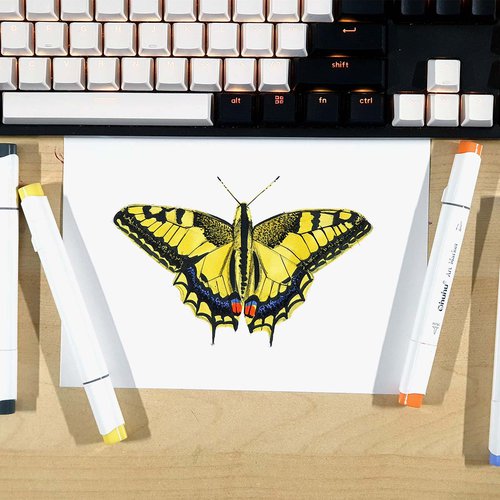
And if you enjoyed this step-by-step bunny drawing guide, you might also like my other step-by-step drawing guides for beginners.
Articles You Might Also Like


I love bringing cars to life with alcohol markers and colored pencils.
Whether you're just starting out or looking to improve your skills, I'm here to help!
Click here to learn more about me.


Be the first to comment!
Comments
There are no comments yet.