How To Draw Santa in 44 Tiny Steps Using Basic Shapes, Outlining, And Markers
This guide is about how to draw Santa Claus easy for Christmas.
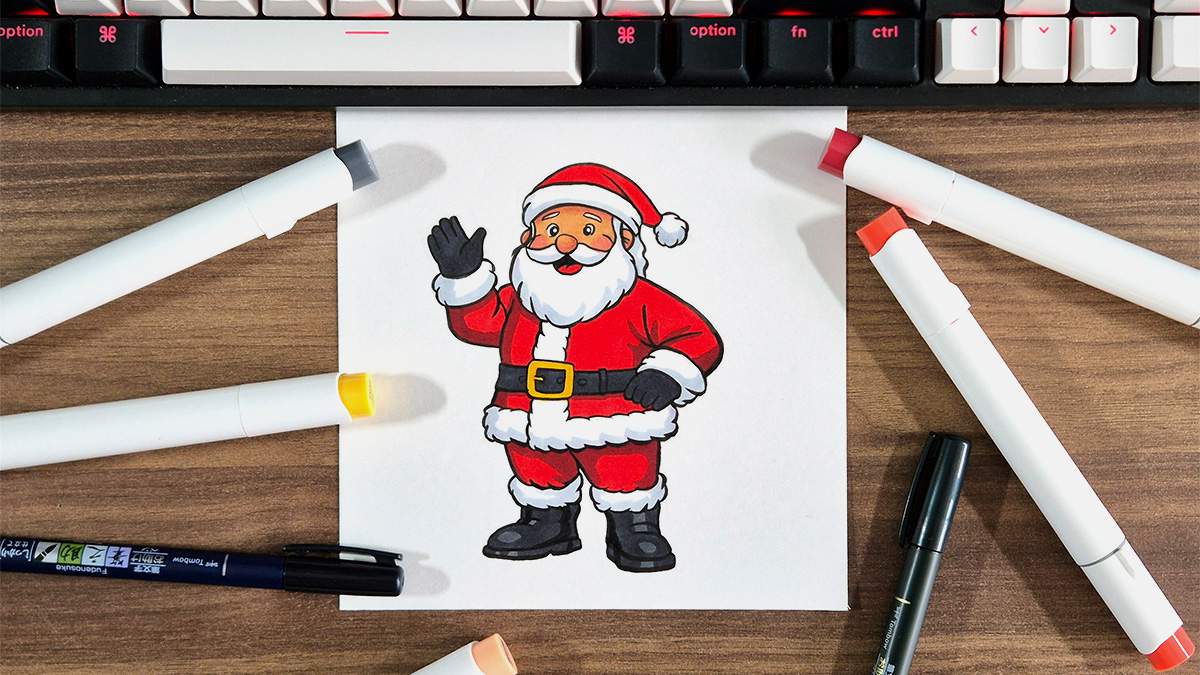
Want to draw Santa Claus but don't know how? This step-by-step guide will show you exactly how to draw Santa easy in 44 tiny and easy-to-follow steps.
This drawing guide is perfect for Christmas (or if you're just in the Christmas mood in the middle of June).
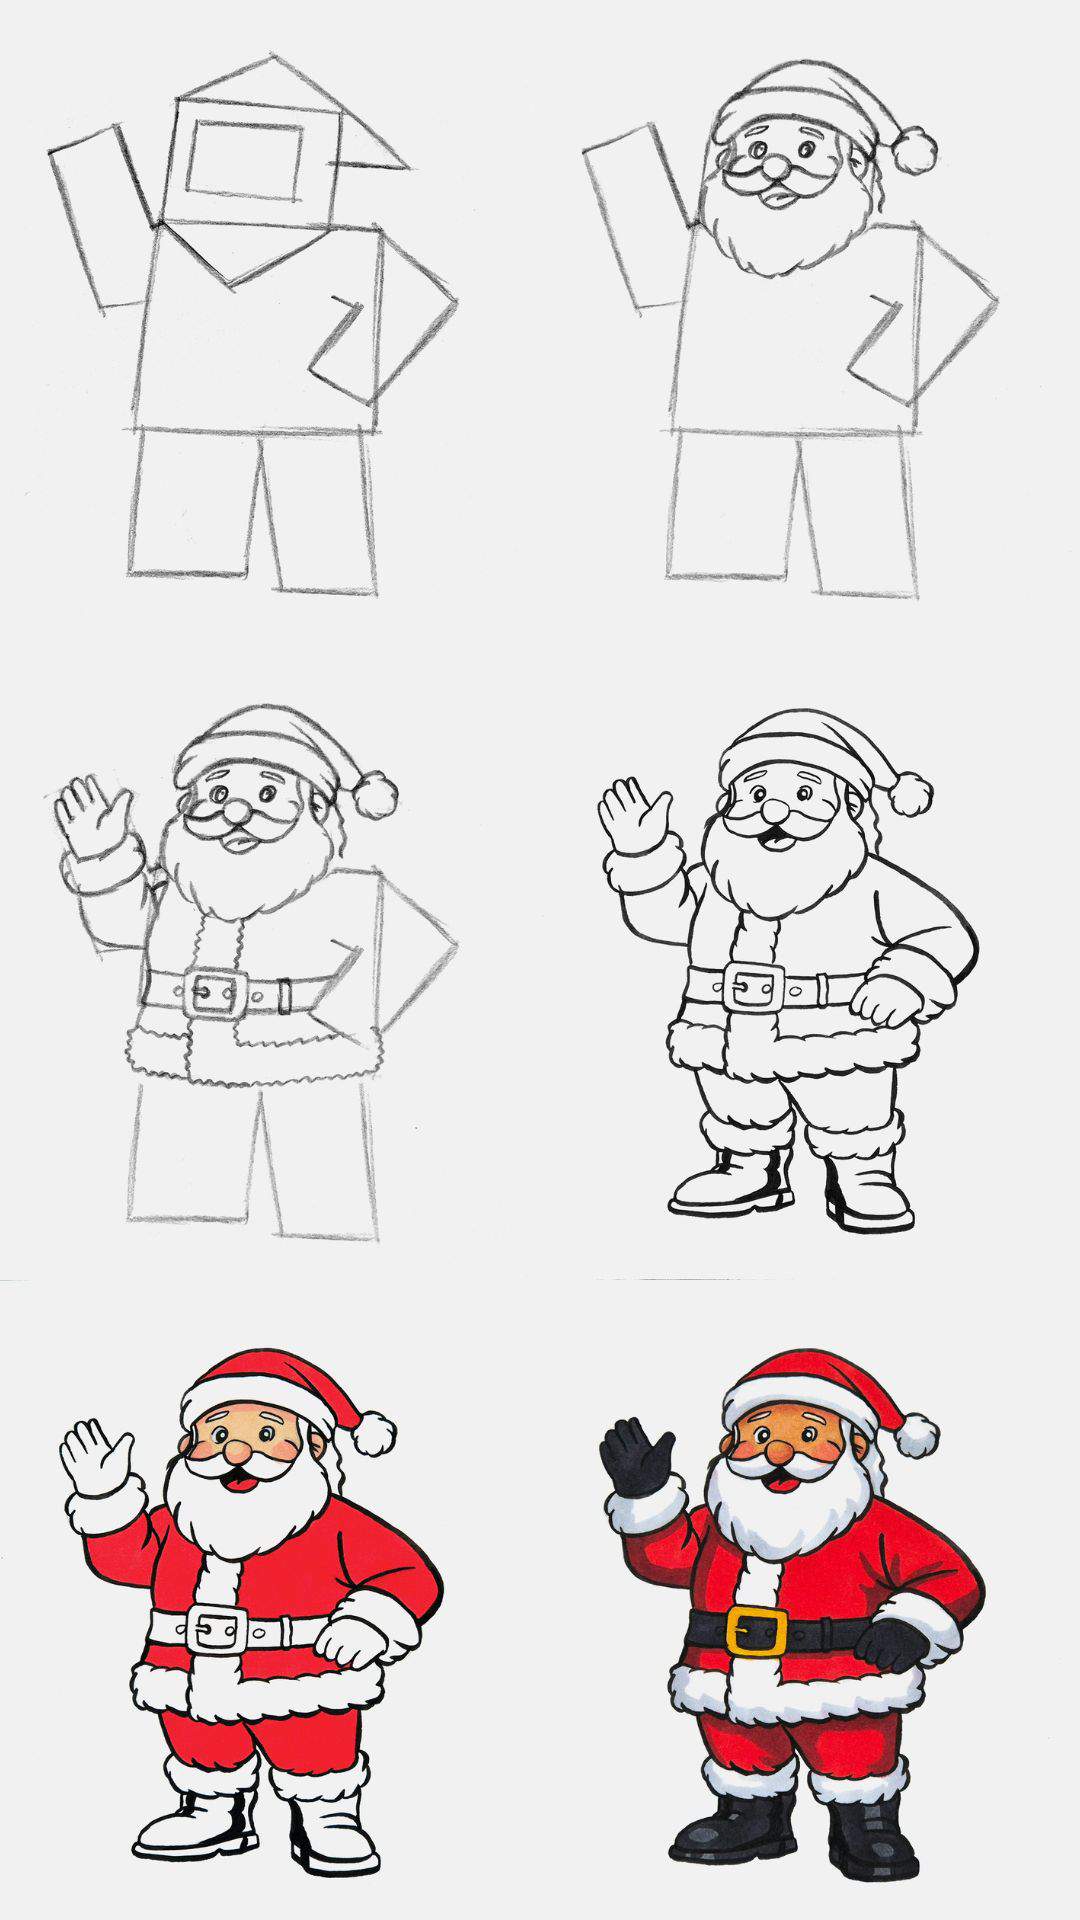
I've broken this step by step Santa drawing guide up into 10 sections, and each of those sections is split up into a total of 44 small and easy-to-follow steps, from sketching using basic shapes, to sketching Santa's proportions, to outlining the drawing and coloring it with alcohol-based markers.
Each step has clear instructions, and during the sketching phase, each new line is marked in red, so you can easily see what changed and what you need to add next. I kept the steps small so as to not overwhelm you with big jumps and needing to figure things out yourself.
If you're new to drawing, or if you've been drawing for a while, this guide is perfect for you.
Now, let's get started with our Santa drawing!
I just wanted to let you know that this post contains affiliate links, and any purchases made through these links will result in a small commission for me and don't cost you anything extra.
In This Guide
- Drawing supplies & colors I used to draw Santa
- How to draw Santa accurately using basic shapes
- Outlining your Santa drawing with a brush pen
- Coloring your Santa Claus drawing with markers
- More drawing guides you'll enjoy
Drawing Supplies & Colors I Used To Draw Santa Claus
To sketch Santa, I used a regular graphite pencil with an eraser. And to lighten my sketch, I used a kneaded eraser. They are really great for this. You just roll them across your sketch, and it will lighten your lines.
I made this drawing on Canson Illustration Manga paper (my favorite paper for using alcohol markers on).
To outline the Santa Claus sketch, I used a black Tombow Fudenosuke brush pen.
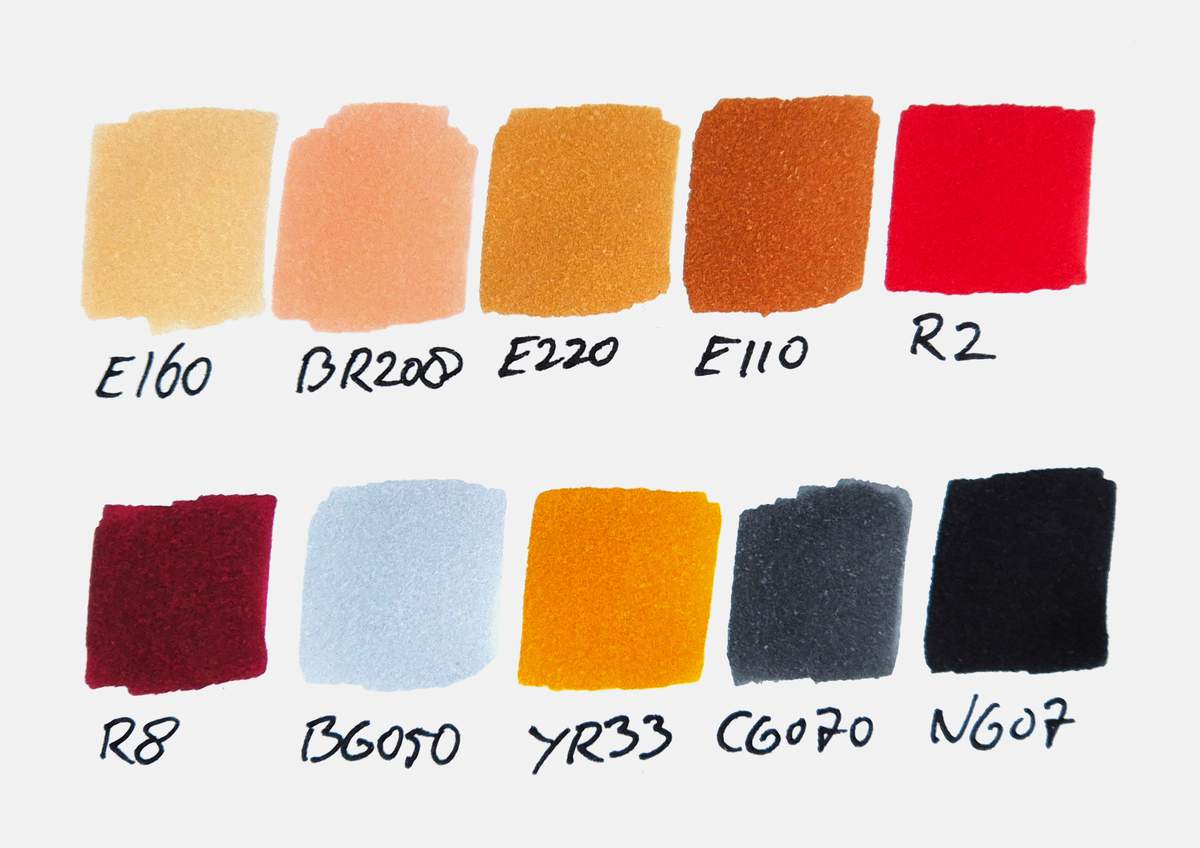
And to color this Santa drawing, I used Ohuhu Honolulu markers. I used 10 colors in total: Soft Sun (E160), Black Brown (BR208), Sand (E220), Dark suntan (E110), Vermilion (R2), Geranium (R8), Cool Grey 05 (BG050), Melon Yellow (YR33), Neutral Grey 07 (CG070), and Neutral Grey 7 (NG07).
You can buy these colors separately or as part of the 320 set. Or you can buy them on Amazon if you prefer.
I've added an image below with all the color swatches so you can match your markers to the ones I used if you already have some.
How To Draw Santa Step By Step
To draw Santa, I will first show you how to sketch him. This is the longest part as I've broken it up into many tiny steps to make it easier for you to follow along with me. To make the sketching part even easier, I highlighted every new line I sketched in red, so you can instantly see what changed.
Step 1: Use Basic Shapes To Build Santa's Proportions
Sketching Santa from scratch can be quite a difficult and daunting task. So to make it a lot easier, I first build up the basic proportions of Santa with some basic shapes: squares, rectangles, and triangles. Adding these shapes first will make creating a more accurate sketch of Santa Claus with details a lot easier later on.
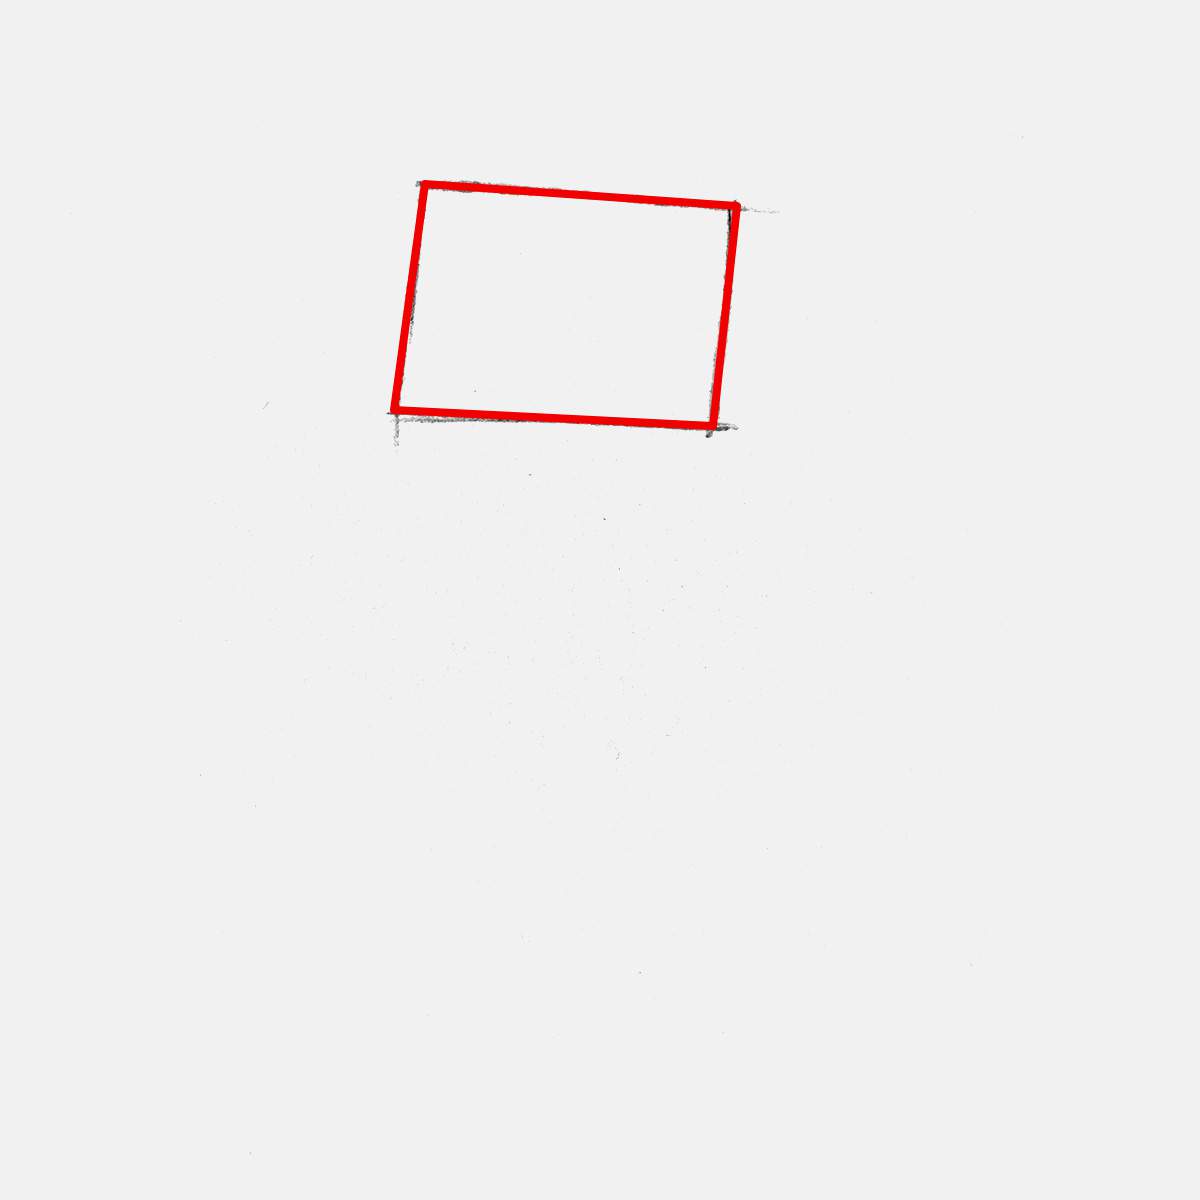
To start my Santa sketch, I first sketched a rough box shape for his head towards the top of the paper.
On top of that, I added this floppy triangle, which we will turn into his Christmas hat, and on the bottom of his head, I added a triangle, which will become his long and wavy beard.
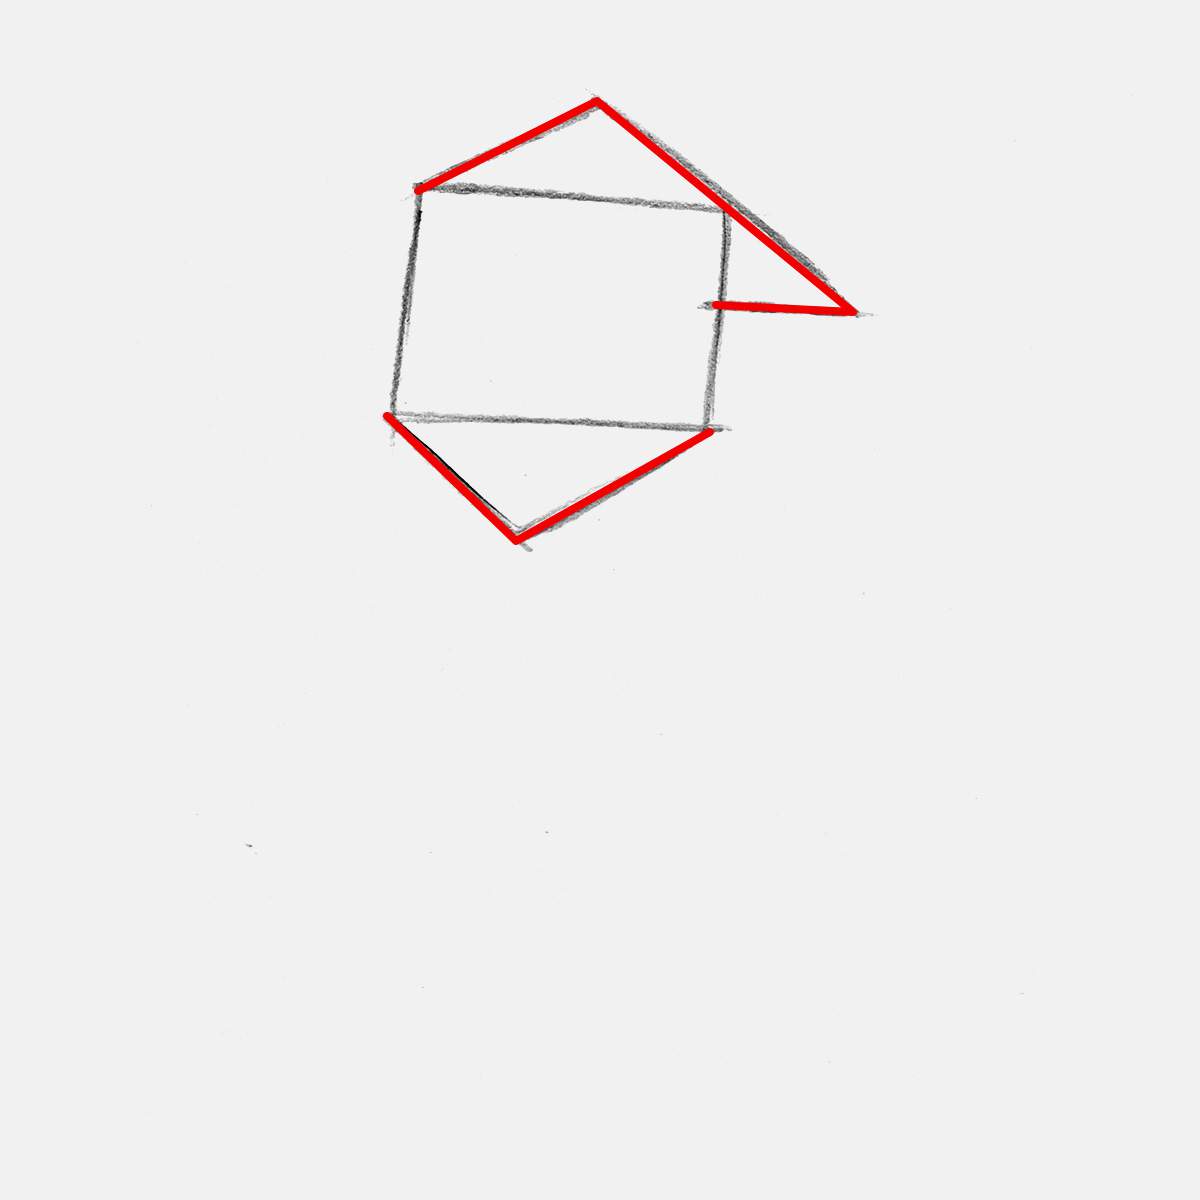
Next, I added another box inside the box shape for his head. This box will be roughly where his face is going to be.
I also added a big square shape below his head, which we will turn into his upper body.
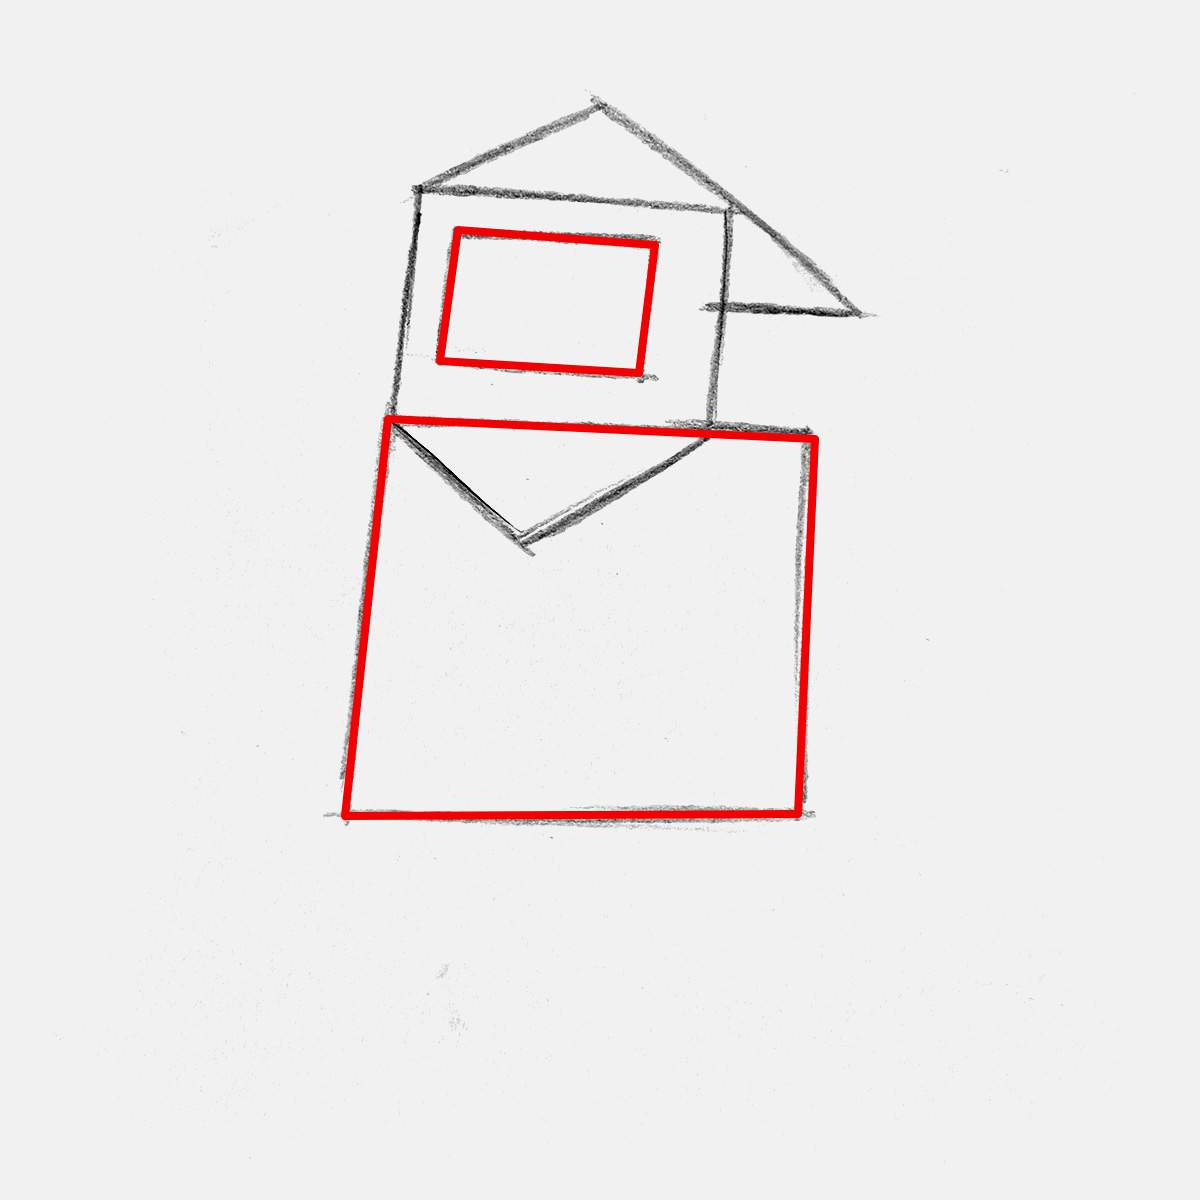
After that, I added two rectangles, not too long, for both of his legs.
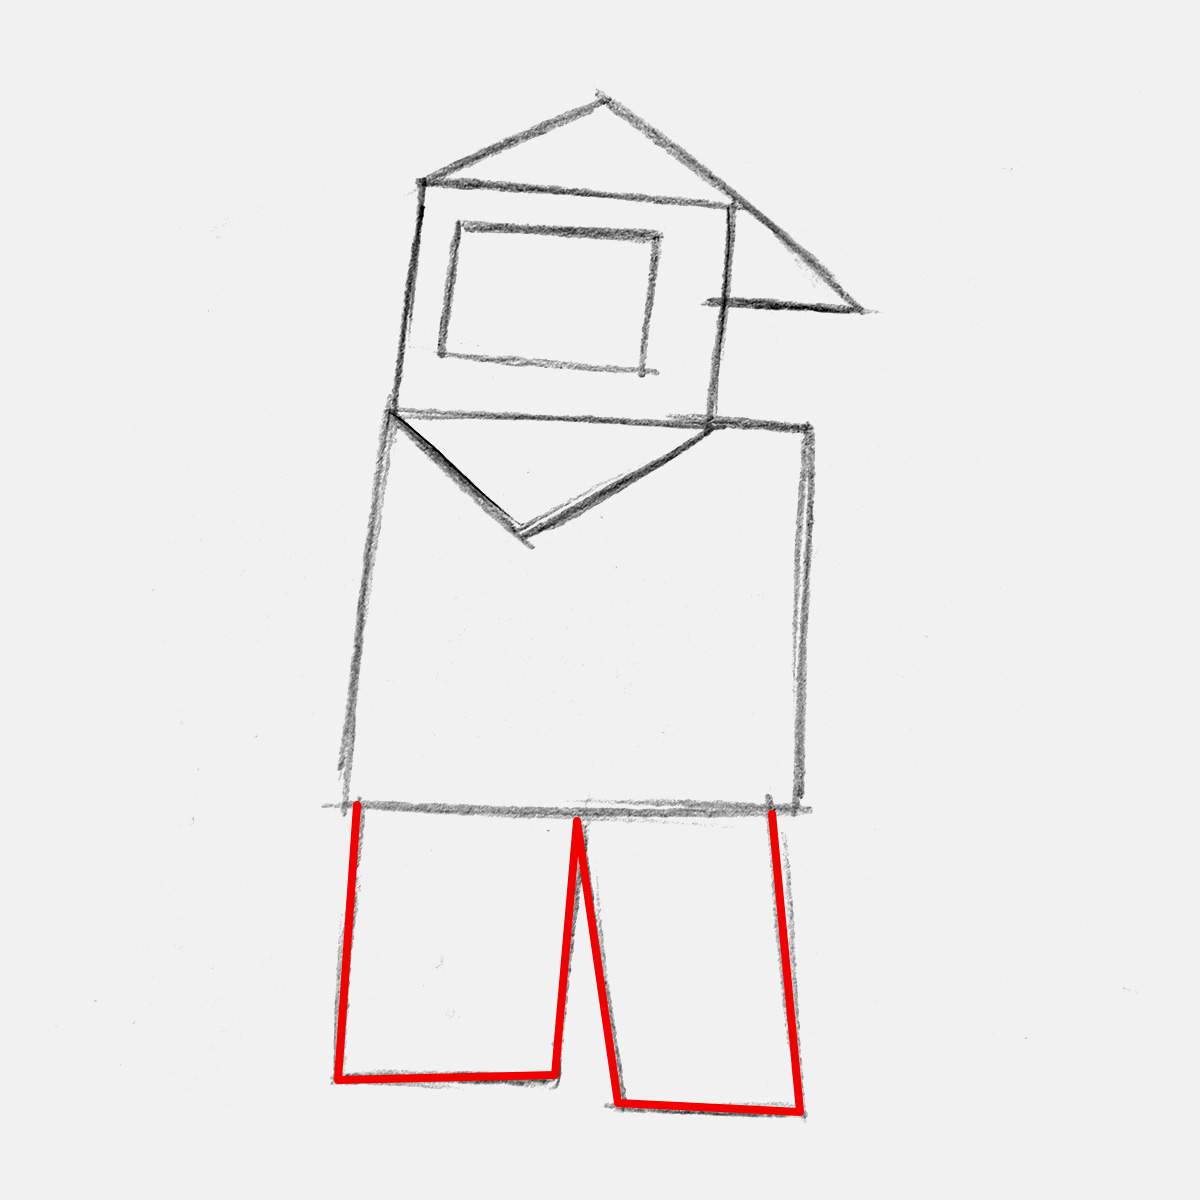
And lastly, I added both of his arms, which are just some L-shaped boxes with one pointing down and one pointing up as he is waving at us.
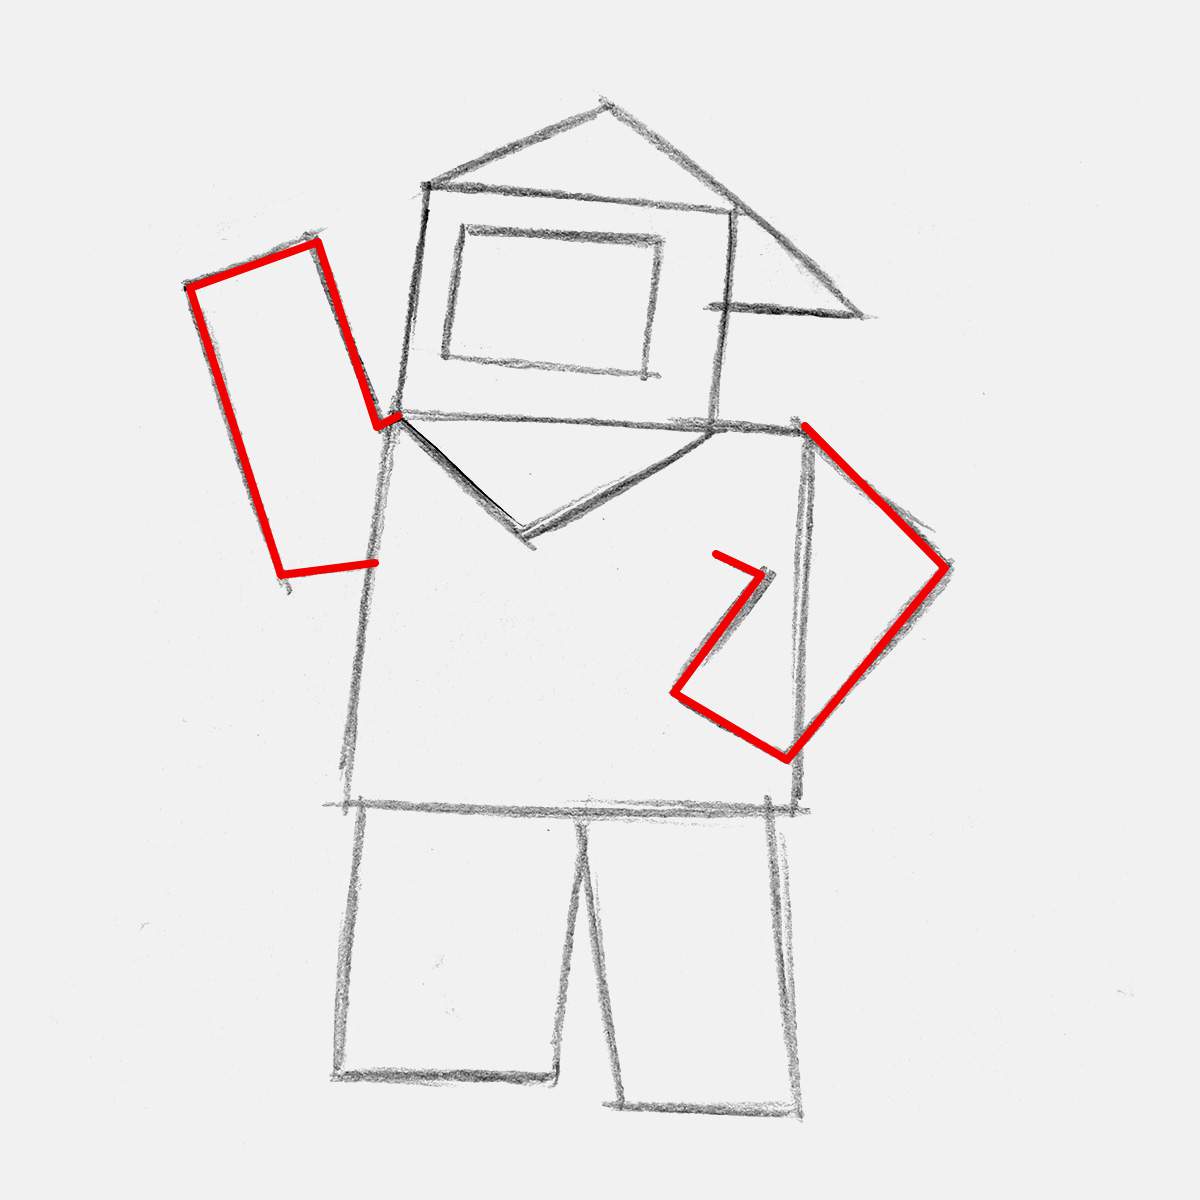
And that's all the basic proportions and construction lines done, which will make our Santa sketch a lot easier to make.
Step 2: Sketch Santa Claus's Christmas Hat On His Head
With the basic shapes now in place, I started working my way from top to bottom. This just felt the most logical.
So I started by sketching his Christmas hat, to be more specific, by sketching the fur brim on the bottom edge of his Christmas hat. It's kinda sausage-shaped and wrapped around his head.
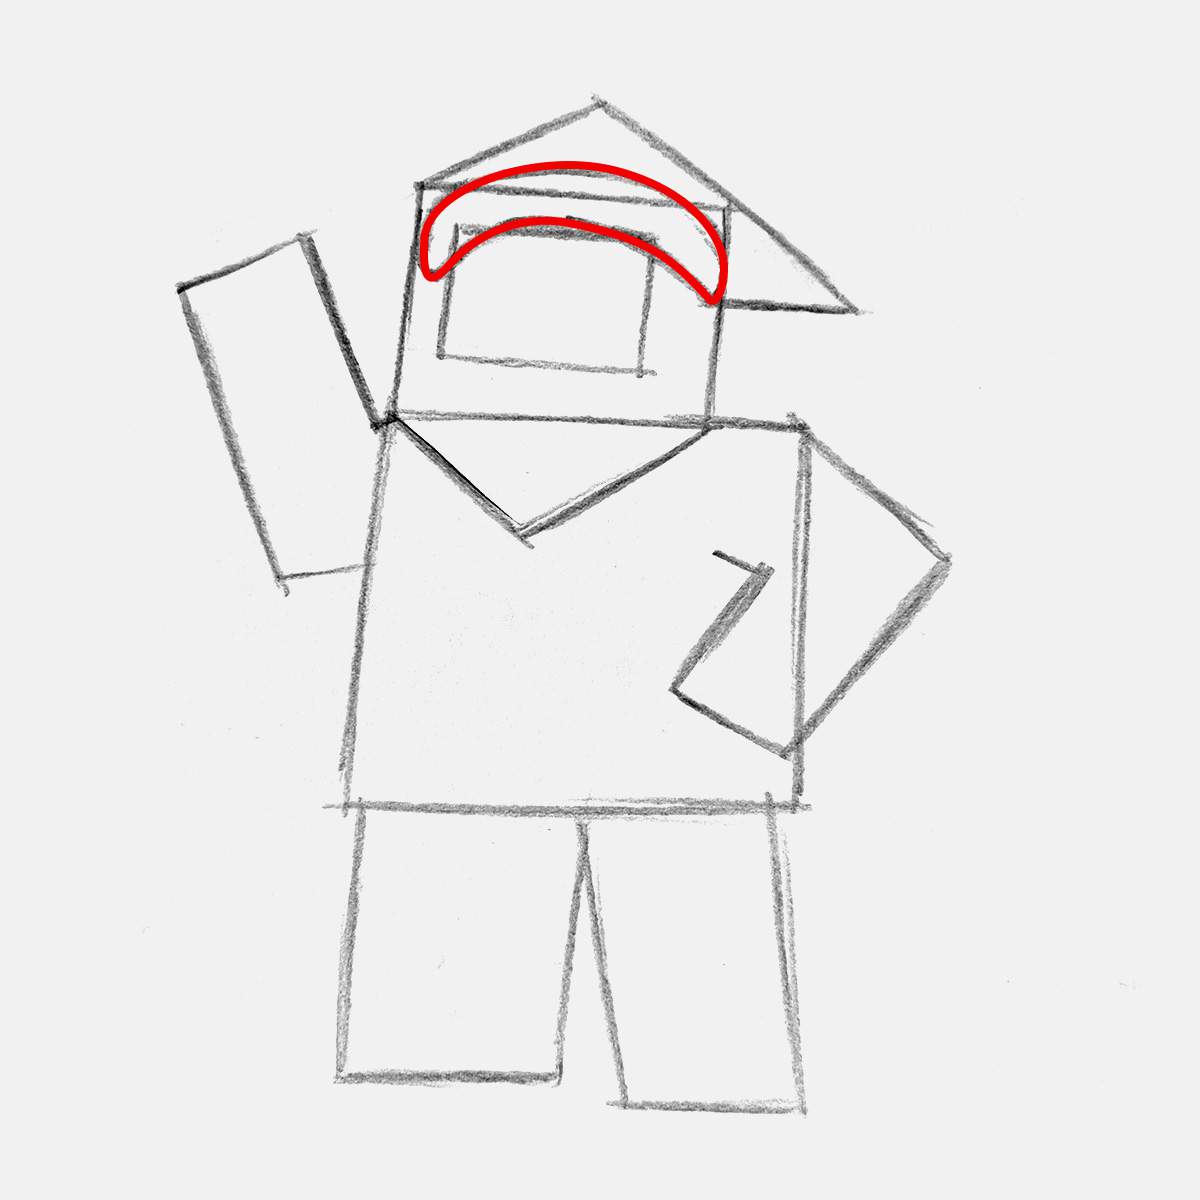
Next, I used the guide for the Christmas hat and sketched the main part, which is bent over to the right, and I also added the fluffy pom-pom to the tip.
To make the pom-pom look fluffy, I used overlapping curved shapes instead of just drawing a circle. You'll see me using this technique a couple more times throughout this guide.
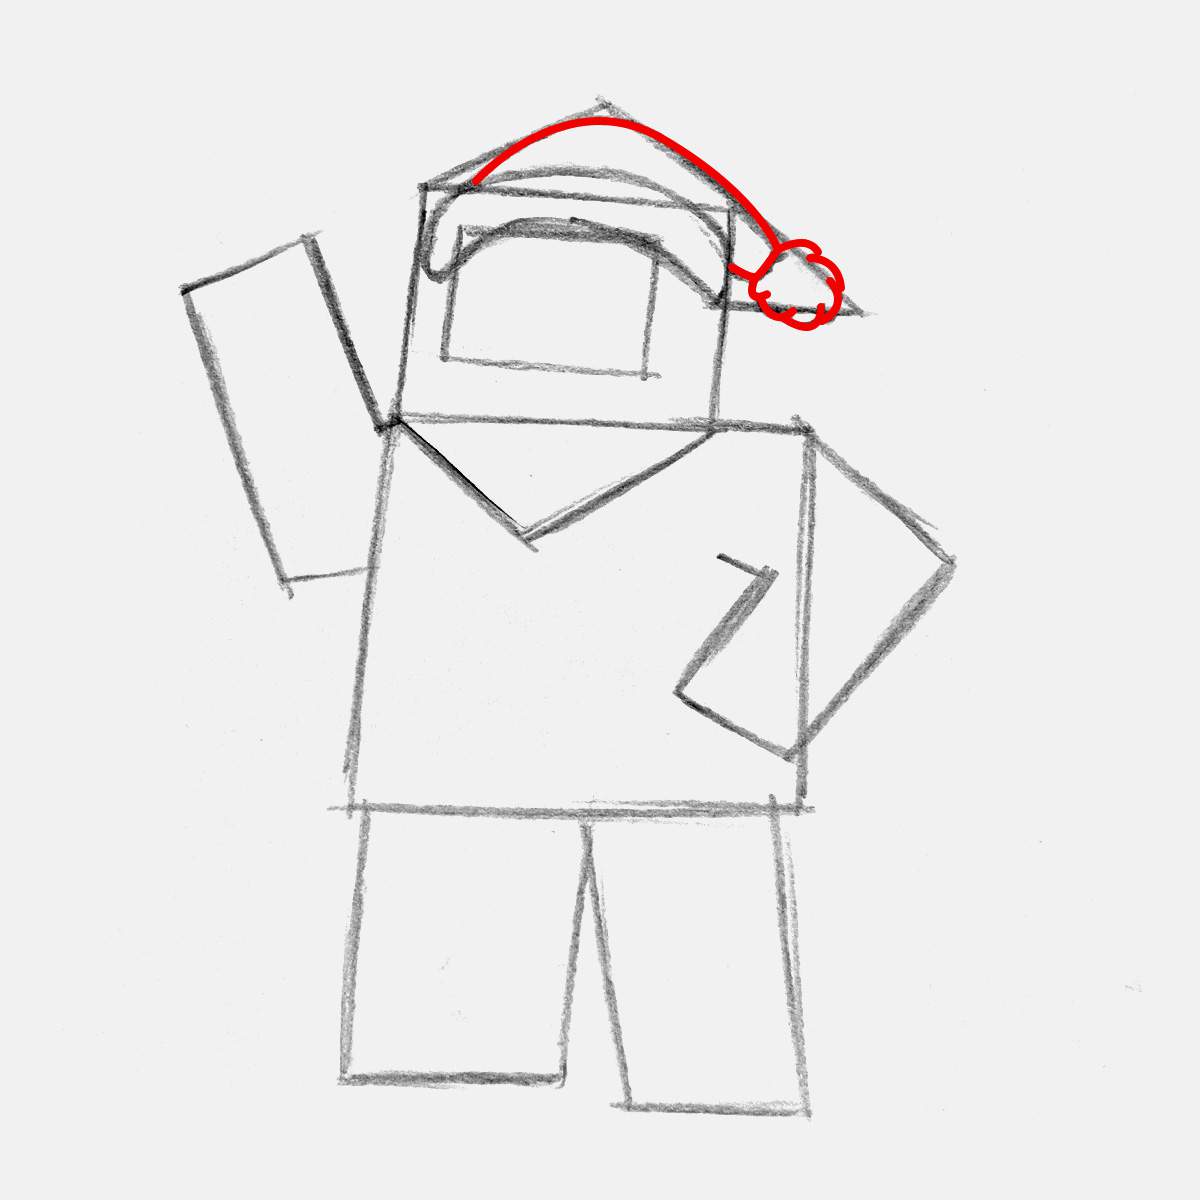
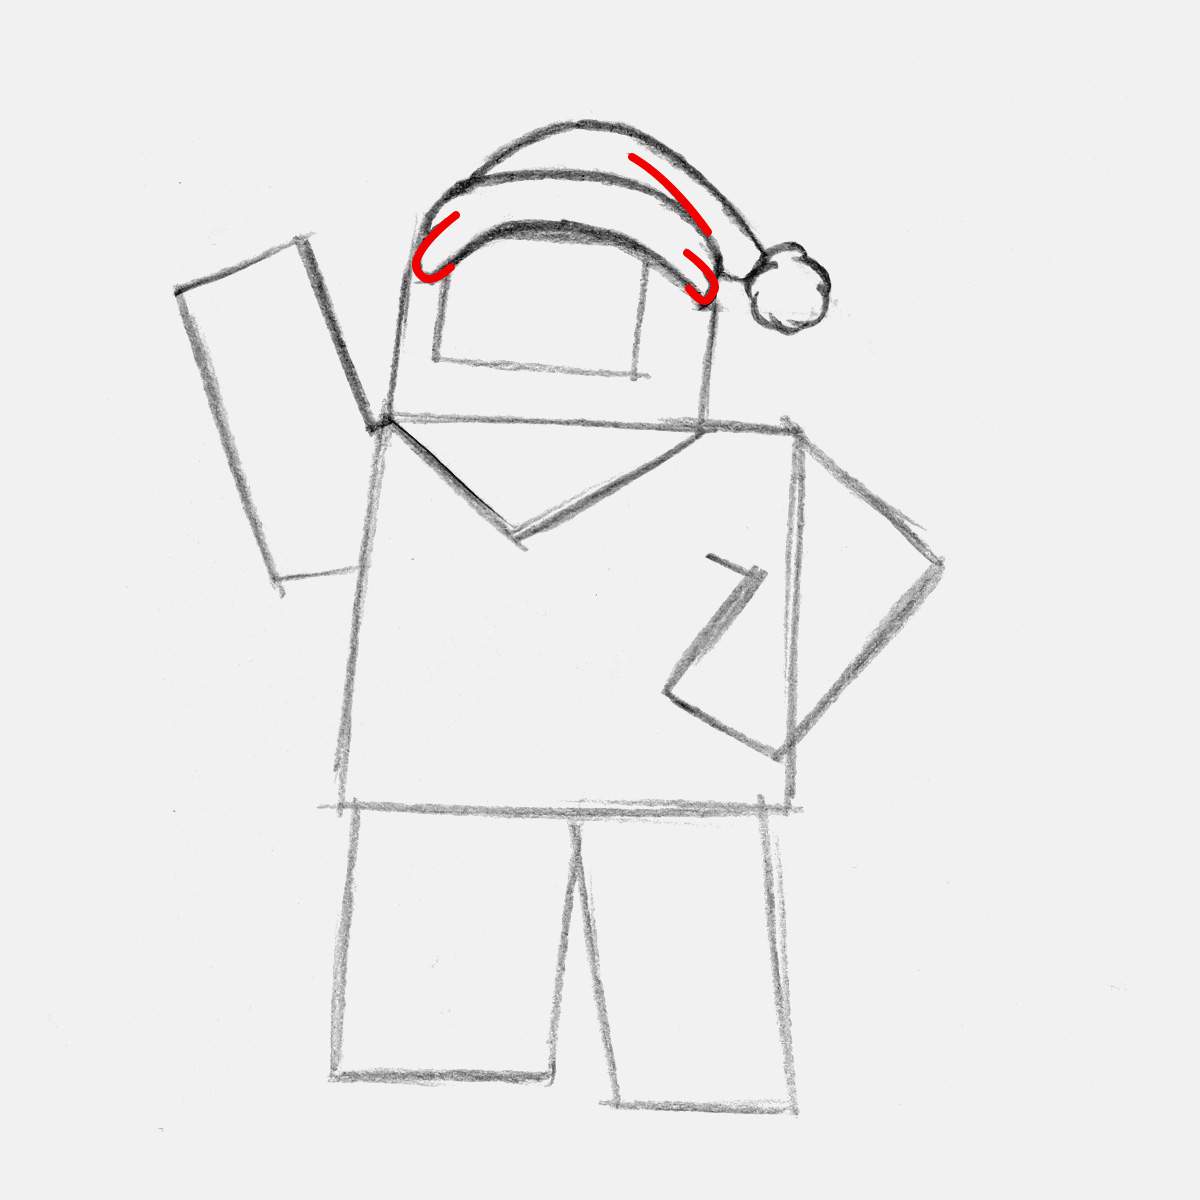
Santa's Christmas hat looked a bit like it lacked something, so I added a fold line into the main part where it's flopped over, and I added some folds in the sides of the fur brim.
I also erased the construction lines we used as a guide to sketch the Christmas hat.
Step 3: Draw Santa's Round Face & Long Beard
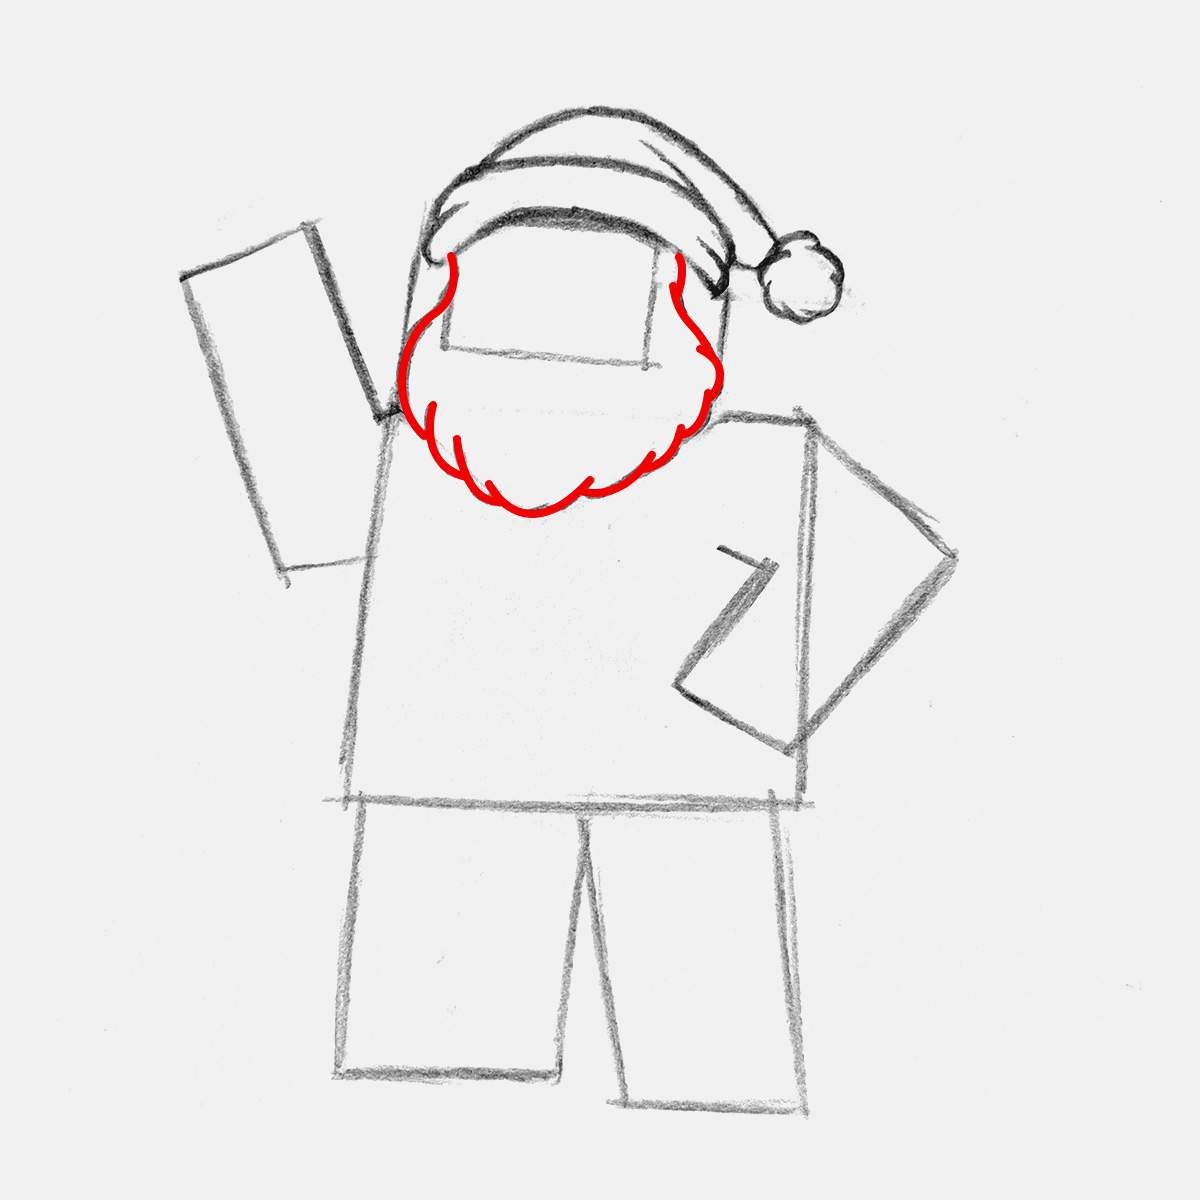
With the Christmas hat all done, I started working on Santa's face, starting with his big and wavy beard.
His beard is slightly narrower at the top and gets wider/fuller around his cheeks, and below that it just follows the form of the basic shape we drew for the beard but with rounded corners instead.
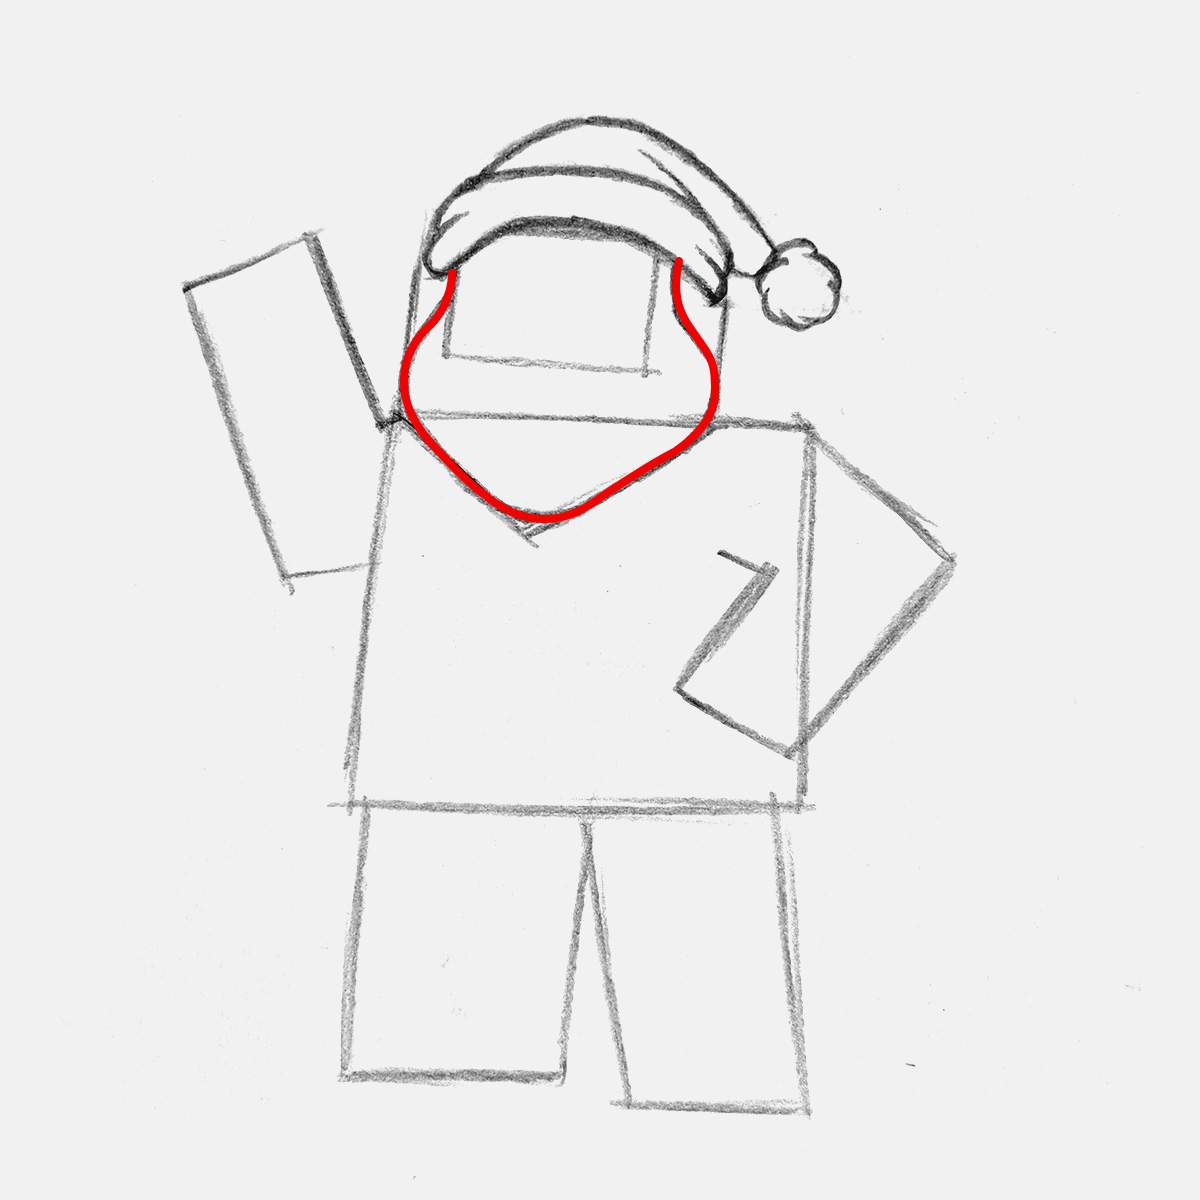
To make Santa's beard look wavy and curly, I erased the outline of the beard we just sketched and used it as a guide to sketch the beard for real this time, using overlapping curve shapes instead of one smooth line. The same as we did for the pom-pom on the Christmas hat.
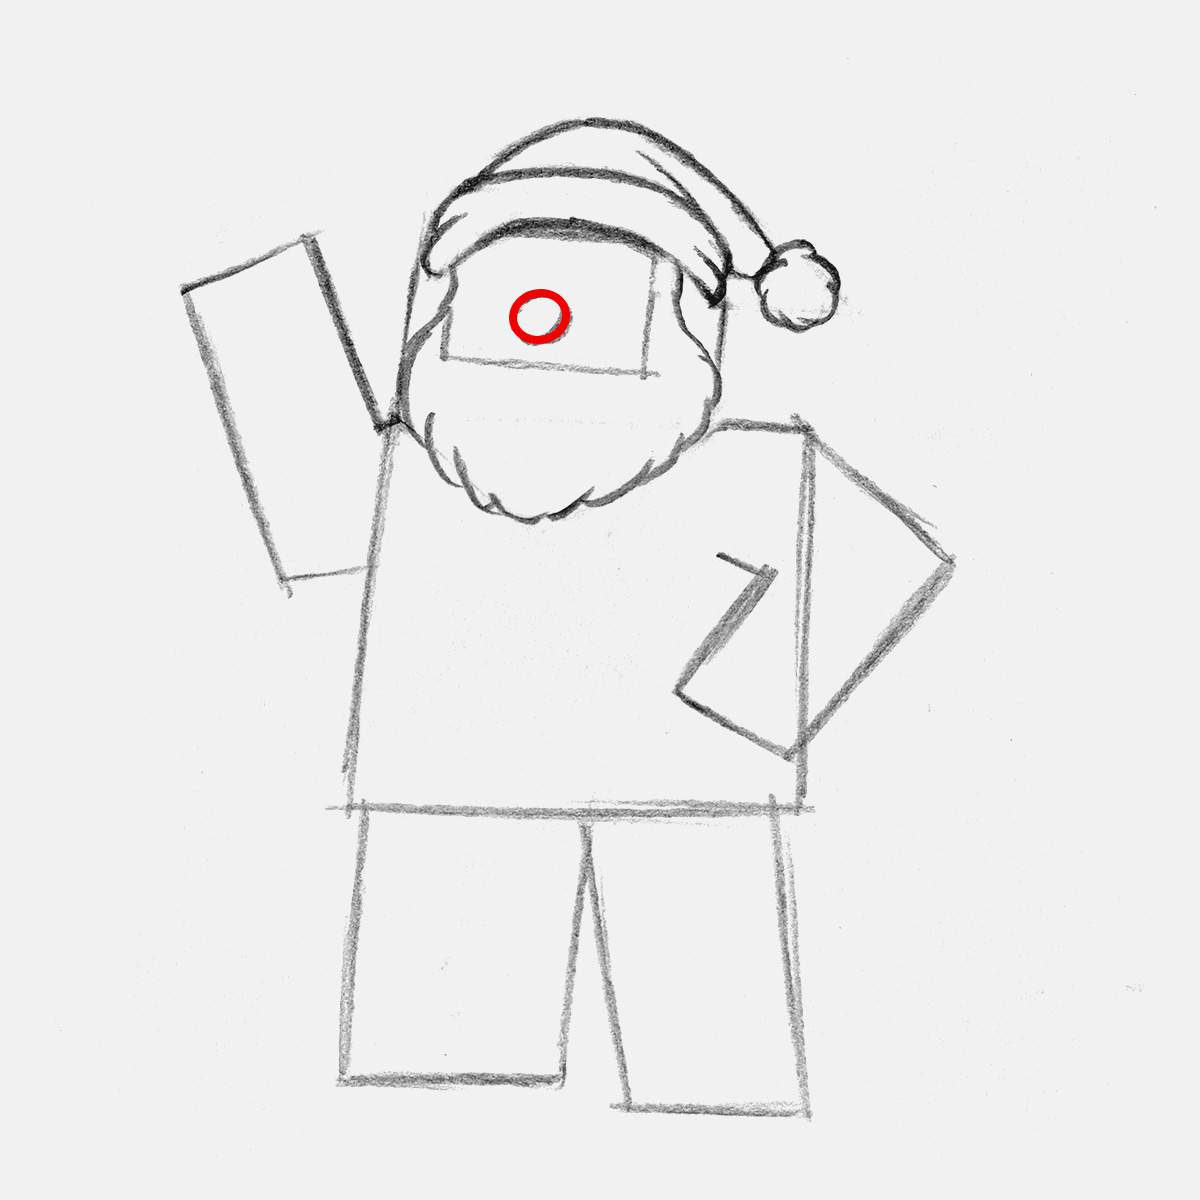
I added Santa's nose next. For this drawing, I just made it a circle, and I have to say, it does look kinda like a clown nose... For now. I sketched it more towards the bottom of the box shape for his face to leave room for the eyes above.
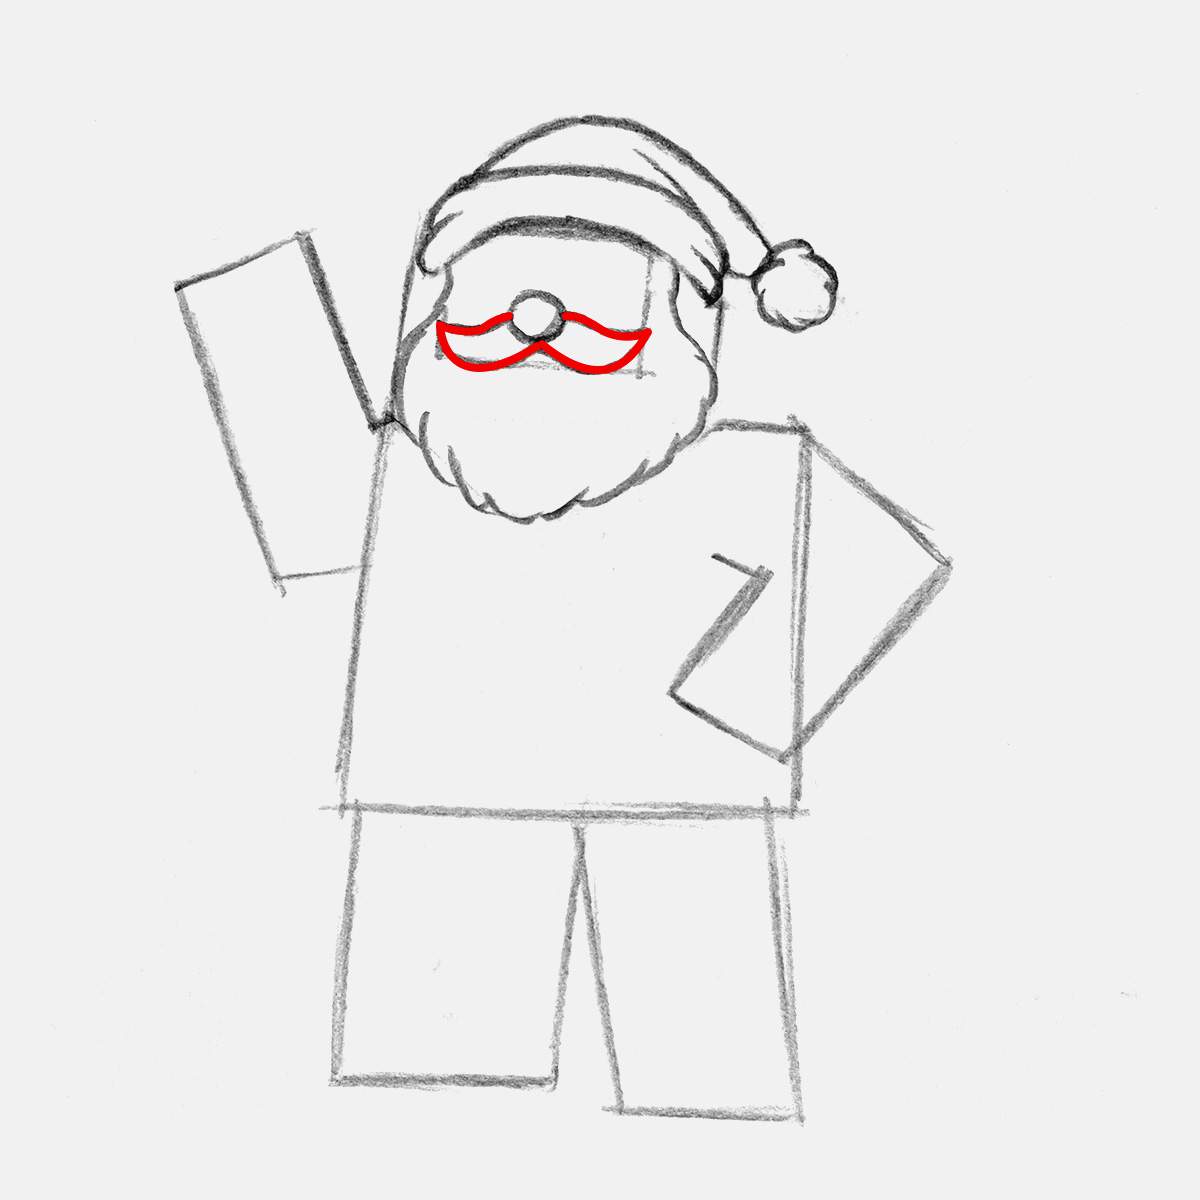
With the nose in place, I was able to add the mustache below it. It looks more or less like a classic moustache shape with the bottom edge of each side being a simple curve and the top edge being a wave shape, with both edges coming to a sharp pointed tip.
Below his moustache, I added an arch shape for his mouth, and I added the sides of his face and his chubby cheeks.
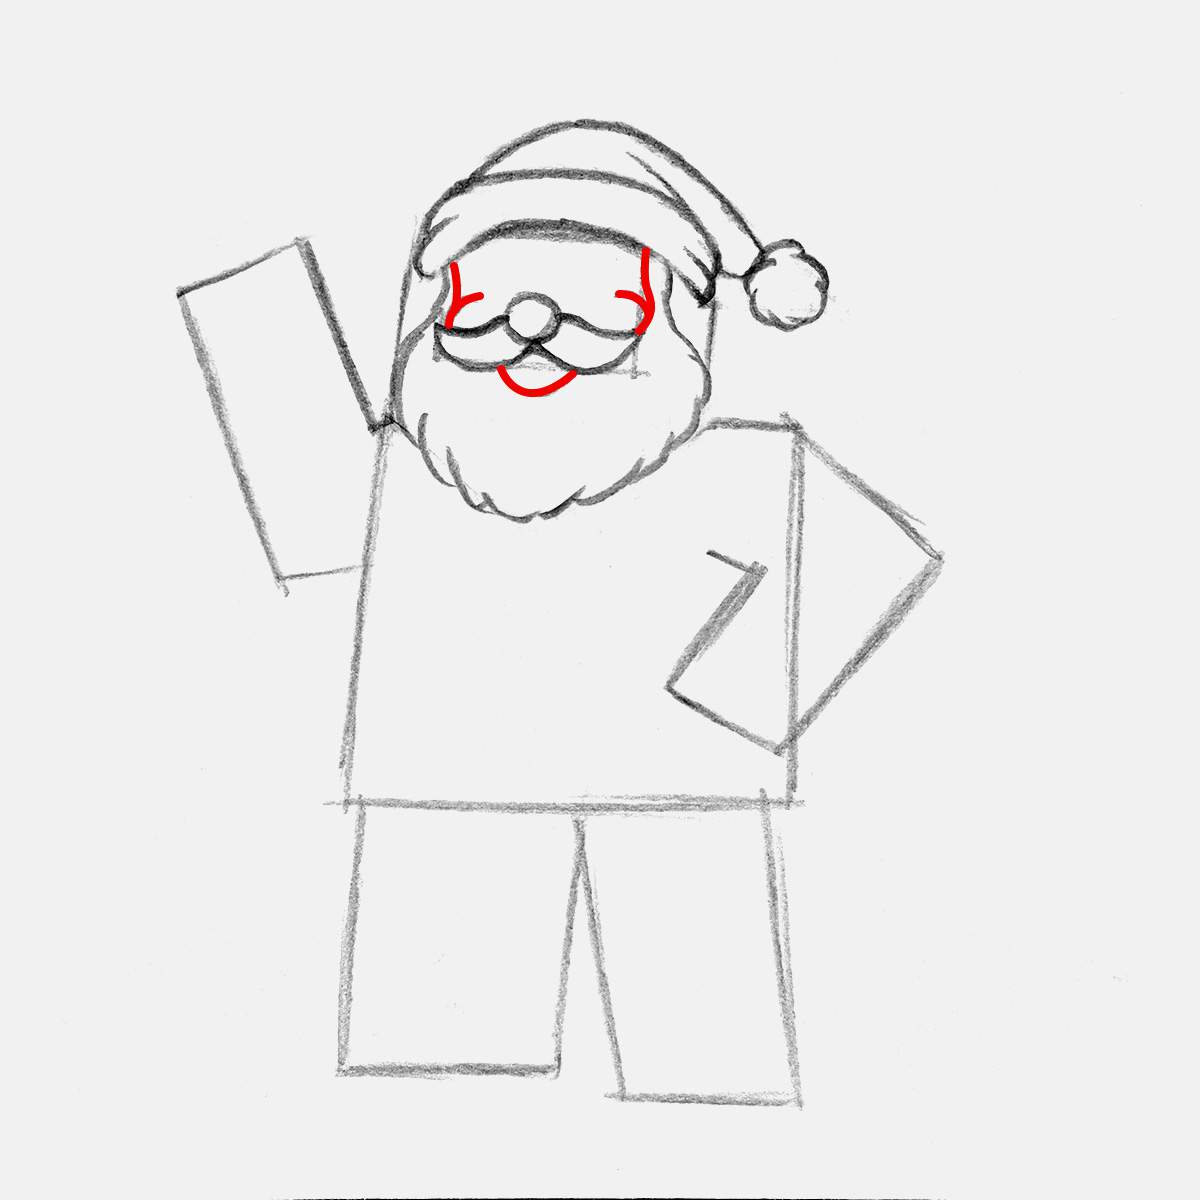
After that, I added his tongue and two small round eyes just above his cheeks. The small round eyes do make him look like a laser-shooting robot for now, but that's going to change. Trust me.
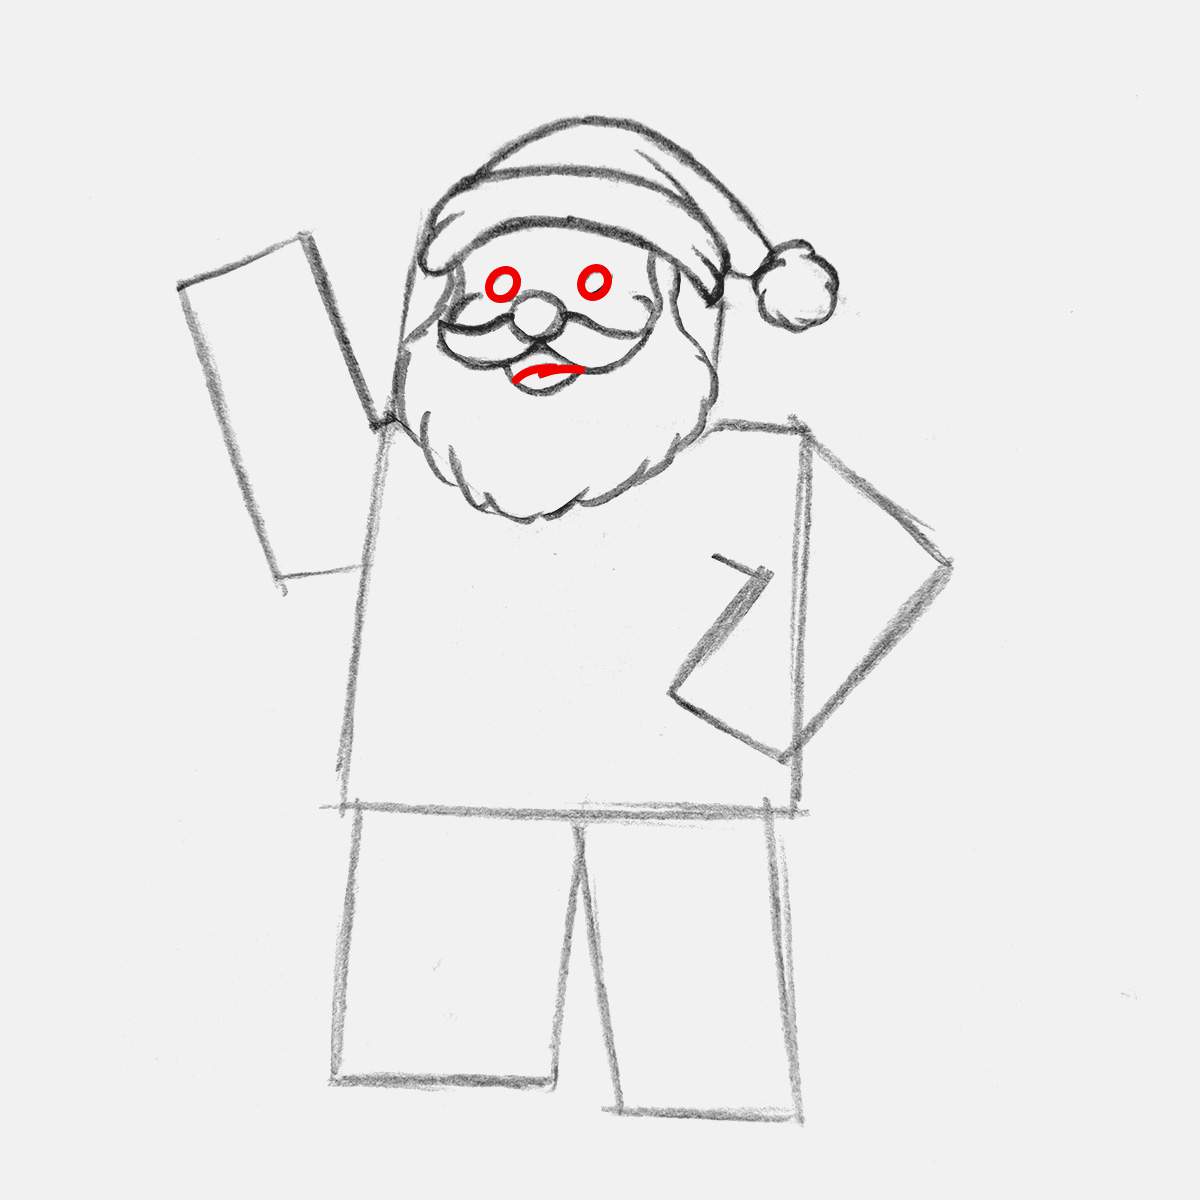
To complete his eyes and make them look less robot-like, I added the pupils with a dot in the top right for the white reflection in the eyes. I also added 2 small eyebrows above his eyes.
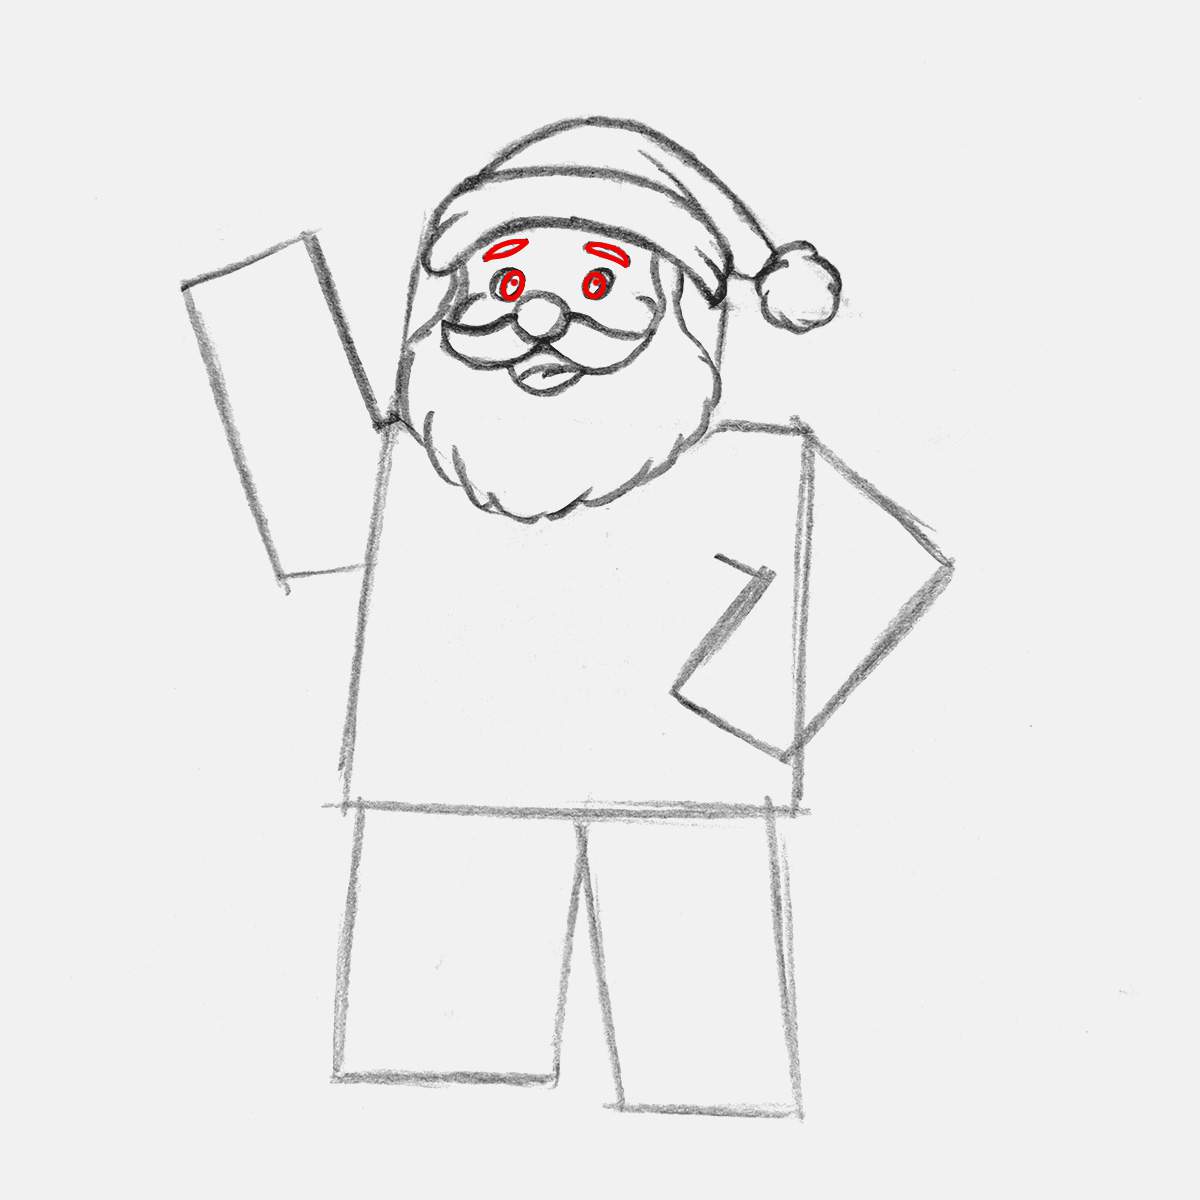
And to complete Santa Claus's face, I added 2 round ears mostly hidden in his white hair, and I added the hair on the back of his head on the right. On his left ear (the one on the right), I also added two lines for the details of his auricle.
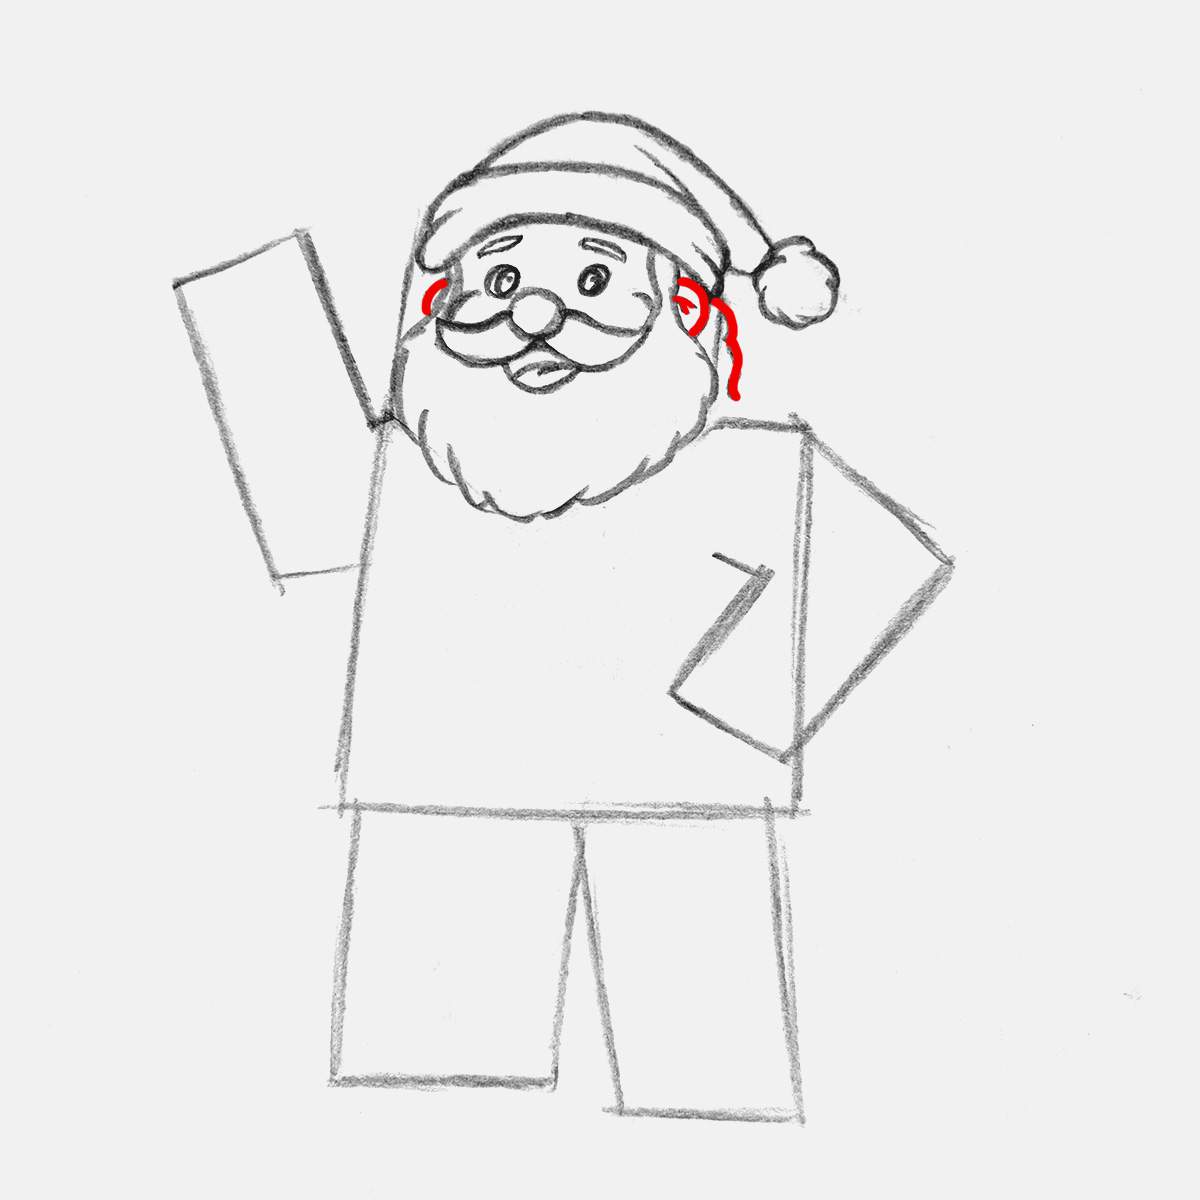
With all of Santa's face now sketched, I erased the construction lines we no longer need. This makes our sketch already look a lot cleaner.
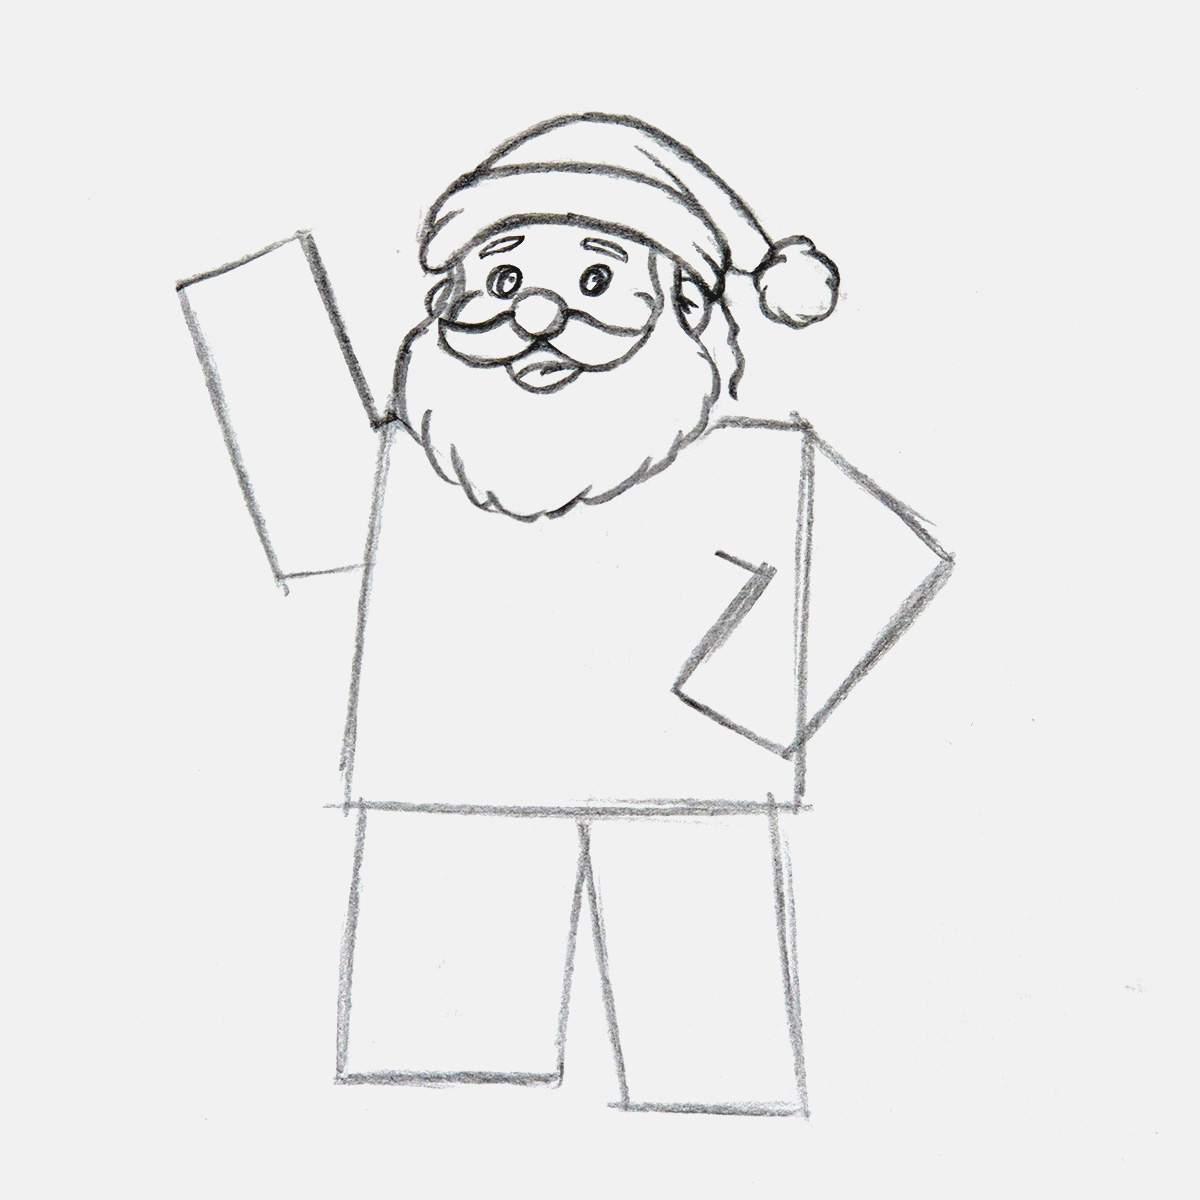
The most difficult part (in my opinion) is now done, which means we can move on to the next part of our Santa sketch: his upper body.
Step 4: Sketch Santa's Coat (Without The Arms For Now)
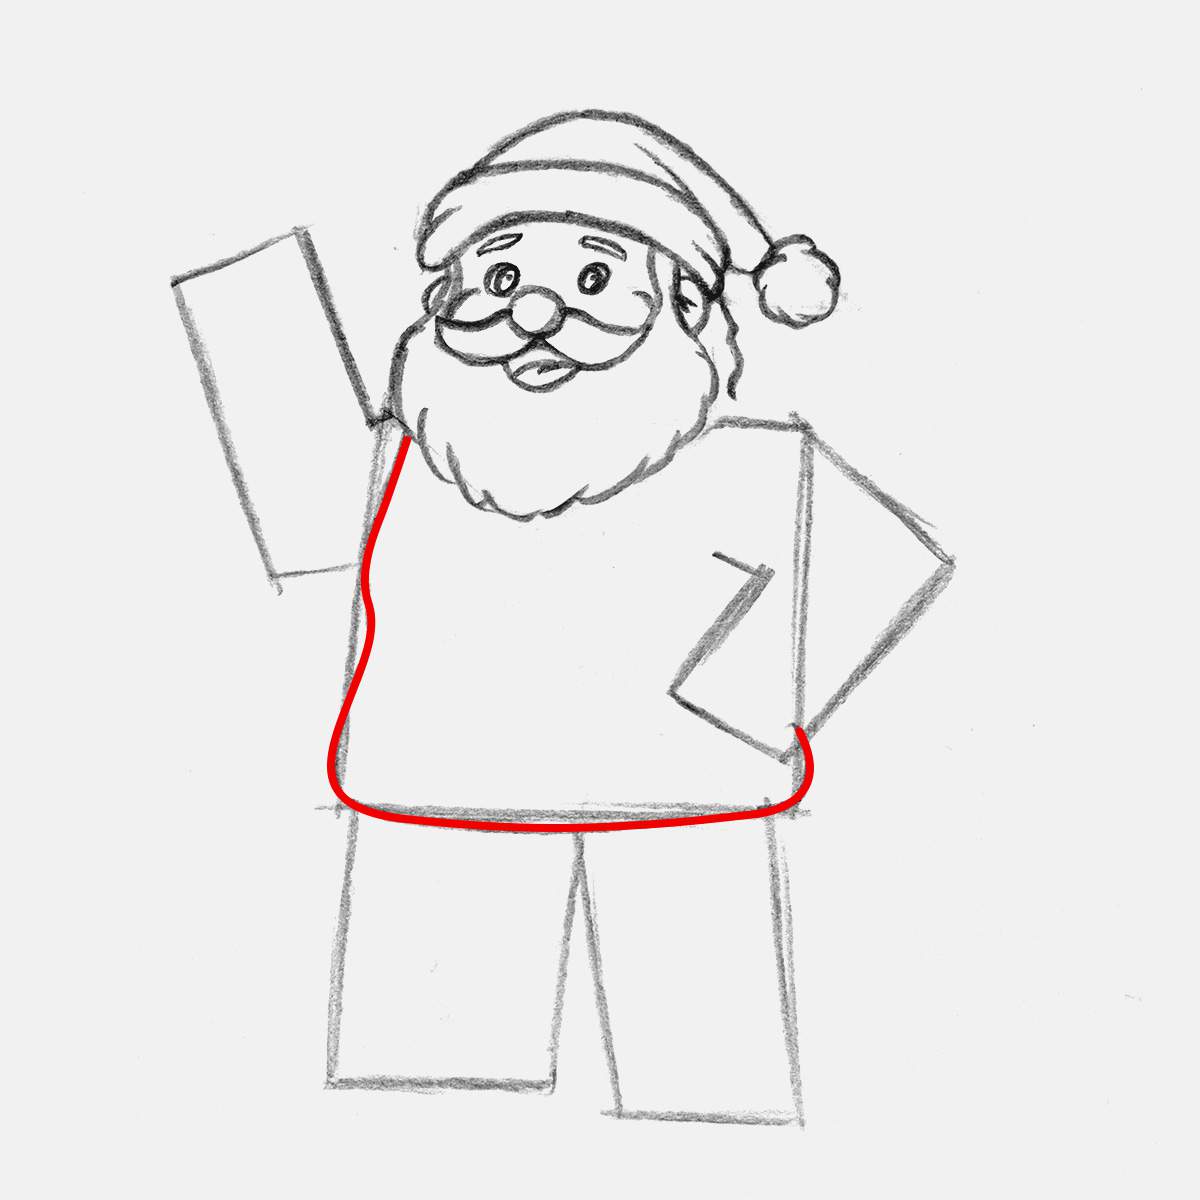
Luckily for us, Santa is wearing his iconic red coat. To sketch his coat, I started by sketching the full outline of it, except for where his left arm (on the right) overlaps it.
Not sure how to describe this line I just drew, but the word that comes to mind is potato sack. Hopefully that helps. Otherwise, I will try my best to explain it a little bit better.
On the top left of Santa's body, just below his beard, I started the outline of his coat, a little bit to the right of the guiding line we drew at the start. Then, at chest height, it curves a little bit outwards, as we all know Santa isn't the skinniest. After that, the outline curves inwards again at his waist, and then at the bottom, it curves outwards. The middle part of the bottom hangs a bit lower than the rest, and all the corners are very round and smooth.
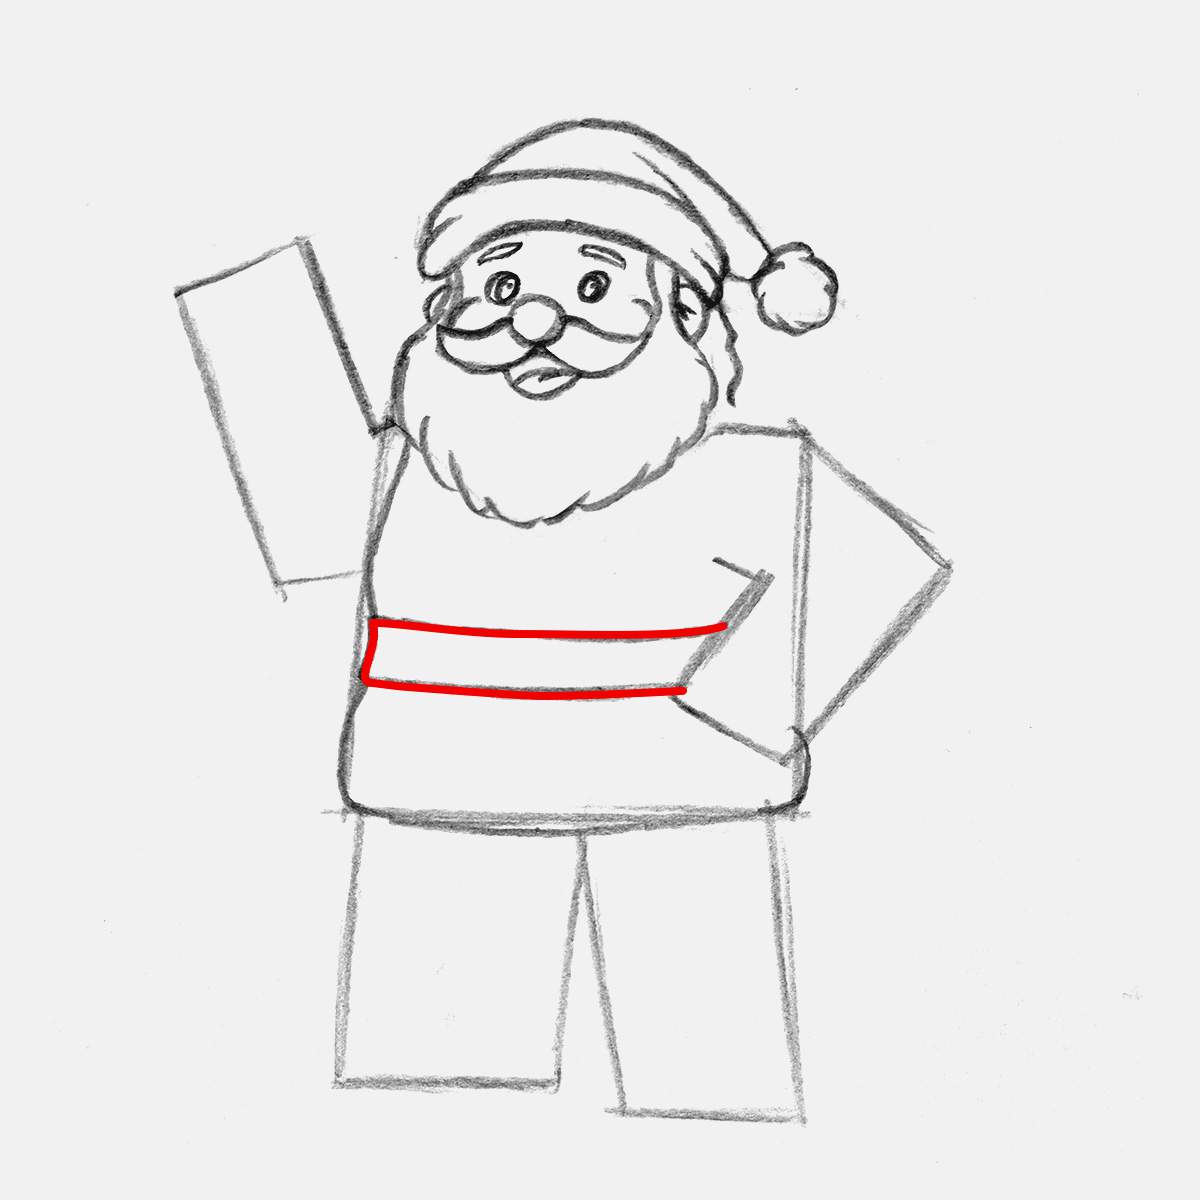
Around his waist, Santa always wears a big black belt, not because he's a karate expert, but to keep his coat wrapped around his body.
To sketch his belt, I just drew 2 parallel and slightly curved lines around his waist. I also made the belt stick out just a little bit on the side as it has a thickness.
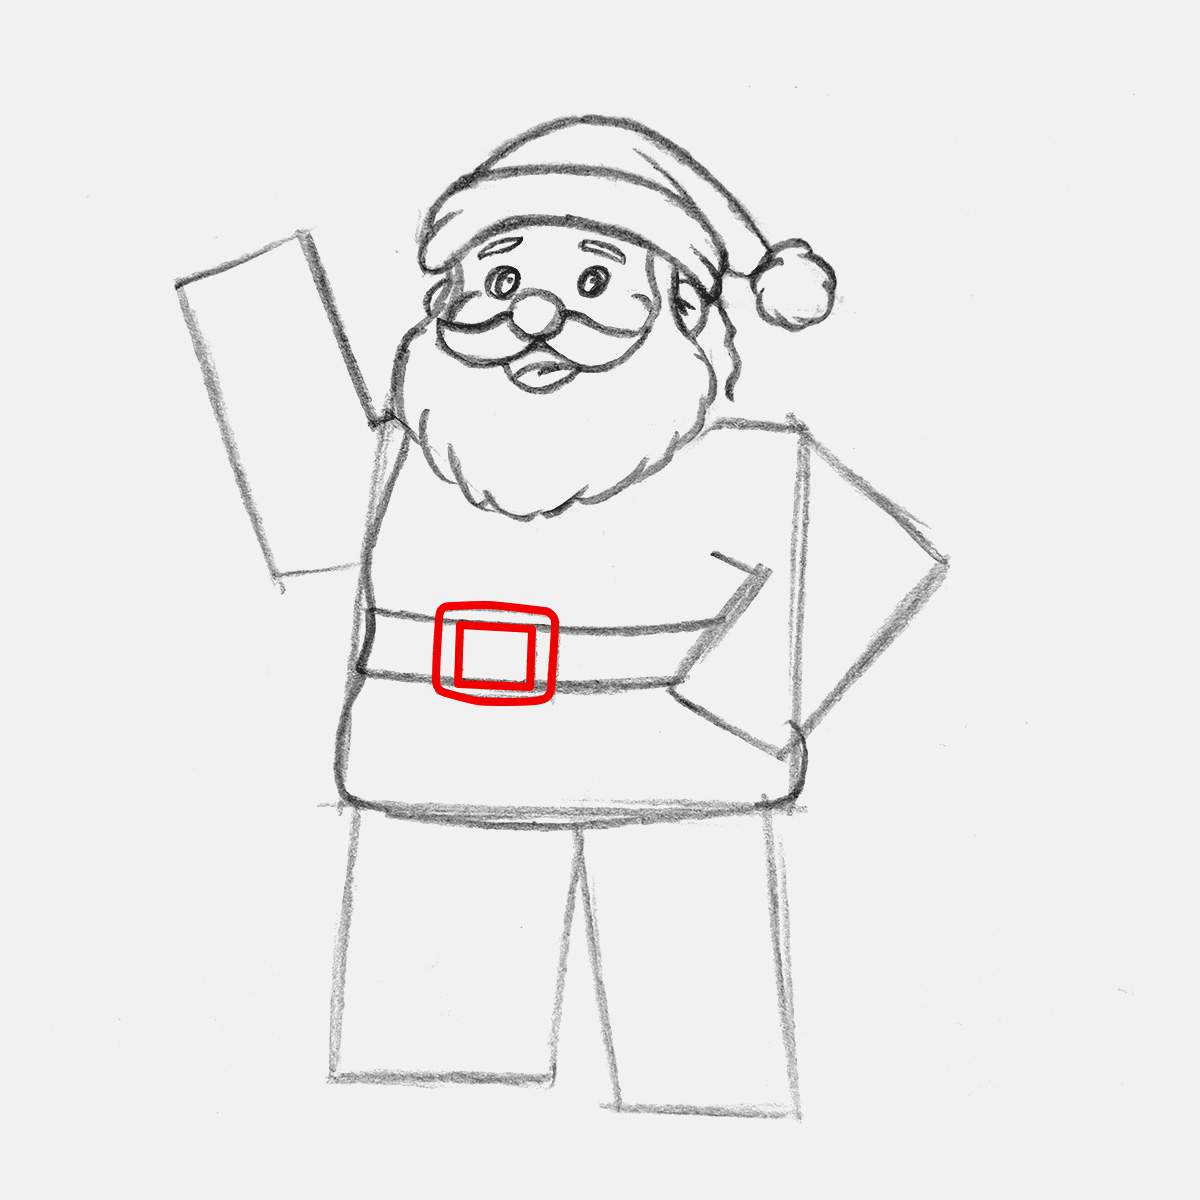
Next, I added the big square and golden belt buckle. The belt buckle is just one rectangle that fits perfectly inside the belt with another rectangle shape around it. The outer rectangle has rounded edges. Otherwise, it looked so sharp and pointy.
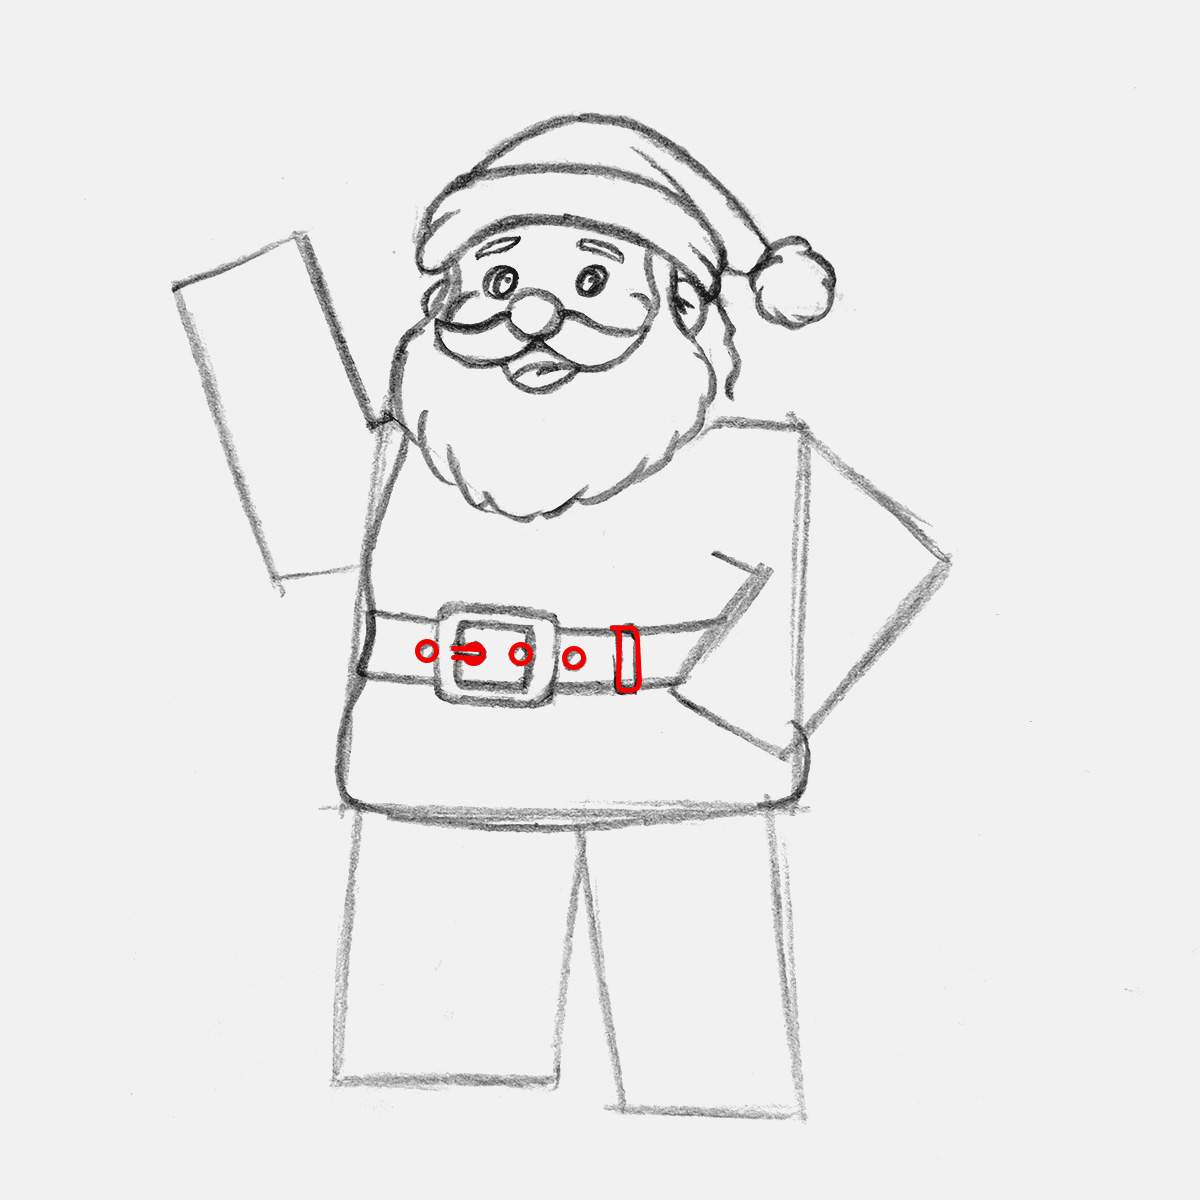
With the belt buckle done, I erased the belt lines that overlap the buckle. You'll probably just need to erase the whole buckle with the overlapping lines and then resketch the buckle. I find this is easier than trying to avoid the sketch lines.
I also added the buckle pin, 4 belt holes (the pin is in one of them), and a belt loop.
After the belt was done, I moved on to the fur trim around the edge of Santa's coat. I added the fur trim around the front edge and the bottom edge. And instead of using overlapping curve shapes, I used this squiggly line that I really disliked and later on replaced with overlapping curve shapes.
If you want to see what that looks like, skip ahead to step 8 where I've outlined the sketch and replaced the fur trim with more soft curve shapes, which, in my opinion, looks better than what I did here.
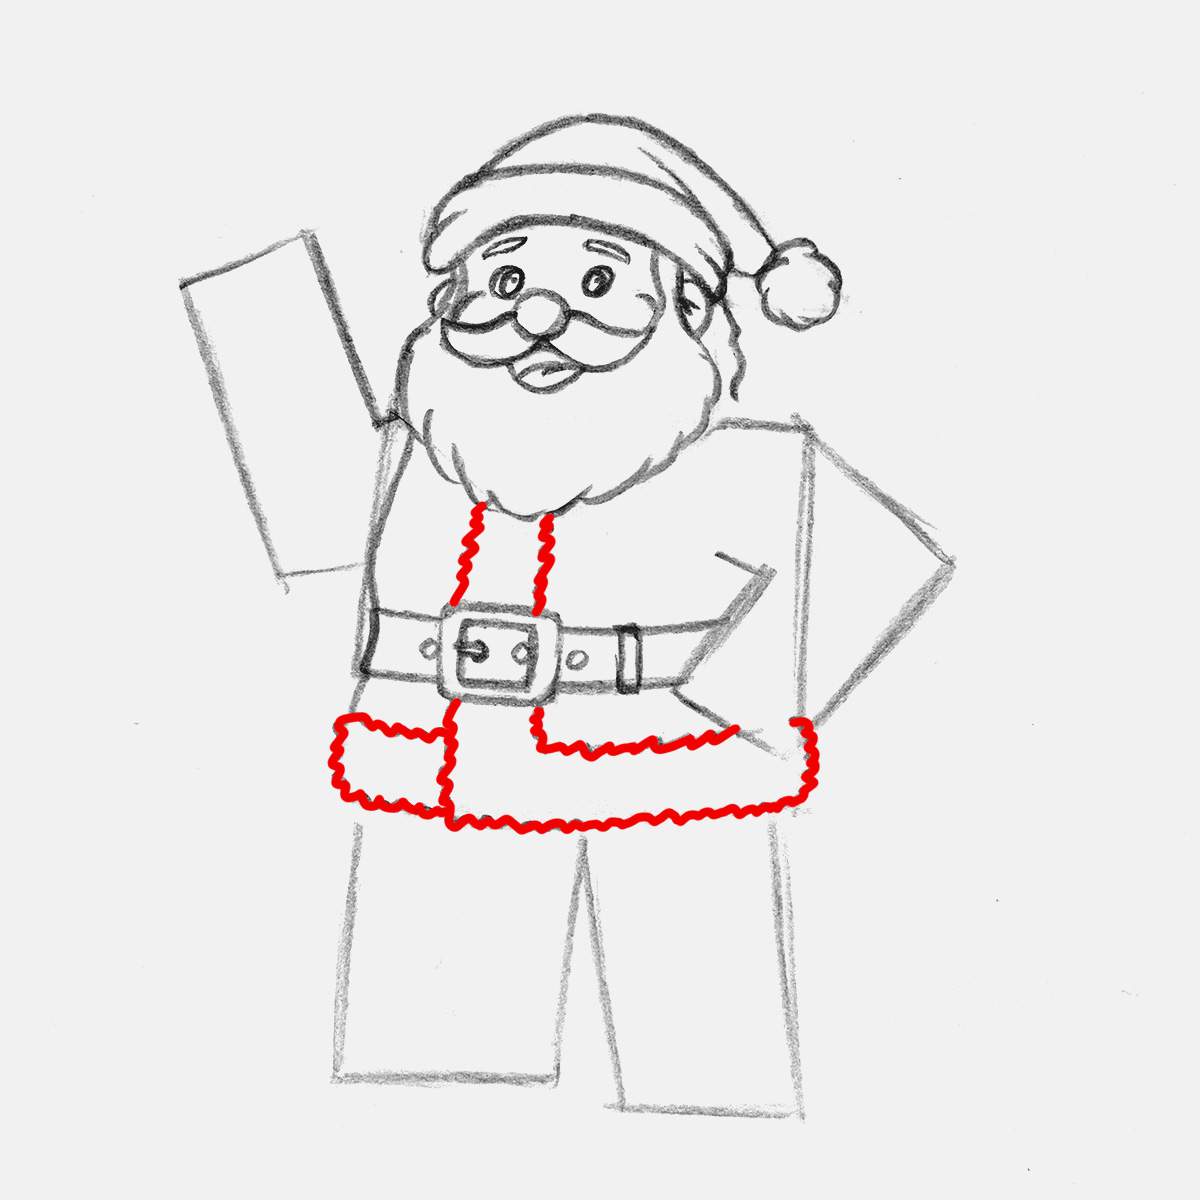
And that's Santa's upper body all done already!
Step 5: Add Santa's Arms & Hands
After sketching Santa's upper body, I added his arms to his body. As I mentioned before, one arm is waving at you, and the other is just on his side.
Let's start with the waving arm, as it's the more difficult one, but only a little bit.
If I were to redraw this exact Santa drawing, I would probably first sketch the fur trim on his sleeves and then sketch the upper part of his sleeves, but since it was my first time making this drawing, I thought it was better to draw the upper part of the sleeves first.
To sketch the upper part of his right sleeve (the one on the left in the drawing), I added a large curve for his elbow and upper arm, and drew curved lines along the top of his arm where the coat sleeve has creases.
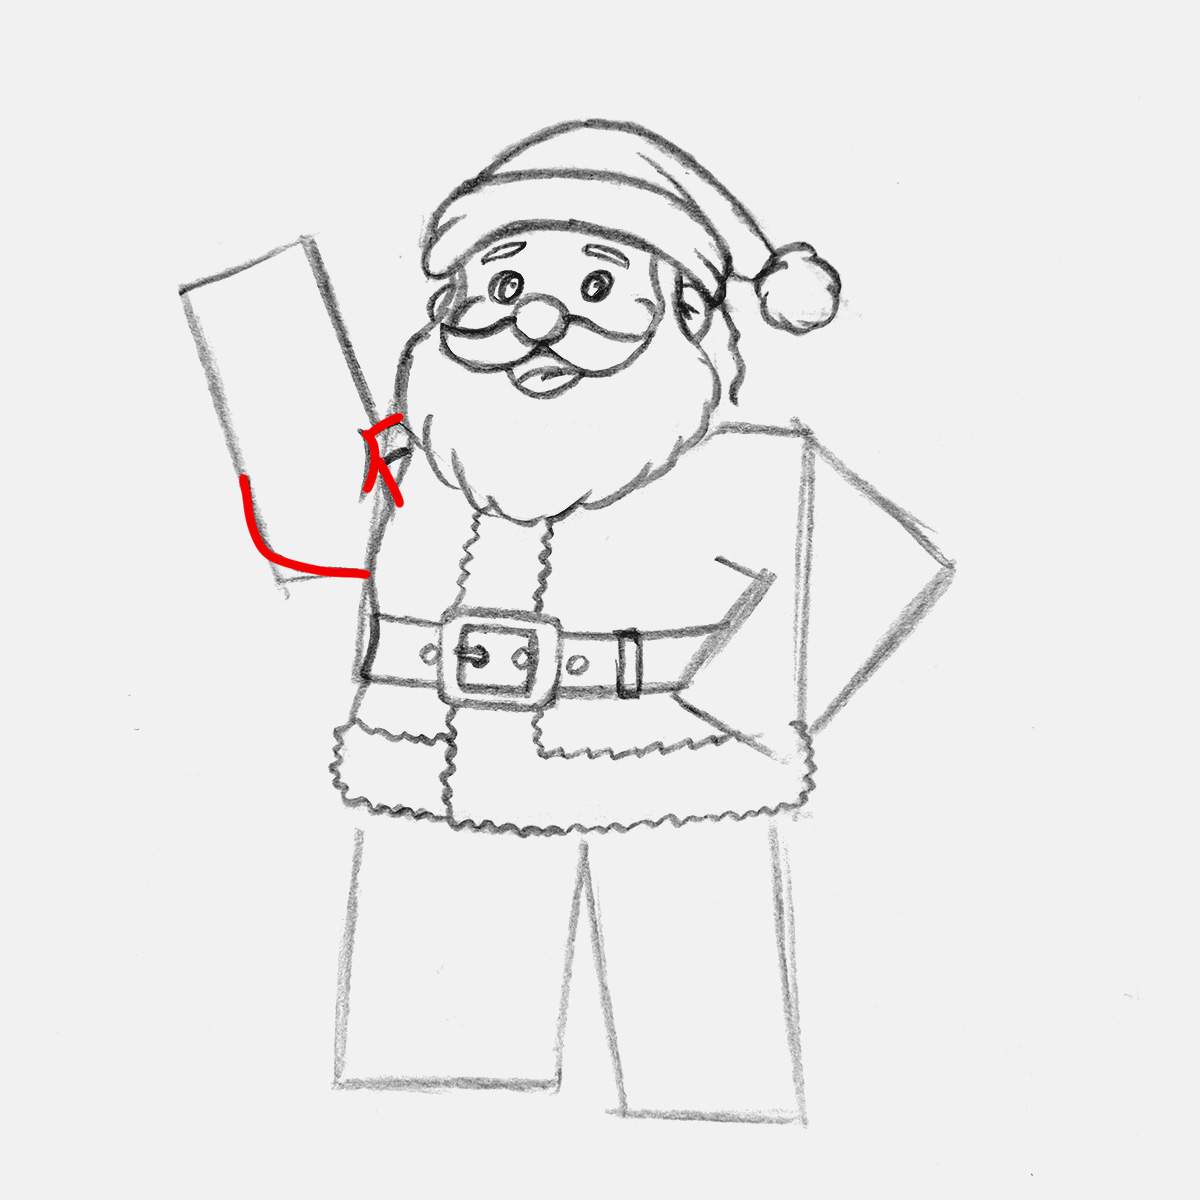
Then, I added the fur trim on the end of the sleeve, using just a few big overlapping curves this time.
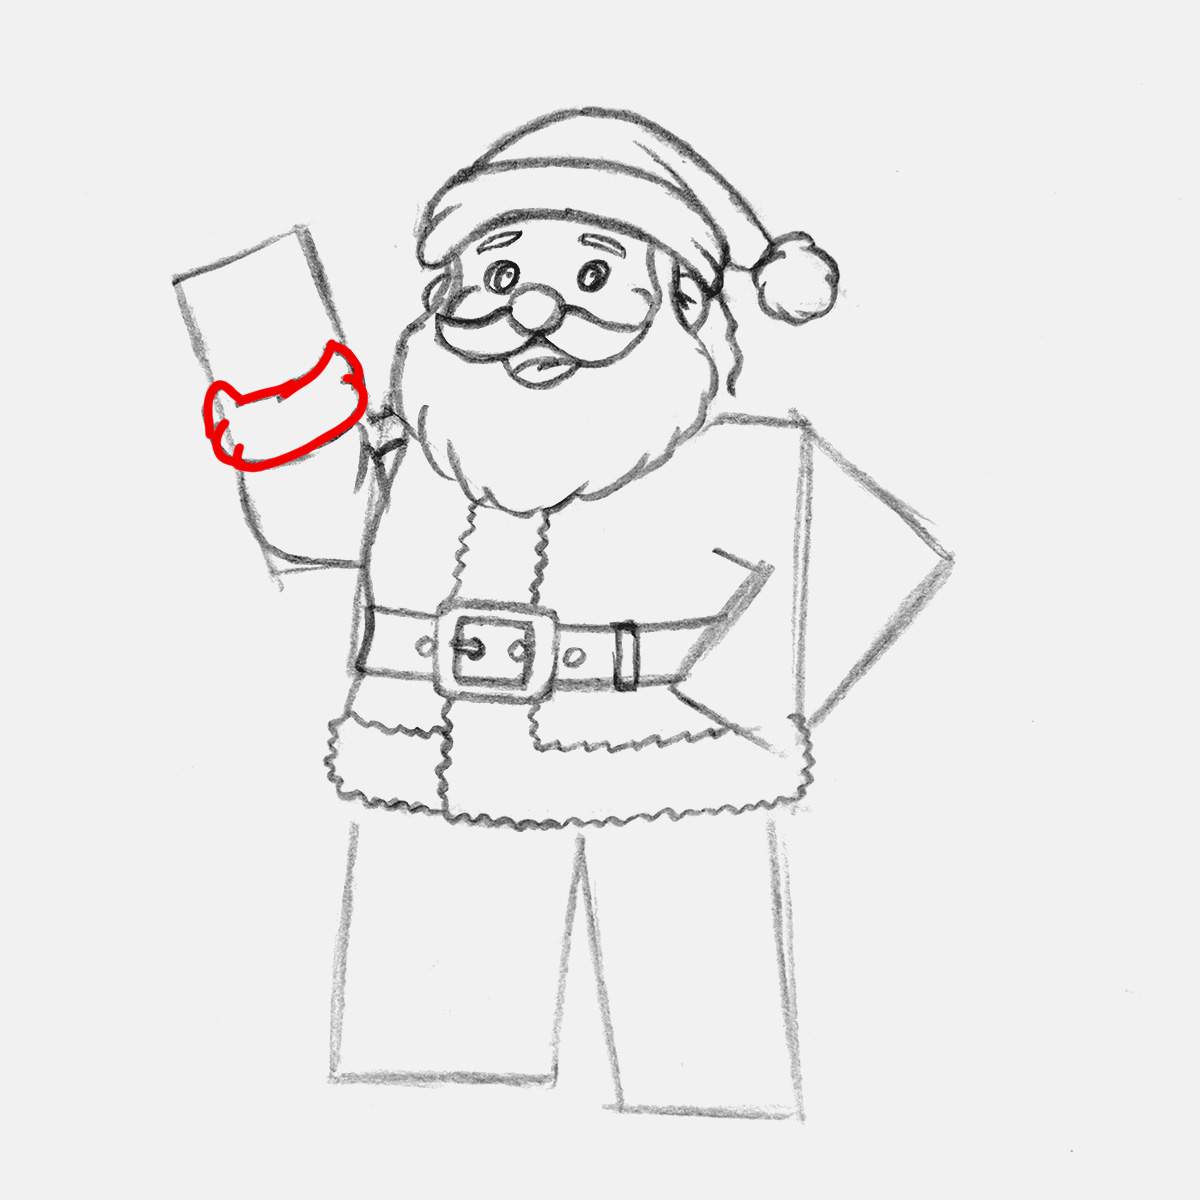
And then, I drew Santa's hand/glove. To make drawing fingers a lot easier, I came up with the fan technique or mitten method (not sure if I was really the first one though). The fan technique is essentially drawing his hand as a big mitten with all the fingers stuck together except for the thumb, in this case. Just focus on the basic shape of the hand first and getting that right first.
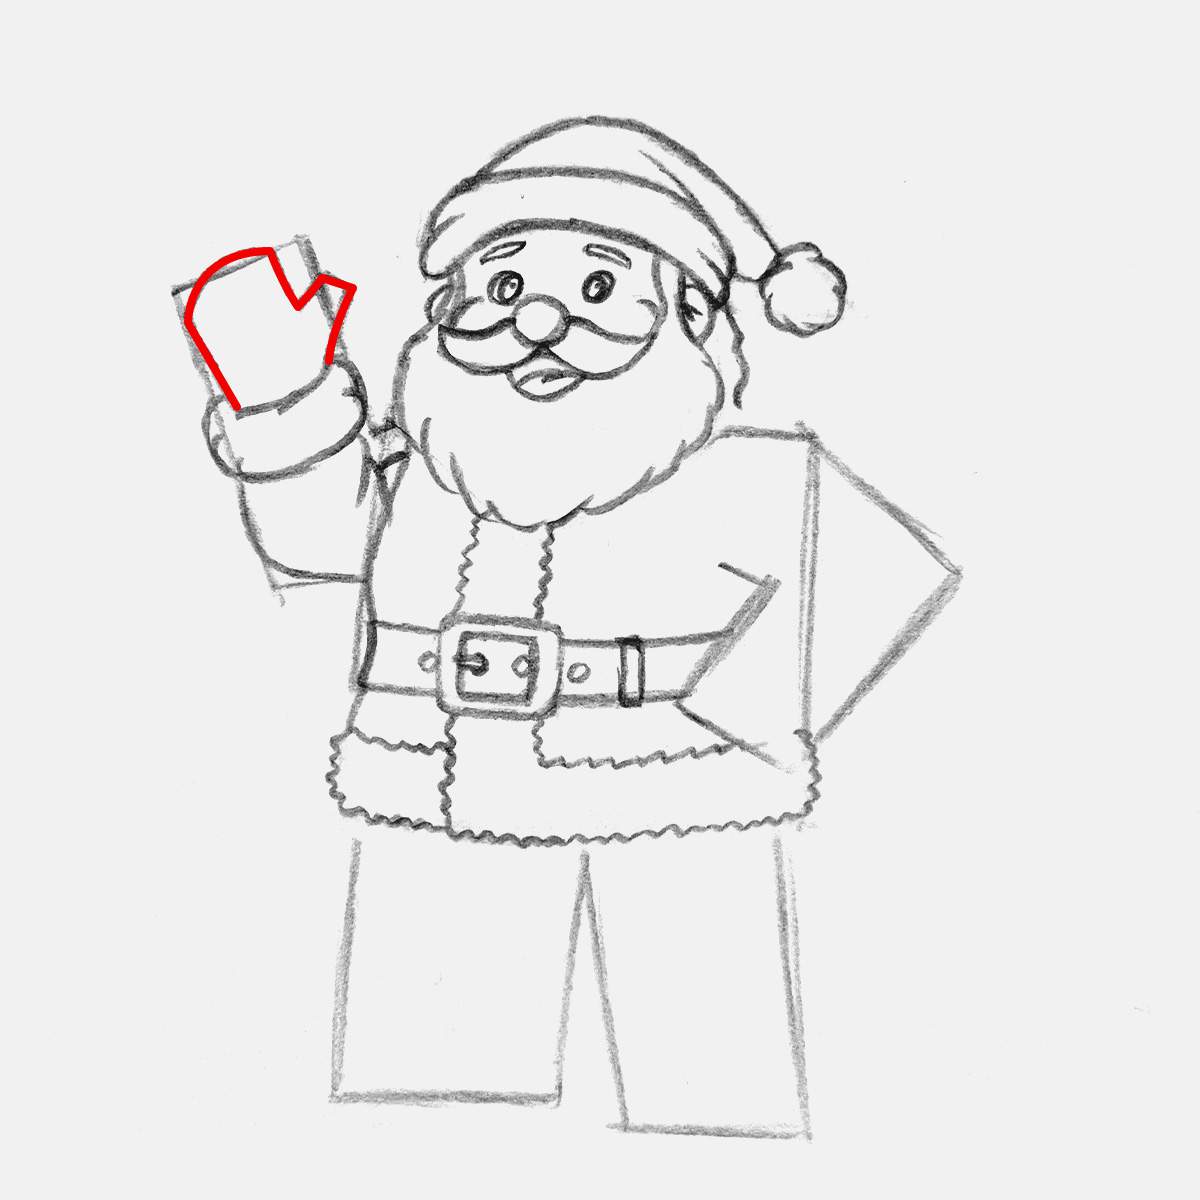
Once you have the mitten sketched, you can use it as a guide for the fingers. And since you know a hand has 4 fingers and a thumb, you just divide the main part of the mitten into 4 fingers, with the pinky shorter than the rest.
To get the fingers all the right length, you just follow the top curve shape of the mitten.
During this step, I also made the thumb look more rounded.
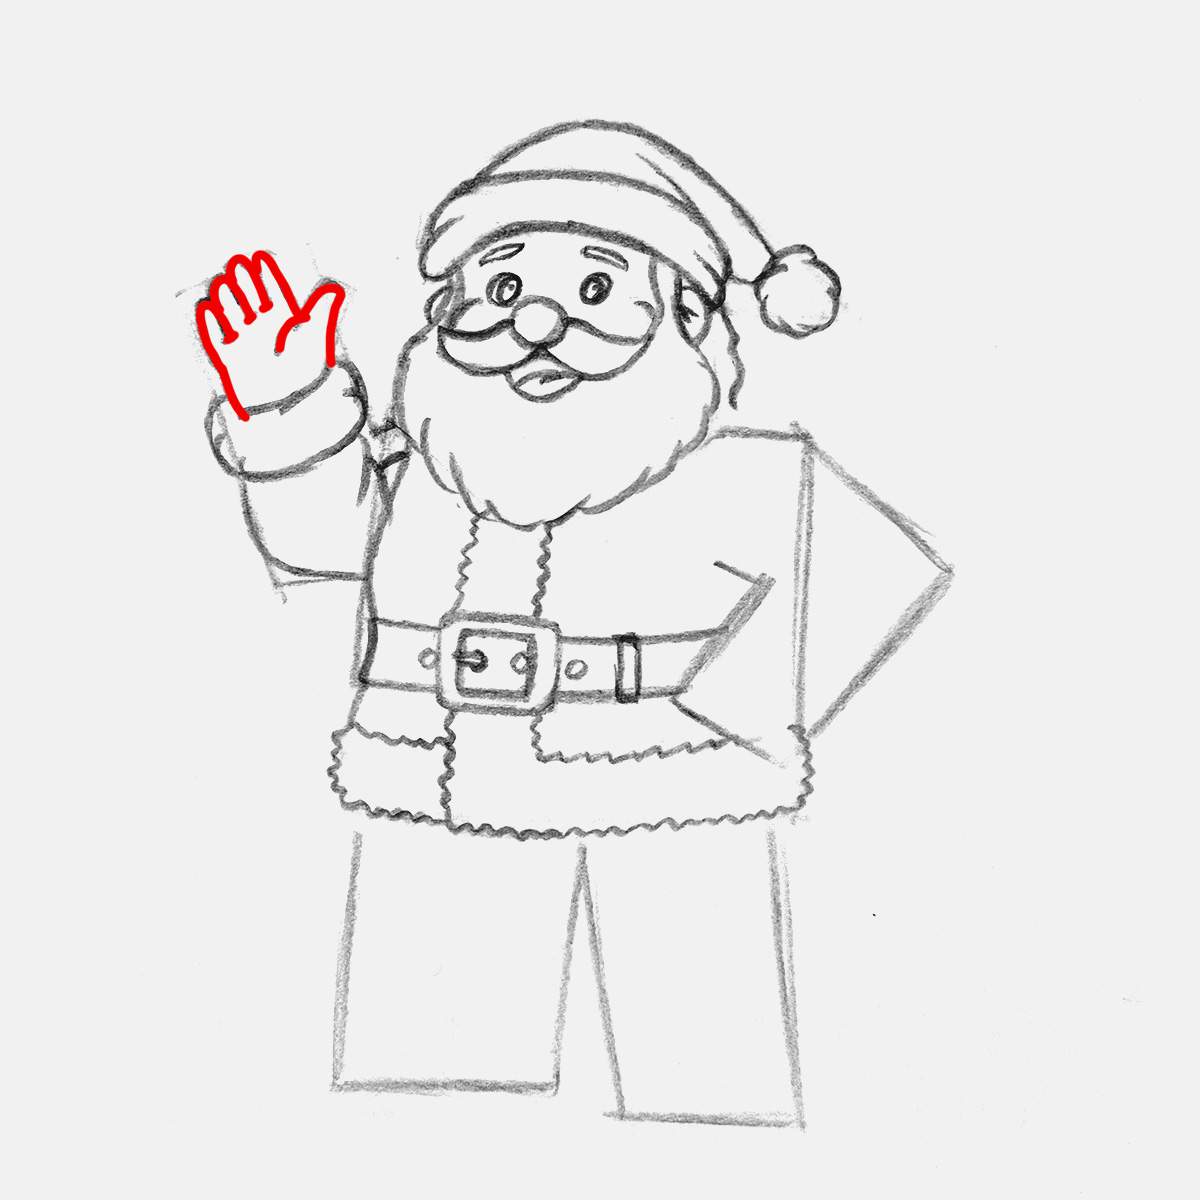
And that's how you can easily draw a hand. (At least I hope I explained it somewhat clearly.)
Now, on to the left arm.
I again started with the top edge of the upper part of the arm. This time it's shaped more like a rounded hockey stick. And I also added 3 crease lines in Santa's armpits and inner elbow.
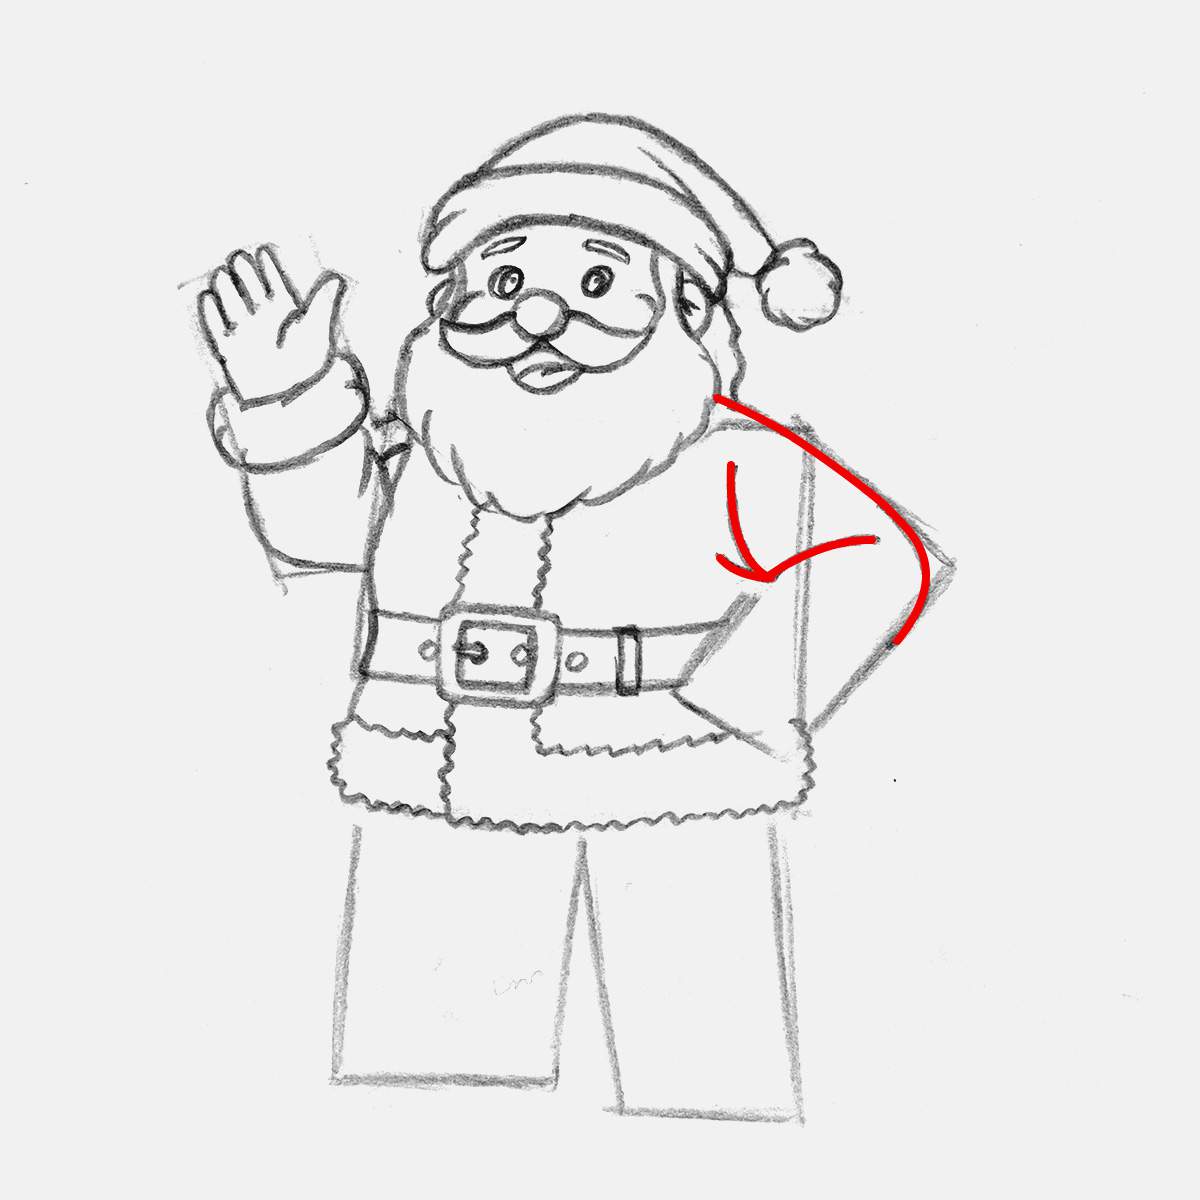
Then, I added the fur trim on the end of the sleeve using some overlapping curve shapes on the sides only.
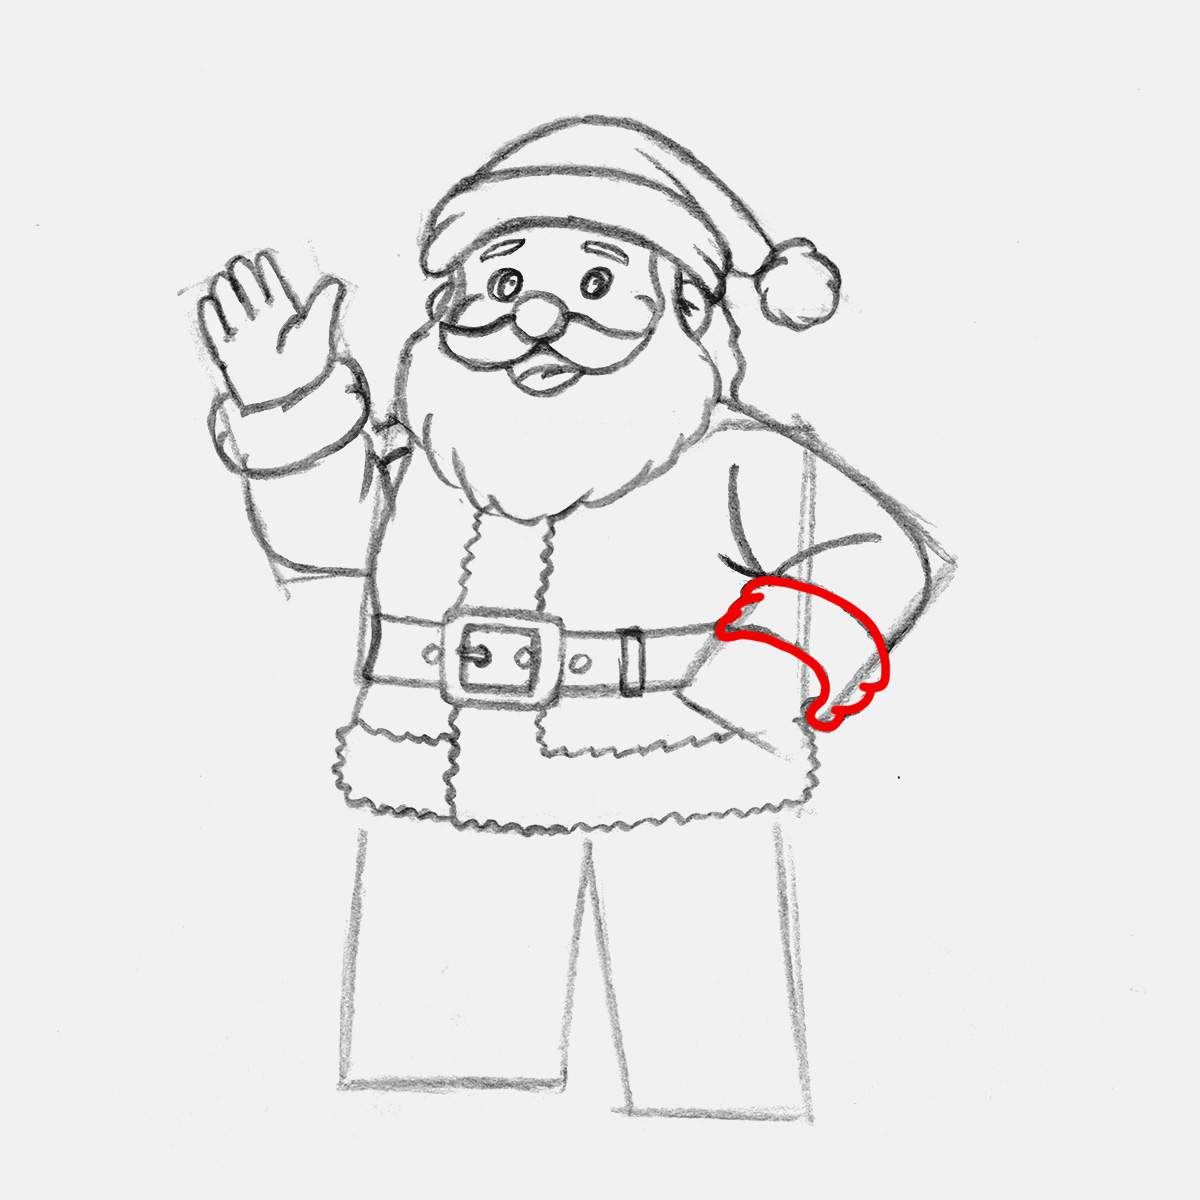
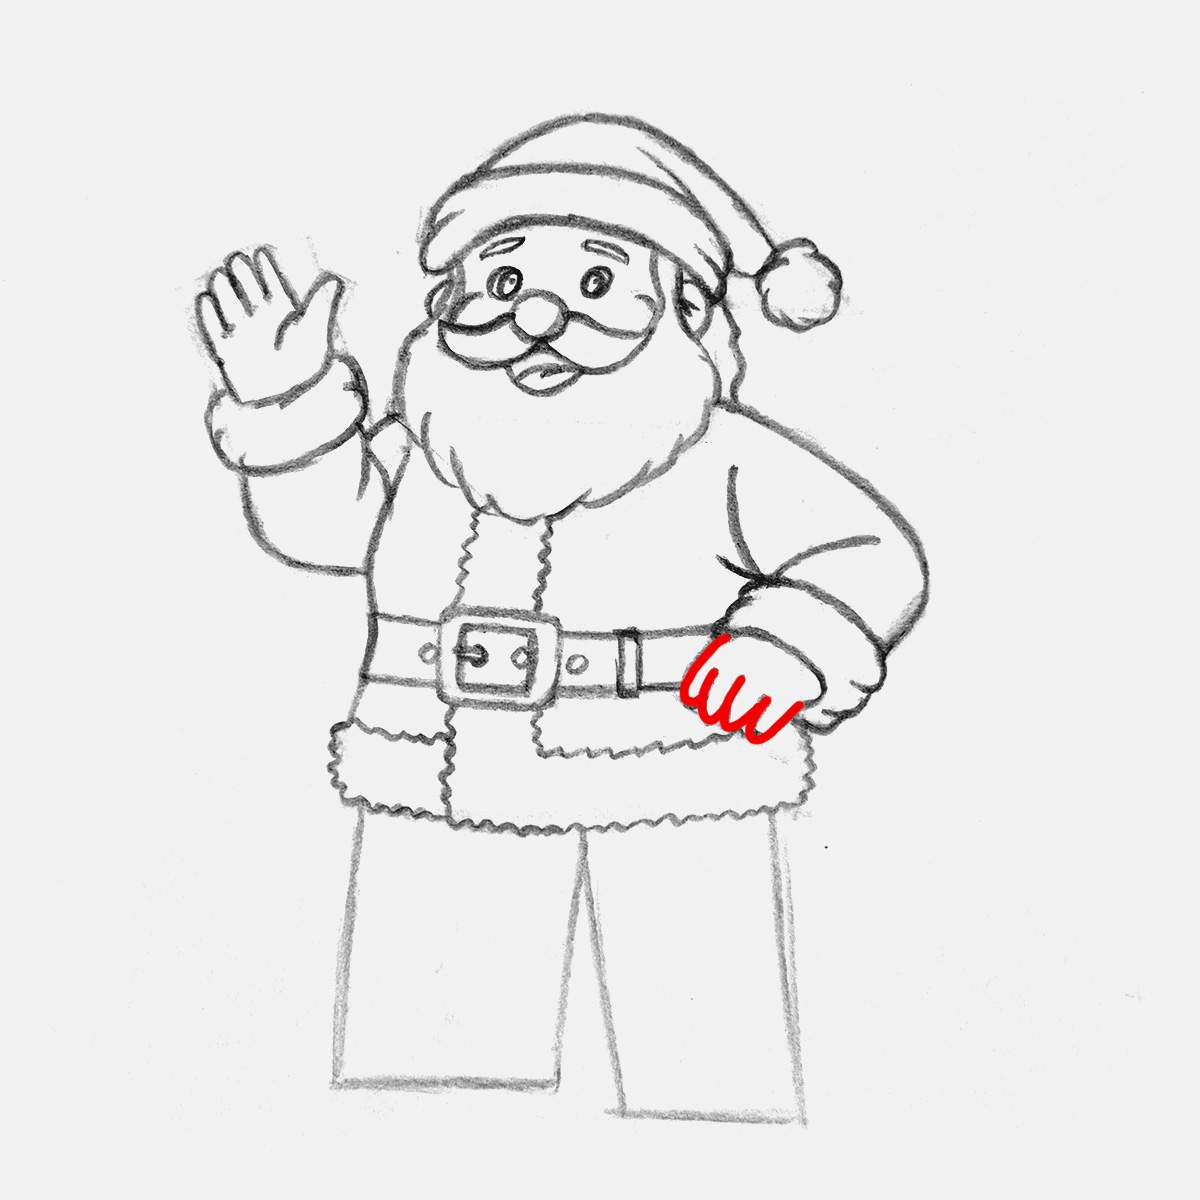
And then, I drew his hand. This one's a lot easier than his other hand, as it looks more like a fist, so you don't see the thumb.
For this hand, I sketched the basic shape using a more box shape with slightly curved edges, attached to the end of the sleeve.
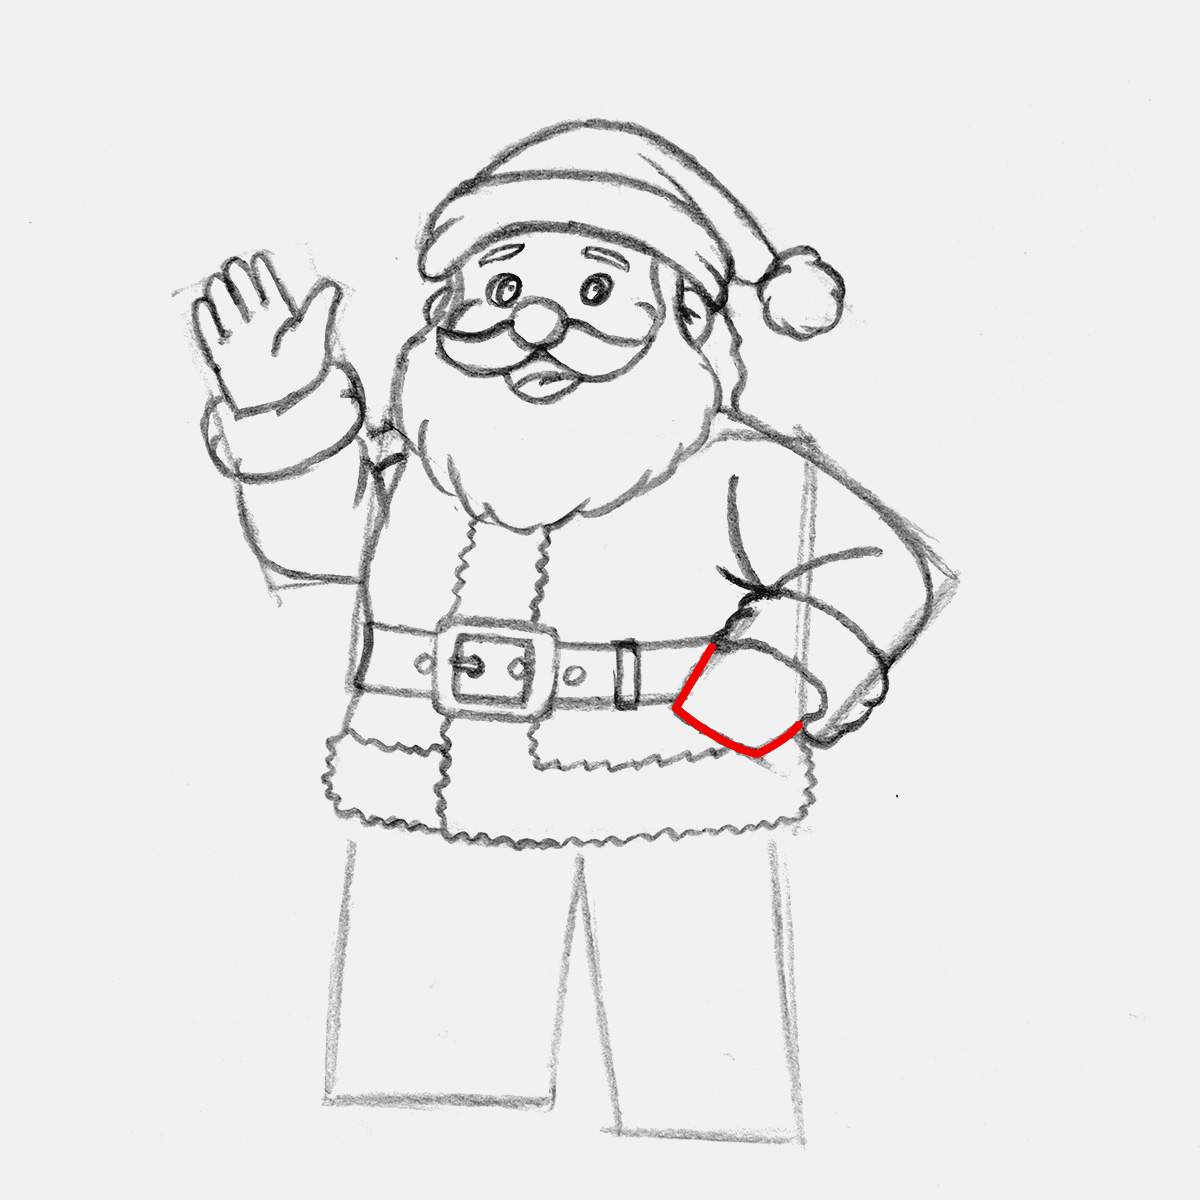
Then, I replaced the box shape with four equally spaced (kinda) sausage fingers.
And that's it for this hand.
In this step, I also erased the guiding lines for the arms and upper body.
Step 6: Give Santa Some Pants
We can't leave Santa standing there without any pants, so that's what we're going to draw next.
This time, I did start with the fur trim and then the sides of his legs, which makes more sense to me.
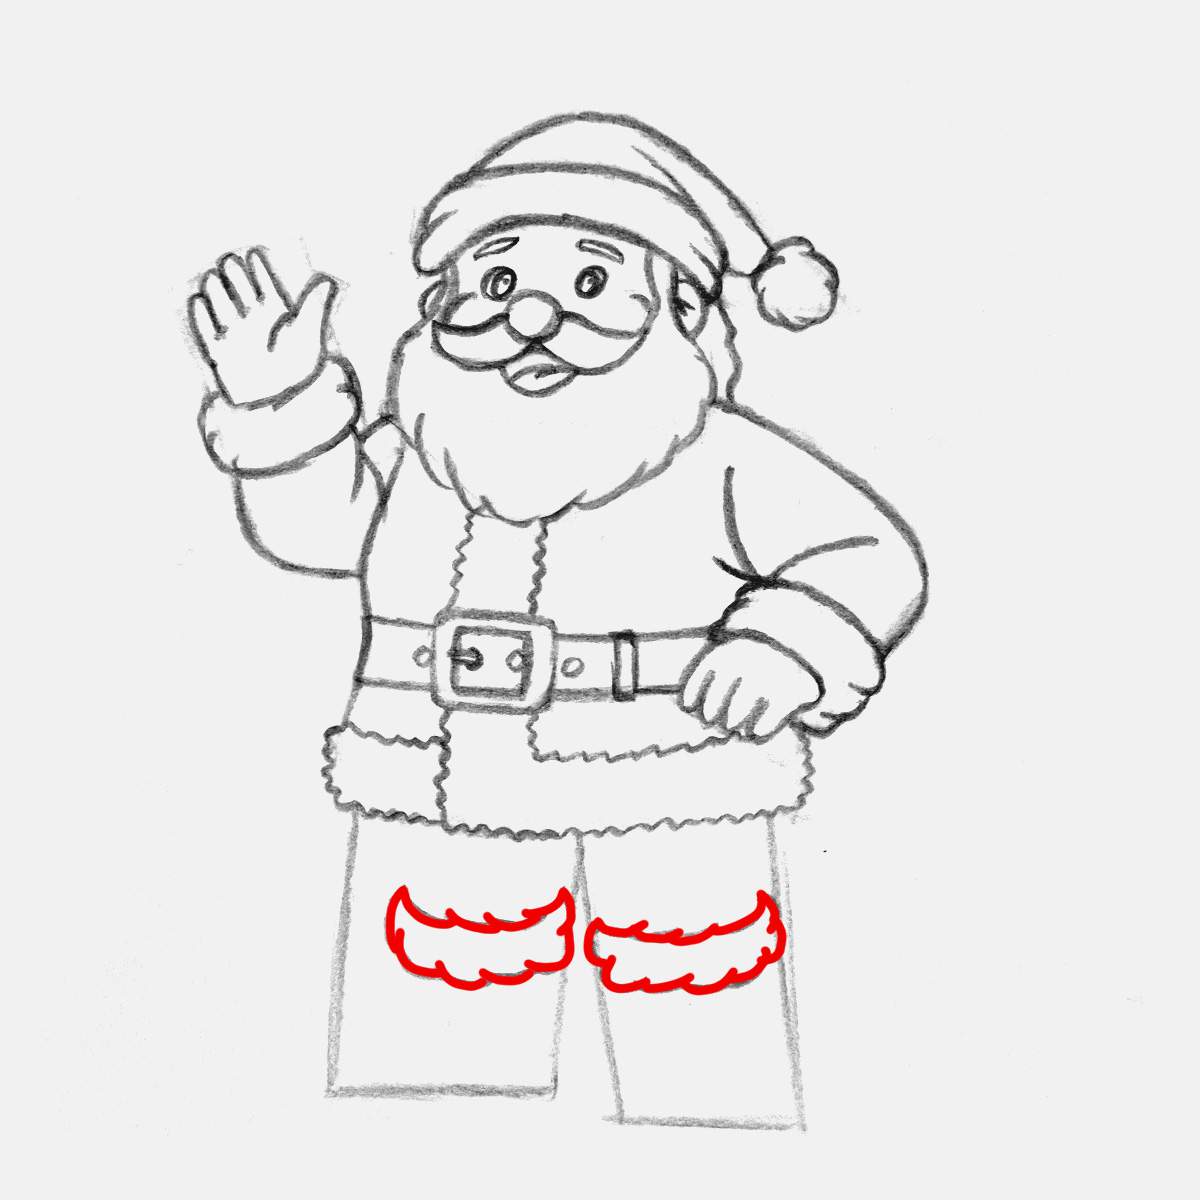
I sketched the fur trims of both pant legs around halfway on his legs, at knee height. And to make these fur trims look extra fluffy, I used some more overlapping curve shapes.
Btw, notice how the left fur trim doesn't go all the way to both edges of the basic leg shapes? That's because of his foot, which is more sideways on this leg.
Next, I added the edges of both legs. They are a tiny bit curved outwards to make the pants look puffy.
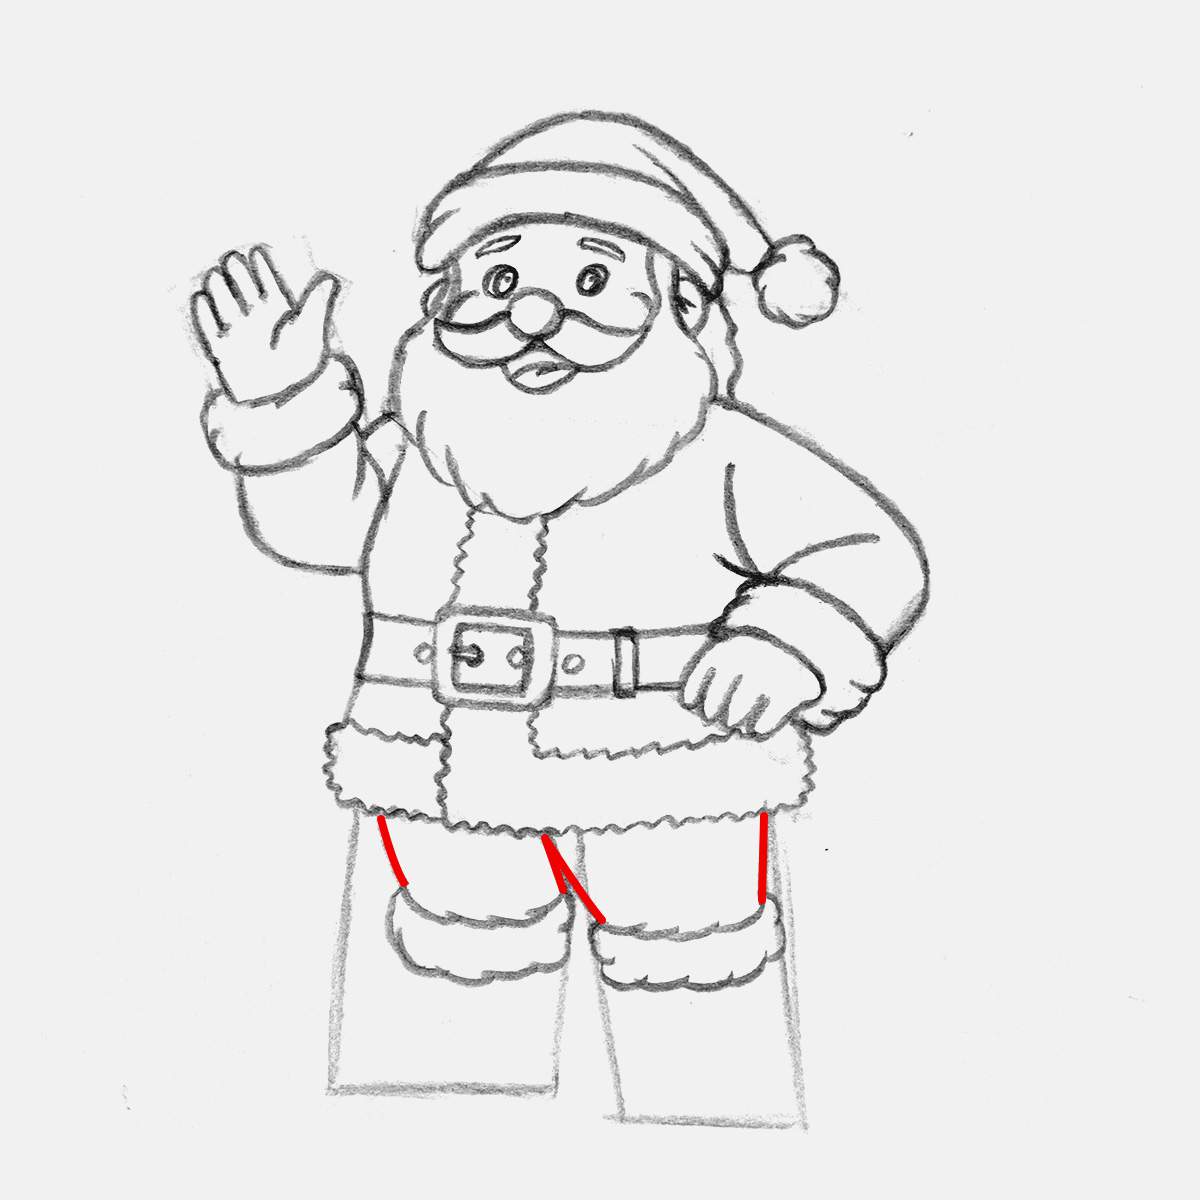
And that's already it for the pants.
Step 7: Add Santa's Black Boots
The last step of sketching Santa Claus is sketching his big black boots.
I first sketched the boots without the sole. The boot on the left is more of a side view, whereas the one on the right is more viewed from straight on.
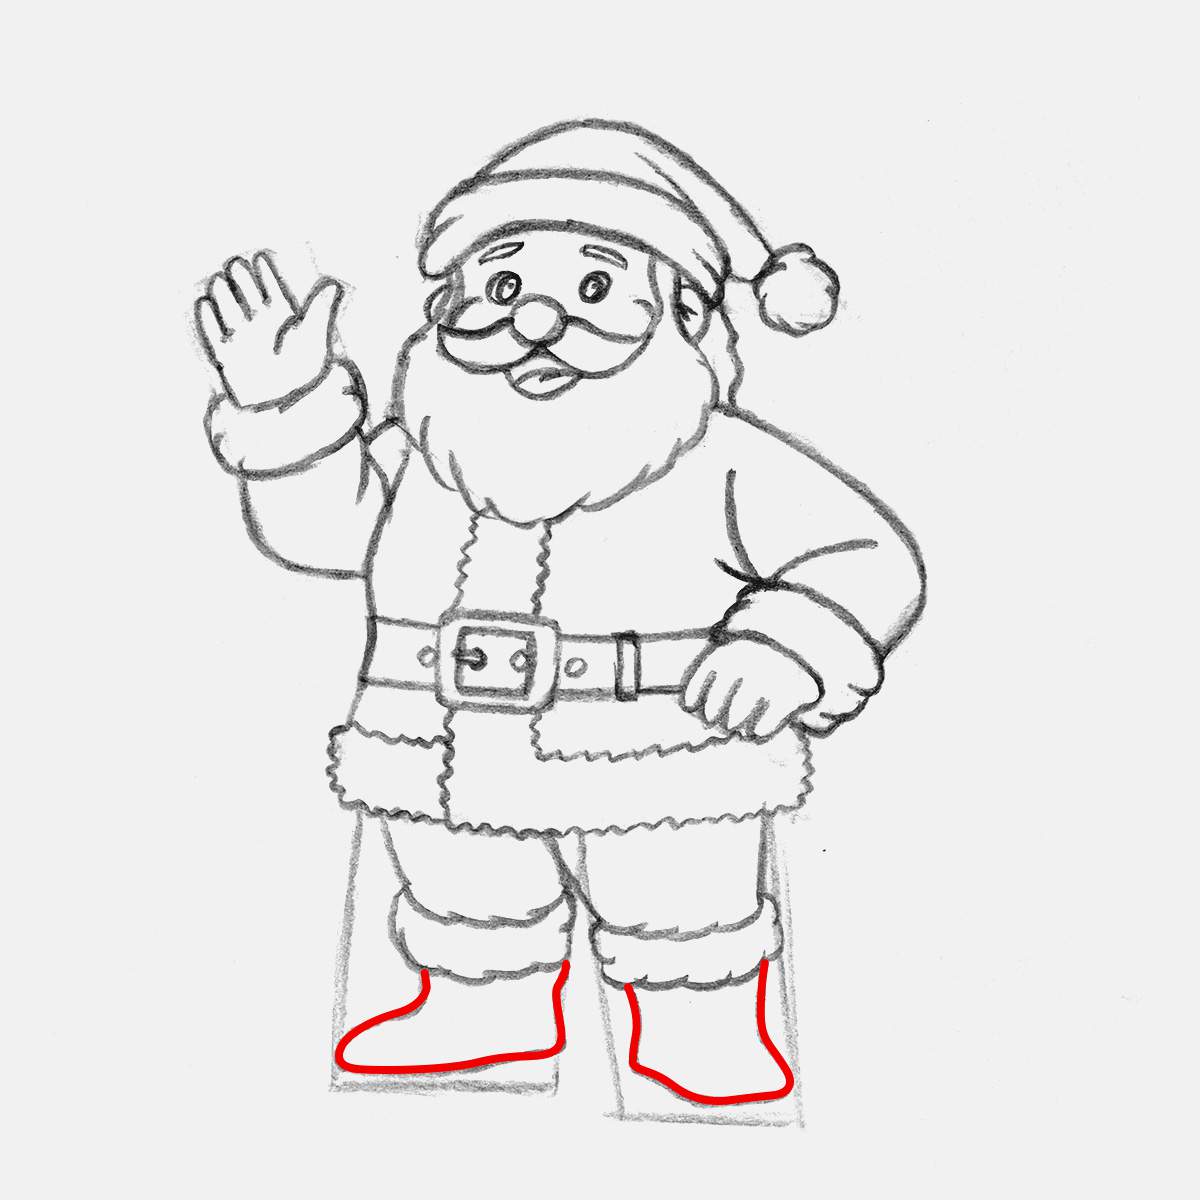
To complete Santa's boots, I added the thick soles with a slight heel, and I drew 2 folds on the top.
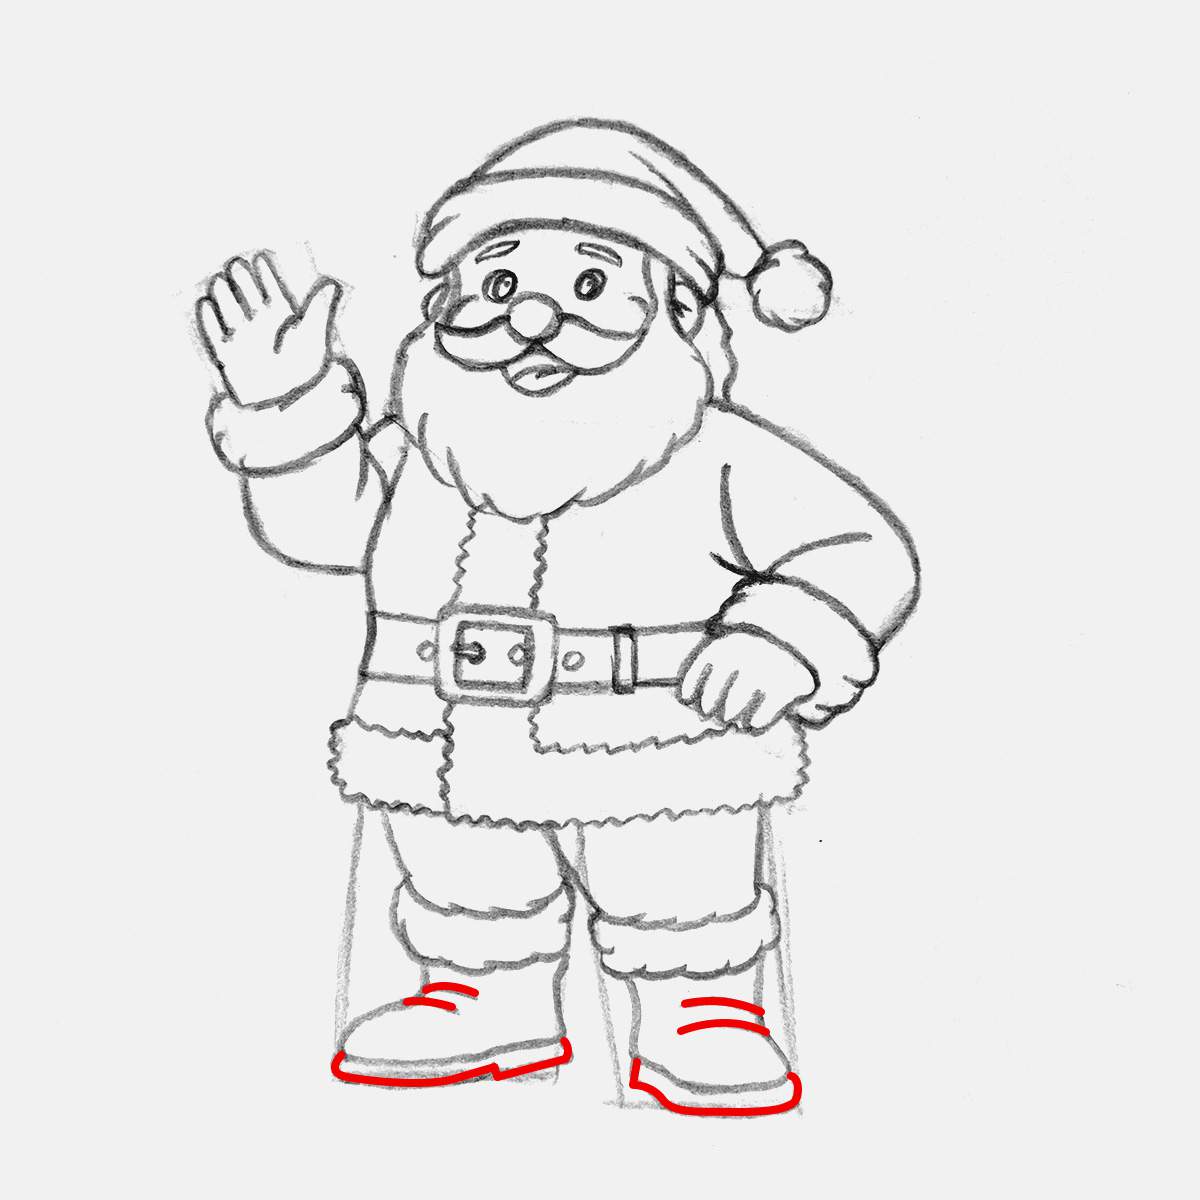
And to finish off our Santa Claus sketch, I erased all the remaining guiding lines we drew right at the start.
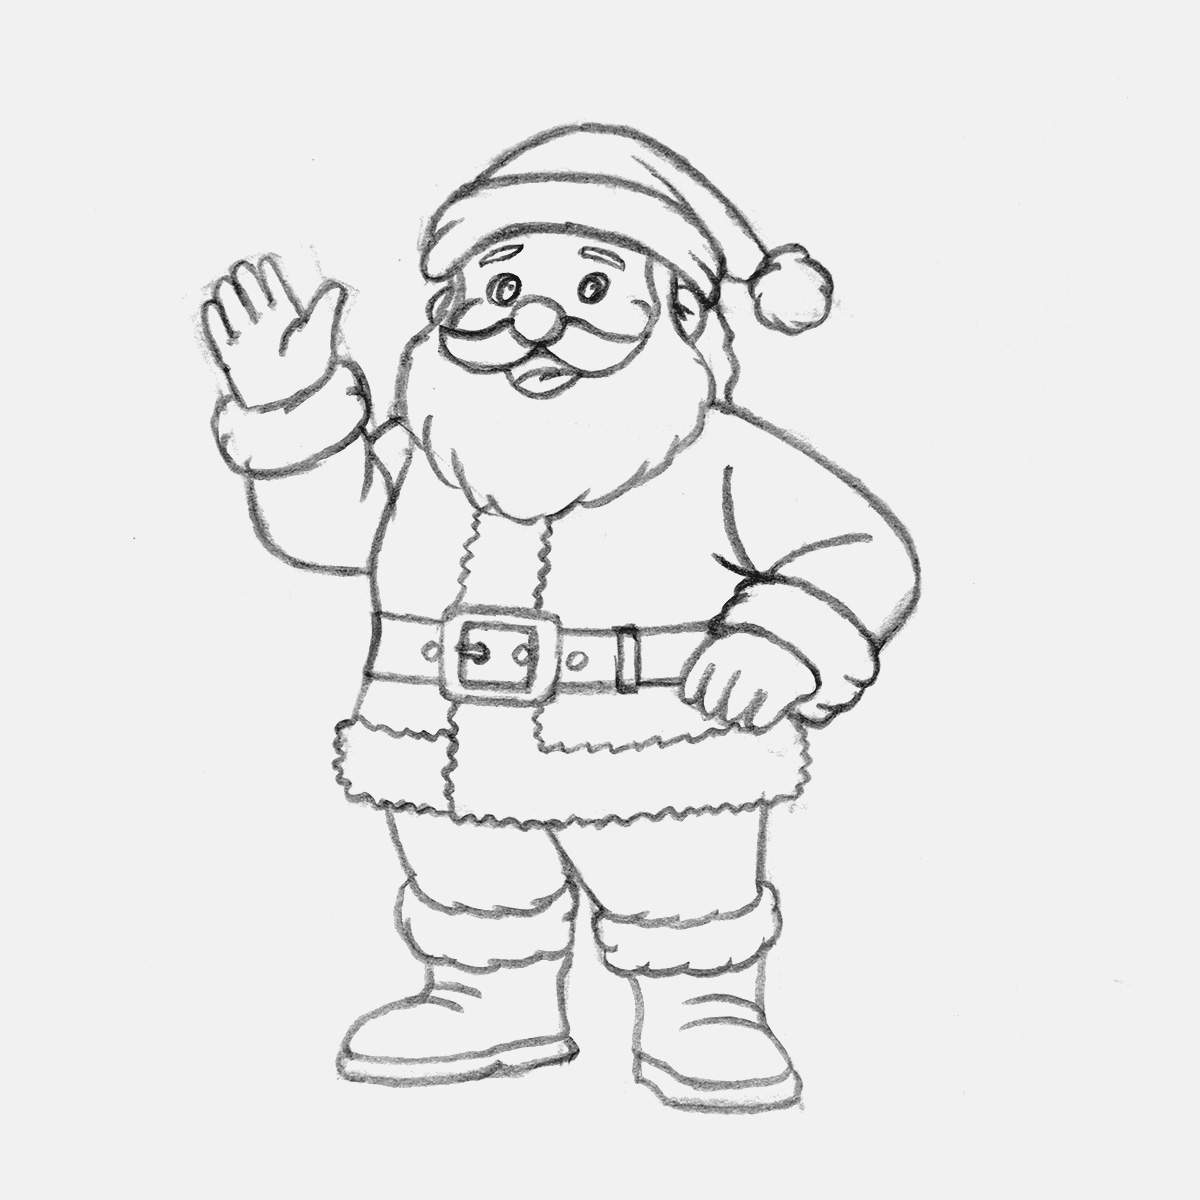
It already looks pretty good! But I like to color my drawings, which makes them even better (most of the time).
Step 8: Outline Santa With A Black Brush Pen
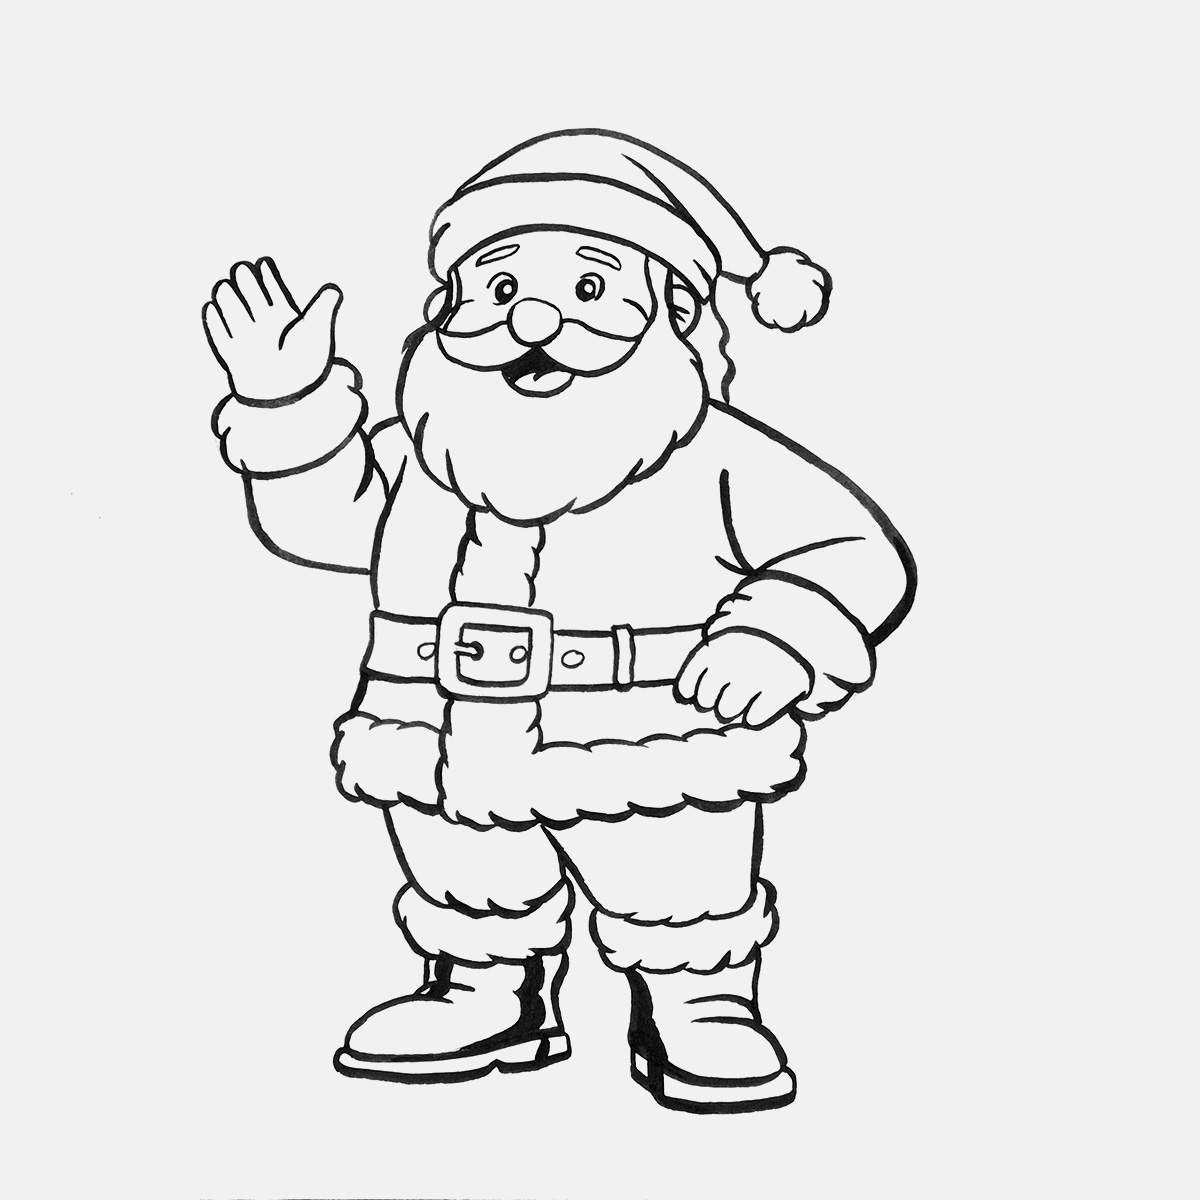
As I said before, I like to color my drawing. And to make coloring them a bit easier and to make the drawing look better, I outlined the sketch first with a black brush pen.
You could also use a regular black fineliner, but I find that my drawings look better if I use a brush pen, which allows me to create varying line widths. My brush pen of choice is the Tombow Fudenosuke brush pen with a soft tip. It's really nice for outlining drawings like this one.
Before I outlined the Santa drawing, I first lightened the sketch by rolling my kneaded eraser across it. By lightening it first, I don't need to erase the sketch after outlining it, which can lighten the black outline.
I just followed the whole sketch and drew over every line we just sketched with my brush pen. And that's it for this step.
When coloring the eyes, make sure to leave some white around the sides of the pupils and leave a tiny white dot in the top right of his pupils. If you didn't manage to keep the tiny white dot, it'll still look good, though.
Step 9: Color Santa's Face With Markers
To color my drawings, I love using alcohol-based markers, especially the Ohuhu Honolulu markers. (I bought the whole 320 set.)
Alcohol markers are great for coloring drawings like these as they are super easy to use and don't dry streaky, unlike most water-based markers. Plus, the Ohuhu ones are super saturated and vibrant, which I really like.
When coloring our Santa drawing, I started by coloring his face with a light skin tone. I also wanted to color his ears, but I forgot that they were also skin-toned... To do this, I used a color called Soft Sun (E160).
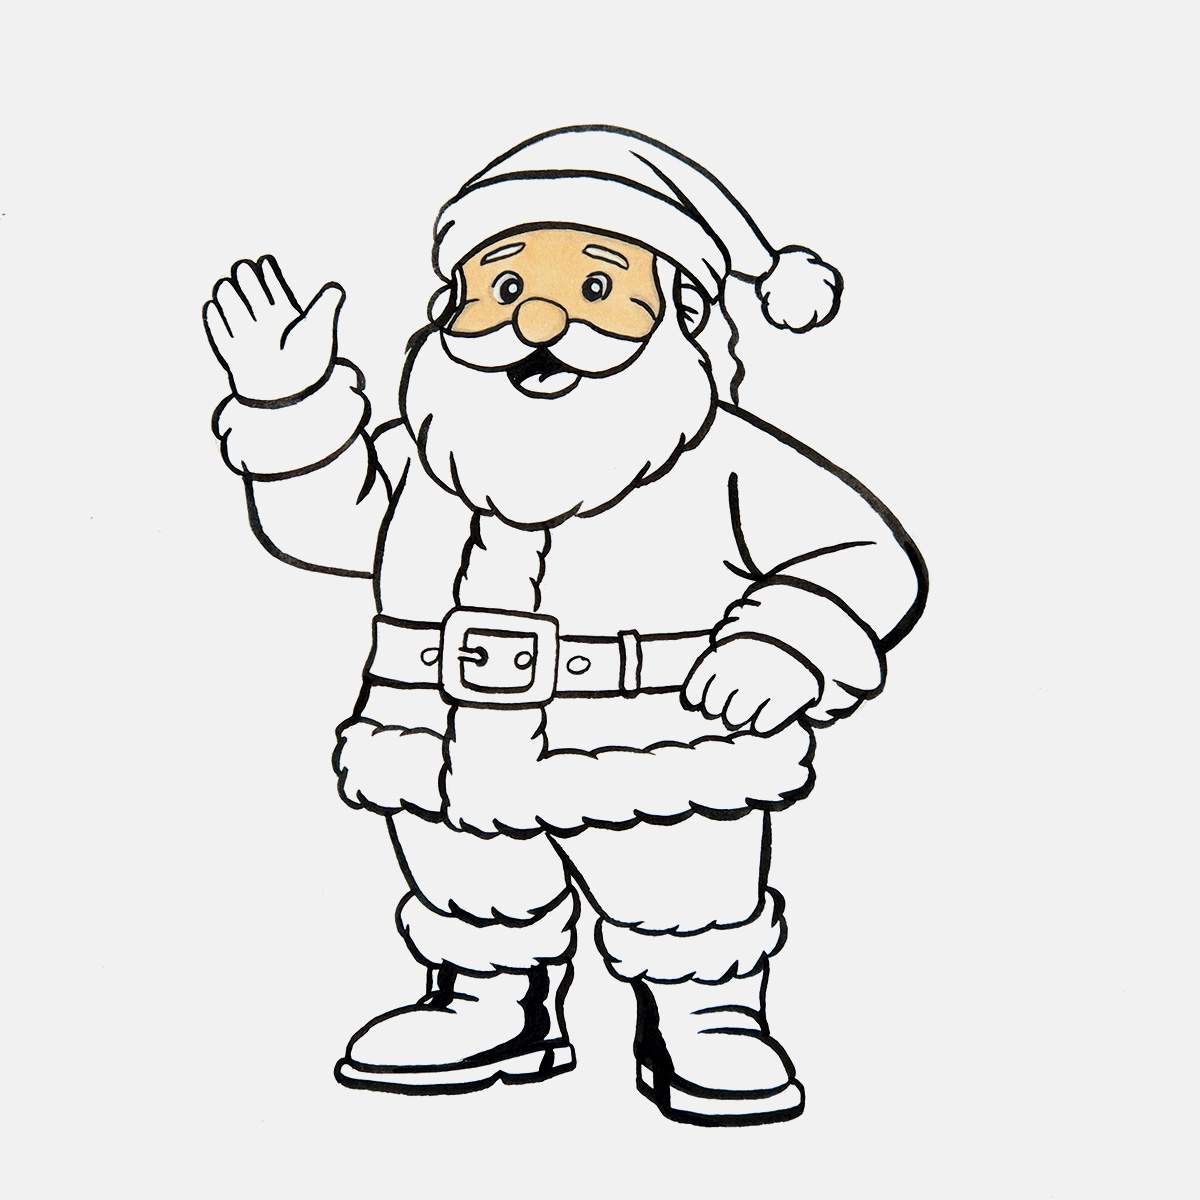
Next, I noticed I forgot to color his ears, so I quickly colored them with Soft Sun (E160), too, and I added some blush on his cheeks, nose, ears, and forehead. I kinda used it as a shadow, too. The blush color I used is called Black Brown (BR208), for some reason.
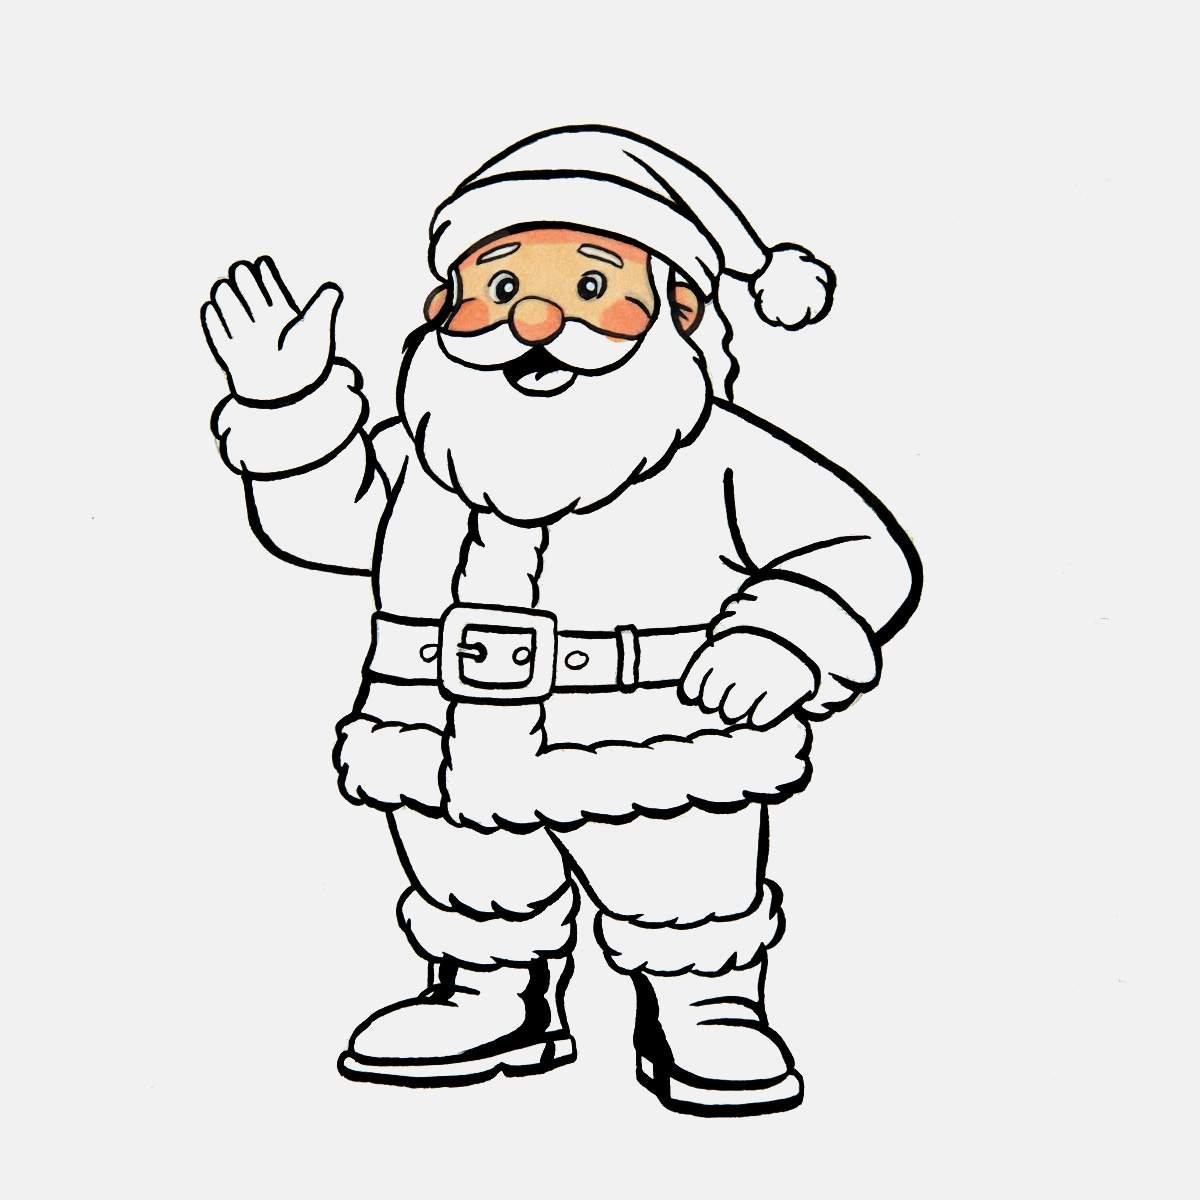
And that's most of his face done. I colored the beard at the same time as the fur trims on his clothing, which is in the next step.
Step 10: Color Santa's Clothes With Markers
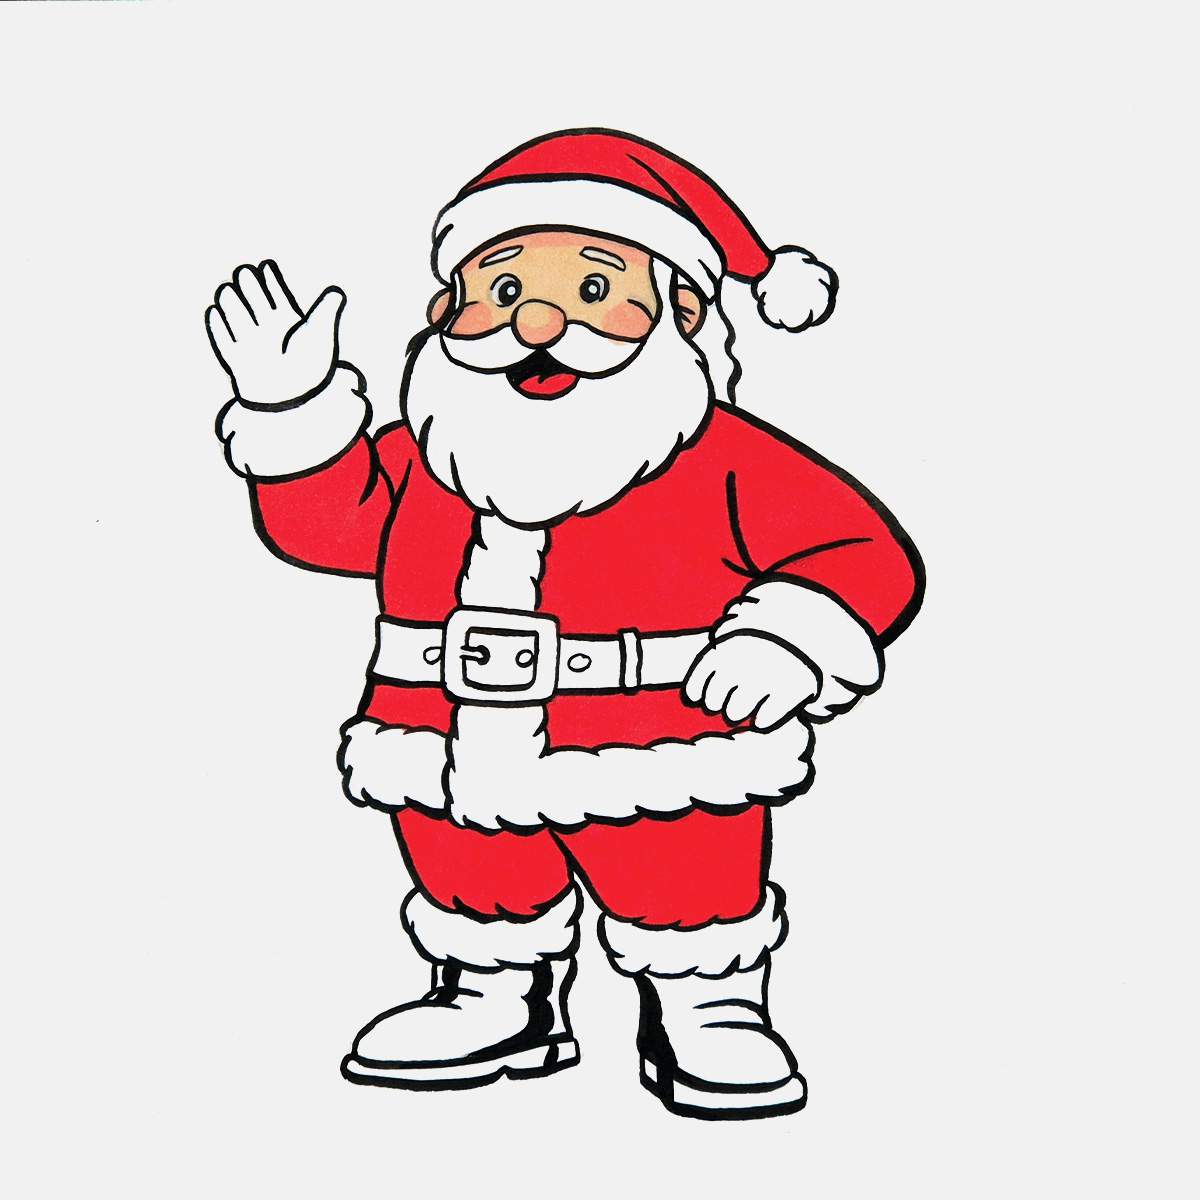
Next, I colored Santa's clothes, the red parts first. I used a bright red called Vermilion (R2).
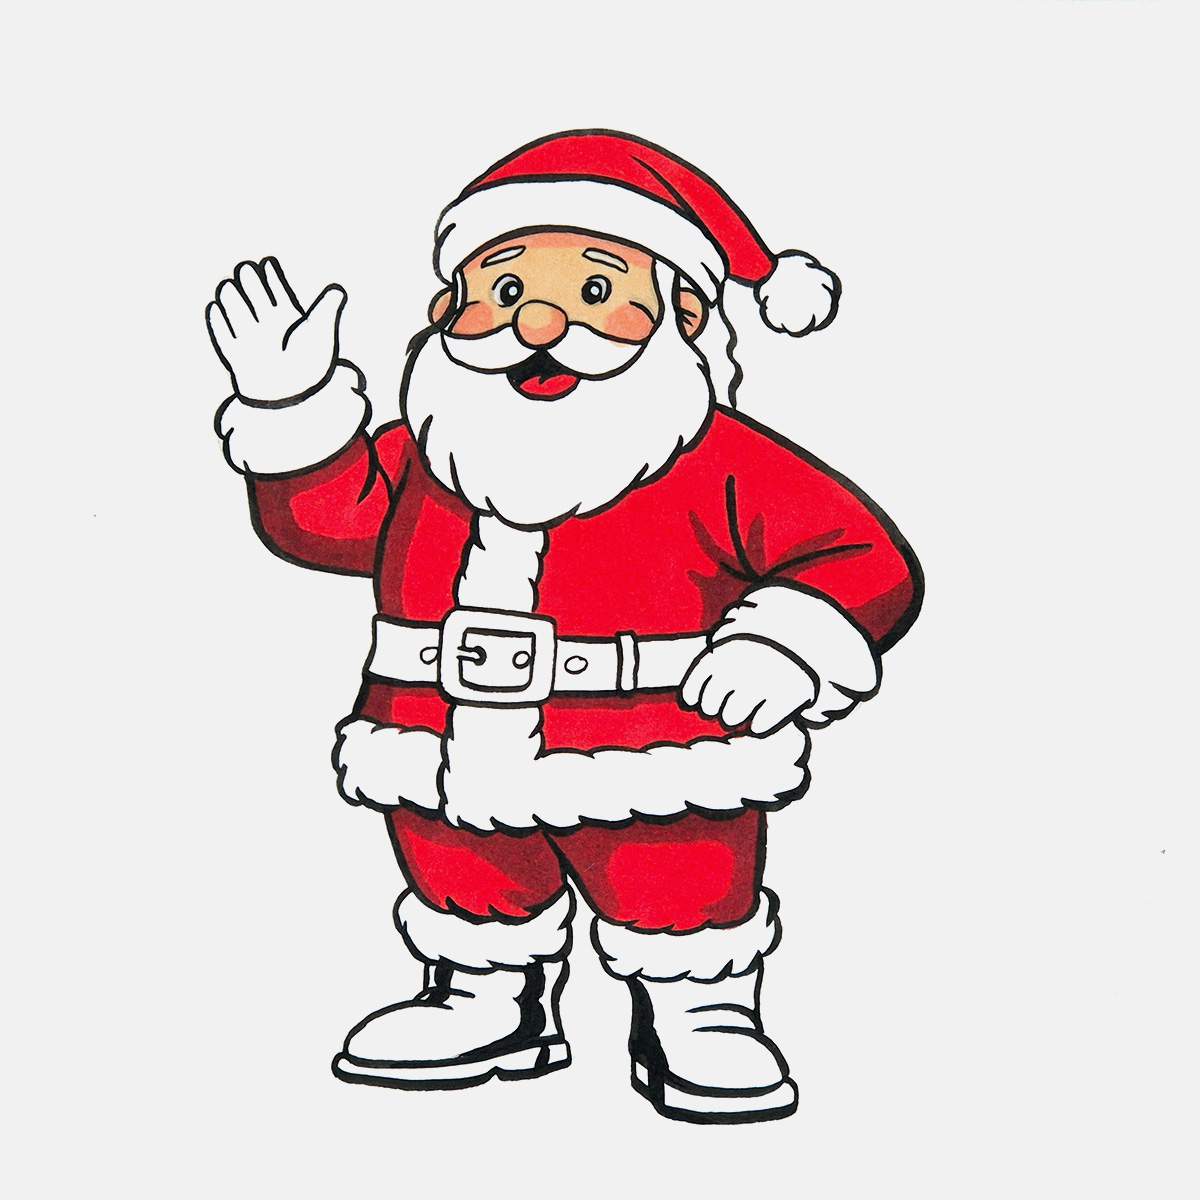
Next, I added shading/shadows to the red parts of his coat and pants, and to do that, I used a dark red called Geranium (R8).
To decide where to place the shadows, I just looked at the shapes. There are always some shadows in creases and folds of the clothing, and also below the fur trims. And since I imagined the light coming from the top right, there is also a shadow on the far left side of Santa.
Next, I added shading to Santa's long beard and all the fur trims on his clothing and Christmas hat. I used a light cool grey called Cool Grey 05 (BG050) as the shading color for these parts. Actually, now that I look at the image of this step, I did forget to color Santa's beard... So again, if you want to see what the shading on Santa's beard looks like, scroll down to the last image where I suddenly noticed that I had forgotten to color his beard.
Again, since the light is coming from the top right, I added shading to the bottom and left of all the trims.
It was during this step that I thought his face looked way too pale. So naturally, I darkened it. But this might've been a mistake. It now looks super dark, just like those people who go on winter sports holiday and come back all tanned (except for where they wore their goggles). But this might make sense as Santa lives on the North Pole, where there is a lot of snow reflecting all the sunlight up in his face.
To darken Santa's face, I used a color called Sand (E220). After I had darkened all of Santa Claus's face, I then went over all the blush parts with Black Brown (BR208) and added some darker shadows on his forehead, ears, and nose with Dark Suntan (E110).
However, in the end, I think it looks alright. Maybe a tad too dark for what I imagined, but it's good enough.
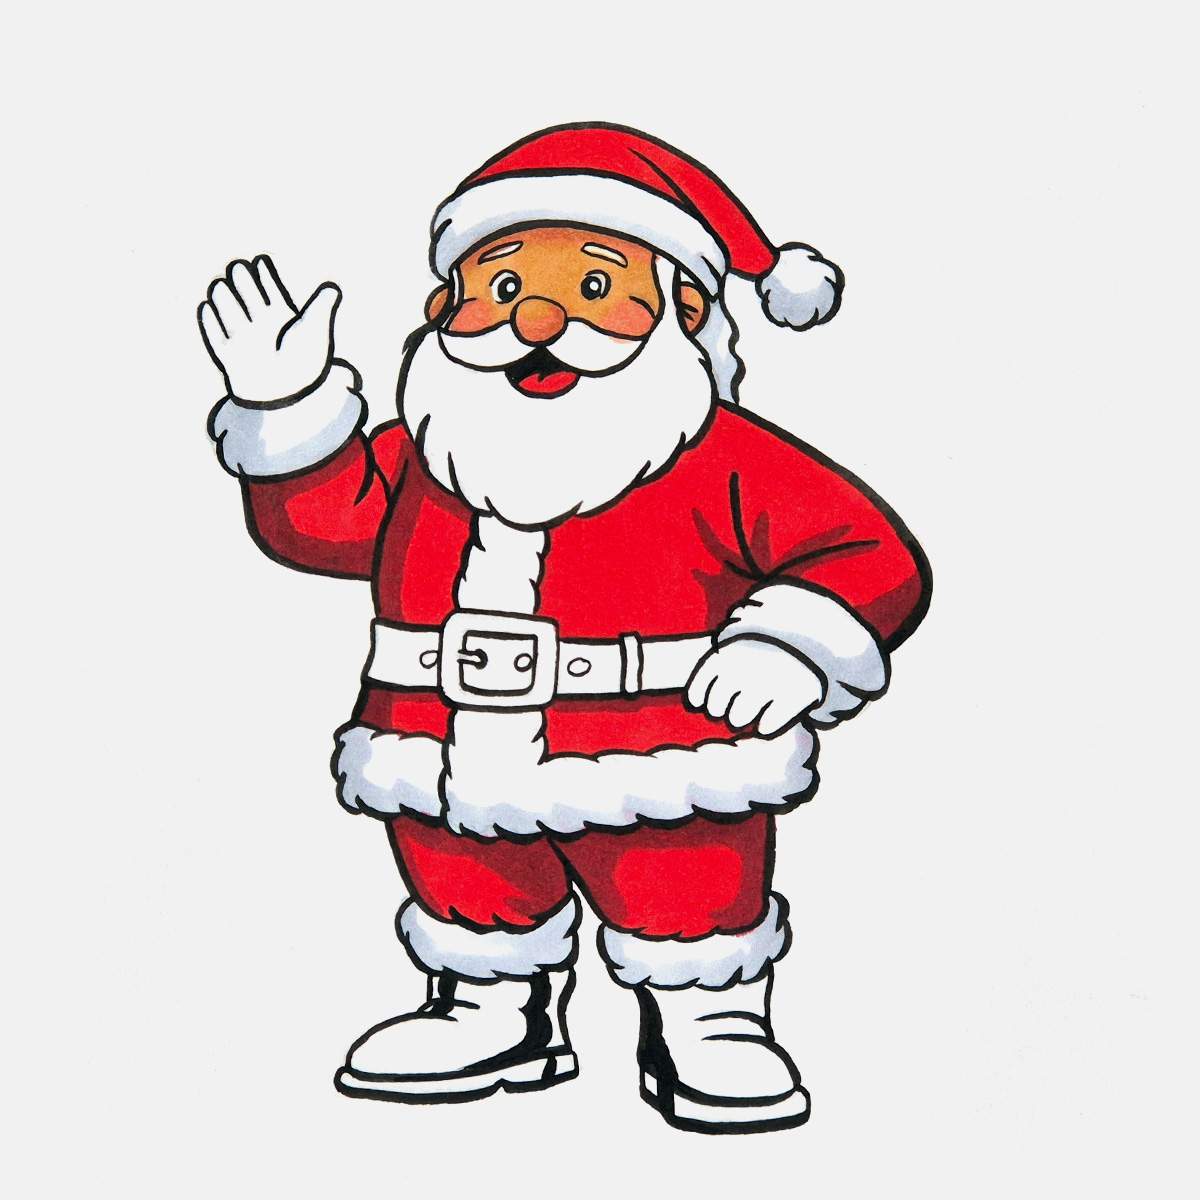
Next is a simple one. I colored the belt buckle a golden yellow with a color called Melon Yellow (YR33).
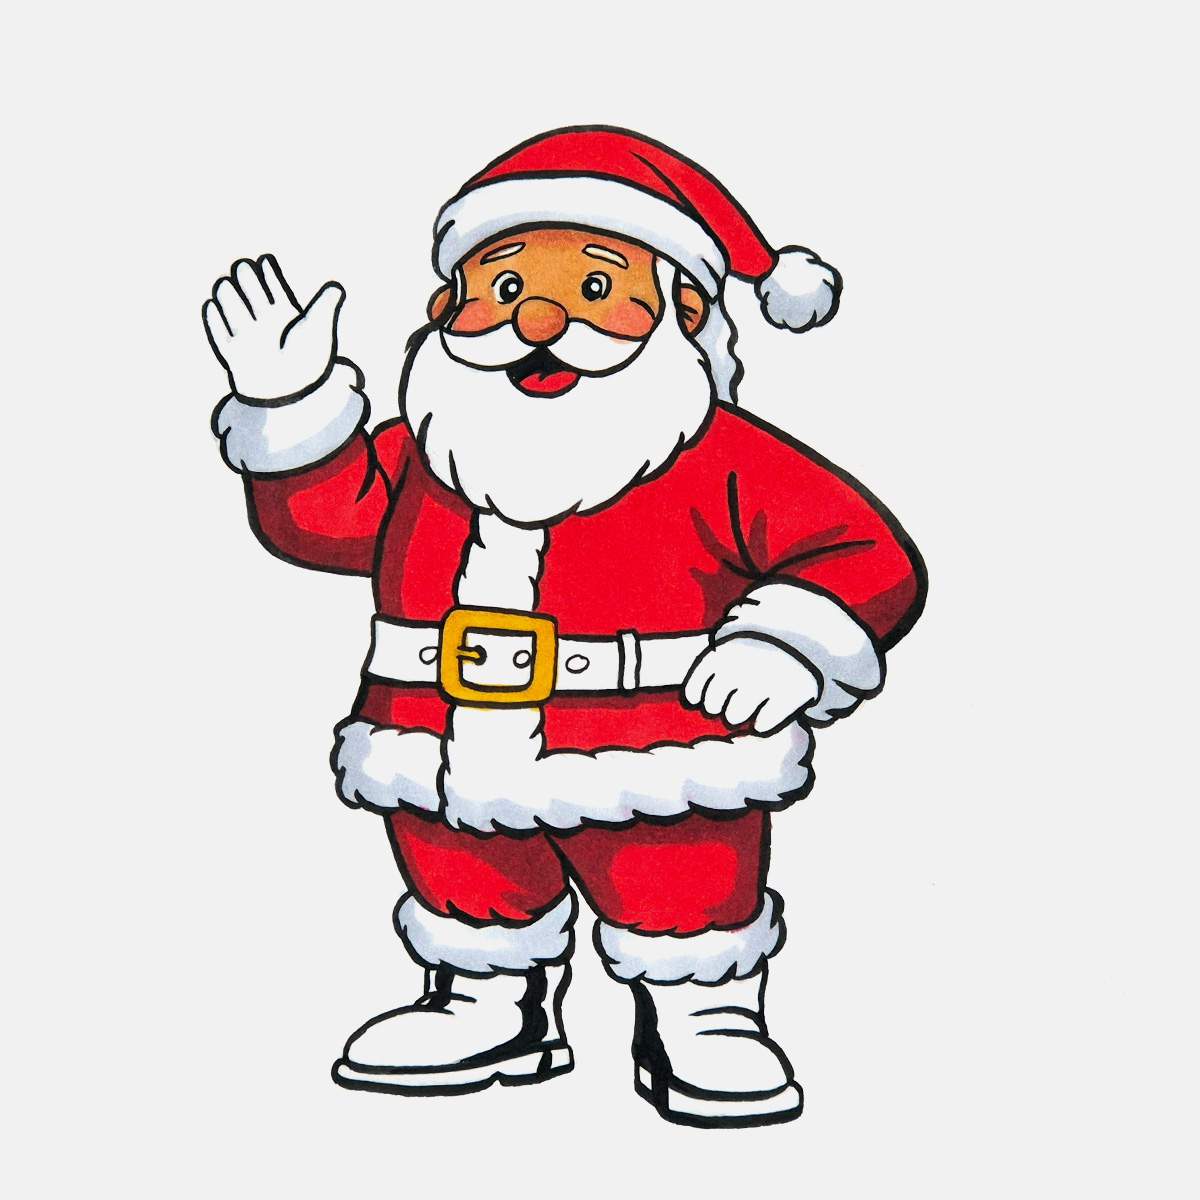
Then, I colored the highlighted parts of Santa's boots with a medium grey called Neutral Grey 07 (CG070). I mainly added a highlighted blob on the nose of both boots and on the shaft.
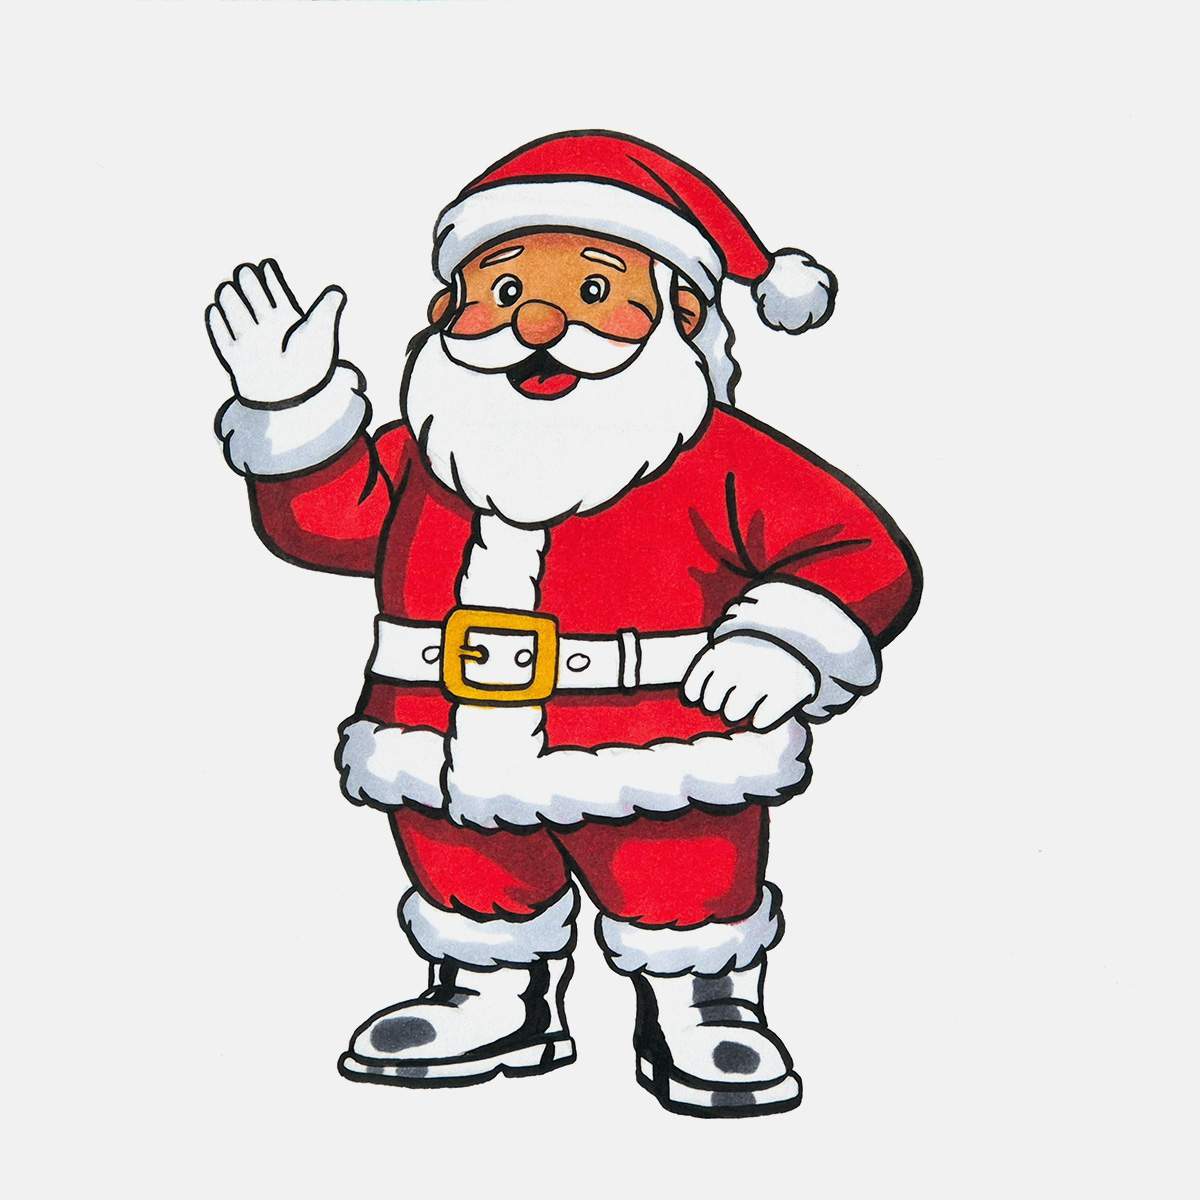
And lastly, I used a dark grey called Neutral Grey 7 (NG07), a very similar name to the previous color but way darker, to color the rest of his black boots, the belt around his waist, and the black gloves.
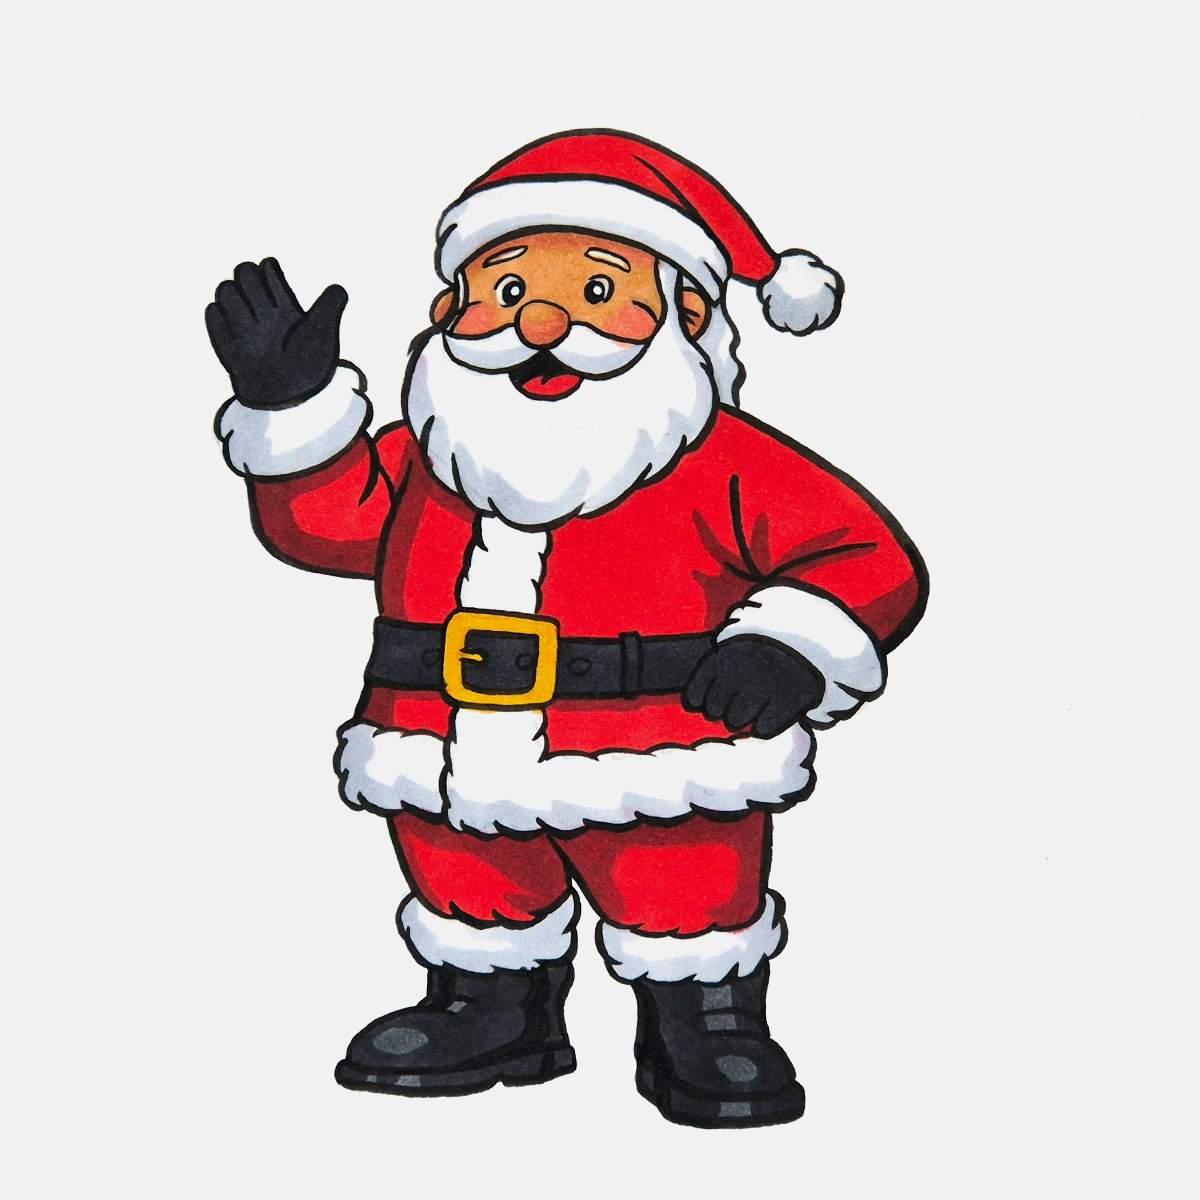
And that's how you draw Santa step by step for Christmas.
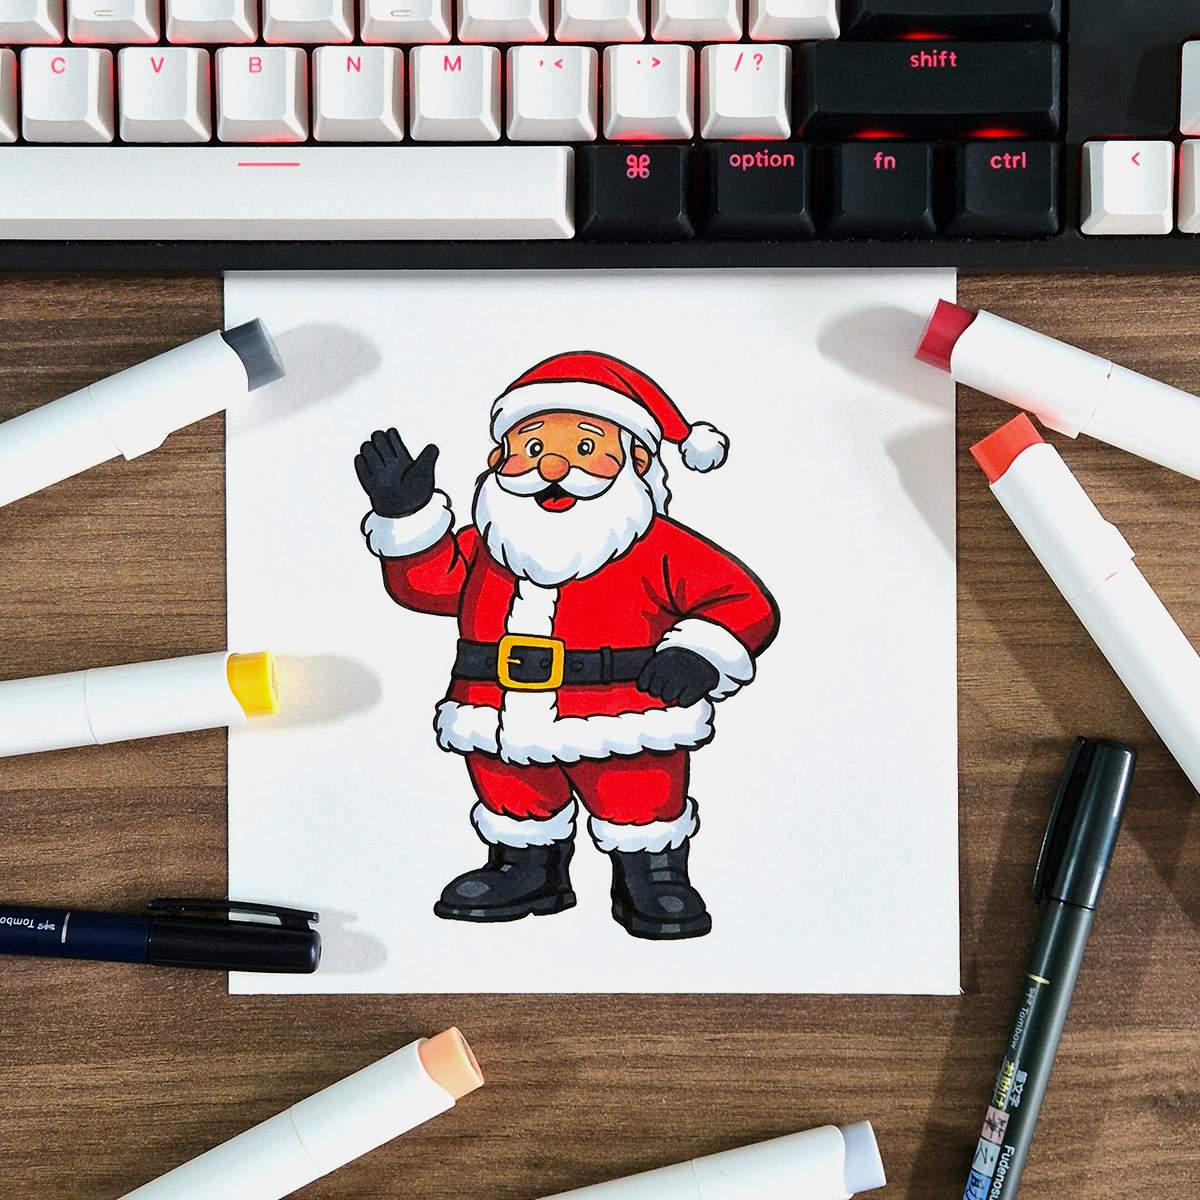
Thank you for following along with me to make this Santa Claus Drawing!
If you enjoyed this guide, you might also like my other Christmas-related step-by-step guides. I will link them below, so make sure to check them out and click any that you like.
Thank you, and I'll see you in my next drawing guide!
Articles You Might Also Like

I love bringing cars to life with alcohol markers and colored pencils.
Whether you're just starting out or looking to improve your skills, I'm here to help!
Click here to learn more about me.


Be the first to comment!
Comments
There are no comments yet.