How To Draw A Goofy Gingerbread Man In 25 Small & Simple Steps
This drawing guide is about how to make a gingerbread man drawing easy.
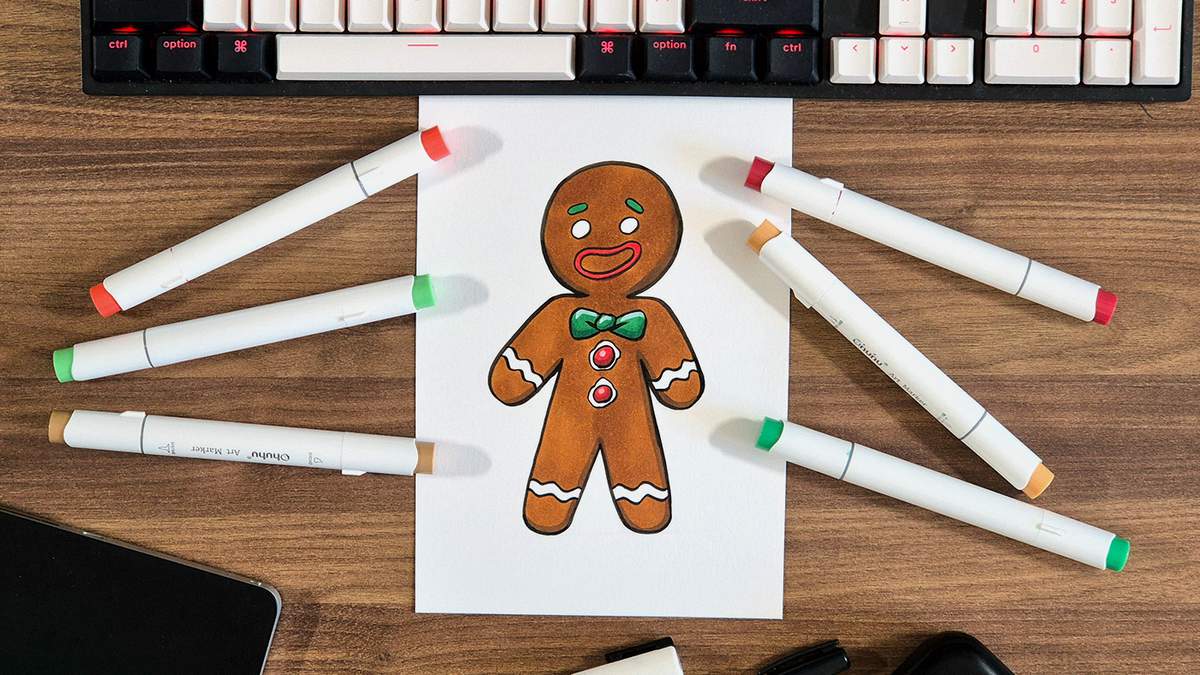
Want to learn how to draw a gingerbread man for Christmas? This gingerbread man drawing tutorial is super simple and broken up into easy and small steps with plenty of supporting photos that help guide you through the whole process from start to finish.
Once you know how to draw your own gingerbread man, you can start to decorate it and get creative. You can give it a goofy face, like I did, or you can give it some festive clothes.
I've tried my best to keep this gingerbread drawing guide as simple as possible. First, I explain to you how to sketch your gingerbread man with accurate proportions, then we're going to outline our sketch, and lastly, I show you what colors you need and how to use markers to color your gingerbread man drawing.
Also, one thing to remember: don't get caught up in perfection. It's better to make mistakes (even if they ruin your drawing) and learn from them than to force yourself to be perfect even if this is your first gingerbread man drawing. Also, if you're less stressed about making the perfect drawing, it gets a lot easier to draw, at least for me.
Also, gingerbread men are never perfect. Have you ever baked some yourself and made the perfect shape with the dough only to find out the arm got super wide and his leg broke off during the baking? So don't worry about making it perfect. Just have some fun with this drawing.
Now, let's get started with this gingerbread man drawing!
I just wanted to let you know that this post contains affiliate links, and any purchases made through these links will result in a small commission for me and don't cost you anything extra.
In This Guide
- Drawing supplies & colors I used to make this gingerbread man drawing
- How to sketch a gingerbread man from scratch
- Outlining your gingerbread man drawing
- Using markers to color your gingerbread man drawing
- More Christmas drawing guides you'll love
Drawing Supplies & Marker Colors I Used To Draw This Gingerbread Man
To sketch this gingerbread man, I used a regular graphite pencil with an eraser. And to lighten my sketch, I used a kneaded eraser. They are really great for this. You just roll them across your sketch, and it will lighten your lines.
I made this drawing on Canson Illustration Manga paper (my favorite paper for using alcohol markers).
To outline the gingerbread man sketch, I used a black Tombow Fudenosuke brush pen.
And to color this gingerbread man drawing, I used Ohuhu Honolulu markers. I used 6 colors in total: Potato Brown (BR2), Raw Umber (BR1), Vermilion (R2), Geranium (R8), Vivid Green (G2), and Green (G390).
You can buy these colors separately or as part of the 320 set. You can also buy them on Amazon if you prefer.
I've added an image below with all the color swatches so you can match your markers to the ones I used if you already have some.
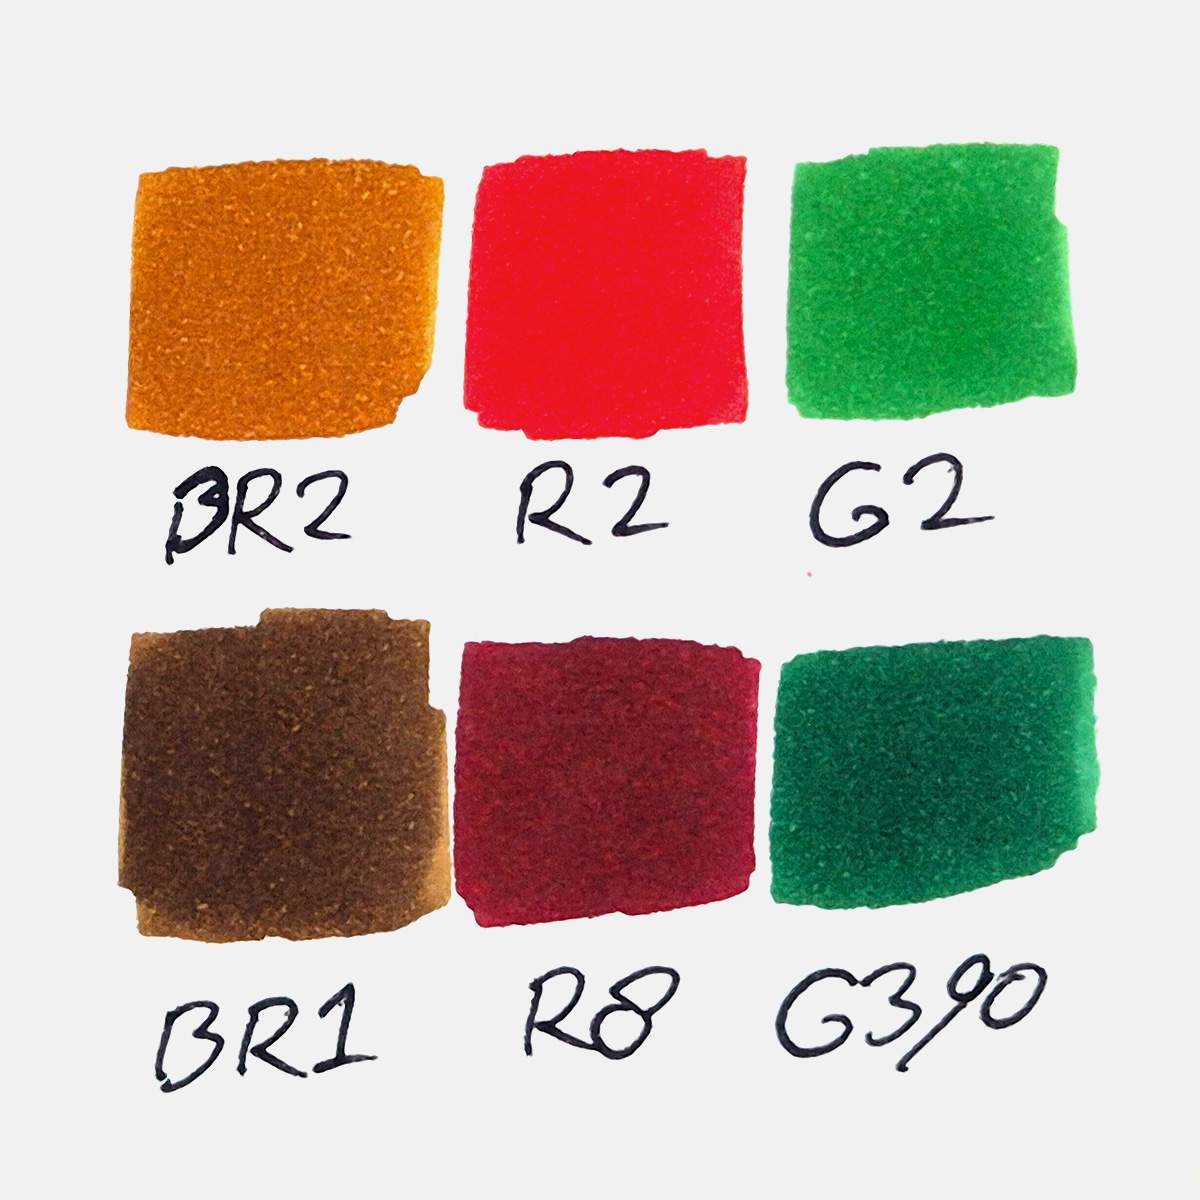
To add a few highlights on the drawing, I used a white Posca PC-3M paint marker.
How To Draw A Gingerbread Man Step By Step
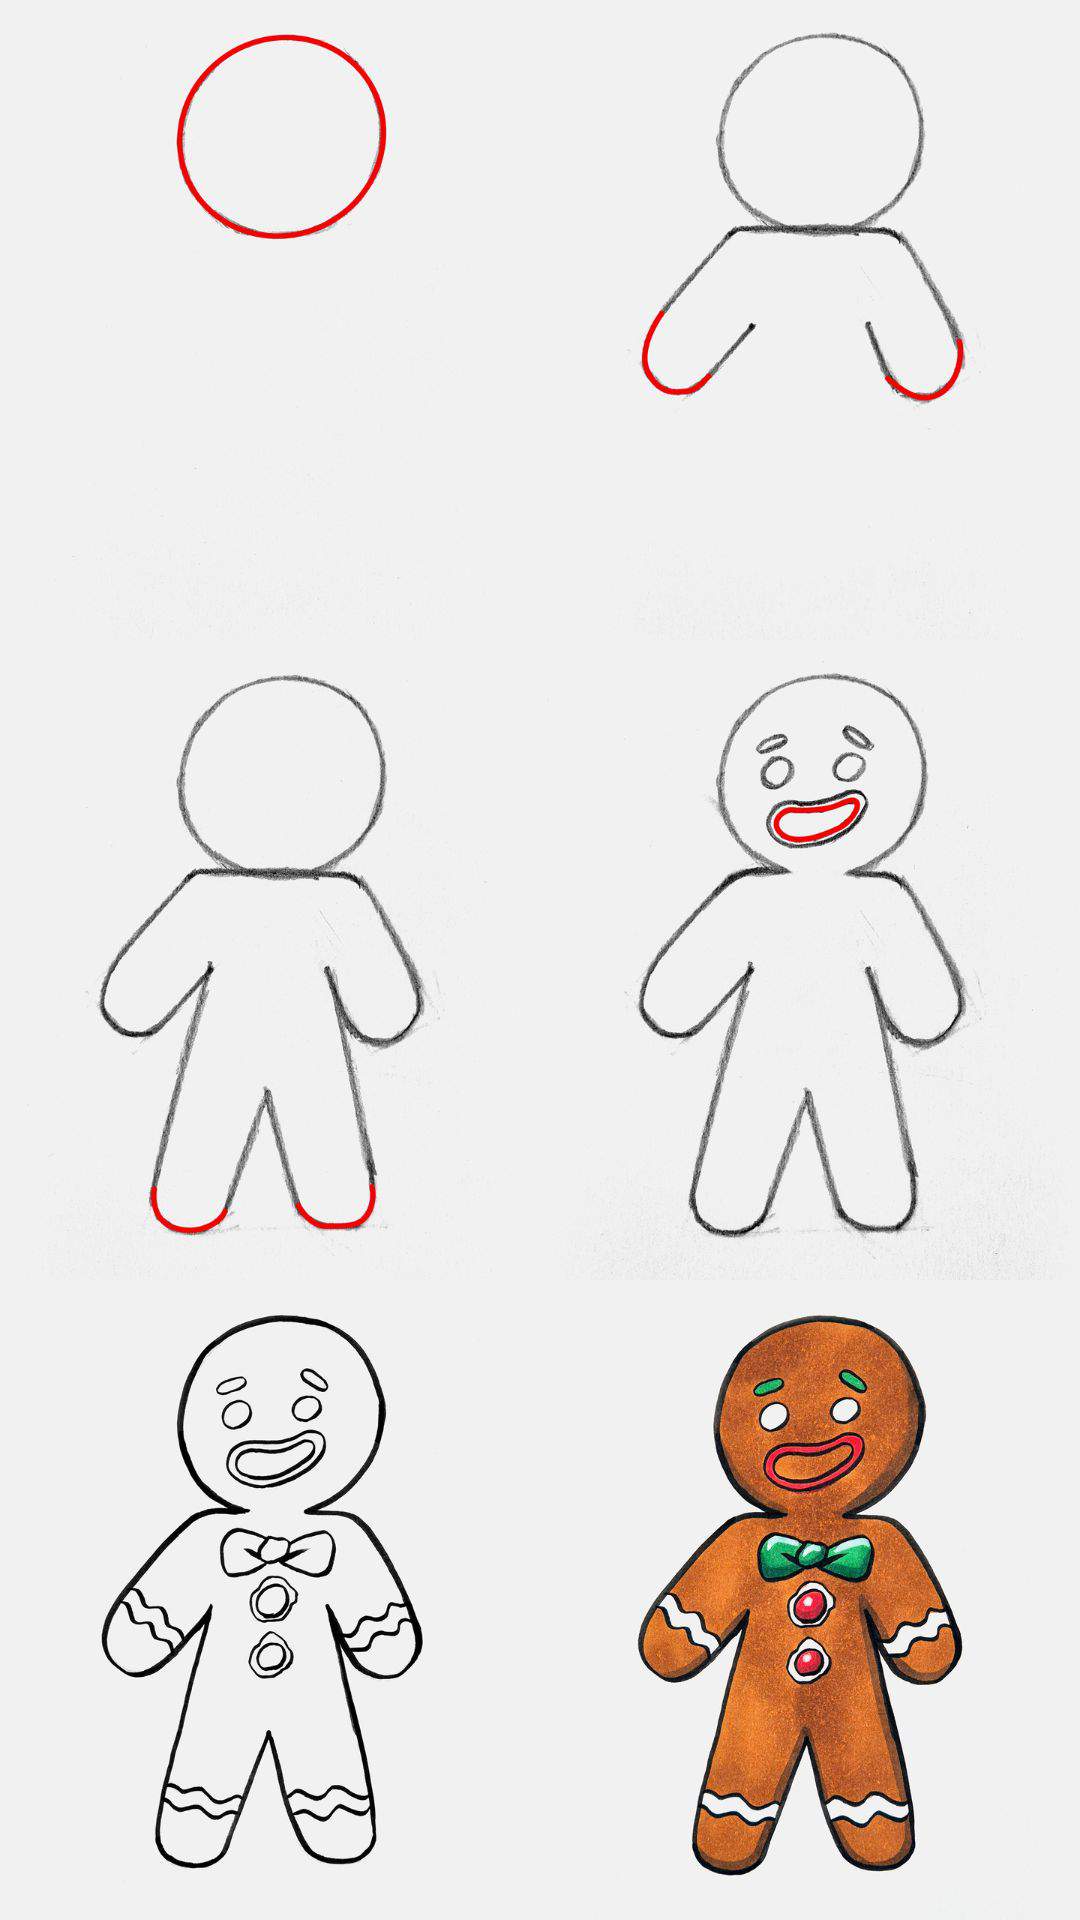
To draw our gingerbread man, we first need to sketch it. To make it easier for you, I marked everything that's just added in each step in red. This allows you to quickly spot what's new and what you should add to your sketch.
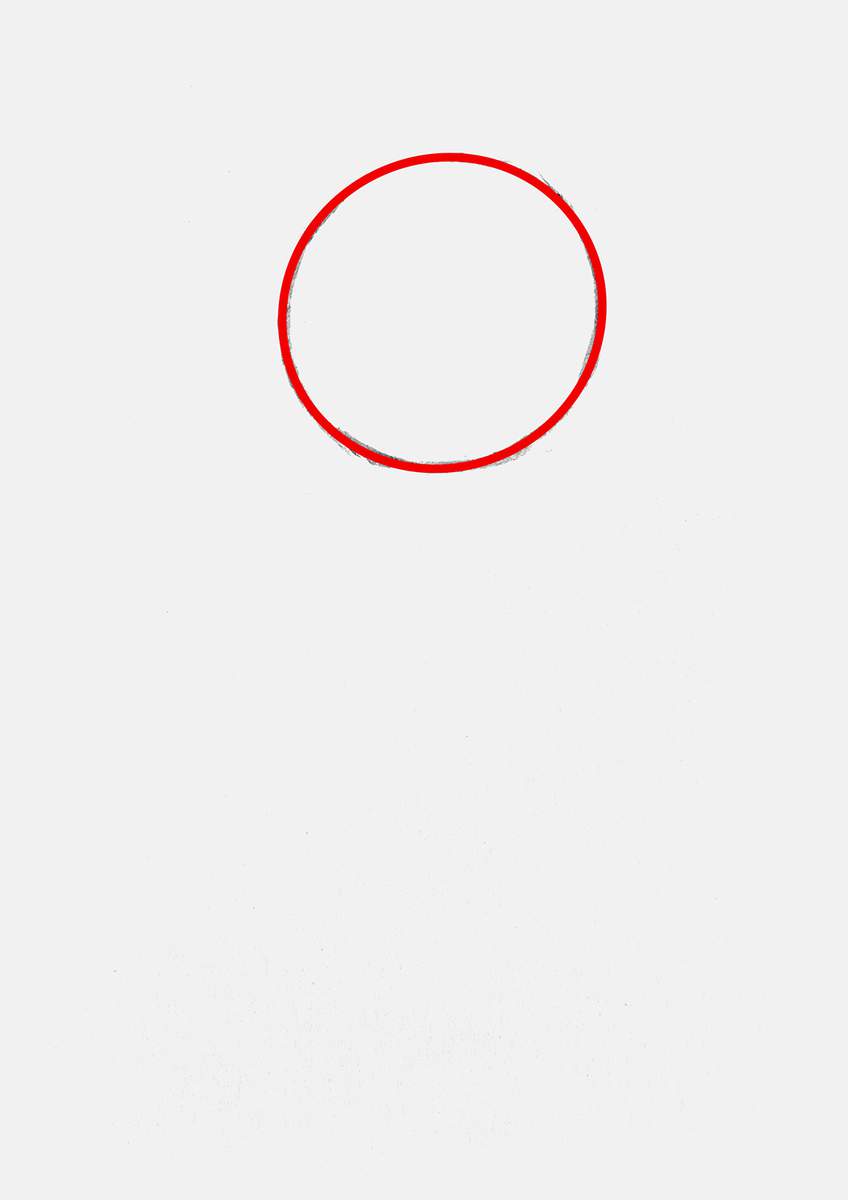
Step 1: Sketch A Big Circle On The Top Of Your Paper
The easiest part to start your gingerbread man sketch is by sketching its head, which is just a large circle toward the top of your paper.
It doesn't have to be a perfect circle. Gingerbread men never have perfectly round heads, so why should the one you're drawing do?
Even though mine looks pretty round, I can assure you it's not. That became very apparent when adding the red circle shape on top of my sketch.
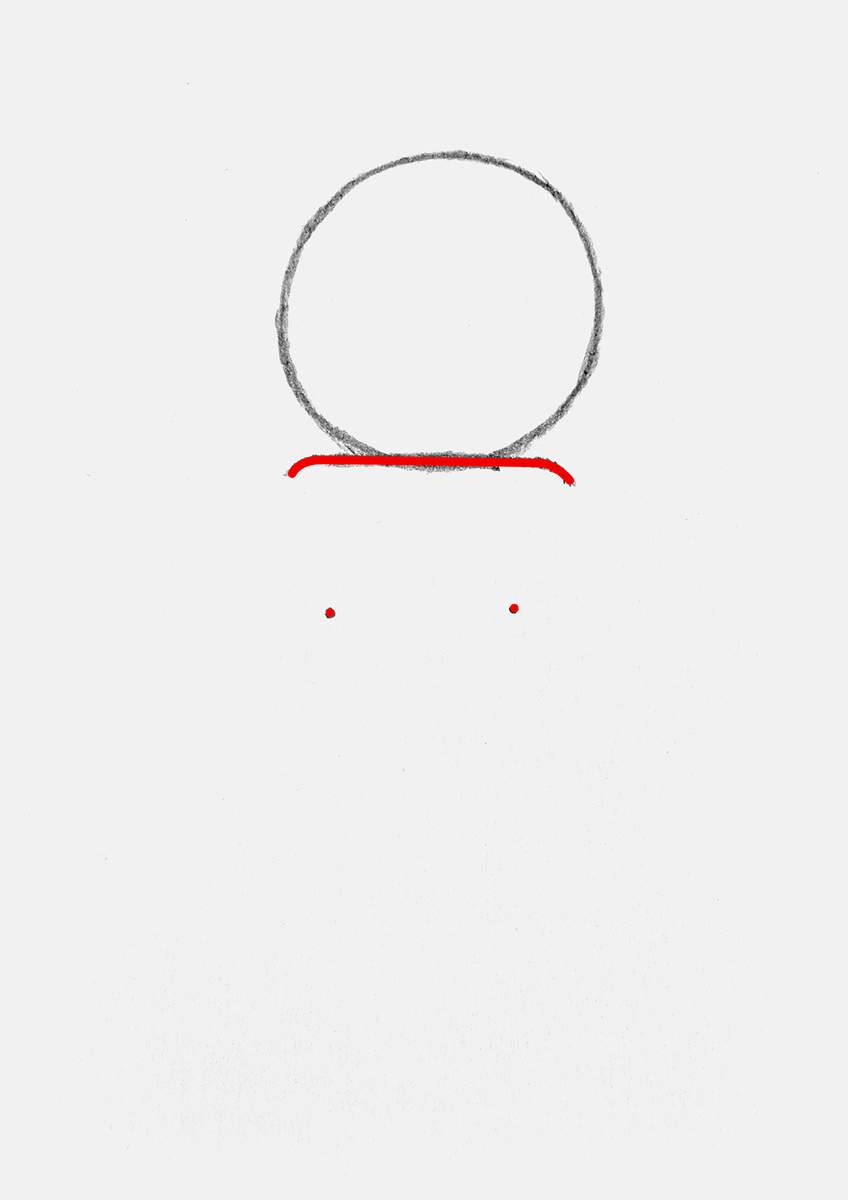
Step 2. Give Your Gingerbread Man Some Arms
After marking out where the head will go, we can start adding arms to out gingerbread man drawing.
To do that, we first need a shoulder line.
I just made mine straight with curved down ends, which are the shoulders.
I also marked 2 spots below the shoulder line that look a lot like nipples. But I can assure you, they're not. They are the spots where the arms connect to the body, so the armpits.
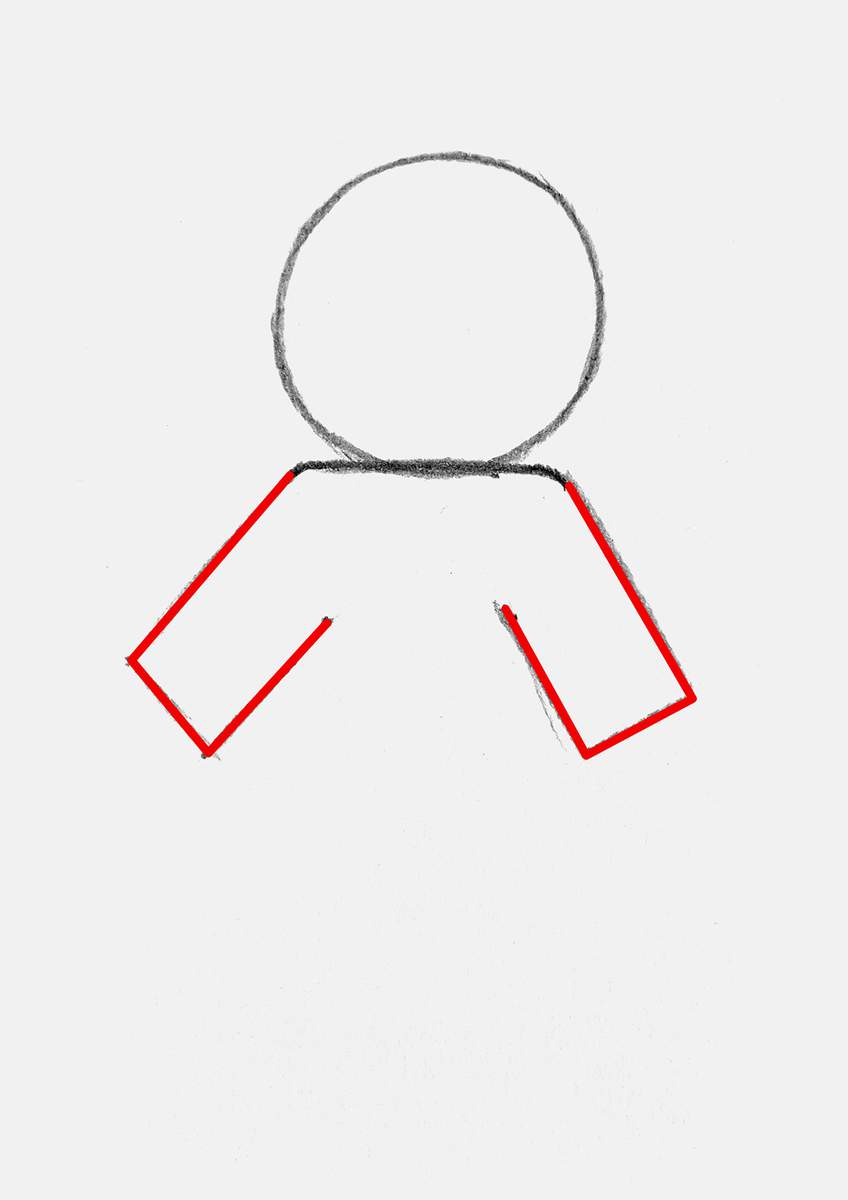
With the help of those 2 points and the shoulders, I added two wide arms, as gingerbread men always have wide limbs.
Notice how I just made large rectangular boxes instead of going straight in with the rounded ends. This makes it easier to judge the shape first and see if it actually looks good.
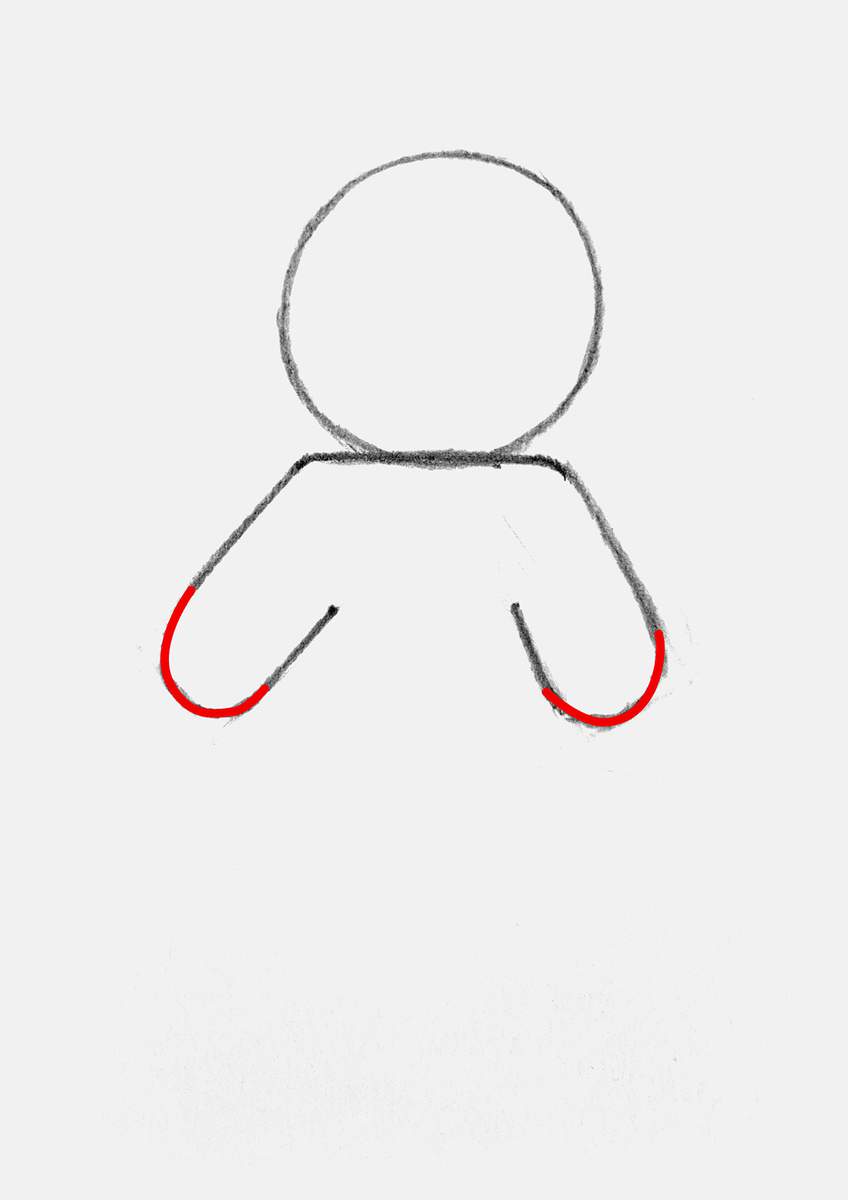
And once I'm happy with the proportions of the arms, I add the rounded hands, if you can call them that, and erase the helping line we no longer need.
Step 3: Add The Legs & Body To Your Gingerbread Man Sketch
With the arms now in place, we can focus our attention on the body of the gingerbread man.
To start, I sketched the overall shape I want the body to be. It kinda looks like a big and long dress. And it can be a bit wonky like mine.
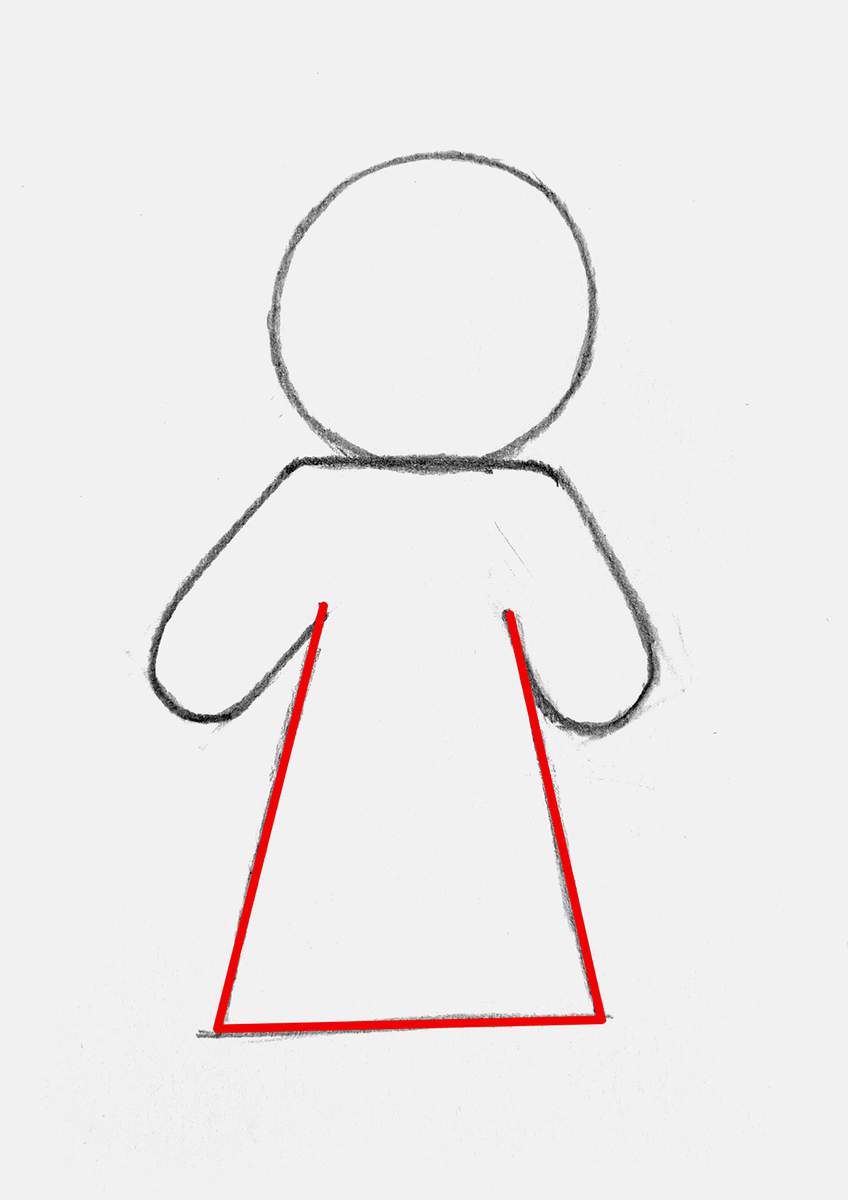
Next, I added the triangle shape in between the legs that separates them.
It already looks a lot more like a body with legs than a big dress.
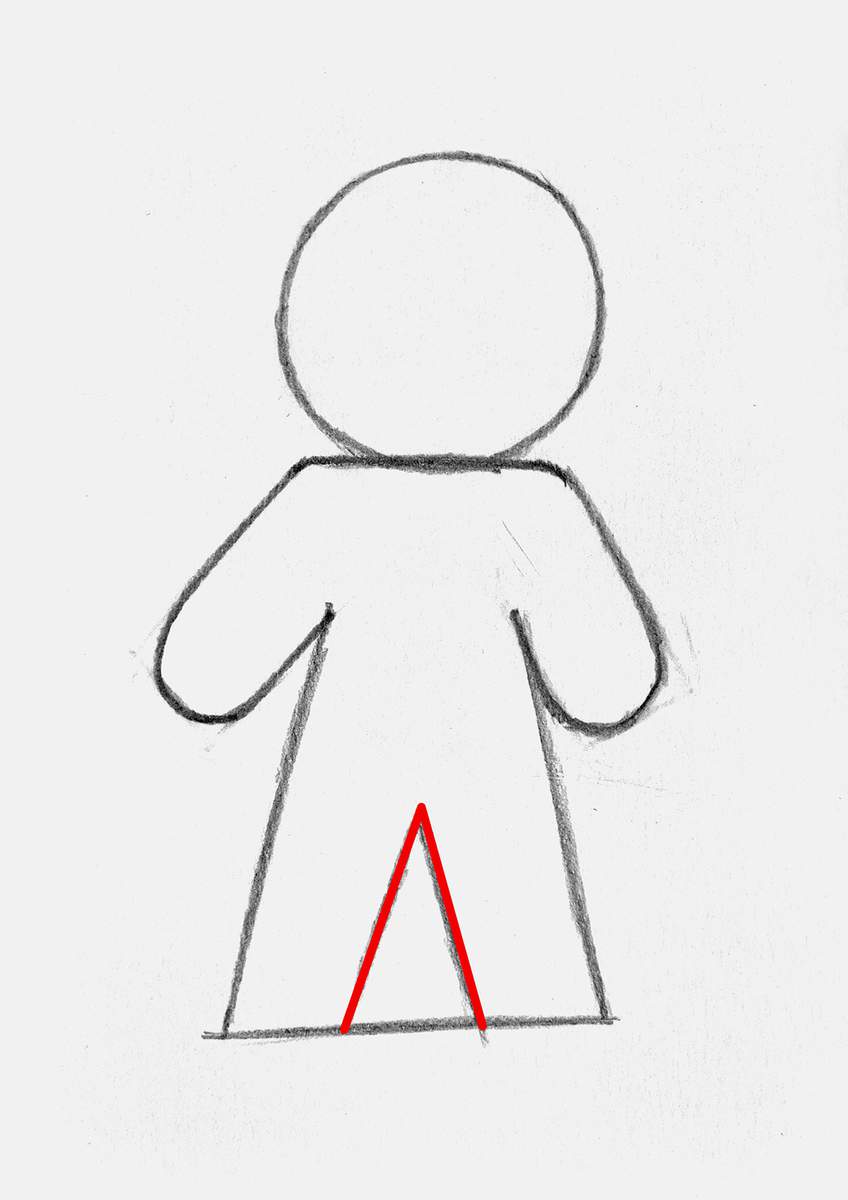
And to finish off the legs, we're going to round the bottom ends, just like we did with the arms, and then erase the guiding lines we no longer need.
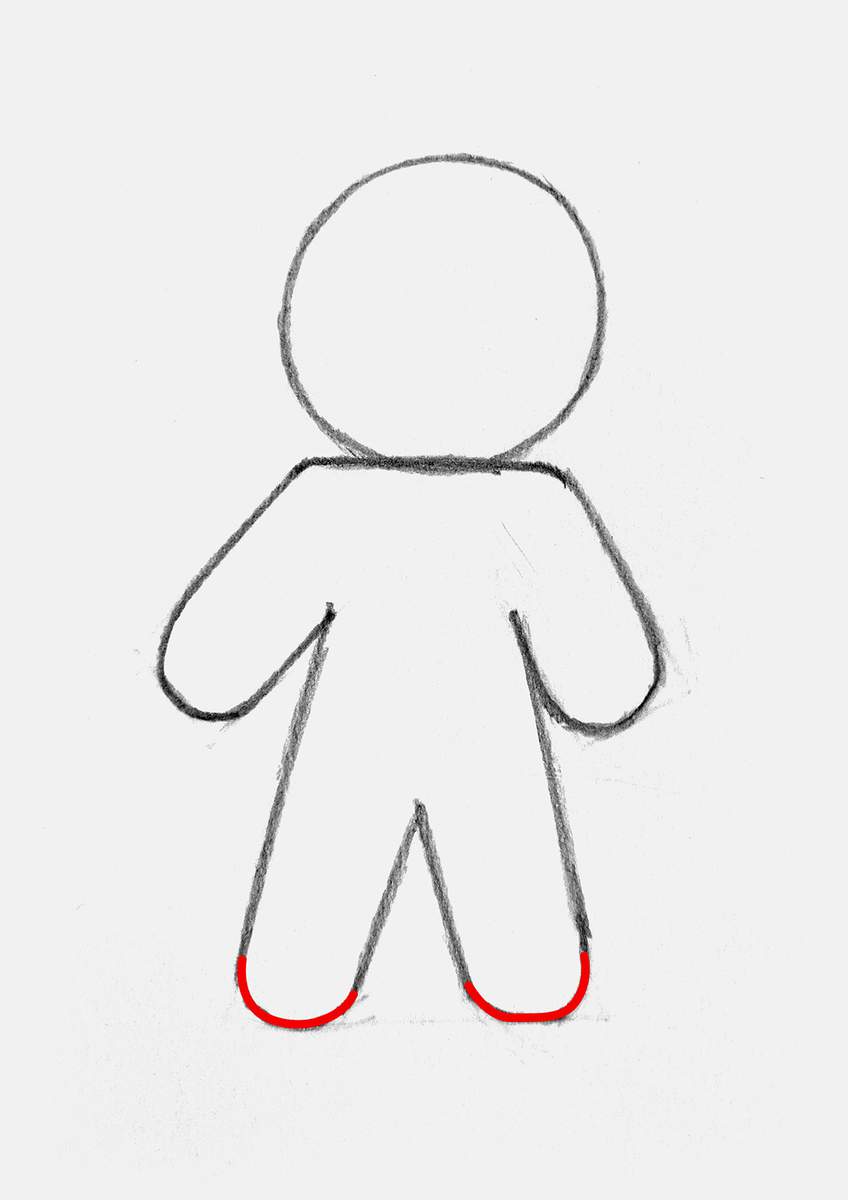
And to complete the basic outline sketch of the gingerbread man, I erased this little line where his head attaches to his body. This makes it look like one shape.
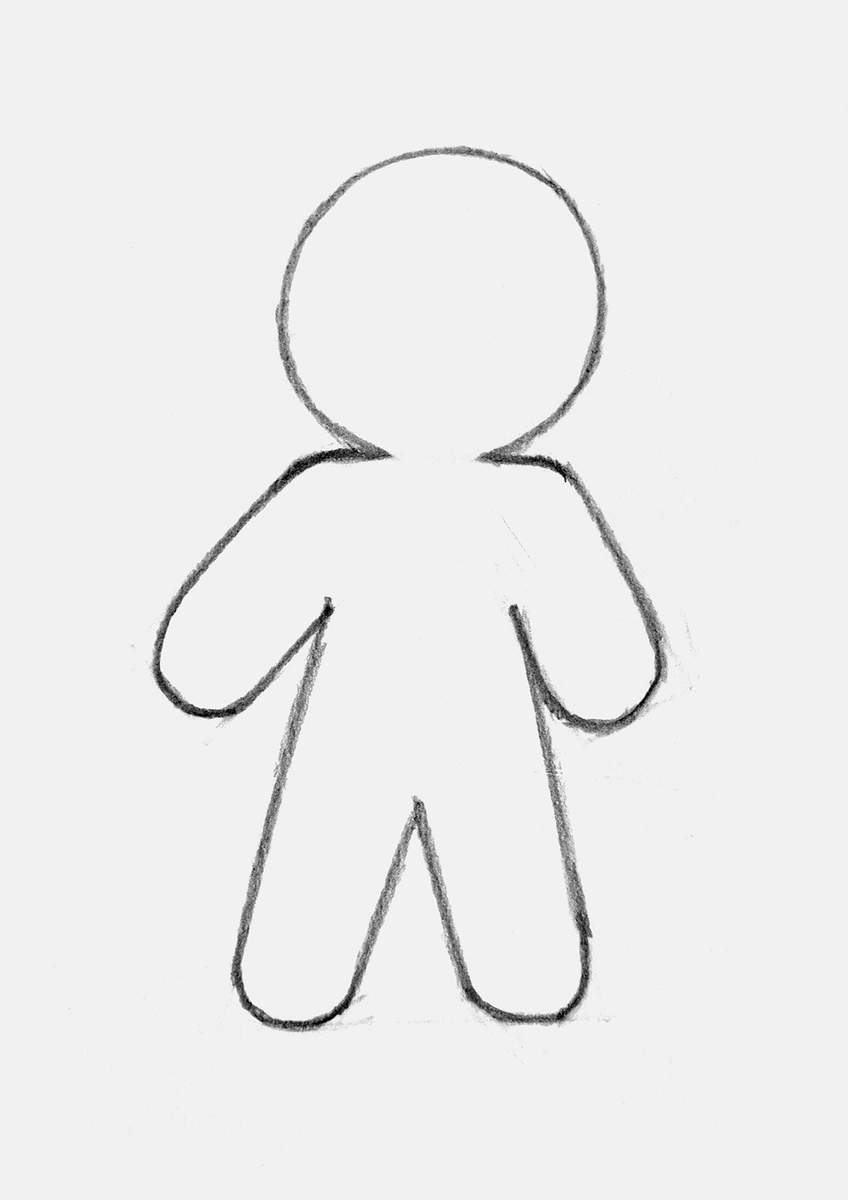
And look at that, the outline sketch of our gingerbread drawing is already done!
Step 4: Give Your Gingerbread Man A Goofy Face
Next up, we can focus on the gingerbread man's face.
I wanted to experiment a bit with the facial expression as I don't like the simple smile mouth most other tutorials have. I wanted to make mine a little different and fun.
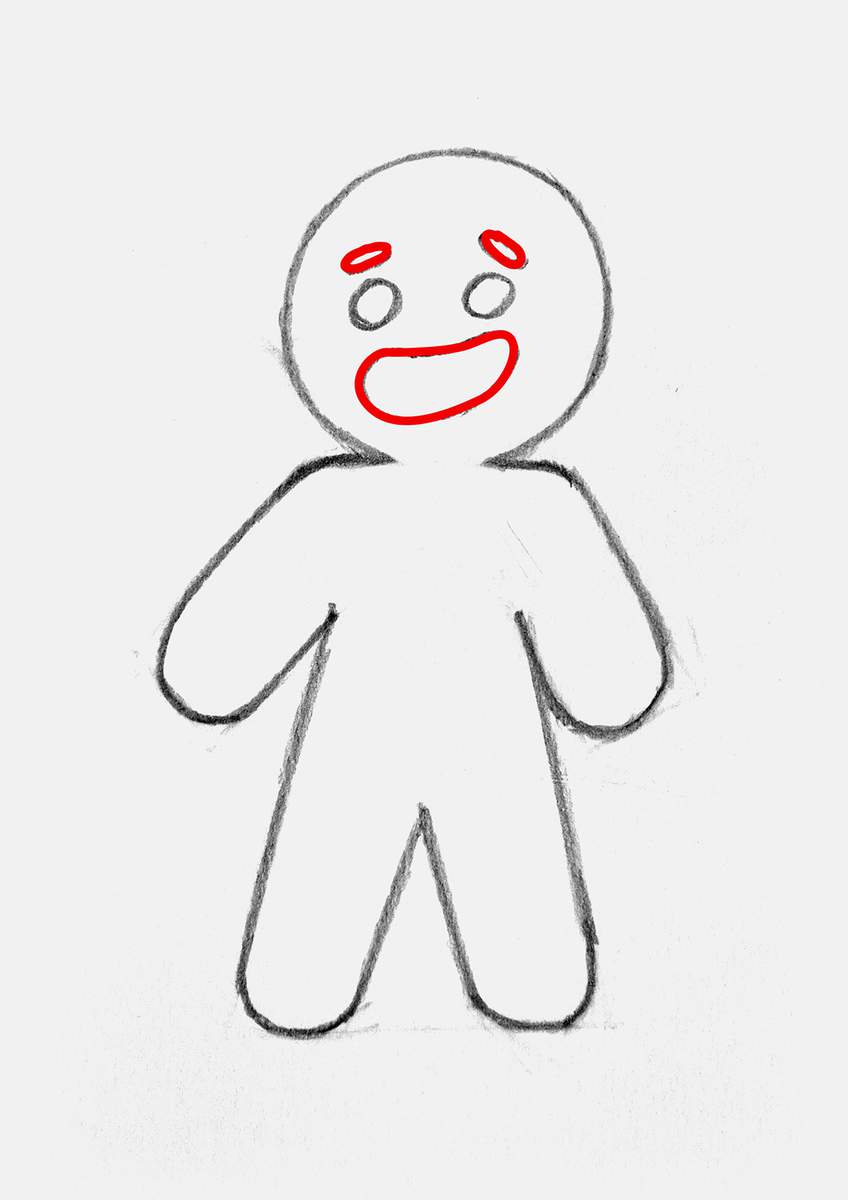
To start, I added two small round eyes just above the center of the head, and I made sure to make their placement a bit wonky instead of perfectly aligned.
Also, the eyes don't need to be perfectly round.
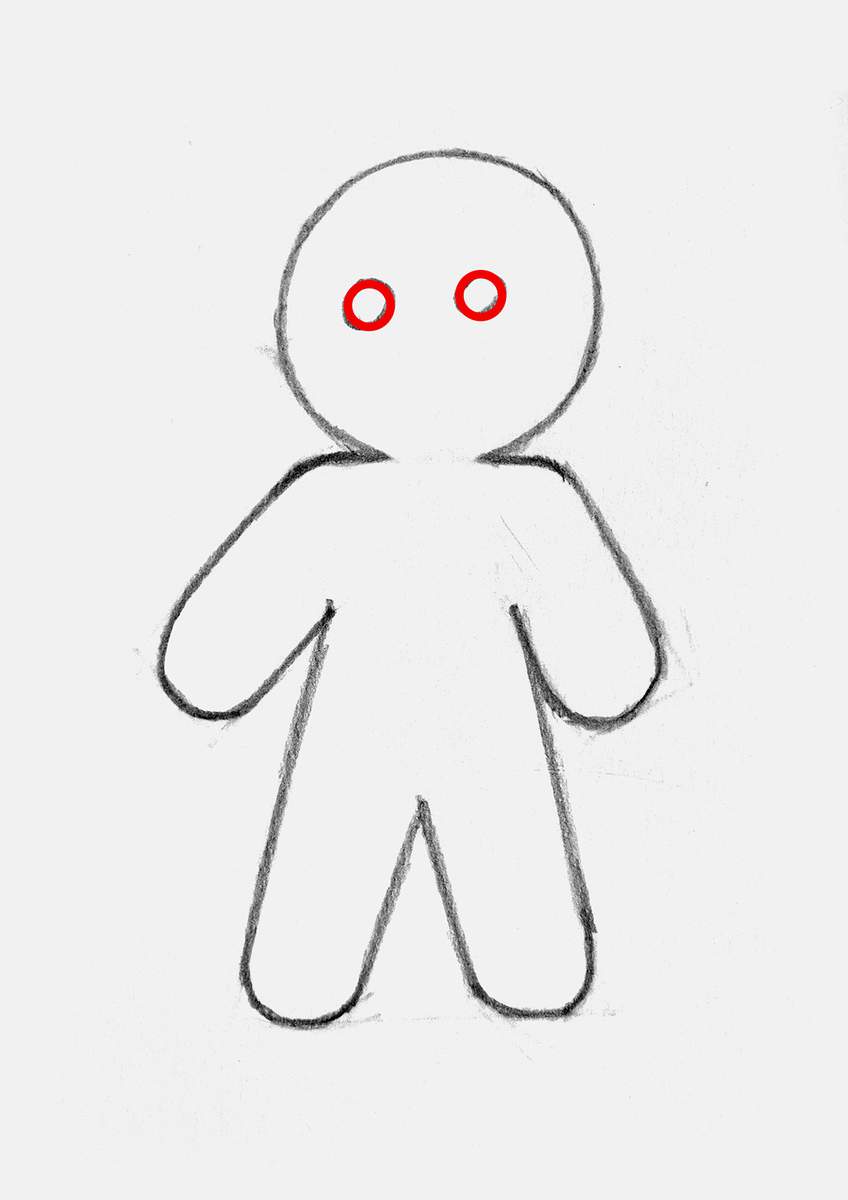
It does look a lot like a zombie right now, but we're going to change that.
First, I added two small pill-shaped eyebrows above each eye. Again, I made their placement wonky to enhance his goofy facial expression.
I also added this bean shape outline for the mouth. This makes our gingerbread man way more fun than if he just had a basic smile.
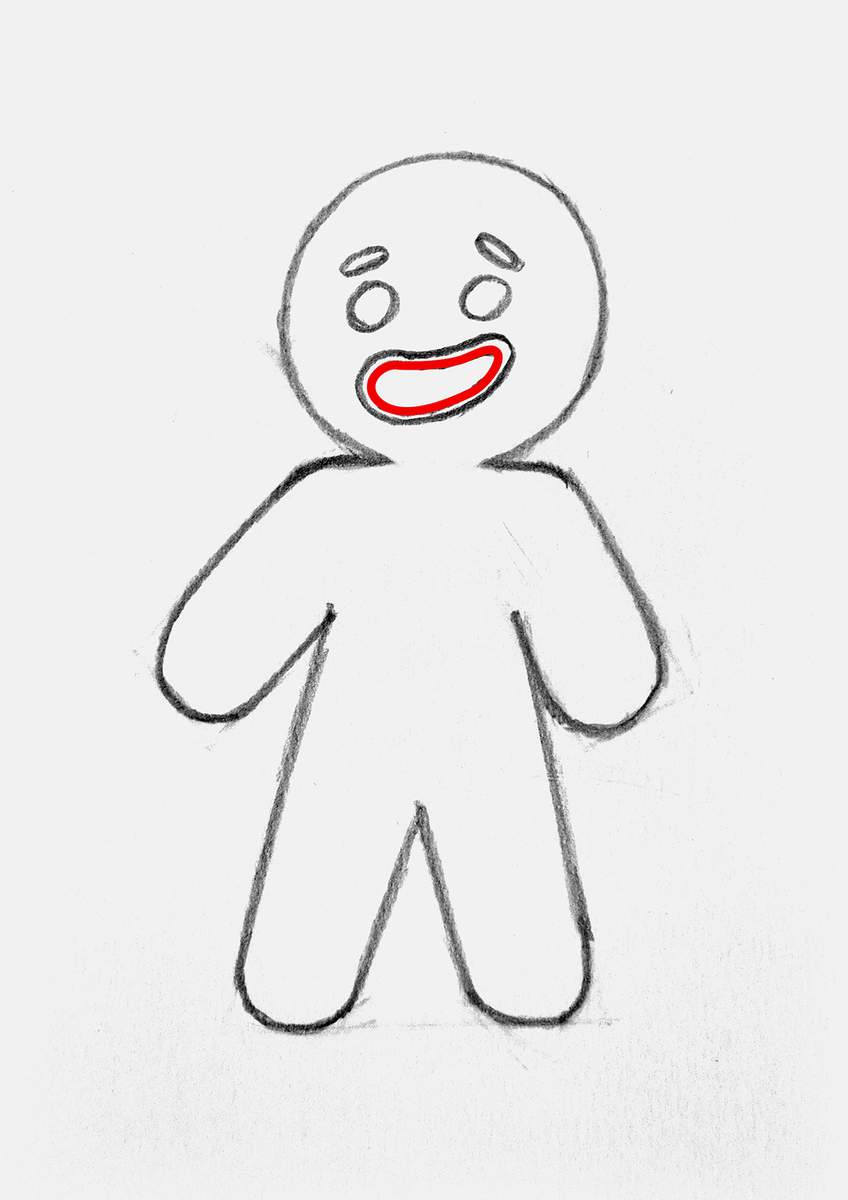
Since I was planning on only coloring the lips or the outline of the mouth, I added another line inside the mouth.
Step 5: Decorate Your Gingerbread Man With Some Icing & Candy
With the face now all done, it's time to decorate your gingerbread man drawing.
I decided to keep it simple for this one, but you can go all out. (Just google gingerbread man decoration for some inspiration.)
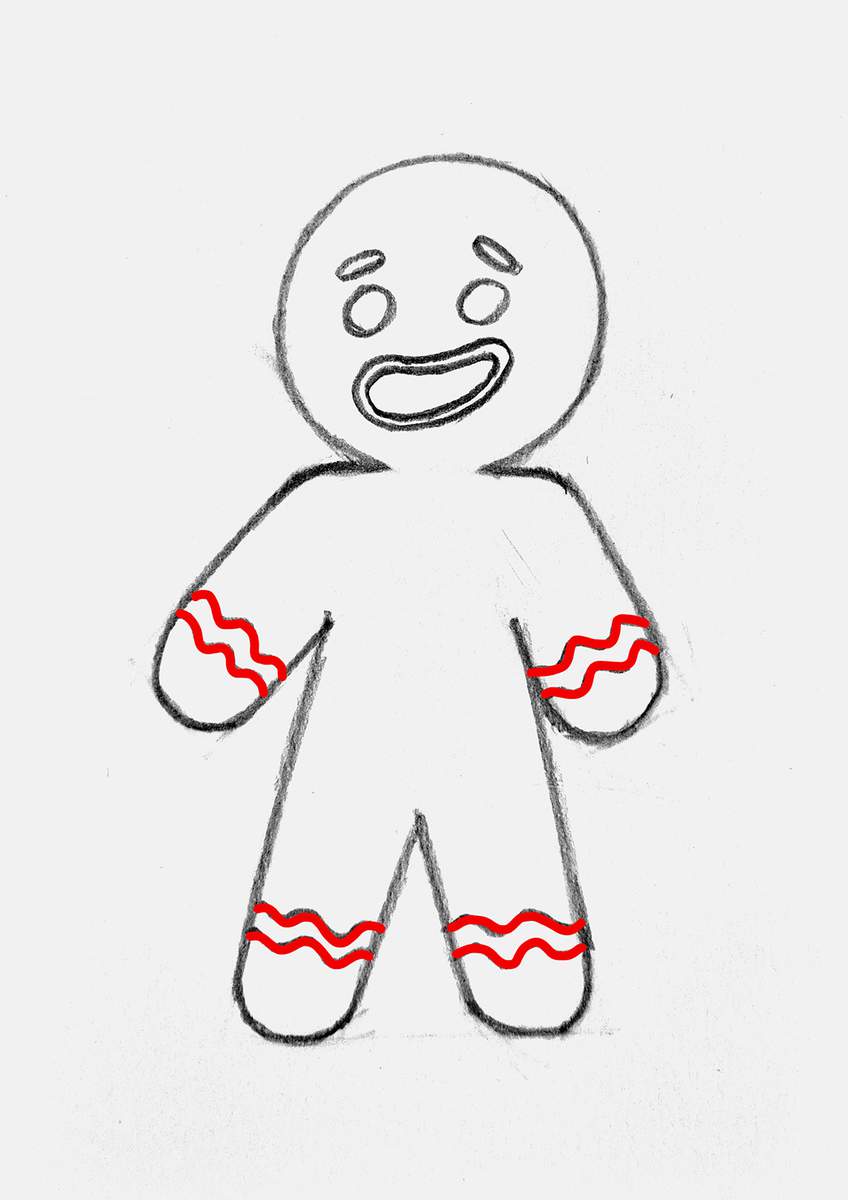
First, I added these wavy icing lines on its arms and legs.
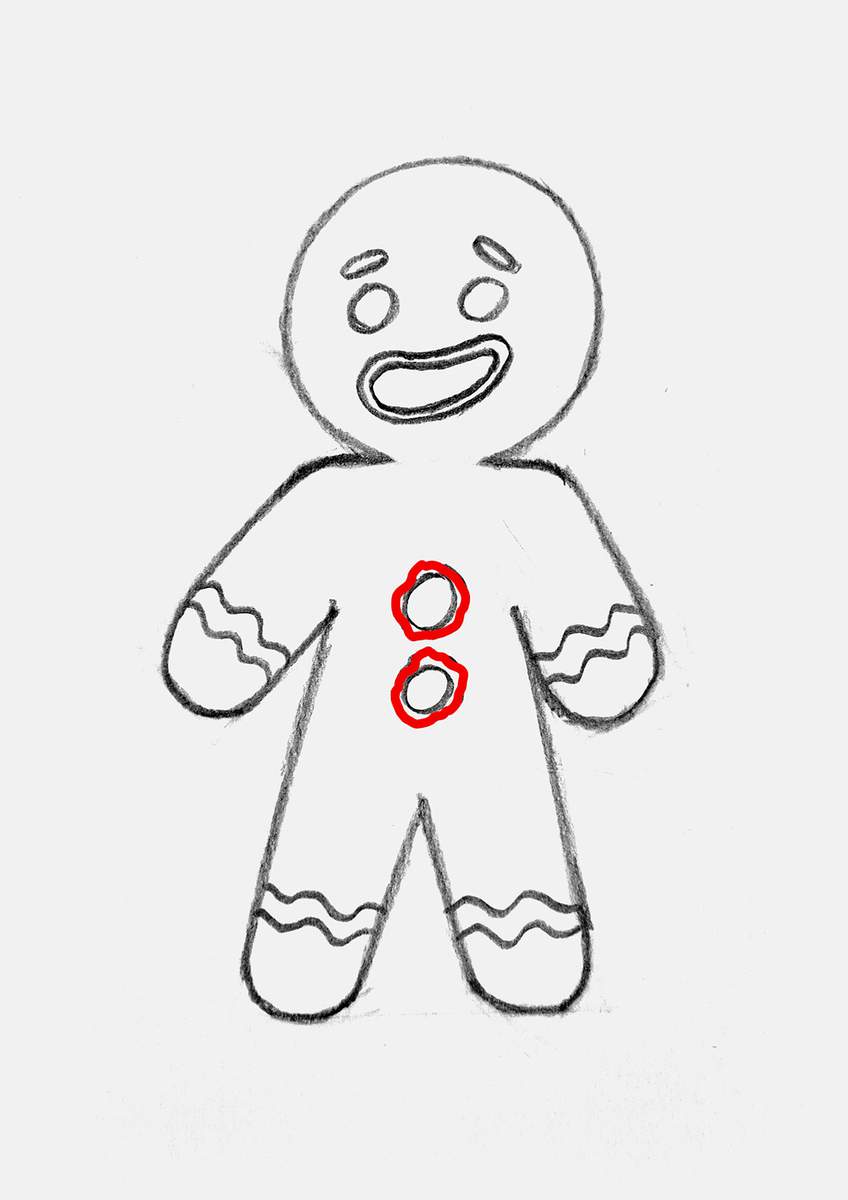
Next, I added two round candy shapes on its belly, leaving some space above for a bowtie.
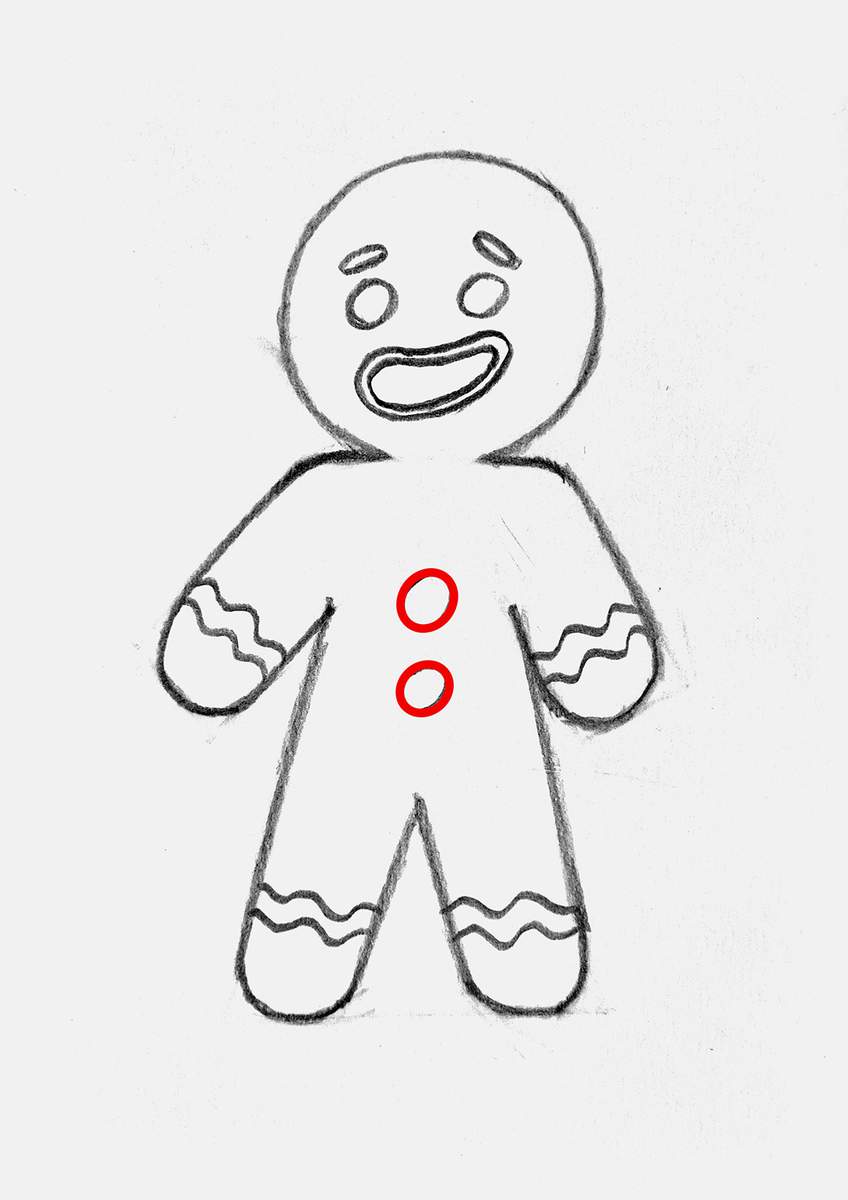
And to make it look like the round candies were stuck on with some icing, I added another wonky line around the candies to make it look like the icing was pressed out from underneath.
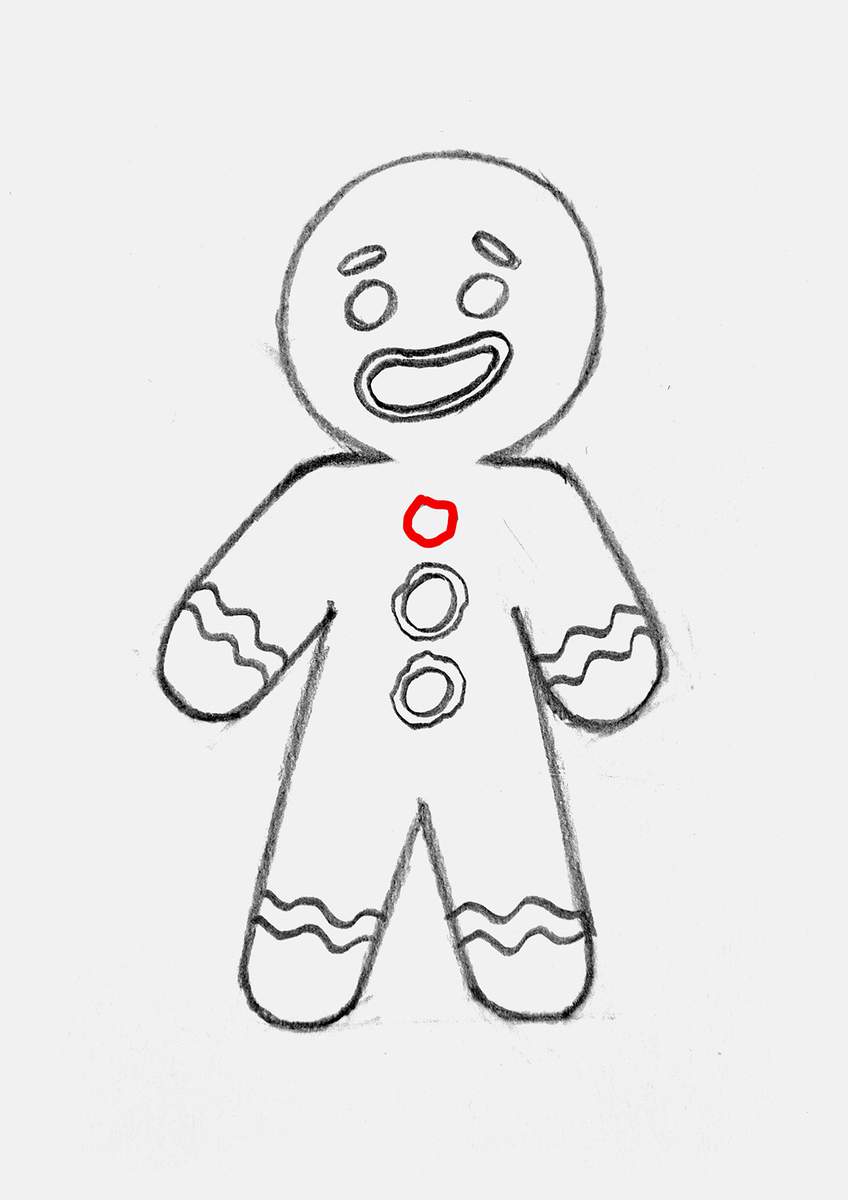
Next, I wanted to add a bowtie.
To do this, I first started with sketching the knot part or the center part of the bowtie. It kinda looks like a wonky circle.
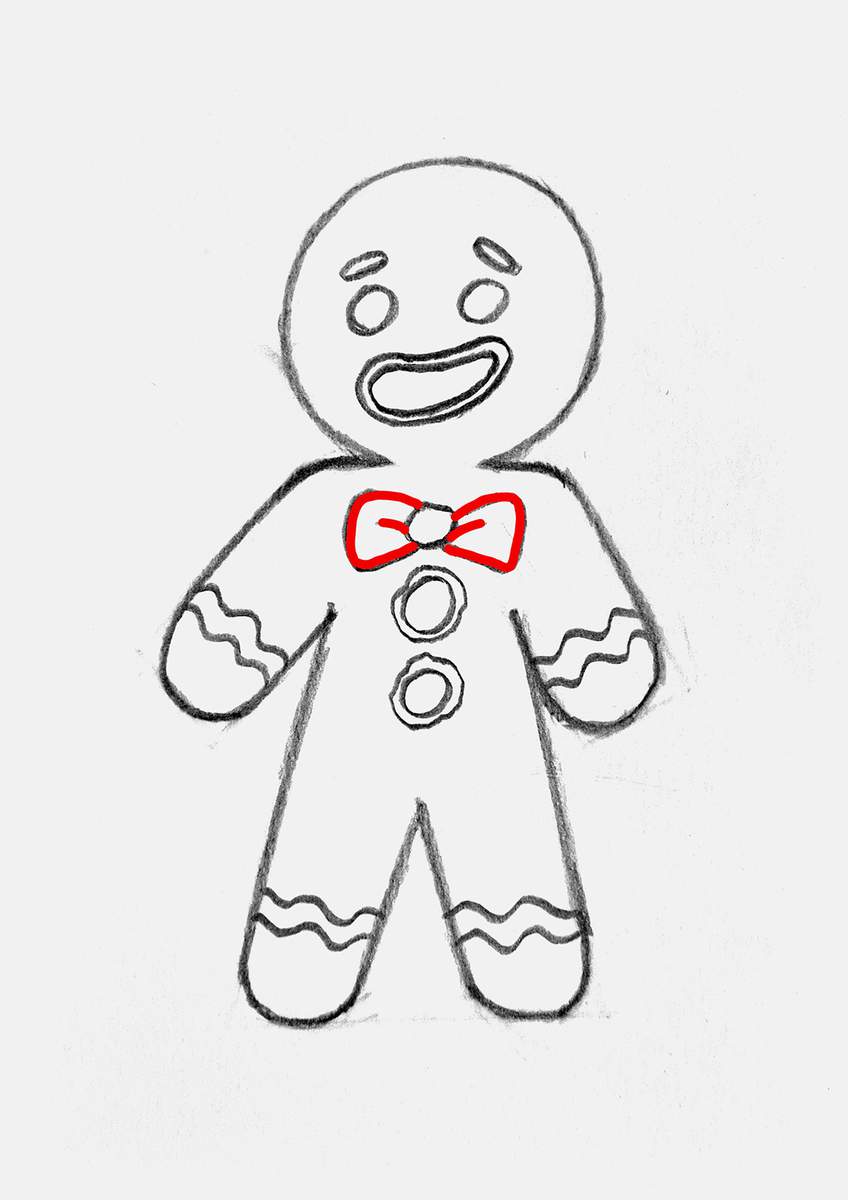
And to complete the bowtie, I added both bows, one on either side of the knot. And I added a small fold line on each bow.
And that concludes the sketching part of this gingerbread man drawing tutorial! I really like how it turned out, especially the facial expressions.
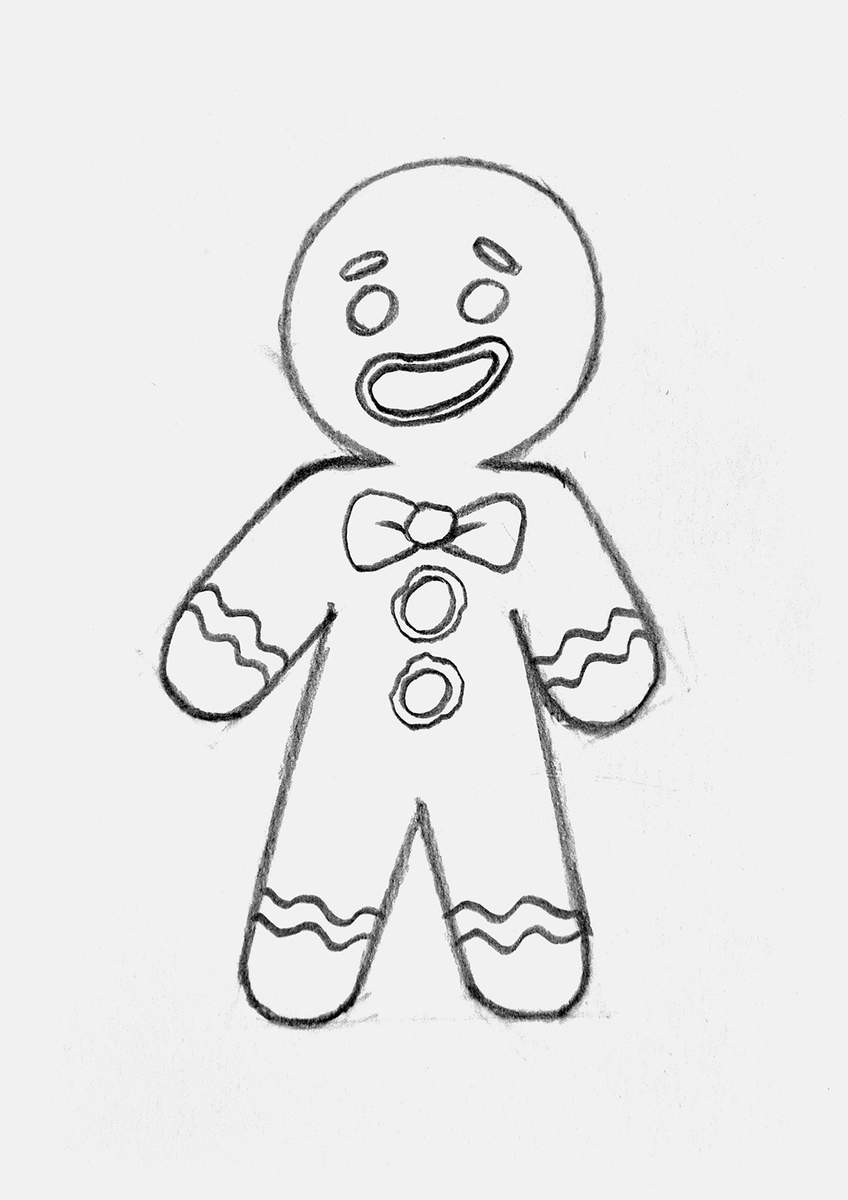
Now all that's left is to color our gingerbread man sketch.
Step 6: Outline Your Decorated Gingerbread Man Drawing With A Black Brush Pen
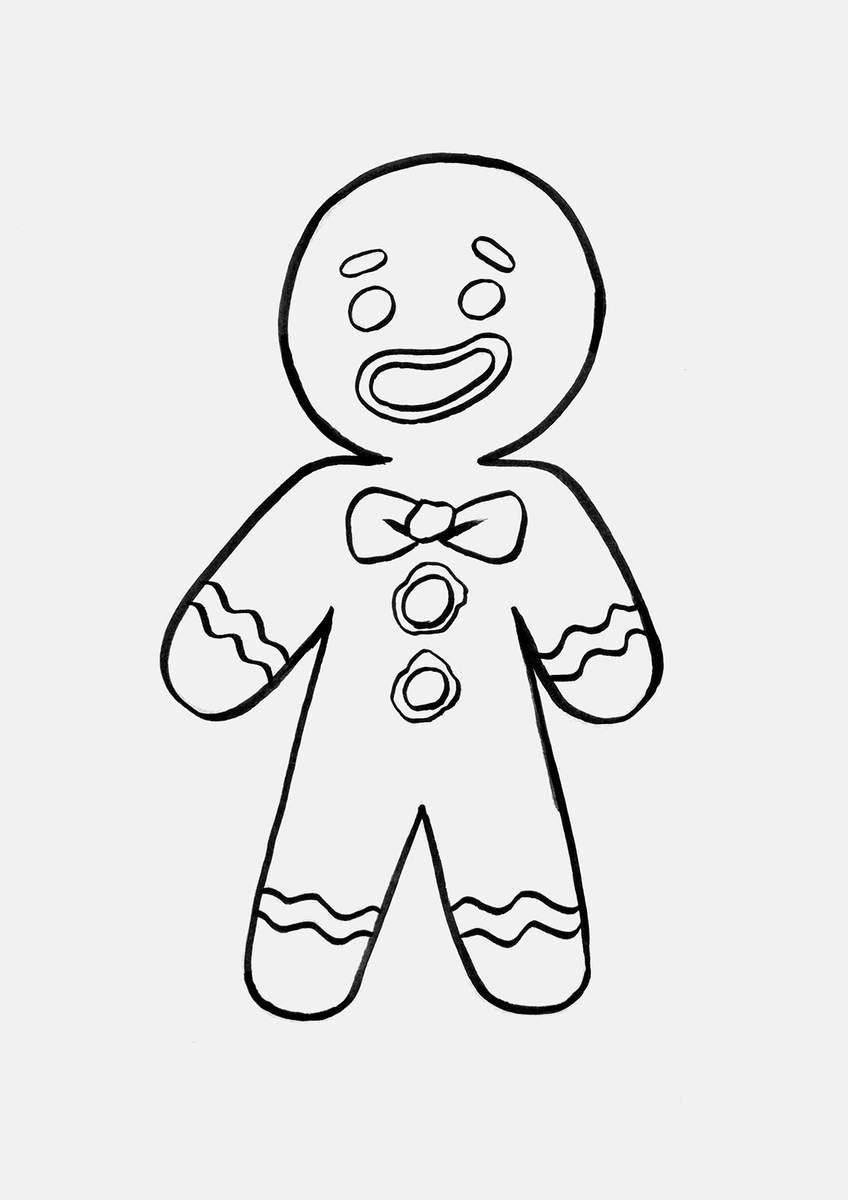
Actually, before we start coloring, I like to outline my drawings first with a black brush pen. This gives the whole drawing a clean finish, and it makes the coloring process a lot easier.
To outline my sketches, the Tombow Fudenosuke brush pen is by far my favorite. I use it all the time.
Before I outline the drawing, I first lighten the sketch lines. I like to do this before the outlining as erasing over the outline will lighten the black ink, and I don't like that.
To lighten my sketch, I used my kneaded eraser and rolled it a few times across the sketch. By using a kneaded eraser instead of a regular one, you can easily and evenly lighten your sketch.
With the sketch all lightened, I outlined every line we just sketched. One thing I did for this drawing that I really like is that I made the outer edge of the sketch look thicker, and the details and decoration are outlined with a thinner line.
You can easily do this with the Tombow Fudenosuke brush pen. You just use more pressure if you want thicker lines and less pressure for thinner lines.
Step 7: Use Alcohol Markers To Color Your Gingerbread Man & The Decorations
With the outline all done, it's time for my favorite part: the coloring!
And to start off with the coloring, I wanted to tackle the most difficult part first: the golden brown gingerbread part.
Why do I find this part the most challenging? The challenge, when using alcohol based markers, is to color quickly to create an even finish without any visible lines. But this comes with another challenge: avoiding all the decorations, which forces you to work slower and be more careful.
My tip for coloring the gingerbread: color the secluded areas first, like the feet, the hands, and the inside of the mouth (yes, I forgot to color the inside of the mouth...). Next, you want to work your way, coloring the rest of the golden brown gingerbread section by section, but always making sure every edge is still wet to prevent any visible lines. This is the most challenging, as you can't focus your attention too long on one part and forget about keeping the edges wet on other parts.
You might notice that the coloring in the photo looks quite uneven, but in real life, it looks a lot smoother. That's just how photos work, unfortunately...
To color the gingerbread of this gingerbread man, I used a color called Potato Brown (BR2). It does look good in the photos, but in real life it's probably a little too dark. So, if you have a lighter golden brown, I recommend you use that instead and use this color for the shading in the next step.
After you've carefully raced your way through coloring the gingerbread, it looks something like this:
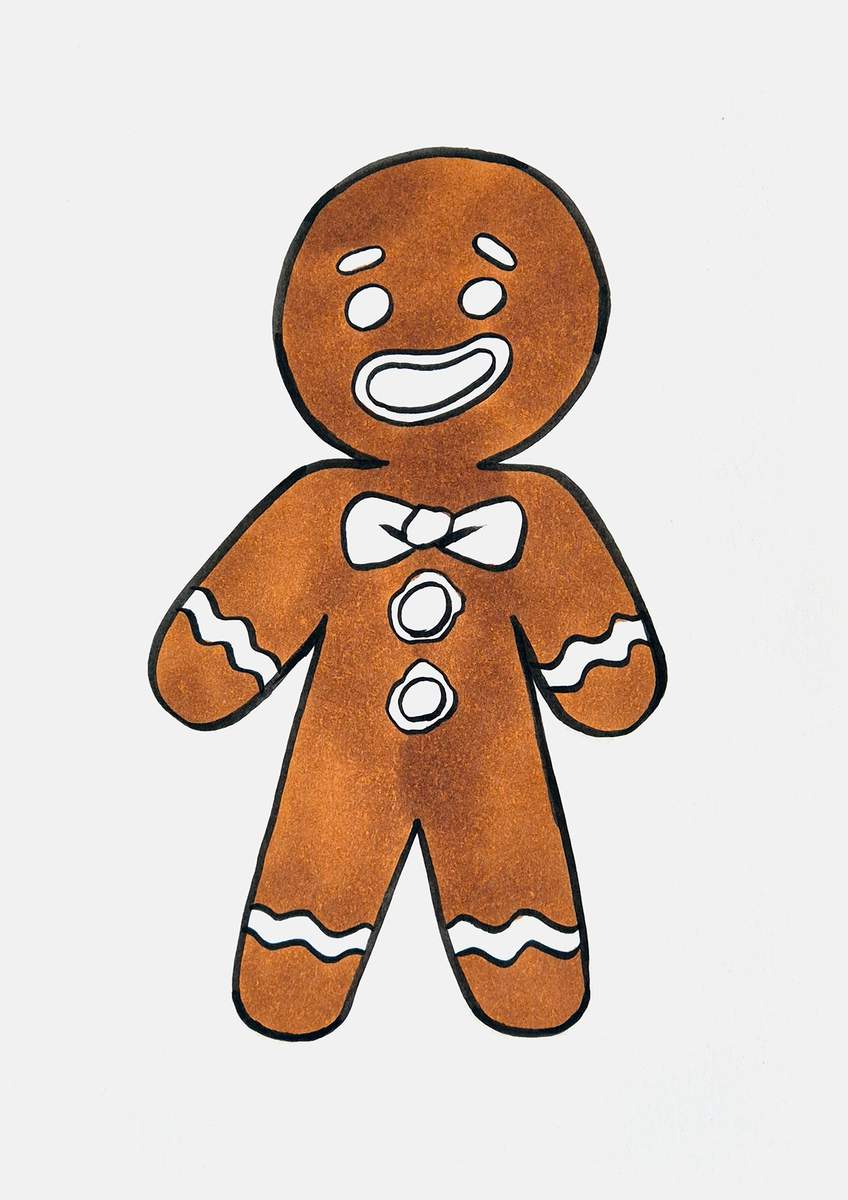
As I said before, yes, I did forget to color the inside of its mouth. And I knew this would happen, and I still forgot it!
Now, with all the gingerbread now colored somewhat evenly, it's time to add shading around the edges with a darker brown color. To do that, I used a color called Raw Umber (BR1). But if you decided to make your gingerbread a lighter golden brown than Potato Brown, you can use Potato Brown (BR2) for the shading instead.
How do you decide where to add shading? Well, that's honestly quite easy. I usually add shading to the bottom and right edges of a drawing, and this gingerbread man drawing is no different.
I added shading to every downward-facing part, with more of a focus on the right side.
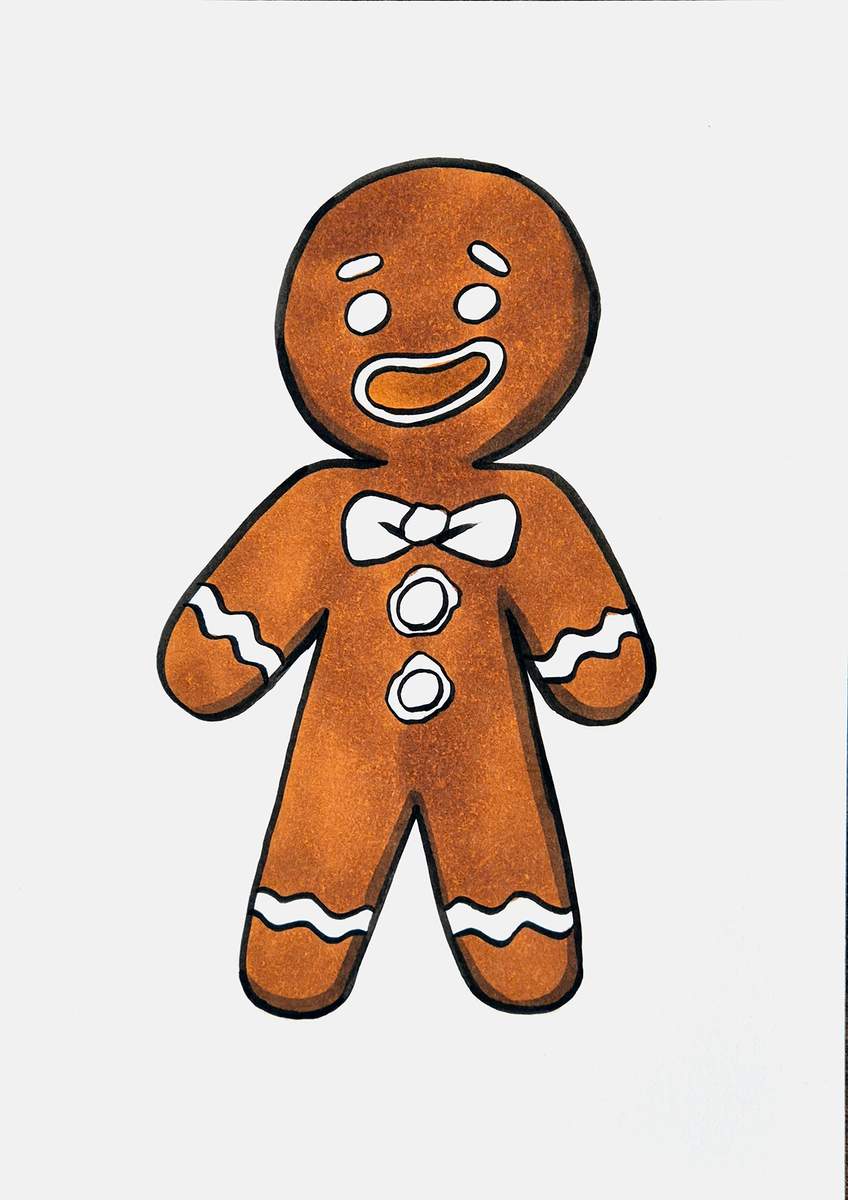
After the gingerbread is all colored and shaded, it's time to color the decorations!
Since the icing on the legs, arms, and eyes is white, we don't need to color it. So I moved straight onto the red decorations.
I used a red called Vermilion (R2) to color the red decorations: the red mouth and the red candy buttons.
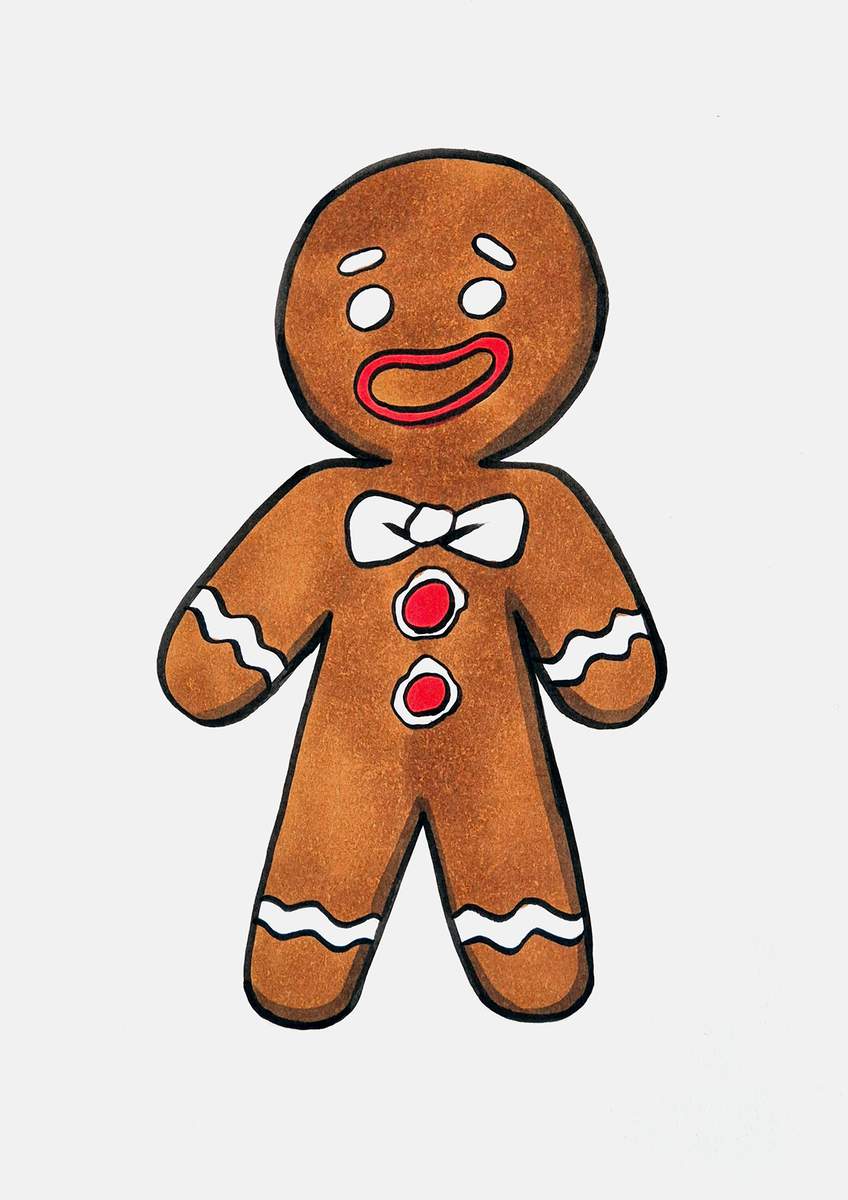
Next, I also added some shading to the red candy button with a darker red called Geranium (R8). Again, I added the shading to the bottom right of both candies.
I did not add shading to the thin mouth line as it was too thin.
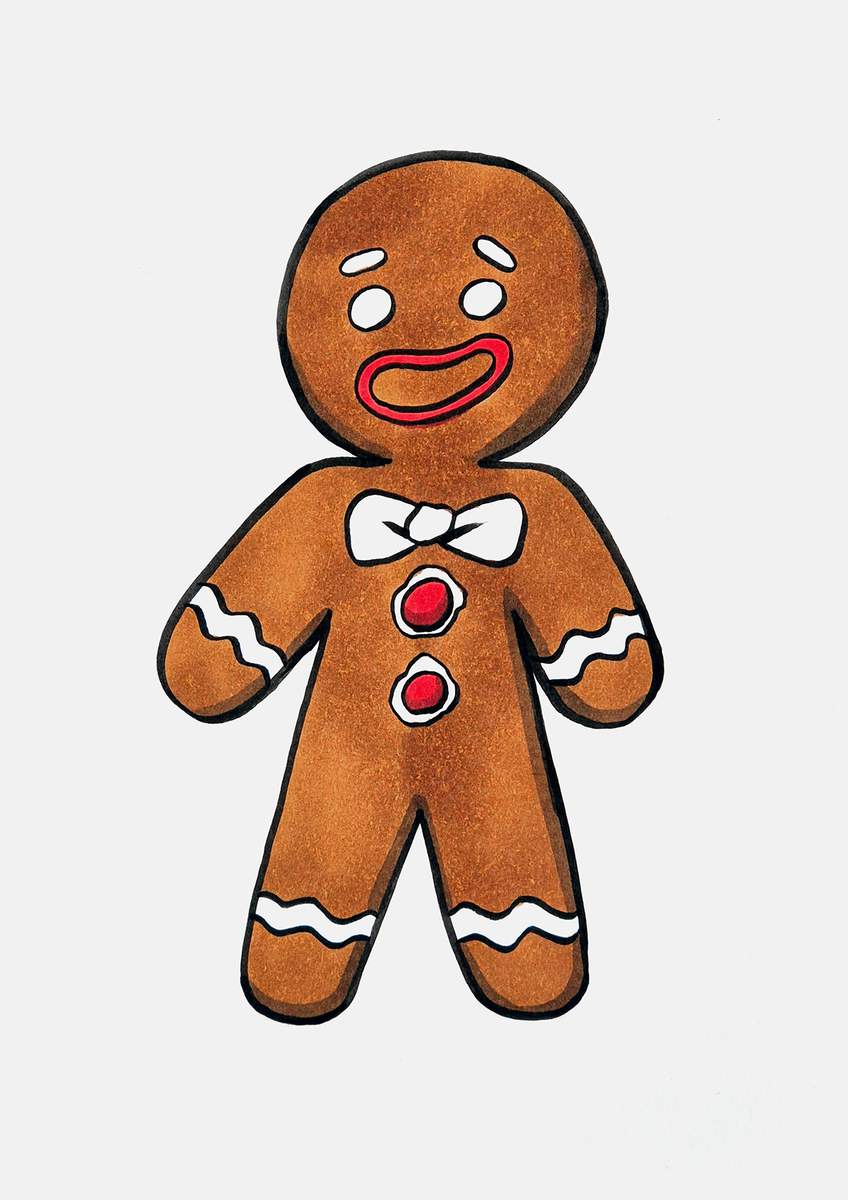
After that, I colored the green decorations: the eyebrows and the bowtie. And to do that, I used a color called Vivid Green (G2).
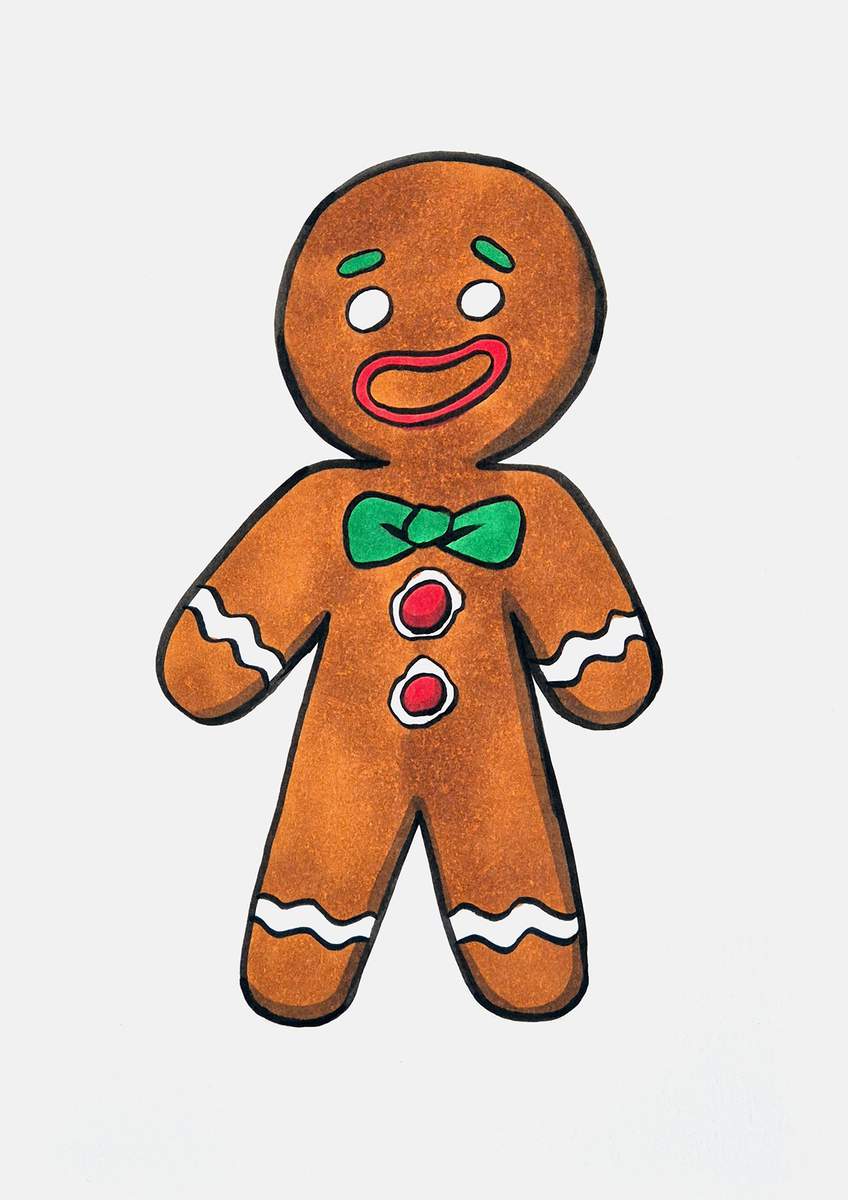
Lastly, I also added shading to the green bowtie with a darker green called Green (G390). Again, I focused the shading mainly on the bottom right parts of the bowtie.
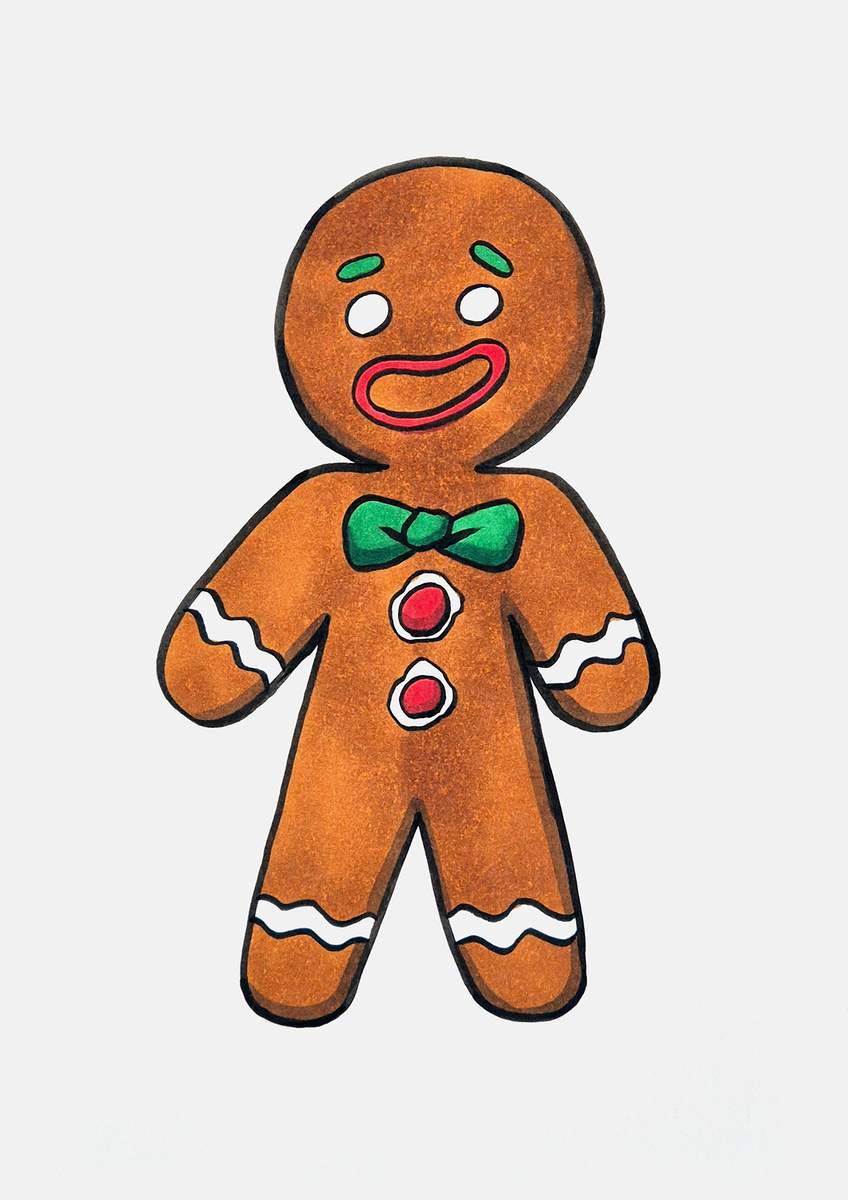
And that's our gingerbread man drawing all colored and almost finished. There is one more thing I wanted to add.
Step 8: Add Highlights To The Decorations Of Your Gingerbread Man
The last thing I wanted to add was some white highlighted reflections on the green icing of the bowtie and the red shiny candies.
Whereas we added the shading/shhadows mainly on the bottom right, the highlights will therefore be focused on the top left, the opposite.
To add highlights, I used my white Posca PC-3M paint marker. This one's great for adding highlights to your drawings, but it does mix slightly with the ink of the Ohuhu markers. But I do not dislike that. It just makes them fit more in instead of standing out from miles away.
I added small dots on the top left of the red candy buttons, and I added some highlighted lines on the top left of the parts of the bowtie. This makes the drawing look just a tad more complete.
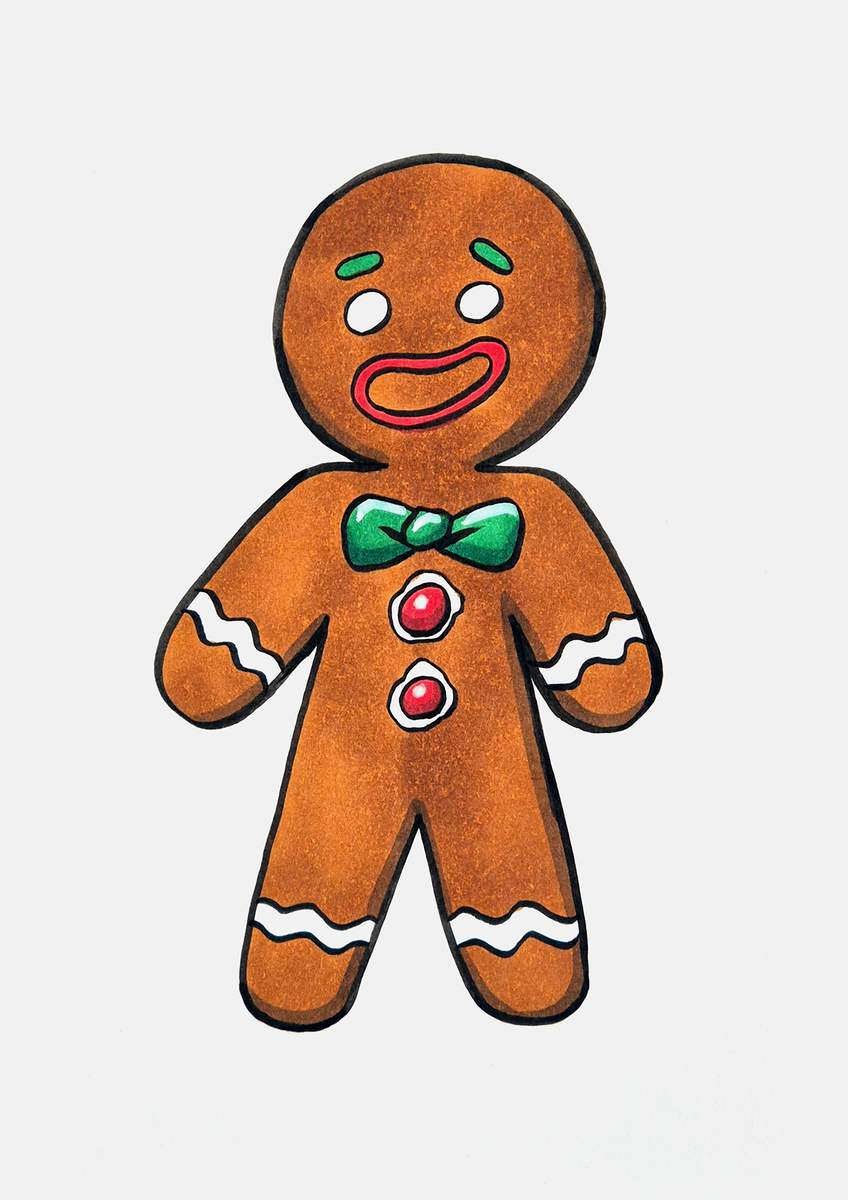
And that's how you draw a gingerbread man with a goofy facial expression.
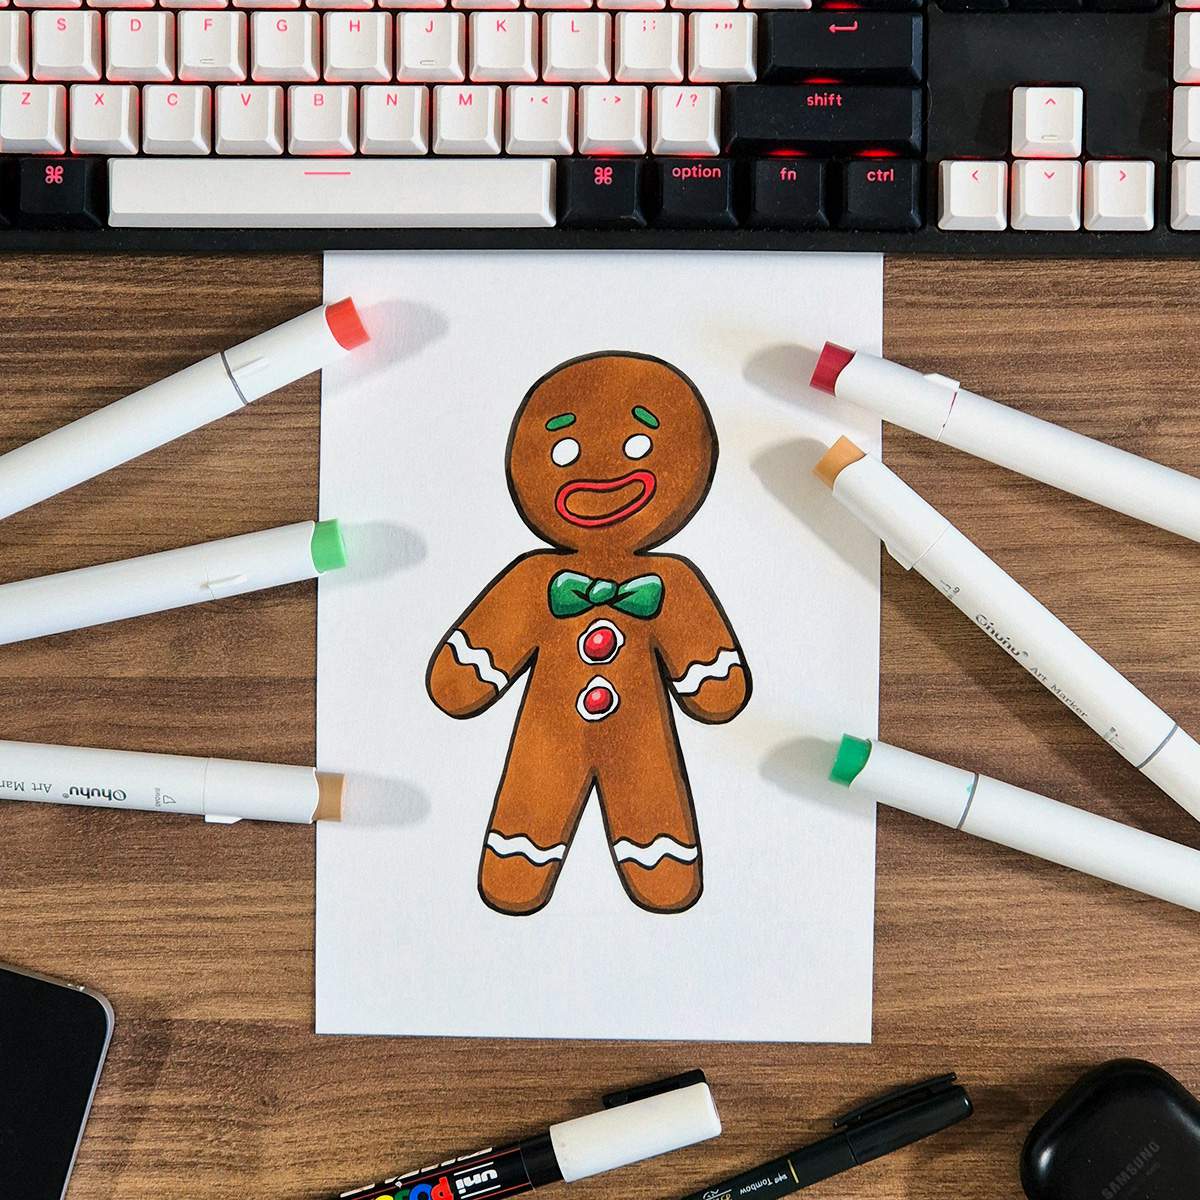
I hope you enjoyed this gingerbread man drawing tutorial! How did yours turn out?
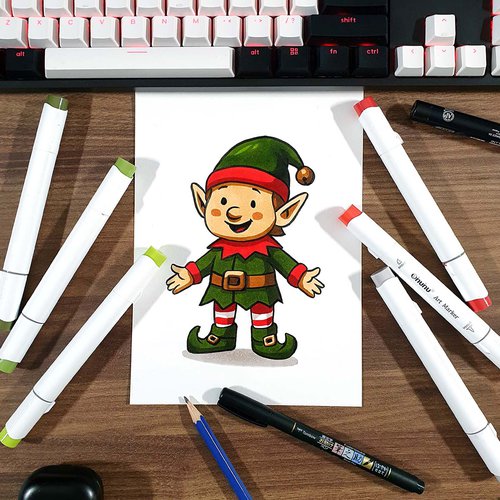
If you did like this tutorial, you might also like my other Christmas step-by-step guides. I especially like this Christmas elf one.
Articles You Might Also Like


I love bringing cars to life with alcohol markers and colored pencils.
Whether you're just starting out or looking to improve your skills, I'm here to help!
Click here to learn more about me.


Be the first to comment!
Comments
There are no comments yet.