Gingerbread House Drawing Easy - Step by Step Tutorial
This post is about how to draw a gingerbread house easy.
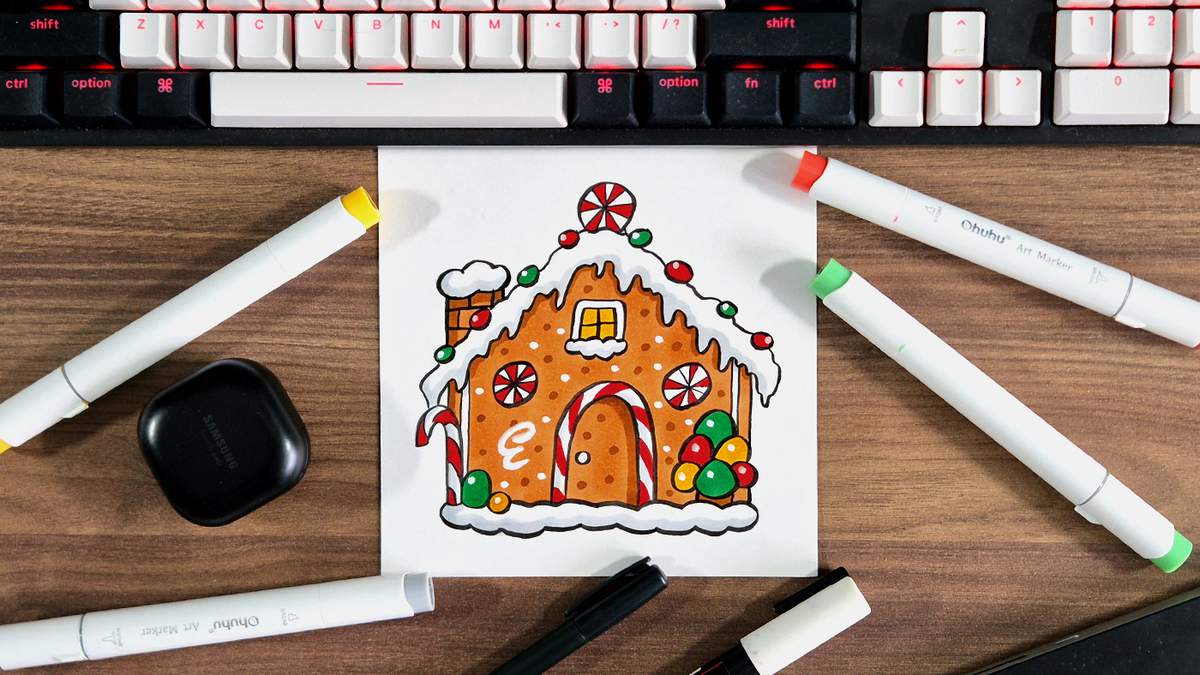
Want to learn how to draw a gingerbread house for Christmas? In this gingerbread house tutorial, I'll show you all the steps to create a beautifully decorated and cozy gingerbread house drawing.
I've broken the whole process up into 10 sections (the main steps), and each section is divided into small, easy-to-follow steps with plenty of supporting images to show you exactly how to make this gingerbread house drawing.
I've tried to make this guide as simple as possible so that you can follow along with me and create your own gingerbread house drawing. I start the process off with sketching a basic house shape. Then, I'll show you how to decorate your house and make it look like a gingerbread house sketch. Then, we're going to outline the sketch and color it with 6 markers. And lastly, we're going to add some icing swirls and details.
When following along with this tutorial, keep this in mind: Don't worry too much about creating the perfect gingerbread house with the perfect proportions and the perfect decorations. You'll learn a lot more if you just have fun and focus on creating the drawing instead of what it could look like. Plus, making a real gingerbread house never goes to plan. It's the same for drawing. You will make mistakes. I certainly did during the creation of this drawing. And you'll learn from them. That's how you get better at drawing. So, don't stress about making the perfect drawing.
Now, let's have some fun making this gingerbread house drawing!
I just wanted to let you know that this post contains affiliate links, and any purchases made through these links will result in a small commission for me and won't cost you anything extra.
In This Guide
- Drawing supplies and colors I used to make this gingerbread house drawing
- Sketching a gingerbread house from scratch
- Outlining your gingerbread house sketch
- Coloring your gingerbread house drawing with markers
- Adding icing swirl and white details
- More step by step guides you'll love
Drawing Supplies and Colors I Used
To sketch this gingerbread house, I used a regular graphite pencil with an eraser. And to lighten my sketch, I used a kneaded eraser. They are really great for this. You just roll them across your sketch, and it will lighten your lines.
I made this drawing on Canson Illustration Manga paper (my favorite paper for using alcohol markers).
To outline the gingerbread house sketch, I used a black Tombow Fudenosuke brush pen.
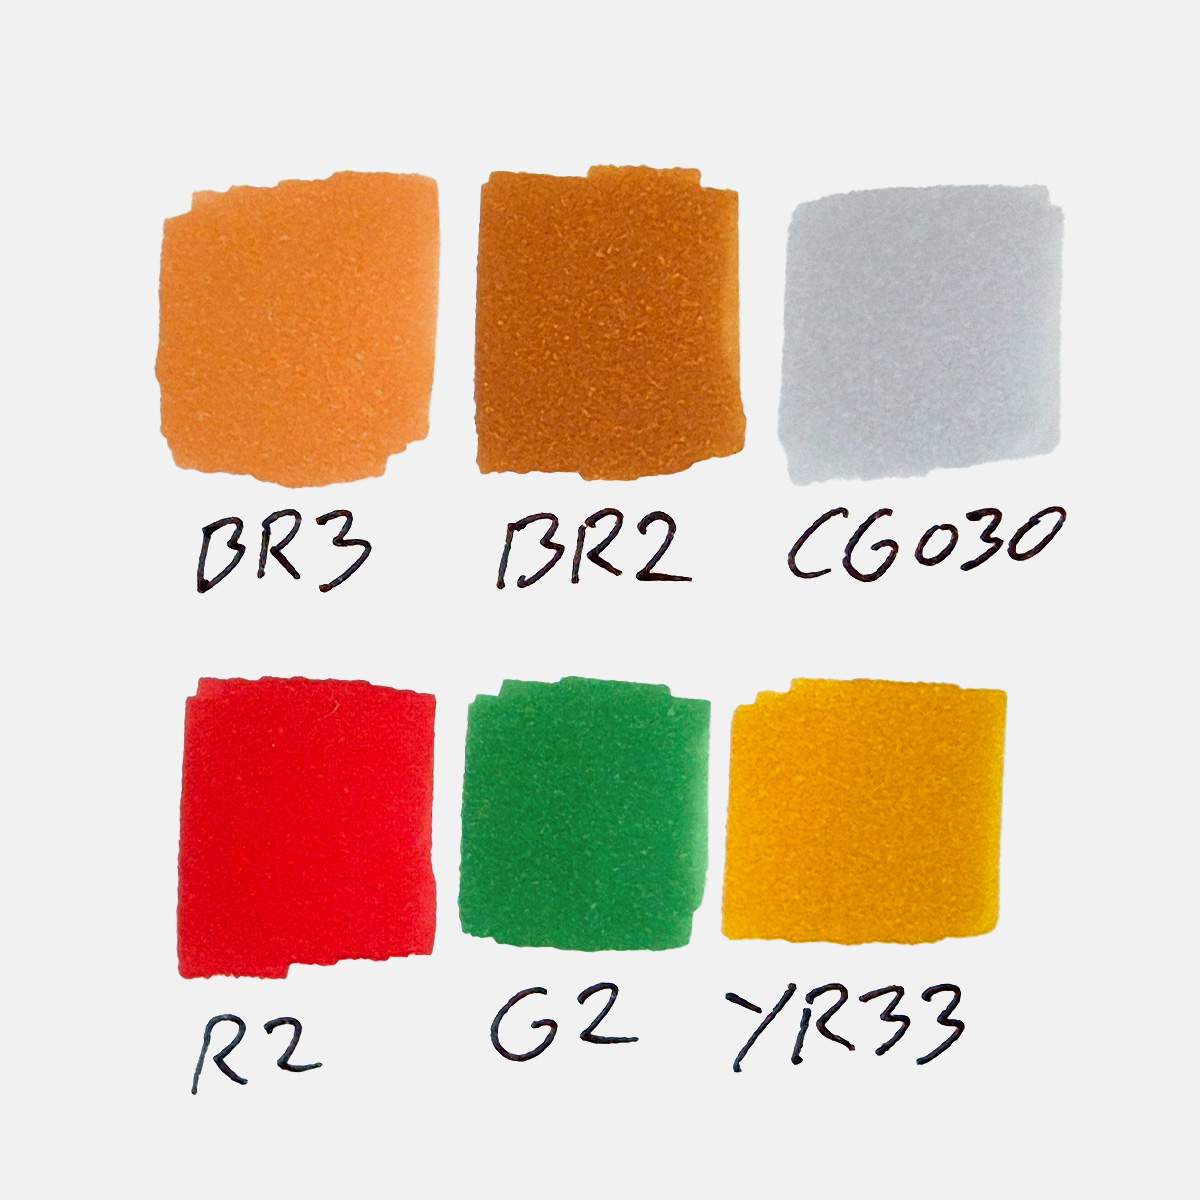
And to color this gingerbread house drawing, I used Ohuhu Honolulu markers. I used 6 colors in total: Rose Beige (BR3), Potato Brown (BR2), Neutral Grey 03 (CG030), Vermilion (R2), Vivid Green (G2), and Melon Yellow (YR33).
You can buy these colors separately or as part of the 320 set. You can also buy them on Amazon if you prefer.
I've added an image below with all the color swatches so you can match your markers to the ones I used if you already have some.
How to Draw a Gingerbread House Step by Step
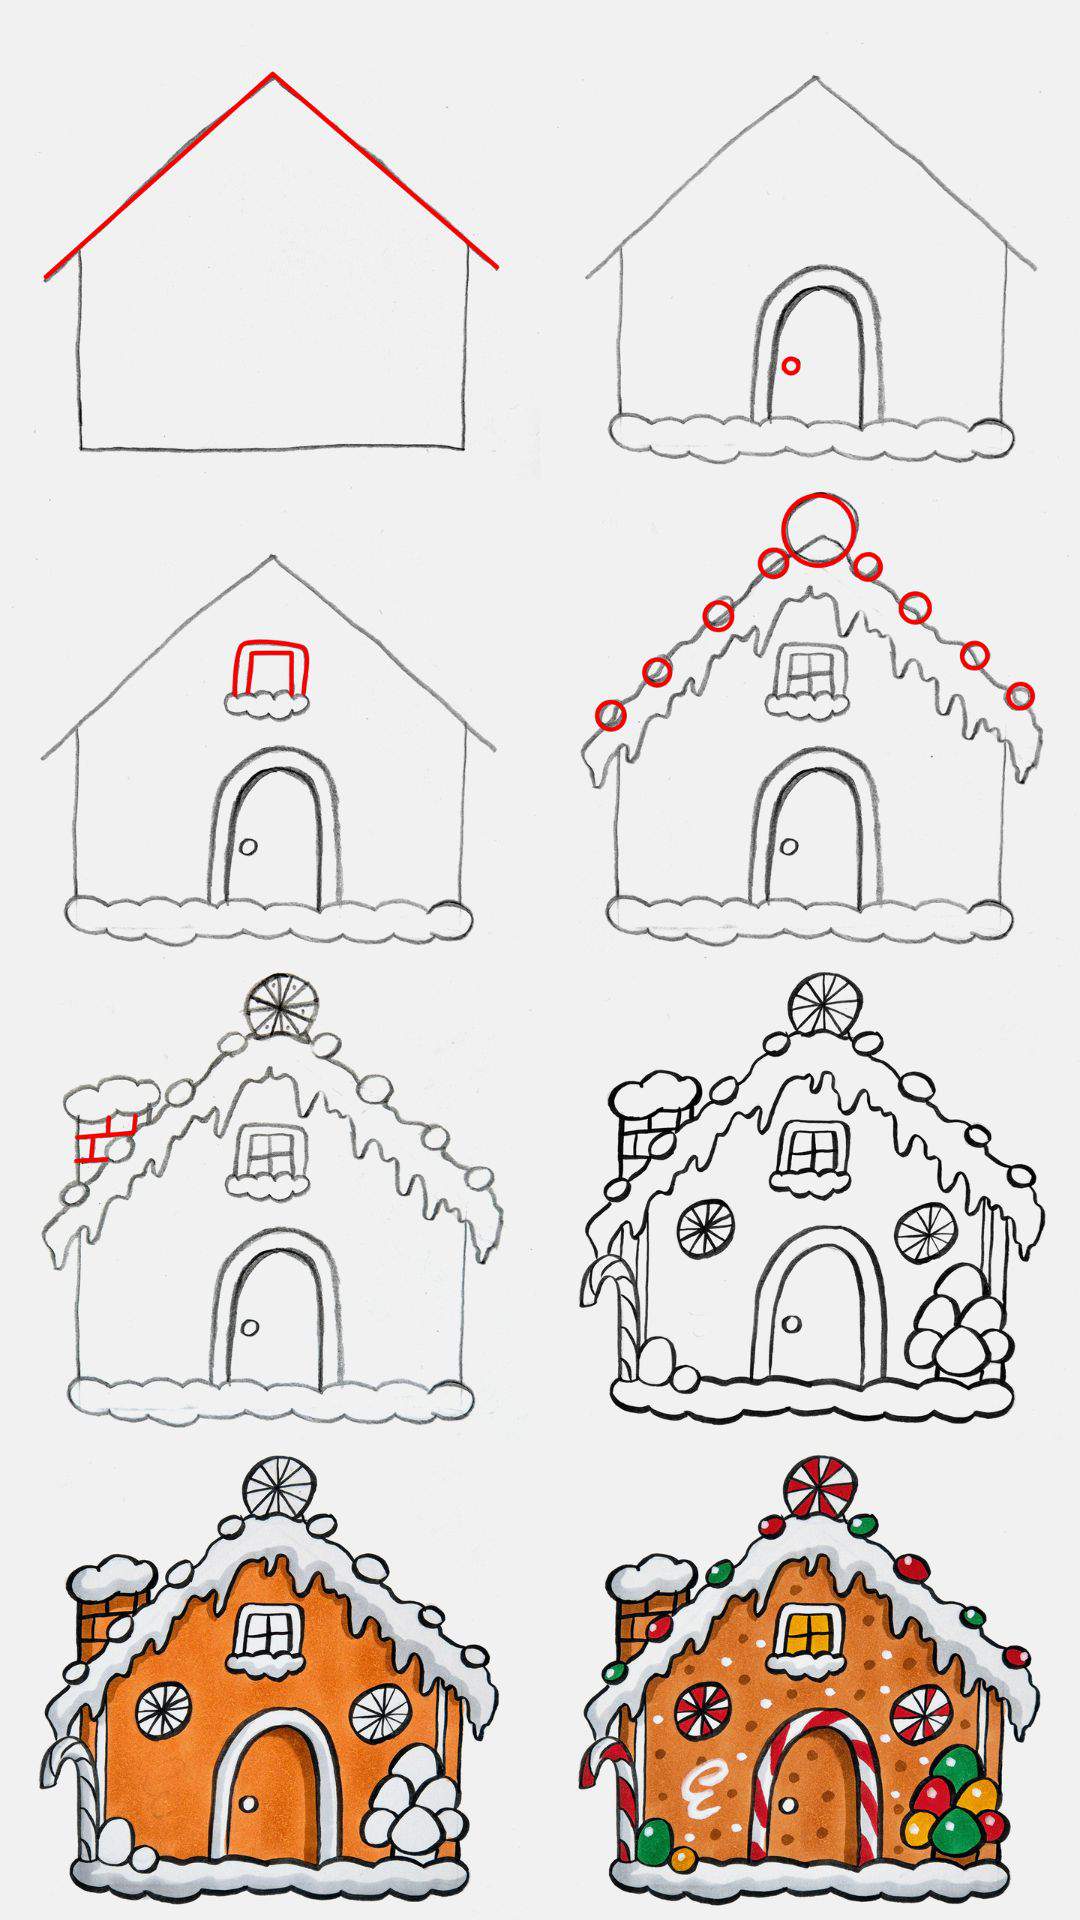
When drawing a gingerbread house, we first need to sketch it. To make it easier for you to follow along with the sketching steps, I marked every new line in red. That way, you can easily spot what's new and what you should add.
After sketching the gingerbread house, we're going to outline it with a black brush pen and then color it with some alcohol based markers. And to finish it off, I also added some white icing swirls and dots with a white paint marker.
Step 1: Sketch a Basic House Shape
To start our gingerbread house sketch, I thought it would be easiest to start with just a basic house shape.
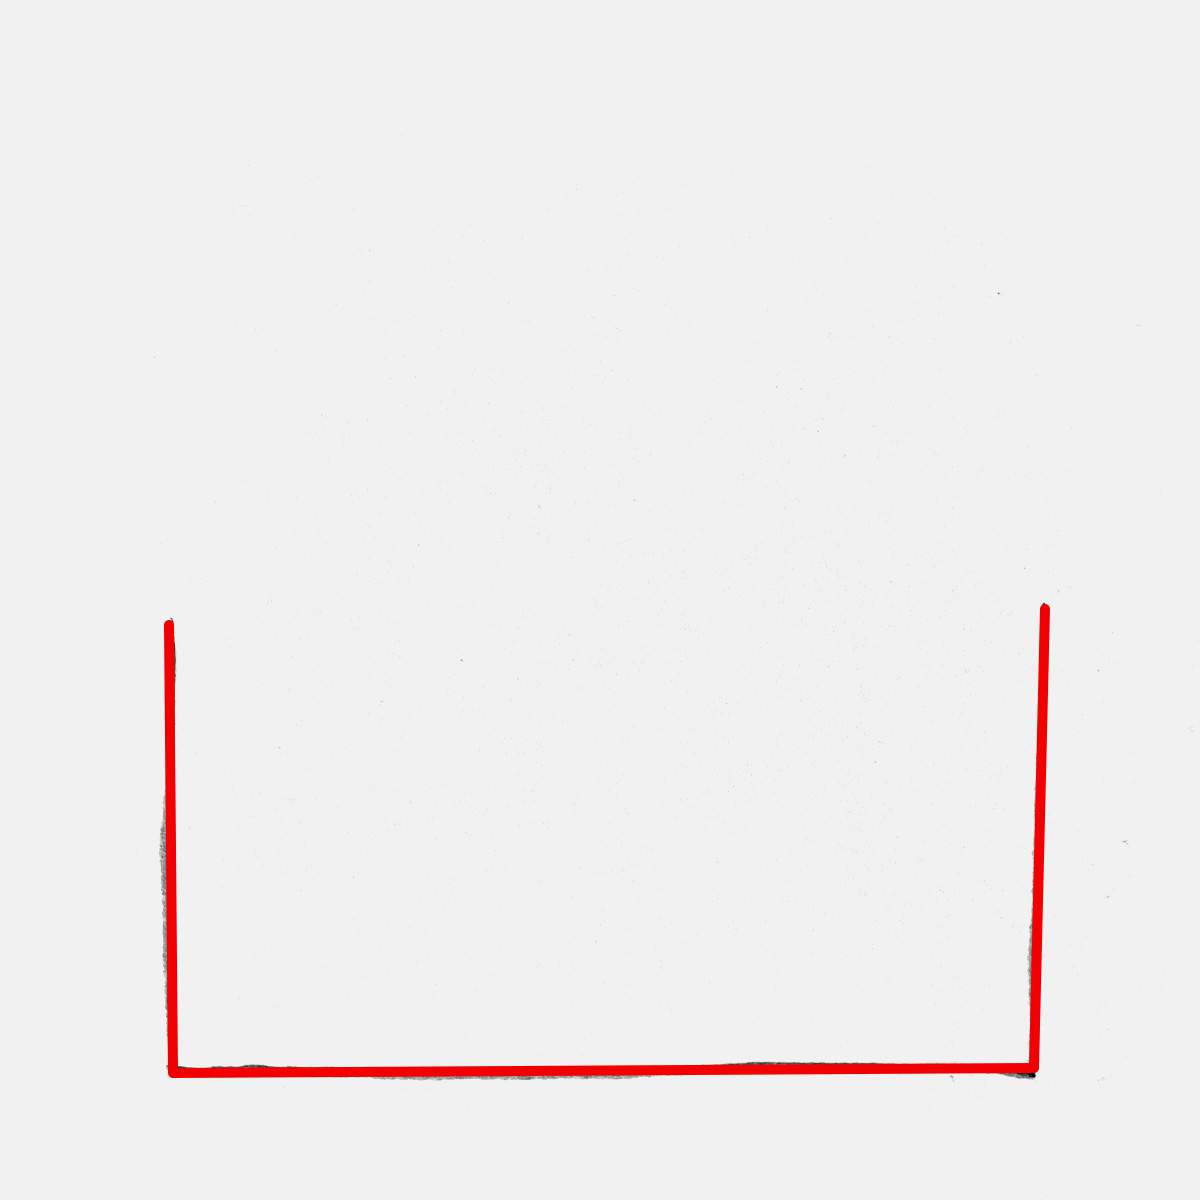
First, I sketched the bottom half of the house. This is made up of one long horizontal line with a vertical line on each end, which are the gingerbread walls of the gingerbread house.
You can decide for yourself how wide you want your gingerbread house to be. I made mine quite wide, but you can make it narrower or taller if you prefer.
With the base of the house in place, I added the roof panels. The roof is just two diagonal lines that form a point at the top.
Again, you can make your roof more pointy or less pointy, depending on what you prefer.
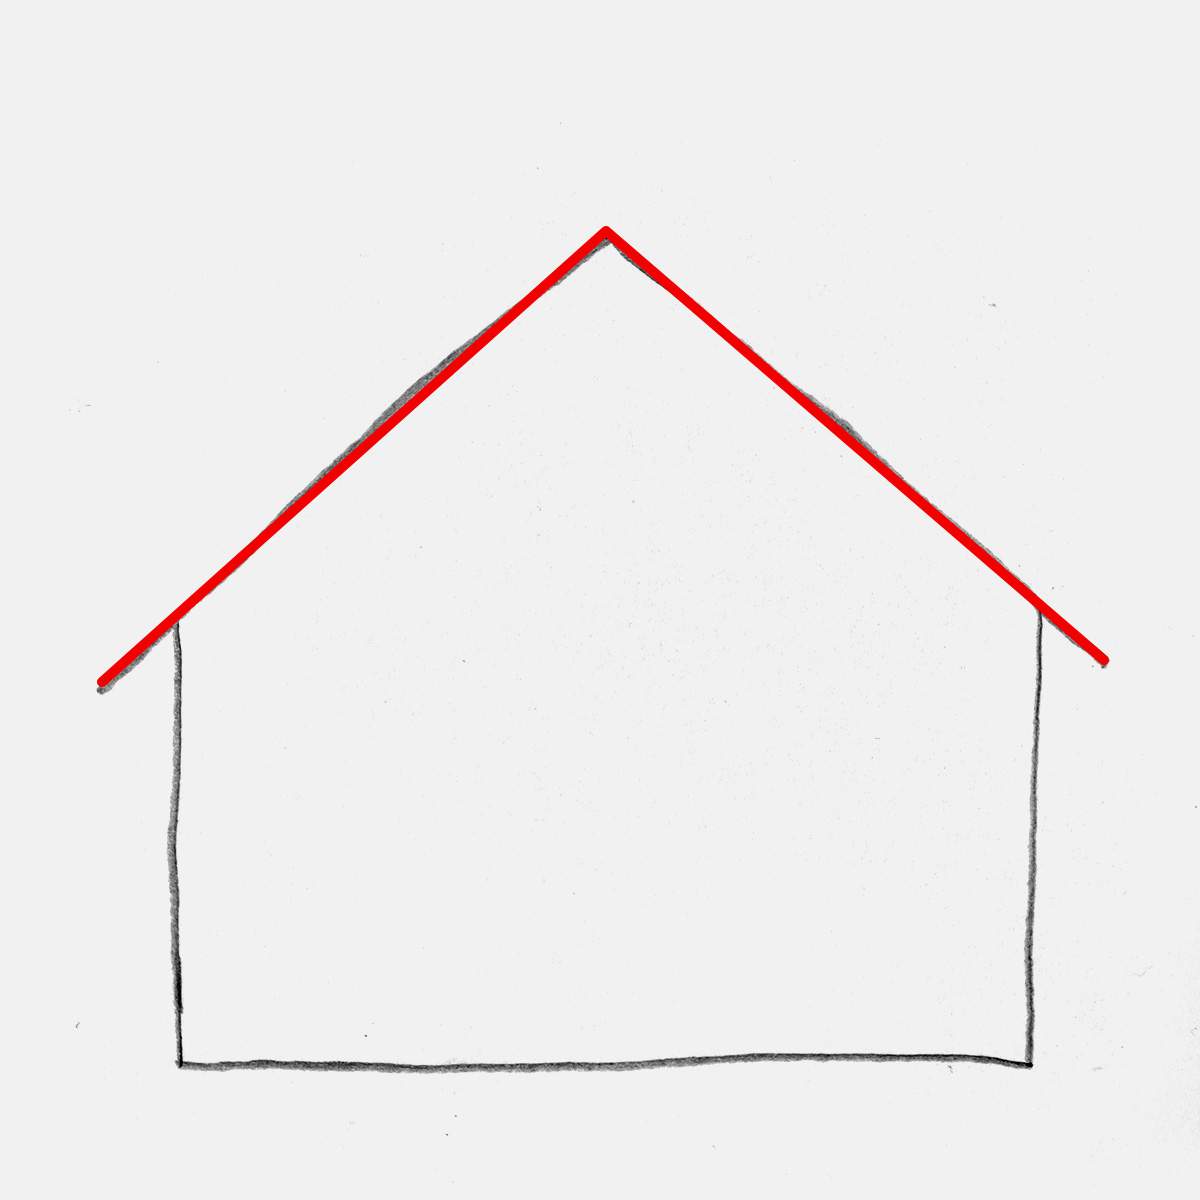
This basic house shape will form the basis of our gingerbread house drawing, and we'll use it as a guide for the rest of the sketch.
Step 2: Add Snow Icing on the Base of the Gingerbread House
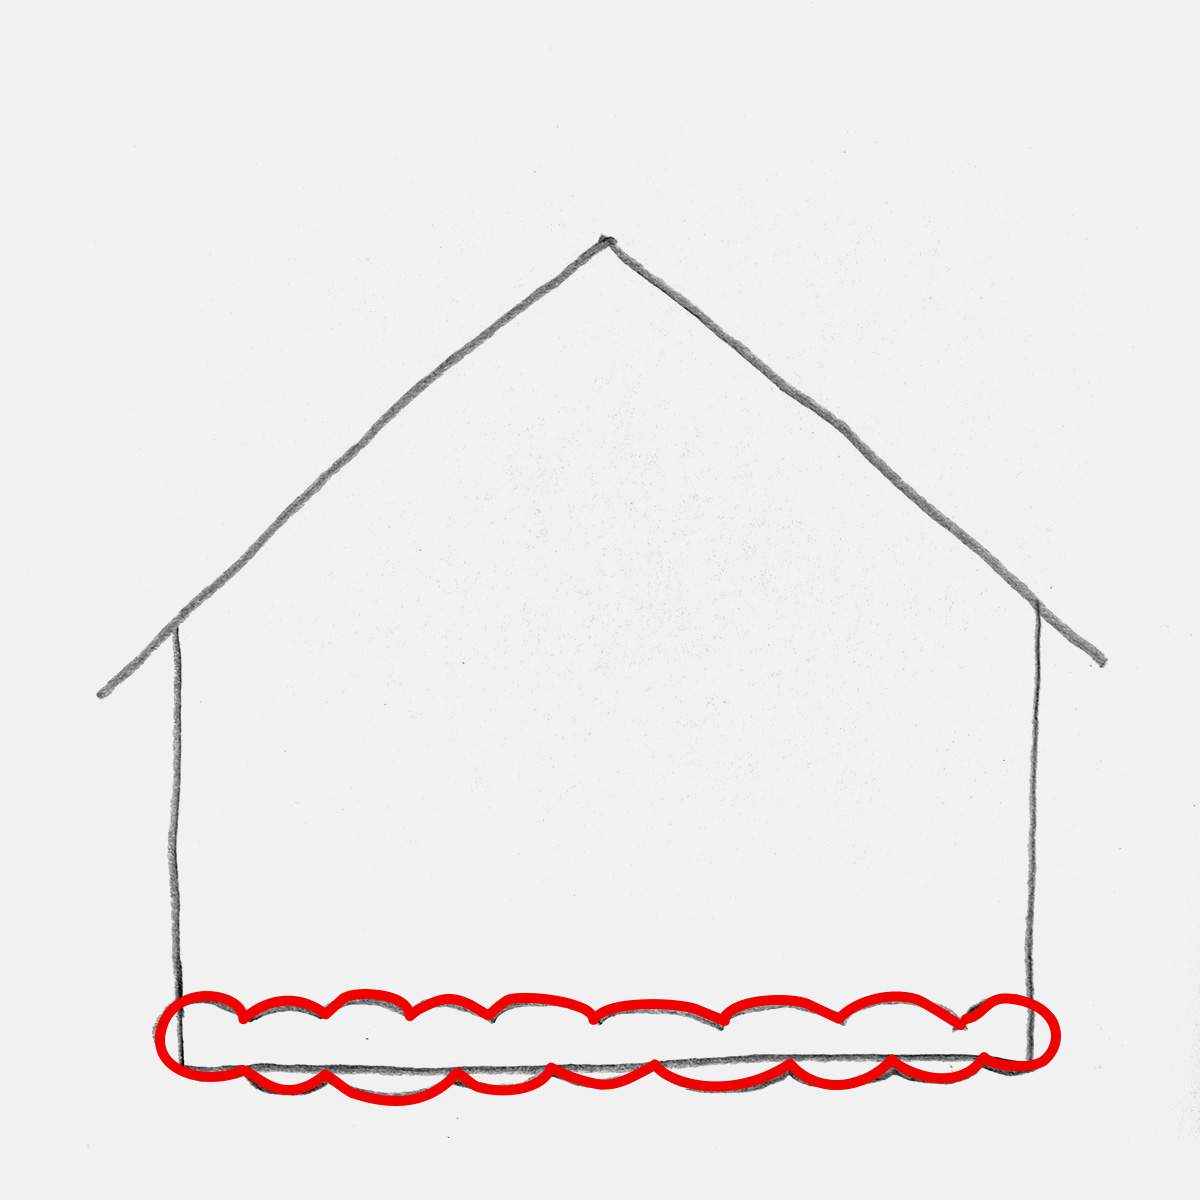
With the base of the house all done, we can start to add some decorations. I will be building/decorating this house from the ground up. So, the first thing to decorate is the ground.
I thought it would be nice to replicate some snow on the bottom of the gingerbread house by adding these fluffy, almost cloud-like shapes on the bottom. If this were real life, this would be made of icing.
Step 3: Add a Front Door to the Gingerbread House Sketch
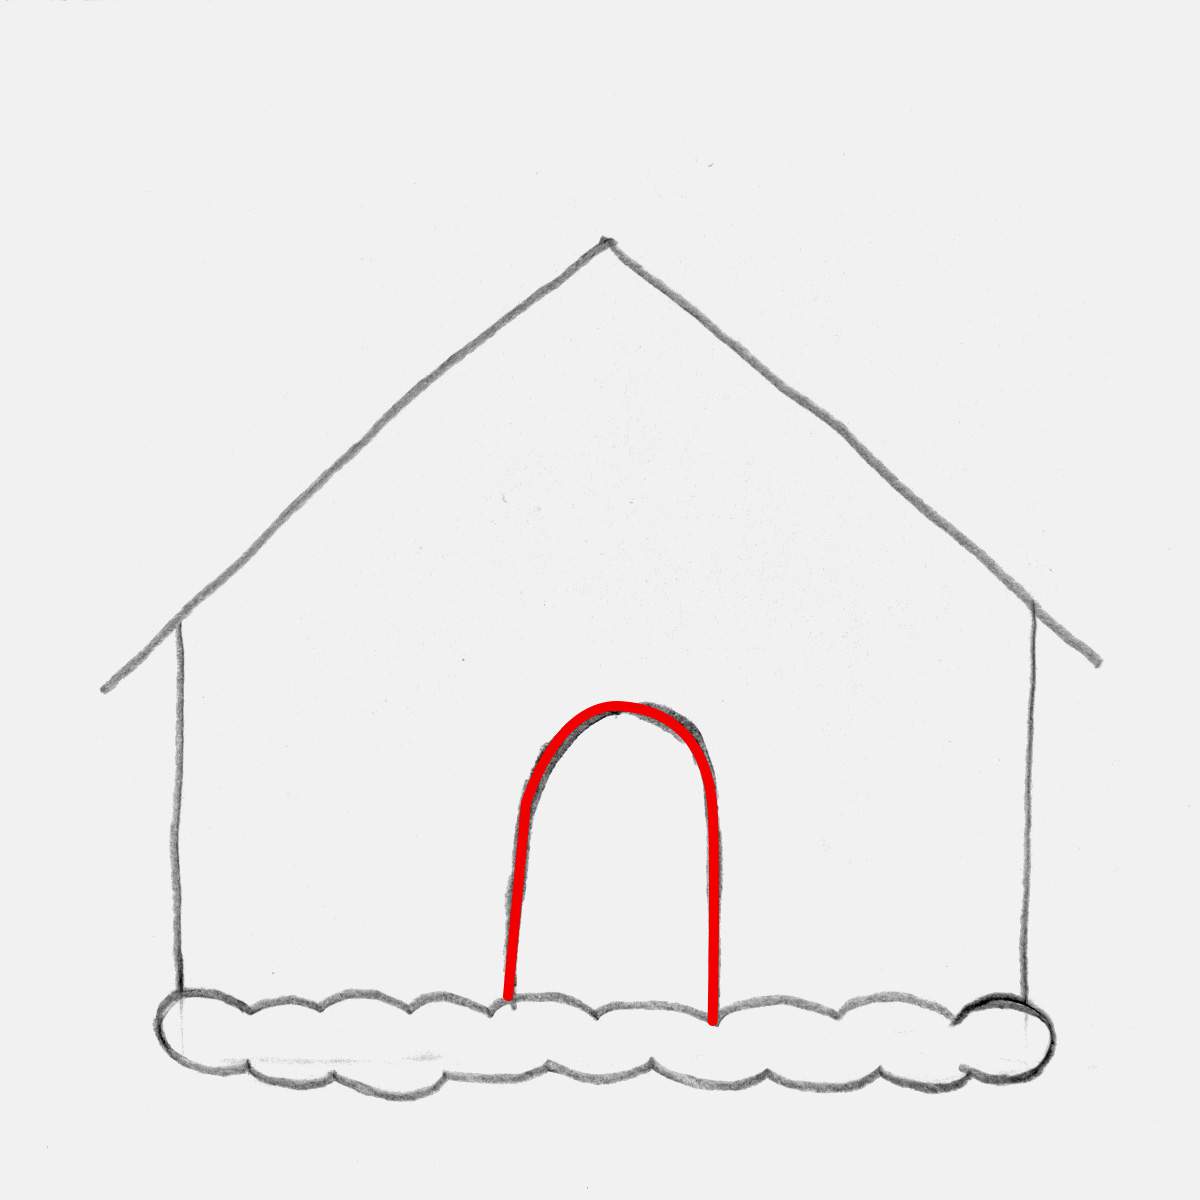
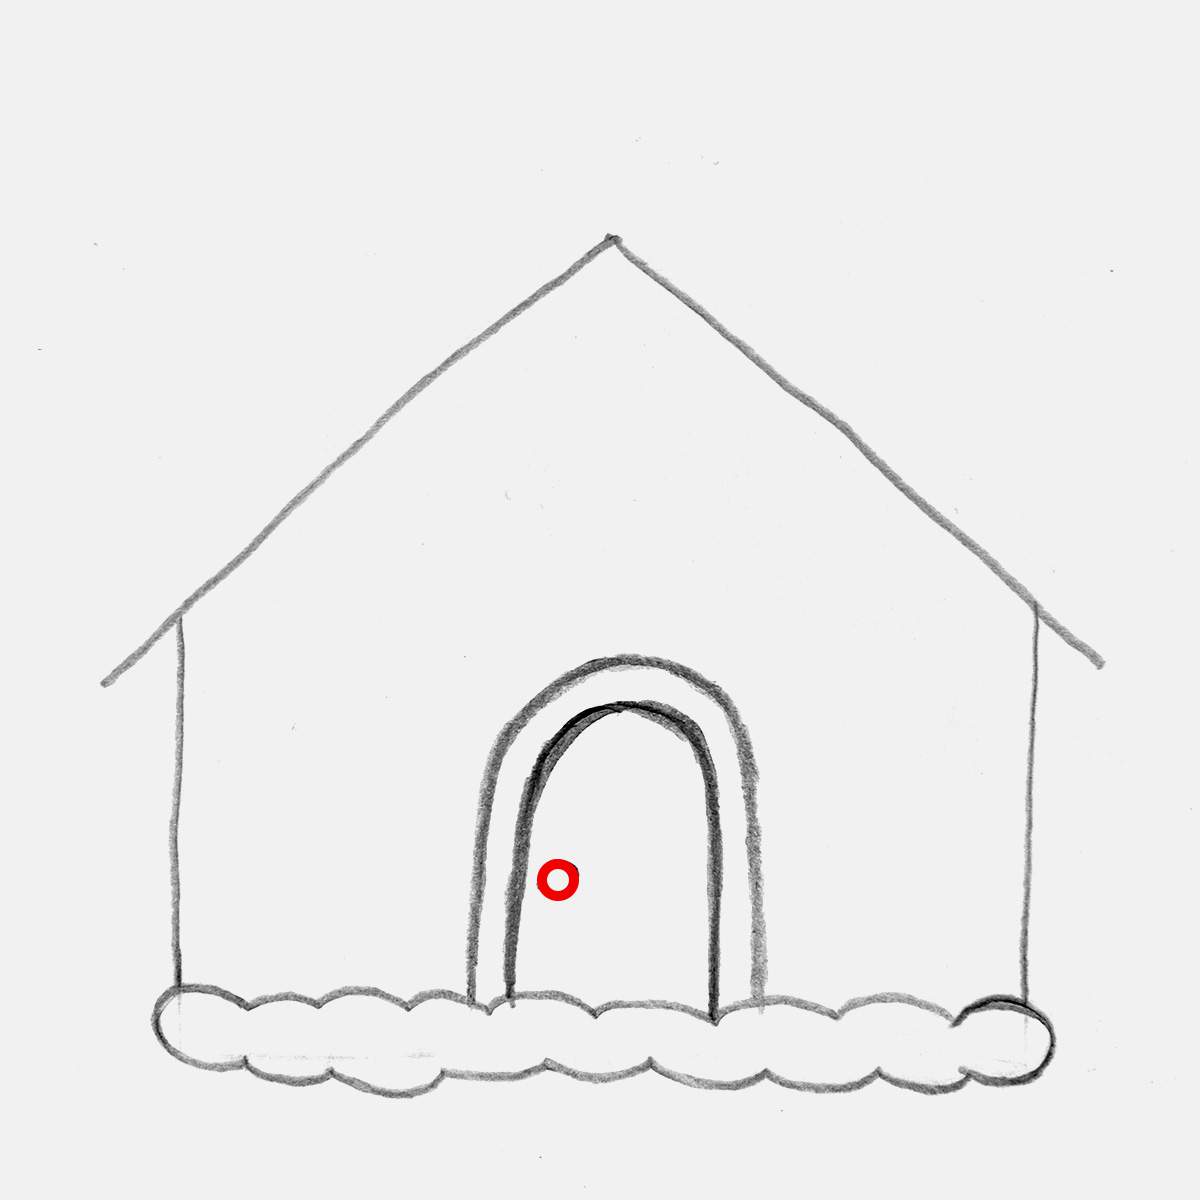
Next, I added a door, starting with a rectangle shape with a rounded top, aka a classic gingerbread house door shape.
You could make it just a rectangle, but there is something cozy about making the top rounded.
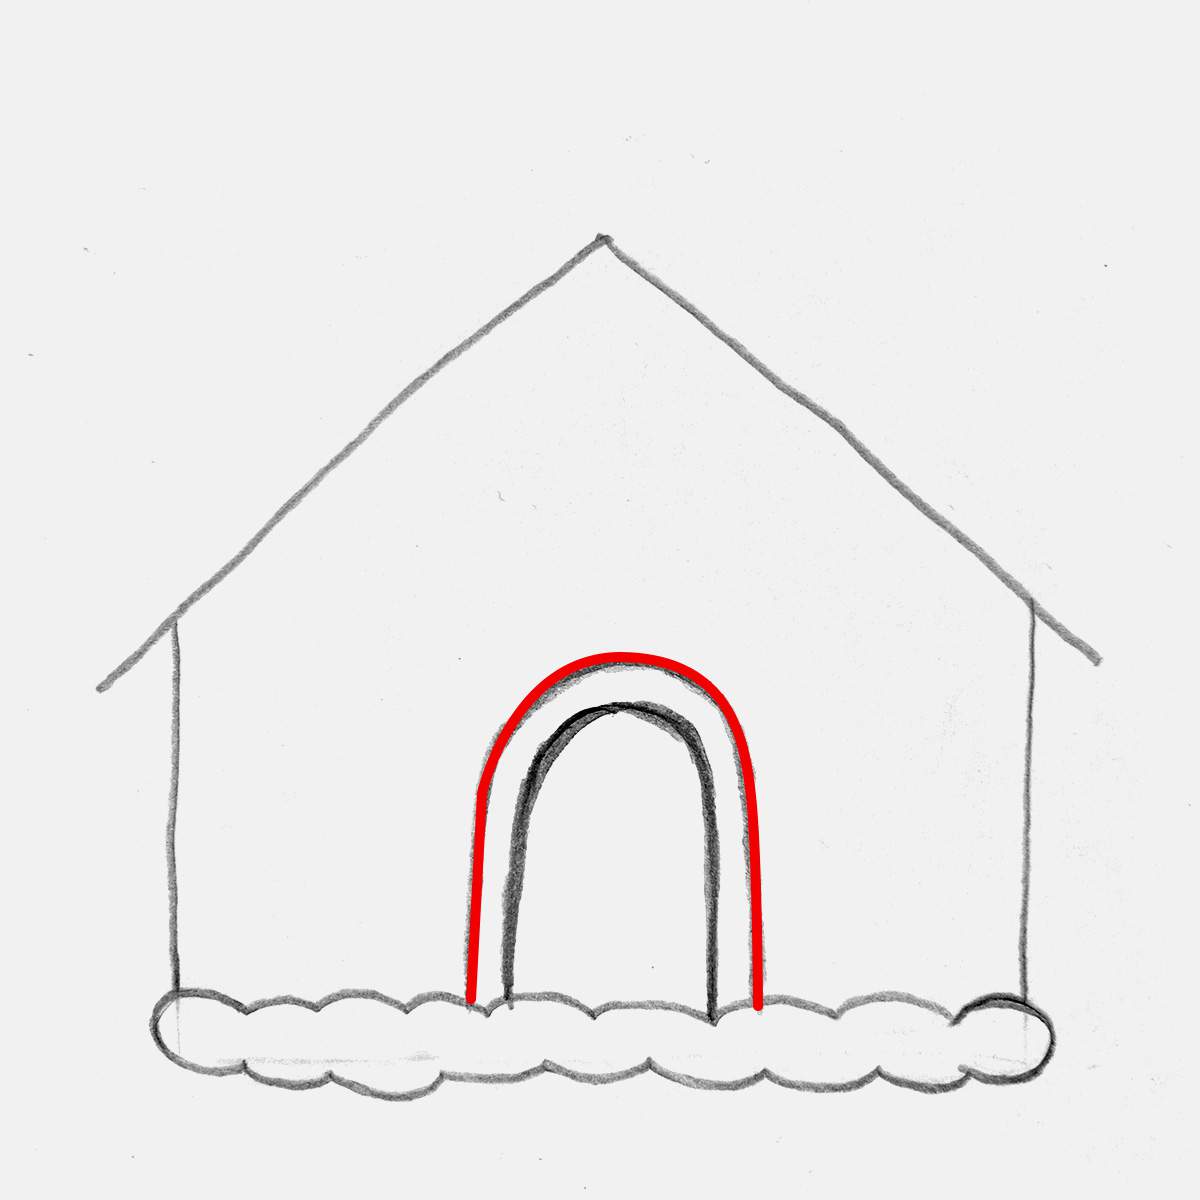
After sketching the outline of the door, I added another line around it. This is for the candy canes that are wrapped around the door.
Next, I added a small circle for the peppermint doorknob.
Step 4: Add a Small Upstairs Window to Your Gingerbread House Drawing
After that, I added the upstairs window.
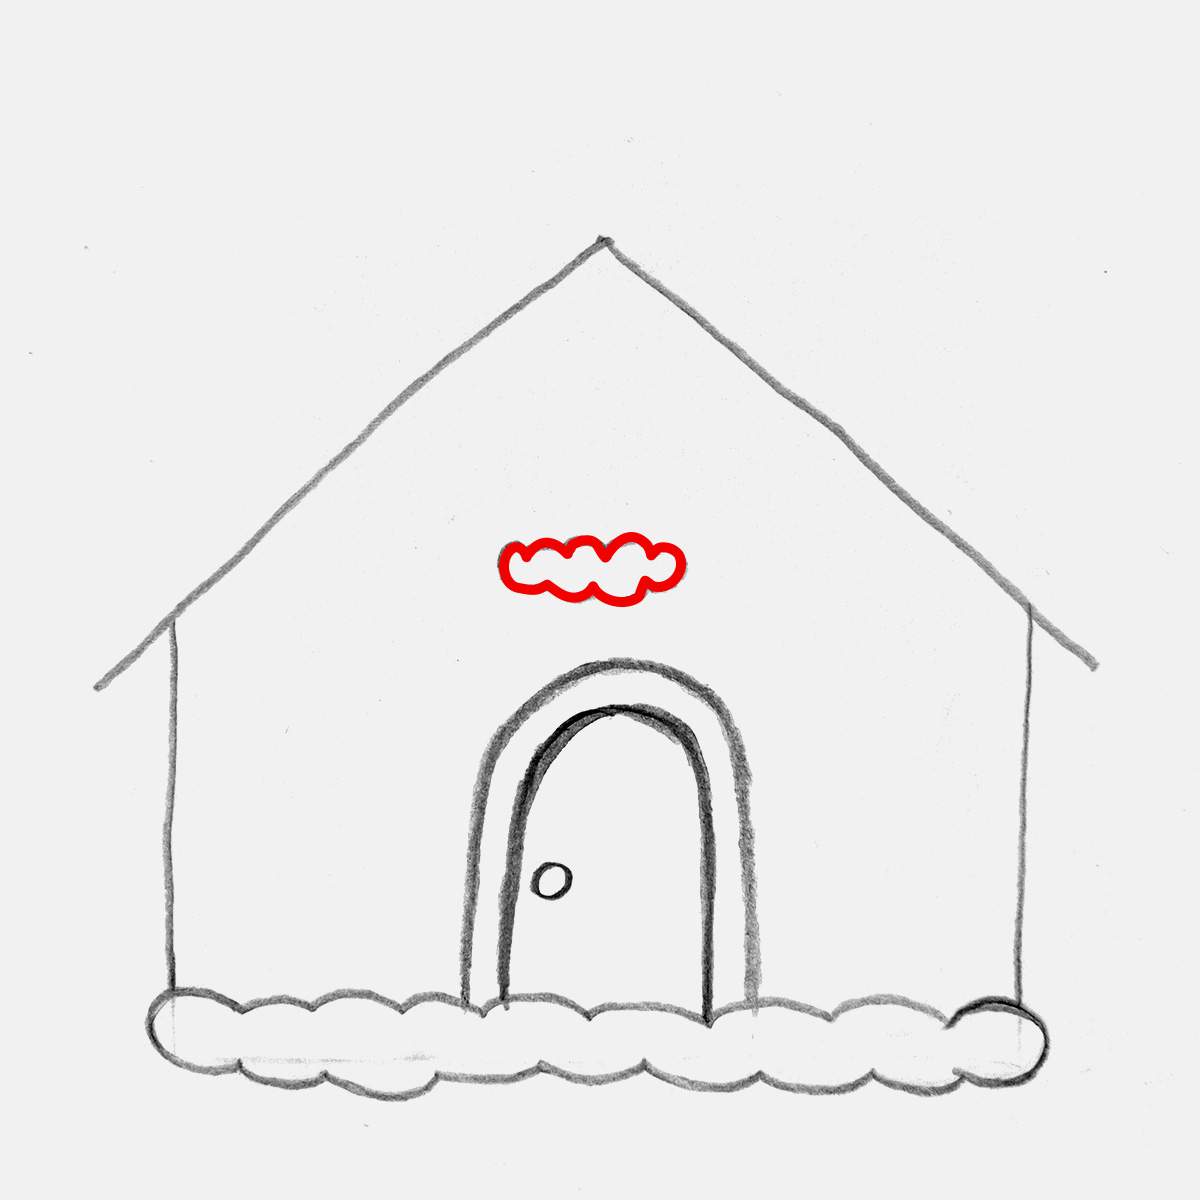
I started by sketching some fluffy icing snow for the windowsill.
Make sure to leave enough space on top for the window itself, but also for the icing drips on the roof.
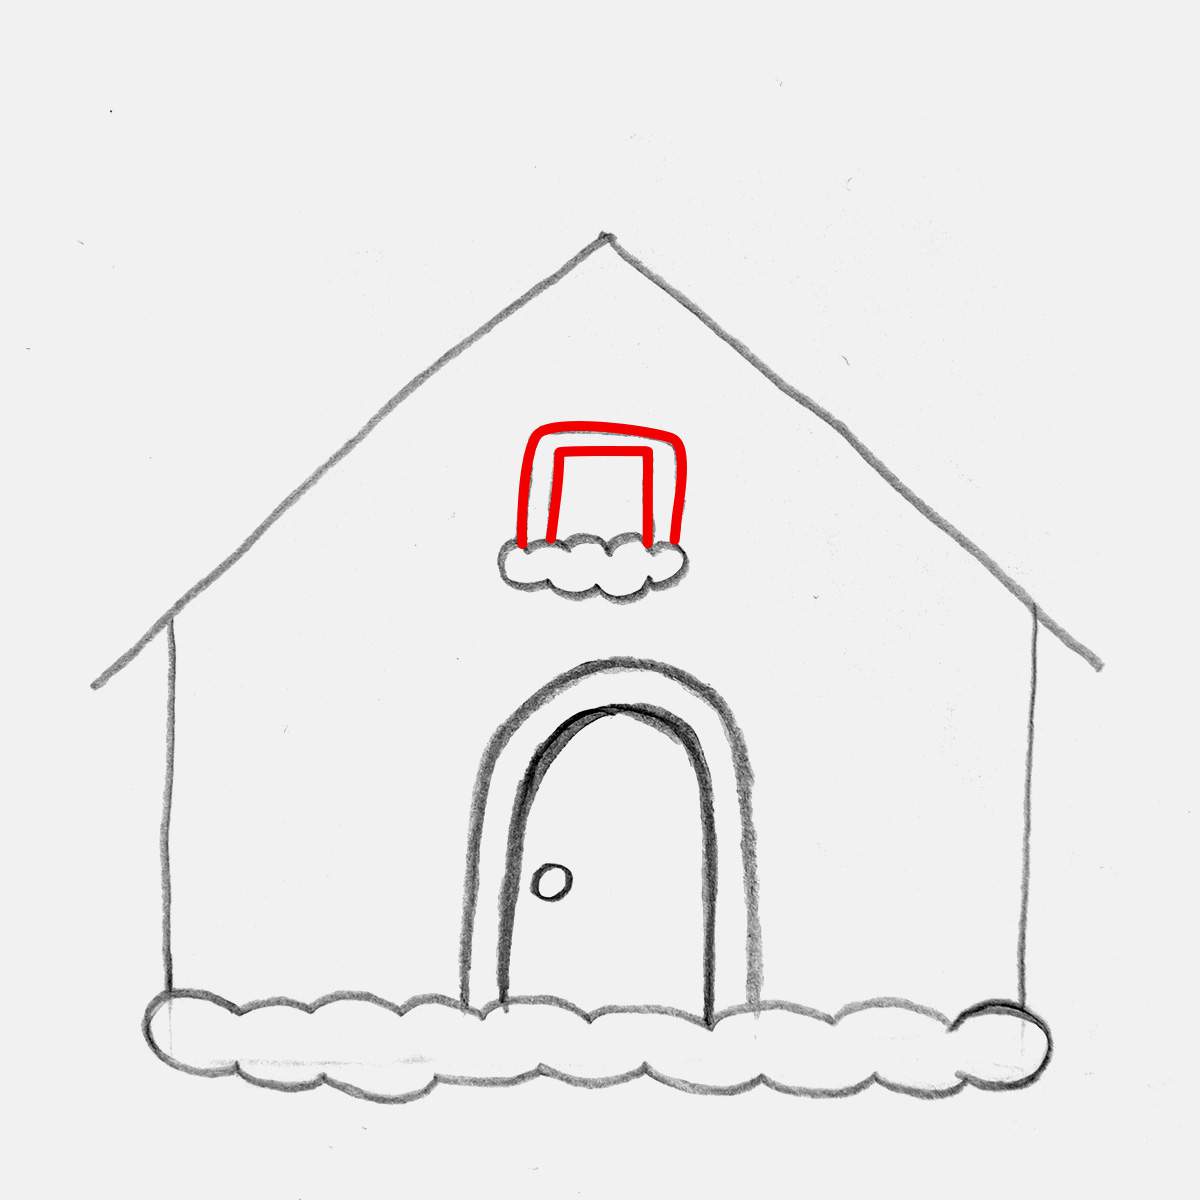
On top of the windowsill, I added two square shapes. One slightly bigger than the other. This will be for the icing frame.
Lastly, I added the window panes by sketching a cross in the smallest square. You could make this also icing, but I forgot, so I didn't.
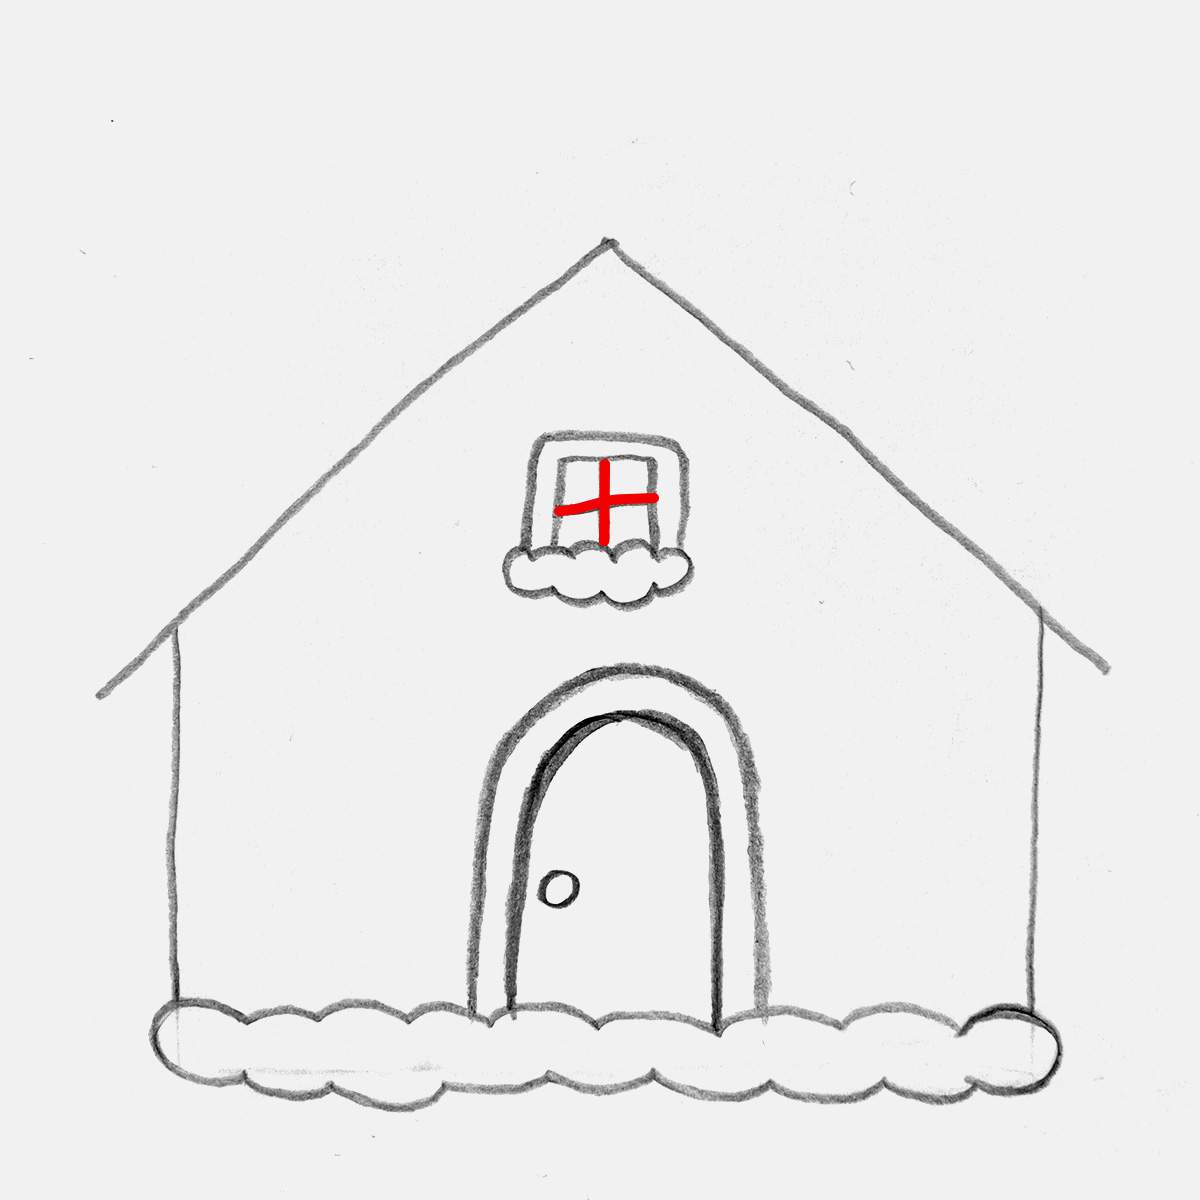
And that's the window all done.
Step 5: Decorate the Roof of the Gingerbread House
Next up is the roof, and this was pretty fun to sketch. Adding the icing drips really makes our gingerbread house sketch look like a gingerbread house.
To start, I added a wobbly line above the roof, kinda like snow on a roof, and I made the ends drip down.
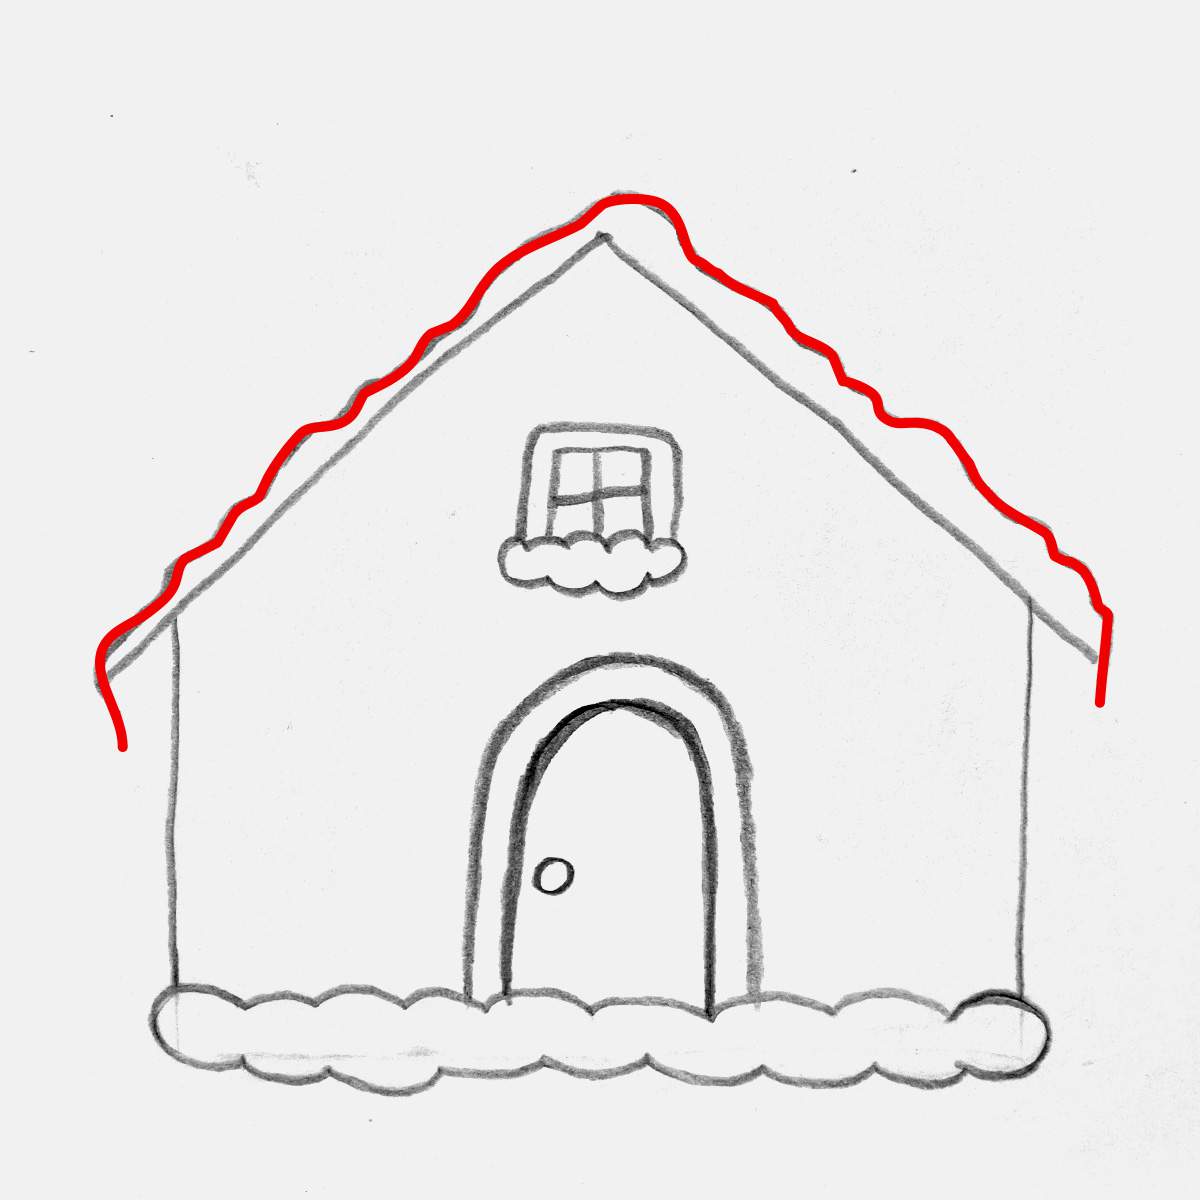
Then, I added all the icing drips to resemble icicles hanging over the edge of the roof. You don't have to copy my sketch exactly. Just let your hand decide where to add drips and where to add some wobbles.
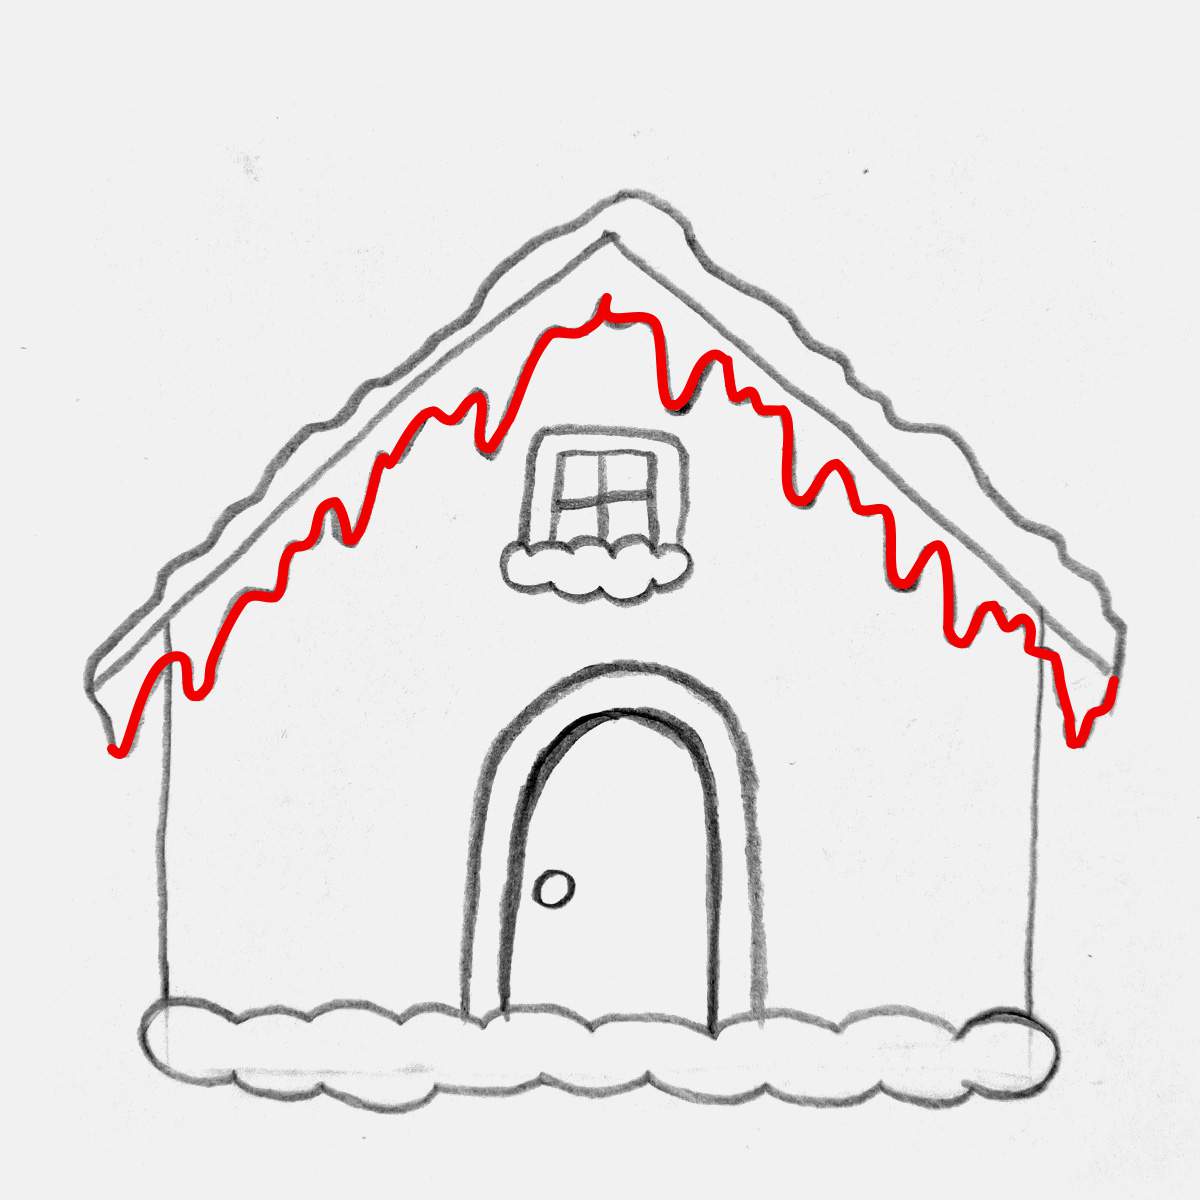
There is one part I didn't like, and that is the top middle part. It's a little too symmetrical and weirdly shaped. I did change this in a later step.
But for now, let's continue by decorating the roof.
To decorate the roof, I added 8 small circles (gumdrops) and a bigger circle (peppermint candy). I made sure to overlap the icing on the roof to make it look like they are stuck in instead of about to roll off.
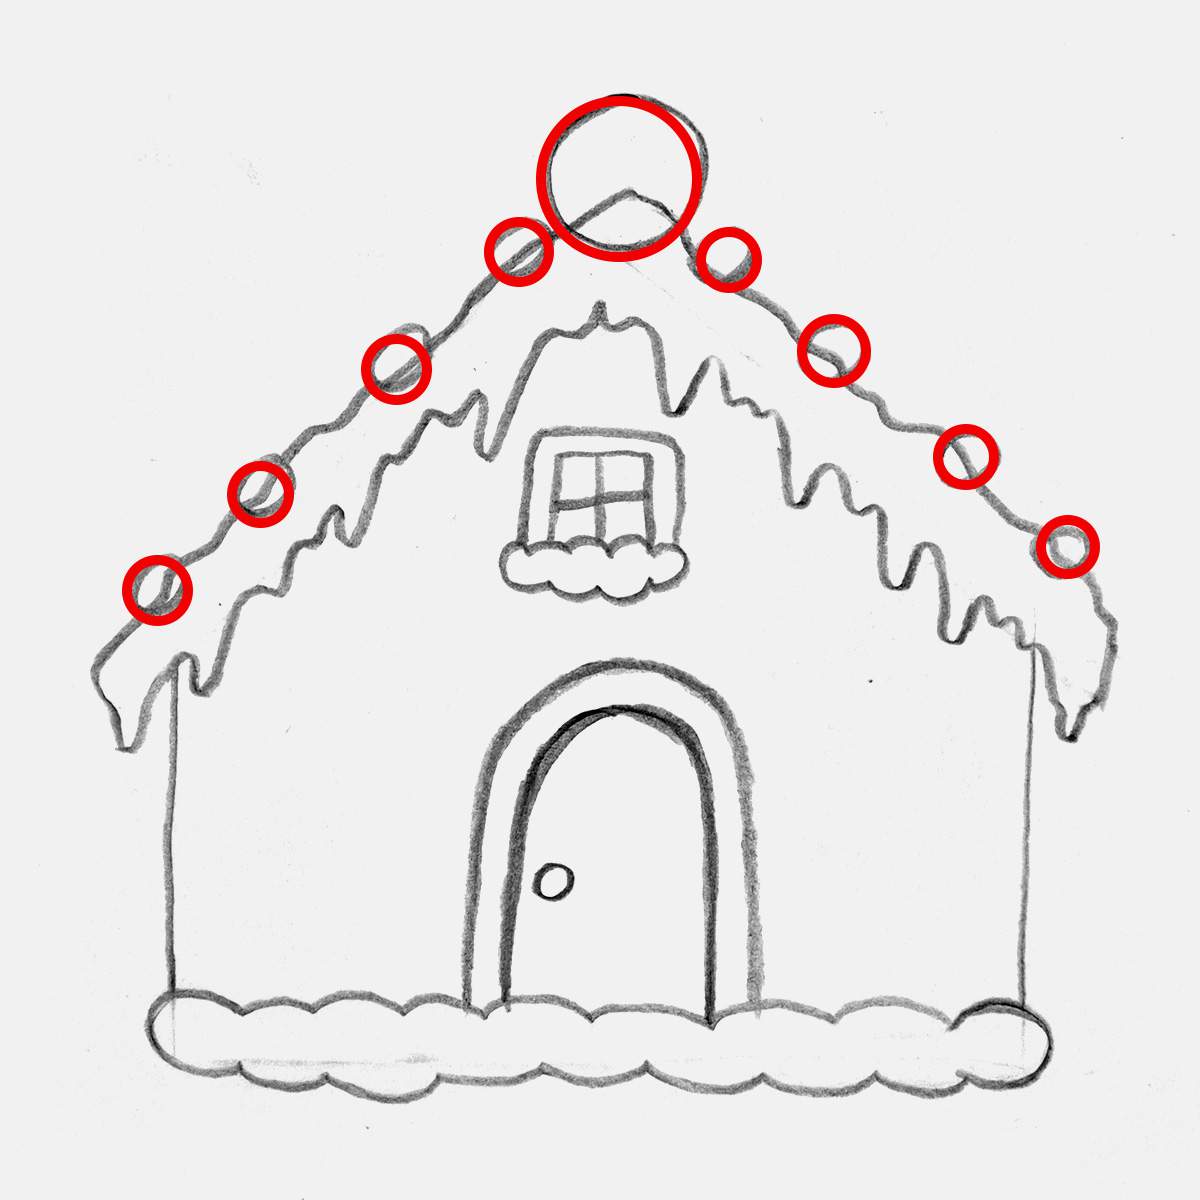
Next, I erased all the lines overlapping with the circles, and I started dividing the peppermint candy into the red and white stripes.
I first sketched a cross on the peppermint candy to divide it into 4 equal sections.
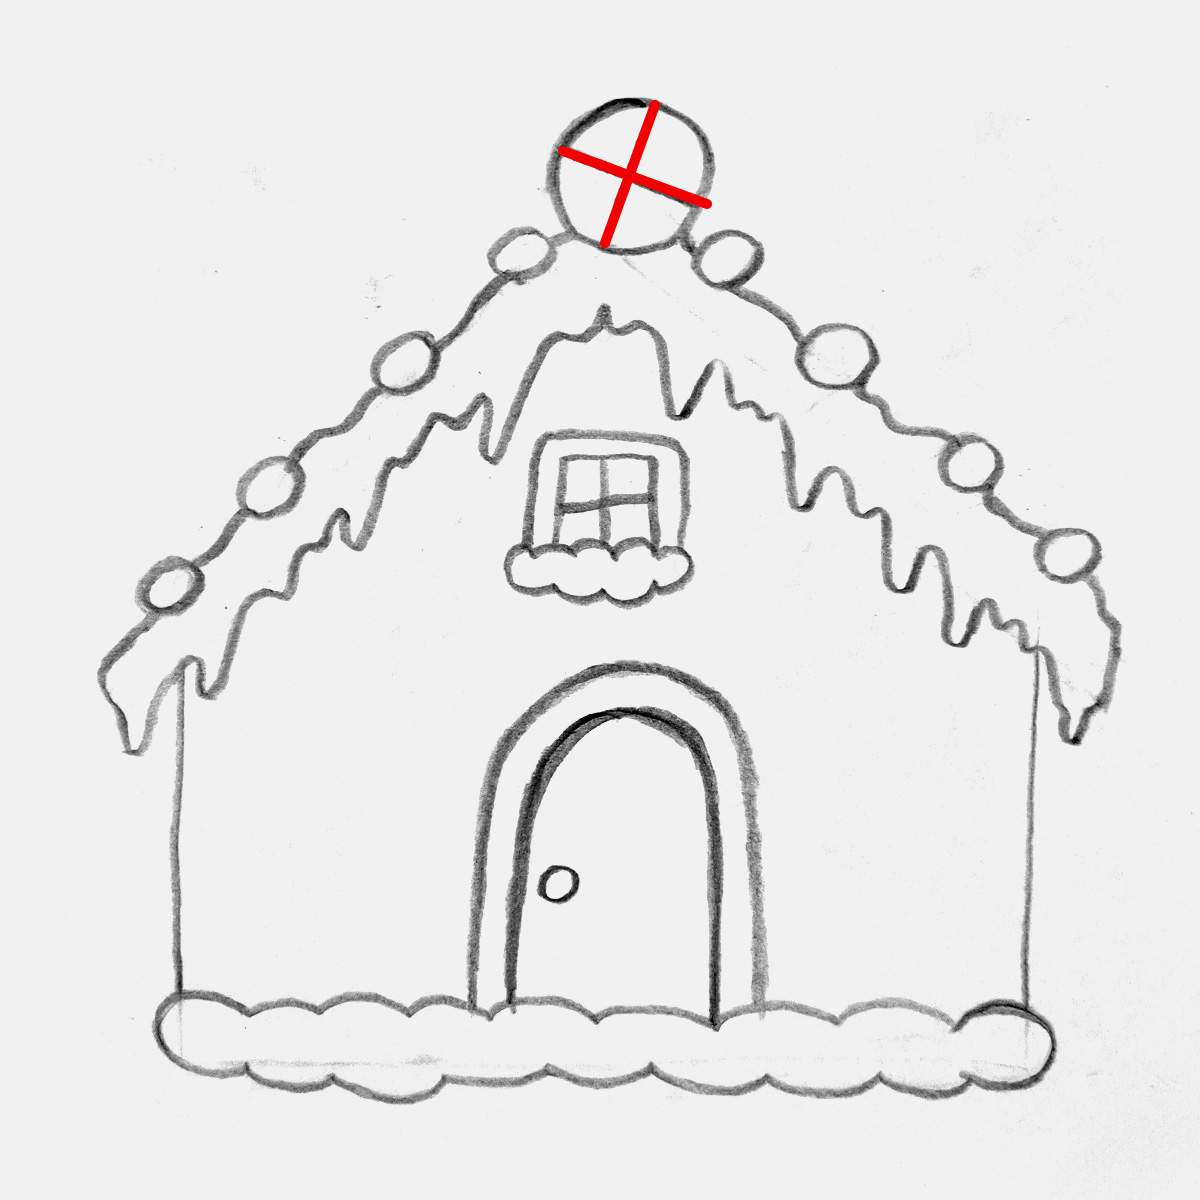
And then, I added 2 equally spaced lines in each quadrant.
And to make sure there was an even number of parts, I marked every other one with a dot, and luckily I did it right.
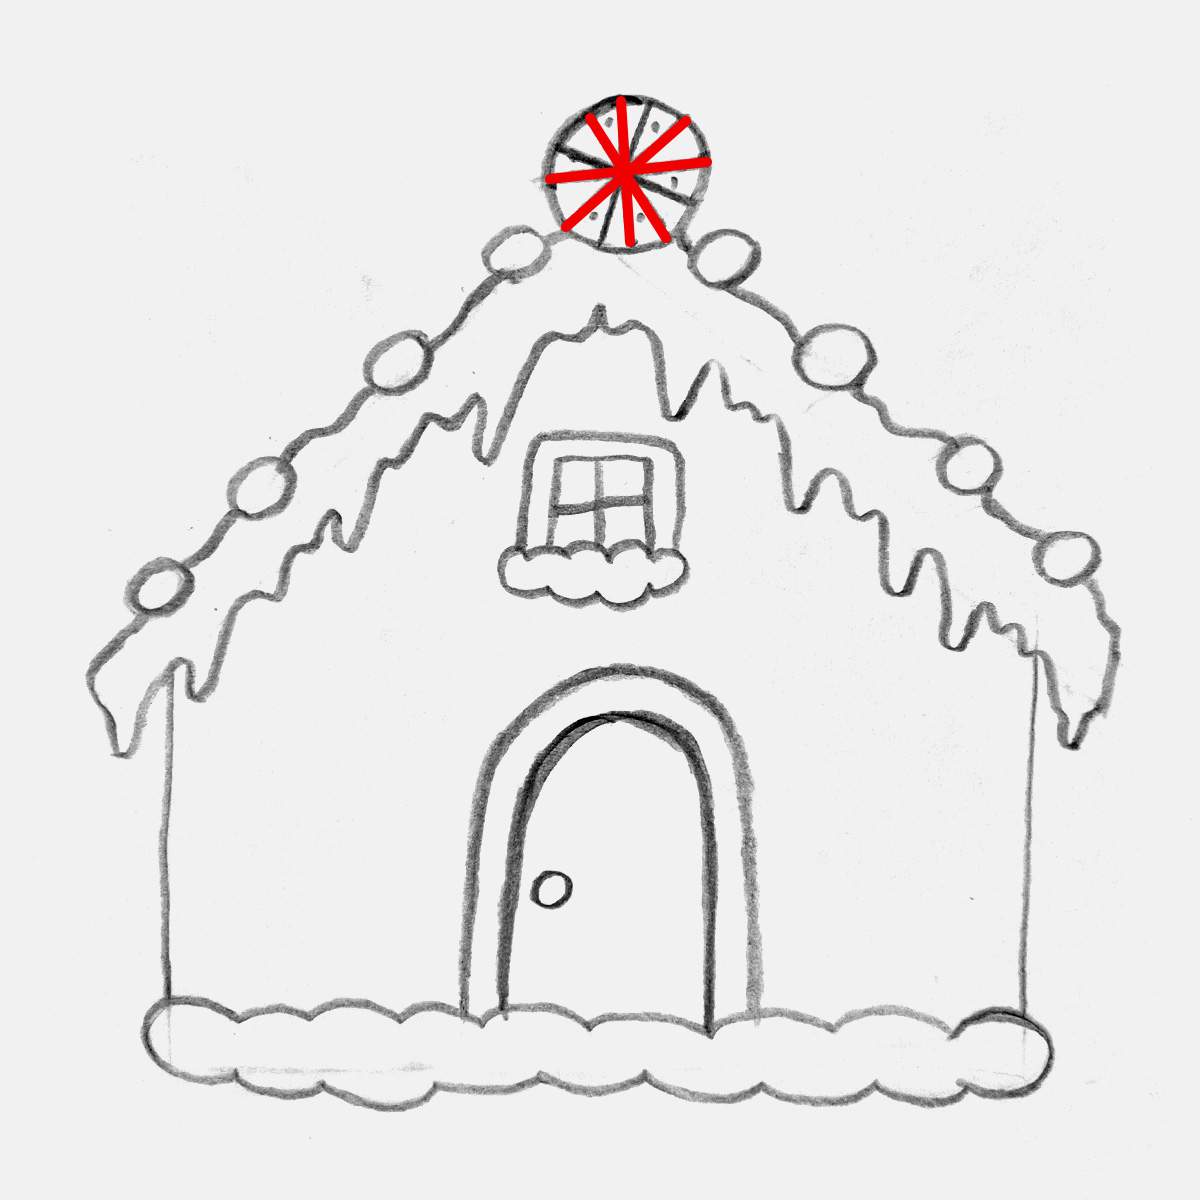
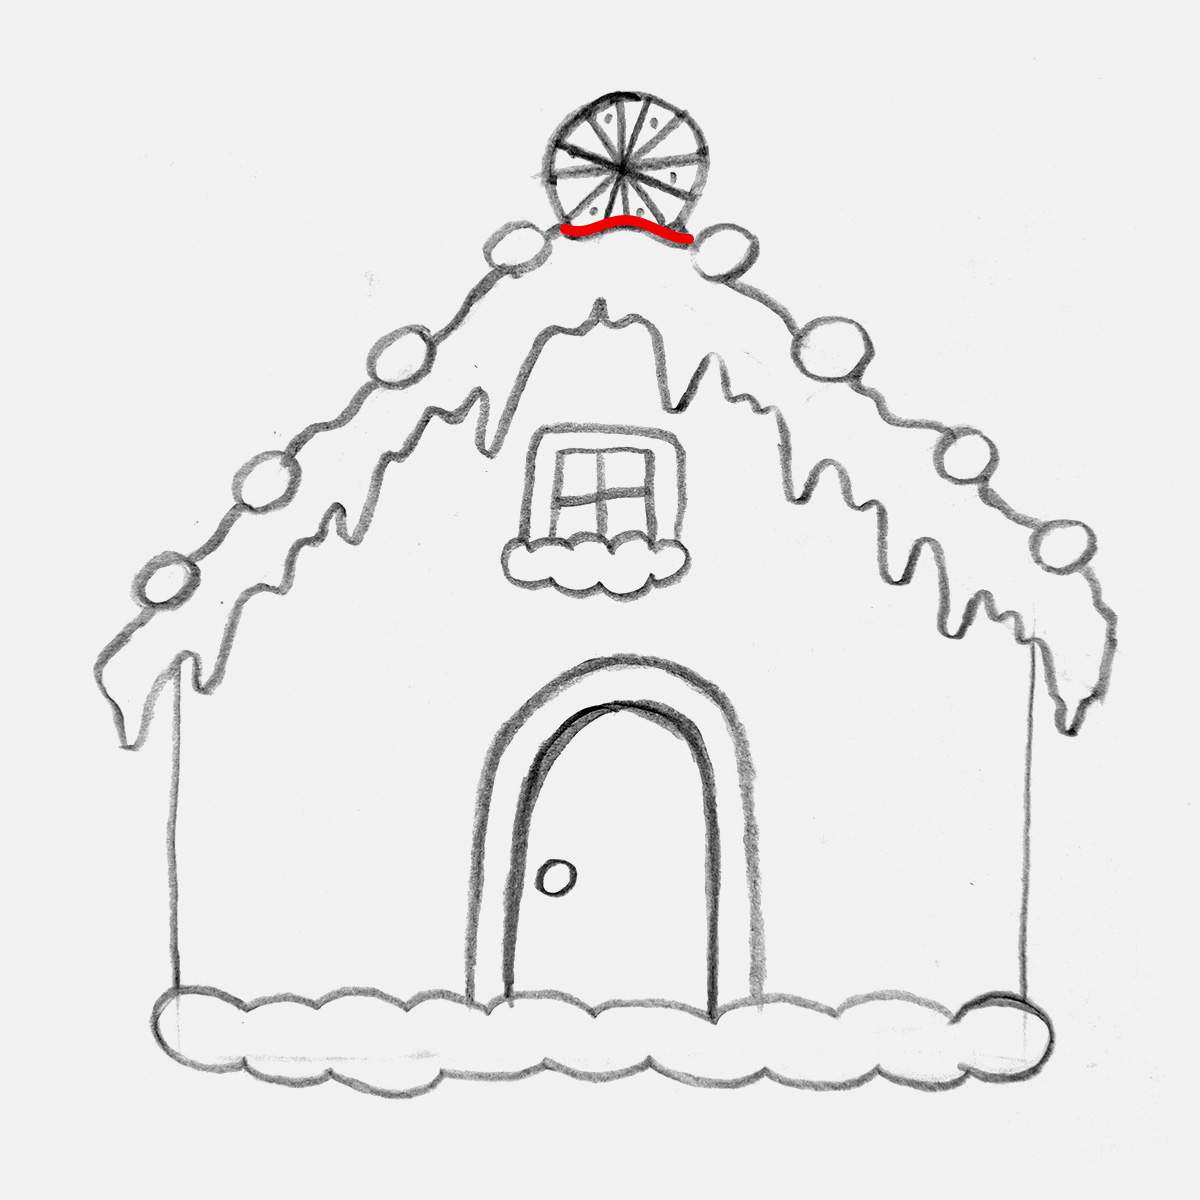
At the moment, the peppermint candy does not look stuck into the icing. So let's change that.
I sketched a wavy line overlapping the bottom of the peppermint candy and erased the bottom bit of the candy.
Now it looks well stuck in the icing.
Step 6: Add a Chimney on the Roof
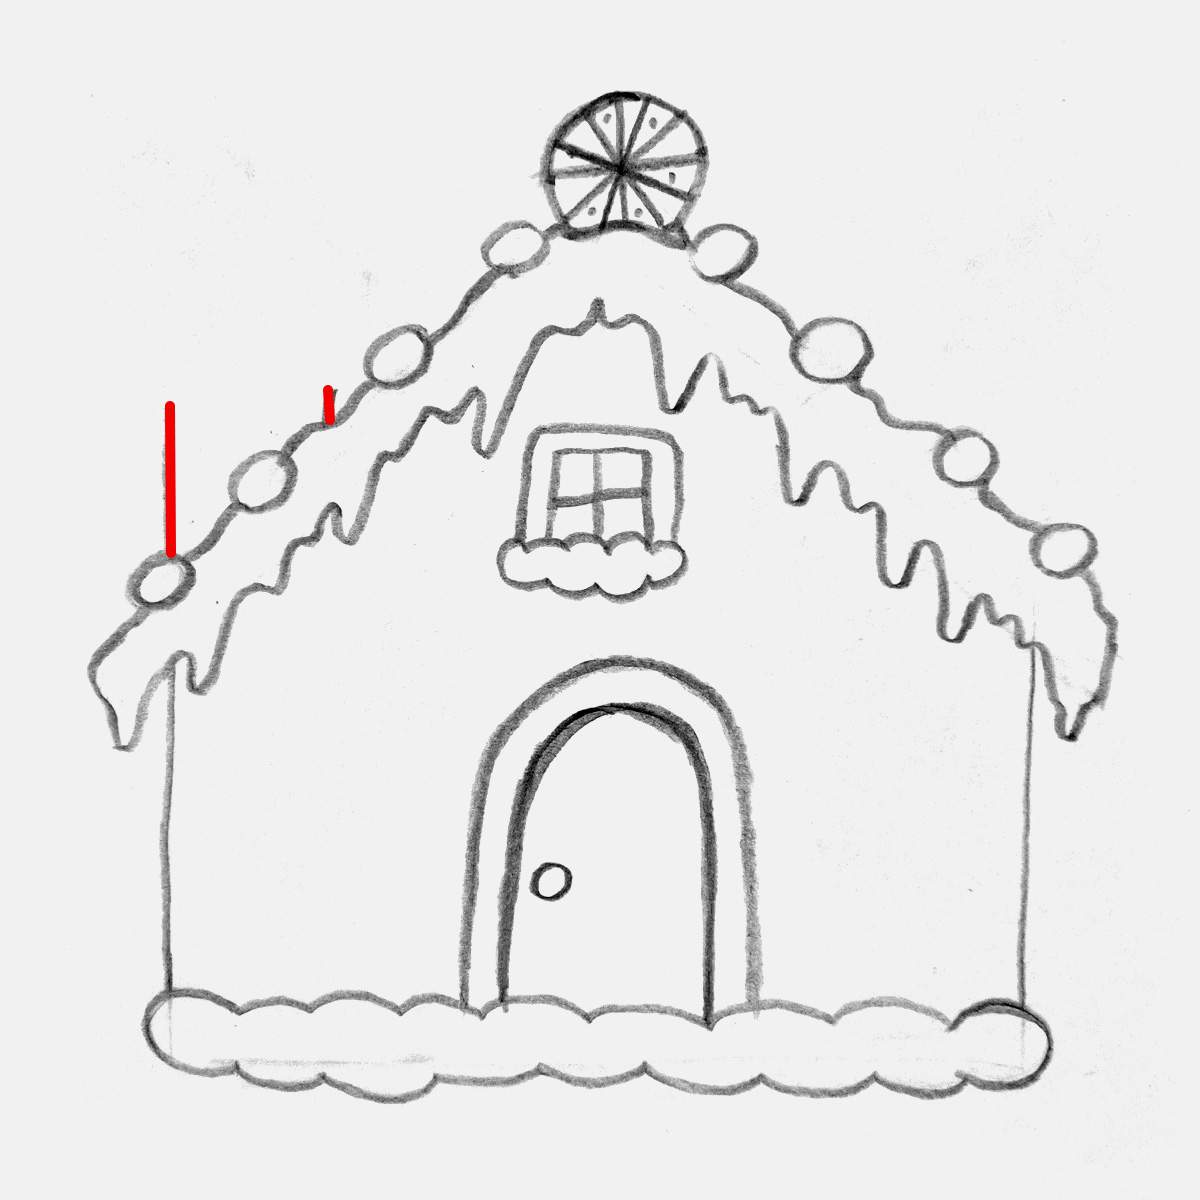
No gingerbread house is complete without a chimney, so I had to add one in my drawing, too.
To start, I sketch two vertical lines on the left side of the roof. They go to about the same height.
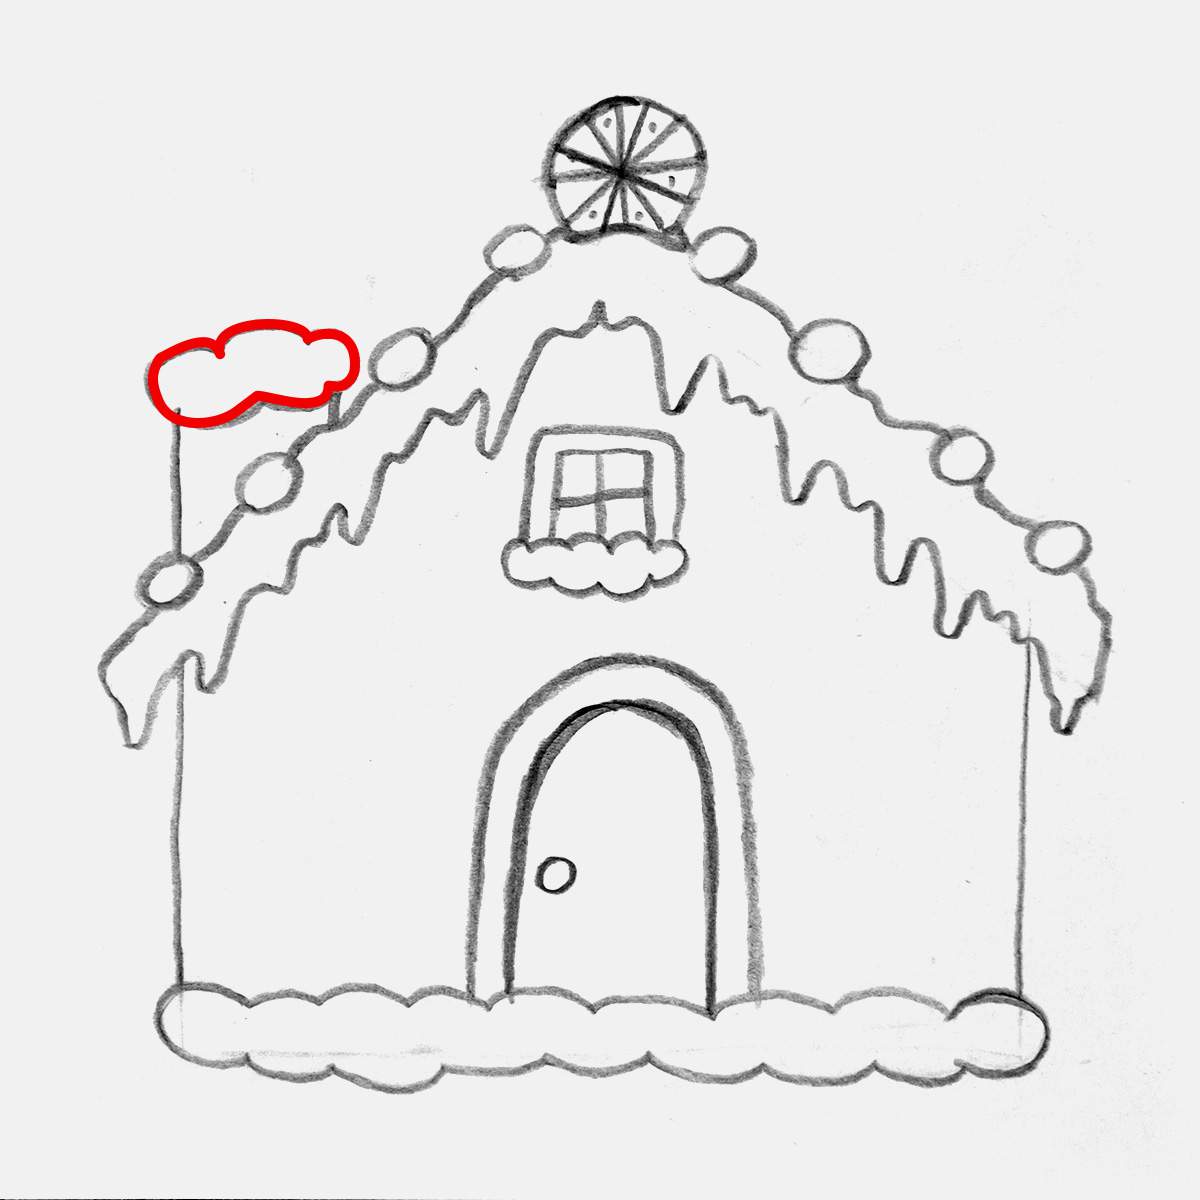
Next, I created more fluffy-looking icing snow and placed it on top of the chimney.
And to complete the chimney, I added a brick texture with 2 horizontal lines and 3 shorter vertical ones.
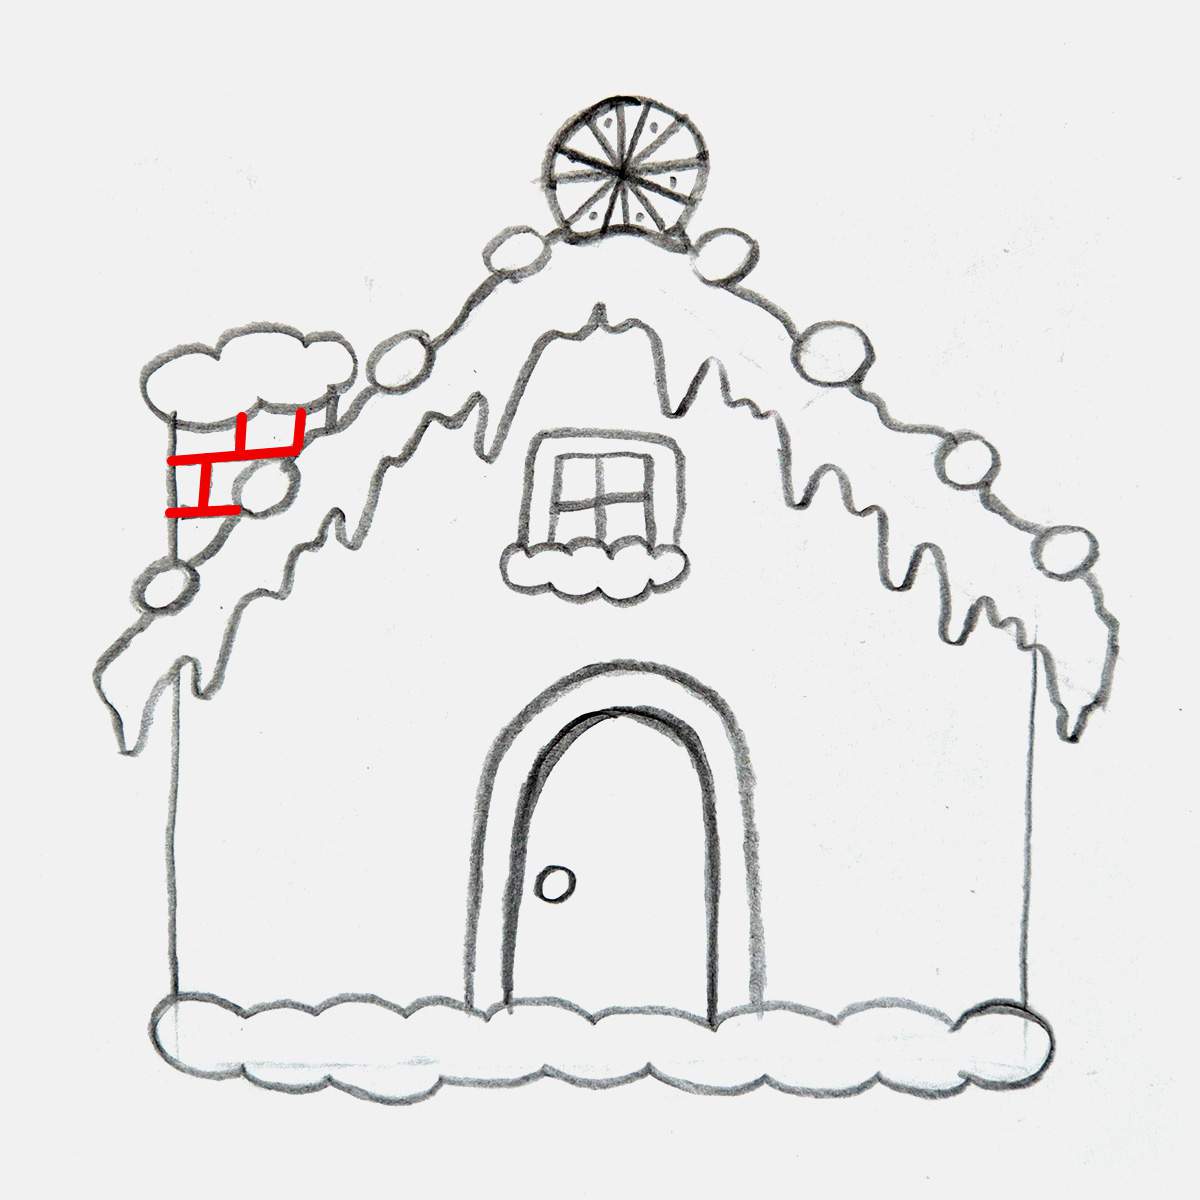
And that's the roof of our gingerbread house all sketched.
Step 7: Decorate the Front of the Gingerbread House
Now that the roof of the gingerbread house looks nicely decorated, it makes the front wall of the house look a bit dull.
The first thing I added as decoration is a small tree on the right, made up of gumdrops.
I started by sketching a wonky circle a little bit off the ground to leave some space for the tree trunk.
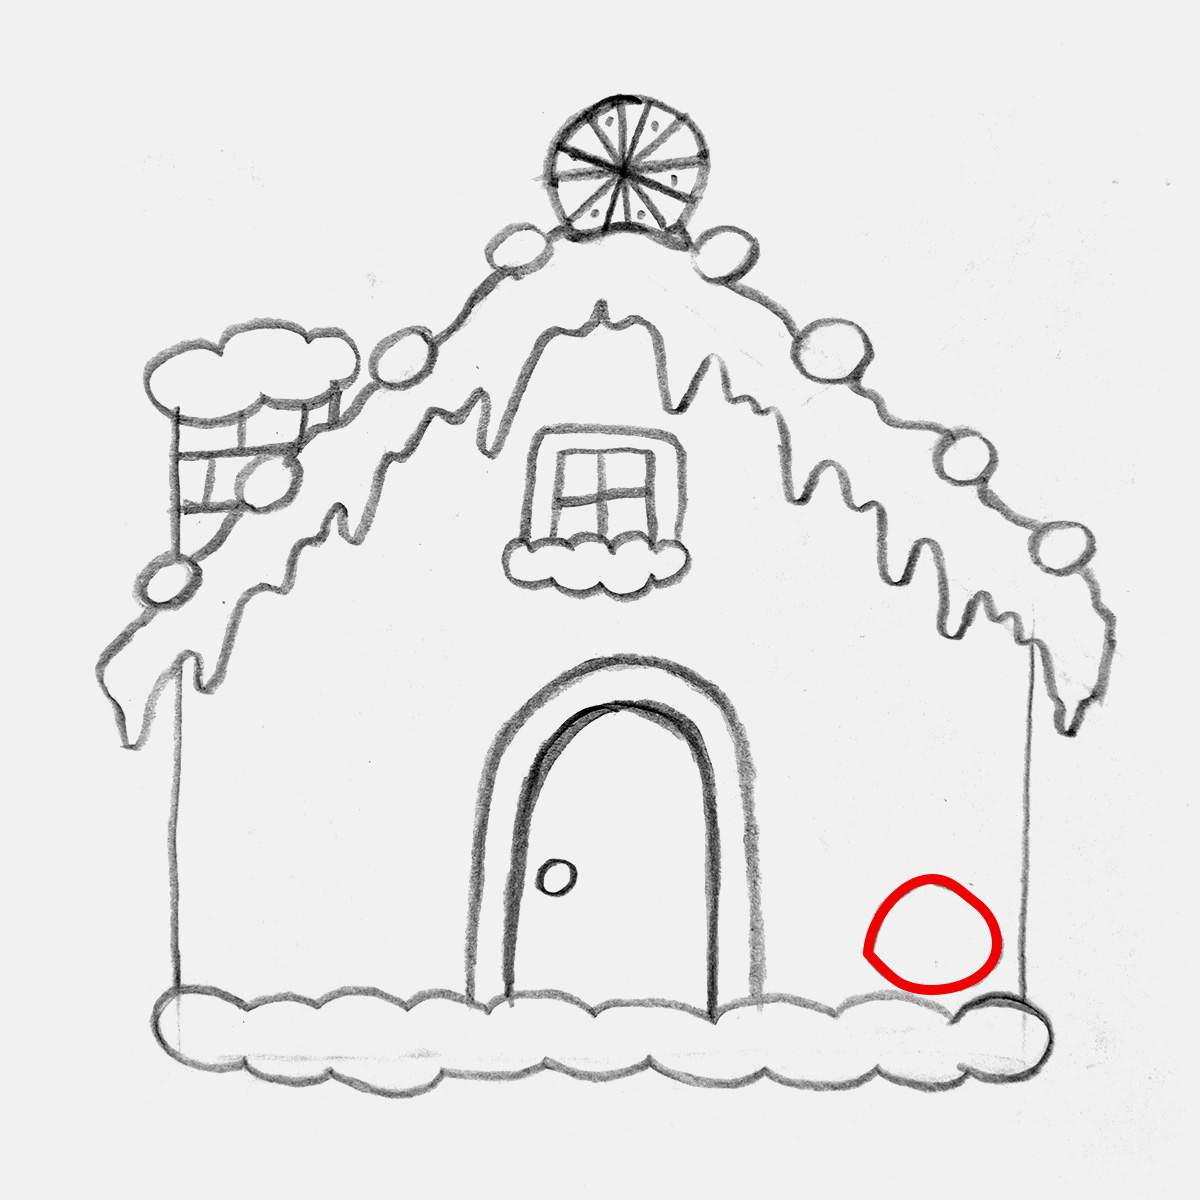
Then, I added two small lines below it for the trunk, and I added two more round gumdrop shapes.
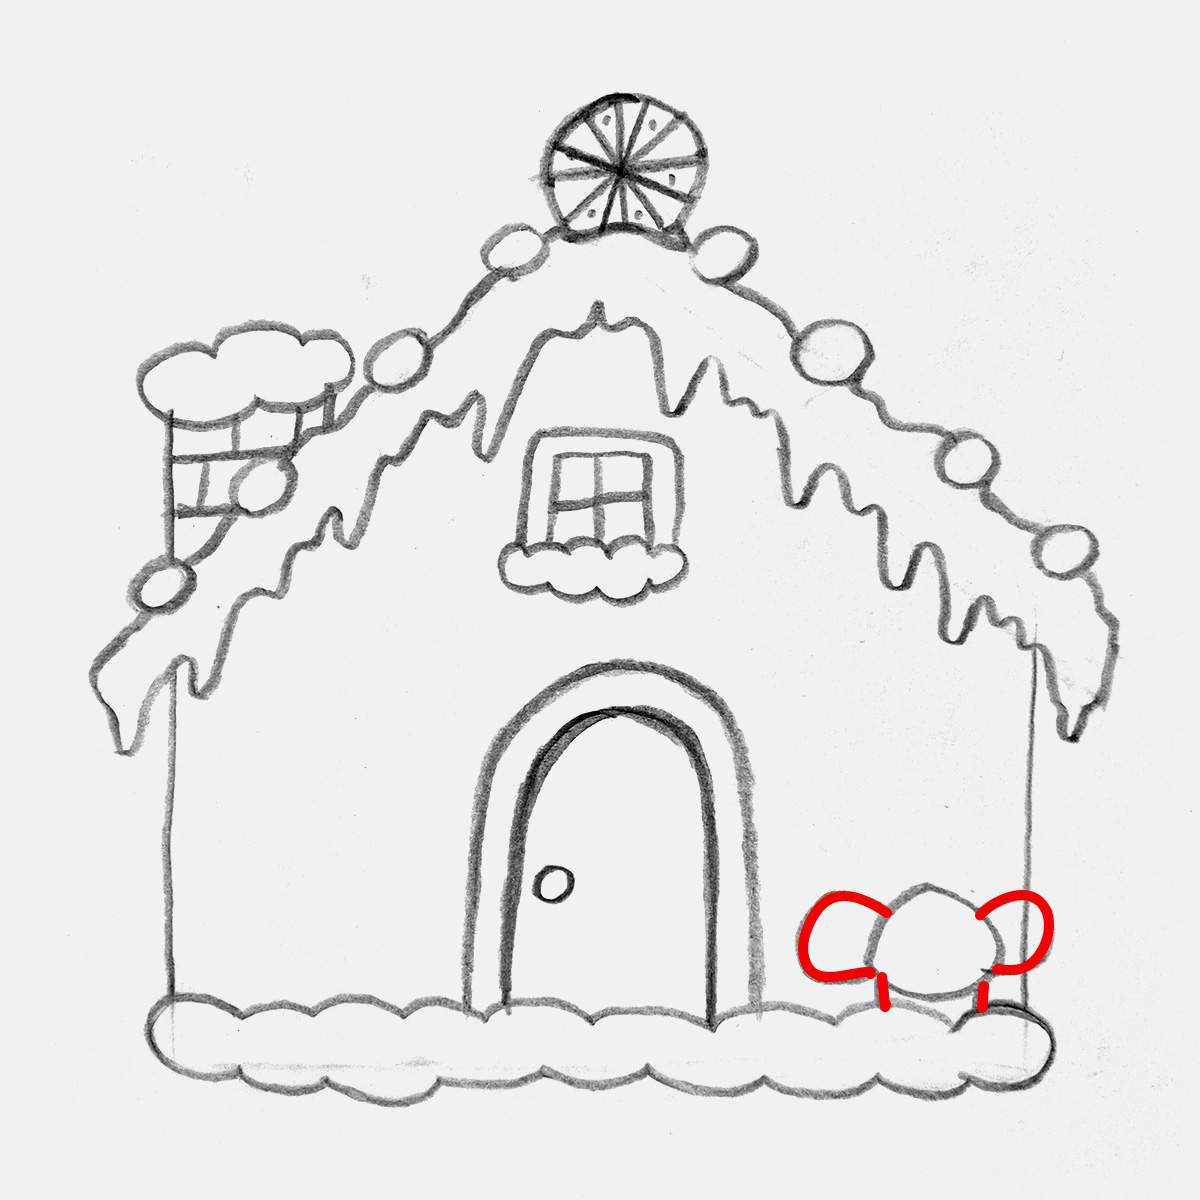
And to complete this little gumdrop tree, I added 3 more gumdrops on top.
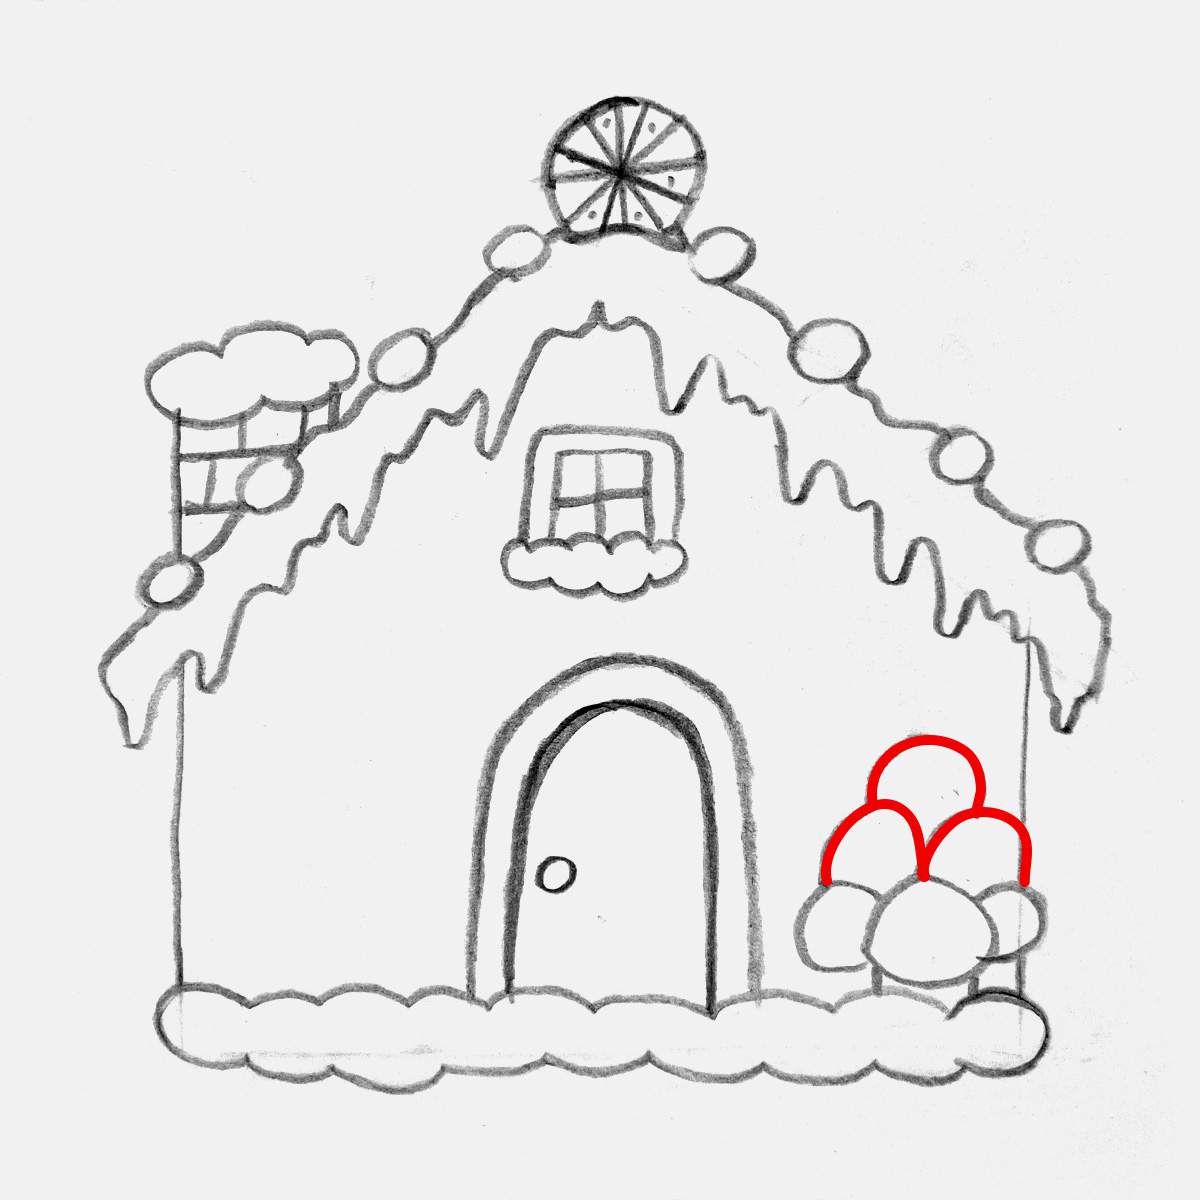
After that, I focused my attention on decorating the left half of the gingerbread house.
I added a big and a smaller round gumdrop.
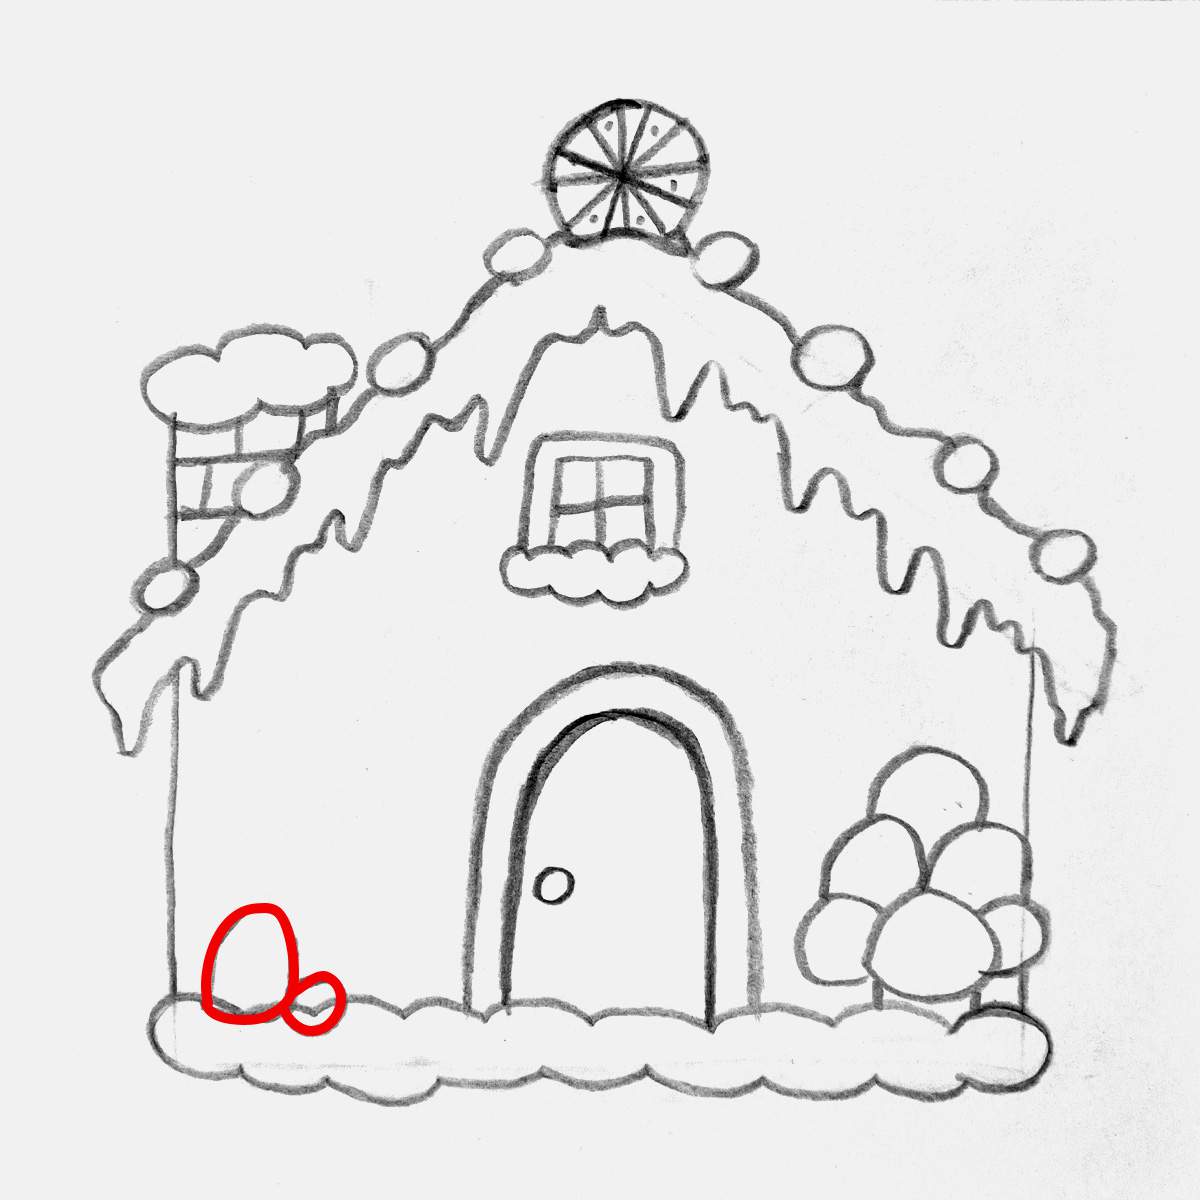
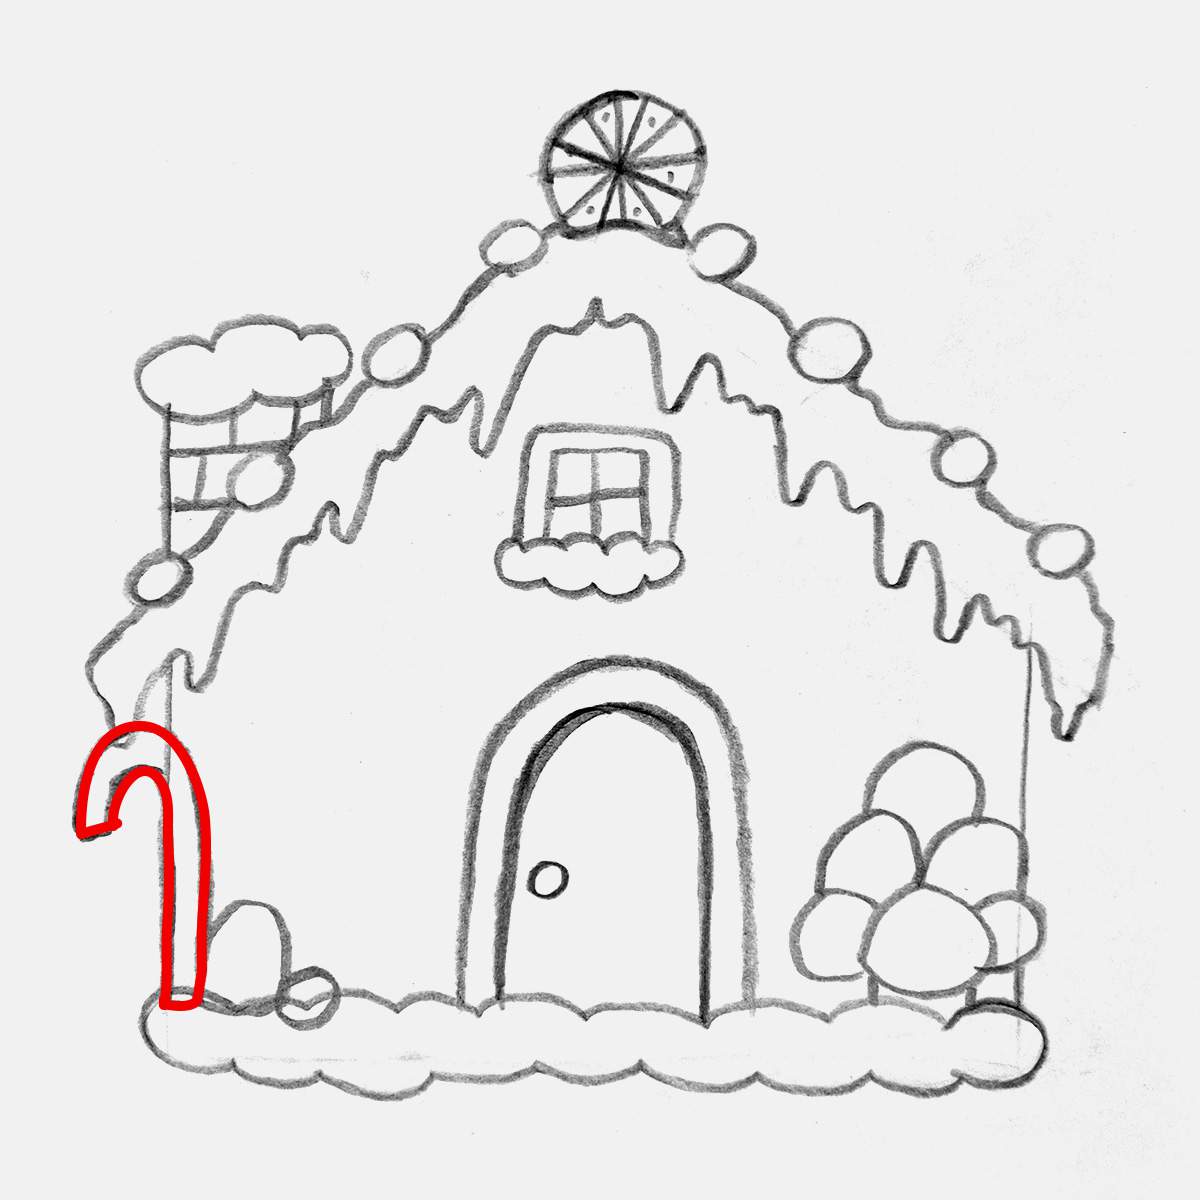
Then, I added a candy cane.
To sketch the candy cane, I first sketched the outer edge. Then, I tried to add the inside line with equal spacing, which is more difficult than it seems. When I was happy, I connected them together at the bottom end and the top end.
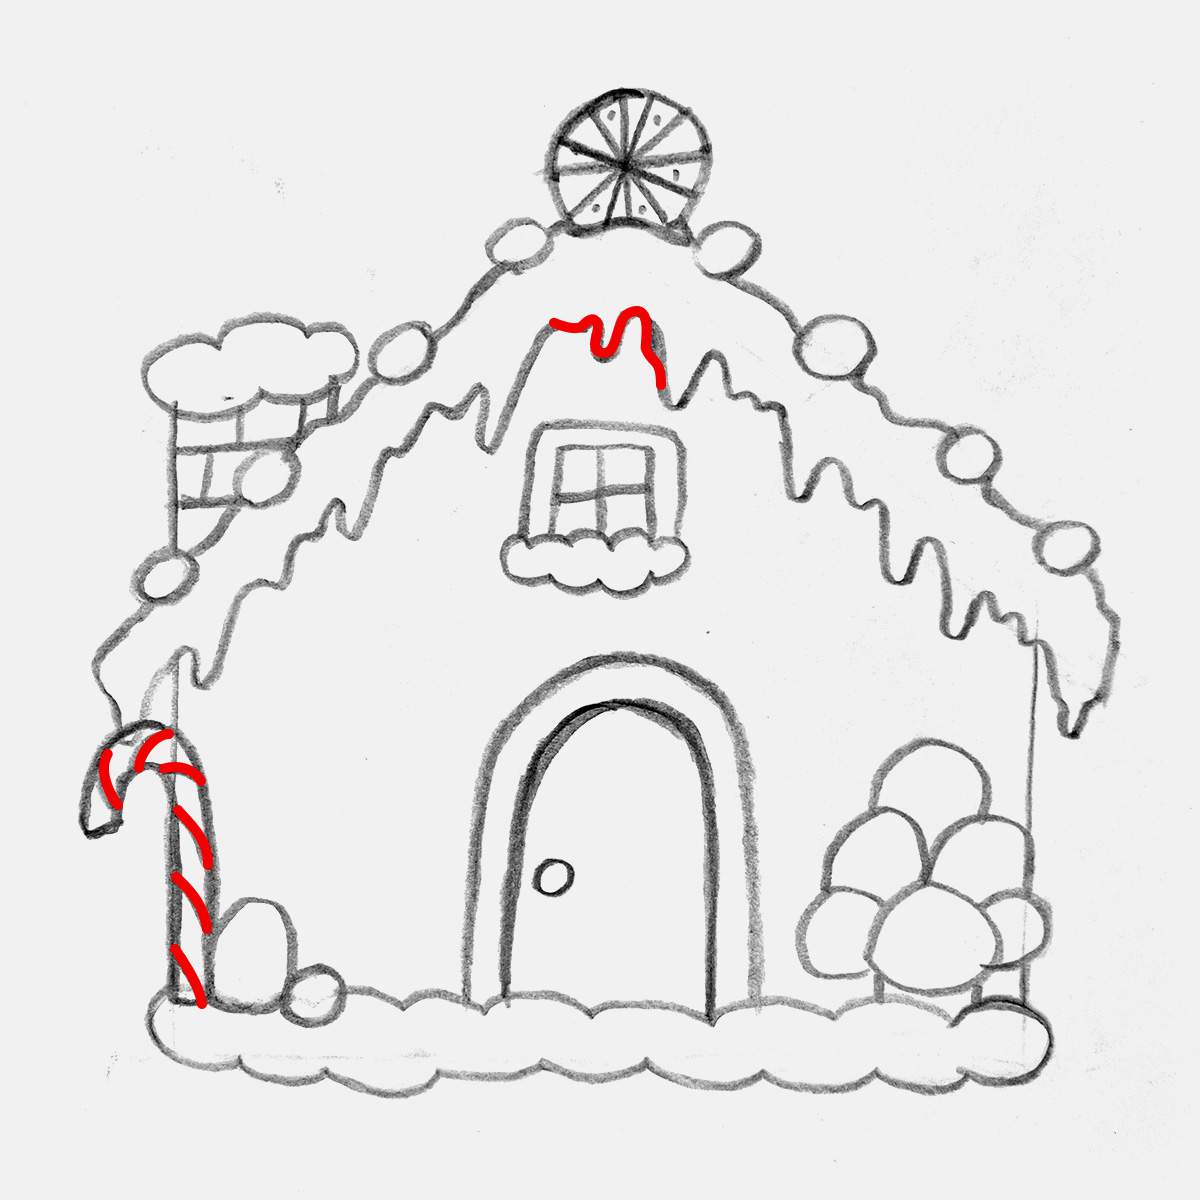
Next, I added curved lines to mark which parts will be red and which ones white.
I also changed the weird icing drip bit on the roof. I made it look a lot more organic, which I prefer.
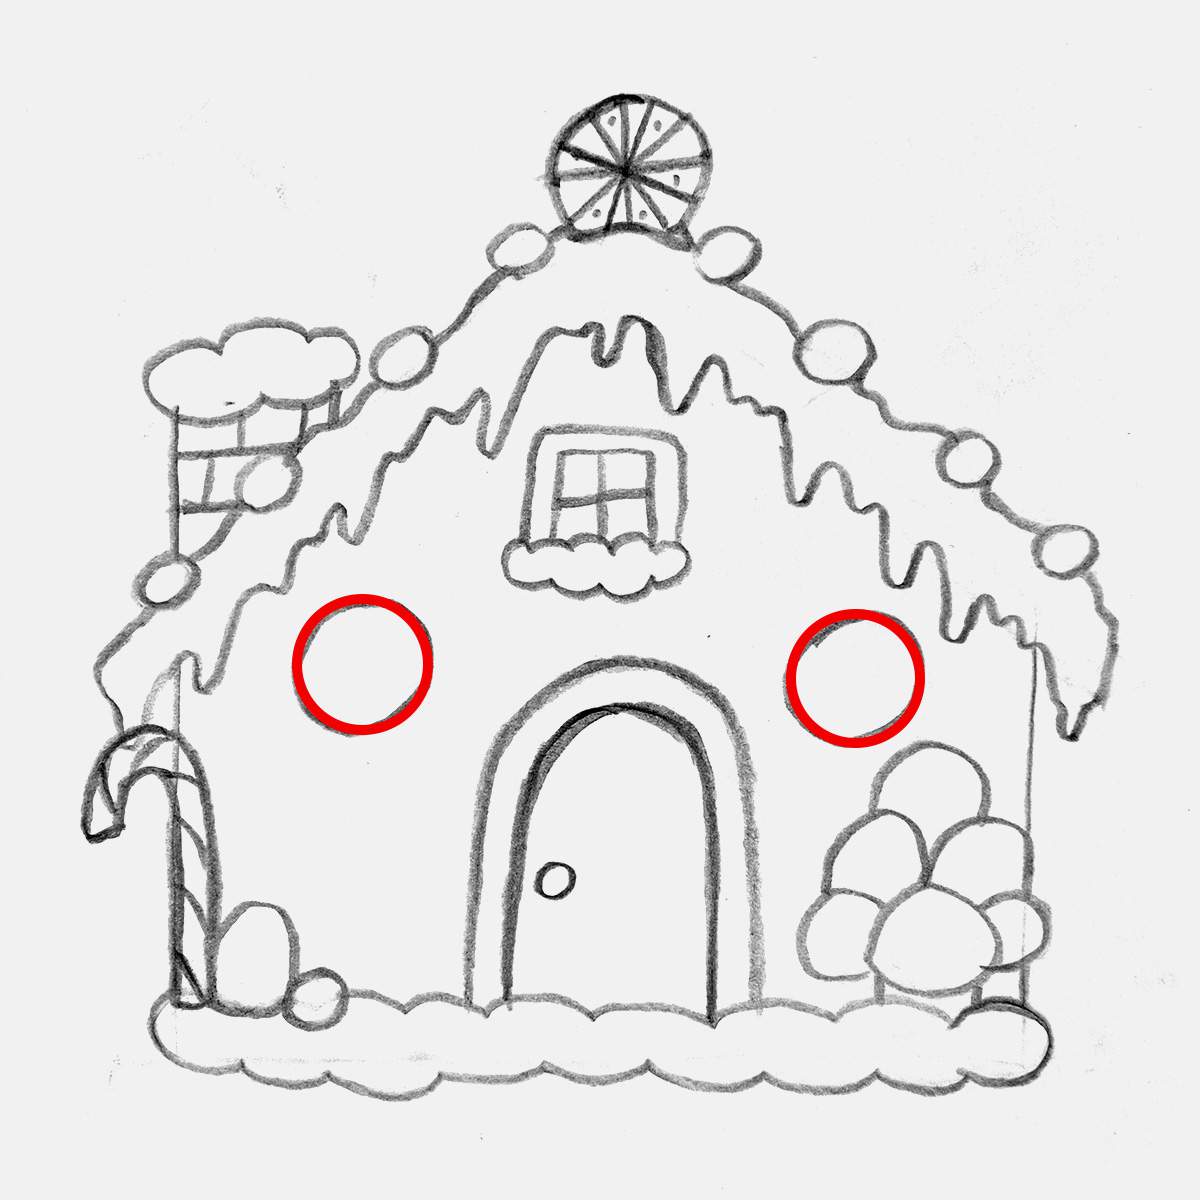
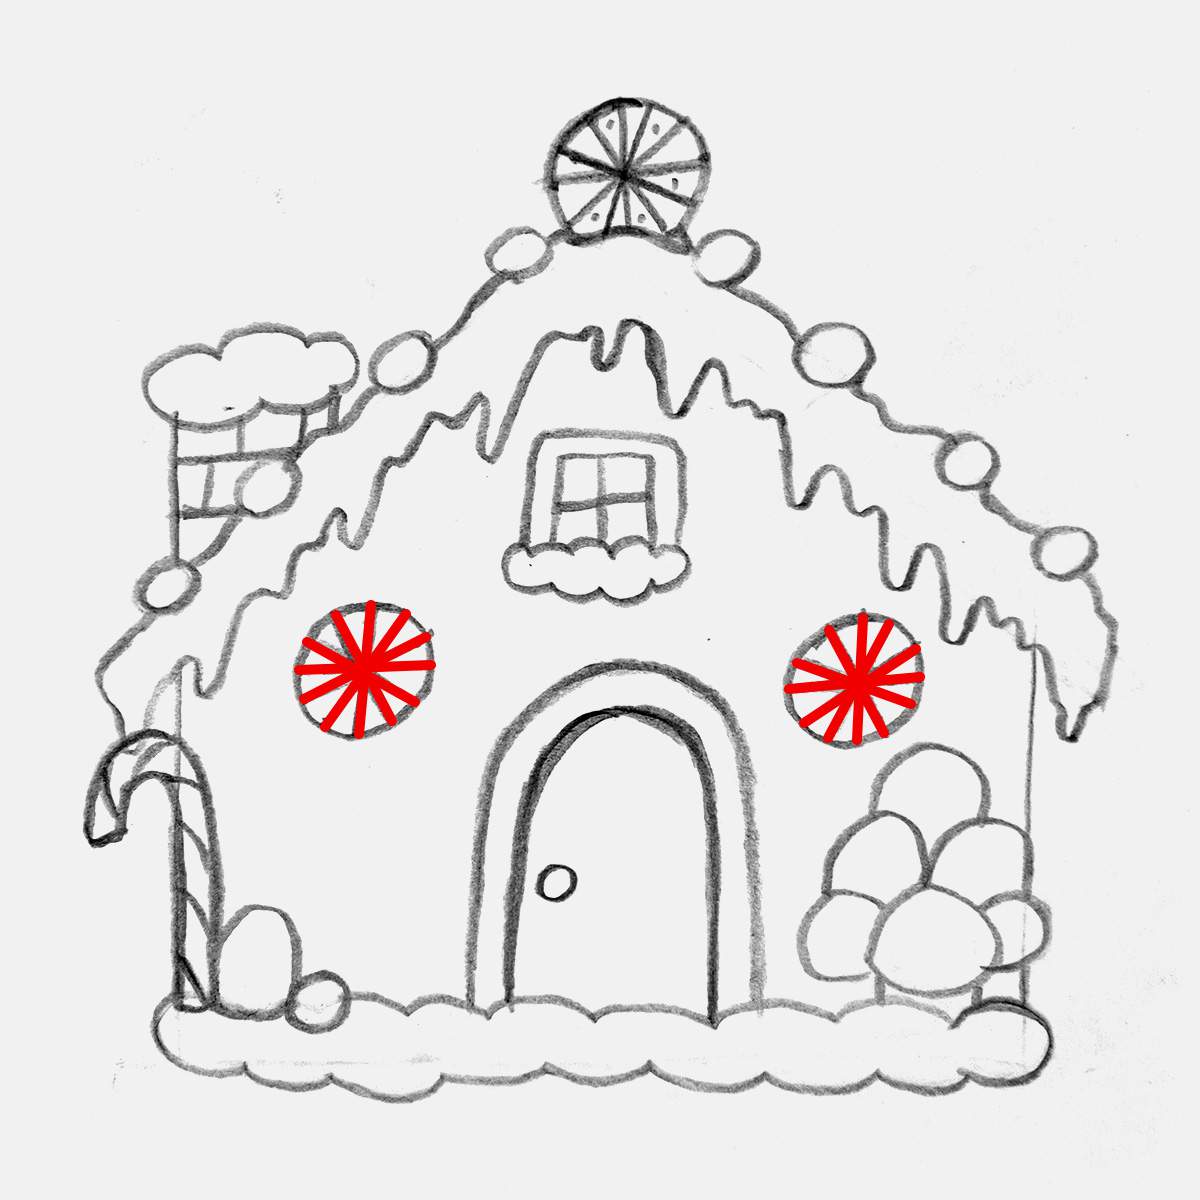
Next, I added two round peppermint candies, one on the left and one on the right.
I first sketched the circle-shaped outlines.
Then, I divided them up into 12 somewhat equal sections.
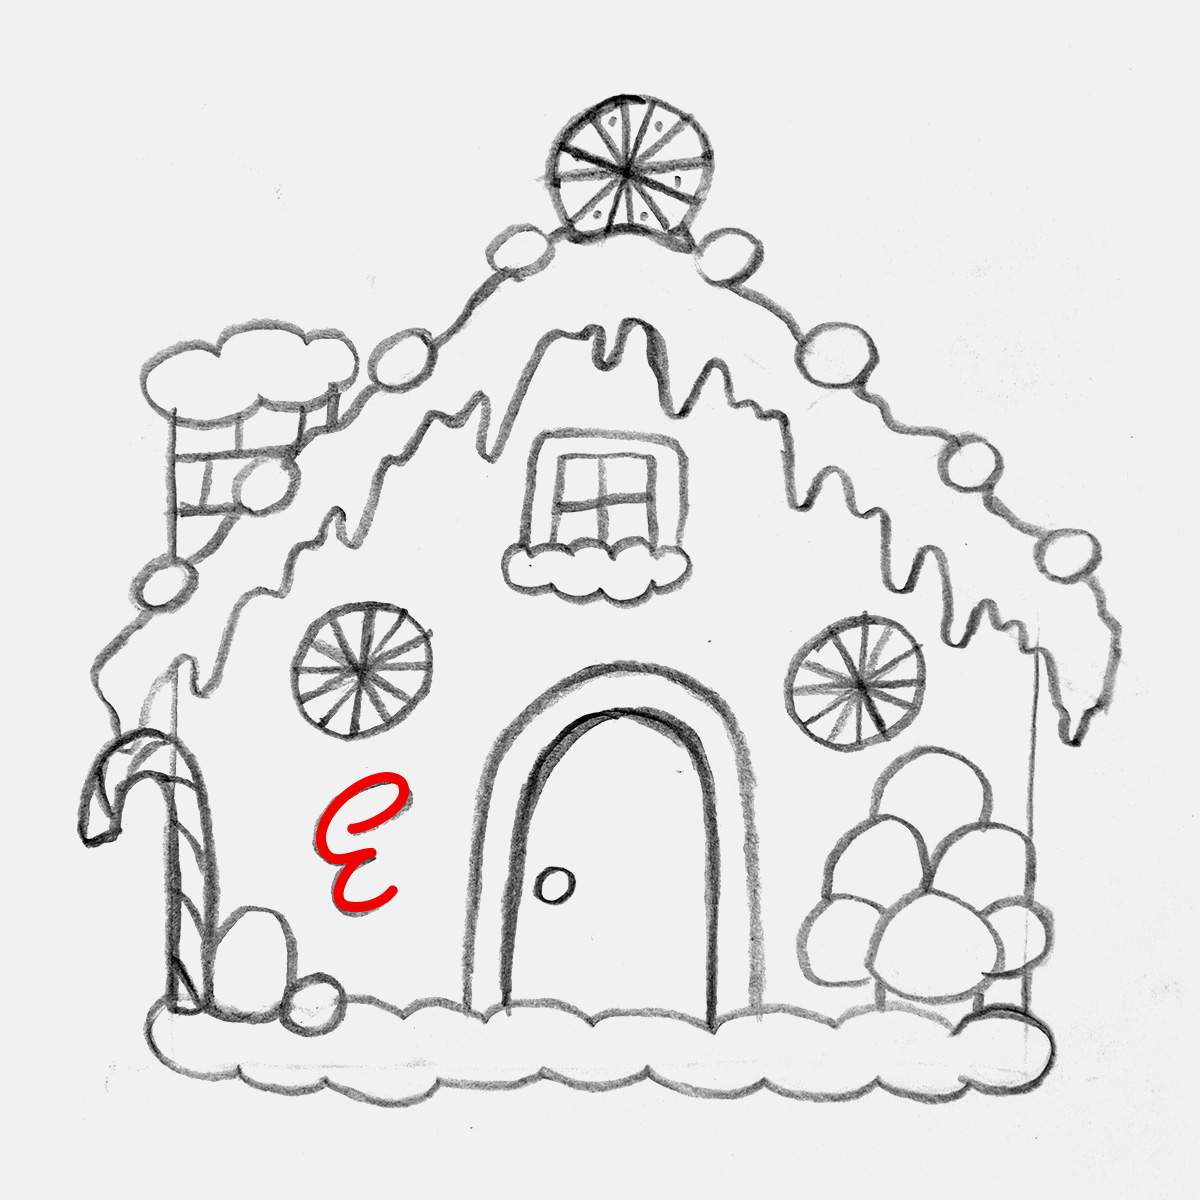
And the last bit of decoration I wanted to add is this icing swirl in the remaining empty space on the left. This fits this space pretty well, and it looks cool.
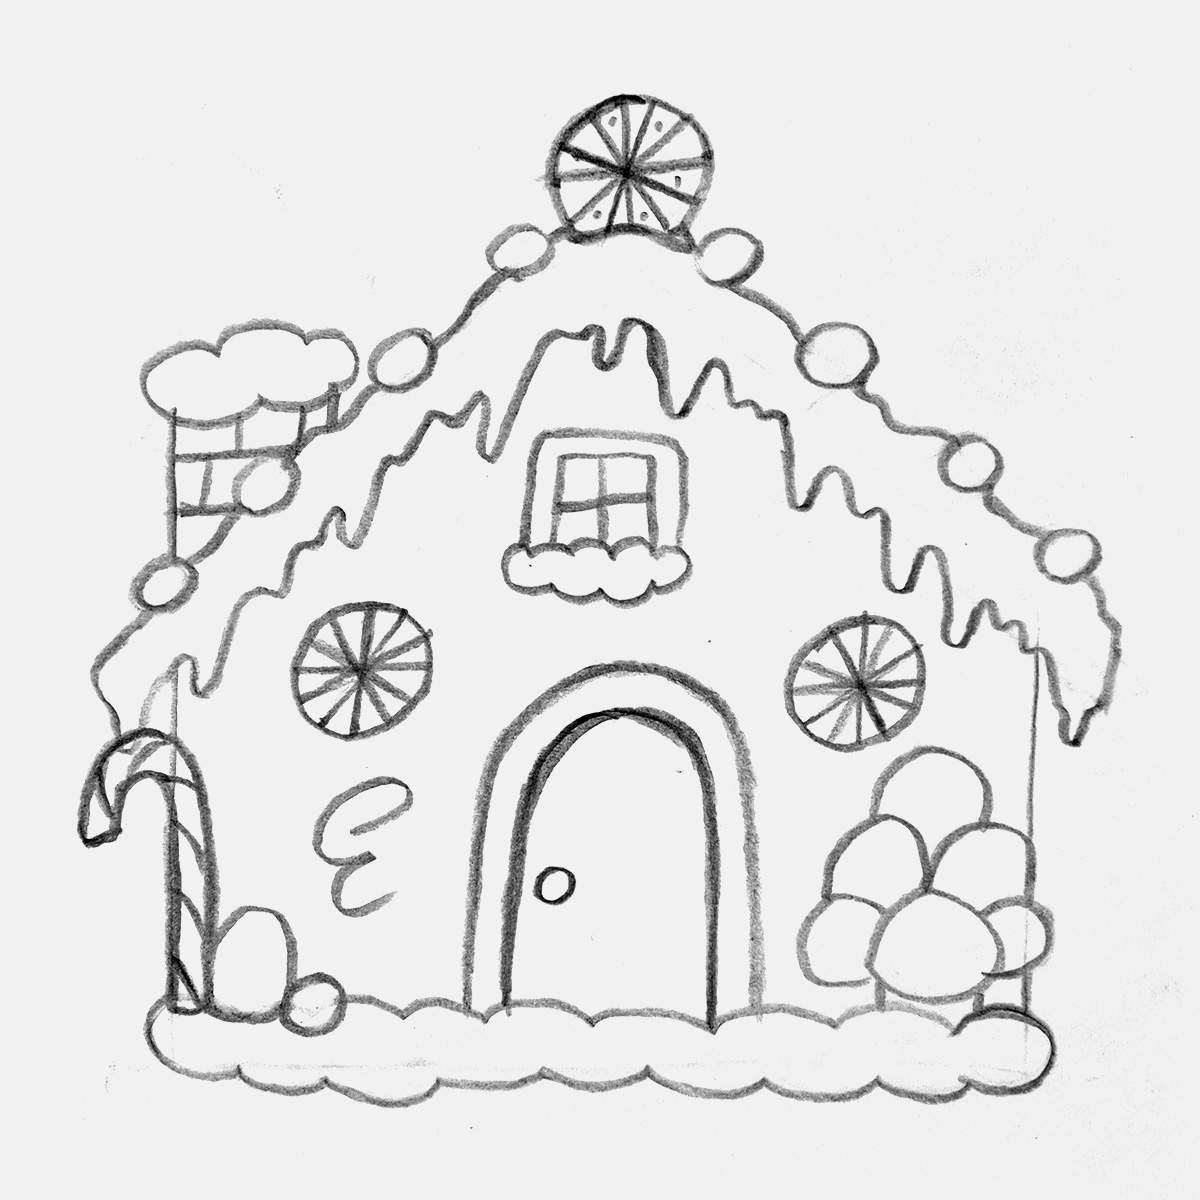
And that's our gingerbread house sketch done and ready to be outlined and colored.
Step 8: Outline the Gingerbread House Sketch
Before we start coloring our gingerbread house, I first like to outline it with a brush pen. This makes the coloring a lot easier, and I think it makes the drawing look better.
To outline my sketch, I used my Tombow Fudenosuke brush pen. It's my favorite brush pen for outlining sketches, and it creates beautiful, dynamic lines.
Before I outlined the sketch, I first lightened it by rolling my kneaded eraser across it. If you first outline and then erase the sketch, it will lighten the black ink, which I don't like. So I lighten the sketch beforehand.
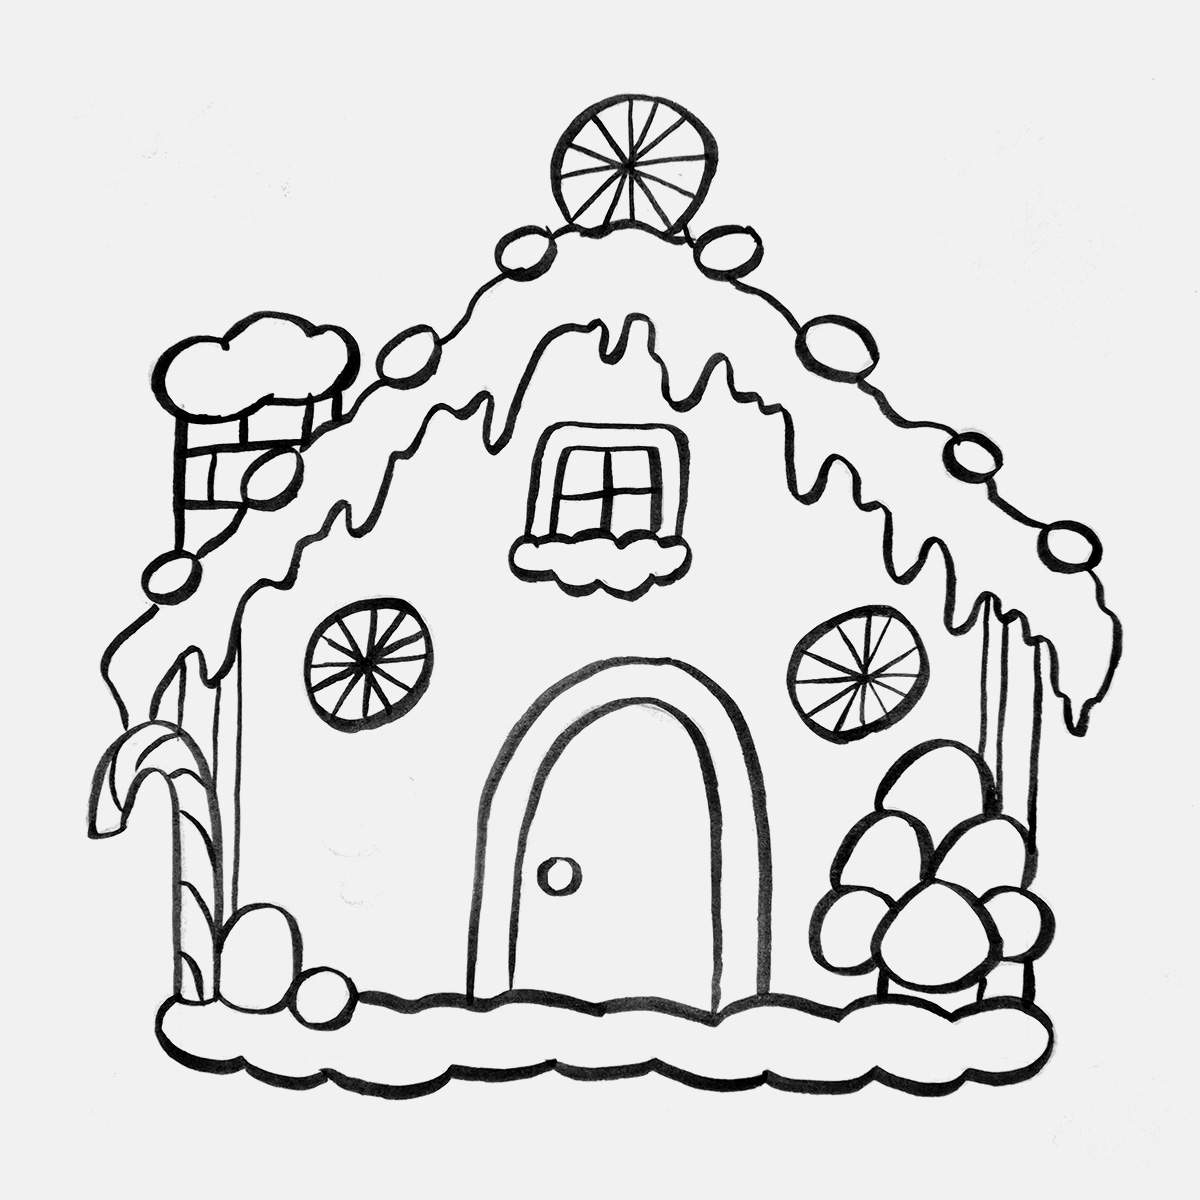
For this gingerbread house sketch, I outlined almost every sketch line, except for the icing swirl we added last, since I don't want that to have an outline.
I also noticed that I forgot to sketch 4 lines. When building a gingerbread house, you glue the side walls onto the front wall, and since the side walls have a thickness, you would be able to see an edge on the side of the front of the house. And you would be able to see the icing used to glue the walls to the house.
Adding these lines is super simple. I added 2 vertical lines right next to, and slightly overlapping, the candy cane on the left. And I added 2 lines above the little tree.
This is what my drawing looks like after outlining it and adding the 4 extra lines.
Step 9: Color the Gingerbread House with Markers
With the outline now all done, it's time to color our gingerbread houses with some markers.
I'm a huge fan of alcohol markers, so I'll be using those for this drawing as well. The markers of my choice are the Ohuhu Honolulu markers.
First, I colored all the gingerbread walls with a brown color called Rose Beige (BR3).
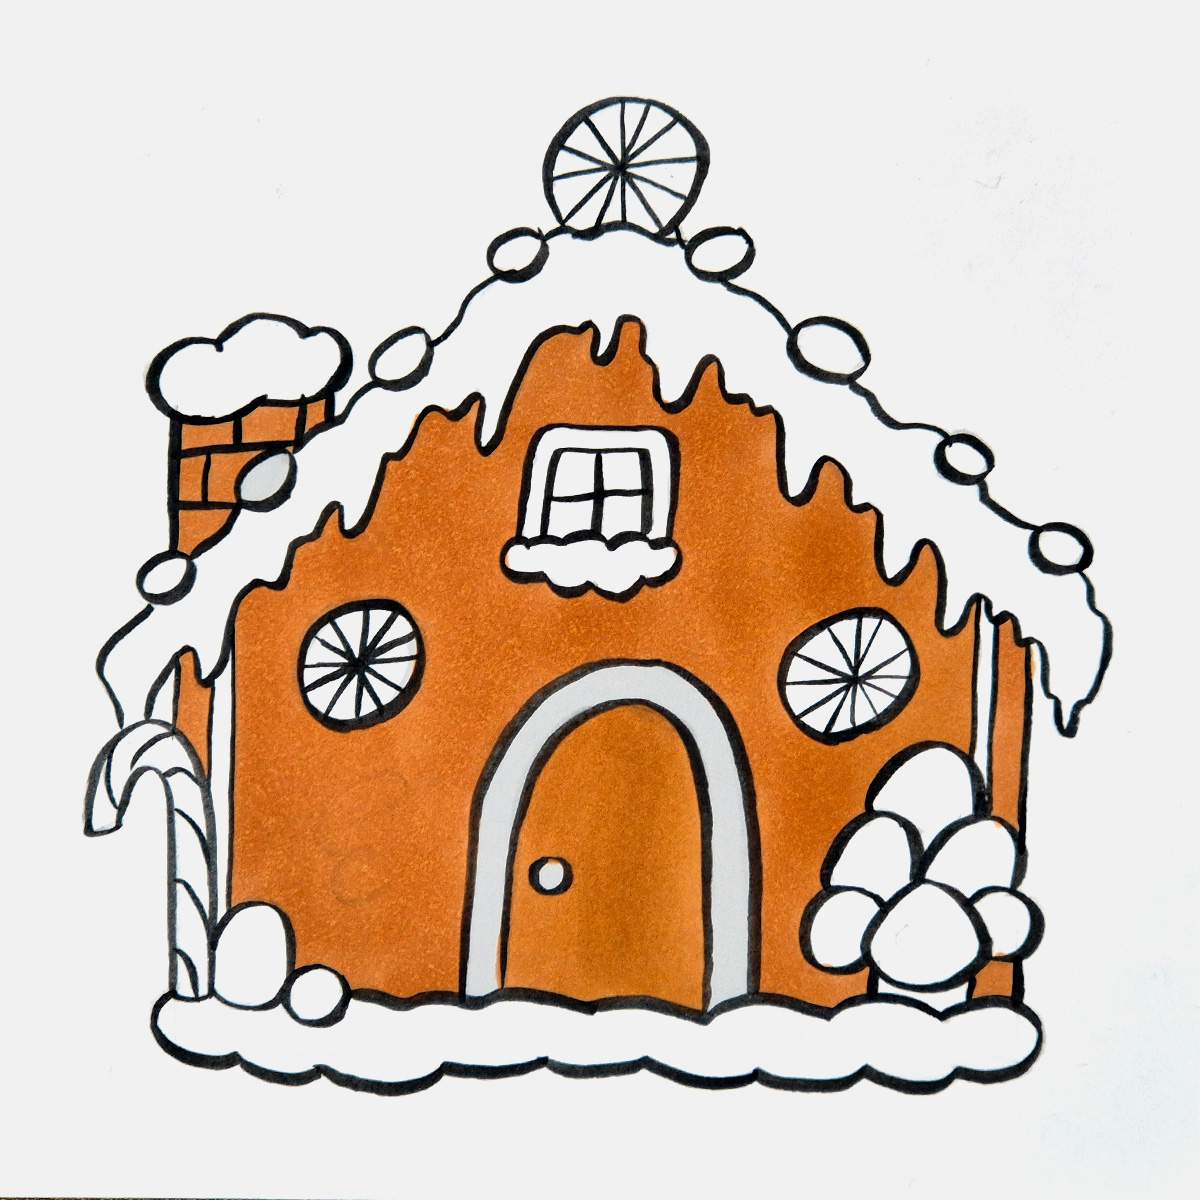
Next, I added shading wherever it felt logical to add. For example, below the roofline, on the door, and on the chimney. To do this, I used a darker brown color called Potato Brown (BR2).
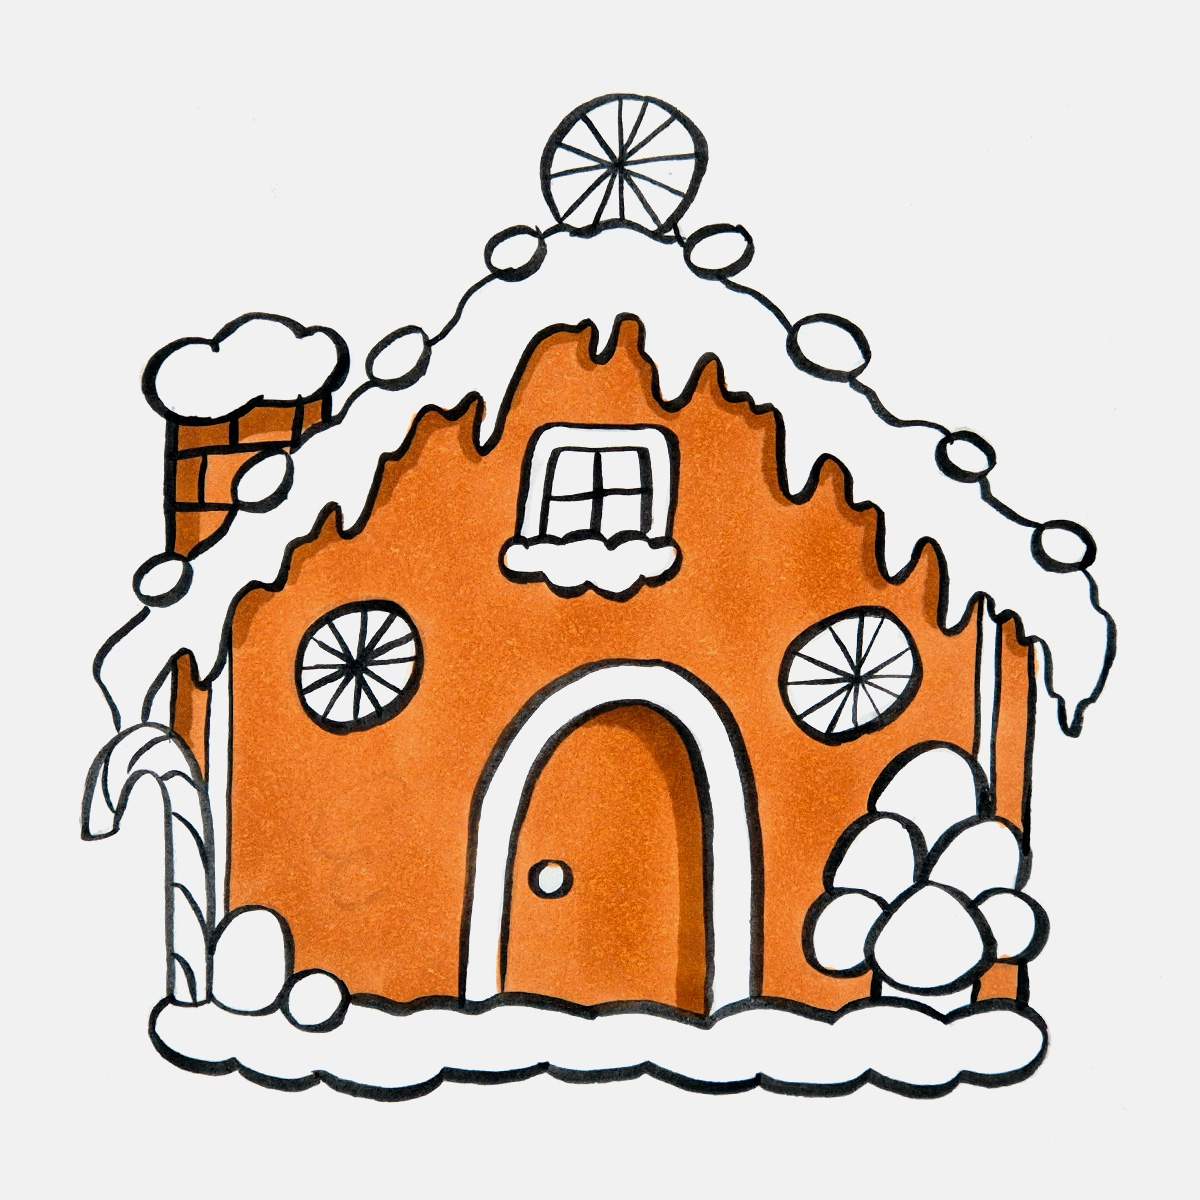
Then, I used a light grey to add some shading to the bottom of the icing. The light grey I used is called Neutral Grey 03 (CG030).
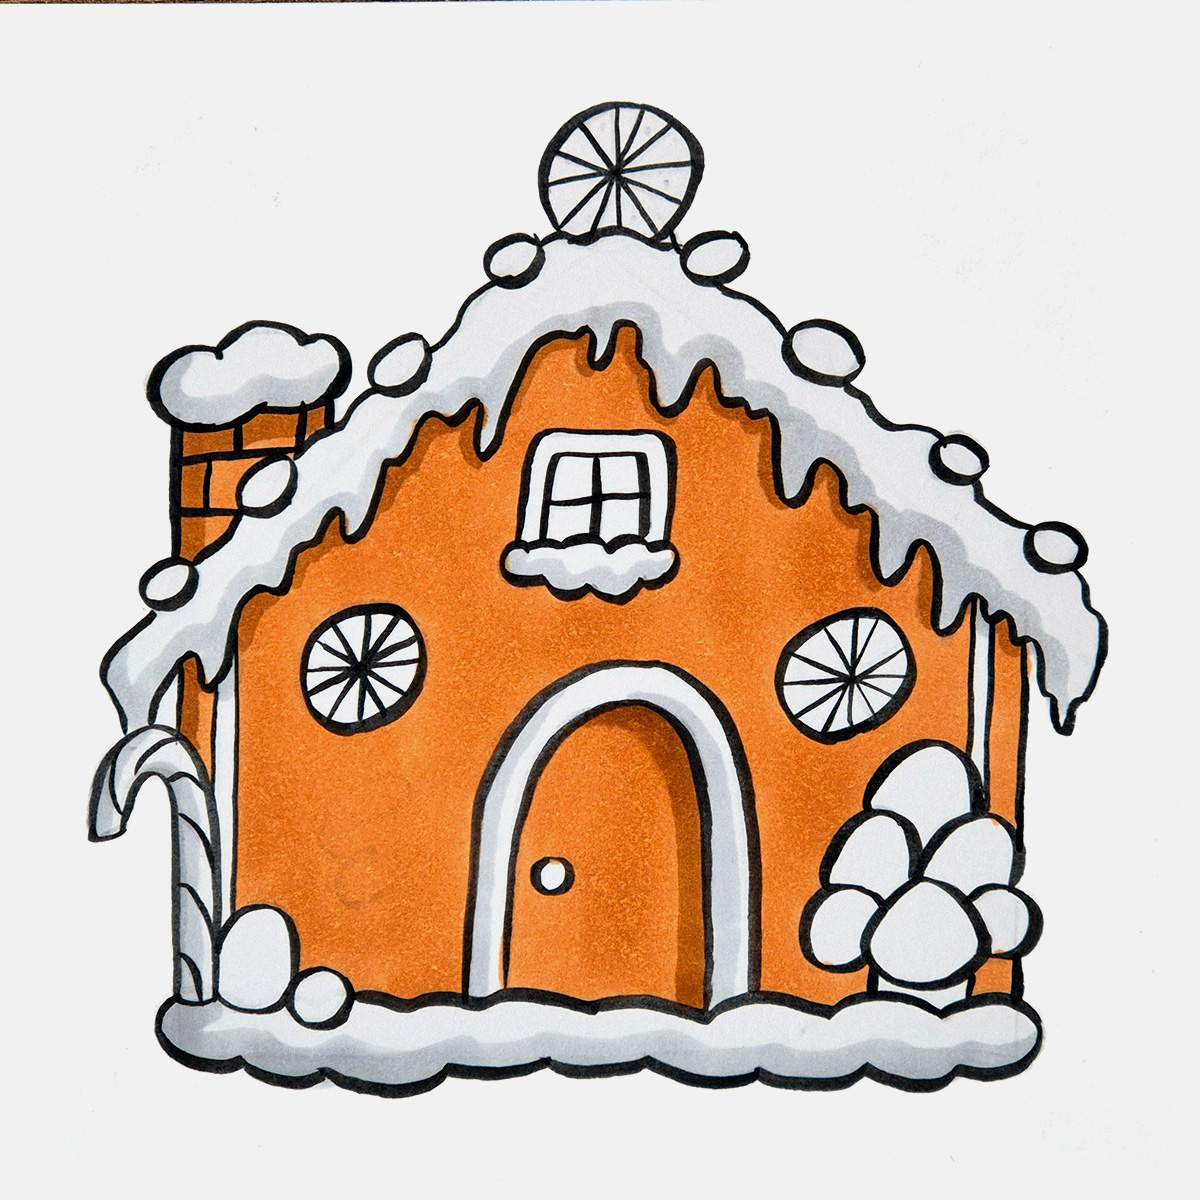
Next, I colored all the red parts. At least that was my plan, but I forgot to color the three peppermint candies...
I also noticed that I forgot to sketch the sections of red and white on the candy cane door that surround the door, so I just guessed it without any guiding lines.
Anyway, to color the red candies, I used Vermilion (R2).
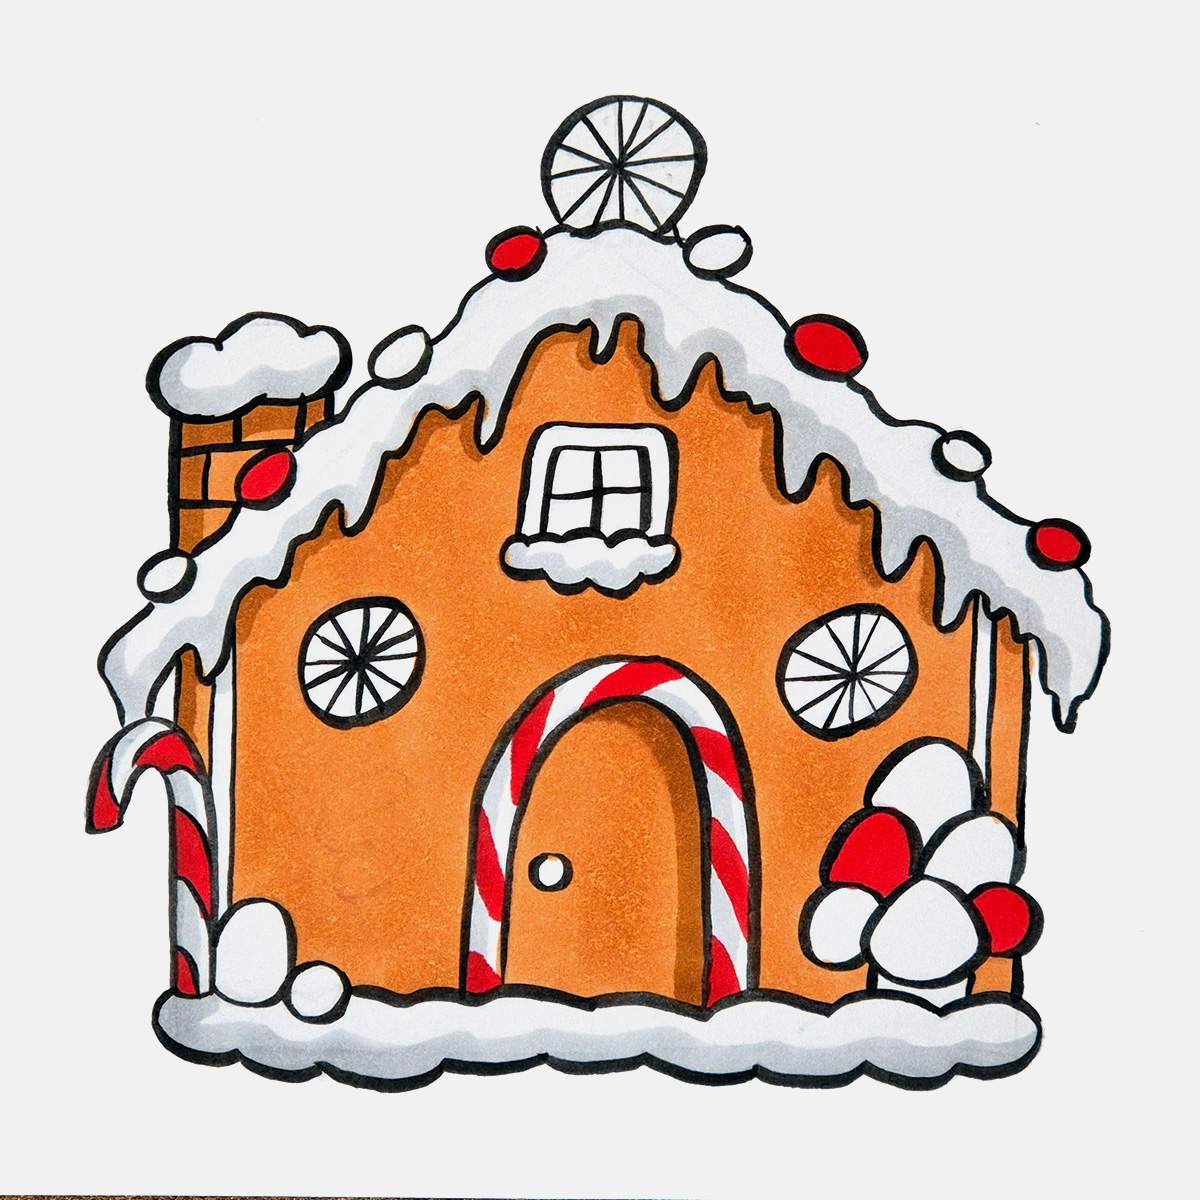
After that, I colored all the green candies with a color called Vivid Green (G2), and I noticed I forgot to color the peppermint candies and colored them red.
You might notice that I messed up the coloring on the right peppermint candy. For some reason, I skipped two parts at once and didn't notice until the last one... I decided to leave it, as mistakes are part of drawing, and I don't mind it too much.
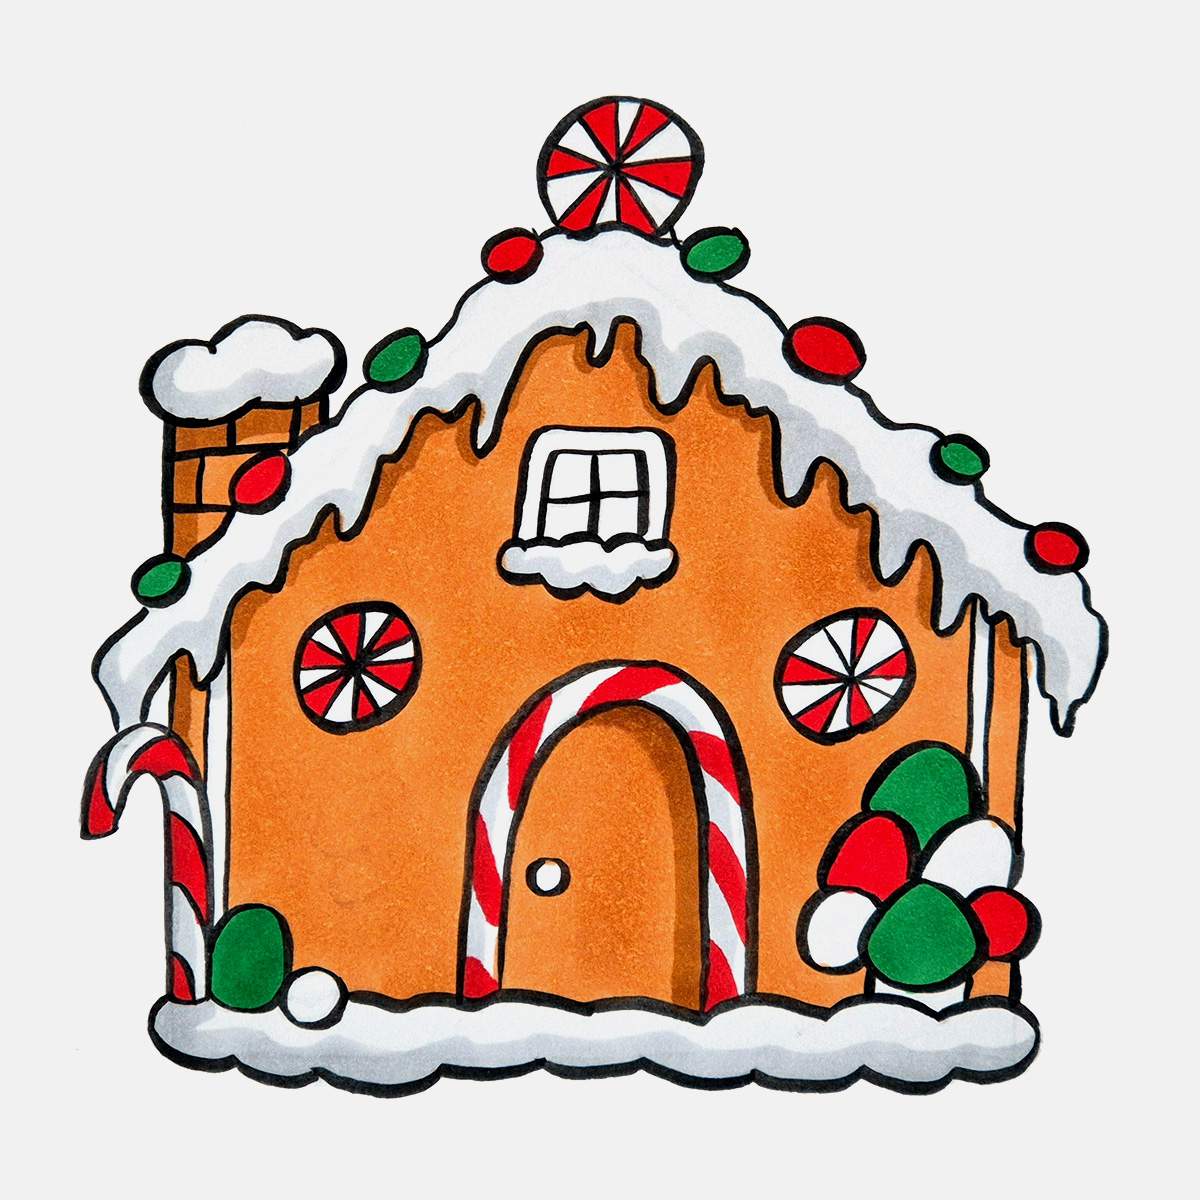
The last parts I colored were the golden yellow candies and the window panes. To color these parts, I used a marker called Melon Yellow (YR33).
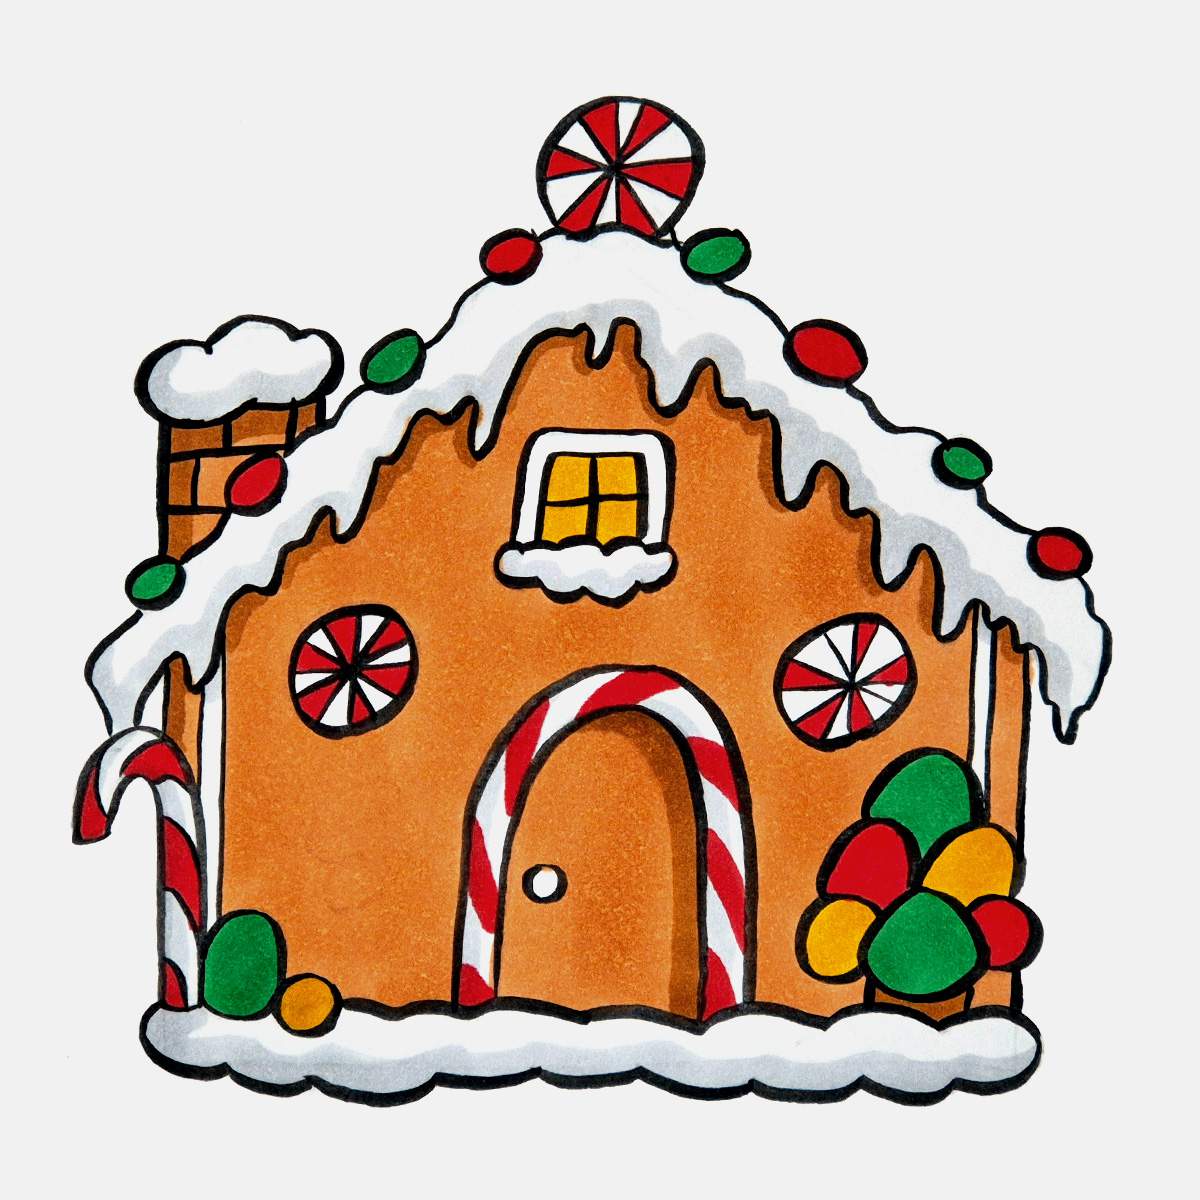
When I was done with the yellow candies, I thought the front wall looked a bit too plain. So I decided to try and create a little bit of a gingerbread texture by adding some darker brown dots all over it. I used the Potato Brown (BR2) marker to do this.
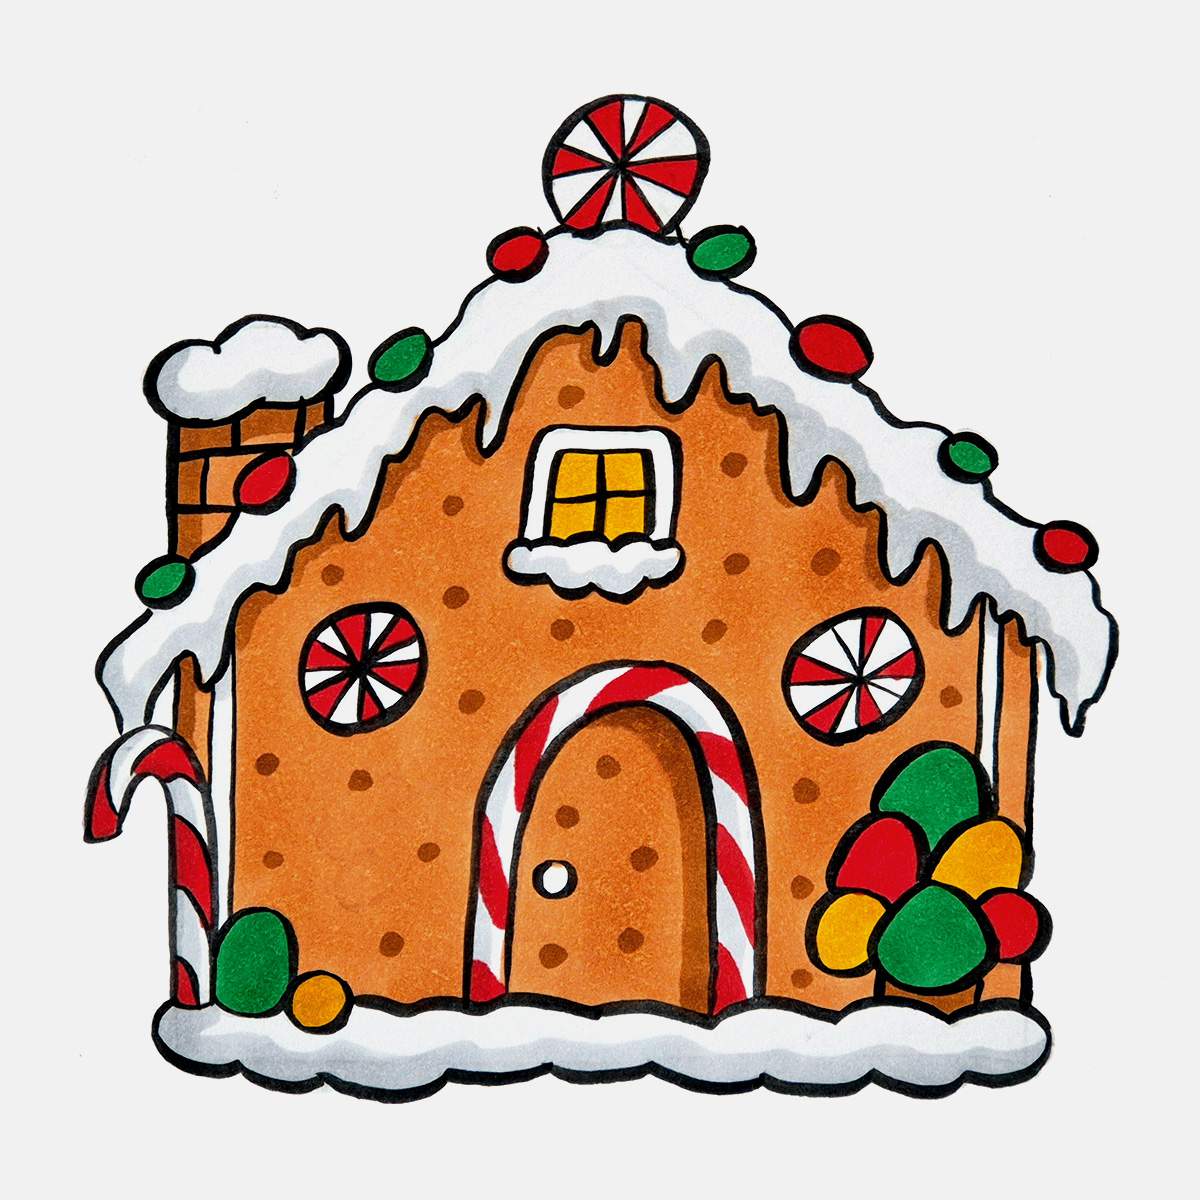
And that's our gingerbread house drawing fully colored!
But it's not done yet.
Step 10: Add Icing and Details with a white Paint Marker
Remember I added the icing swirl on the front wall? We're going to add that with a white paint marker.
And I also wanted to add some white dots all over the front wall and some highlights on all the candies.
Adding these white details makes the drawing look so much more complete.

And that's how you draw a cozy and beautifully decorated gingerbread house from scratch.
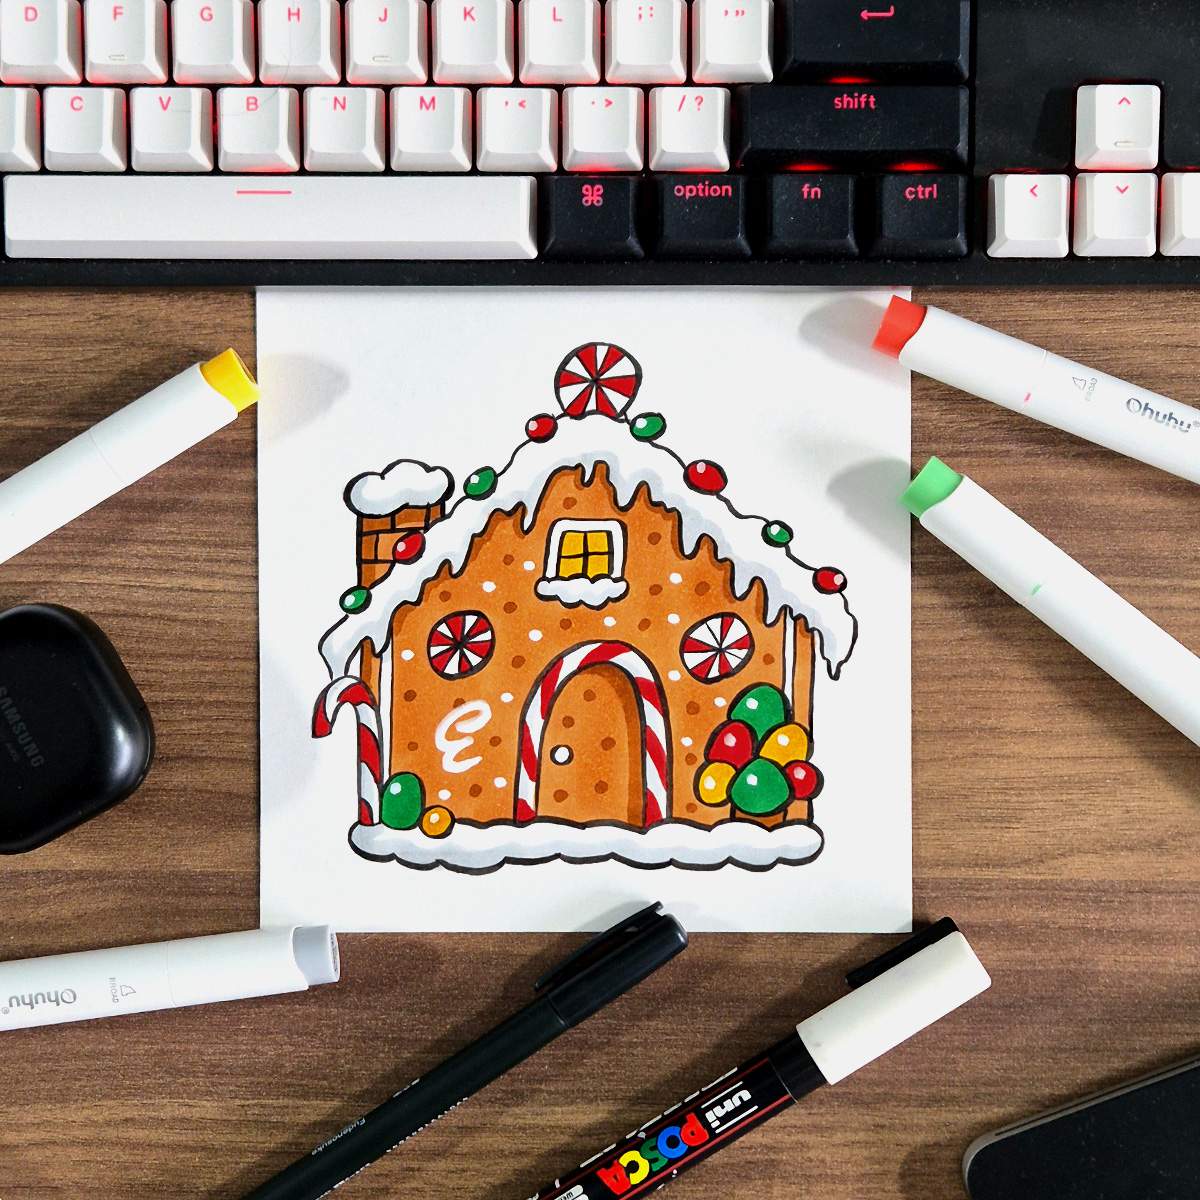
I hope you liked this gingerbread house drawing tutorial! How did your drawing turn out?
If you did enjoy it, you might also like my other Christmas and winter step by step drawing guides. This Christmas elf is my favorite.
Articles You Might Also Like







I love bringing cars to life with alcohol markers and colored pencils.
Whether you're just starting out or looking to improve your skills, I'm here to help!
Click here to learn more about me.


Be the first to comment!
Comments
There are no comments yet.