How to Draw a Koi Fish Easy Step by Step
This post is about how to draw a koi fish easy.
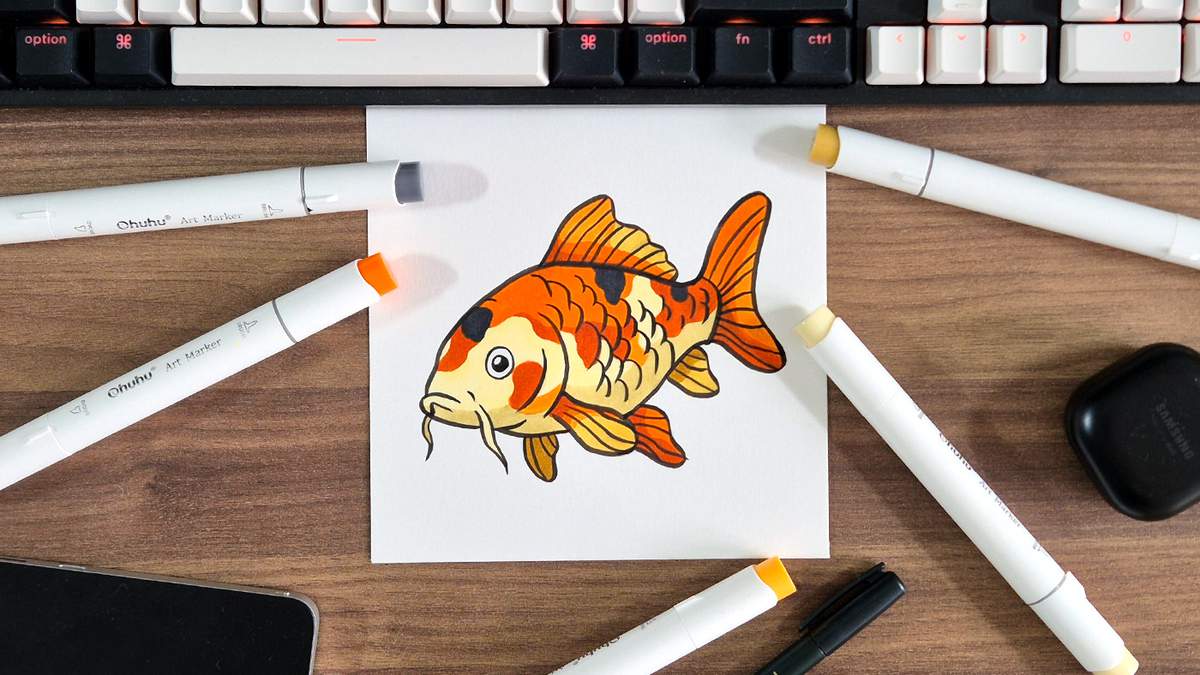
Want to learn how to create a drawing of a colorful koi fish?
In this drawing guide, I'll show you how to draw a koi fish step by step.
I've broken the whole guide up into 9 parts (the main steps), and each step is broken up into smaller steps, for a total of 20 easy-to-follow drawing steps. Each step contains supporting pictures showing you exactly what to draw where, so you can follow along and create your very own koi fish drawing.
Let's get started with our colorful koi fish drawing, shall we?
I just wanted to let you know that this post contains affiliate links, and any purchases made through these links will result in a small commission for me and won't cost you anything extra.
In This Guide
- Drawing supplies and colors I used to draw this koi fish
- Sketching a koi fish from scratch using simple shapes
- Outlining the koi fish sketch with a brush pen
- Coloring the koi fish with markers
- More step-by-step guides you'll like
Drawing Supplies and Colors Used
To sketch this koi fish, I used a regular graphite pencil with an eraser. And to lighten my sketch, I used a kneaded eraser. They are really great for this. You just roll them across your sketch, and it will lighten your lines.
I made this drawing on Canson Illustration Manga paper (my favorite paper for using alcohol markers).
To outline the koi fish sketch, I used a black Tombow Fudenosuke brush pen.
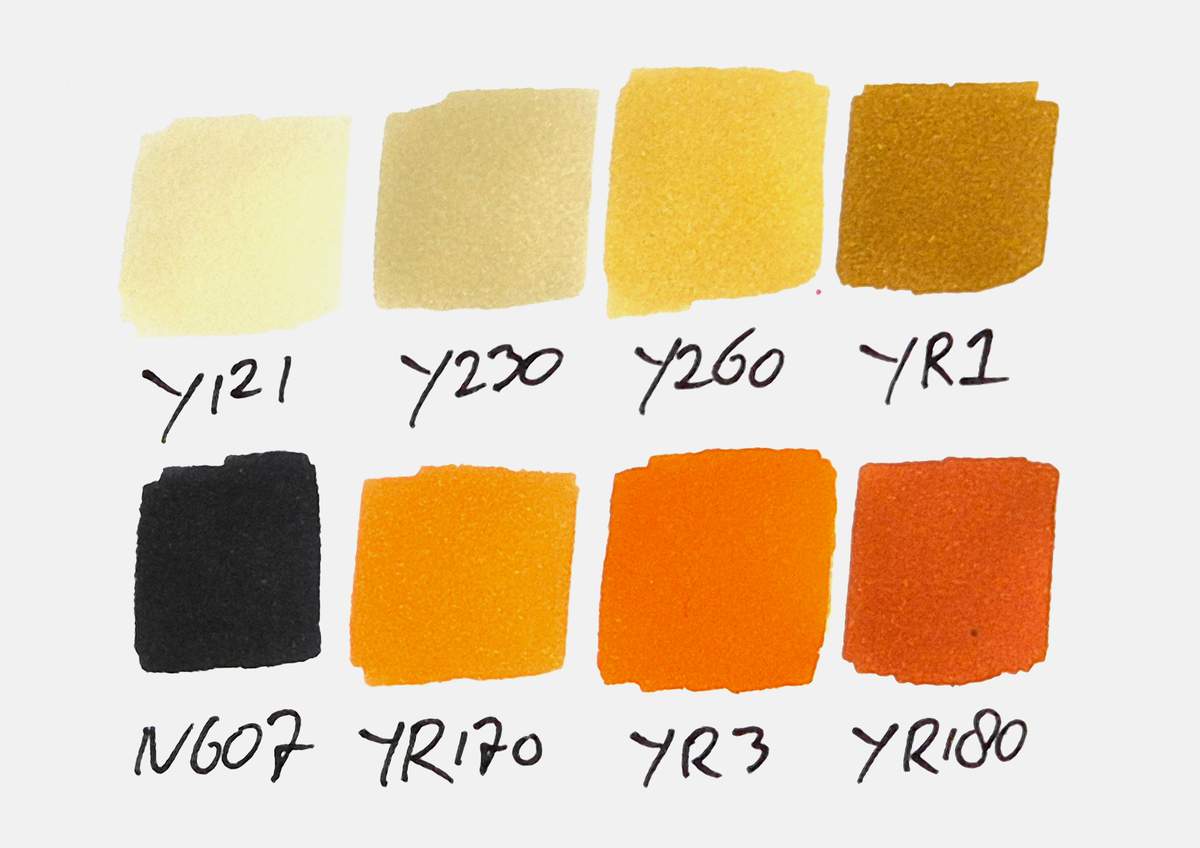
And to color this koi fish drawing, I used Ohuhu Honolulu markers. I used 8 colors in total: Primrose (Y121), Deep Cream (Y230), Yellow Dahlia (Y260), Dark Yellow (YR1), Neutral Grey 7 (NG07), Chrome Orange (YR170), Orange (YR3), and Lipstick Orange (YR180).
You can buy these colors separately or as part of the 320 set. You can also buy them on Amazon if you prefer.
I believe Ohuhu changed all the color codes of their markers, so I have no clue which ones are which. These are the ones that I have, which probably have the old color codes...
I've added an image below with all the color swatches so you can match your markers to the ones I used if you already have some.
How to Draw a Koi Fish Step by Step
To draw a beautiful and colorful koi fish, the first thing we're going to do is sketch it step by step from scratch.
I'll use simple shapes, so you can easily follow along.
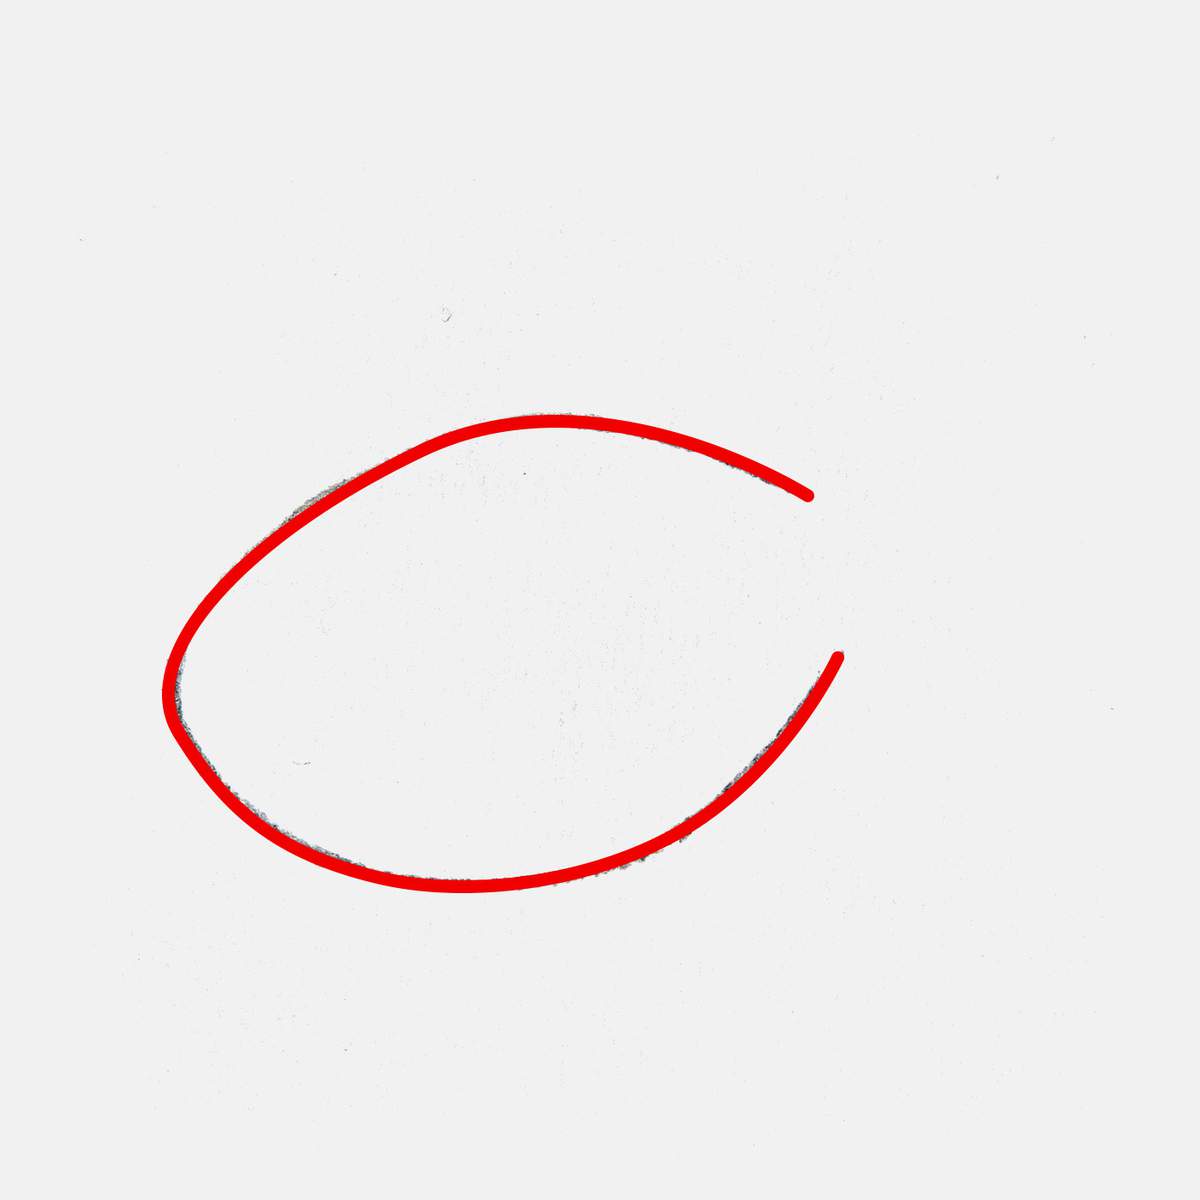
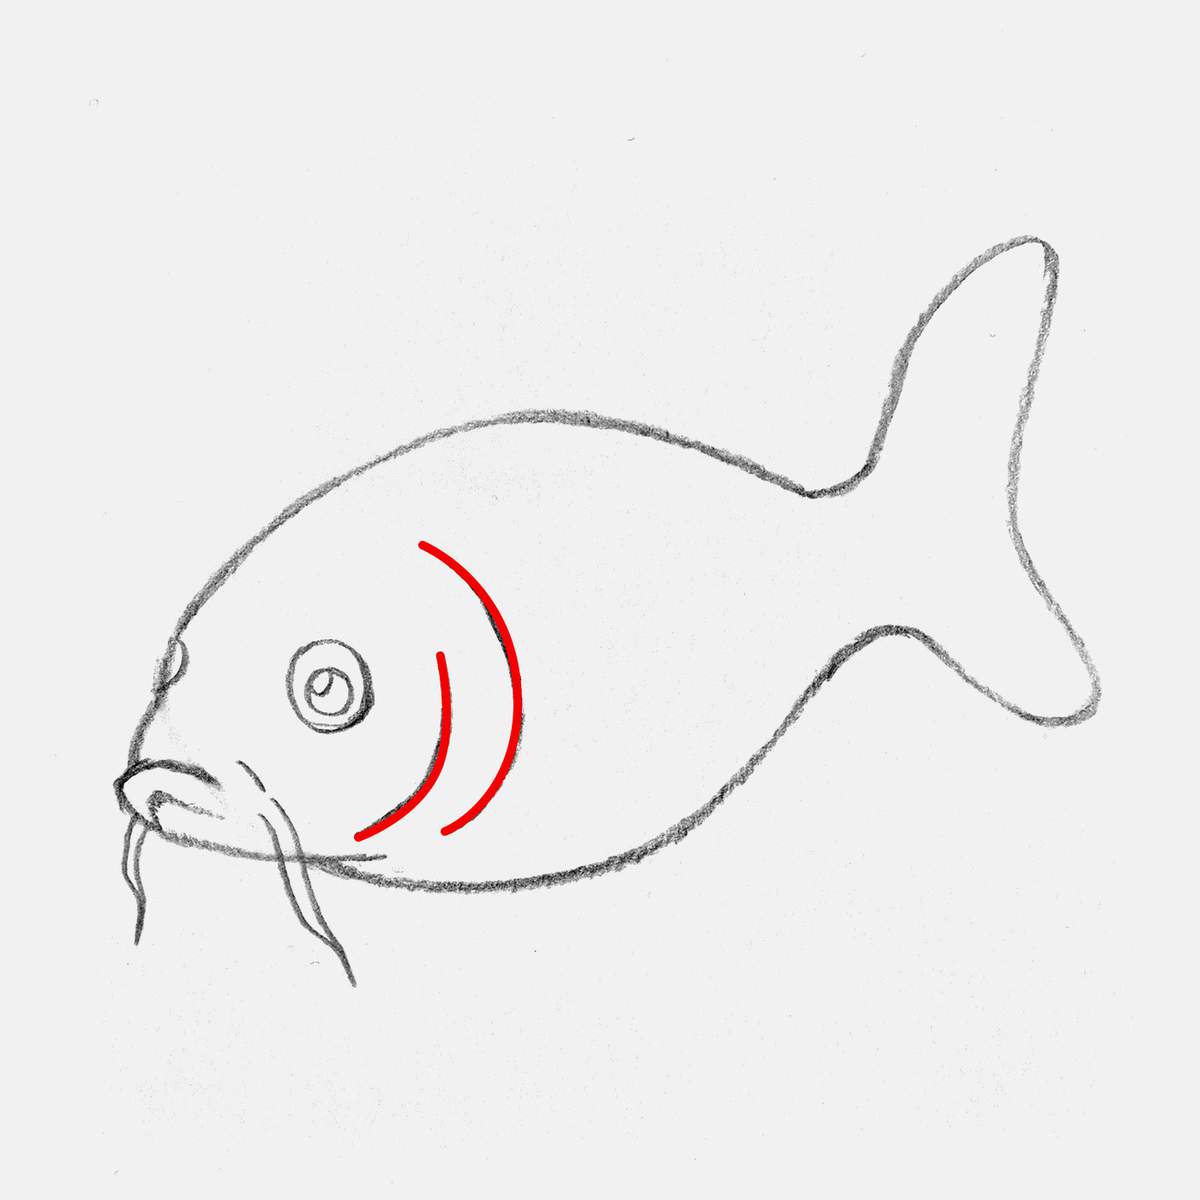
To make it a little easier for you, I marked the newly sketched lines in red. This way, you can easily spot what's new.
Let's start with the main shape of the koi fish's body.
Step 1: Sketch the Body of the Koi Fish
To start our koi fish drawing, I started by sketching the main shape of the body.
Luckily, it's quite a simple shape. It's oval-shaped with a little more volume at the bottom for the koi fish's stomach.
I left the right end open. This is where the tail fin will attach too.
Step 2: Add the Tail Fin
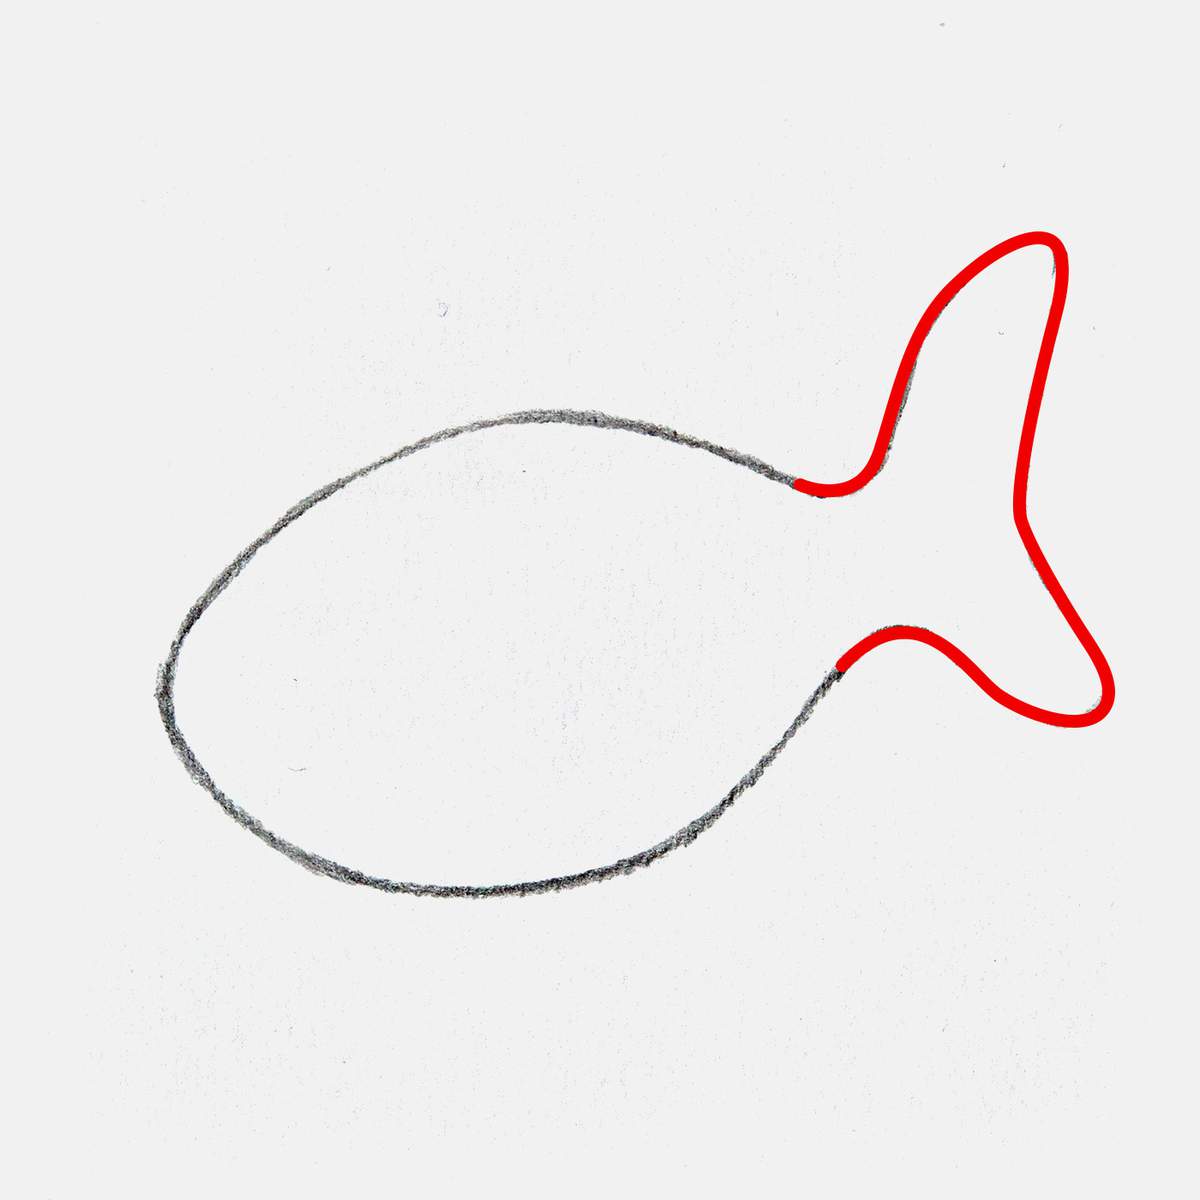
Next, I added the tail fin of the koi fish. Like most other fish, the tail fin is shaped like a rounded crescent moon, which is attached to the body with two curved lines.
Step 3: Sketch the Koi Fish's Mouth and the Barbels
After that, I added the mouth of the koi fish.
We started by sketching an oval. The mouth attaches to the front (the left) of this oval shape.
The main shape looks like an overly round candy cane.
The top part of the candy cane is attached to the main oval shape with a nose-bridge-like line.
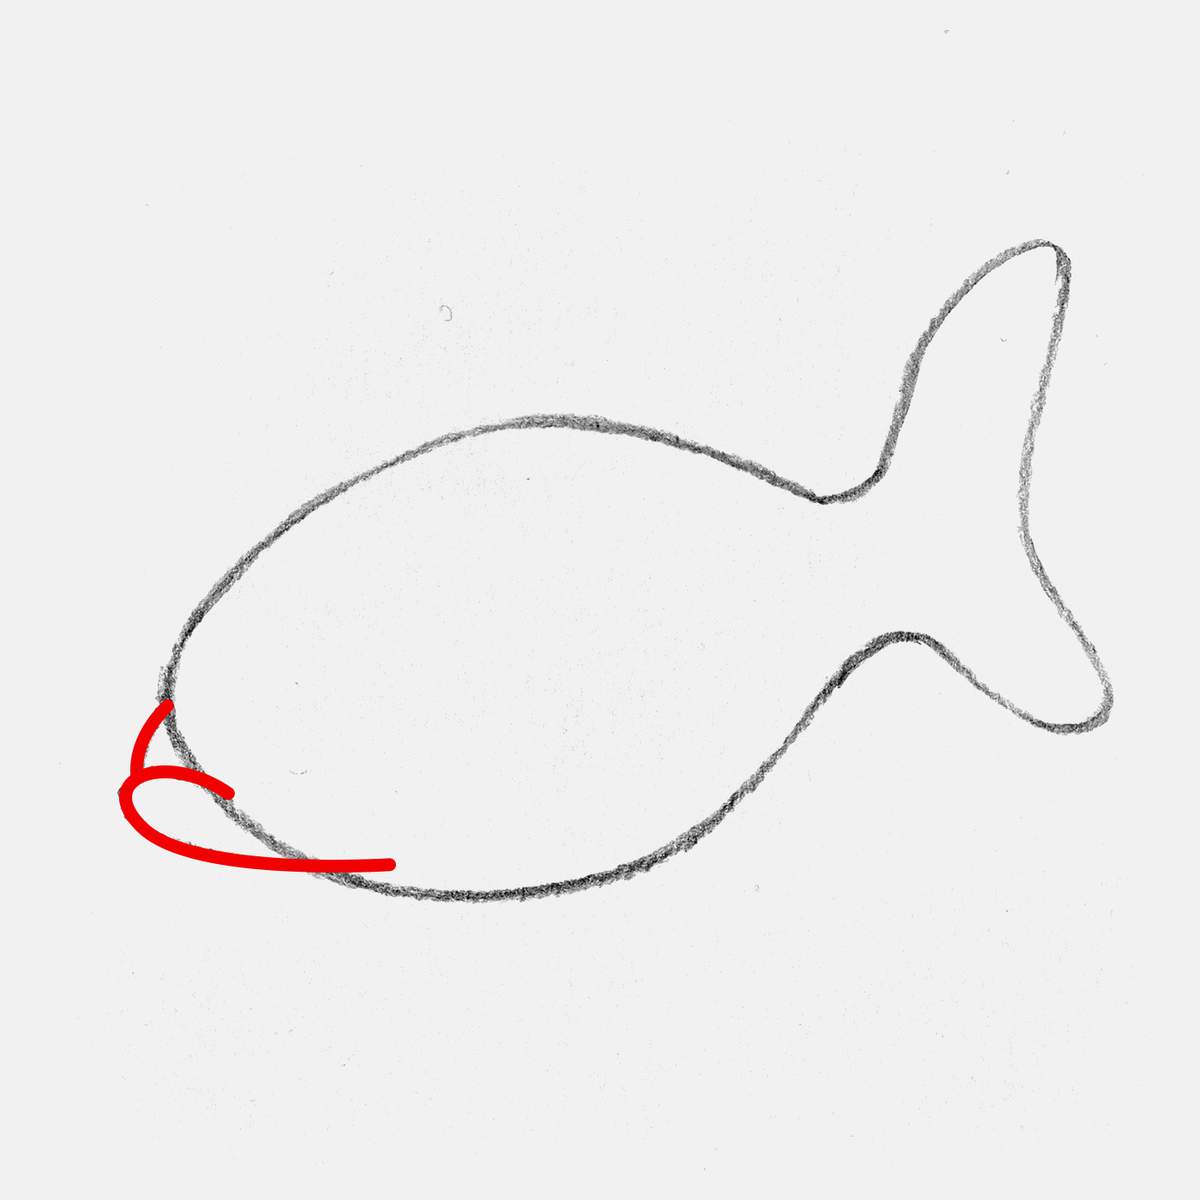
I then erased the part of the main oval shape that overlaps with the mouth.
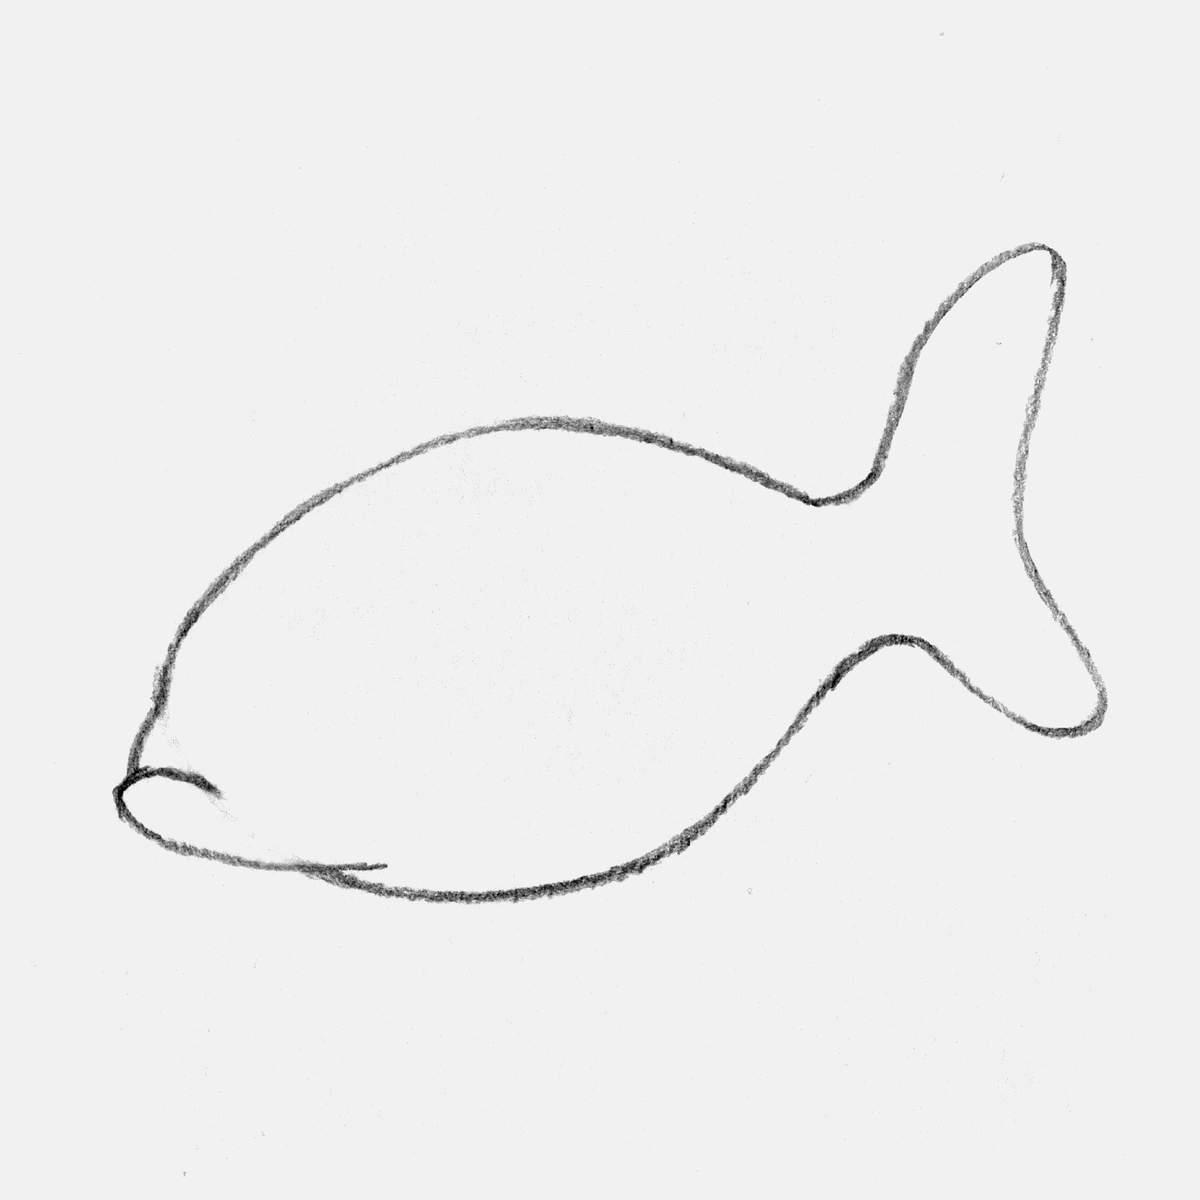
The mouth shape we just sketched isn't actually the full mouth. It's more like the outline of the mouth.
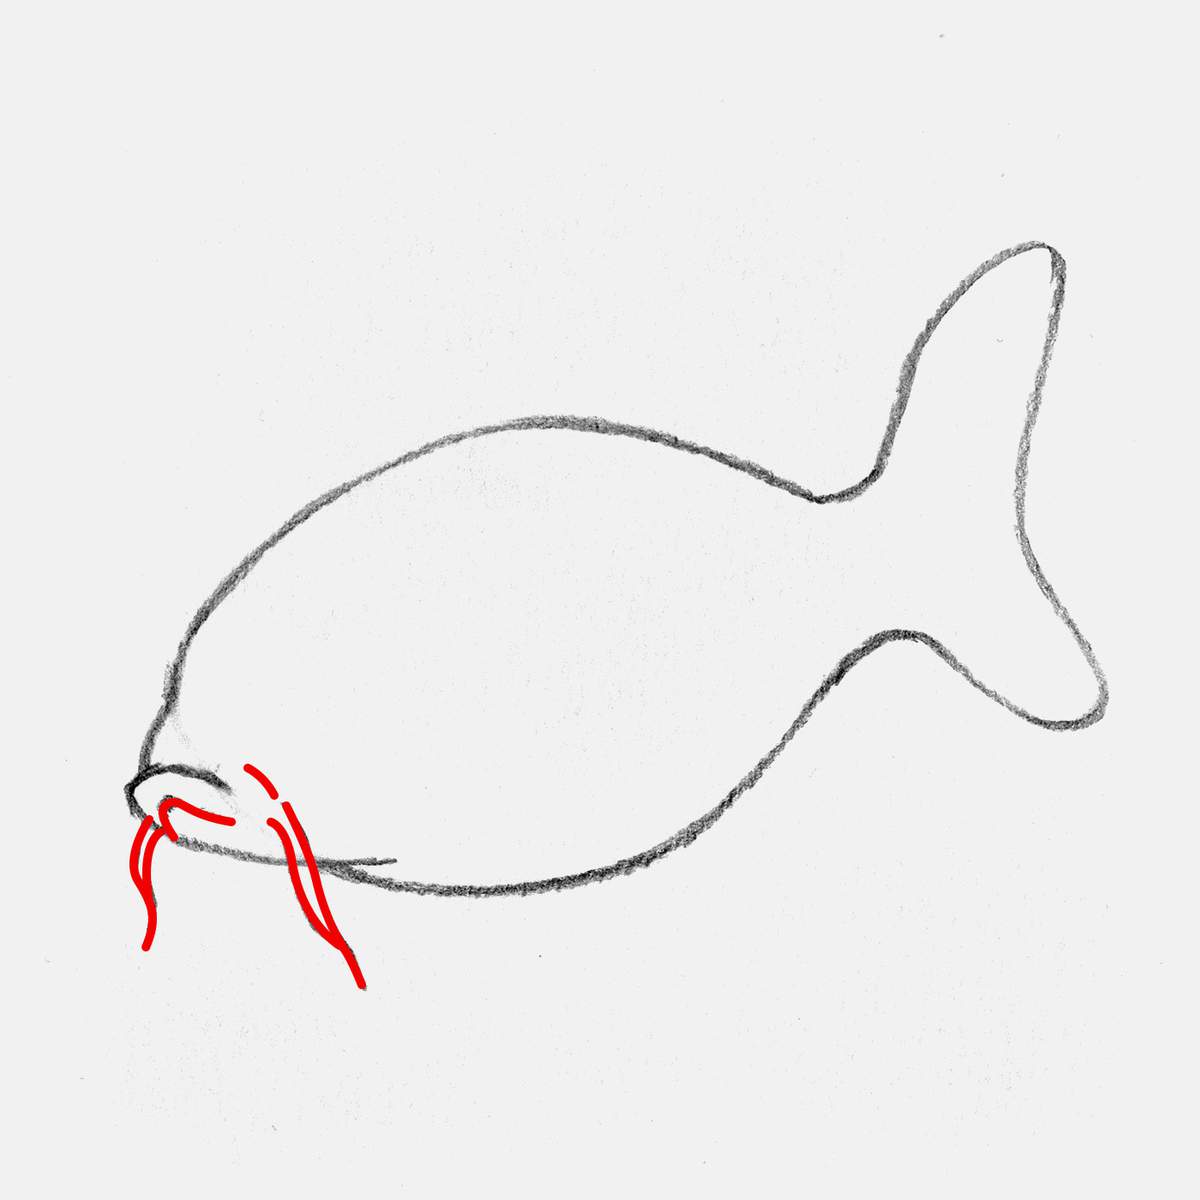
So, next, I added the actual mouth line.
I also added the barbels on both sides. These look like wavy tentacles that are wider at the base and converge into a point.
Step 4: Draw the Round Eyes of the Koi Fish
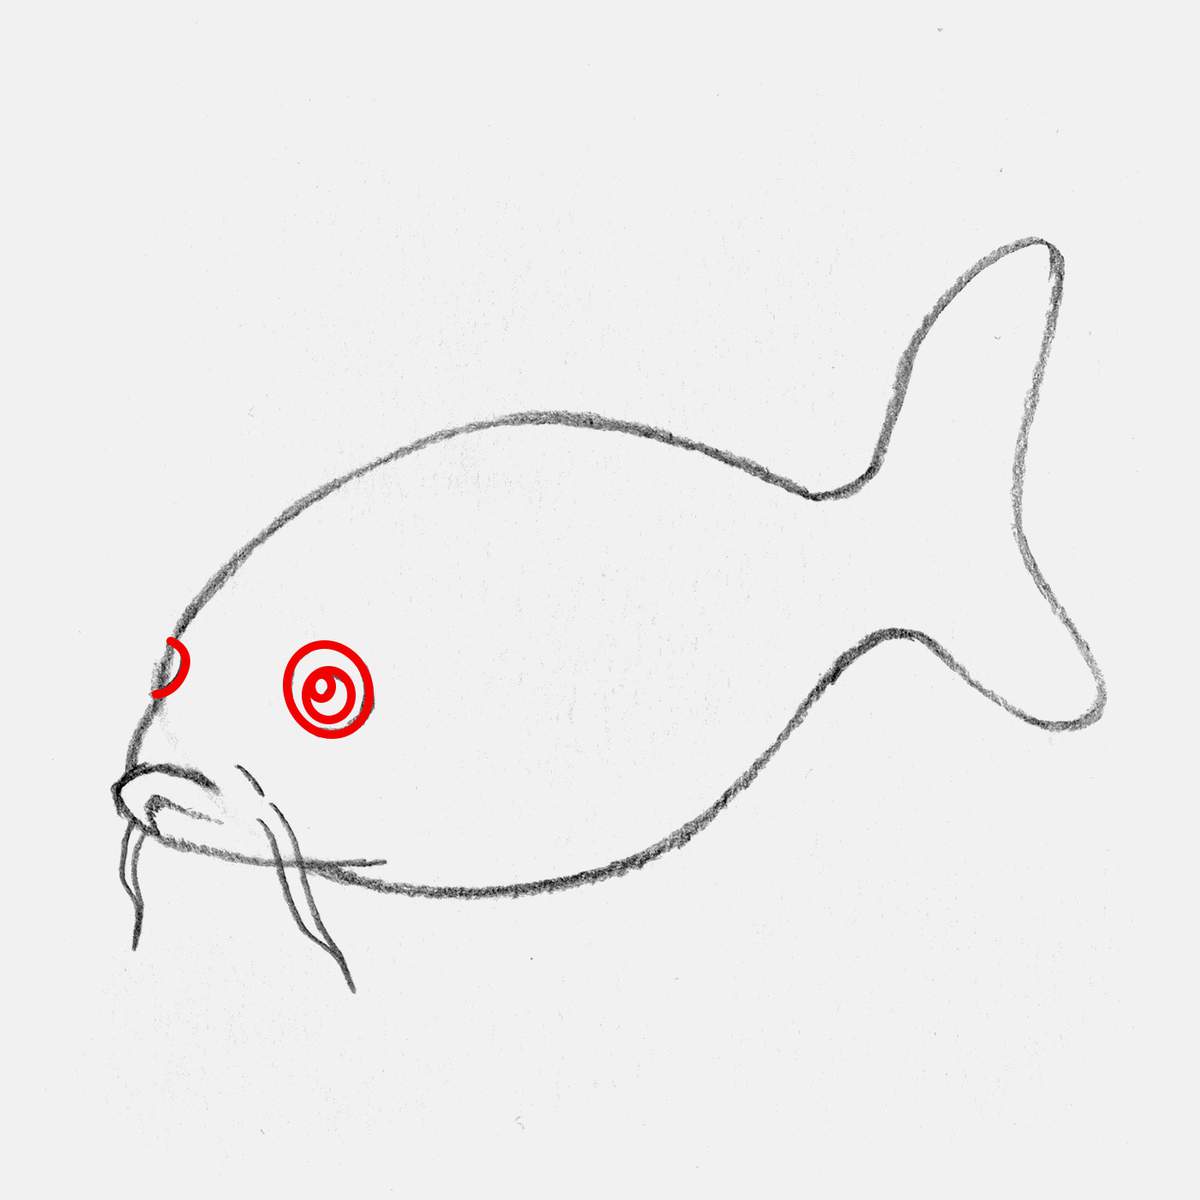
After that, I sketched the round eyes of the koi fish.
You can't really see the eye on the left. I thought I could while sketching it, but that is just a part of the colorful pattern of the koi fish.
The eye on the right is fully visible, and it's super simple to sketch.
It's shaped like a wonky circle with a smaller circle inside, which in turn has another smaller circle inside placed at the top left.
Step 5: Add the Gills of the Koi Fish
Next, I added two big curved lines behind the eye. These are the gills of the koi fish.
Step 6: Sketch the Fins of the Koi Fish
To make this koi fish actually look more like a fish, I added all the fins.
I first sketched the pectoral fins at the bottom. These are pretty round and kinda blob-shaped.
Then I added the dorsal fin on its back. The front edge of the dorsal fin is quite long, while the back edge is very short. The top edge is an uneven, wavy line.
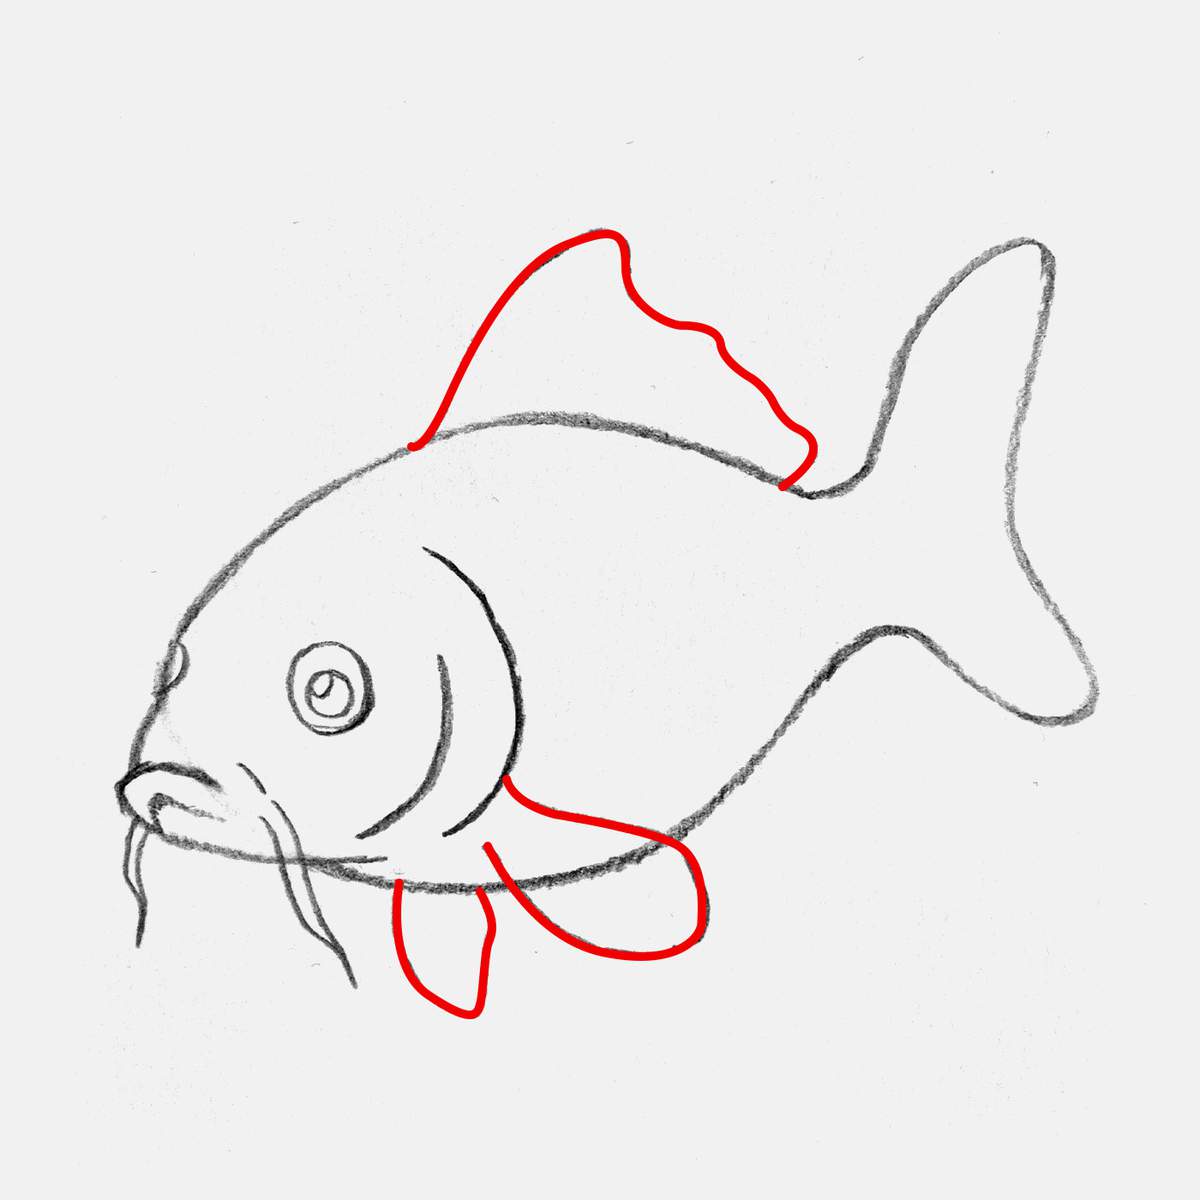
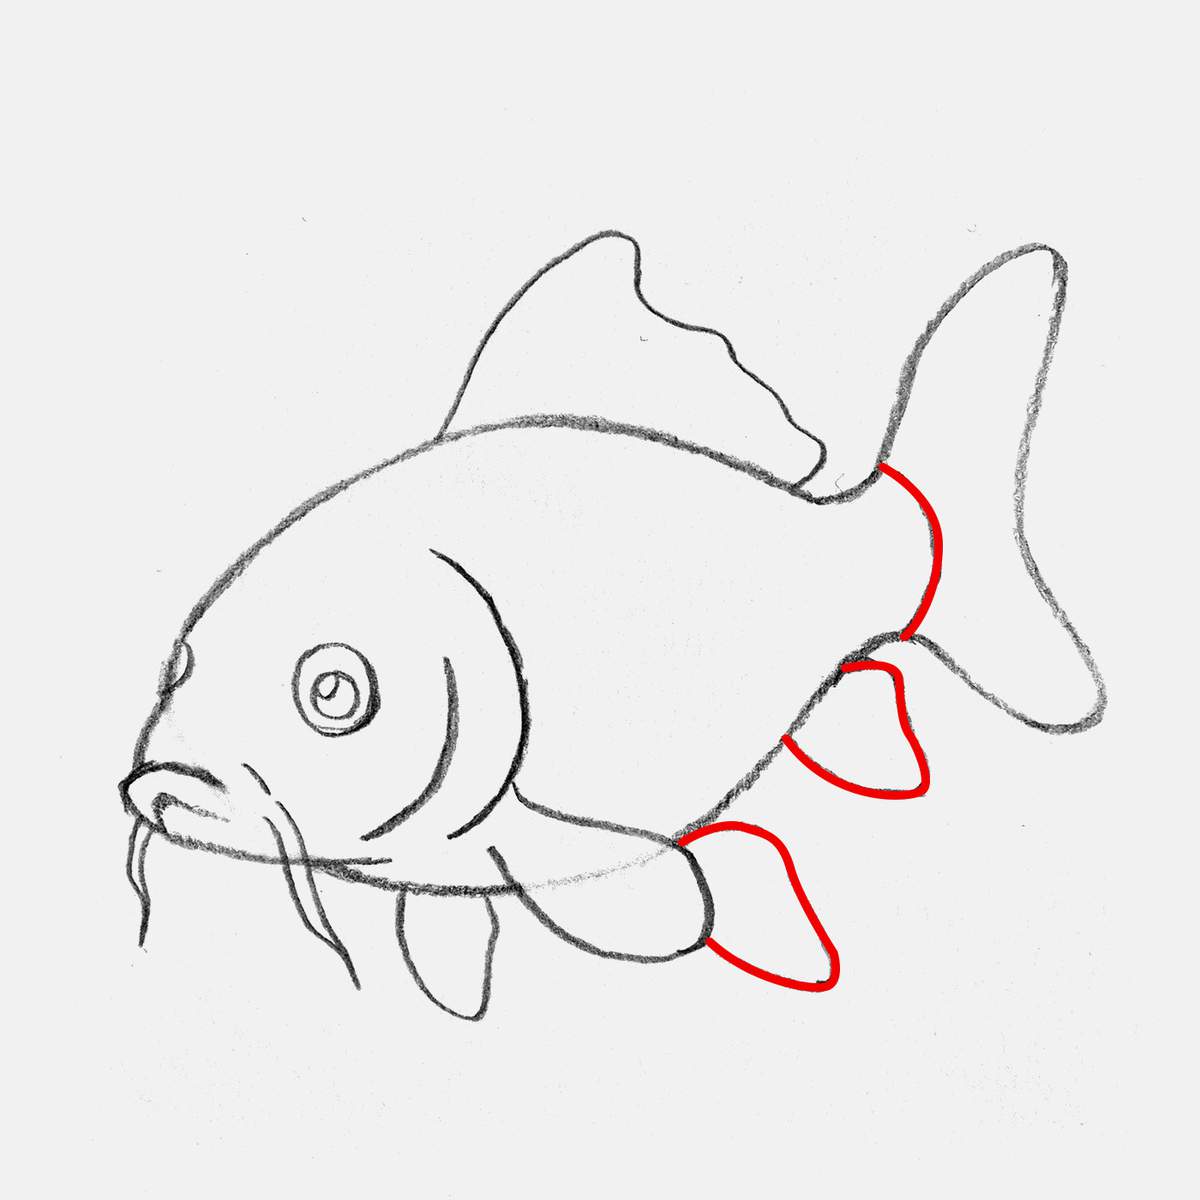
Next, I added the ventral fin and the anal fin. The anal fin is right at the back, where I suppose its bottom is too, and the ventral fin is placed in between the pectoral fins and the anal fin.
I also added this line to separate the tail fin from the main body.
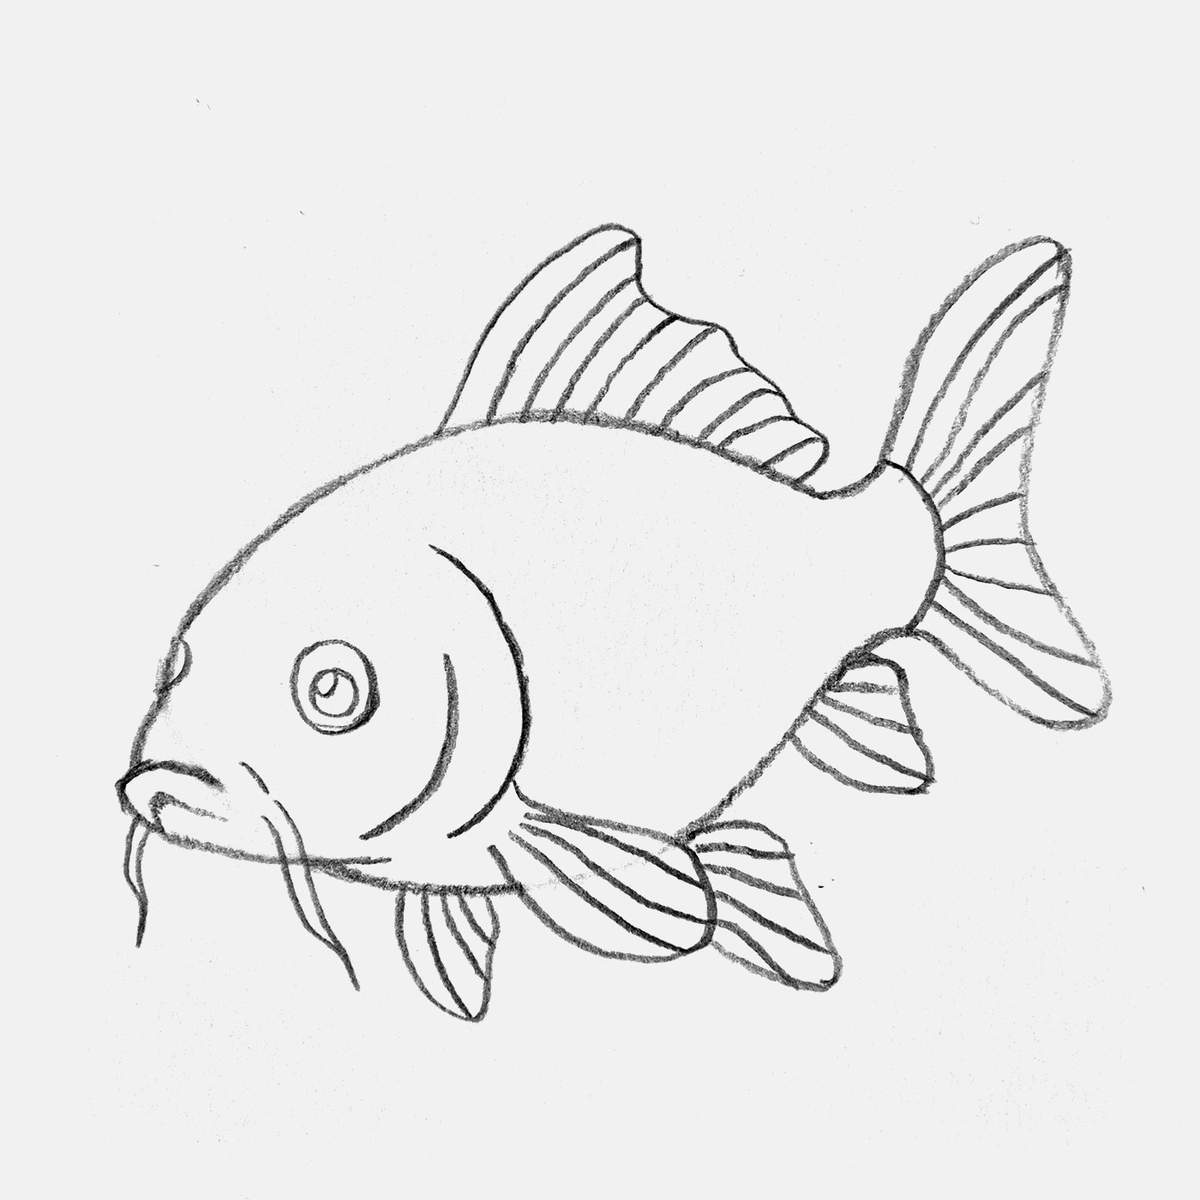
To complete the fins, I added lots of lines on them. To make it look more organic, I made the lines pretty uneven and sometimes a little wavy.
I didn't highlight these lines in red as I honestly didn't feel like doing it, and I didn't think it would make this step clearer.
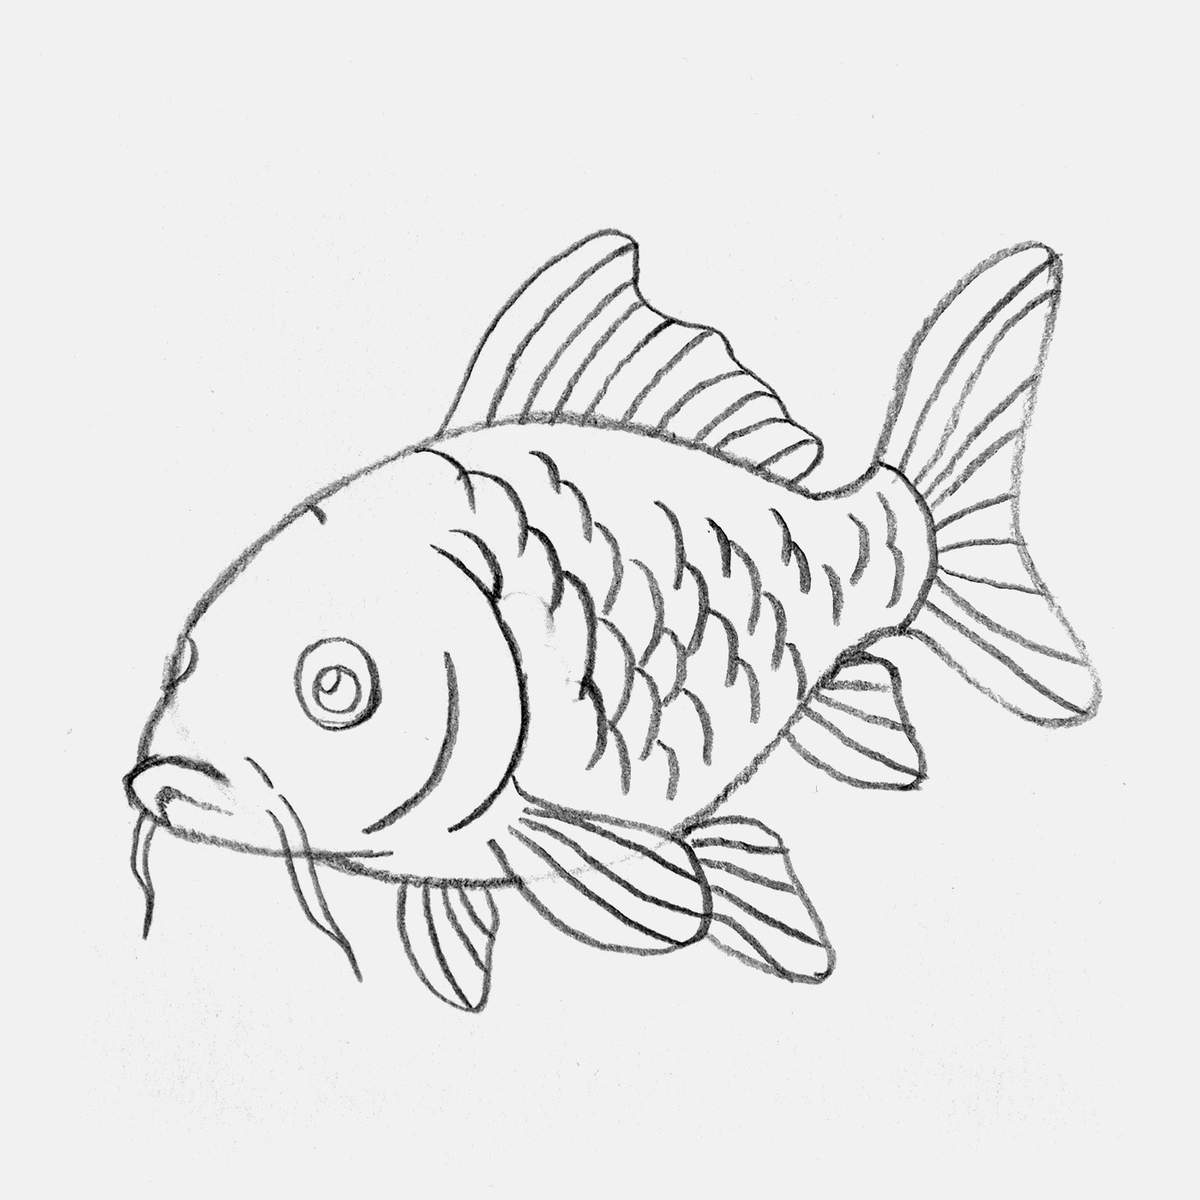
Step 7: Draw the Scales of the Koi Fish
To complete the sketch, we also need to add the scales.
You could cover the whole fish in perfectly spaced scales, but that makes it look very flat and unnatural.
To make it look more natural and give it the impression that the koi fish has scales over its body, I added a big patch on the side that kind of fades out towards the edge where the lines of the individual scales would be less visible.
I also didn't make each scale perfectly similar. Some lines are a bit bigger than others. Sometimes there is a scale missing. And sometimes they don't fully connect.
That's the fun of making this more natural instead of anatomically perfect but flat.
Step 8: Outline Your Koi Fish Drawing with a Black Brush Pen
With the sketch now done, we can outline it to make the coloring part a little easier. Plus, it gives the drawing a nice look, especially when you're not going for photorealism.
To outline drawings like this koi fish, I really enjoy using a brush pen instead of a fineliner. Fineliners create very static and thin lines. With brush pens, you can create thicker and more dynamic lines with varying widths.
The brush pen I use is the Tombow Fudenosuke brush pen. I use it in every drawing where I need to outline the sketch.
It has one little drawback, though. But you can easily work around it.
Usually, I first draw the outline and then erase the sketch. That's what I would do if I outlined it with a fineliner. However, the black ink of this brush pen gets lighter if you erase it. I don't like that.
So to prevent that, I first lighten my sketch with a kneaded eraser and then outline with the brush pen.
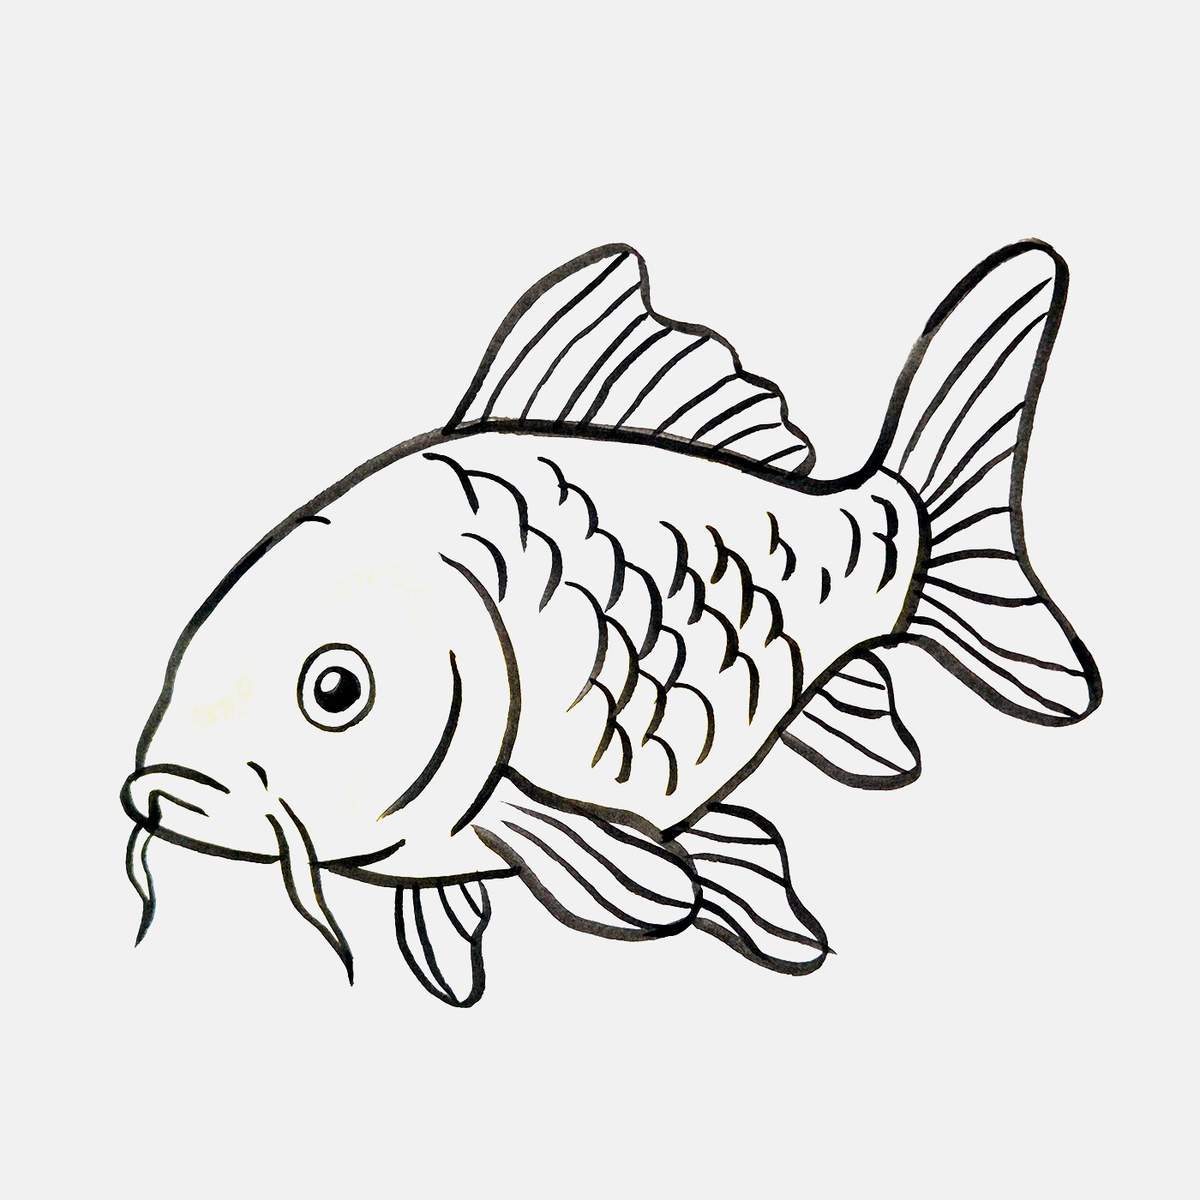
Now we have essentially created our very own coloring page of a koi fish.
Step 9: Color The Koi Fish with Markers
To color this koi fish drawing, I used alcohol-based markers. They're perfect for drawings like this. I use the Ohuhu Honolulu markers, and I'll be using their color names and codes in this step.
If you have other markers, you can just find color matches using the color swatches I included at the start of this guide.
To start off, I colored the more yellow areas, starting with this super light yellow color called Primrose (Y121). I used it to color all the areas that are yellow.
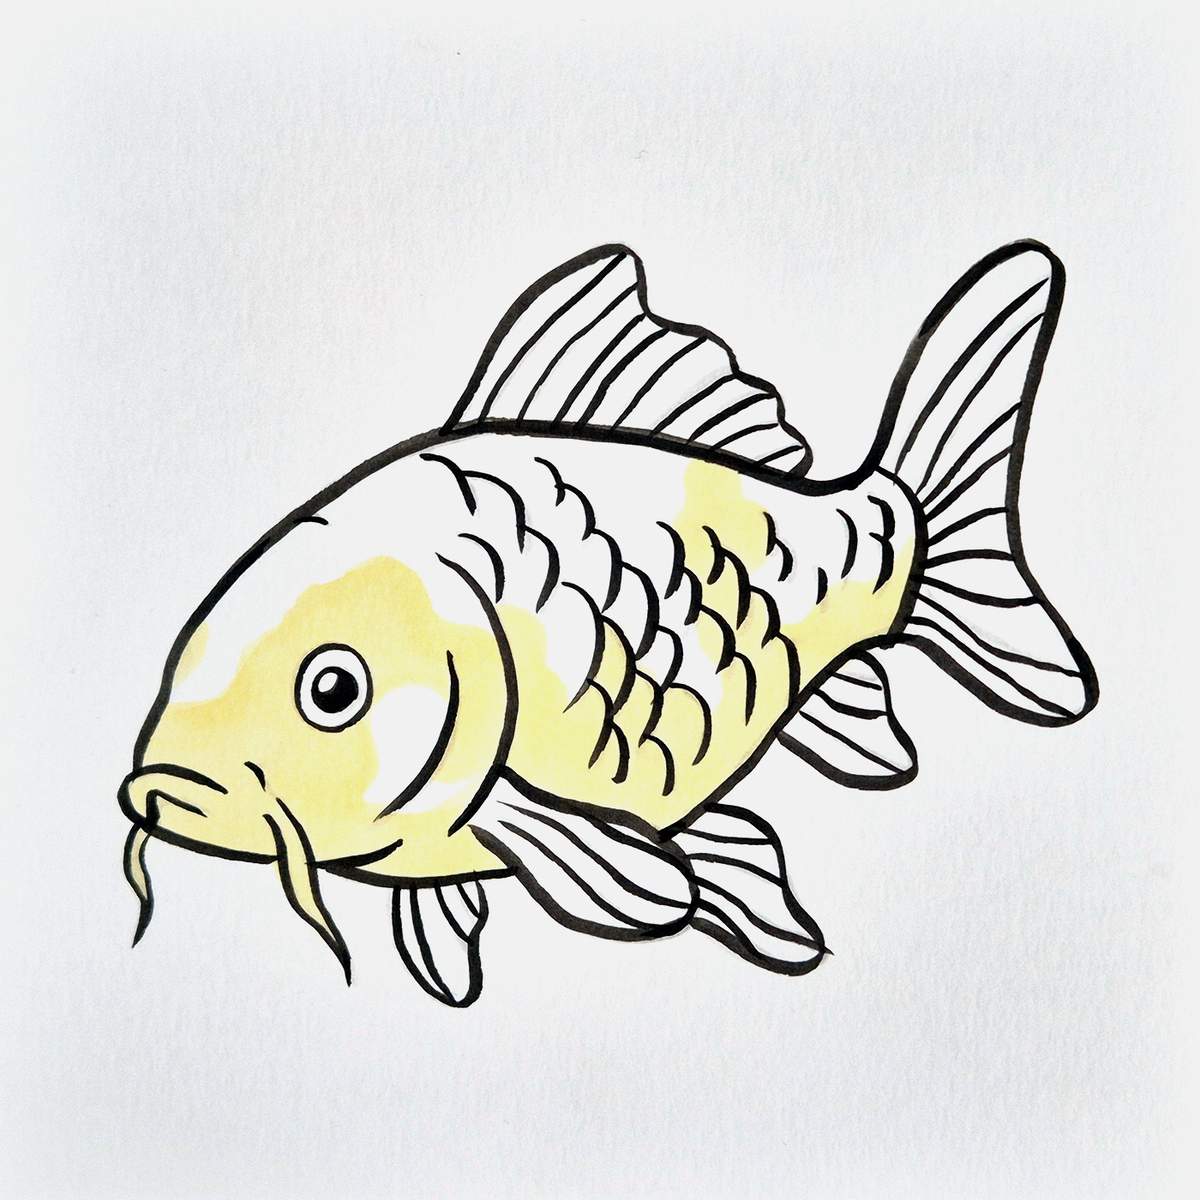
This yellow is super light, so I had to change the way I edit these photos. Normally, I would make the paper look very light, but if I did that, you would barely see the yellow. So, to make the coloring steps clearer, I didn't lighten the photos as much as I otherwise would.
Next, I used a darker yellow called Deep Cream (Y230) to add shading to the koi fish's belly.
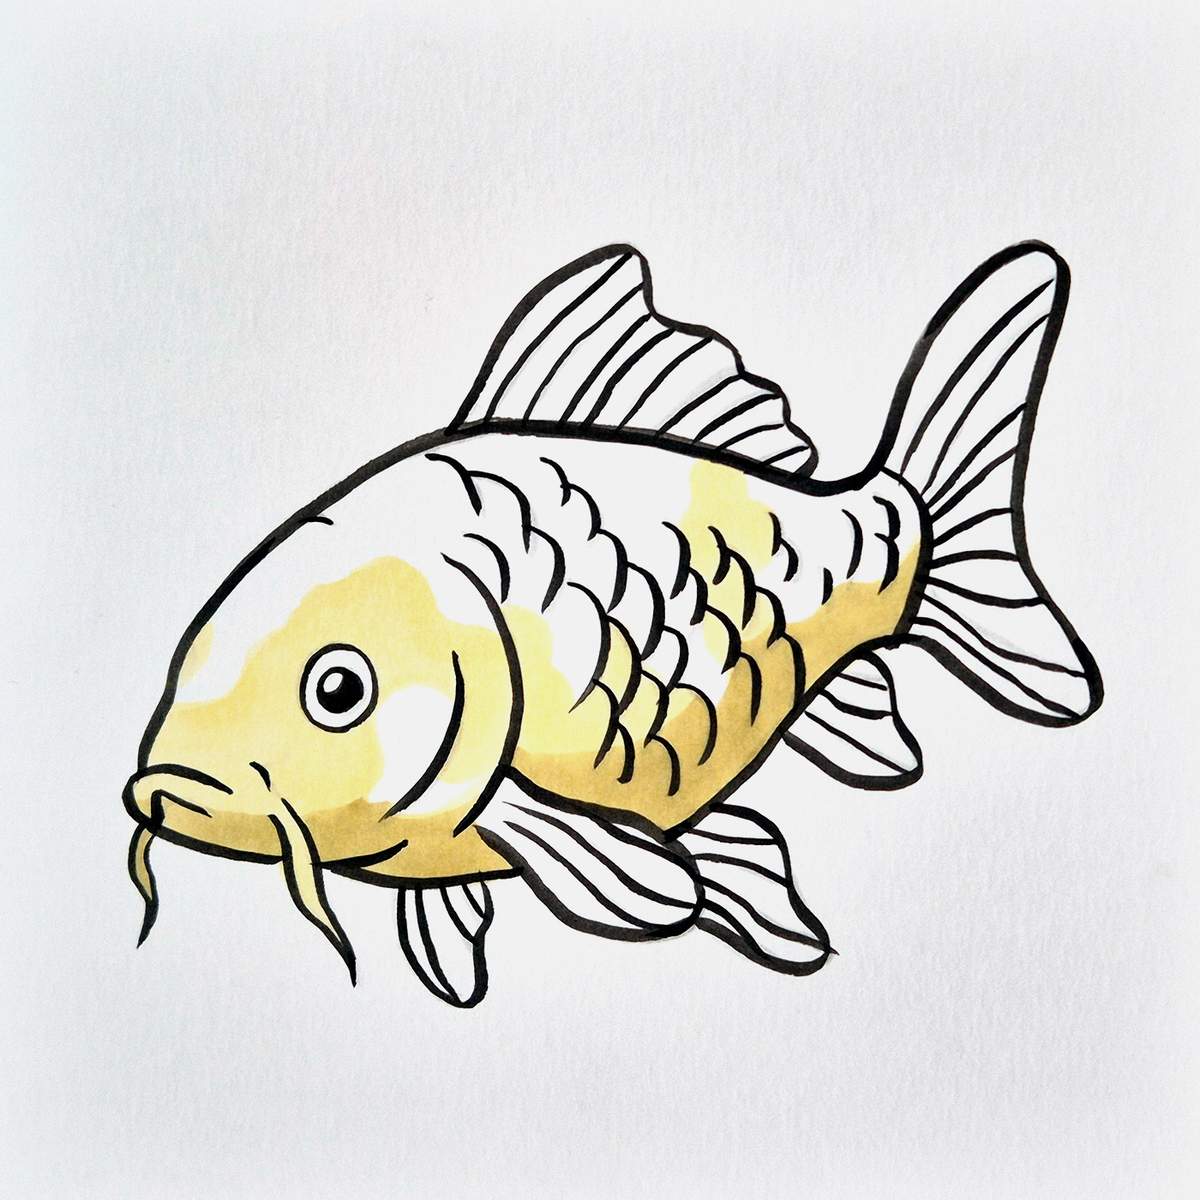
After that, I colored the vibrant yellow parts of the fins.
I used Yellow Dahlia (Y260) to color the tip of the pectoral fin, the anal fin, and the top of the dorsal fin.
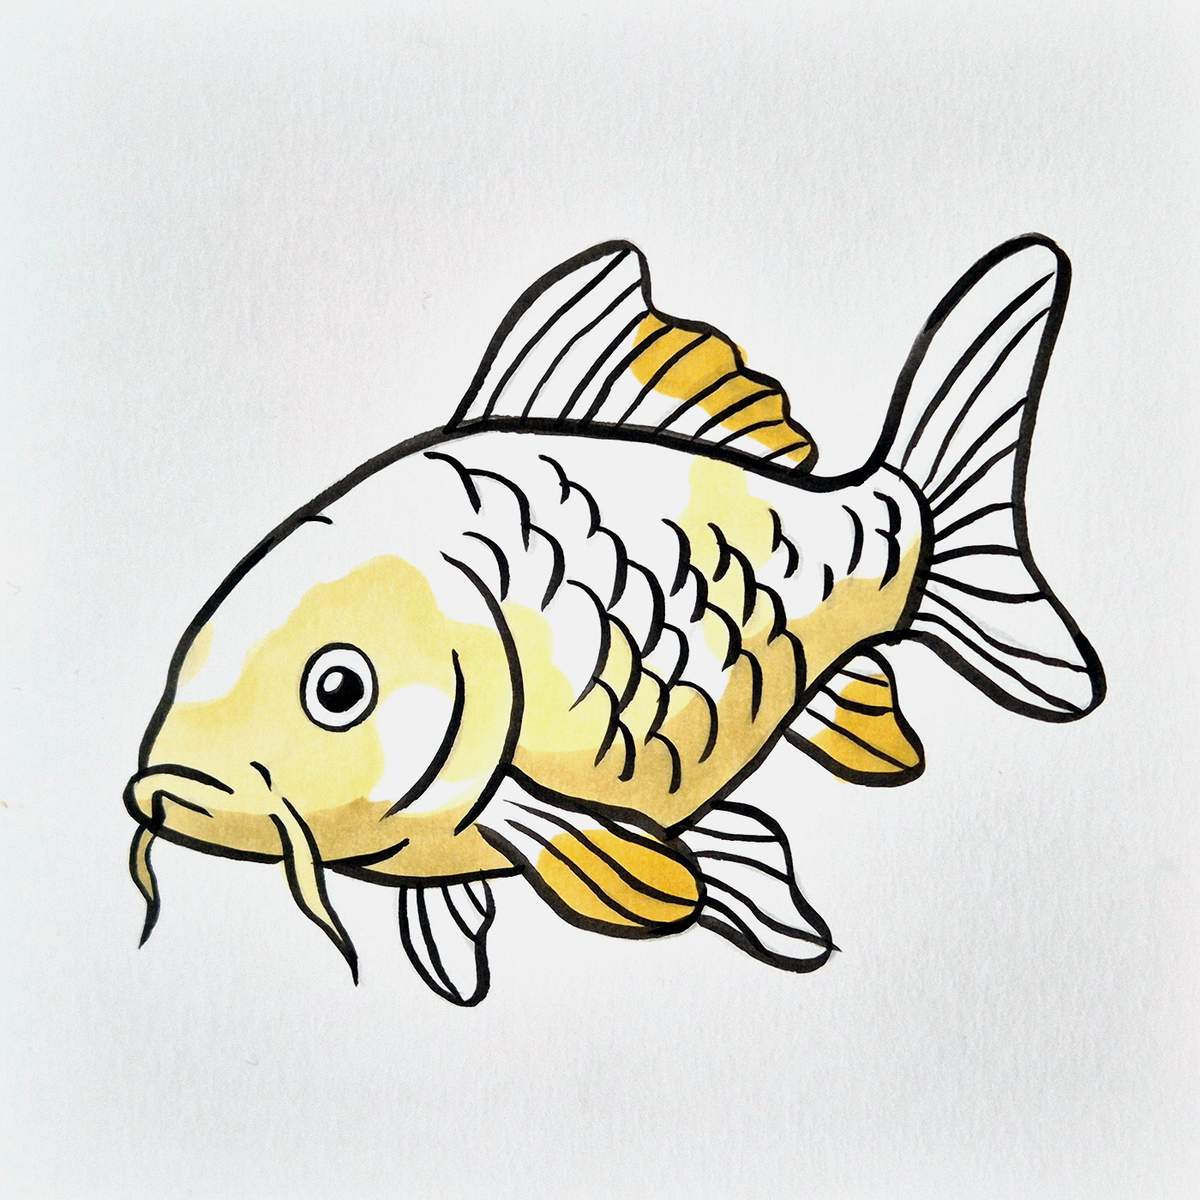
To complete all the yellow parts, I used a dark yellow called ... Dark Yellow (YR1). I colored the backside of the other pectoral fin and the top half of the anal fin.
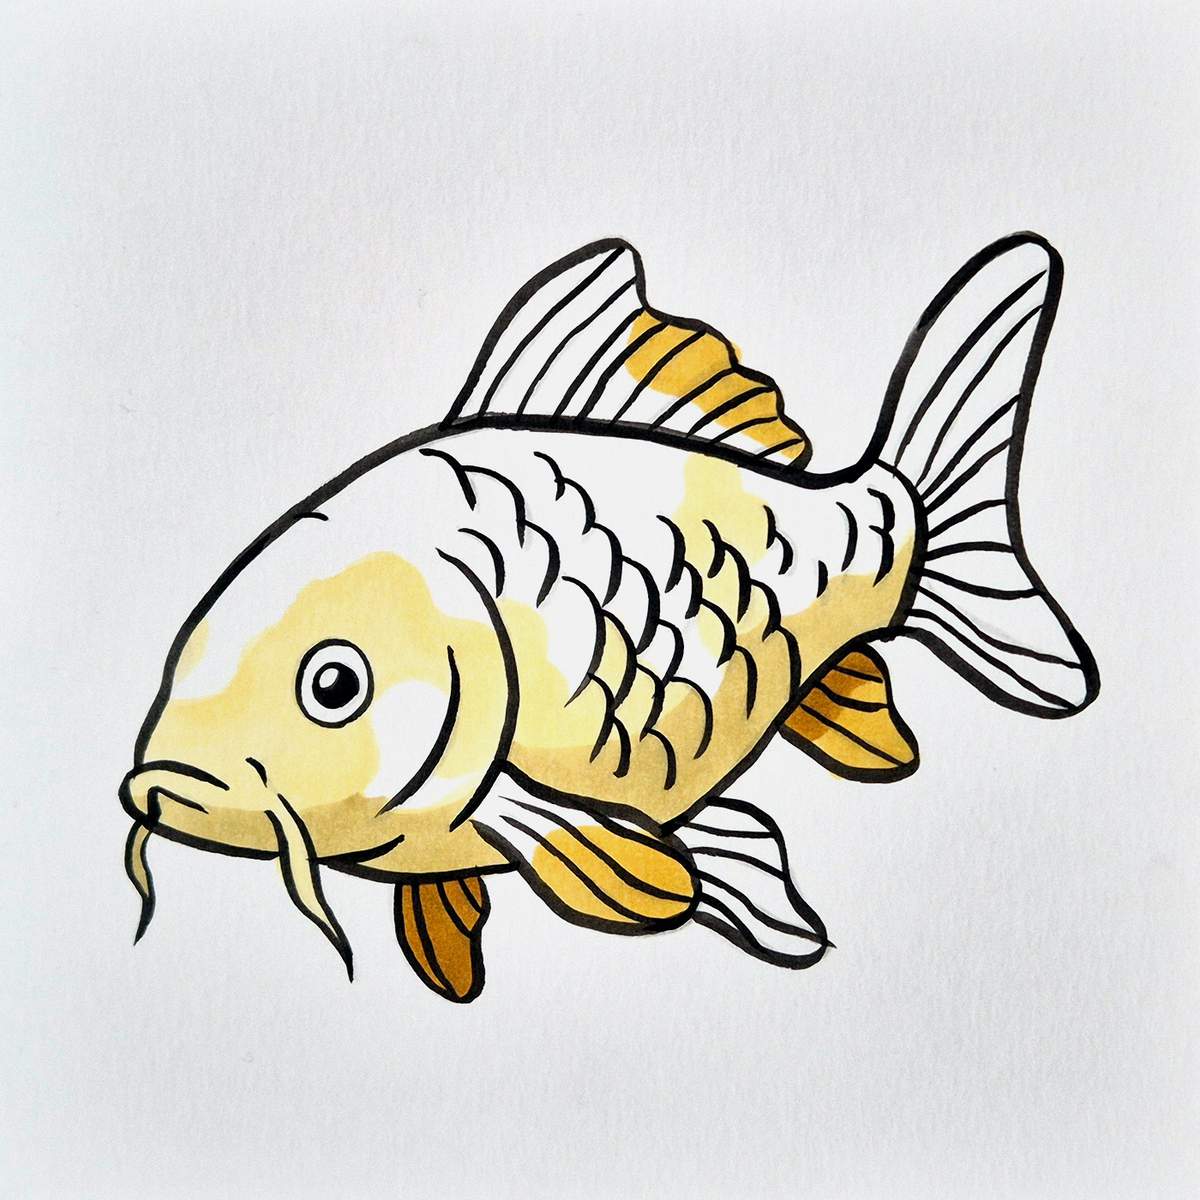
Now all the yellow parts of the koi fish are done!
Next, I added three dark grey spots along the top edge of the koi fish. The marker I used for that was Neutral Grey 7 (NG07).
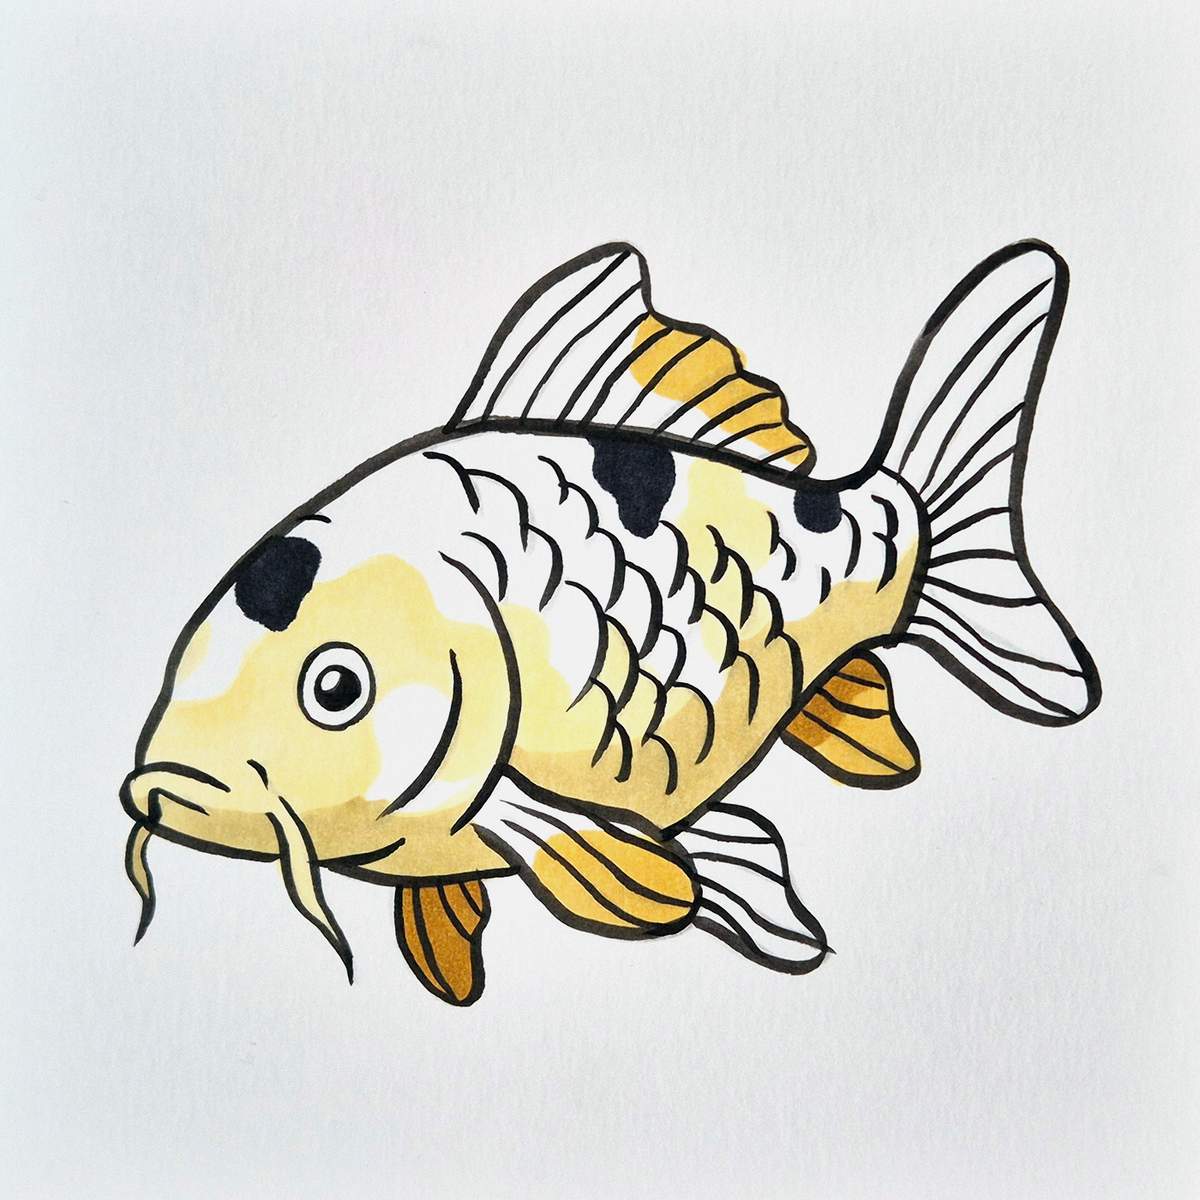
After adding the dark grey dots, I continued working on the orange parts of the koi fish.
I started by coloring the lightest orange parts with Chrome Orange (YR170). I used it in just four areas: the top left of the big dorsal fin, the right edge of the tail fin, the small spot in the center of the side, and the top edge of the pectoral fin and a part between the gills.
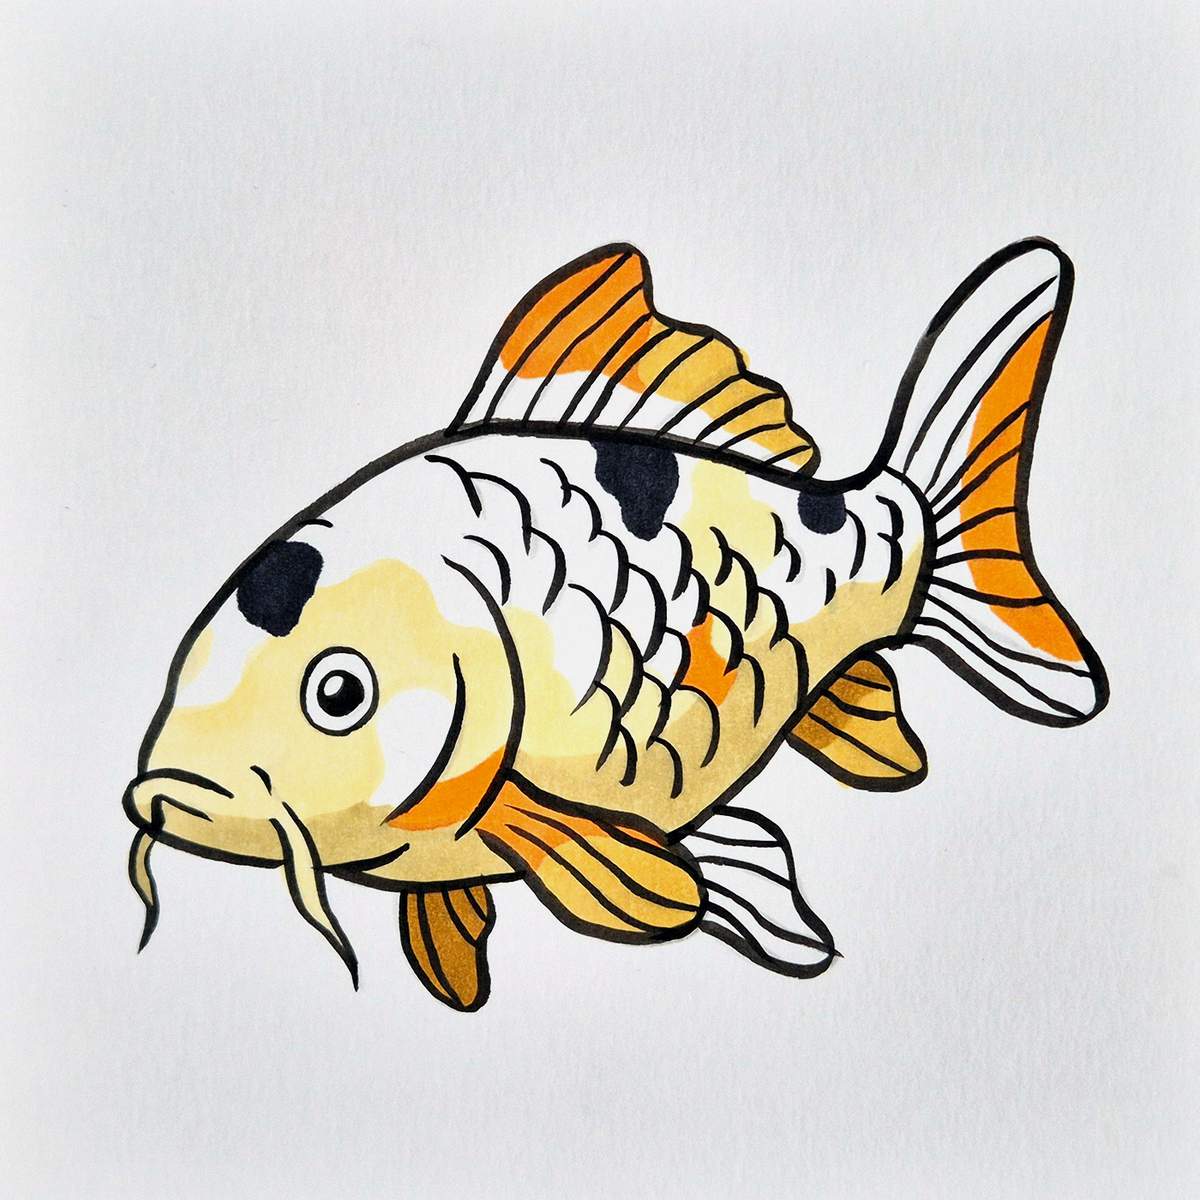
Next, I colored the remainder of the koi fish with Orange (YR3). I also used this color to shade the top bit of the pectoral fin where we just colored the top half light orange.
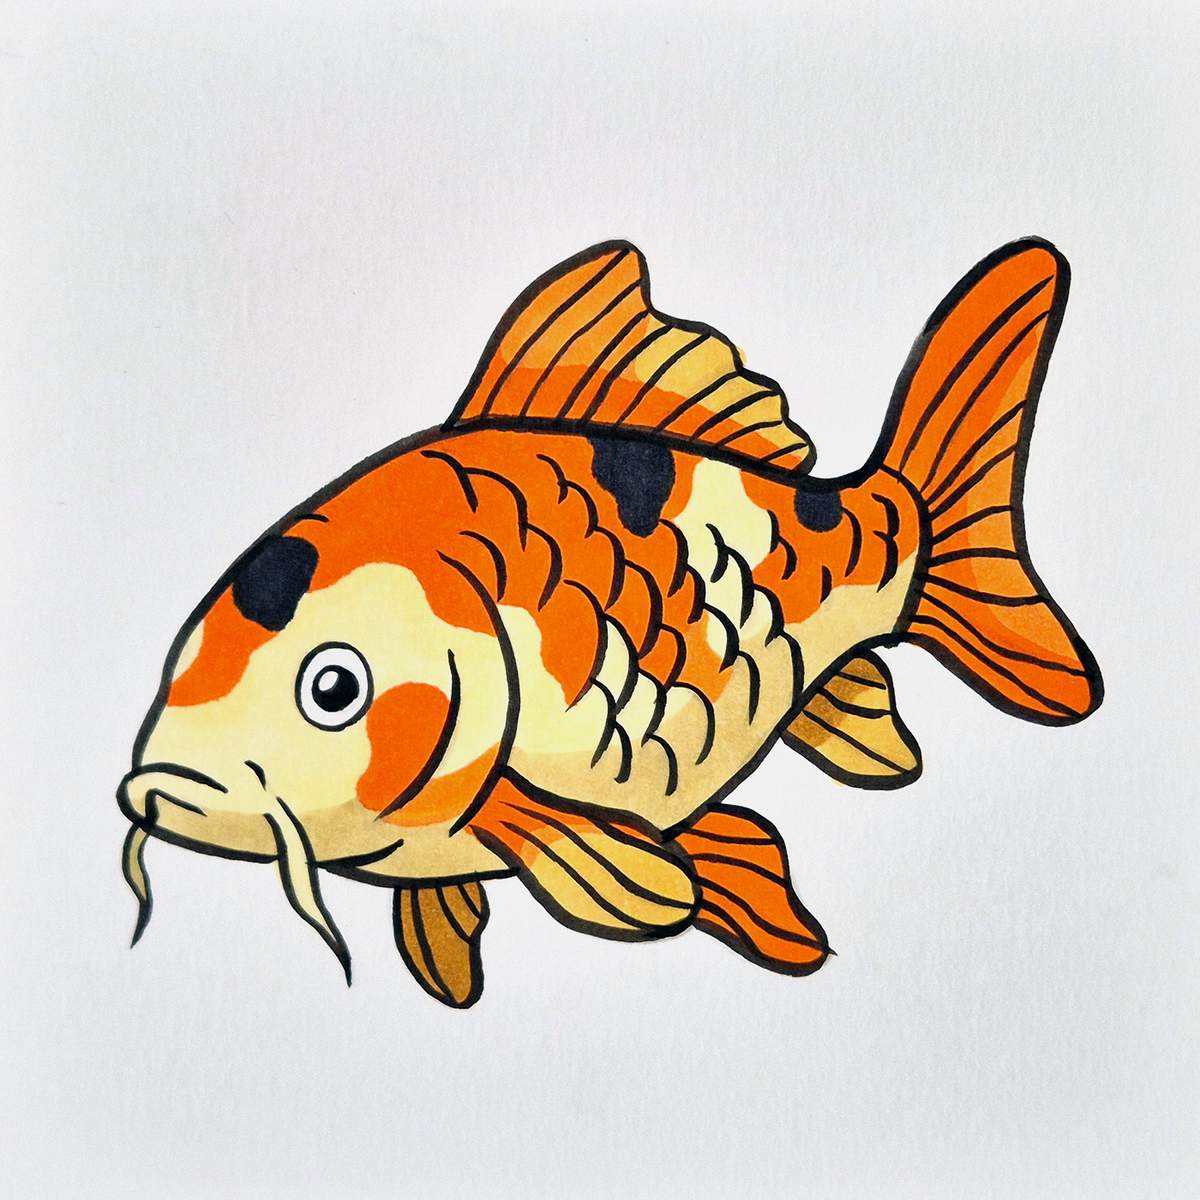
And to finish off our koi fish drawing, I used Lipstick Orange (YR180), a darker orange, to shade the orange parts.
I shaded the bottom half of the orange on the side of the koi fish, the spots on its head, the front of the bottom edge of the big dorsal fin, the bottom of the tail fin, the top edge of the pectoral fin, and the left side of the ventral fin.
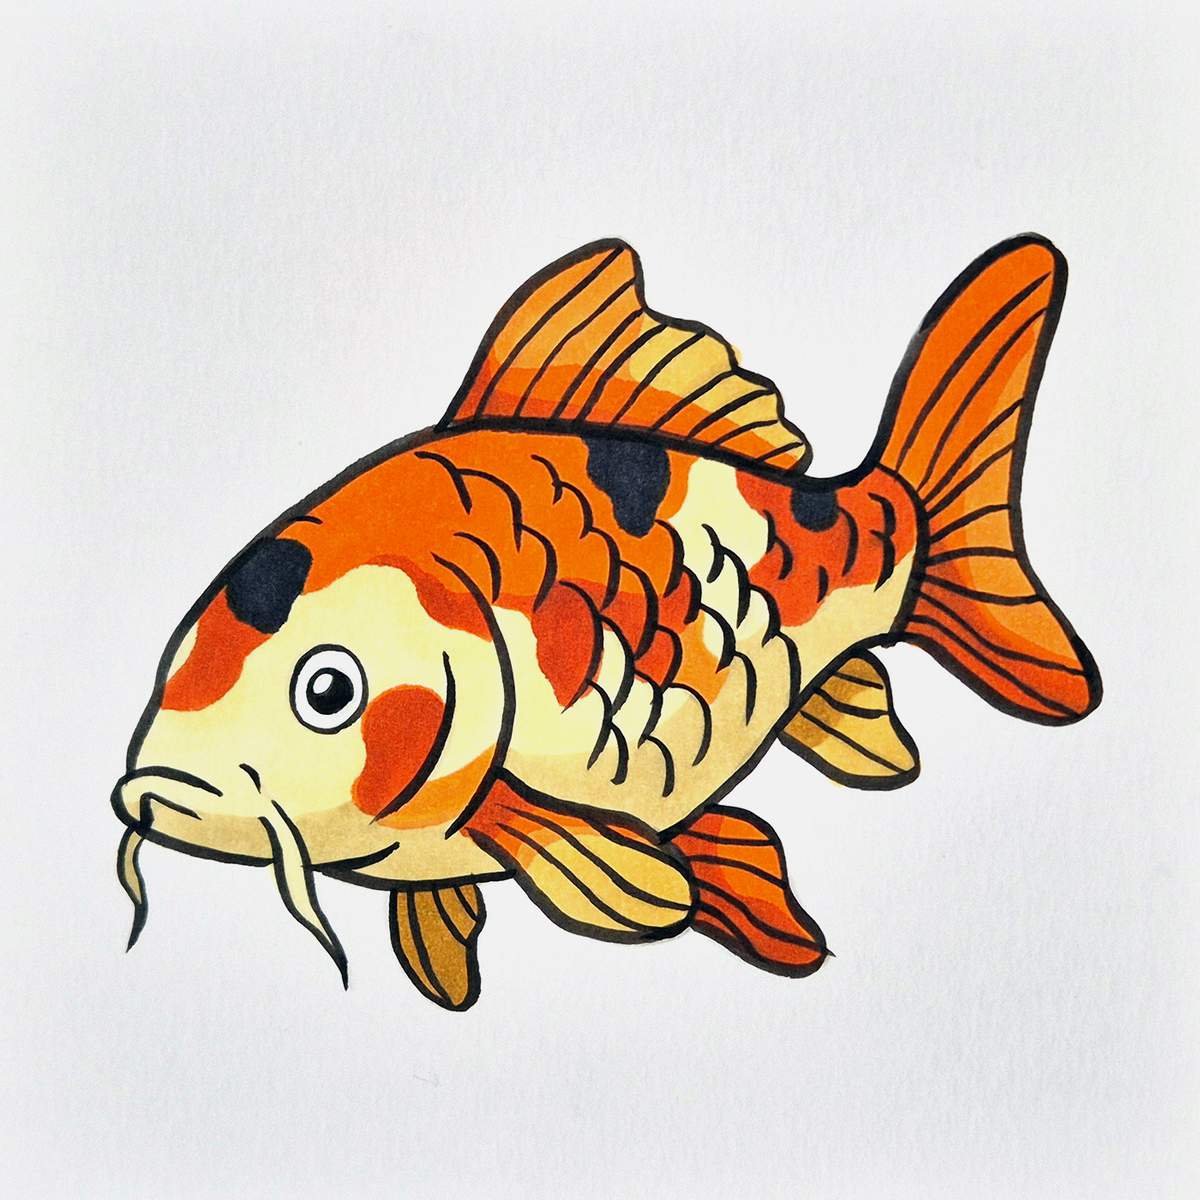
Your koi fish drawing is now done!
That's how you create a colorful koi fish drawing from scratch.
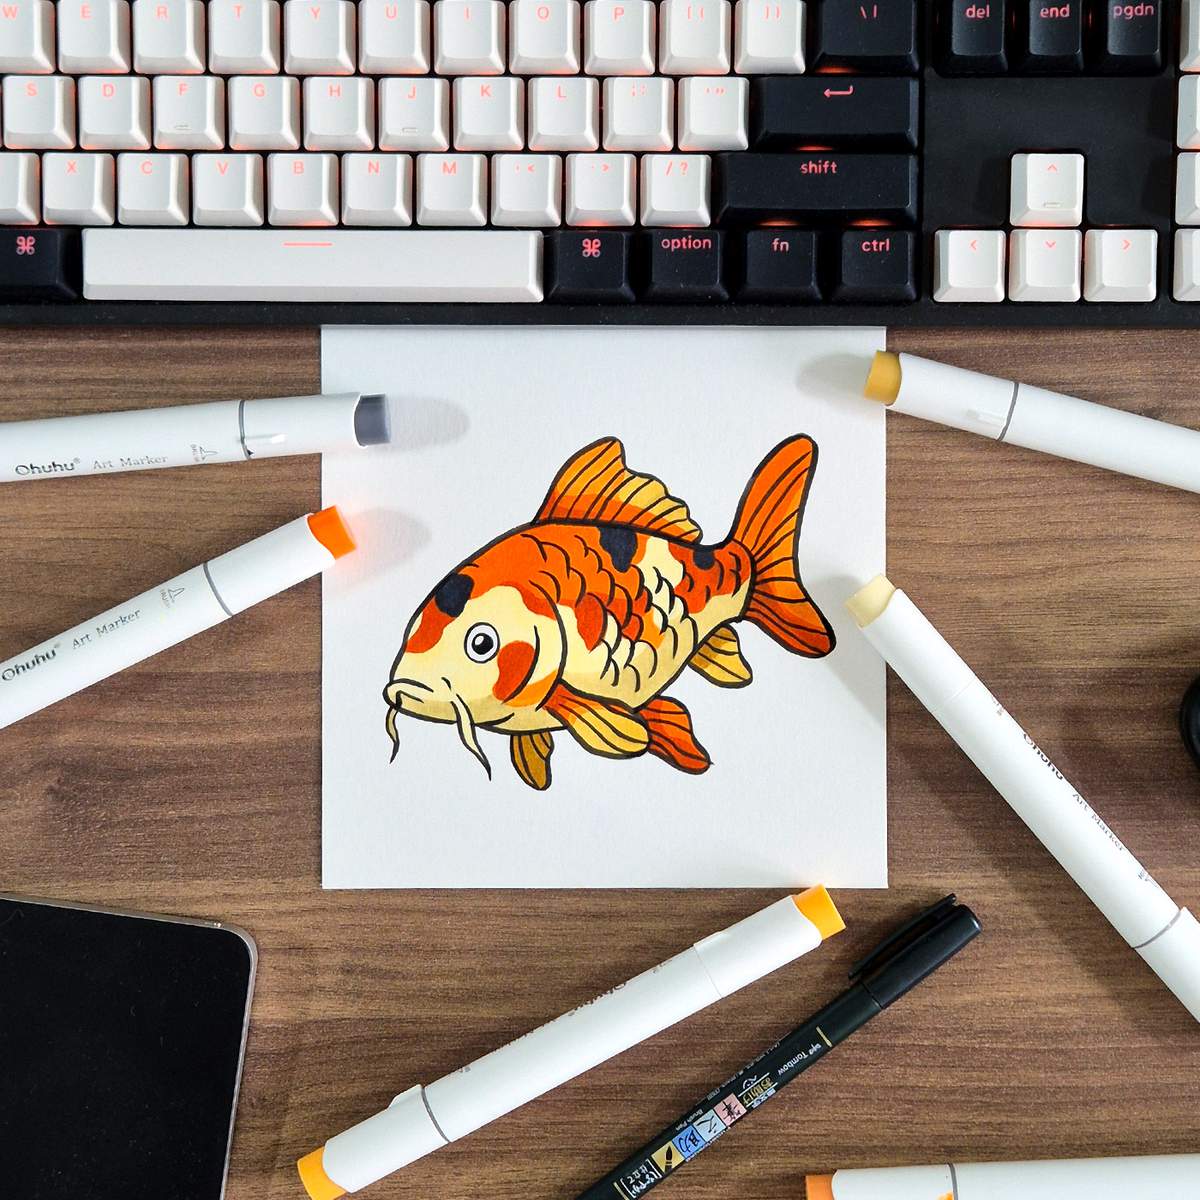
I hope you enjoyed this step-by-step koi fish drawing guide and learned how to create your very own koi fish drawing. How did yours turn out?
If you did enjoy this drawing guide, you might also like my other step by step guides, like these animal guides. This dolphin drawing guide is one of my favorites.

I love bringing cars to life with alcohol markers and colored pencils.
Whether you're just starting out or looking to improve your skills, I'm here to help!
Click here to learn more about me.


Be the first to comment!
Comments
There are no comments yet.