Realistic Step-by-Step Ferrari F12 TDF Drawing Tutorial
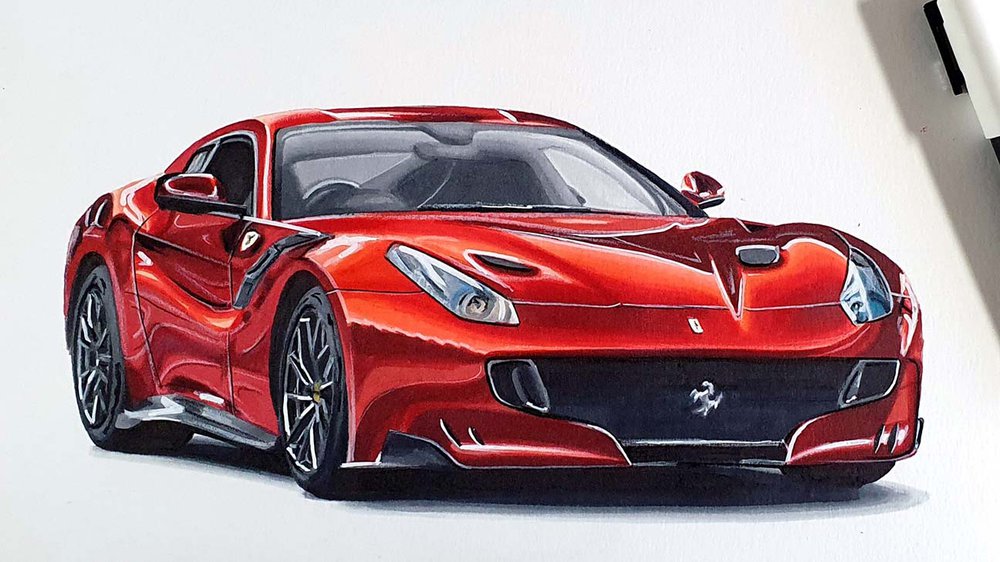
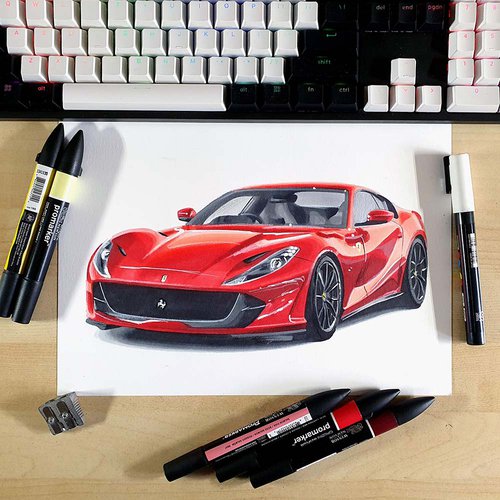
In this tutorial, I'm going to show you how to draw a Ferrari, namely the Ferrari F12 TDF in this beautiful fiery red called Rosso Monza.
It's actually not as difficult as it looks. Just follow along with the steps.
Let's get started!
Disclaimer: In the name of full transparency, please be aware that this blog post contains affiliate links and any purchases made through such links will result in a small commission for me (at no extra cost for you).
Art Supplies I Used in This Tutorial
To make this drawing I used the following art supplies:
A4-sized Canson Illustration paper (which is the best paper for alcohol markers in my opinion);
A graphite pencil and a ruler;
Winsor & Newton Promarkers in the colors:
- Ice Grey 1 (IG1), Ice Grey 2 (IG2), Ice Grey 4 (IG4), Ice Grey 7 (IG7), Blue Black (XBB), and Black (XB);
- Arctic Blue (B119), Cobalt Blue (B637), Aegean (B146), Apricot (O538), Soft Lime (Y828), and Mustard (O948);
- Dusky Rose (R327), Antique Pink (R346), Burgundy (R424), Soft Peach (O138), Salmon Pink (R547), Mandarin (O277), Lipstick Red (R576), and Berry Red (R665);
Derwent Coloursoft colored pencils in the colors White, Dove Grey, and Black;
And a white Posca PC-1MR.
Reference Photos I Used for This Tutorial
For this tutorial I used 3 reference images. One for the proportions, one for the reflections, and one for the color.
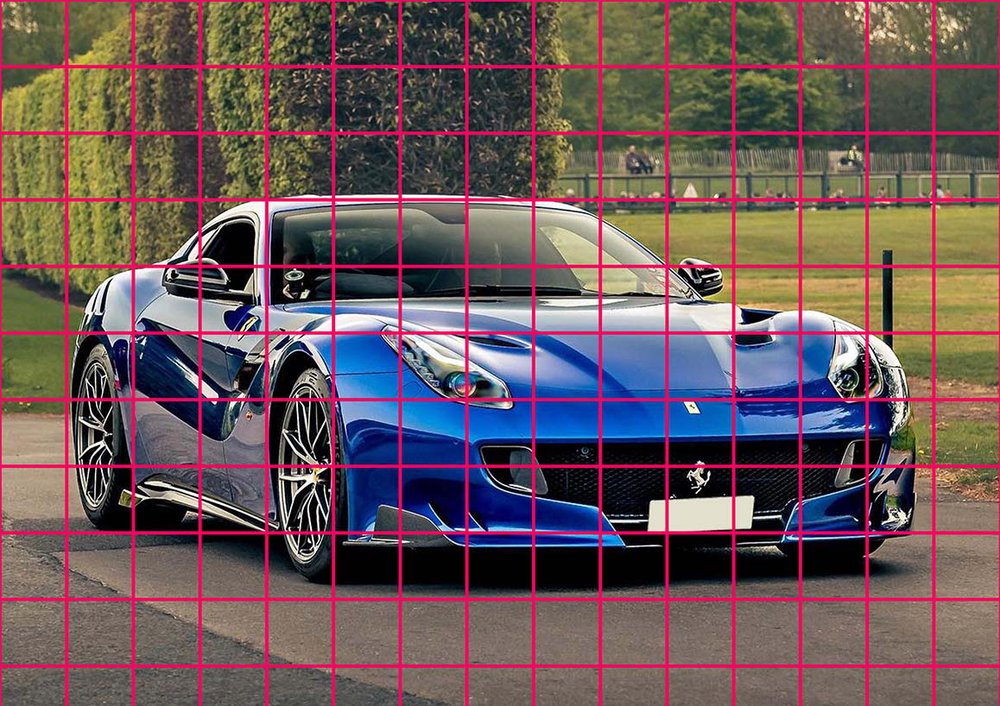
I used this image to get the proportions and the perspective of the Ferrari F12 TDF right.
I used this image (3rd slide) as a reference for the reflections.
And I used these images as a reference for the color: Rosso Monza.
How to Draw a Ferrari F12 TDF?
To draw a Ferrari F12 TDF, I first sketched the outline of the car. After that, I colored all black and grey parts with alcohol markers. Next, I colored the main body of the car in a beautiful fiery red with lots of reflections of buildings. And to finish it off I added some details with colored pencils and bright highlights.
Step 1: Sketch the Outline of the Ferrari
When drawing cars the sketch is the first and most important step. It's key you get the proportions right before you start coloring otherwise your drawing will look wonky.
Sketching a car like the Ferrari F12 TDF can be very difficult if you try to freehand it, but luckily there are a few techniques that make sketching this car a lot easier.
For this tutorial, I'm going to use the grid method which is my personal favorite.
I first placed a grid over the reference photo. The grid I used is 15 by 10.5 squares and each square is 2 by 2 cm which fits well on the paper I'm using.
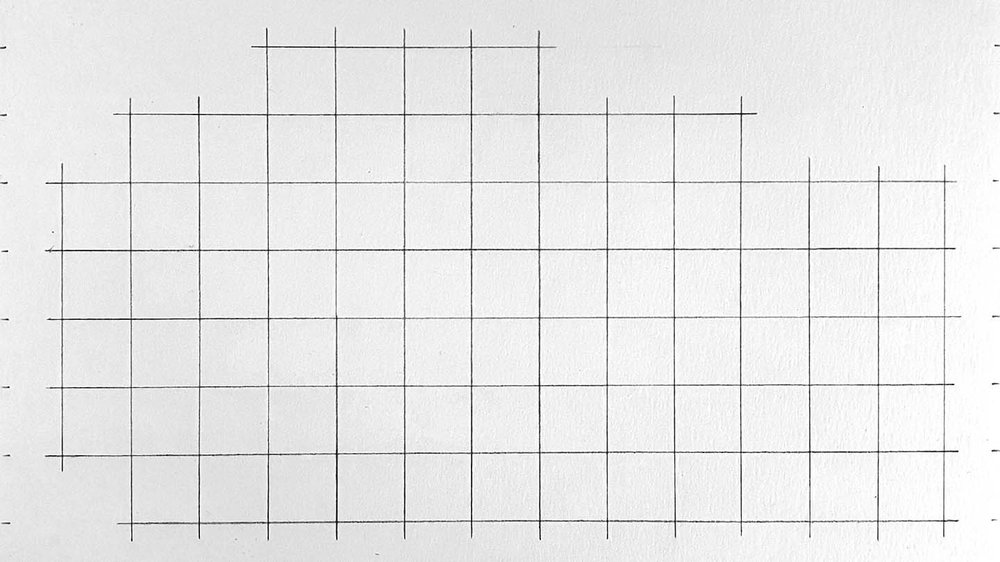
After that, I recreated that same grid on my piece of paper. I only sketched the squares I'll be using.
Now it's time to start sketching the Ferrari. I started by sketching the outline of the car.
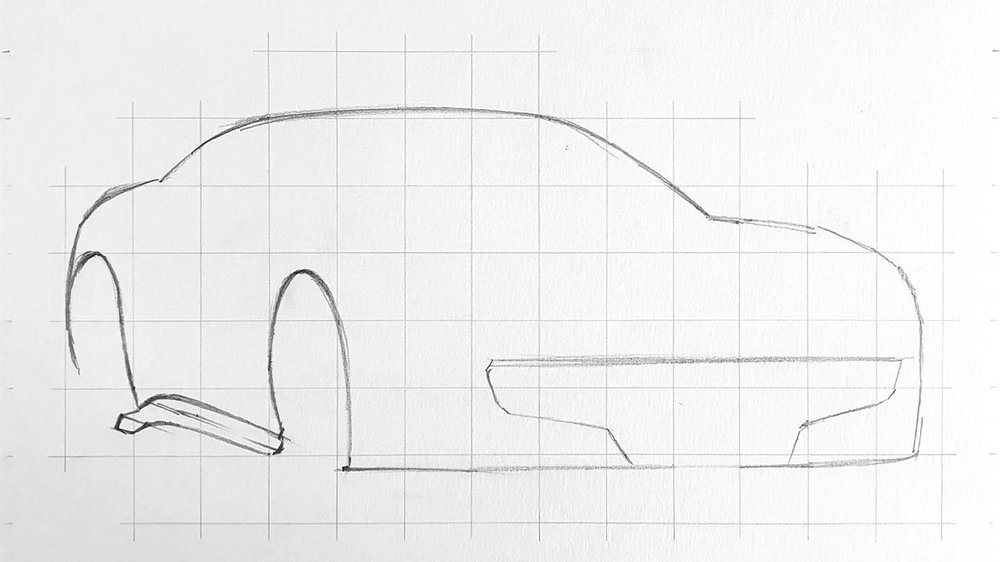
Next, I sketched the rest of the car, like the headlights, the windshield, the hood lines, etc.
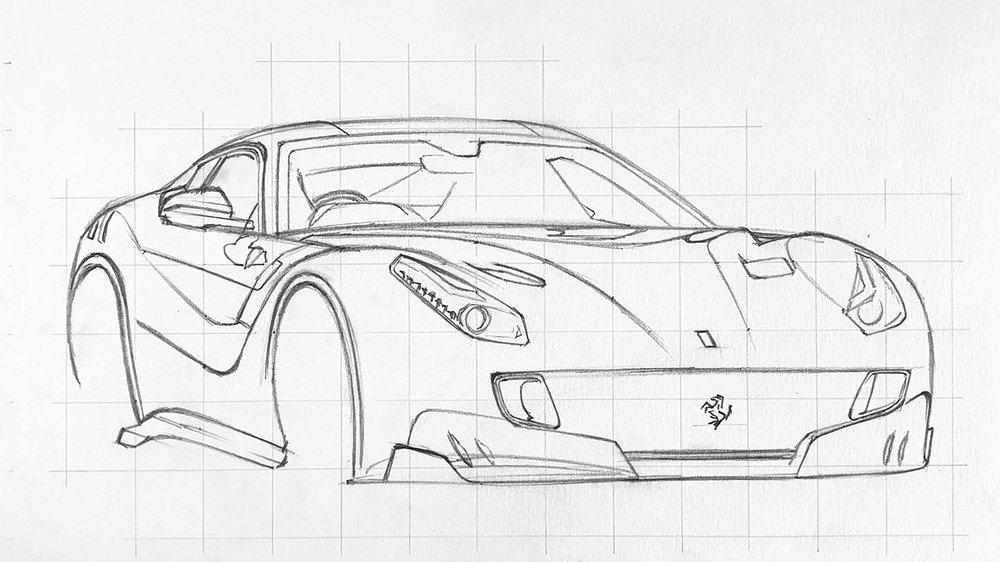
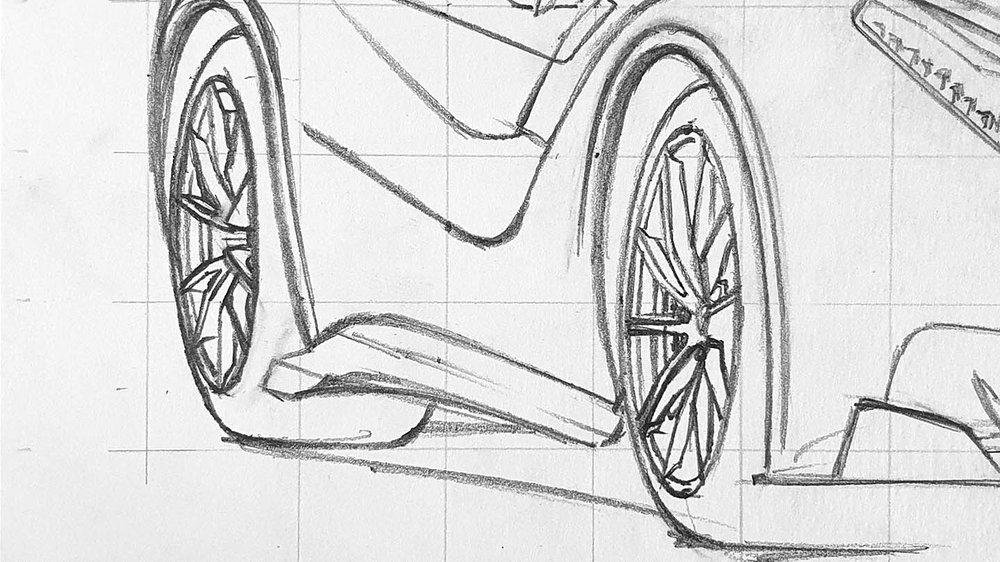
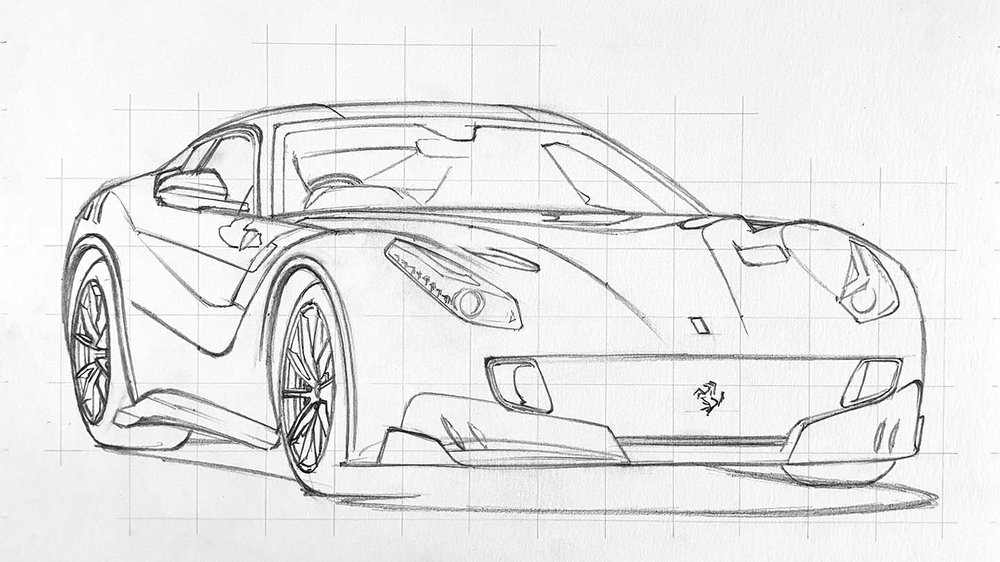
I always sketch the wheels after I've sketched the main body to make sure the main body has the correct proportions.
When sketching the wheels you need to make sure that the shape is as perfect as possible. When the wheels are not correctly sketched they will look wonky and make your whole car drawing look off.
The wheel can be a bit awkward to sketch, but just take your time and make adjustments until you think they're good.
Step 2: Sketch the Reflections
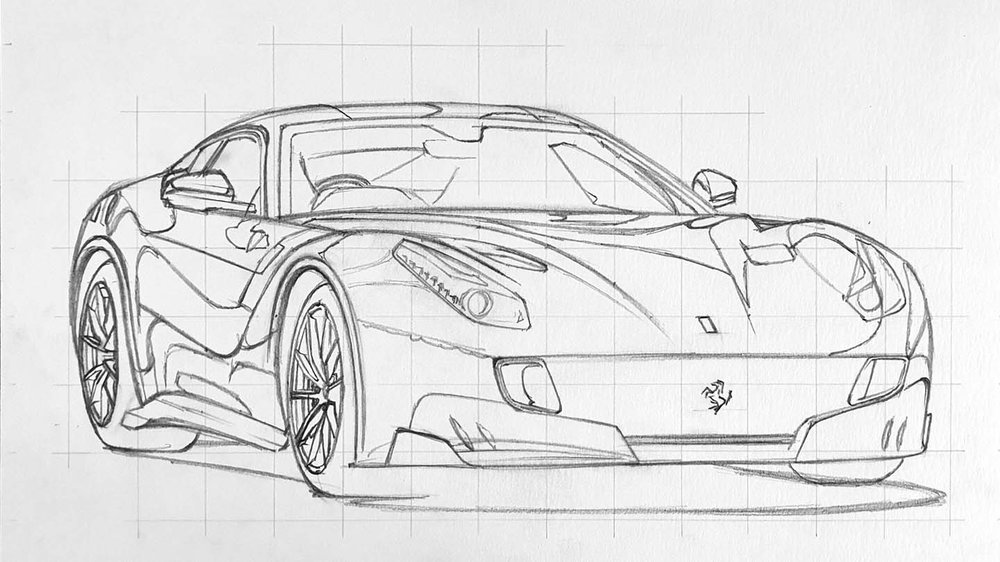
The Ferrari F12 TDF we're drawing has beautiful reflections of some buildings. To make it easier to color these reflections later we're going to sketch in where they are going to be.
They don't have to be too detailed or precise.
Step 3: Color All Pure Black Parts
At this point, the sketch might look a bit overwhelming.
To make it less overwhelming we're going to color all pure back parts first. And for this, I used the Black Promarker.
Make sure to erase your sketch until you can only barely see it to prevent the sketch from showing through the ink of the markers.

Step 4: Color the Front Grill of the Ferrari F12
Next up, we're going to draw the front grill and some aero parts.
I first colored the air intakes to either side of the grill with Ice Grey 4 and I colored the horizontal lines at the bottom with Ice Grey 2.

Next, I colored the remainder of the front grill with Blue Black and the inside of the intakes with Ice Grey 7.

Lastly, I colored the aero fins with Ice Grey 7 and Blue Black and I colored the prancing horse with Ice Grey 1, 2, and 4.

Step 5: Color the Wheels Of the Ferrari
Next are the wheels of the Ferrari F12 TDF.
I first colored the front wheel and I started by coloring the spokes Ice Grey 4 and the logo with Mustard.

Then I added some depth to the spokes by darkening the bottom of each spokes with Ice Grey 7.

Next, I colored the tire Ice Grey 7 and blended that into the black with Blue Black.

Next, I repeated these steps for the rear wheel, except the logo on the rear wheel isn't visible.

Step 6: Color the Shadow
Now it's time to color the shadow.
I started by coloring the shadow with Ice Grey 1.

After that, I used Ice Grey 4 and colored in between the Ice Grey 1 edge and the black. To make the transition from Ice Grey 1 to 4 a bit smoother I blended the edges with Ice Grey 1 and 2.

Lastly, I smoothened the edge between the black and Ice Grey 4 with Ice Grey 7 and I used Ice Grey 4 to blend the Ice Grey 7 into the lighter greys.

Step 7: Color the Headlights of the Ferrari F12 TDF
Next on the list to color are the headlights.
I first colored the left headlight with Ice Grey 1.

Then I added some blue and orange as the headlight has a few blue and orangey reflections.
For the blue reflections I used Arctic Blue and Cobalt Blue, and for the orange reflection I used Apricot.

After that, I added some details with Ice Grey 2, 4, and 7.

Next, I colored the right headlight.
I first colored the left half with Ice Grey 1 and the right half with Ice Grey 2.

After that, I added some details and reflections with Ice Grey 2, 4, and 7 on the left part and Ice Grey 4, 7, and Blue Black on the right.

And lastly, I added the blue shine to it with Arctic blue on the lighter parts and Cobalt Blue and Aegean on the darker parts.

Step 8: Color the Logo/Badge above the Front Grill
The next thing I colored was the badge on the front of the car, just above the front grill. And to color that I used Lemon Yellow.

Step 9: Color the Vents on the Hood
After that, I also colored the 2 vents on the hood with Ice Grey 7.

Step 10: Color the Side Skirt
Next up is the side skirt.
I started by coloring the lightest part of it with Ice Grey 2.

Next, I colored the remainder using Ice Grey 4 and I added some deeper reflections with Ice Grey 7.

Step 11: Color the Windshield of the F12 TDF
Now it's time to color the windshield.
The windshield in this case doesn't have any difficult reflections and is because of that quite simple.
I started by coloring the side window and the rear window you can see through the windshield with Ice Grey 1. I also colored the part above the rear window the side window and the left half of the right A-pillar.

After that, I colored the dark edge on the left, top, and right of the window with Ice Grey 2, as well as the steering wheel, the left seat, the rearview mirror, and some more bits of the interior.

Next, I colored the remainder of the windshield with Ice Grey 4 and I darkened the right seat as well as some parts of the edge of the windshield.

Lastly, to give it more depth I used Ice Grey 7 to darken mainly the seats and the area around the right seat, and I added some darker reflections on the right of the windshield.
I also darkened the rear window with Ice Grey 2 as it looked too light.

Step 12: Color the Side Windows
Next up are the side windows and sills.
I first colored the sills on the front side window with Ice Grey 4 and I colored the window triangle with Ice Grey 7.

After that, I colored the window frames with Ice Grey 2 as well as the rear side window. I also added some black details and some reflections with Ice Grey 4.


Step 13: Color the Reflections of the Buildings on the Main Body of the Ferrari
Now that all the non-body parts are done it's time to finally add some color to the drawing.
I first colored the reflections. They are a more desaturated shade of the body color.
I first colored the light reflections with Dusky Rose.

After that, I colored the rest of the reflections first with Dusky Rose and on top of that Antique Pink.

Lastly, I added some darker reflections using Burgundy. I also colored the reflection in front of the front wheel as I forgot to do so earlier...

The reflections are not perfect yet. They need to be a bit darker and they also need a bit of a color correction. But first I wanted to color the rest of the body to see how it together.
Step 14: Color the Remainder of the Main Body
I started by coloring the lightest parts of the main body that aren't yet colored. For that, I used Soft Peach. I would've colored everything, but the marker was almost dry...

After that, I used Mandarin to darken most of it. I left a lighter edge of Soft Peach visible and I used Soft Peach the blend that edge a bit.

Next, I used Lipstick Red to add some red to the mix and darken the sky reflections a bit. I also used Berry Red on the front to darken it even more.

At this point, the colors of the reflections of the buildings didn't really fit with the rest very well, but luckily that's an easy fix.
I layered Lipstick Red over the parts that are Dusky Pink, and Berry Red over the rest of the reflections.
I also used Ice Grey 7 to darken some parts of the reflections, mainly around the front, and layered Berry Red over it to make the colors more saturated.

Step 15: Add Details with Colored Pencils
The whole car is colored now, but some parts aren't very detailed and precise yet.
To resolve this we're going to use a White, a Dove Grey, and a Black colored pencil.
I started by adding a lot of white details all around the car. I refined the spokes, added some details in the headlights and the prancing horse, and I added some reflections to the side of the car.
After that, I used Black to add some reflections on the side, refine the spokes a bit more, and add some darker details around the car.
I just noticed I forgot to add the lines of the panel gaps... I'll fix that later.
Lastly, I used Dove Grey to add some grey details to the headlights and refine the prancing horse more.

Step 16: Add White Highlights with a Posca Marker (+ Forgotten Panel Gap Lines)
Now that all details are in place it's time to put the finishing touches on the drawing with a white Posca PC-1MR.
I added some white reflections on the headlights, the front, the prancing horse, the side skirt, the wheels, the window frames, the roof, and on a few more places.
I also added the panel gaps with a Black and White colored pencil.
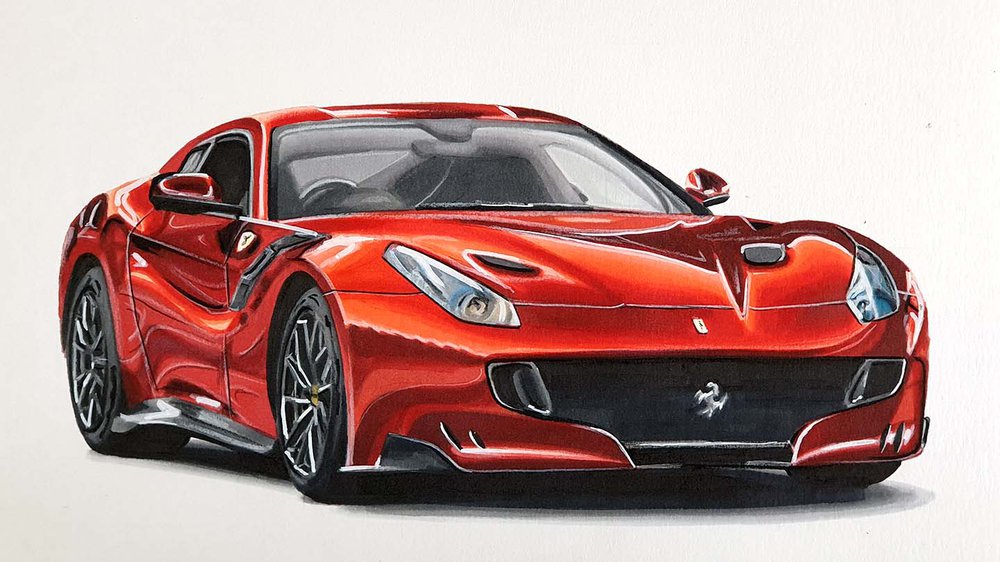
Now it's fully done!
And That's How You Draw a Ferrari F12 TDF
I hope this was helpful to you!
If you decide to share your drawing on Instagram, make sure to tag me (@luukminkman). I'd love to see how yours turned out!
One last thing, I'd really appreciate it if you could share this article with someone you think might also like it. It would help me out a lot.




Add a comment
Comments
Hey mr. Luuk Minkman, I had been following you from past 2 weeks. Your drawings excellent and great. My drawings after following you look good nowadays. Thankyou, Dear Abhinav B
Brilliant
this was so amazing 👍!!!