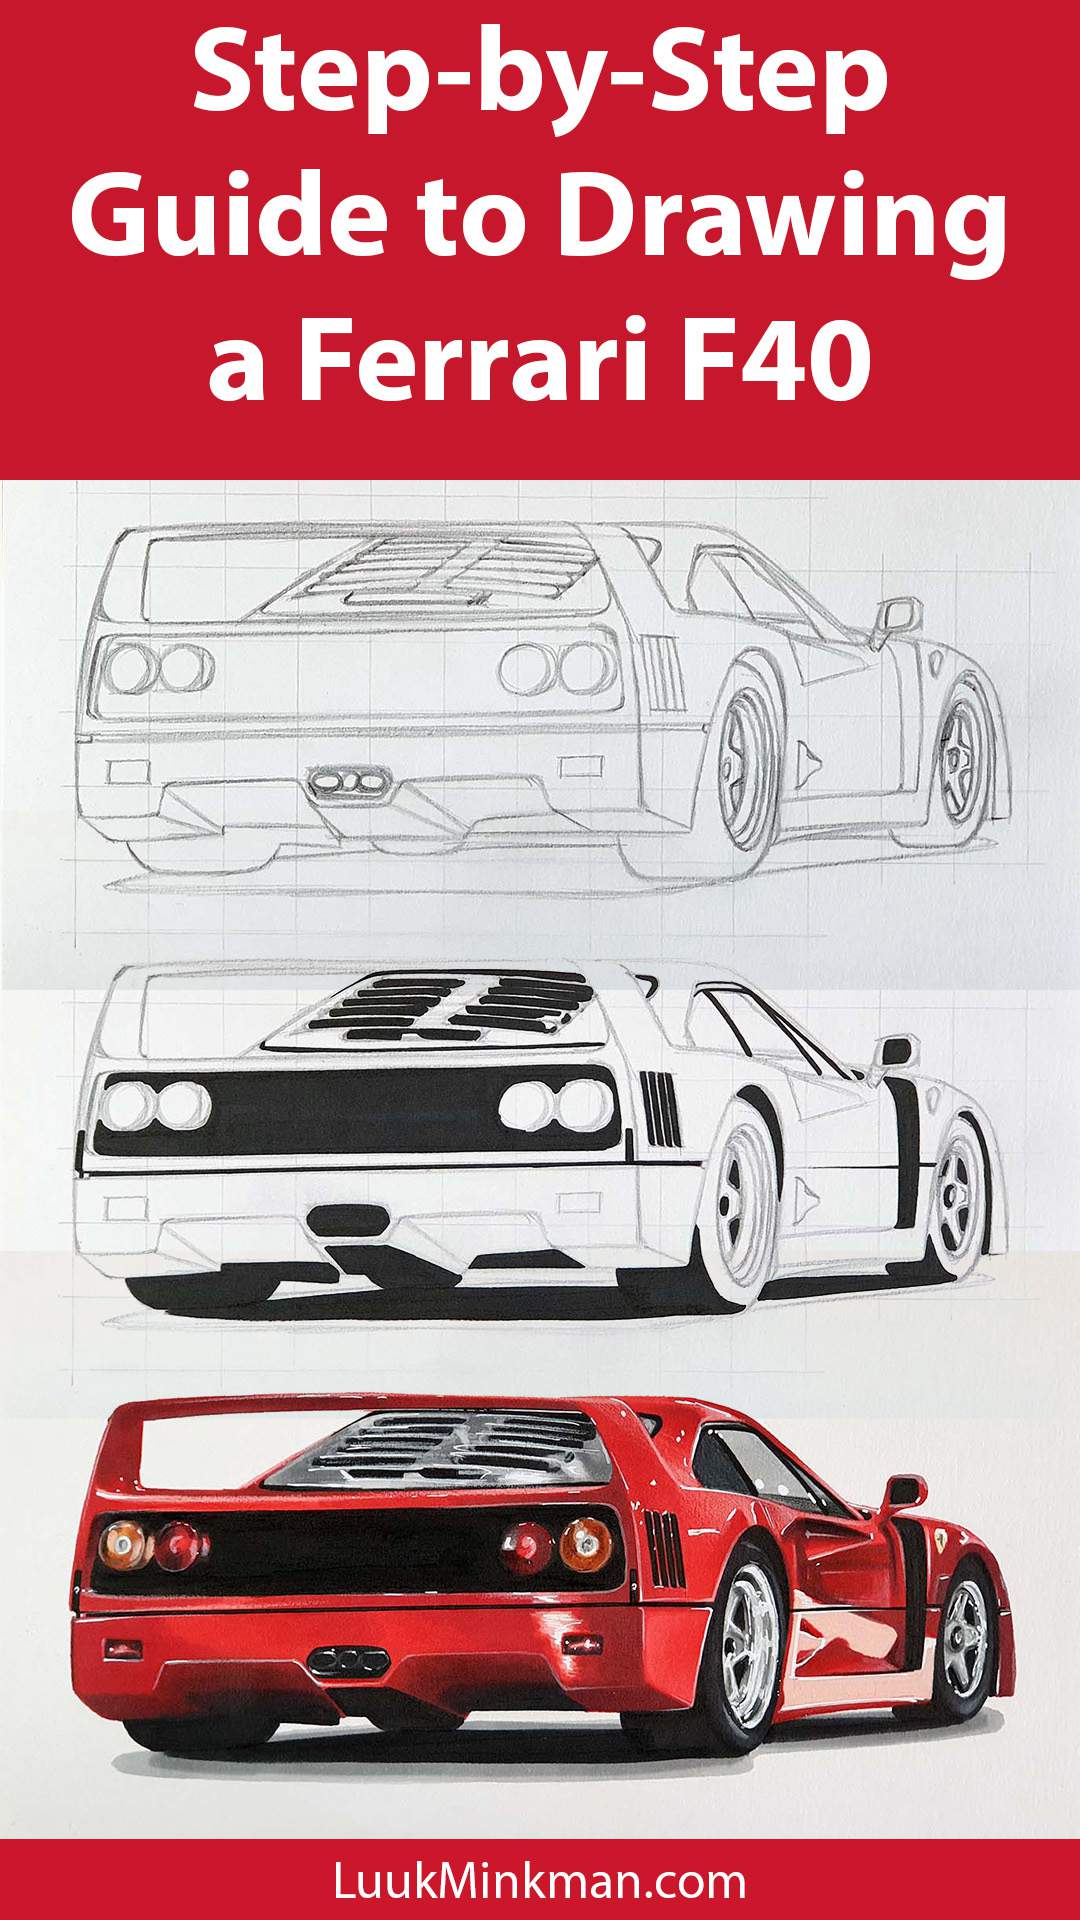
How to Draw a Ferrari F40 | Easy and Realistic Step-by-Step Tutorial

In this car drawing tutorial, I'm going to show you how to draw a Ferrari F40 step-by-step.
Disclaimer: In the name of full transparency, please be aware that this blog post contains affiliate links and any purchases made through such links will result in a small commission for me (at no extra cost for you).
Art Supplies I Used for this Tutorial
I made this drawing on Canson Illustration paper which is by far the best for alcohol marker drawings in my opinion.
To color the Ferrari F40, I used Ohuhu Honolulu markers in the colors Neutral Grey 03 (CG030), Neutral Grey 05 (CG050), Neutral Grey 07 (CG070), Black (120), Barium Yellow (Y3), Chrome Orange (YR170), Reddish Brass (E120), Pear Color (R29), Pastel Rose (R9), Zinnober (R150), Vermilion (R2), and Geranium (R8).
I also used a black Stabilo Pen 68 marker and a Stabilo Point 88 fineliner for the pure black parts.
To add details in the end, I used Faber-Castell Polychromos colored pencils in White, Cool grey 4, and Black.
And lastly, I used a white Posca PC-1MR to add bright white highlights.
The Reference Photo for this Car Drawing Tutorial
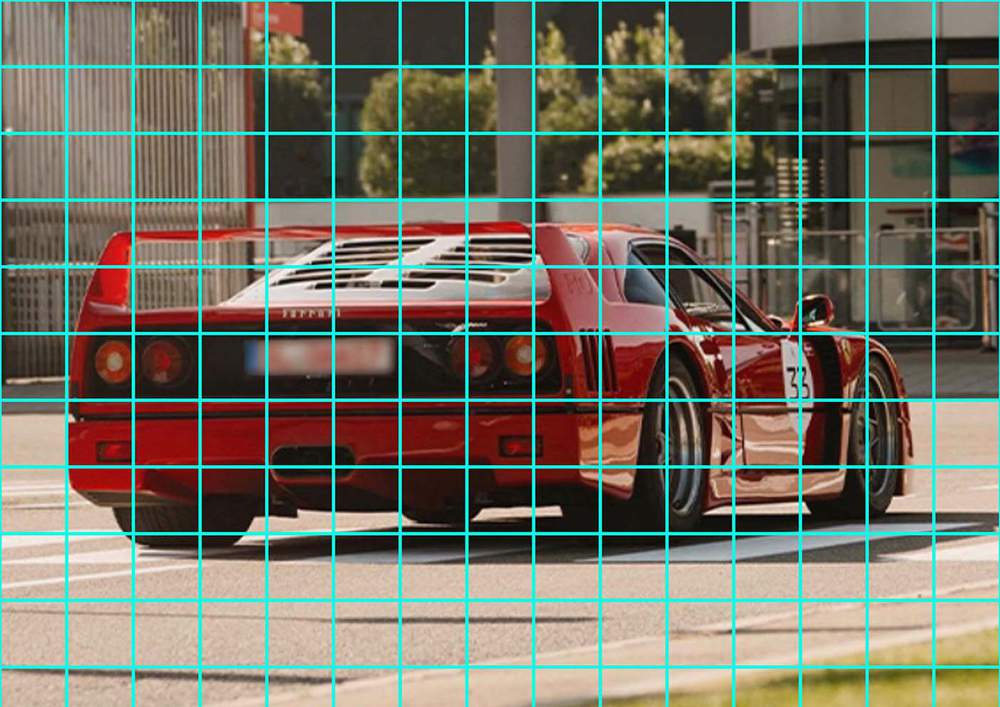
For this drawing tutorial we'll be using a photo I found on Instagram posted by @ferrari of a Ferrari F40. We'll be using this photo only to get the perspective and the proportions correct.
How Do You Draw a Ferrari F40?
Step 1: Sketching the Ferrari F40
I used the grid method to make it a little bit easier to get the proportions of the F40 right. But feel free to use any other sketching technique.
I started by putting a grid of 15 by 10.5 squares over the photo in Photoshop.
Then I drew that same grid on my paper which is A4 sized, so each square will be 2x2cm.
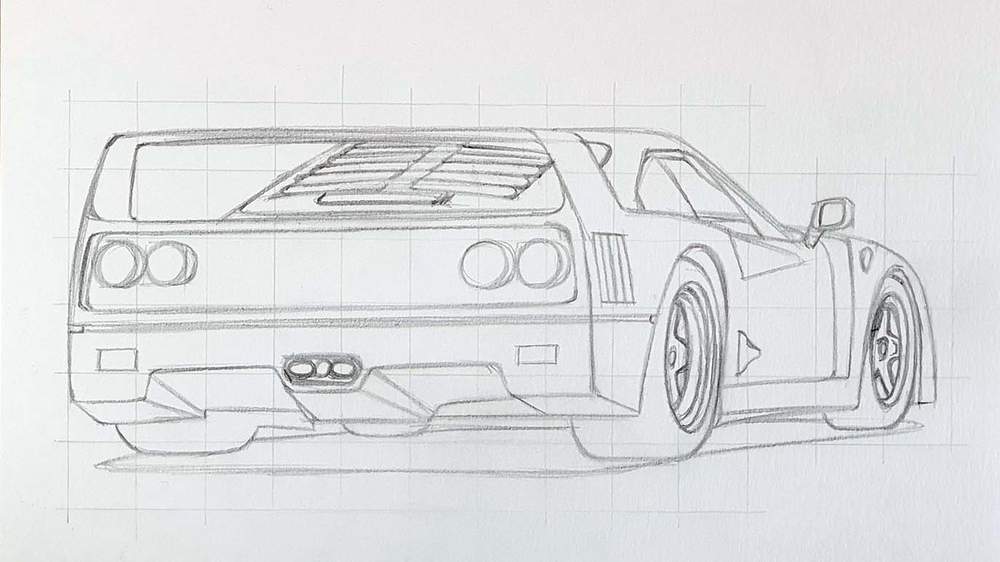
Once I had made the grid I started sketching...
Sketching is the most important when making a realistic drawing as it is the base for everything that comes next. If the car's proportions are off, the whole car won't look realistic in the end.
So take your time.
When making this drawing I spend almost half the time on the sketch to make it as perfect as possible.
Step 2: Coloring All Pure Black Parts of the F40
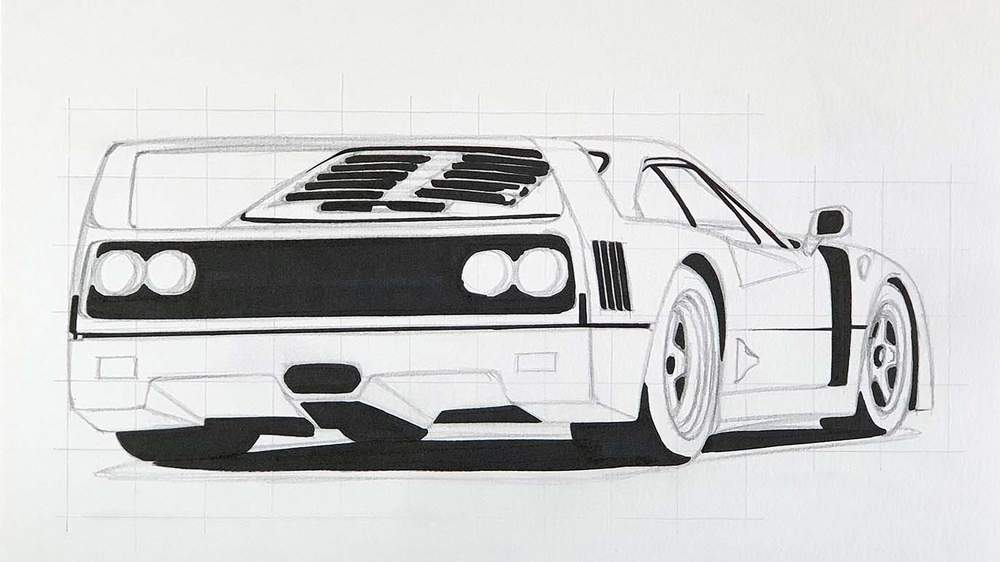
To make the drawing look a lot less overwhelming, I started by coloring all pure black parts first with Black (120).
To draw the tinier and more precise parts, I first outlined them using a black Stabilo Point 88 fineliner, and then I colored them in using the Black (120) marker.
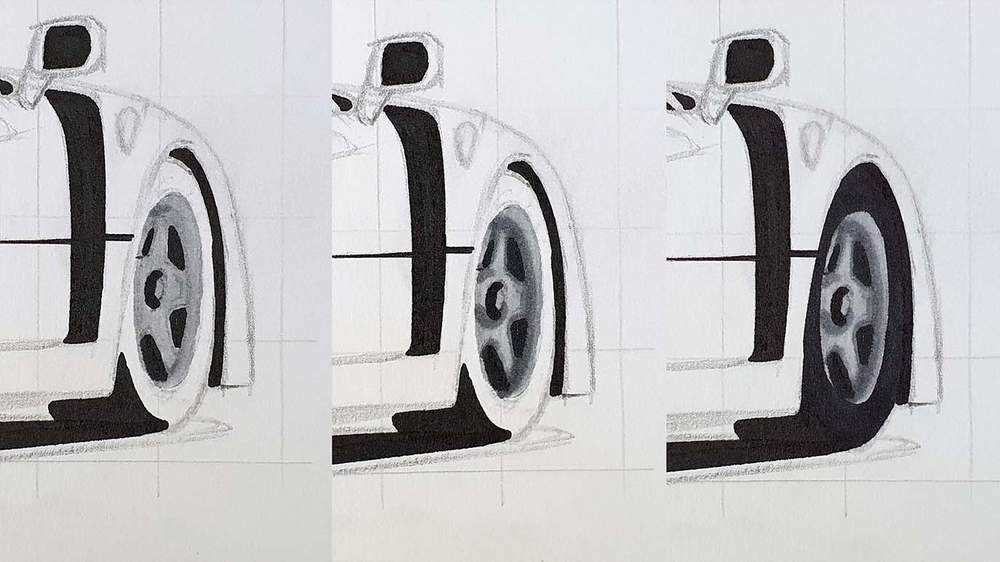
Step 3: Coloring the Wheels of the Ferrari F40
To color the rear wheel, I first started by coloring the 2 dark grey curved lines on the inside of the rim with Neutral Grey 05 (CG050).
Then I colored the rest with Neutral Grey 03 (CG030).
And finally, I colored the tire with Black (120).
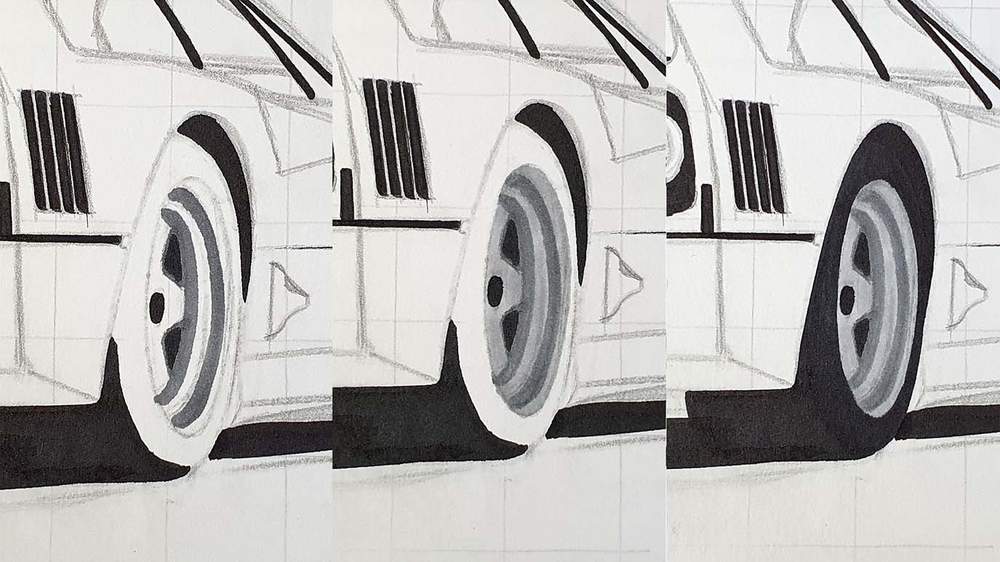
Next, I drew the front wheel.
This time, I started by coloring it with Neutral Grey 03 (CG030).
Then I added some dark grey details with Neutral Grey 05 (CG050) and Neutral Grey 07 (CG070).
And lastly, I colored the tire Black (120).
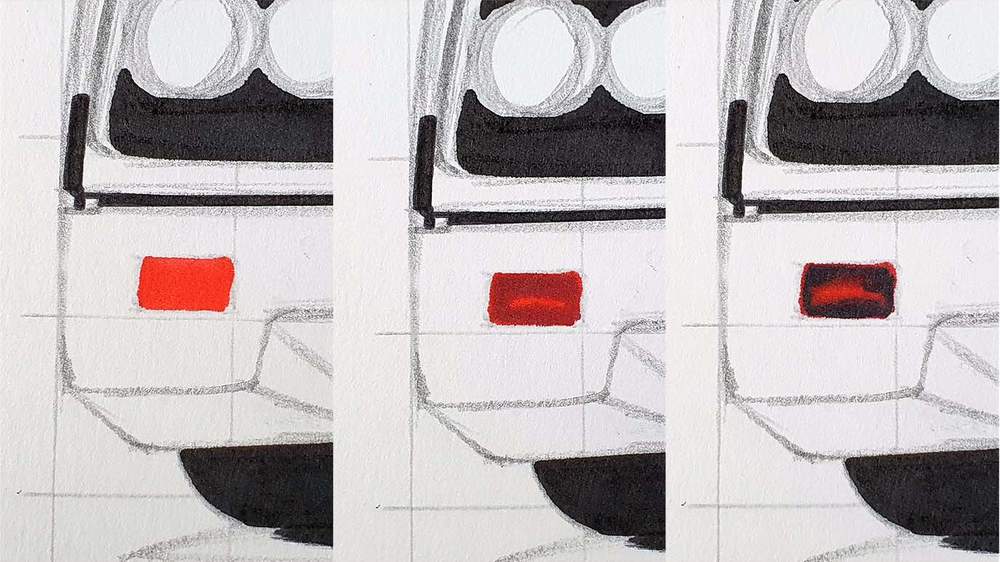
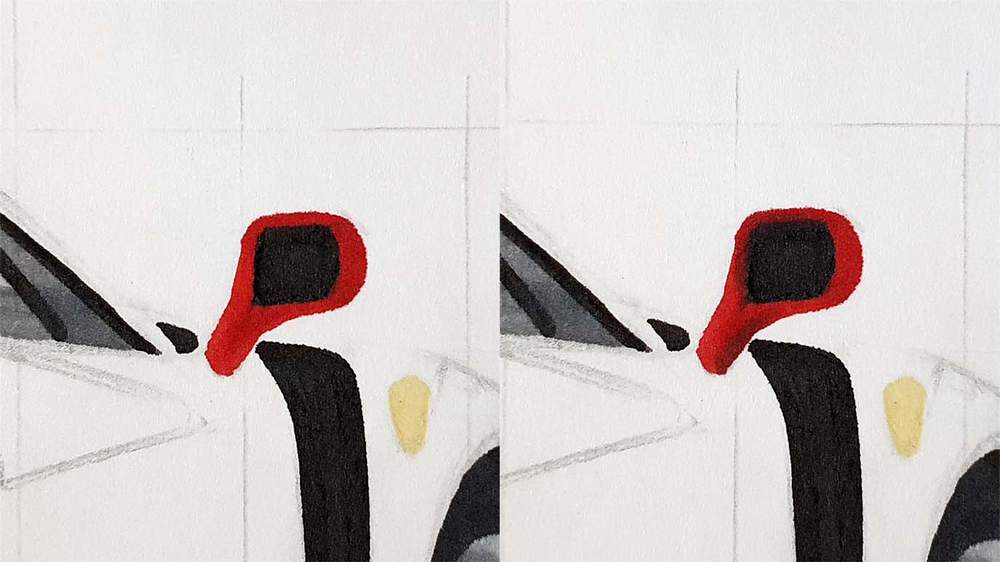
Step 4: Coloring the Reflector on the Rear of the F40
I started by coloring the left reflector with Zinnober (R150).
Then I layered some Geranium (R8) over that, but leaving a line just below the center uncolored.
And lastly, I added some Black (120) to the top right and top left corners and the bottom of the reflector, and I blended that out with Geranium (R8).
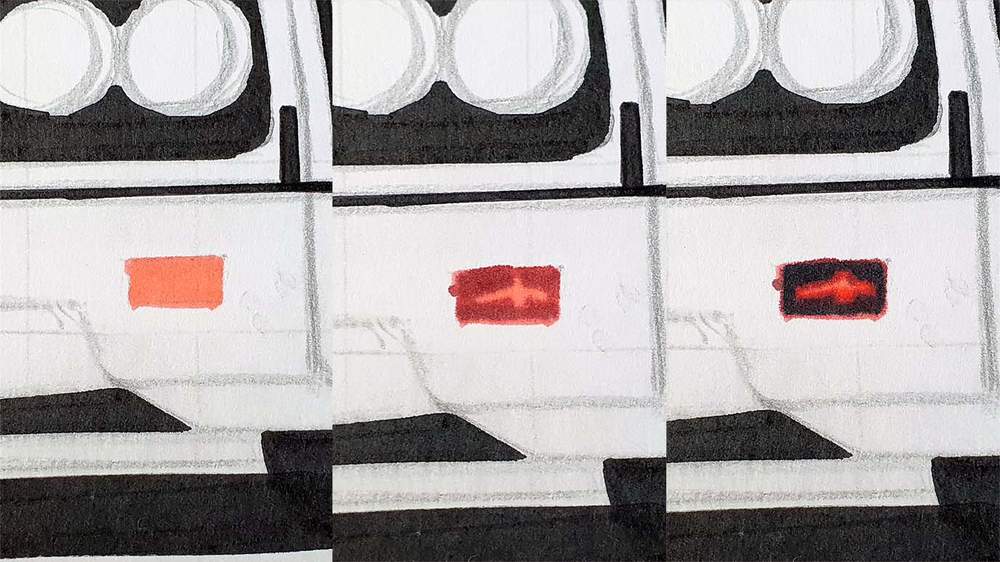
Next up is the right reflector.
I first colored it with Pastel Rose (R9).
Then I added some Geranium (R8) to all 4 of the corners, leaving an elongated cross shape in the middle.
Lastly, I added some Black (120) in the corners too, and blended that out with Zinnober (R150).
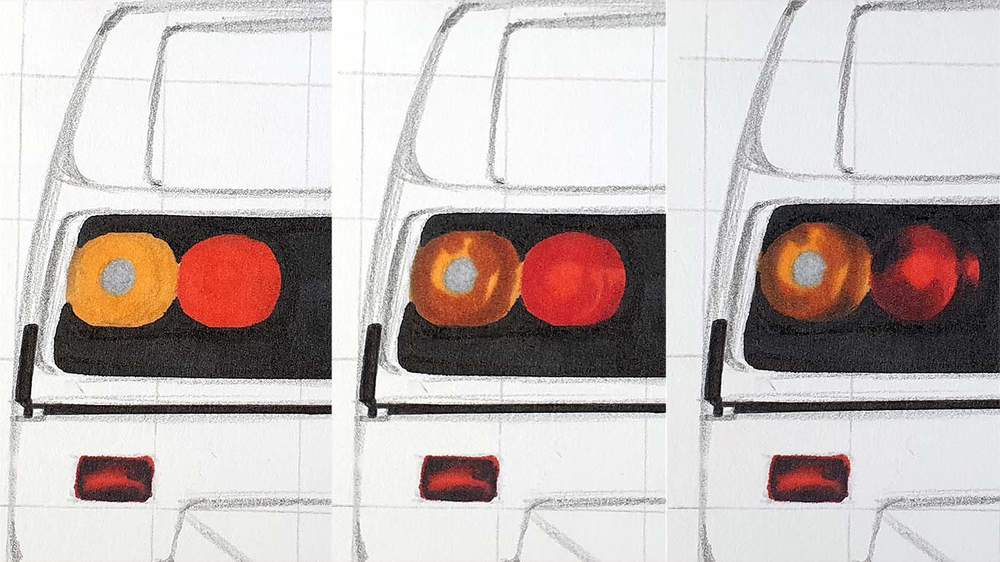
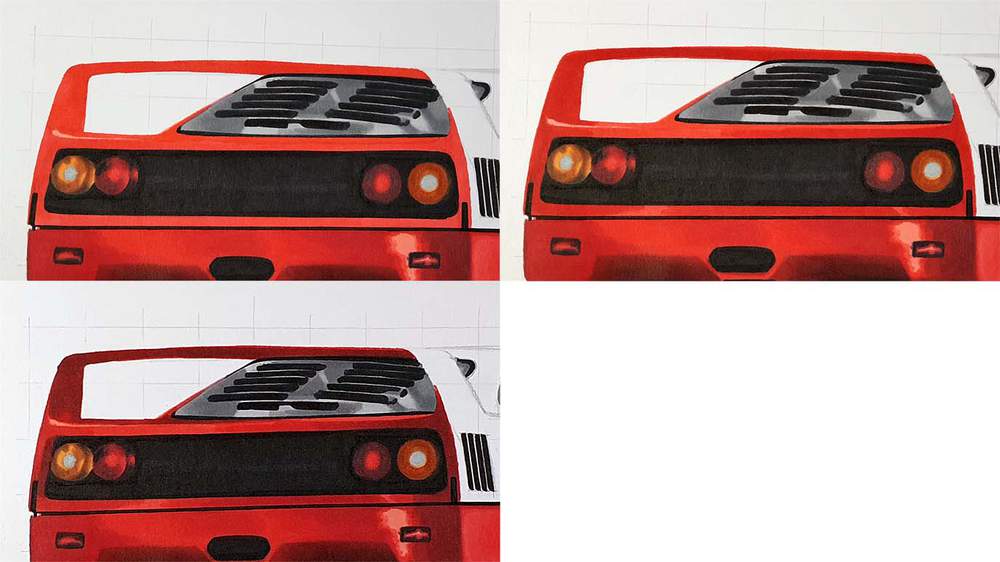
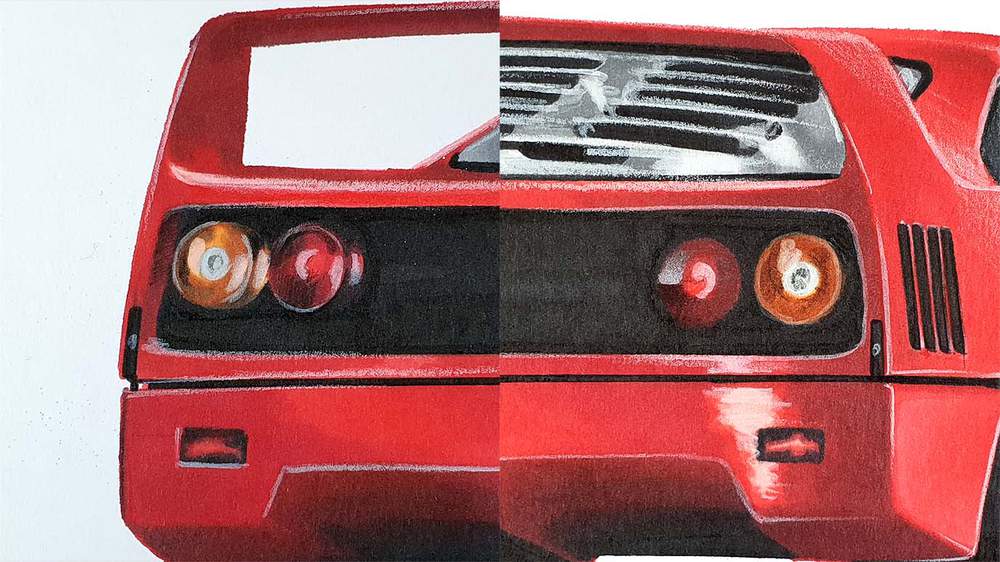
Step 5: Coloring the Taillights of the Ferrari F40
I started by coloring the left taillights.
I colored the outside of the far left one with Chrome Orange (YR170) and the circle in the middle with Neutral Grey 03 (CG030). And I colored the right one with Zinnober (R150).
Then I added some Reddish Brass (E120) to the left one and Vermilion (R2) to the right one.
Lastly, I added some Neutral Grey 07 (CG070) the the left taillight and some Black (120) to the right one.
Now it's time to do the same for the two right taillights.
I first colored the outside of the right light with Chrome Orange (YR170) and the inner circle with Neutral Grey 03 (CG030), and I colored the left one with Zinnober (R150).
Then I colored Reddish Brass (E120) over all of the orange on the right taillight, and I added Geranium (R8) to the outside of the left light, leaving a lighter red circle in the middle.
And lastly, I layered Neutral Grey 07 (CG070) over the Geranium (R8) on the left taillight.

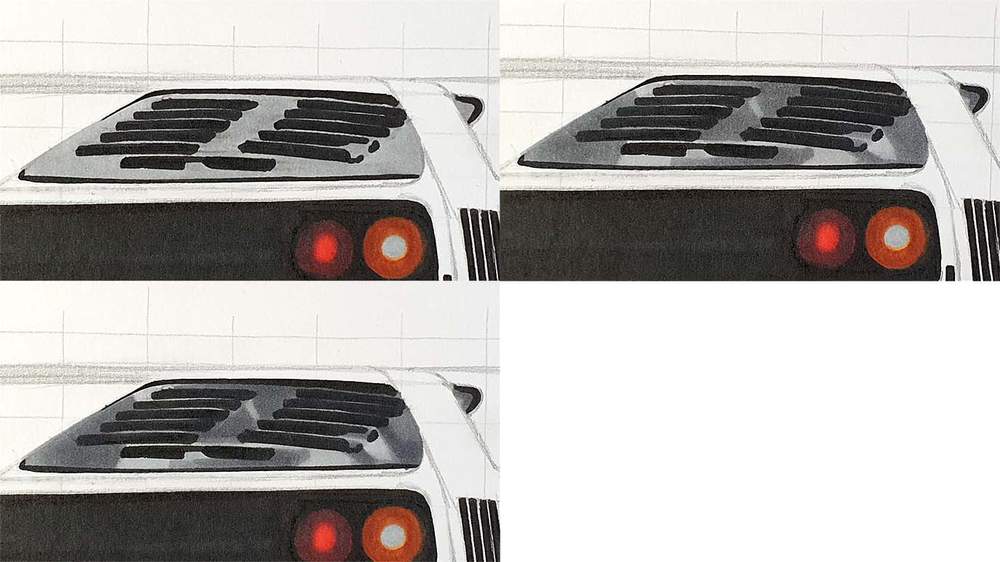
Step 6: Coloring the Rear Window of the Ferrari F40
The rear window of the F40 is quite detailed, but luckily, most of those details are already colored.
First, I colored the whole window with Neutral Grey 03 (CG030).
Then I added some grey reflections with Neutral Grey 05 (CG050).
And lastly, I darkened some parts of those reflections with Neutral Grey 07 (CG070).
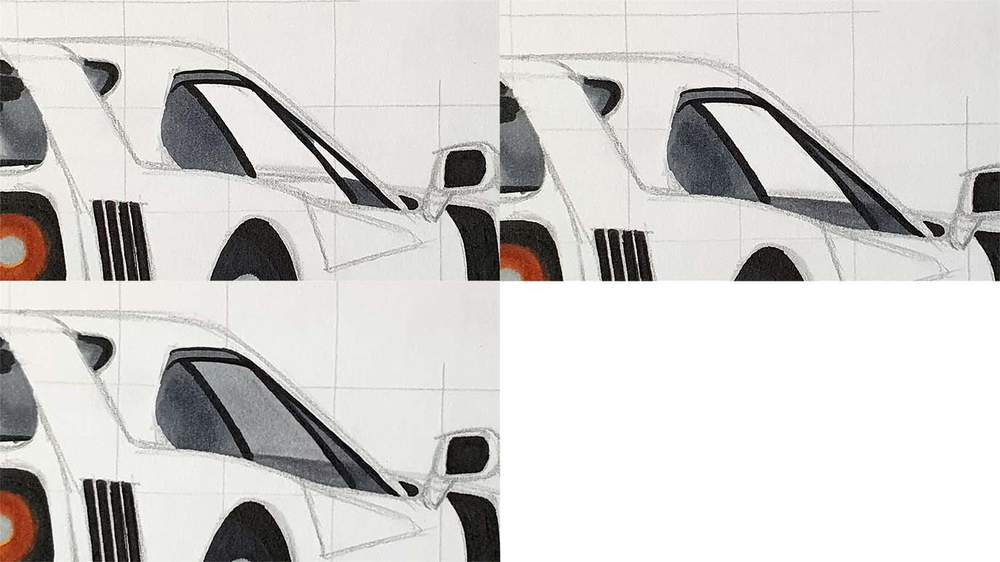
Step 7: Coloring the Side Windows of the Ferrari F40
To color the side windows, I first colored the rear side window, the window sill at the top, and a bit of the window on the bottom right with Neutral Grey 07 (CG070).
Then I colored the rest of the triangular shape toward the right and a bit of the dashboard with Neutral Grey 05 (CG050).
And lastly, I colored the part where you can see through the front window with Neutral Grey 03 (CG030).
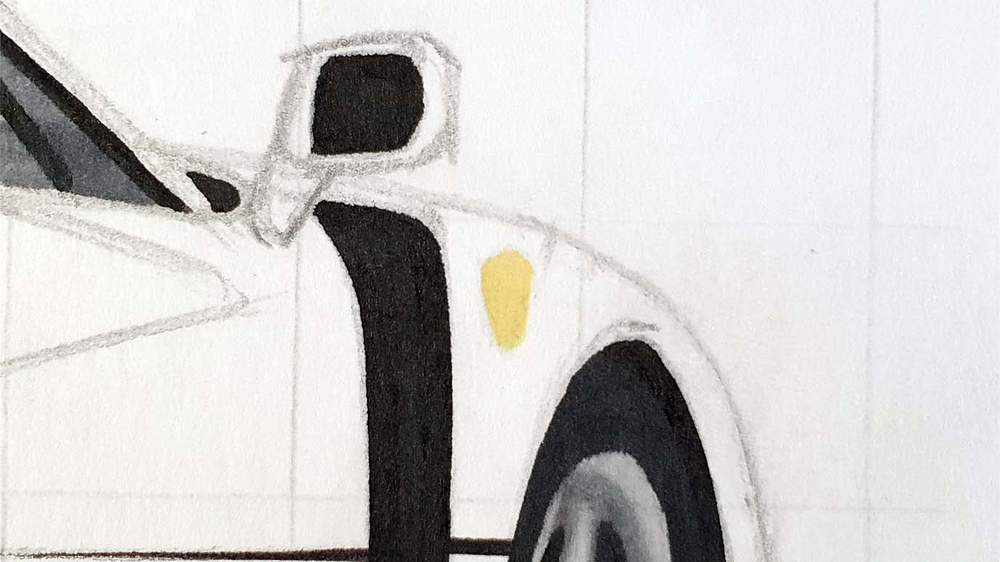
Step 8: Coloring the Shield on the Side
This is a very short step.
I colored the shield with Barium Yellow (Y3) and that's it.
I wanted to include an overview photo of what the drawing of the Ferrari F40 looks like at this stage, but I forgot to take a photo...
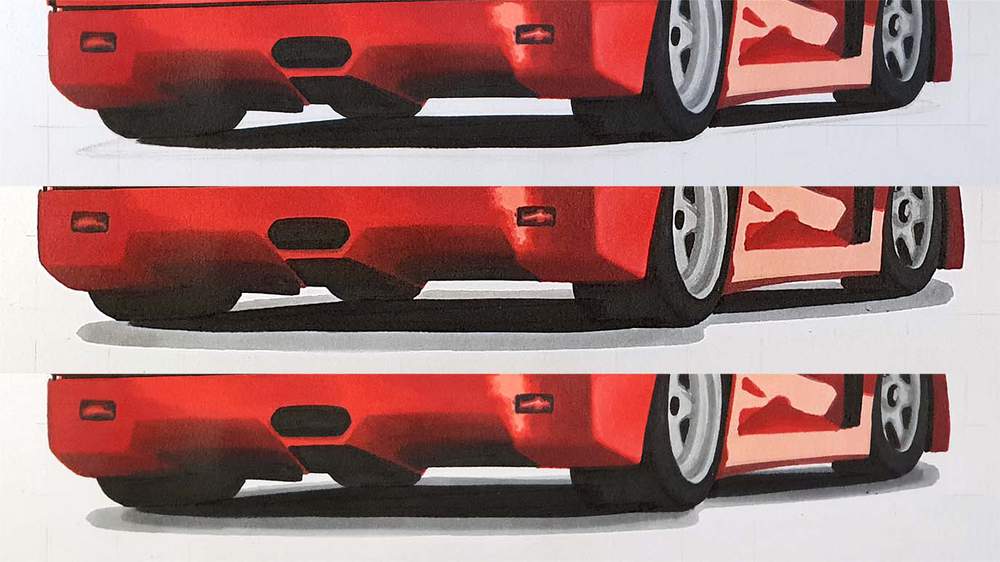
Step 9: Coloring the Rear Bumper of the Ferrari F40
It's time to add some color to the car.
I started by coloring a small reflection just toward the left of the right reflector with Pastel Rose (R9), and I colored the rest with Zinnober (R150).
Next, I darkened most of the red with Vermilion (R2). I left the part to the right lighter red, and I colored the part above the exhaust a little unevenly, showing some of the lighter red.
Next, I added Geranium (R8) to darken the lower part and a bit toward the right of the right reflector.
And lastly, I added some Neutral Grey 07 (CG070) and black to the bottom of the rear bumper to blend it a little bit into the black.
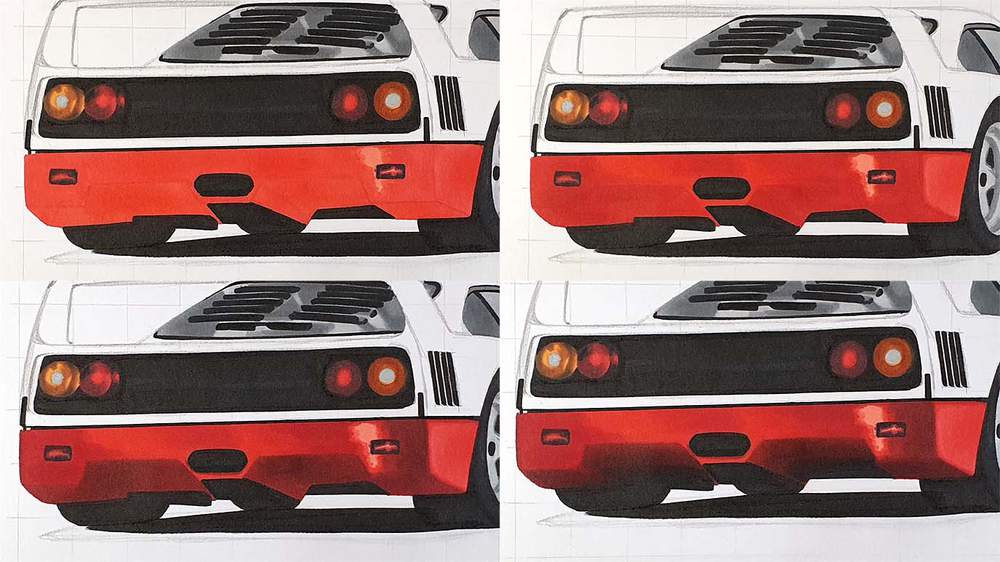
Step 10: Coloring the Upper Part of the Rear of the F40
I started by fully coloring the upper part of the rear with Zinnober (R150), except for one small bit just above the left taillights. I colored that part with Pastel Rose (R9).
Then I darkened the red to the left, the bottom, the right, and the underside of the wing with Vermilion (R2).
Lastly, I added some darker tones to the right, the part just to the left of the left taillights, and the inside/bottom of the wing with Geranium (R8).
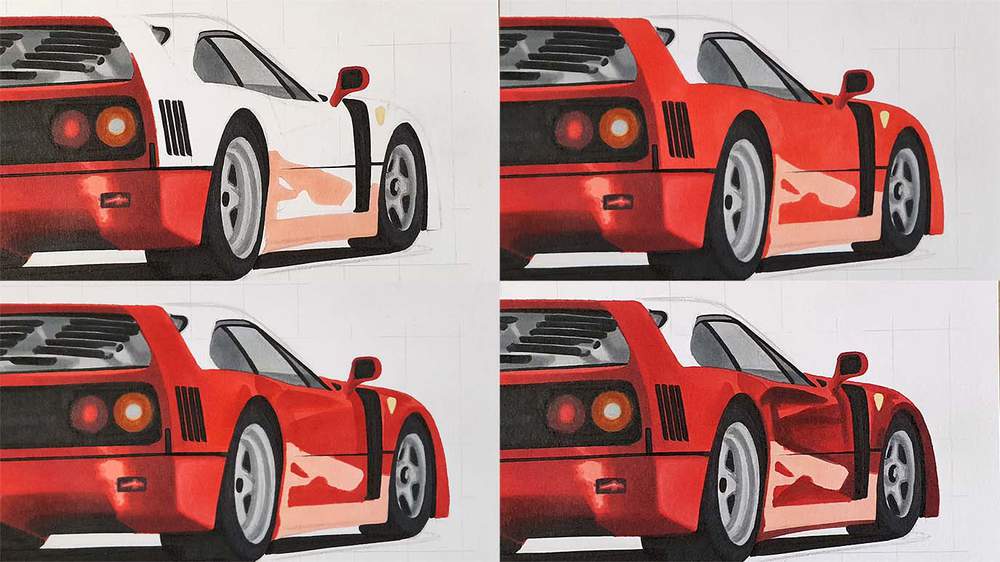
Step 11: Coloring the right Mirror of the Ferrari
To color the mirror, I started by coloring it fully with Vermilion (R2).
Then I added some darker red to the bottom right and the top left with Geranium (R8).
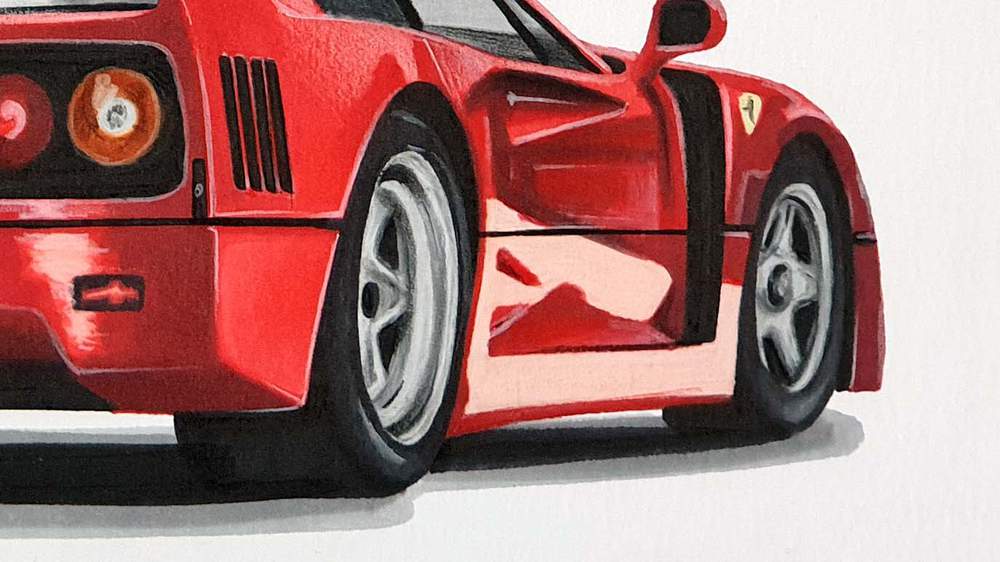
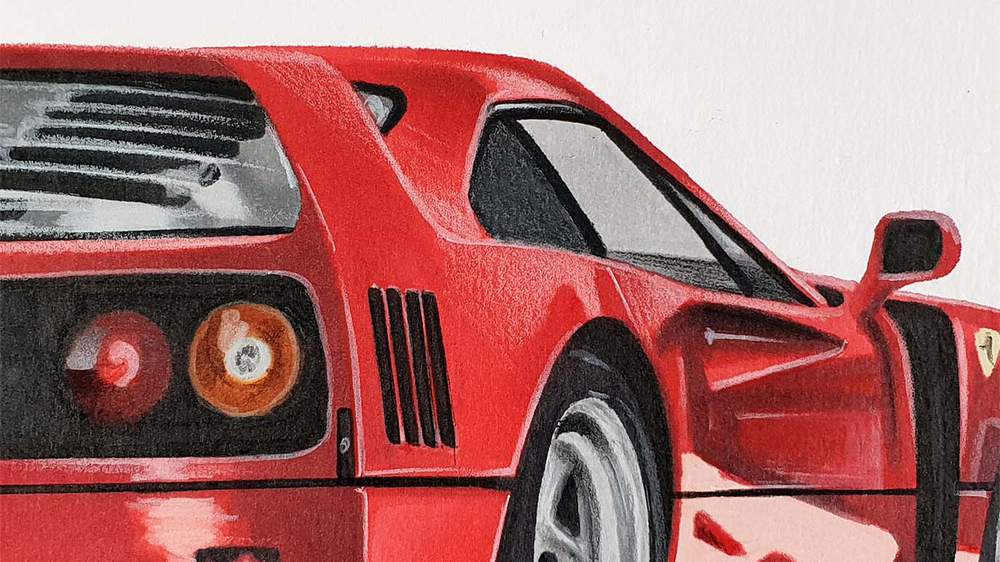
Step 12: Coloring the Side of the Ferrari F40
It's time to color the biggest part of the car: the side.
First, I colored the light pink reflection on the lower part of the side with Pastel Pink.
Next, I colored the remaining of the side with Zinnober (R150).
Then I added some darker red tones and reflections with Vermilion (R2).
And lastly, I added some darker red reflections with Geranium (R8), and in some places I also used Neutral Grey 07 (CG070) on top of that to darken it even more.
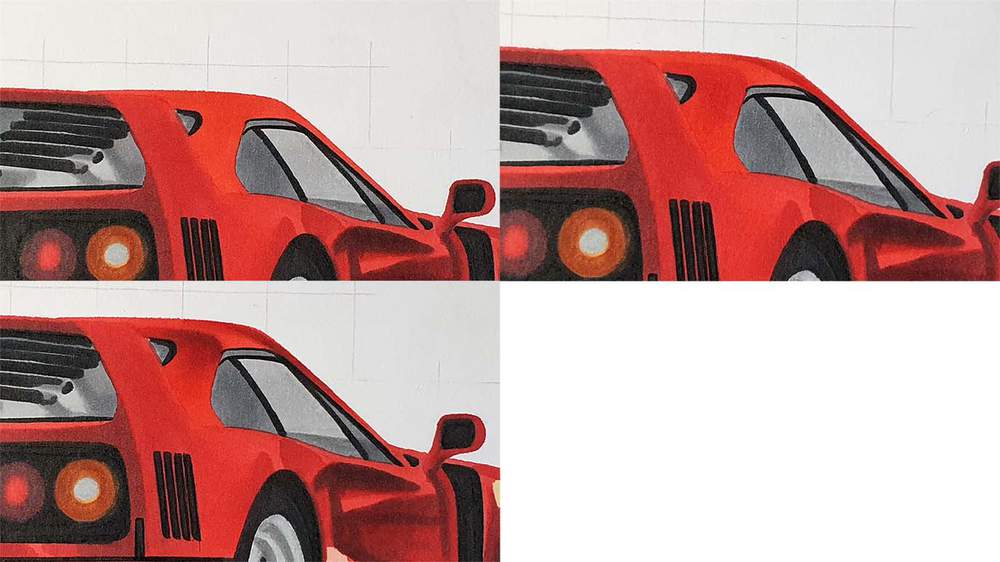
Step 13: Coloring the Roof of the Ferrari F40
I started by coloring the whole roof with Zinnober (R150).
Then I added some Vermilion (R2) to the top right and to the top of the part between the rear window and the side windows, and I blended that into the lighter red with Zinnober (R150).
Lastly, I added some dark red with Geranium (R8), and I blended the part between the windows into the lighter red, but this time using Vermilion (R2) instead.
Step 14: Coloring the Shadow of the F40
The last thing to color now is the shadow.
Most of it is already colored black, but I wanted to add some Neutral Grey 03 (CG030) and Ice Neutral Grey 05 (CG050) toward the outside of it.
I started by outlining the shadow with a thick line of Neutral Grey 03 (CG030), but in the end, I think it looks too dark, so it's better to use Neutral Grey 02 (CG020) instead.
And then between the Neutral Grey 03 (CG030) and the Black (120), I added some Neutral Grey 05 (CG050).
You could blend those together, but I kind of like it unblended, so I left it as it is.
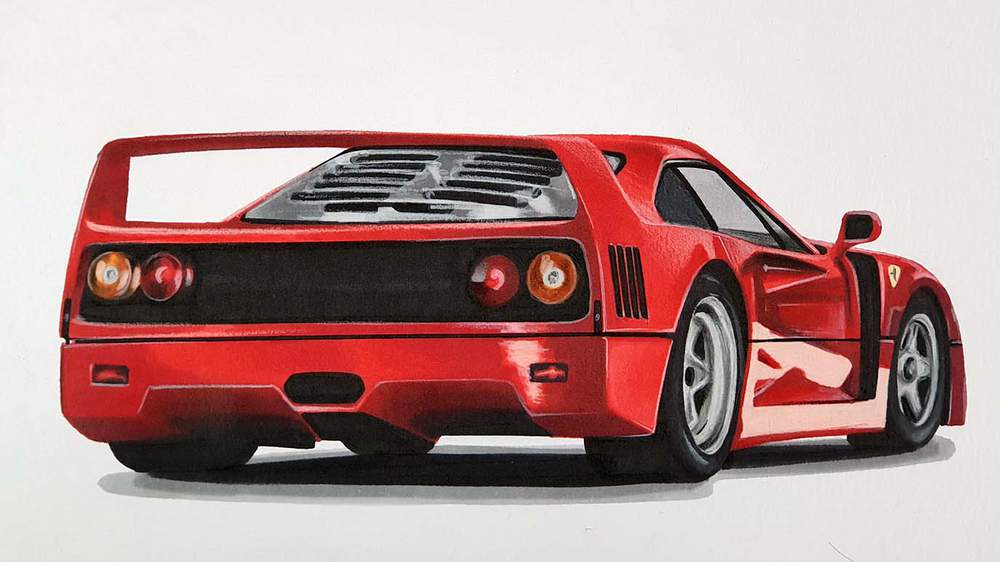
Step 15: Adding Details with Colored Pencils
Now that the car is fully colored with markers, it's time to add some details with colored pencils.
I started by lightening the light pink reflection on the side of the car with the white Faber-Castell Polychromos pencil.
Next, I added some details into both wheels with the Black, Cool Grey 4, and White colored pencils.
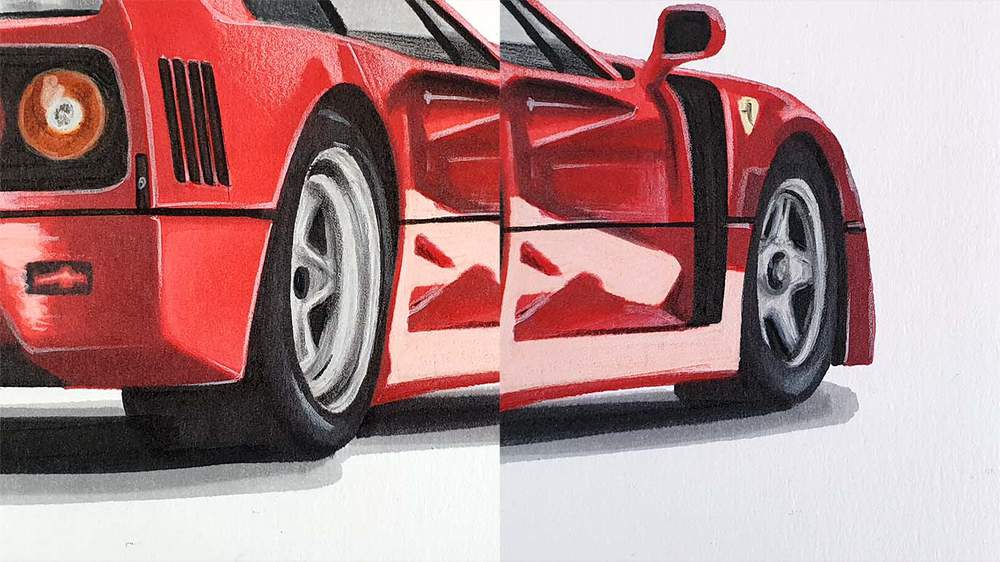
Then I added some reflections in the taillight with the white and black pencil.
After that, I exaggerated some of the reflections above the rear wheel with white.
And lastly, I added some white lines to some of the body lines of the car. Mainly on the rear of the Ferrari.
Step 16: Adding White Highlights using the Posca Pen
The next and final step of drawing this Ferrari F40 is adding pure white highlights with the Posca paint pen.
In the previous step I forgot to color the exhaust tips, so I firstly did that using the Cool Grey 4 and White colored pencils.
Then I added some highlights on the exhaust, the taillights, the rear window, and the wheels.
I also brightened the reflection on the rear and I added loads of other tiny reflections all over the car.
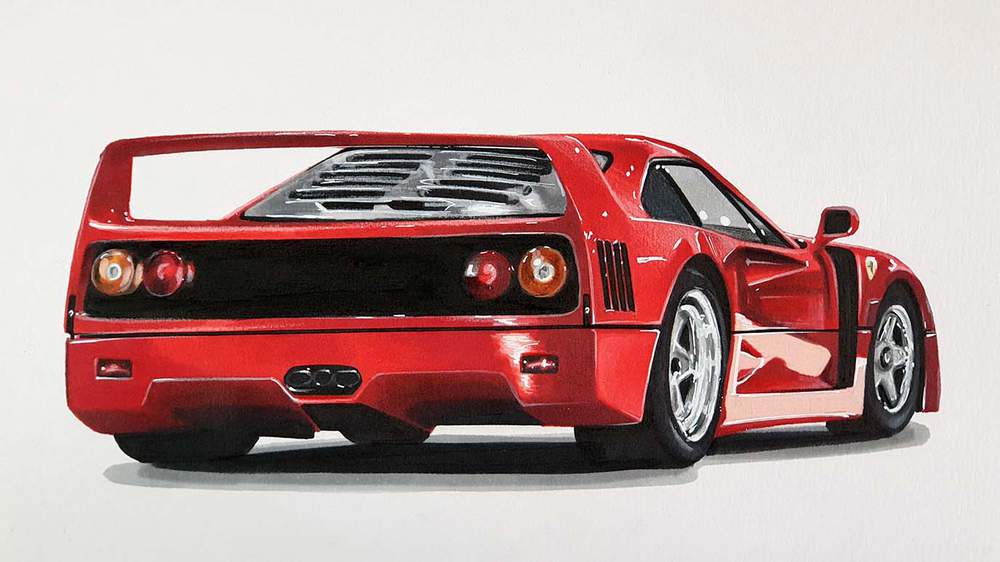
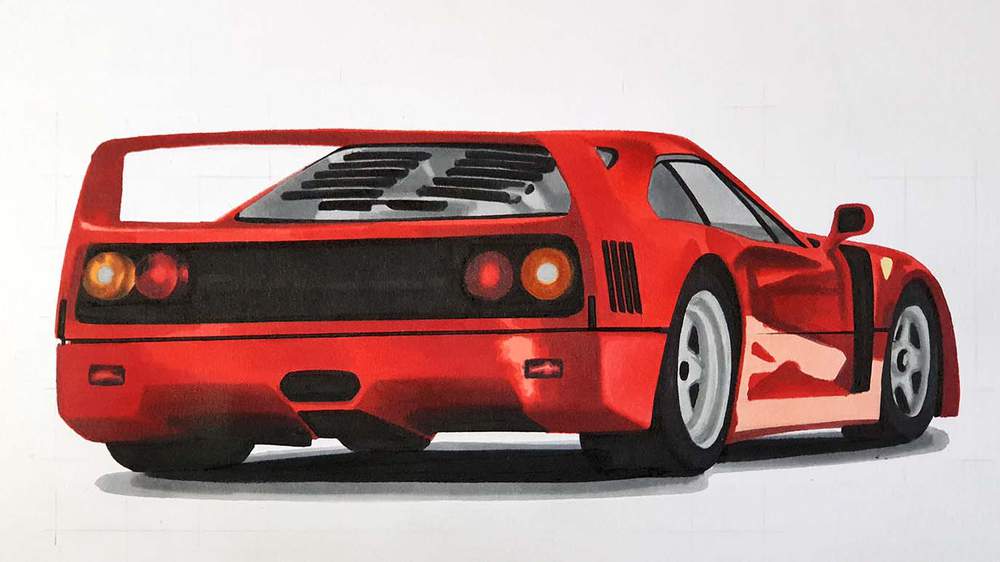
Your Ferrari F40 Drawing is Finished!
It's done!
How did your drawing of the Ferrari F40 turn out?
I'd love to see it, so if you decide to share it on Instagram, make sure to tag me (@luukminkman).
Articles You Might Also Like


I love bringing cars to life with alcohol markers and colored pencils.
Whether you're just starting out or looking to improve your skills, I'm here to help!
Click here to learn more about me.


Be the first to comment!
Comments
There are no comments yet.