How to Draw a Cute Ice Cream Cone - Super Simple & Fun Step by Step Guide
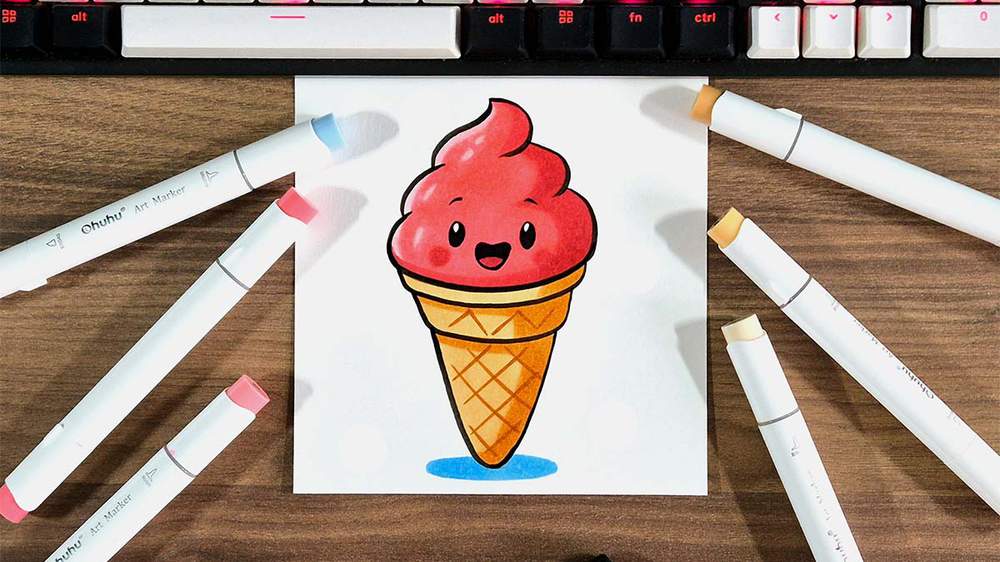
Hi! In this drawing guide, I'll show you how to draw a cute ice cream cone step-by-step.
This easy ice cream cone drawing is perfect for beginners and only takes a few minutes to draw.
It's broken down into super simple steps so everyone can follow along, even if you're new to drawing. And you only need a few drawing supplies.
So, let's get started!
Disclaimer: In the name of full transparency, please be aware that this blog post contains affiliate links and any purchases made through such links will result in a small commission for me (at no extra cost for you).
Drawing Supplies I Used
I only used a few art supplies to make this cute ice cream cone drawing.
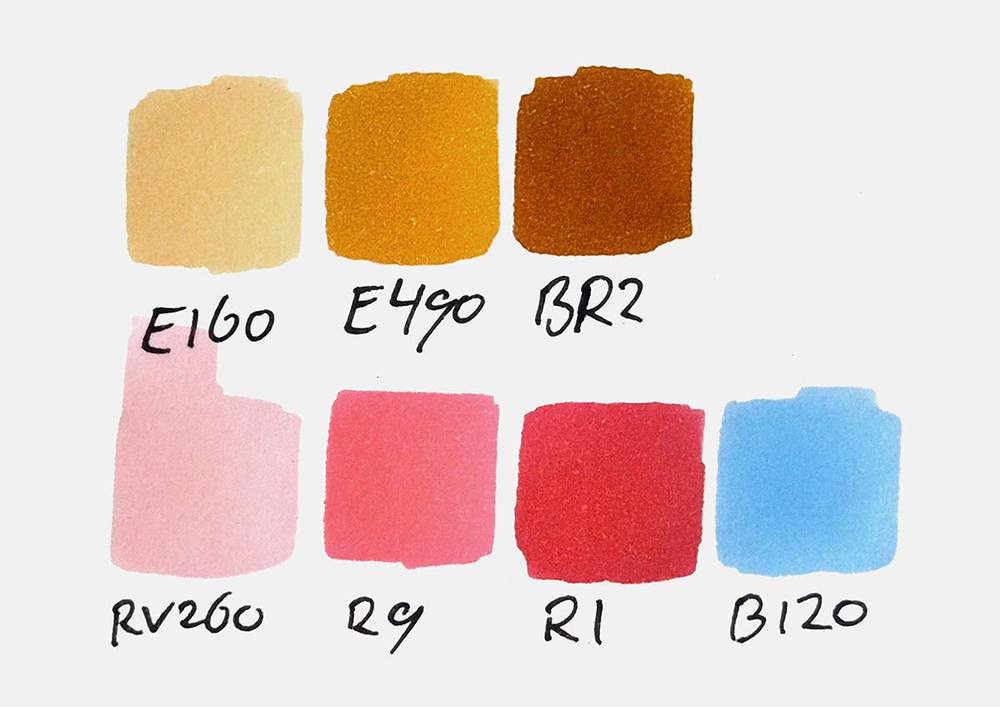
I used 7 Ohuhu Honolulu markers in the colors Soft Sun (E160), Deep Orange (E490), Potato Brown (BR2), Pink (RV260), Pastel Rose (R9), Coral Pink (R1), and Pale Blue (B120). You can buy these colors here.
Or buy a set to start with.
I used a Tombow Fudenosuke Brush Pen to outline the sketch.
And I made this drawing on Canson Illustration Manga Paper.
How Do You Draw a Cute Ice Cream Cone?
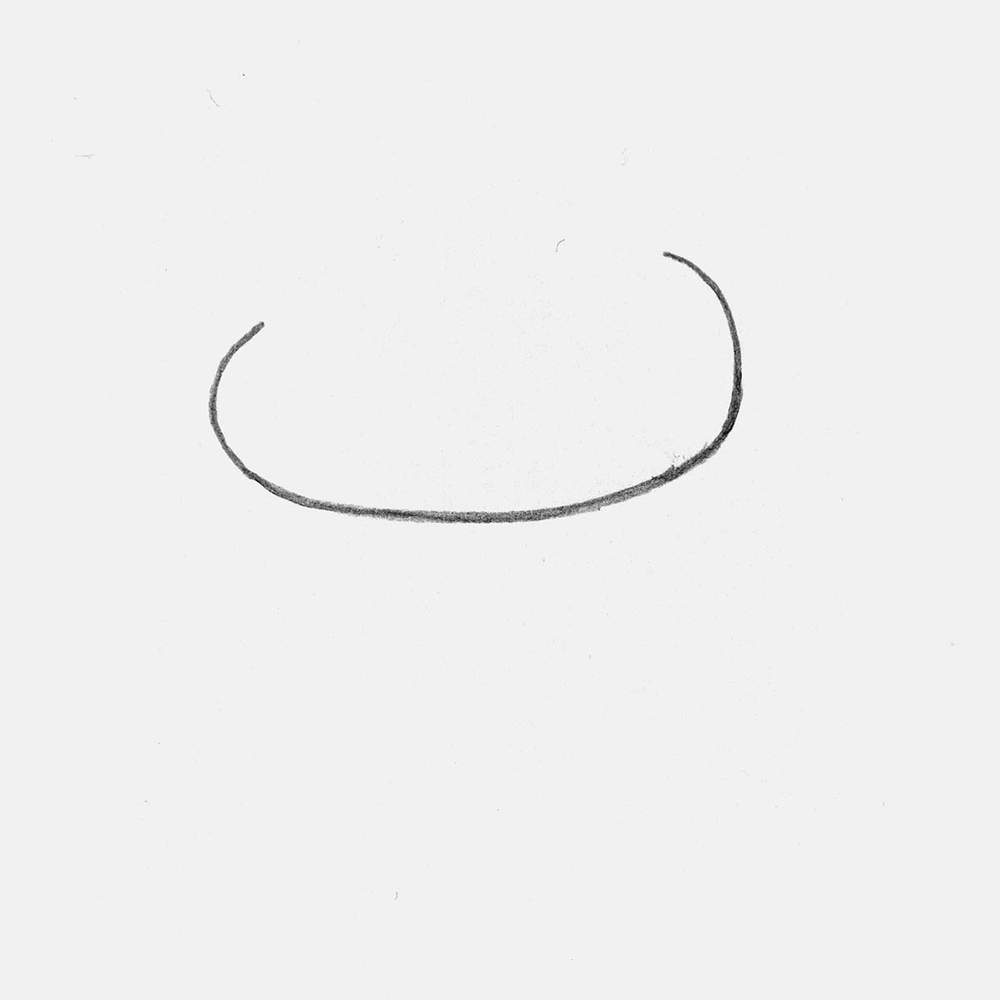
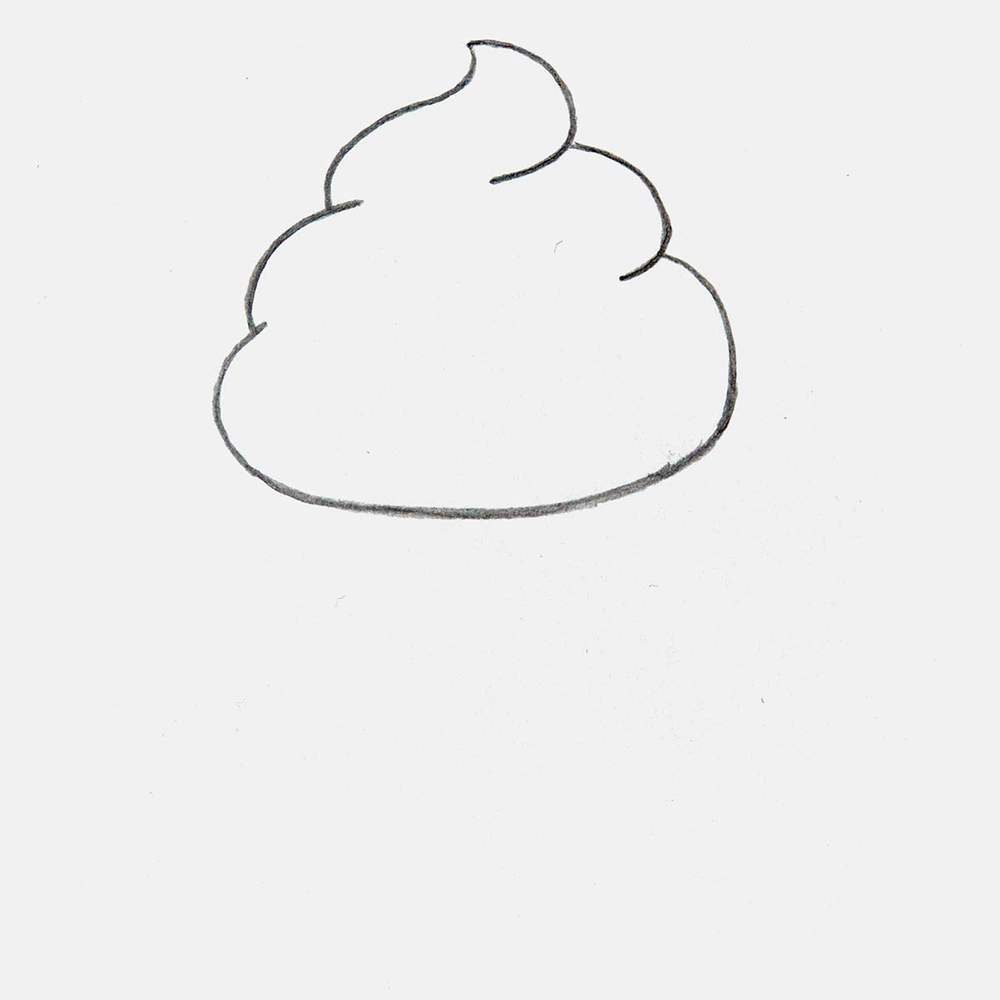
Step 1: Sketch the Outline of the Ice Cream
To sketch our kawaii ice cream cone, I started with the ice cream itself.
I sketched this wonky oval shape just above the center of my paper.
I left the top open as it connects to the rest of the ice cream there.
Next, I added a curve on either end of the first shape, with the tops getting closer together.
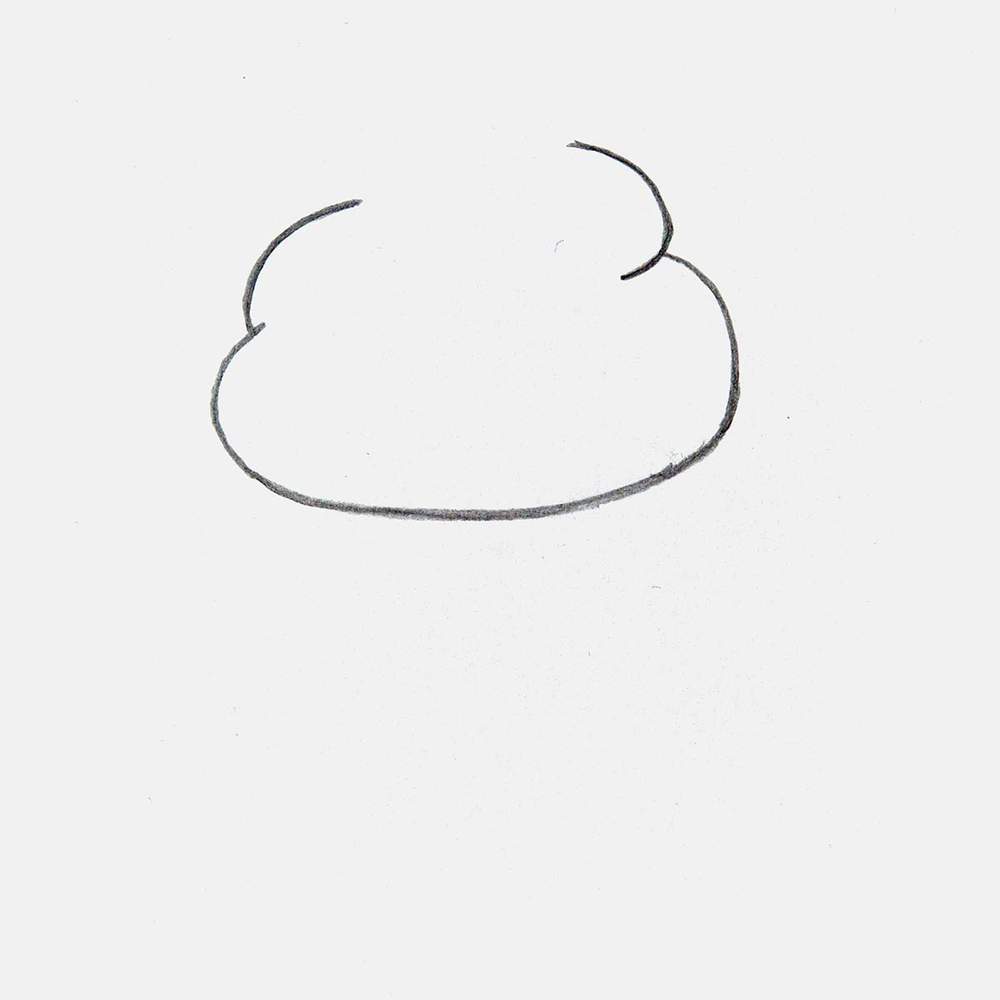
Lastly, I sketched the tip of the ice cream. On the right, I added another curve, and on the left, an S-shape to form a pointy tip.
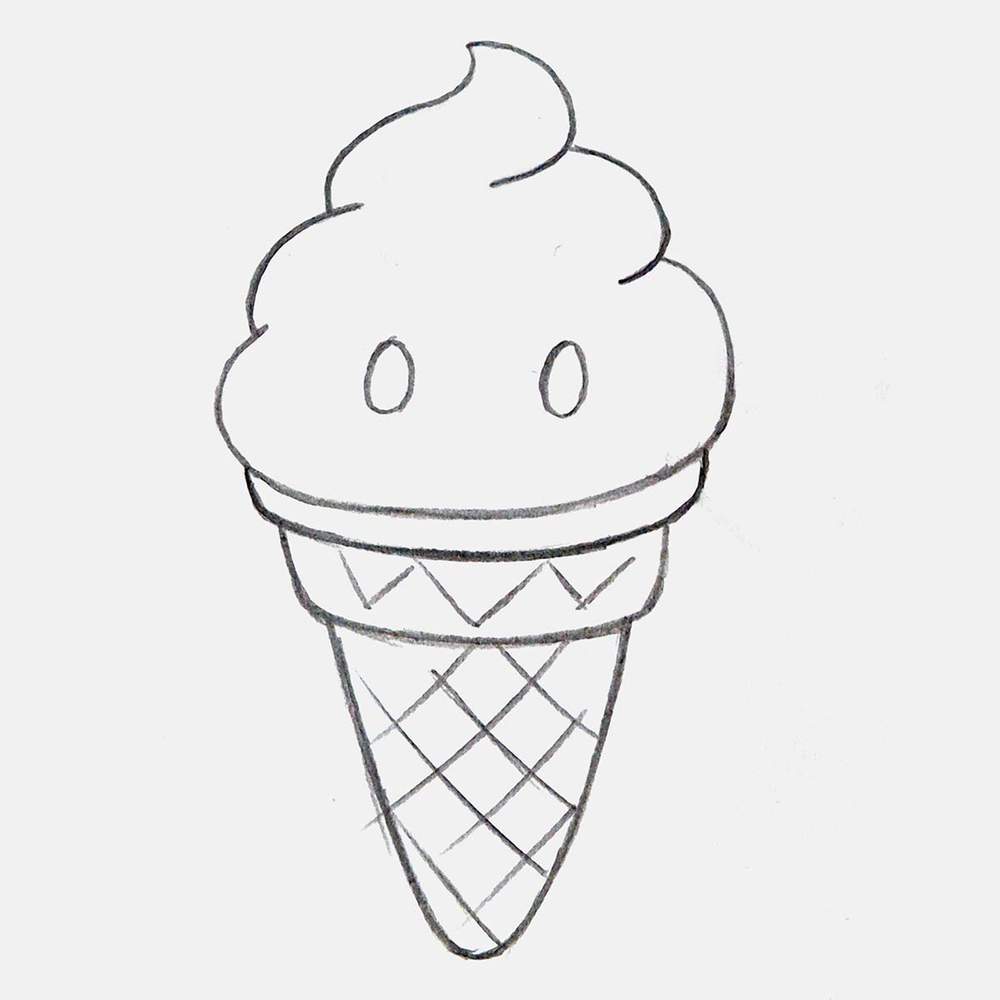
Step 2: Sketch the Outline Of the Cone
After that, I started drawing the cone.
I added a little ridge below the ice cream, which will be the top edge of the cone.

Then, I added a thicker shape below it to form the next layer of the cone.
Don't worry about making it perfect. The wonkiness/imperfections give the ice cream cone more character.
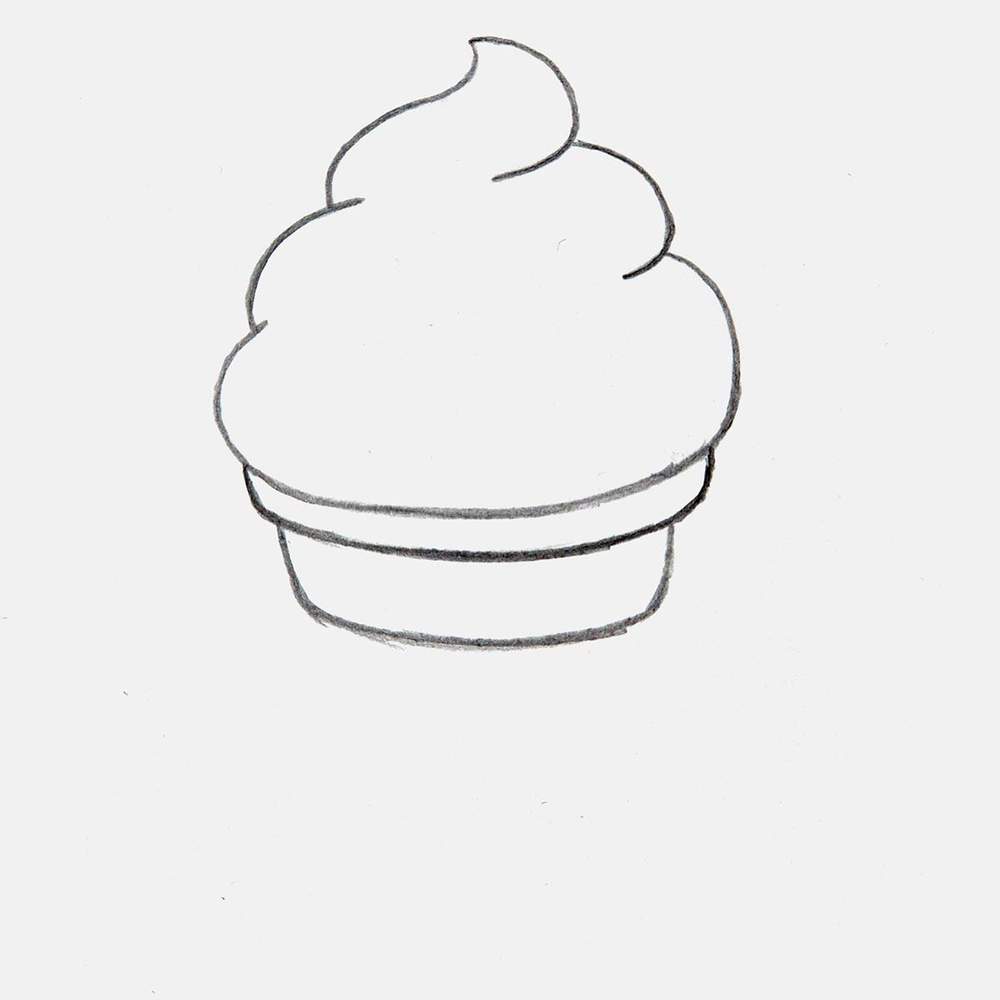
To complete the cone, I added this rounded V-shape to the bottom.
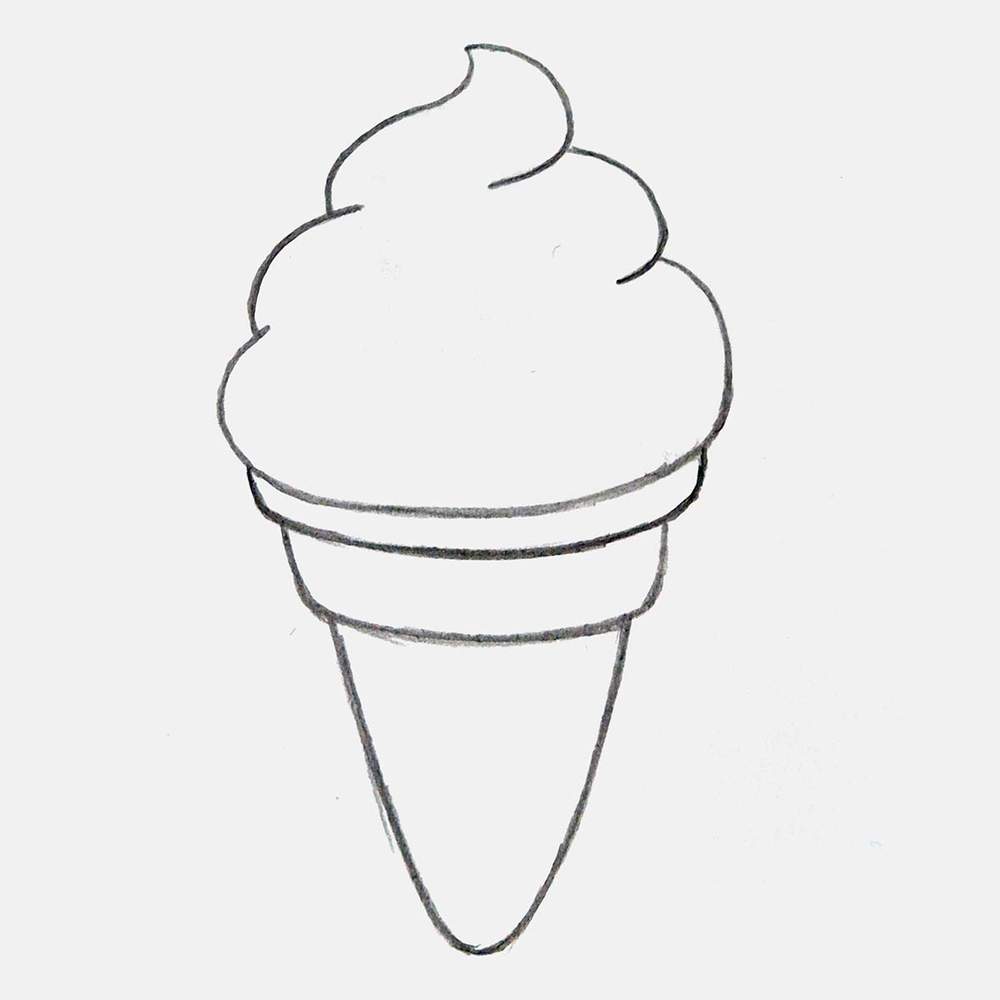
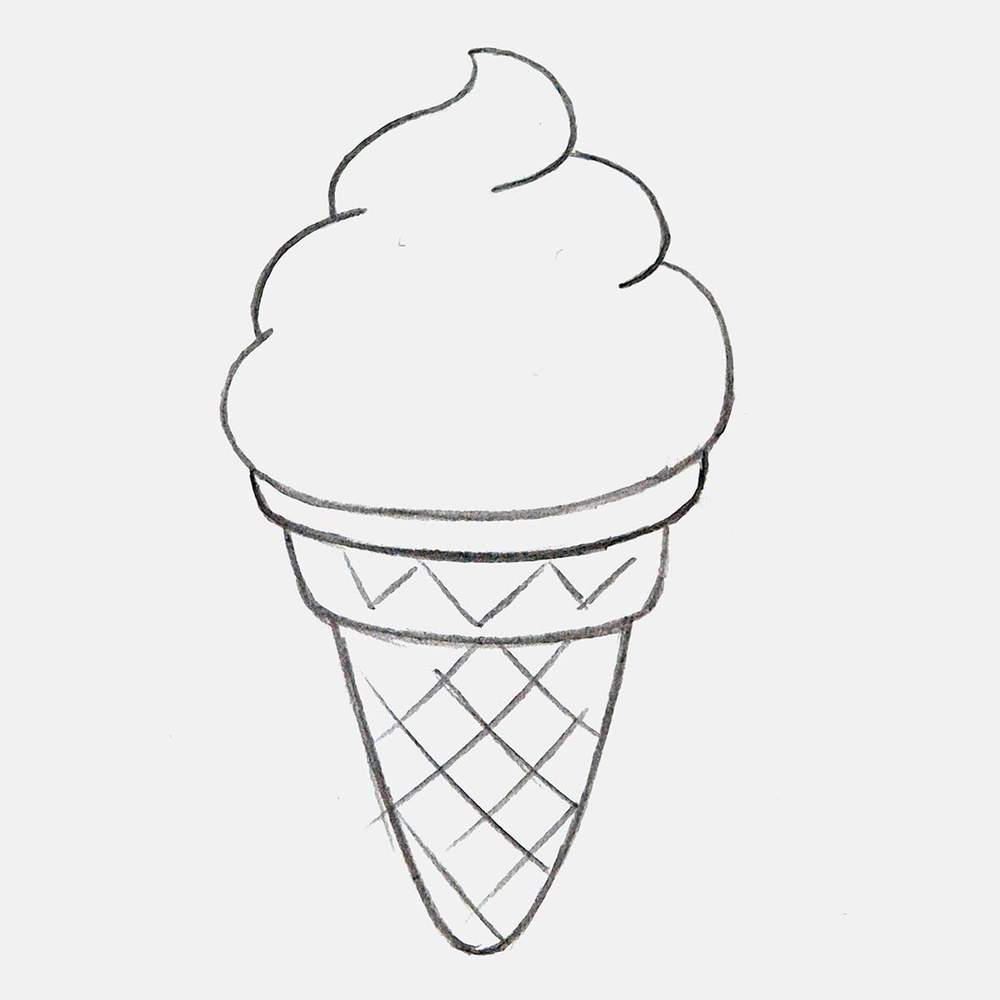
Step 3: Add the Waffle-Like Texture to the Cone
Ice cream cones usually have this waffle-like texture.
To add this texture, I just added a few cross-parallel lines. I focused them more in the center and faded them out a bit towards the edges.
Step 4: Add a Face to the Ice Cream Cone
With the ice cream cone done, we can start to make it look cuter by giving it a face.
I started by drawing two egg-shaped ovals in the bottom half of the ice cream.
Next, I added his mouth, which looks kinda like a :D face.
I also added a small circle in the top left of each eye to make them sparkle.
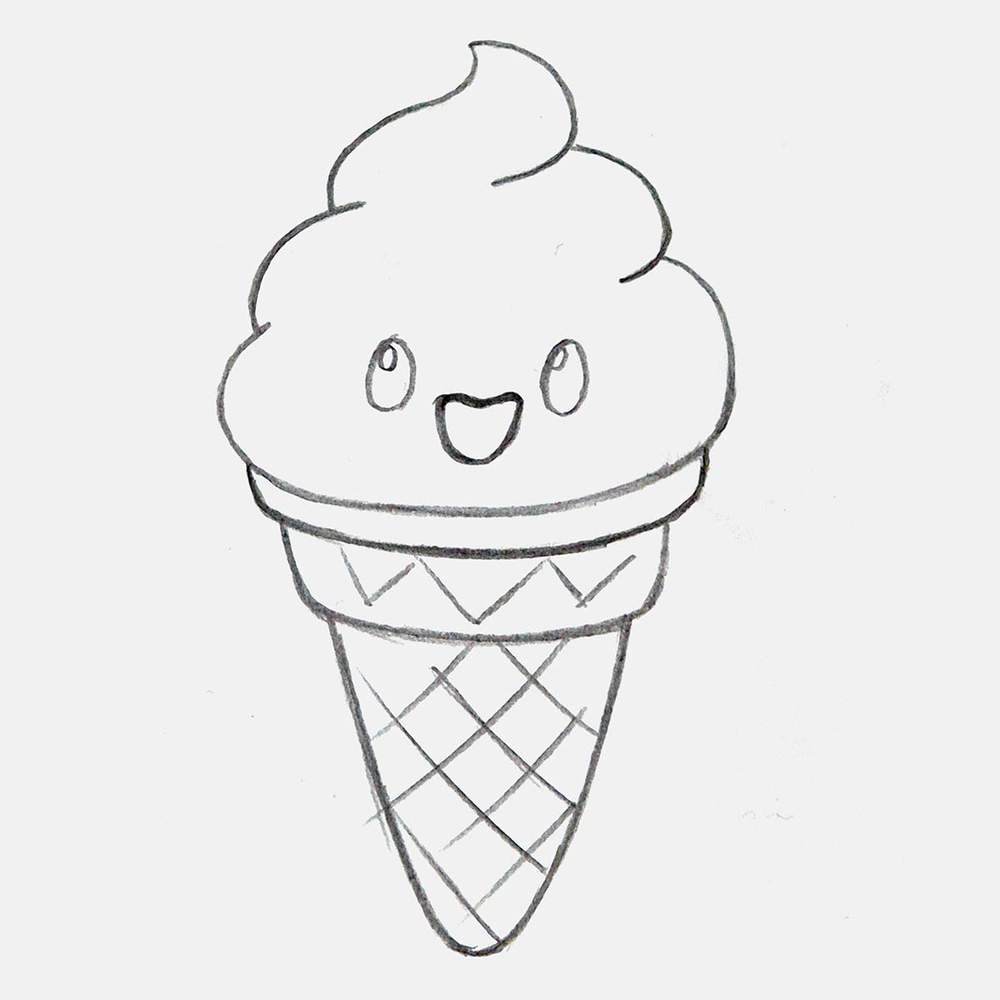
And to complete his adorable face, I added two small eyebrows above his eyes, and I drew the top edge of his tongue in his mouth.

Step 5: Outline Your Adorable Ice Cream Cone with a Pen
With the sketch of our adorable ice cream cone now done, we can outline it.
To outline it, I used my black brush pen.
I outlined the whole drawing and colored in his eyes and mouth, except for the waffle texture on the cone.
I also erased the sketch.

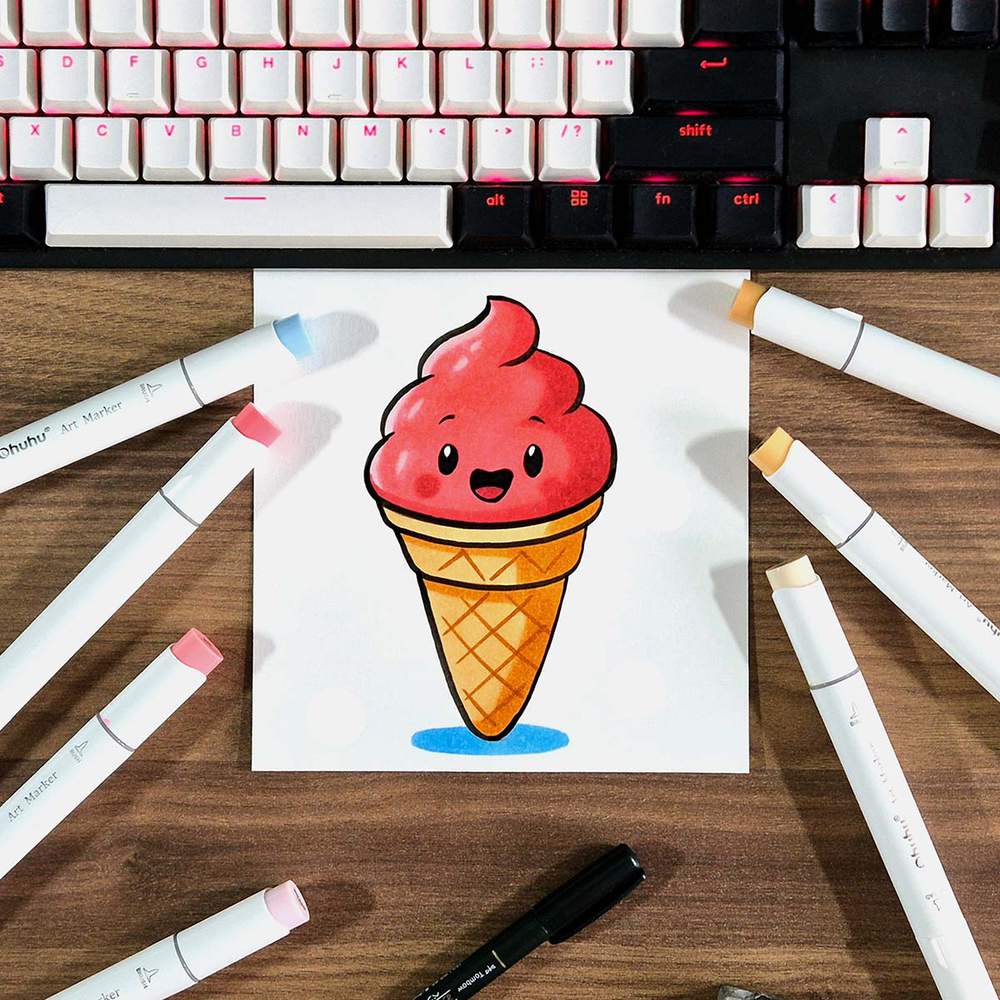
Step 6: Color the Cone with Markers
Our drawing is now ready to be colored with markers.
To do this, I used my favorite brand of markers, which I use for all my drawings: Ohuhu Honolulu markers.
I started by coloring the cone Soft Sun (E160).

Next, I used Deep Orange (E490) to add shading to the right and below the edges of the cone.

And I used Potato Brown (BR2) to color the lines of the waffle texture.

Step 7: Color the Ice Cream with Markers
After that, I colored the ice cream and his face pinkish red.
I started by coloring the left side of the ice cream with Pink (RV260).

Next, I used Pastel Rose (R9) to color the rest of the ice cream and refined the highlights on the left side.
I left an edge lighter pink on the left side of the ice cream, as well as a few small spots.

And to complete the ice cream and his cute face, I used Coral Pink (R1) to shade the right and bottom, to color his tongue, and to give him some adorable blush spots below his eyes.

Step 8: Color the Shadow Below Your Cute Ice Cream Cone
And to finish off our kawaii ice cream drawing, I added an oval-shaped shadow below the cone with Pale Blue (B120) as it complements the pinkish red really well.

Your Adorable Ice Cream Cone Drawing is Done!
And that's how you draw a cute ice cream cone!
I hope you enjoyed creating this drawing with me!
If you did, you might want to check out my other cute step-by-step drawing guides.
Thank you!
Articles You Might Also Like


I love bringing cars to life with alcohol markers and colored pencils.
Whether you're just starting out or looking to improve your skills, I'm here to help!
Click here to learn more about me.


Be the first to comment!
Comments
There are no comments yet.