How to Draw a Lamborghini Gallardo - Complete Step-by-Step Tutorial
In honor of Mat Armstrong's crashed Lamborghini Gallardo, I created this step-by-step tutorial so you can make a drawing of how his car looked before he crashed it.
You probably have heard about it, but if you haven't yet, here's a link to Mat's video.
Now, without further ado, let's get started!
Disclaimer: In the name of full transparency, please be aware that this blog post contains affiliate links and any purchases made through such links will result in a small commission for me (at no extra cost for you).
Drawing Supplies I Used in this Tutorial
To draw Mat's Twin Turbo Lamborghini Gallardo, I used the following art supplies:
- A graphite pencil, a ruler, a kneaded eraser, and a regular eraser;
- Winsor & Newton Promarkers in the colors Ice Grey 1 (IG1), Ice Grey 2 (IG2), Ice Grey 4 (IG4), Ice Grey 7 (IG7), Blue Black (XBB), Black (XB), *Champagne (Y219) (Not a necessary color), Caramel (O727), Umber (O615), *Pumpkin (O467) (Not a necessary color), Mandarin (O277), Burnt Orange (R946), Sunflower (Y156), Lipstick Red (R576), Berry Red (R665), and Burgundy (R424);
- Derwent Coloursoft pencils in the colors White, Dove Grey, and Black;
Reference Photos I Used to Draw Mat Armstrong's Gallardo
When looking for reference photos I could find the perspective I wanted. I wanted to draw Mat's Gallardo from the rear as it's a Twin Turbo Lamborghini without a rear bumper.
I did however find a photo of his car from the angle I wanted before he upgraded it (9th slide). So I decided to work with that one instead.
I still wanted it to look like how it did before he crashed it, so I put my amazing Photoshop skills to use and created this image:
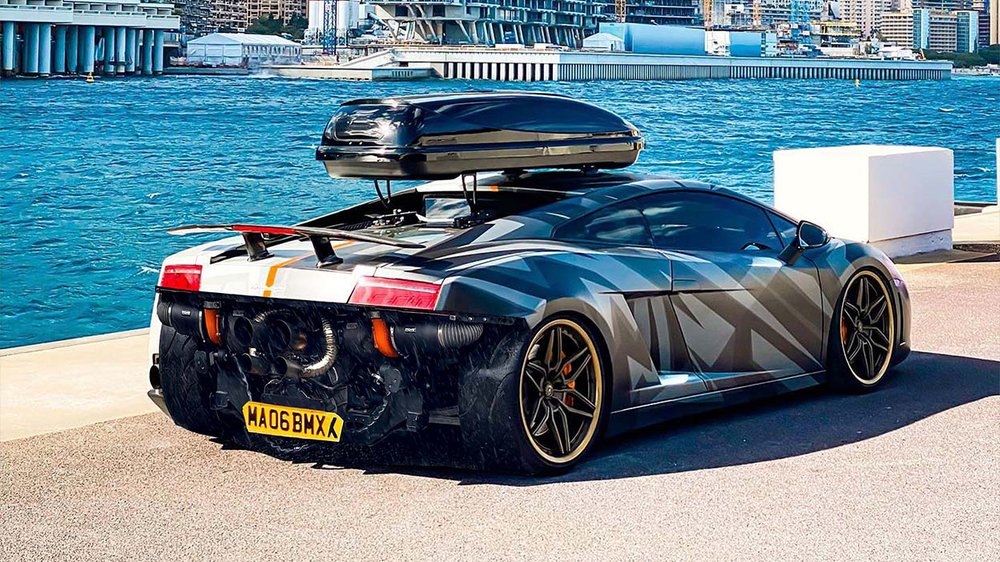
It's far from perfect, but it'll do the job.
How Do You Draw Mat Armstong's Twin Turbo 1000HP Lamborghini Gallardo?
To draw Mat Armstrong's Twin Turbo Gallardo, I first Photoshopped a reference photo.
Then I started sketching the car using the grid method.
Once the sketch was done, I colored the car in with alcohol markers. First all black parts, then the rest of the car.
And lastly, I used 3 colored pencils to add some details and I used a Posca paint pen to add white highlights.
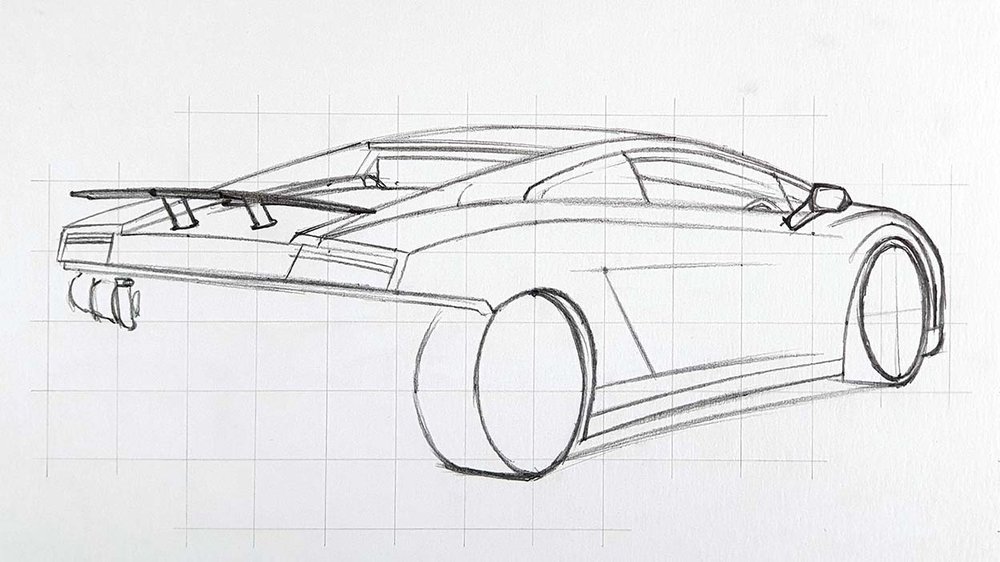
Step 1: Sketch the Outline of the Gallardo
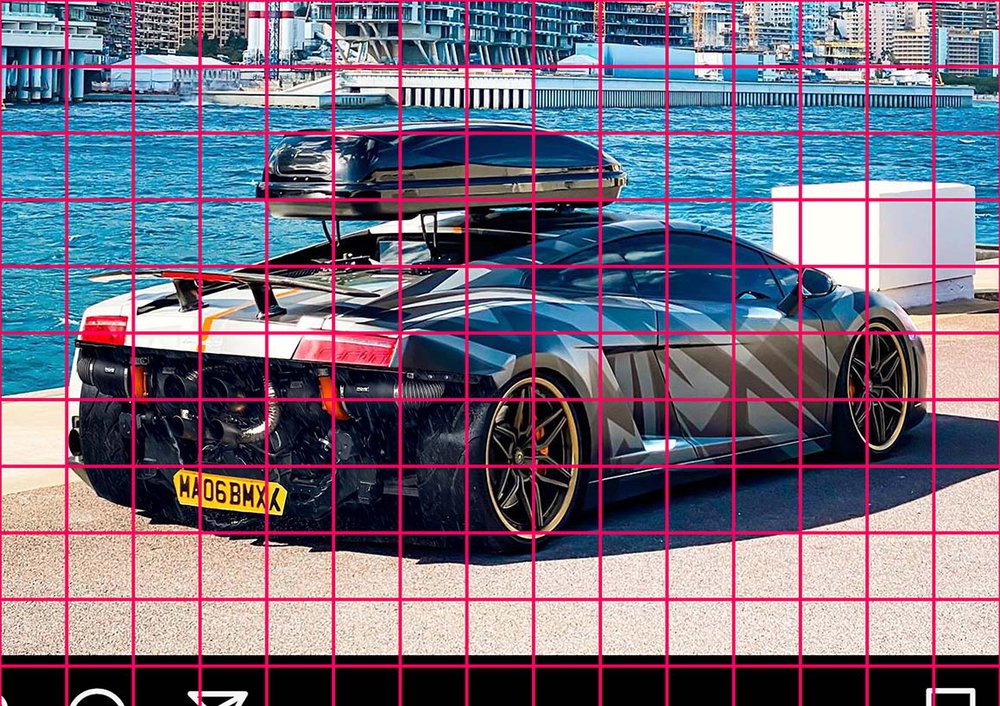
I first started by sketching the outline of the Lamborghini and for that, I used the grid method to make it a lot easier. However, if you don't like using this method, there are other techniques you can use, or you can freehand your sketch.
I started by overlaying a grid of 15 by 10.5 squares on top of the photo that I resized to be the same size as my piece of paper which is A4-size or 29.7 by 21 cm.
Next, I recreated that grid on my paper, but I only sketched the squares I'd actually need for the sketch.
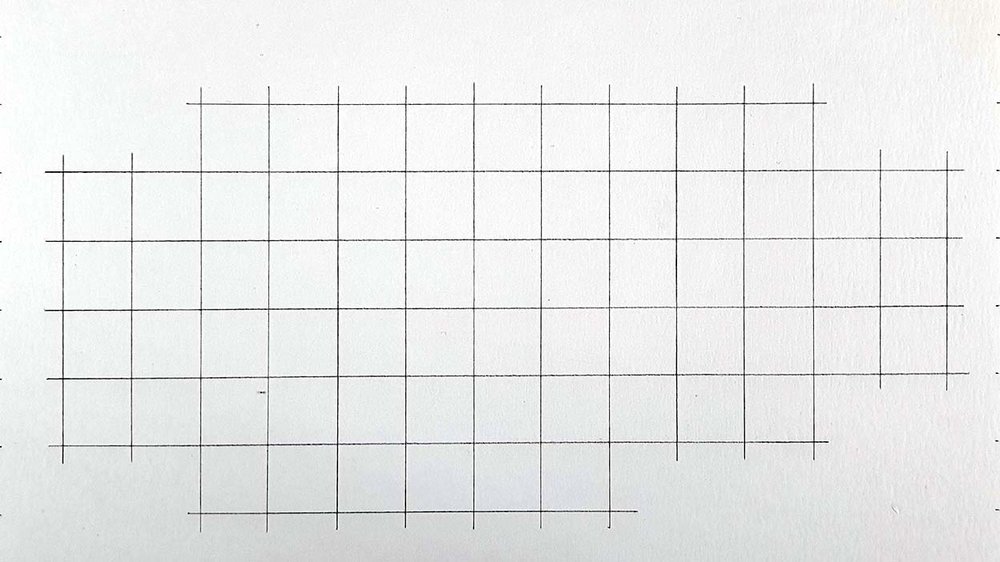
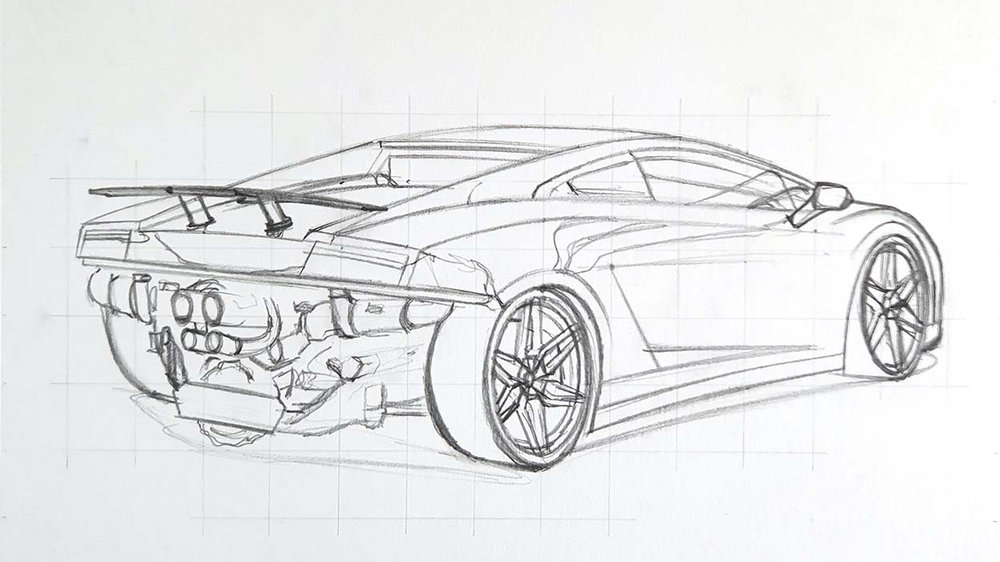
After that, I finally started sketching. I started with the basic shapes, and later I added all the details like the exhaust and all the other bits in the rear and the pokes of the wheels.
Step 2: Color All Pure Black Parts of the Lamborghini
When coloring the car, the first thing I like to do is to color all black bits. This is a very simple thing to do and it makes the drawing look so much less complicated.
For a black car like Mat's Gallardo, you'd expect to have more black parts, but most of the bodywork is actually grey as it reflects the light of its surroundings.

Step 3: Color the Wheels of Mat's Lamborghini Gallardo
Next, I started coloring the wheels.
I first colored the tires of all 3 visible wheels with Ice Grey 4. I also colored the spokes and rims with Champagne and the brake calipers with Pumpkin.
However, after that, I decided that champagne was too light and ended up darkening the wheels with Caramel. So you don't actually need to color them with Champagne. I also ended up darkening the calipers to Mandarin.

After that, I added depth to the tired by darkening some parts with Ice Grey 7 and blending that into the Black and IG4.
I also added some darker bits to the wheels. I first darkened them with Caramel and then added some depth with Umber.
I also darkened the brake Calipers with Mandarin and Burnt Orange.

Step 4: Color the Rear of the Twin Turbo Gallardo
Next up, I colored the rear of the car.
There is so much going on there that I decided that I would deal with that later when adding details with colored pencils. So I kept it simple for now and only added a few details.
I first colored the lightest parts of the rear with Ice Grey 2 and Ice Grey 1, which include the lower exhaust pipes, a few rings around the hoses connecting the turbos, and a few other bits.
I also colored the lower exhaust tips and the part of the suspension of the right wheel that you can just about see with Ice Grey 4.

Next, I colored the remainder of the rear except for the plate and the turbos with Ice Grey 7. I colored the license plate with Sunflower and I colored the turbos first with Mandarin and added some depth with Burnt Orange.

Step 5: Color the Shadow of the Car
After that, I colored the shadow underneath the car.
I first outlined the shadow with a thick Ice Grey 1 border.

After that, I used Ice Grey 4 to color the shadow that's more underneath the car.

And lastly, I blended the colors together.
I used Ice Grey 1 again to blend the IG4 into the IG1.
I used IG7 to blend the IG4 into the Black. Then I used IG4 again to blend the IG7 into the IG4.

Step 6: Color the Tail Lights of the Gallardo
Next up, I colored the tail lights of the Gallardo.
I first colored the light grey lines with Ice Grey 2 and colored the rest with Lipstick Red. For the left light, I also used Berry red to darken the bottom half.

Step 7: Color the Wing of Mat's Gallardo
After that, I colored the wing.
I colored the brake light with Burgundy and the top of the wing with Ice Grey 2.
For the wing stands I used Ice Grey 2 for the bottom and I used Ice Grey 7 for the top three quarters.

Step 8: Color the Rear Deck of the Callardo
Next, I colored the rear deck.
I first colored pretty much everything with Ice Grey 2.

Then, I used Ice Grey 7 to add some dark spots on the left and below the rear window.

Lastly, I used Blue Black to color the left bit and the part above the rear window.

Step 9: Color the Windows of the 1000HP Gallardo
Next up are the windows and the door mirror, the last part before coloring the main body.
I started by coloring the windows and the mirror with Ice Grey 2. I didn't color the darker reflection for now.

After that, I colored the reflection on the right half of the windows with Ice Grey 7 and a darker line of Blue Black on the bottom. I also added some darker tones to the mirror arm and the mirror reflection.

Step 10: Color the Main Body of the Lamborghini Gallardo
It's now time to color the last part of Mat's Twin Turbo Charged Gallardo: the main body.
I started off by coloring the lightest parts with Ice Grey 1 which includes the roof, the rear deck, the bits above the taillights, and a few more bits towards the front.

After that, I colored the second lightest parts with Ice Grey 2.

Next, I used Ice Grey 4 and 7 to color the darker parts more on the lower half of the body panels that reflect the ground and the buildings.

And lastly, I used Blue Black to add more depth to the body of the Gallardo. In most places, I blended the Blue Black into the grey with Ice Grey 7.
And that's the car all colored! But it's not yet finished

Step 11: Add Details with Colored Pencils
Now that the car is fully colored, it's time to add all the details.
I added tons of details on the rear of the car with the White, Dove Grey, and Black Coloursoft pencils as well as on the wheels.
I also used white to add in a slight gradient on the windows going lighter on the top to the grey on the bottom.
And I used black to add some details around the window frame.
I also use the pencils to add the panel gaps and a few more details all over the car.

Step 12: Add White Highlights
To finish the drawing off, I added a few white highlights all around the car. I added a few details on the rear, on the wheels, in the windows, and on some edges of the body.
I also added the "Lamborghini" lettering on the rear (as well as I could for how small it is).
Lastly, I added Mat Armstrong's personalized lice plate. For this, I used a black Posca PC-1MR, but you can also use a fineliner.

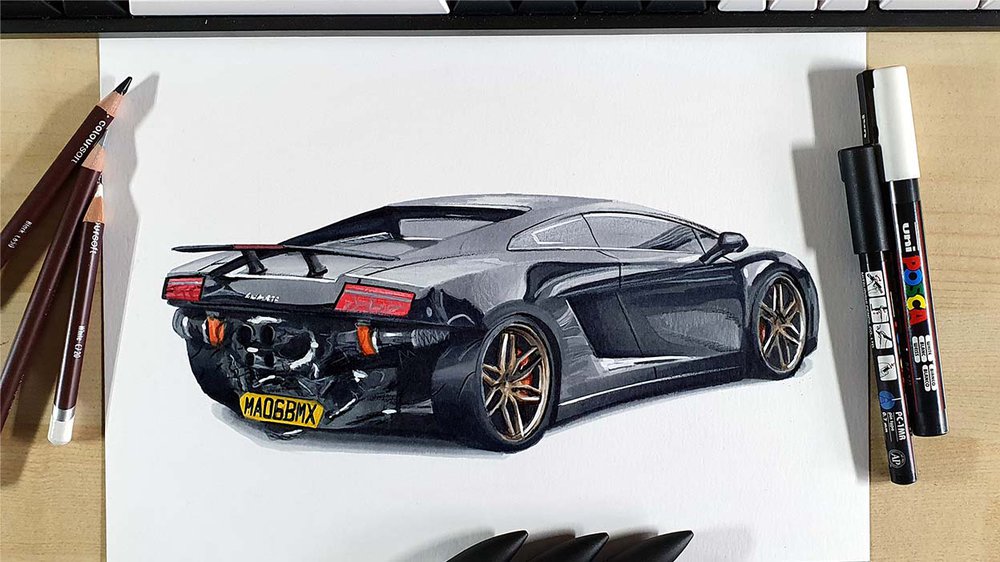
And That's How I Drew Mat Armstrong's 1000HP Twin Turbo Lamborghini Gallardo
After a few hours of drawing it is finally done! And holy f*** it turned out well!
I hope yours turned out as well as mine and if you decide to share it on Instagram, make sure to tag me (@luukminkman). I'd love to see how yours turned out!
One last thing, I'd really appreciate it if you could share this article with someone you think might also like it. It would help me out a lot.

Tags
Articles You Might Also Like

I love bringing cars to life with alcohol markers and colored pencils.
Whether you're just starting out or looking to improve your skills, I'm here to help!
Click here to learn more about me.


Be the first to comment!
Comments
There are no comments yet.