How To Draw A Skull Easy Step-By-Step
This guide is all about how to draw a skull step-by-step.
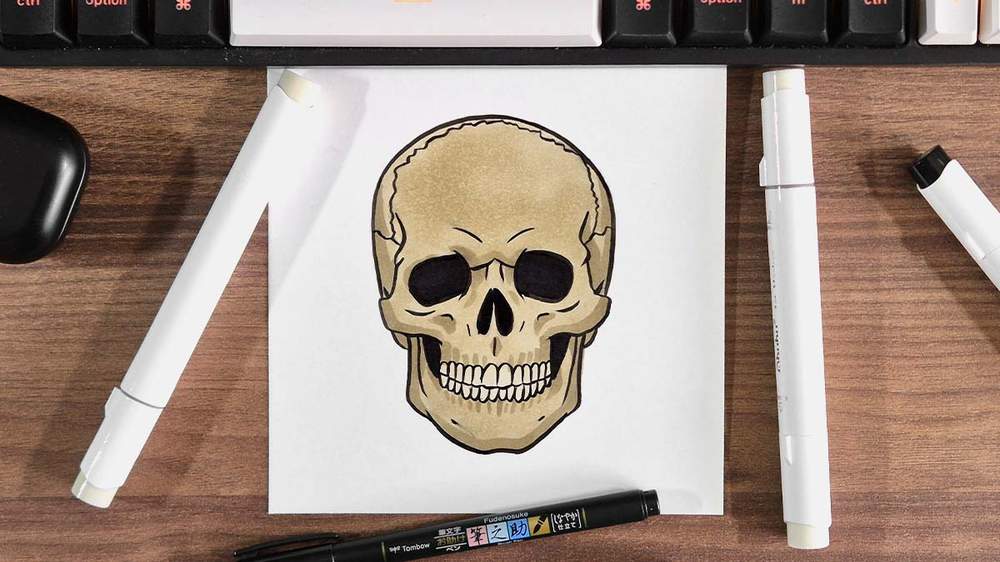
Want to learn how to draw a skull? In this step-by-step drawing guide, I will show you exactly how to draw a skeleton head that is simple and still looks cool.
This step-by-step skull drawing guide is broken up into 11 steps with clear descriptions. Each step also comes with clear photos showing you exactly what to do, so you can create your very own skull drawing.
One thing to remember: don't strive for a perfect skull drawing if this is your first time. Have some fun, make mistakes, and try again. That's how you actually learn. Your first skull drawing might suck (a lot), but don't give up. You'll need to practice to get better, and making bad drawings is part of that.
Now, with all that said, let's get started on this skull drawing!
I just wanted to let you know that this post contains affiliate links, and any purchases made through these links will result in a small commission for me and don't cost you anything extra.
In This Guide
- Drawing supplies & colors I used
- How to sketch a skull step-by-step
- Outlining the skull with a brush pen
- Coloring the skull with markers
- FREE printable Halloween coloring pages
- More drawing guides you'll love
Drawing Supplies I Used
To sketch the skull, I used a regular graphite pencil with an eraser. And to lighten my sketch, I used a kneaded eraser. These are really great for this.
And I made this drawing on Canson Illustration Manga paper (my favorite paper for using alcohol markers on).
To outline the skull sketch, I used a black Tombow Fudenosuke brush pen.
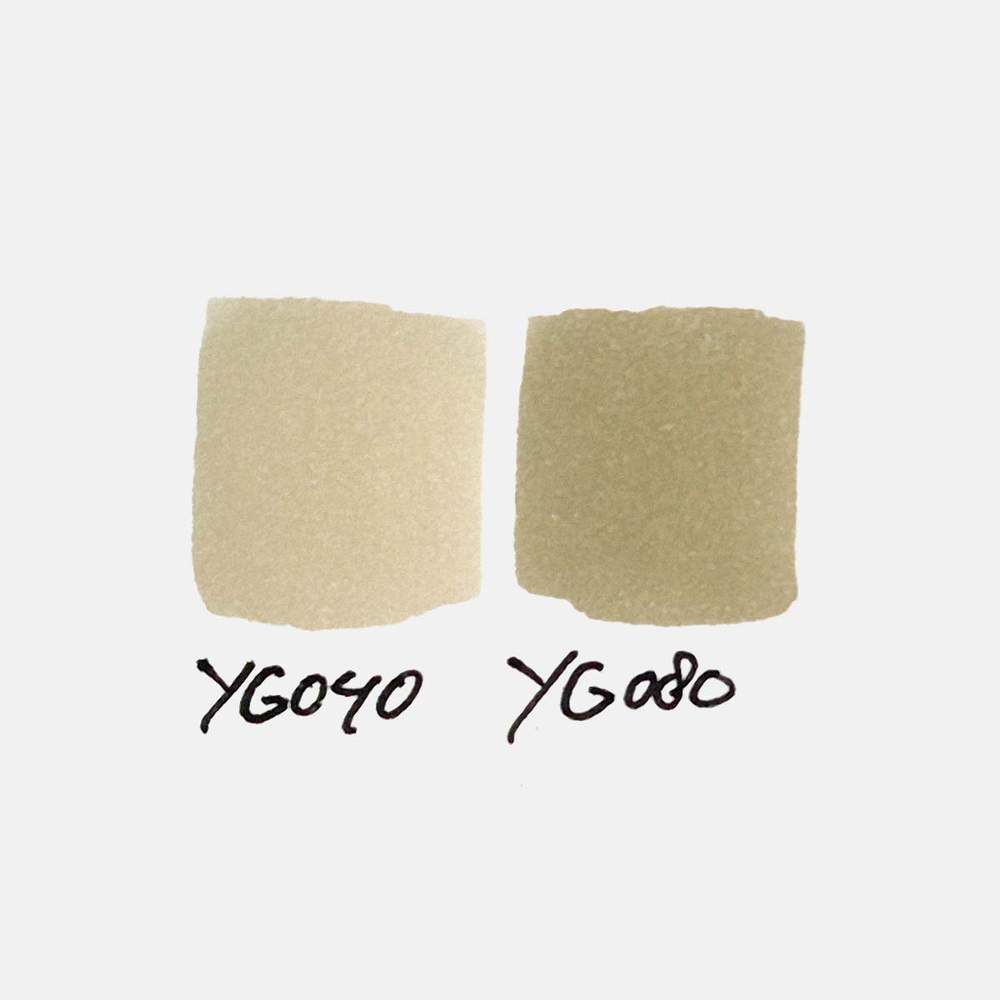
And to color this skull, I used Ohuhu Honolulu markers. I used 2 colors in total: Yellow Grey 04 (YG040) and Yellow Grey 08 (YG080).
You can buy these colors separately or as part of the 320 set.
I've added an image below with all the color swatches so you can match your markers to the ones I used if you already have some.
How To Draw A Skull
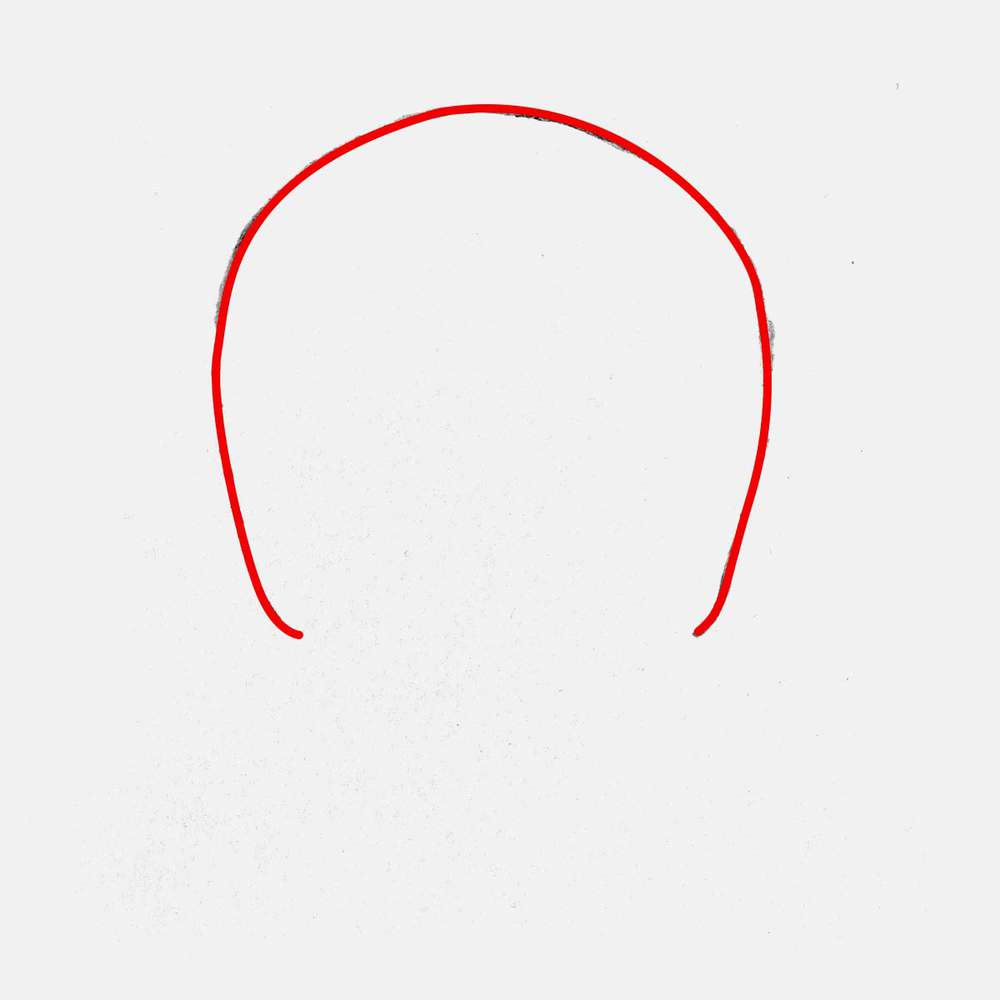
Step 1: Sketch A Big Circle With Flat Sides (The Cranium)
To sketch a skull, I find it easiest to start with the outline of the cranium. This is a big circle shape with flattened sides.
Step 2: Add The Sides Of The Jaw To The Bottom Of The Head
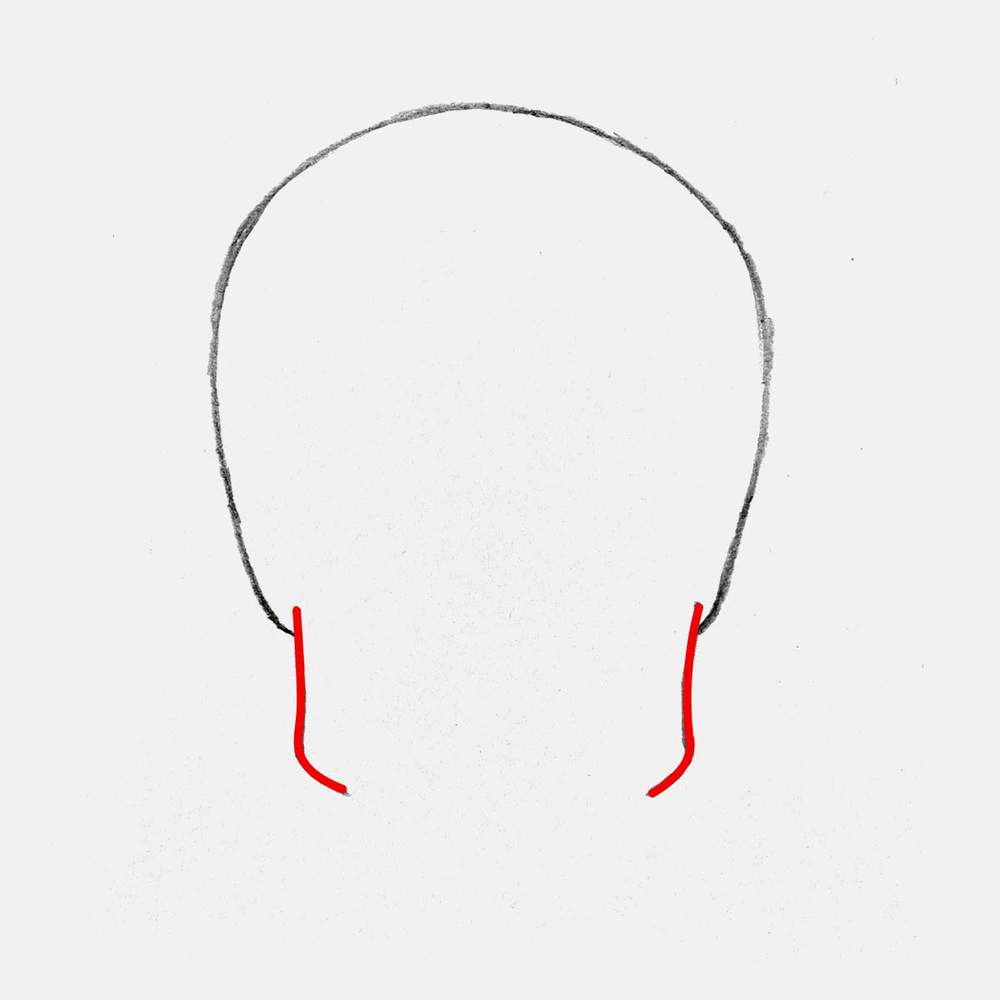
With the cranium in place, I then sketched the sides of the bottom jaw and attached them to the bottom where the ends curve inwards.
The sides of the jaw are more or less shaped like inwards hockey sticks.
Step 3: Draw The Chin Bone At The Bottom Of The Jaw
To connect both sides of the bottom jaw, I added the chin bone. It's essentially just a big curve with a little indent in the middle, making it look like a flat W shape.
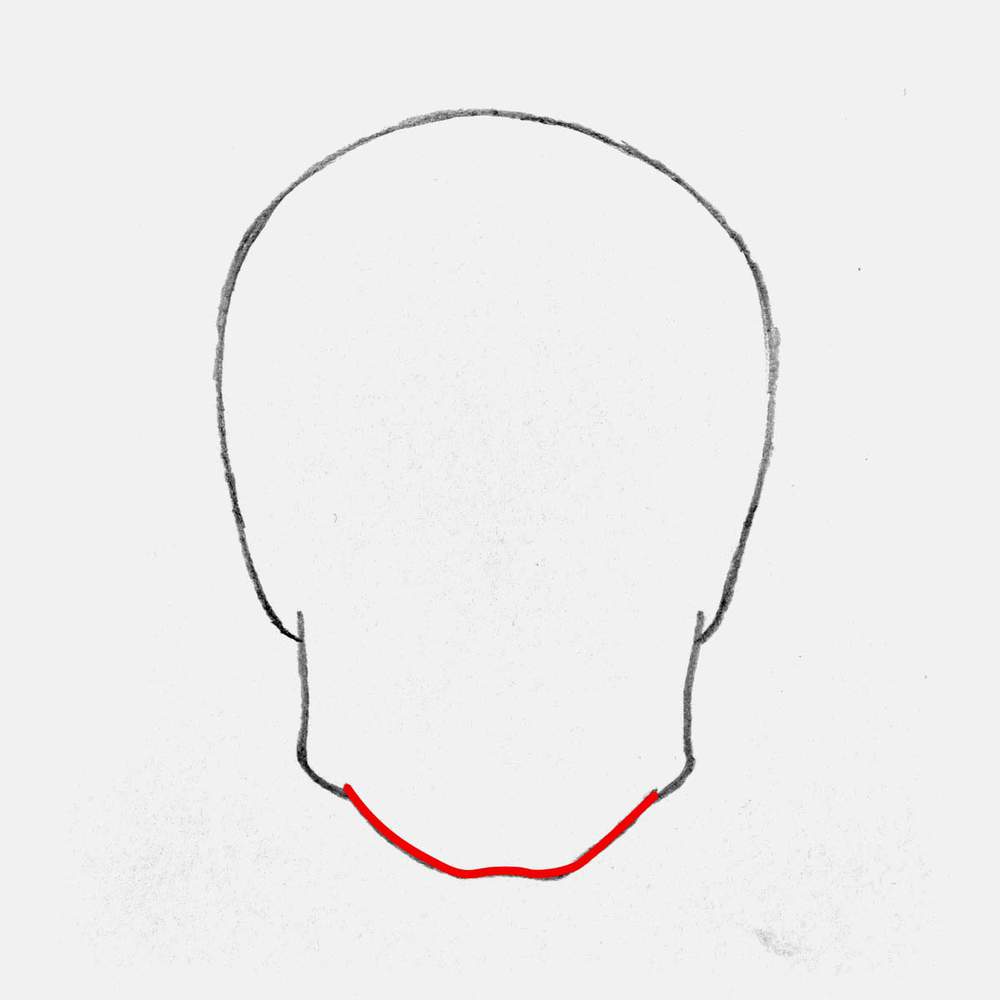
Step 4: Sketch The Cheekbones & The Forehead Ridges
Next, I added the sides of the cheekbones and attached those to the top of the bottom jaw. And to the top of the cheekbones, I added this ridge that's next to the eyes/on the forehead.
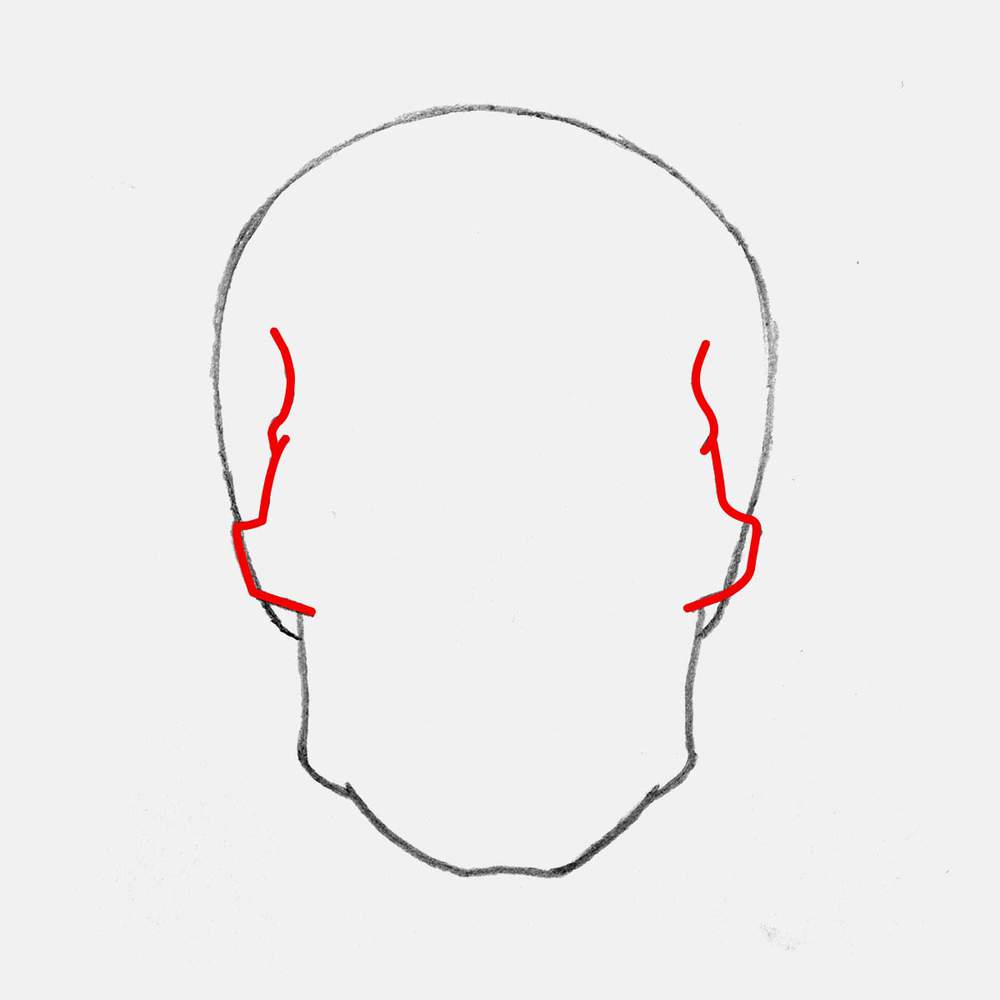
Step 5: Draw The Eye Sockets
After that, I added the big eye sockets that house the eyes.
I started with the inner edges, which are just 2 round curves.
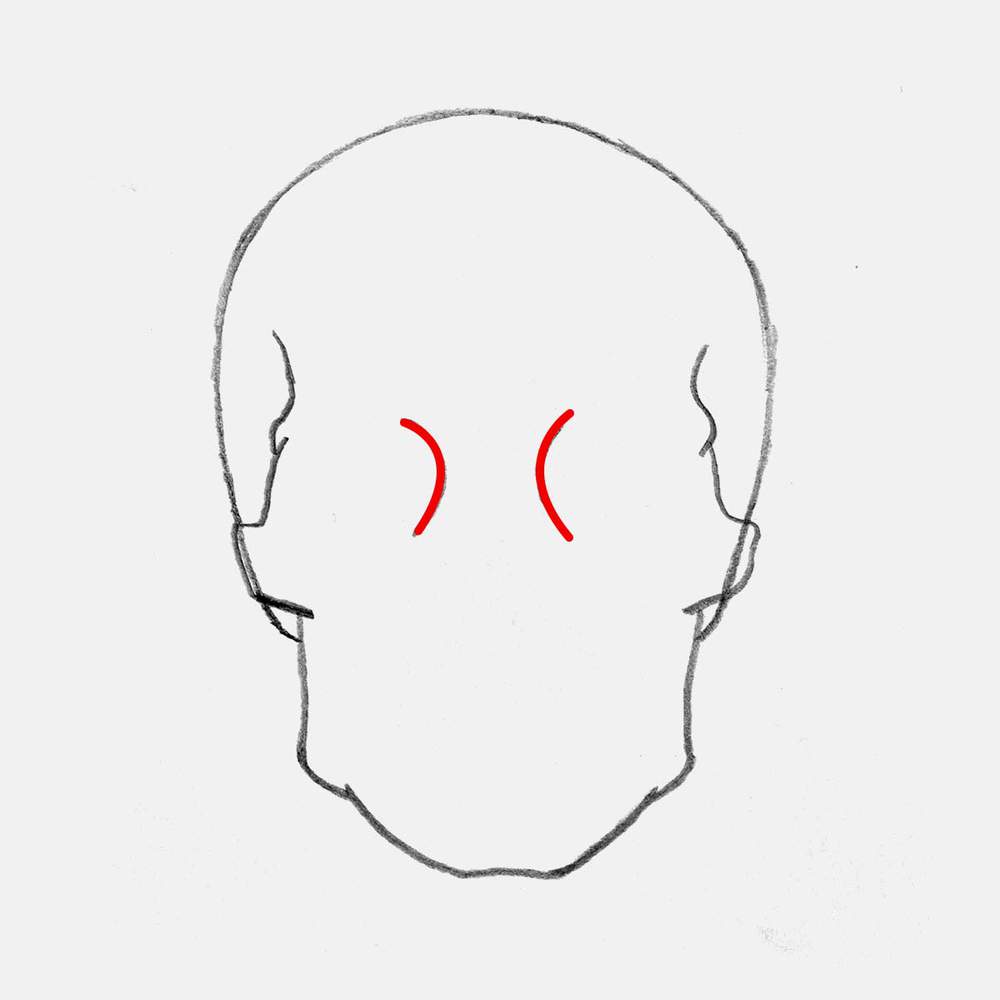
Next, I added the rest of the eye socket edges. The eye sockets are mostly shaped like a rounded rectangle, and they're not perfectly horizontal. They point slightly downwards.
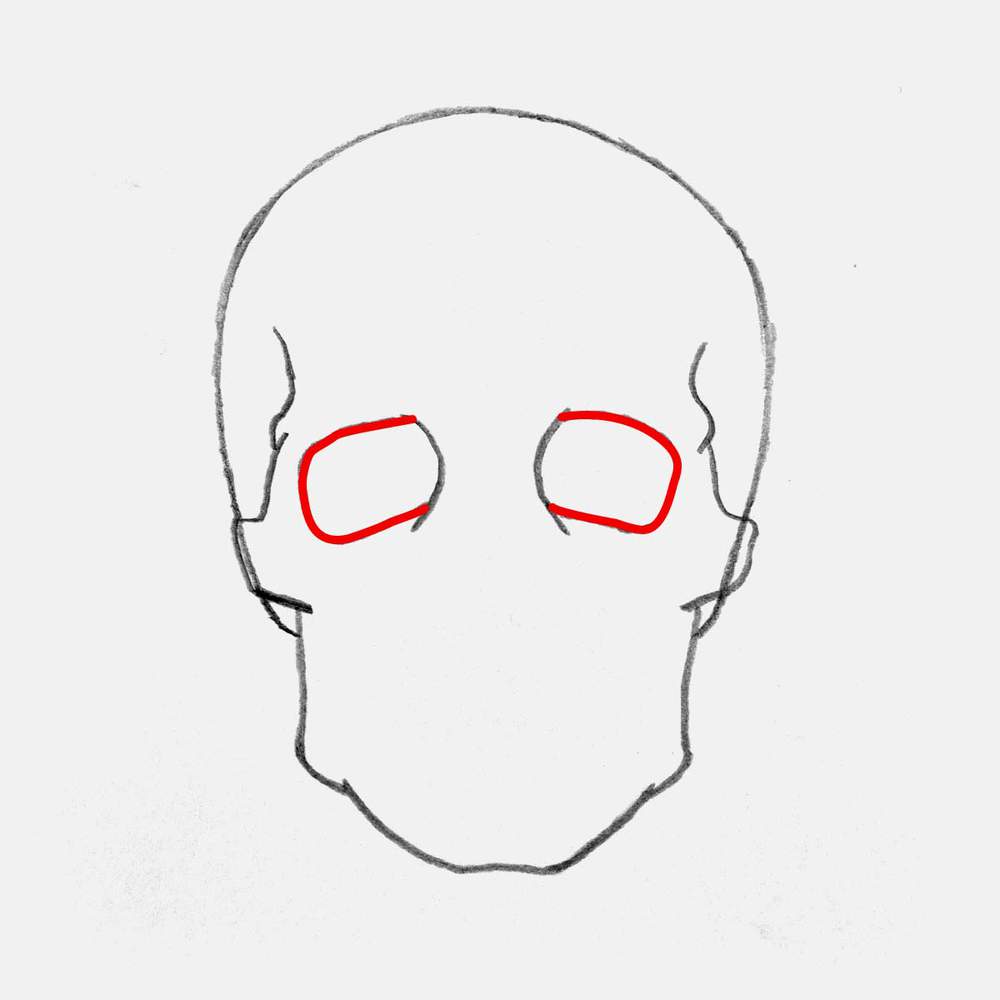
Step 6: Add The Nasal Opening In The Center Of The Skull
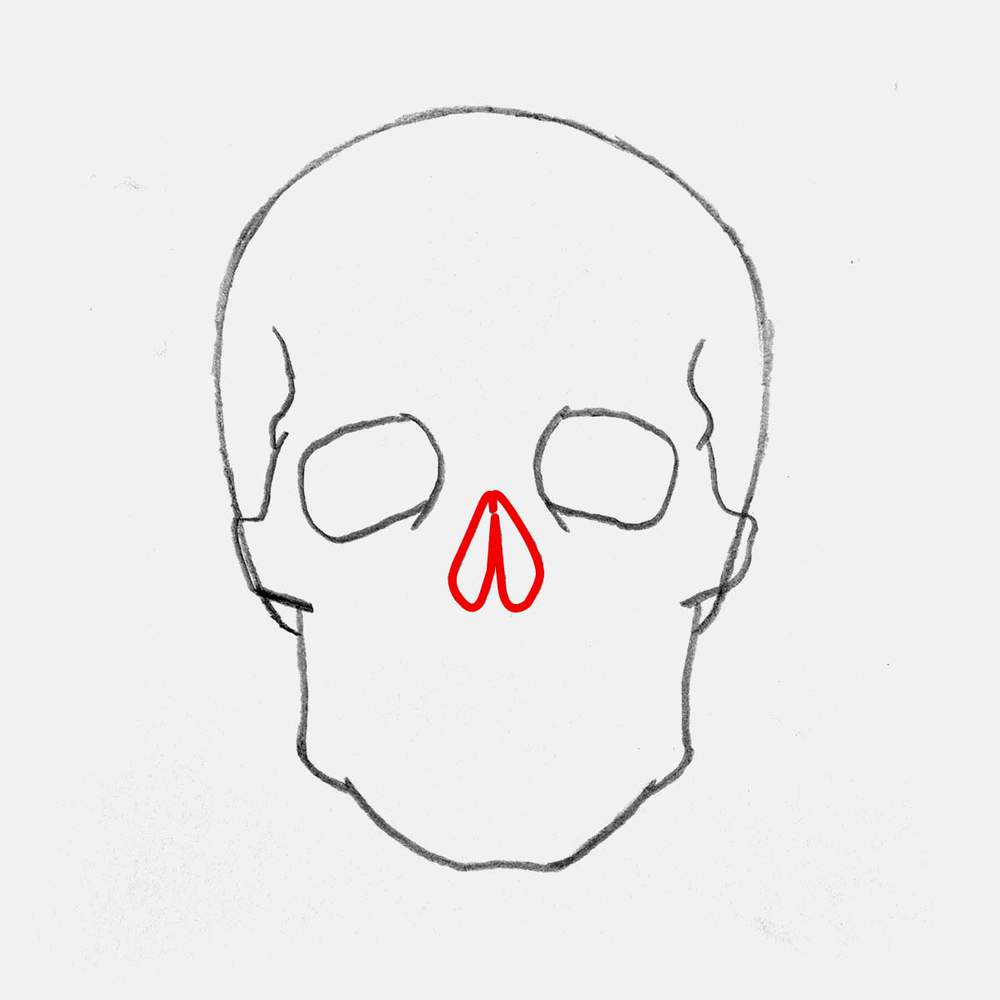
Just below and slightly in between the eyes, I added the nasal opening. It looks pretty much like an elongated and upside-down heart shape, but with this little indent in the top.
Step 7: Sketch The Teeth Of The Skull
With the eye sockets and the nasal opening now sketched, it's time to add what is probably the most difficult part of this drawing: the teeth. I'll try to explain it as simply as possible.
Before we sketch the teeth, we first need to add the inner edge of the bottom jaw, the bottom of the cheekbones, and the outer edges of the upper jaw.
The bottom edges of the cheekbones are simple curves. The inner edges of the bottom jaw are shaped more like inward pointing hocky stick shapes again. And the left outer edge of the upper jaw is just a short straight line, while I made the right one more curved. I did make this one straight too when adding the outline of the teeth.
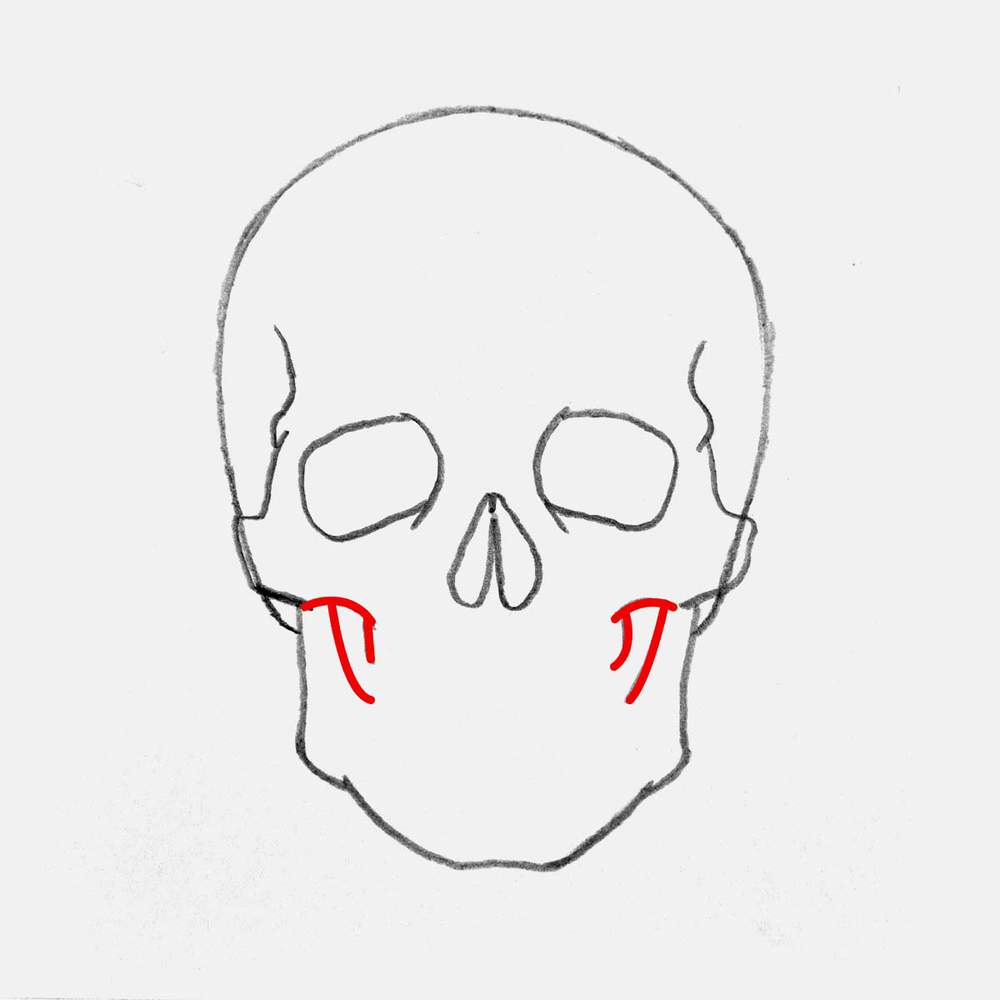
With these parts now in place, we can start to sketch the teeth. To make this process a lot easier, I like to add this outline box first. This is just a guide for where the teeth will be.
The top edge of this box connects both sides of the upper jaw with an almost straight line that curves slightly downwards in the middle. The sides of this box are just short straight lines that go down to a little bit after the inner edges of the bottom jaw. And the bottom edge of this box (which is the top edge of the bottom of the bottom jaw) is made up of three straight lines: one in the middle, and one on each side connecting the middle to the sides of this box.
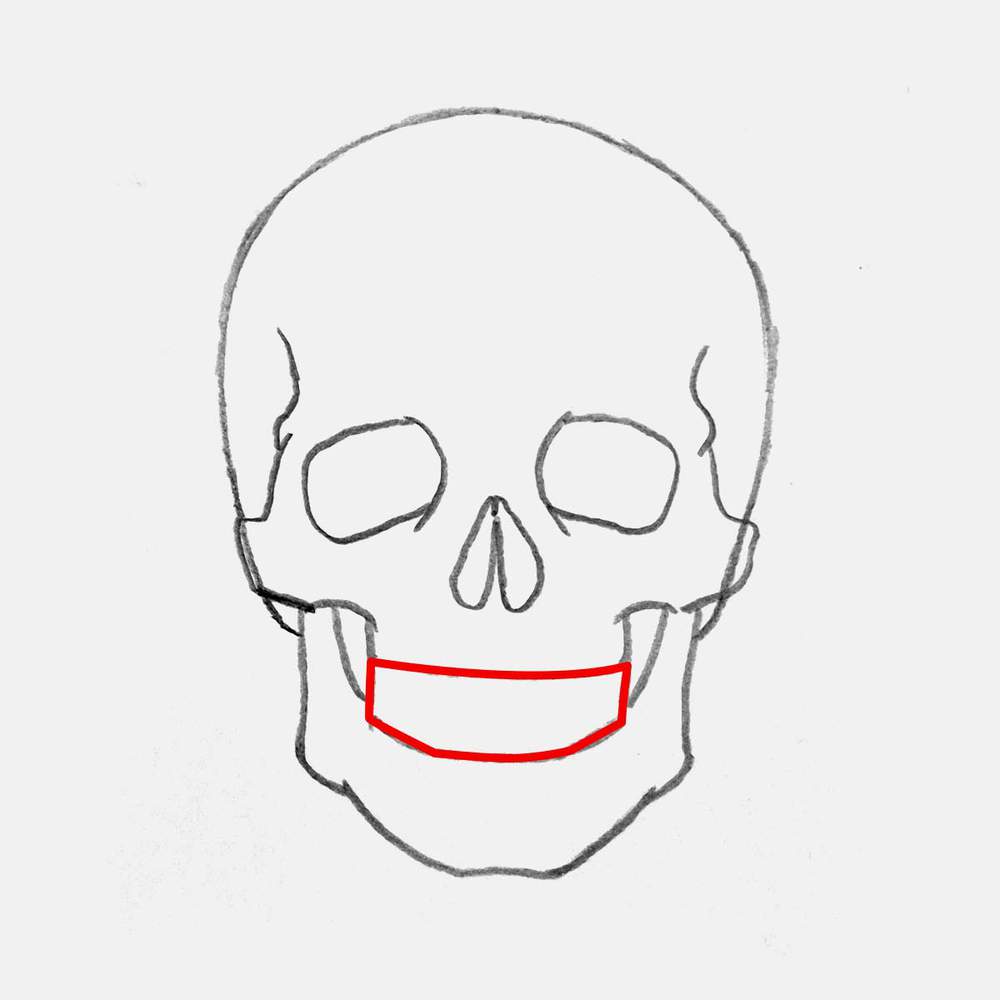
Now, with this helping box shape done, it's a lot easier to sketch the teeth.
I started by sketching the upper teeth. And after erasing the top half of the box, I started with the two big arches in the middle for the two central incisor teeth. Then I kept connecting more and more arches to either side of these teeth until I had sketched 12 in total, which are all the ones that are actually visible.
Next, I added the bottom of the teeth and made them slightly curved instead of perfectly aligned and flat. This makes them look more real, as no one has perfectly straight lines that align perfectly at the bottom.
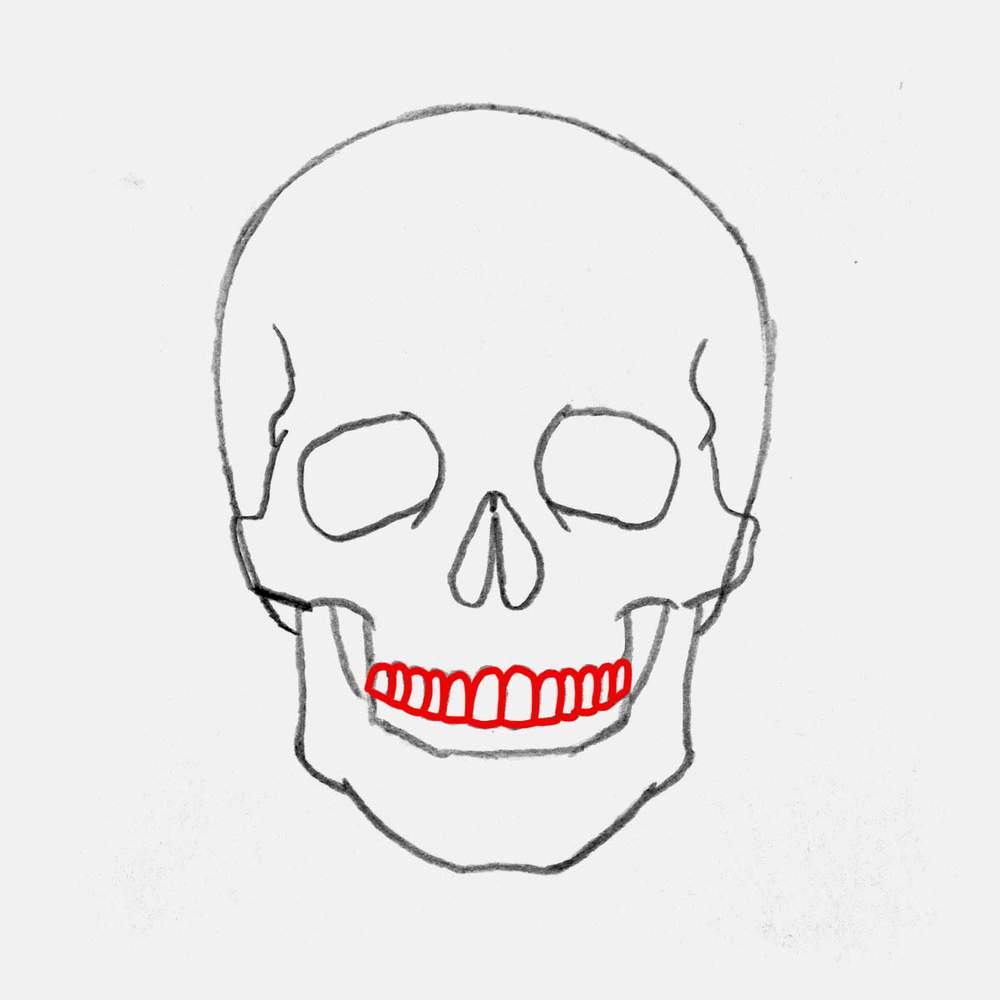
After that, I did the same for the lower teeth, but upside down. I again started with two arches in the center for the central incisor teeth, and then kept adding more arches to either side of them until I had done 14 in total. (Yes, that is two more than the upper jaw, but on the bottom one you can actually see more, at least in my drawing.)
For these bottom teeth, I did sketch the tops as they connect straight to the upper teeth.
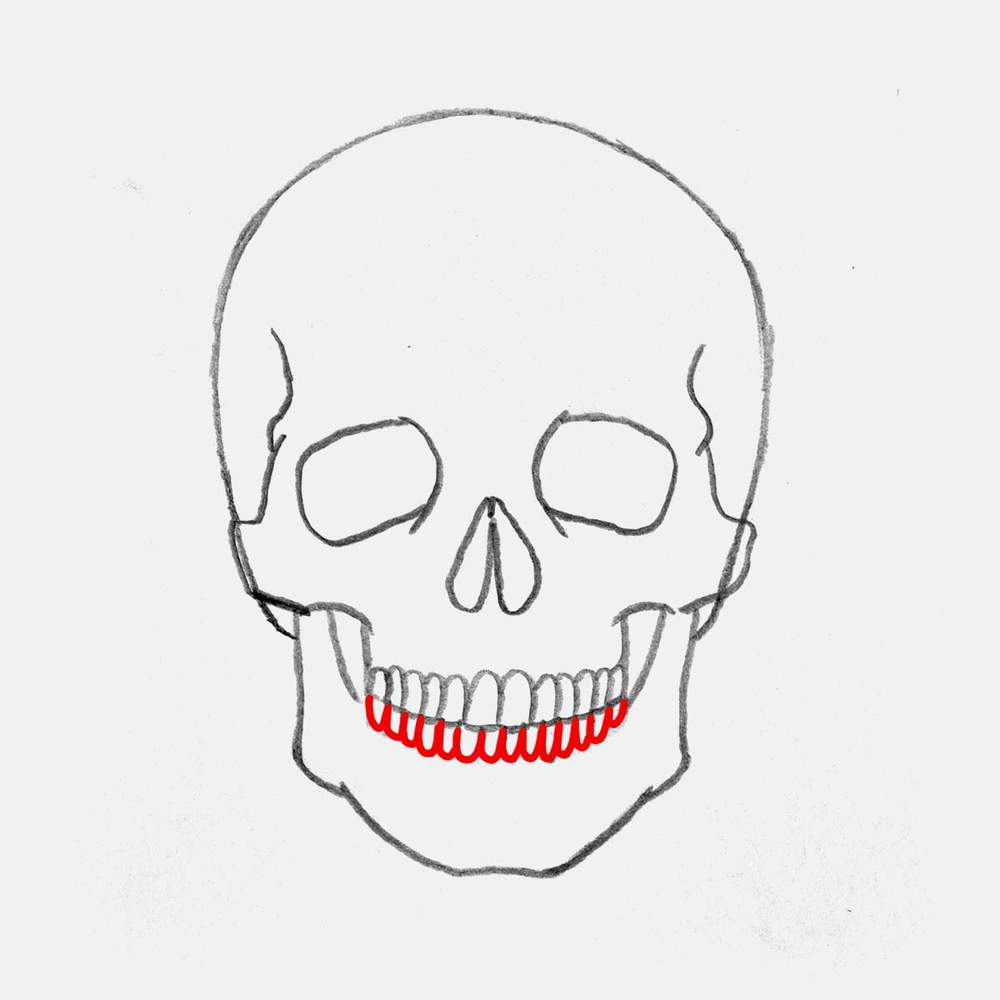
And that's the teeth all done, and it wasn't even that difficult, was it?
Step 8: Add Ridges All Over The Skull To Give It More Shape
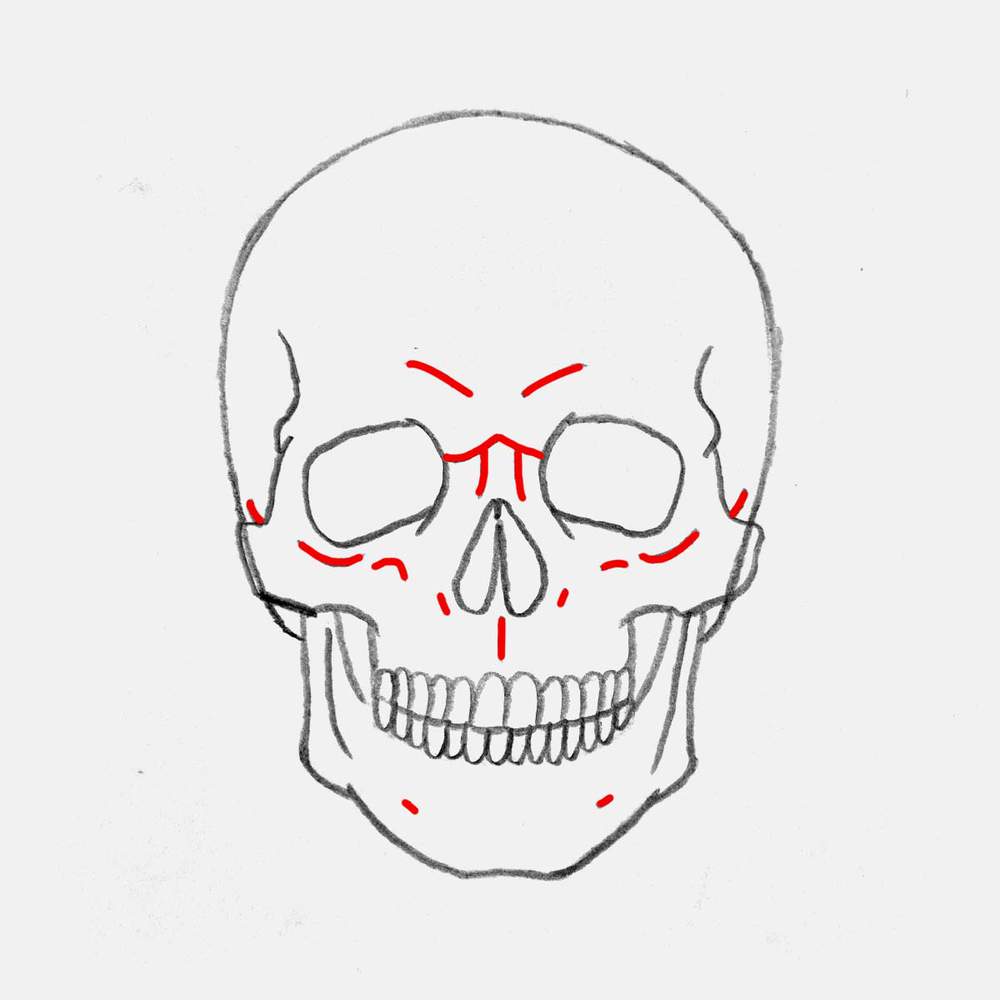
All the main parts of the skull are now done, but to make it look more real and detailed, I added tons of ridges that skulls have onto this sketch.
I added two short lines for the brow ridge, I added ridges just above the nose, I added ridges on the cheekbones, I added ridges around the nose, I added a ridge above the two upper central teeth, and I added two little ridges on the bottom jaw.
Step 9: Draw The Sutures To The Cranium
The skull already looks super good, but there is one thing that will make it even better: adding the suture lines.
Suture lines are basically the lines that form when the different parts of your cranium fully grow together (I believe).
In my drawing, I added the big coronal suture that runs all the way around the top of the skull, and I added the sphenofrontal and sphenoparietal suture (the short ones on the sides of the forehead).
To sketch these sutures, I just scribbled about and created these uneven serrated/zigzaggy lines.
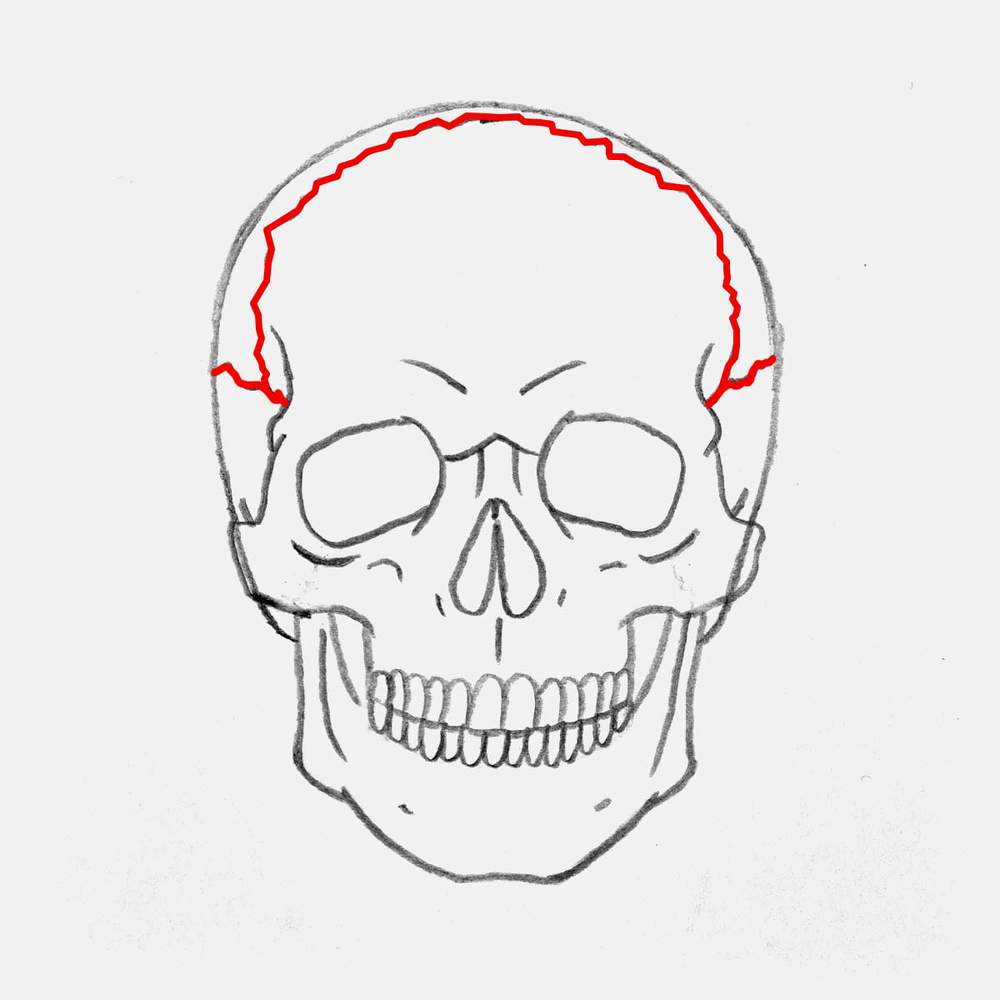
Now the skull looks really good, especially with these sutures now added!
Step 10: Outline The Skull Sketch With A Black Brush Pen
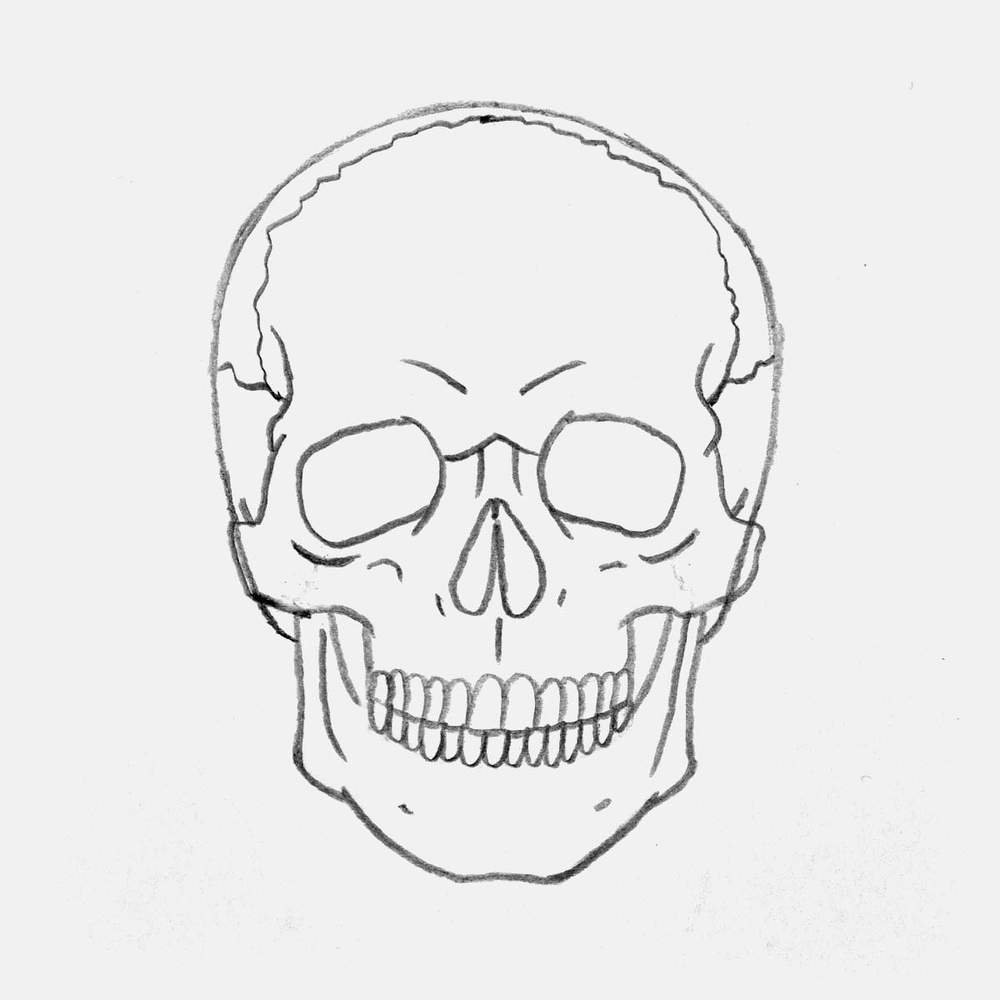
After the sketch of the skull is done, I like to outline it with my black Tombow Fudenosuke brush pen. This is great for outlining drawings like this one and for coloring in the large black parts. The brush nib makes it possible to vary the width and create these beautiful sweeping lines that start and end in sharp points.
To outline this skull sketch, I first lightened the sketch a lot with my kneaded eraser. And then, I used the brush pen and colored over every line of the sketch, except for the small part where the cheekbones overlap with the cranium.
I also colored the eye sockets and the nasal opening black. I did forget to color the space in between the upper and lower jaw black... But I fixed that in the next step.
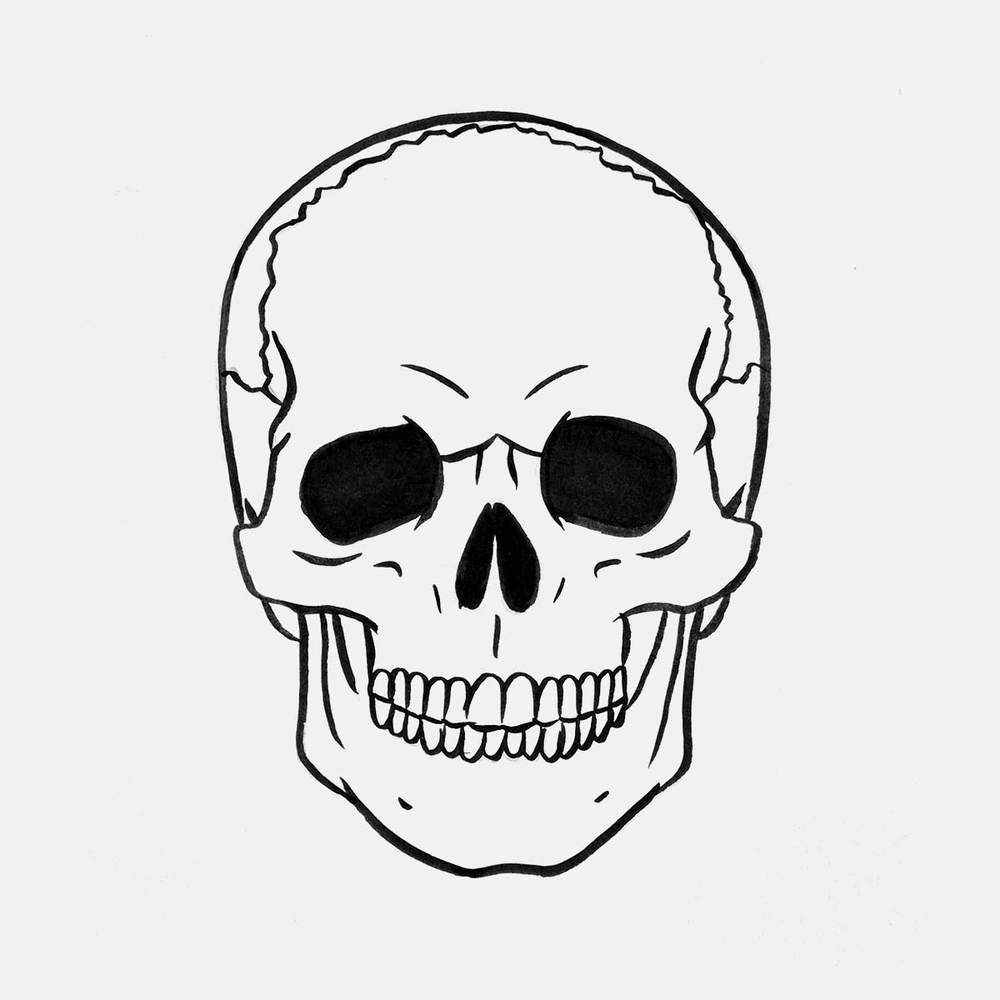
And with that, you have essentially created your very own skull coloring page, and the only thing left to do is coloring it in.
Step 11: Color Your Skull Drawing With Alcohol Markers
To color my drawings, I love using alcohol-based markers. Their ink makes it so much easier to color evenly, and if needed, they blend super well, too. My personal favorites are the Ohuhu Honolulu markers. They still provide a premium experience, but are way more affordable. Plus, you can buy individual markers on their website.
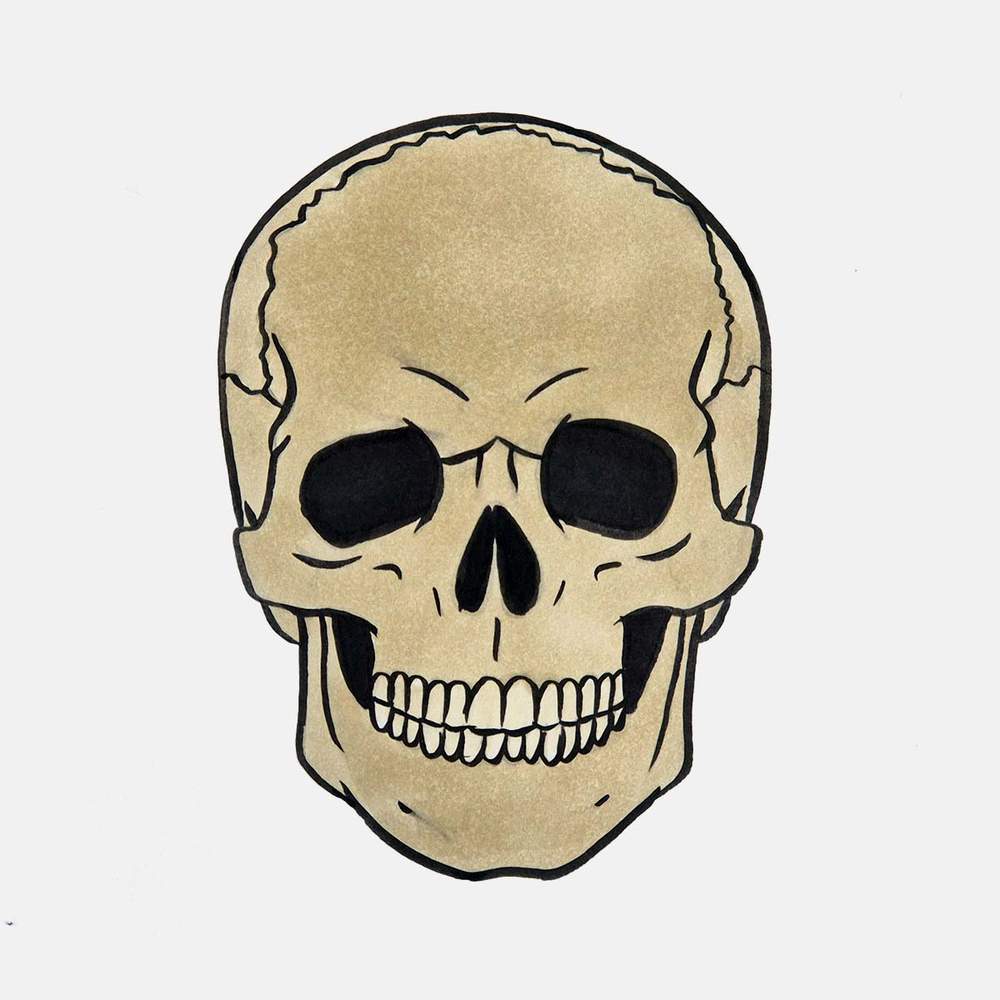
For this skull drawing, I only used two colors to recreate the bone color: a light yellow grey and a darker yellow grey.
When coloring, you do need to be a little careful not to color over the black ink too much. If you do color over it, it will create black smudge marks.
I started by coloring the whole skull with the light yellow grey color called Yellow Grey 04 (YG040). During this step, I also colored the parts in between the jaws black with my brush pen.
And to finish off the skull drawing, I added some shading around all the edges and ridges of the skull with the darker yellow grey marker called Yellow Grey 08 (YG080).
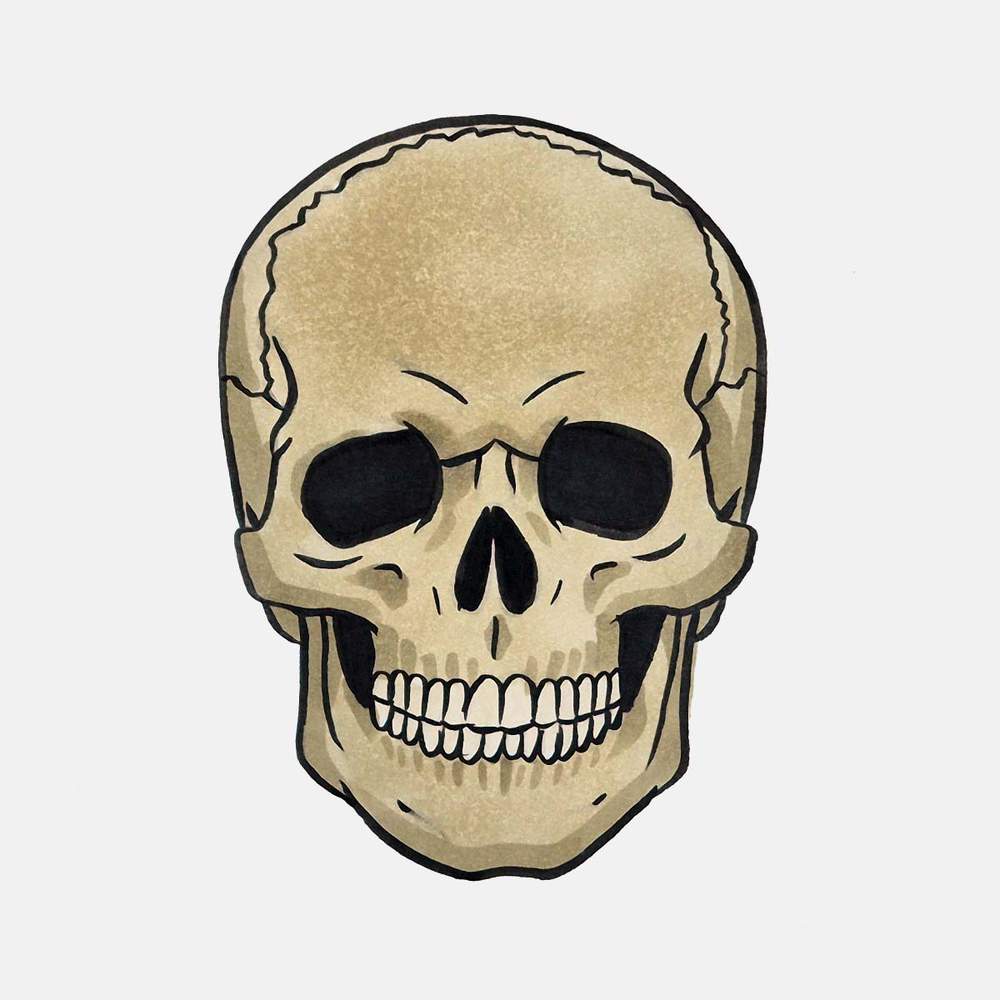
And that's how you draw a skull step by step.
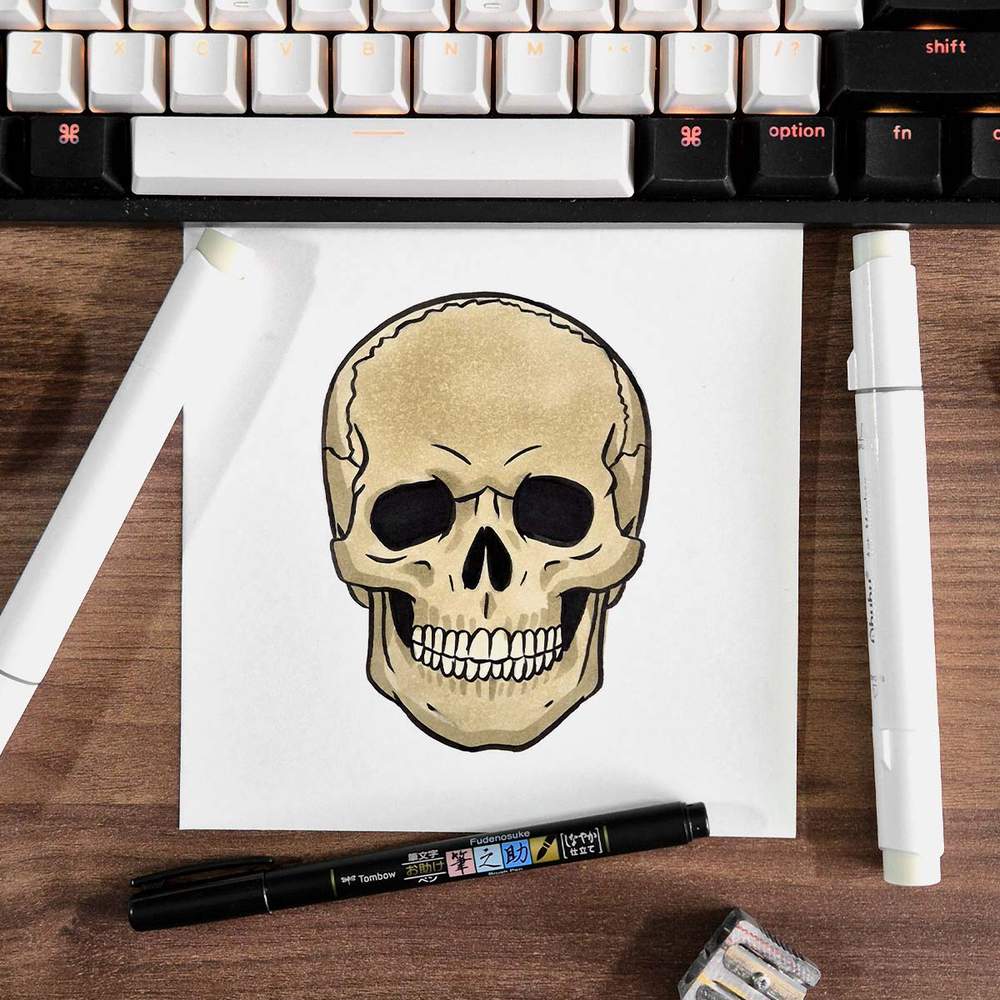
I Turned This Skull Drawing into a Coloring Page!
I recently learned how to use Illustrator to turn my drawings into printable coloring pages. Download this skull and 9 other Halloween coloring pages for free.
I hope you had fun following along with me and learned how to draw a cool-looking skull. If you did enjoy it, you might also like my other step-by-step drawing guides. I made some pretty cool ones, like this dragon.
Articles You Might Also Like


I love bringing cars to life with alcohol markers and colored pencils.
Whether you're just starting out or looking to improve your skills, I'm here to help!
Click here to learn more about me.


Be the first to comment!
Comments
There are no comments yet.