How to Draw a Motorcycle - Ducati Panigale V4S Step by Step Guide
In this step-by-step drawing guide, I'm going to show you how to draw a realistic motorcycle, to be more specific, the Ducati Panigale V4S.
I made this tutorial more realistic and in-depth than any other free guide you'll find on the internet.
So if you want to draw your own realistic motorbike, let's get started!
Disclaimer: In the name of full transparency, please be aware that this blog post contains affiliate links and any purchases made through such links will result in a small commission for me (at no extra cost for you).
Drawing Materials I Used
To make this drawing, I used Ohuhu Honolulu markers in the colors Colorless Blender (0), Neutral Grey 03 (CG030), Neutral Grey 3 (NG03), Neutral Grey 07 (CG070), Neutral Grey 6 (NG06), Black (120), Mustard (Y130), Melon Yellow (YR33), Pastel Rose (R9), Zinnober (R150), Vermilion (R2), and Geranium (R8).
You can also buy these colors separately on their website.
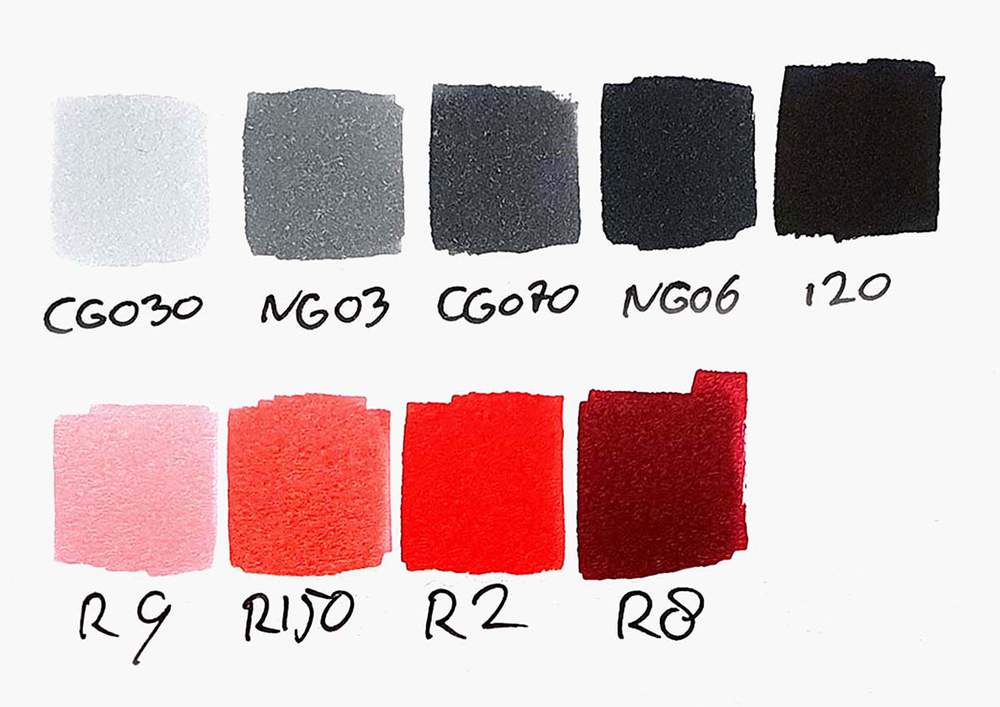
I also used some Derwent Chromaflow colored pencils to add details. I used White 2400 and Black 2300.
I used a white Posca PC-1MR paint pen to add white highlights.
And I used an HB pencil, a ruler, an eraser, and a kneaded eraser.
I made this drawing on A4-sized Canson Illustration Manga Paper.
How Do You Draw a Realistic Motorcycle Step by Step?
To create a realistic motorcycle car drawing, you'll first need to find a good reference photo.
Next, you sketch the outline of the bike.
After that, you color it in, part by part, until it is fully colored.
And to finish it off, you add a few details with colored pencils and a few highlights with a white paint marker.
Step 1: Look for a Reference Photo of a Motorcycle
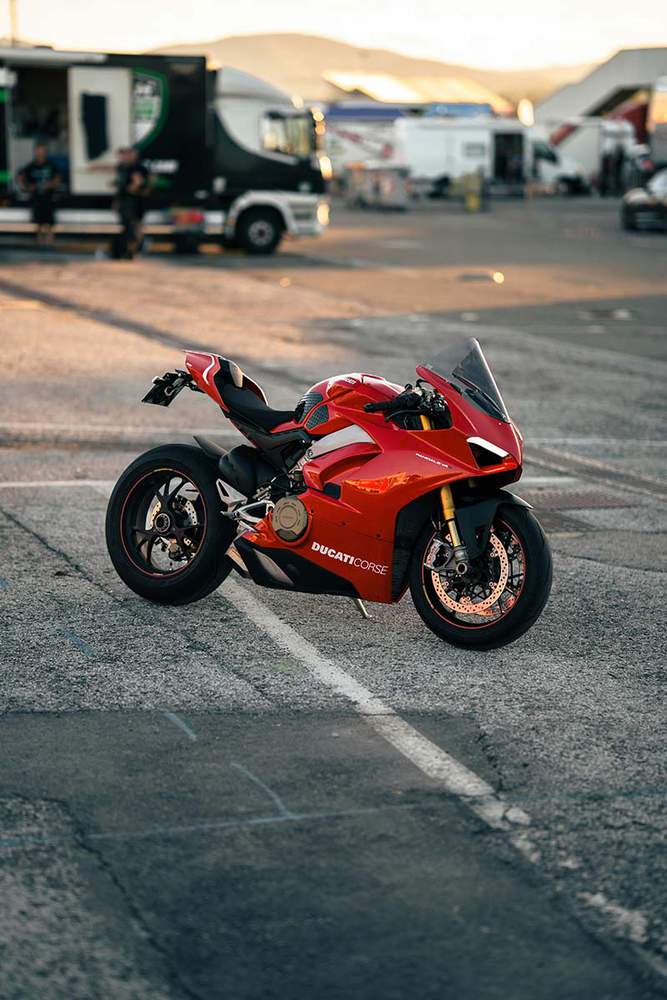
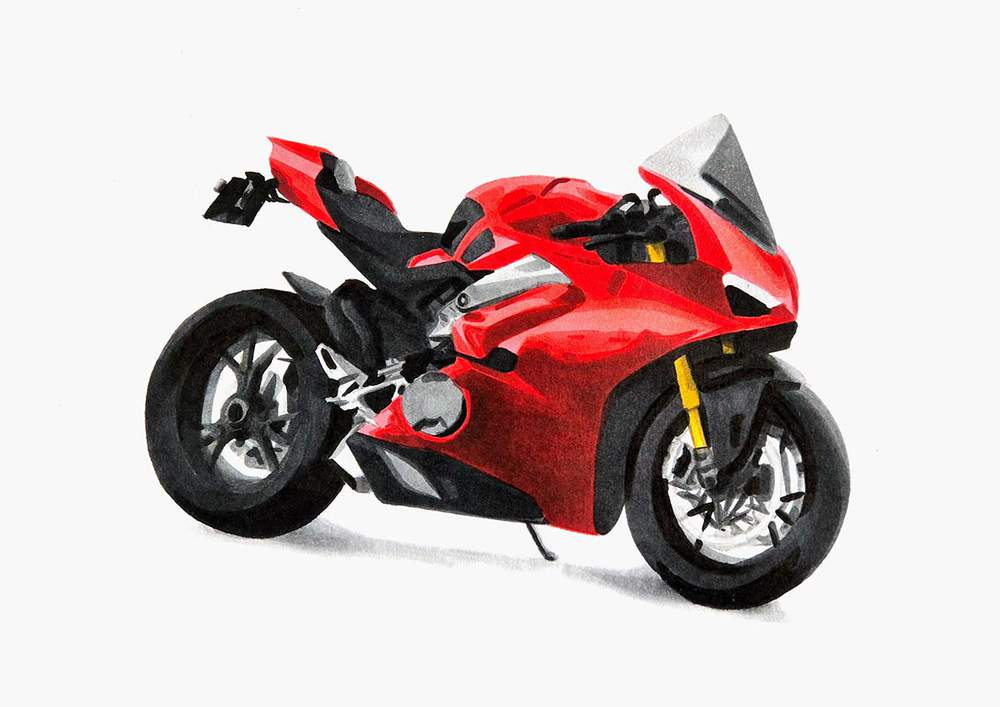
When drawing a bike, the first thing I do is look for a reference photo. Unsplash and Pexels are great places to find good photos to draw.
I found this photo of a Ducati Panigale V4S that I'll be drawing for this step-by-step motorcycle drawing guide.
Step 2: Sketch the Outline of the Motorcycle
After you've found a photo you'd like to draw, we can start sketching.
Sketching a motorbike with realistic proportions can be quite difficult.
To make it a bit easier, I like to use the grid method. If you're not sure what it is or how to use it, I highly recommend you check out this guide I wrote about it.
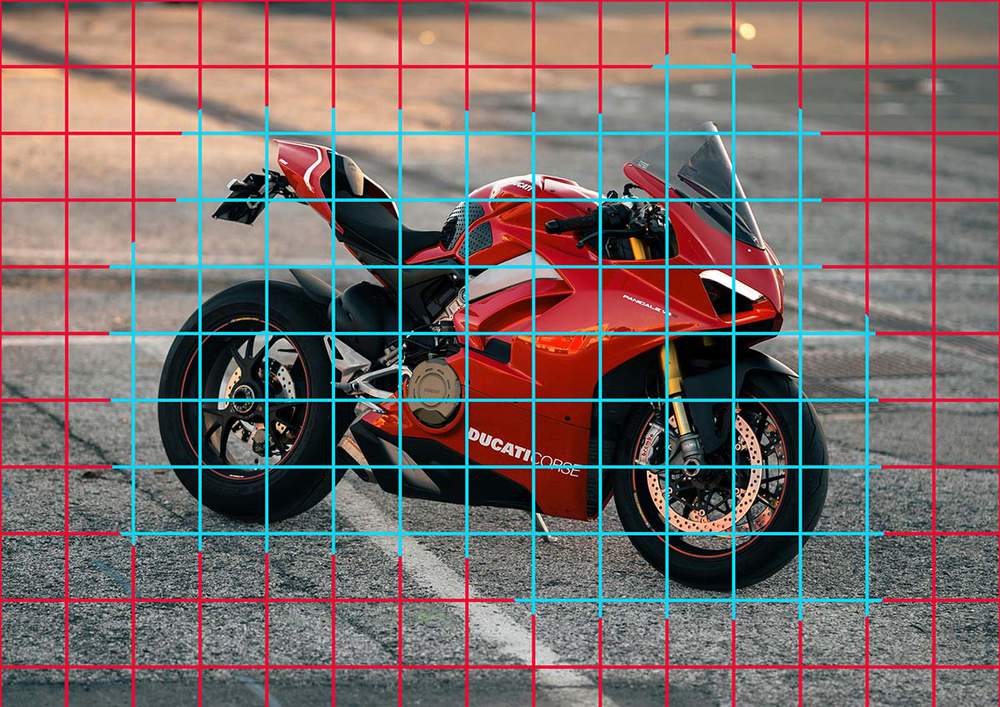
To use the grid method, I first resized the reference photo to the same size as my paper, which is 29.7 by 21 cm or 3508 by 2480 pixels.
Next, I added a grid overlay of 15 by 10.5 squares. This works well for me as each square will be 2 by 2 cm (or 0.8 by 0.8 inches), which is easy to measure and sketch.
I also positioned the bike in the center of my paper and marked the grid squares that contain parts of the motorcycle in light blue.
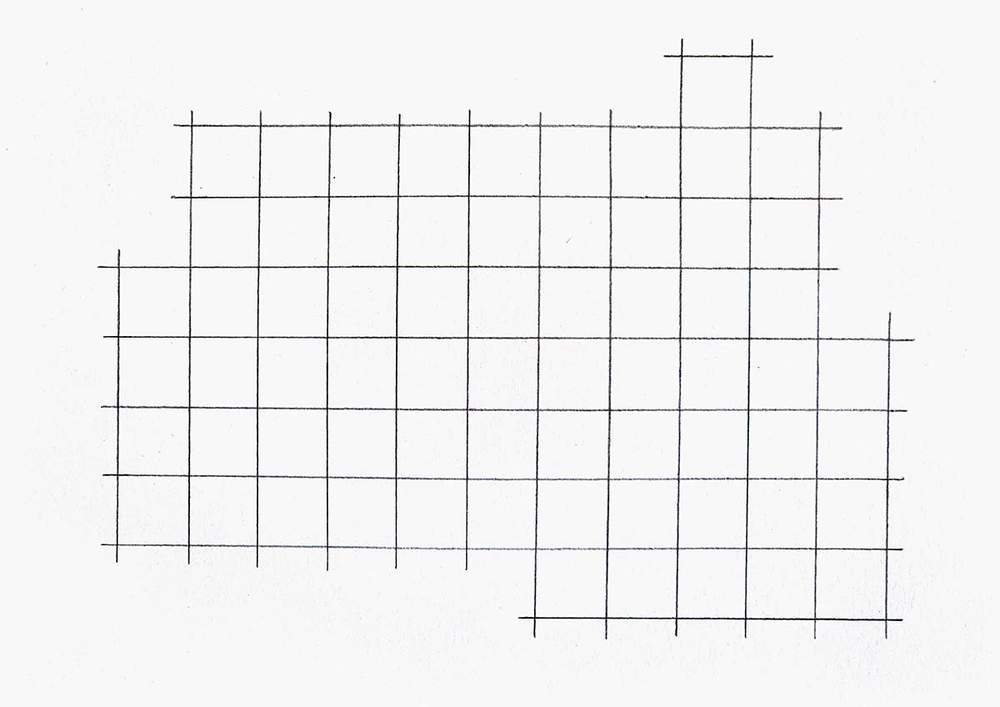
After that, I recreated the grid on my paper with a graphite pencil. I used light pressure so that the grid would be easily erasable later on.
I like to sketch only the grid squares that contain parts of the bike, but it's easier to sketch the full grid if you're new to this method.
Here's the grid I sketched:
Now that all the preparations for the grid method are done, we can start sketching the Ducati motorcycle.
I like to sketch the full outline of the bike first before adding in all the parts and details.
To do this, I mentally break the outer edge of the bike up into sections. Every time there is a hard edge, it's a new section.
Then, I sketch the outline section by section until the whole outer edge is sketched.
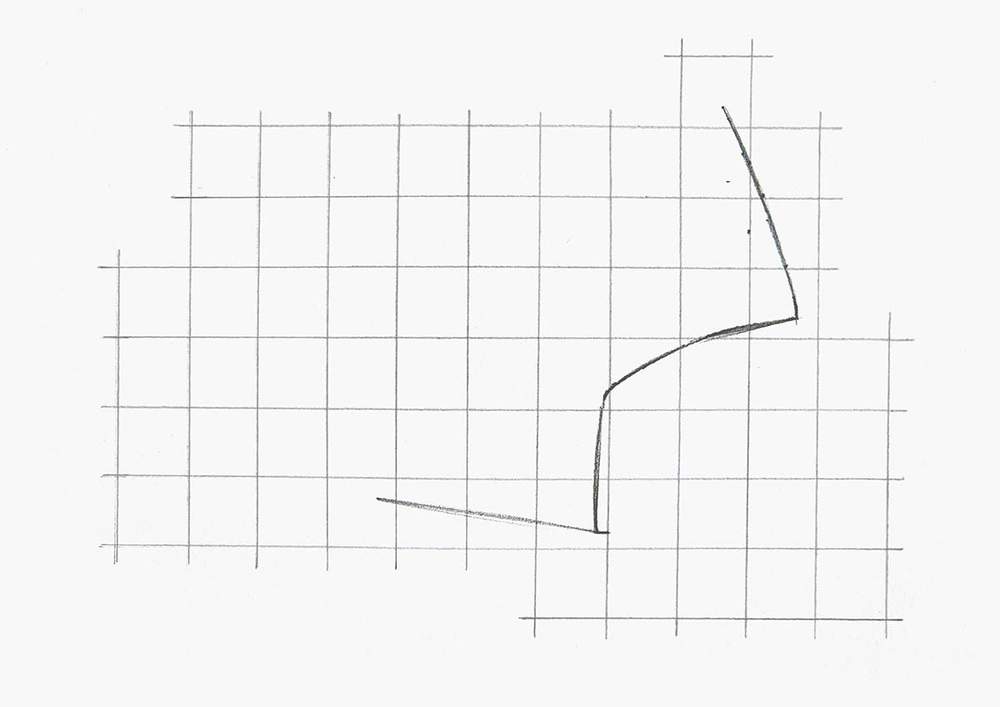
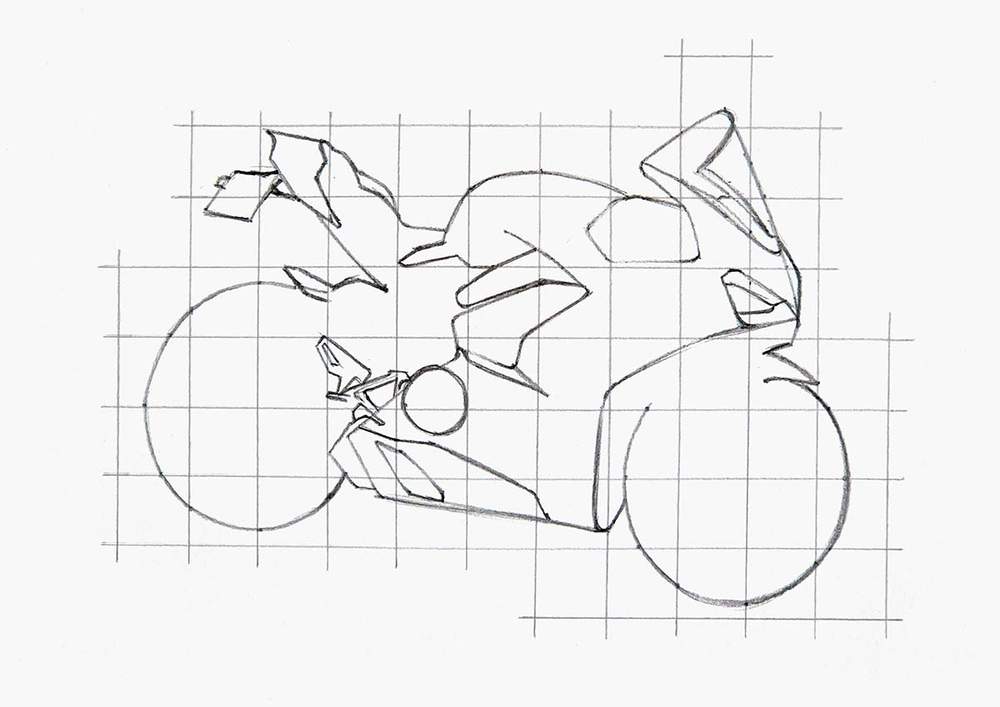
I usually start with the easiest and longest lines, which are in this case the bottom and the front of the bike.
To sketch these lines, I mark where they start, end, and cross grid lines. Next, I sketch each line one by one in one swift motion.
The first 4 lines look something like this:
After that, I sketched the rest of the outline using the same technique.
I first added the top part and a small bit on the bottom rear.

Then, I added the wheels.
To sketch them, I first marked a few points on the grid where the outer edges of the wheels cross the grid lines. And then, I sketched them as smoothly and round as possible.
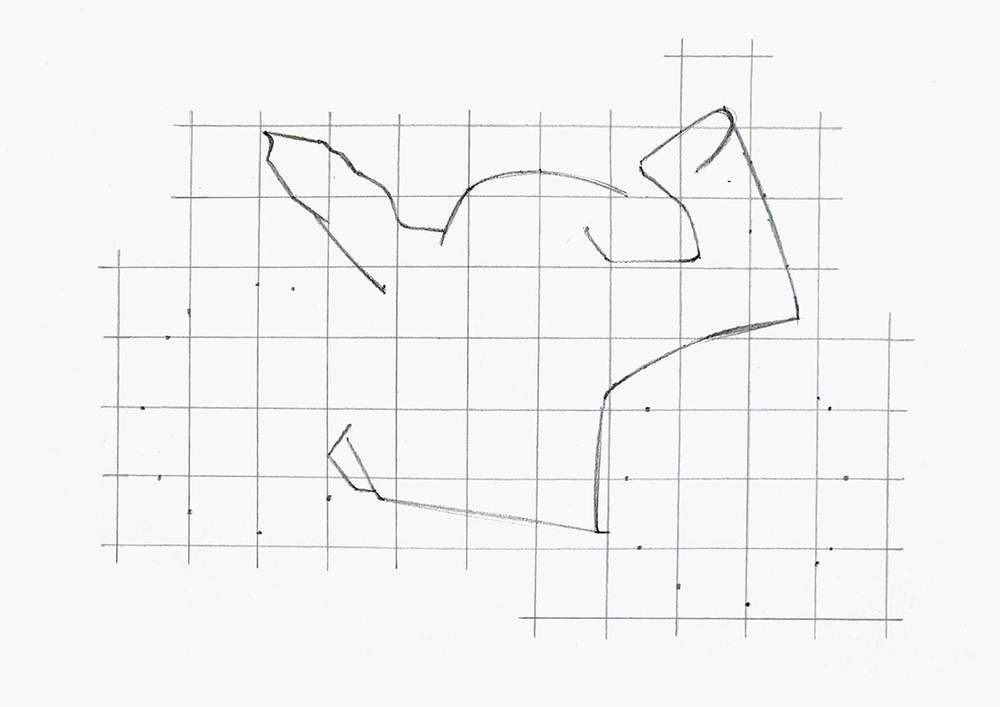
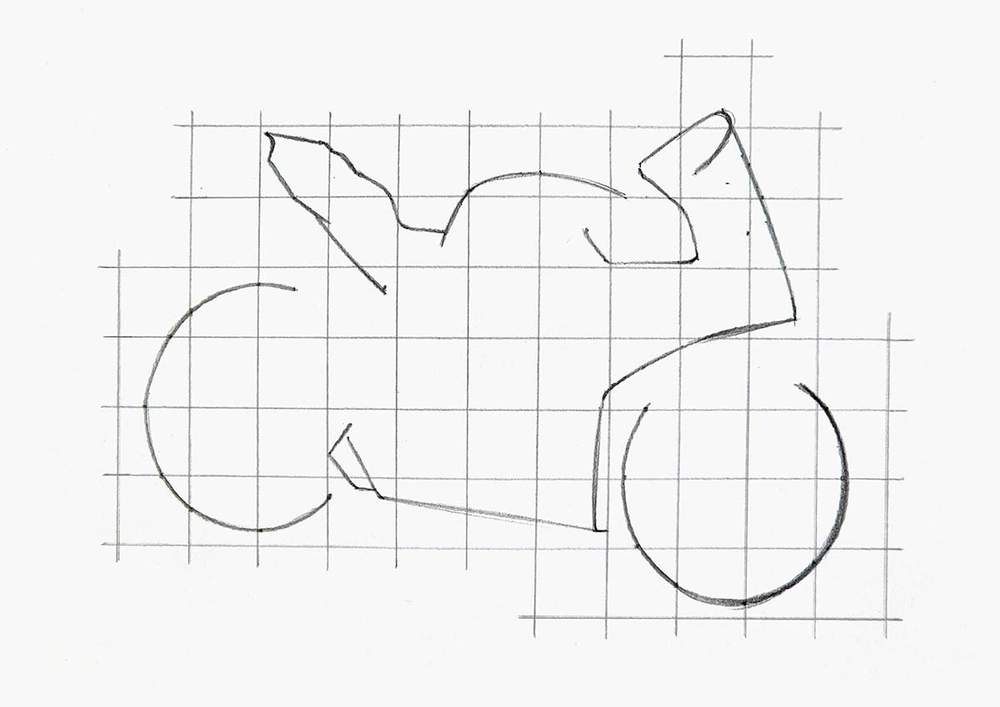
As you can see, the wheels are not connected to the bike yet. That's because there are a few parts still missing.
To finish the outline, I sketched the parts to connect the wheels, the license plate holder, and a few other bits.

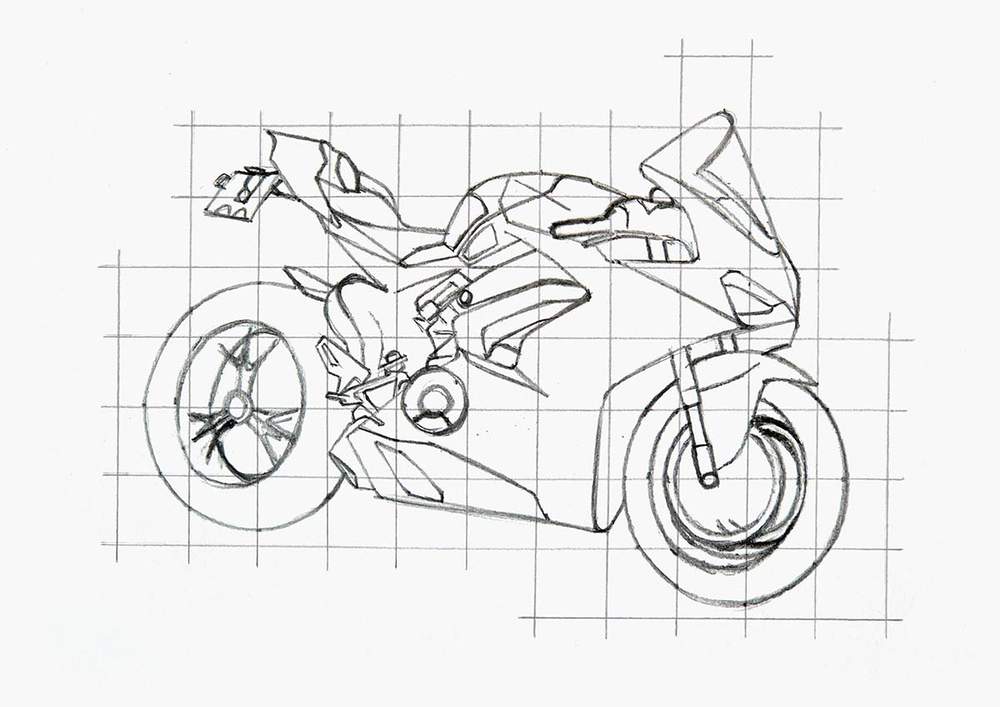
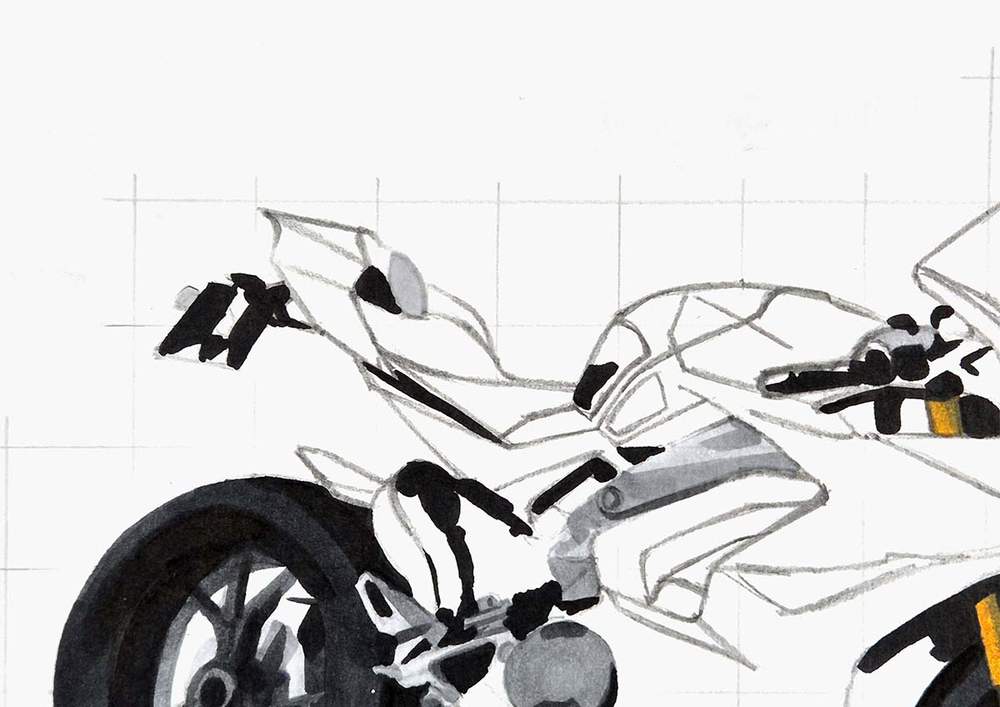
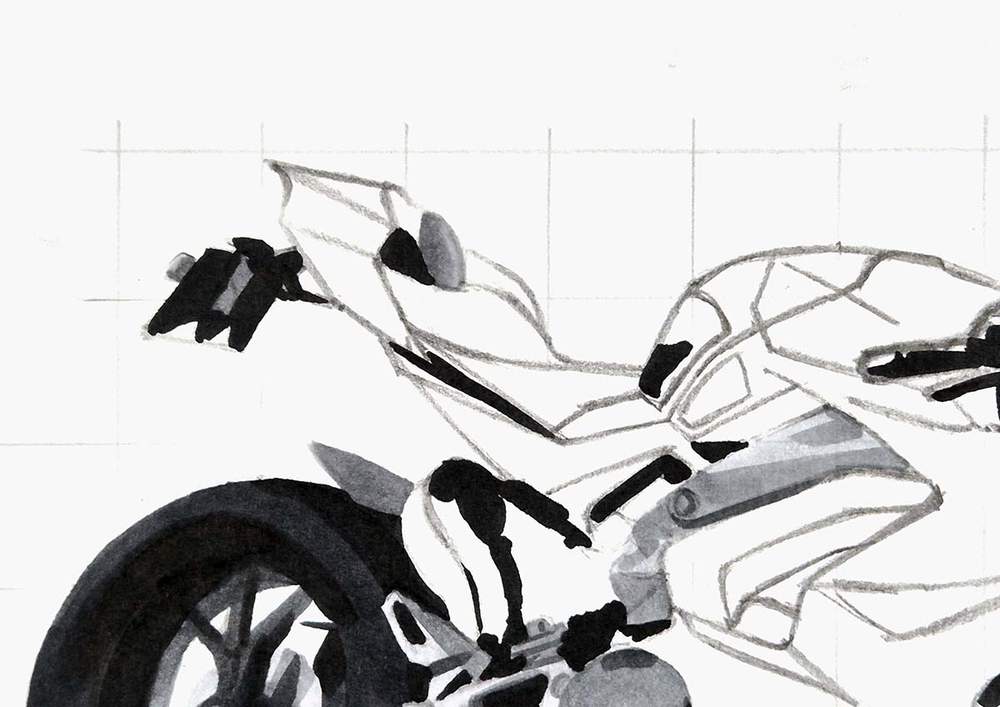
Step 3: Sketch All the Parts & Details of the Motorcycle
Next, I added all the parts and details to the motorbike.
I started by sketching the biggest shapes using the same method as the outline of the bike.
And then, I added the smaller parts and details.
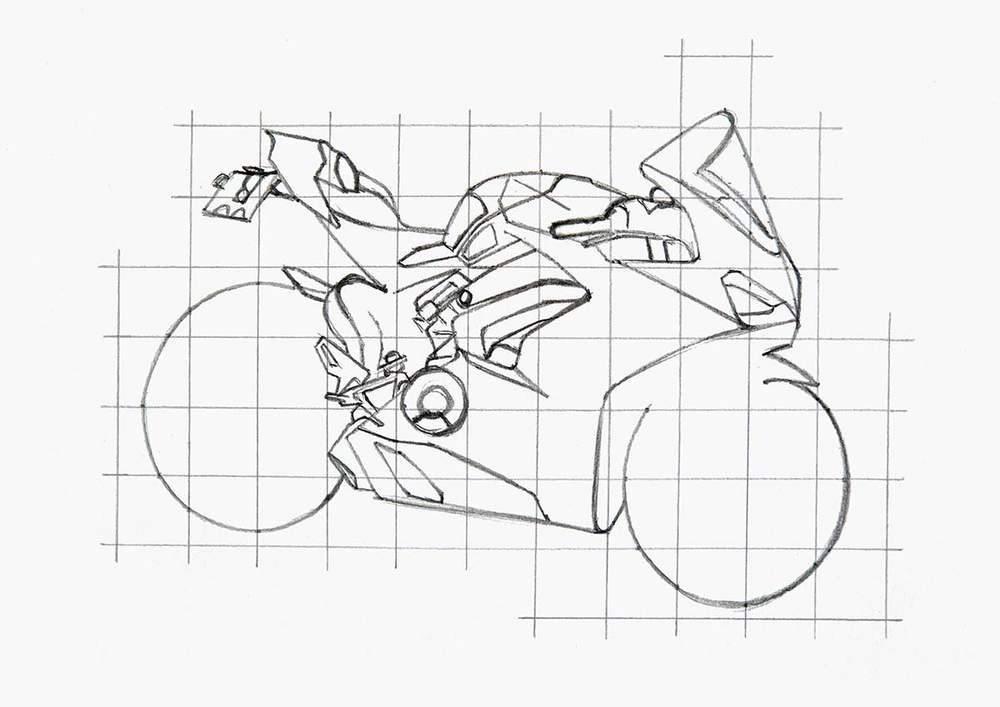
I left the wheels for the next step.
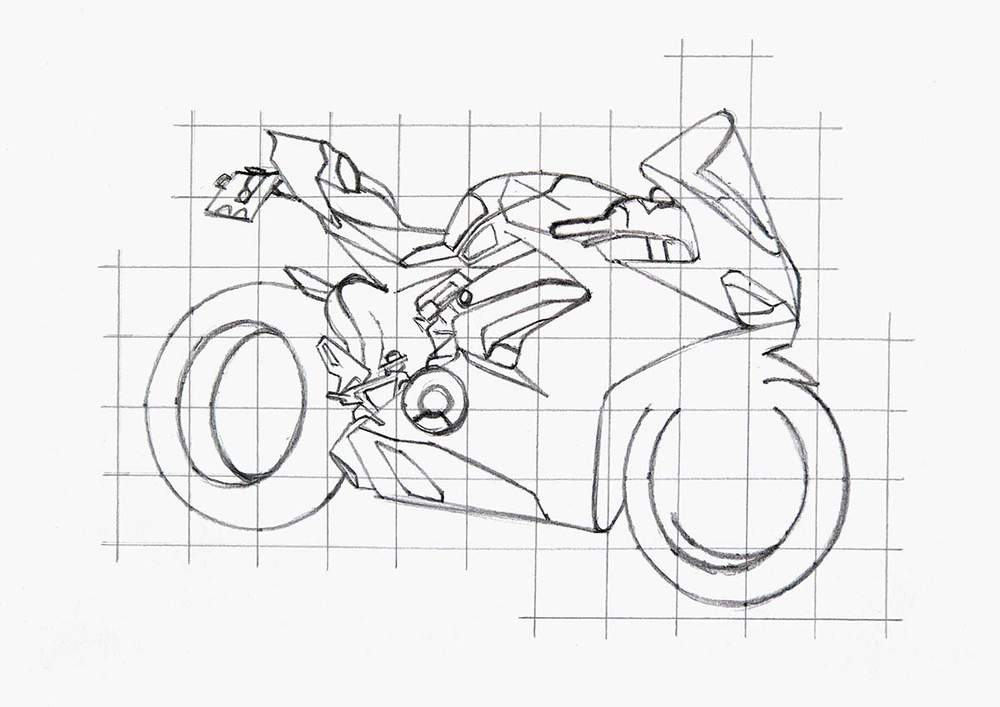
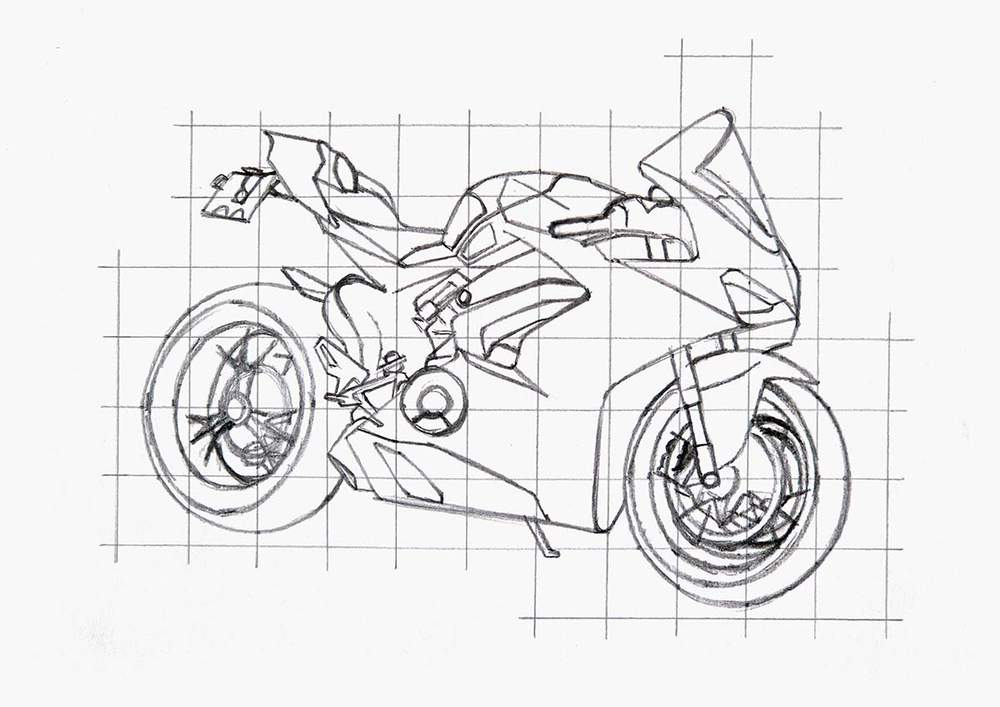
Step 4: Sketch the Wheels
To complete the wheels, I first sketched the inner rims.
I again marked where they cross grid lines before I sketched them in both wheels.
On the front wheel, I didn't sketch the top bit as the mudguard was going to be there.
Next, I sketched the front mudguard bit and the suspension, and I marked the center of the rear wheel with a small circle.
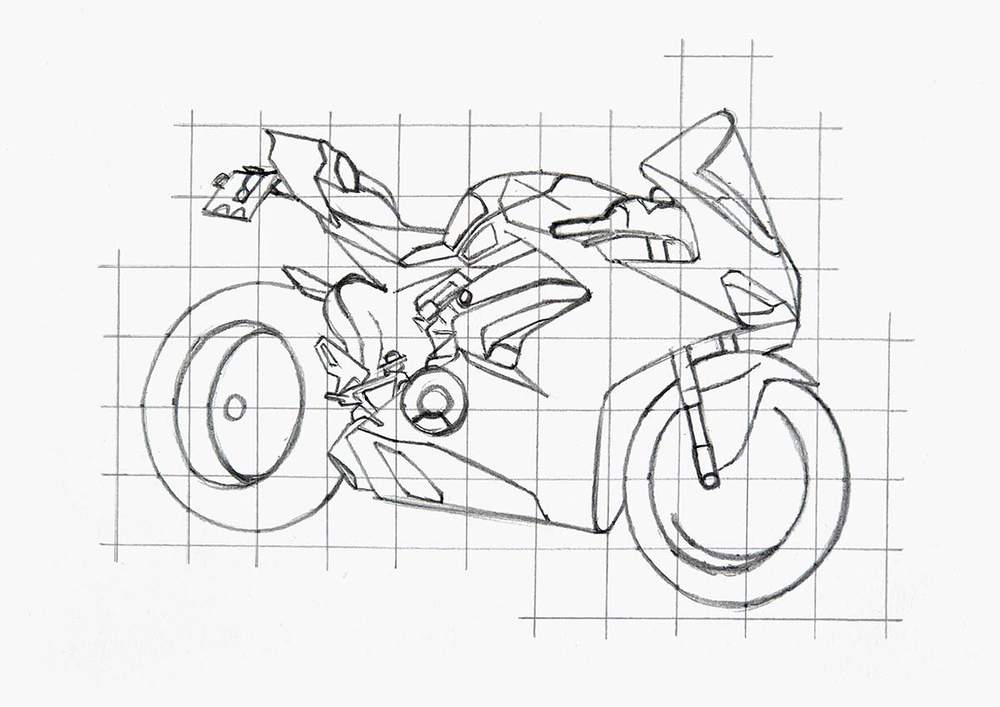
After that, I added the trident-shaped spokes on the rear wheel and the brake disks on the front wheel.
Next, I sketched the brake disk on the rear wheel and the spokes on the front wheel. The spokes were hard to see, so I just sketched the ones I could see.
I also added the brake caliper on the front wheel.

And to complete the wheels, I added one more line on the tires where the round outer part curves back in towards the rim.
I also added the bike stand to the bottom of the motorcycle.
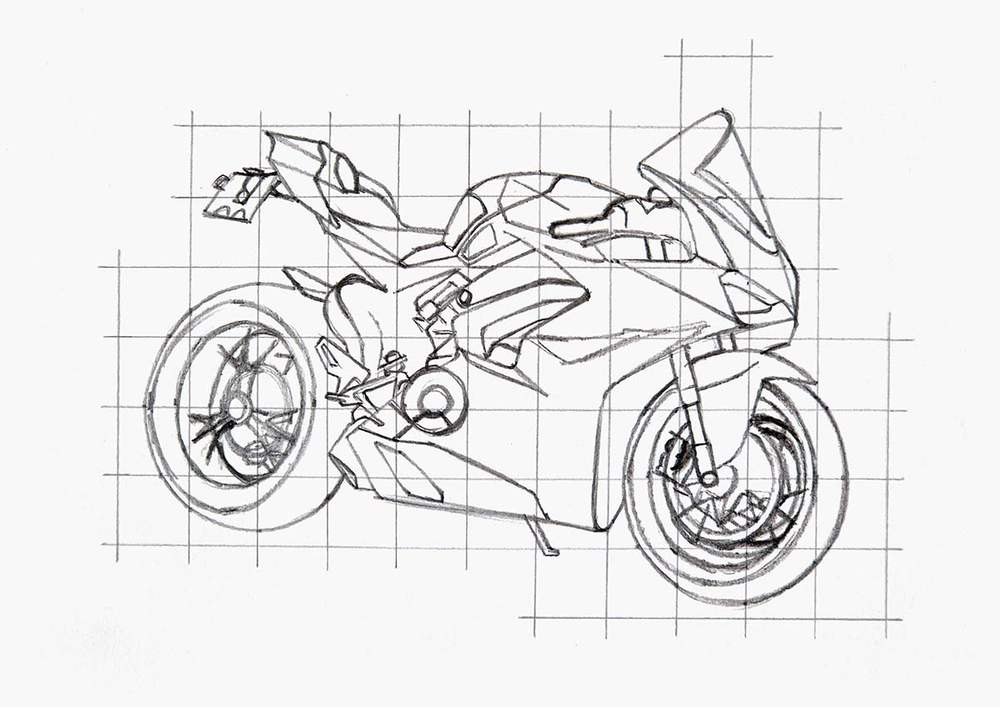
Step 5: Mark the Reflections on the Motorcycle
To complete the motorcycle sketch, I added a few reflections.
These are just a few lines to help with coloring later on.
I marked some reflections on the top bit of the big side panel, between the windshield and the headlight, and on the rear part behind the seat.
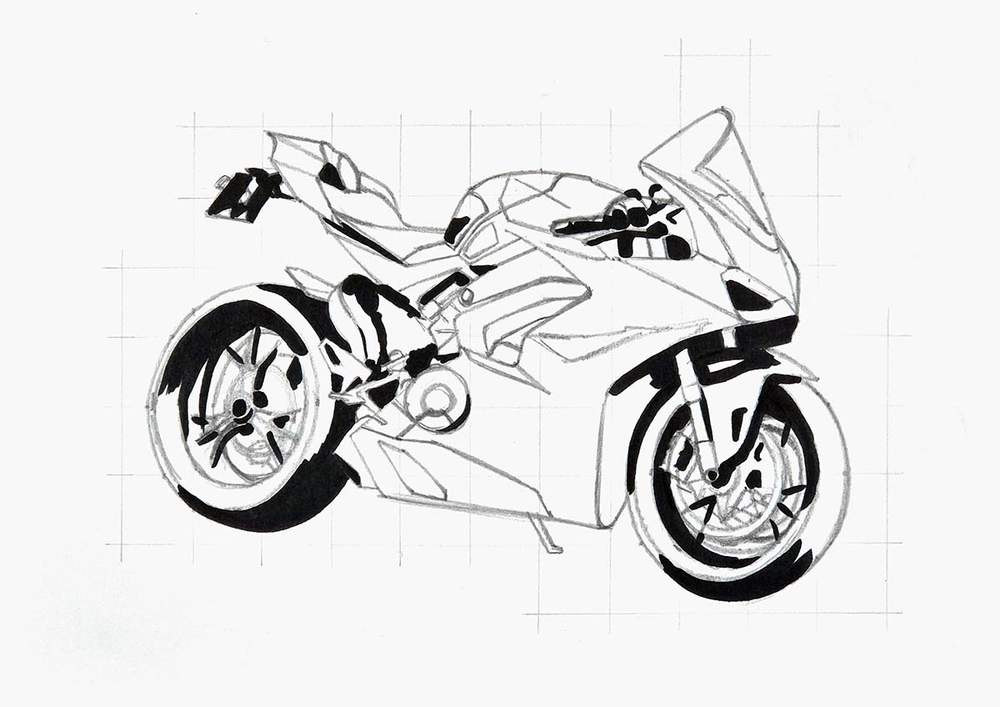
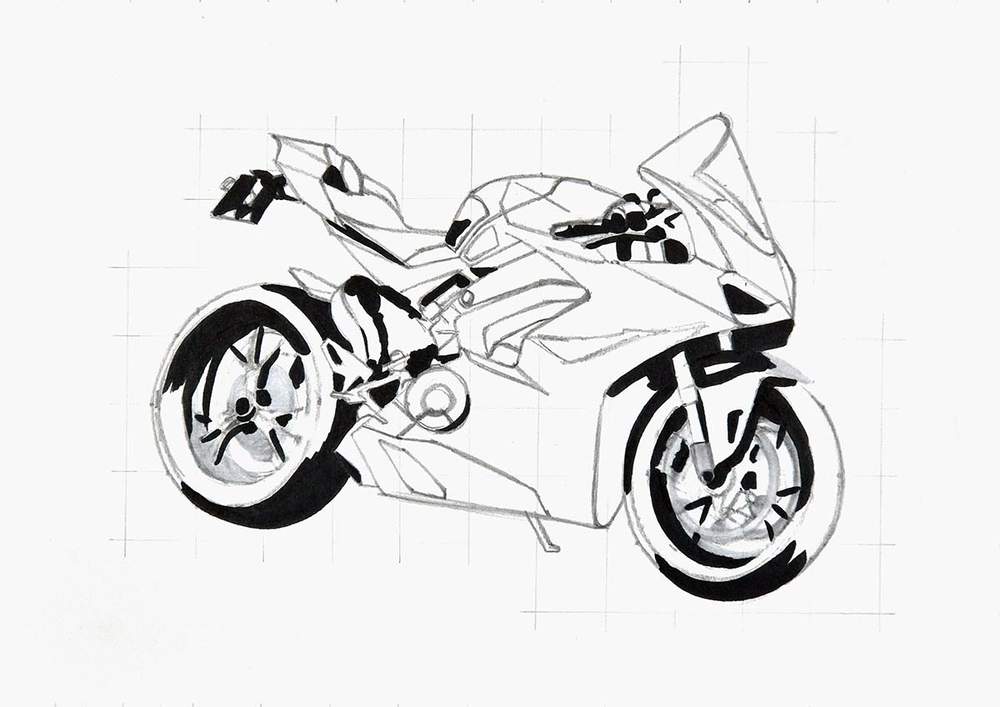
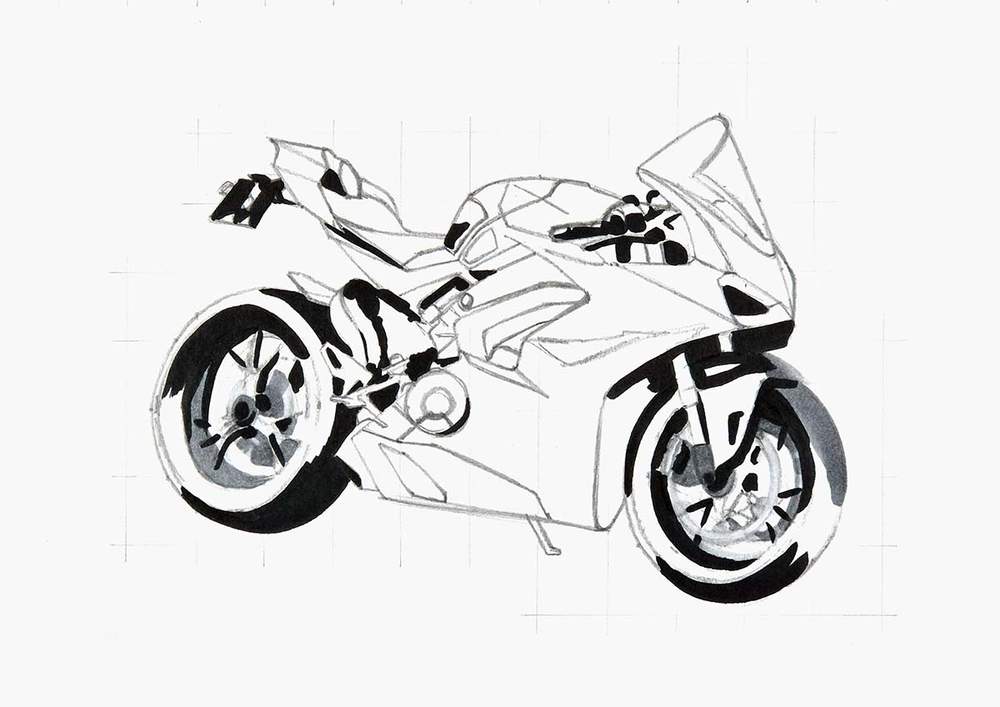
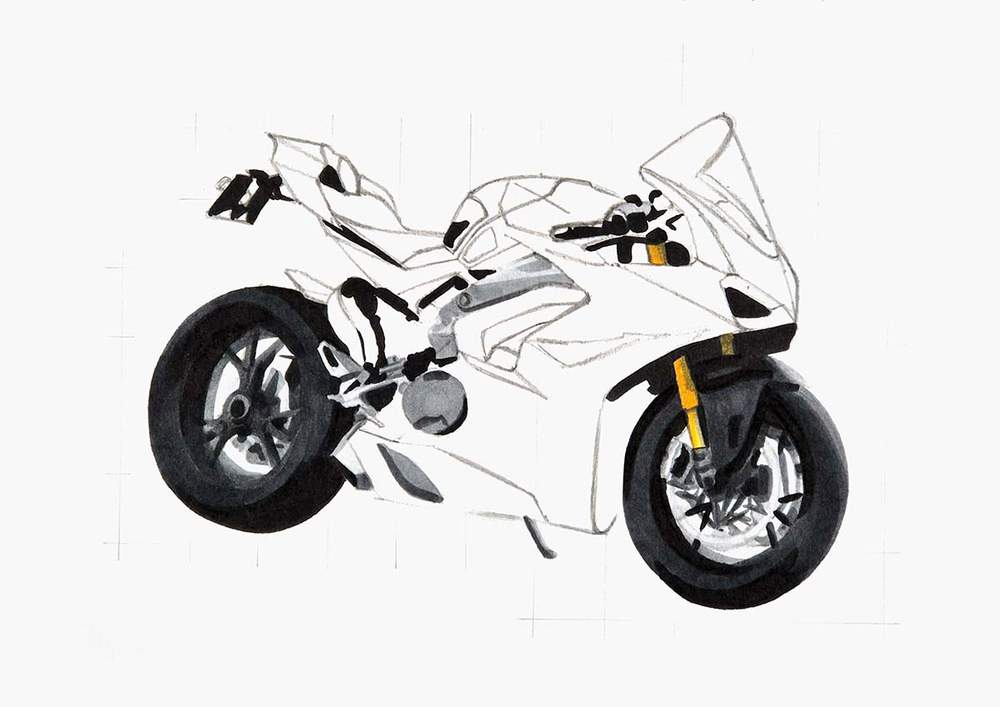
Step 6: Color All Pure Black Parts
After finishing the sketch, I colored the pure black parts.
I always like to color these first, as it will make the drawing look less complicated.
Step 7: Color the Wheels of the Motorcycle
Next, I colored the wheels.
I started with the lightest parts and colored those with Neutral Grey 03 (CG030), mostly the brake disks, caliper, inside of the outer rims, and the top edge of the front mudguard.
Then, I used Neutral Grey 3 (NG03) to add shadows on those parts and color the top right of the front wheel.
After that, I used Neutral Grey 07 (CG070) to color the spokes, parts of the tires, a bit of the front mudguard, and probably some other small bits.
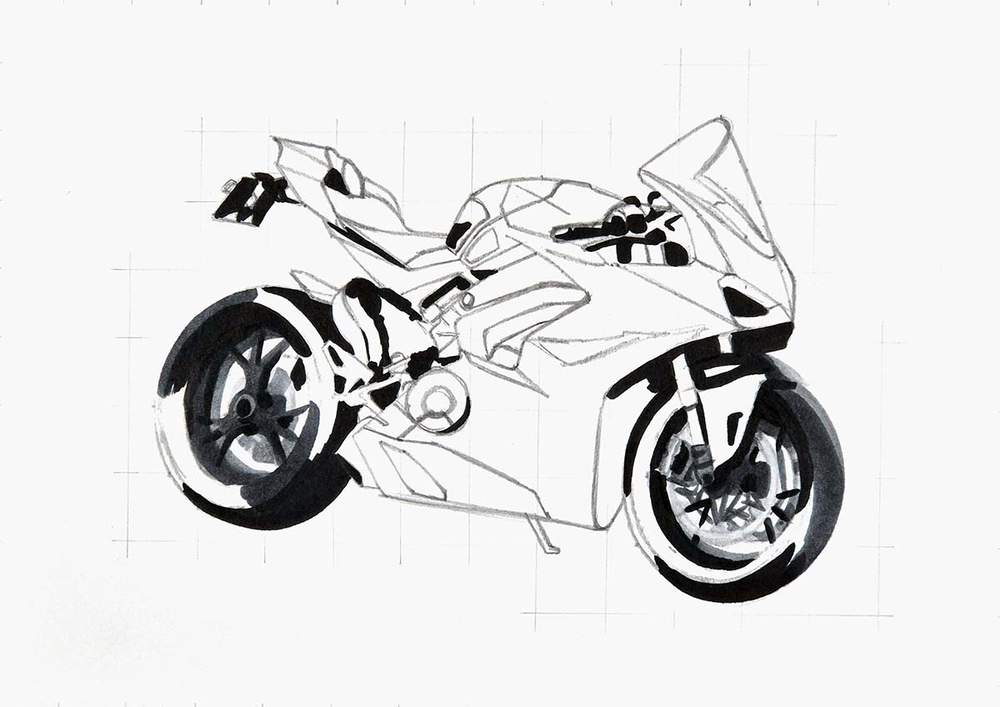
Next, I used Neutral Grey 6 (NG06) to color the remainder of the wheels.
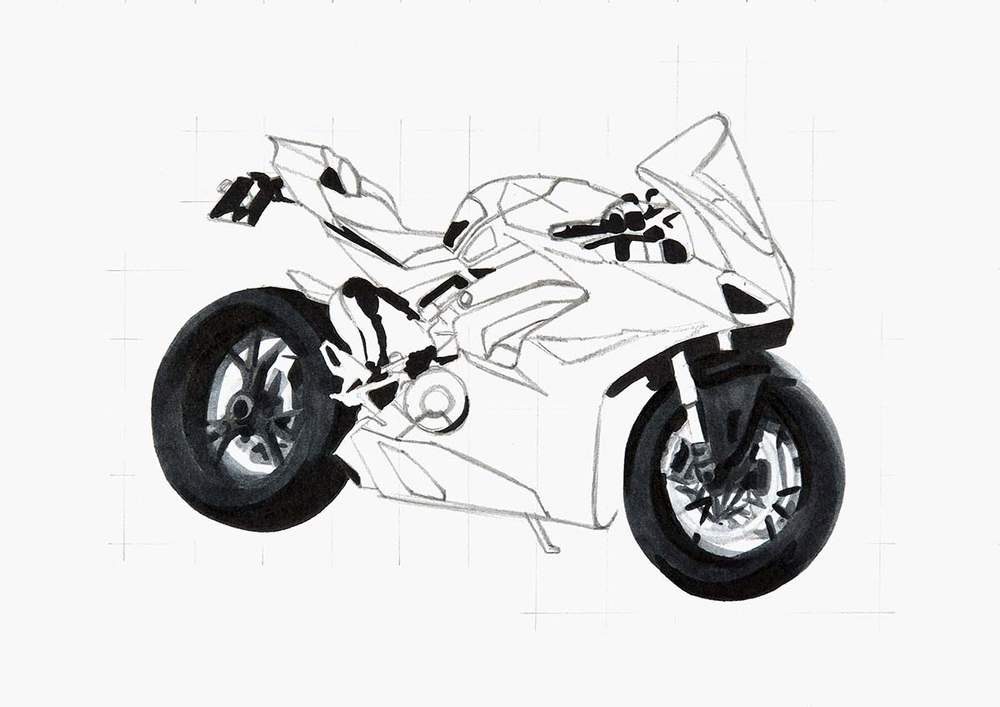
To complete the wheels, I also colored the suspension on the front.
I used Mustard (Y130) to color the bottom half of the lower bit and Melon Yellow (YR33) to color the top half of the bottom bit and the top bit at the handlebars.
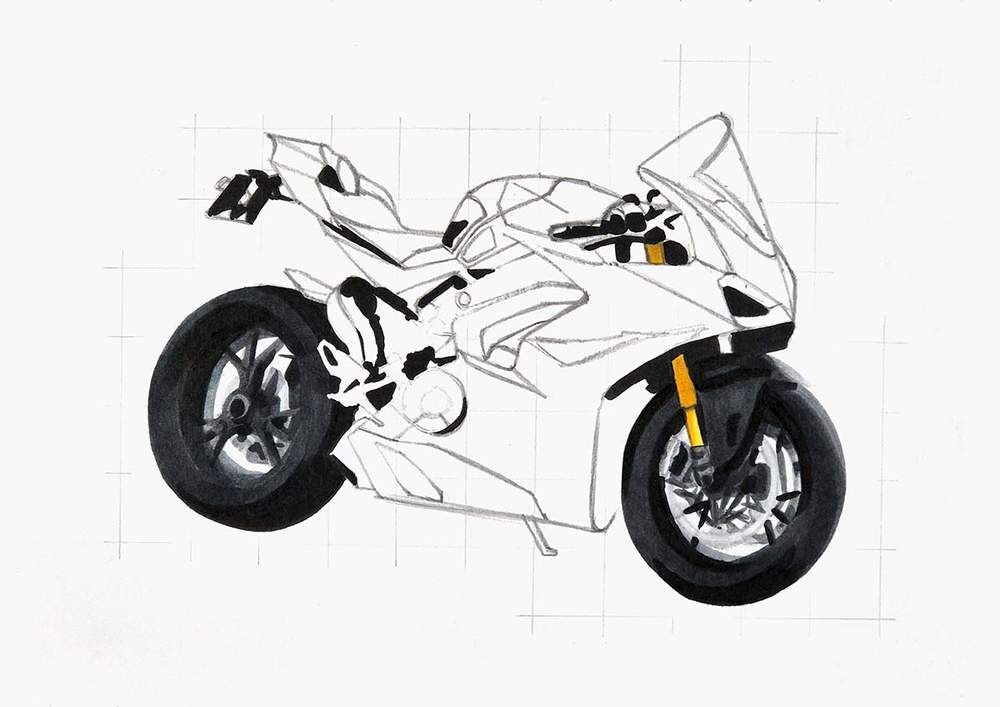
And to finish it off, I used a bit of Neutral Grey 03 (CG030) to shade the right half of the lighter bottom bit and Neutral Grey 3 (NG03) to shade the right side of the two other parts.
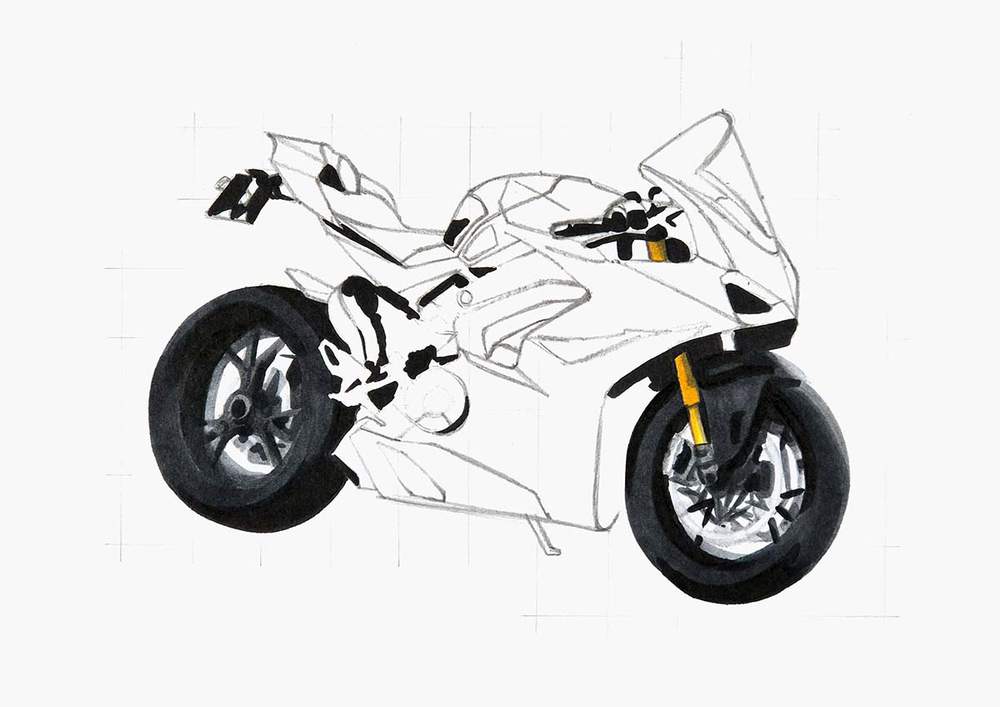
Step 8: Color the Light Grey Parts of the Motorbike
I didn't know how to break the rest of the grey parts down into simple clusters...
So I just colored all the light grey parts in one go. These are all parts of the side of the motorbike and the stand.
I started by coloring these parts with Neutral Grey 03 (CG030).
Next, I used Neutral Grey 3 (NG03) to add some shading. This will give a bit of shape to the parts.
Lastly, I used Neutral Grey 07 (CG070) to add a little bit of dark grey shading and a few details.
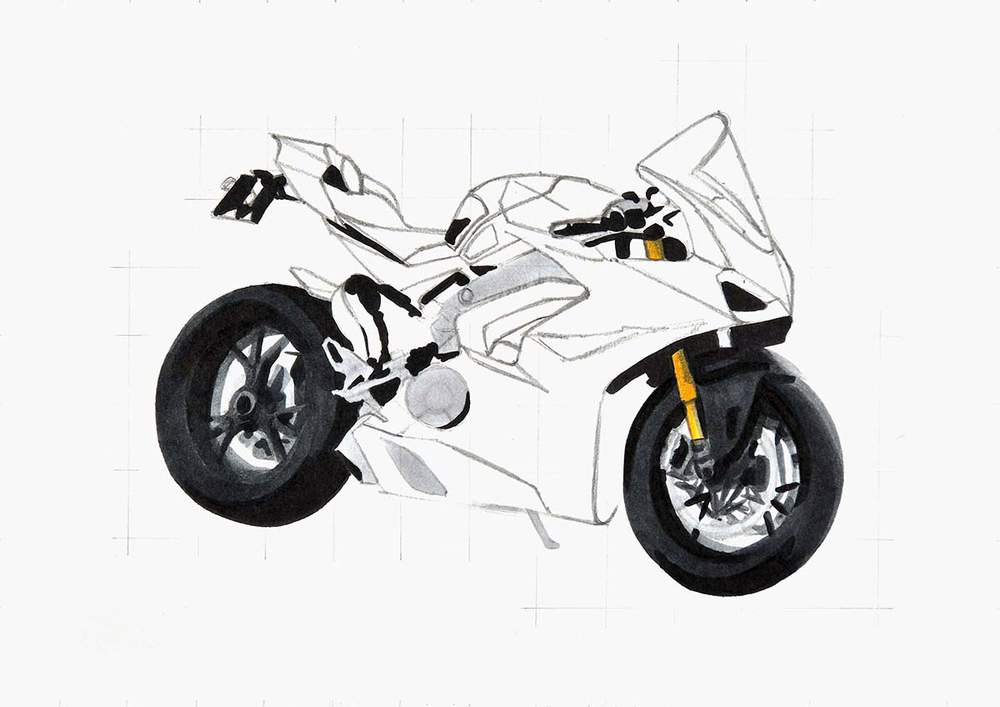
Step 9: Color the Seat of the Ducati Motorcycle
Next, I colored the seat and the surrounding grey parts of the engine.
I again started by coloring the lightest parts with Neutral Grey 03 (CG030): the top part of the seat and the small part that sticks out from the license plate holder.
After that, I used Neutral Grey 3 (NG03) to color the left side of the seat part, the license plate holder, and the rear mudguard.
Then, I colored the remainder of the seat and the license plate holder, the engine bits, and other surrounding grey parts with Neutral Grey 07 (CG070).
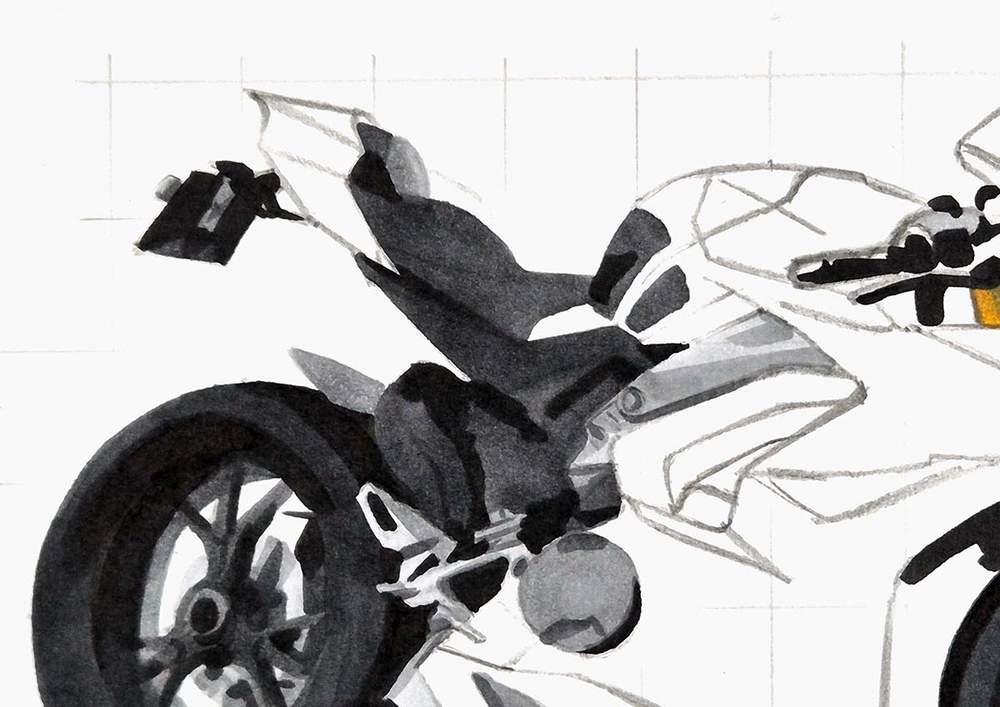
Lastly, I used Neutral Grey 6 (NG06) to darken the bottom edge of the seat, as well as the top left part and some parts of the engine components.

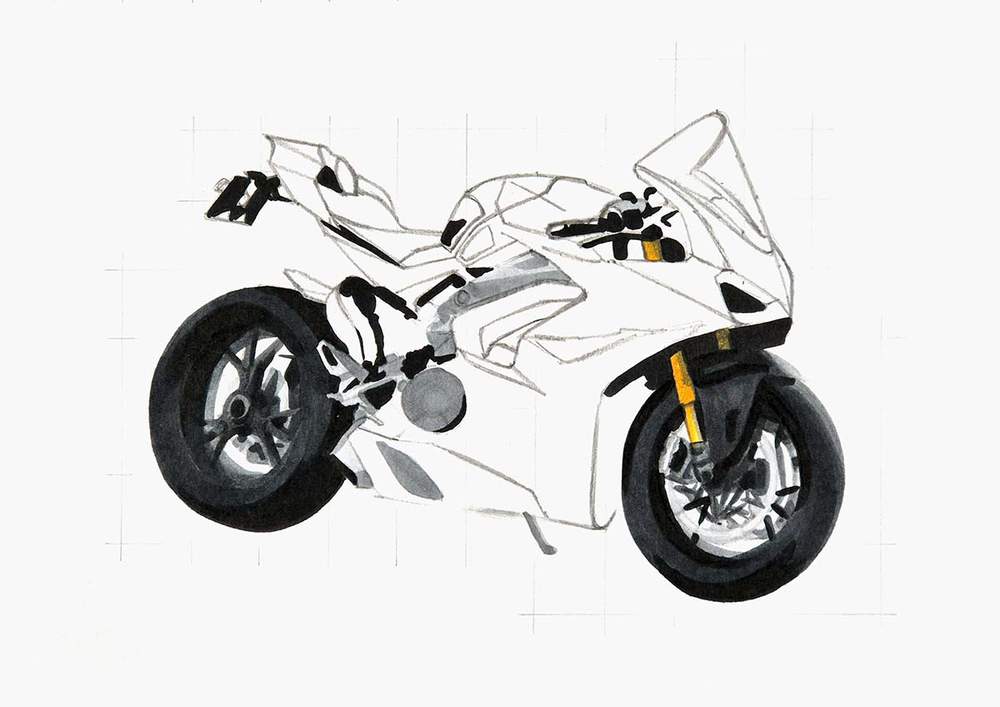
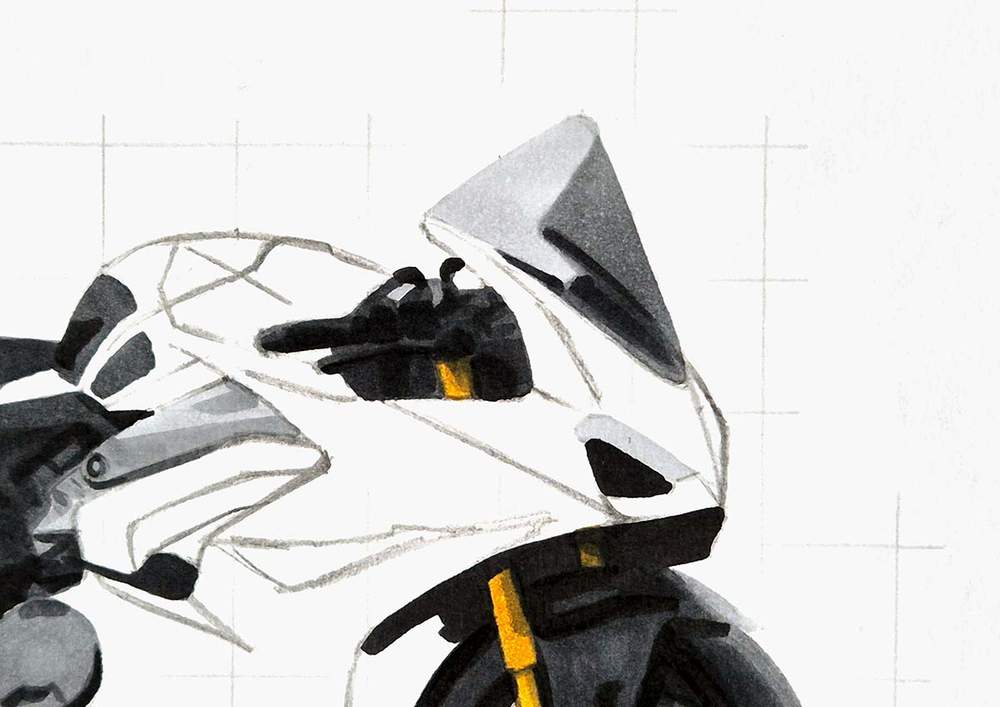
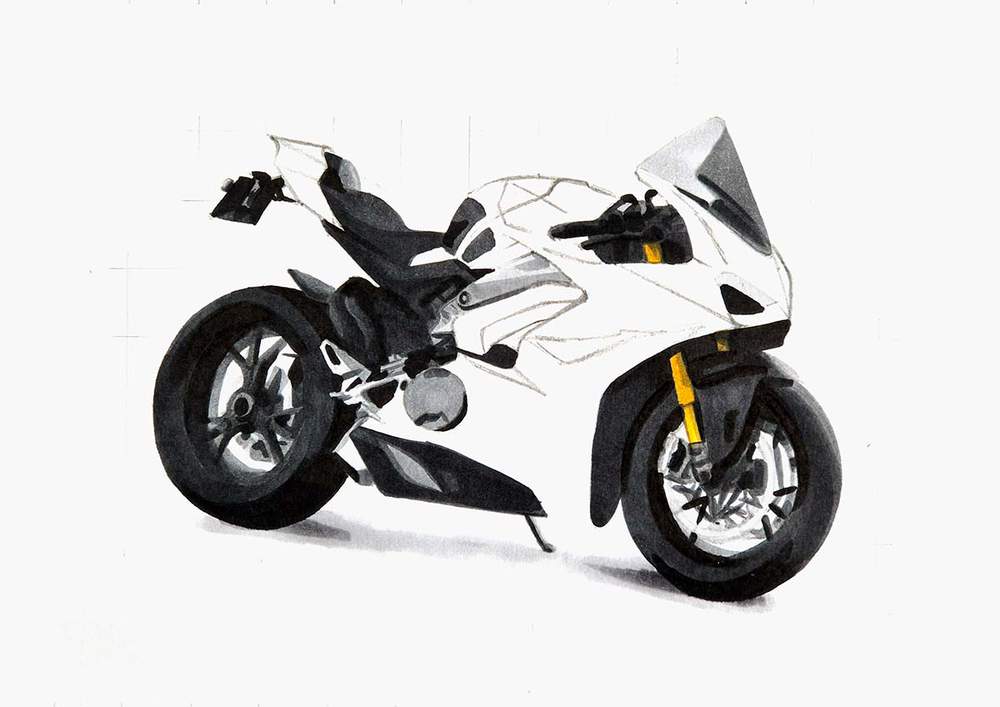
Step 10: Color the Handlebars & the Windshield of the Motorcycle
Next, I colored the handlebars and the windshield of the Ducati motorbike.
I first used Neutral Grey 03 (CG030) to color the light part of the windshield and the headlight, and then, I used Neutral Grey 3 (NG03) to color the remainder of the windshield and the light parts of the handlebars.
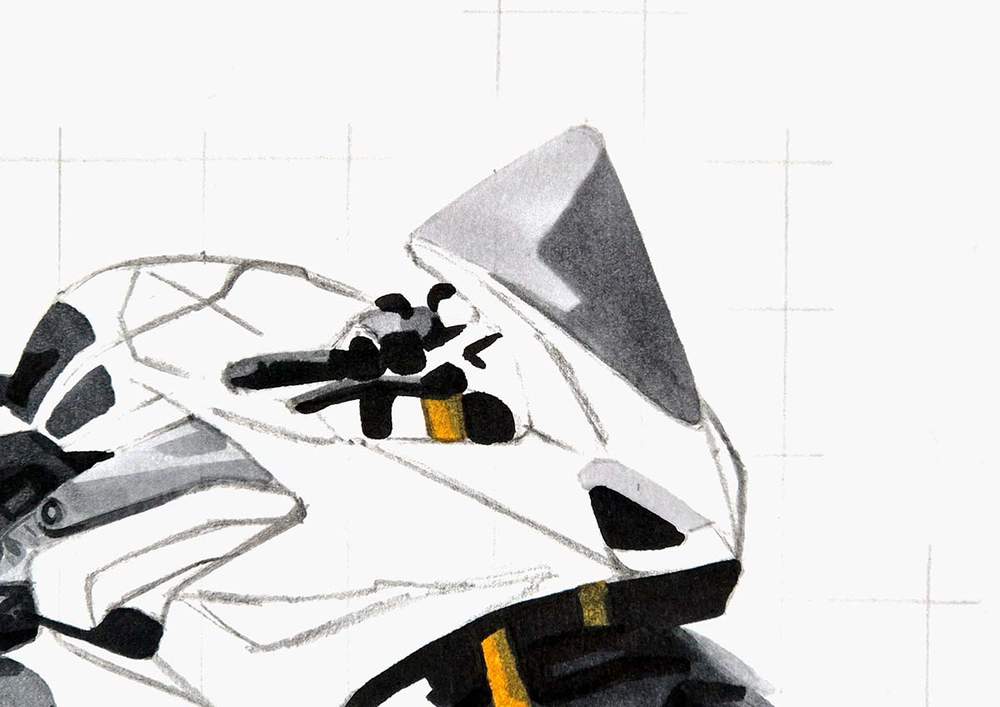
After that, I used Neutral Grey 07 (CG070) and Neutral Grey 6 (NG06) to add some dark grey shading and color the remainder of the handlebars.
Step 11: Color the Air Intake Behind the Front Wheel
Then, I colored the air intake behind the front wheel with Neutral Grey 6 (NG06).

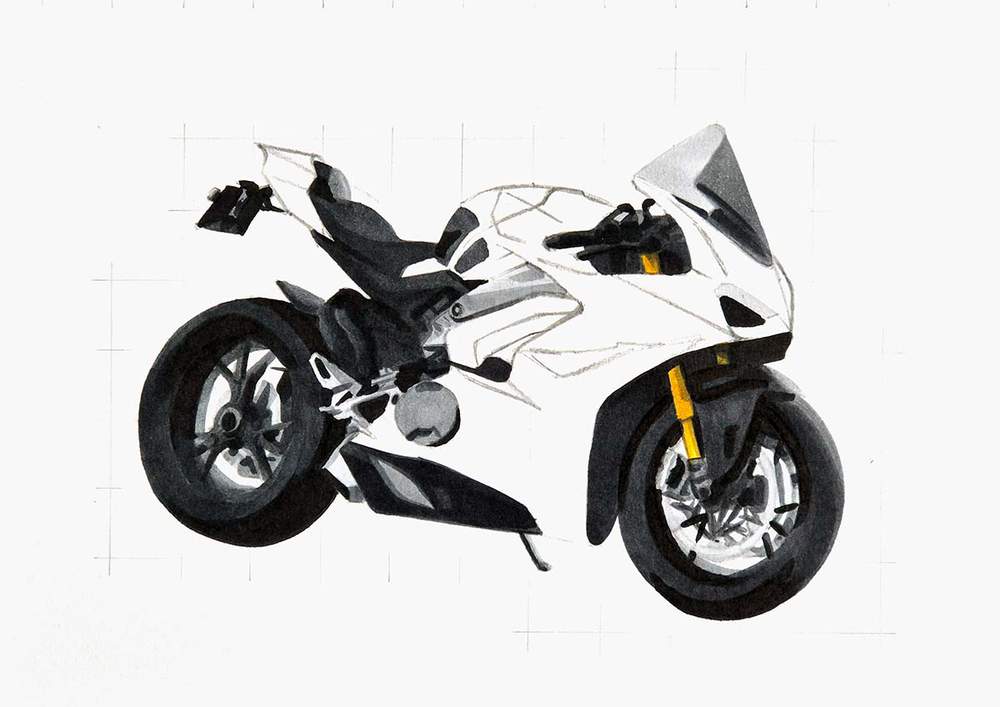
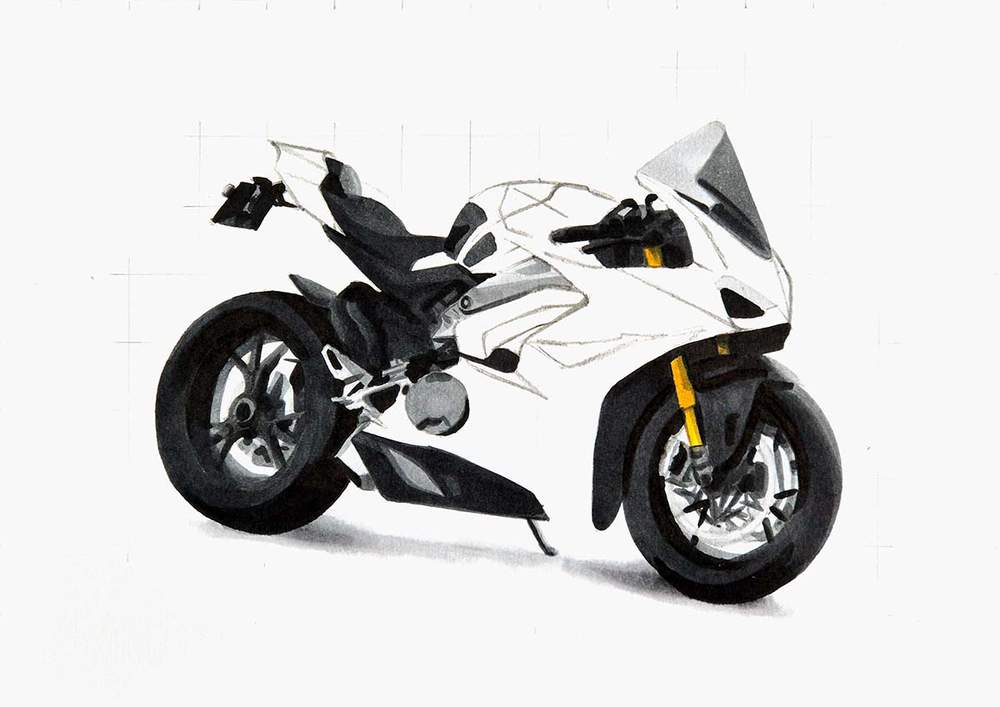
Step 12: Color the Dark Grey Part at the Bottom of the Motorcycle
Next, I colored the plastic bit at the bottom of the bike with Neutral Grey 07 (CG070).

And then, I used Neutral Grey 6 (NG06) to darken most of it, except for the top left and a rectangular shape in the middle.

Step 13: Color the Shadow below the Motorbike
All the grey parts of the bike are now colored, but before we move on to adding the red, I'd like to do the shadow first.
The shadow consists of a grey blob below the bike with lighter edges and darker shadows below the wheels.
I started by coloring the whole shadow shape with Neutral Grey 03 (CG030).
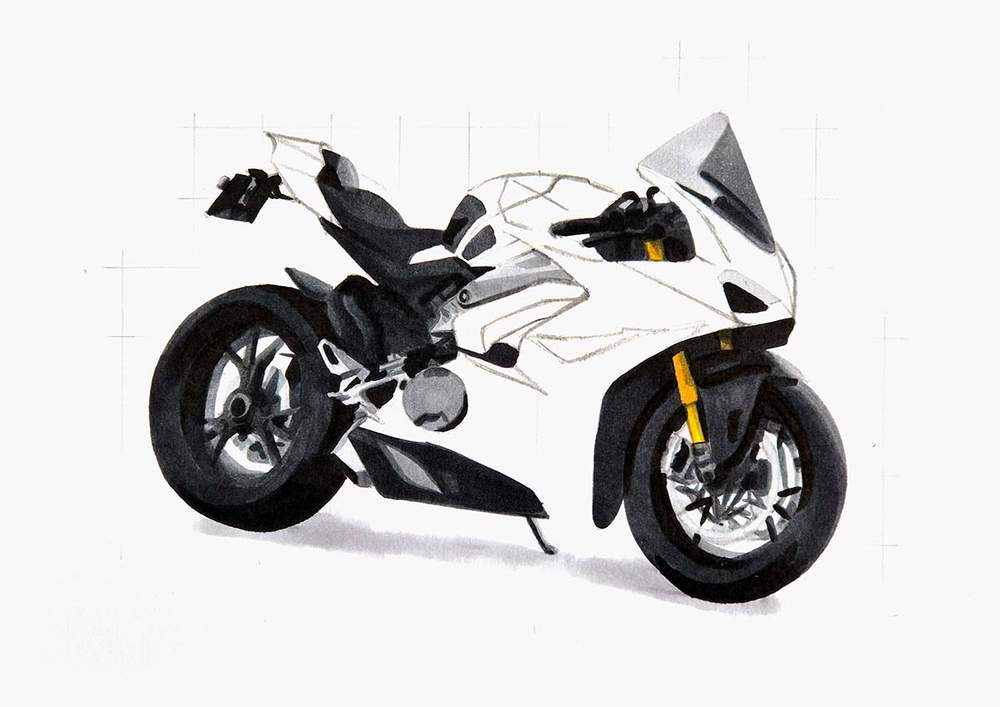
Then, I added just a bit of Neutral Grey 3 (NG03) to darken the shadow below the wheels.
Lastly, I blended the grey tones to form a smooth-ish gradient.
To do this, I used Neutral Grey 03 (CG030) to soften the edge of the Neutral Grey 3 (NG03) parts.
And I used the Colorless Blender (0) to soften the outer edge of the shadow.
Step 14: Color the Ducati Panigale Motorcycle with Multiple Reds
With all the grey parts now done, we can start adding the striking red color of the Ducati.
I like to start light and then go darker.
I first colored the whole main body of the bike with Pastel Rose (R9).
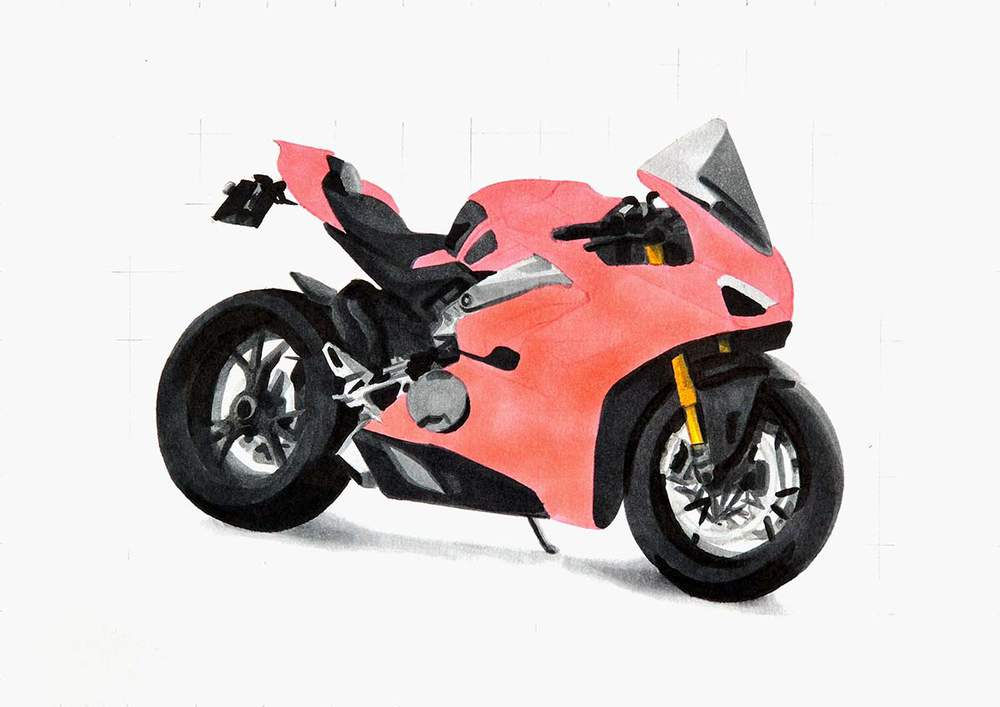
Then, I used Zinnober (R150) to darken most of it, except for the lightest reflections.
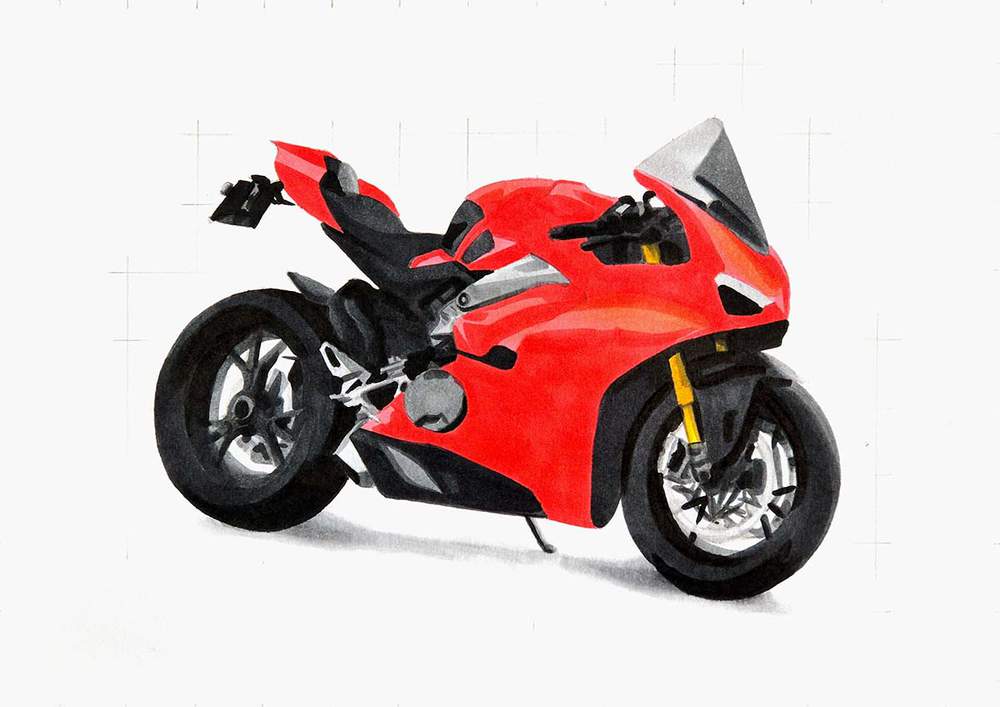
After that, I used Vermilion (R2) to create a little more shading and reflections on the red.

Lastly, I used Geranium (R8) to add some very dark red shadows.
Step 15: Add Final Details to the Motorcycle Drawing
The motorcycle is now fully colored, but it doesn't have many sharp details.
To add the details, I like to use a black and a white colored pencil.
I used the black pencils to add a few panel gaps and bolts on the red parts. I also used it to add the wholes on the brake disks.
And I used the white pencils to add highlights to the red parts, draw details on the wheels, and color the "DUCATI CORSE" text on the side of the bike.

Step 16: Add Final Highlights to Your Motorcycle Drawing
To finish off the drawing, I added just a few pure white highlights with my white paint marker.
I added highlights on the top half of the red part, a few on the front wheel, and I made the "DUCATI" text white.

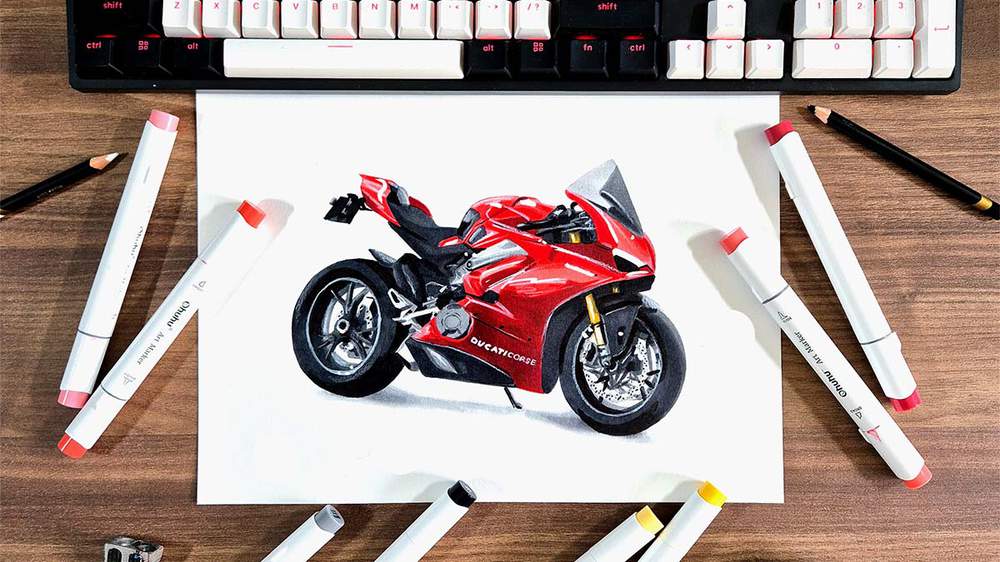
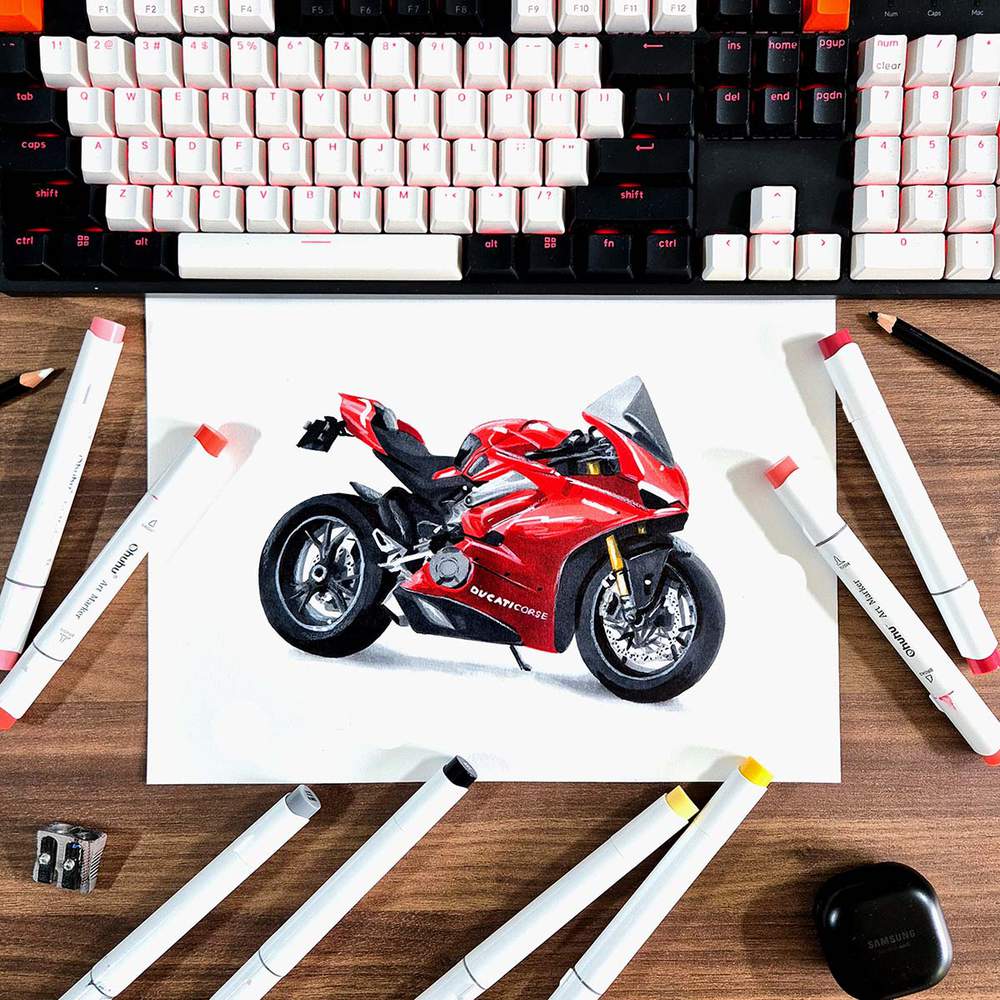
Final Result: Finished Ducati Panigale V4S Motorcycle Drawing
And that's how I drew this realistic Ducati Panigale V4S motorcycle step-by-step.
I hope you enjoyed this step-by-step car drawing guide.
If you did enjoy it and want to learn how to draw more vehicles, make sure to check out my other step-by-step drawing guides.
Articles You Might Also Like
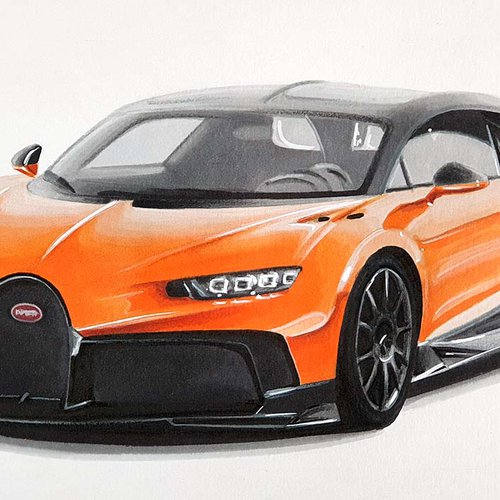
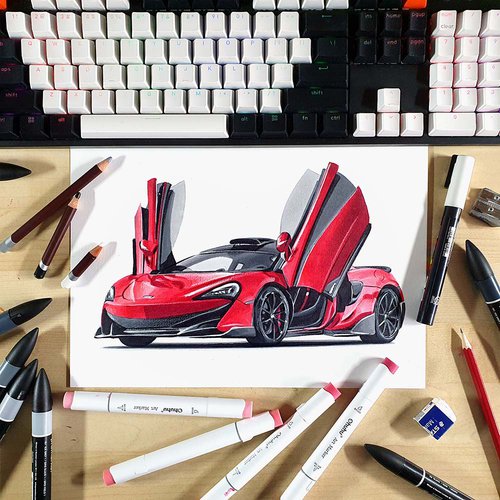

I love bringing cars to life with alcohol markers and colored pencils.
Whether you're just starting out or looking to improve your skills, I'm here to help!
Click here to learn more about me.


Be the first to comment!
Comments
There are no comments yet.