How to Draw a Ferrari Purosangue in 14 Easy-to-Follow Steps
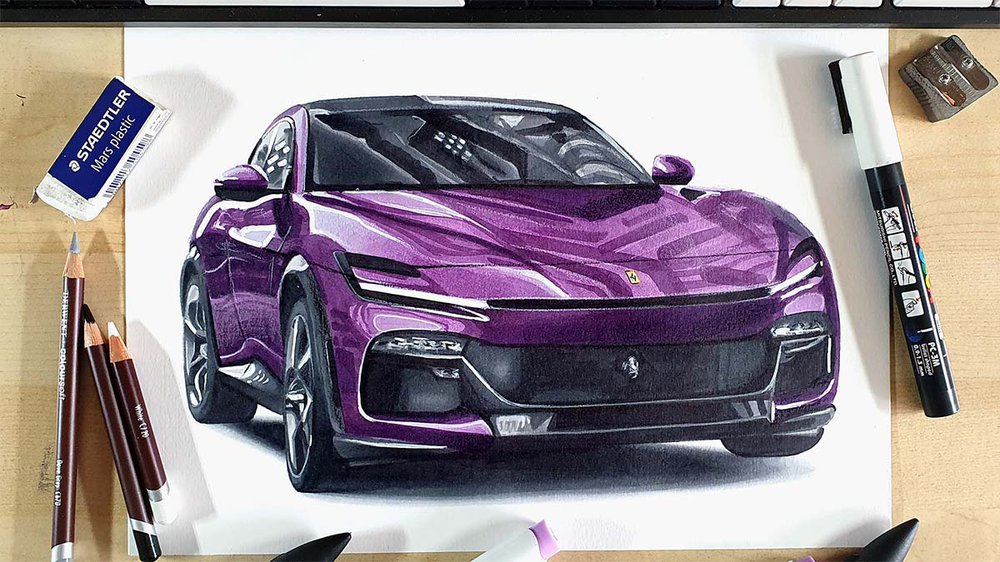
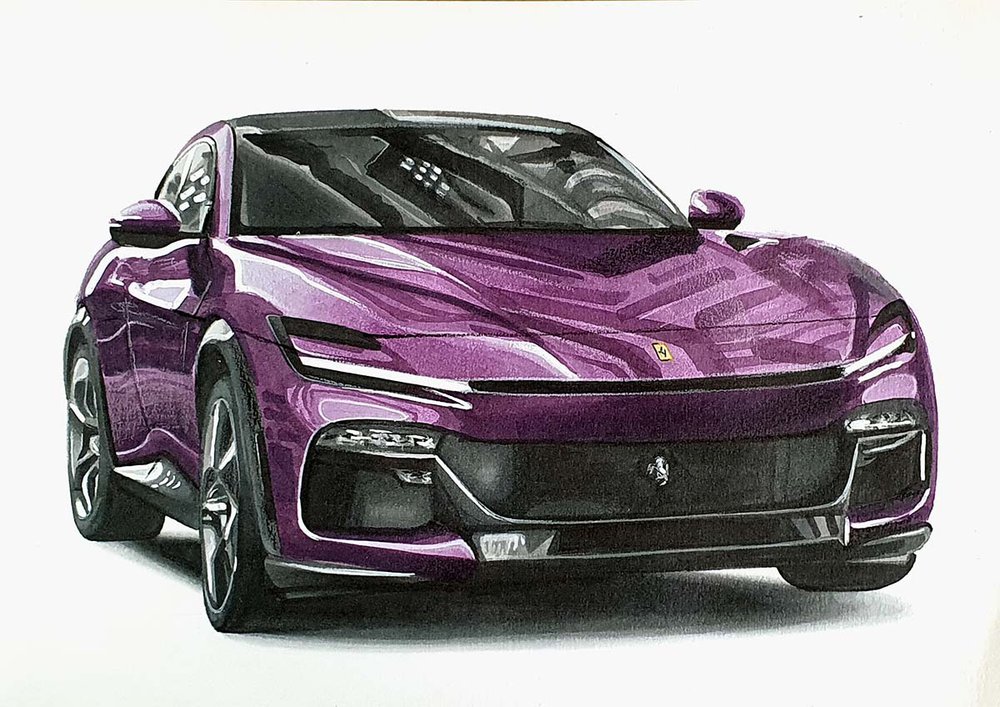
In this week's car drawing tutorial, I'm going to show you how to draw a simple and realistic-looking Ferrari Purosangue step-by-step in one of my favorite Ferrari colors: Viola Hongkong.
Let's get started!
Disclaimer: In the name of full transparency, please be aware that this blog post contains affiliate links and any purchases made through such links will result in a small commission for me (at no extra cost for you).
Drawing Supplies I Used to Draw the Ferrari Purosangue
To draw the Ferrari SUV FUV, I used the following art supplies:
- A graphite pencil, a ruler, a kneaded eraser, and a regular eraser;
- Winsor & Newton Promarkers in the colors Ice Grey 1 (IG1), Ice Grey 2 (IG2), Ice Grey 4 (IG4), Ice Grey 7 (IG7), Black (XB), Lilac (V327), and Aubergine (V524);
- Ohuhu Honolulu markers
in the colors Acid Yellow (Y070), Pearl Violet (V050), and Dark Violet (V080). I
also used the colorless blender;
- Derwent Coloursoft pencils in the colors White, Dove Grey, and Black;
- And a white Posca PC-1MR.
Reference Photos I Used to Draw this Ferrari Purosangue
To make this drawing of the Ferrari Purosangue, I used 3 reference photos. 1 for the proportions and the perspective, 1 for the lighting and the reflections, and 1 for the color.
I used this photo for the perspective.
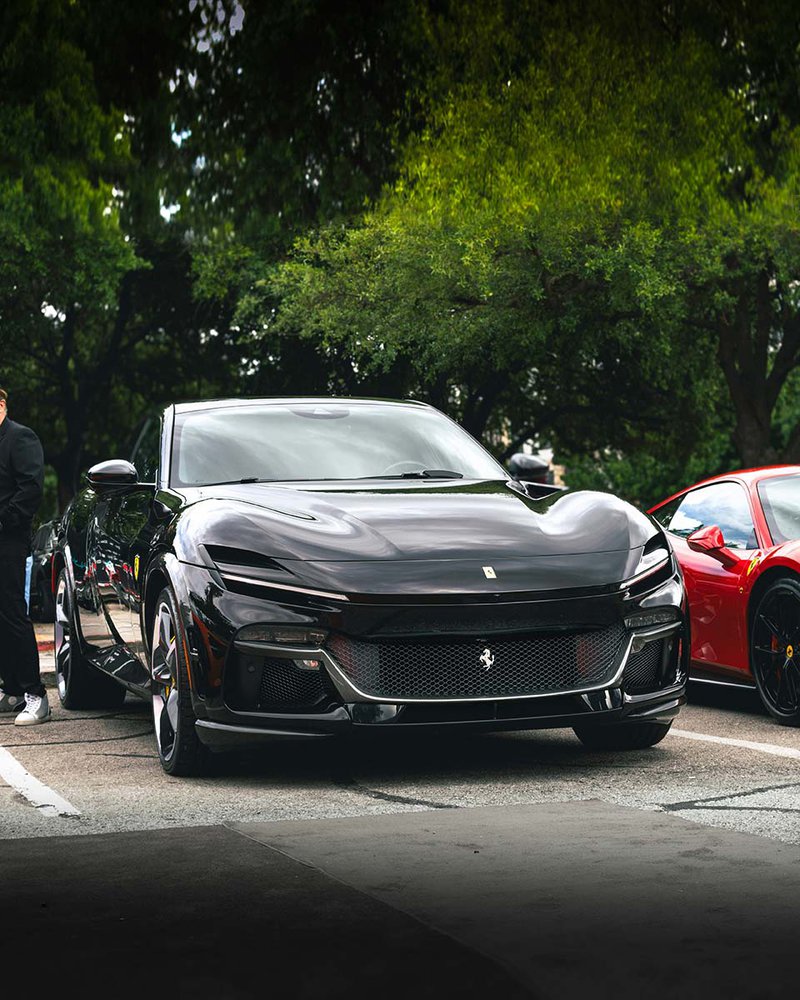
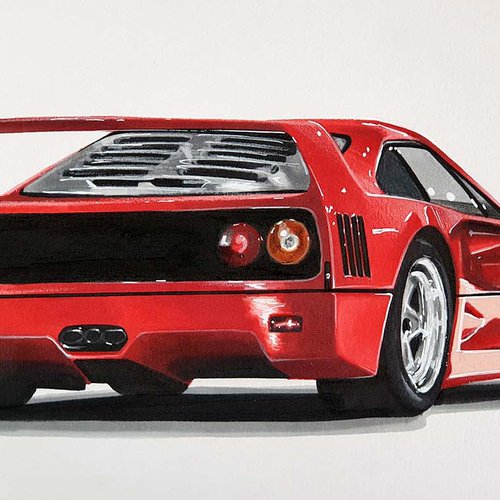
I used this photo for the reflections.
And I used this photo as a color reference.
How Do You Draw a Realistic Ferrari Purosangue?
To make a realistic drawing of a Ferrari Purosangue, first gather a few reference photos for the perspective, proportions, lighting, reflections, and color.
After that, create a sketch of the outline of the car using the grid method.
Next, color the car with alcohol markers starting with the black and the grey parts, before moving on to the main body of the Purosangue.
Lastly, add some details with colored pencils and highlights with a Posca paint marker.
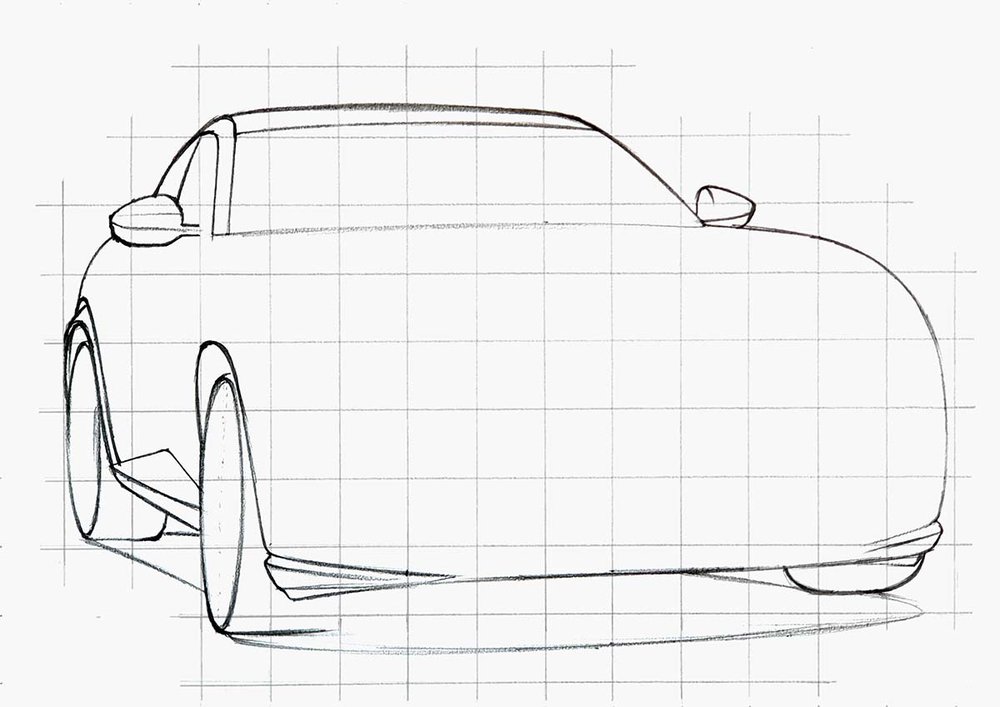
Step 1: Sketch the Outline of the Ferrari Purosangue
To sketch the Ferrari Purosangue, I'm using the grid method. This technique makes sketching a car with accurate proportions a lot easier. You can learn more about how to use it here.
1. Resize the reference photo for the proportions to have the same dimensions as your piece of paper. In this case, that's A4 size or 3508 by 2480 pixels.
2. Overlay a grid of 15 by 10.5 squares over the photo.
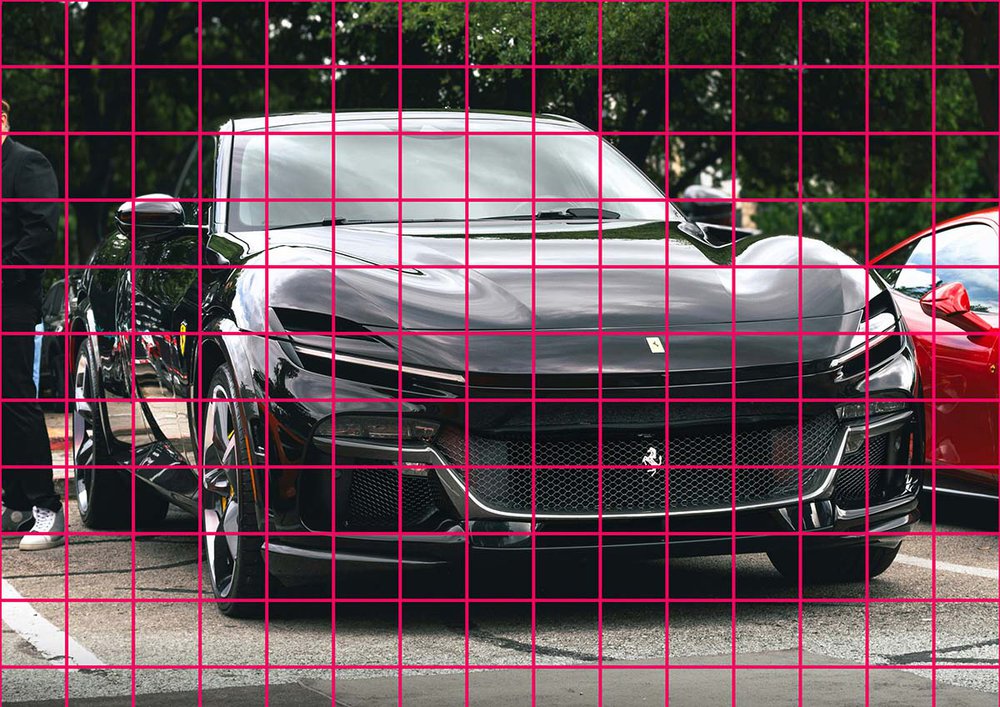
3. Sketch the grid lines on your piece of paper. Each square is 2 by 2 cm as we made the grid 15 by 10.5 squares. I only sketched the squares I needed to sketch the Ferrari Purosangue.
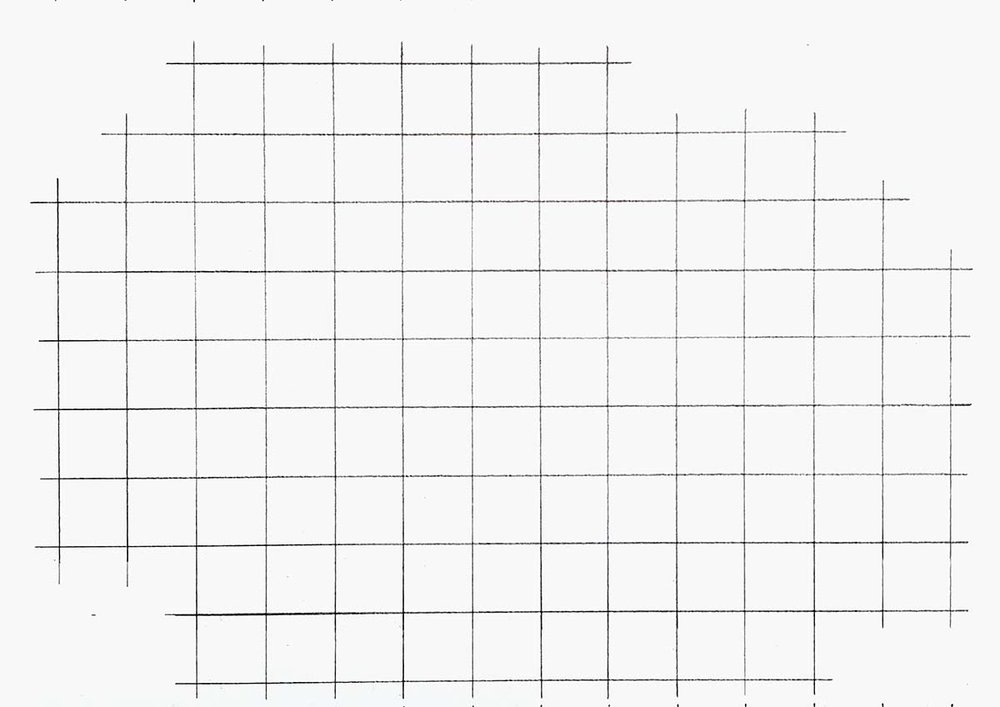
4. Carefully sketch the outline of the Ferrari Purosangue. I like to start on the left of the car and work my way up and around the car. I start by marking the start and the end of a part of the outline and where it intersects grid lines. Then I sketch the line. I do this for every part of the outline.
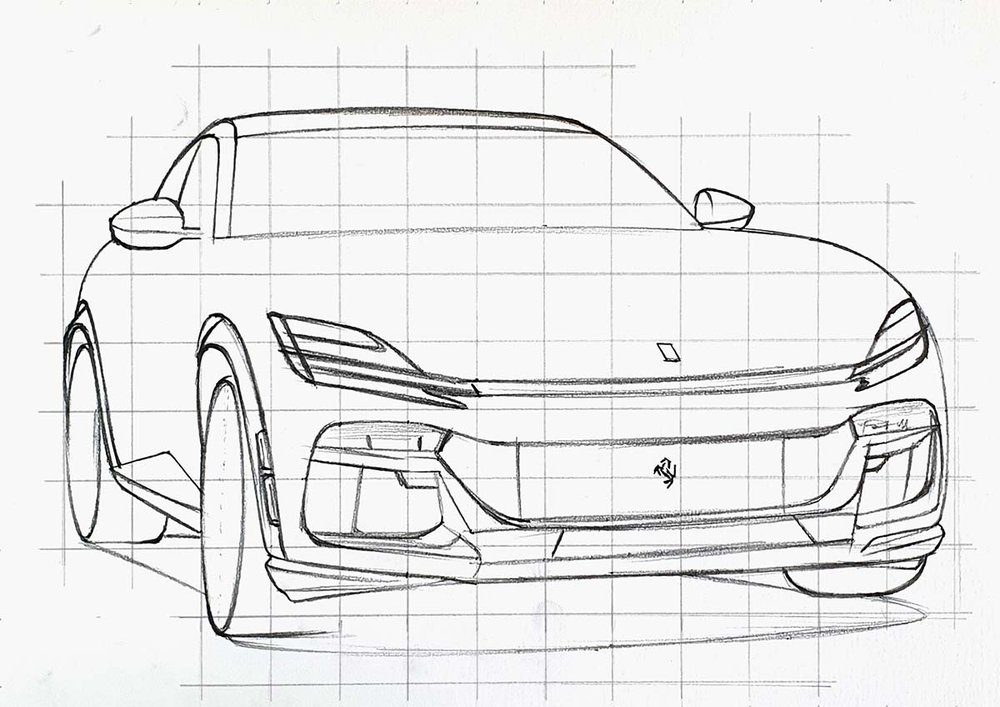
Step 2: Sketch the Details of the Ferrari Purosangue
5. Sketch the details of the Ferrari Purosangue. Start with the bigger shapes and work your way to the smaller details until you've sketched the whole car.
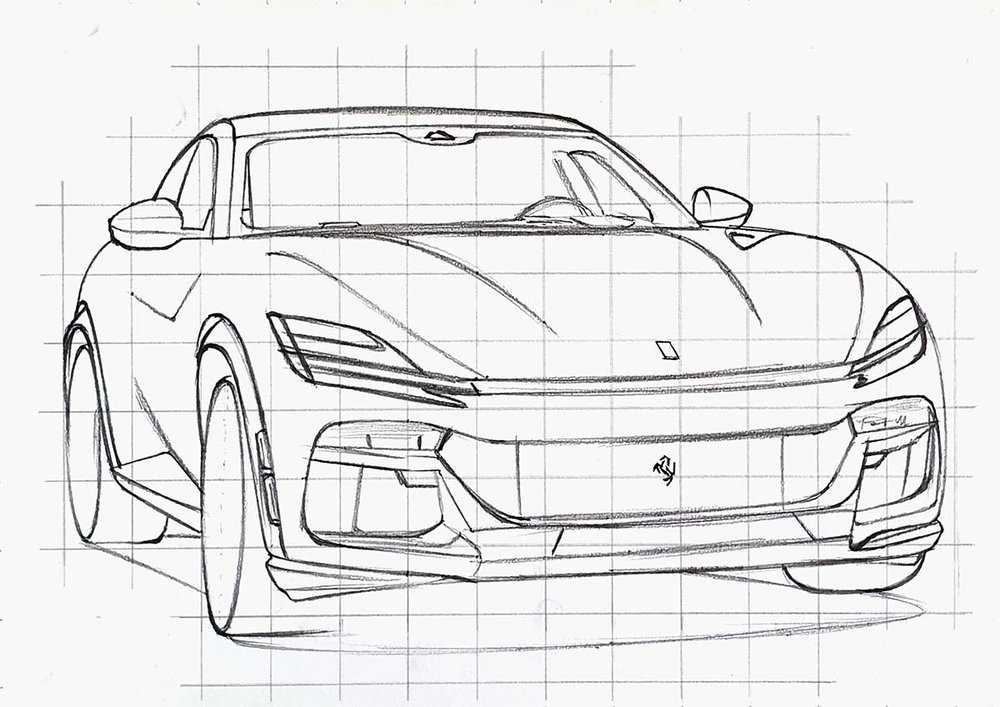
Step 3: Sketch the Reflections on the Ferrari Purosangue
6. Sketch the Reflection onto the car. This will make coloring it a lot easier as the Ferrari Purosangue has a ton of reflections in this case.

Step 4: Color All Pure Black Parts of the Ferrari Purosangue
7. Use the Black Promarker to color all pure black parts.
The sketch might look pretty overwhelming and the easiest thing to do to make progress with your drawing and to make it look less daunting is to color all pure black parts first.

Step 5: Color the Wheels of the Ferrari Purosangue
Before you start coloring any part, you need to lighten your sketch first with a kneaded eraser (or a normal one) until it's just about visible.
8. Use Ice Grey 2 to color the rims of both wheels and the top left of the wheel arches.

9. Use Ice Grey 4 to color the tires and darken some parts of the rims and spokes. Also, color the remainder of the wheel arches.

10. Use Ice Grey 7 to add darker tones and depth to the wheels by coloring the darkest parts of the spokes and the rims. Also, color the tires and the right half of the wheel arches with this color.

Step 6: Color the Shadow of the Ferrari Purosangue
11. Use Ice Grey 1 to color the whole shadow underneath the Ferrari Purosangue.

12. Use Ice Grey 4 to color the inside half of the shadow, leaving a light grey border.

13. Use Ice Grey 7 to blend the black into the Ice Grey 4 by going over the edge where the two colors meet.
14. Use Ice Grey 4 to blend the Ice Grey 7 into the Ice Grey 4 by coloring over the edge where the two colors meet.
15. Use Ice Grey 1 to blend the Ice Grey 4 into the Ice Grey 1 by coloring over the edge where the two colors meet.

Step 7: Color the Front Grills of the Ferrari Purosangue
16. Use Ice Grey 1 to color the daytime running lights above the front grills.
17. Use Ice Grey 2 to color the headlights at the top of the grills on either side of the car, the top of the part on the bottom left, the left half of a lighter reflection on the left of the bottom middle part, and the prancing horse in the middle of the center grill.

18. Use Ice Grey 4 to add darker details to both headlights and to color the left half of the top bit of the bottom left part, the bottom right parts, the remainder of the bottom middle part, and the bits below the right headlight.

19. Use Ice Grey 7 to color the remainder of the front grills and other parts and use it to darken the details in the headlights.

Step 8: Color the Side Skirt of the Ferrari Purosangue
20. Use Ice Grey 1 to color a curved reflection on the left of the side skirt.

21. Use Ice Grey 4 to color the remainder of the side skirt.

22. Use Ice Grey 7 to color the bottom of the side skirt.

Step 9: Color the Side Window of the Ferrari Purosangue
23. Use Ice GRey 1 to color the side windows.

24. Use Ice Grey 4 to add some tree-like reflection to the bottom right of the side windows.

25. Use Ice Grey 7 to add some details to the reflection and color the window triangle in the bottom right.

Step 10: Color the Windshield of the Ferrari Purosangue
26. Use Ice Grey 2 to color the lightest parts of the front windshield and the roof. These are the right quarter of the window, the right half of the roof, the center of the windshield, and a wide line to the left of the most left black reflection.

27. Use Ice Grey 4 to color the remainder of the windshield and the roof and shape the lighter reflections.

28. Use Ice Grey 7 to add more depth to the windshield and the roof by darkening the left half of the roof and some parts on the windshield while leaving some lighter reflections.

Step 11: Color the Logo of the Ferrari Purosangue
29. Use Acid Yellow to color the Ferrari badge on the front of the car.

Step 12: Color the Main Body of the Ferrari Purosangue
30. Use Lilac to color the lightest reflections on the main body of the Purosangue:
- 2 spots below the right headlight
- a spot below the left headlight
- an edge on the bottom to the right of the front wheel
- a curved shape to the left of the logo
- 3 reflections below the left of the windshield, following the body lines
- the a-pillar
- the top of the left mirror
- the right mirror
- and 2 pots below the left mirror
31. Use Pearl Violet to color the remainder of the main body and blend it into the lighter lilac in a few places.

32. Use Dark Violet to add tons of darker reflection all over the Ferrari.

33. Use Aubergine and Ice Grey 7 to add more dark tones and depth to the paintwork of the Purosangue, mainly on the side and the part directly above the center grill.

Step 13: Add Details to Your Ferrari Purosangue Drawing
34. Use the White Coloursof pencil to add highlights and details to the following places:
- the headlights
- the wheels
- the prancing horse in the grill
- the reflections on the front, the windshield, and the roof
- the left of both mirrors
- and a few body edges
35. Use the Dove Grey pencil to add some grey tones to the reflection on the side of the Purosangue.
36. Use the Black pencil to add the panel gaps. (I forgot to do this... I did it in the next step.)
Step 14: Add White Highlights to Your Ferrari Purosangue Drawing
37. Use the white Posca paint marker to add white highlights all over the car, but mainly on:
- the spokes of the wheels
- the daytime running lights
- the headlights
- the lightest reflections on the body including the mirrors
- the side windows
- and a few panel edges
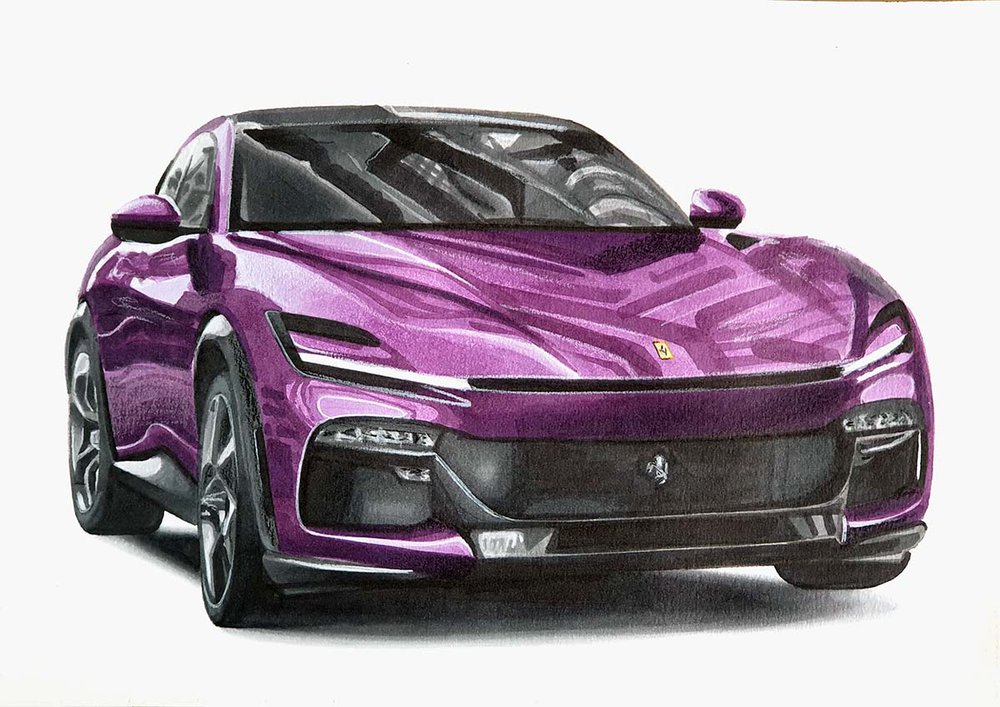
And Your Realistic Ferrari Purosangue Drawing is Done!
And that's how I draw realistic cars like the Ferrari Purosague.
I hope this helped you! If so, I'd appreciate it if you'd share this article with someone who might also like it. It would help me out a lot!
Thank you for taking the time to read (and do) this tutorial!

Tags
Articles You Might Also Like


I love bringing cars to life with alcohol markers and colored pencils.
Whether you're just starting out or looking to improve your skills, I'm here to help!
Click here to learn more about me.


Add a comment
Comments
Hi, i very like your drawing cars. I'm drawing fron childrenhood, but can't do it like you. Now I'll draw with your tutorial. Thank you