How to Draw a Coffee Mug - Easy Step by Step Guide for Beginners
Hi! In this step-by-step guide, you'll learn how to draw a coffee mug filled with coffee, using simple shapes and just 8 steps.
It's super simple, everyone can do it! And you only need a few drawing supplies.
So, let's get started!
Disclaimer: In the name of full transparency, please be aware that this blog post contains affiliate links and any purchases made through such links will result in a small commission for me (at no extra cost for you).
Drawing Supplies I Used
To make this coffee mug drawing, I only used a few supplies.
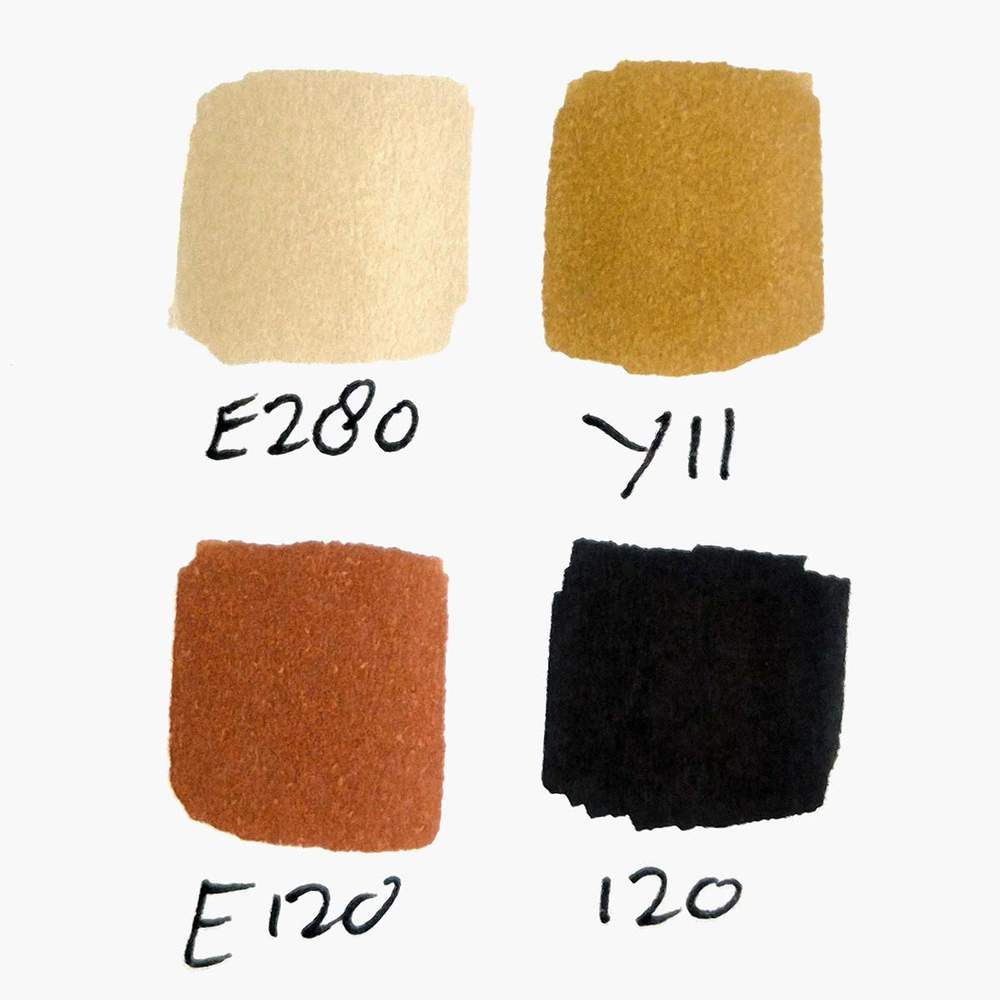
I used 4 Ohuhu Honolulu markers in the colors Sand White (E280), Brown Grey (Y11), Reddish Brass (E120), and Black (120). You can buy these colors separately here.
Or you can buy them in a set.
I used a Tombow Fudenosuke Brush Pen to outline the sketch.
I also used the white Derwent Chromaflow colored pencil.
And I made this drawing on Canson Illustration Manga Paper.
How Do You Draw a Coffee Mug?
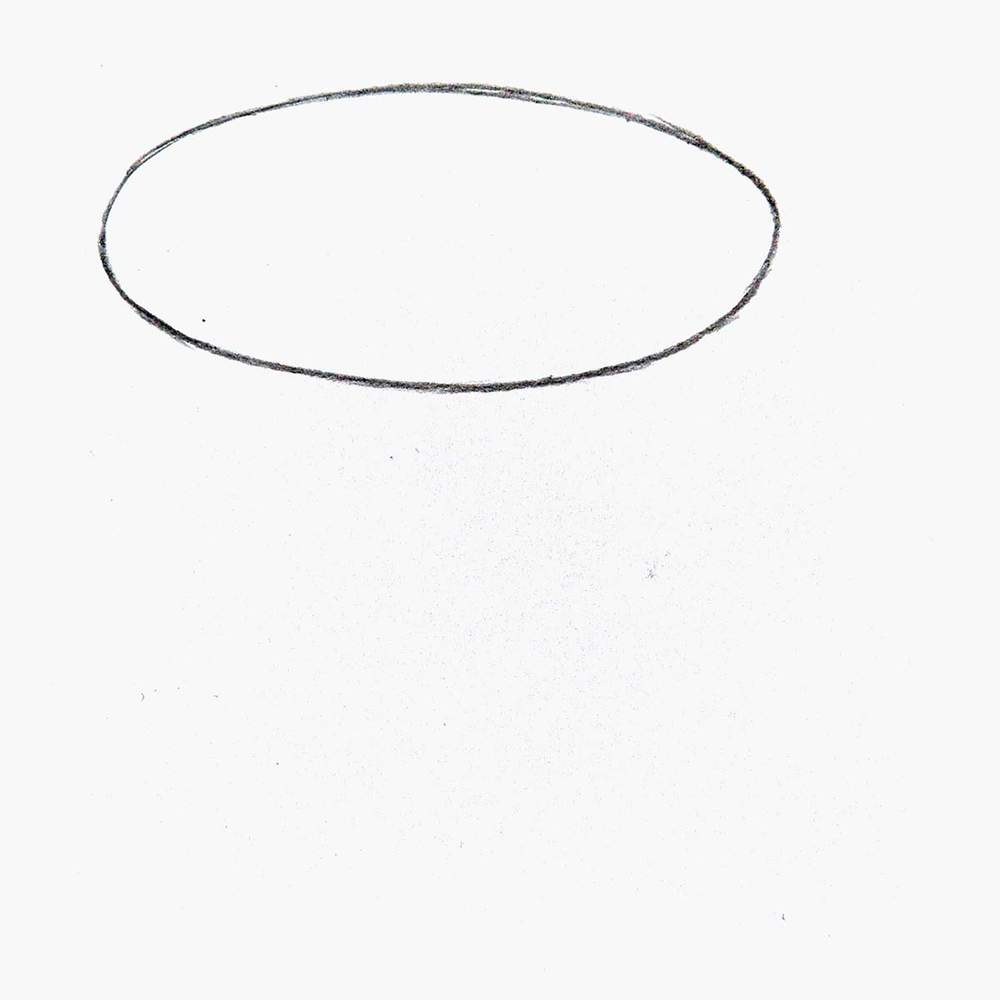
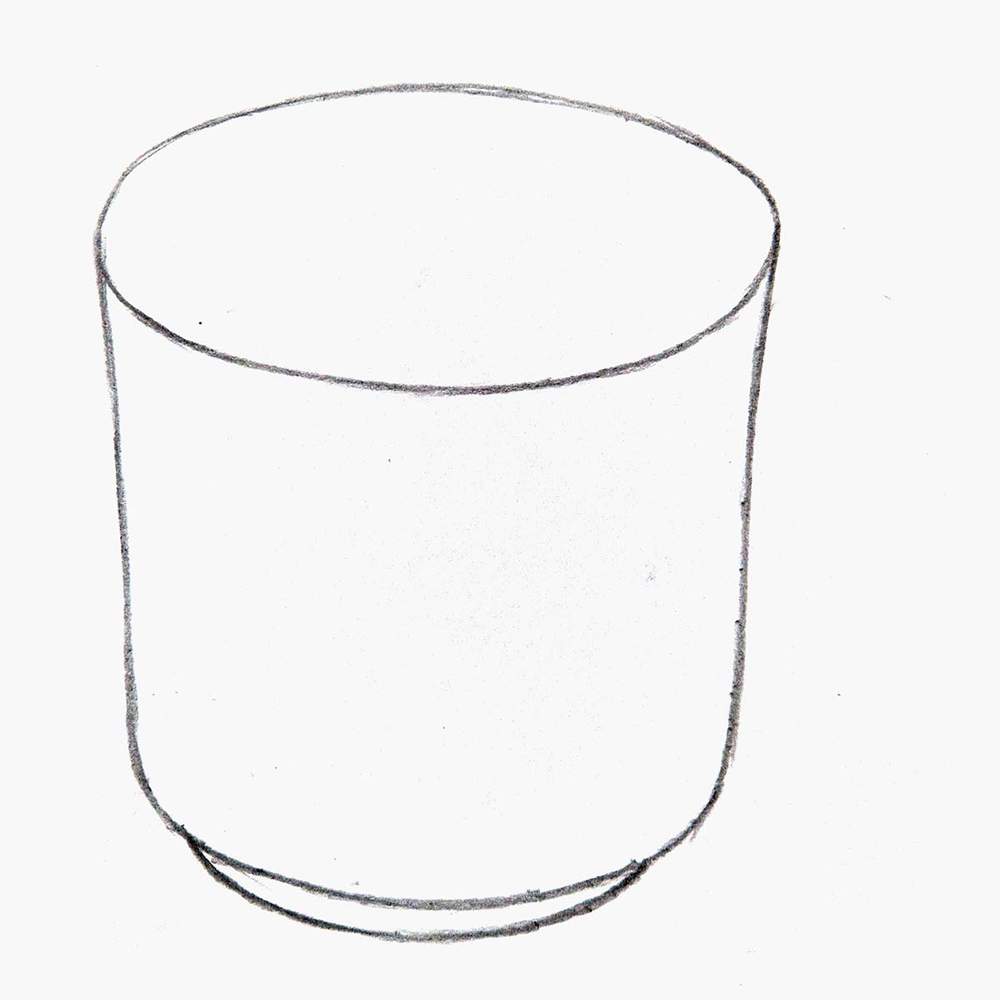
Step 1: Sketch an Ellipse for the Top Rim
To start the sketch of my coffee mug, I first drew the top rim of the mug.
This is just a flattened ellipse towards the top of the paper.
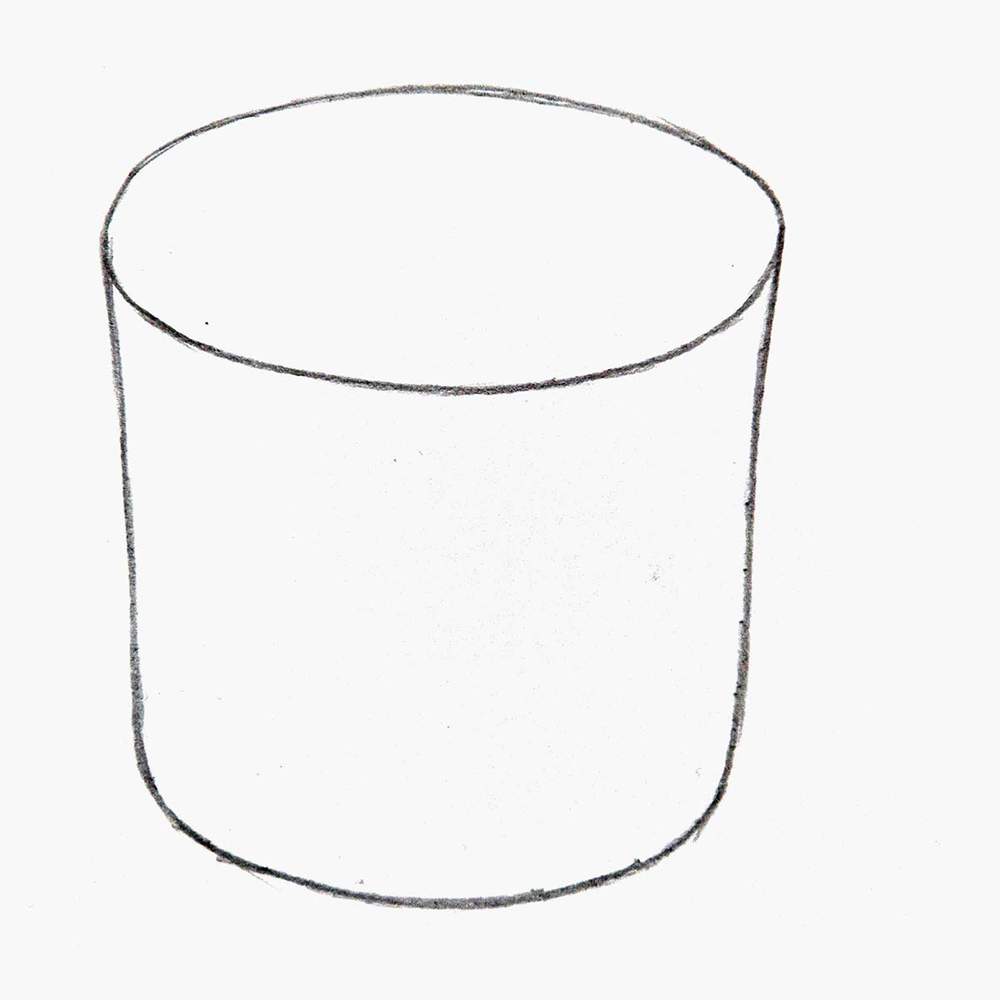
Step 2: Draw the Body Shape of the Mug
Next, I added the general shape of the mug.
I chose to keep it simple and basic, so I added 2 straight edges going down from each side of the ellipse.
Then I added a round bottom edge (as the mug is round).
I did make the side a little bit curved to replicate the inaccuracies of a real ceramic mug.
Mugs and cups often have this edge on the bottom. Honestly, not sure what it is for, but I added it to the sketch.
It looks just like another curved shape, but this time smaller than the bottom edge of the mug.
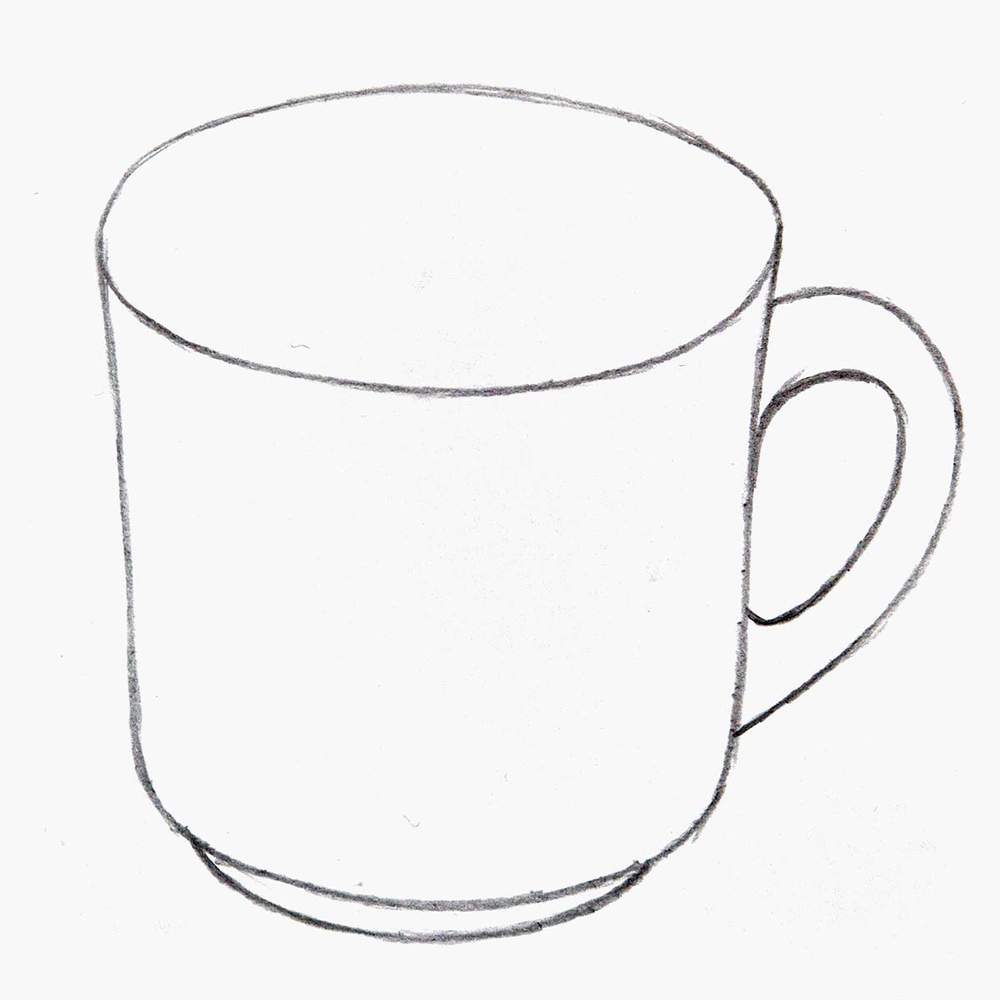
Step 3: Add a Handle to the Coffee Mug
After that, I added the mug handle, which is pretty much ear-shaped, or kinda like half a heart.
I first added the outer edge of the handle.

And then I added the inner edge.
I made the points where the handle attaches to the mug a bit thicker by curving the inner edge line inwards.
Step 4: Draw the Coffee's Surface
Now, it's time to fill the mug with coffee!
Actually, I just noticed I missed the second rim line at the top, so let's add that first.
To complete the top edge of the mug, I added this slightly smaller ellipse in the big one on the top.
This gives the rim a little bit of thickness.
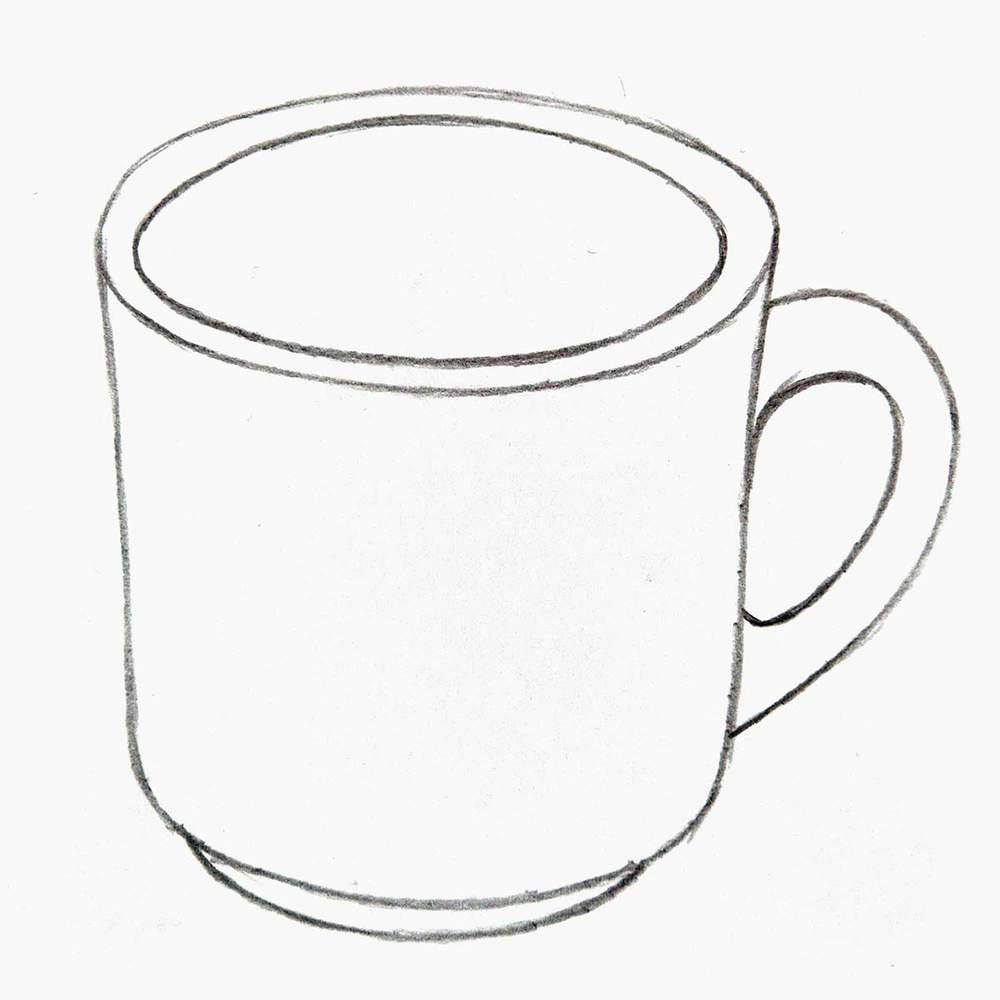
Now, we can add the coffee.
I started by adding this ellipse-shaped fill line a little below the top edge of the mug.
Next, I added the foam line. To make it look organic, I just scribbled a line below the ellipse shape we just did.
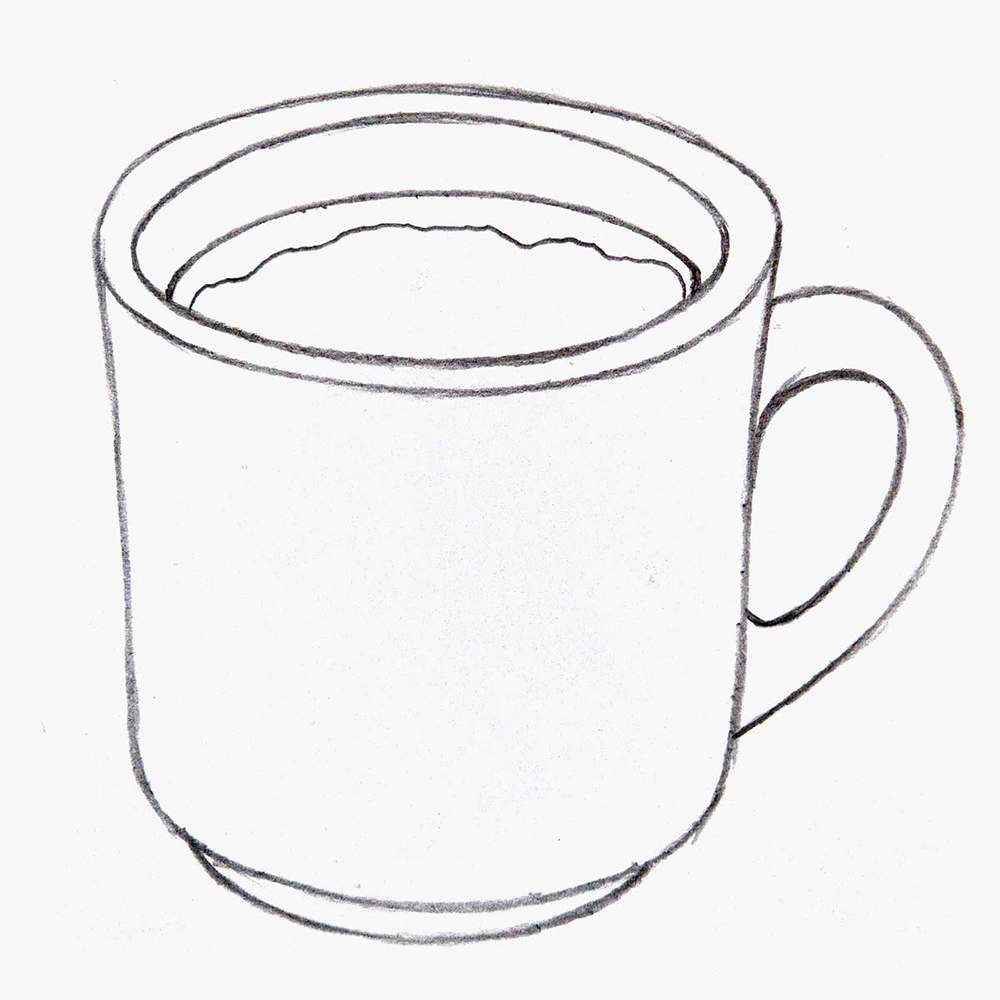
Lastly, I added a few foam bubbles in the foam edge and 4 on the rest of the coffee part.
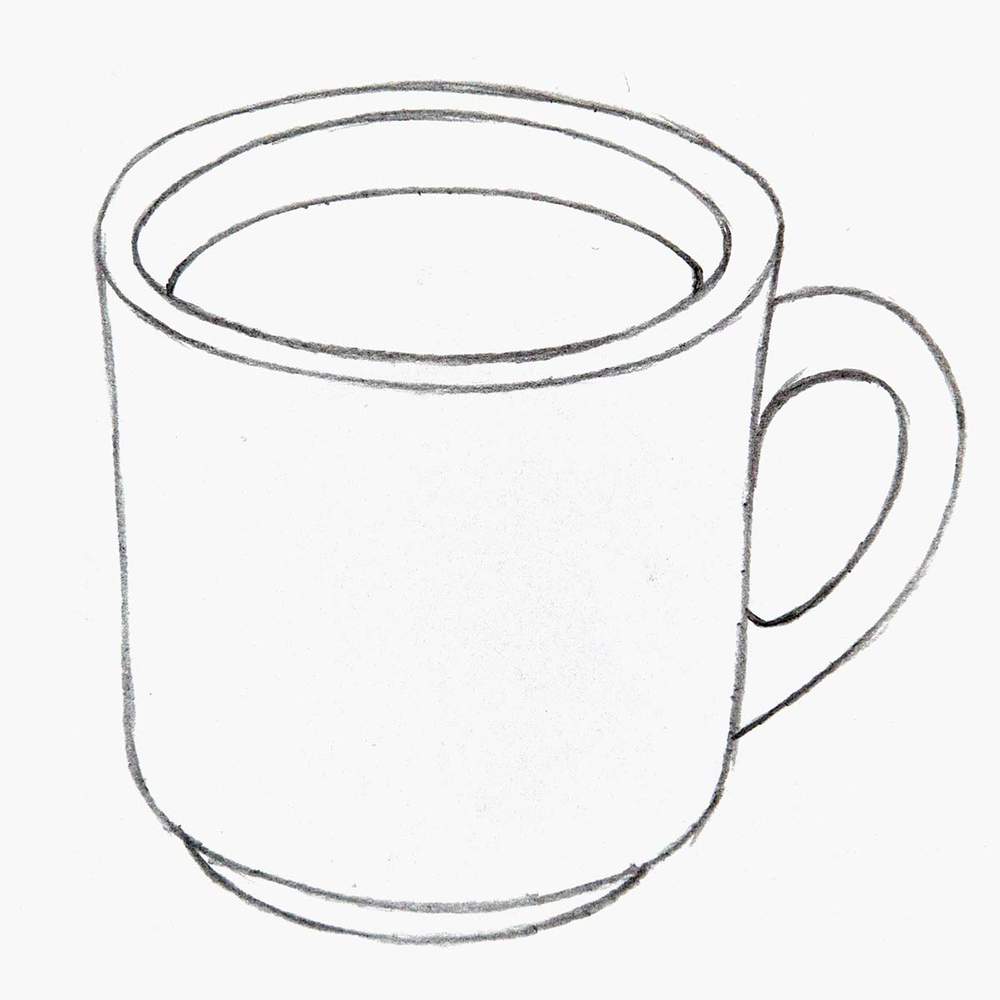
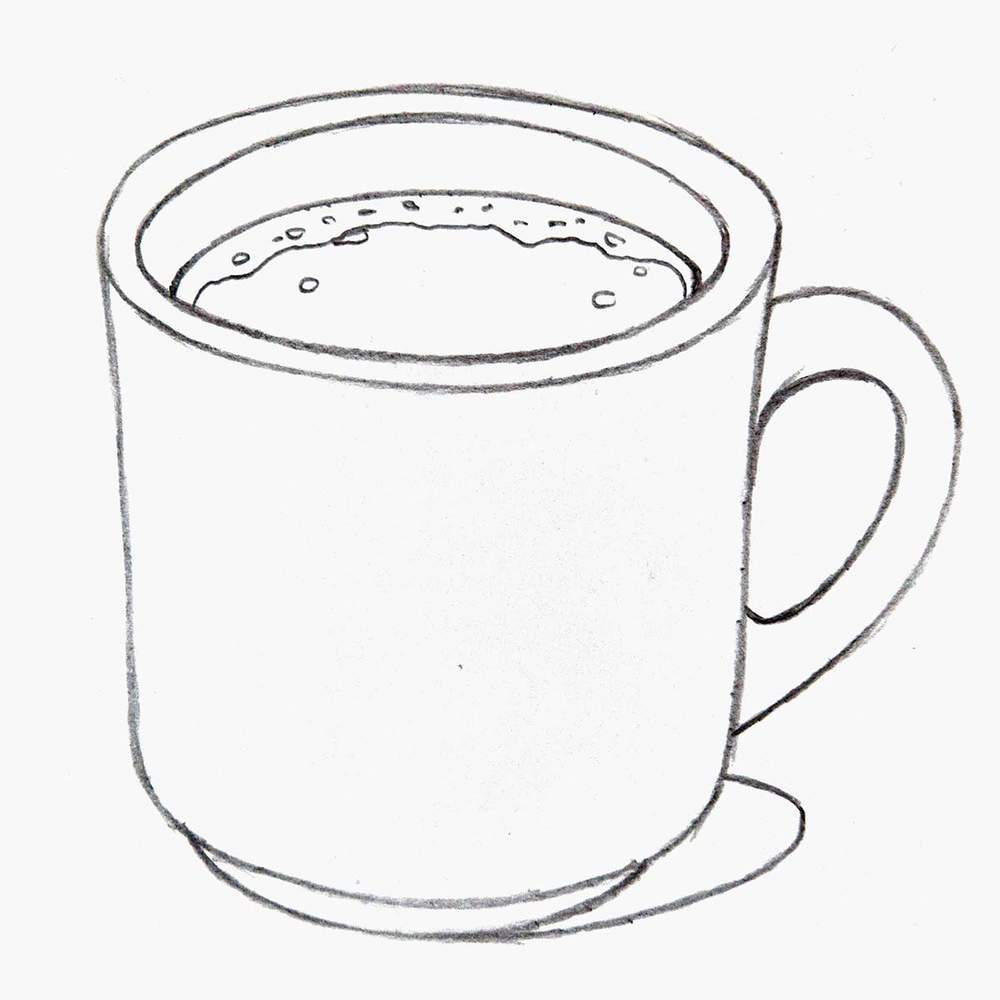
Step 5: Add the Shadow of the Mug
To complete the coffee mug sketch, I added a shadow to the bottom right of the mug.
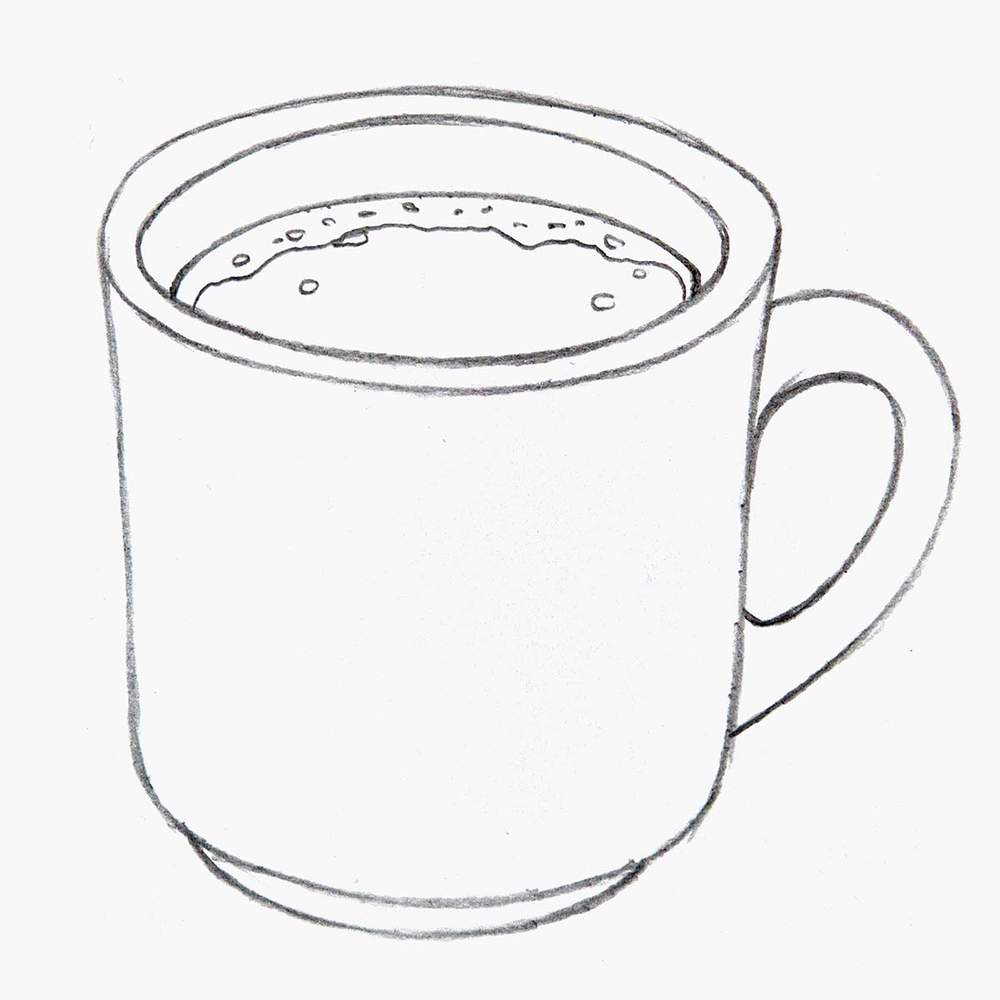
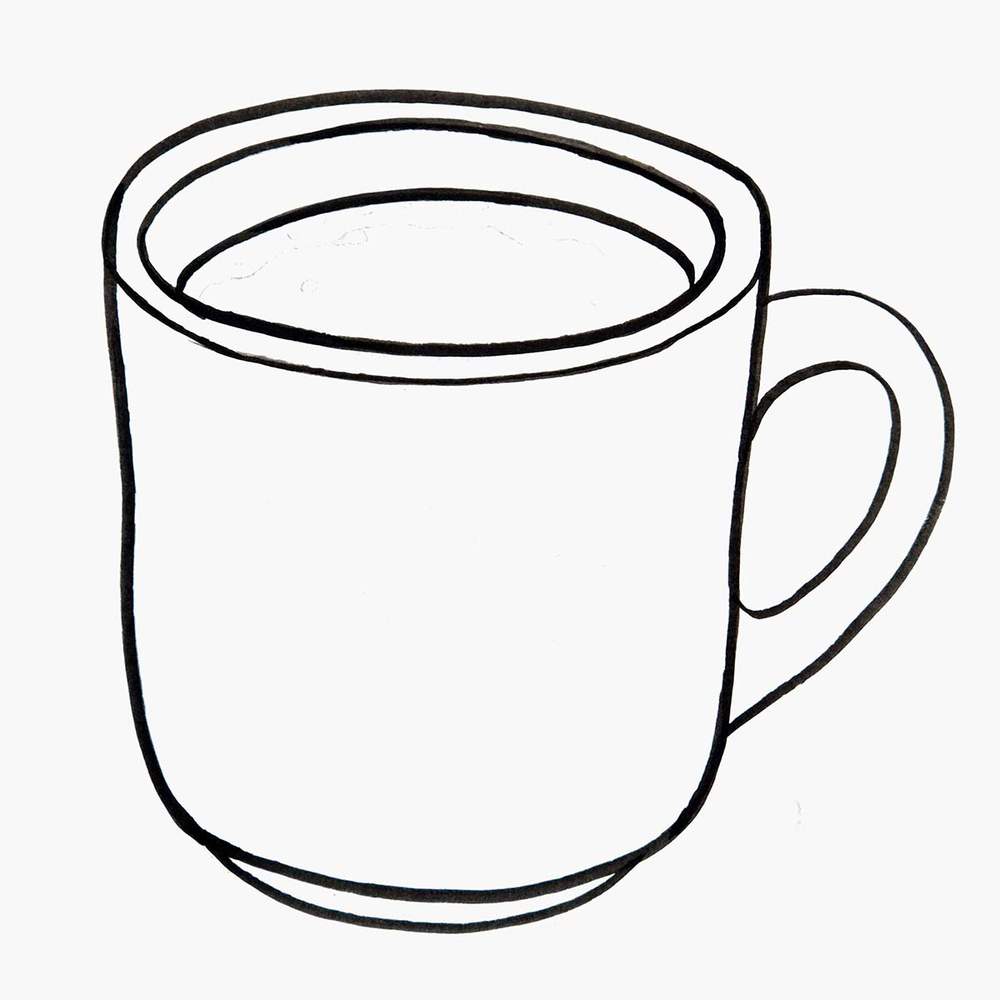
Step 6: Outline the Coffee Mug with a Black Pen
To prepare the sketch for coloring, I first lightened it with an eraser until I could only barely see it.
This prevents the sketch from showing through the marker ink.
Next, I outlined the sketch with my black brush pen.
I didn't outline the foam and the shadow of the mug.
Step 7: Color the Coffee Mug with Markers
The coffee mug is ready to be colored. My favorite part!
To do this, I like to use the Ohuhu Honolulu alcohol based markers. They are by far my favorite.
I started by coloring the whole mug (except for the coffee) with Sand White (E280).
Next, I used Brown Grey (Y11) to add some shading on the inside edge of the rim, the right and bottom edges of the body, and the inside edge of the handle.
I also colored the shadow with Brown Grey (Y11).

After that, I colored the coffee inside the mug with Reddish Brass (E120).

And then, I colored the black coffee with Black (120).
I colored a few openings in the foam also black, and I left some foam bubbles on the main coffee part brown.

Step 8: Add Some Details to Your Coffee Mug Drawing
To finish the drawing of a mug filled with coffee, I added some texture details with my black pen. I lightly added some sketchy/scribbly lines around the edges.
I also used my white pencil to lighten the far left edge and the left of the top rim.
I also used it to add some highlights to the bubbles and the foam on the coffee.

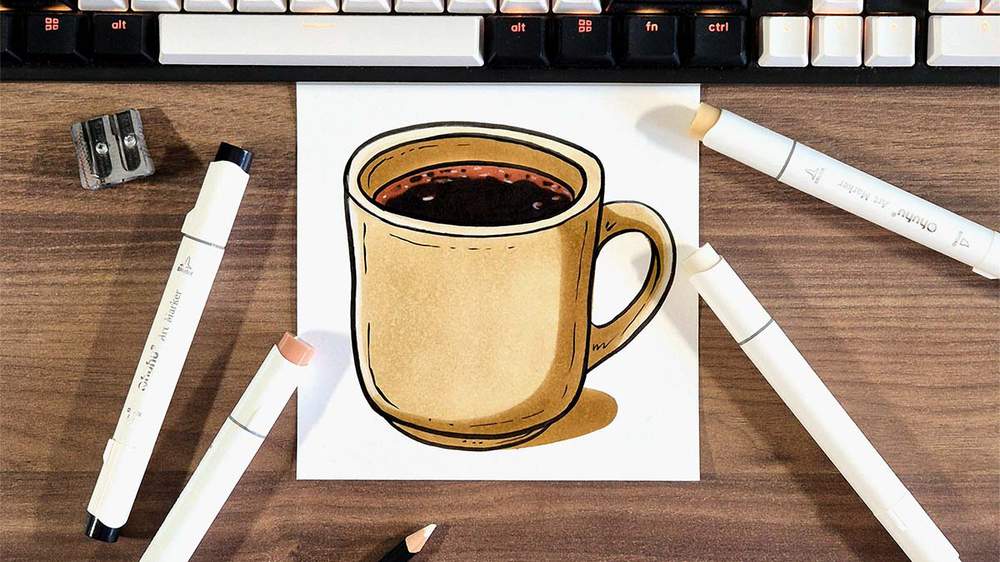
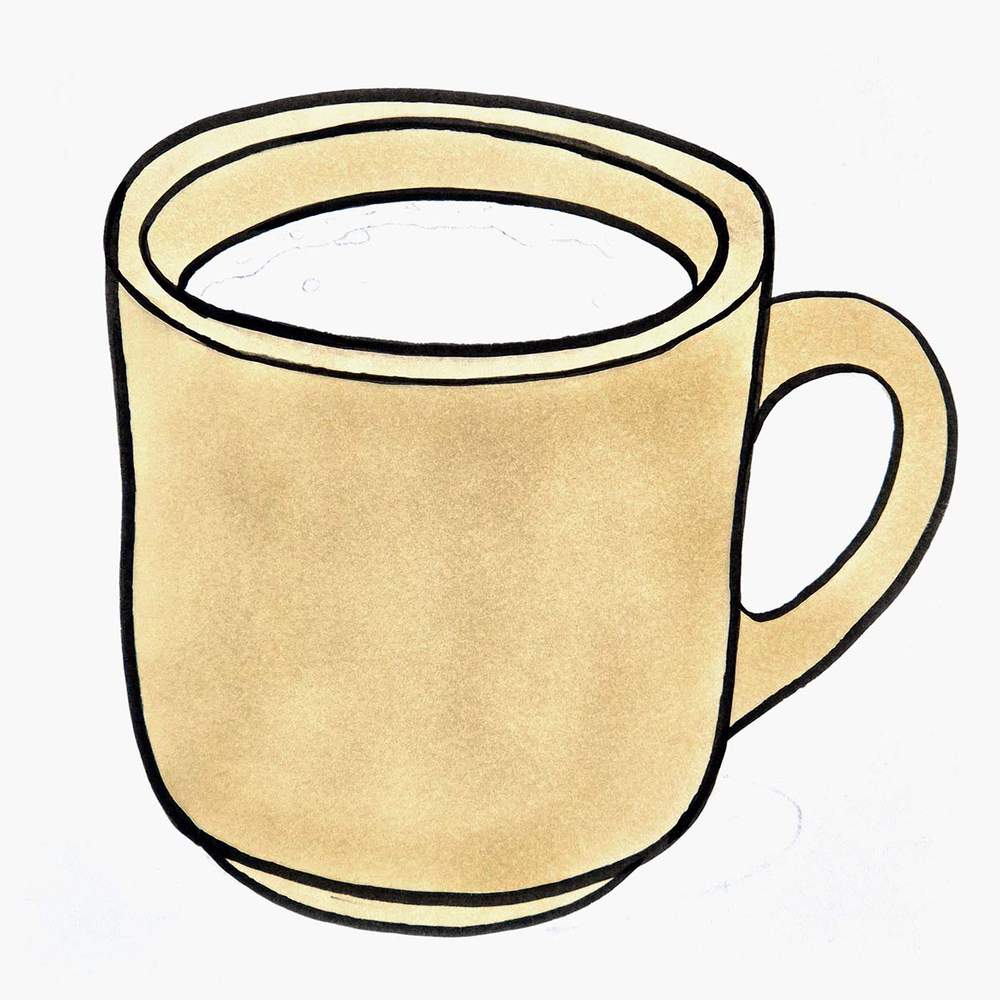
Finished Easy Coffee Mug Drawing
And that's how to draw an easy coffee mug. This easy coffee mug drawing is perfect for beginners who want to learn how to draw everyday objects.

I hope you had fun drawing this coffee mug with me!
Looking for more drawing inspiration and step-by-step guides? Make sure to check out my other tutorials.
Thank you!
Articles You Might Also Like

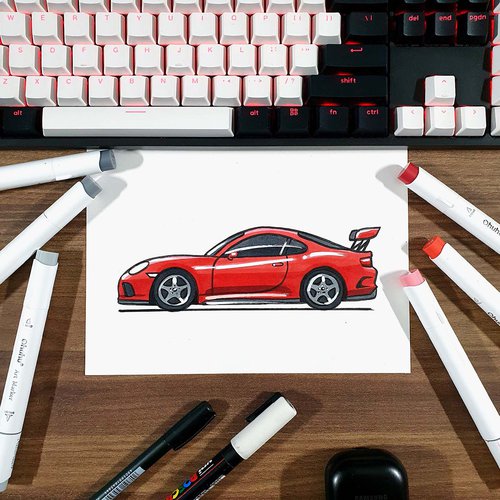

I love bringing cars to life with alcohol markers and colored pencils.
Whether you're just starting out or looking to improve your skills, I'm here to help!
Click here to learn more about me.


Be the first to comment!
Comments
There are no comments yet.