How To Draw A Vampire Easy Step-By-Step
This post is all about how to draw a vampire easy.
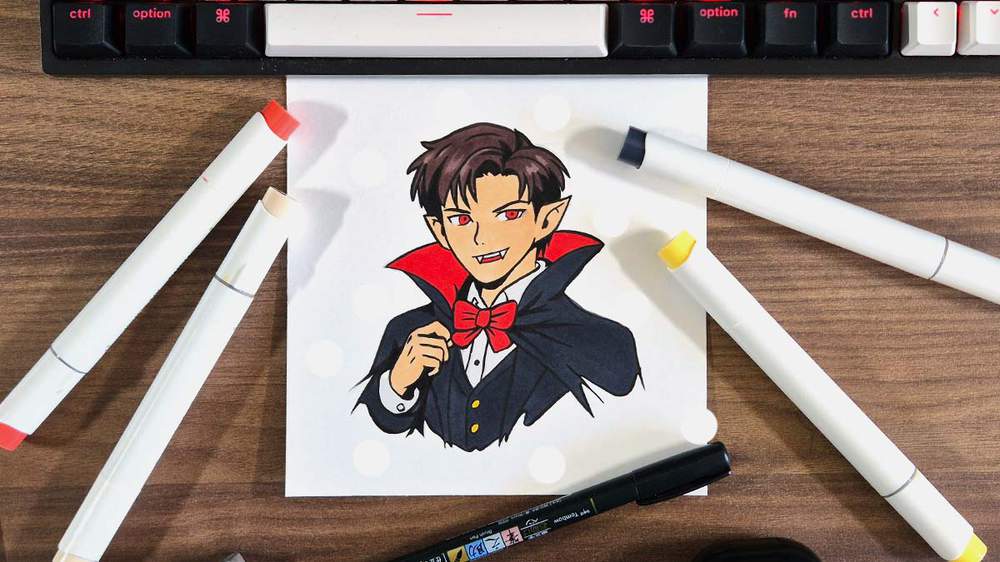
Looking for a fun vampire drawing guide? In this step-by-step guide, I'll show you how to draw an easy vampire.
I don't like how the typical vampire looks, so I made mine look more like an elegant and mysterious anime vampire.
In this guide, I'll show you step-by-step how to sketch this vampire with accurate proportions, and then show you how to outline and color it with markers. Every step comes with plenty of detailed guiding photos so you can easily follow along with me.
Now, let's get started and draw a vampire!
I just wanted to let you know that this post contains affiliate links and any purchases made through these links will result in a small commission to me and don't cost you anything extra.
In This Guide
- Drawing supplies & colors I used
- How to sketch a vampire step-by-step
- Outlining the vampire sketch
- Coloring the vampire with markers
- FREE Halloween-themed coloring pages
- More step-by-step drawing guides
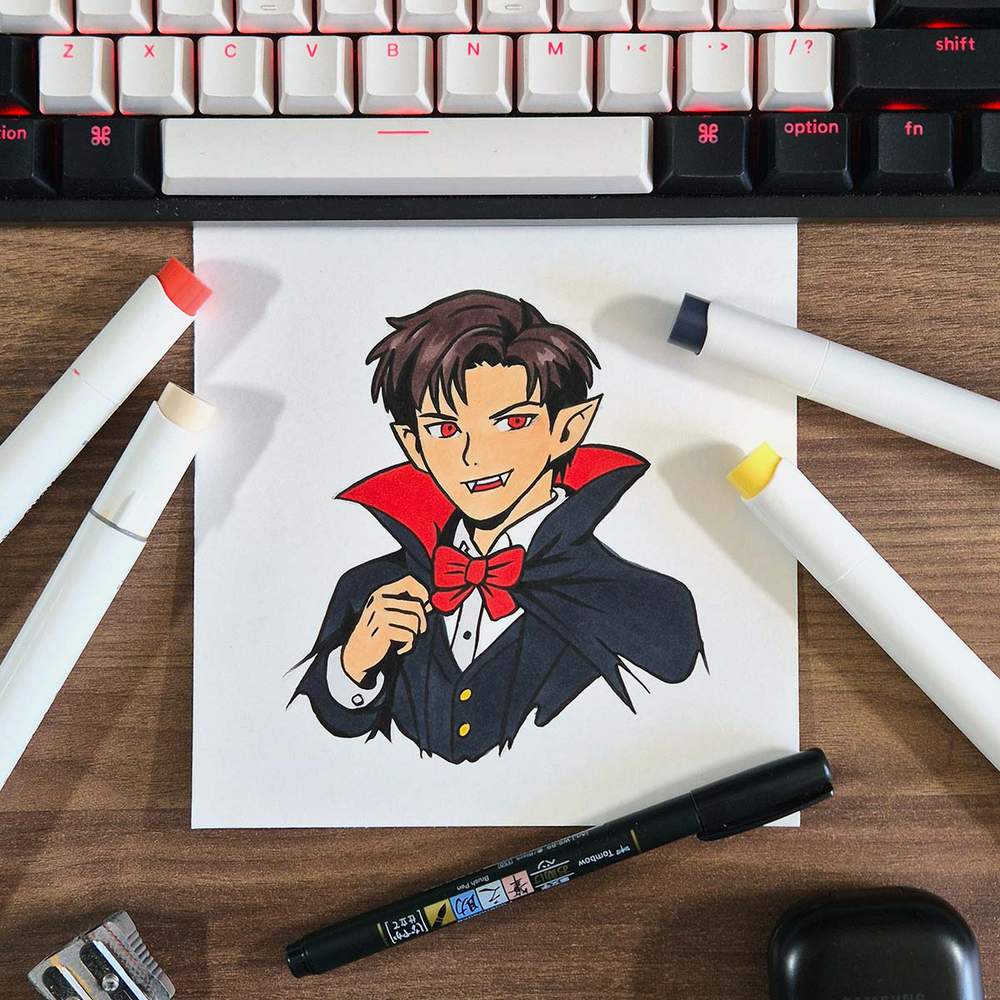
Drawing Supplies I Used
To sketch the vampire, I used a regular graphite pencil with an eraser.
And I made this drawing on Canson Illustration Manga paper, which is my favorite paper for using alcohol markers on.
To outline the vampire sketch, I used a black Tombow Fudenosuke brush pen.
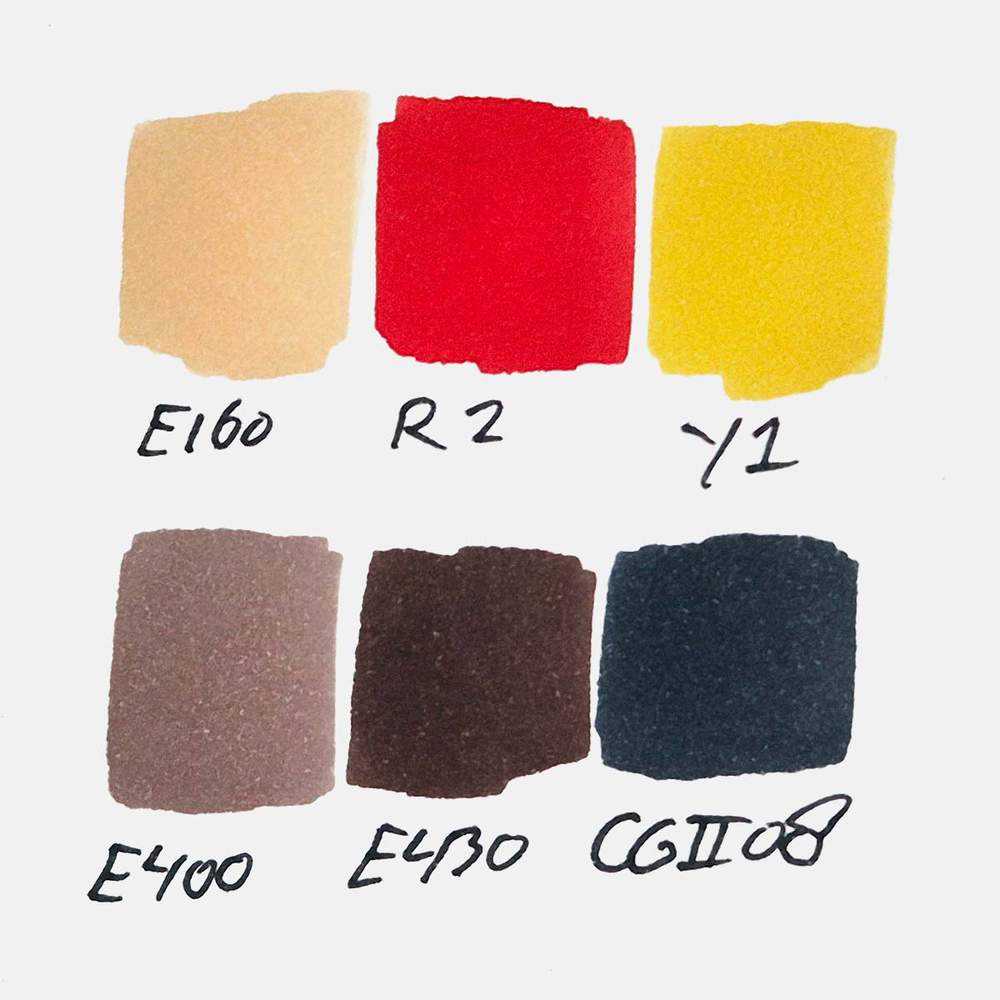
And to color this vampire, I used Ohuhu Honolulu markers. I used 6 colors in total: Soft Sun (E160), Vermillion (R2), Pastel Yellow (Y1), Cocoa Brown (E400), Pecan (E430), and Cool Grey II 8 (CGII08).
You can buy these colors separately or as part of the 320 set.
Below, I've added an image with all the color swatches so you can match your markers to the ones I used if you already own some.
How To Draw A Vampire
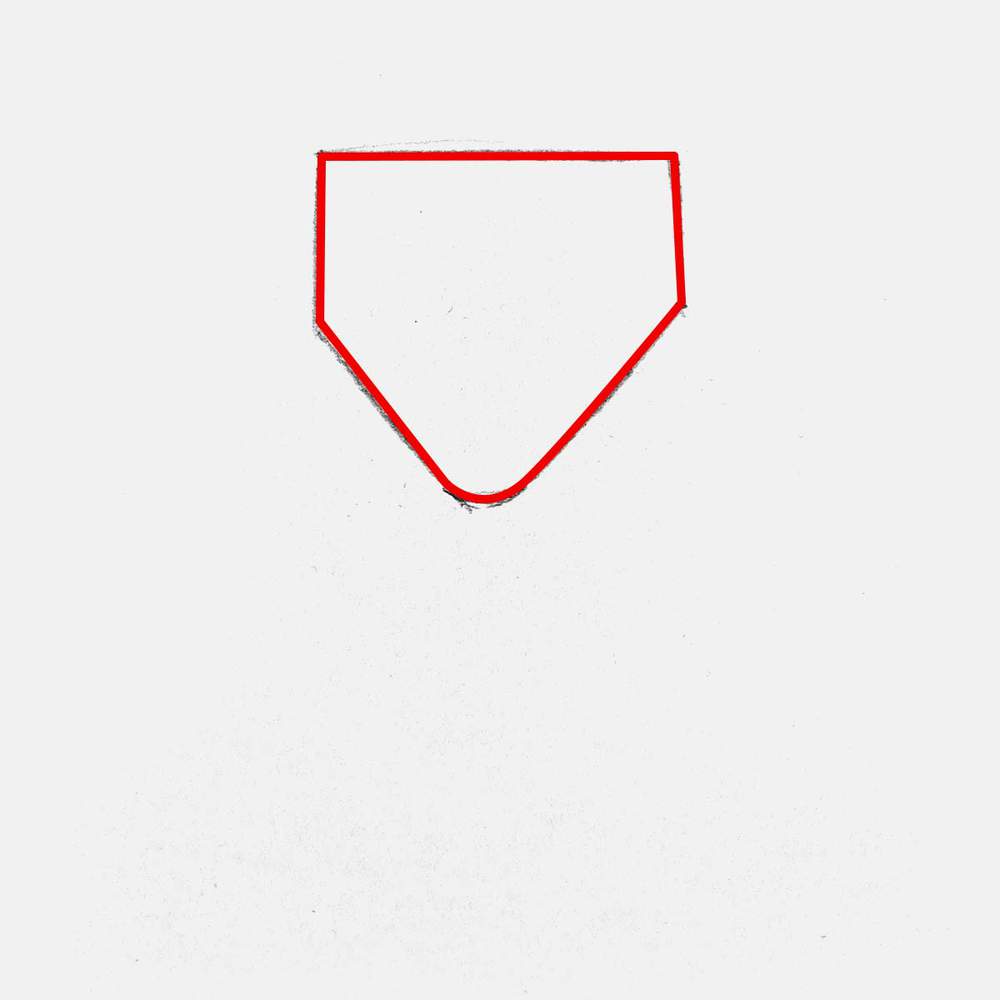
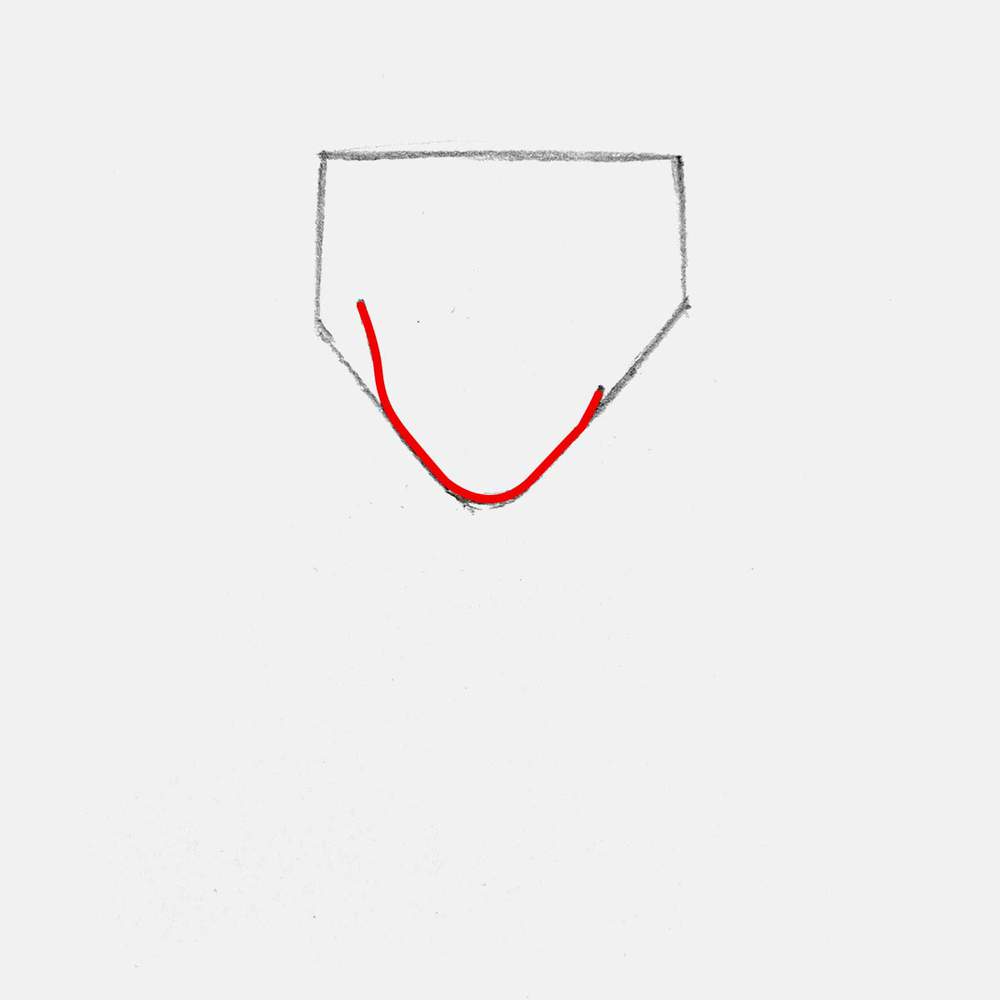
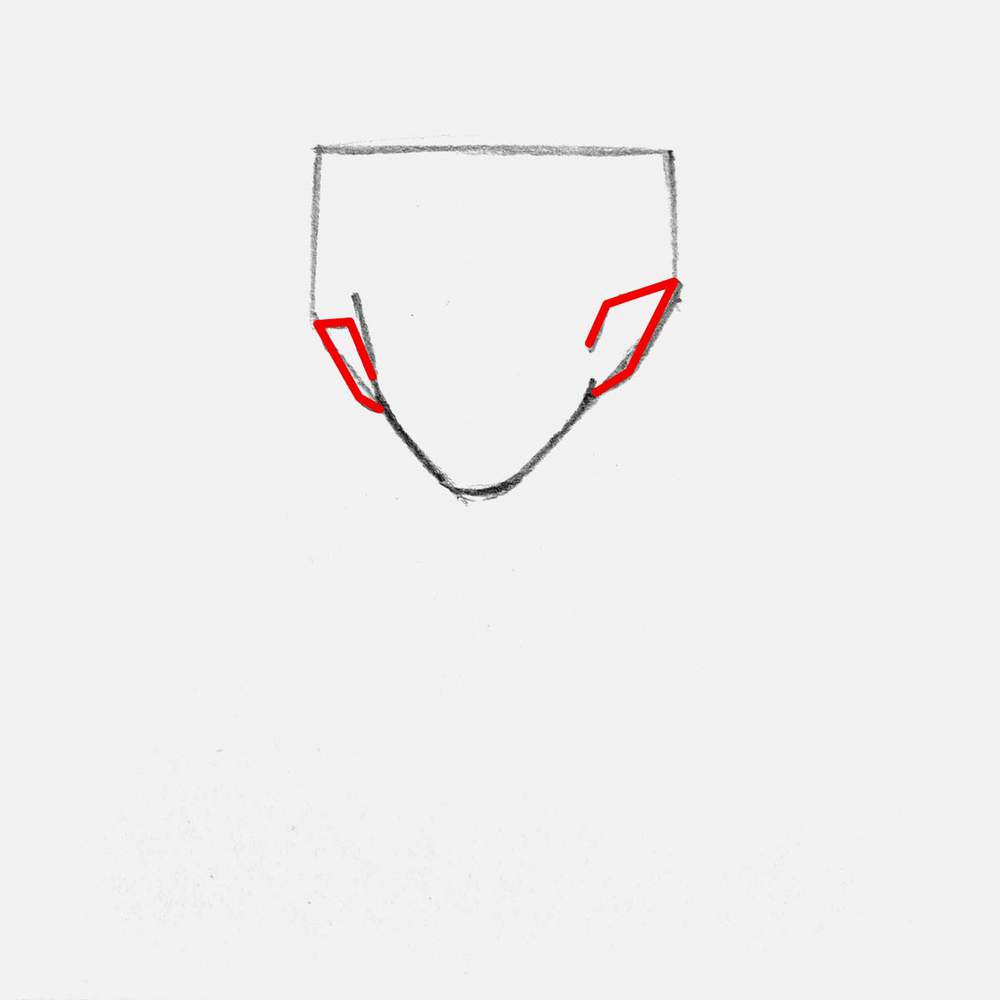
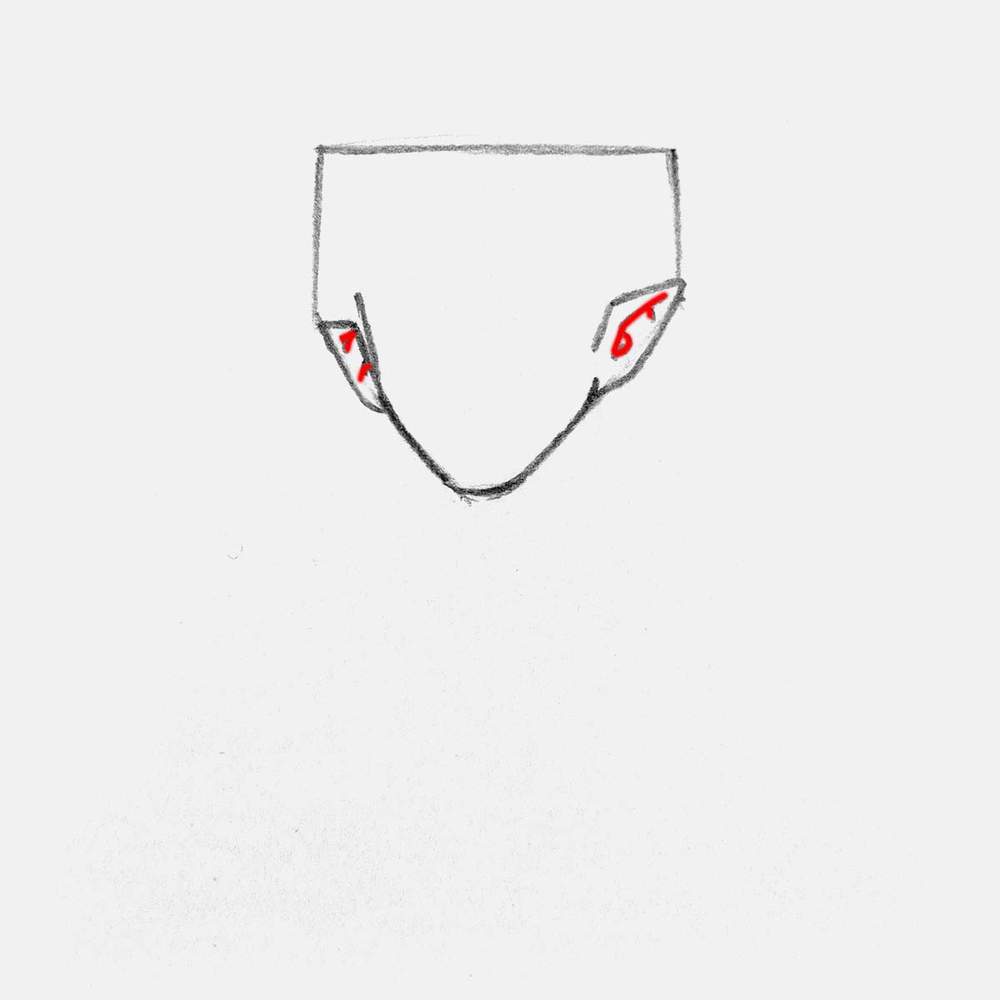
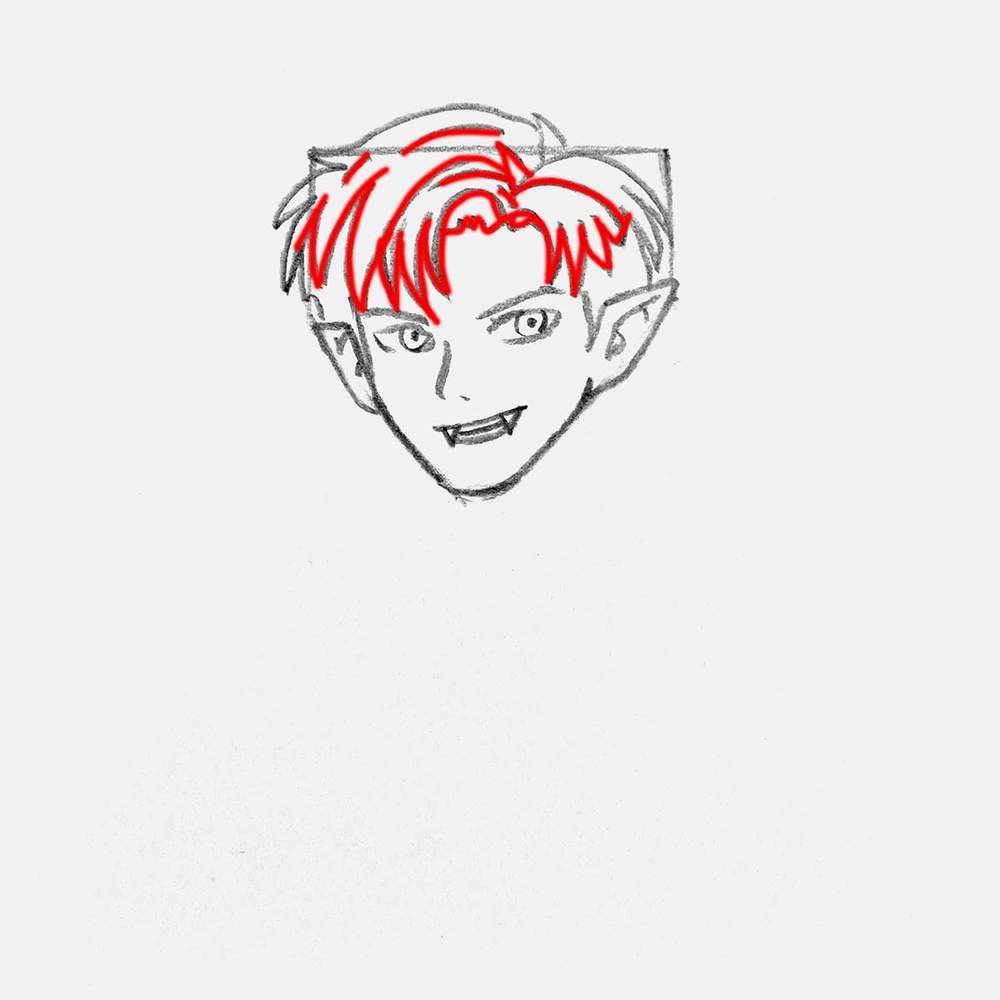
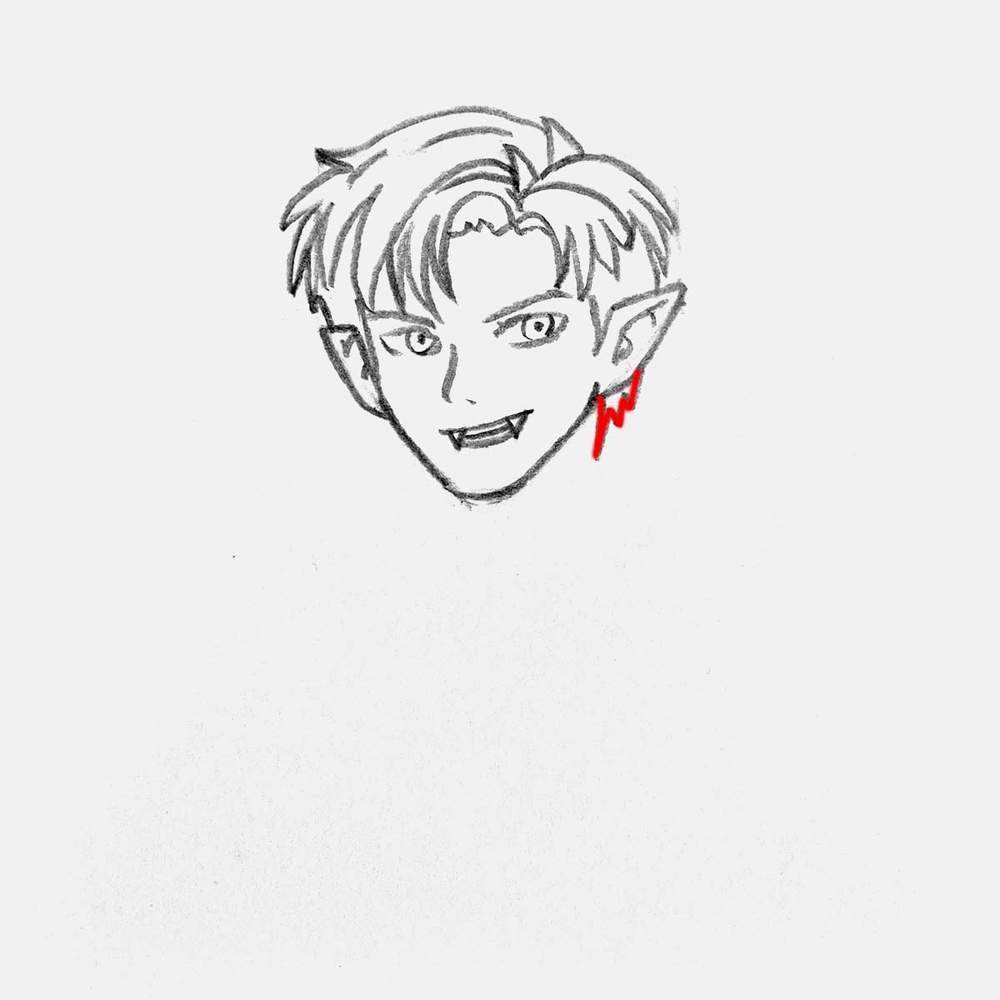
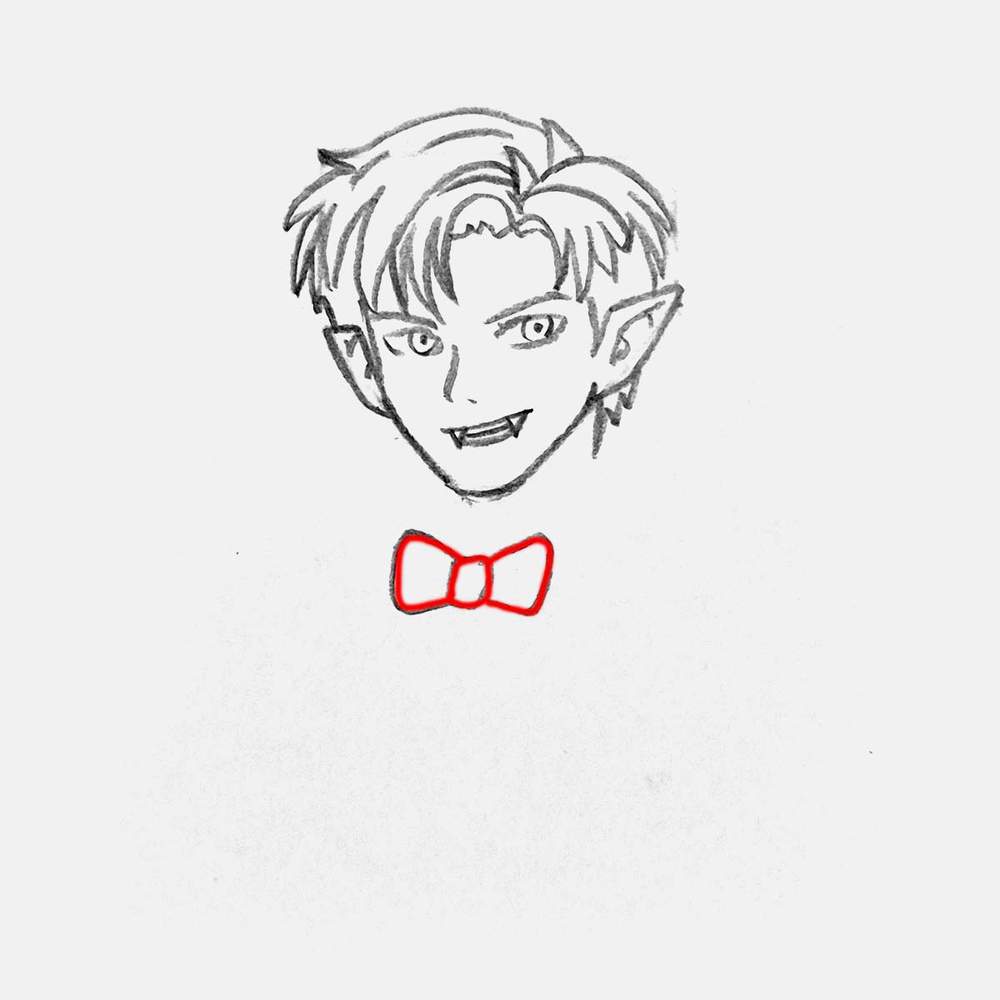
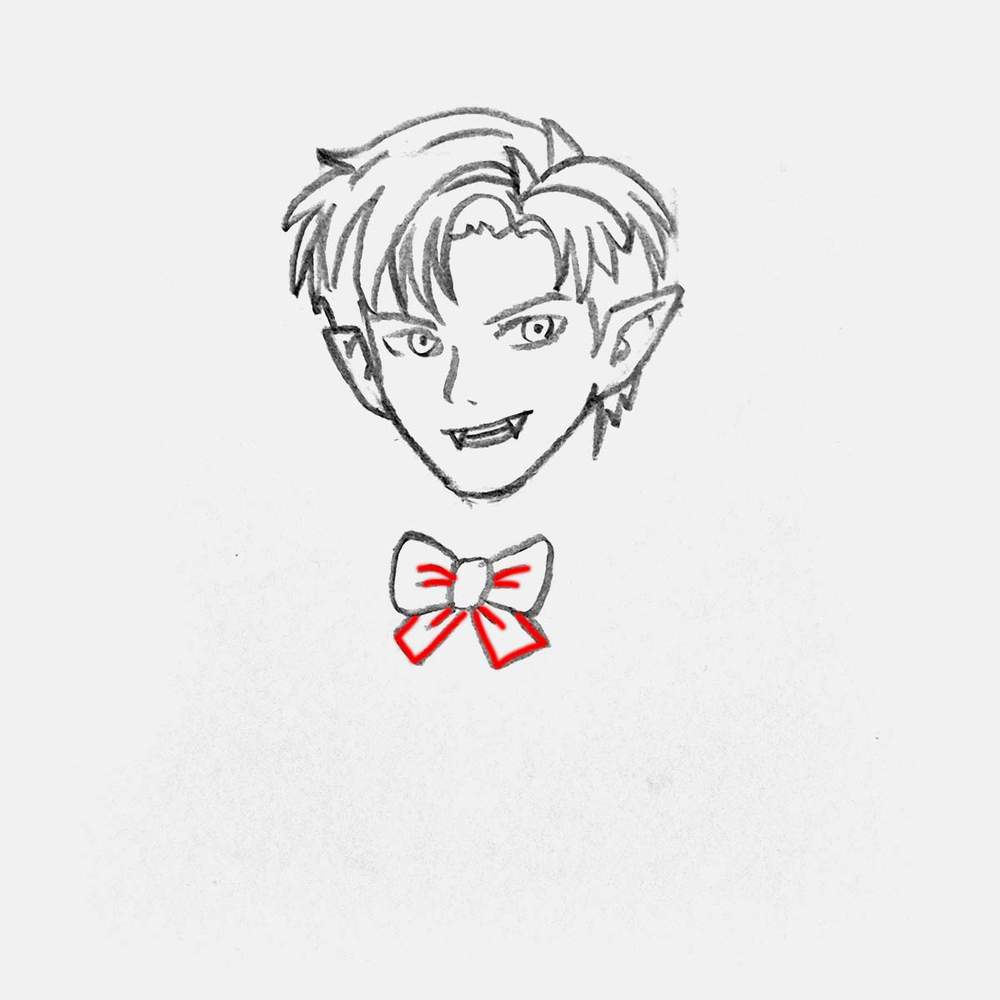
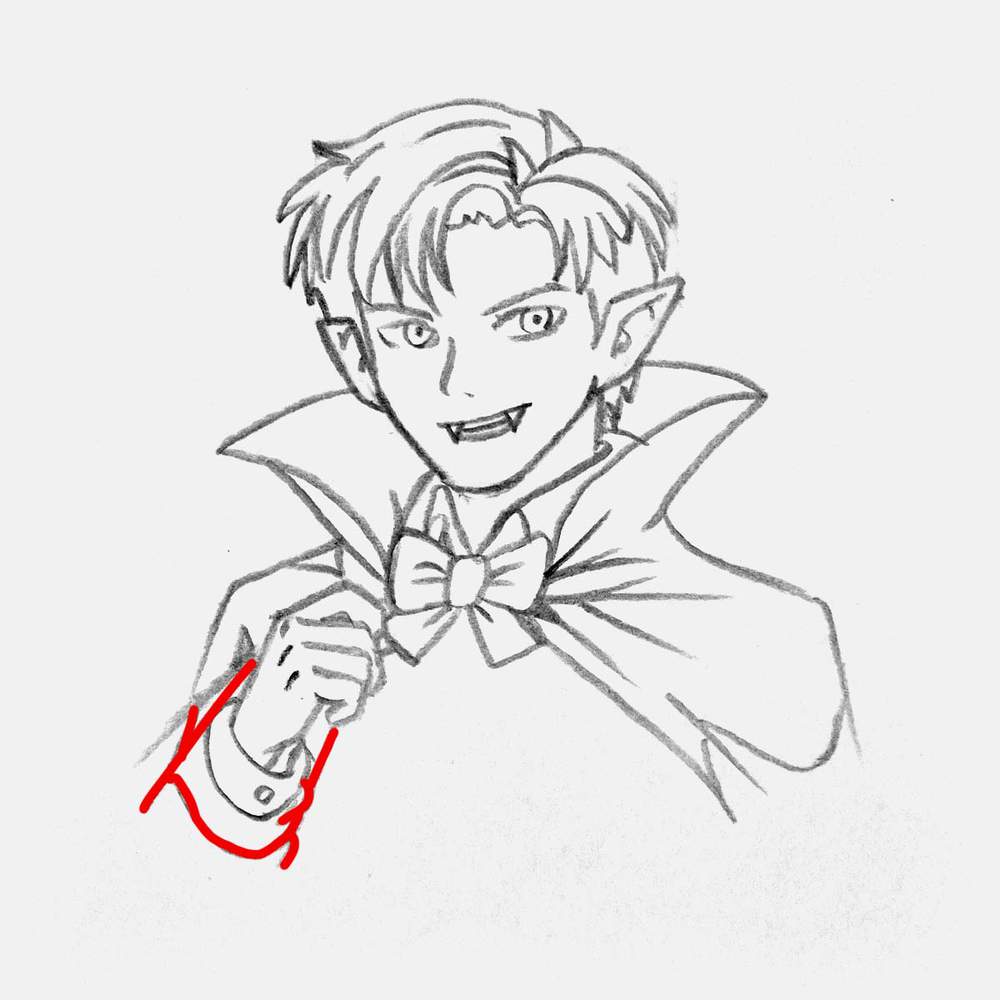
During the sketching phase of this drawing, I marked all the changes in red so you can easily see what I added in each step.
Step 1: Sketch The Basic Shape Of The Vampire's Face
To make sketching the vampire's head a bit easier, I started by drawing this diamond shape with straight sides. This will form the base of his head.
With the helping lines in place, it's a lot easier to sketch the jawline, chin, and left cheek of the vampire face. I sketched this all in one line.
Step 2: Add The Pointy Ears Of The Vampire
Next, I added the iconic pointy vampire ears. Both ears are made up of four straight lines that form a skewed rectangle.
And to complete the sketch of the vampire ears, I added some details on the inside.
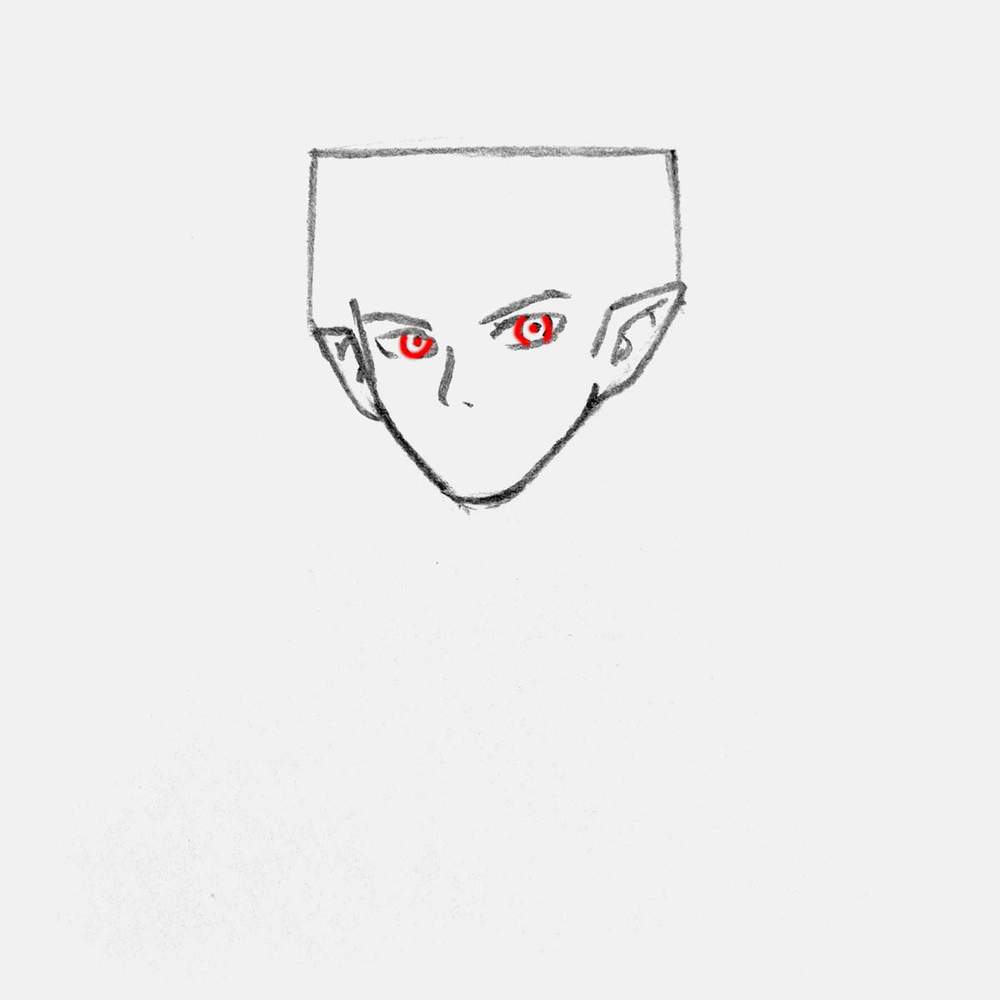
Step 3: Sketch The Vampire's Eyes & Nose
Next up are the eyes and the nose. You might think that eyes are super difficult to draw, but these vampire eyes are pretty simple.
I started by sketching the left edge of his nose and added a small dot on the bottom right.
I also drew his eyebrows. They are both fairly straight and point down towards his nose.
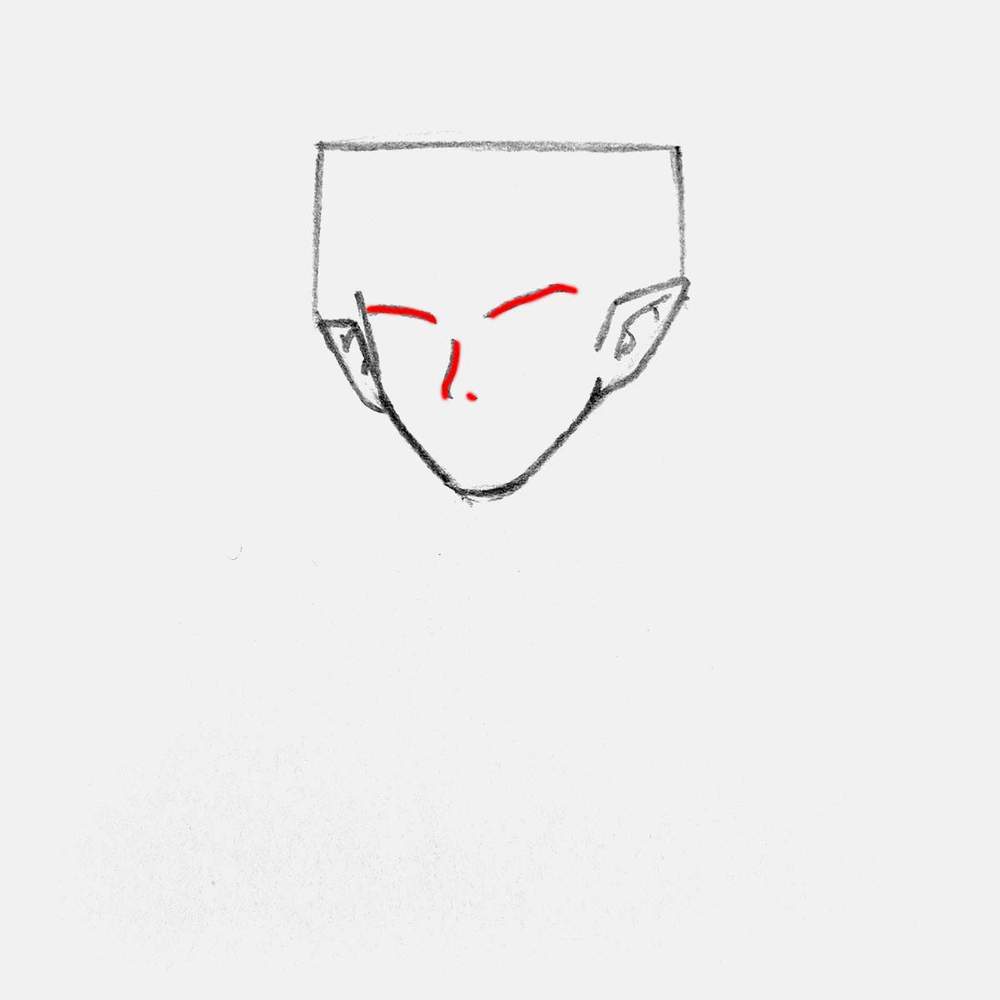
Next, I added 2 anime-style eye outlines just below his eyebrows. As you can see, I did not fully outline his eyes. That's because I don't want to add a full black outline around his eyes, as that makes them look quite odd.
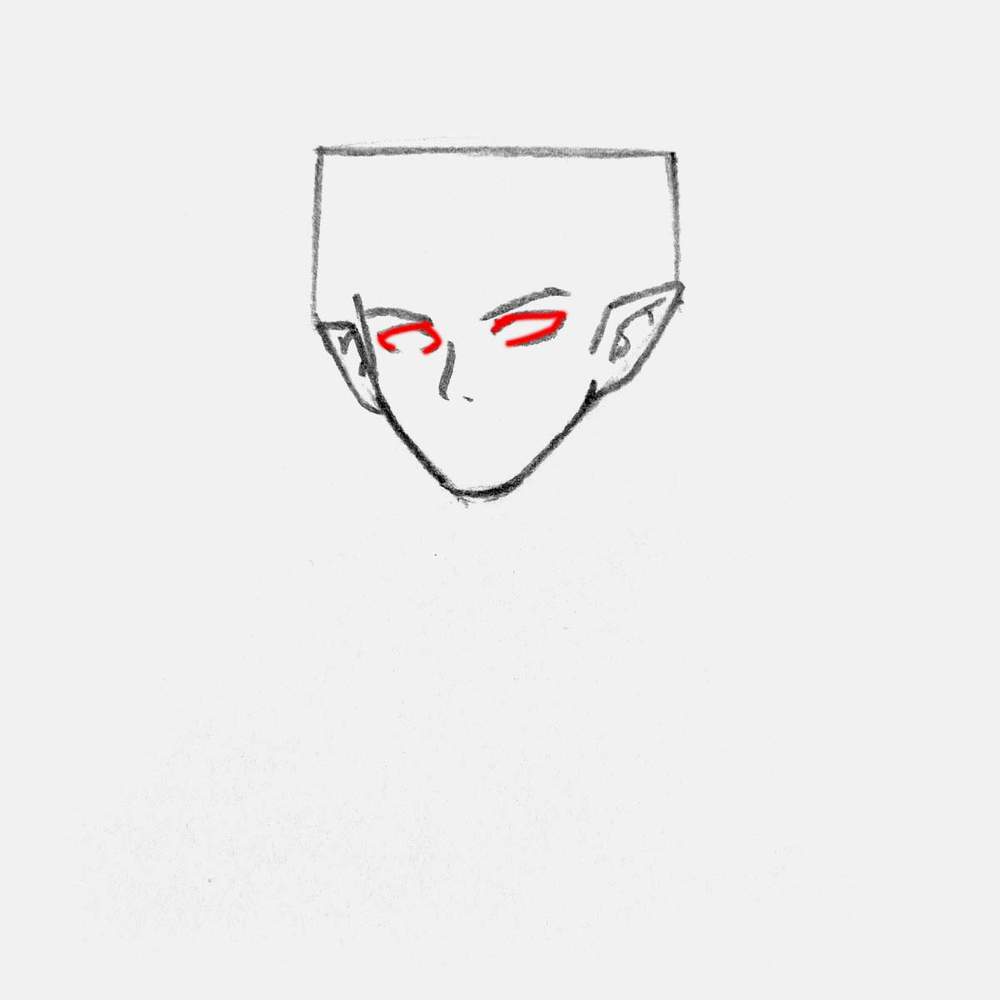
To finish his eyes, I added a small circle towards the right side of both eyes with a dot in the center. This makes the vampire look directly at you.
Step 4: Draw The Vampire Fangs
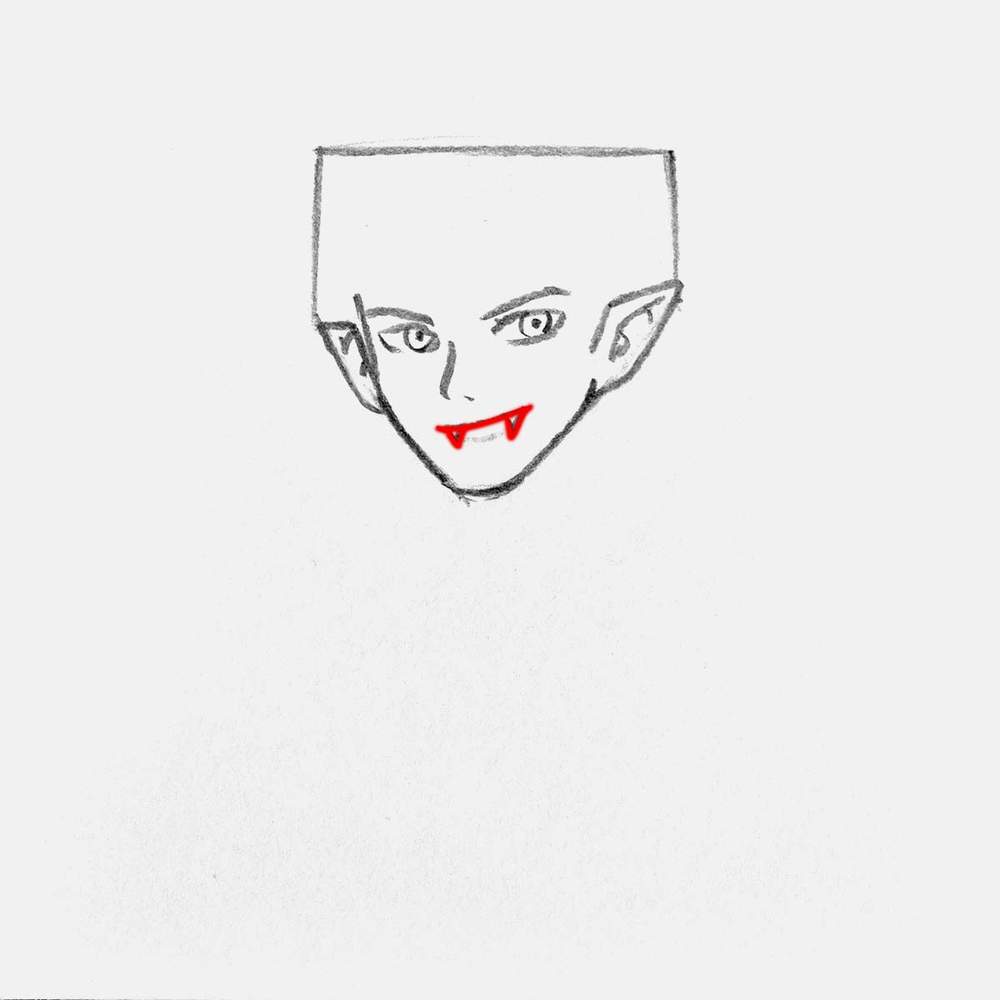
A vampire isn't a vampire if he doesn't have fangs.
To draw those pointy fangs, I first sketched the top edge of his mouth, and since he's smirking, it curves up on the right.
Then, I added one pointy triangle shape to each corner of his mouth, which will be the vampire fangs.
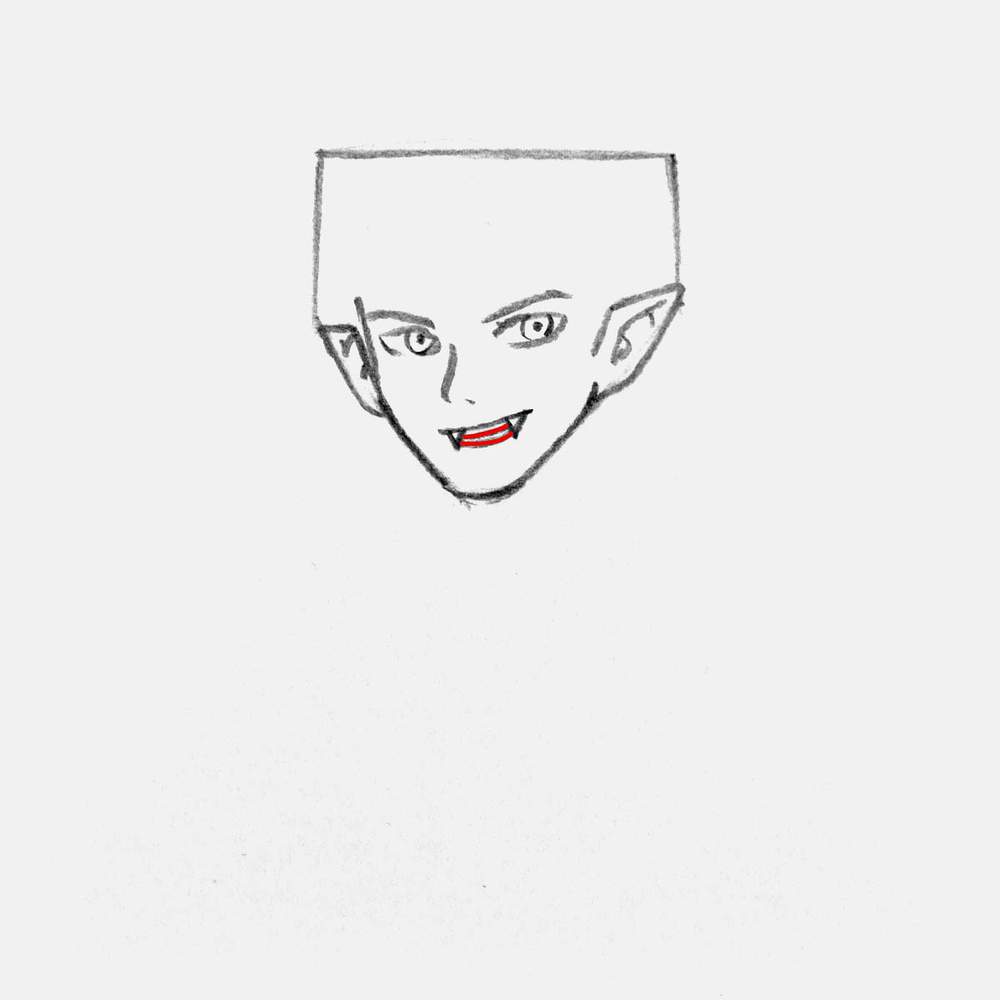
To complete the sketch of his mouth, I added 2 lines in between the fangs. One for the bottom edge of his mouth, and one for the bottom edge of his teeth.
Step 5: Sketch The Vampire's Hair
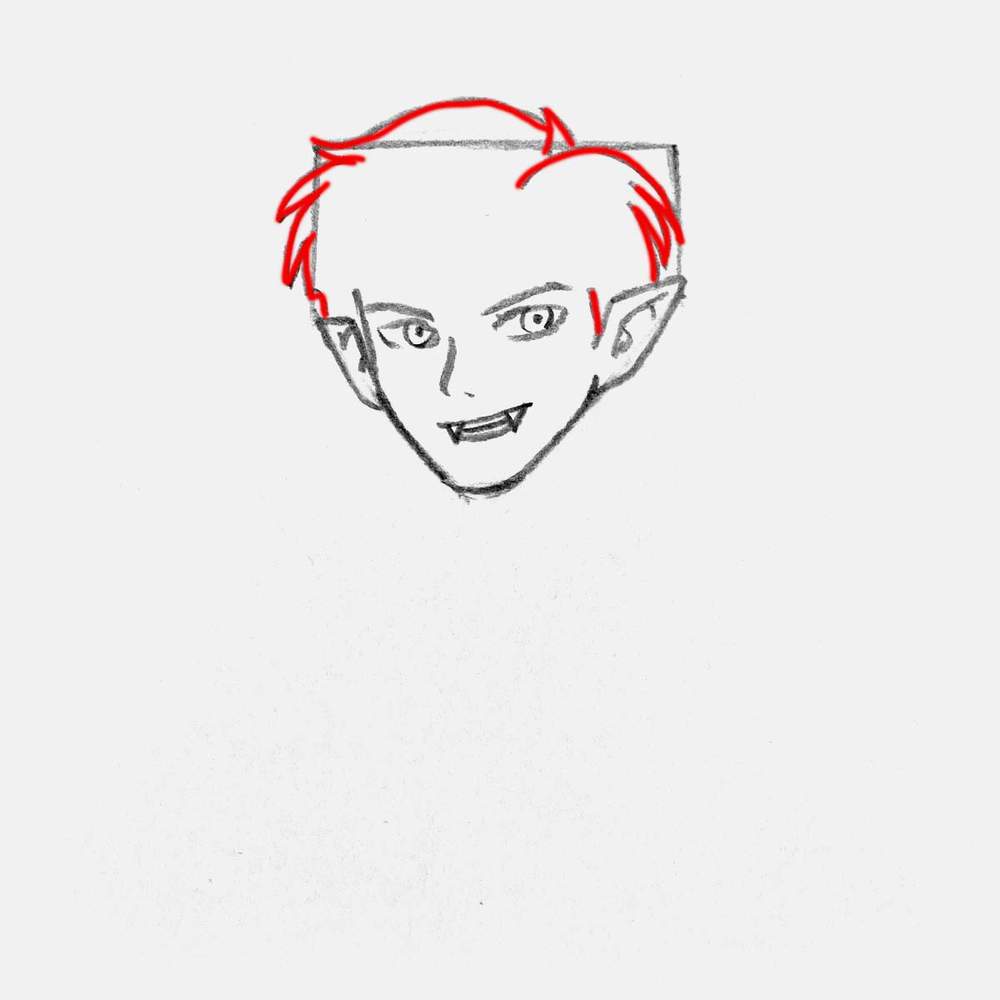
I don't like the classic slick-back hair. So I gave my vampire a more anime-inspired hairstyle with some flowing hair and a side part.
Hair can be a bit daunting to draw, but hair can also look millions of different ways. When I draw flowing hair like this, I sketched long and pointy strands of hair following the shape of his head, but pointing a bit outwards. And sometimes one points more up for the variation. And when it comes to the side part, I like to add a short strand almost pointing straight up.
And when done, it looks something like this:
Now, this is only the outline. To complete the vampire hair, I sketched his hairline and added tons more curved and pointy hair strands on his head and forehead.
To complete his hair, I added a few tiny strands below his right ear/in his neck.
The vampire's head is now all sketched and already looks pretty good if I say so myself.
Step 6: Draw The Bow Tie
Next, we're going to work on the clothing, starting with his bow tie as it's in front of the rest of his clothes.
I sketched the bow tie a bit below his chin, starting with a small squared-off circle in the center (the knot) and then adding the flat loops on either side.
And to finish the bow tie, I added the square tails and sketched some wrinkles on the loops and the tails.
Step 7: Sketch The Vampire's High-Collared Cape
With the bow tie now in place, we can start drawing the iconic high-collared vampire cape.
I sketched a curved triangle shape on either side of his neck (they kinda look like dolphin fins), and then added a straight line to mark the side of the high collar.
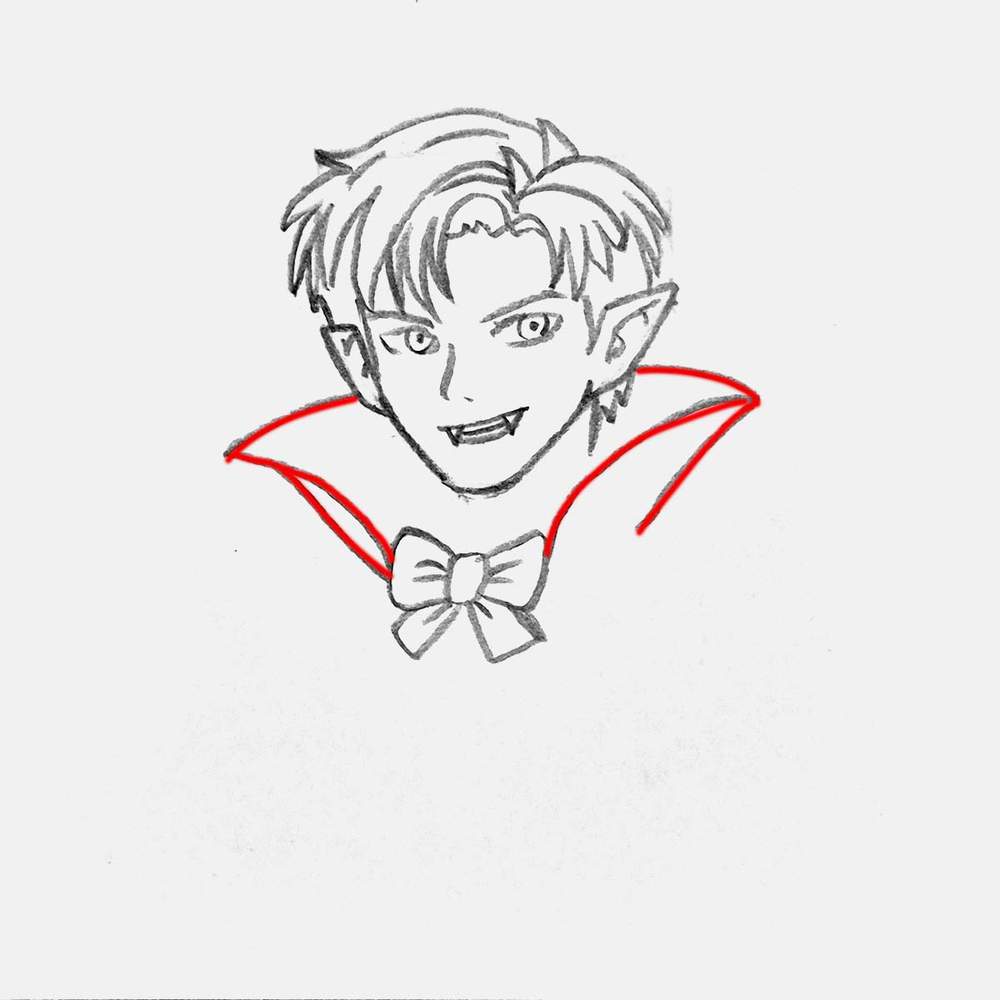
Next, I added the shoulders of the vampire and the front edge of the cape on the right side. (On the left side, his hand is covering it.)
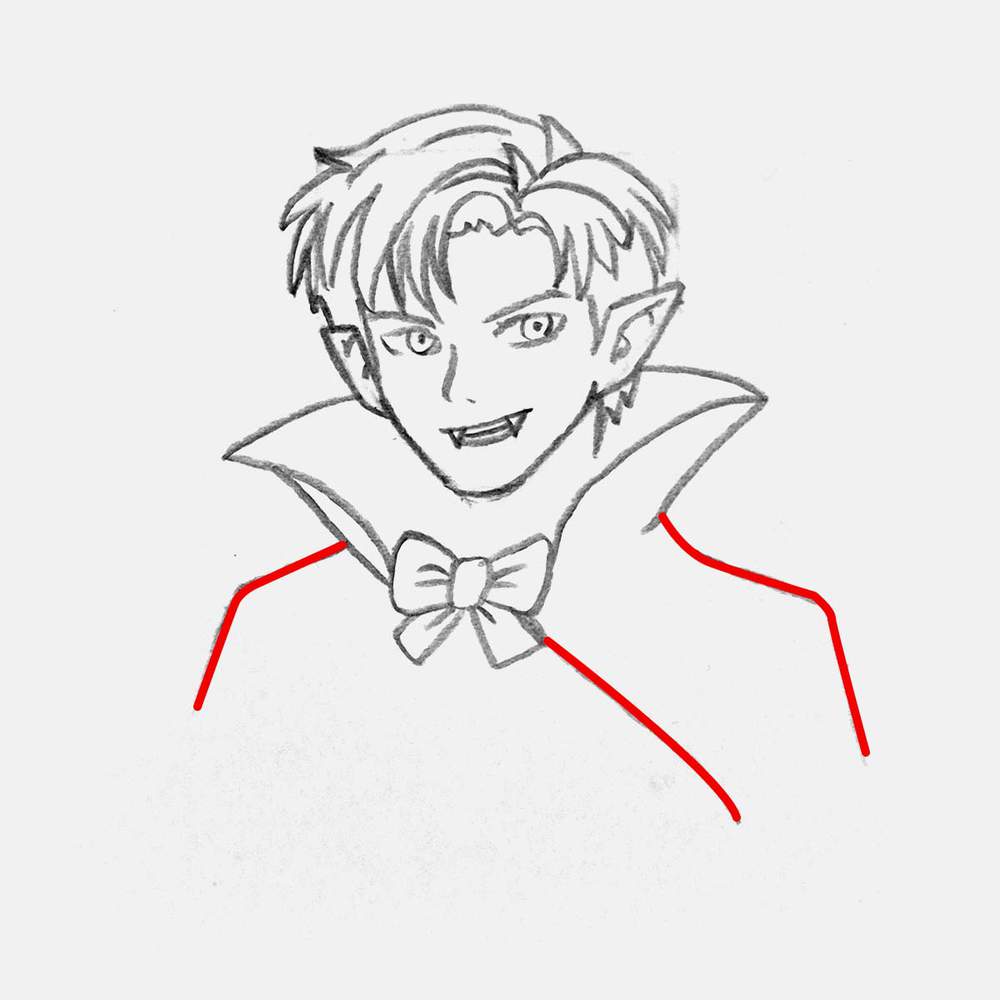
While sketching the cloak, I also sketched the collar of his white blouse. I first sketched a sharp-ish 3 shape on top of his bow tie, and then I sketched the top edge of his collar on the right side.
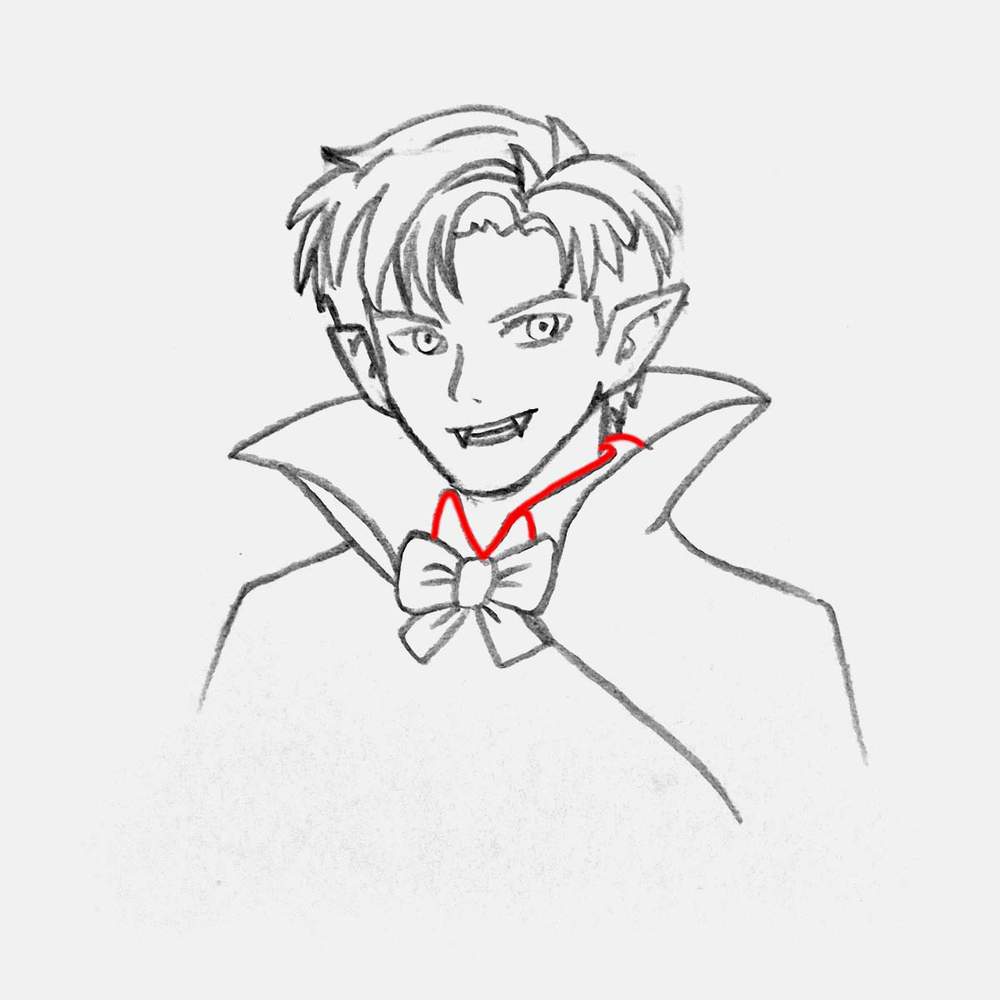
Then, I added some small wrinkles to the inside of the left side of that 3 shape, and I drew some wrinkles on the inside of the collar of the cape.
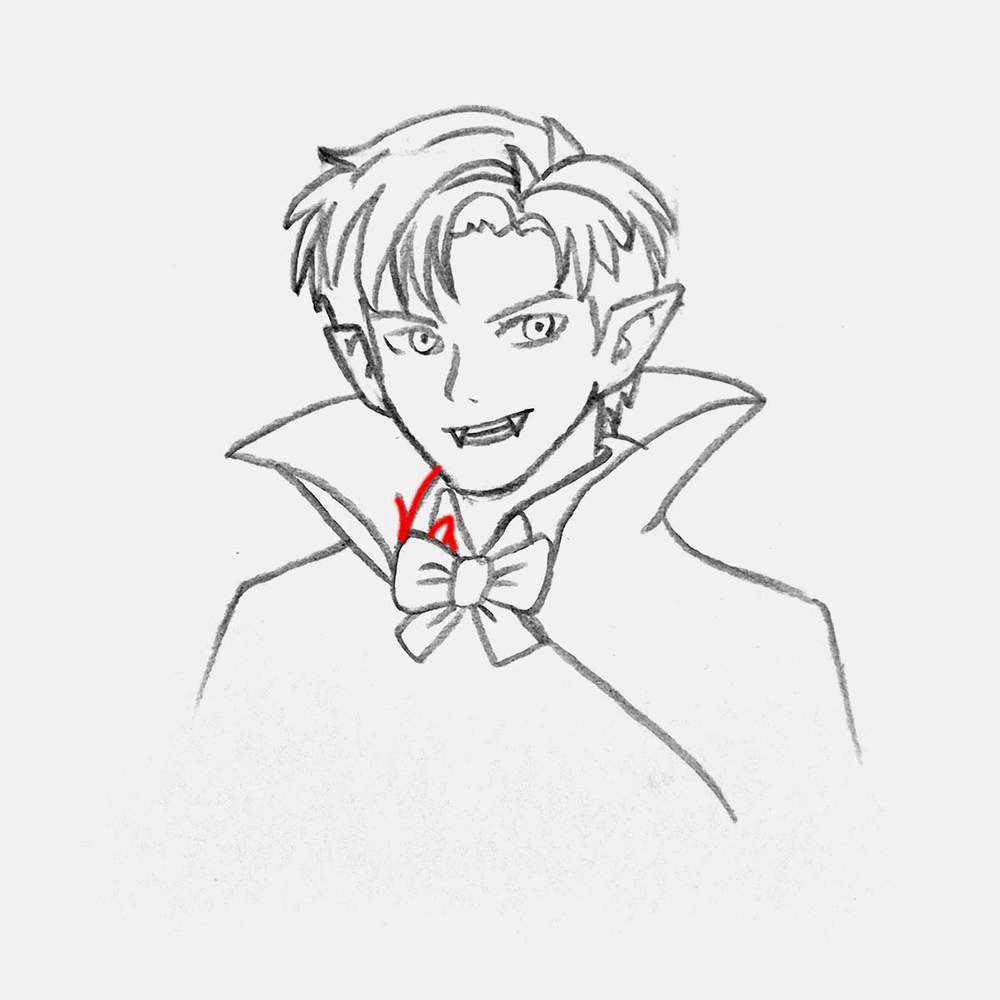
Lastly, I added all these wrinkles on the cape. The wrinkles mostly point outward from parts where it is tied, like around the bow tie, but also around joints, like his shoulders/arm pits.
To make wrinkles look good, I find it best to make them organically shaped and not all perfectly straight and equal length. Make them all look different and make them branch every now and then. This will make your clothing wrinkles look a lot better.
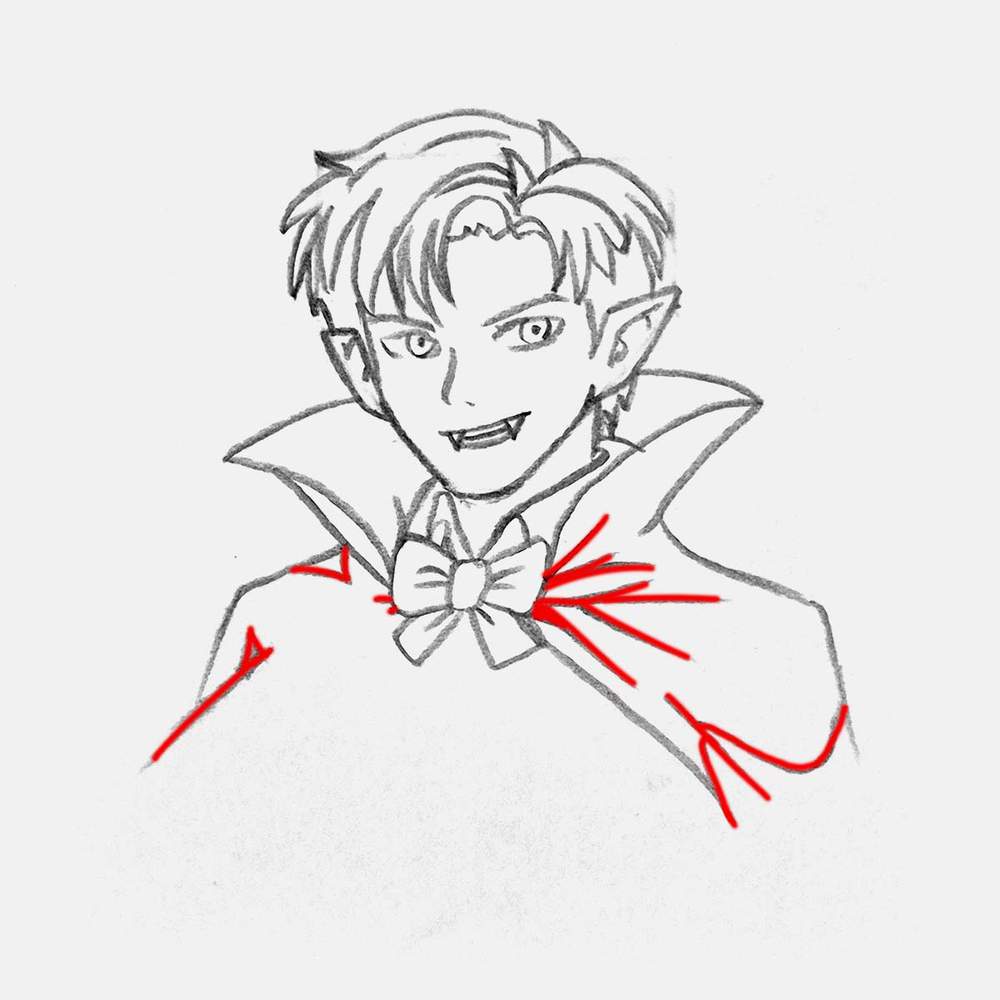
Step 8: Draw The Hand & Arm Of The Vampire
As you might have noticed, I only sketched the cape on the right side and not on the left. That's because the vampire I'm drawing is elegant and is holding the left edge of the cape with his hand.
Hands are notoriously difficult to draw, but I don't think you should be scared of them. To draw this vampire hand, I first marked out the basic shape with this box shape. The top part will become his fingers, and the bottom part is his hand and wrist.
Starting with such a box shape makes sketching his fingers next a lot easier.
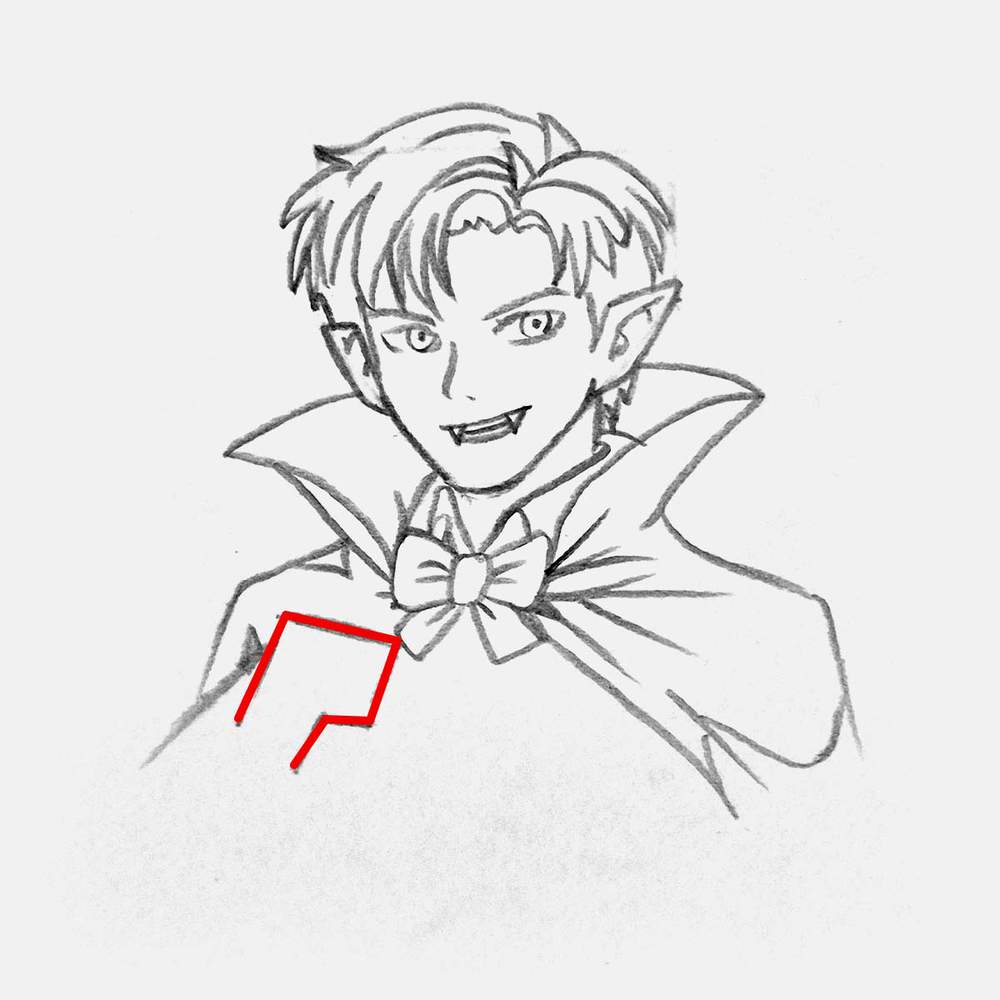
Now it's time to sketch the fingers into/onto this box shape.
I added his index finger on top of the box shape. The top edge of the box shape is also the top of his middle finger. Then, I added 2 lines inside the box which are the top edges of his ring finger and pinky. Each finger also overlaps over the next one on the right side, if that makes sense. And for his pinky, I also added the inner edges.
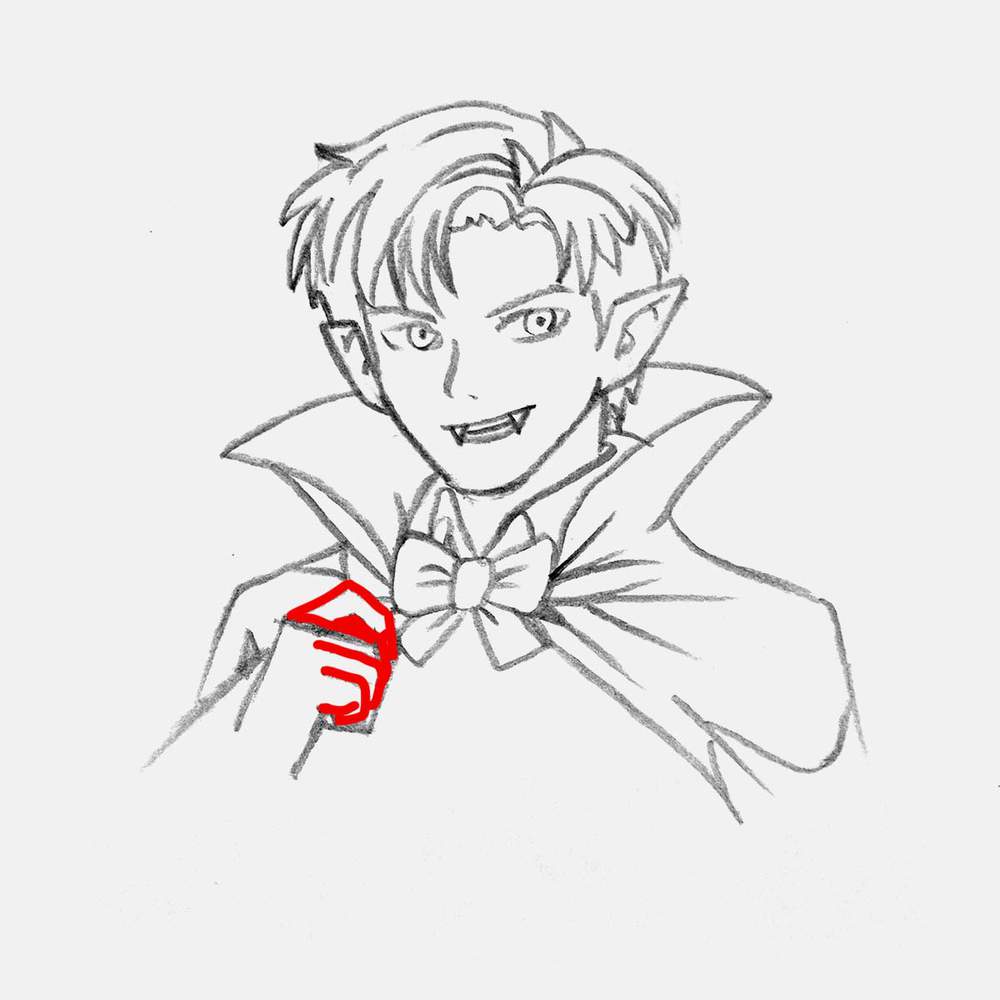
It might be a little hard to see with the red lines, so here it is with only the sketch and the box shape erased:
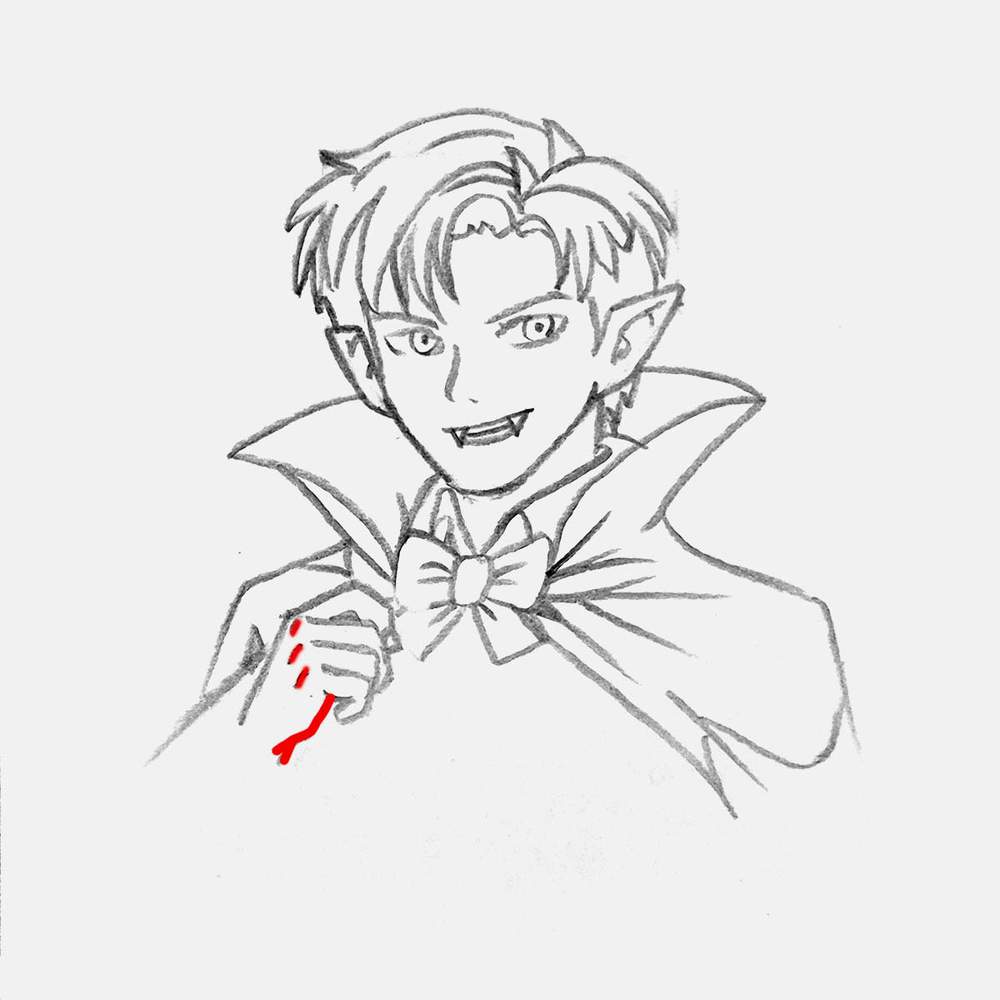
In the image above, I also added 3 short lines for his knuckles, and I added the shape of his hand and wrist. And yes, I did accidentally erase part of his bow tie and didn't notice until the next step...
After that, I added the sleeve, starting with the sleeve of his blouse with a small button.
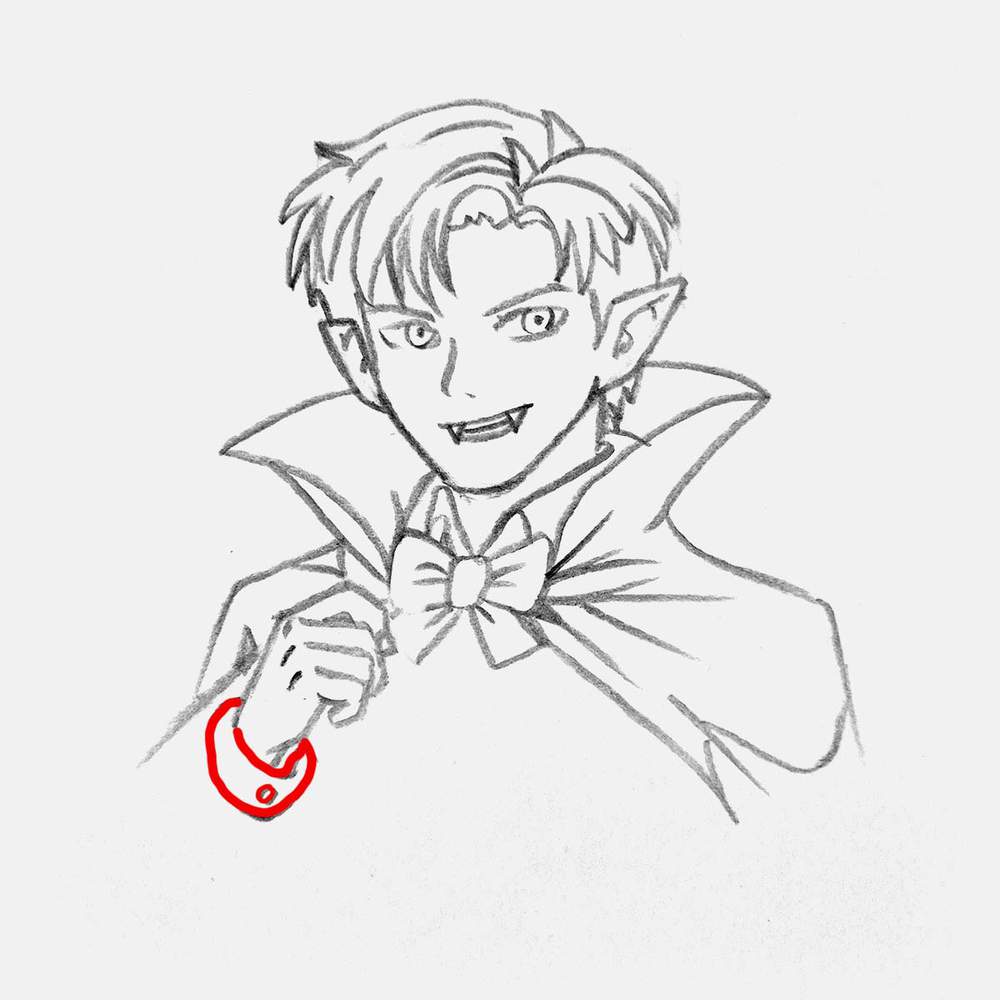
And to complete his arm, I added the sides with some wrinkles and this wavy line at the bottom.
Step 9: Sketch The Vampire Waistcoat & Blouse
The sketch of the vampire is now almost done! Only the waistcoat and the rest of his blouse are left!
To sketch his waistcoat, I added 2 pairs of straight lines almost connecting into a point.
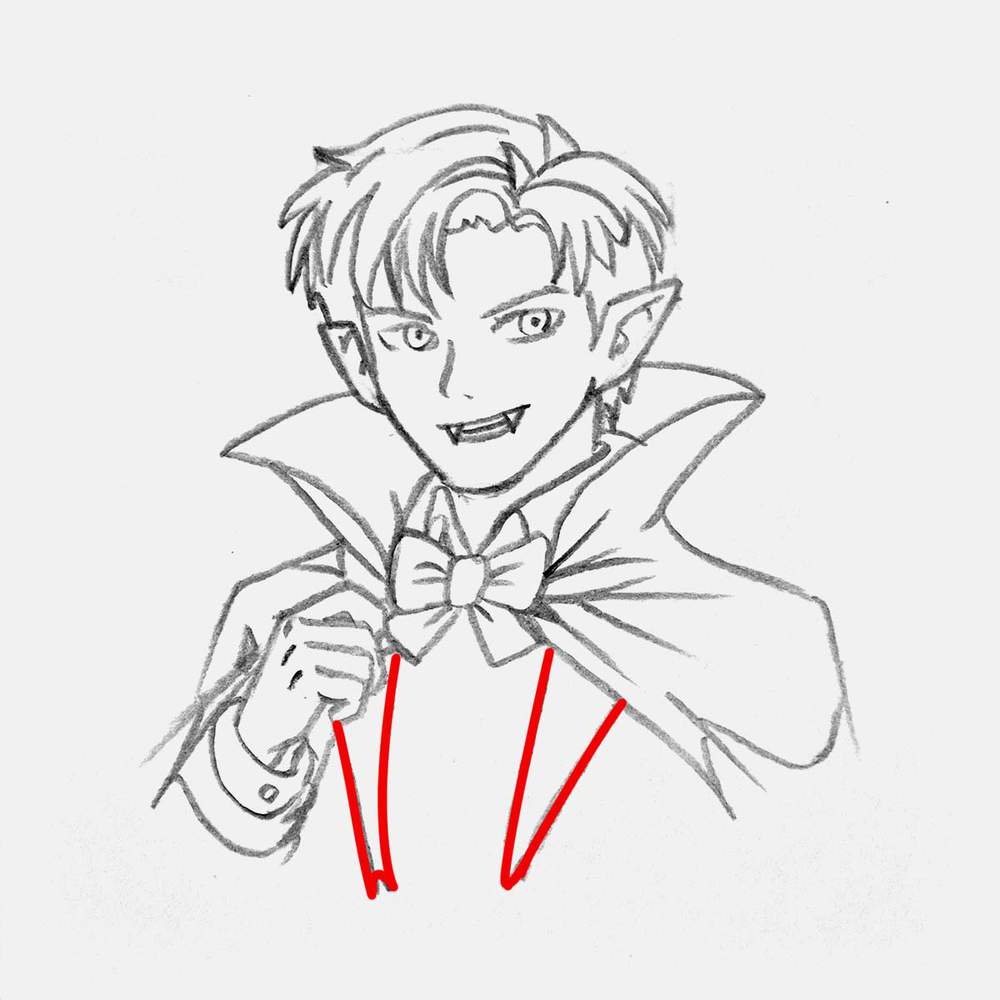
Then, I added some lines to mark the bottom edge of our vampire drawing, and I marked out a shadow on the left next to his arm.
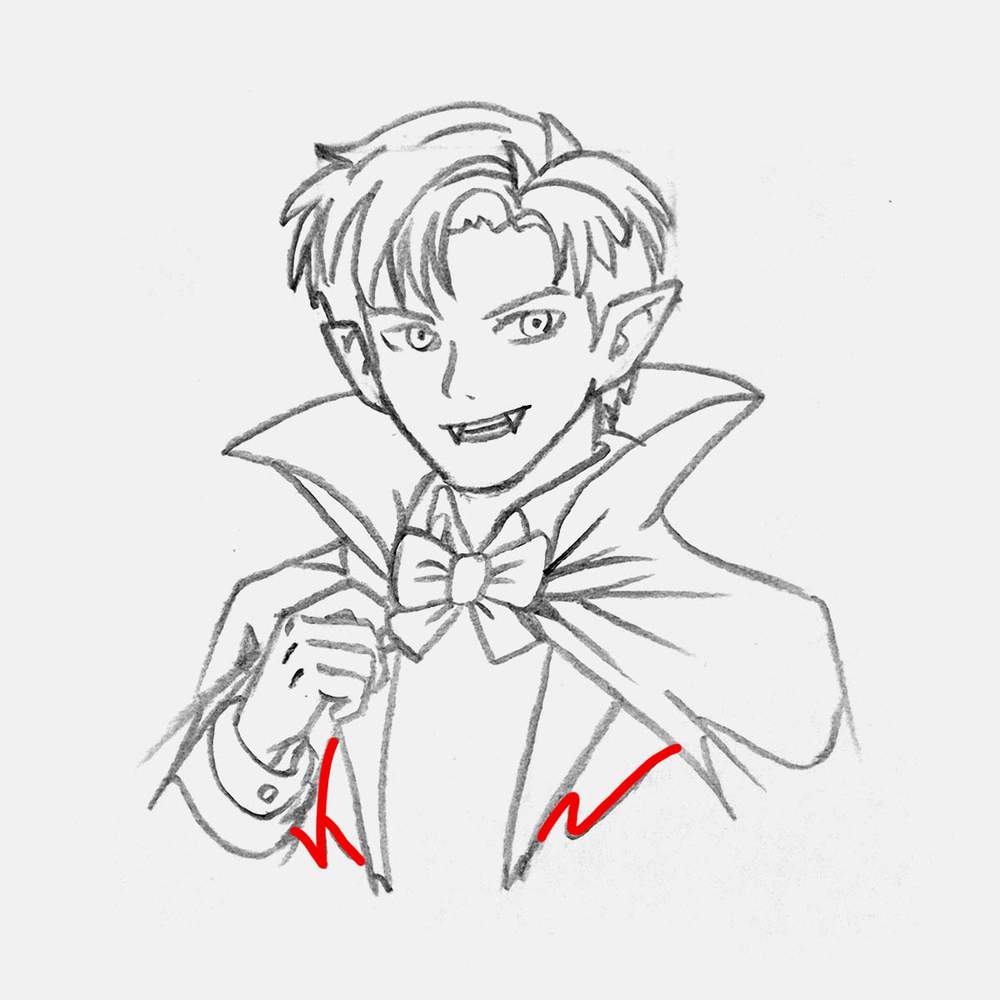
Next, I added the overlapping parts of the waistcoat in the middle.
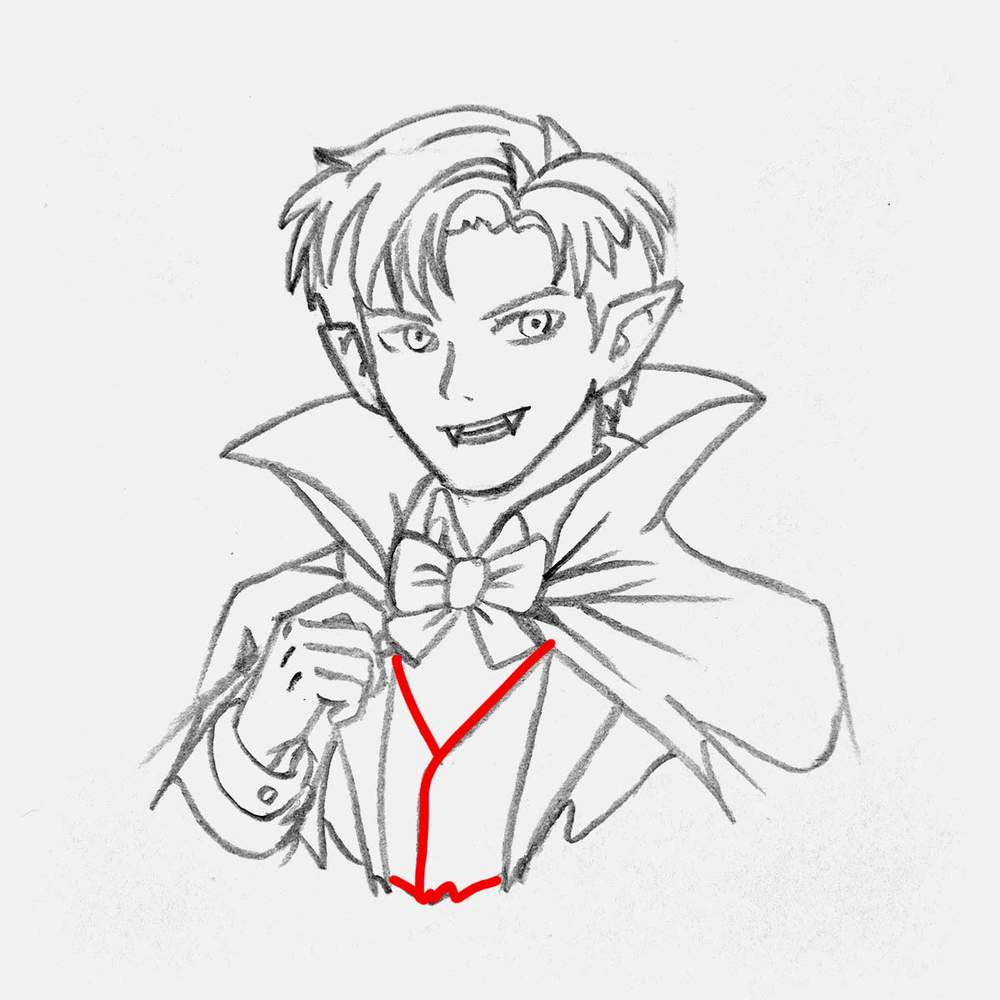
And lastly, I added 2 buttons on the vampire's waistcoat and 2 lines, and I sketched 2 straight lines on his blouse just above the waistcoat and added a button on that as well.
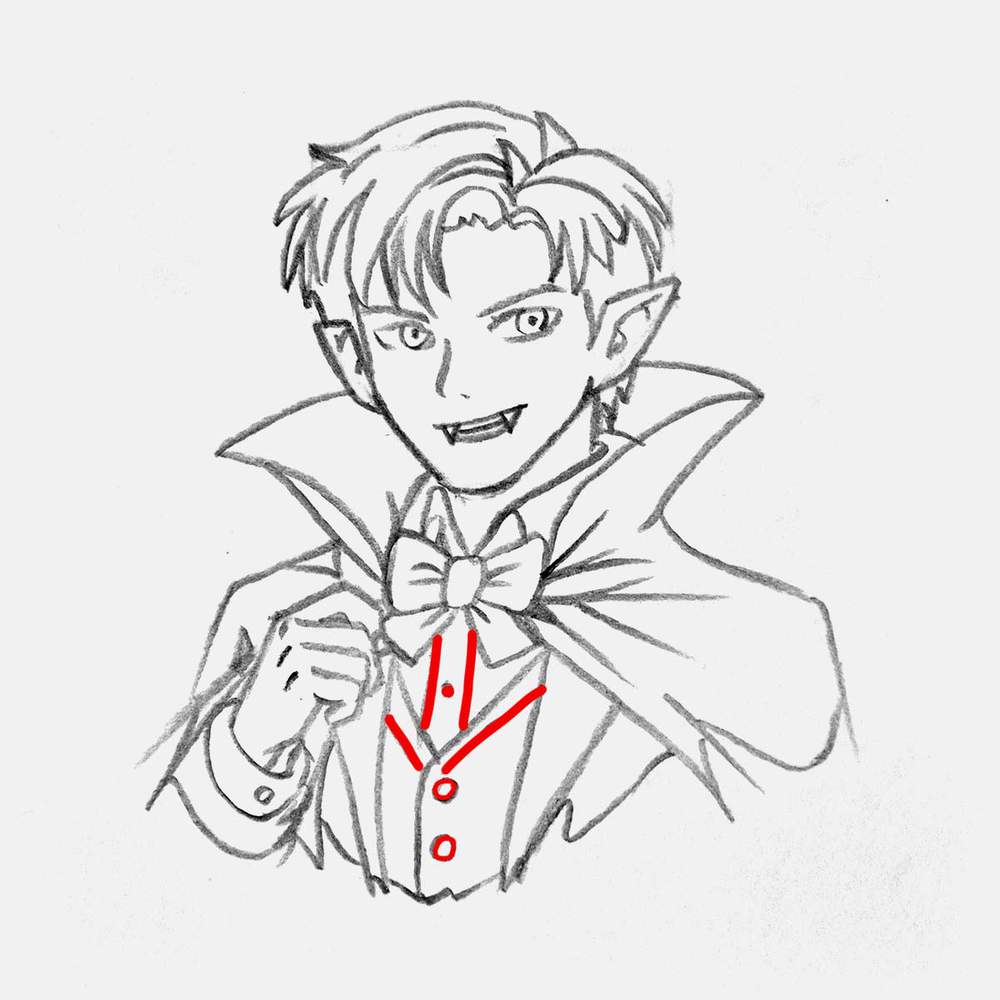
And that's the vampire sketch fully done!
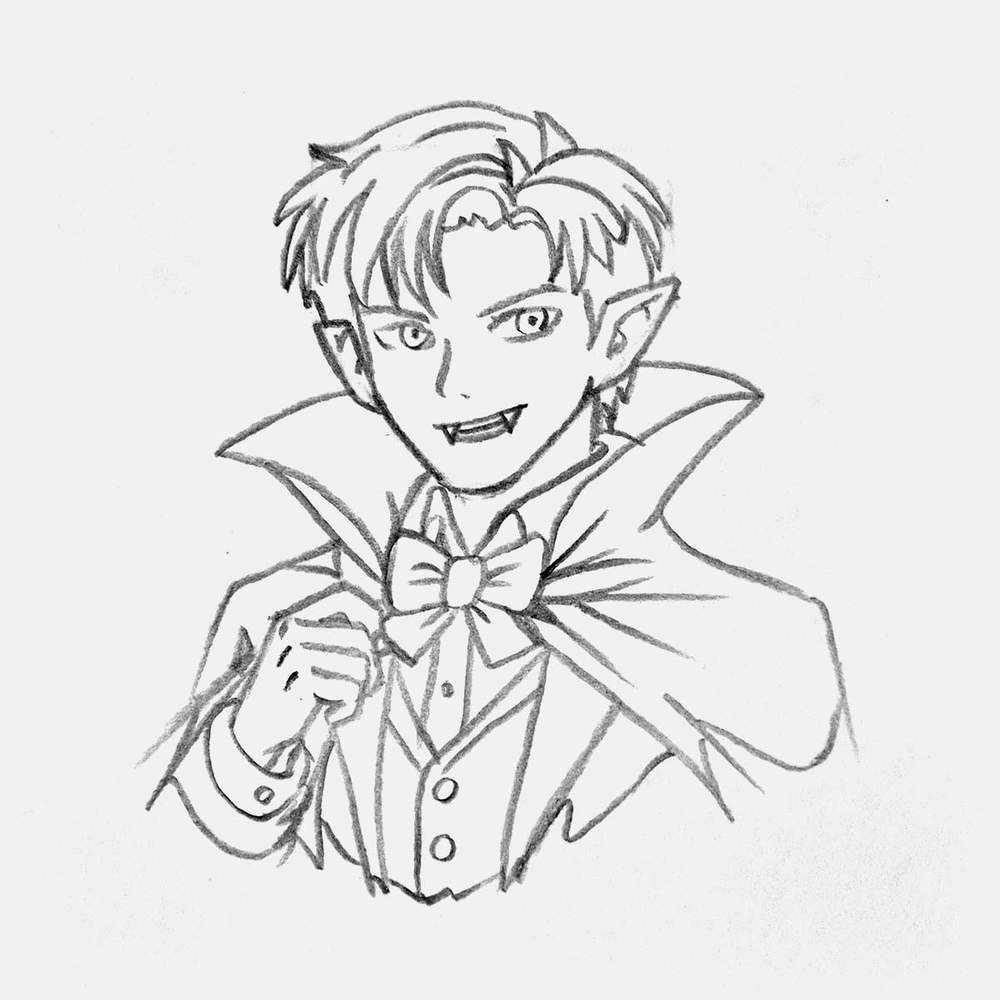
I'm so excited to start coloring the vampire! But first we need to prep it.
Step 10: Outline The Vampire Sketch With A Black Pen
To make the coloring part of this vampire drawing a lot easier, and to already add some details and shadows, I outlined this drawing using a black brush pen.
I like using a brush pen as it makes the outline look a lot more dynamic with the varying width. You can make more prominent lines wider and keep the tiny ones narrow. Plus, you don't need a black marker to color in the larger parts. You can just use the brush pen.
To outline my drawings, I like to use the Tombow Fudenosuke brush pen. It works really well, but you do need to watch out when using it in combination with alcohol markers, as they can smudge the black ink. But if you're careful, it's not a problem.
Before I started outlining, I lightened the sketch with my eraser.
The vampire drawing already looks so good with the outline fully done! I did mess up his right eye a bit. I made the edge on the right way too thick, but it is what it is, I guess.
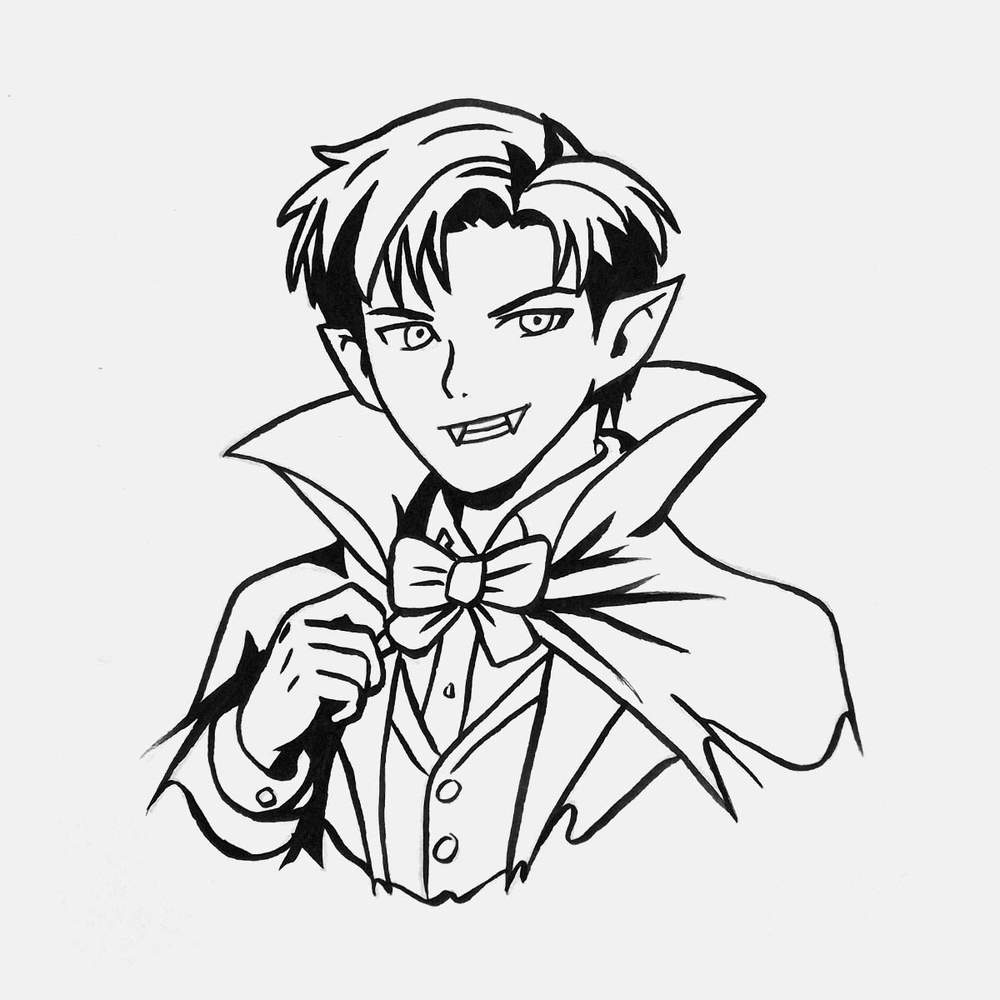
Now it's time for the coloring!
To color my drawings, I love using my Ohuhu Honolulu markers (yes, I do have all 320), and this drawing is no different.
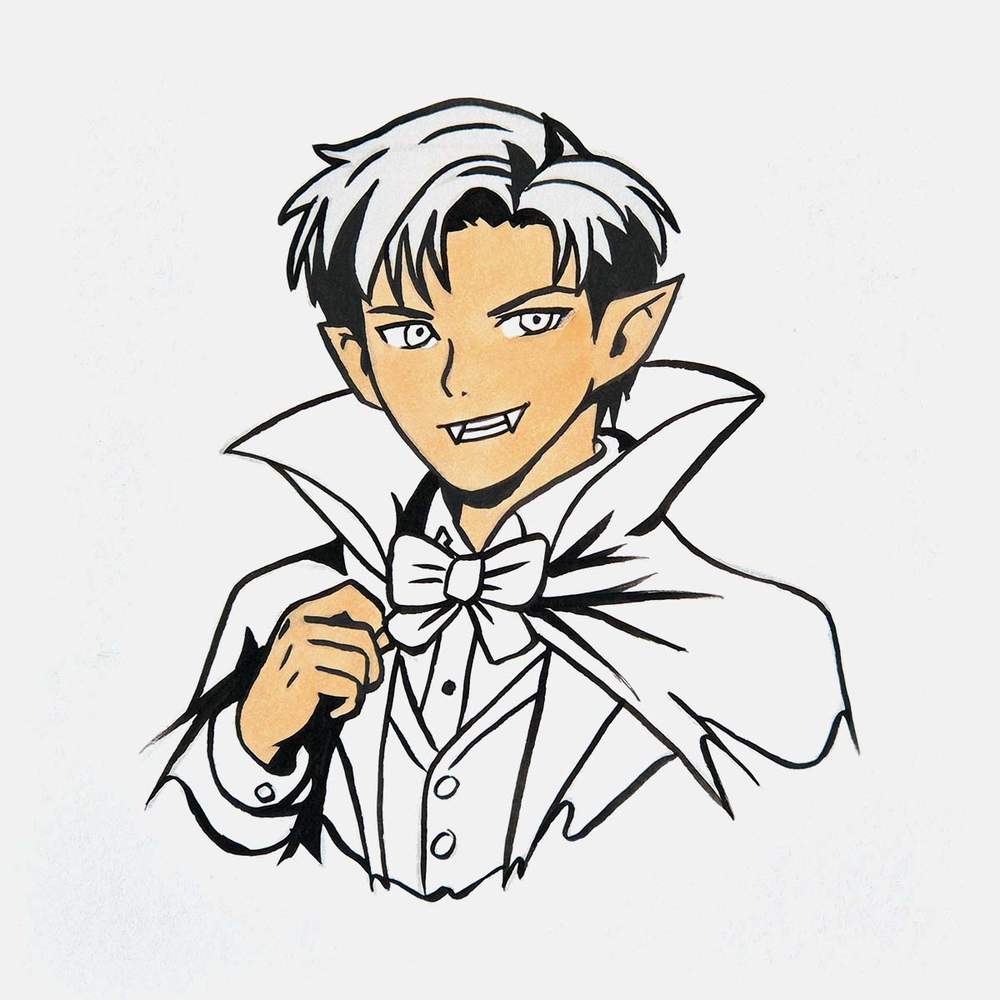
Step 11: Color The Pale Skin Of The Vampire
The first thing I colored of the vampire was his pale skin. To color the pale vampire skin, I used Soft Sun (E160). Honestly, I would've loved a marker that was a bit lighter, but this one will do.
With this skin tone, I colored the vampire's face, neck, and hand.
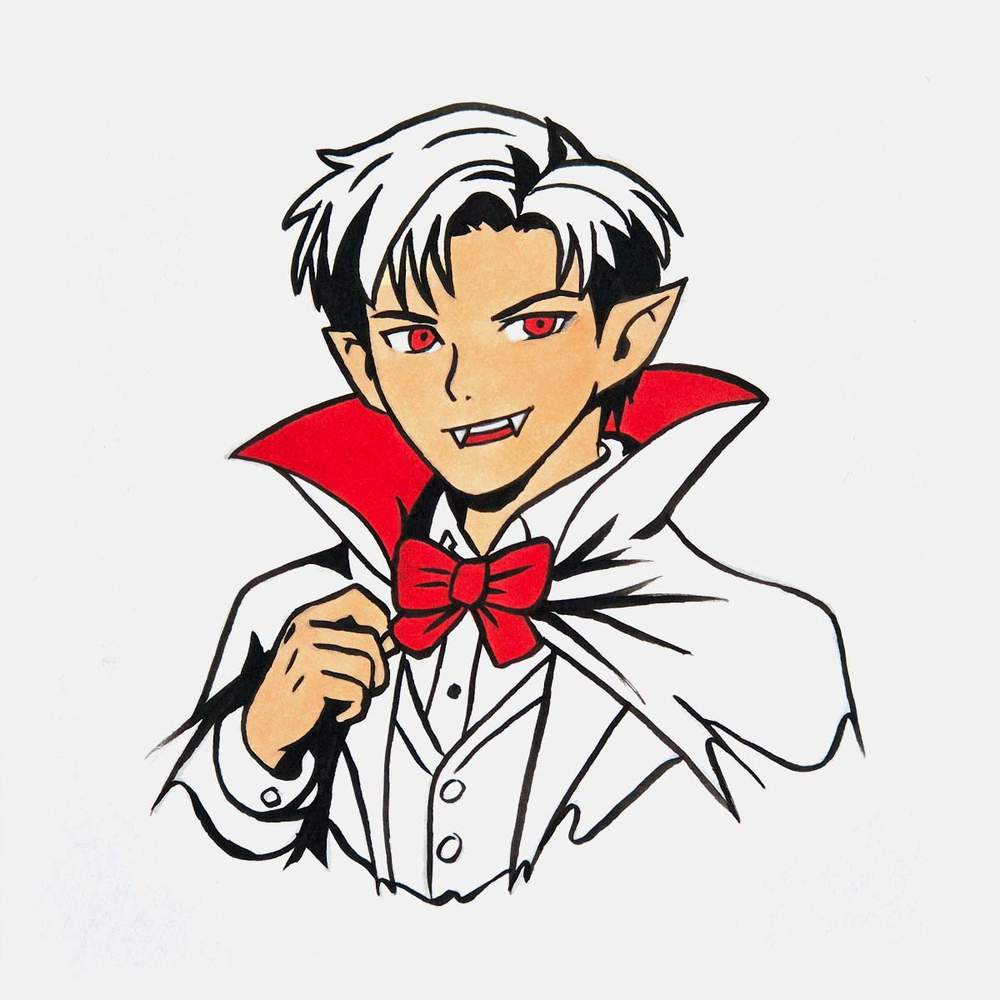
Step 12: Color The Red Vampire Eyes, Mouth, Bow Tie, And Inside Of The Cape
Next, I colored the characteristic red eyes and cape of the vampire, and also his mouth and bow tie.
To color all these parts red, I used Vermillion (R2).
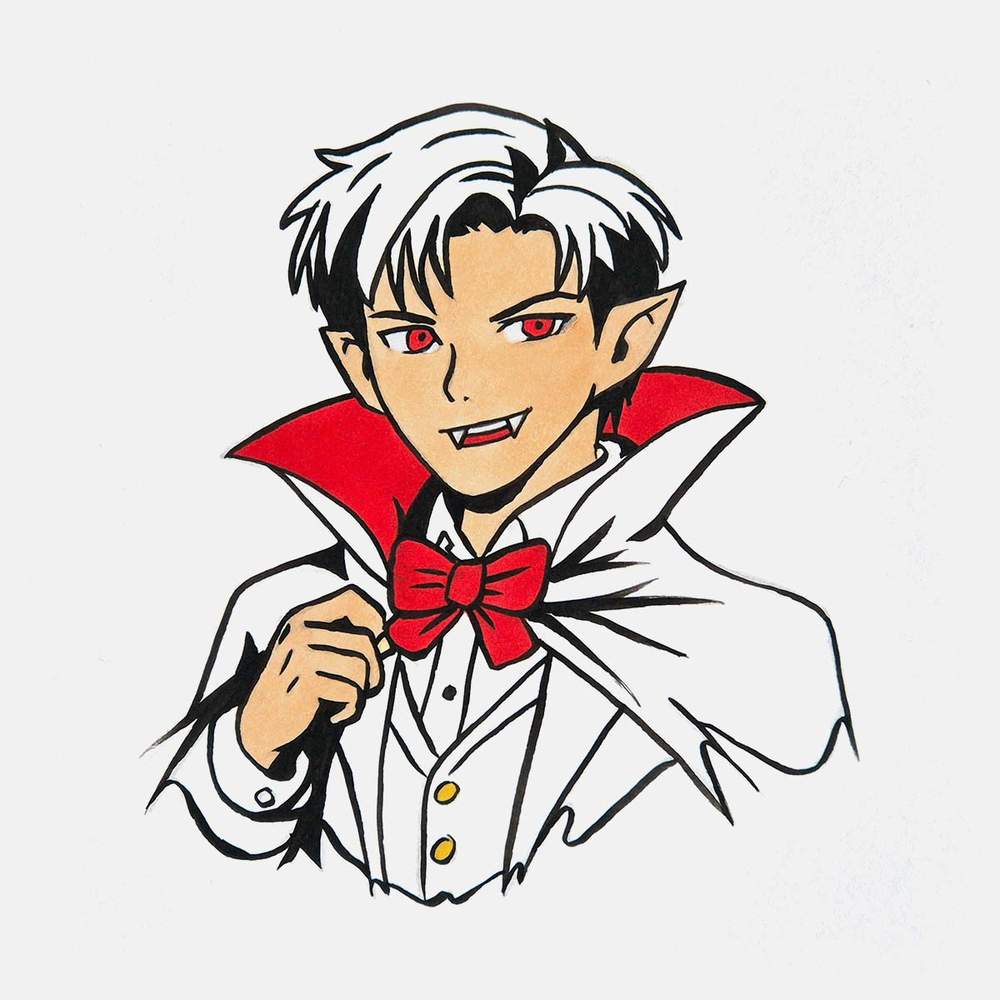
Step 13: Color The Gold Button On The Vampire's Waistcoat
Next, I colored the 2 golden buttons on the vampire's waistcoat with Pastel Yellow (Y1).
Step 14: Color The Vampire Hair
After that, I used 2 shades of grey brown to color the hair.
I like to color the whole hair first using the light brown and then use the darker brown to color all the darker parts except the highlights. This is just how my brain works, but you can do it the other way around too.
To color the vampire's hair, I first used the light grey brown called Cocoa Brown (E400) and colored all of his hair.
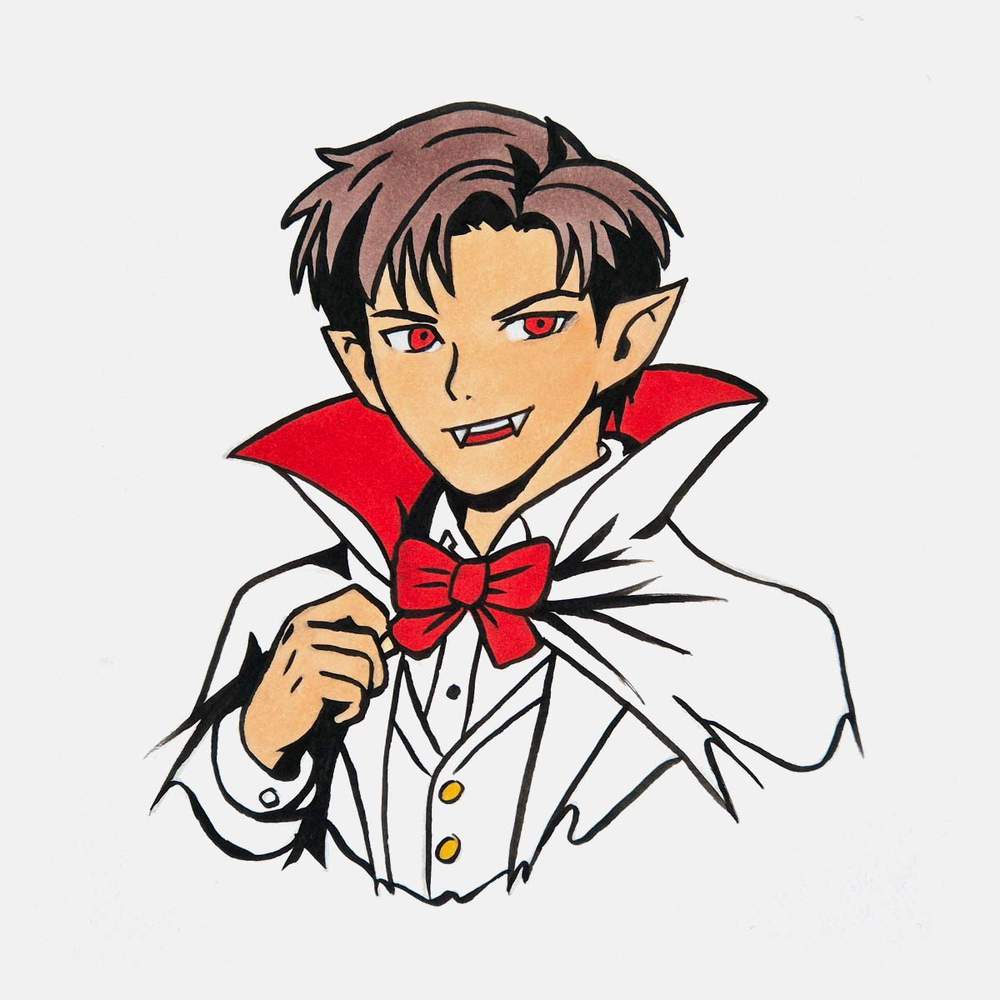
Next, I used the darker grey brown called Pecan (E430) and colored over the lighter grey brown of his hair while leaving a few highlights.
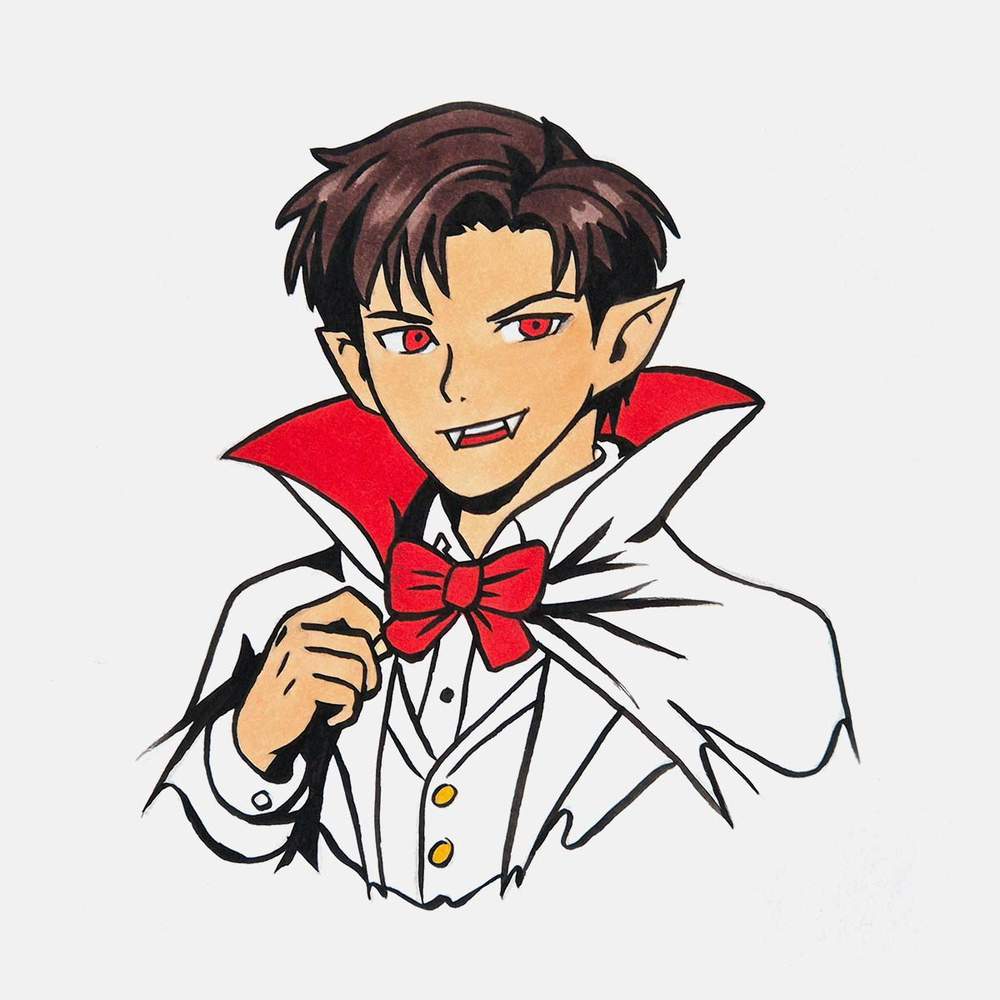
Step 15: Color The Cloak & Waistcoat Of The Vampire Dark Grey
And to finish out vampire drawing, I used a dark grey called Cool Grey II 8 (CGII08) and colored all the dark parts of his cape and waistcoat.
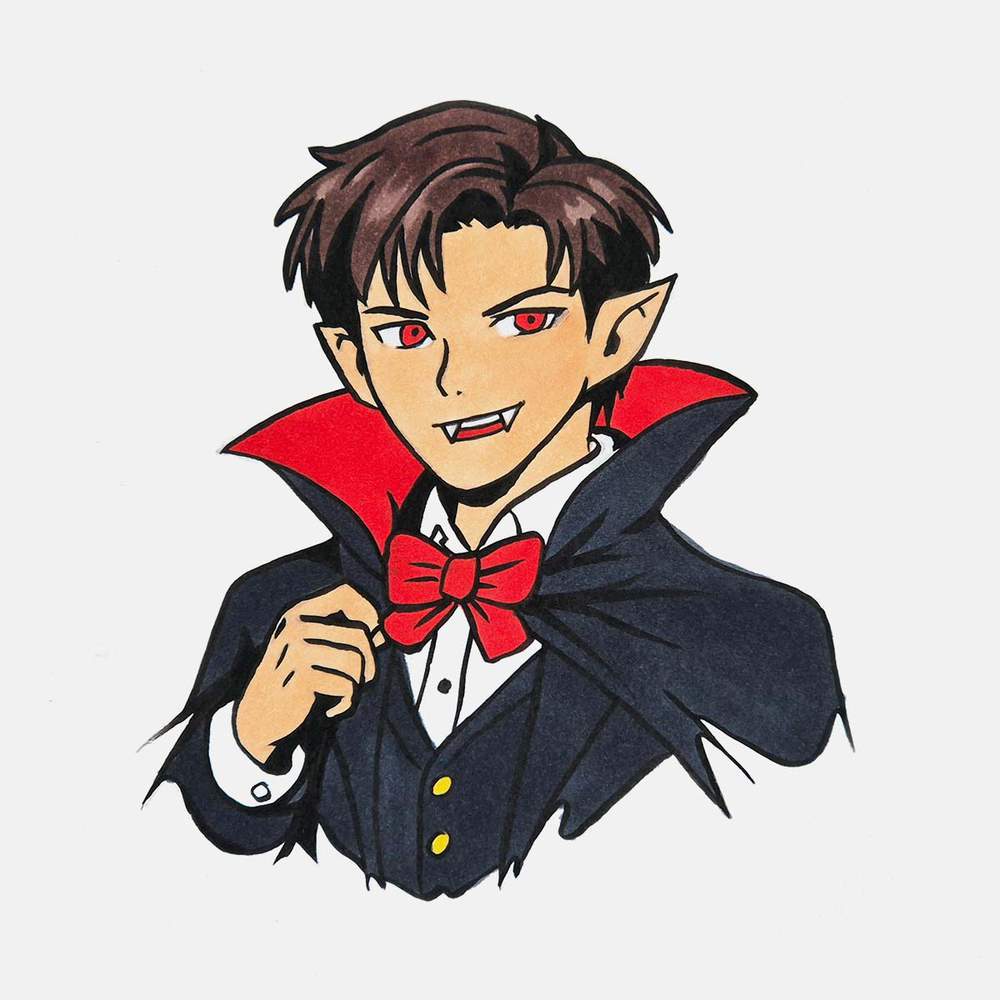
This vampire drawing was a lot of fun to make. I hope you enjoyed it too. How did yours turn out?
I Turned This Vampire Drawing into a Coloring Page!
I recently learned how to use Illustrator to turn my drawings into printable coloring pages. Download this vampire and 9 other Halloween coloring pages for free.
If you liked this step-by-step drawing guide, you might also like my other drawing guides. I'll also link a few below. Make sure to check them out (if you want).
Thank you for following along with me!
Articles You Might Also Like

I love bringing cars to life with alcohol markers and colored pencils.
Whether you're just starting out or looking to improve your skills, I'm here to help!
Click here to learn more about me.


Be the first to comment!
Comments
There are no comments yet.