How To Draw A Scarecrow For Halloween Easy
This post is all about how to draw a simple scarecrow for Halloween.
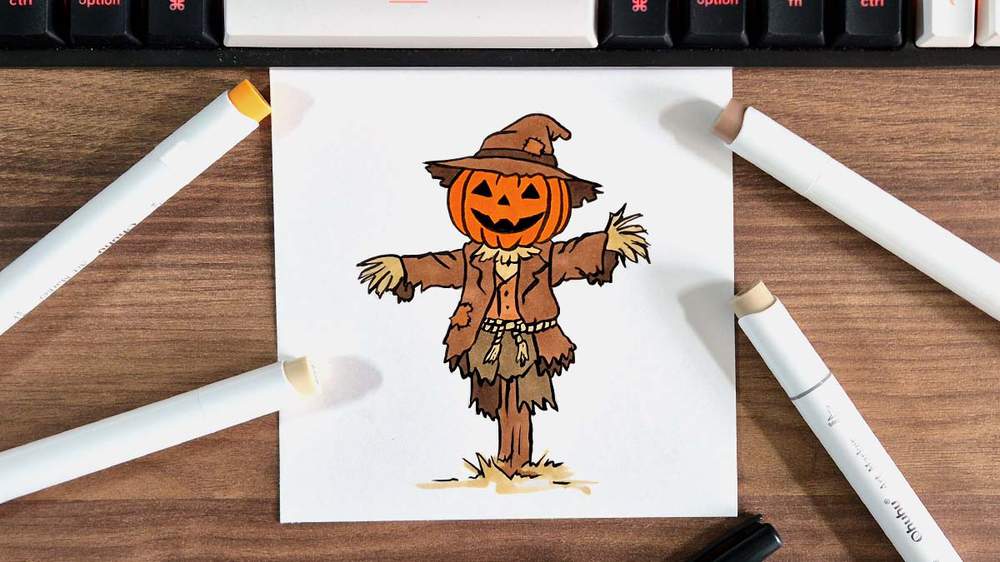
Want to learn how to draw a scarecrow? In this step-by-step drawing guide, I'll show you the exact steps to draw this simple and fun scarecrow with a pumpkin head.
I'll show you how to sketch the scarecrow from scratch, how to outline it with a brush pen, and what colors to use to give it its faded old look. Every step comes with a detailed description and plenty of photos so you can easily see what to do in each step.
Take your time and follow along at your own pace. And remember that your drawing does not need to be perfect. It's way more fun to just draw and make mistakes than it is to try and make it perfect.
Now, let's get started with this Halloween scarecrow drawing!
I just wanted to let you know that this post contains affiliate links, and any purchases made through these links will result in a small commission to me and don't cost you anything extra.
In This Guide
- Drawing supplies & colors I used
- Sketching a scarecrow from scratch
- Outlining the scarecrow drawing
- Color the scarecrow with markers
- FREE printable Halloween coloring pages
- More step-by-step guides you'll like
Drawing Supplies & Colors I Used
To sketch the scarecrow, I used a regular graphite pencil with an eraser.
And I made this drawing on Canson Illustration Manga paper (my favorite paper for using alcohol markers on).
To outline the scarecrow sketch, I used a black Tombow Fudenosuke brush pen.
And to color this scarecrow, I used Ohuhu Honolulu markers. I used 6 colors in total: Apricot (Y10), Caribe Cocoa (E170), Dark Suntan (E110), Clay (E300), Dark Brown (E310), and Brick Beige (E210).
You can buy these colors separately or as part of the 320 set.
I've added an image below with all the color swatches so you can match your markers to the ones I used if you already have some.
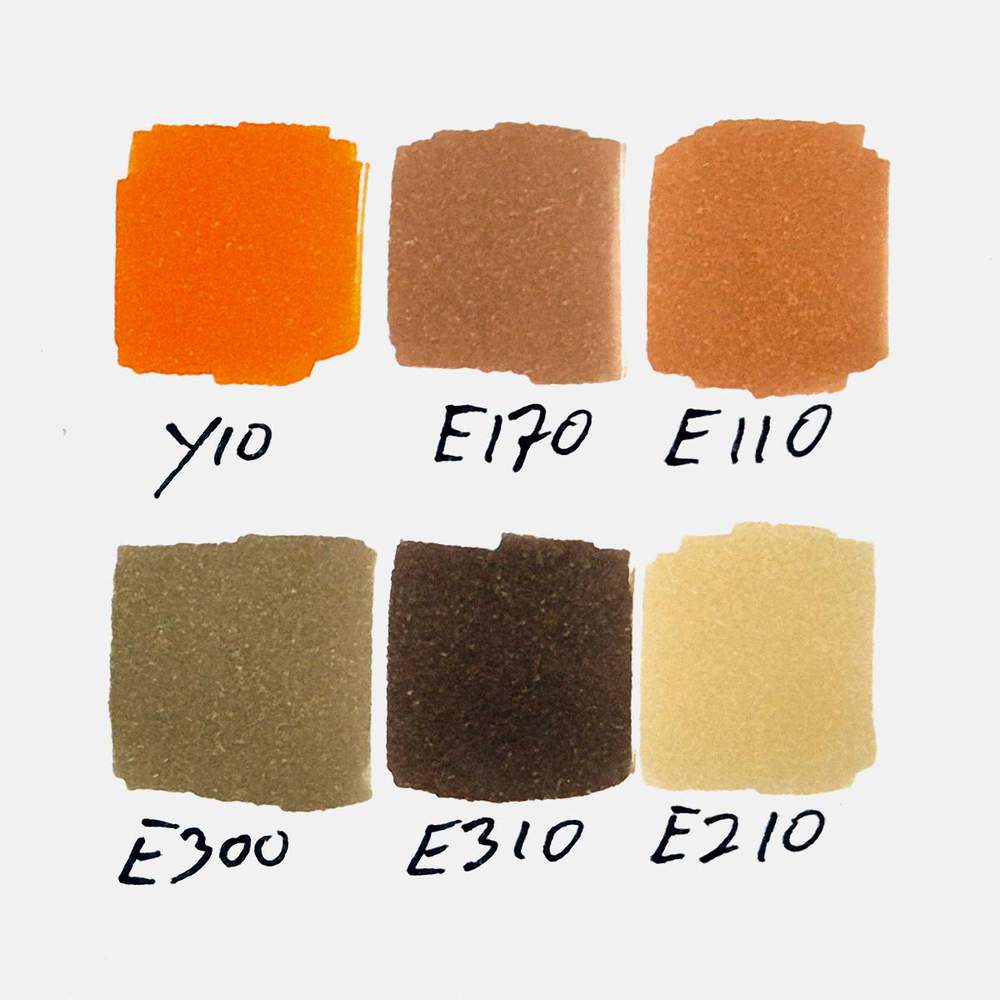
How To Draw A Scarecrow Easy
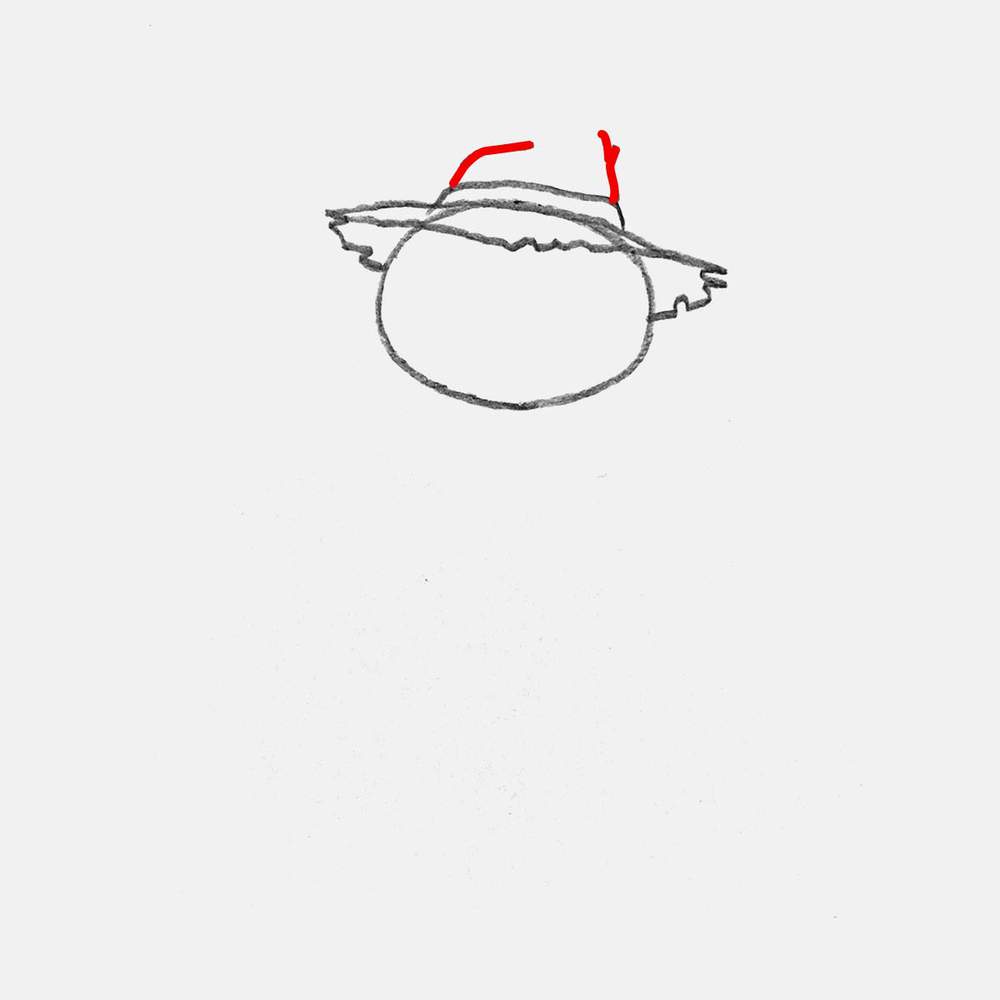
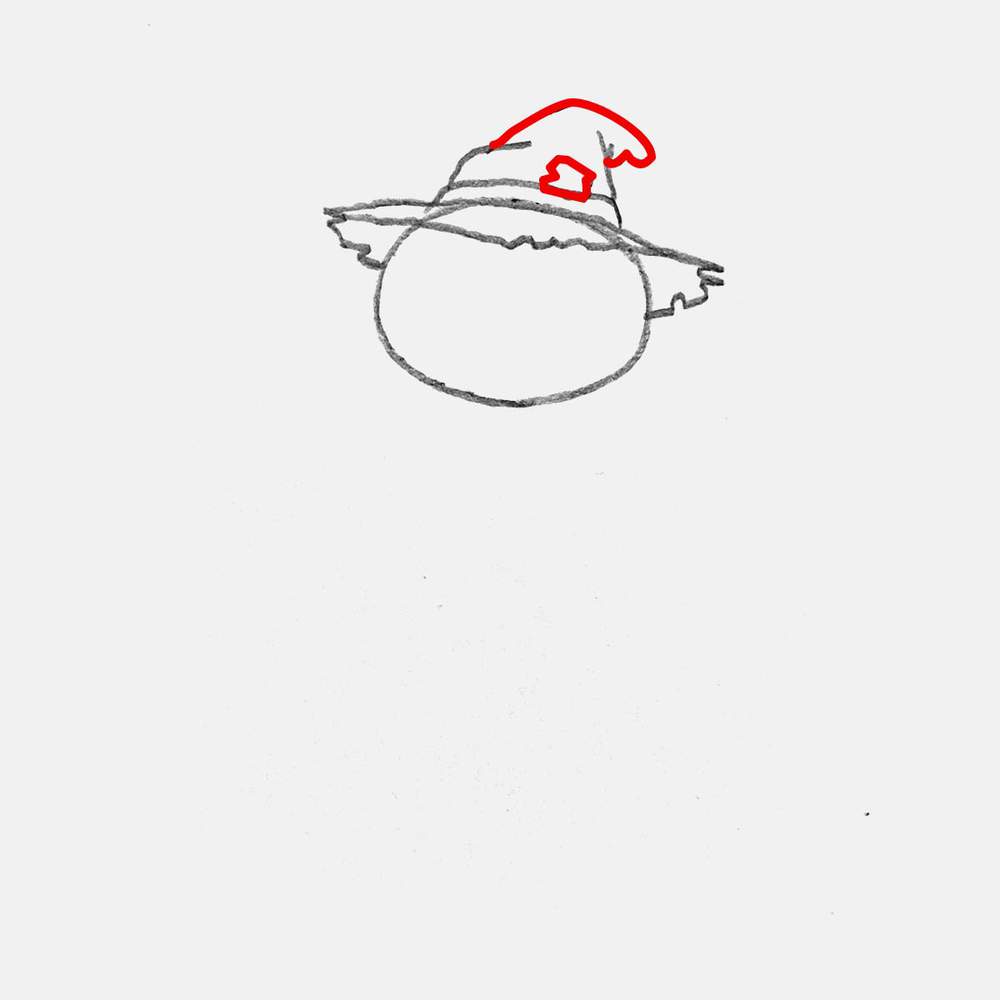
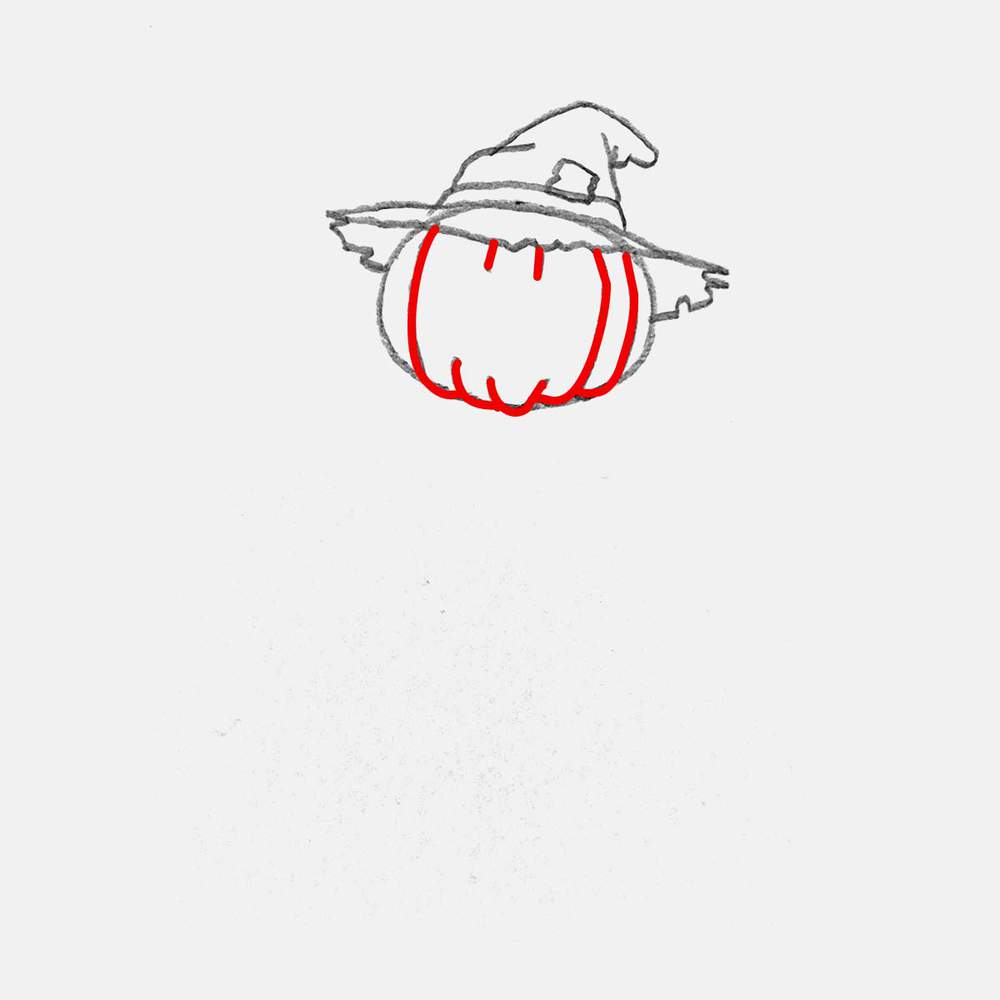
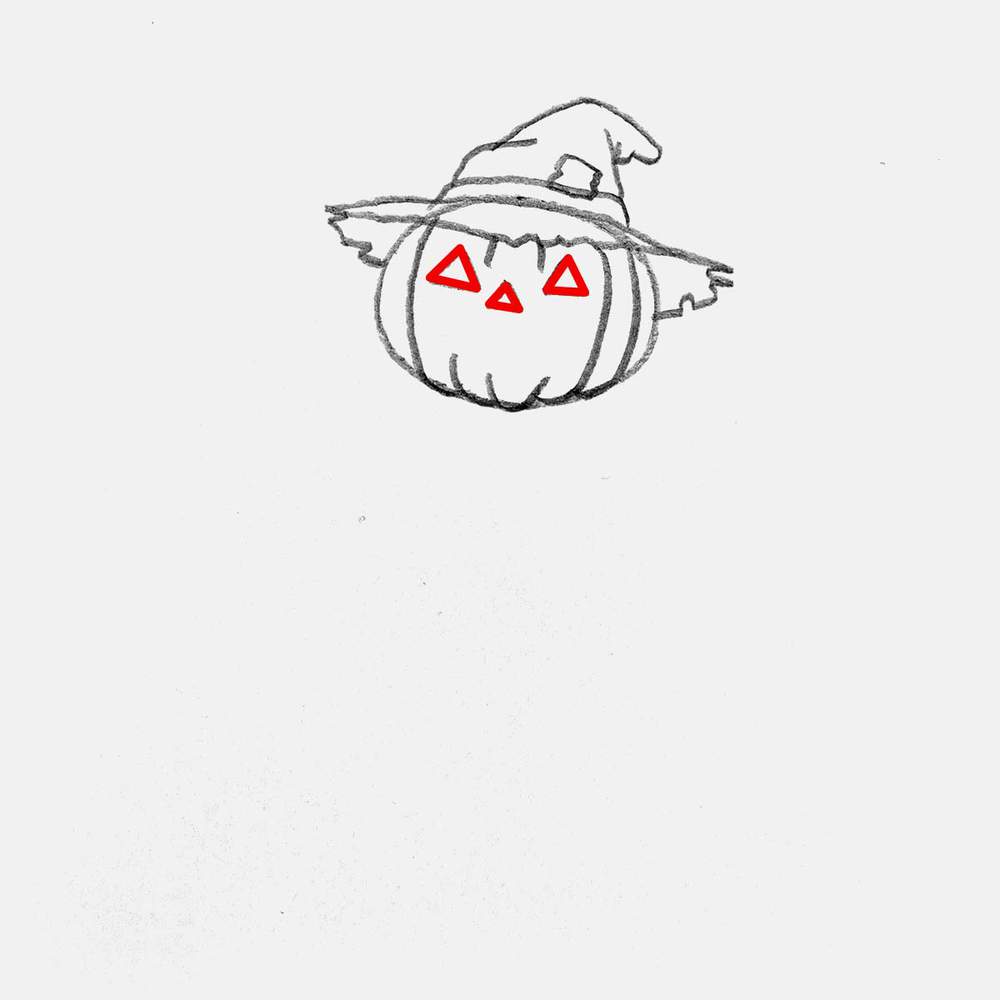
For the sketching part of this drawing guide, I marked all the changes in red, so you can easily spot what's new with each step.
Step 1: Sketch An Oval For The Scarecrow's Head
To start a scarecrow from scratch, I find it easiest to start with a slightly squished oval shape at the top of the paper, but leave space for a hat. This will later become the head of the scarecrow.

Step 2: Add An Old Hat On Top Of The Oval
Before we turn this oval into the pumpkin head, we're going to add the classic weathered floppy hat on it first. I do this because it overlaps with the head.
To sketch the old floppy hat, I start by drawing a kind of halo directly on top of the oval shape. To make the hat look old, I made the wide brim uneven and frayed in some spots.
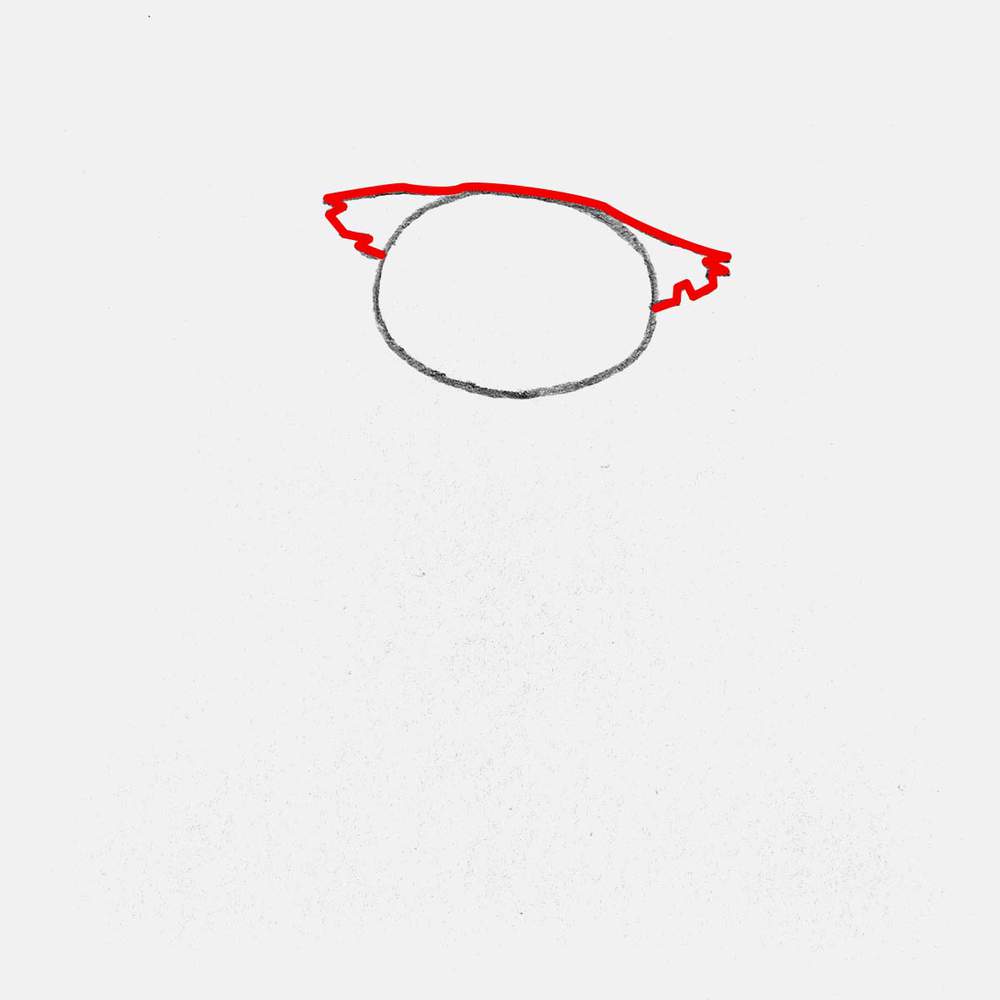
Next, I added the front edge of the brim to the hat. This is the part that overlaps with the scarecrow's pumpkin head.
To sketch this part of the brim, I again made it look uneven and a bit frayed in some parts where the hat is more weathered.
I also added this band that surrounds the base of the crown of the hat on top of the brim.
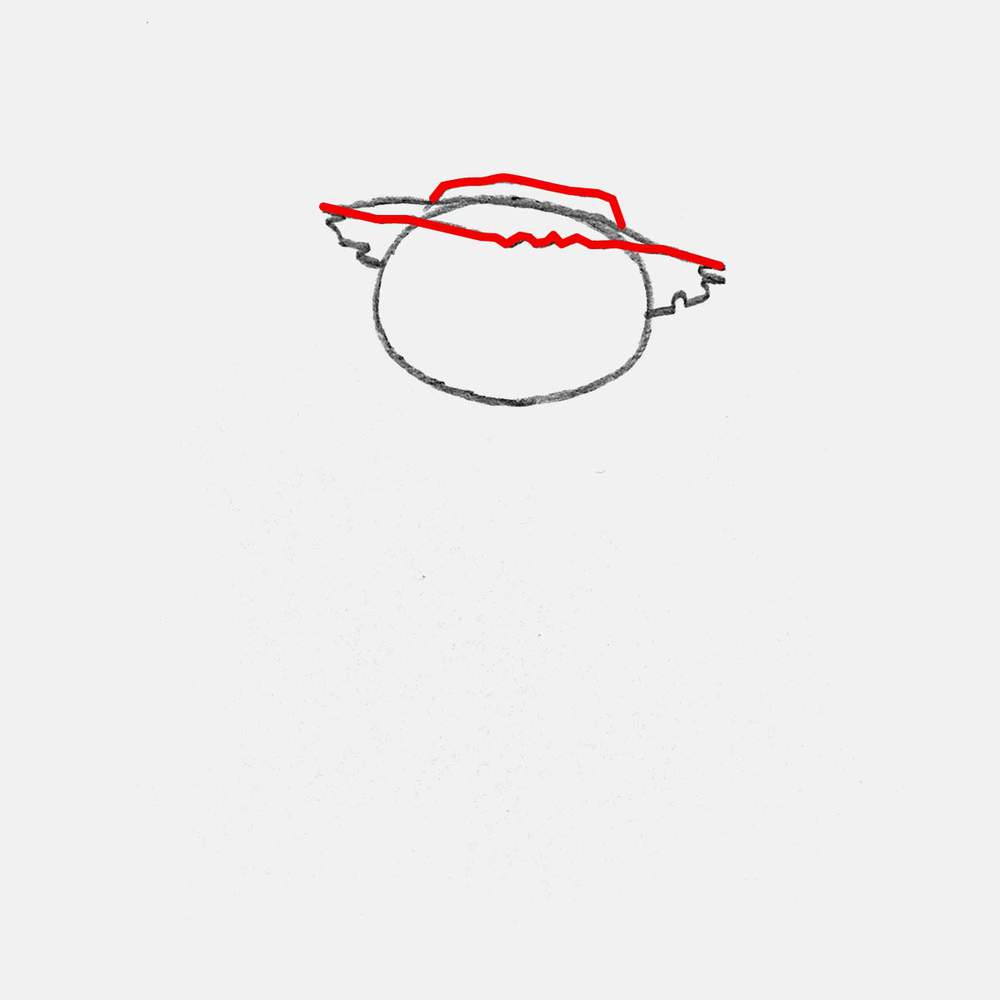
With the base now in place, we can draw the floppy pointed crown onto it.
Since the crown is floppy, there are some folds in it. Thinking about it now, I probably should've sketched the basic shape of the whole hat first before adding all the folds, but I didn't... I sketched it line by line.
So to sketch the floppy crown, I first added a rounded angle shape on the left side and a somewhat straight line on the right with a tiny fold line attached to it on the right side.
Then, I sketched the point that's flopped over to the right. I also added this stitched patch on the hat to make it look a bit more interesting.
Step 3: Turn The Oval Into A Pumpkin With A Face
With the hat now done, we can turn the oval into the head of the scarecrow. I chose to make the head of my scarecrow a pumpkin as I like the look of it more than the regular burlap sack head.
To make the oval look like a pumpkin is quite easy. You just add a bunch of vertical curved lines, following the shape of the pumpkin. I added one on the left and two on the right.
Since this pumpkin will have a face, I left the middle blank for now and only added the lines to the bottom and the top of the pumpkin.
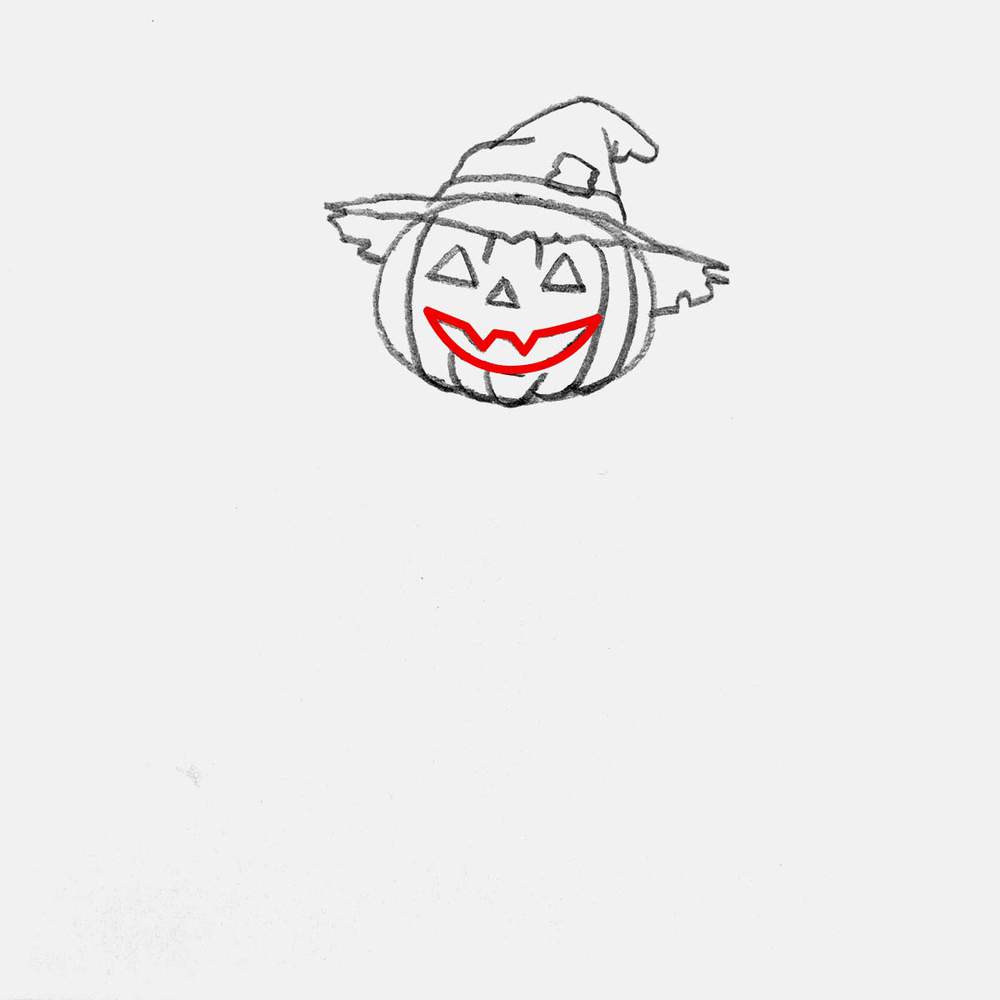
Next, I added the triangular eyes and nose of the scarecrow. I made them point up, which makes him look happy, but if you want to make him look very angry, you can sketch the eyes pointing down.
Next, I added his mouth. And again, I made him look goofy and happy, so I added two teeth near the middle and none on the bottom. If you want to make him look super angry, you should add more teeth and place them on both the bottom edge and the top edge of his mouth.
Step 4: Sketch The Worn-Out Clothes Of The Scarecrow
With the head and the hat of the scarecrow now all done, we can start to sketch the torn clothes.
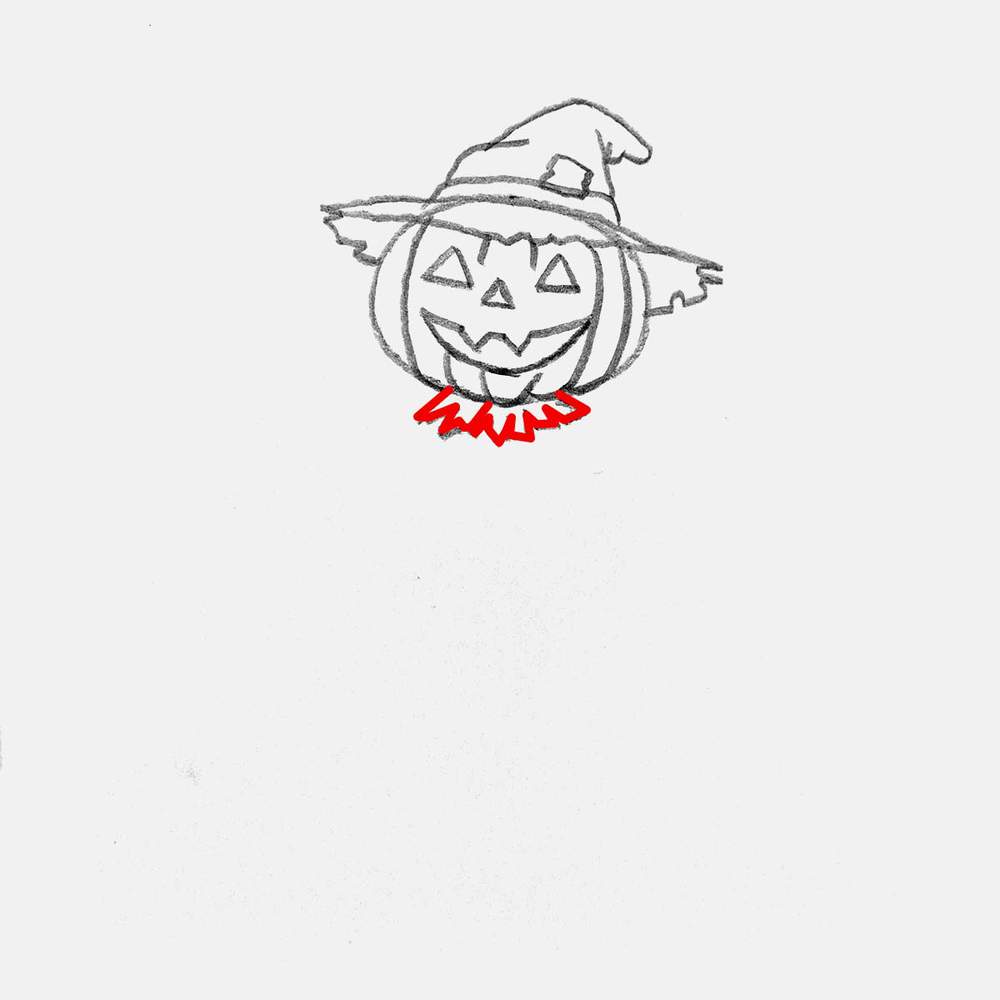
I first added a little straw collar below the head with uneven strands.
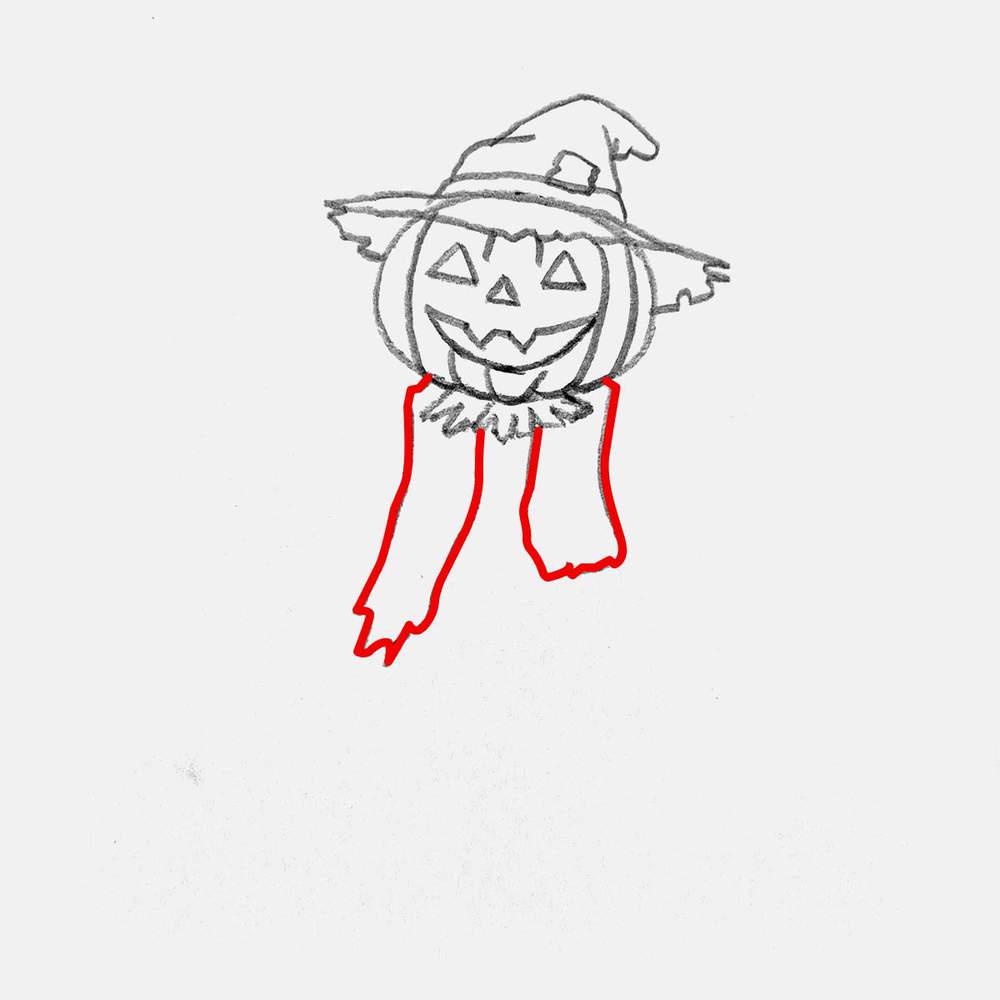
Next, I sketched the basic shape of his coat, starting with the front part. The part on the left isn't bound behind the rope belt, so it's just hanging all the way to the bottom with a frayed bottom edge. The right side of the coat is stuck behind the rope belt, so I only sketched it up to there for now.
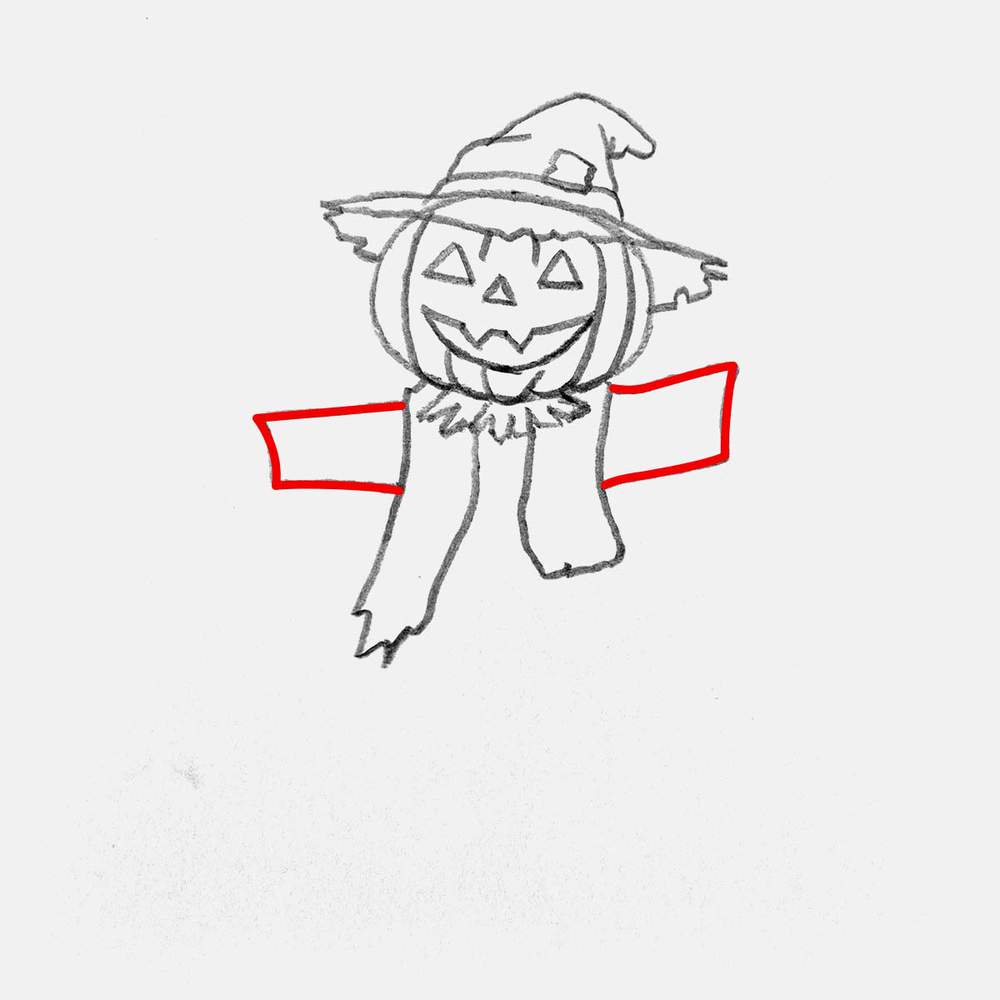
Then, I added two rectangular shapes, one for each sleeve, giving the scarecrow a wonky T-pose look.
After that, I sketched the outline of the rope belt around the waist of the scarecrow. It's overlapping the coat on the right and covered by the coat on the left.
The rope is essentially just three wonky horizontal lines with a circle in the middle for the knot.
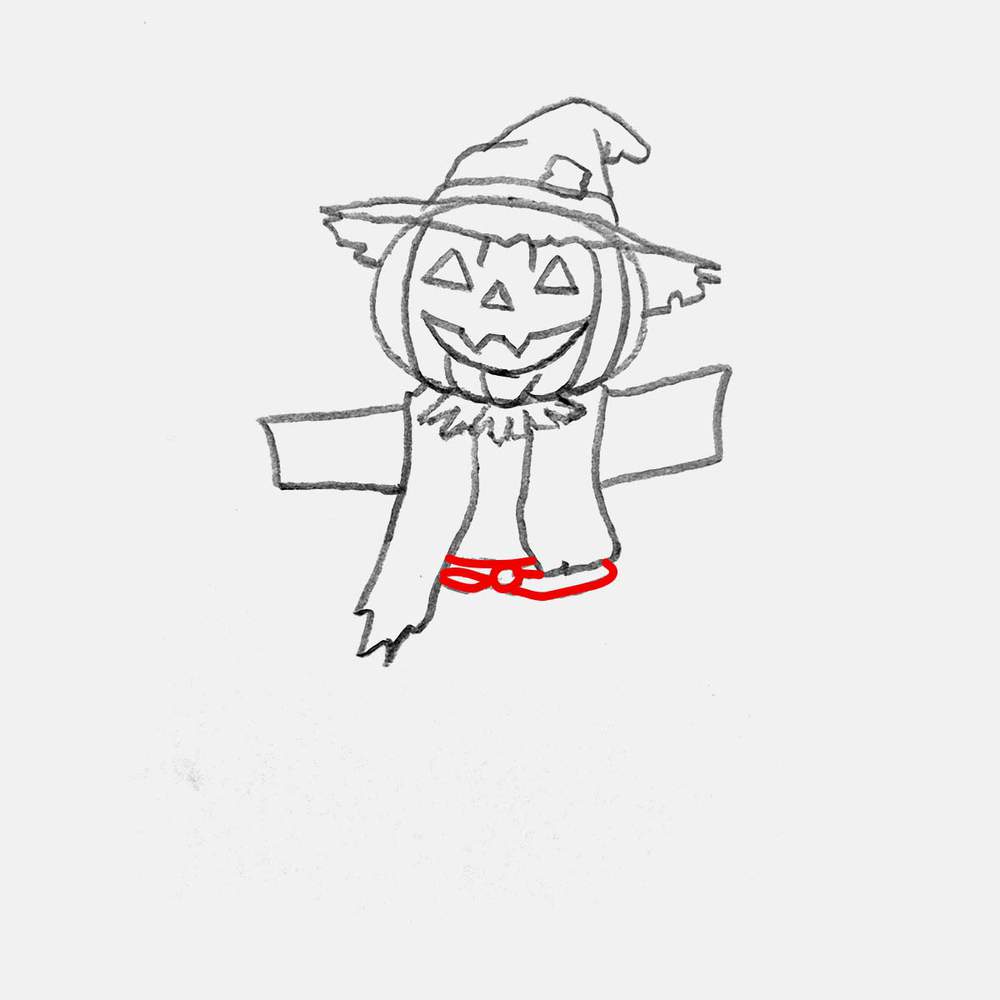
With the rope belt now in place, I added the lower part of the right side of the coat, with the frayed bottom edge, of course. And I added the two tails of the rope dangling below the knot.
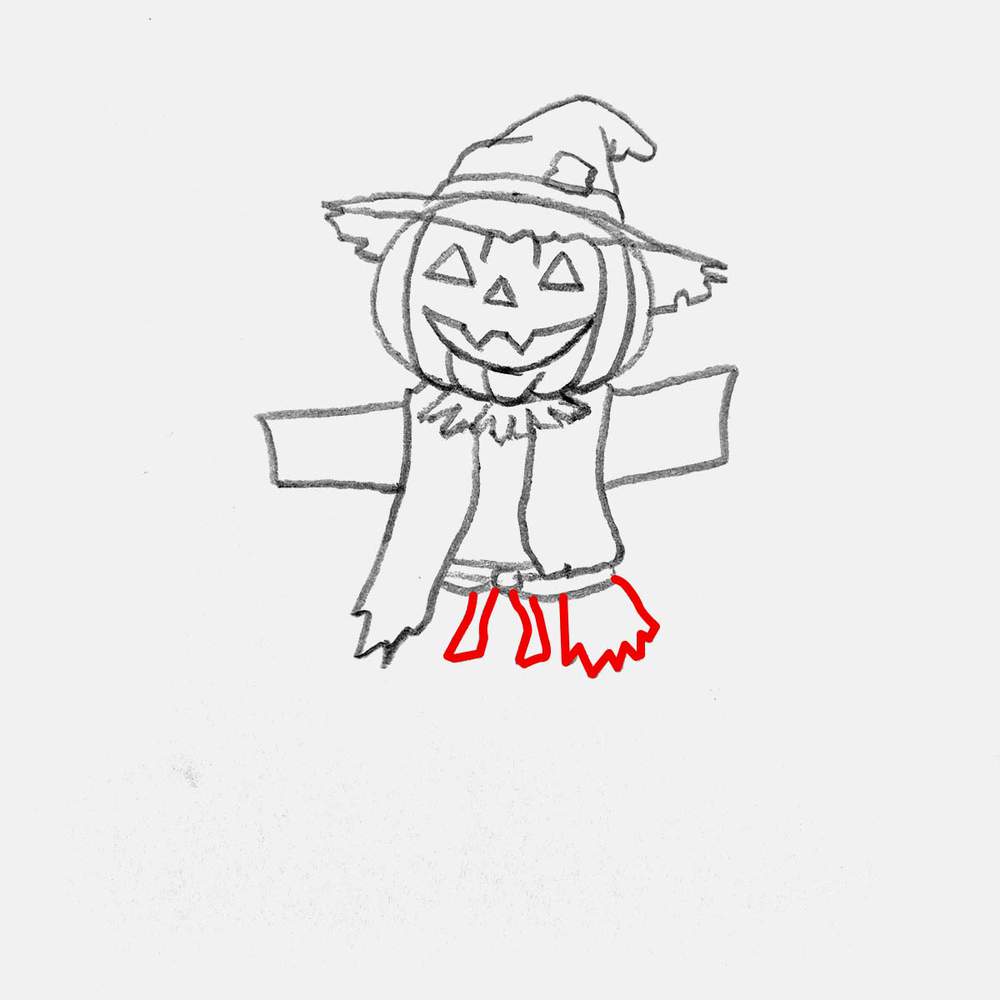
To complete the coat, I added another small frayed edge below it.
I also sketched the top part of the torn pants of the scarecrow. I sketched it in between the bottom parts of the coat, and again added lots of frays.
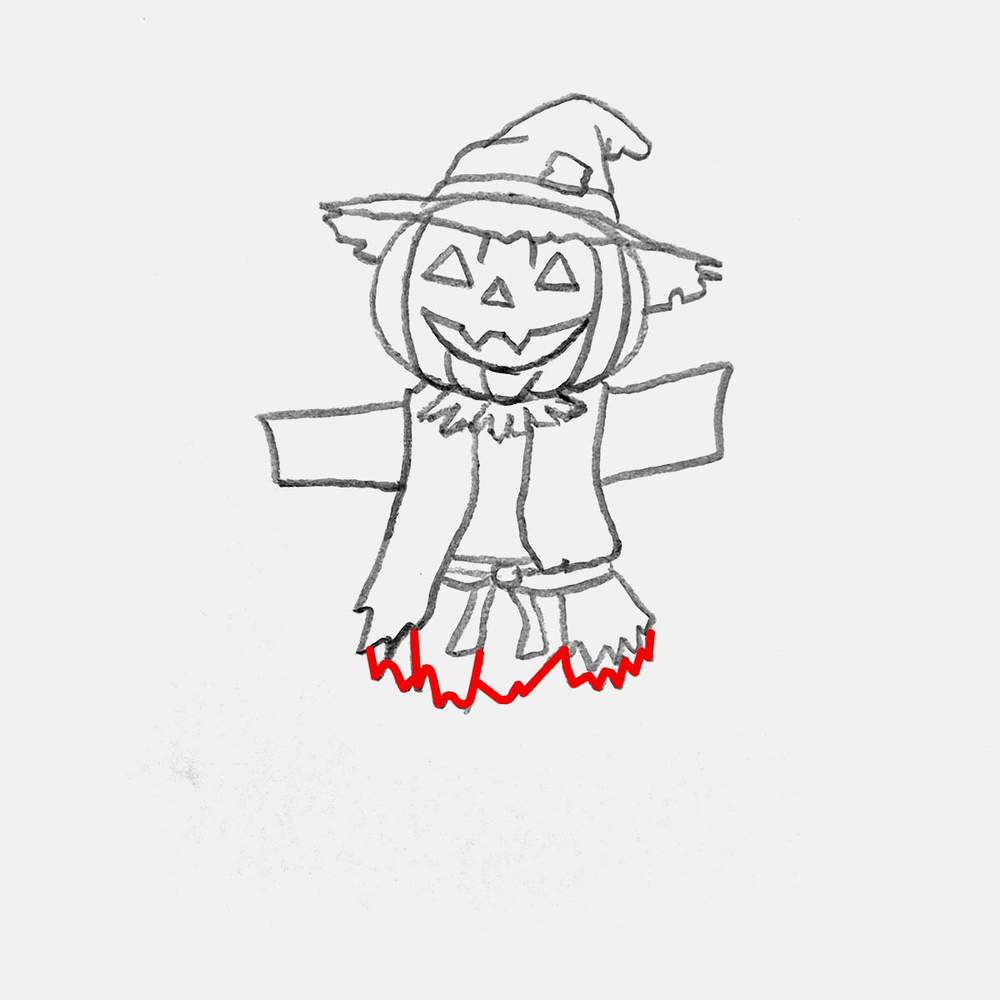
Next, I added the trouser legs, which are just two narrow rectangles with more frays on the bottom edge.
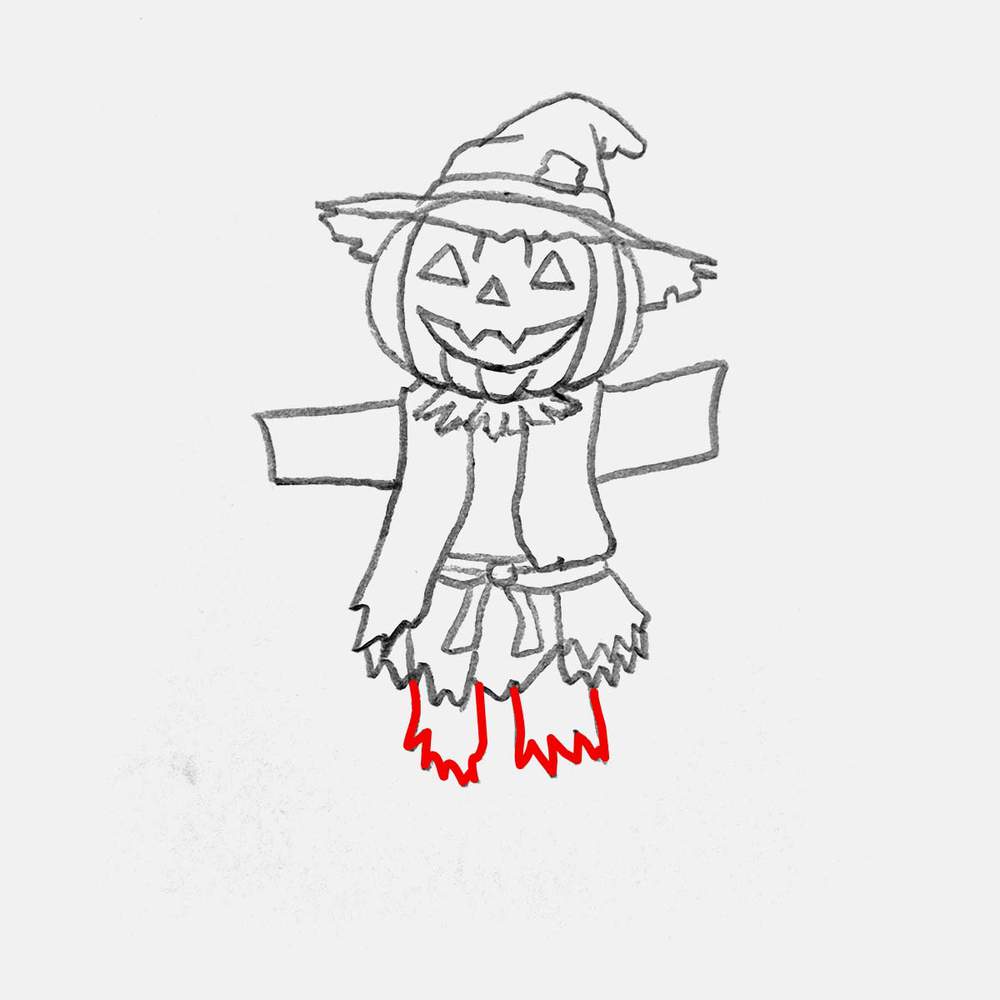
After that, I added the folded front flaps on the coat below the collar, and I added the shirt in between the two front panels of the coat with two buttons connecting both sides.
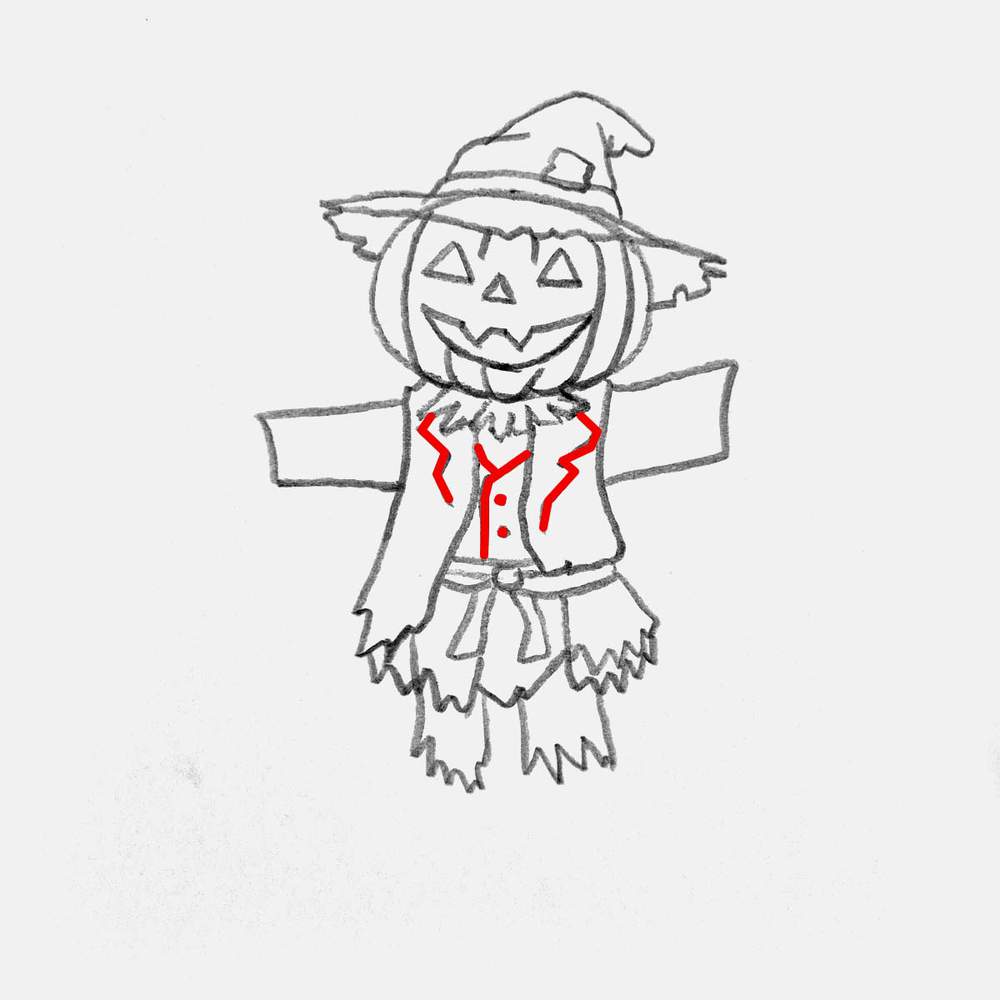
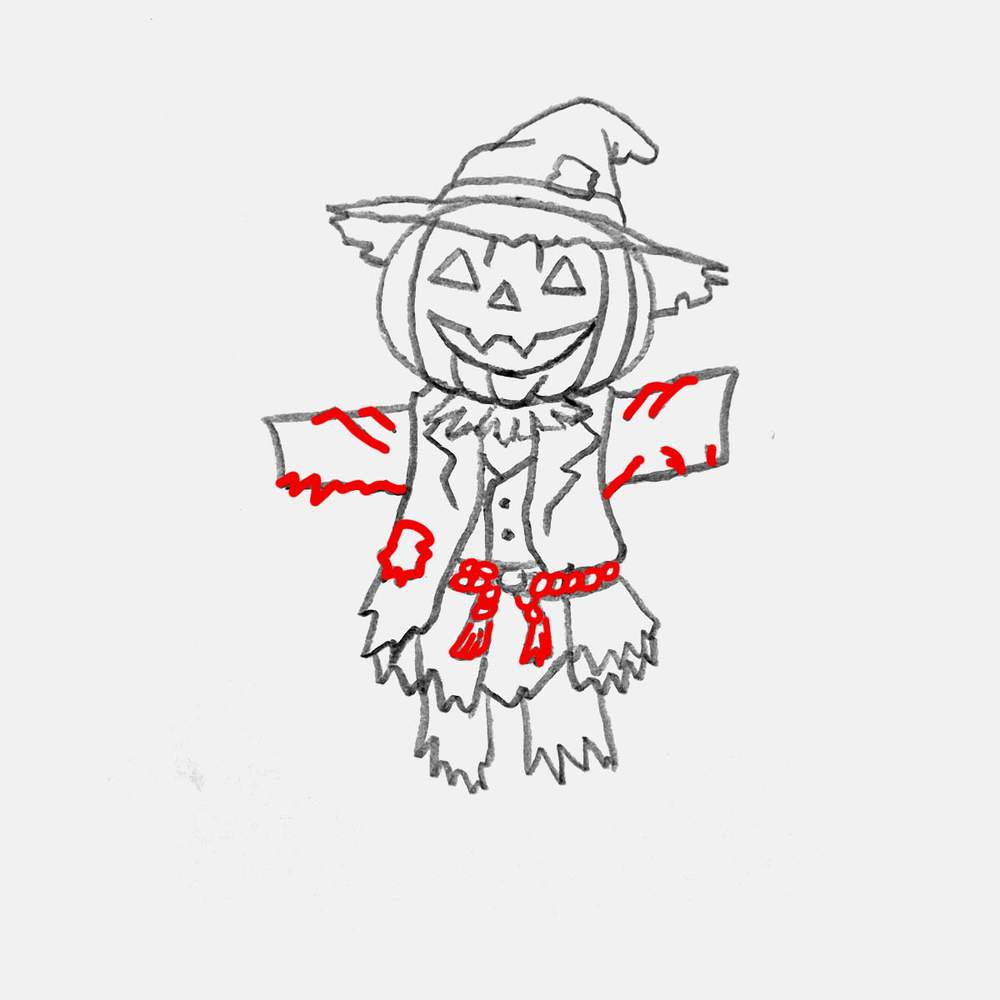
And to complete his look, I added folds on the arms, a stitched patch on his side, and details to the rope belt. Adding the details to the rope is actually quite simple. I just used a bunch of small circles, and that's it.
Step 5: Add Some Straw Poking Out The Sleeves Of The Scarecrow
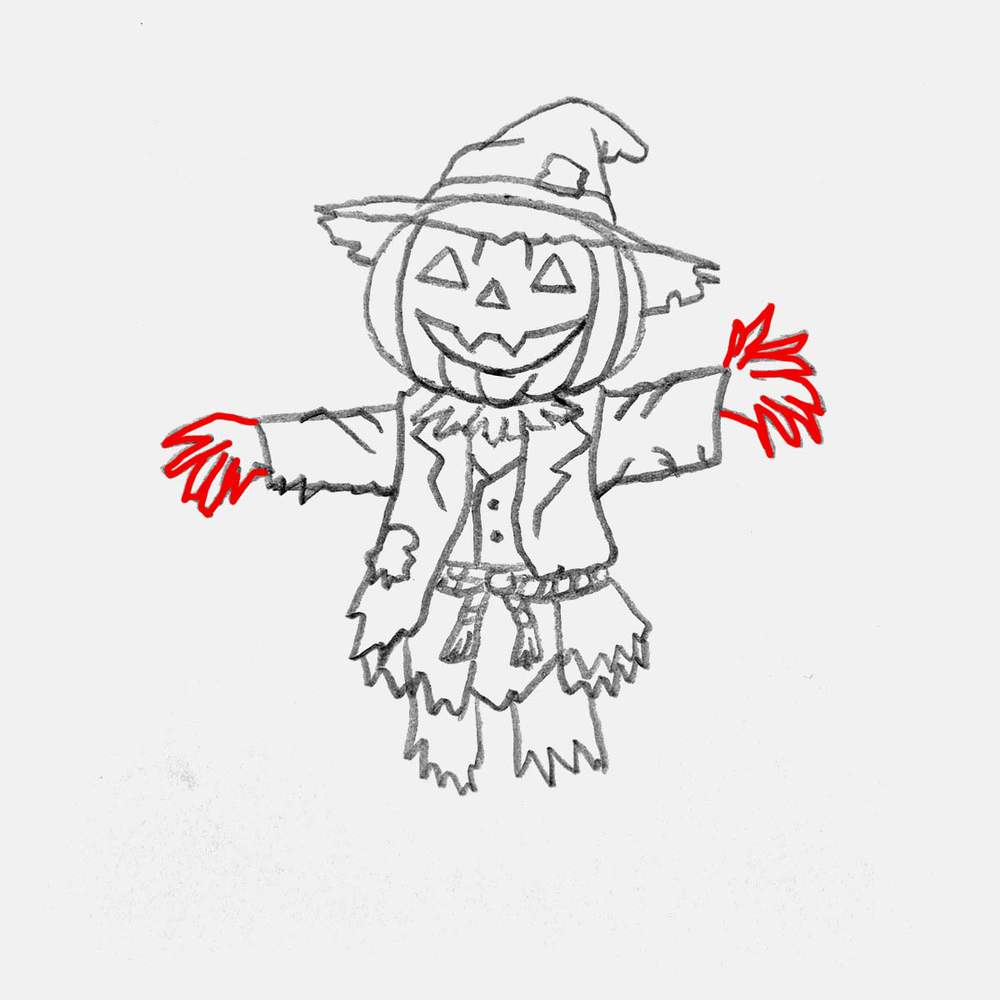
One thing, or two things, that are missing right now are the straw hands of the scarecrow.
I sketched long strands of straw poking out of both sleeves in all sorts of directions.
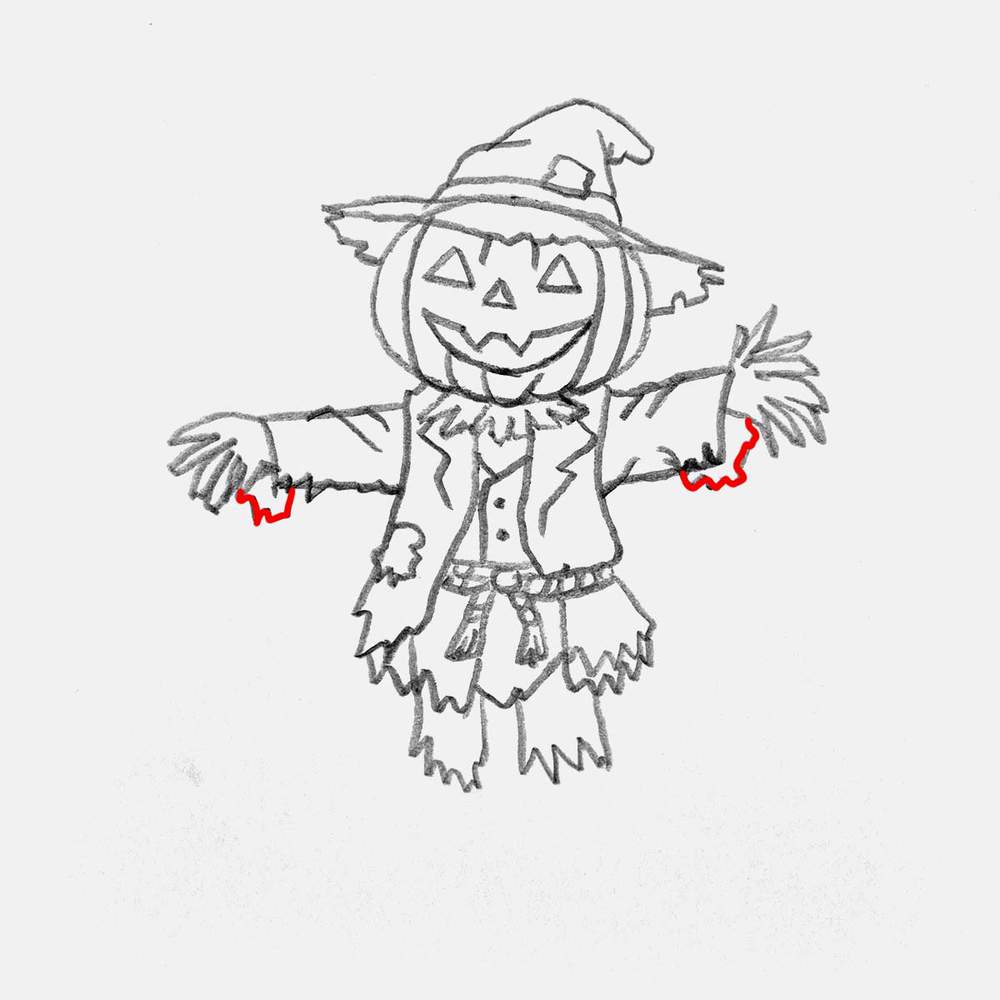
Next, I added the last bits of clothes: the frayed ends of the sleeves below the straw hands.
Step 6: Sketch The Post On Which The Scarecrow Is Mounted
And to complete the scarecrow sketch, I added the wooden post on which it is mounted. It's basically just two vertical lines with 2 vertical texture lines to make it look less flat.
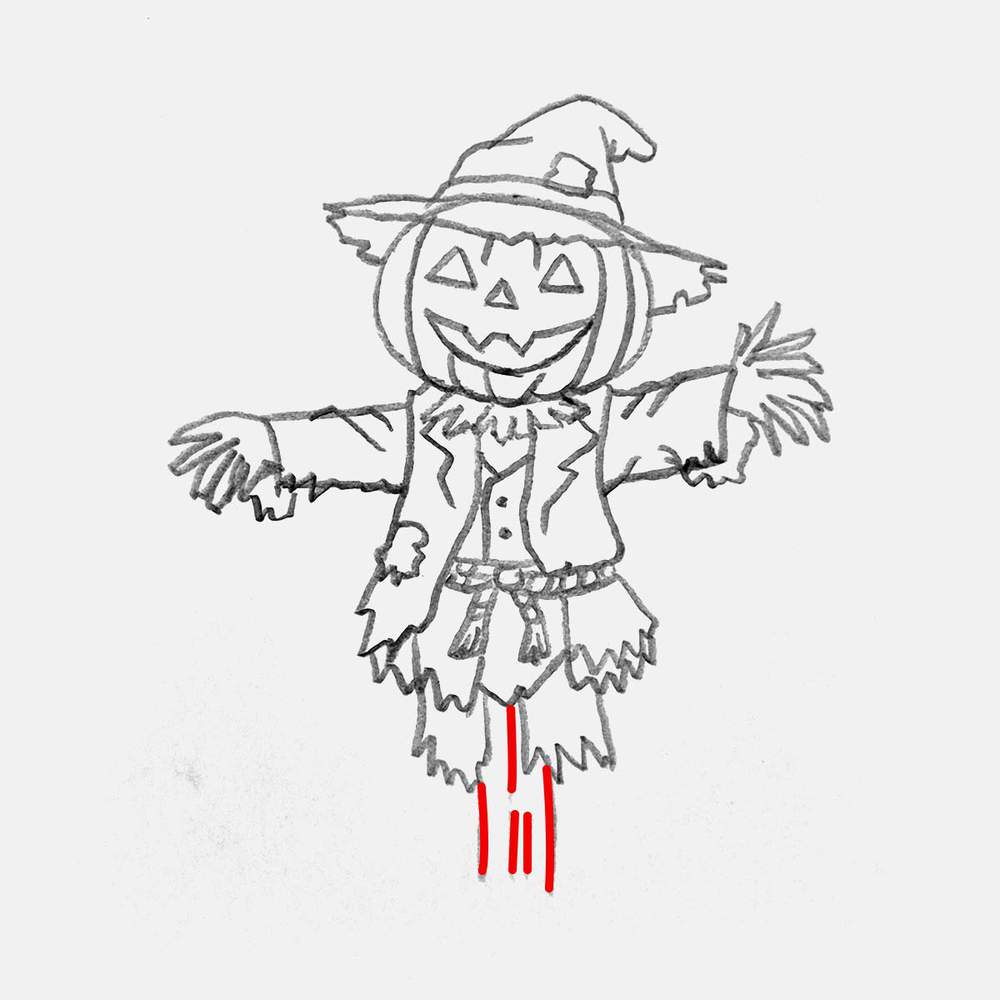
To make it look like the scarecrow is firmly planted into the ground, I added some ground around the bottom of the post. I did that by sketching some long and short grass around the bottom.
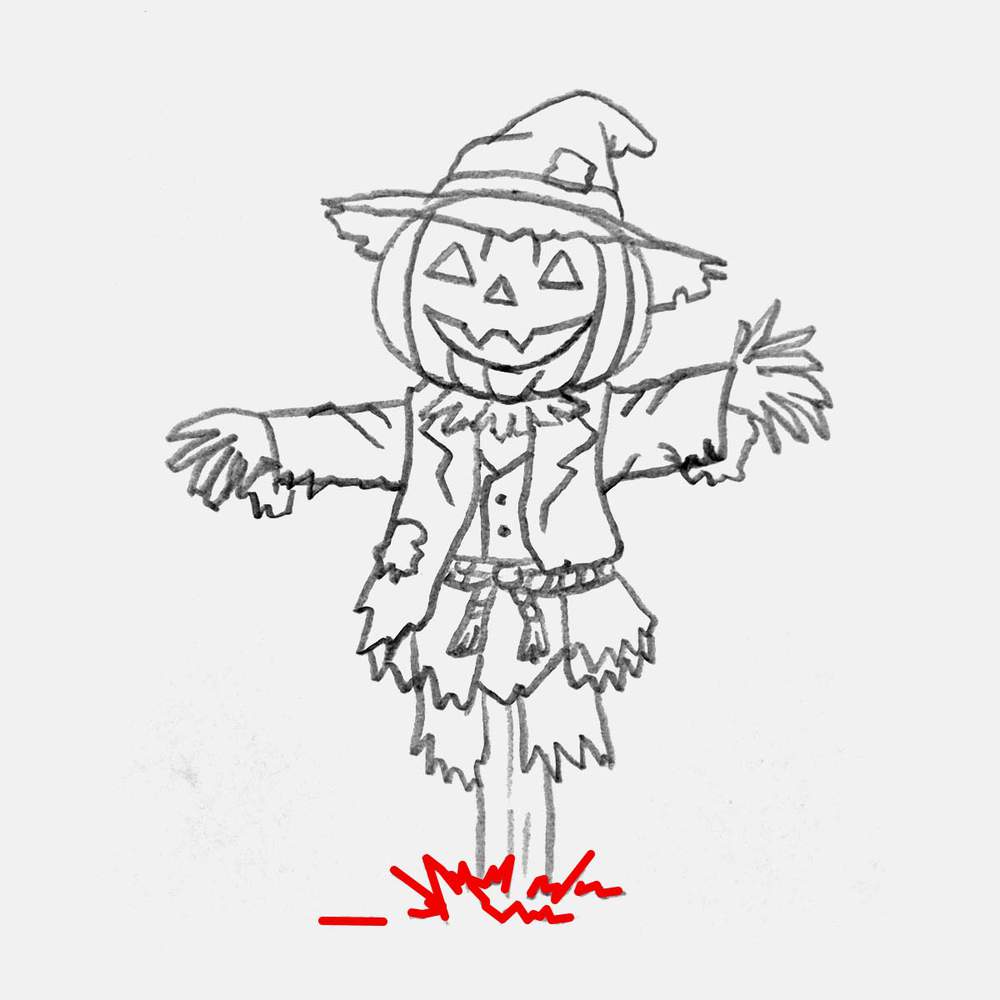
And that's the scarecrow sketch all done! And it already looks really good, but coloring it will make it even better.
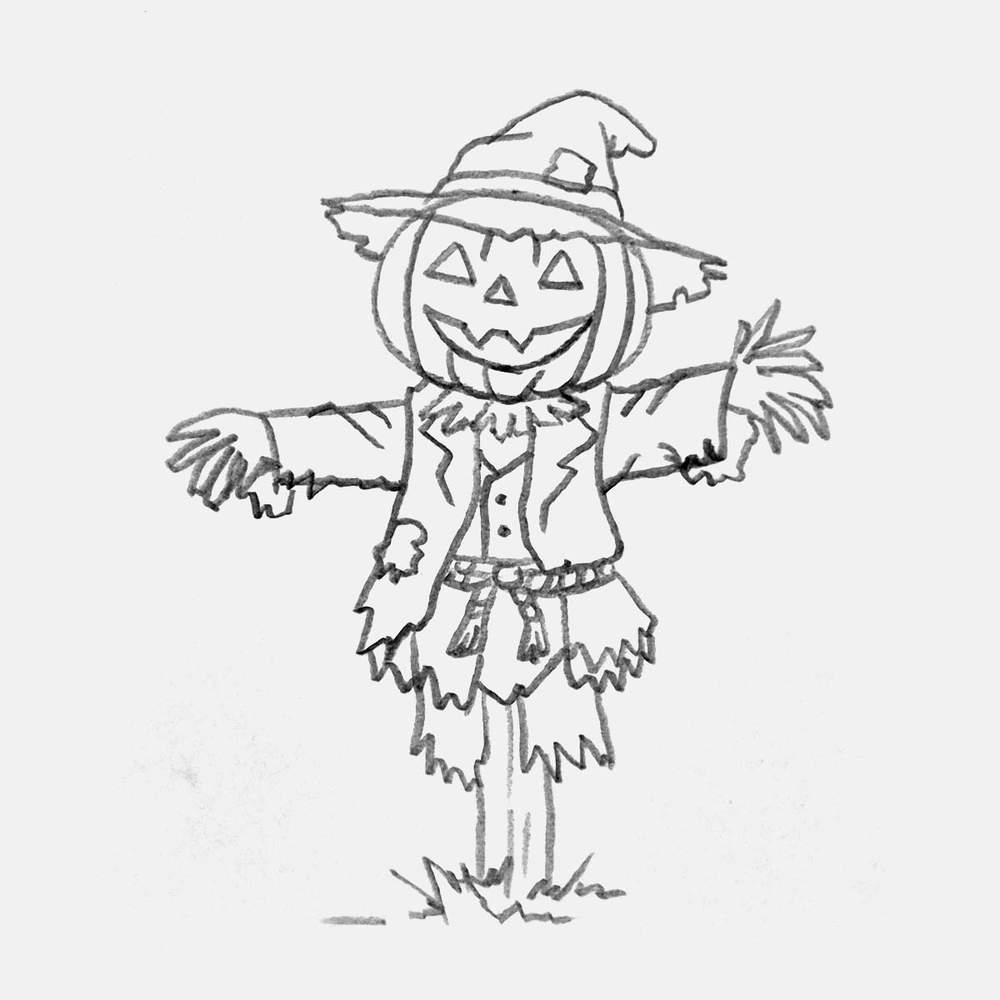
Step 7: Outline The Scarecrow Sketch With A Black Brush Pen
To prepare the sketch for coloring, I outlined the whole drawing with a black brush pen. I love using my Tombow Fudenosuke pen for this. But you can use regular fineliners too, like these Micron ones that I also really like.
To outline the sketch, I first lightened it quite a bit. Then, I carefully drew over all the sketch lines with my brush pen. I also colored in the eyes, nose, and mouth of the scarecrow.
One thing to keep in mind: don't outline the part where the hat overlaps with the top of the pumpkin.
And when done, it looks like this:
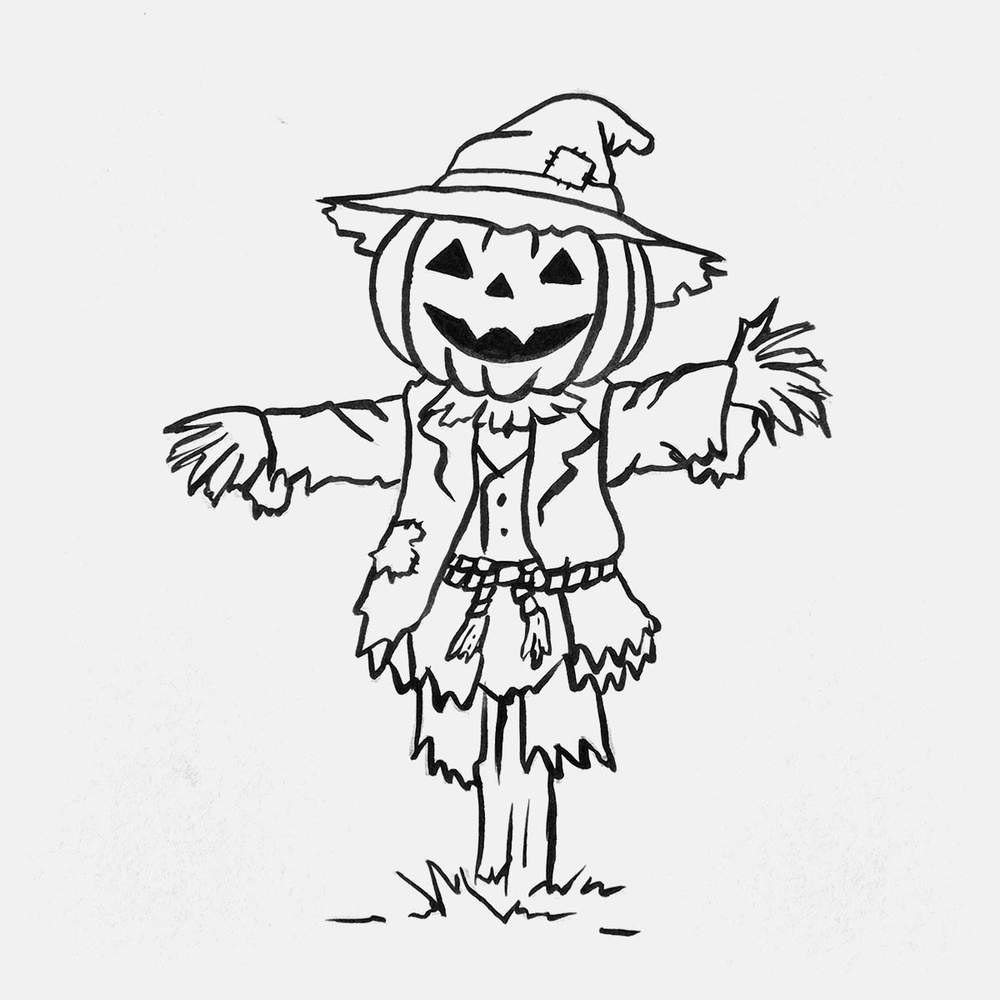
You've now created your own scarecrow coloring page.
Step 8: Color The Scarecrow With Alcohol Markers
To color my drawings, I like to use alcohol-based markers, like the Ohuhu Honolulu ones that I love.
I first colored the orange pumpkin head of the scarecrow, and to do that, I used a color called Apricot (Y10).
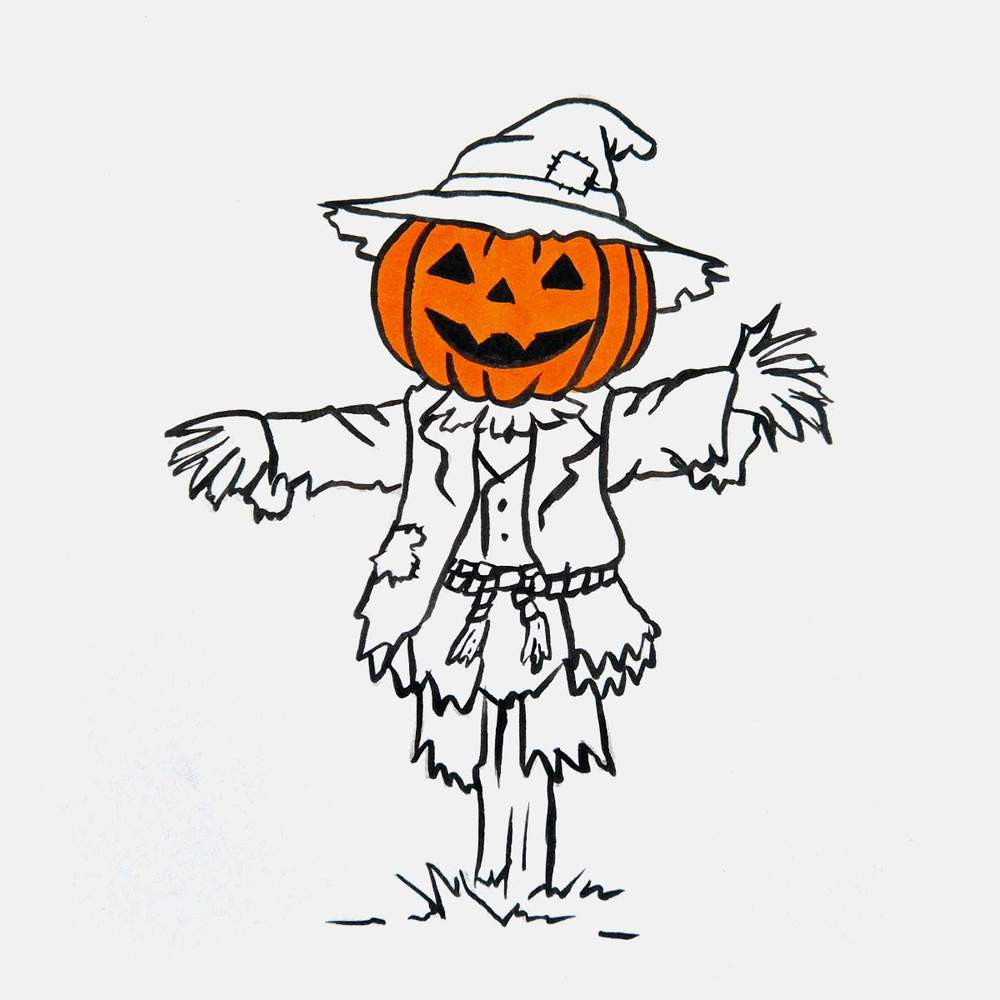
For the clothes, I wanted to use all faded brown to show that the scarecrow has been standing in the field for so long.
For the coat, the hat, and the wooden post, I used a warm faded brown called Caribe Cocoa (E170).
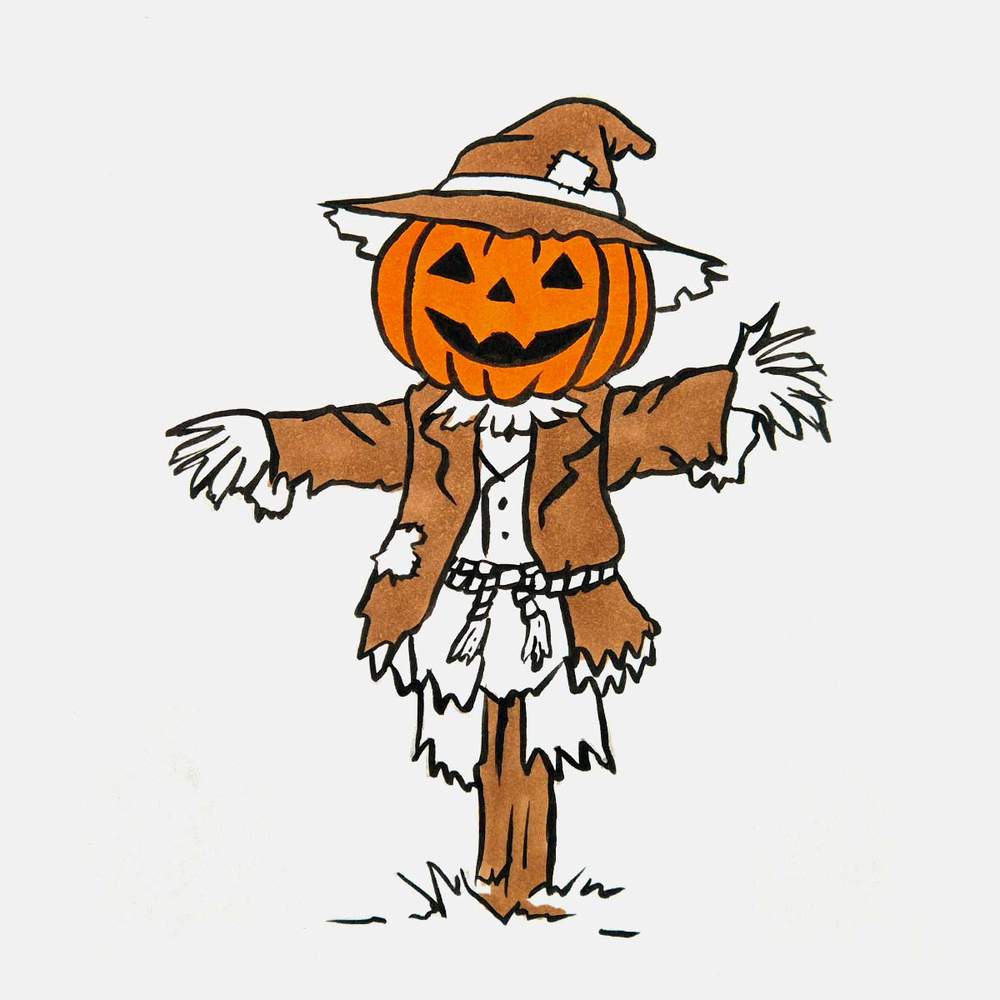
After that, I colored the shirt and the two stitched patches (one on the hat and one on the coat) with a slightly richer orangy brown called Dark Suntan (E110).
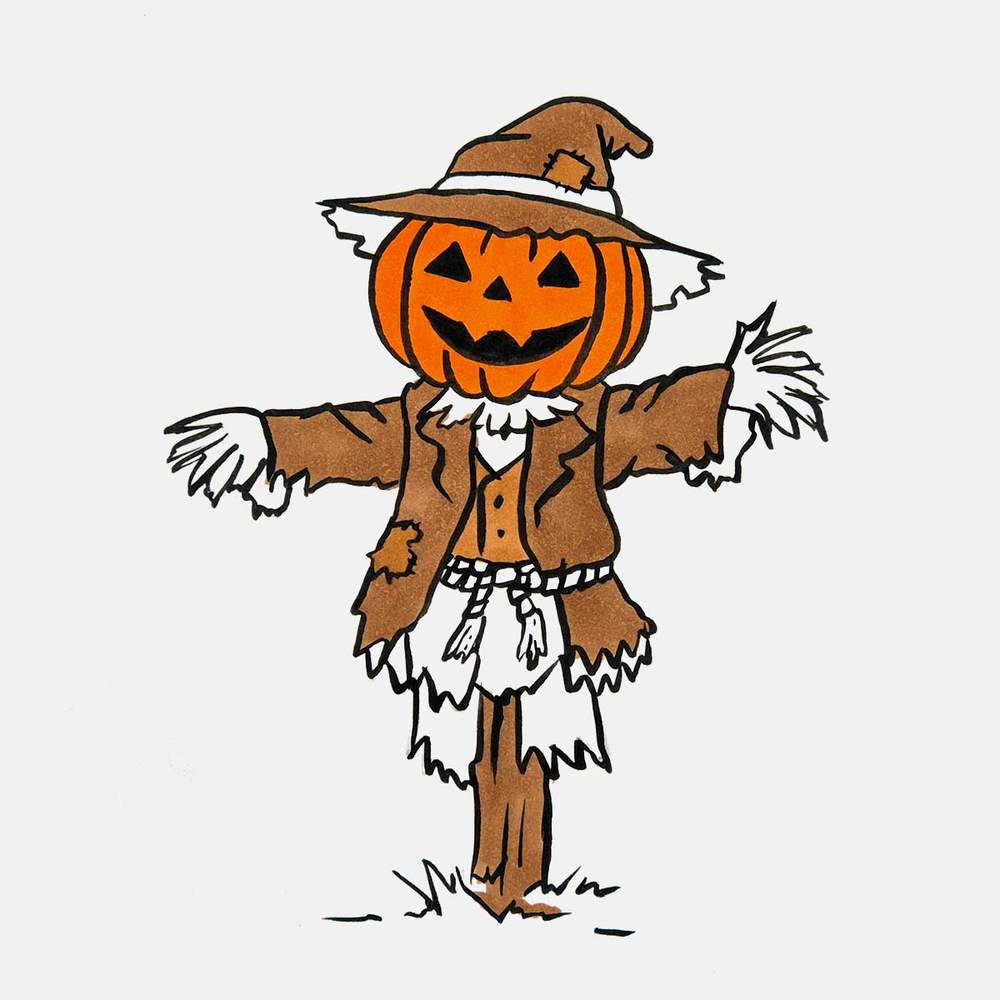
Then, I used a faded and more greenish brown called Clay (E300) to color in the pants.
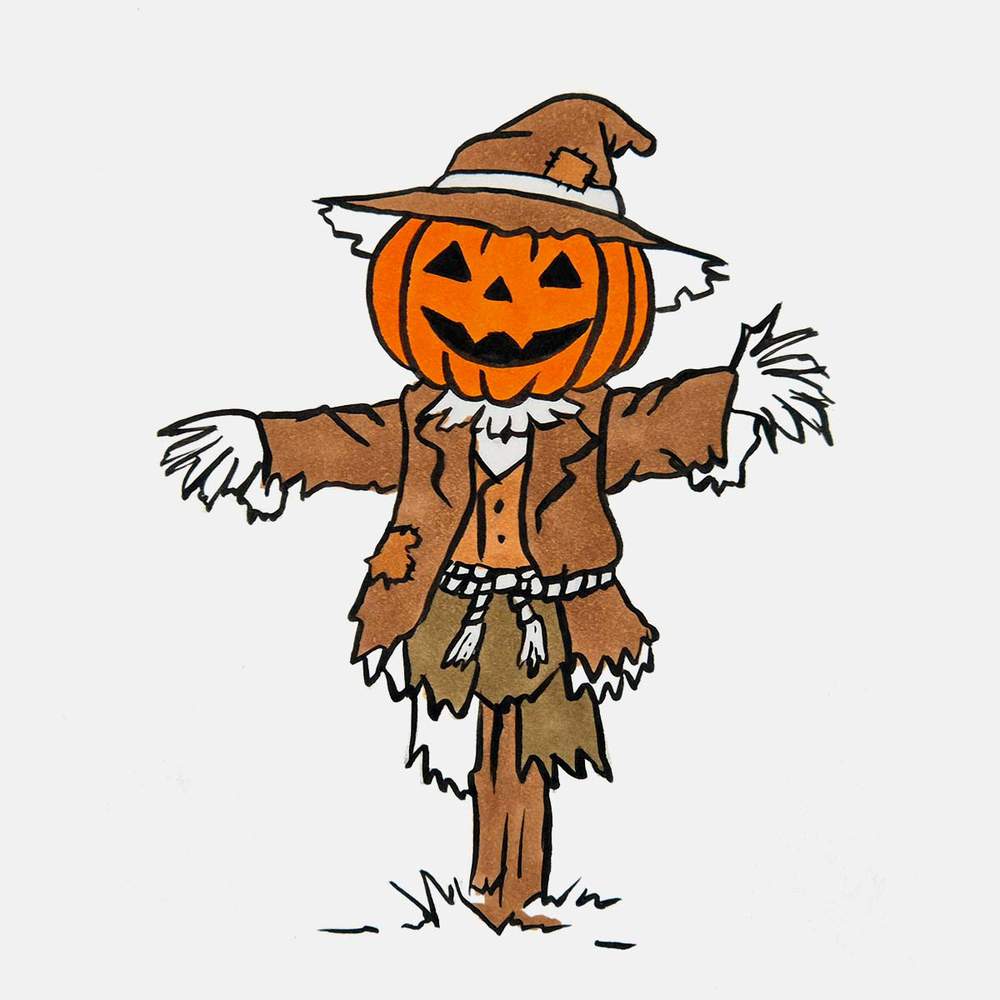
For all the dark parts, I used the same dark brown called Dark Brown (E310), of course. I used this marker to color the dark band around the hat, the bottom side of the hat, the frays on the sleeves, the bottom of the coat, and the left leg of the pants, as the front is all torn off.
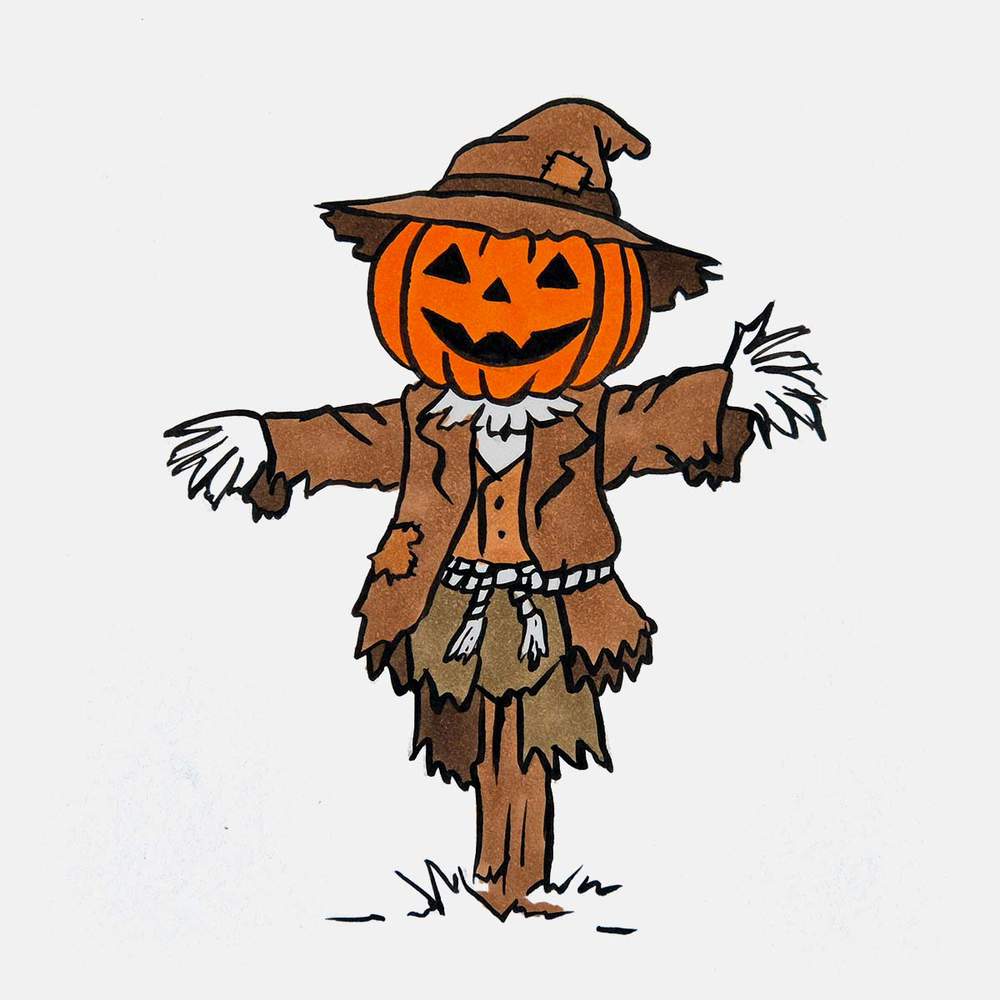
And to finish the scarecrow drawing, I used a faded yellow called Brick Beige (E210) to color the straw collar, the straw hands, the rope belt, and the dried grass on the ground surrounding the wooden post.
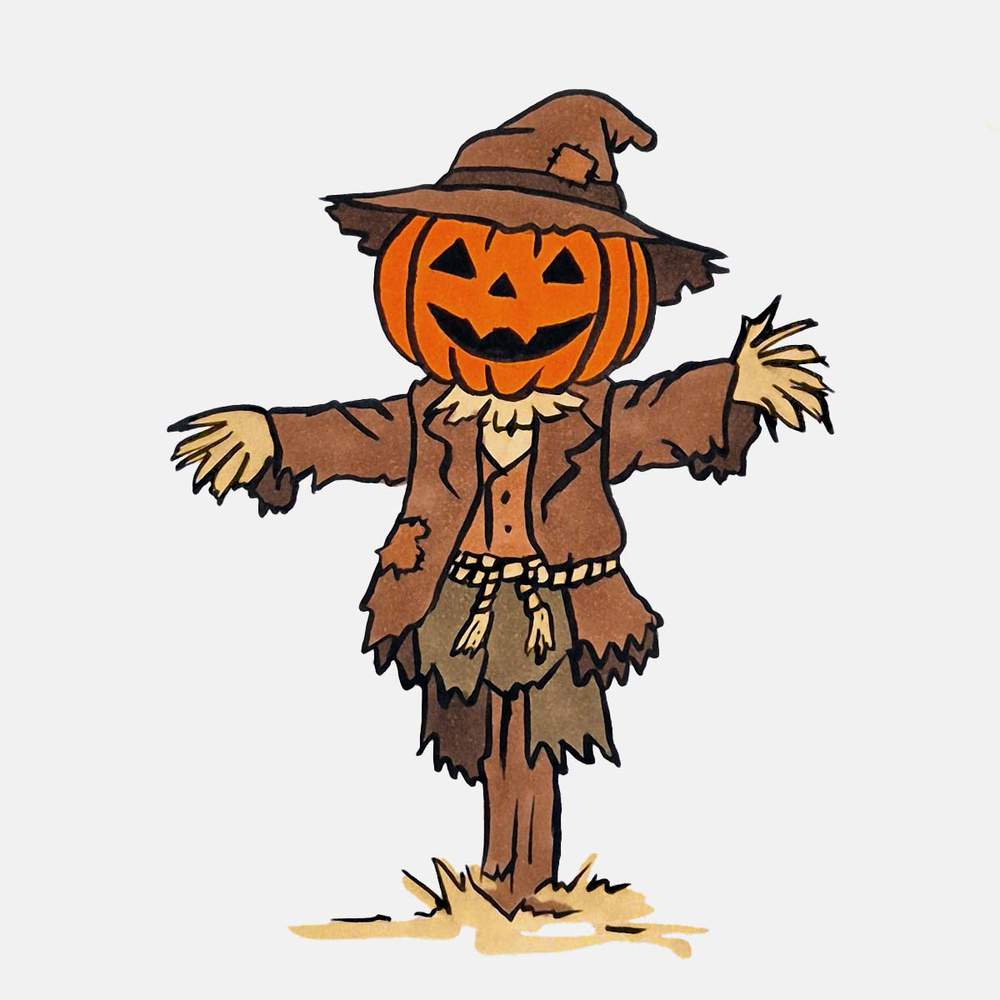
Now you've learned how to draw a scarecrow step-by-step for Halloween.
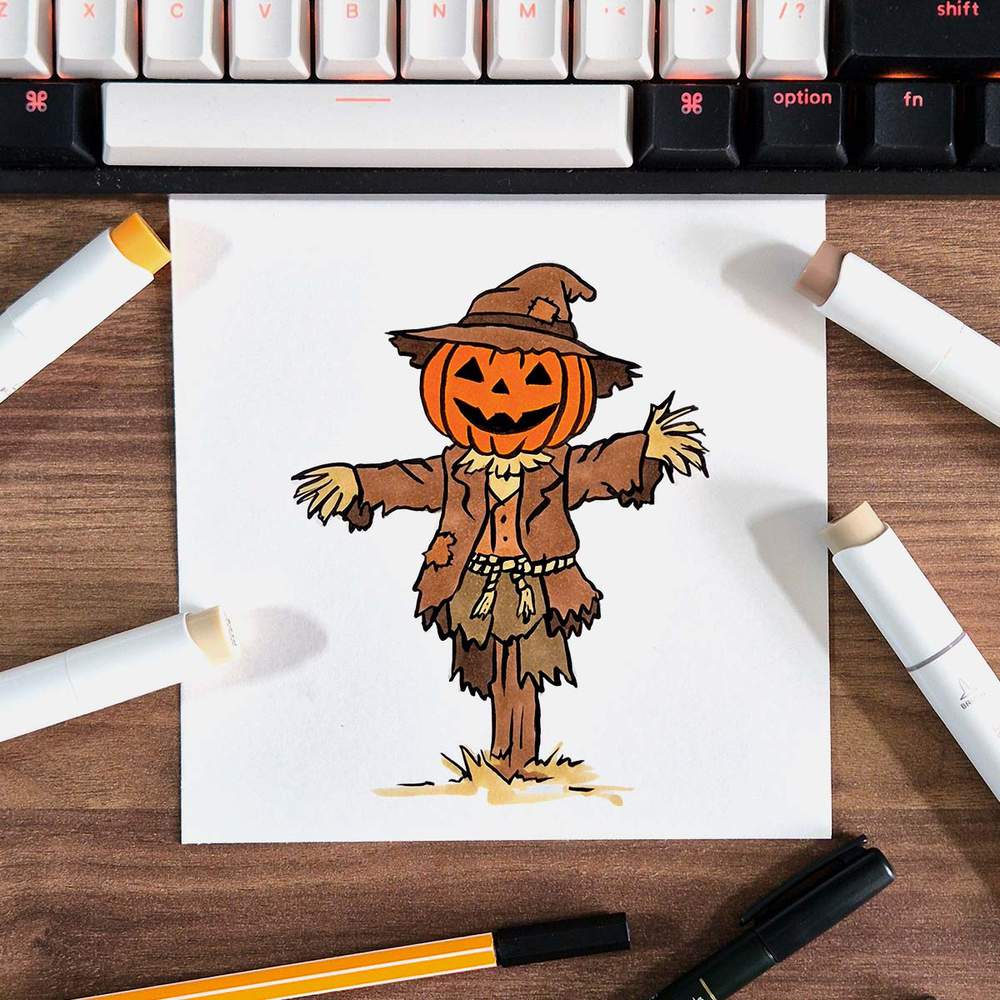
I Turned This Scarecrow Drawing into a Coloring Page!
I recently learned how to use Illustrator to turn my drawings into printable coloring pages. Download this scarecrow and 9 other Halloween coloring pages for free.
I hope you had as much fun as I did drawing this scarecrow, and if you did, you might want to check out my other Halloween drawing guides too. See you there!
Articles You Might Also Like

I love bringing cars to life with alcohol markers and colored pencils.
Whether you're just starting out or looking to improve your skills, I'm here to help!
Click here to learn more about me.


Be the first to comment!
Comments
There are no comments yet.