How To Draw A Sunset - Easy Step-By-Step Tutorial
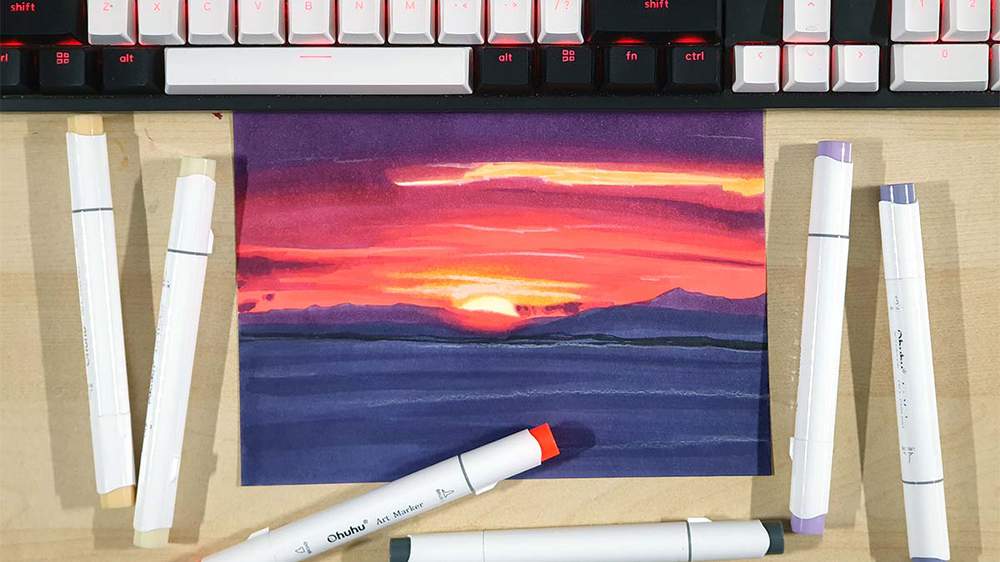
In today's tutorial, I'm going to show you how to draw a simple yet stunning sunset with markers.
This drawing isn't as difficult as it might seem at first. I've broken everything up into many easy-to-follow steps so you can draw one just as well as I did (hopefully).
Let's get started!
Disclaimer: In the name of full transparency, please be aware that this blog post contains affiliate links and any purchases made through such links will result in a small commission for me (at no extra cost for you).
Drawing Materials I Used To Draw This Sunset
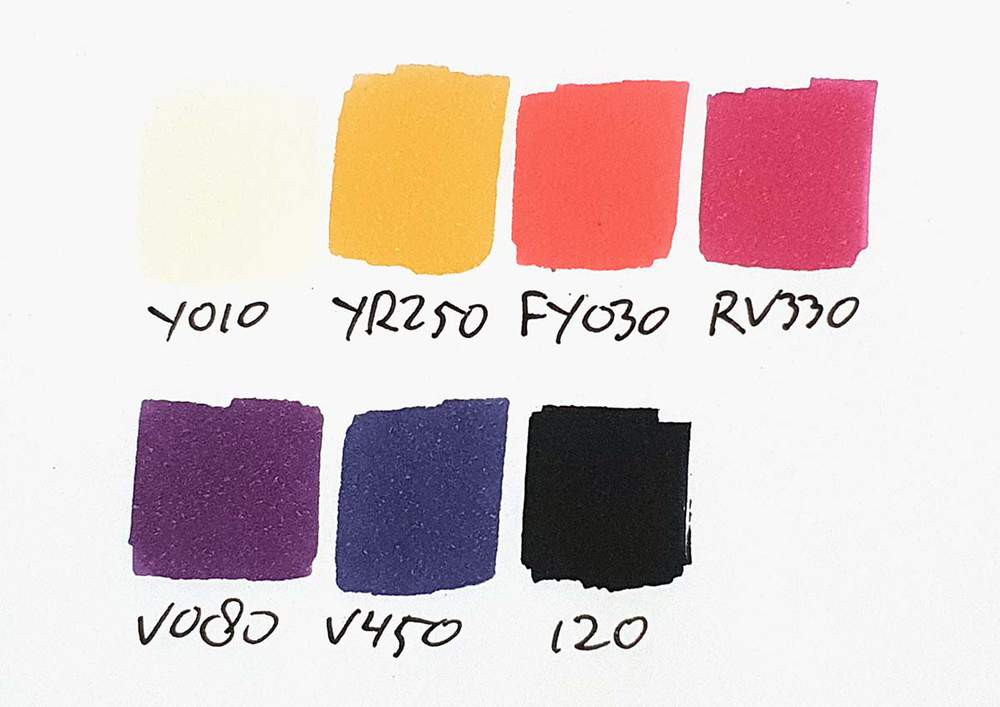
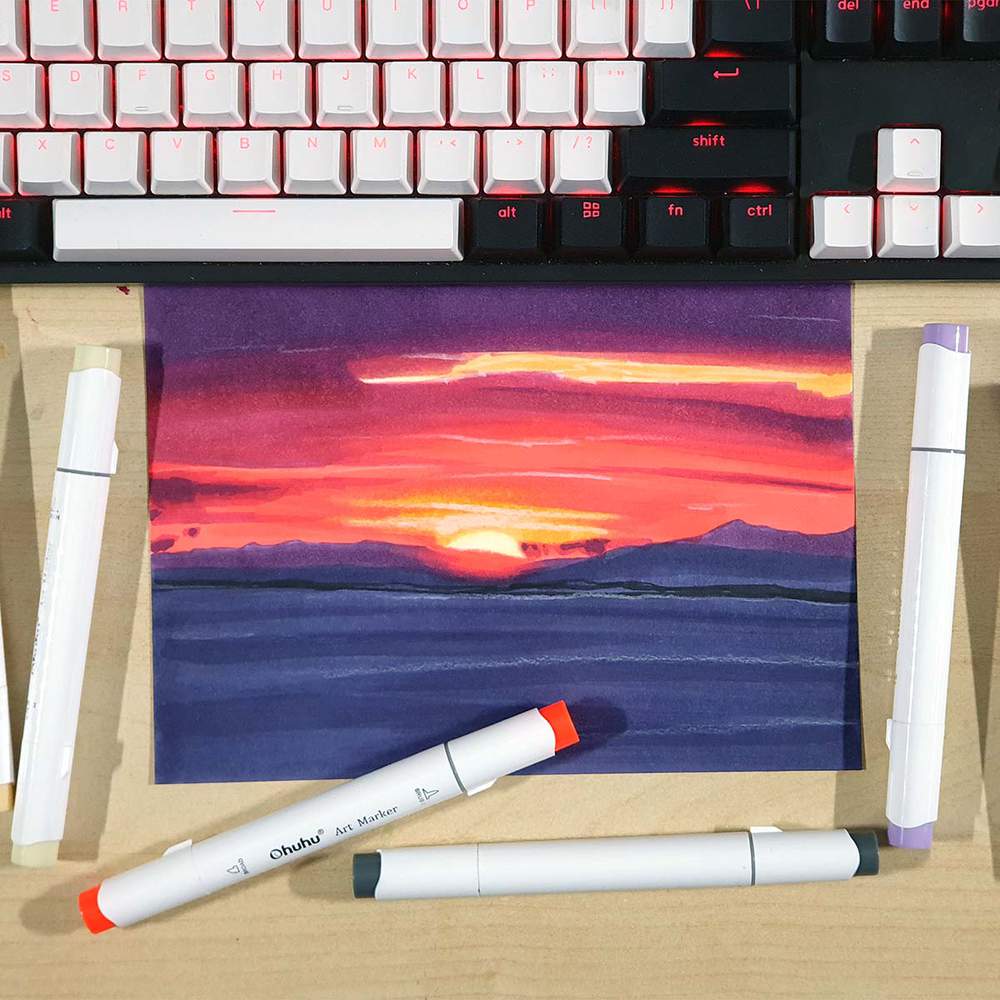
To make this sunset drawing, I used Ohuhu Honolulu markers in the colors Y010 Primrose, YR250 Moccasin, FY030 Fluorescent Red, RV330 Strawberry Pink, V080 Dark Violet, V450 Dark Lavender, and 120 Black.
I also used a white Derwent Chromaflow colored pencil.
I made this drawing on my favorite marker paper: Canson Illustration Manga.
How Do You Draw A Sunset?
First, you sketch the horizon line. Then you sketch a few hills, the sun, and a few clouds. After that, you color the hills with blue and purple colors and the sky with orange, pink, and purple. Lastly, you add a few white lines in the sky to highlight some clouds.
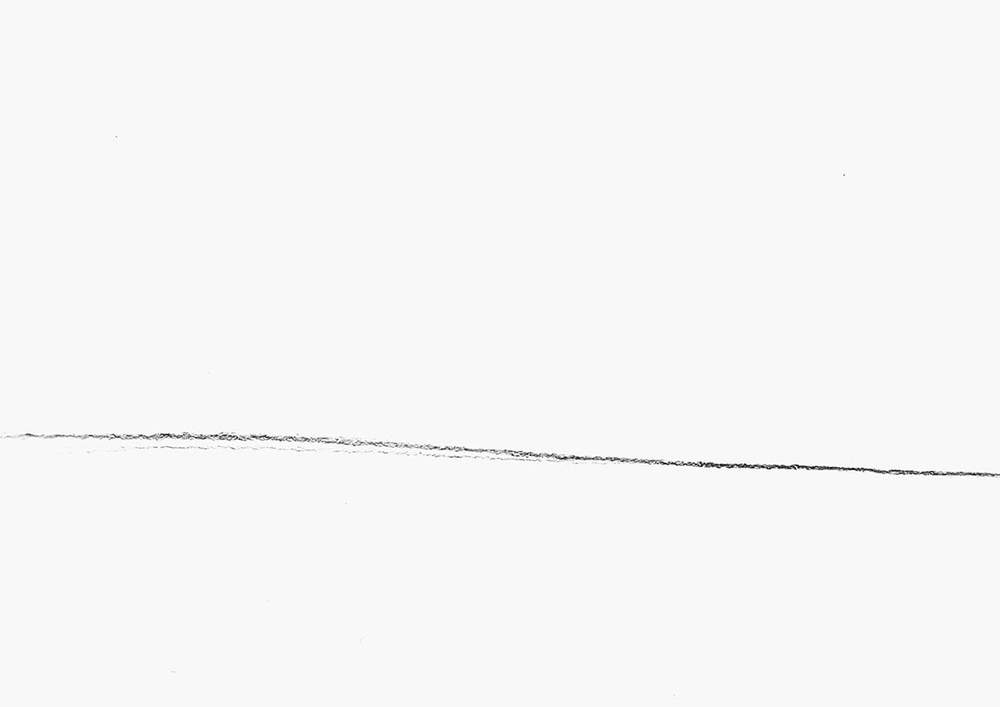
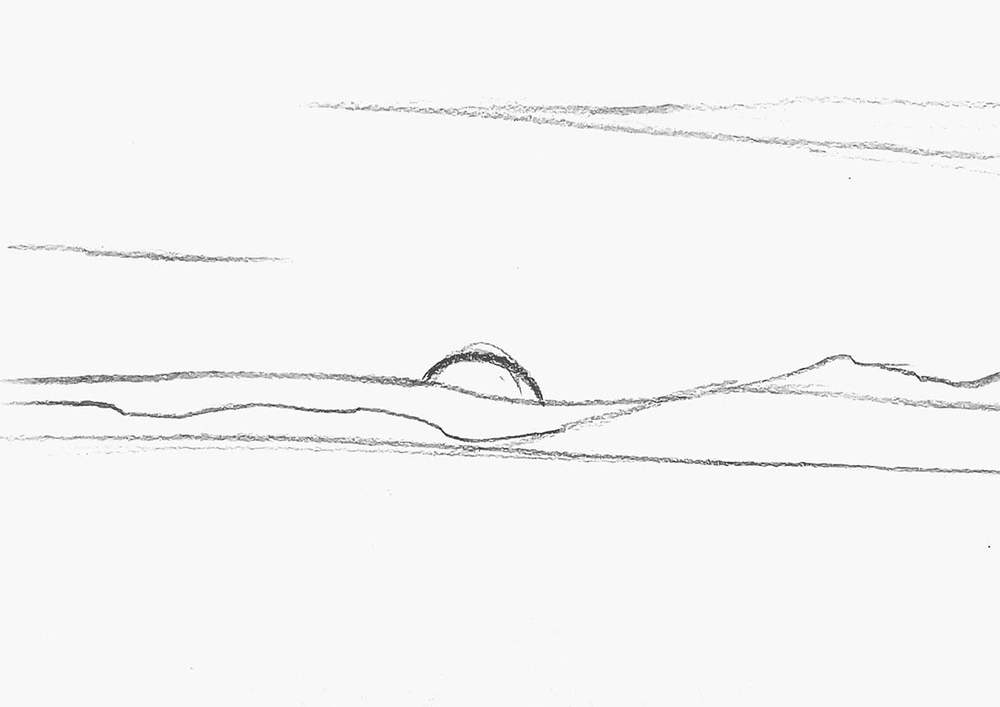
Step 1: Sketch The Horizon Line
To start off the sunset drawing, I first sketched the horizon line.
This is a straight line about a third from the bottom of the paper.
It doesn't have to be perfectly straight as the shoreline this line represents isn't perfectly straight either.
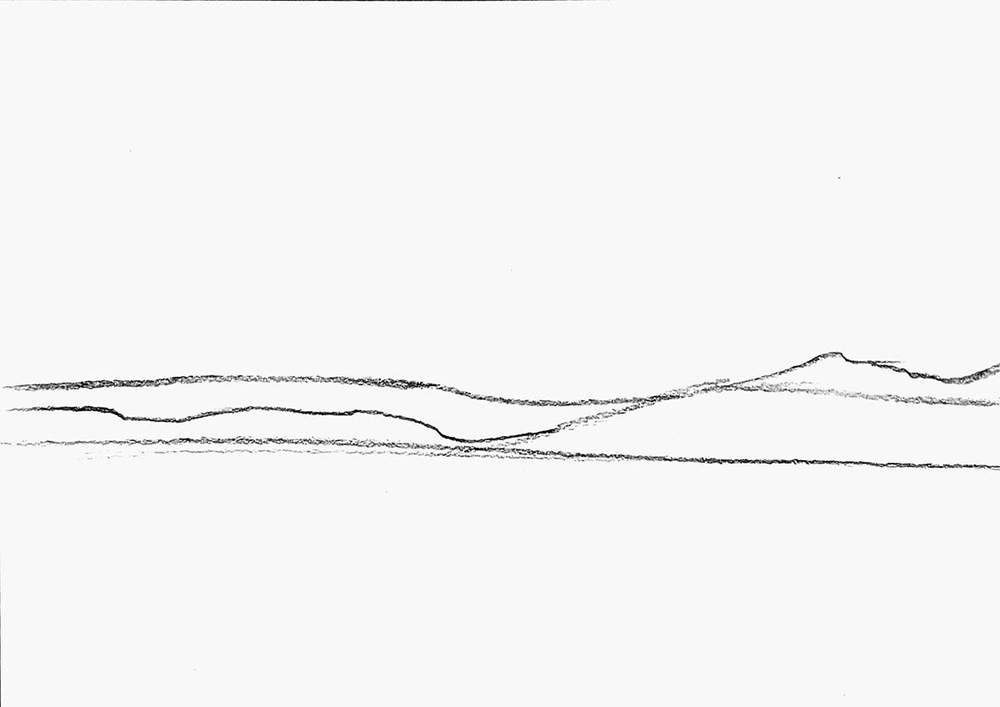
Step 2: Sketch A Few Hills
After that, I sketched some rough hill shapes above the horizon line to make it look more interesting.
I added two rows of hills. The front row is lower than the one behind it.
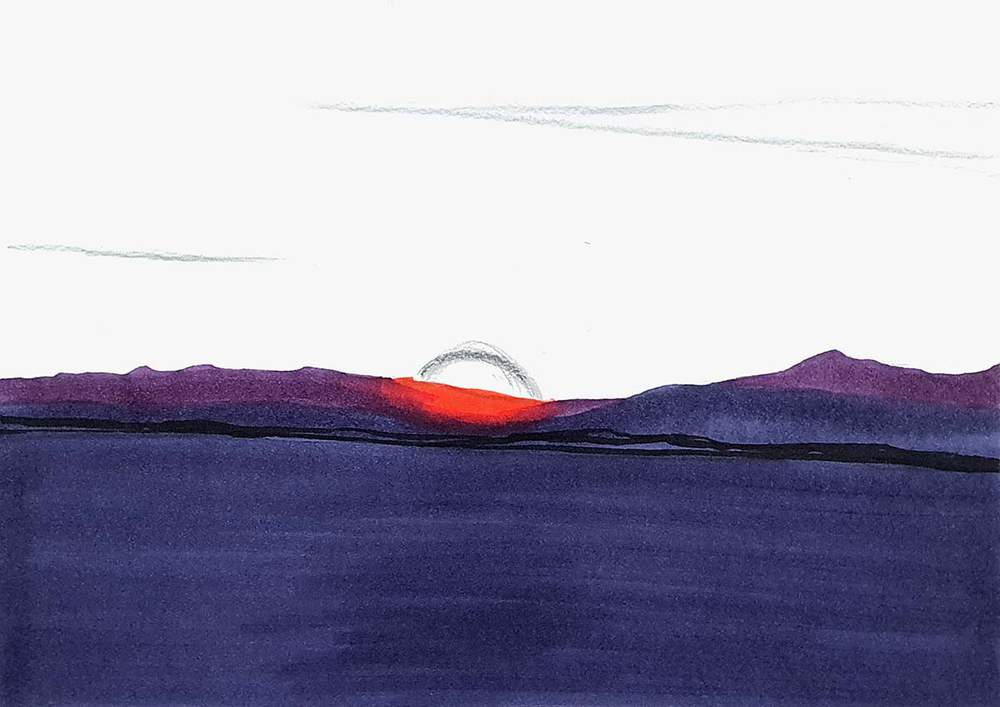
Step 3: Sketch The Sun & A Few Clouds
Next, I sketched the outline of the sun.
Only the top half of the sun is visible and it is approximately in the center of the paper.
I also sketched 2 cloud shapes. One small streak on the left and a bigger one on the right that gets thinner toward the left.
Step 4: Color The Hills & The Water
After that, I started coloring.
I started by coloring the hills closest to the sun. I colored this part with FY030 Fluorescent Red.
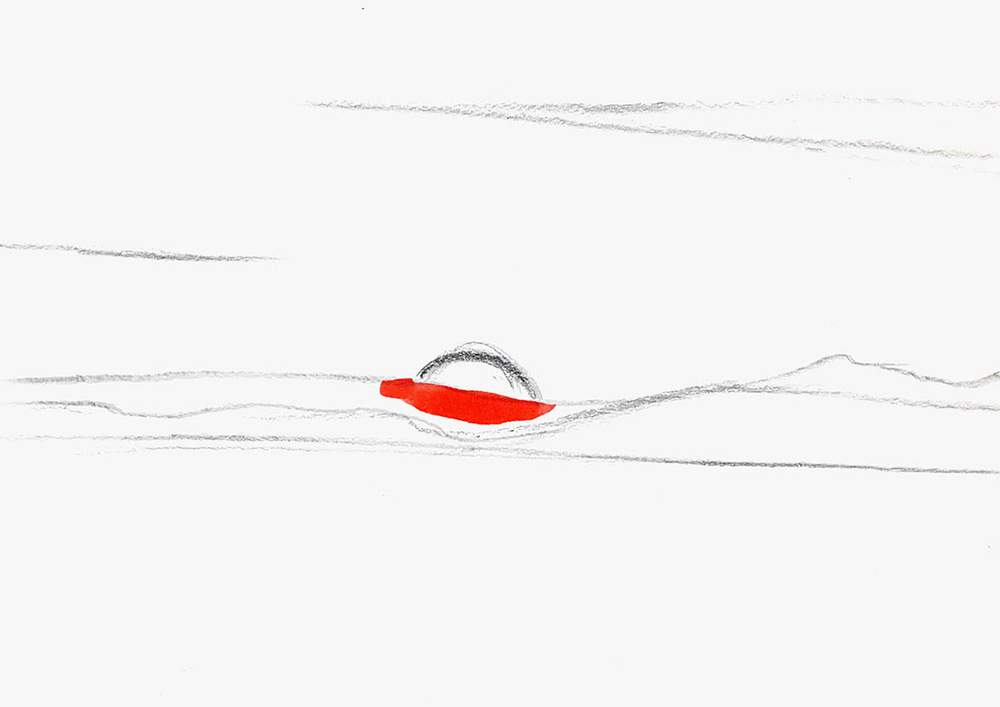
Next, I colored the remainder of the 2nd row of hills with V080 Dark Violet.
I blended this purple into the bright red by coloring over the edge of the 2 colors with FY030 Fluorescent Red.
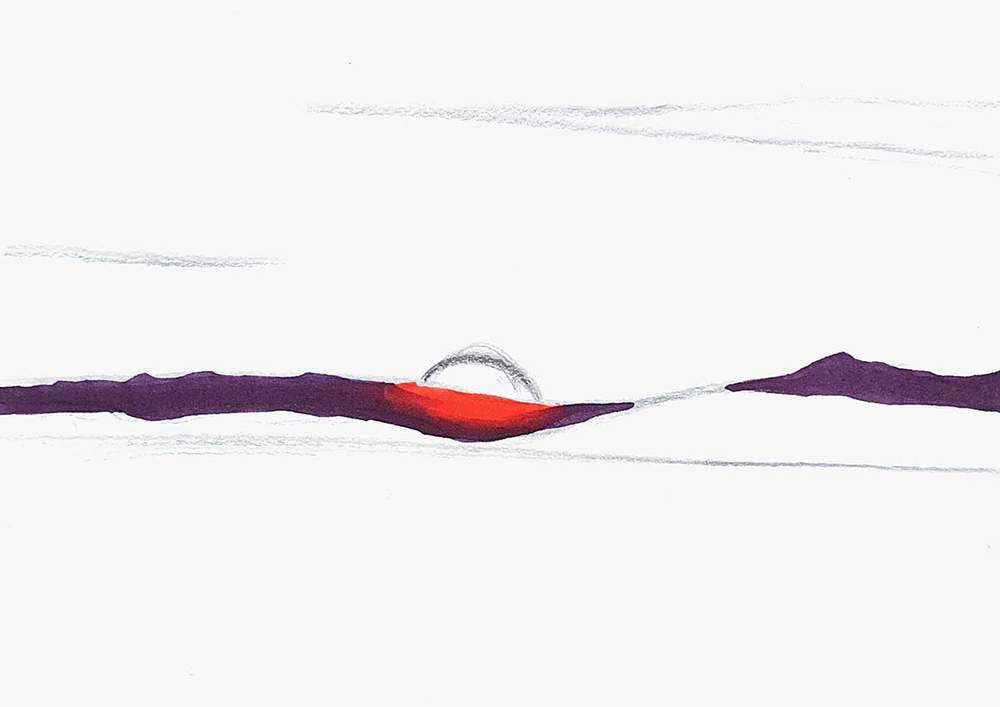
Then, I colored the 1st row and the water with V450 Dark Lavender.
And to finish the land portion of the drawing, I added the shoreline with the 120 Black marker.
I used some wiggly lines to color the shoreline to make it look uneven or rocky.
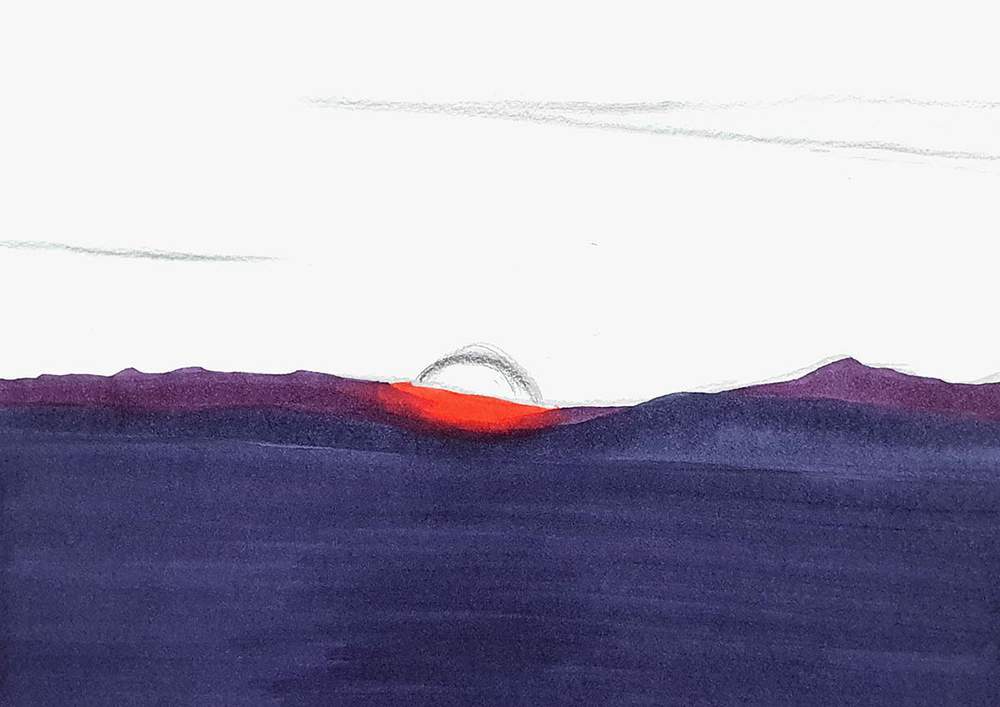
Step 5: Color The Sky & The Clouds
Next up, I colored the sun with Y010 Primrose and the surrounding sky and clouds with YR250 Moccasin.
I made the clouds and sky around the sun more streaky as there were some streaky clouds. To make this effect, I used the brush nib.
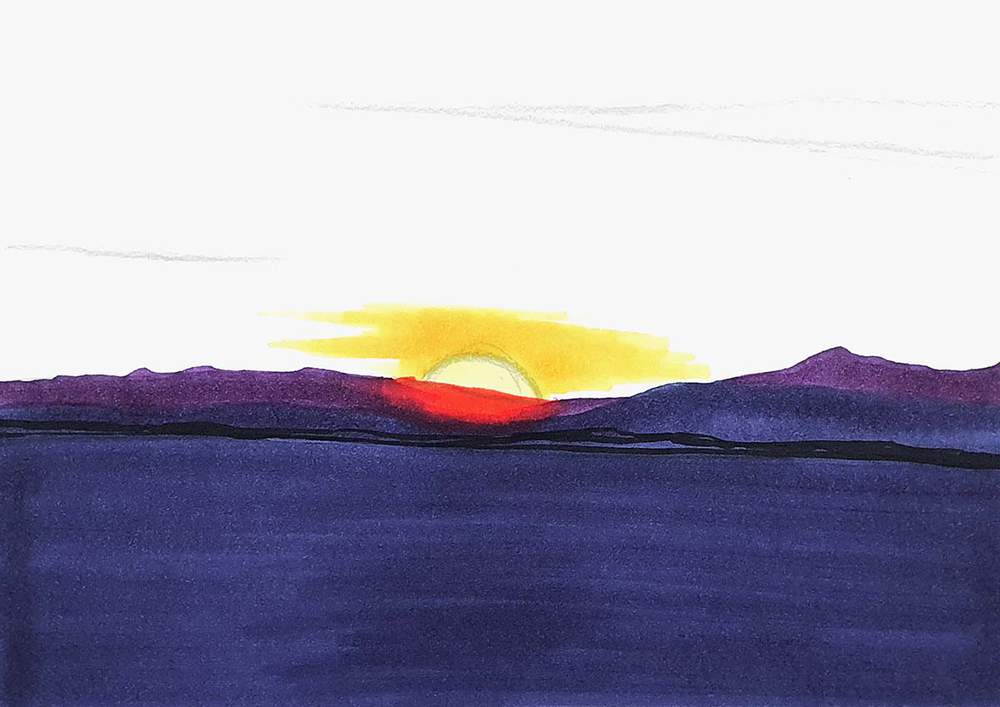
Then, I colored the remainder of the bottom half of the sky with FY030 Fluorescent Red and blended that into the light orange by coloring over the edge of the two colors with YR250 Moccasin.
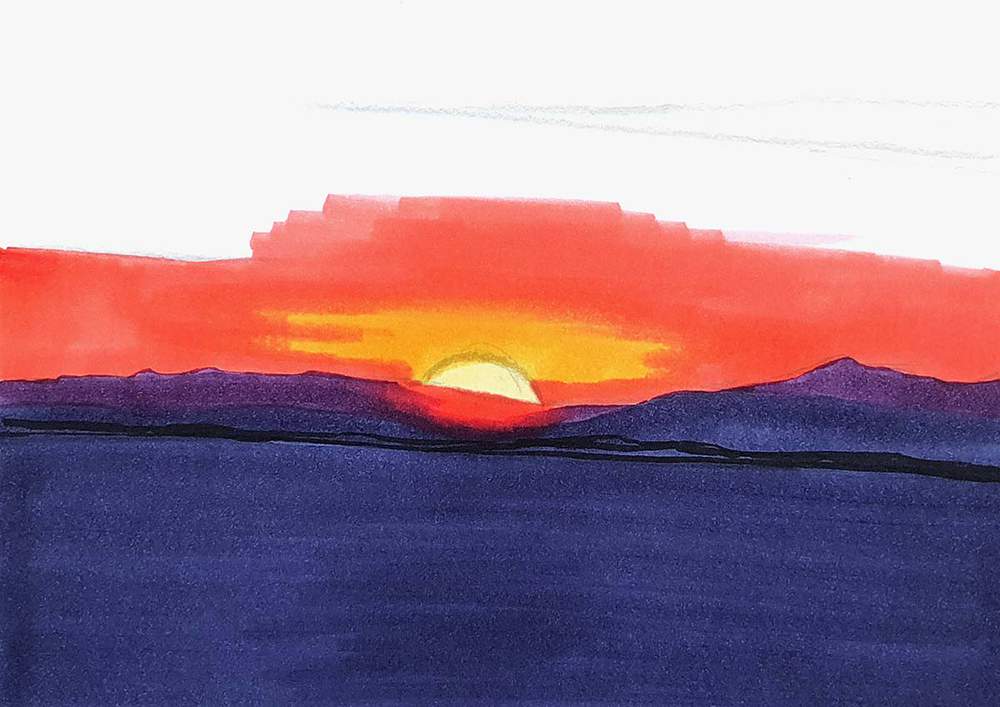
Next, I colored the big cloud shape on the top right with YR250 Moccasin and I colored the lower half of the remaining part of the sky with RV330 Strawberry Pink.
I blended this into the fluorescent red by coloring over the Strawberry Pink edge with the FY030 Fluorescent Red marker. I left the left third unblended to make it look like a cloud.
I also added a few dark cloud shapes to the left and one to the right with RV330 Strawberry Pink. And I added a few small clouds to the right of the sun.
Lastly, I used V080 Dark Violet to color the rest of the sky and to add some dark shadows in the clouds we just drew.
I blended the top bit of the sky into the dark pink by coloring over the edge of the purple and pink with RV330 Strawberry Pink.

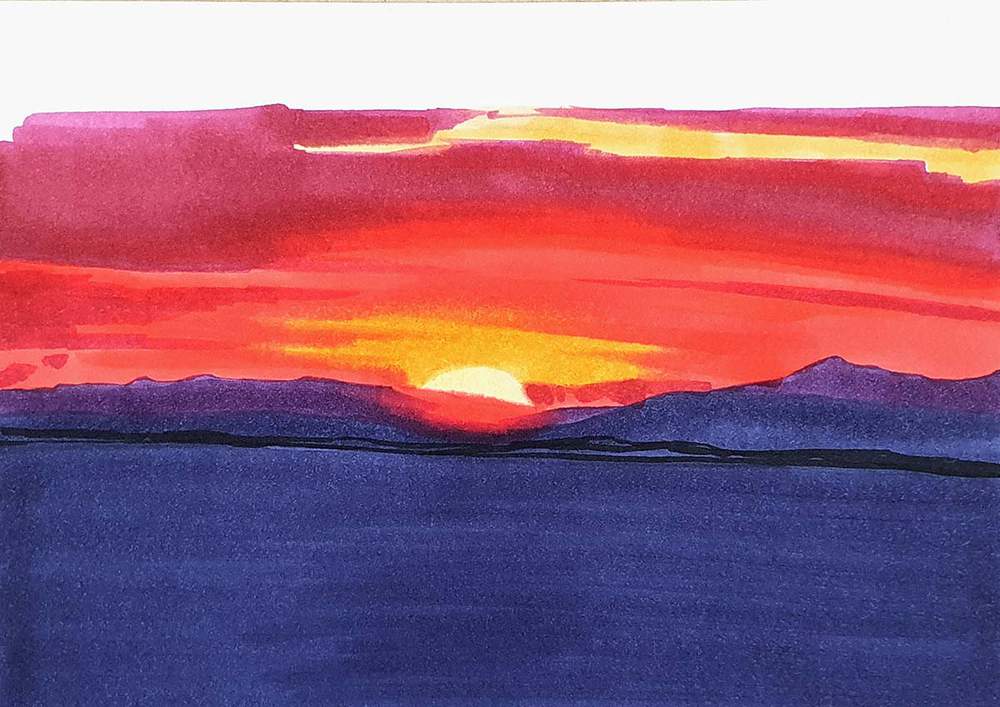
Step 6: Add A Few Highlights With A White Pencil
To finish this drawing off, I added a few highlights with my White Derwent Chromaflow pencil.
I added some wave lines on the water, just 2 or 3, with light pressure.
I added some highlights in the orange clouds above the sun and on the big cloud.
I also added a few lines in the sky to make it look like there are some tiny bright clouds.
Lastly, I used V450 Dark Lavender again to add thick dark streaks below the highlights I just made in the water. This makes it look more like actual waves.

And That's How You Draw A Sunset
I hope you liked this tutorial!
Let me know how your drawing went!
Thank you for following along and I'll see you in my next step-by-step guide.

My go-to alcohol markers for blending, rich color payoff, and amazing value. The brush tips feel super natural to draw with — a must-have for smooth gradients and realistic shading!
- Brush + chisel tips
- Great for beginners & advanced artists
- Budget-friendly alternative to Copics
Tags
Articles You Might Also Like


I love bringing cars to life with alcohol markers and colored pencils.
Whether you're just starting out or looking to improve your skills, I'm here to help!
Click here to learn more about me.


Be the first to comment!
Comments
There are no comments yet.