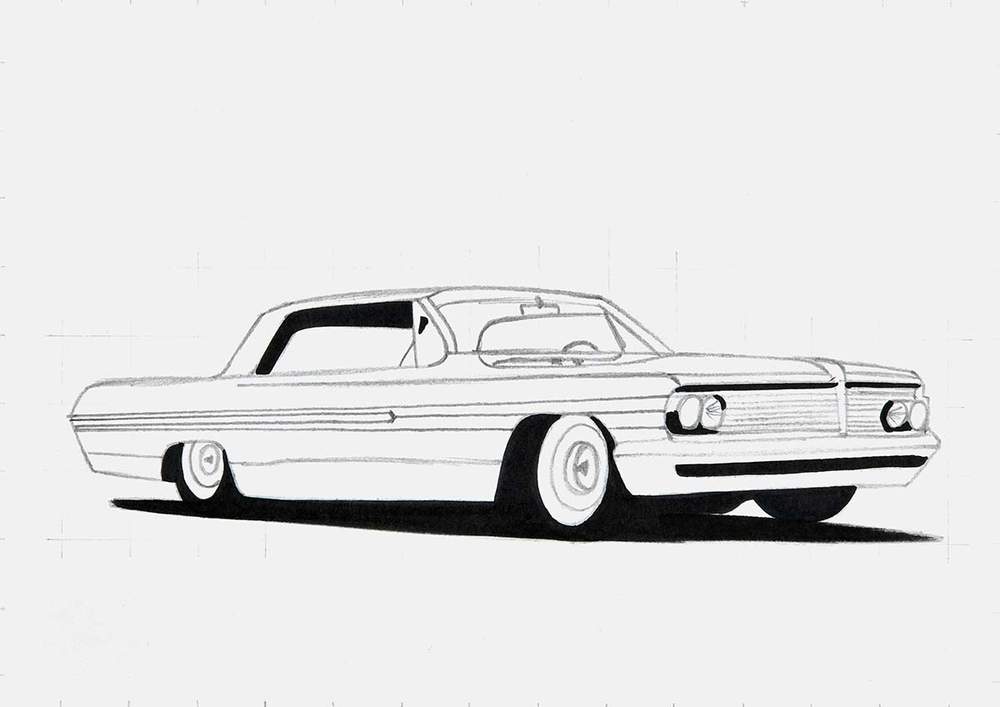
How to Draw a Lowrider in 14 Clear Steps - Realistic & Easy Step by Step Guide
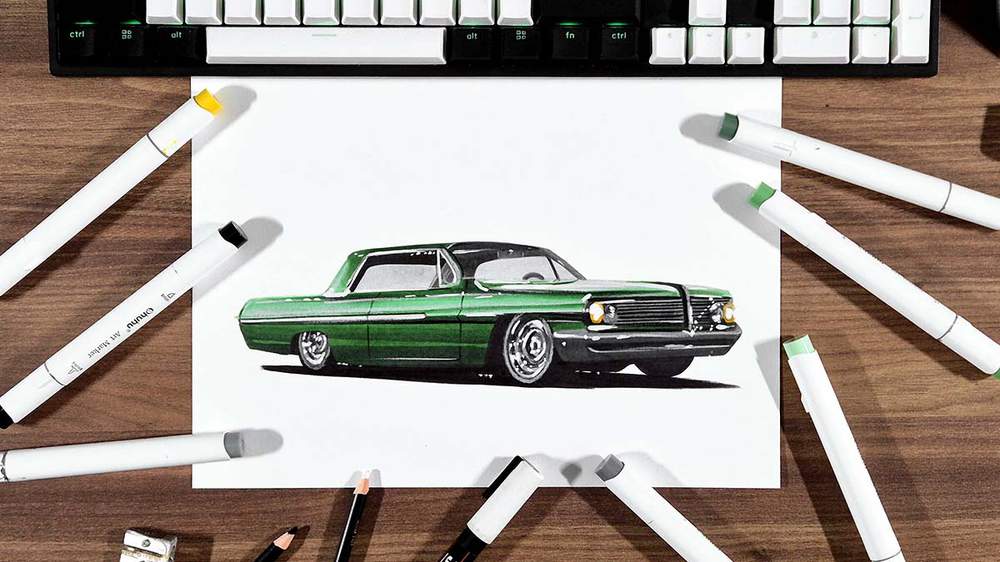
I have made many realistic car drawing guides over the past few years, and people find them very helpful.
In this car drawing tutorial, I'll show you how to draw a realistic lowrider car.
I explain every step in detail, and there are a lot of pictures for each step so you can easily follow along and create your very own lowrider drawing.
And you only need a few art supplies to create this drawing.
Let's get into it!
Disclaimer: In the name of full transparency, please be aware that this blog post contains affiliate links and any purchases made through such links will result in a small commission for me (at no extra cost for you).
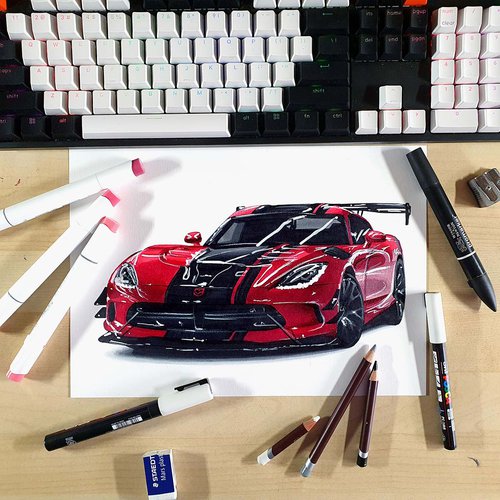
Drawing Supplies I Used
To make this drawing, I used Ohuhu Honolulu markers in the colors Neutral Grey 03 (CG030), Neutral Grey 3 (NG03), Neutral Grey 07 (CG070), Neutral Grey 6 (NG06), Black (120), Sunflower (Y2), Leaf Green (G440), Pine Tree Green (G470), and Chromium Oxide Green (G7).
You can also buy these colors separately on their website.
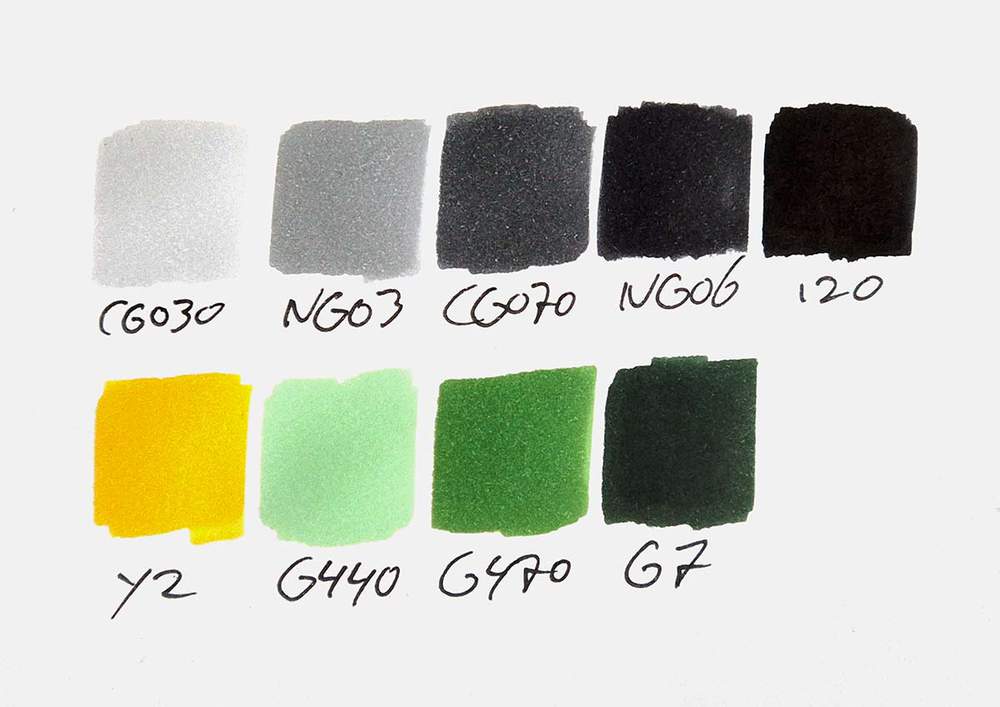
I also used some Derwent Chromaflow colored pencils to add details. I used White 2400 and Black 2300.
I used a white Posca PC-3M paint marker to add white highlights.
And I used an HB pencil, an eraser, and a ruler.
I made this drawing on A4-sized Canson Illustration Manga Paper.
How Do You Draw a Lowrider?
To create a drawing of a lowrider, you first search for a reference photo you like.
Then, you choose your sketching method and sketch the car as accurately as possible. There are tricks you can use to make this easier.
Next, you color your lowrider part by part from light to dark, without worrying about the details yet.
And finally, you add details with a white and a black colored pencil and some white highlights with a white paint marker.
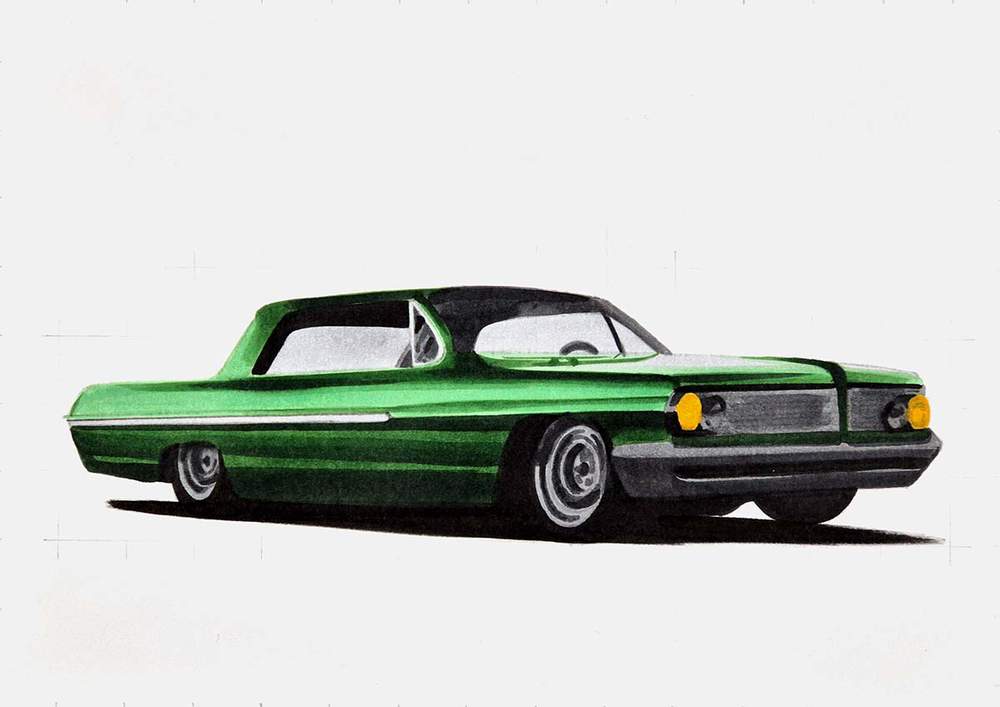
Step 1: Find a Reference Photo of a Lowrider
To create a realistic drawing of a lowrider car, you'll first need to find a reference photo of one that you like.
I like looking through Unsplash, and on there, I found this image of a green lowrider that I will be using as the reference during this car drawing tutorial.
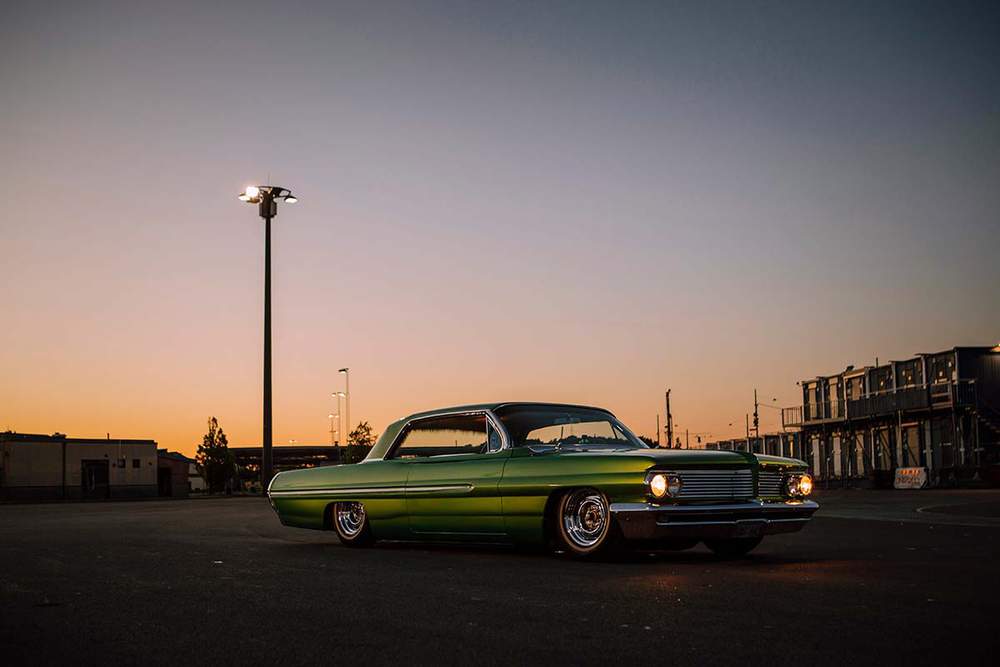
You can use a different image if you want. The steps will be roughly the same.
Step 2: Add a Grid Overlay to the Reference Photo & Sketch the Grid on Your Paper
Now that we've found the reference photo we'll be using for this drawing, we can start sketching the car.
To make sketching the lowrider a little bit easier, I like to use the grid method.
This method makes sketching accurate proportions a lot easier, and it speeds up the process a bit.
If you're not sure what the grid method is or how you can use it, I highly recommend you check out this guide I made about it.
To use the grid method, we first need to add a grid overlay to our reference photo. This might sound difficult, but it's easily done by uploading the image to my grid overlay tool.
I set the width of the paper to 297mm and the height to 210mm, as this is the paper size I'm using. If your paper is a different size, you can change it to your size.
Then, I set the number of horizontal squares to 15, which automatically sets the number of vertical squares to 10.6. Each square will be 19.8 by 19.8mm, but I like to round it to 20mm or 2cm (~4/5 inch), which is a lot easier to sketch.
Again, if you want more squares, you can add more squares. This will make it easier to sketch more precisely.
Next, I moved the lowrider so that it's in the center of the grid.
To make sketching the car a bit easier, I like to mark out the squares that contain parts of the car in a different color. (You can't do this yet in my grid tool. I used Photoshop to do it.)
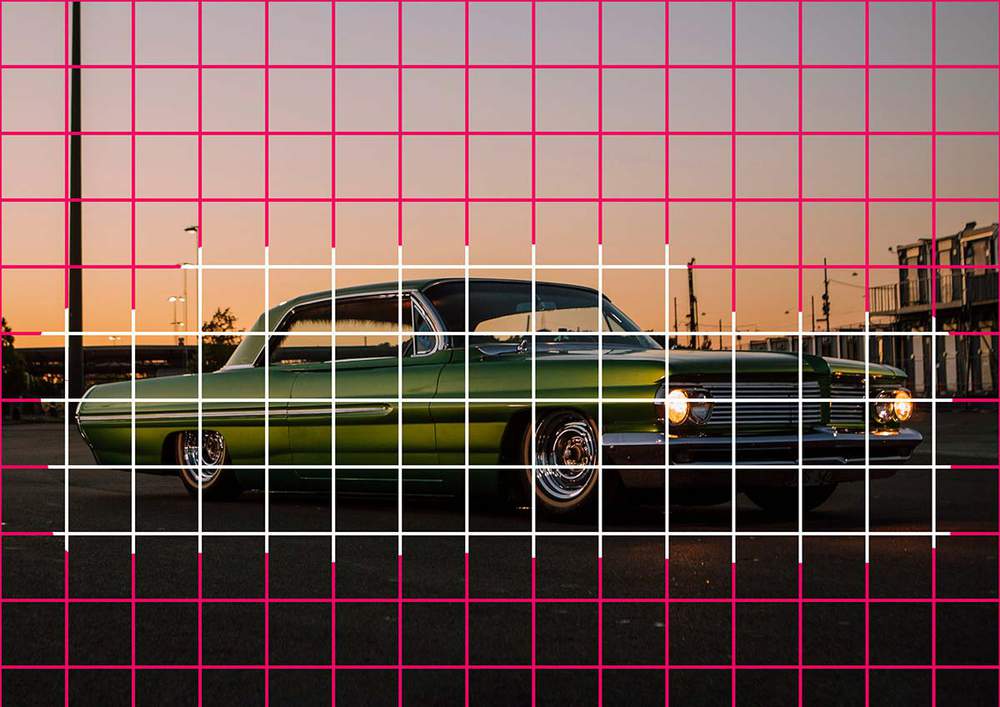
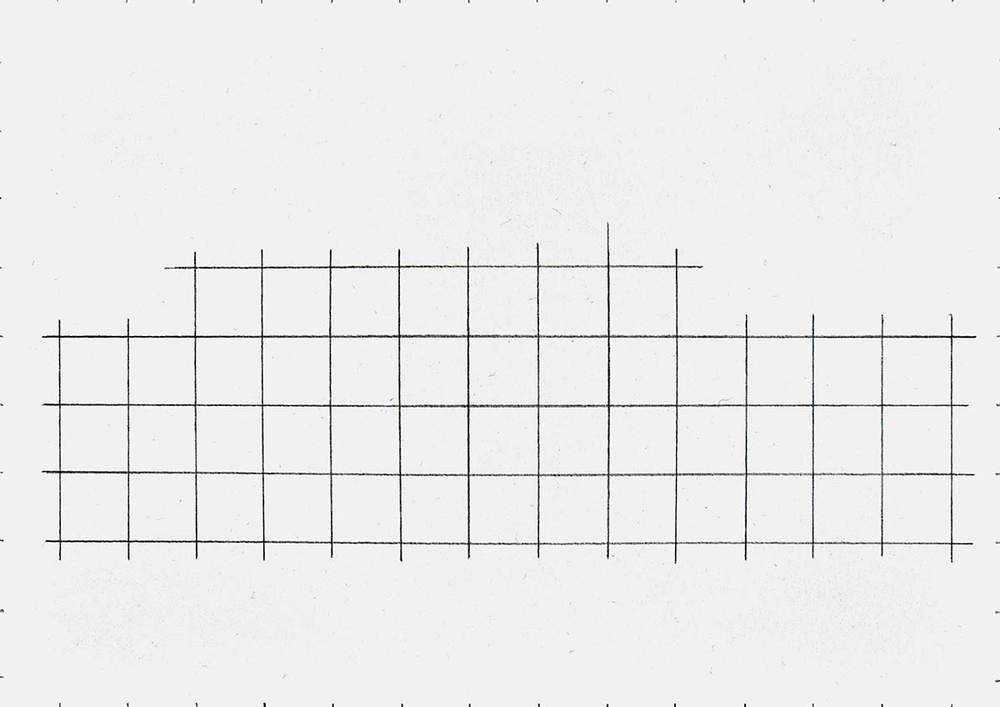
Now that we've added the grid to the reference photo, we can replicate that same grid on our paper.
I start by adding markings every 2 cm on the edges of the paper, and I keep in mind that the squares on the right edge are slightly less than 2cm, as I rounded them up, and that the squares on the bottom edge are only about 1cm tall.
Next, I recreate the grid. I like to only sketch the squares that contain parts of the car, which I marked earlier.
When I finished sketching the grid, it looked like this:
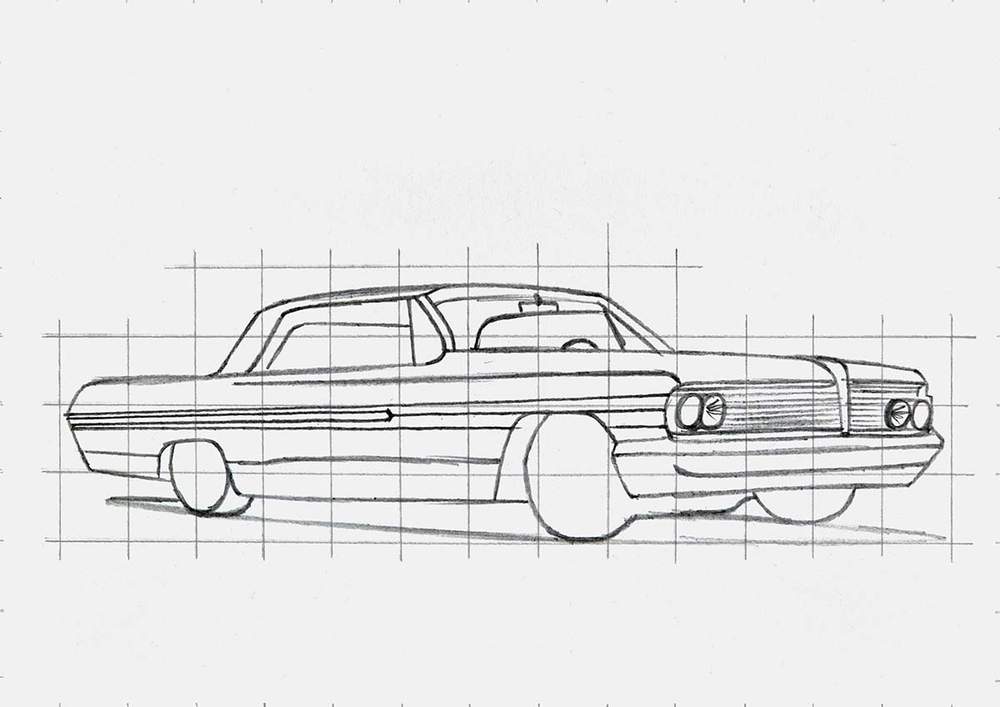
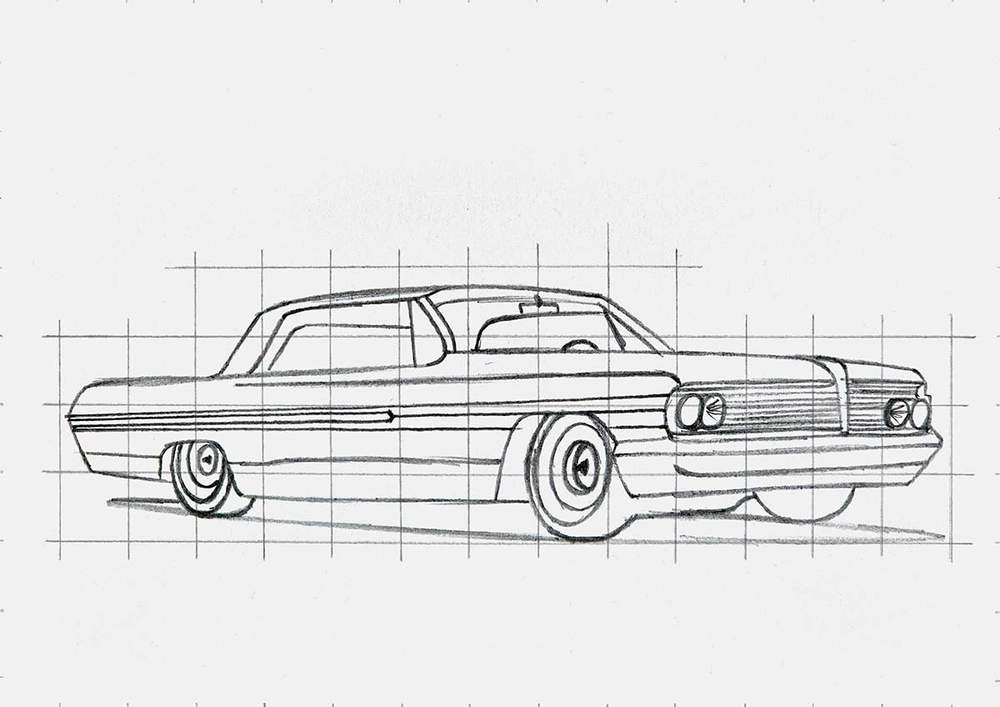
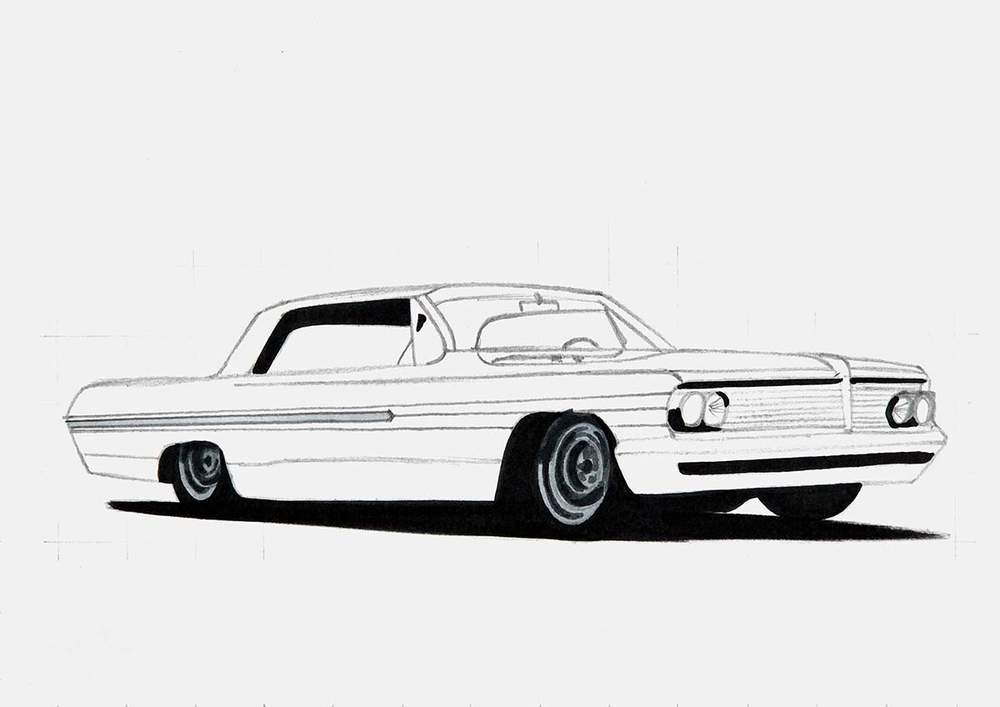
Step 3: Sketch the Outline of the Lowrider Car
With the grid now drawn, we can start sketching the outline of the lowrider.
I like to start with the outline of the car as this forms the basis of the drawing. Everything else we're going to sketch has to go inside of this.
I broke the outline up into 3 parts: the main body, the roof line, and the wheels.
I started by sketching the main body. This consists of a few long straight lines and some more detailed curvy lines.
I started by sketching the big, long lines on the top.
I first marked where those lines start, end, and where they cross the grid lines. Next, I sketched the lines in on long motion.
Then, I focused my attention on the rest of the outline. I again marked the starting and ending points and where they cross grid lines, and then I sketched the lines one by one until the outline of the main body was done.
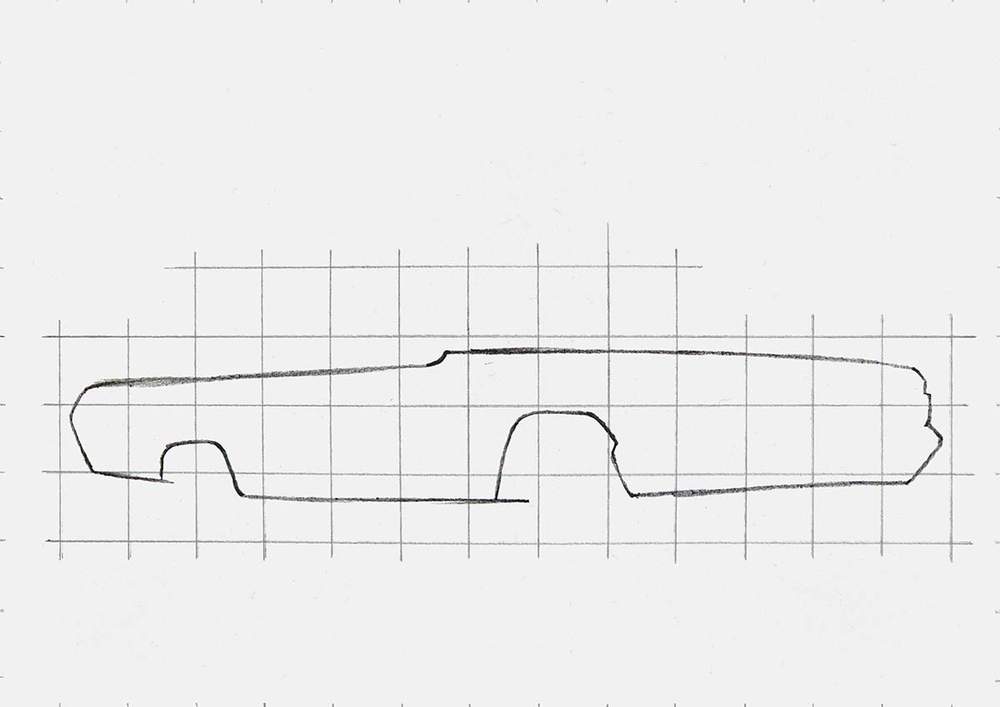
Next, I added the window and roof line on top of the main body, the wheels, plus some of the bits between the front wheels.
I used the same technique as before: I marked the starting and ending points, where the lines cross grid lines, and then I sketched them.
For the outline, it's very important to make sure you sketch everything in the right square. If your sketch looks off, it's probably because you've sketched a line longer or shorter than it needs to be, or you sketched a wheel in the wrong square.
This still happens to me all the time, so I make sure I fix these mistakes first before I move on to the next step.
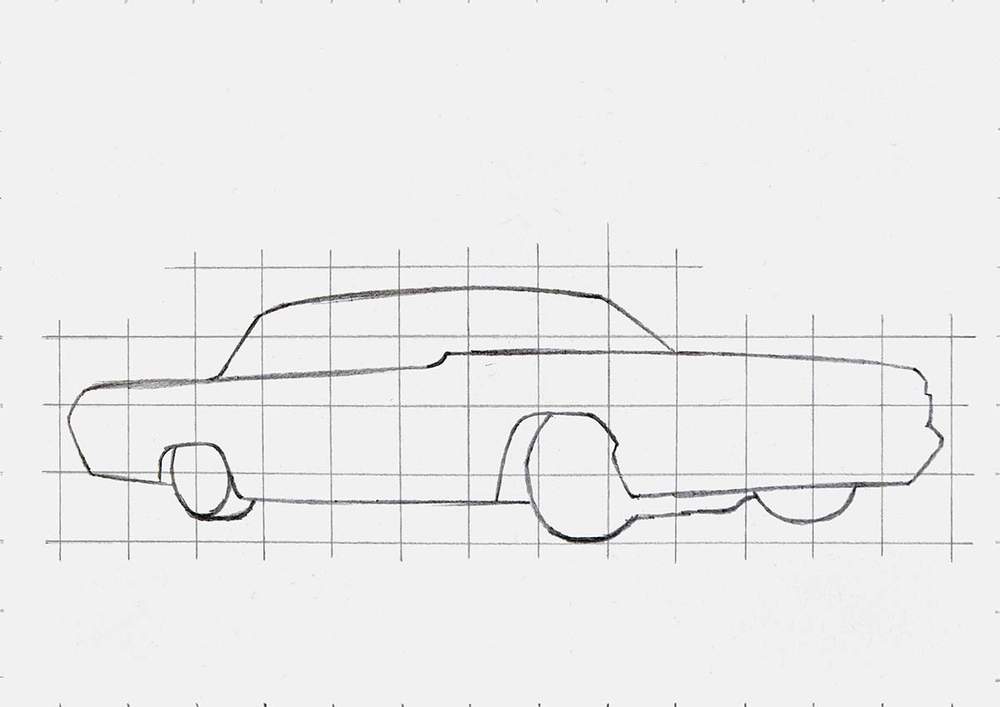
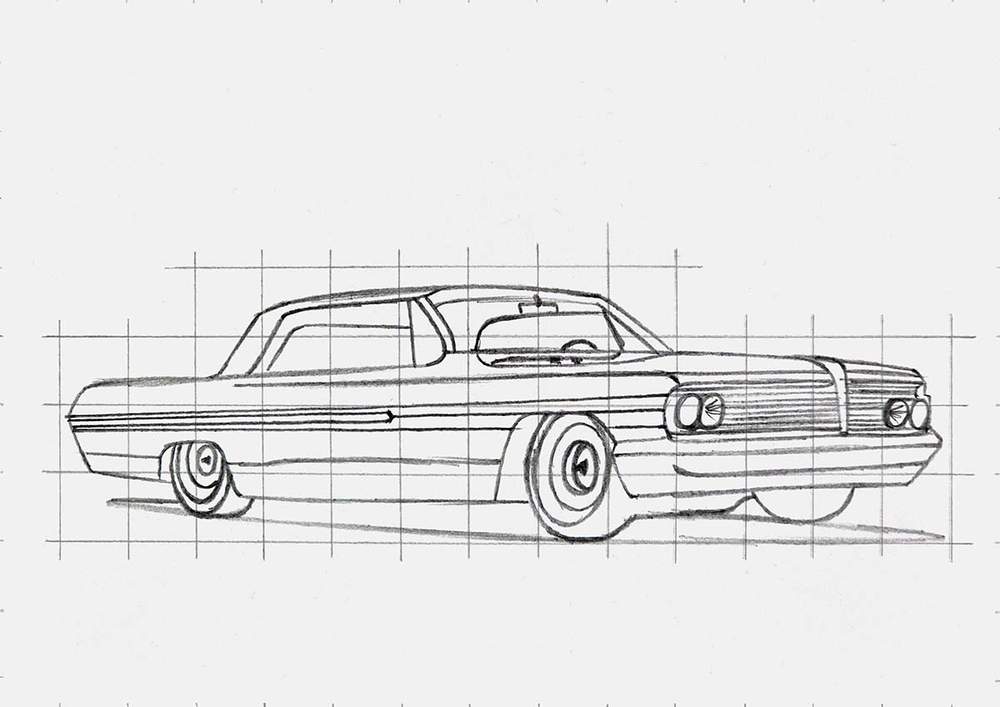
Step 4: Add the Parts & Details to the Lowrider
With the outline of the lowrider done, it's a lot easier to add all the parts to the car, like the windows, the chrome detailing, the grill, etc.
To sketch these parts, I used the same technique again.
I first sketched the outline of the parts. I sketched the outline of the grills and the headlights, I added the chrome strip and the body lines on the side of the car, and I added the outline of the windows.
Next, I added all the details to those parts.
I added the interior, the steering wheel, the rearview mirror, and the edges of the rear and side windows. I also added the lines in the grill and some details on the center-most headlights. And I added a slightly wobbly line towards the bottom edge of the car, and I sketched the outline of the shadow below the car.
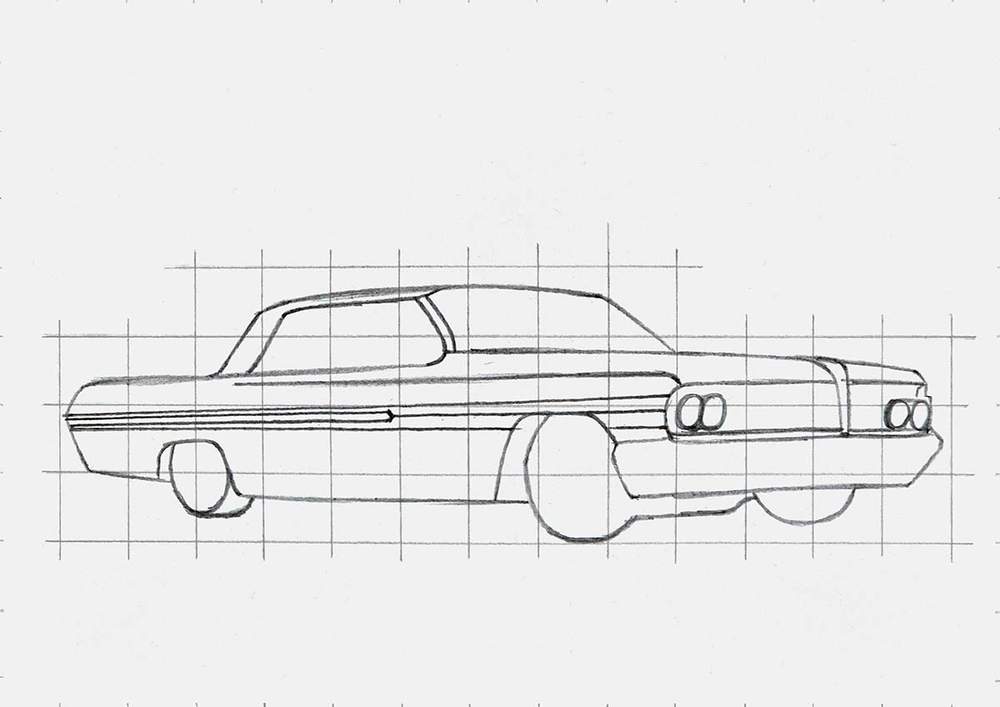
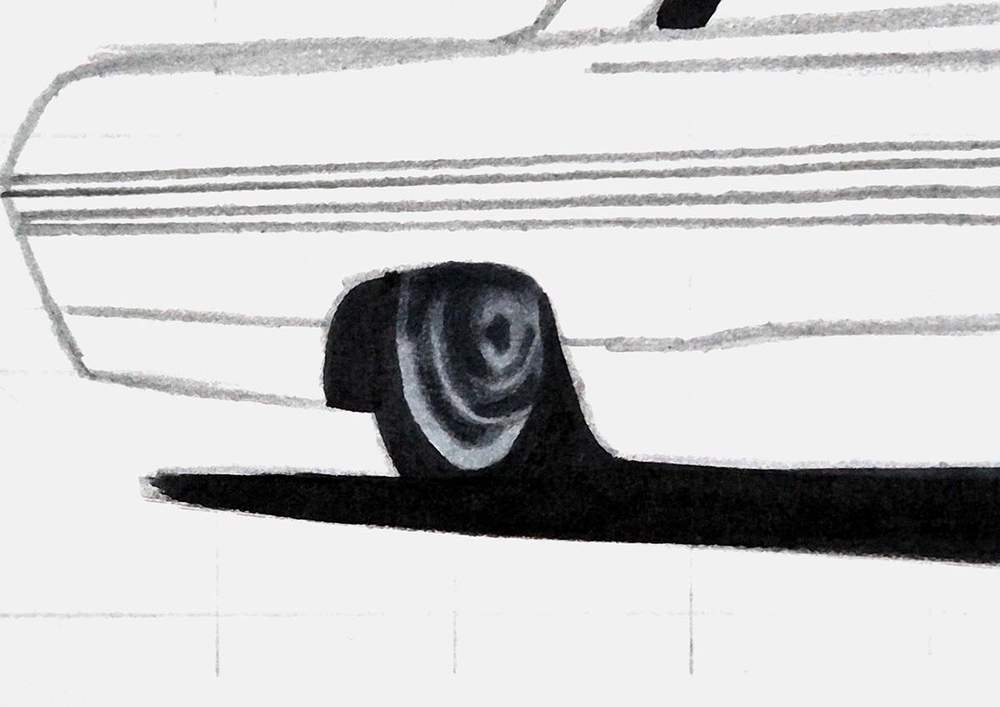
Step 5: Sketch the Wheels of the Lowrider
You might've noticed that I didn't sketch the wheels yet. That's because people often find them the hardest to sketch, so I like to give them a bit more attention in my guides.
However, these chrome lowrider wheels are super simple compared to any of the others I've done for my blog.
These wheels are just a bunch of ovals with a pointy thing in the center. That's it.
Since we've already sketched the outline of the wheels, I started by adding this pointy thing to the center of the wheel. Notice how it's a little more to the right? That's because it's inset into the wheel.
I also added the outer rim edge, giving the tire its thickness.
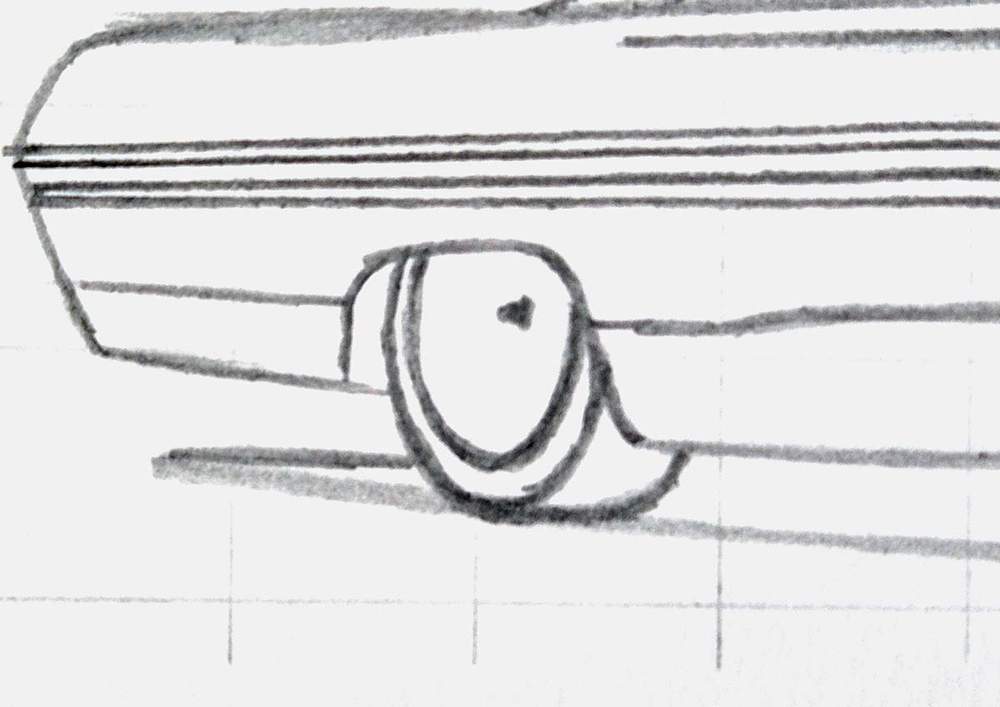
Next, I added a small ellipse shape around the center point.
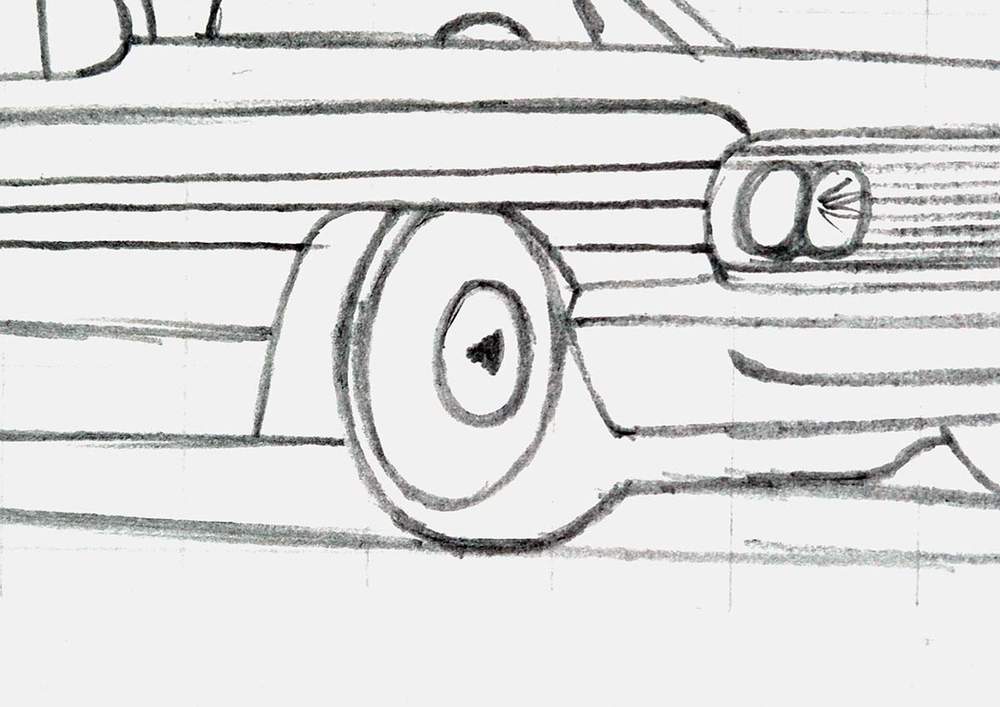
After that, I added a bigger oval around it. Again, notice how it goes behind the edge of the tire.
For the front wheel, I added another small ellipse in the center. This ellipse is a bit more inset into the wheel, so again, you can only see the left edge of it.
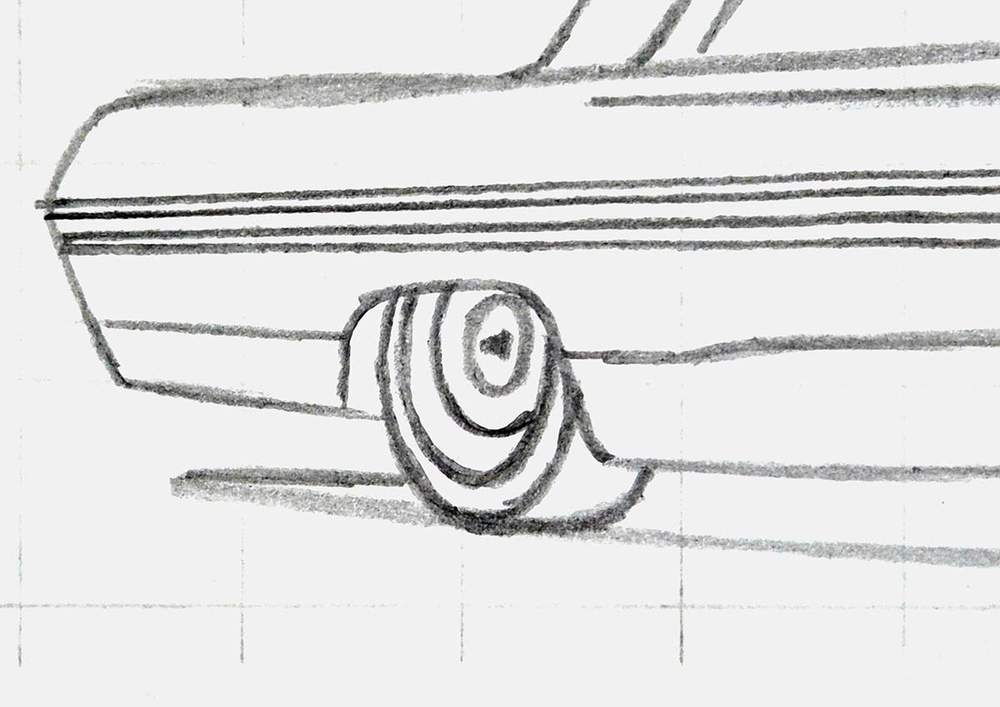

And that's the wheels all done. Pretty easy, right?
Step 6: Mark Out the Reflections on the Lowrider Car
To complete the sketch, I like to mark out where the reflections on the car are going to be. However, most of the reflections align with the body lines we've already sketched.
Only the reflections of the windshield on the hood just below the front windshield are left.
I roughly marked their shape. They don't need to be perfect. They are already super distorted, so a little more distortion won't hurt.
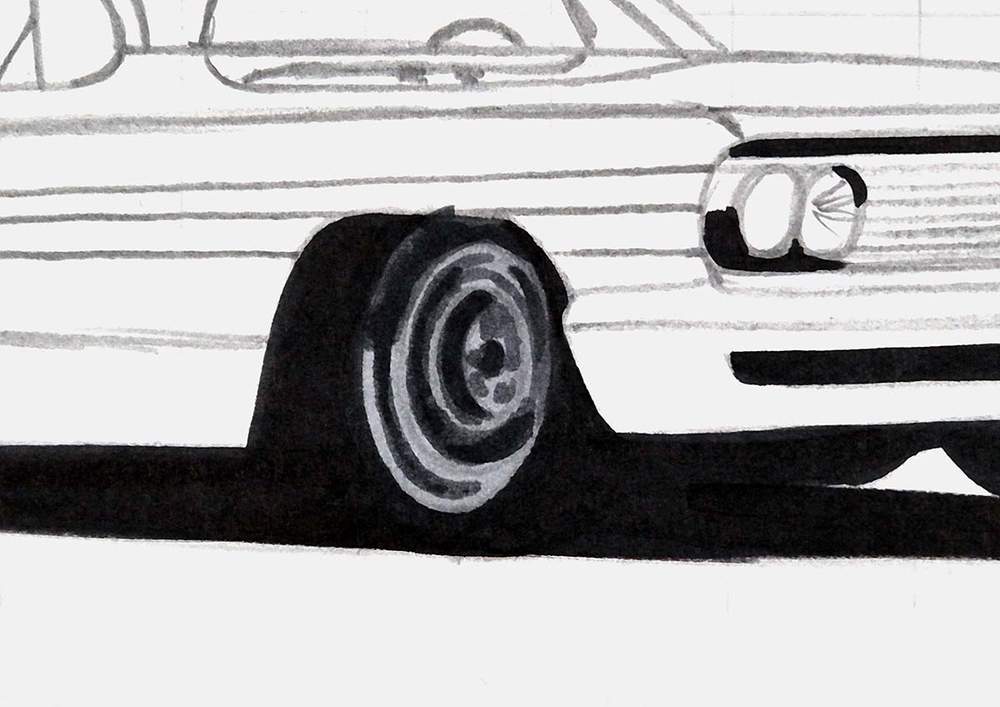
Step 7: Color All Pure Black Parts of the Lowrider
Now that the sketch is all done, we can start coloring the lowrider drawing.
I like to color all pure black parts first. This makes it easier to judge the values of all other colors, plus it makes the drawing look simpler and less overwhelming, in my opinion.
To do this, I just used my Black (120) Ohuhu Honolulu marker.
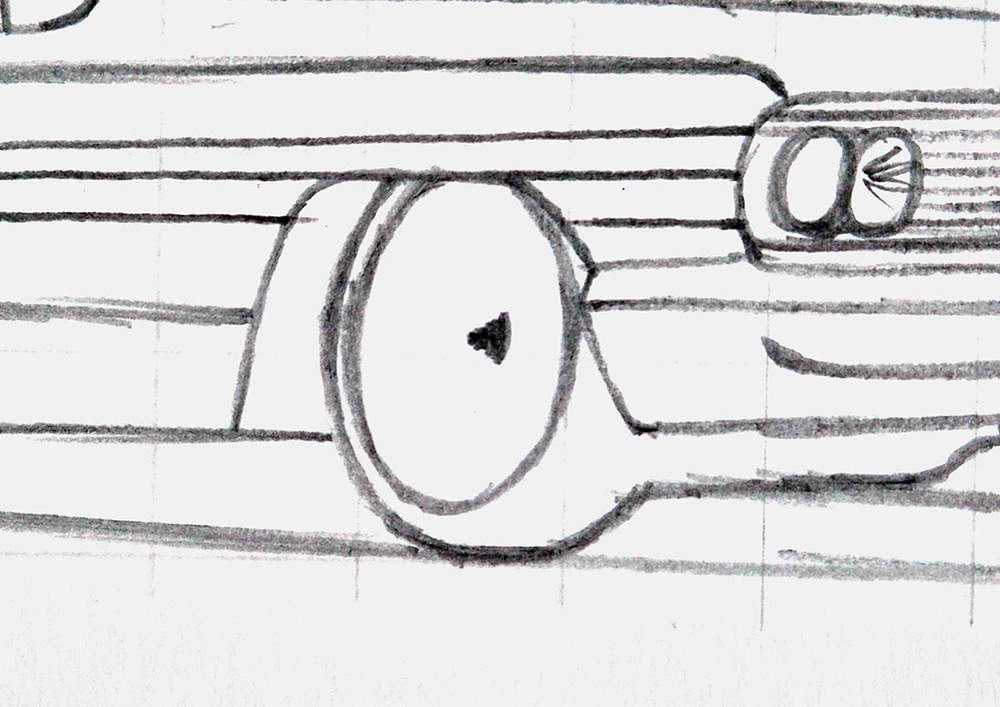
Step 8: Color the Chrome Wheels of the Lowrider
After that, I lightened the sketch of the wheels to prevent it from showing through the ink and colored them with markers.
For this coloring stage, I simplified the wheels a lot.
I started by coloring both wheels with Neutral Grey 3 (NG03).
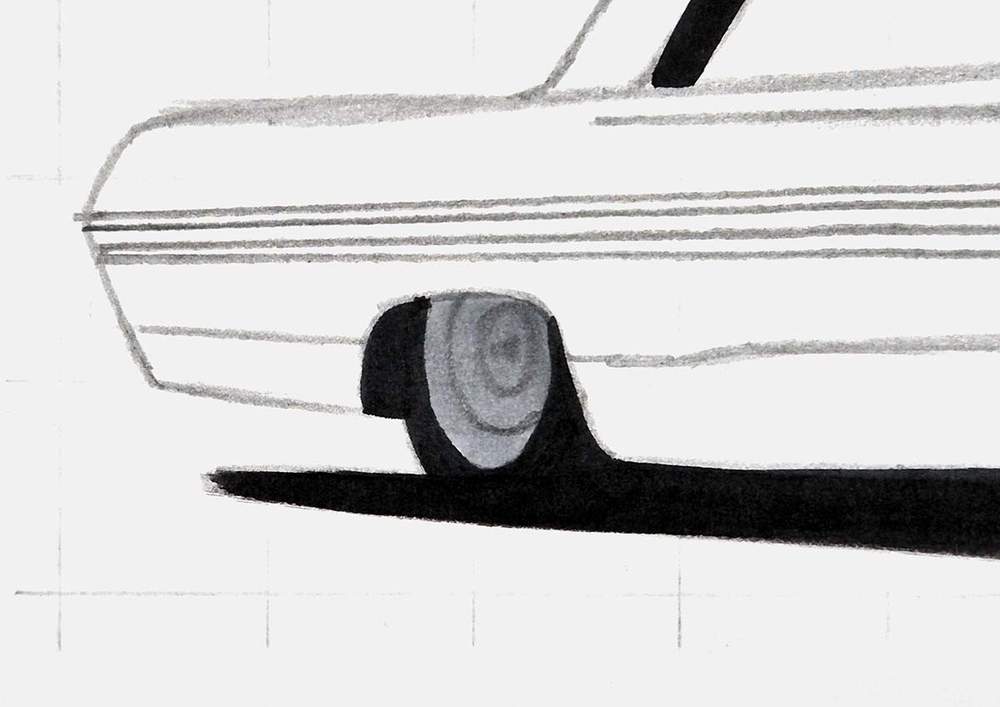
And then, I added dark reflections and shading with Neutral Grey 07 (CG070). To do this, I made sure to follow the round shapes of the wheels.
I also looked at the reference to spot the darker parts of the wheels and color those, while leaving the lighter bit lighter.
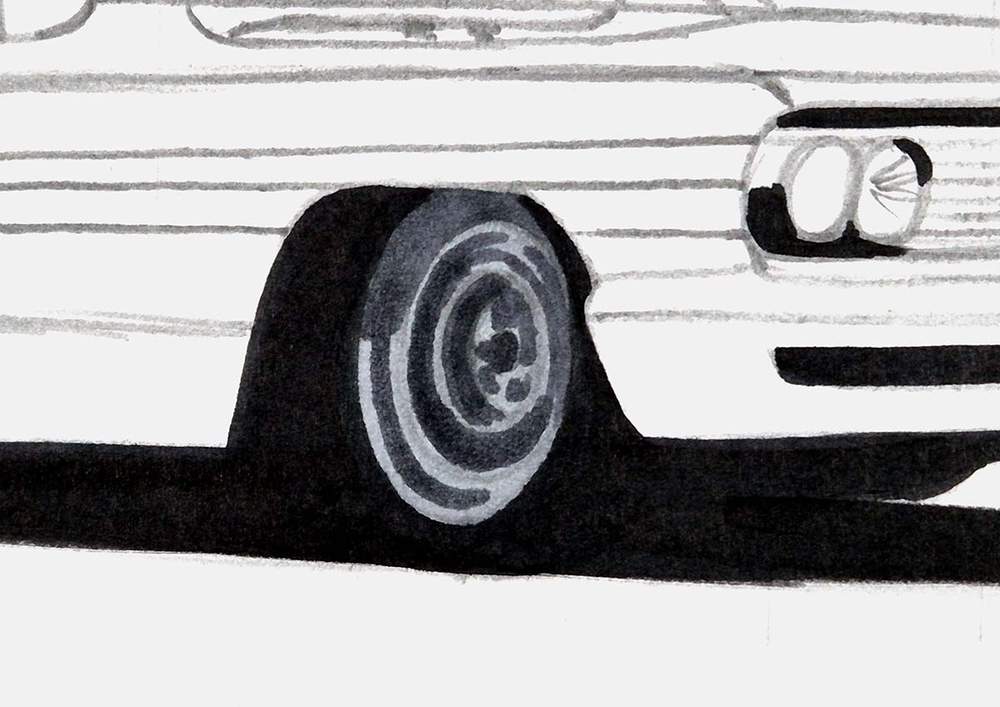
Lastly, I used Neutral Grey 6 (NG06) for the super dark grey parts of the wheels.
I again studied the reference for the darkest spots, and then I marked those on the drawing.
And that's the wheels all colored for now.
Step 9: Color the Chrome Strip on the Side of the Lowrider
Next, I colored the chrome strip on the side of the lowrider with Neutral Grey 03 (CG030).
And that's all for this step.
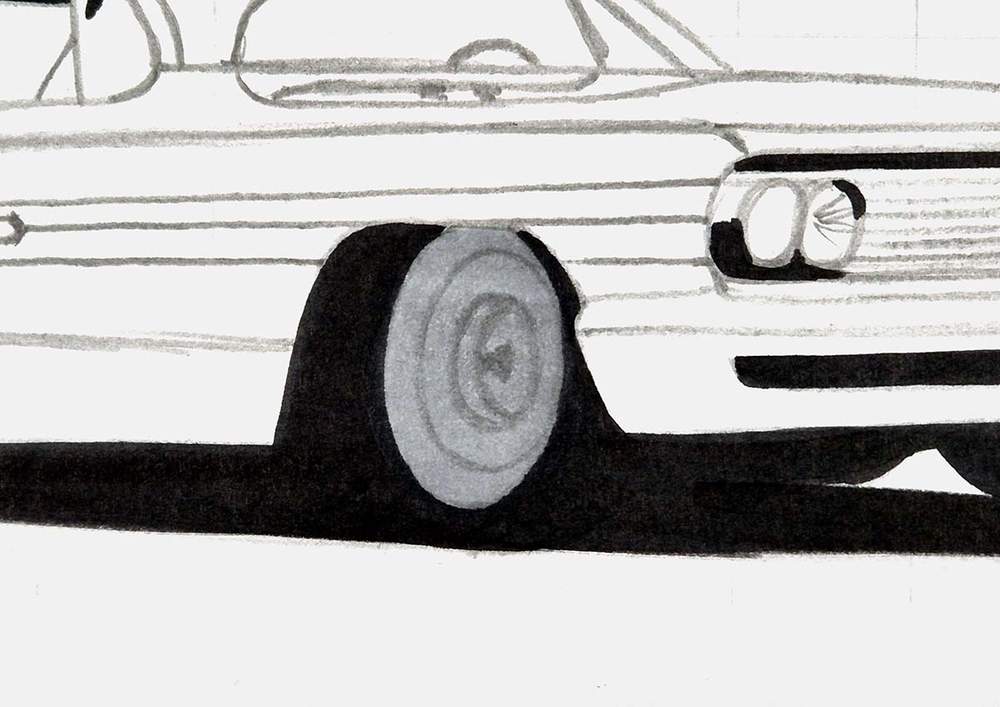
Step 10: Color the Front bumper, the Headlights, and the Front Grills of the Lowrider
Then, I worked on the front of the car.
I first lightened the sketch of the front of the car with my eraser, and then I colored the lights, the grill, and the front bumper.
I used Sunflower (Y2) to color the outer lights, and I used Neutral Grey 3 (NG03) to color the inner two lights, the grills, and the front bumper.
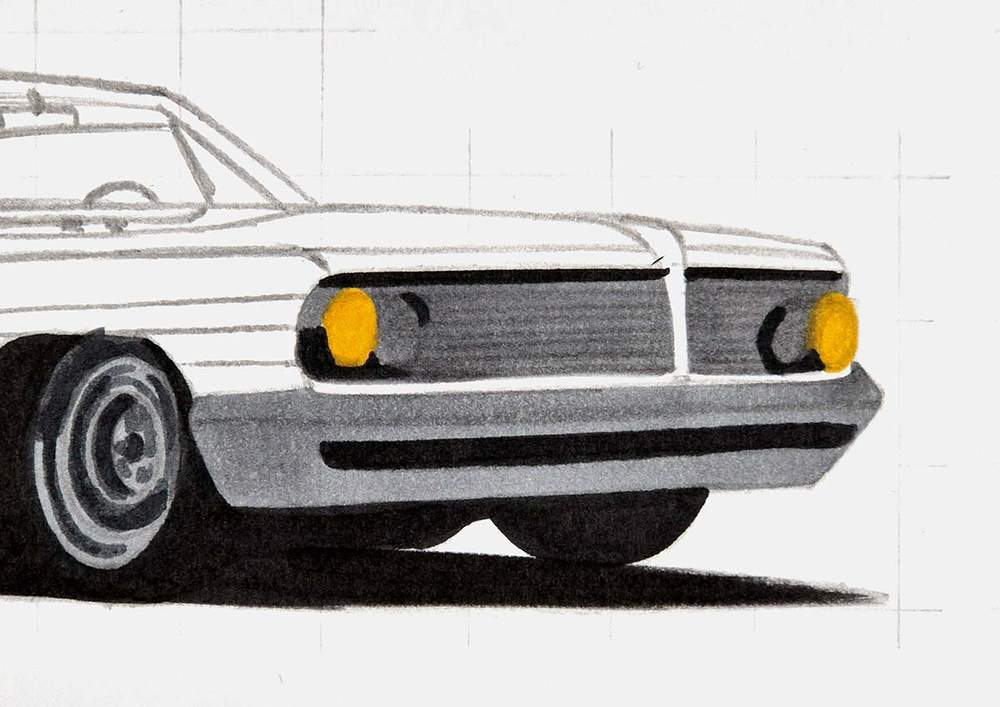
Next, I used Neutral Grey 07 (CG070) to add shading to the top half of the inner two lights and the center of both grills.
I also color the bottom 3/4 of the front bumper, while leaving a light line below the black opening in the bumper, and I added two thin reflections below the grills on the top edge of the bumper.
To finish off the front of the car, I added some more darker shading to the top half of the inner lights with Neutral Grey 6 (NG06). Just a few blob shapes is enough.
Step 11: Color the Windows & the Interior of the Lowrider Car
After that, I colored the windows and the interior of the lowrider, after I lightened that part of the sketch with an eraser.
I started by coloring the side window you can see through the windshield, the rear window you can see through the side window, and the triangular chrome frame just behind the A-pillar.
To color these parts, I used Neutral Grey 03 (CG030).
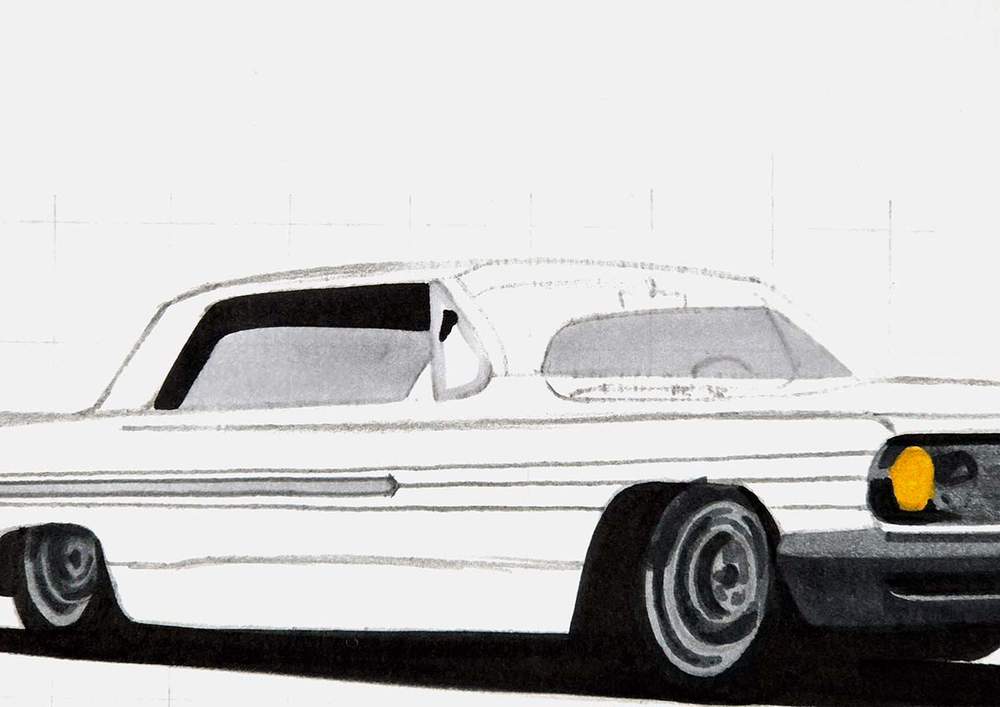
Next, I used Neutral Grey 3 (NG03) to color the steering wheel and the rest of the interior.
After that, I added shading to the steering wheel and the other parts of the interior with Neutral Grey 07 (CG070). I made sure to leave the rearview mirror lighter so you can actually see it now, and I left two lighter lines to the right side of the rear window.
Lastly, I added even darker shading to the interior with Neutral Grey 6 (NG06), mainly to the roof.
I also darkened the rearview mirror with Neutral Grey 07 (CG070), as it was looking a bit too light for my liking.
And that's all the grey parts done!
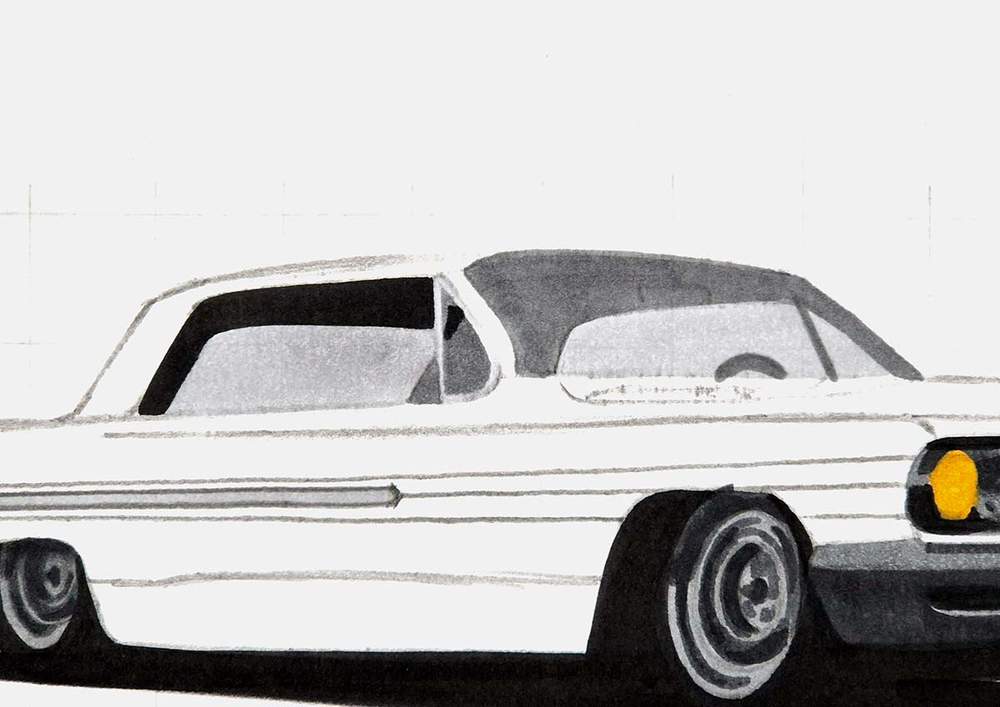
Now, we can move on to my favorite part of any car drawing: coloring the main body and the reflections.
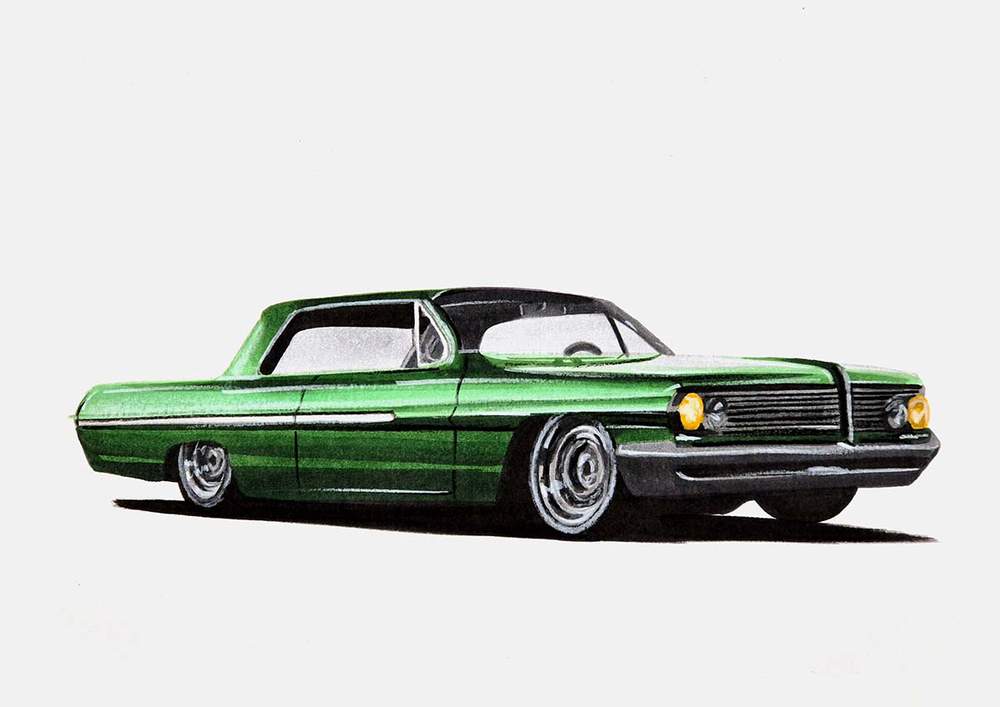
Step 12: Color the Main Body & the Reflections of the Lowrider Car
The reference photo of the lowrider I'm drawing was taken at night. This probably would've looked good if I were to draw the background too, but that wasn't my plan. I wanted to draw the car only.
To make sure the car looked good on paper with a white background, I made the colors slightly lighter. And to simplify this drawing so you can more easily follow along, I made the colors simpler too.
Before I started coloring the body, I first highlighted the sketch so it wouldn't show through the marker ink.
To color the main body of the car, I first added a layer of light grey on the hood. I used Neutral Grey 03 (CG030) to do this.
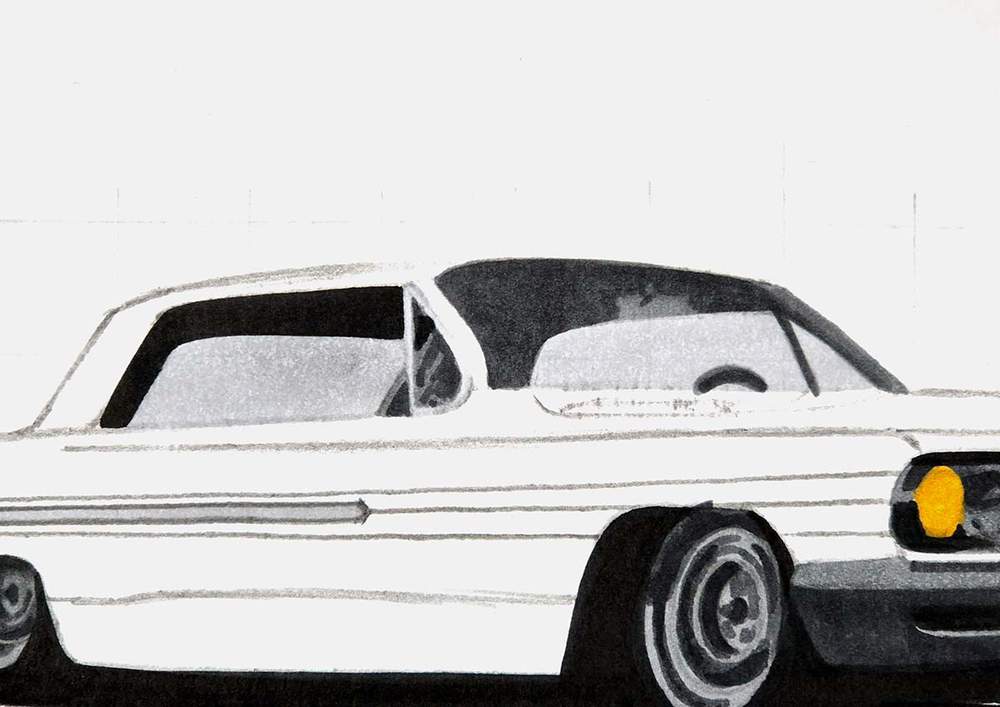
Then, I colored the top half of the car with the lightest of the three greens I'll be using: Leaf Green (G440).
I also overlapped some of this on the front edge and the reflections on the hood.
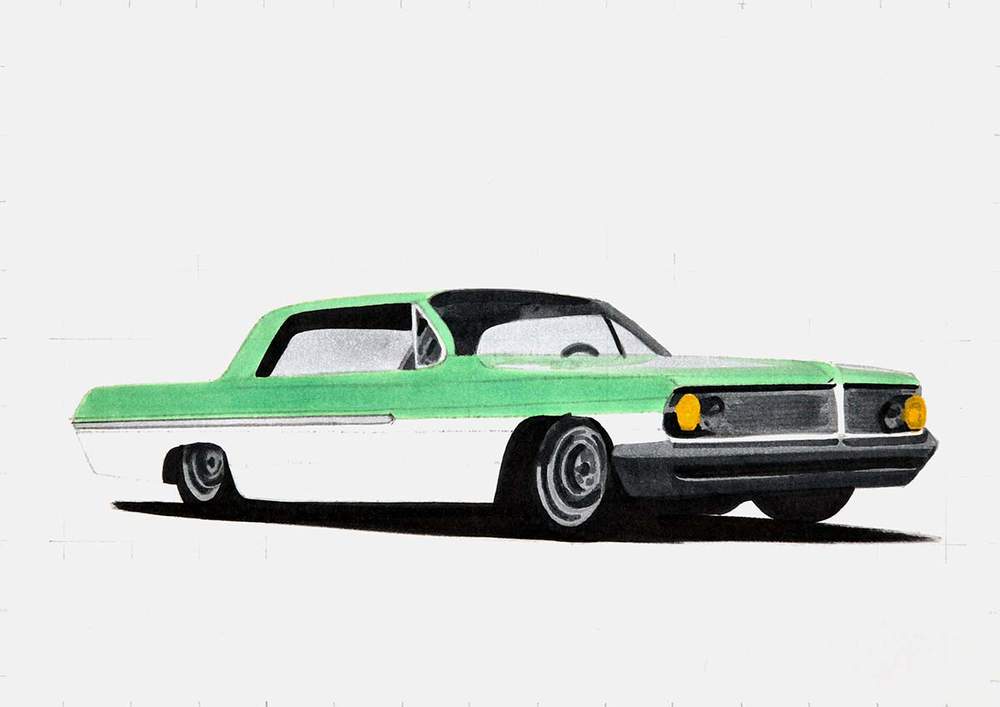
After that, I used Pine Tree Green (G470) to color the bottom half of the lowrider.
I also added some shading to the top edge of the line, continuing from the chrome strip on the side of the car. And I colored the top edge of the side of the car as well as the A-pillar, the roof, the green around the grills, and the line on the hood.
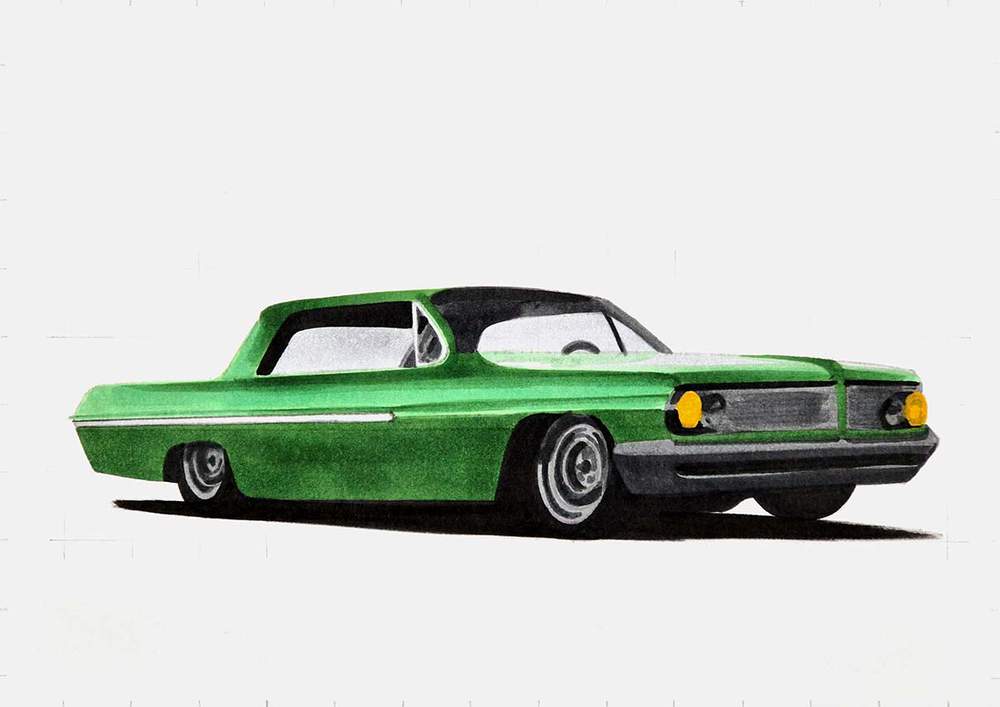
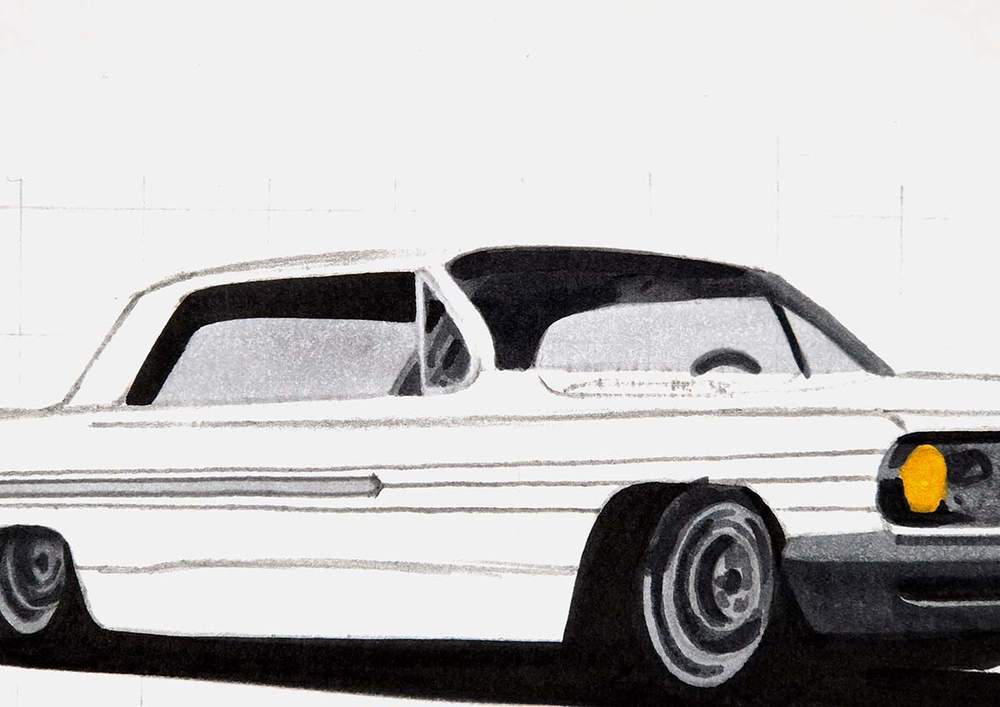
And to complete the body of the car, I added some dark green shading with Chromium Oxide Green (G7) to the darker parts.
I darkened the bottom edge of the side of the car and added a thick dark line above that.
I also darkened the bottom edge of the body lines that continue from the chrome strip on the side towards the front of the car.
And I darkened the top edge of the side of the car, the roof, the A-pillar, the green below the grills, and the nose fin thing between the grills and on the hood.
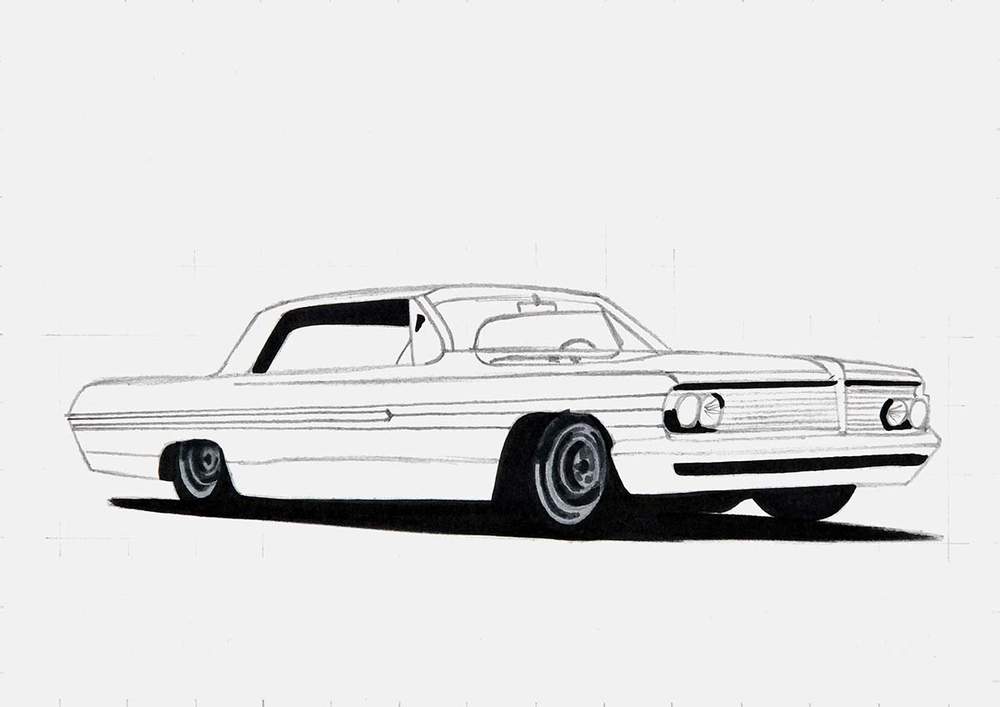
The lowrider is now all colored, but it's not quite finished.
There are a ton of details missing, like the grill lines and the highlights in the wheels.
That's what we're going to add next.
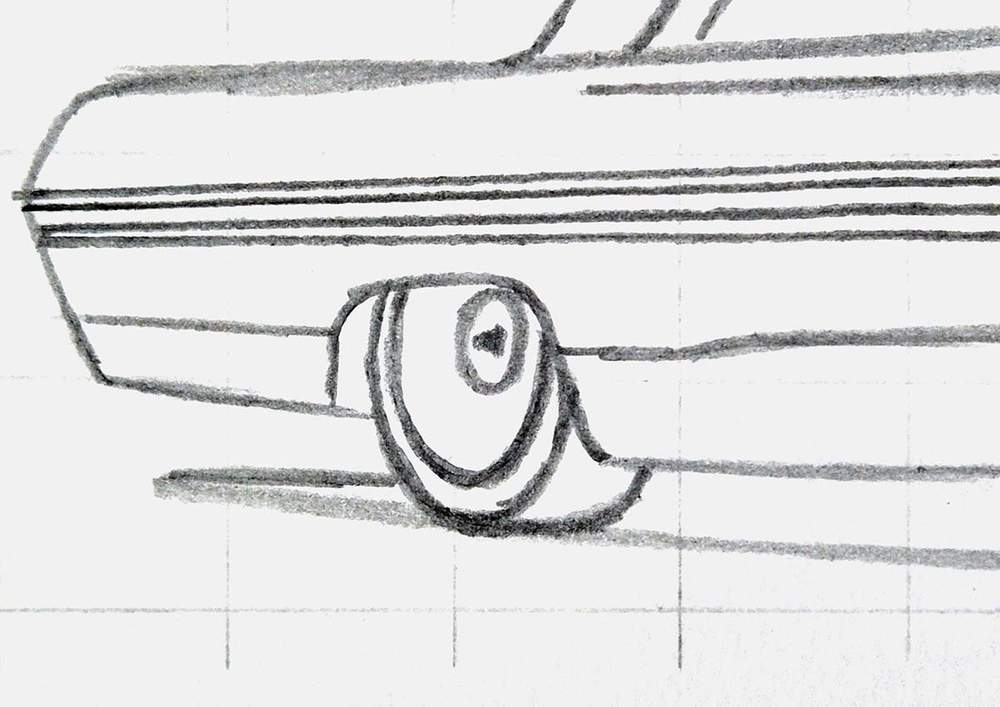
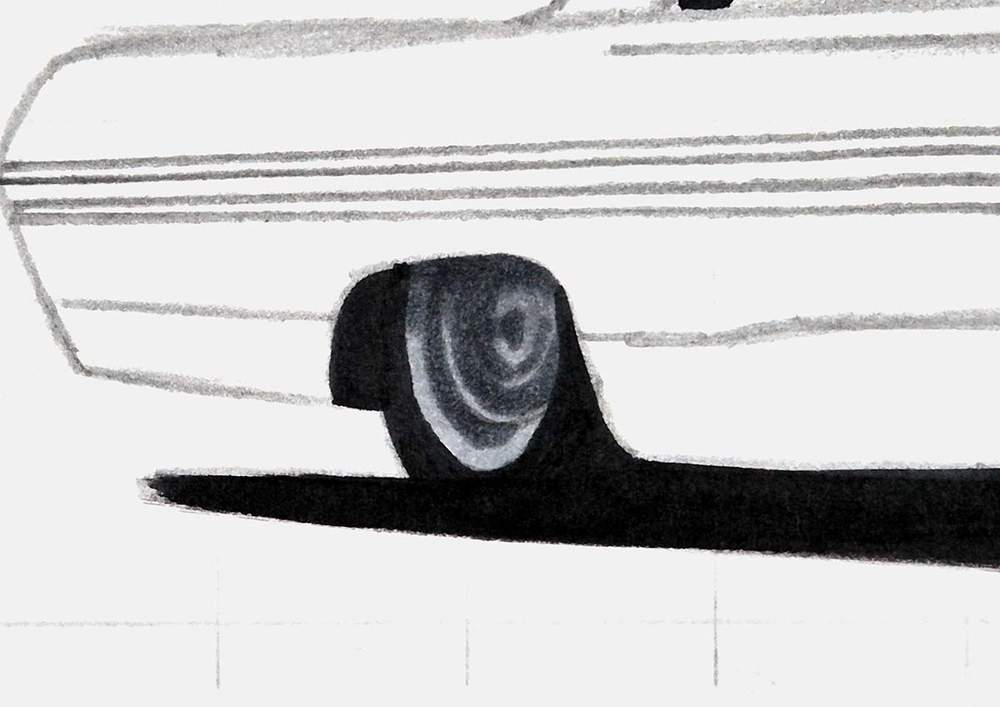
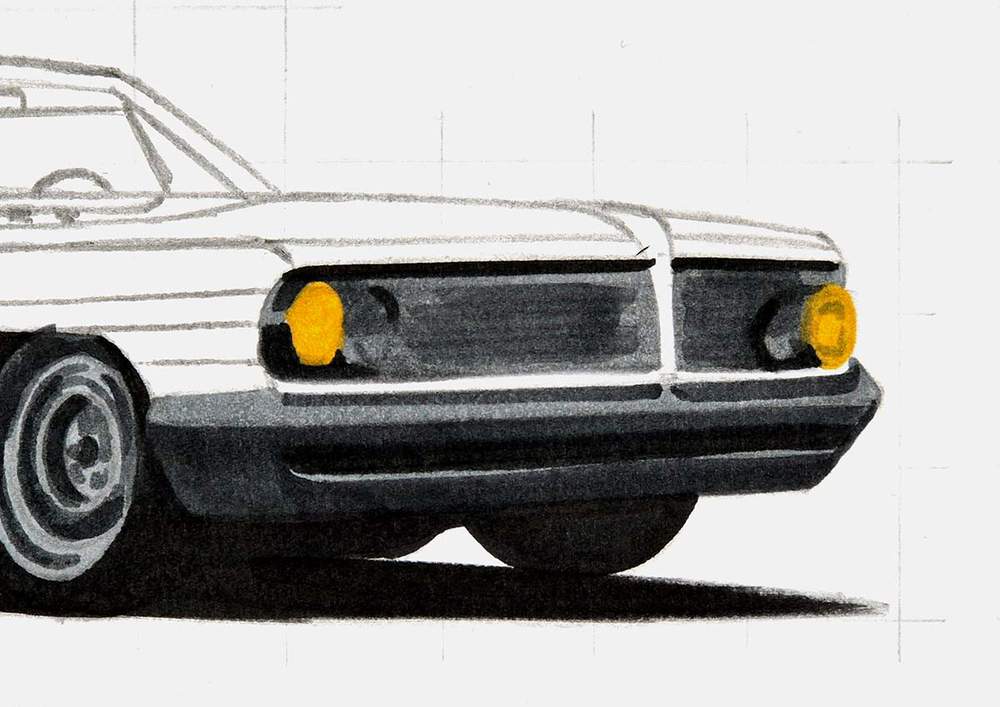
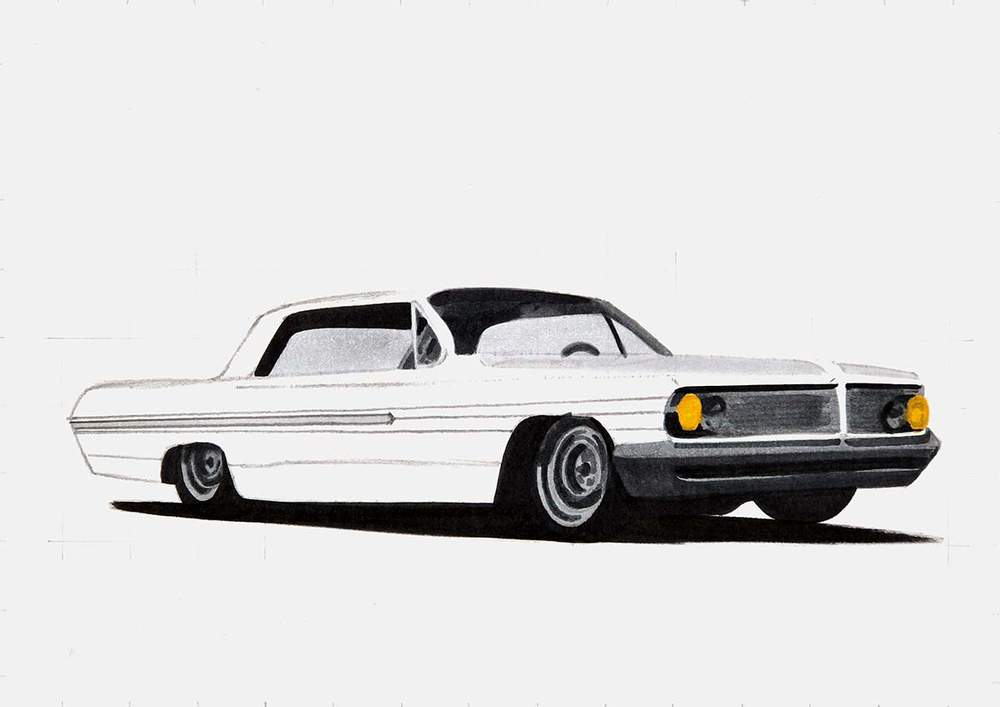
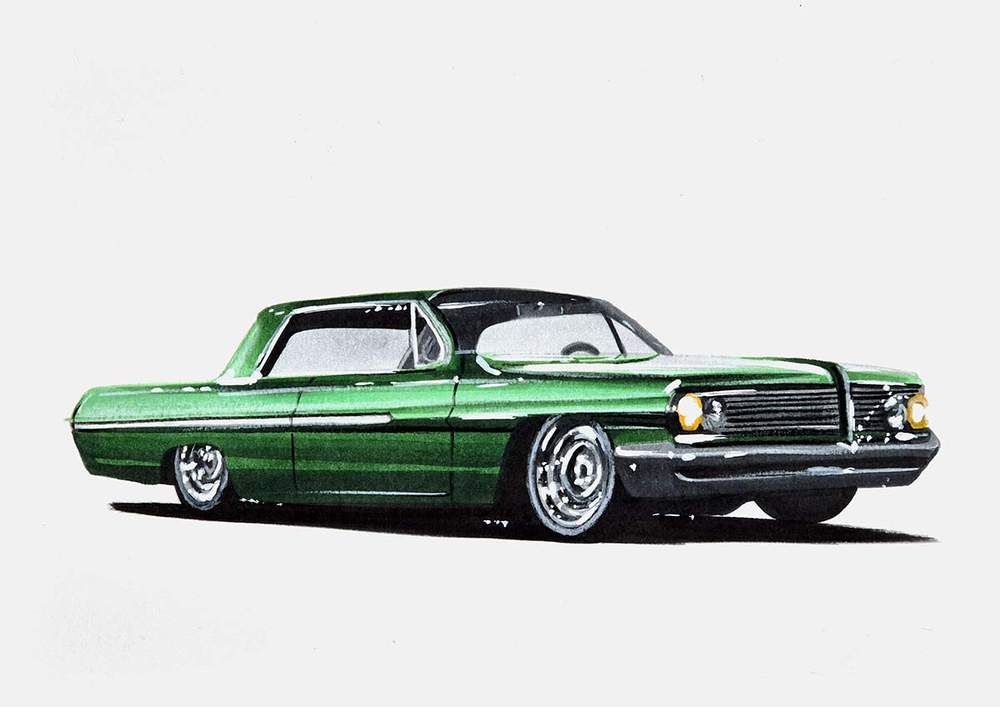
Step 13: Add Details to the Lowrider with Colored Pencils
By just using a black and a white colored pencil, you can make this drawing look so much better.
But before I did that, I first erased what was left of the sketch. It's easier to erase it now than when you've already added colored pencil details you need to avoid.
Now, it's time to add all the details to this lowrider drawing.
I used the black pencil to:
- Add the door gaps
- Add a black line above the chrome strip on the side of the car
- Add the horizontal lines to the grills
- Add a few dark, ellipse-shaped lines in the wheels
Then, I used the white pencil to:
- Add highlights on the wheels to make them look a lot more chrome-like
- Highlight the top half of the chrome strip on the side
- Add the chrome window sills
- Highlight the edges of the front chrome bumper
- Add highlight dots to the headlights
- Add a few highlighted lines on the side of the car
- Highlight some edges on the rearview mirror
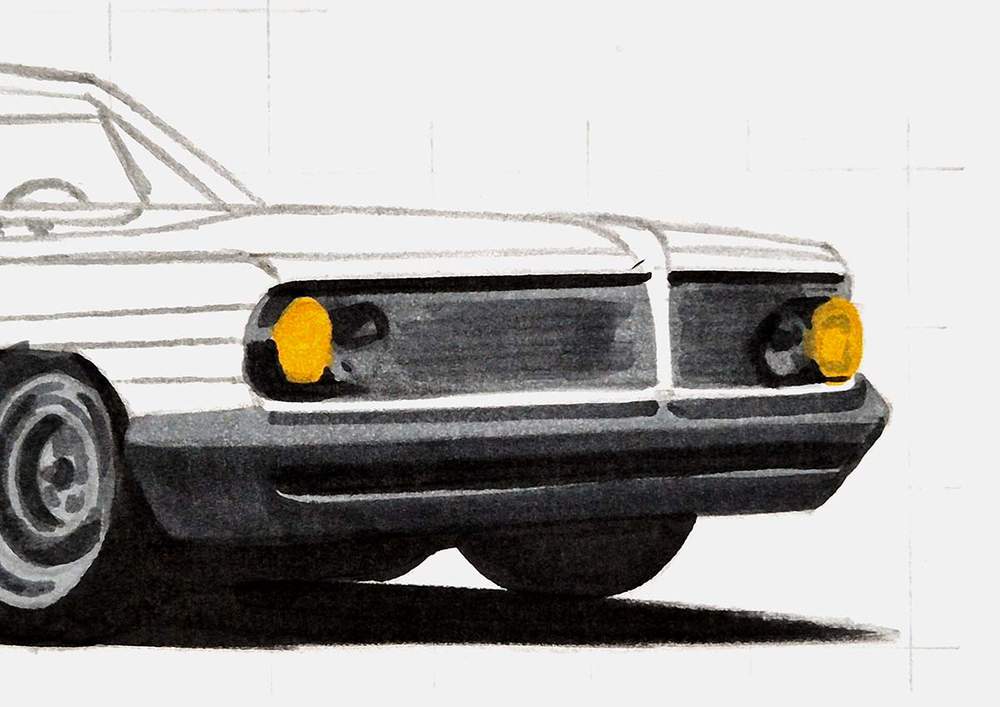
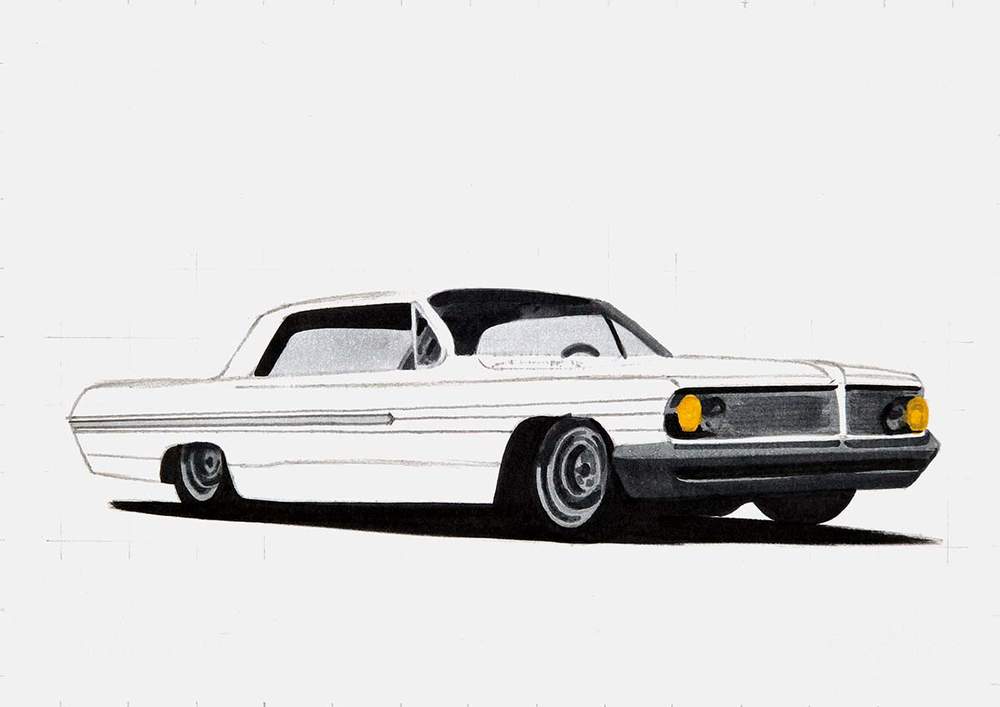
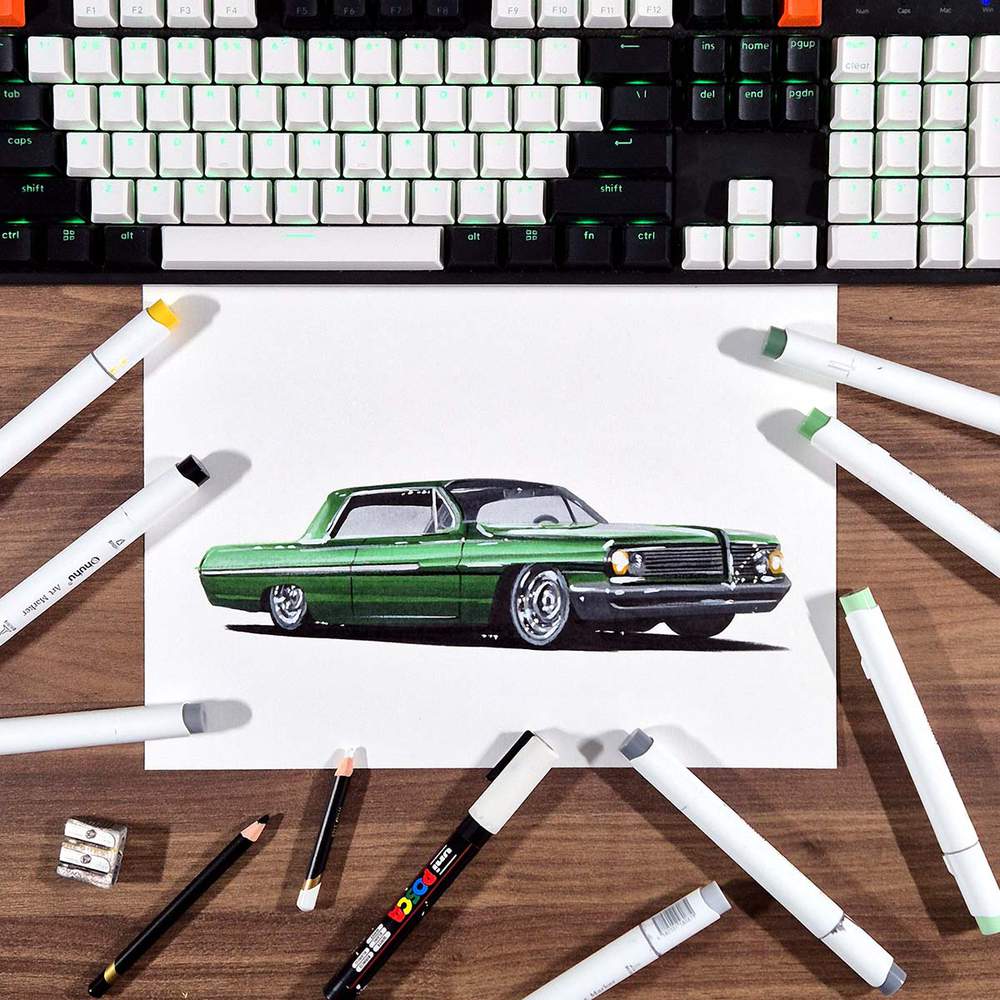
Step 14: Add Highlights on the Body and the Chrome of the Lowrider
And to finish the lowrider drawing off, I added a few white highlights with my paint marker.
Since this lowrider has many chrome parts, I kinda went crazy with the highlights.
I added many highlights on the wheels, the front, the headlights, the top half of the side of the main body, the window sills, some on the windshield, and even some on the bottom edge of the car.
I think this helped make the lowrider drawing come to life so much more than it did with just the pencil details.
And that's it! That's how I made this drawing, and how you can draw a lowrider yourself.
If drawing this feels hard, just keep going. This is where most people quit and give up. But you know better than that.
I hope you found this helpful.
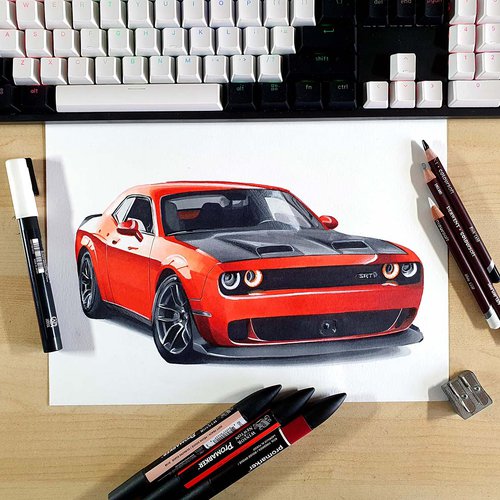
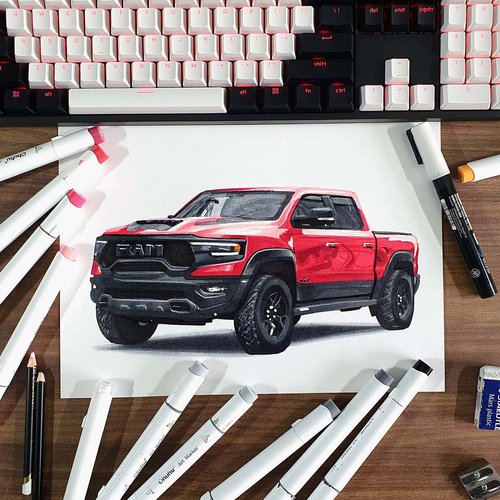
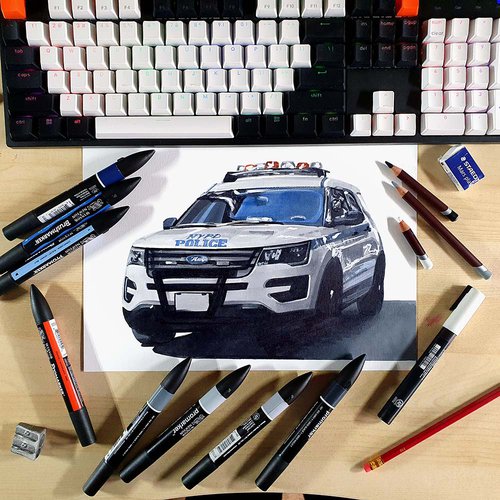
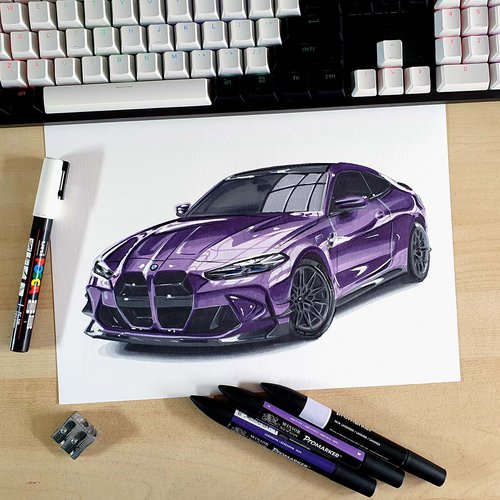
If you did, you should check out my other car drawing guides. Thank you!
Articles You Might Also Like

I love bringing cars to life with alcohol markers and colored pencils.
Whether you're just starting out or looking to improve your skills, I'm here to help!
Click here to learn more about me.


Add a comment
Comments
Its a perfect tutorial, its short but the result is still stunning! Thank you so much for makeing my drawing 100 times better.