How to Draw a Ferrari SF90 Side View - Realistic Step by Step Guide
Want to learn how to draw a realistic side view of a Ferrari?
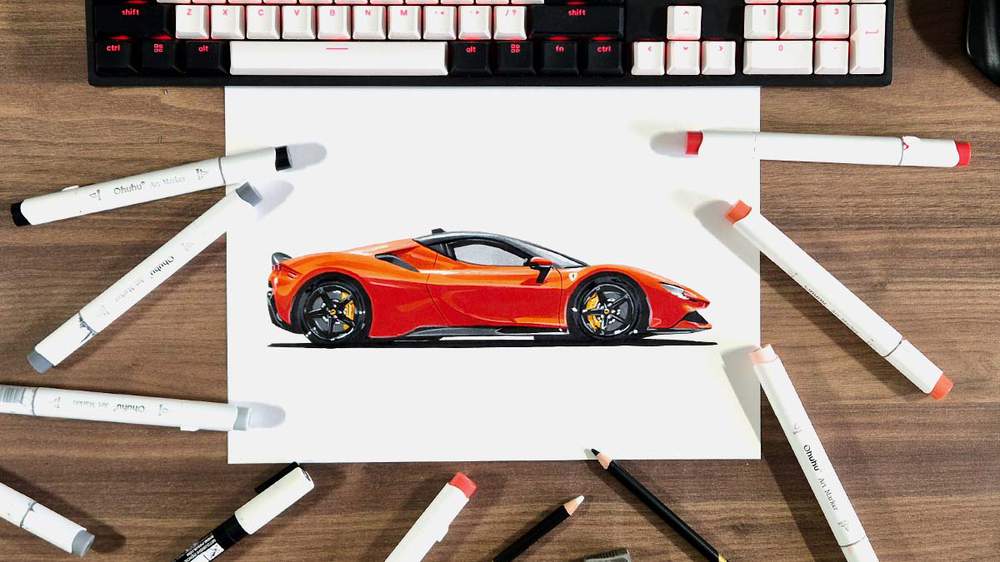
In this drawing guide, I'll show you how to draw a beautiful side view of a Rosso Dino Ferrari SF90 Stradale that is relatively simple.
I show every step and explain in-depth how I made this drawing.
So, let's get started!
Disclaimer: In the name of full transparency, please be aware that this blog post contains affiliate links and any purchases made through such links will result in a small commission for me (at no extra cost for you).
Art Supplies I Used to Draw This Ferrari Side View
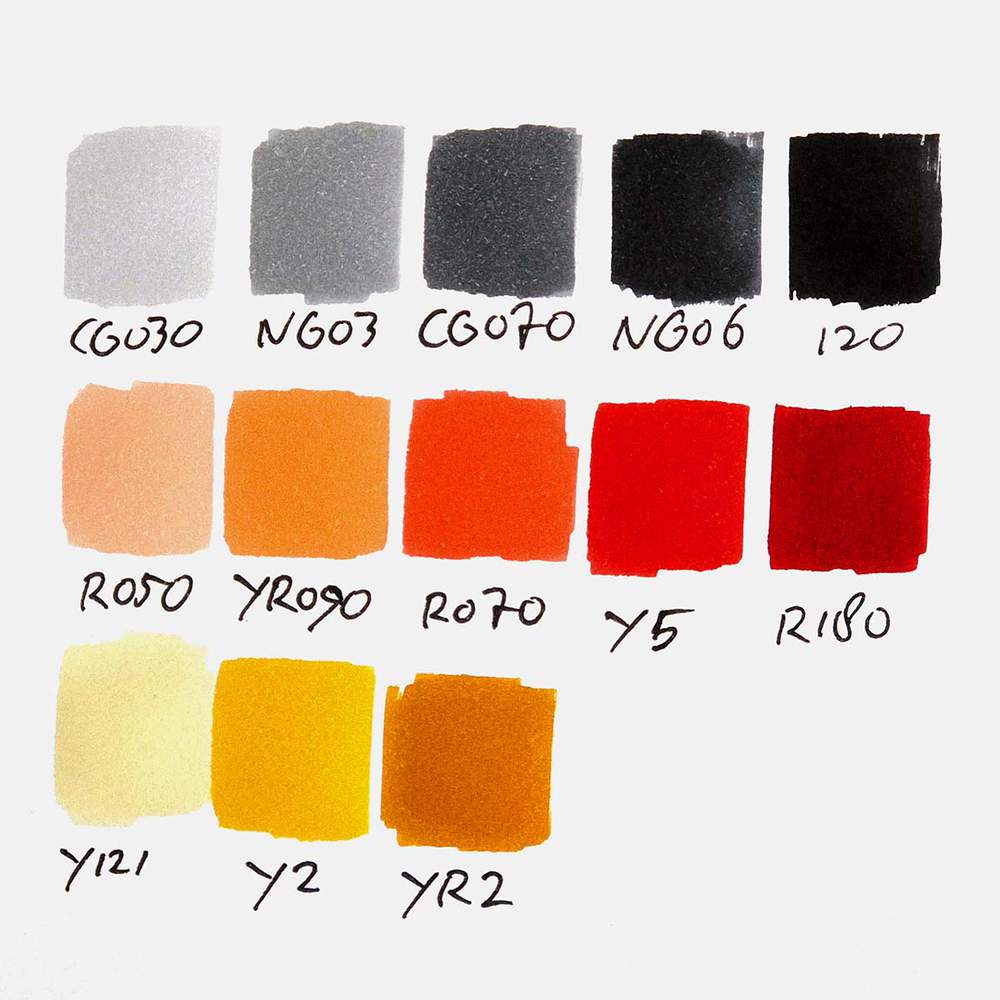
To make this drawing, I used Ohuhu Honolulu markers in the colors Neutral Grey 03 (CG030), Neutral Grey 3 (NG03), Neutral Grey 07 (CG070), Neutral Grey 6 (NG06), Black (120), Primrose (Y121), Sunflower (Y2), Marigold (YR2), Chocolate Pink (R050), Peach Pie (YR090), Agate (R070), Rouge Orange (Y5), and Bright Red (R180).
You can also buy these colors separately on their website.
I also used some Derwent Chromaflow colored pencils to add details. I used White 2400 and Black 2300.
I used a white Posca PC-3M paint marker to add white highlights.
And I used an HB pencil, an eraser, and a ruler.
I made this drawing on A4-sized Canson Illustration Manga Paper.
How Do You Draw a Ferrari Side View?
To create a realistic Ferrari side-view drawing, you'll first need to find a good reference photo.
Next, you sketch the outline of the car.
After that, you color the Ferrari part by part, until it is fully colored.
And to finish it off, you add a few details with colored pencils and a few highlights with a white paint marker.
Step 1: Find a Reference Photo of a Ferrari Side View
Usually, I search on Unsplash for reference photos for my drawings. This time was no different.
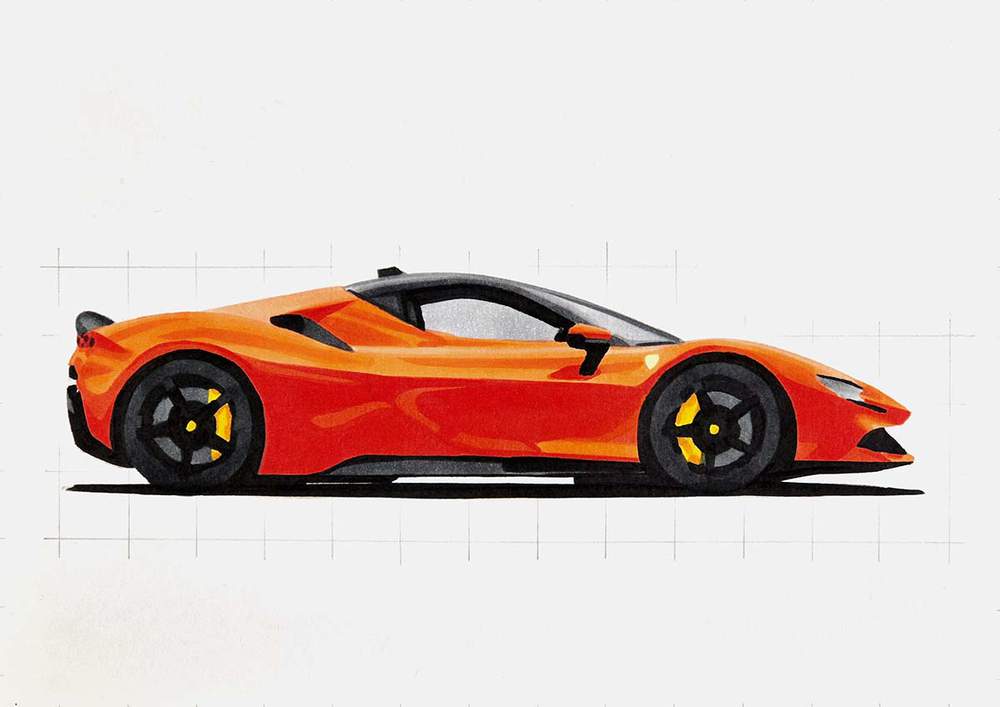
I searched for "Ferrari" and started browsing. When I see a photo I like, I also look through the related photos. And that's where I found this beautiful side profile of a Ferrari SF90 in an orangy-red color (Rosso Dino, I believe).
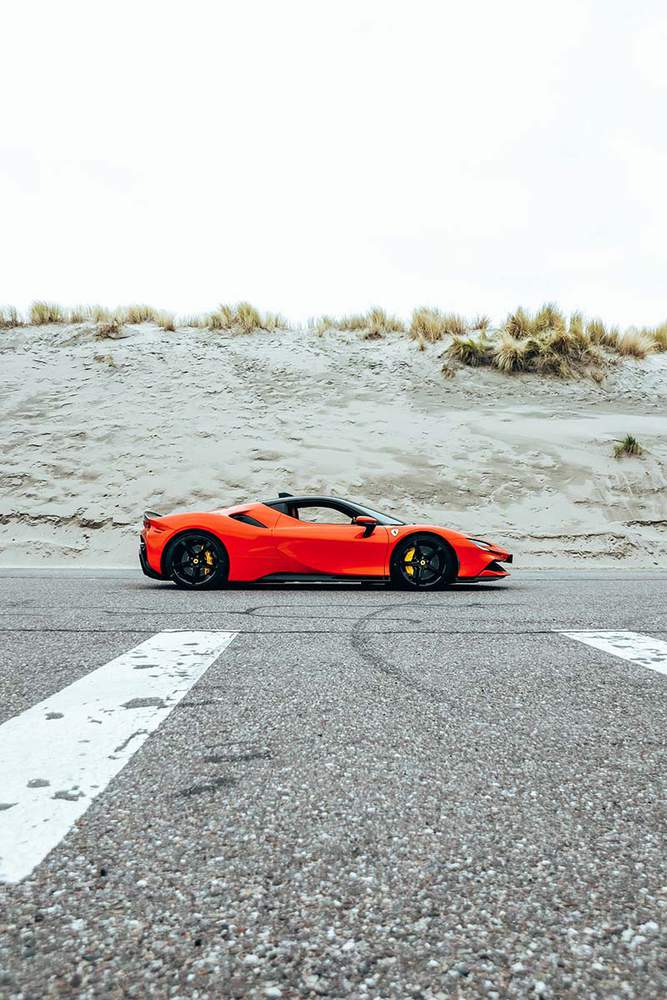
This had to be the one for this Ferrari side view drawing tutorial.
To make the sketch of this car, I used the grid method. If you're new to this method or don't know how to use it, I highly recommend you check out this guide I wrote about how to use it.
To use the grid method, we first need to resize this photo and add a grid overlay to it.
To do this, you can use my grid overlay tool.
I resized the image to 29,7 by 21 cm or 3508 by 2480 pixels, which is the size of the paper I'm using, and placed the Ferrari horizontally centered and vertically just below the middle.
I also added a grid overlay of 15 by 10.5 squares, and in Photoshop, I marked the squares that contain parts of the Ferrari blue.
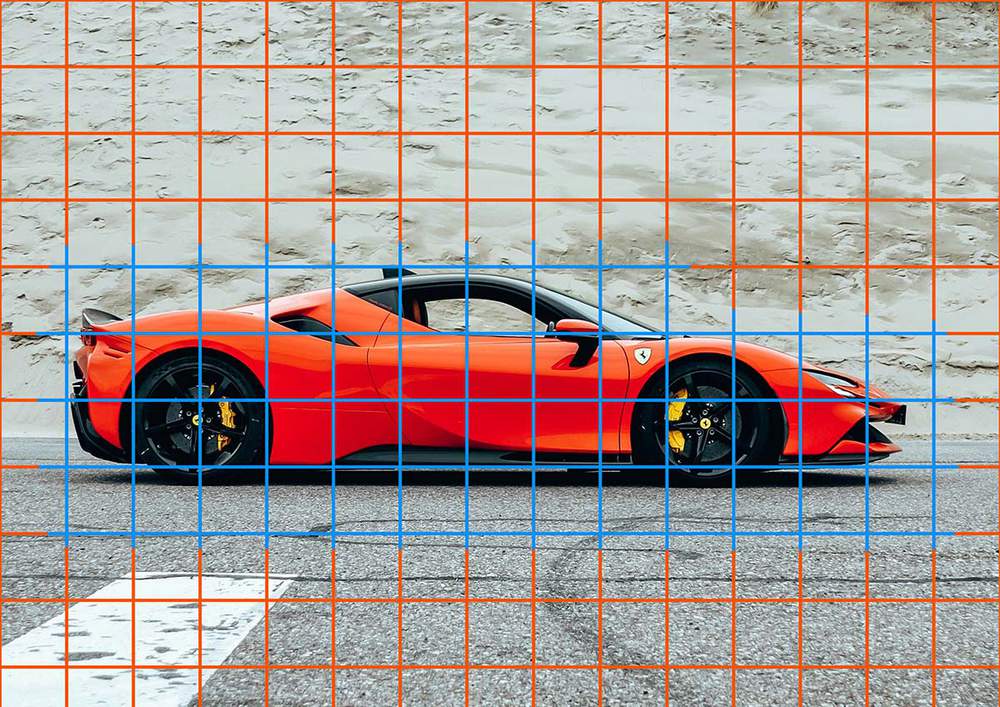
When sketching the Ferrari, I'm constantly looking at this photo to see where I need to sketch what.
Step 2: Sketch the Outline of the Ferrari
With the reference photo now all prepared, we can start drawing the Ferrari side view.
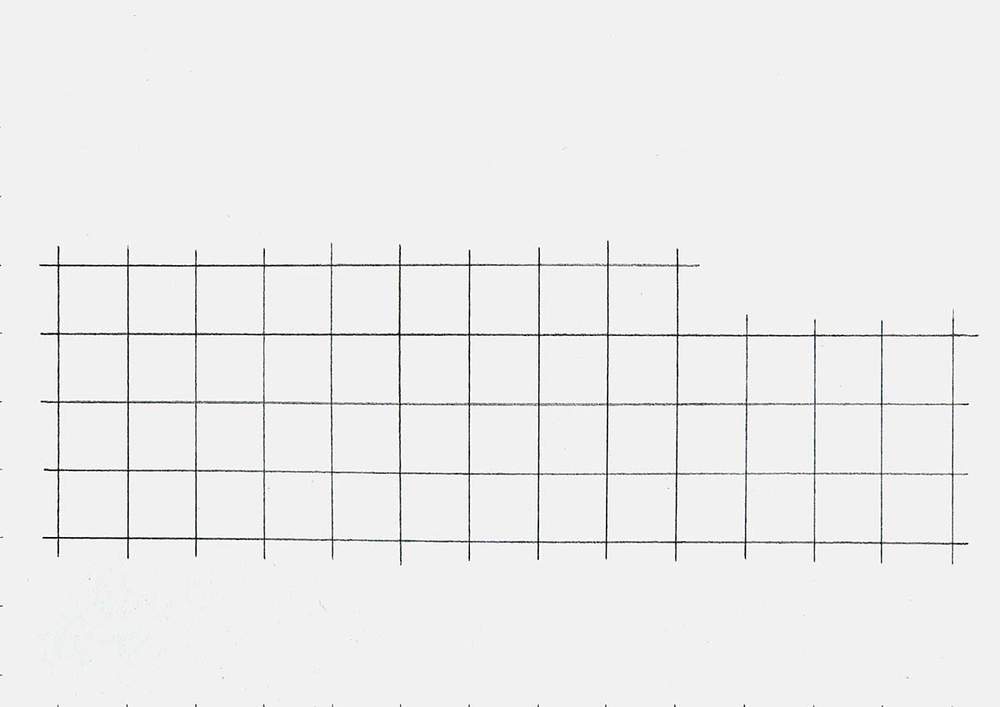
I first recreated the grid on my paper.
Since I added 15 squares horizontally and my paper is almost 30 cm wide, each square should be 2 by 2 cm.
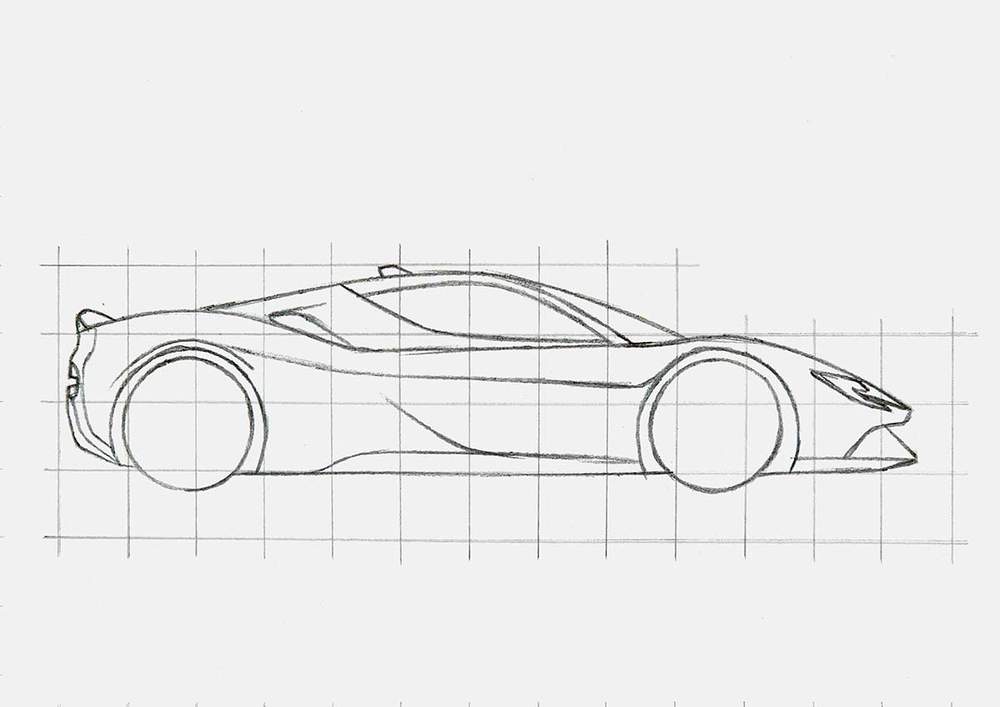
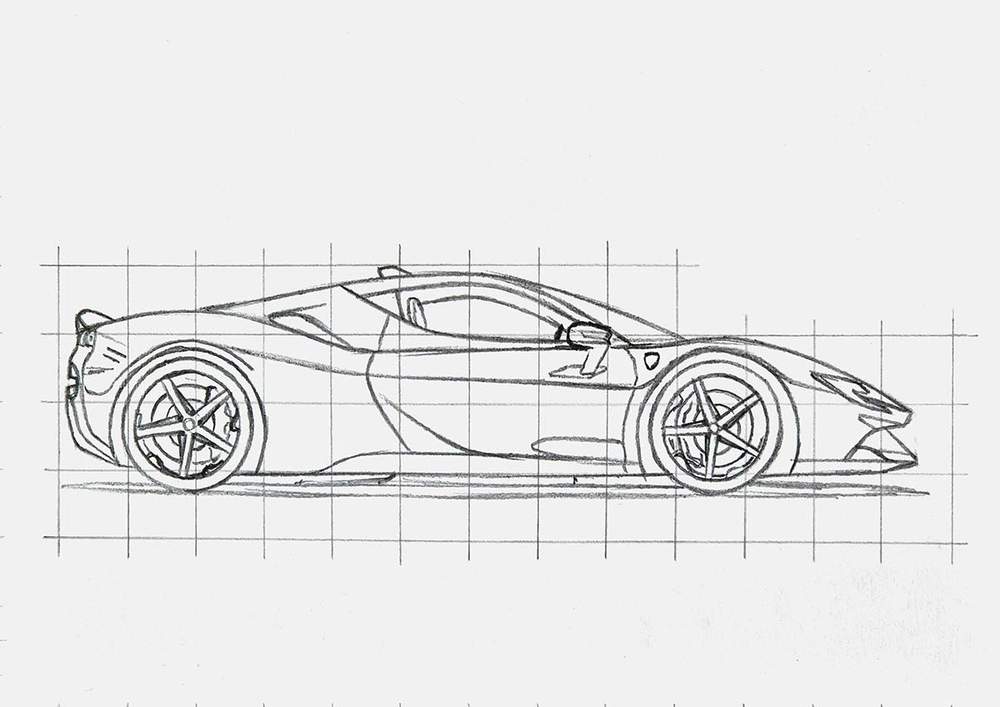
And when you sketch the ones marked in blue, it should look something like this:
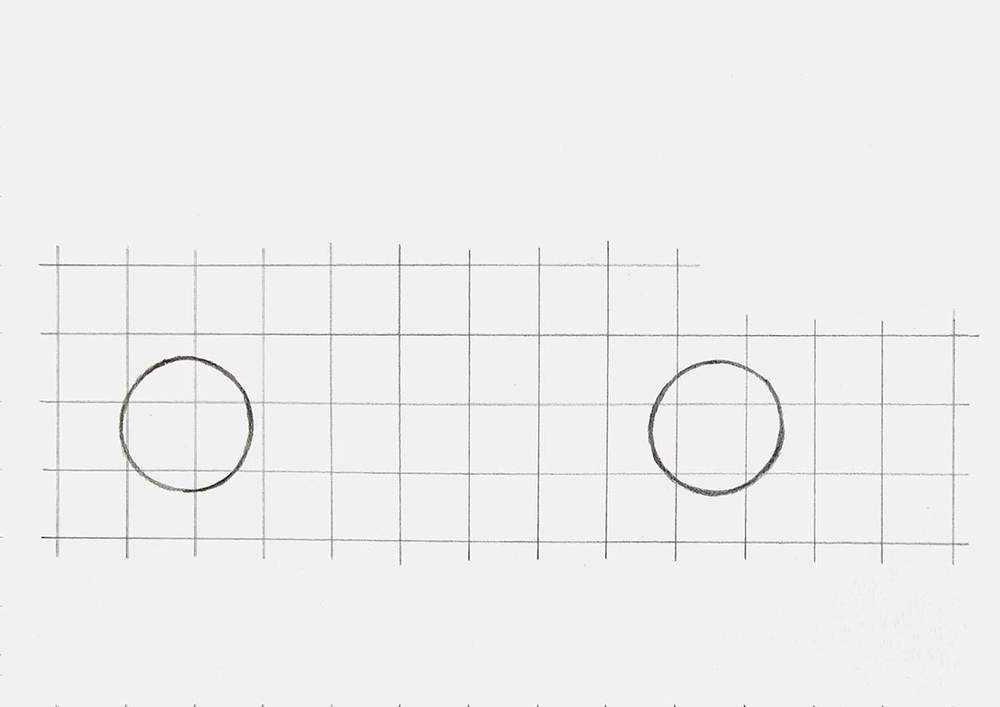
Since this is a side view, the wheels are perfect circles and form a great starting point for the sketch.
To sketch the wheels, I marked the top, right, bottom, and left edges of each wheel relative to the grid lines of the reference photo, and then measured where the center was.
Normally, I would just connect these points by hand, but since the wheels are perfect circles, I used my compass to sketch the outline of the wheels. (That's why I needed to measure where the center was).
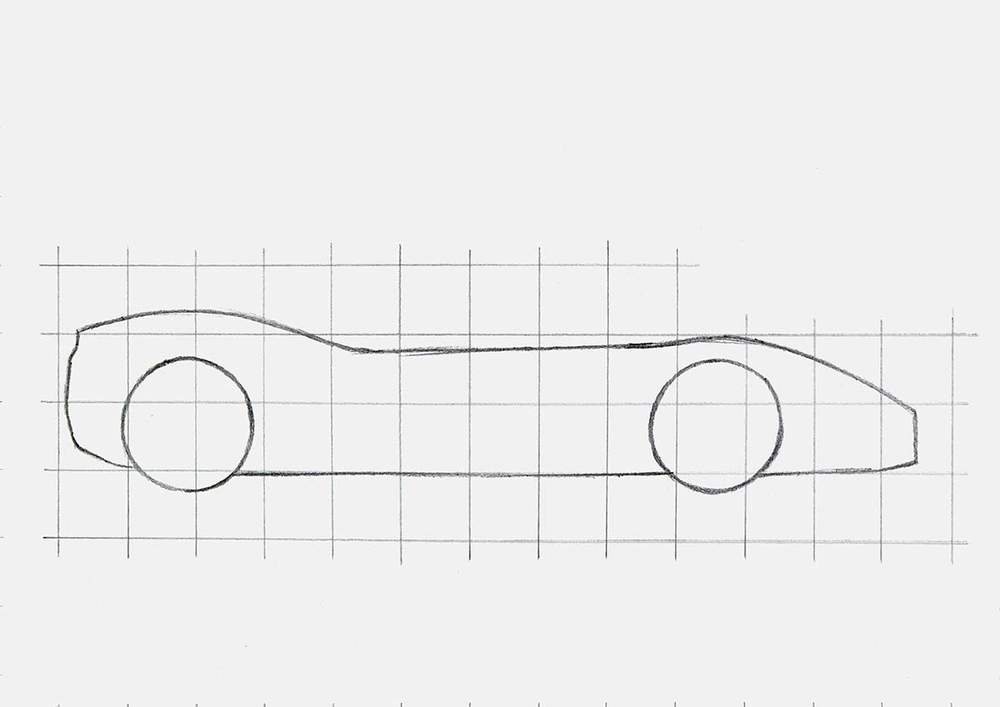
Next, I added the outline of the lower half of the body.
I carefully studied the reference photo with the grid overlay to find where it crosses grid lines and where there are sharp angles and curves, and marked those points on my sketch.
I did simplify the front quite a bit.
Next, I sketched the outline with smooth lines.
With the lower body in place, it gets a lot easier to sketch the roof line.
I again looked at the reference, marked where the roof line crosses grid lines and where it connects to the lower body, and then sketched it in one smooth motion.
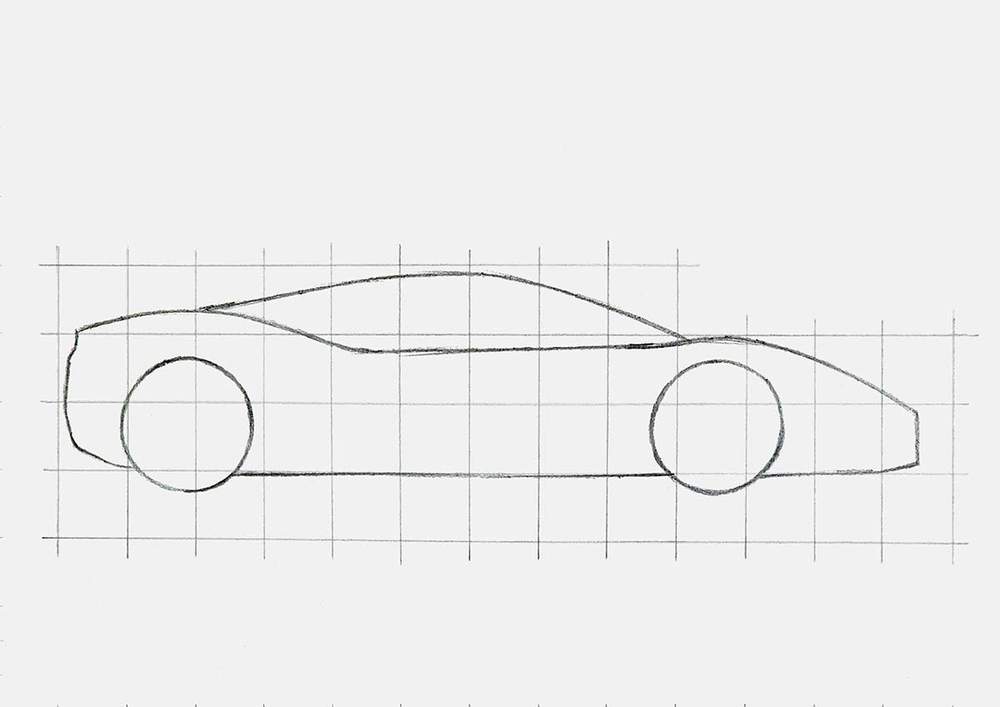
And that's the basic outline of the Ferrari side view already done!
Step 3: Add the Body Lines and Parts of the Ferrari
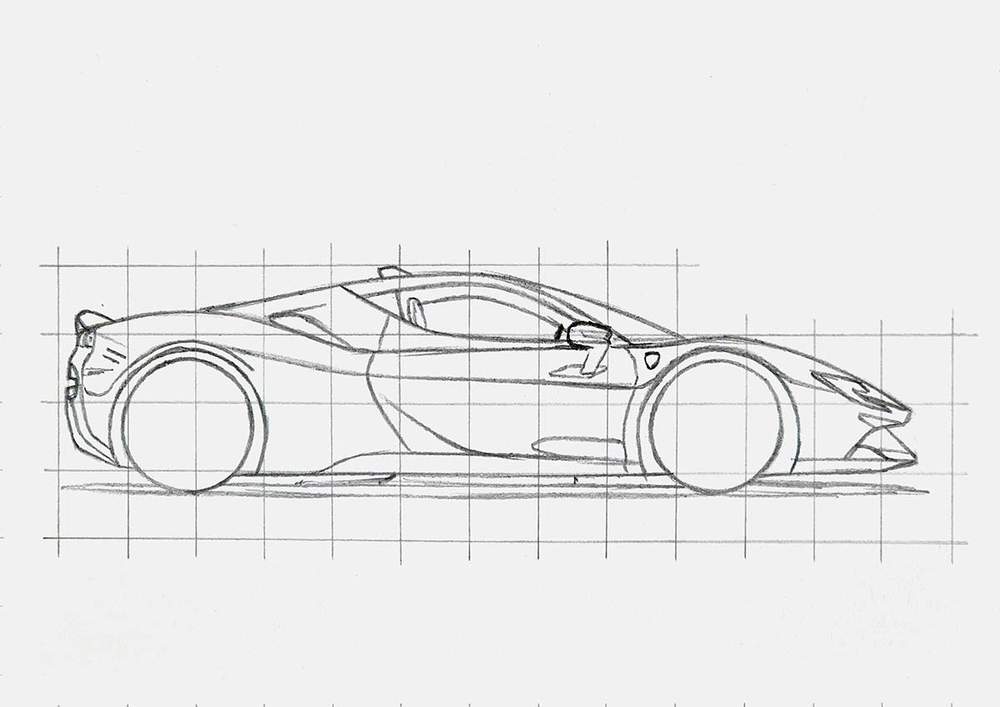
With the basic outline of the side view done, it is a lot easier to add in all the parts and other shapes of the Ferrari.
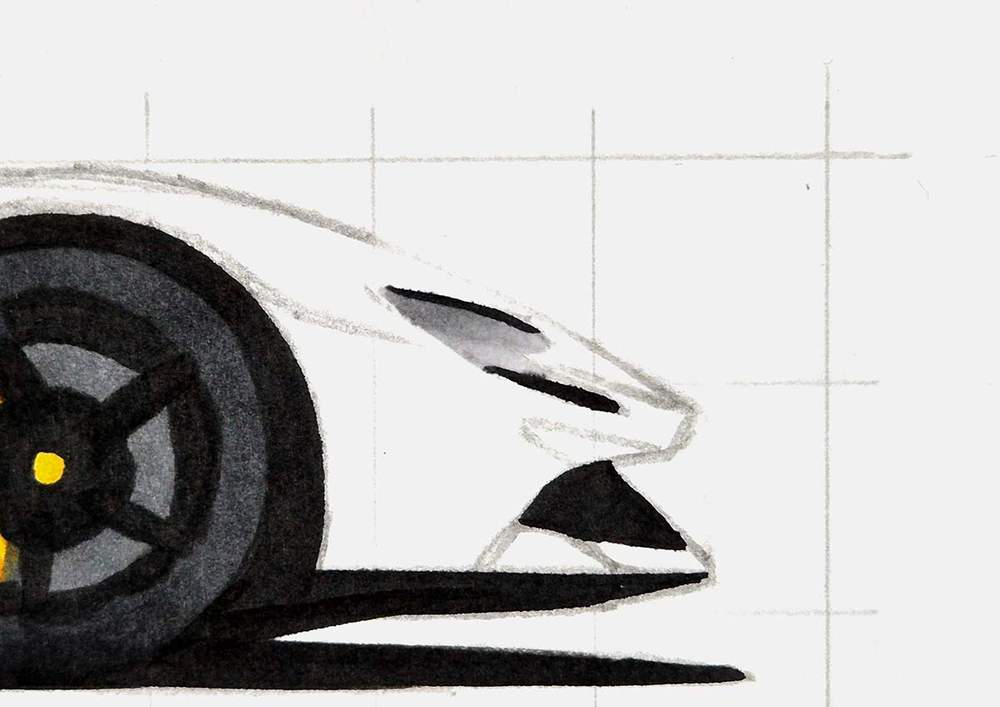
I started by adding the bigger, more important parts, like the wheel arches, the A-pillar/side window frame, the diffuser, the side skirt, the air intake, the headlights, the front bumper, and a few characteristic body lines.
I also added the spoilers and the antenna in this step.
To add all of these shapes, I again relied heavily on the reference photo. I worked part by part, looking at the reference where they fit in the grid and cross grid lines. I marked those points and then sketched the part.
After that, I added all the smaller parts and the details using the same steps as before.
I also added some rough markings for where the reflections would go. For example, I marked the reflection of the mirror in the body of the car around where the mirror is mounted to the door, and a shape on the bottom right of the door.
Step 4: Sketch The Wheels of the Ferrari
You probably noticed that I haven't done the wheels yet. I like to give them a little bit more attention in my drawing guides.
We already started this sketch by drawing the outlines of both wheels. Now, I'll show you step by step how to sketch the front wheel, as both wheels are very similar and use the exact same steps.
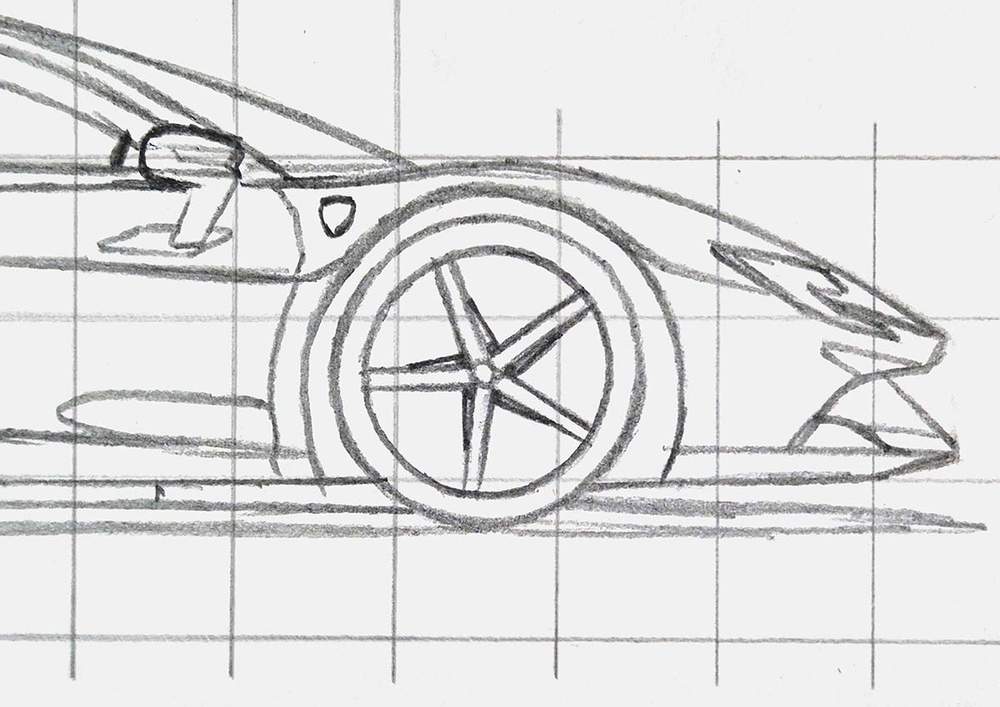
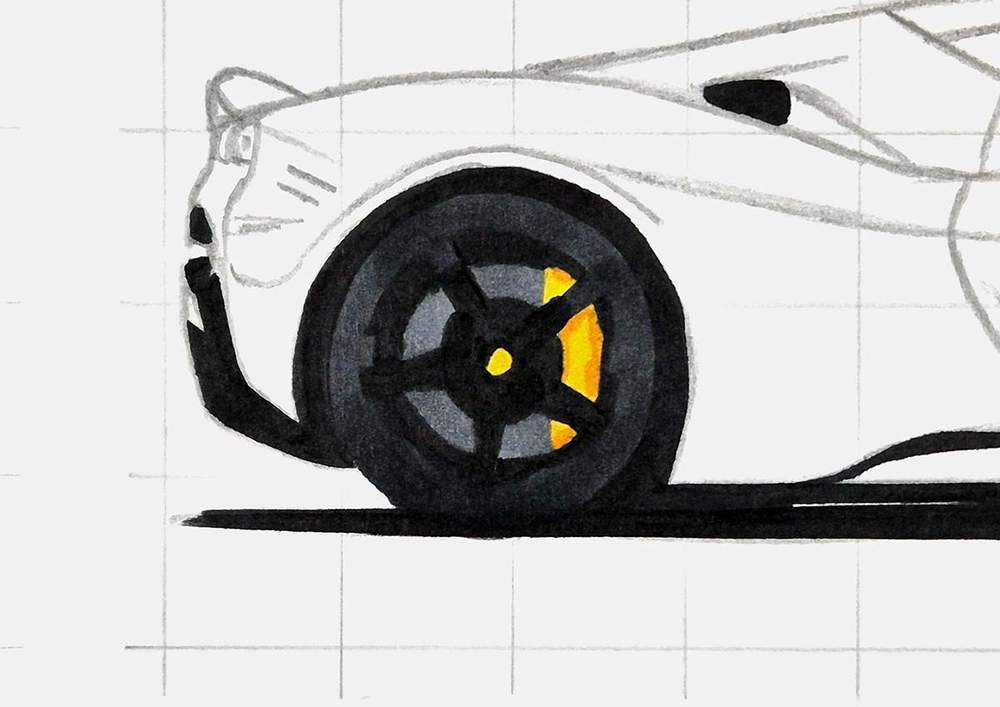
I first marked the center of the wheel with a small circle, and I used my compass to draw the inside edge of the tire/outer rim edge.
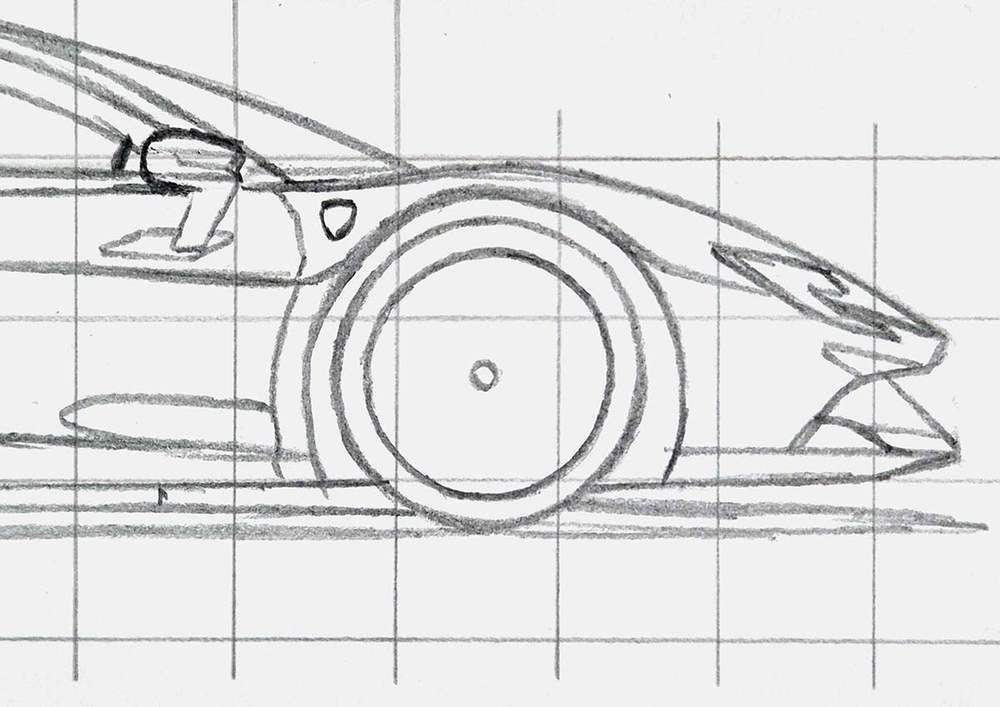
Next, I added 5 pairs of parallel lines that are ideally evenly spaced around the center. The parallel lines are about the width of the center circle apart.
Once you've sketched them, they should look something like this:
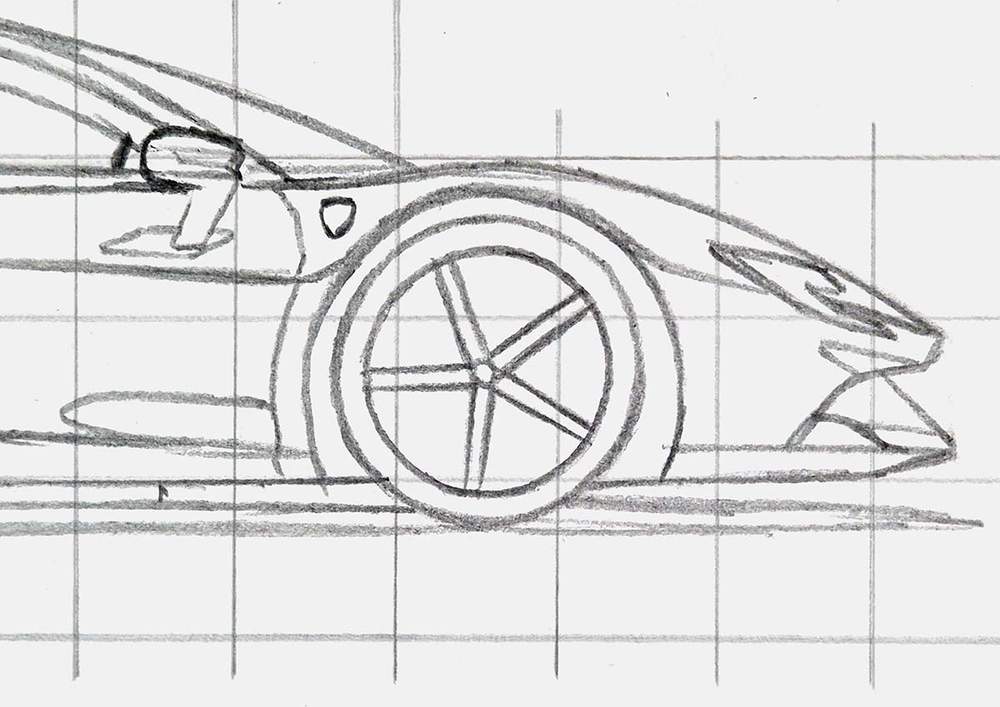
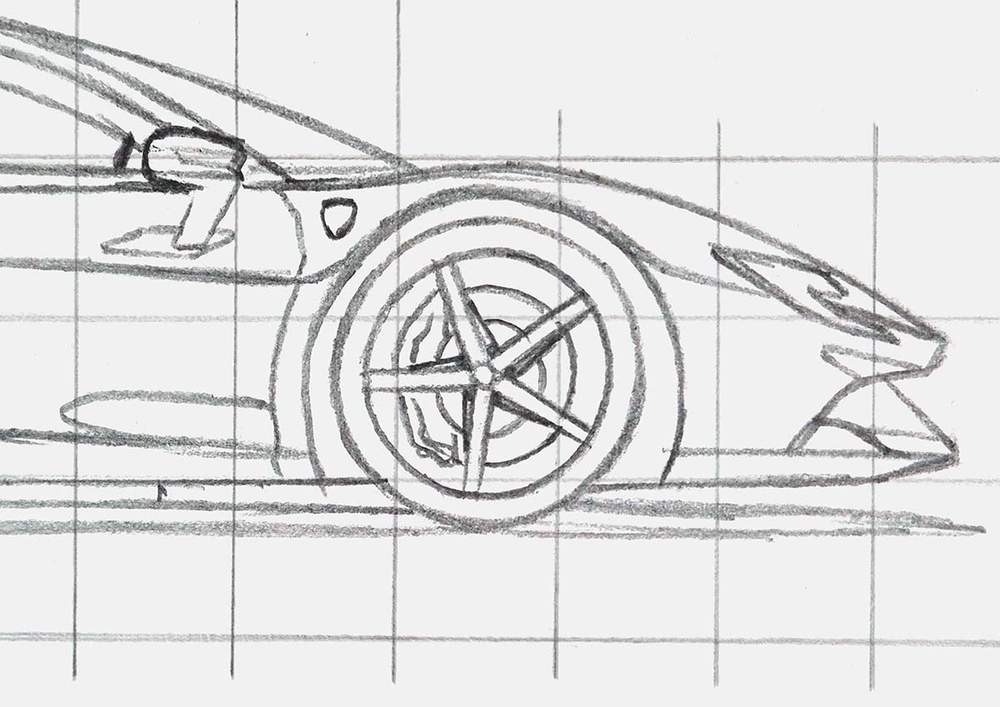
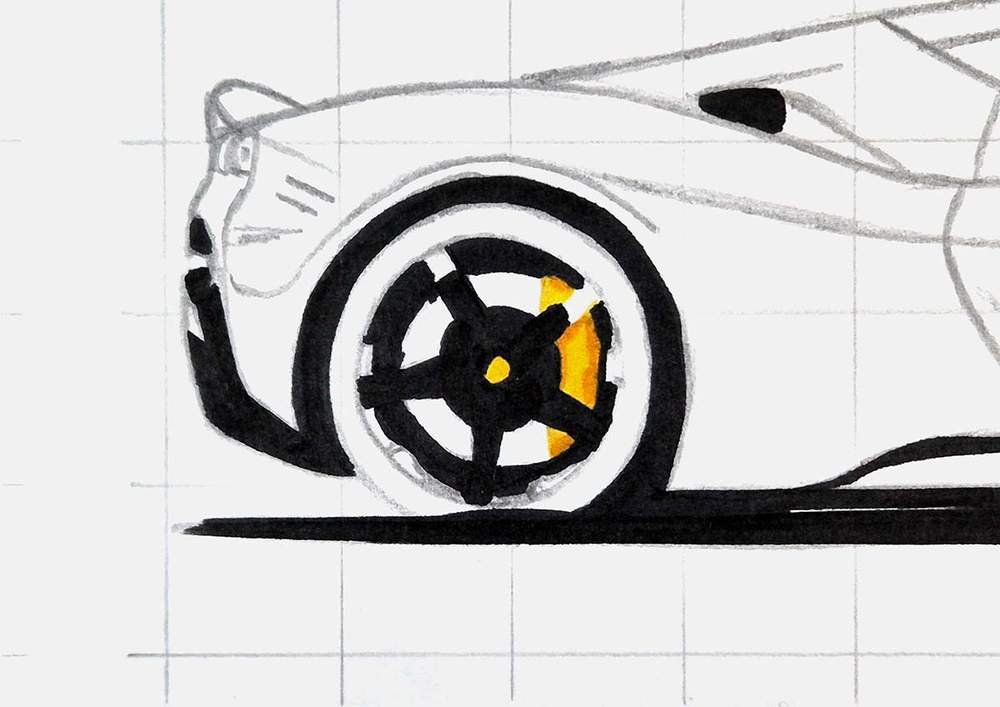
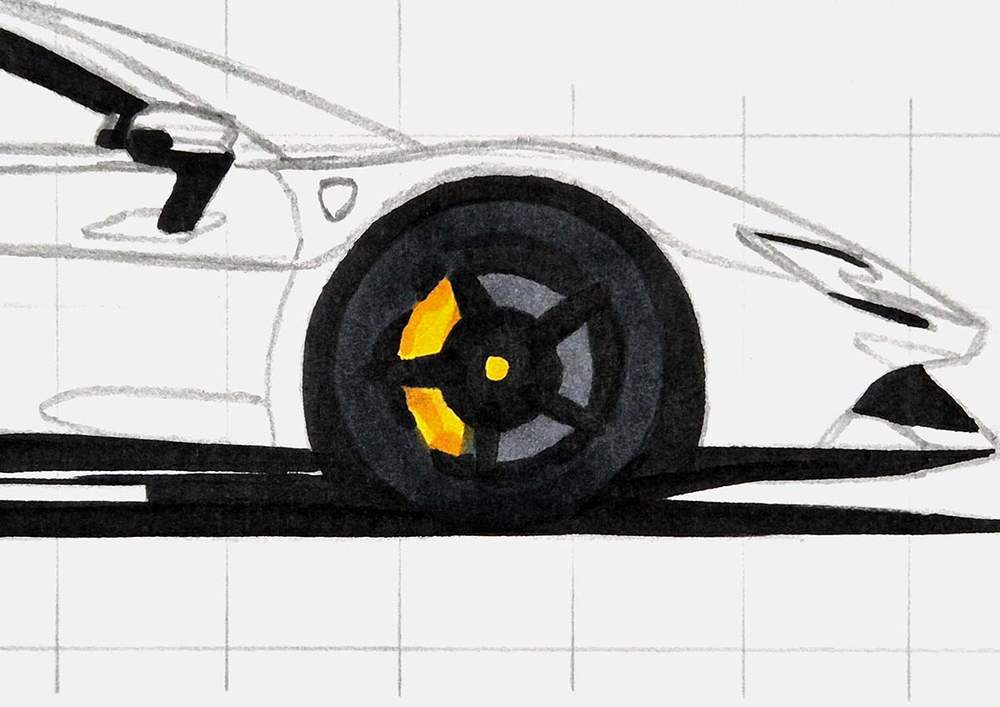
Then, I marked the bolts with small dots in the 5 corners around the center, and I added a line on the right side of each spoke that starts halfway and connects to the far end of the bolt. It kinda forms a star around the center of the wheel.
After that, I added 2 circles around the center and behind the spokes. 1 bigger circle (the brake disc) and one smaller one that houses more bolts.
On the left side, I added the brake caliper. It's mostly a bunch of scribbly lines that house round brake pistons. I tried to make it look similar to the reference photo.
Lastly, these SF90 wheels have these small fins on the outer rim edge. In the reference, you can only see 3 of the 5, so I only sketched 3 of the 5 fins.
I also added a thin line on the inside edge of the bottom half of the wheel, which is lighter colored.
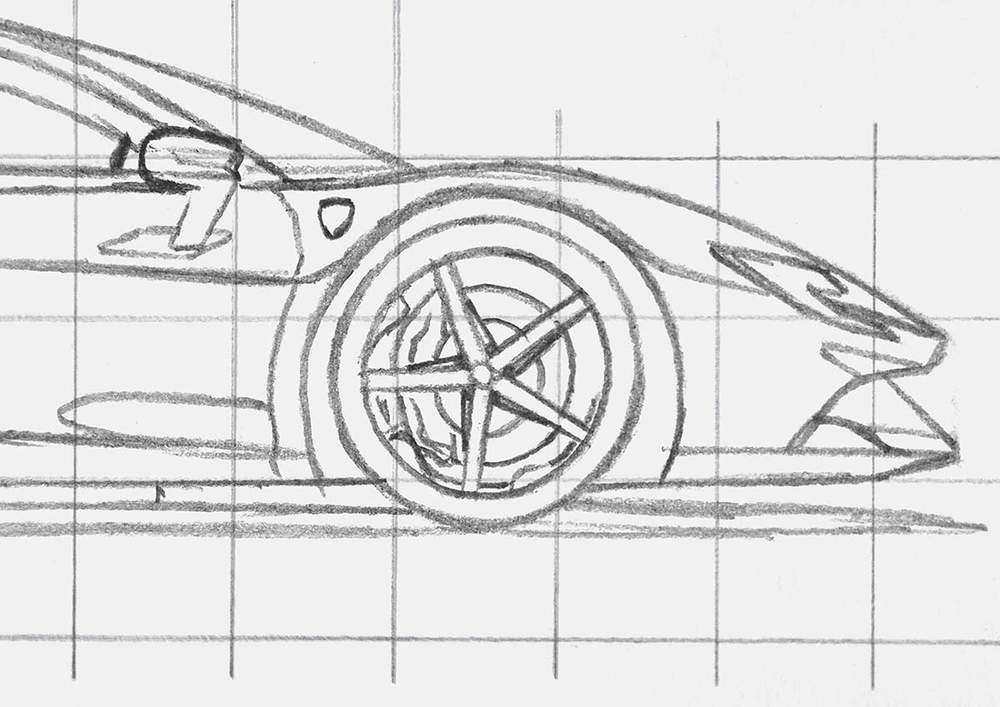
And that's how I sketched the full front wheel.
I used the exact same steps on the rear wheel and just mirrored the caliper.
But there is one thing to keep in mind when following the reference photo. It looks like the rear wheels are on backwards; the fins point in the other direction compared to the front wheel. I checked on other photos, and I believe the fins should be pointing in the same direction as the ones on the front wheel.
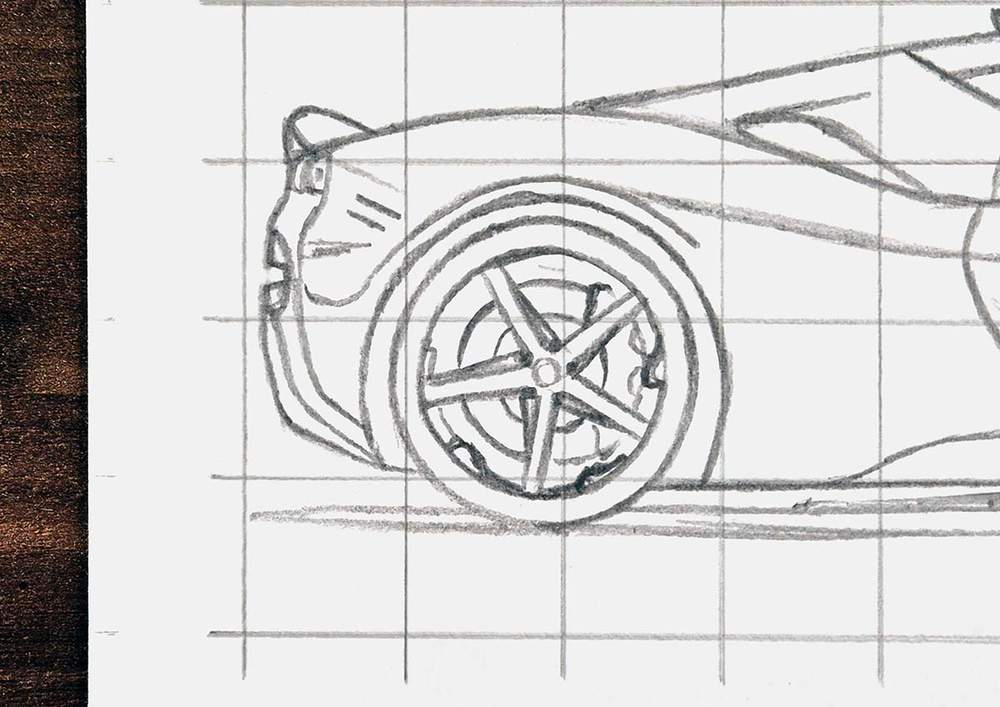
After drawing the wheels, the sketch of the Ferrari side view is ready to be colored! (My favorite part!)
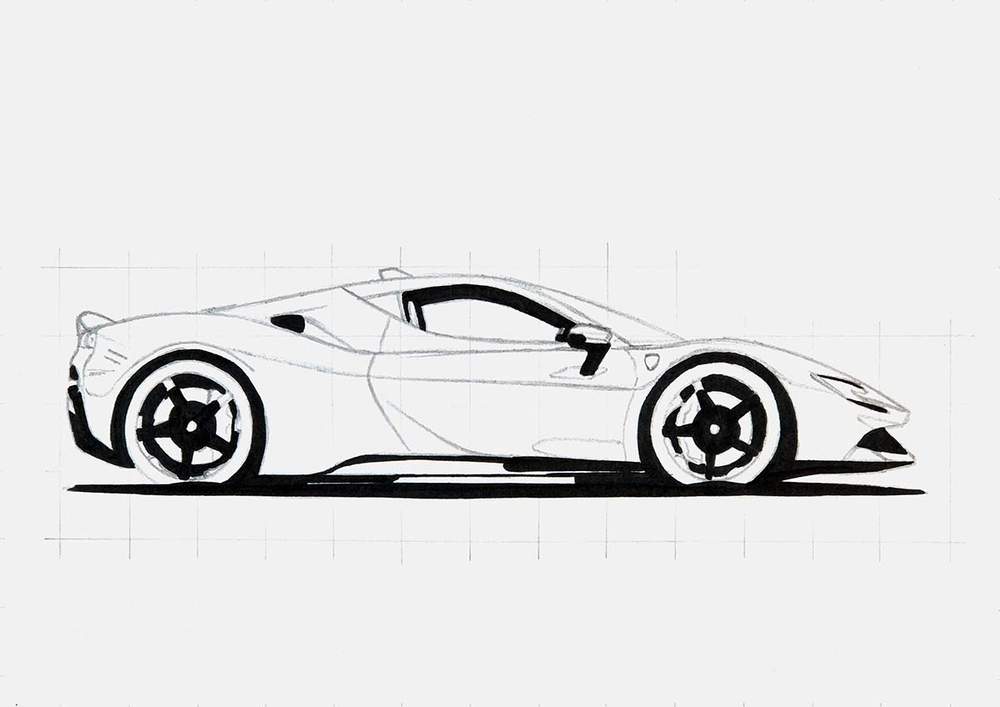
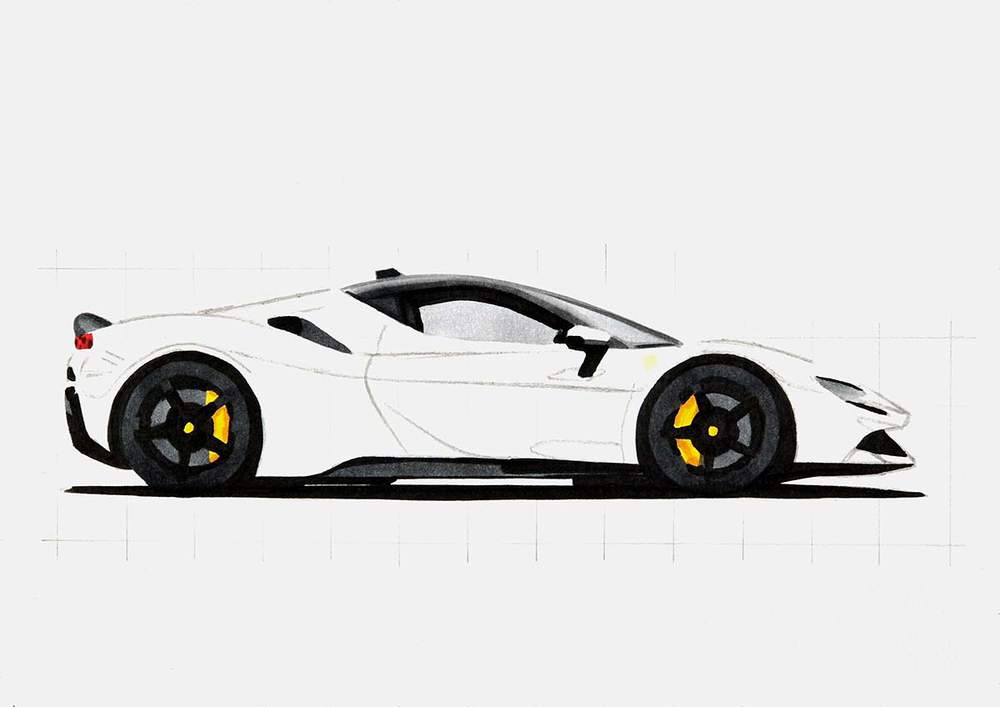
Step 5: Color All Pure Black Parts of the Ferrari
I always like to start by coloring all the pure black parts. For some reason, this makes coloring the rest of the car a lot easier.
I carefully looked at the reference photo, found all pure black spots, and colored those in on my sketch.
I did make 2 mistakes this time. They're just small mistakes that don't matter too much. I forgot to leave the top bit of the second top spoke on the front wheel uncolored, and I colored the whole front splitter thing black when there should be some lighter spots...
Before continuing to color the other parts, I first lighten the sketch to make sure it doesn't show through the marker ink and ruin the drawing.
I like to do this just before I color a part.
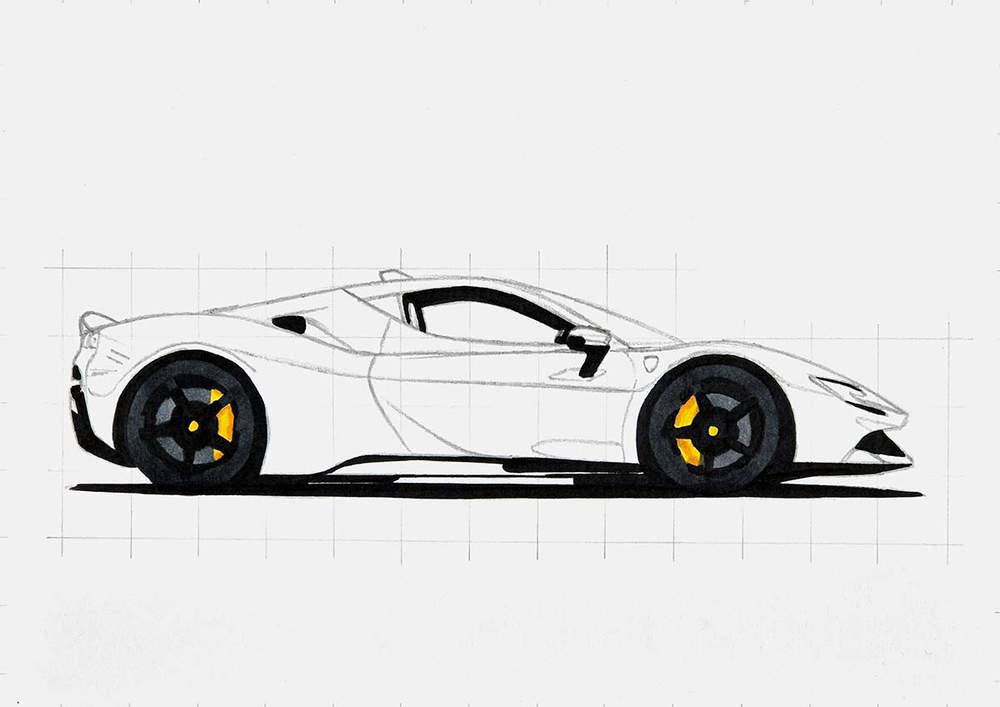
Step 6: Color the Wheels of the Ferrari
After that, I colored the wheels. I like to get them done straight away.
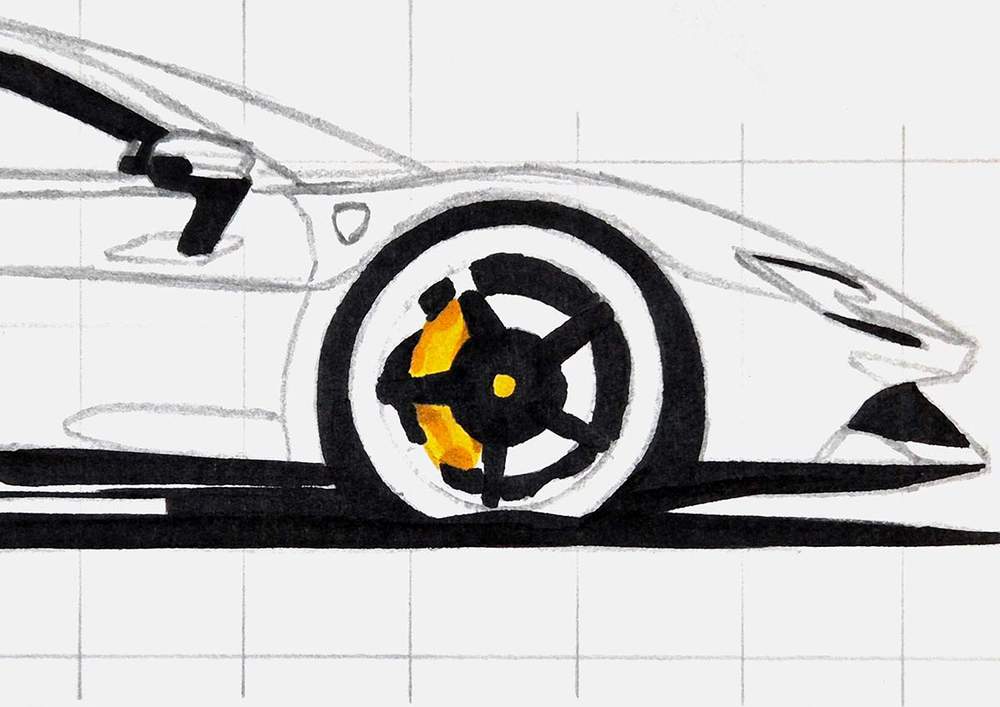
I first used Sunflower (Y2) to color the Ferrari logo at the center of the wheels and the brake calipers.
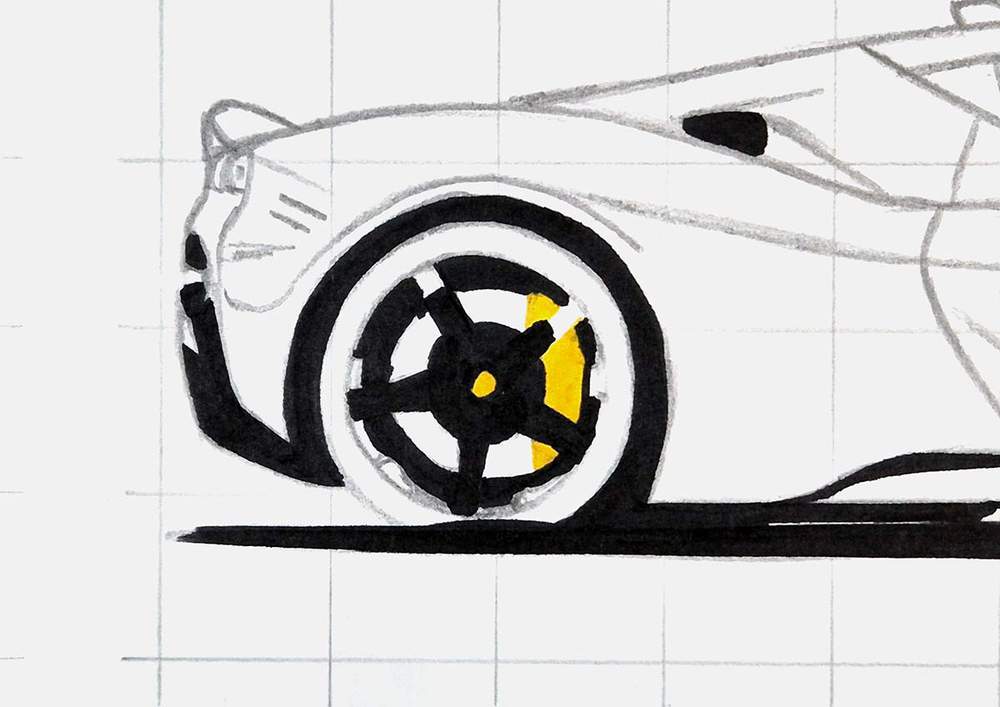
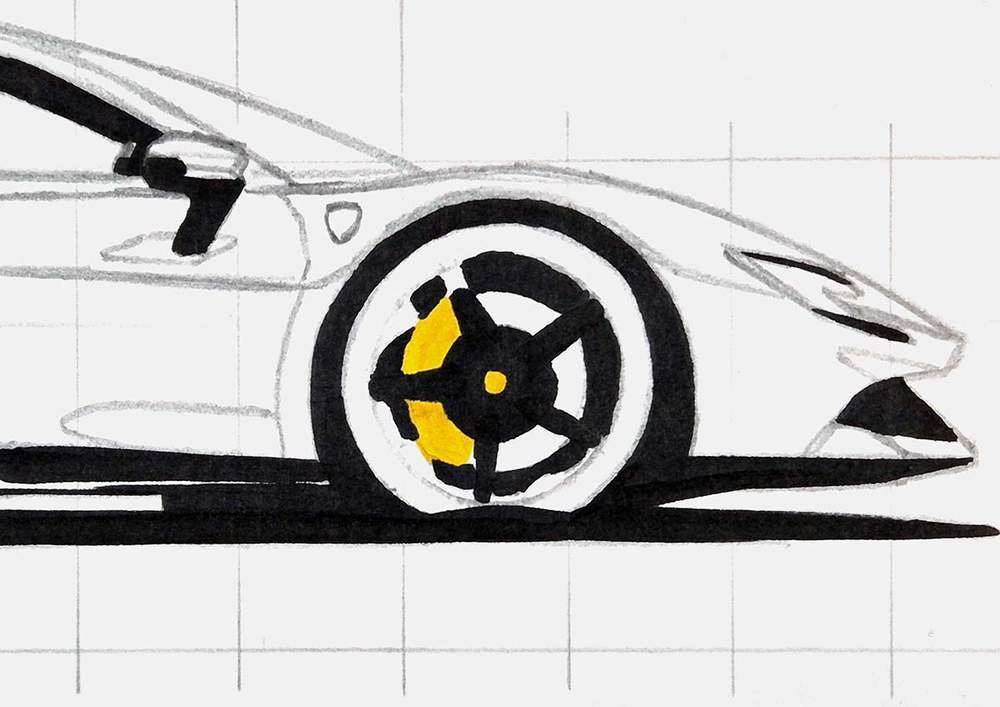
Next, I used Marigold (YR2) to add some darker yellow shading to the calipers.
Then, I colored the brake disc with Neutral Grey 07 (CG070)...
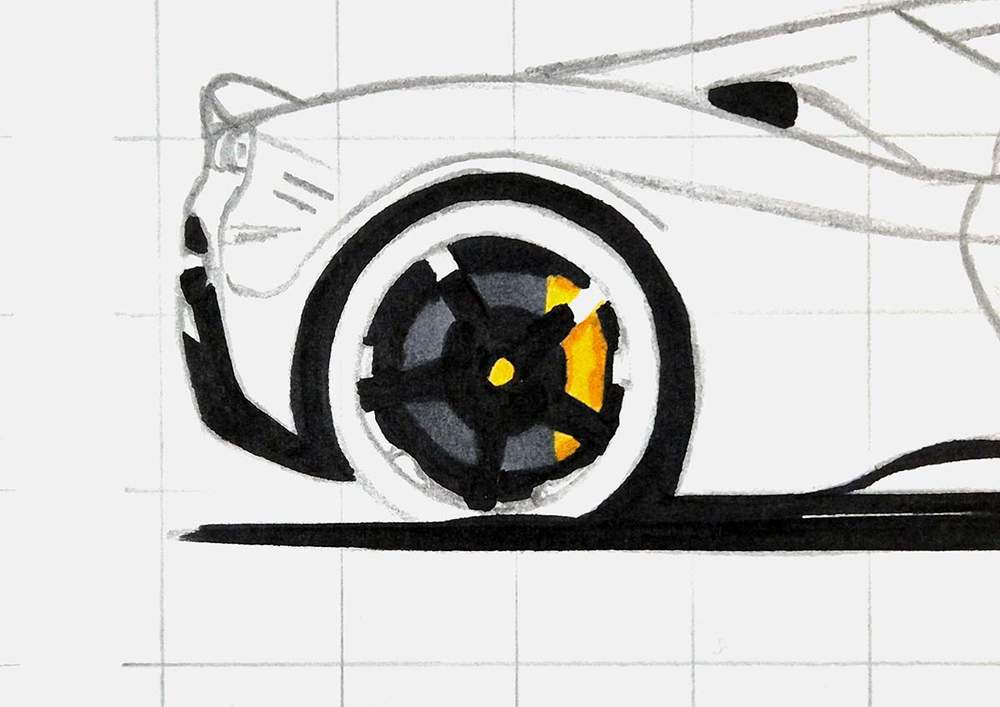
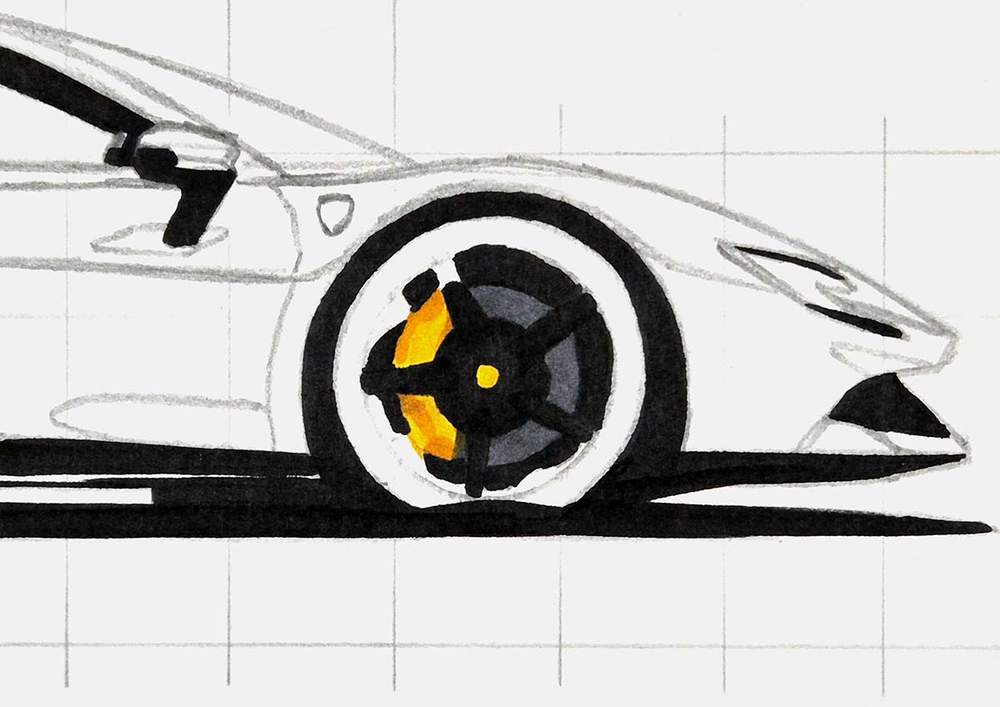
And the rest of the wheel with Neutral Grey 6 (NG06).
And that's all for the wheels for now.
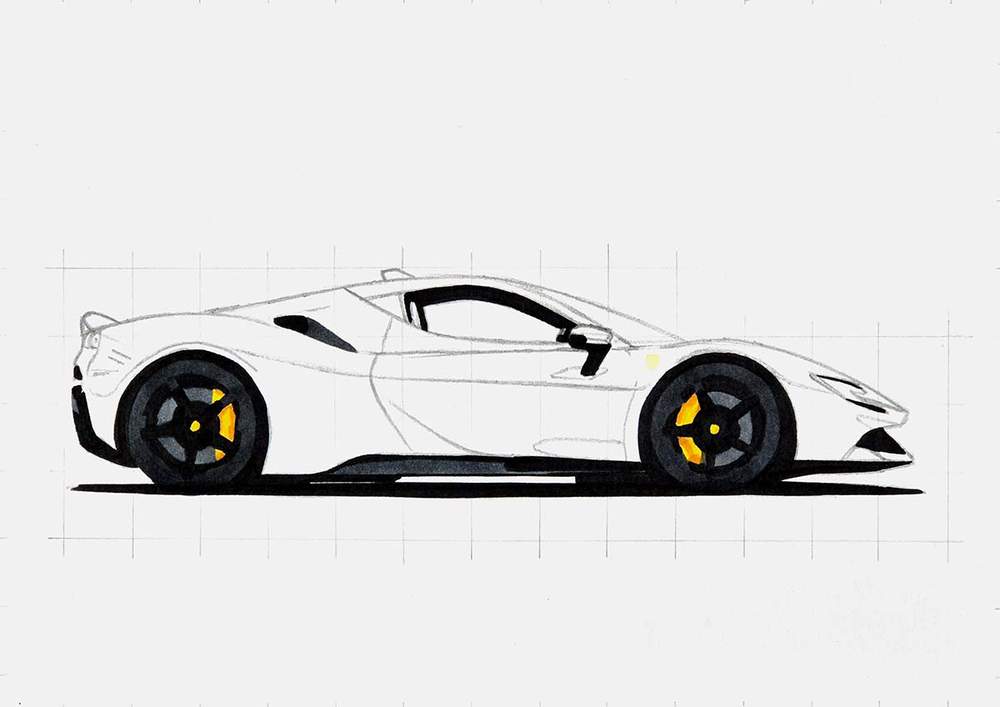
Step 7: Color the Diffuser, Side Skirt, Air Intake, and Ferrari Shield
Next, I colored the small bit of the diffuser, the side skirt, and the remainder of the air intake on the side of the car with Neutral Grey 07 (CG070), and I colored the Ferrari shield on the side of the car with Primrose (Y121).
Step 8: Color the Ferrari Headlights
Then, I colored the headlight.
I colored the bottom half with Neutral Grey 03 (CG030) and the top half with Neutral Grey 3 (NG03).
Step 9: Color the Taillights and the Spoiler
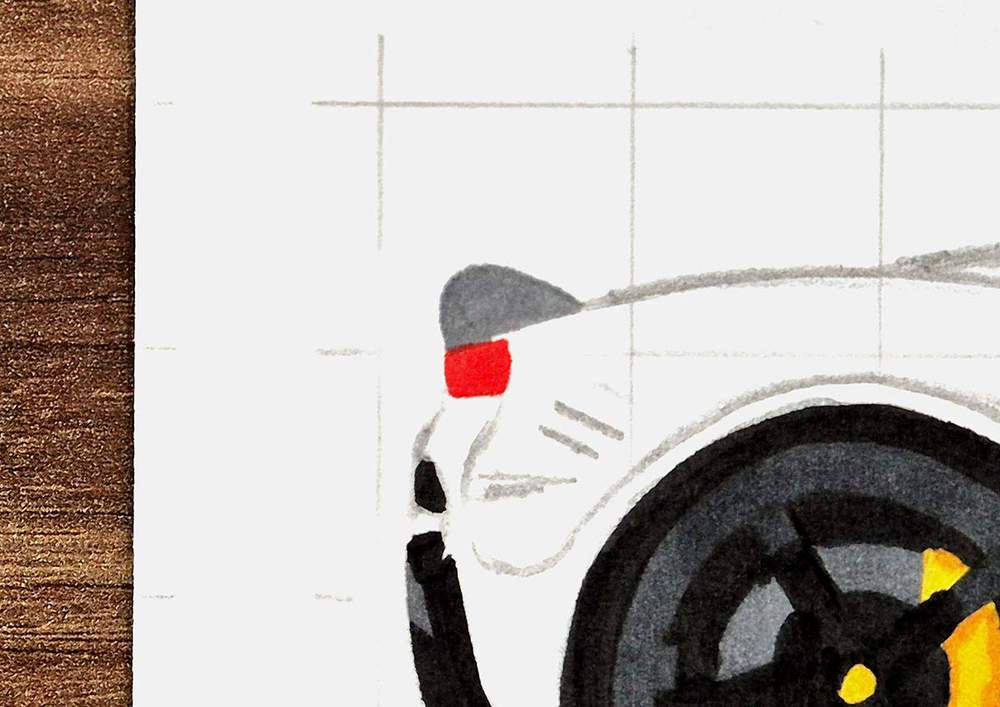
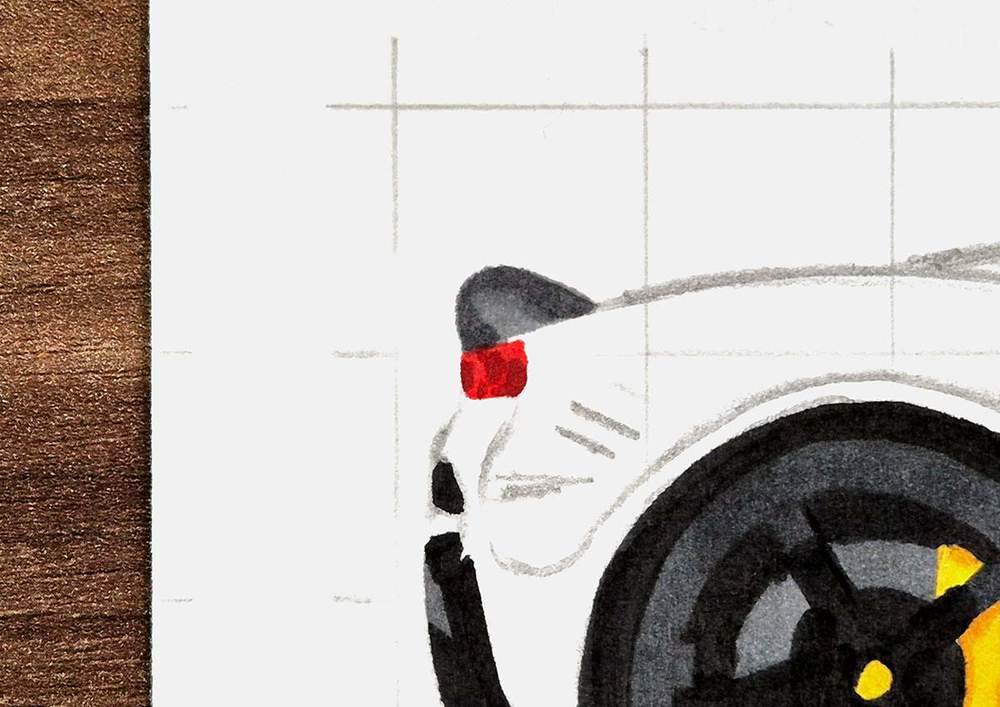
After that, I colored the rear lights and the carbon fiber spoiler.
For the taillights, I used Rouge Orange (Y5) as the base, and for the spoiler, I used Neutral Grey 3 (NG03) as the base color.
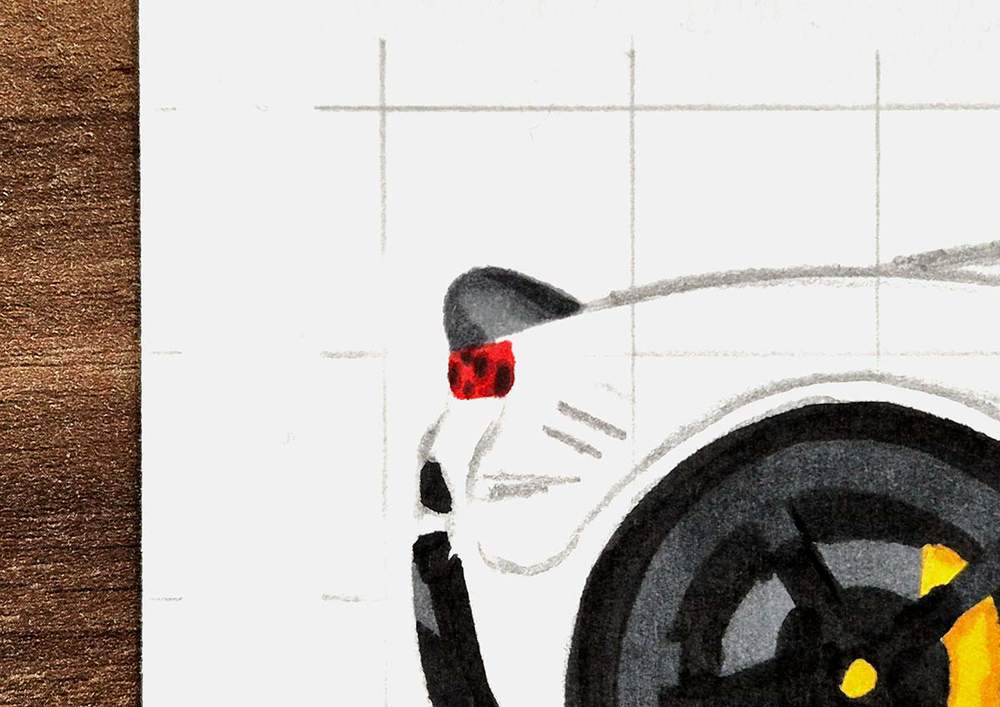
Then, I shaded the bottom left and the top edge of the spoiler with Neutral Grey 07 (CG070). And I used Bright Red (R180) to add some darker shadows to the rear lights to make them look more like the lights of the SF90 in the reference photo.
Lastly, I used Neutral Grey 6 (NG06) to add darker shading on the top right edge of the spoiler, and I used Neutral Grey 07 (CG070) to make the darker spots in the taillights darker.
Step 10: Color the Roof, Side Windows, and Windshield of the Ferrari
Next, I focused my attention on the greenhouse of the Ferrari (the windshield, roof, side windows, and interior).
I started by coloring it all with Neutral Grey 03 (CG030).
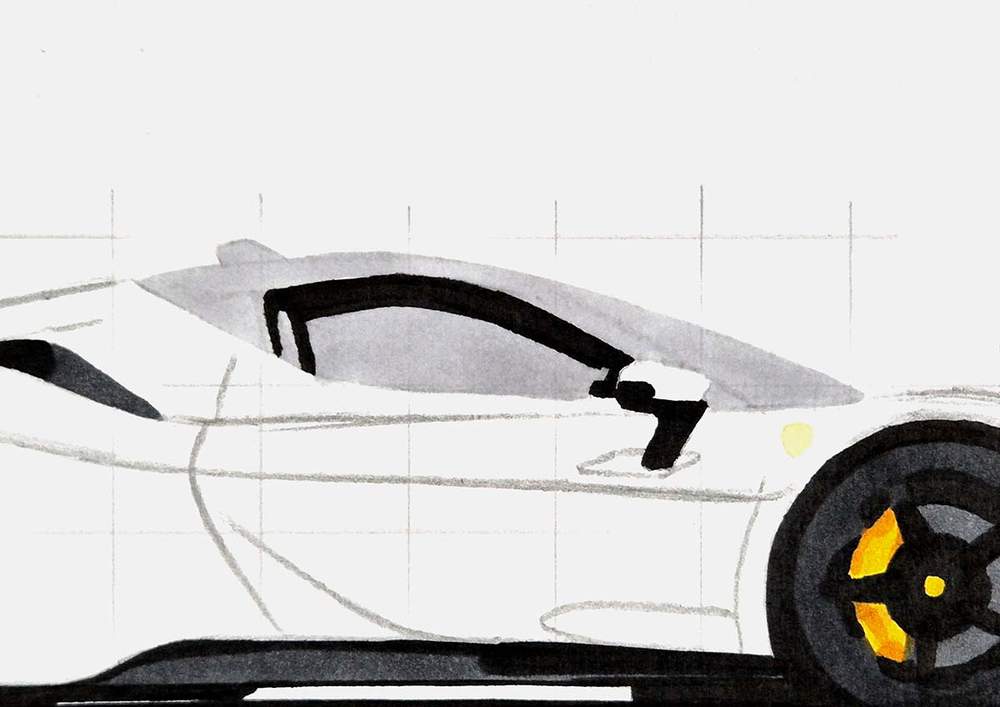
Then, I used Neutral Grey 3 (NG03) to darken the top edge of the roof in the windshield and the A-pillar, the lower roof line, the seat, and the steering wheel.
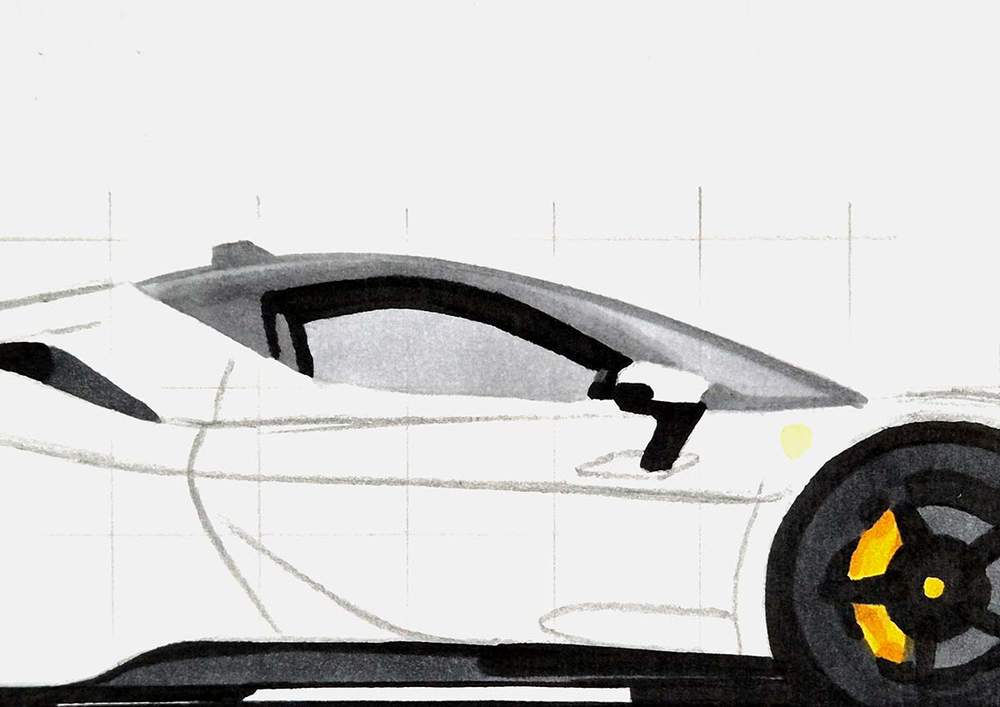
After that, I used Neutral Grey 07 (CG070) to darken the antenna, the outer edge of the windshield, the seat, the A-pillar and lower roof line, and the steering wheel.
I also colored a small line at the center of the door mirror.
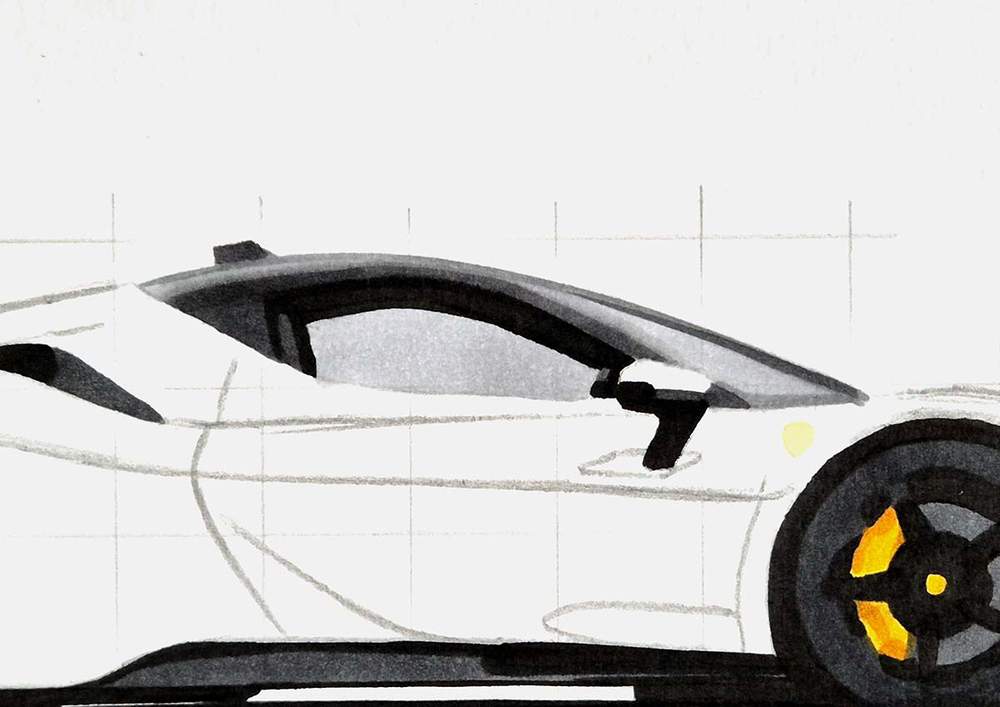
Lastly, I used Neutral Grey 6 (NG06) to darken the top and bottom edges of the seat, the lower left edge of the roof line, the antenna, and the edge between the roof and the body of the car.
I also added a dark grey line for the windshield wiper below the windshield.
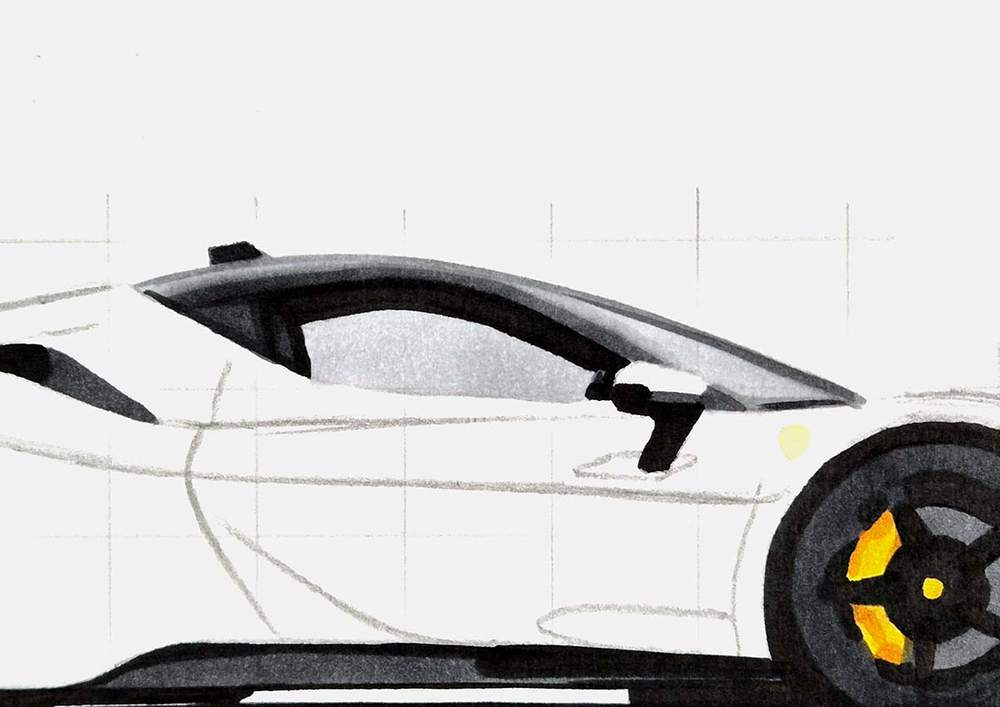
And that's all the grey parts done!
Step 11: Color the Main Body of the Ferrari with Markers
I already told you that coloring is my favorite part of any drawing, but coloring the main body of a car is my favorite part of the coloring process. Especially the color of this SF90.
Since Shmee bought a 296 GTS in Rosso Dino, I've wanted to draw a Ferrari in that color. The orangy-red looks so good!🤩
Now, I've finally got the chance to draw a Ferrari in that color.
Before I colored the main body, I made sure to lighten the sketch with my eraser so that it wouldn't show through the ink of my markers.
After that, I colored the lightest orange parts of the main body with Chocolate Pink (R050). These include the buttress, the top edge of the door, the mirror cap, the top edge of the fender, and a small reflection below the headlight.
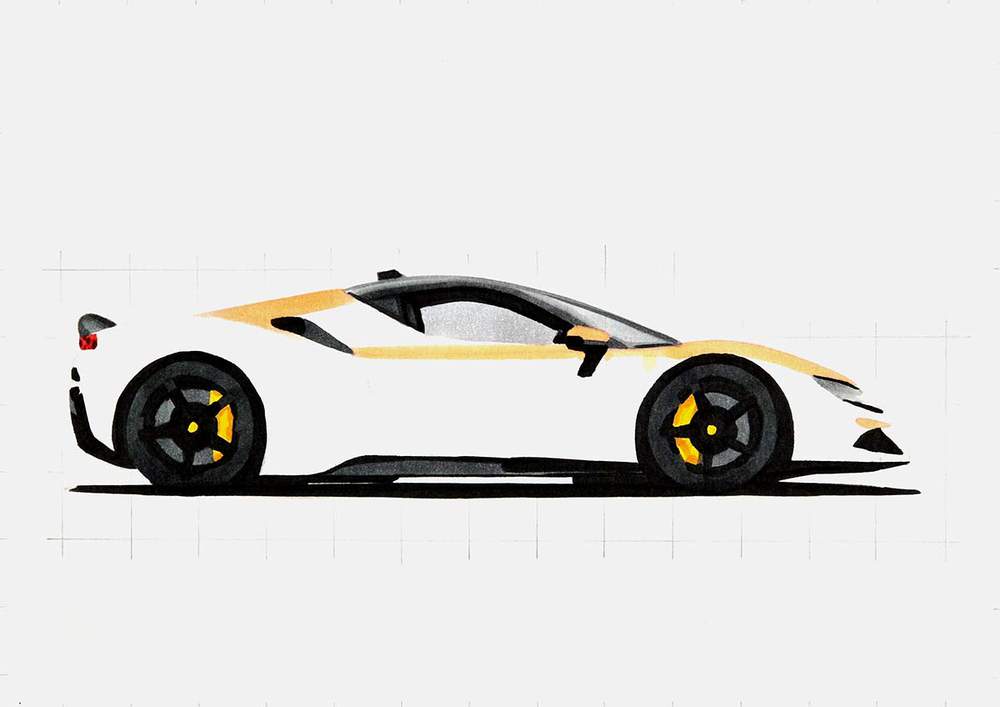
Next, I used Peach Pie (YR090) to color the rest of the body above where the dark reflections will go, and some light reflections on the front and the lower side.
I also darkened the mirror cap while leaving the top edge lighter orange.
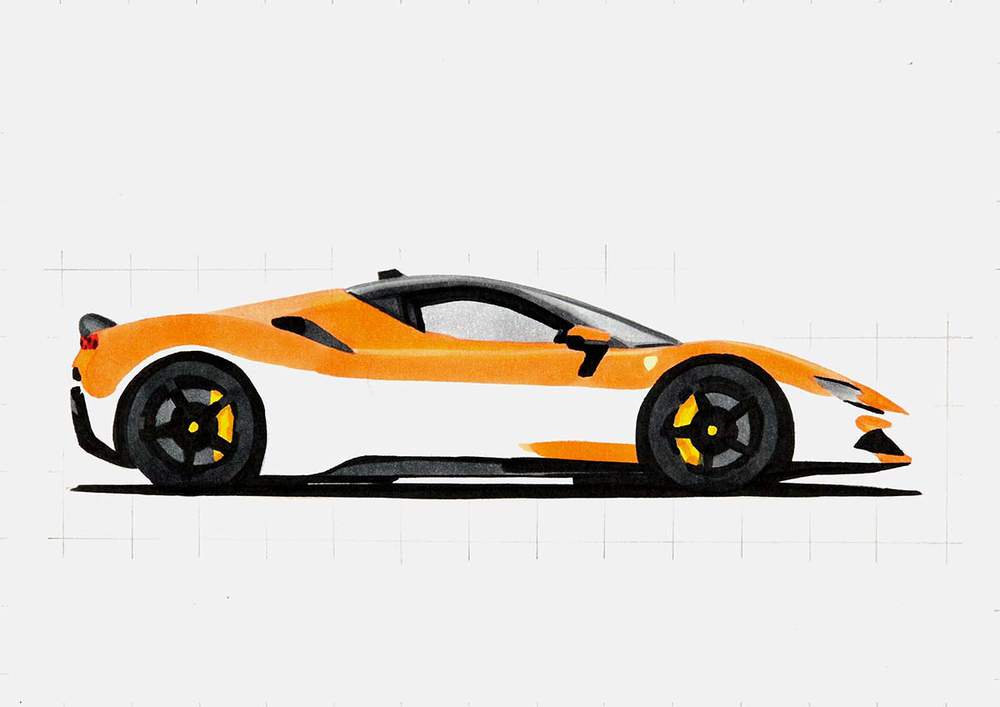
After that, I used Agate (R070) to color the dark reflections on the lower half of the Ferrari. I also added some elongated cloud reflections on the lighter orange parts and blended those out by coloring over them with Peach Pie (YR090).
And I darkened the lower half of the mirror cap with Agate (R070).
Then, I used Rouge Orange (Y5) to darken the reflection on the side. I did leave some lighter orange shapes that look similar to the reflections in the reference photo.
I also used Rouge Orange (Y5) to darken the bottom bit of the rear bumper, the lower half of the front bumper, the edge by the taillights, the reflection below the door mirror, the darker red edge on the mirror cap, and the shadow above the side air intake.
And lastly, I used the darkest orange-red called Bright Red (R180) to add just a little bit of shading below the hockey stick shape on the door, the tip of the "nose" of the Ferrari, the shadow by the air intake, and the dark red edge on the mirror cap.
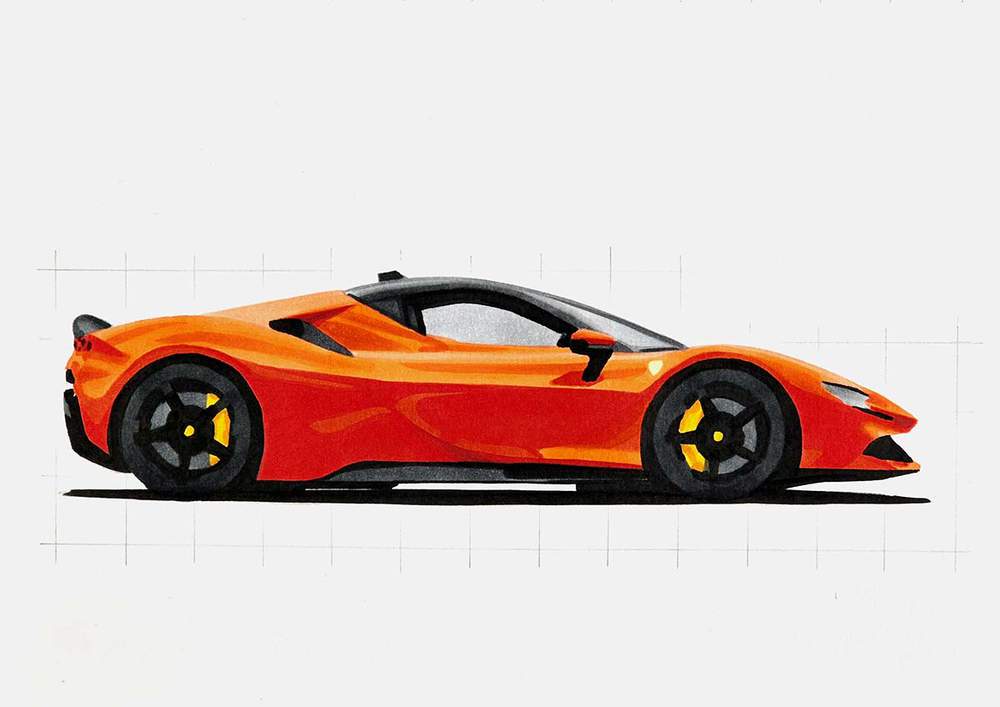
The Ferrari side view is now all colored!
However, you might agree that it isn't looking good yet. But there is a super simple thing you can do to make your drawing look good.
Step 12: Add Some Details to Your Ferrari Sideview Drawing
With just a white and a black colored pencil, you can push your car drawing from meh to wow!, or at least good.
These 2 pencils are perfect for adding in all the tiny details and highlights on the car that make it look real.
But first, I erased what's left of my sketch. I find it easiest to do that now when everything is colored with markers, and before I used colored pencils, so it doesn't matter if I go over the drawing or not.
After that, I used the black pencil to add:
- the panel gap by the taillights and the 2 little vents below it
- the door gaps
- the black sill on the bottom of the side window
- the edge around the headlight, the gap between the front bumper and the fin on the splitter
- some lines on the brake calipers
- and the prancing horses of the 3 Ferrari logos. (Yes, I did forget to draw the horse in the logo of the front wheel...)
And I used the white pencil to add highlights on:
- the spokes, bolts, and rims of the wheels
- the side skirt and front splitter
- the spoiler
- the window sills
- and on some of the lighter reflections

Just doing this already made such a big difference!
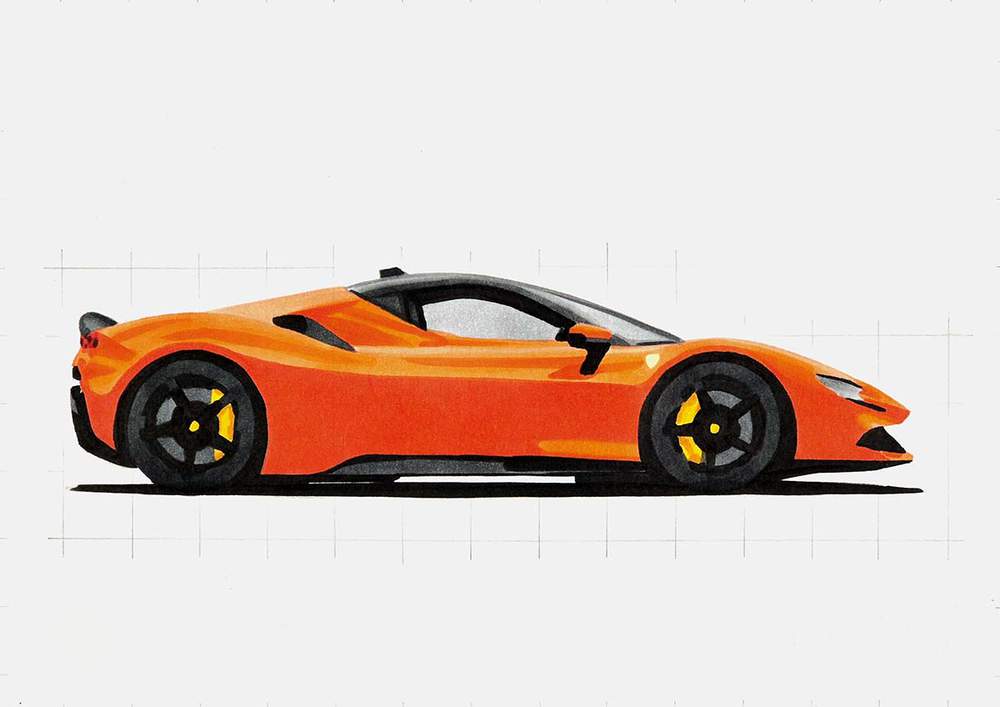
Step 13: Add a Few Final Highlights to the Ferrari Side View Drawing
To make this drawing just a tad better, I like to add some bright white highlights with my Posca paint marker.
I added some white highlights on:
- the wheels (mainly the bolts and the rims)
- the lower half of the headlights (3 horizontal lines)
- the roof
- the buttress (by the air intake on the side)
- and on the door (also by the air intake)

And That's How I Draw Realistic Side Views of Ferraris (& Other Cars)
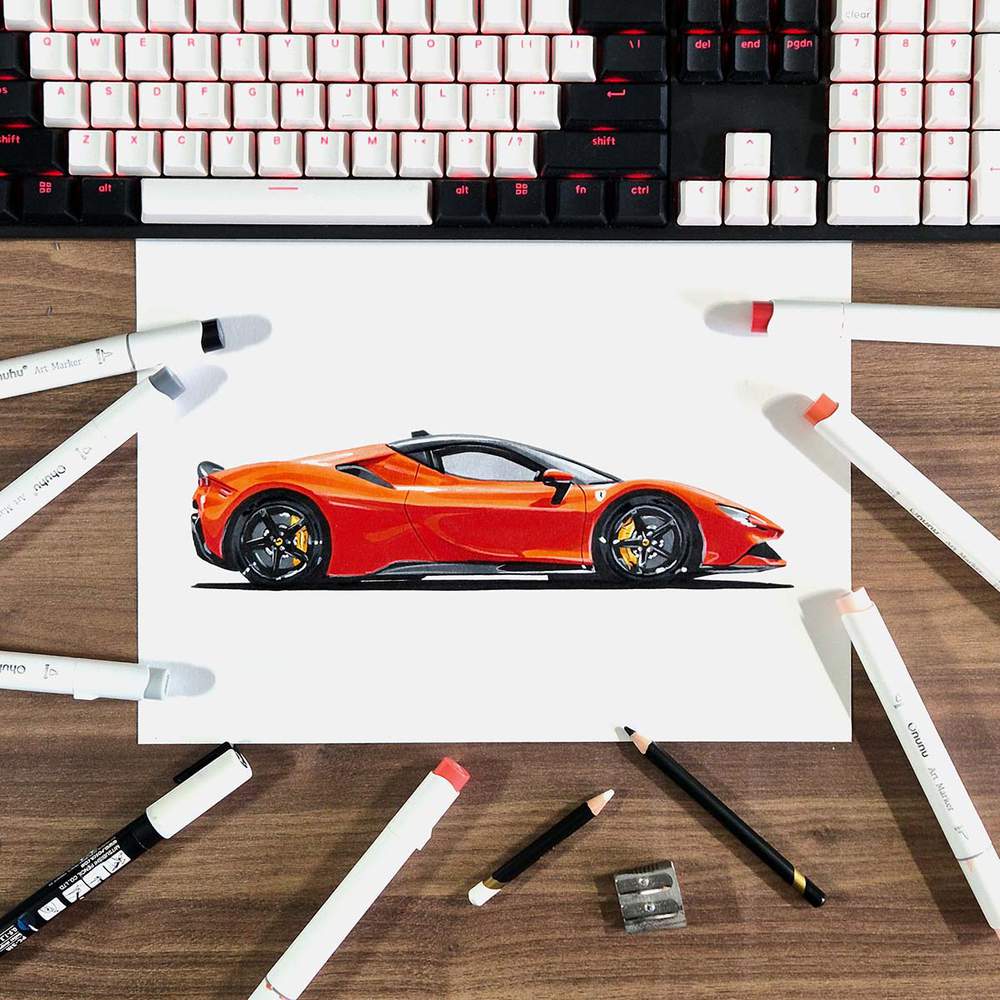
The Ferrari side view drawing of the SF90 Stradale is done! And I really like how this color turned out!
How did yours go?
I hope you found this helpful and learned something!
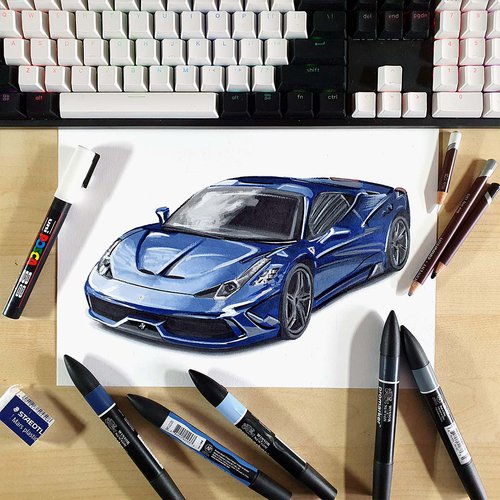
Want to draw more cars? Make sure to check out my other car drawing guides!
Thank you!
Articles You Might Also Like


I love bringing cars to life with alcohol markers and colored pencils.
Whether you're just starting out or looking to improve your skills, I'm here to help!
Click here to learn more about me.


Be the first to comment!
Comments
There are no comments yet.