How to Draw a Ferrari 812 GTS with Beautiful Reflections
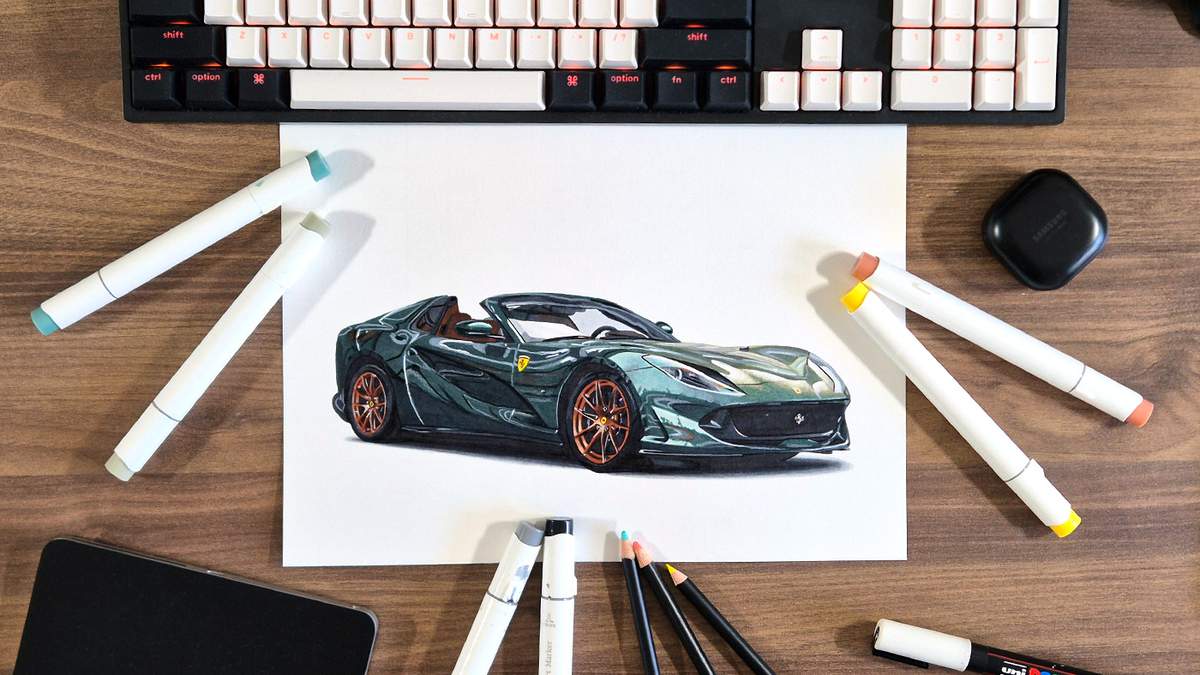
I've been meaning to draw this Ferrari 812 GTS for a while now. I came across this image a long time ago.
The color and the reflections are beautiful.
I just didn't have any incentive to actually draw it.
For the past years, I've only drawn for my blog. Not for me. And since I had already created a how to draw a Ferrari 812 post, there was no reason to draw this car.
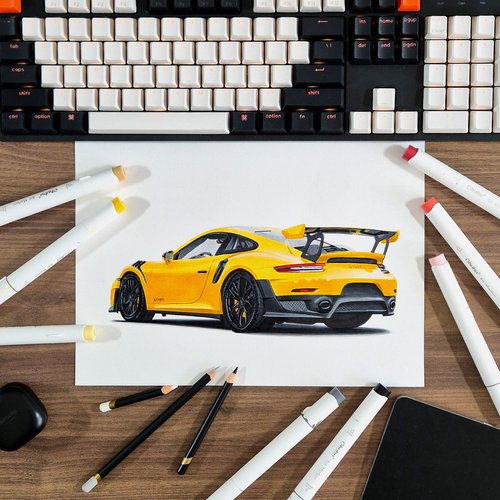
A few weeks back now, I started drawing just for me again. I first drew the yellow GT2 RS and then this 812 GTS. (I've already drawn 5 more cars. I post them every week on my Instagram.)
Again, this is a long guide. I've made 174 pictures of all the steps. 84 for the sketching process and 90 for the coloring and adding details.
Together with the GT2 RS, this is my most in-depth car drawing guide I've made.
I hope you like it!
I just wanted to let you know that this post contains affiliate links, and any purchases made through these links will result in a small commission for me and won't cost you anything extra.
In This Guide
Since this guide is quite long, I added some shortcuts below. You can click them, and it will take you to that part of the guide.
- The reference photo
- Picking the colors for the Ferrari
- List of the drawing supplies I used
- Sketching the Ferrari 812 step-by-step
- Coloring the 812 (everything except the main color)
- Coloring the main body of the Ferrari
- Adding details, reflections, and highlights
- Final result
The Reference Photo
I've had this image of a green Ferrari 812 GTS saved for a while now. I found it on Unsplash when browsing car pictures.
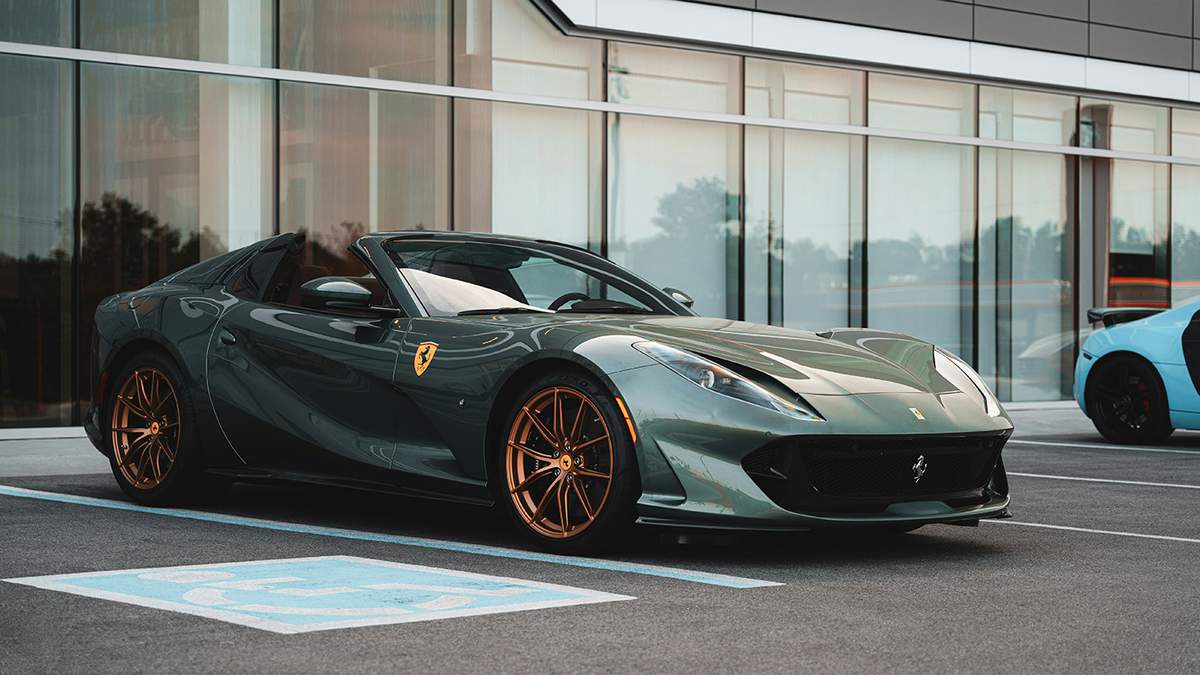
The reflections look so nice. The color looks a bit complex. The wheels are bronze. And the interior is brown.
It looks really nice.
Picking the Colors
I usually don't include a section like this in my guides. But for this one, it seemed like a good addition since the color picking and mixing was more complex than my usual 4 colors and no mixing method.
The color of this Ferrari and the reflections looked too nice to simplify or dull down.
However, this meant mixing colors to create the ones I actually need. For some reason, this is not something I like to do. Maybe it's because it makes explaining the process more complex, or because I don't like that the ink can behave a little unpredictably.
First, I needed to know what the main colors were and what they looked like on a white background.
Our eyes are pretty deceiving when it comes to colors and what shade they are and how dark they appear. Especially in the context of other colors.
That's why I use the color picker tool on Photoshop and pick some of the main colors and swatch them below the photo.
This makes it easier for me to see what the colors actually look like on paper since paper is white and doesn't come with the whole background of the photo already there.
Here are the colors I picked for this Ferrari 812 GTS:
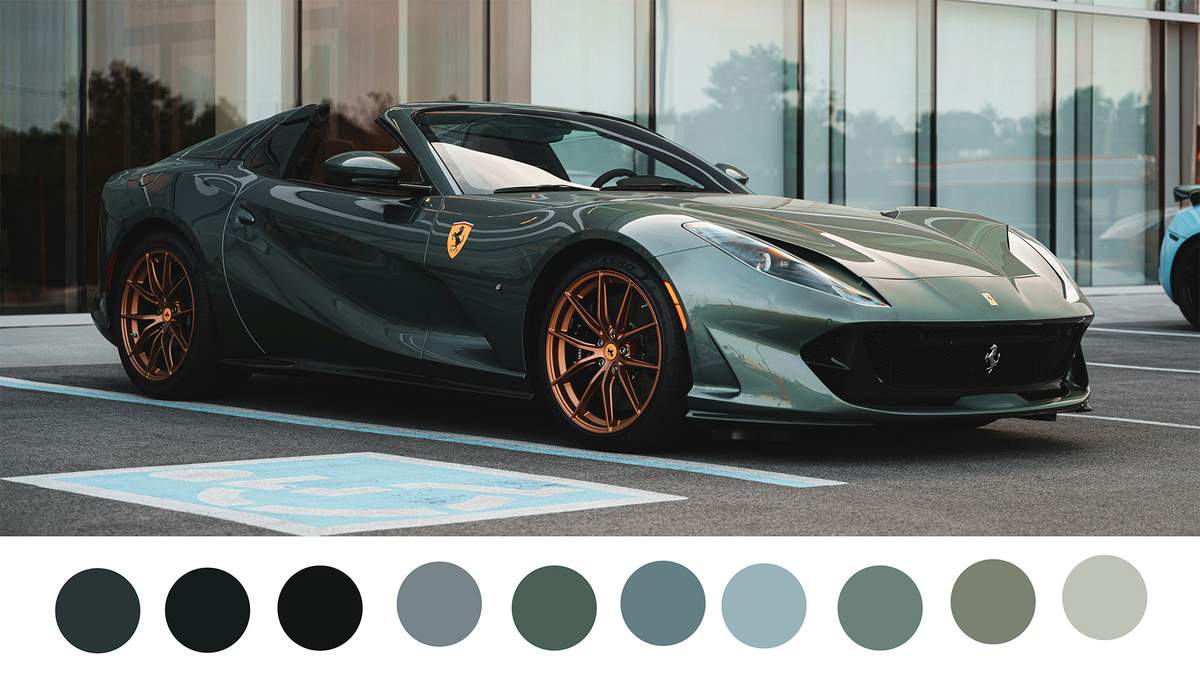
With these colors now swatched, I started looking for matches in my marker swatches.
I quickly noticed that there weren't any matches for the dark green parts... That means mixing.
Luckily, this turned out to be easier than I thought.
For the yellow-green-grey colors on the hood, I was able to find 2 perfect colors. And for the lighter reflections on the bumper, I also found two markers that worked well.
When picking colors, I swatch them on a scrap piece of paper. I do this for every drawing.
If I see a color that might work, I swatch it.
After a while, I had a pretty good selection of colors to create this green.
To create the other colors I needed, I started mixing them with some greys.
Here's what my swatches look like for this 812:
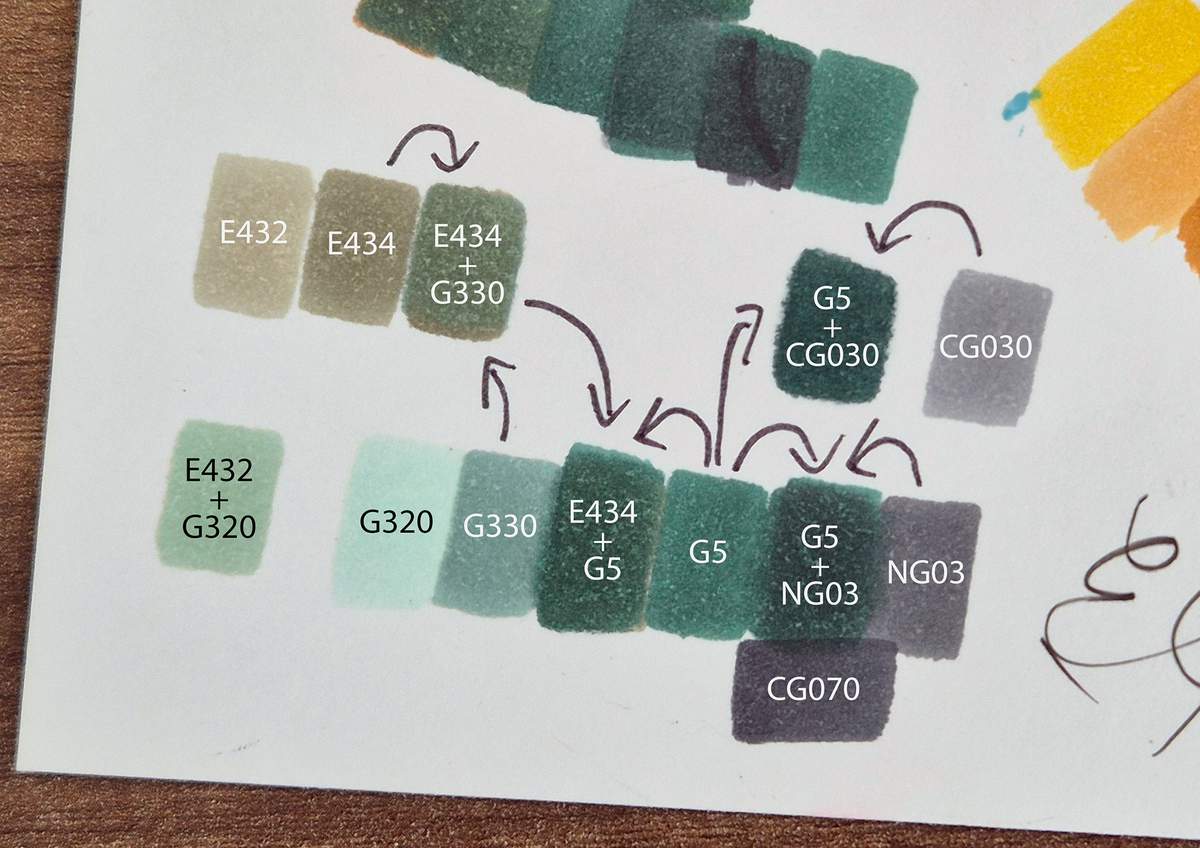
With this testing and mixing, I felt pretty confident I could make the colors necessary.
List of the Drawing Supplies I Used
Since this is mainly an alcohol marker drawing, I used my favorite alcohol marker paper: Canson Illustration Manga paper. I buy the A3 size and cut it in half to A4. It's cheaper that way. But you can also just buy the A4-sized pad.
To sketch, I use a regular HB graphite pencil, an eraser, and a kneaded eraser. The kneaded eraser is especially nice to lighten your sketch. You just roll it across your sketch, and it will lighten it.
To outline some of the black parts, I used a cheap black fineliner. The Stabilo Point 88, to be precise.
Then, to color the Ferrari 812 GTS, I used Ohuhu Honolulu markers from the 320 set. You can also buy the colors individually if you don't want to buy the full set yet. These markers are also available on Amazon.
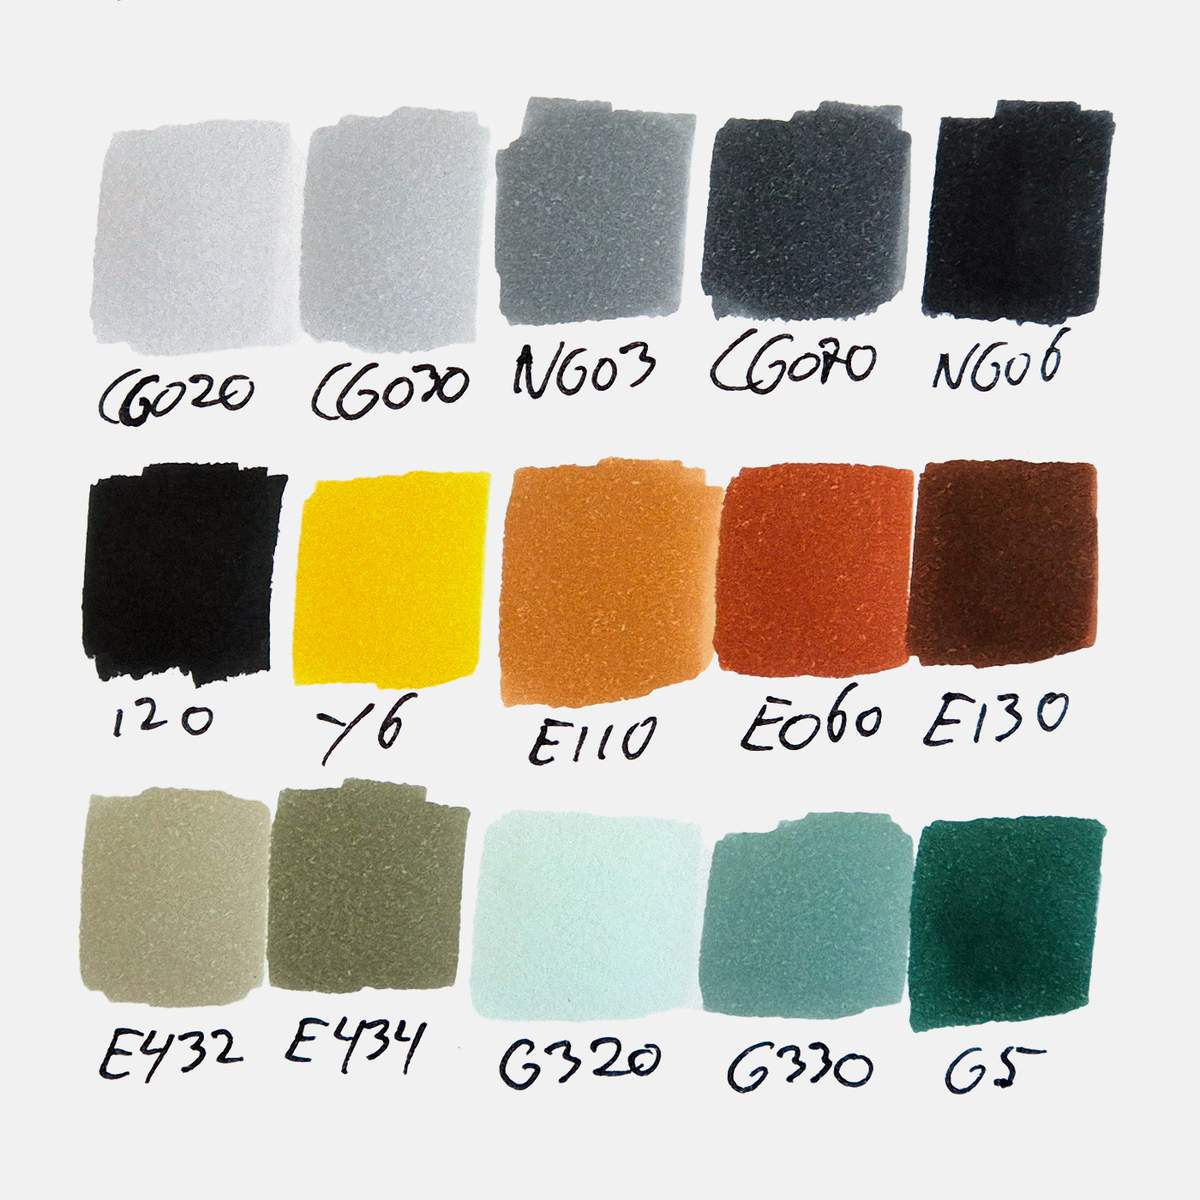
I used 15 colors in total plus the colorless blender. The colors I used for this drawing are the Colorless Blender (0), Neutral Grey 02 (CG020), Neutral Grey 03 (CG030), Neutral Grey 3 (NG03), Neutral Grey 07 (CG070), Neutral Grey 6 (NG06), Black (120), Lemon Yellow (Y6), Dark Suntan (E110), Light Mahogany (E060), Copper (E130), Vert Celadon (E432), Dragon Well Tea (E434), Jade Green (G320), Mineral Green (G330), and Turquoise Blue (G5).
Here is an overview of how the colors look if you want to match them to markers you already own.
To add the details, I used Derwent Chromaflow colored pencils from the 24-color set. I used the colors turquoise Green (1500), Sun Yellow (0100), Blush Pink (0800), Scarlet (0500), and Strawberry (0600).
And to add the final highlights, I used a white Posca PC-3M paint marker.
Sketching the Ferrari 812 GTS
Step 1: Add a grid overlay to the reference photo and sketch the grid
As with every car drawing, I like to use the grid method to make my sketches more accurate and easier.
If you're new to this technique or want to know more about it, I highly recommend you check out this guide that I created on this topic.
The first thing I do is add a grid on top of the reference photo. To do this, you can use my grid overlay tool.
I set the size to A4, which is 29,7 by 21 cm or 11.7 by 8.3 inches, and I set the number of vertical squares to 10.5, which results in a grid of 2 by 2 cm squares.
Here is the image of the reference photo with the grid overlay:
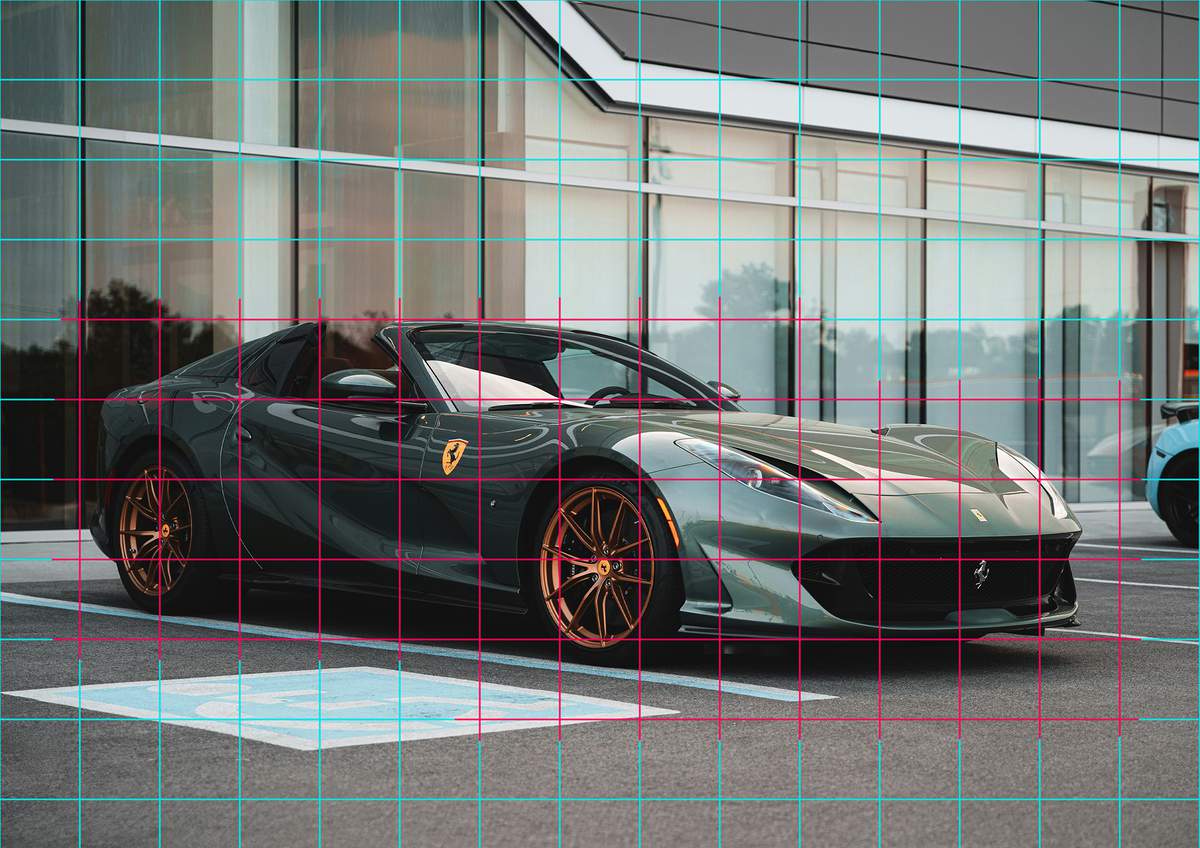
As you can see, the grid is not made up of full squares only. The very right column is just shy of 2 cm, and the bottom row is all half squares. You'll need to take this into account when sketching the grid.
For this drawing, I recreated the whole grid on my paper.
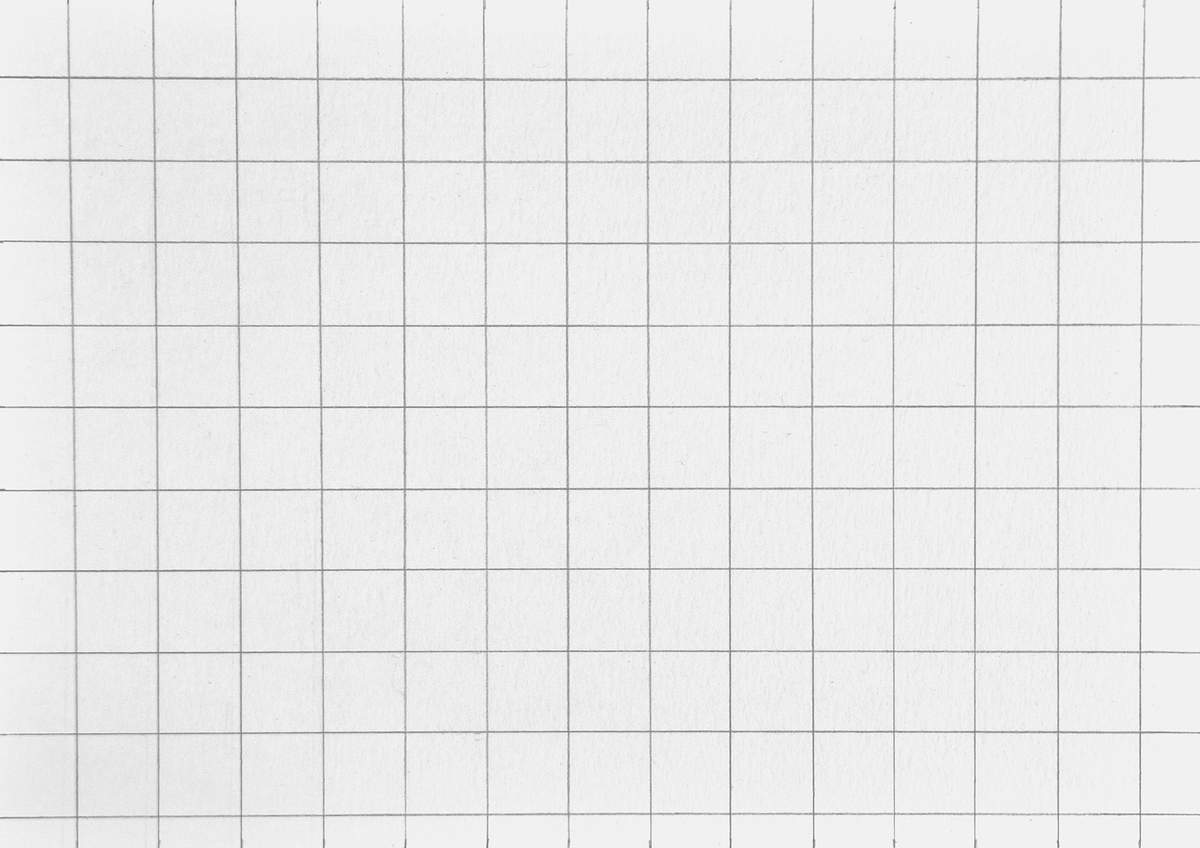
And that's all the preparation done.
When sketching, carefully look at which square you should sketch in, how the lines are placed in those squares, and where they cross the grid lines.
You do need to be pretty precise with the placements. But a grid like this makes it a lot easier than if you were to freehand, while still making it feel like you made it yourself and didn't just trace it.
Step 2: Sketch the outline of the Ferrari 812 GTS
Like all my other drawings, I started the outline sketch of this Ferrari 812 GTS on the left side of my paper and worked my way up and around the car. That's just my preferred way. You can change the order to what fits you best.
I started with this line on the far left of the car, aka the back.
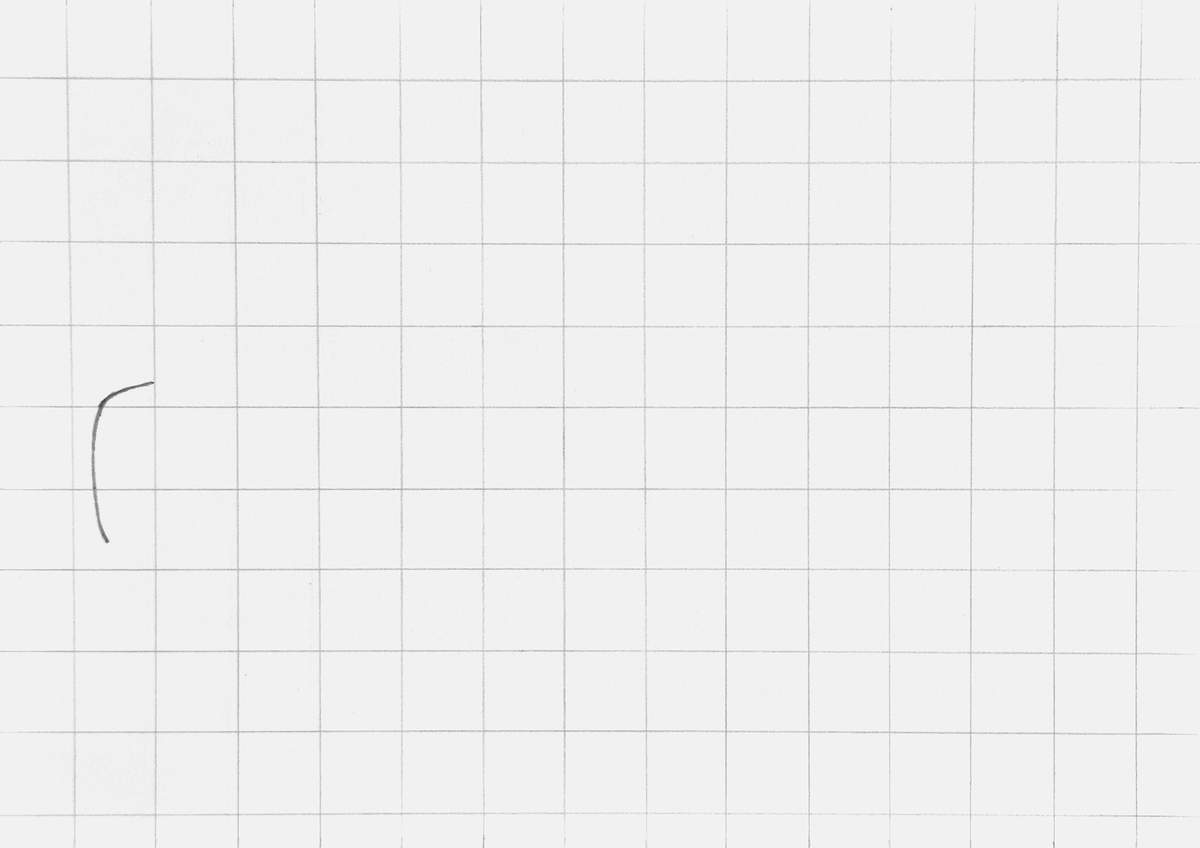
Next, I added the outer edge of the diffuser bit/the bit that houses the exhausts below the first line. This is just a nicely curved line.
I also added the top edge of the buttress, since this is a cabrio. At least, I think they are called buttresses.
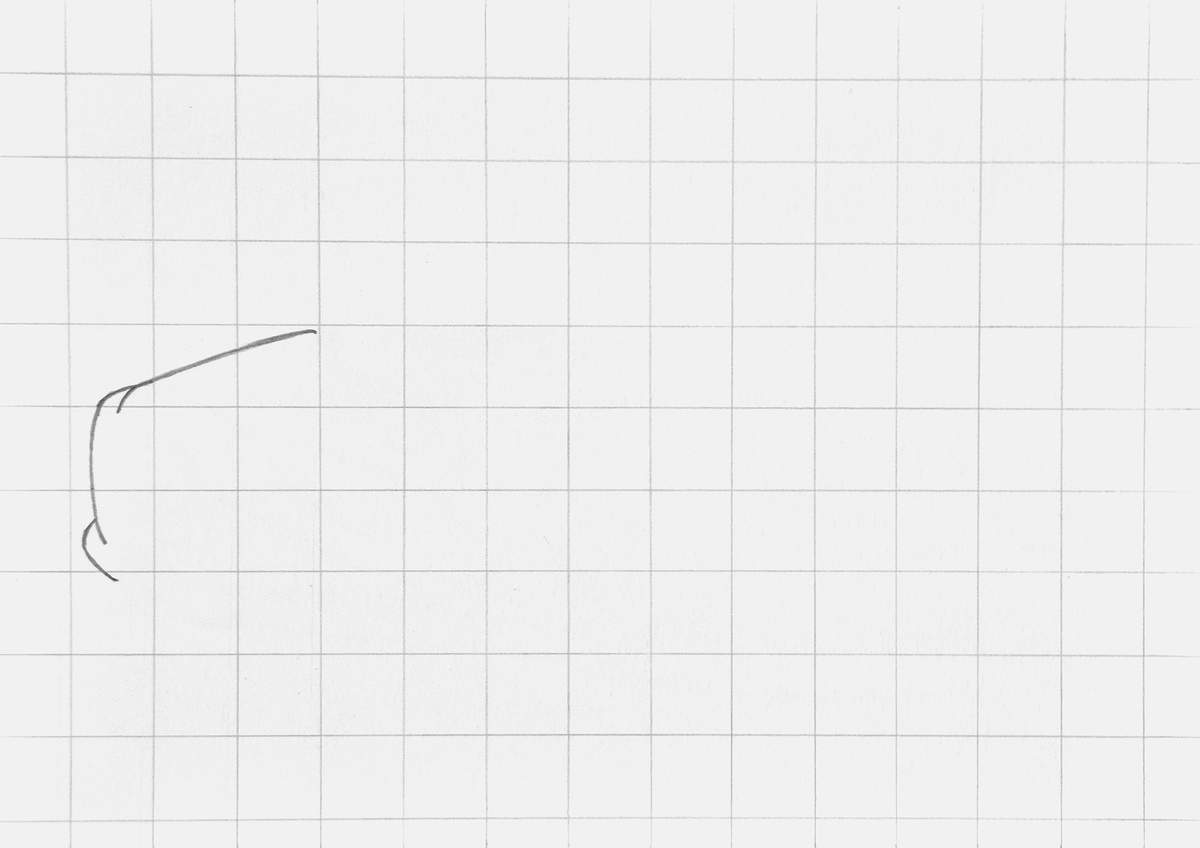
Now, since this is a convertible and the roof is down, this complicates the outline a bit. You could just sketch it without the windshield and the interior. That would be an easy option. But I chose to just sketch the main parts of the interior as part of the outline.
I started by adding this line, which is the outline of the front-facing side of the buttress and the bottom edge of the side windows. I made this line longer as it turns into a body line.
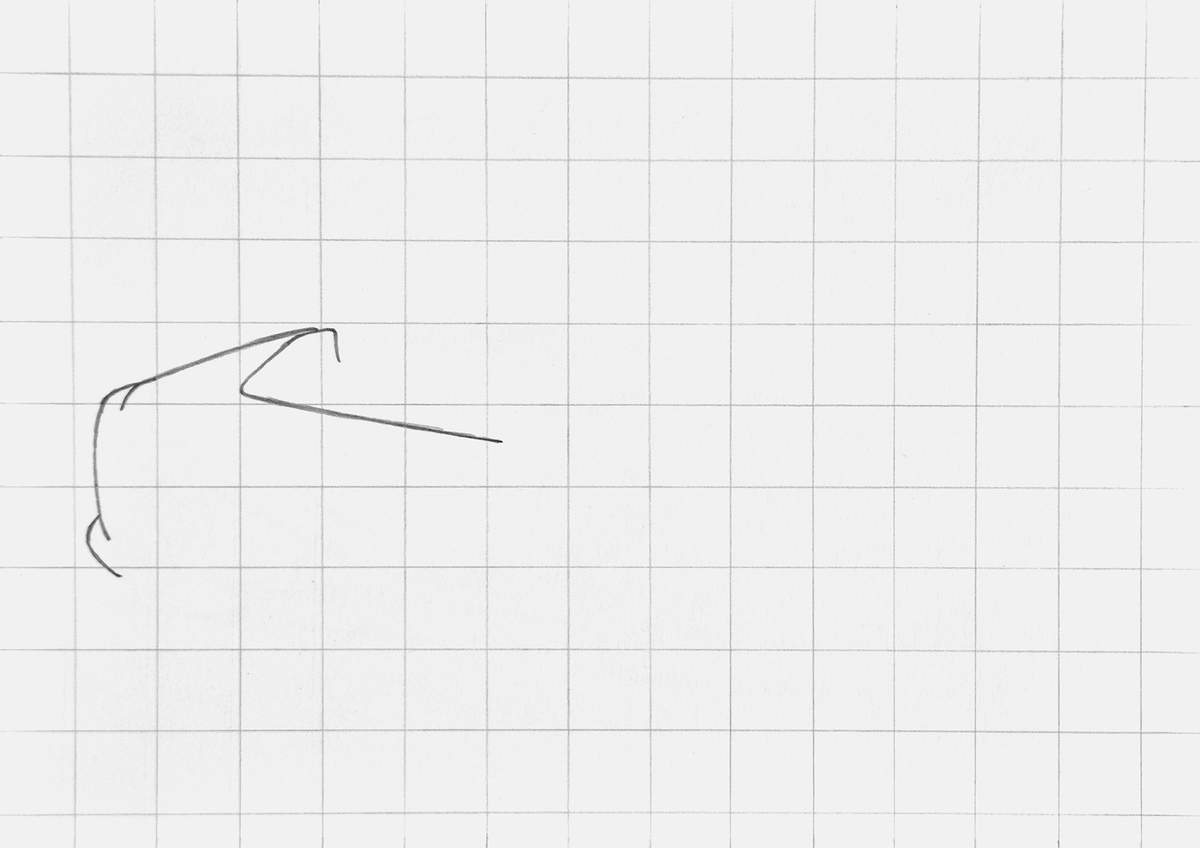
Next, I added this curved line to the end of the line from the previous step. This will sit right above the front wheel arch.
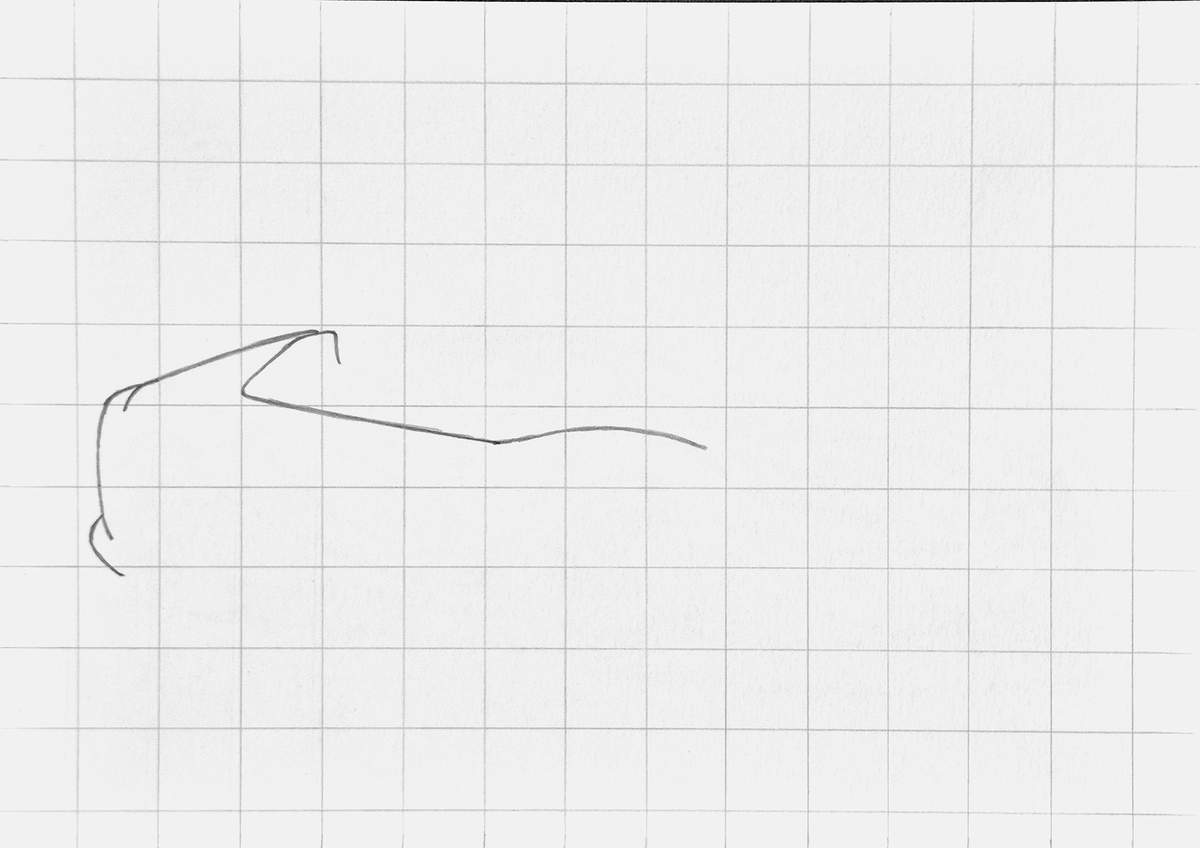
Then, I added this small line kinda connecting the two lines.
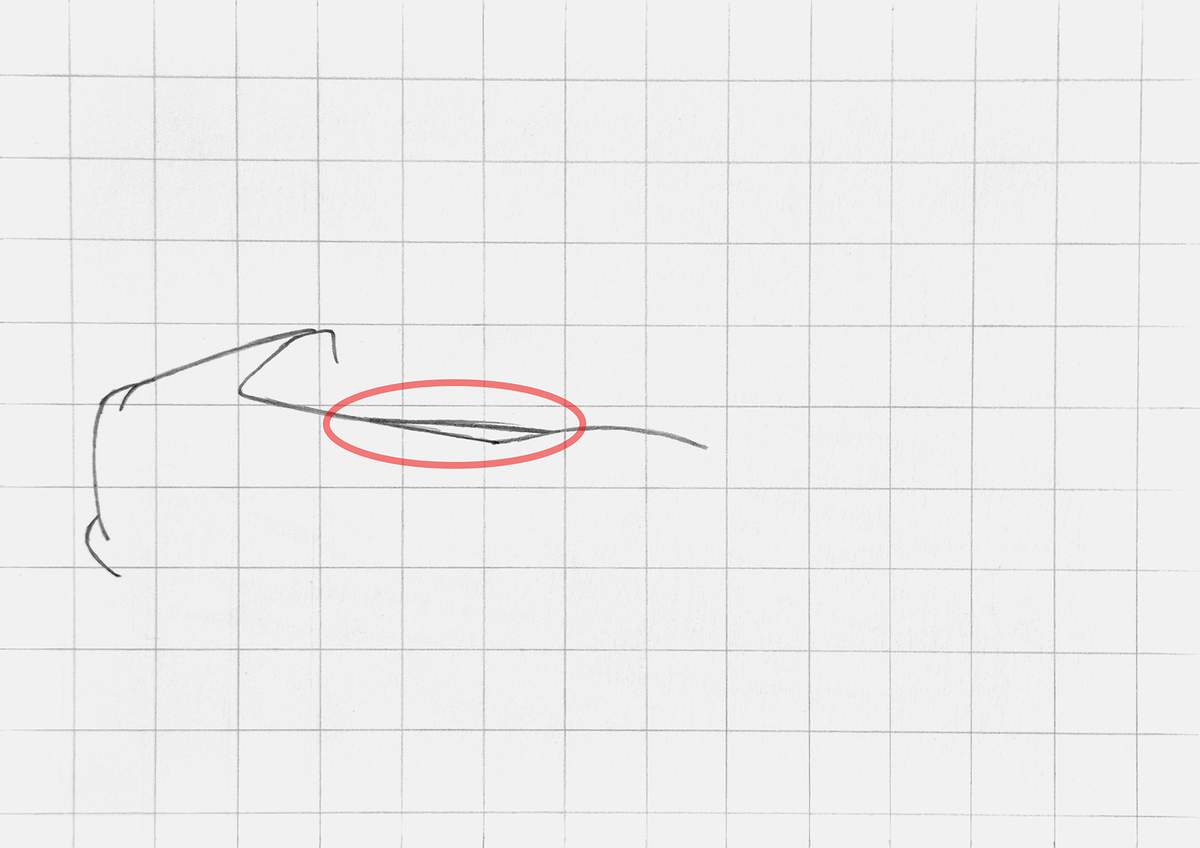
After that, I worked on the outline for the windshield.
I started by sketching two parallel lines for the A-pillar.
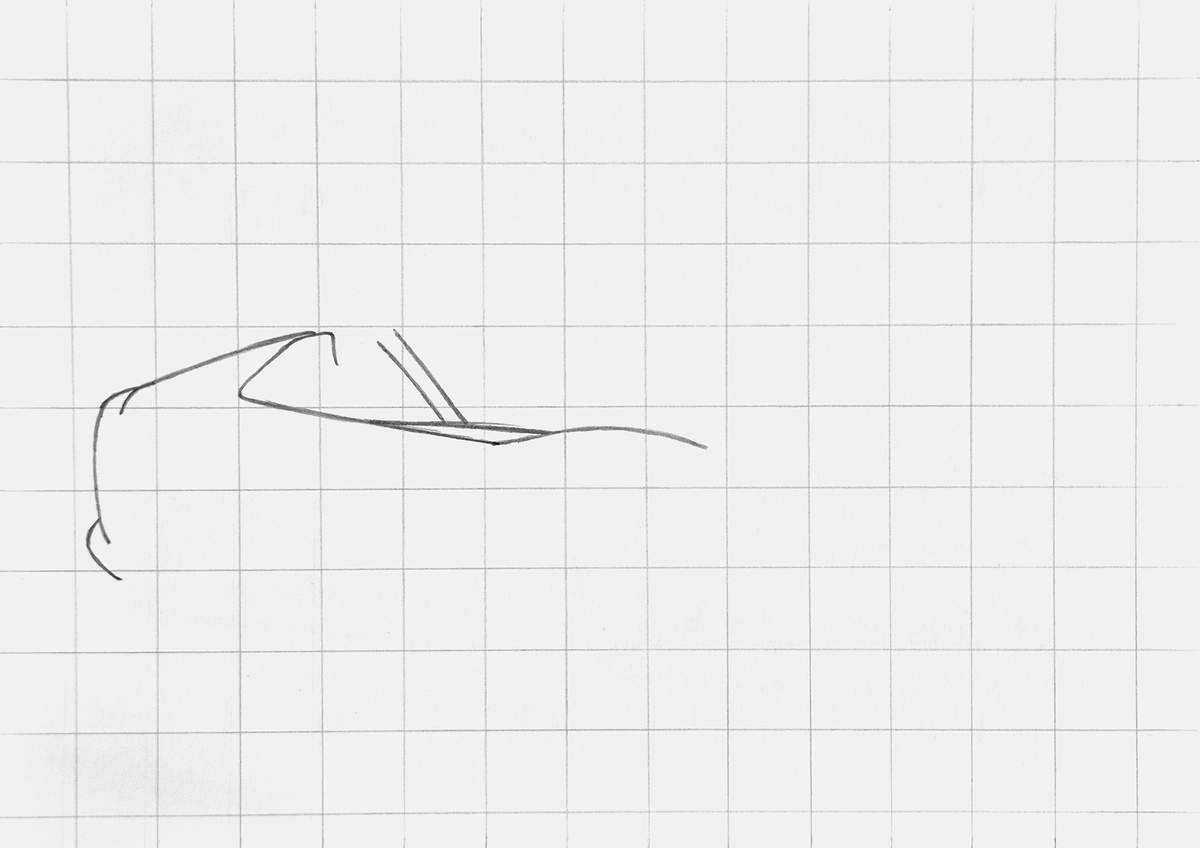
Then, I added a small line to the left of the A-pillar, which is the rubber door sill, and I added the outline of the actual window.
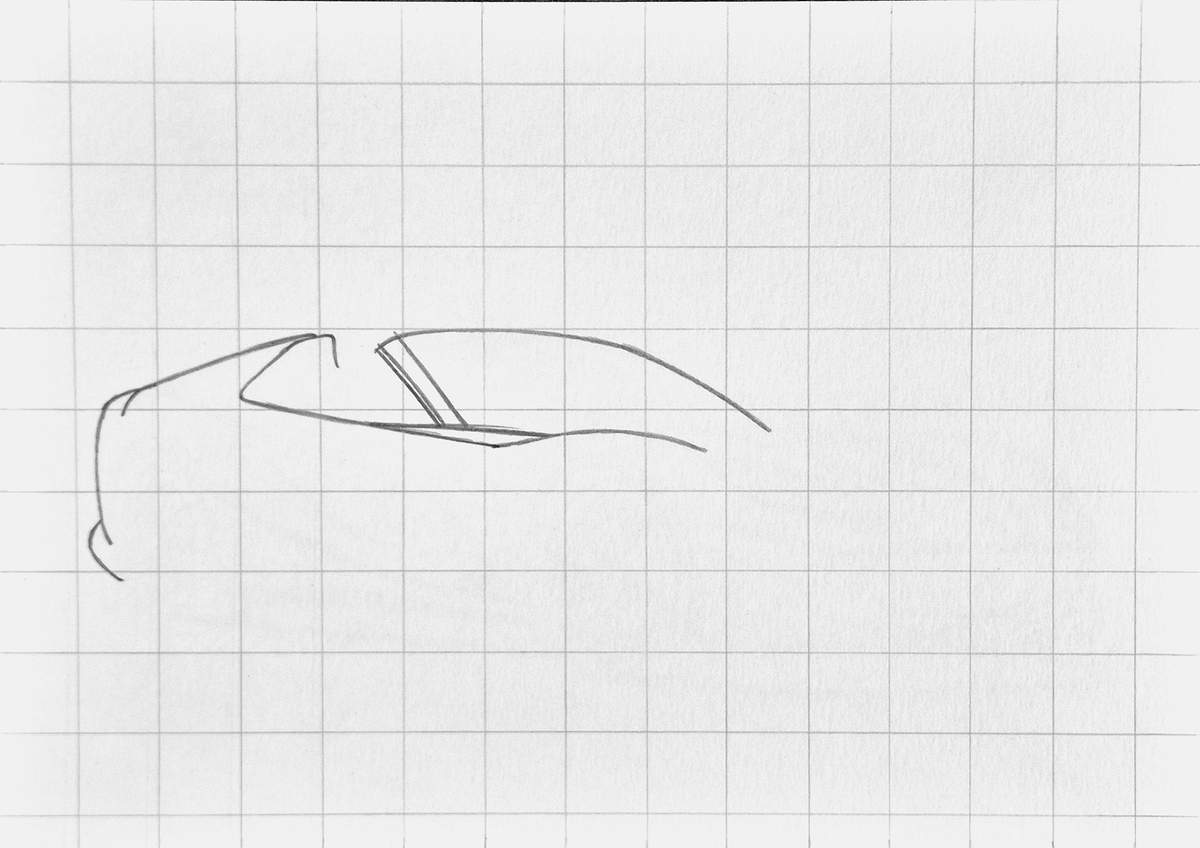
I then added this shape, which is part headrest and part rear shelf. It also has this little diagonal line to the left of the A-pillar. This is the tiny part of the buttress on the other side of the car that you can see.
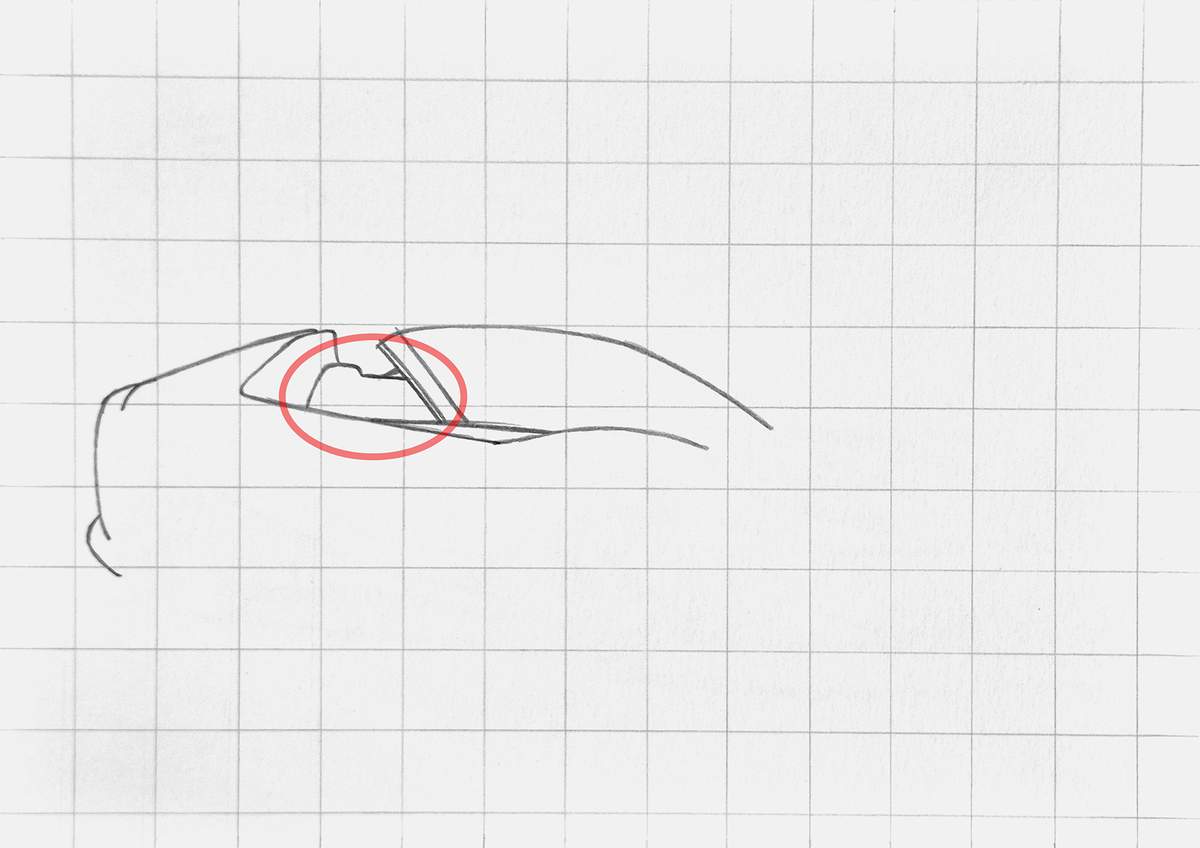
After that, I continued with the rest of the car.
To sketch the front, I first added this line that runs across the hood.
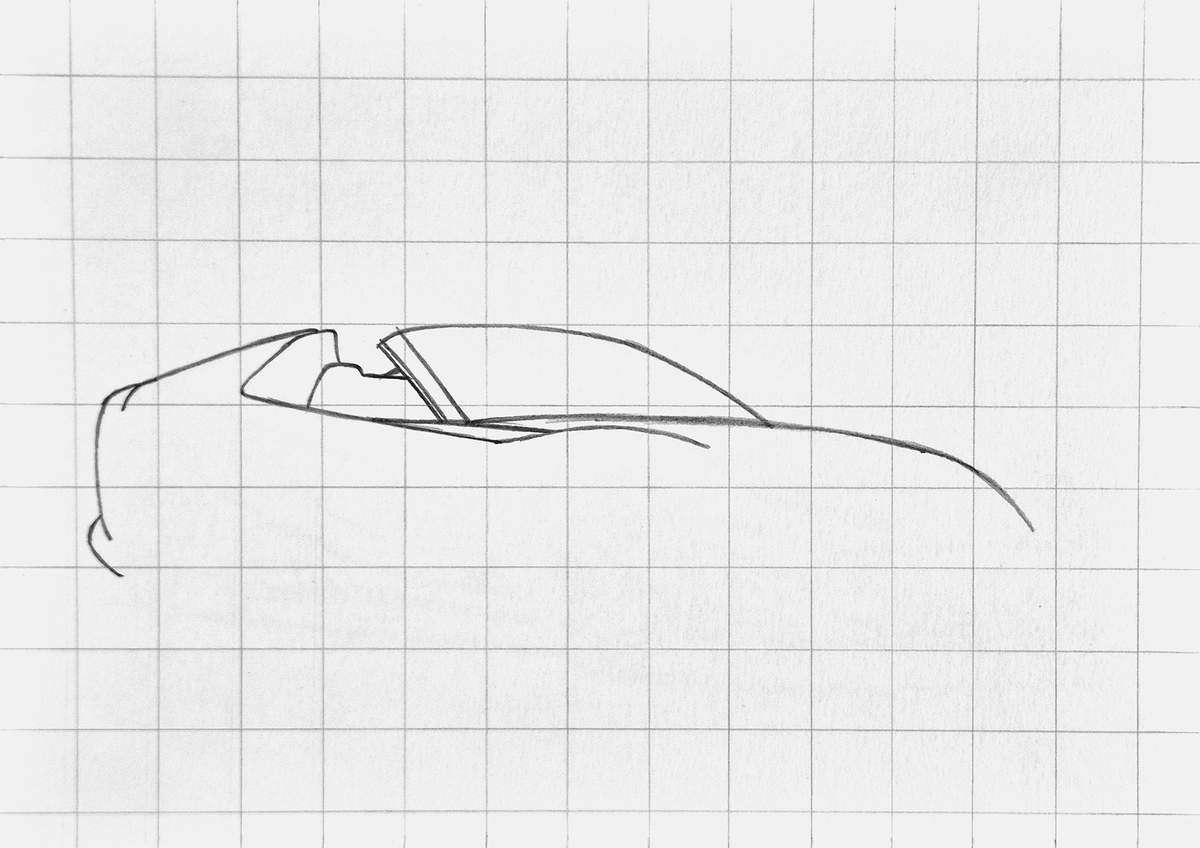
Then, I added this curved line that sits above the front wheel on the other side and curves all the way to the front.
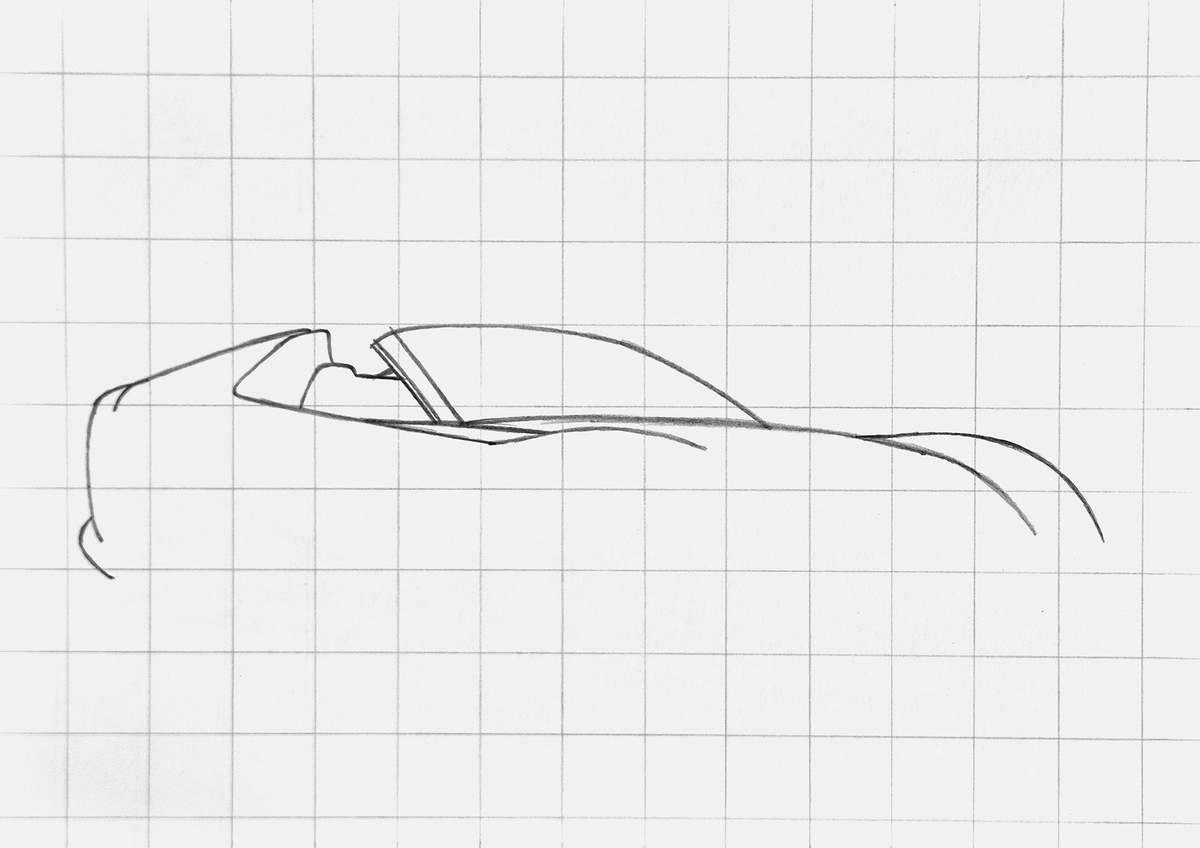
I then sketched the far right edge of the front.
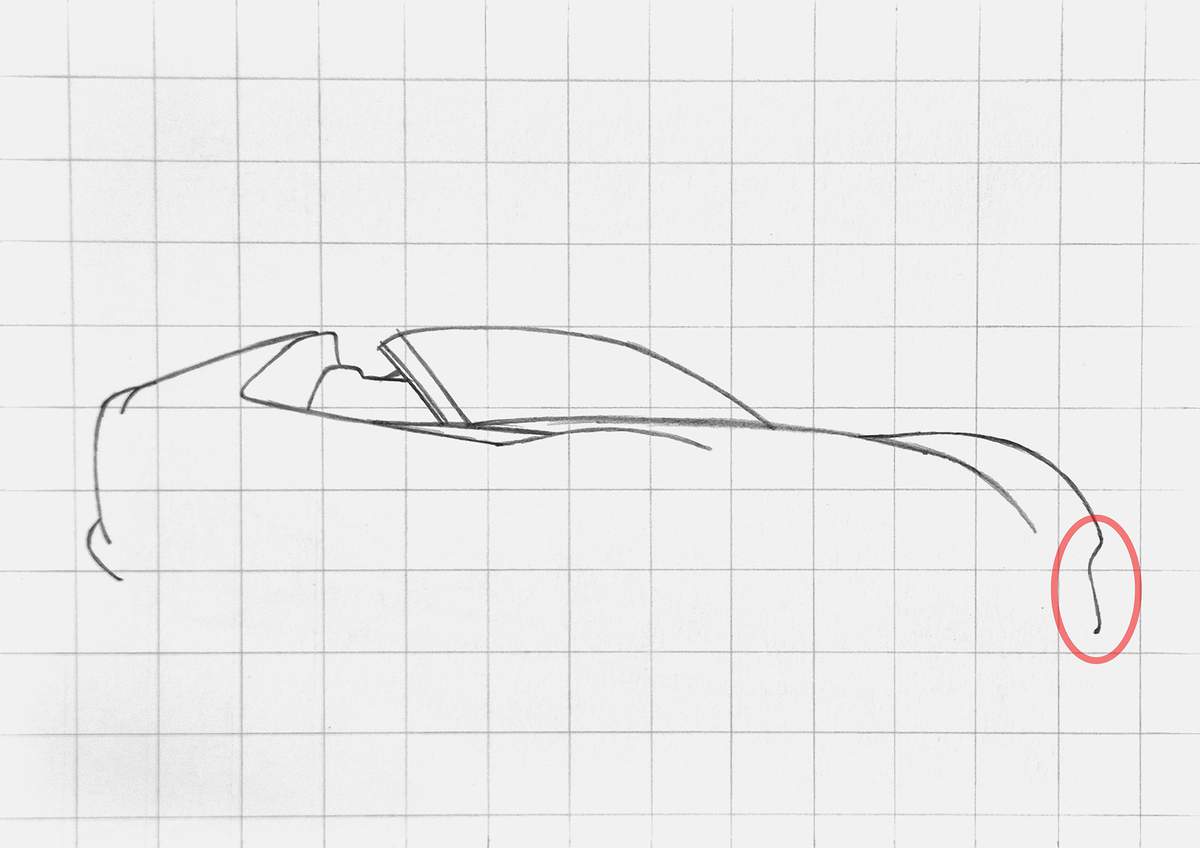
Next, I sketched the bottom edge of the front bumper.
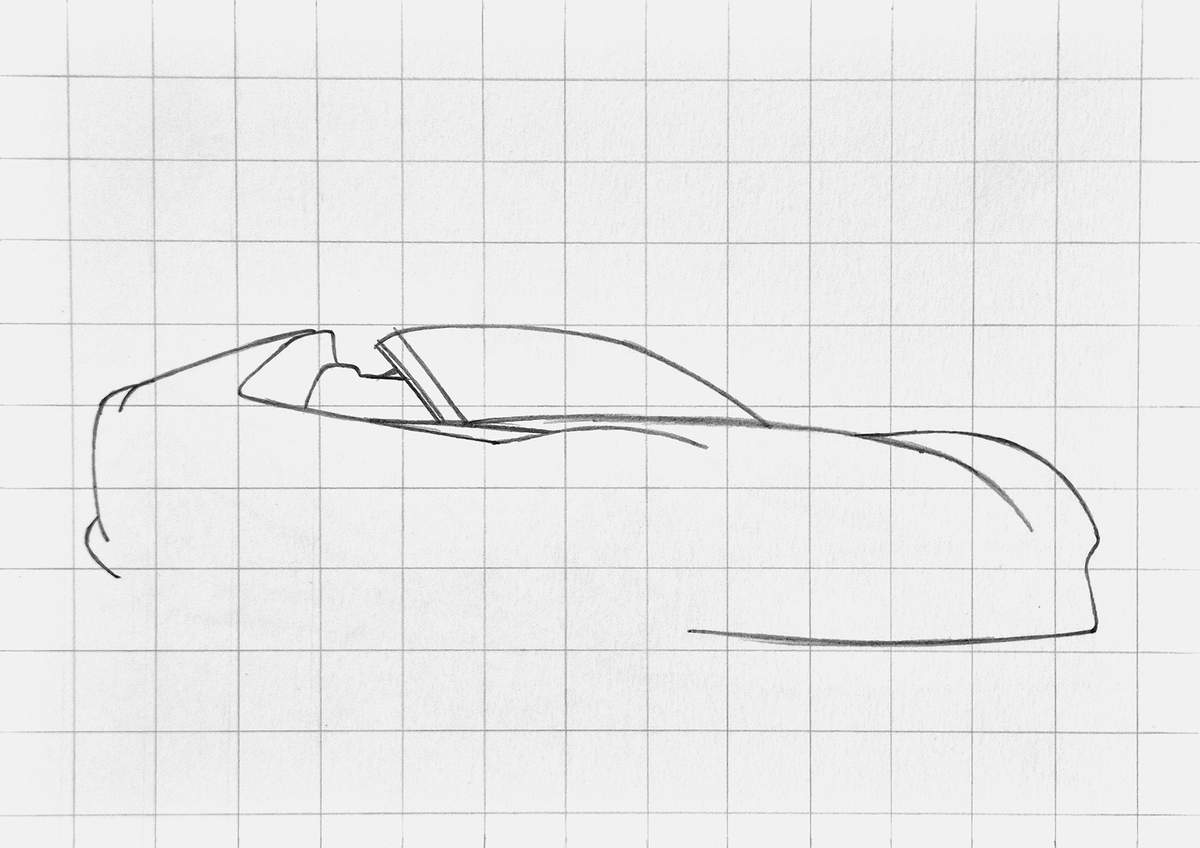
Then, I added the small splitters to either side of the front, and I added this zigzag line to the far left of the front. This is where the front wheel arch will connect to.
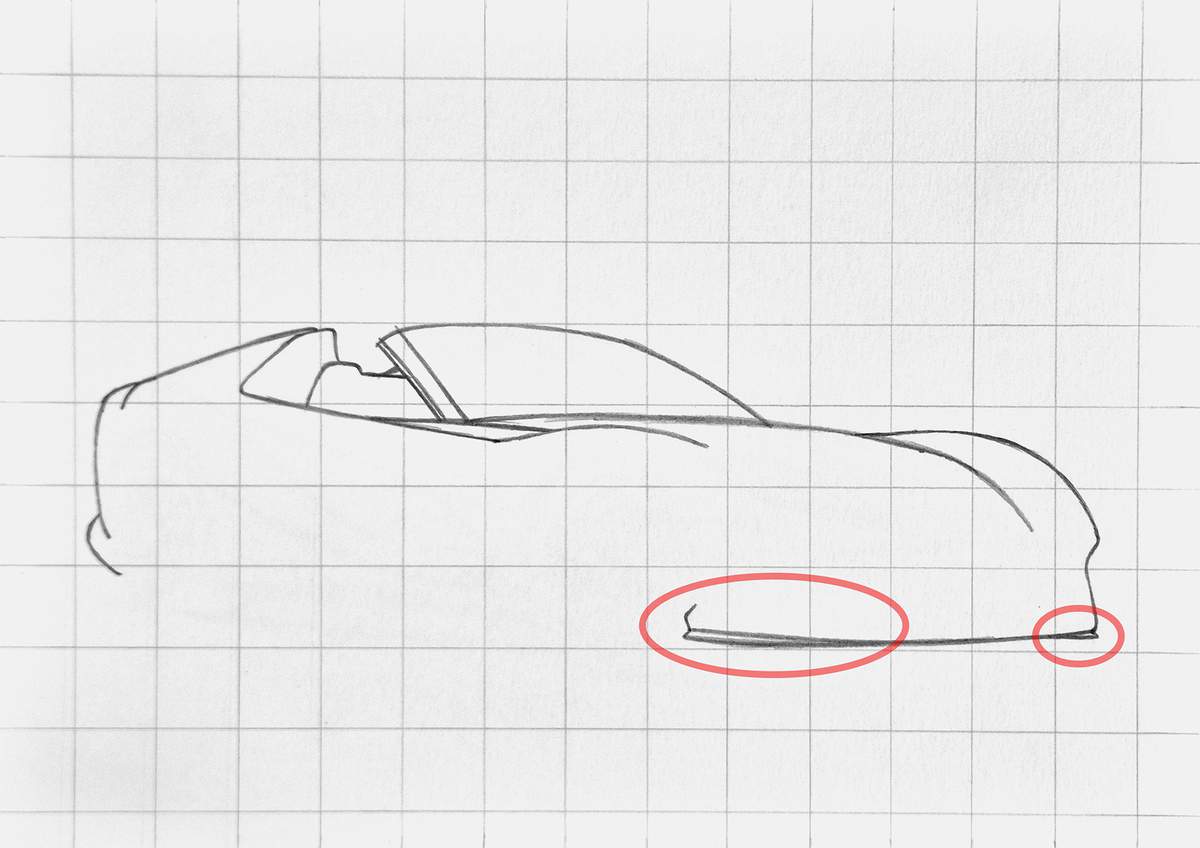
So, naturally, I sketched the front wheel arch next.
This might be one of the most important lines to get right, as the wheel will need to fit inside it. So, pay close attention to where the arch crosses the grid lines and mark those points before you sketch the line.
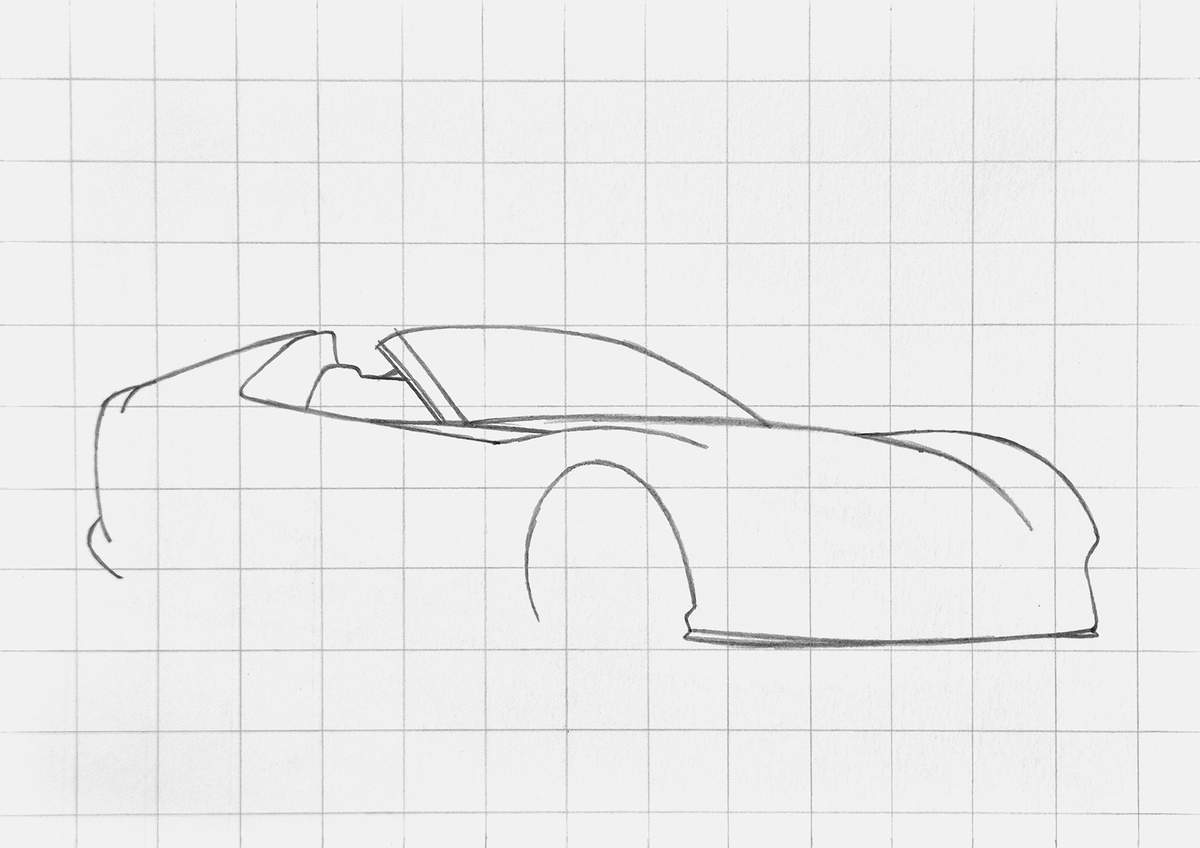
After that, I sketched the top edge of the side skirt. It has a slight curve to it.
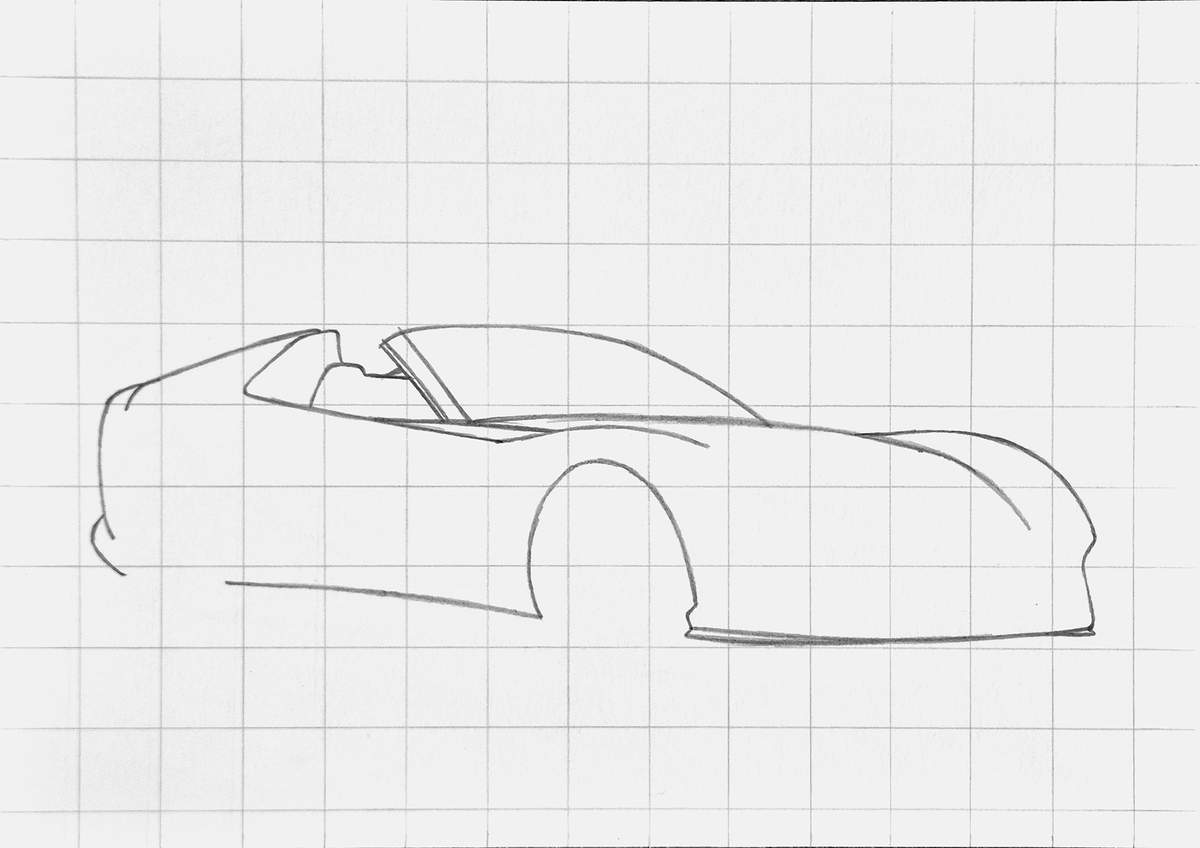
And to complete the outline, I added the rear wheel arch too.
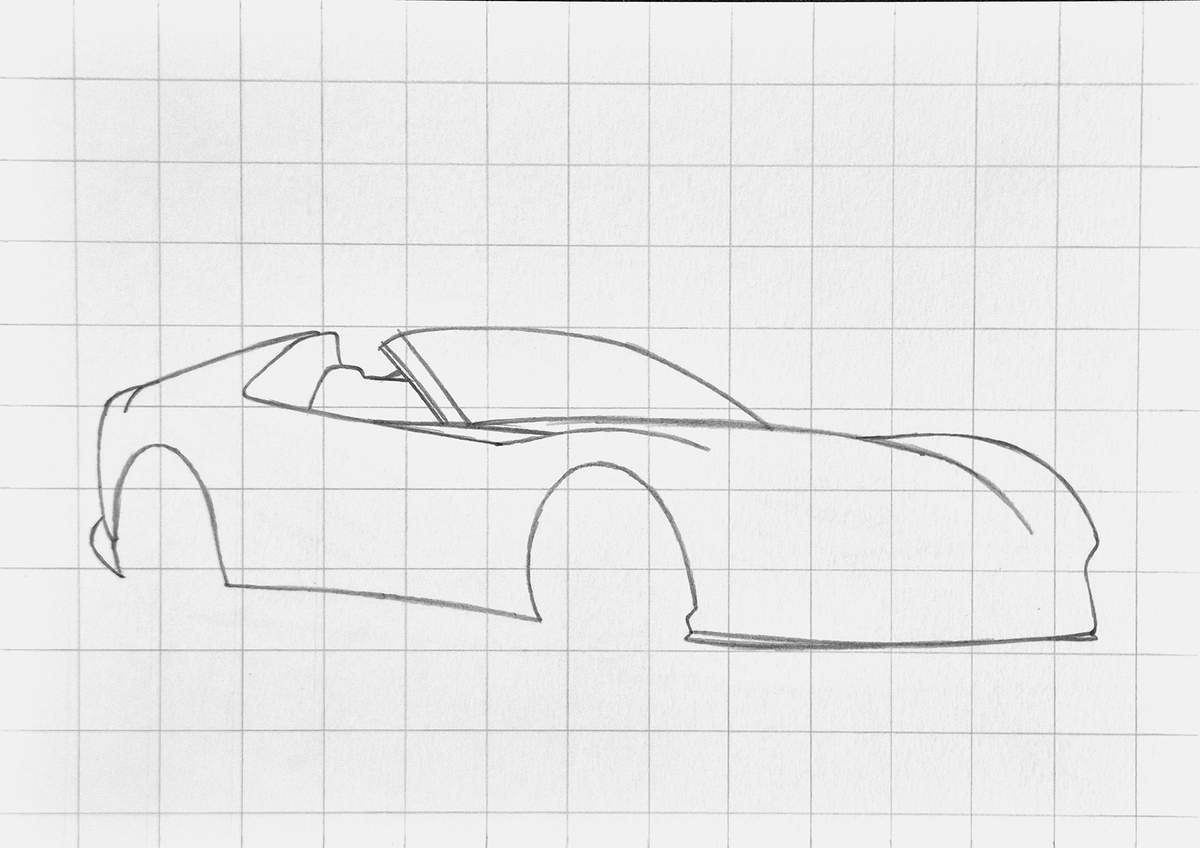
And that's the outline all done! And it only took 16 images. Yes, this will be another long one. I can already tell.
Step 3: Sketch the side of the 812 GTS
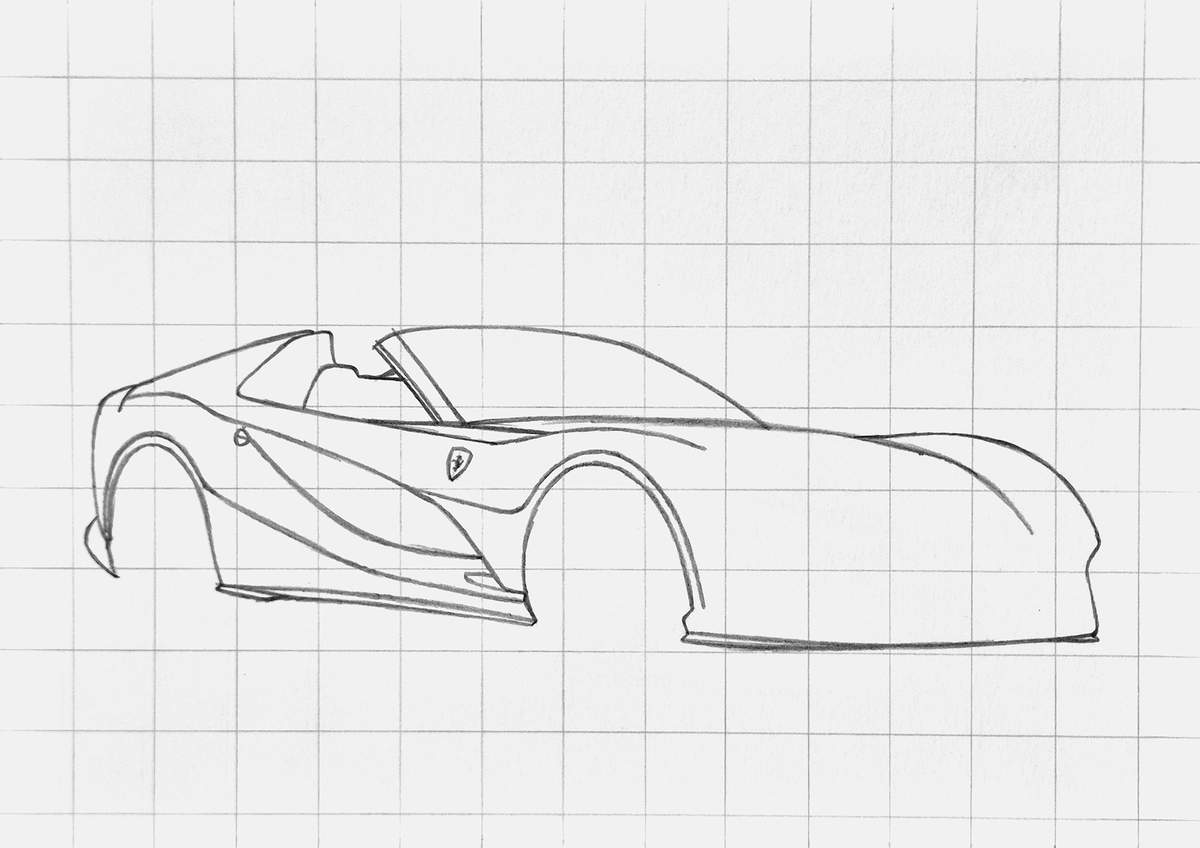
With the outline done, I continued working on the side of the car.
I first added the bottom edge of the side skirt.
Most of the line is parallel to the bottom edge of the side. But there is this fin-line thingy on the far left that sticks out a bit.
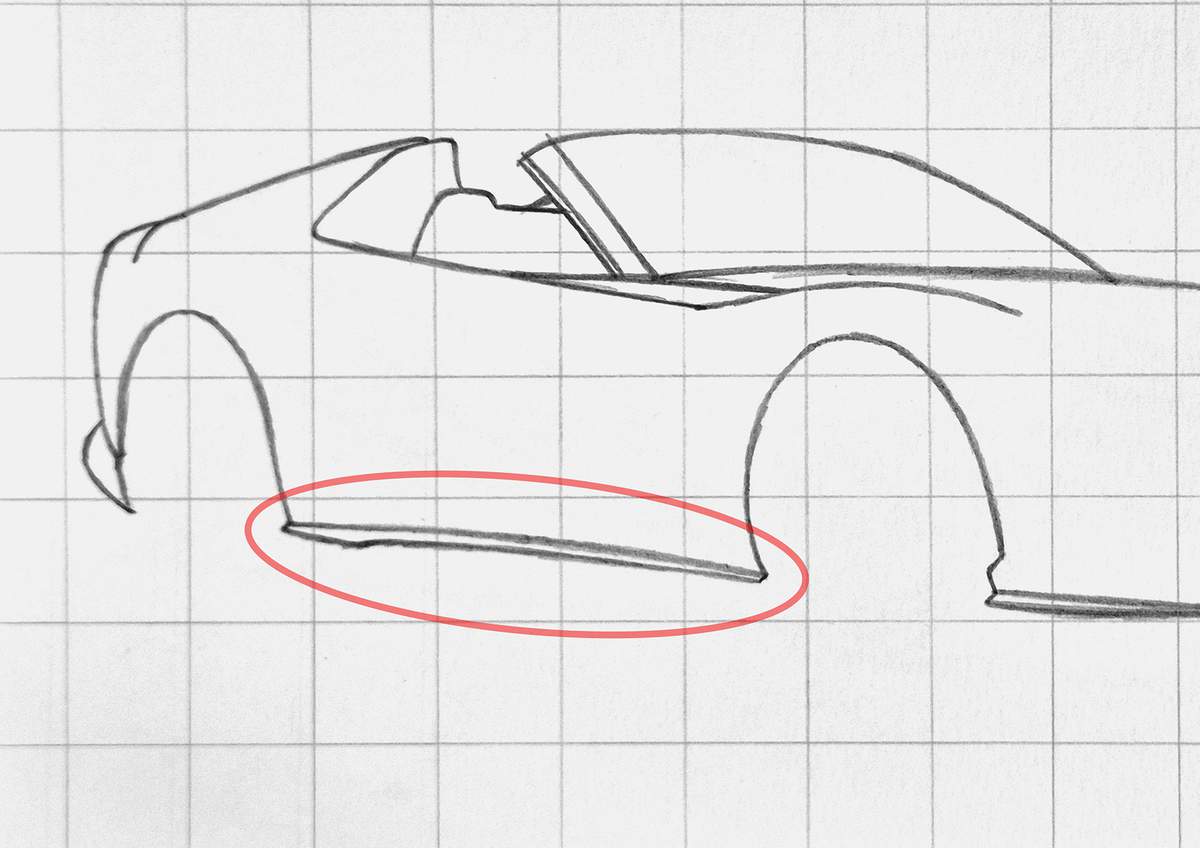
I then added the line around the rear wheel arch. On 812s, this line continues into a body line across the whole side of the car, so I sketched that part too.
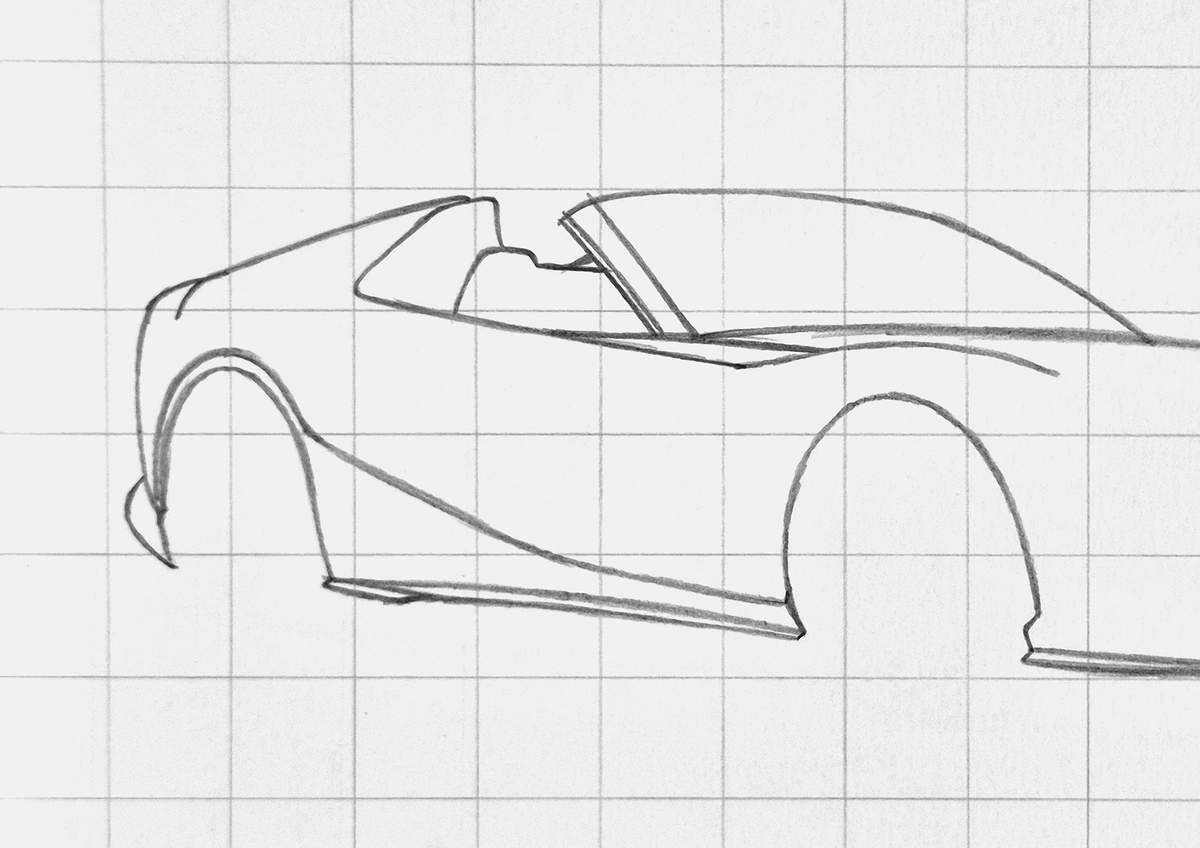
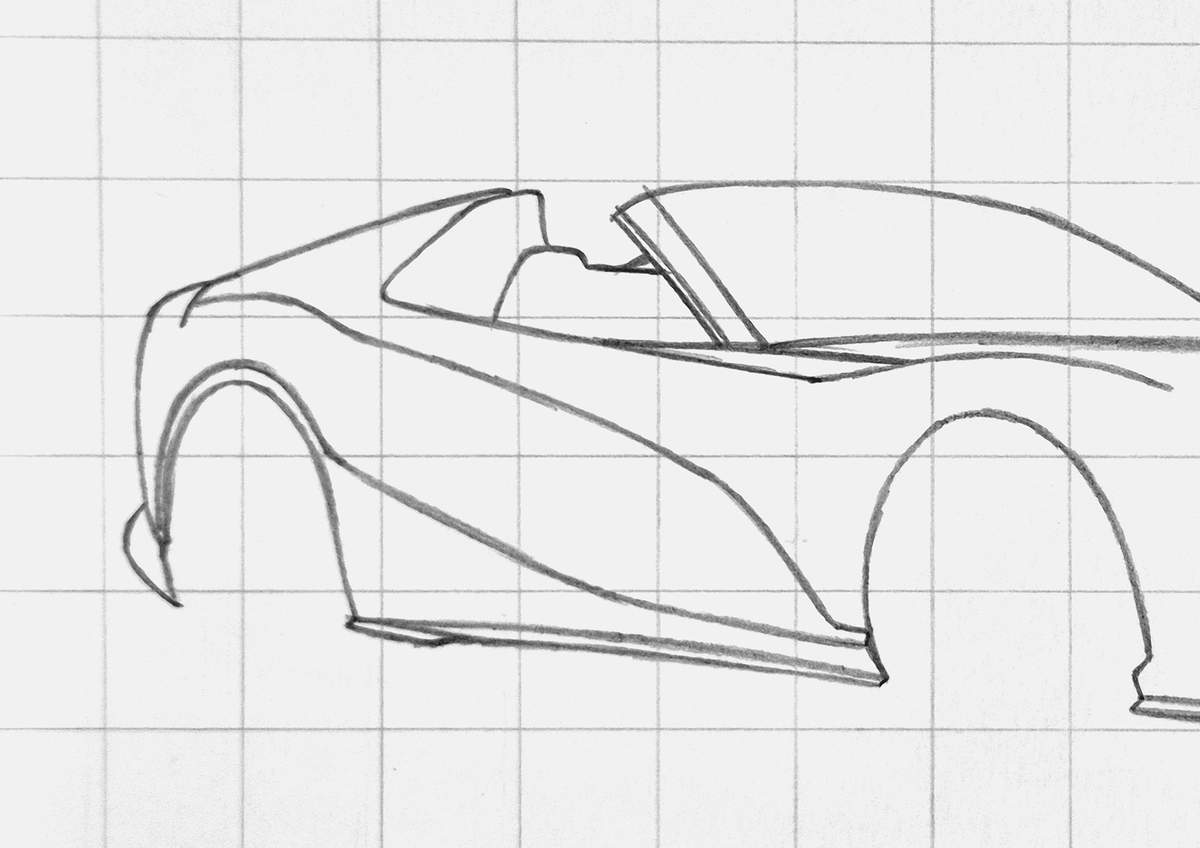
Next, I added the fin on the right, which also turns into a body line that runs the whole length of the car and connects to one of the first lines we sketched.
Above the wheel arch, this line also has a slight bump.
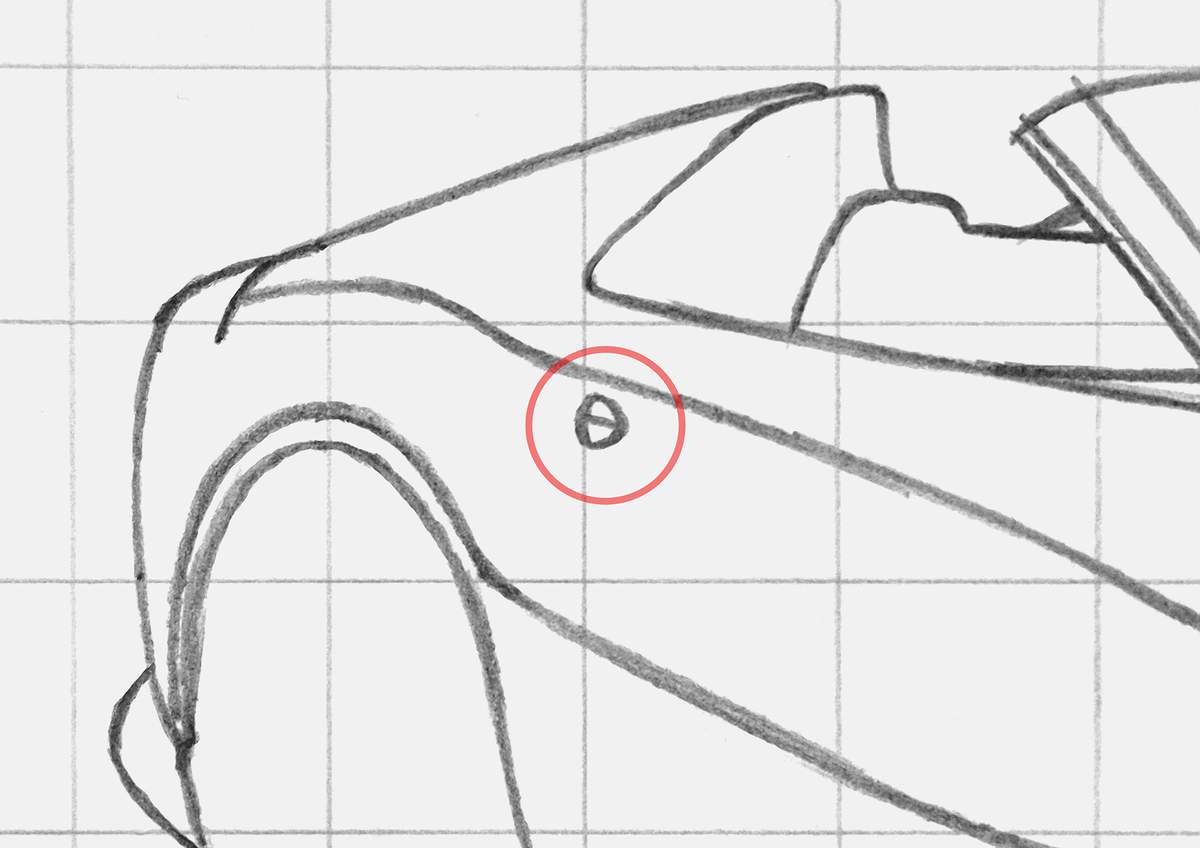
I then added the tiny door handle. It is shaped like a triangle on its side (▶️) with very rounded corners and a line through the middle of it.
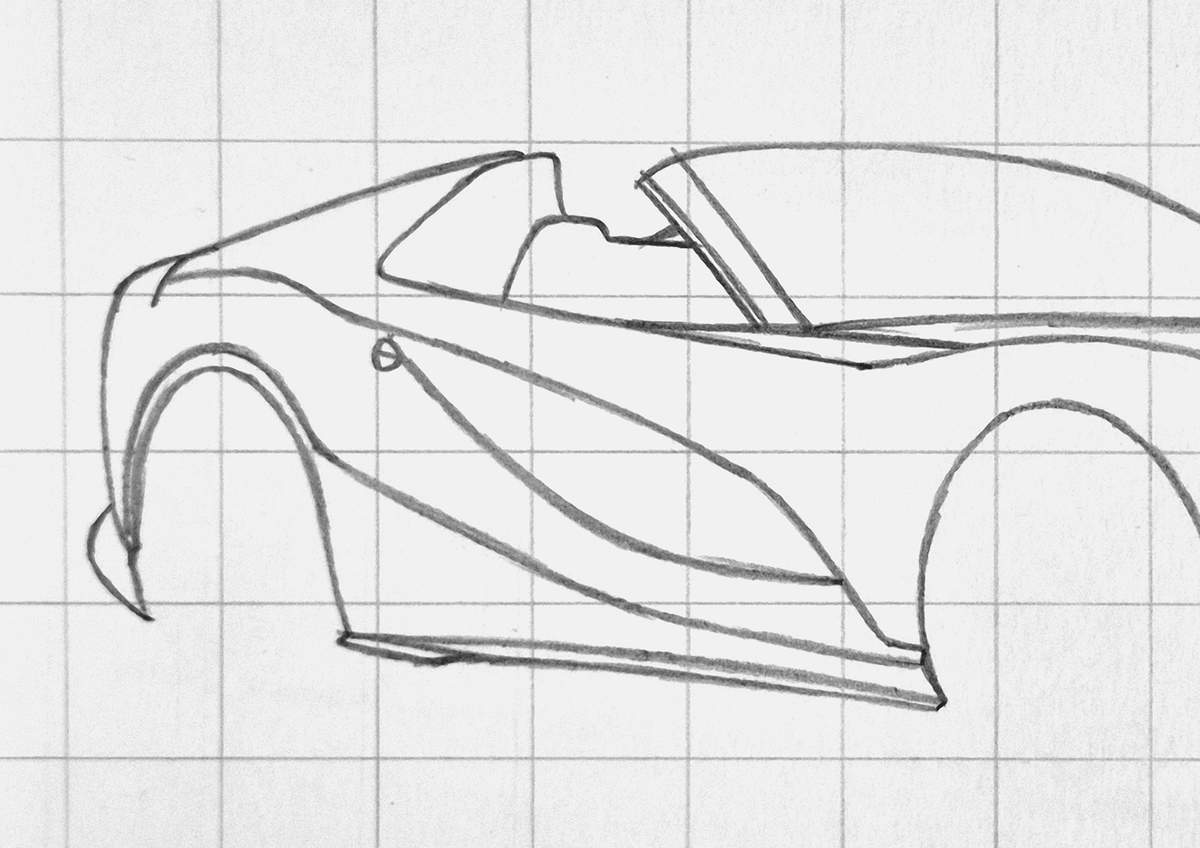
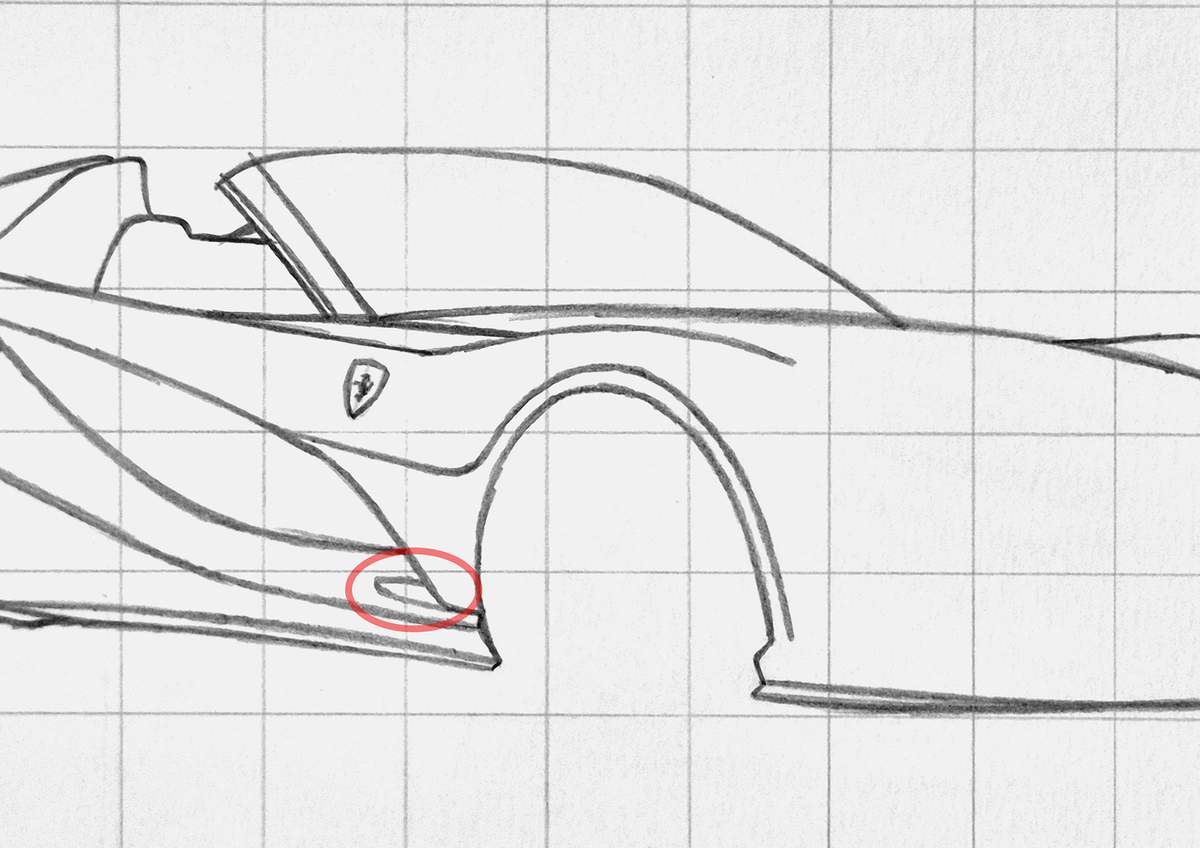
Then, I added this big curved line right in the middle of the side. This isn't actually a body line but a reflection. To make the sketch look right, I sketched this line as if it were a body line. It connects the door handle to the air vent fin behind the front wheel.
Next up is the Ferrari Shield. And it's simpler than you might think.
I started with these three lines. The middle one is the longest and slightly curved to follow the shape of the body. To either side of this line is a shorter line. These lines are the straight parts of the side of the shield.
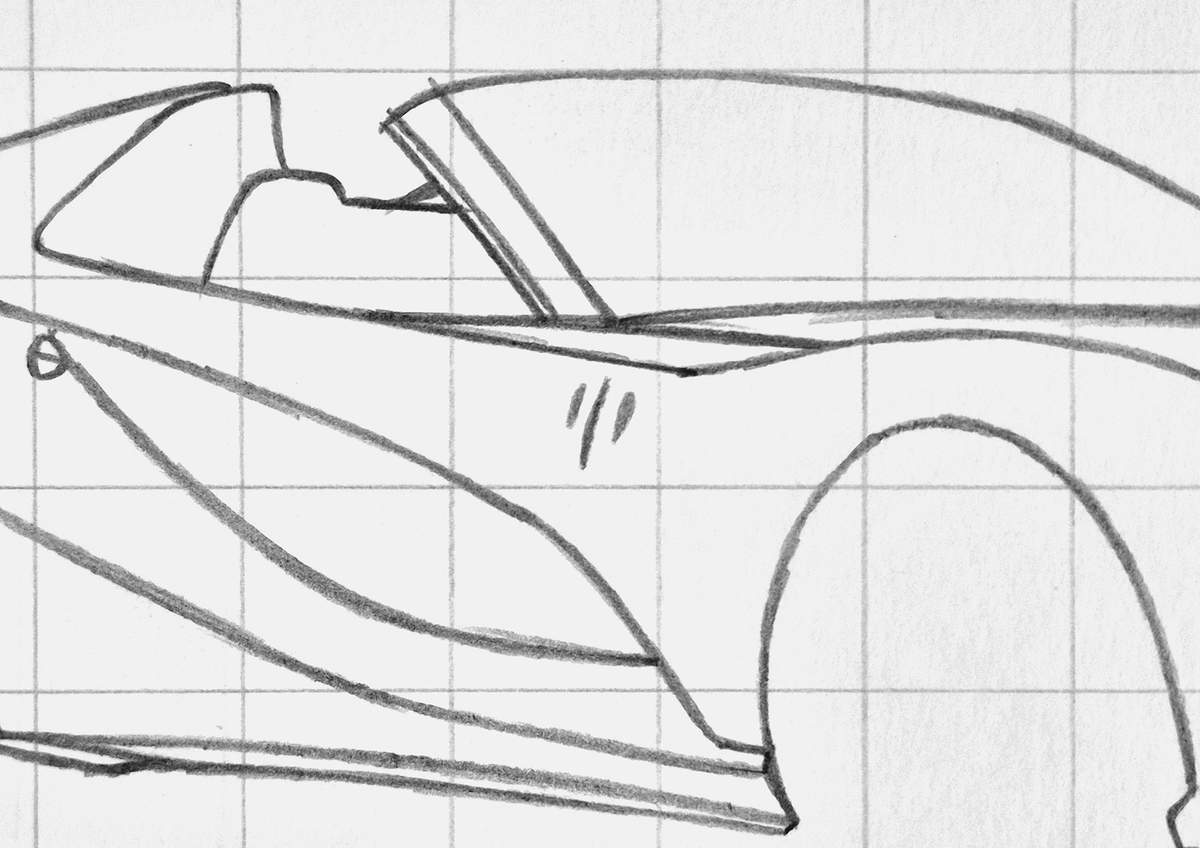
After that, I added the top and the bottom parts of the side that form the bottom point.
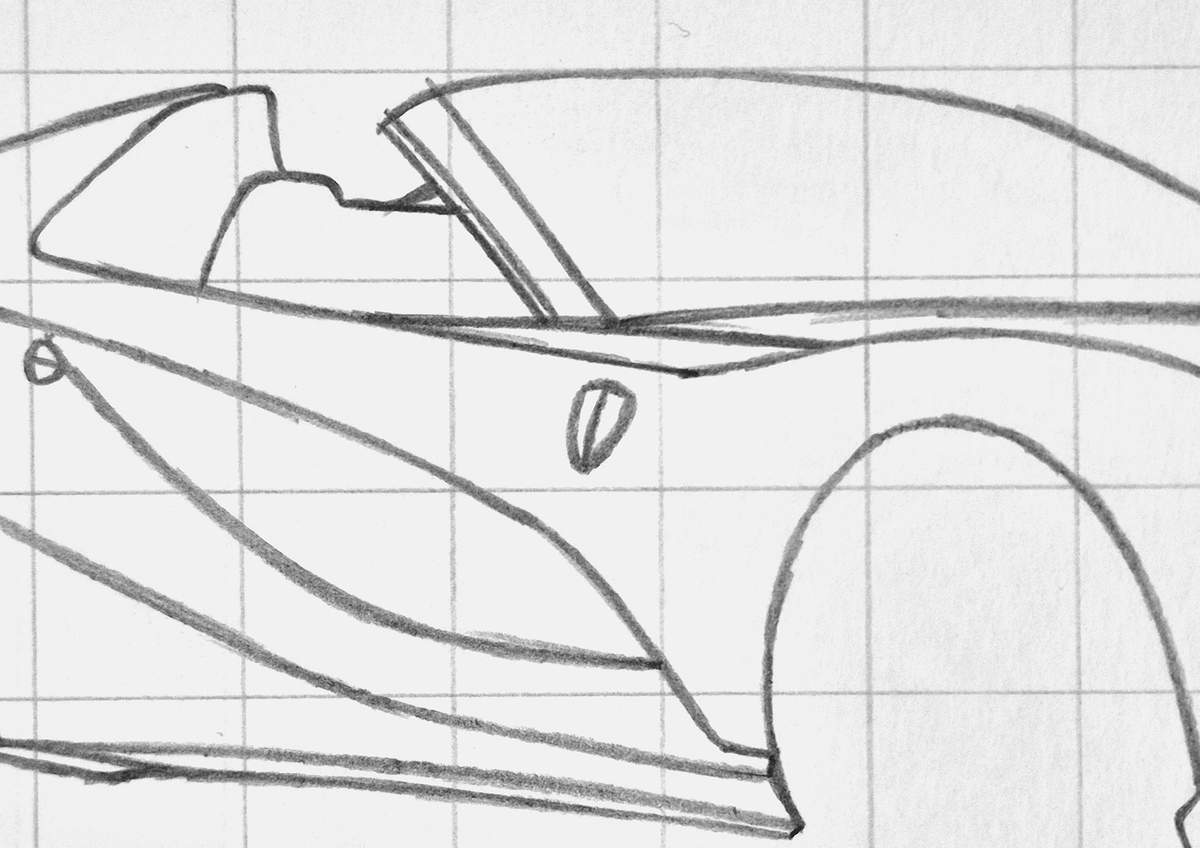
Next, I erased the middle line.
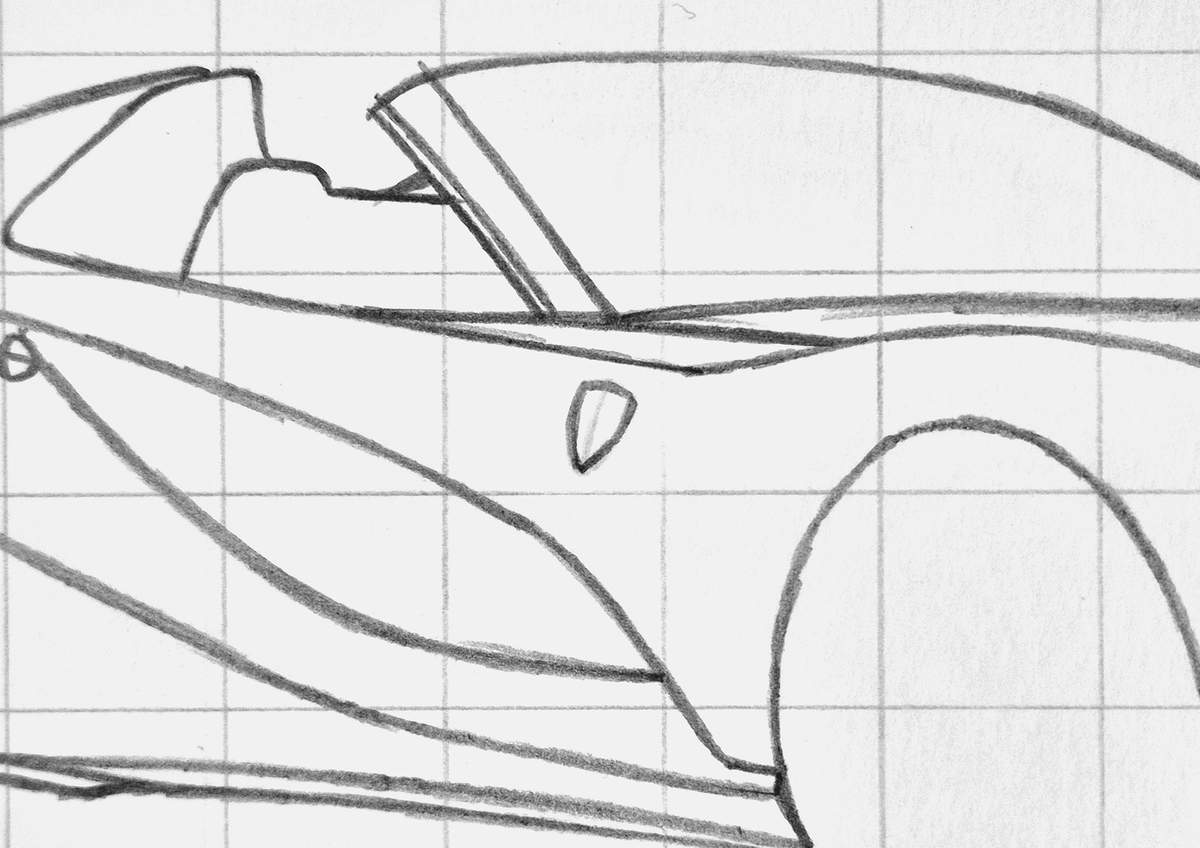
And I roughly sketched the parking horse in the center. It doesn't have to look good. It's way too small to do that. Plus, we are so zoomed in that no one will ever see how not detailed it is.
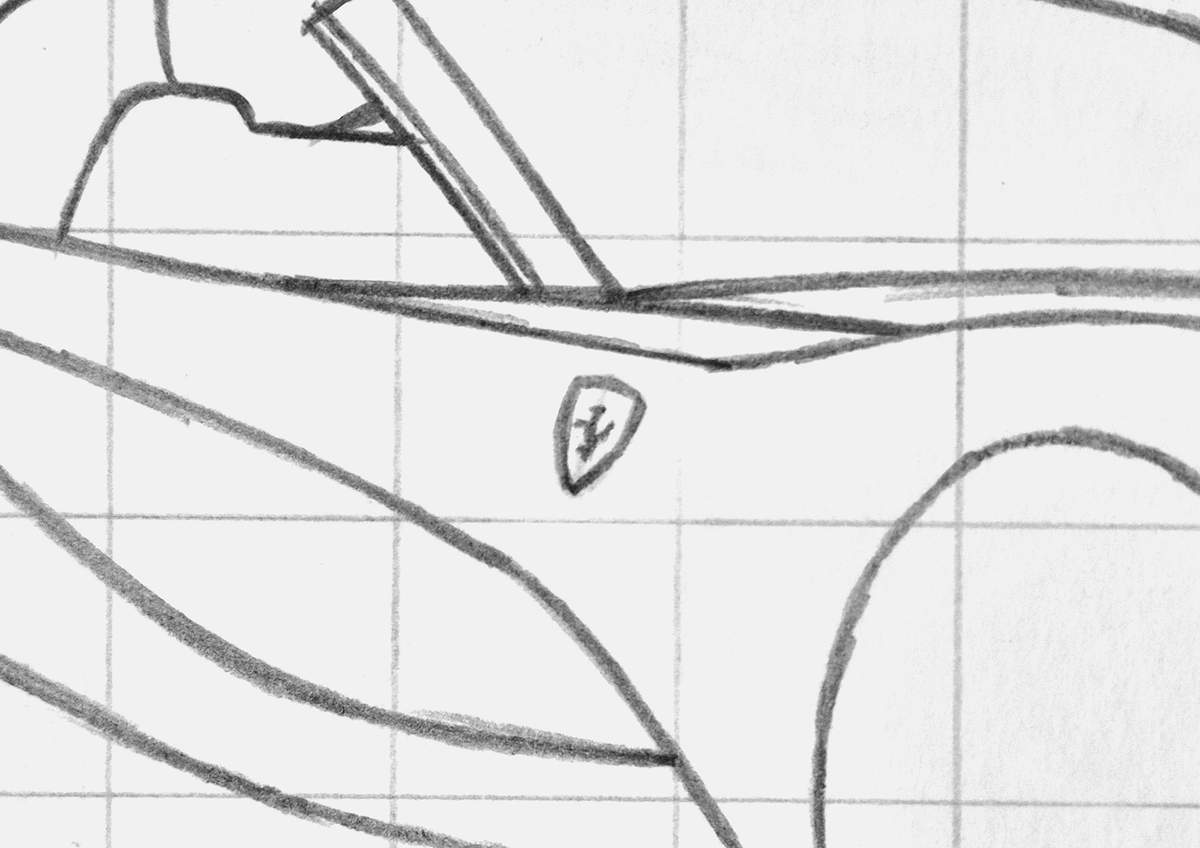
To finish the side of the car, I also sketched the line around the front wheel arch, and I added this tiny reflection to the left of the fin/air vent behind the front wheel.
Step 4: Sketch the front of the 812 GTS
I started the front with the big opening, the grill. It is made up of two parallel lines, with on the left a wonky, rounded sideways V-shape.
It's easiest to mark where the parallel lines cross the grid line, mark the round bit on the far left, and then sketch the line.
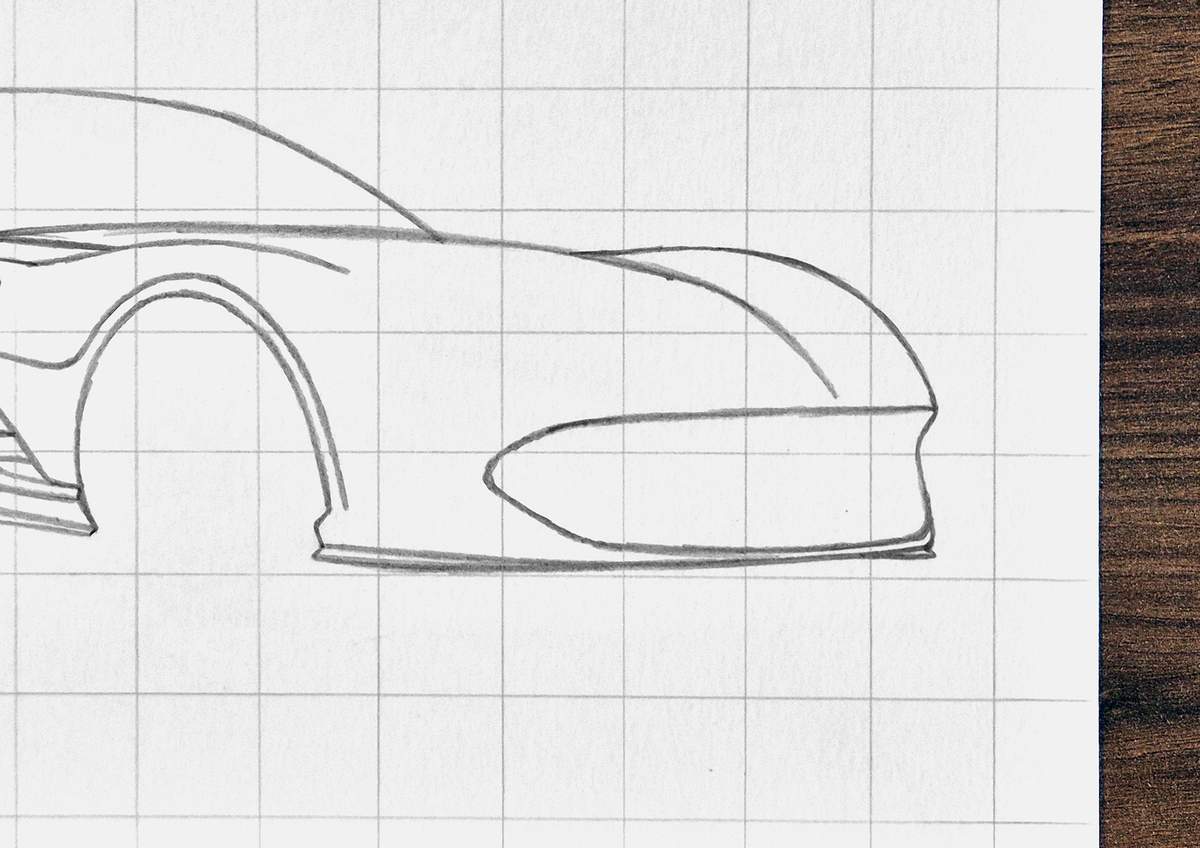
I then added the inner line of the black piece in the grill.
To sketch this, I marked the four corners and then sketched the part.
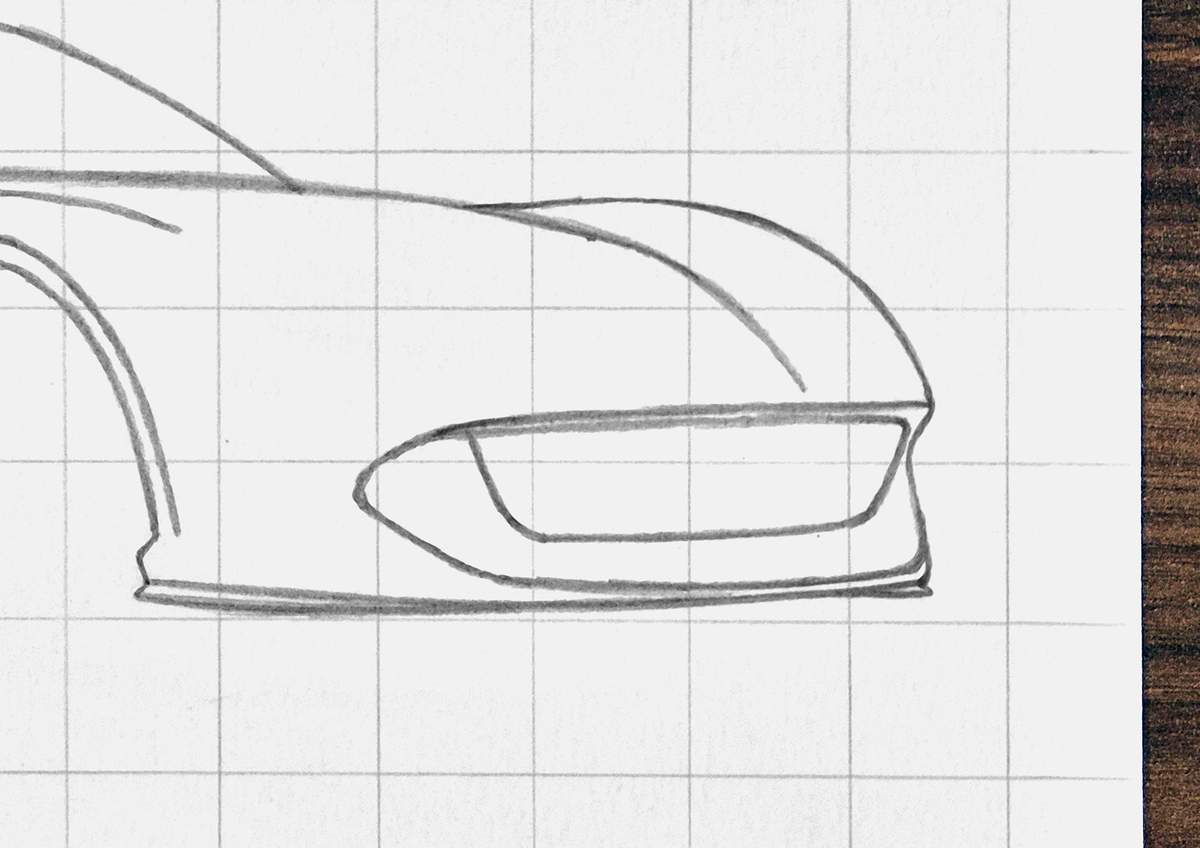
After that, I added this piece right below it. This is the edge of the colored part of the bumper.
It's mostly parallel to the bottom of the part above except in the center. Right in the middle, this line has a bump.
On the far right, this line curves up and connects to the part above. And right where they connect, I added another short line.
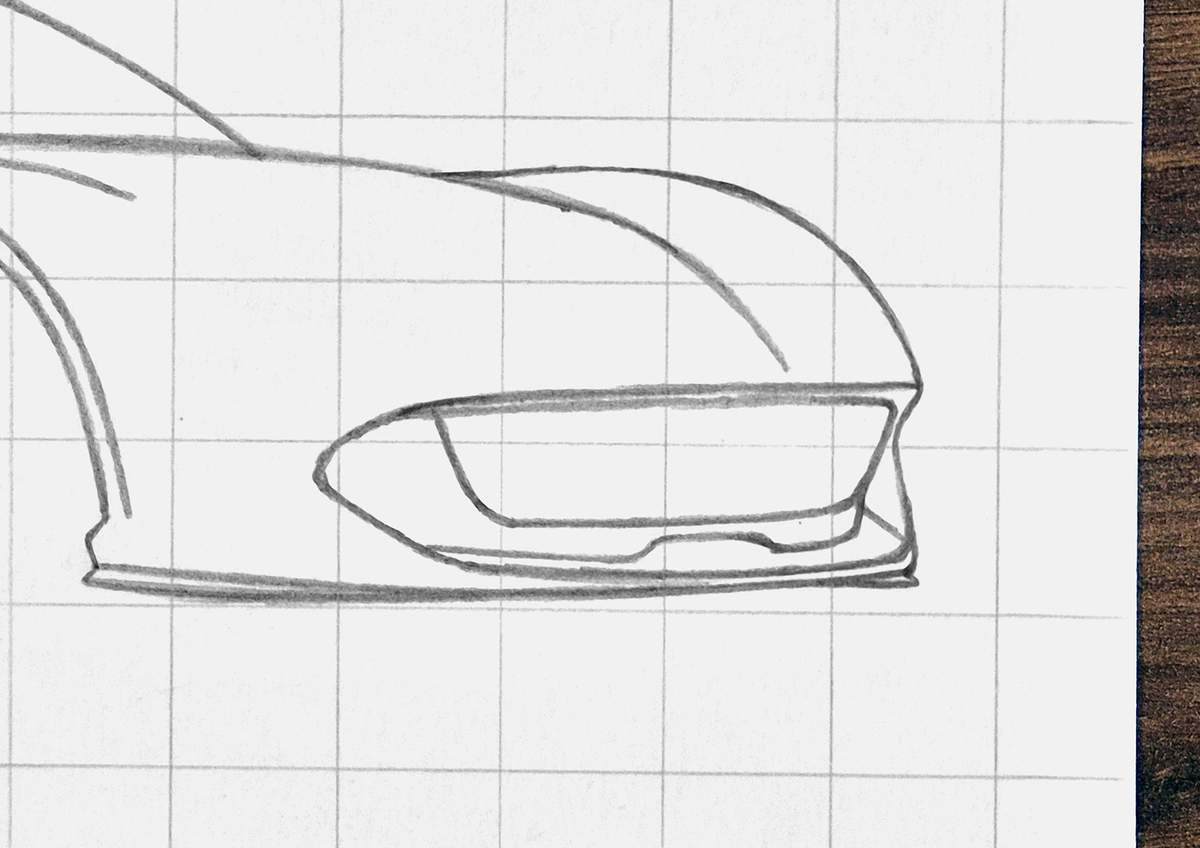
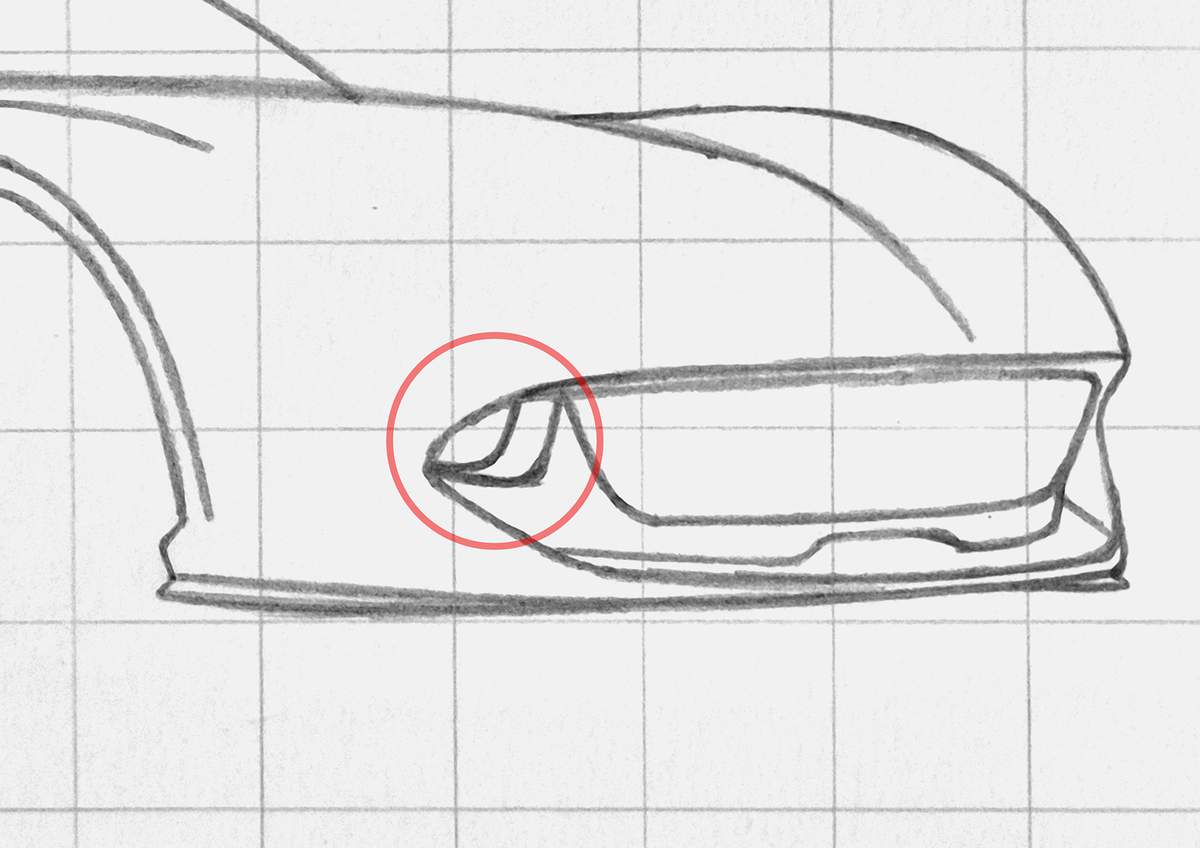
Next, I added these two lines shaped like a rounded right angle, which form an intake on the far left of the grill.
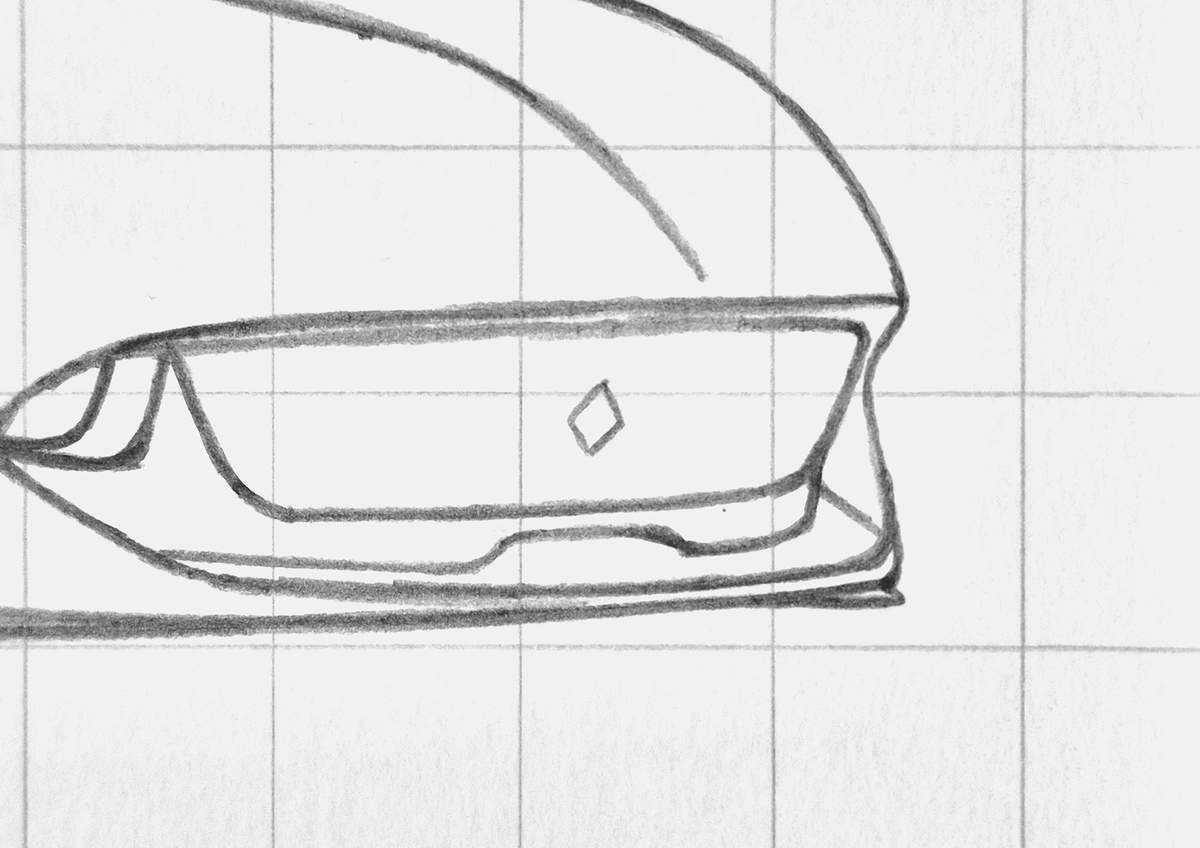
To complete the grill, I added the prancing horse. This one is also too tiny to get to look good and detailed.
I started by sketching this diamond shape, which is the size of the horse and will be the guide for sketching it.
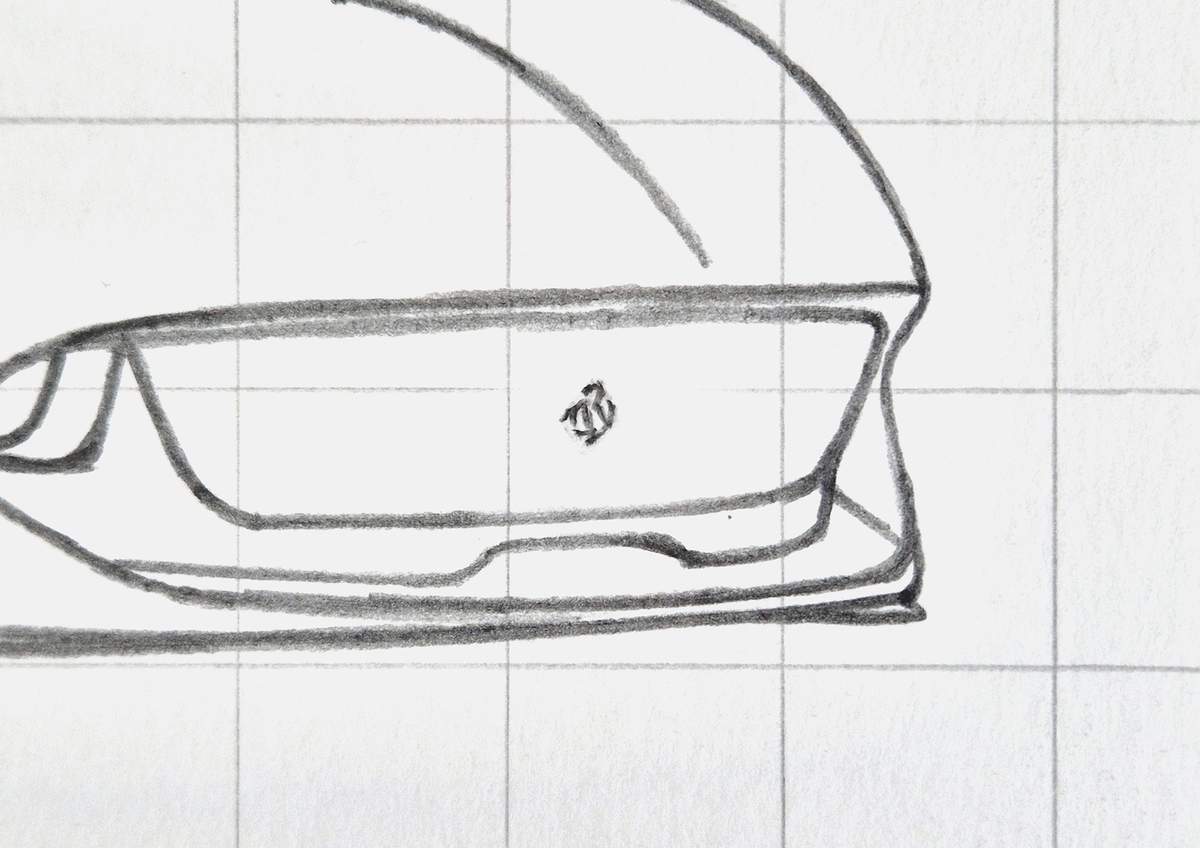
I then lightened the diamond shape and sketched a bunch of lines inside it.
I hope this photo is detailed enough to show you the lines I sketched to make this super simplified version of the prancing horse.
With that out of the way, I continued with the rest of the front of the 812.
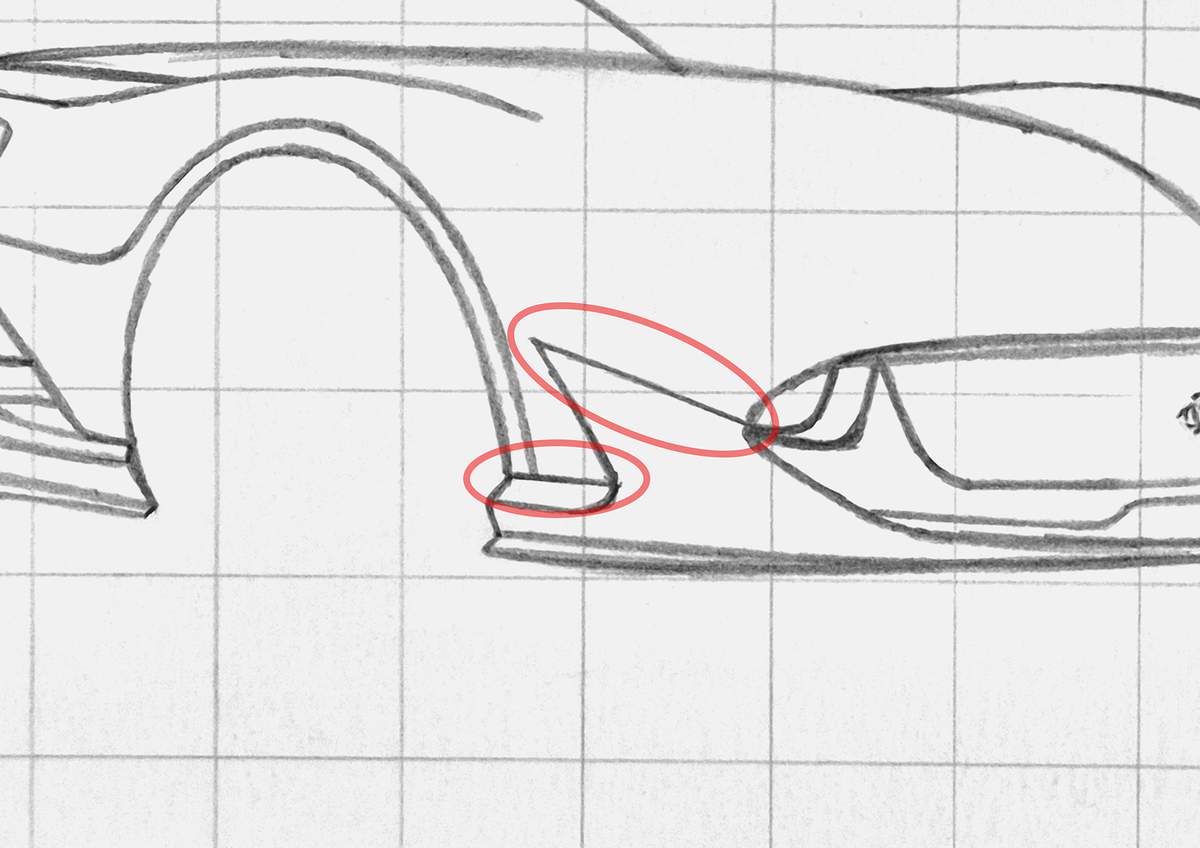
I first sketched this line to the right of the front wheel arch. The air flows through the front opening and comes back out here.
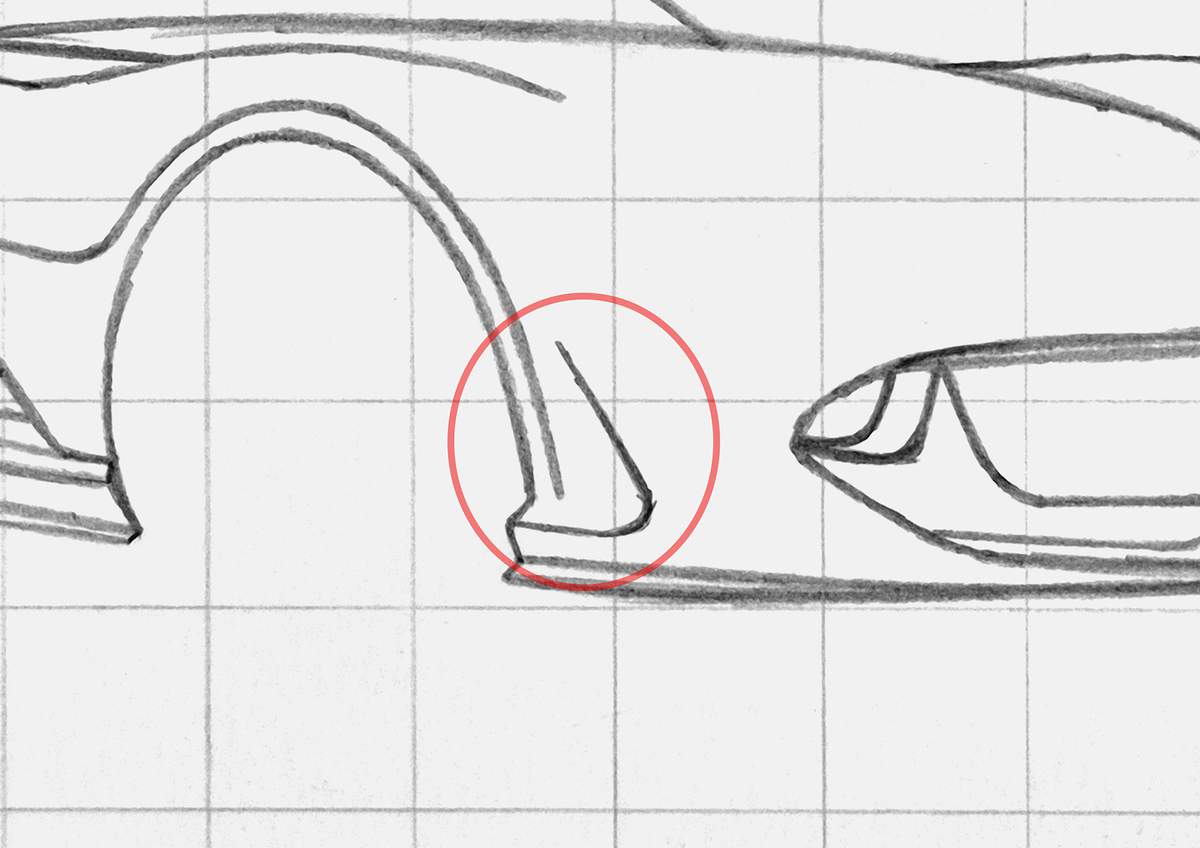
I then added a line parallel to the bottom of the line we just sketched, and I added a diagonal line from the top of the previous line to the grill.
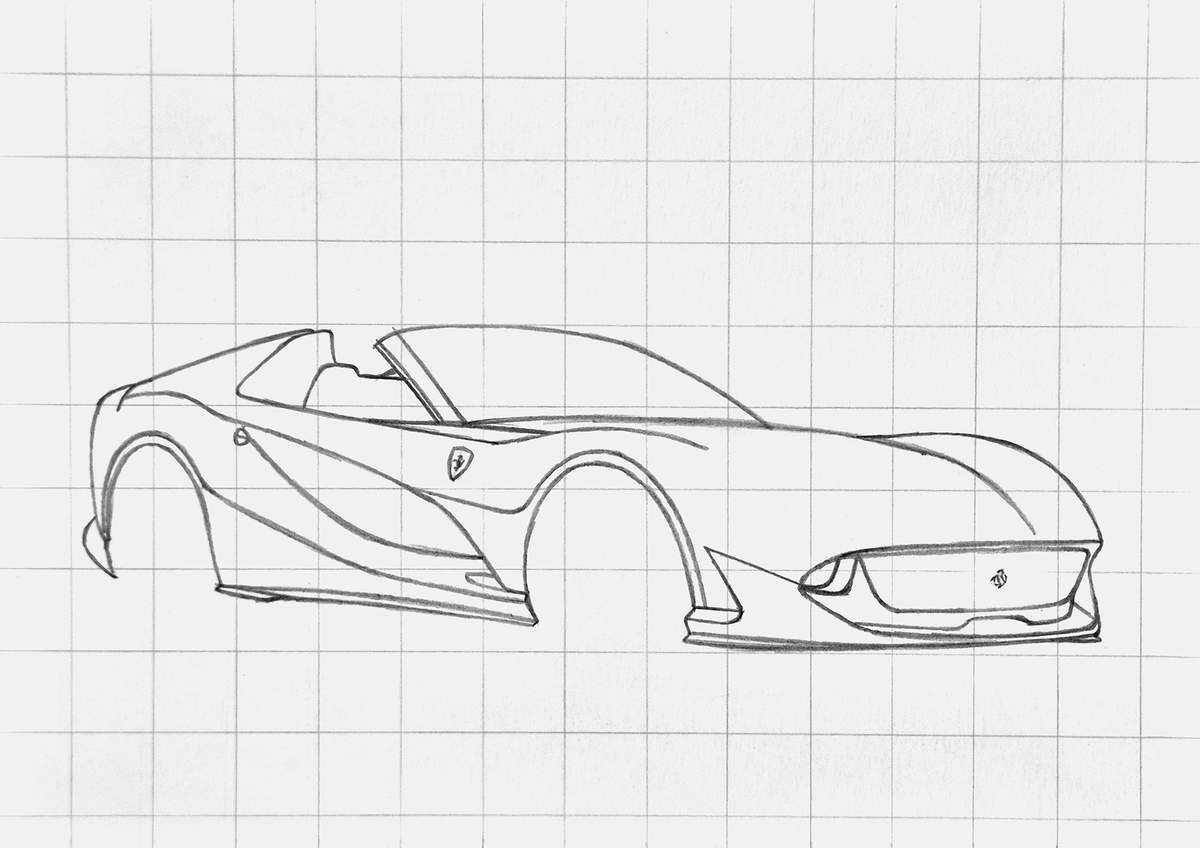
Step 5: Sketch the hood and the headlights
With the whole front bumper now done, I continued with the hood and the headlights.
I started by adding this long line across the hood.
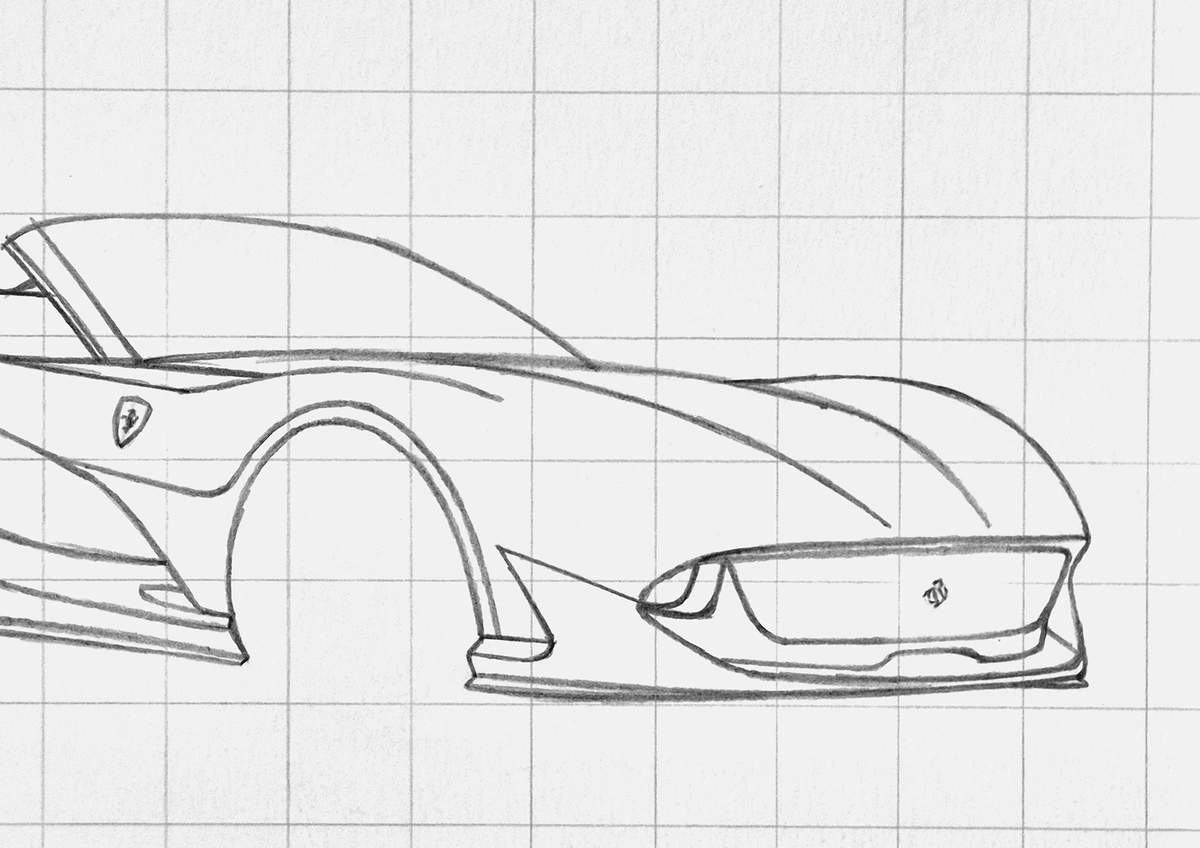
Next, I sketched the outline of the left headlight and the air intake next to it.
I started by sketching the right side of this part.
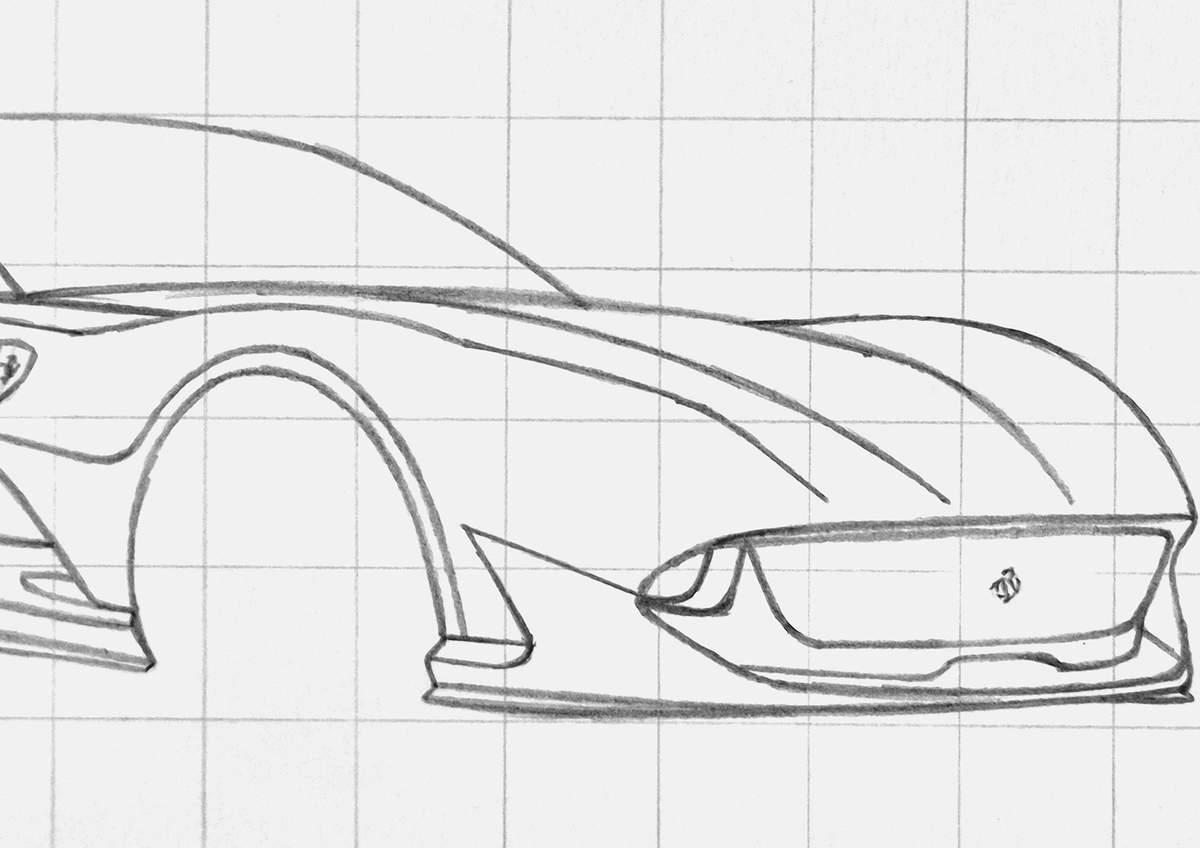
Then, I added the left edge.
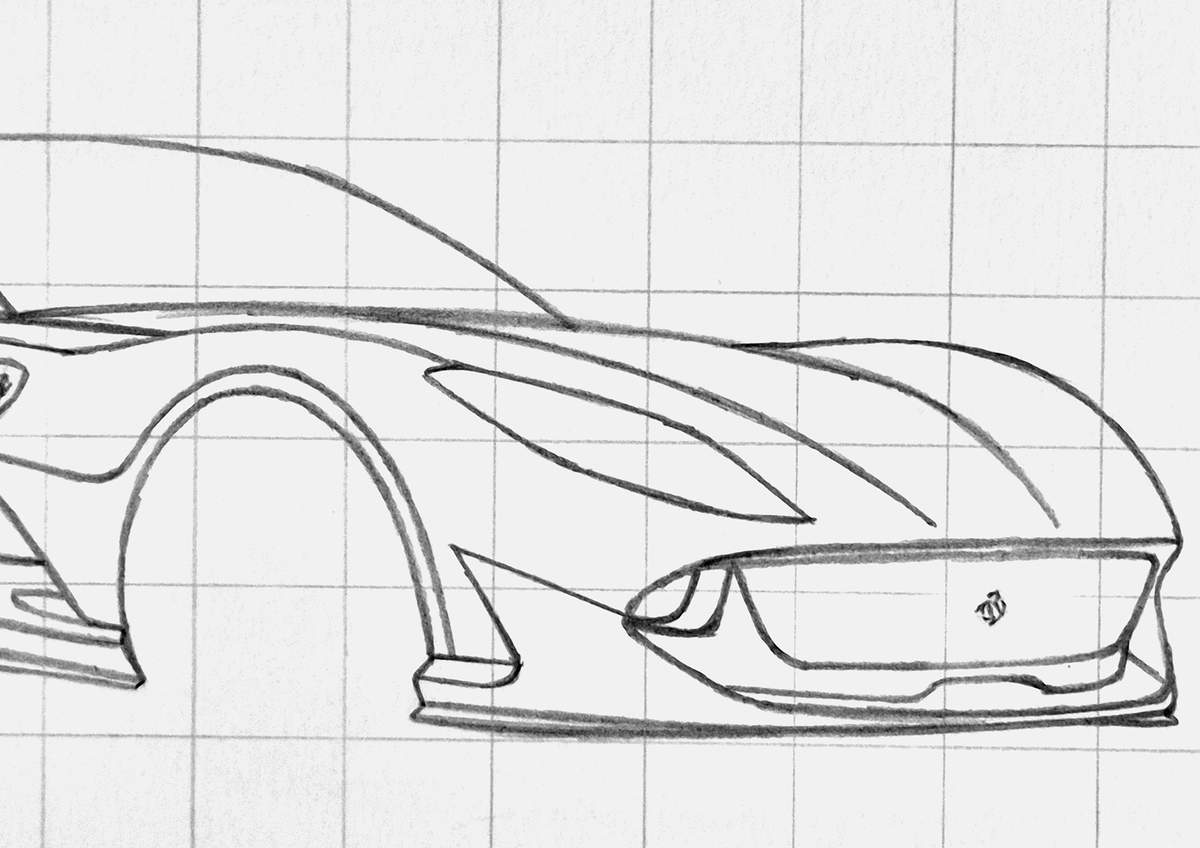
Now it looks more like a headlight.
The next thing I did was to sketch the actual right side of the headlight/the left edge of the air intake next to the headlight.
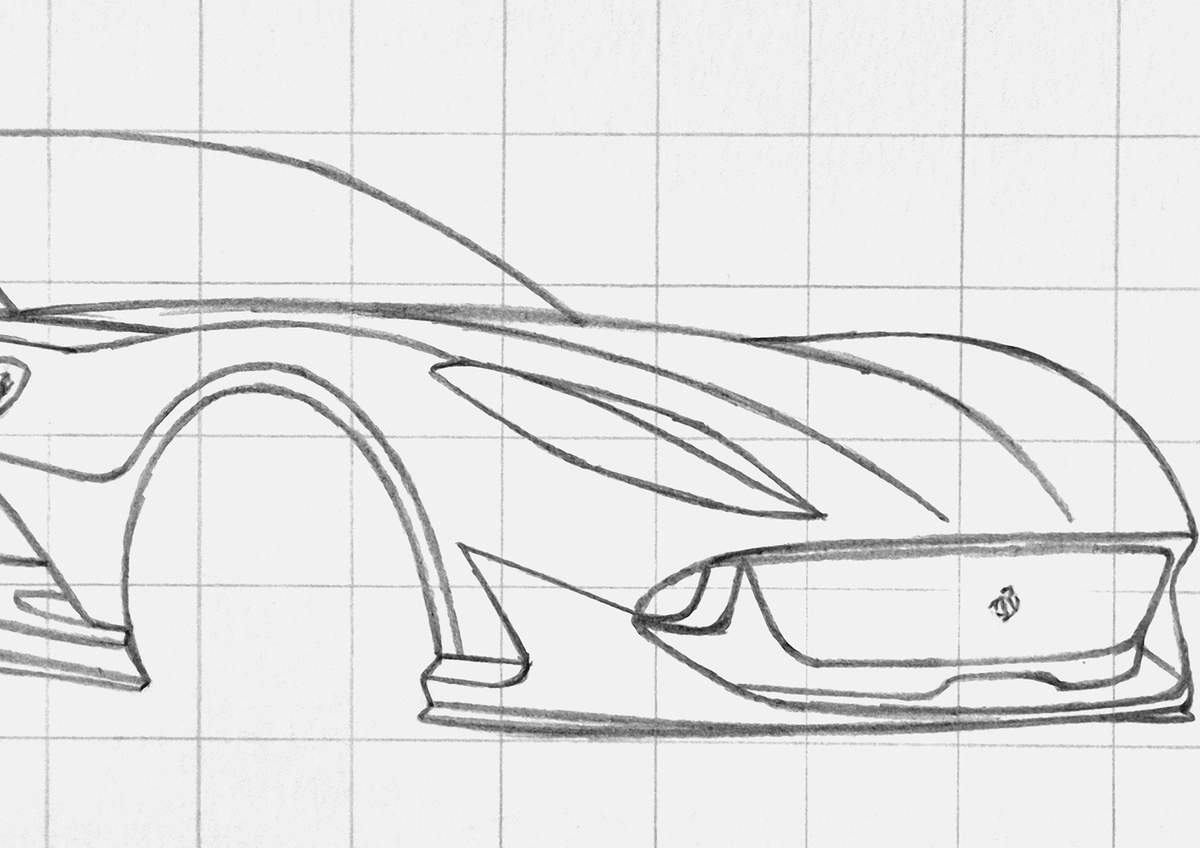
And to complete the left headlight, I sketched all the parts inside it. I kept it pretty simple as they won't be that visible.
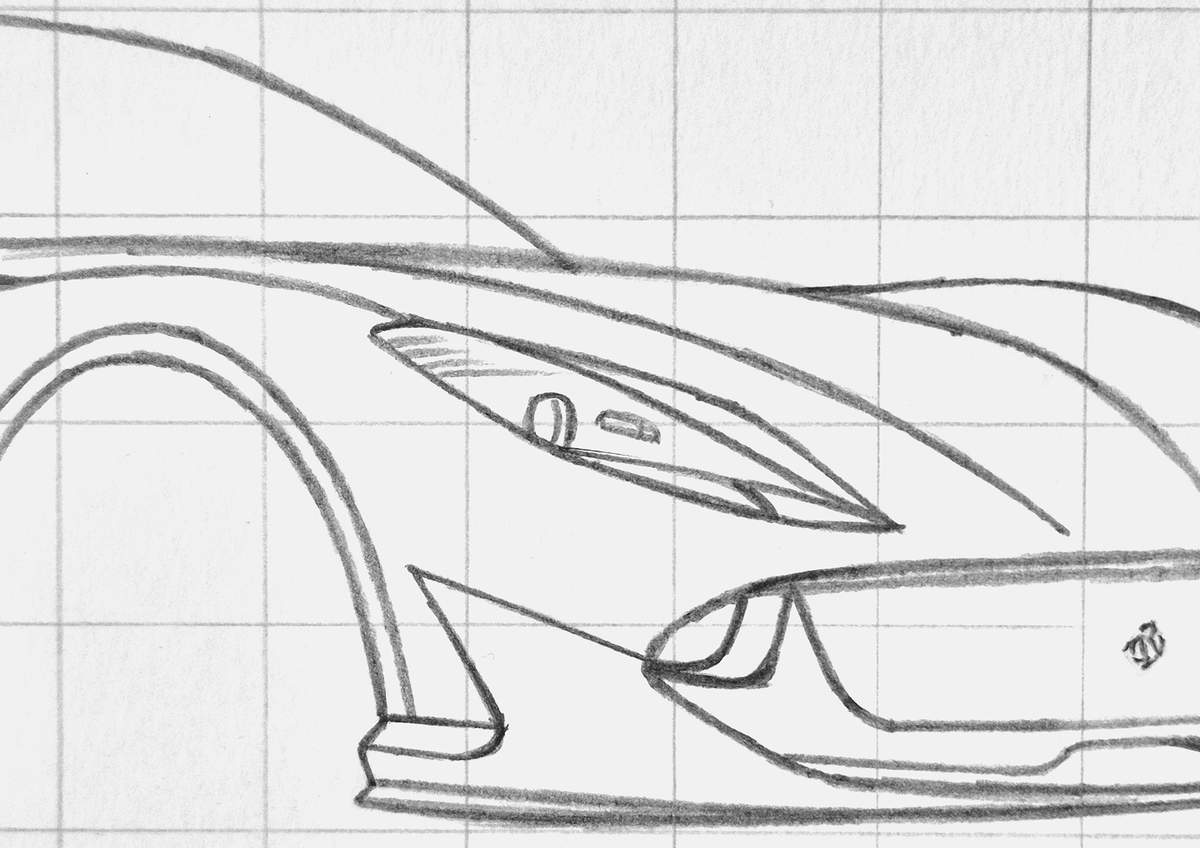
After that, I sketched the outline of the right headlight, including the air intake to the left of it.
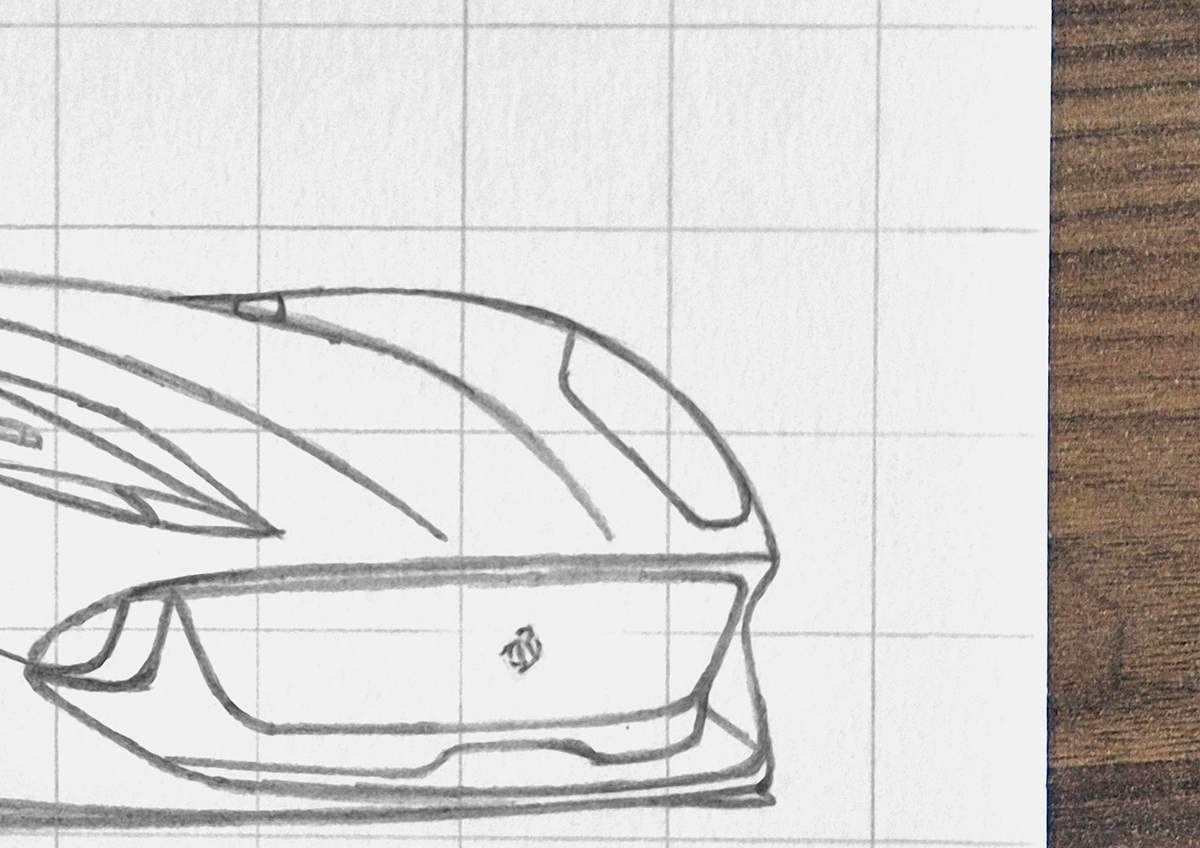
Then, I added the left edge of the headlight.
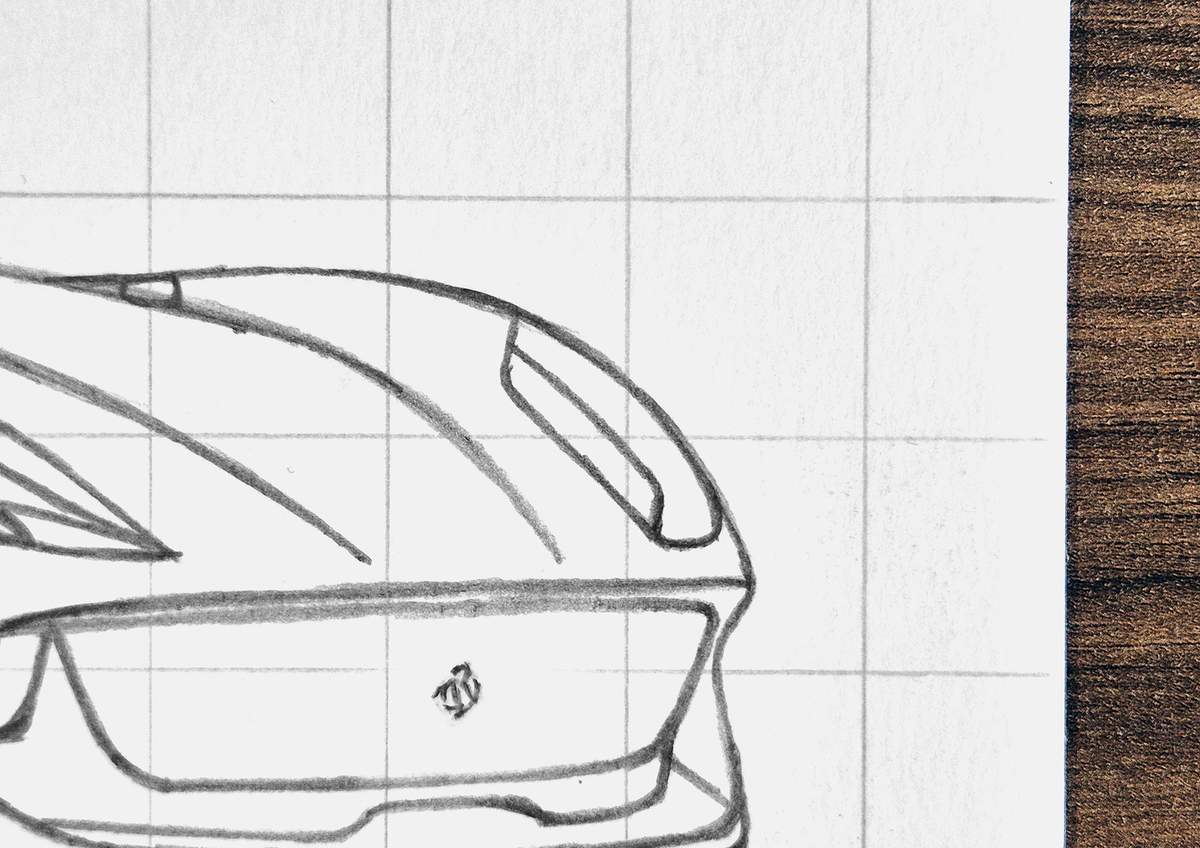
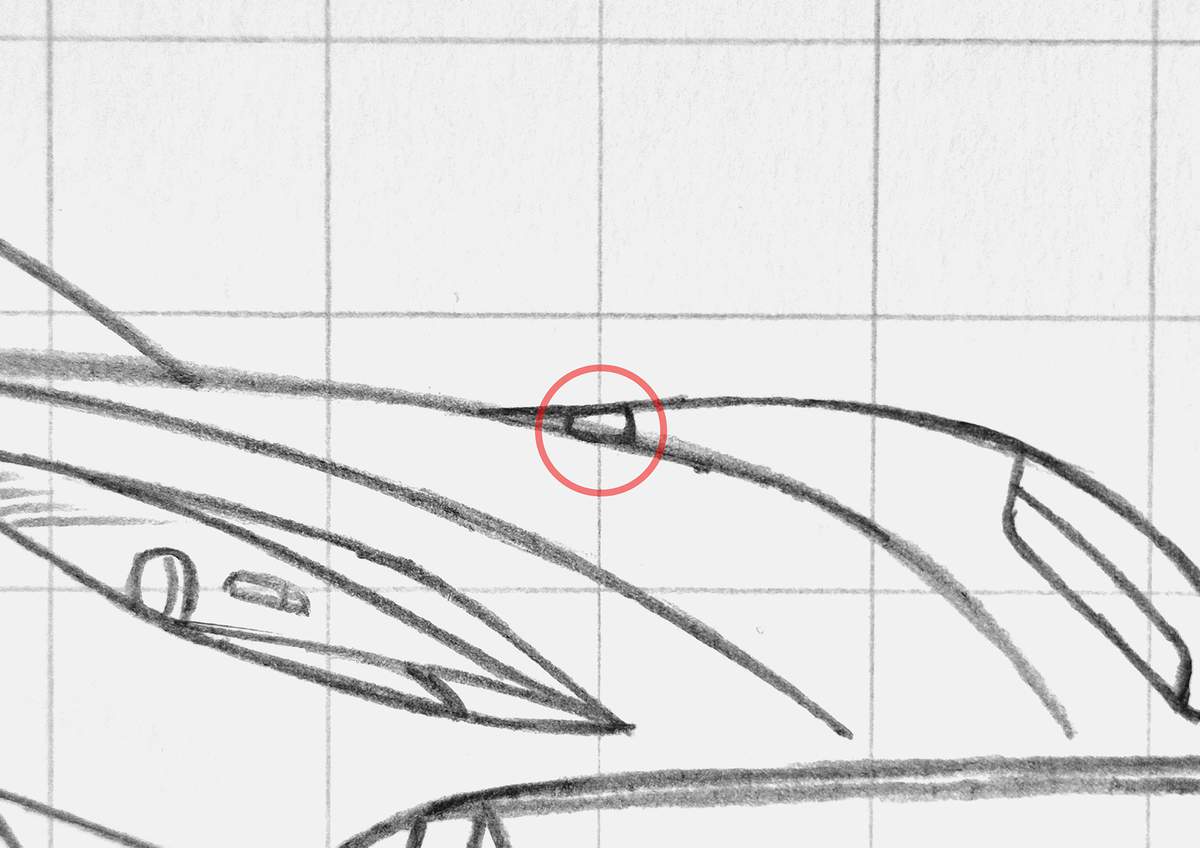
And I added this small air vent thing all the way on the far side of the hood.
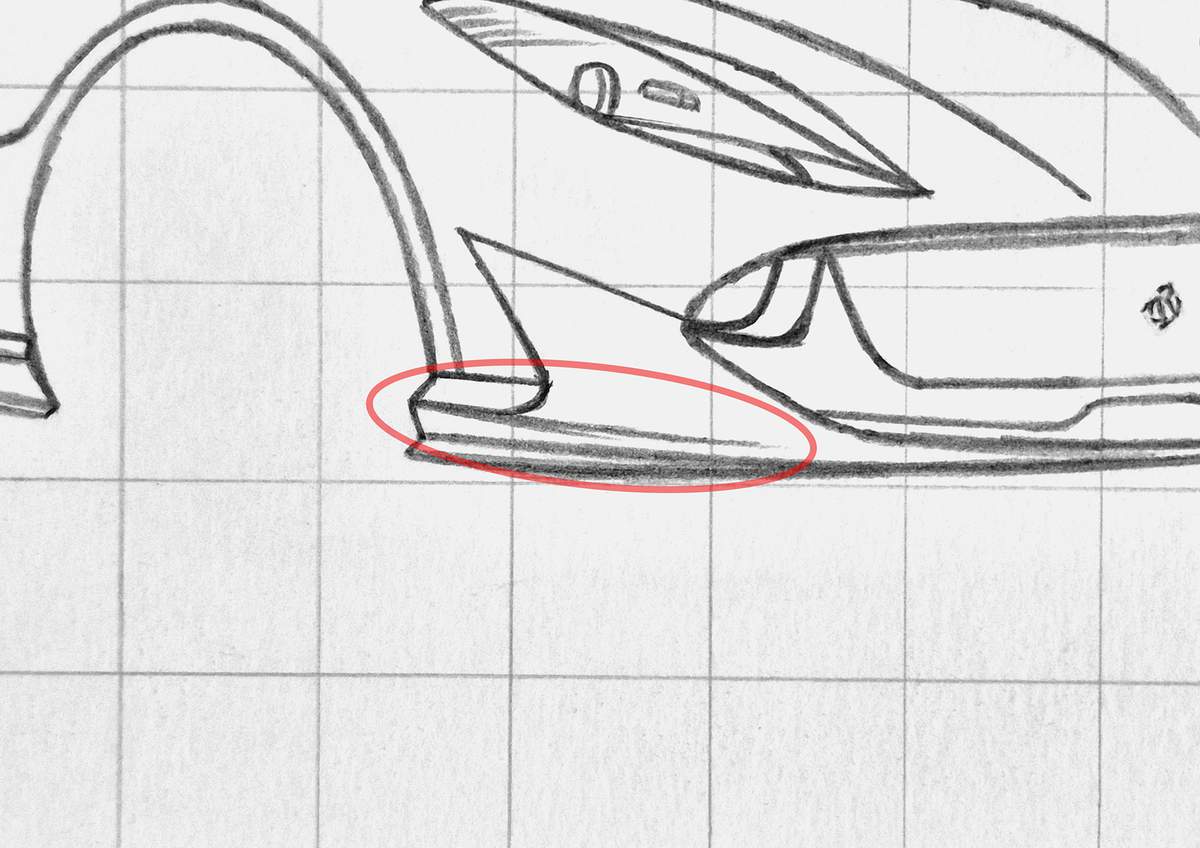
And I also added this small line on the bottom of the side of the front bumper.
Next, I sketched the Ferrari logo on the front of the car.
I started off with two horizontal lines for the height. I made them longer than necessary as I didn't know yet exactly how wide it was going to be.
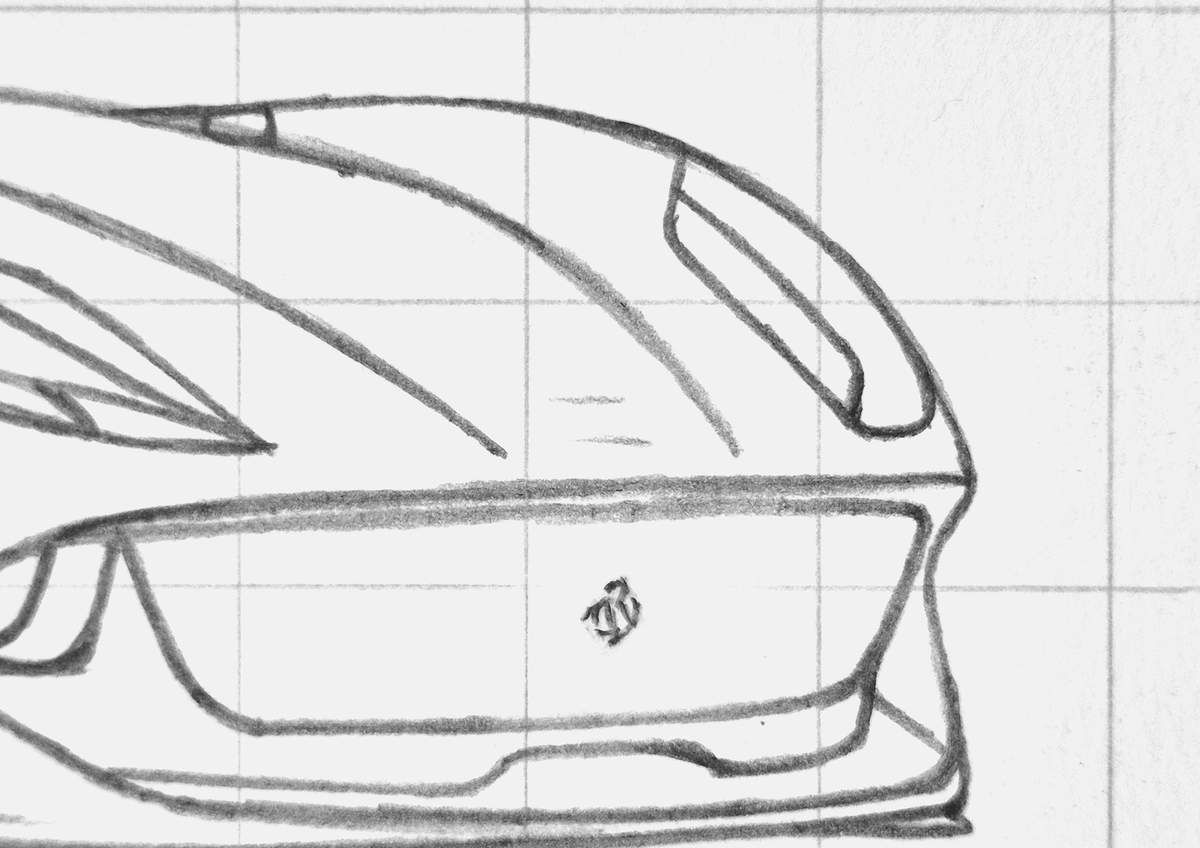
Then, I added the sides, making sure they follow the shape of the hood.
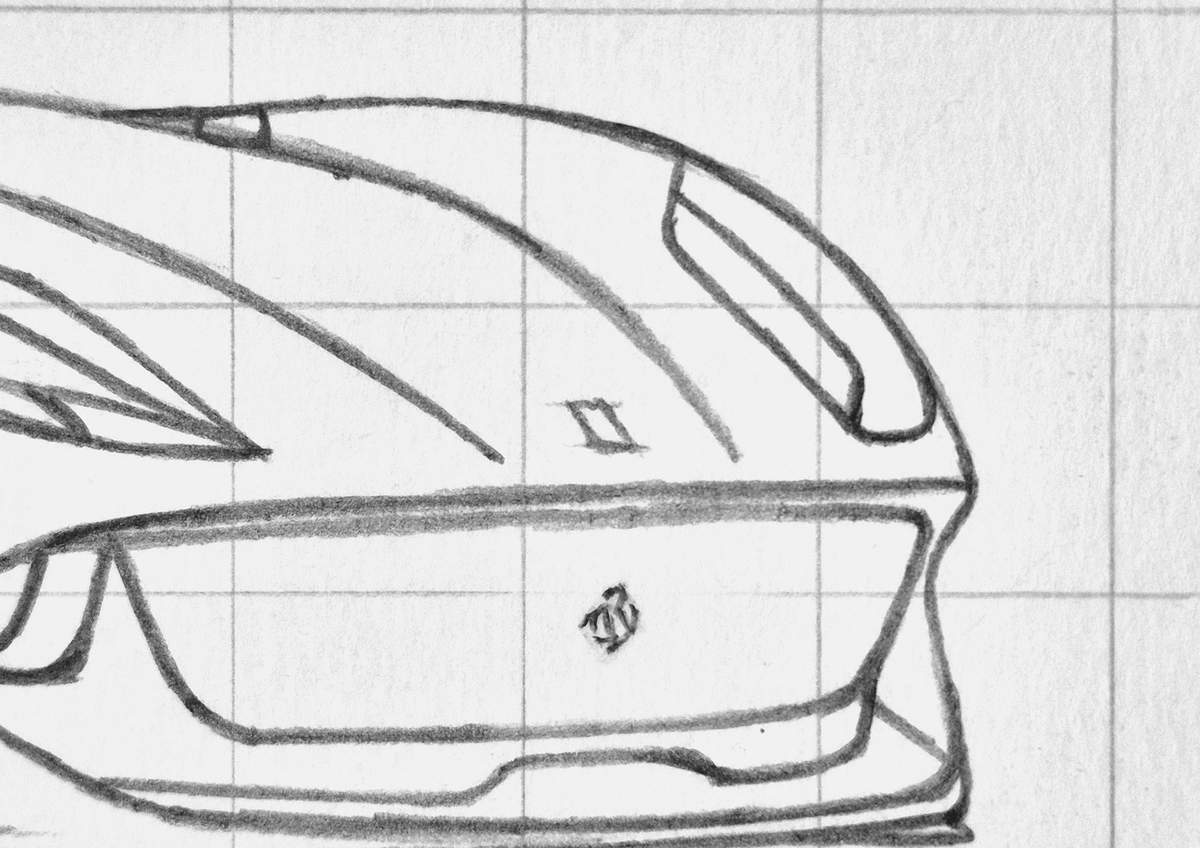
That's it for now. We'll add the general shape of the prancing horse when adding details with colored pencils.
Step 6: Sketch the door mirror of the 812
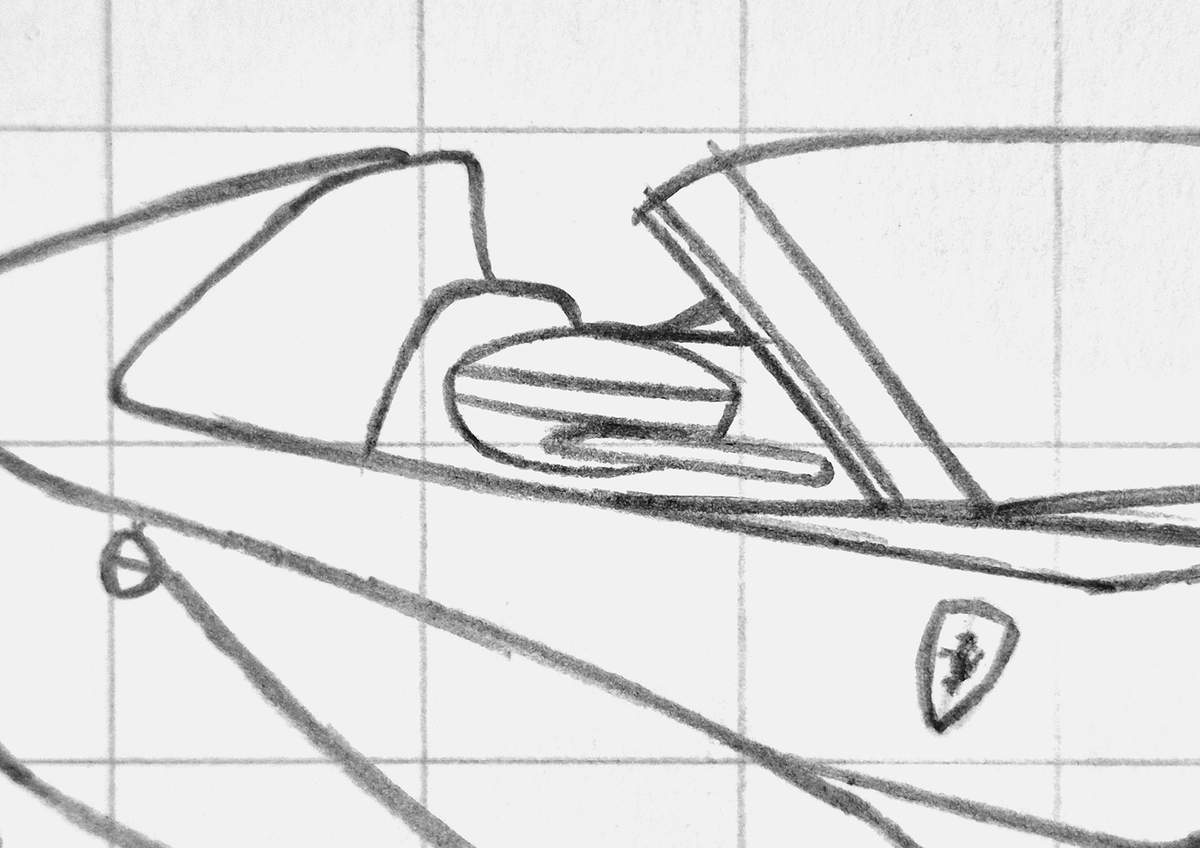
Next, I sketched the door mirror on this side of the car.
I started with the right edge, which is quite short and diagonal. I also drew the curved top edge.
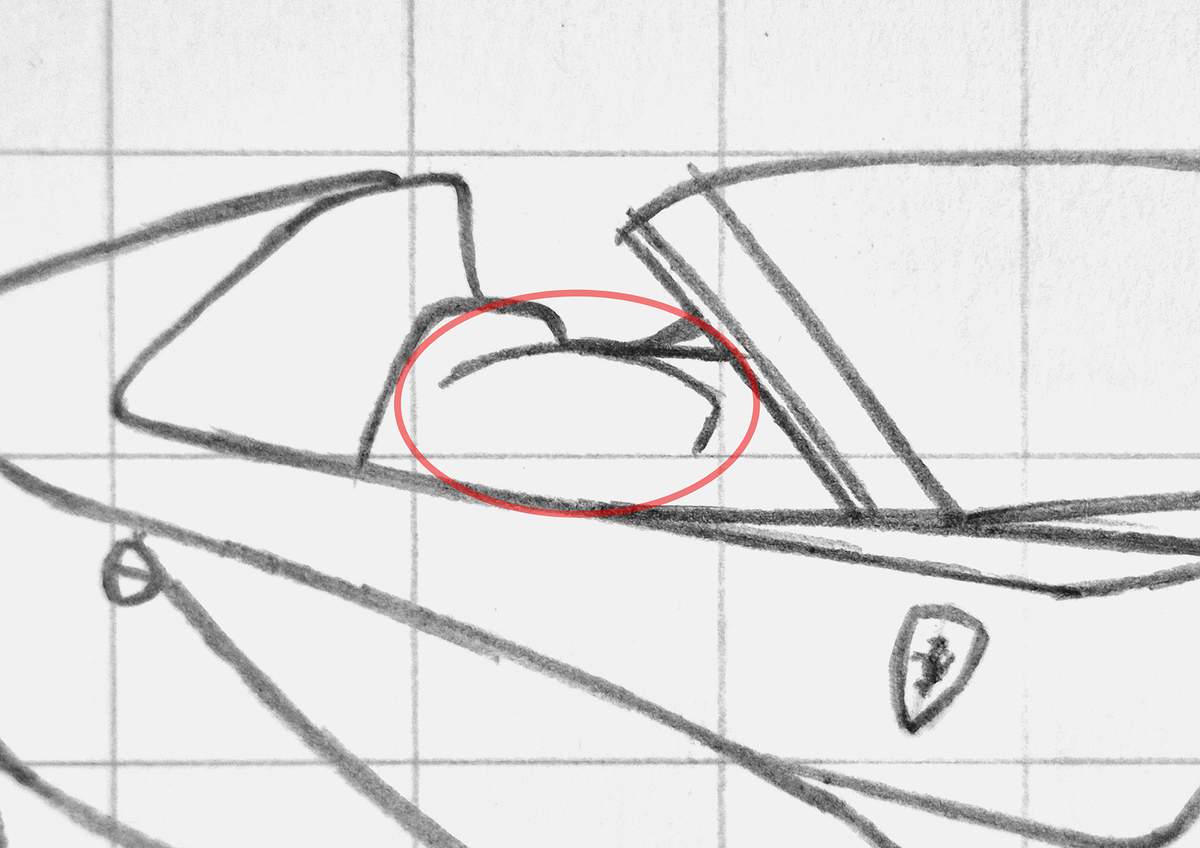
Then, I added the left/bottom edge as one long curve. I left a gap on the right. This is where the mirror arm will go.
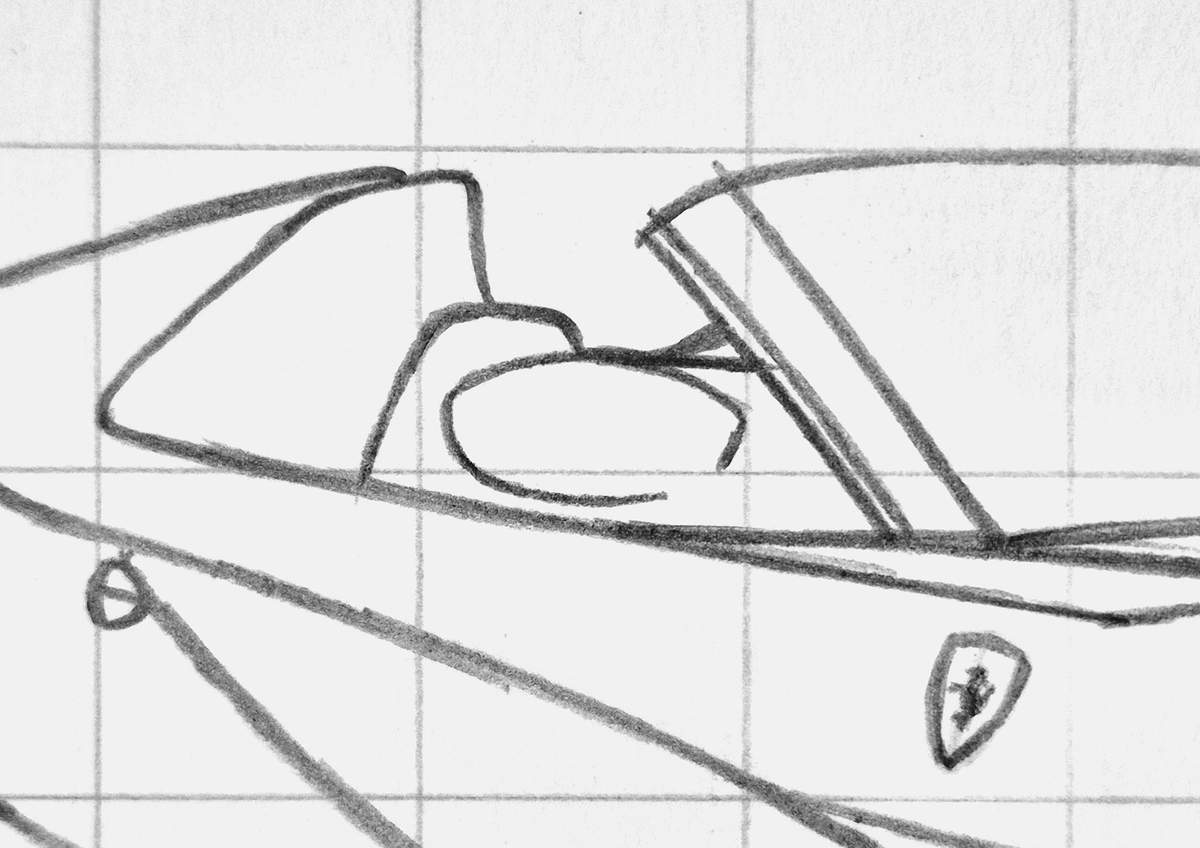
And with the mirror arm attached to the mirror, it looks something like this:
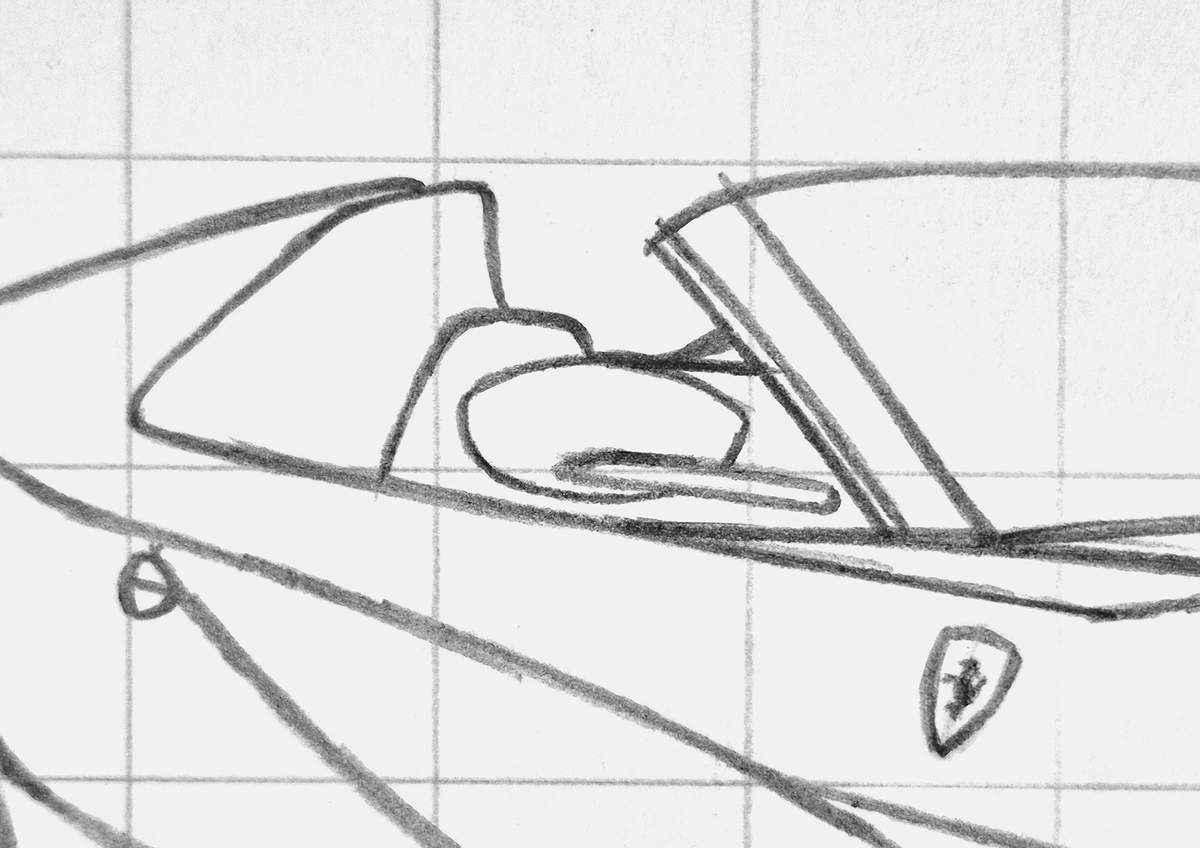
To complete this mirror, I added two parallel lines to the mirror cap.
Step 7: Sketch the remainder of the interior and the windshield
After that, I worked on the interior of the 812, starting with the buttress.
I first added the left edge of the front-facing side.
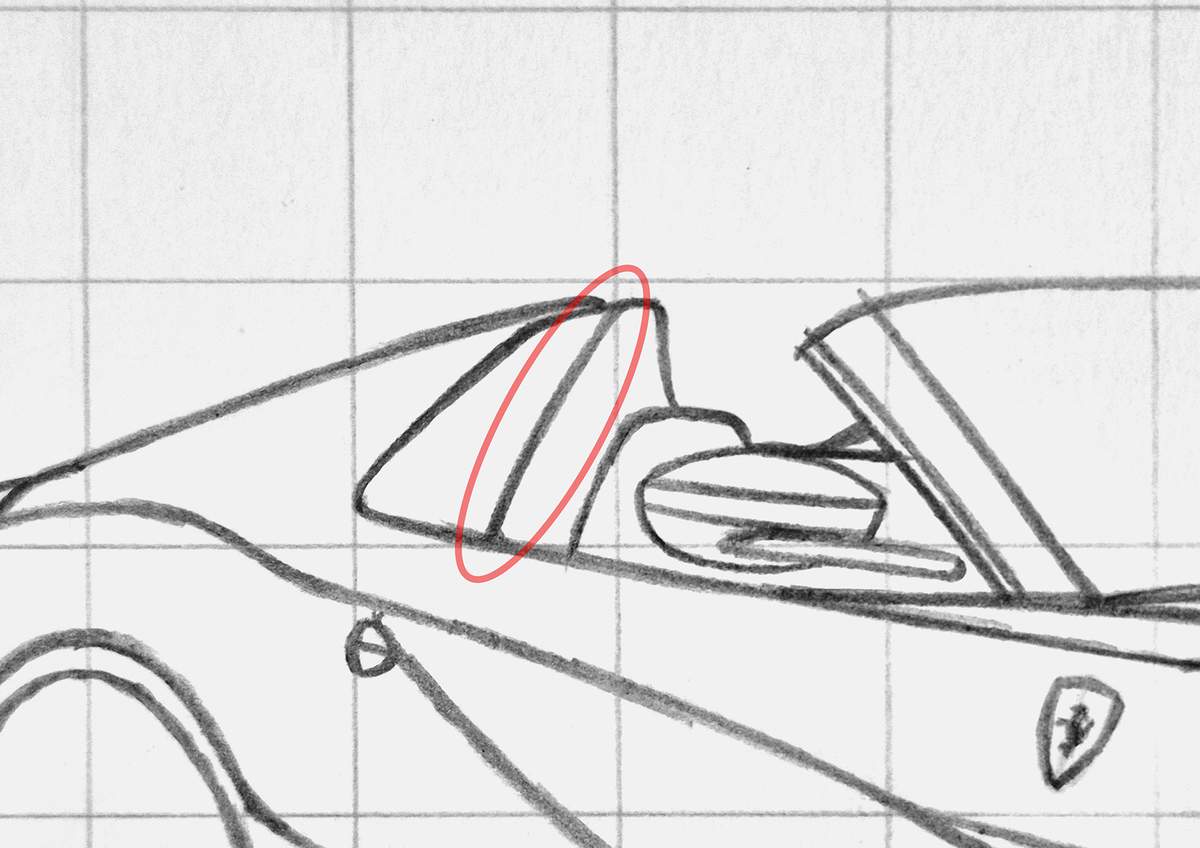
Then, I added the lines for the part that will open up and connect to the roof when it's down.
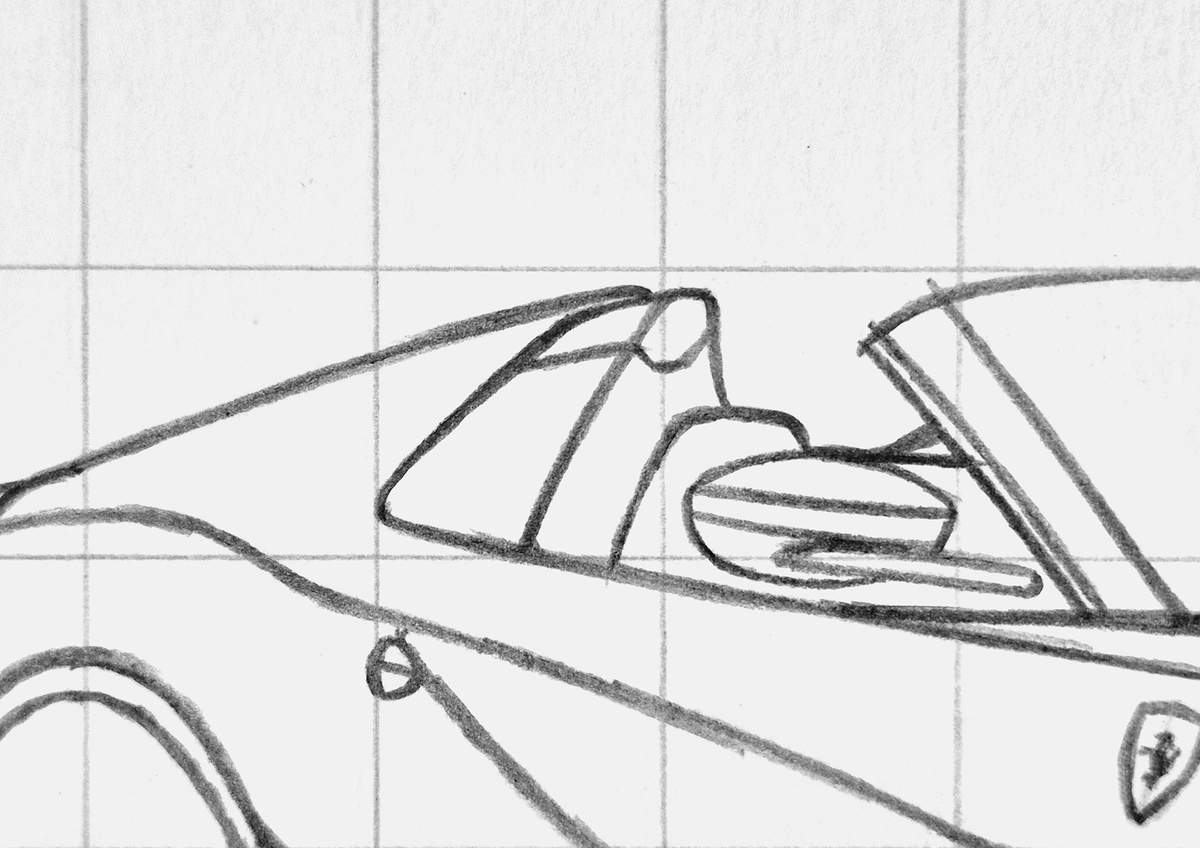
And I added more details and lines to the buttress.
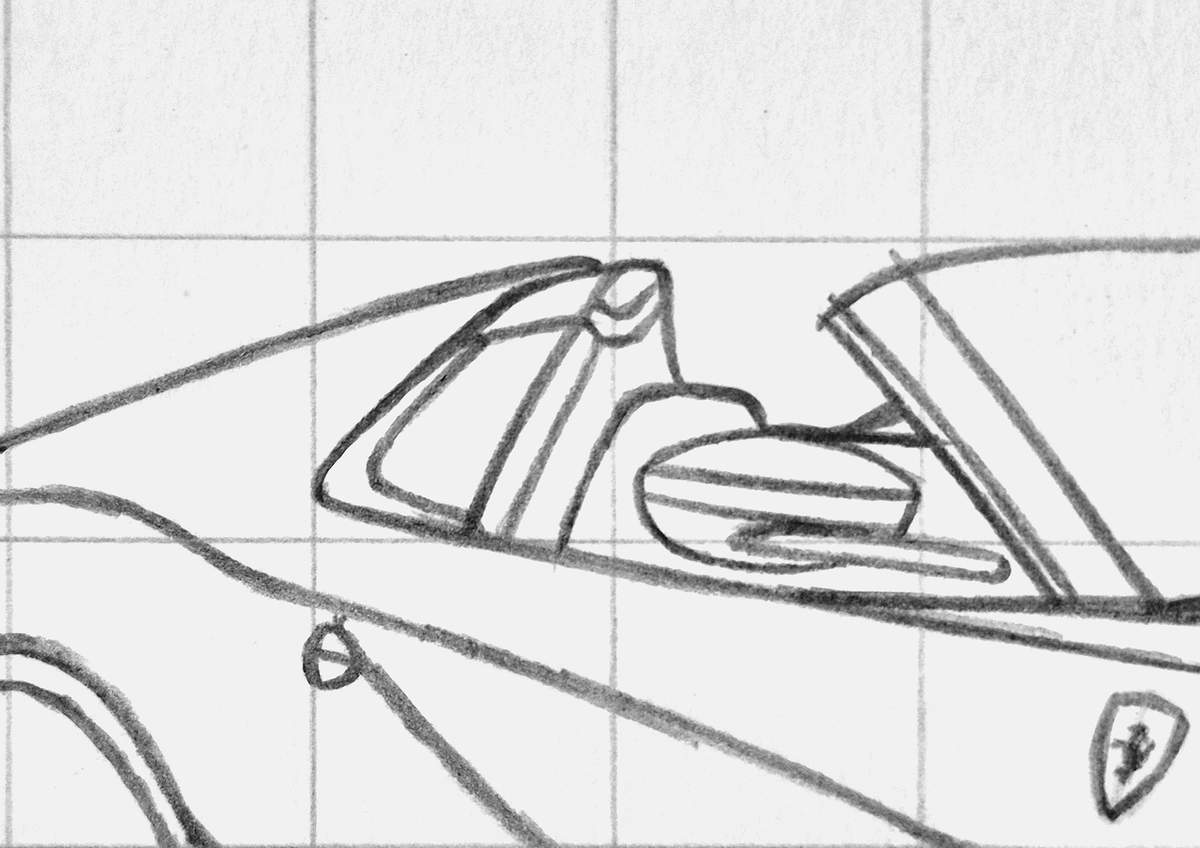
To complete the interior on this side of the car, I added the seatbelt right next to the seat, and I added a line to make the window triangle (the part where the door mirror connects to).
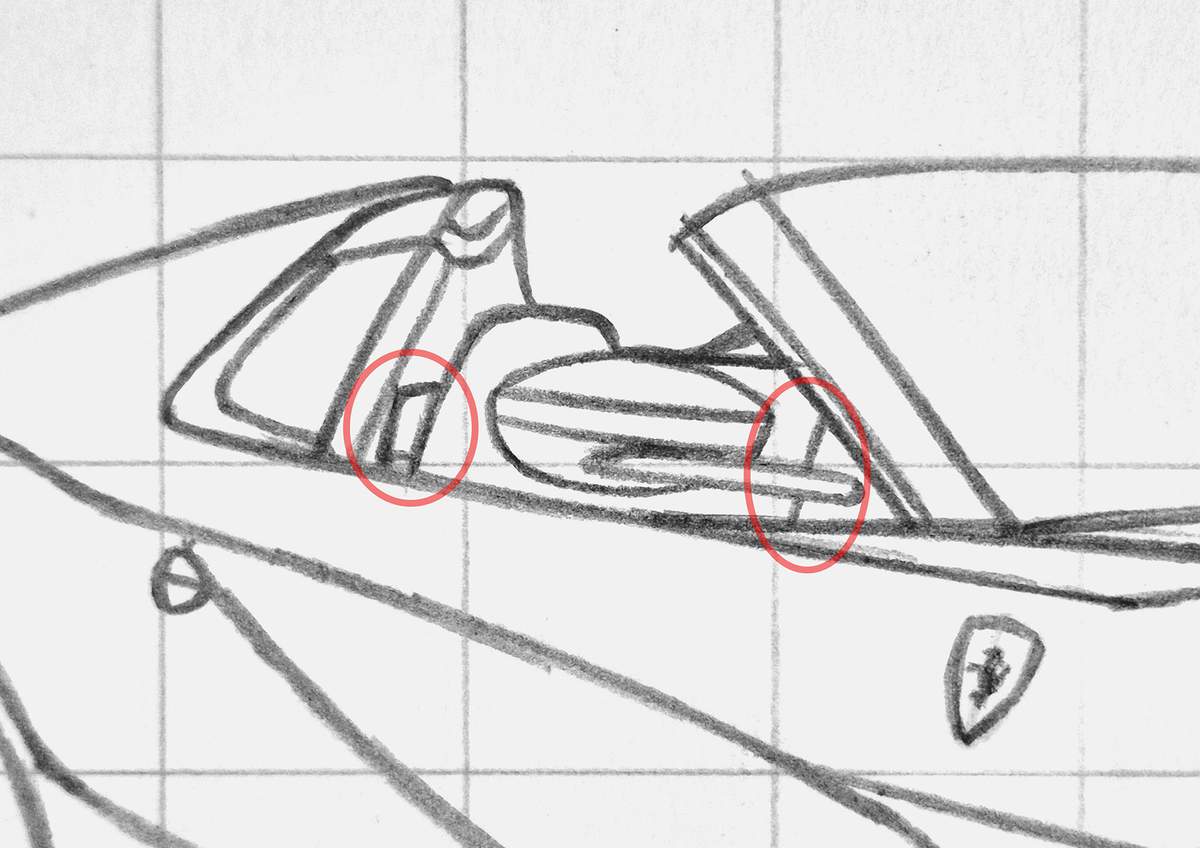
Next, I added the windshield wipers right at the bottom of the windshield.
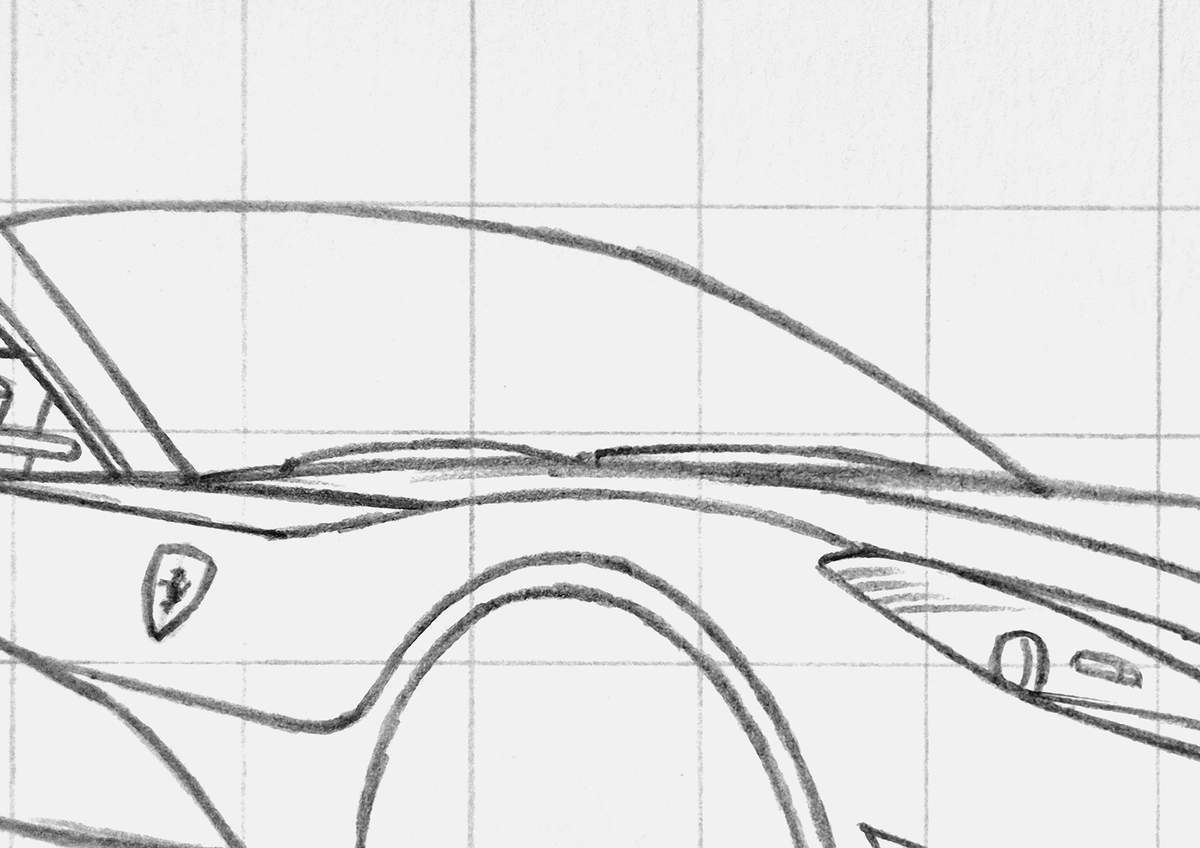
I then completed the outline of the actual window, leaving a small border at the top for the frame.
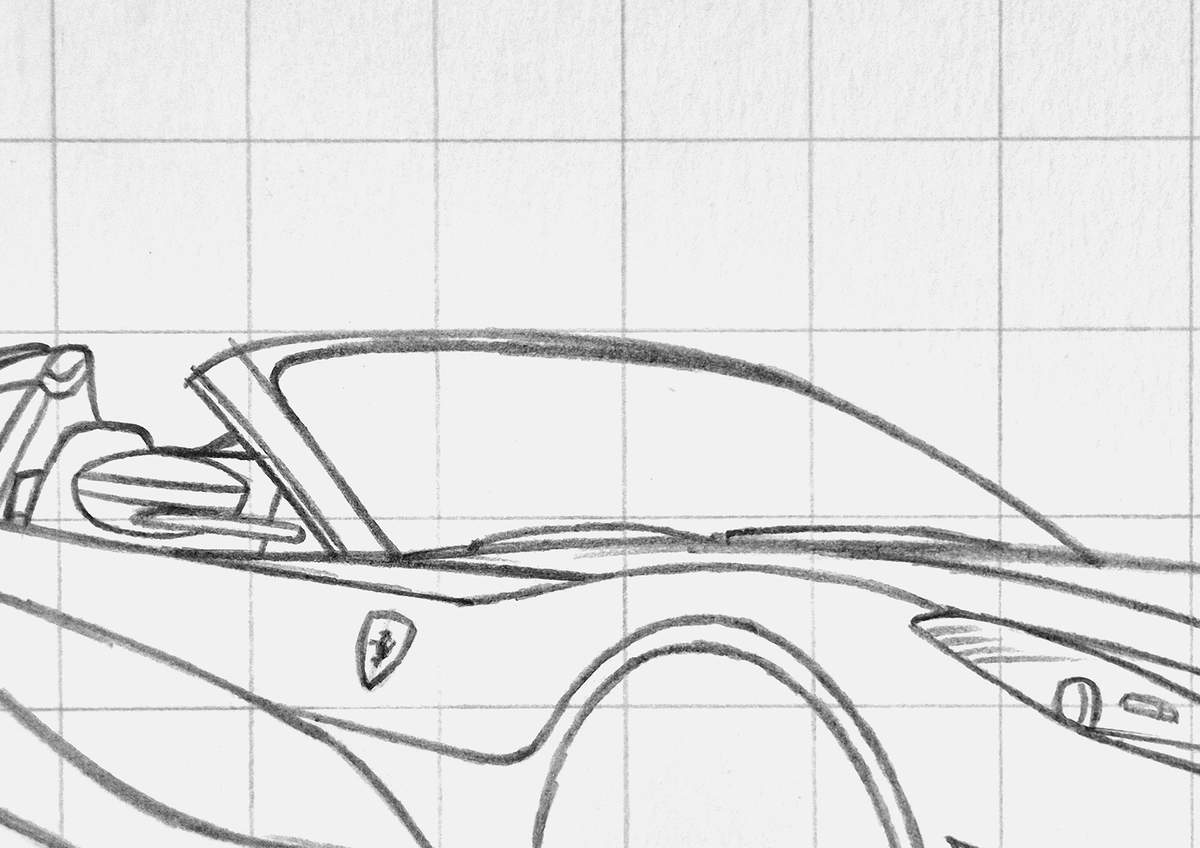
After that, I added the black border on the outer edge of the windshield. This also includes this piece at the top where some sensors are placed.
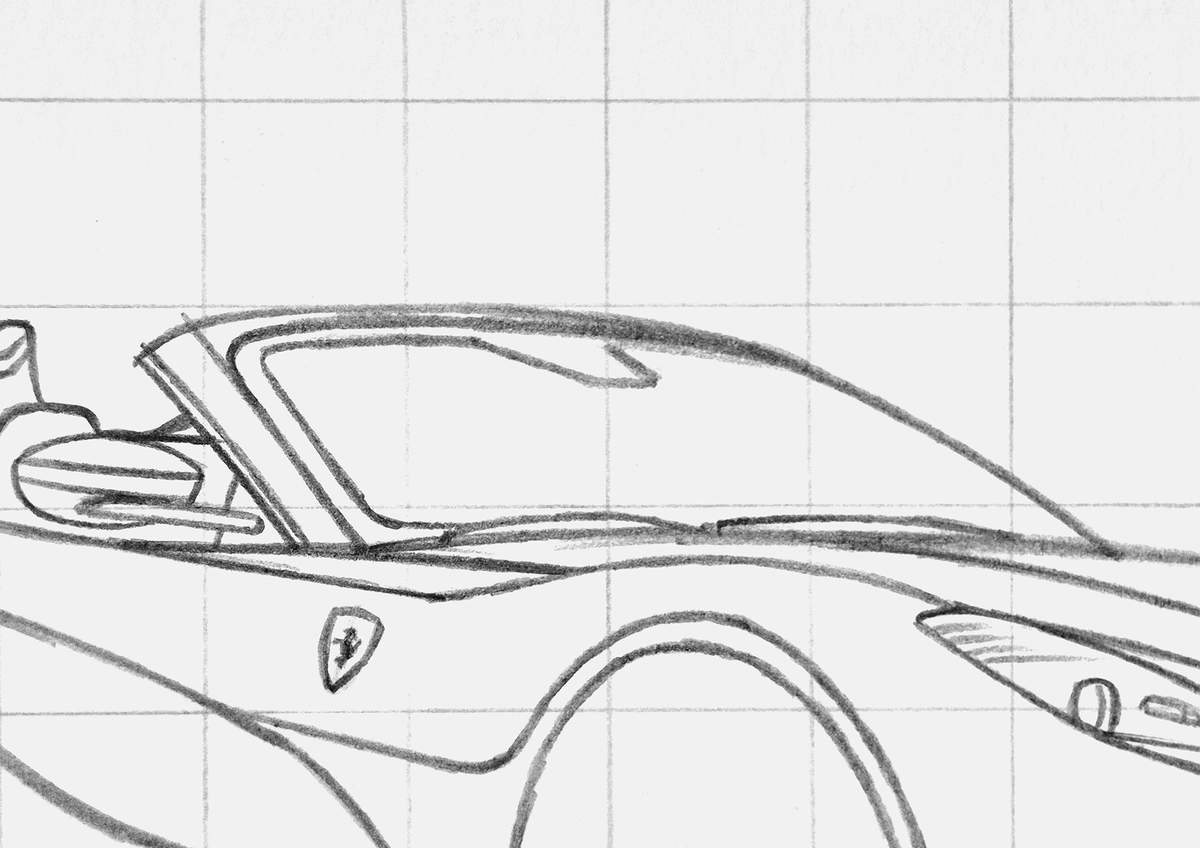
Next, I sketched the triangular cut in this black patch at the top, and I added the bits below it that house the sensors and where the rearview mirror attaches to.
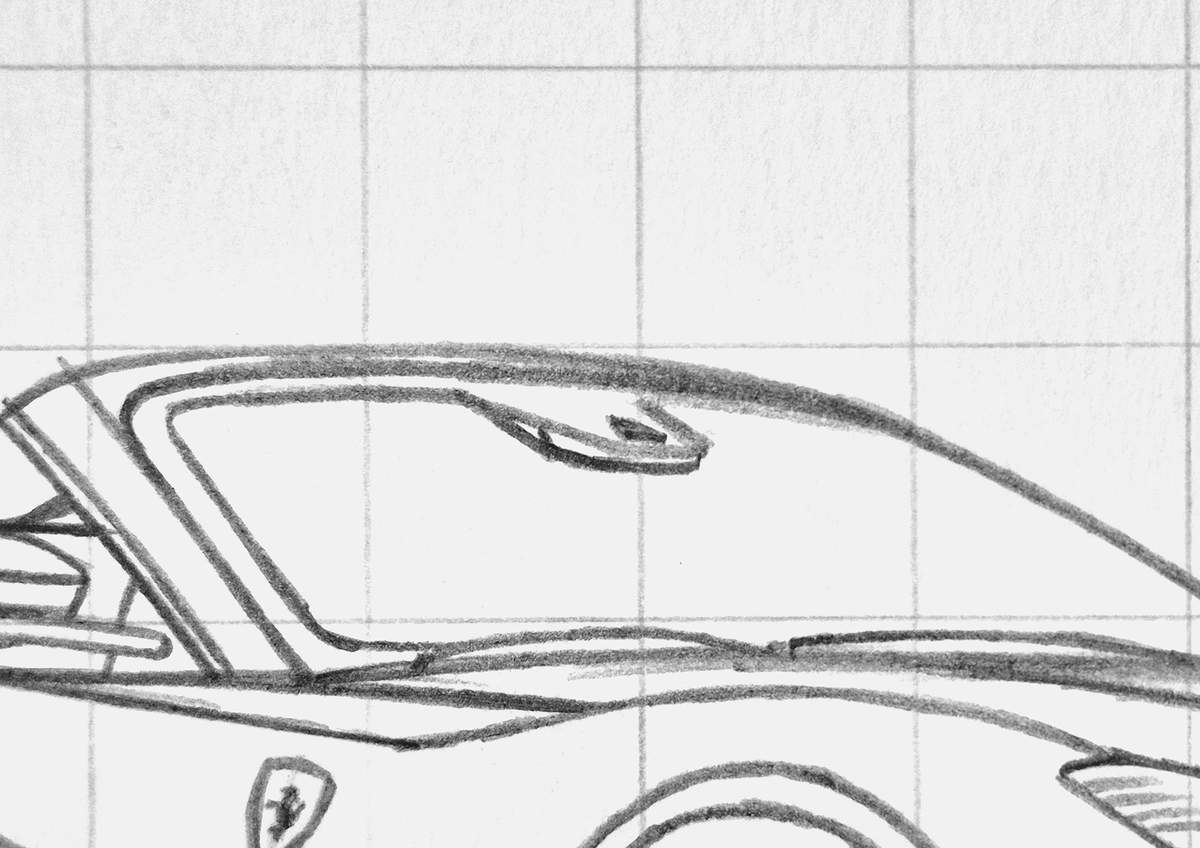
Then, I added the outline for the rearview mirror.
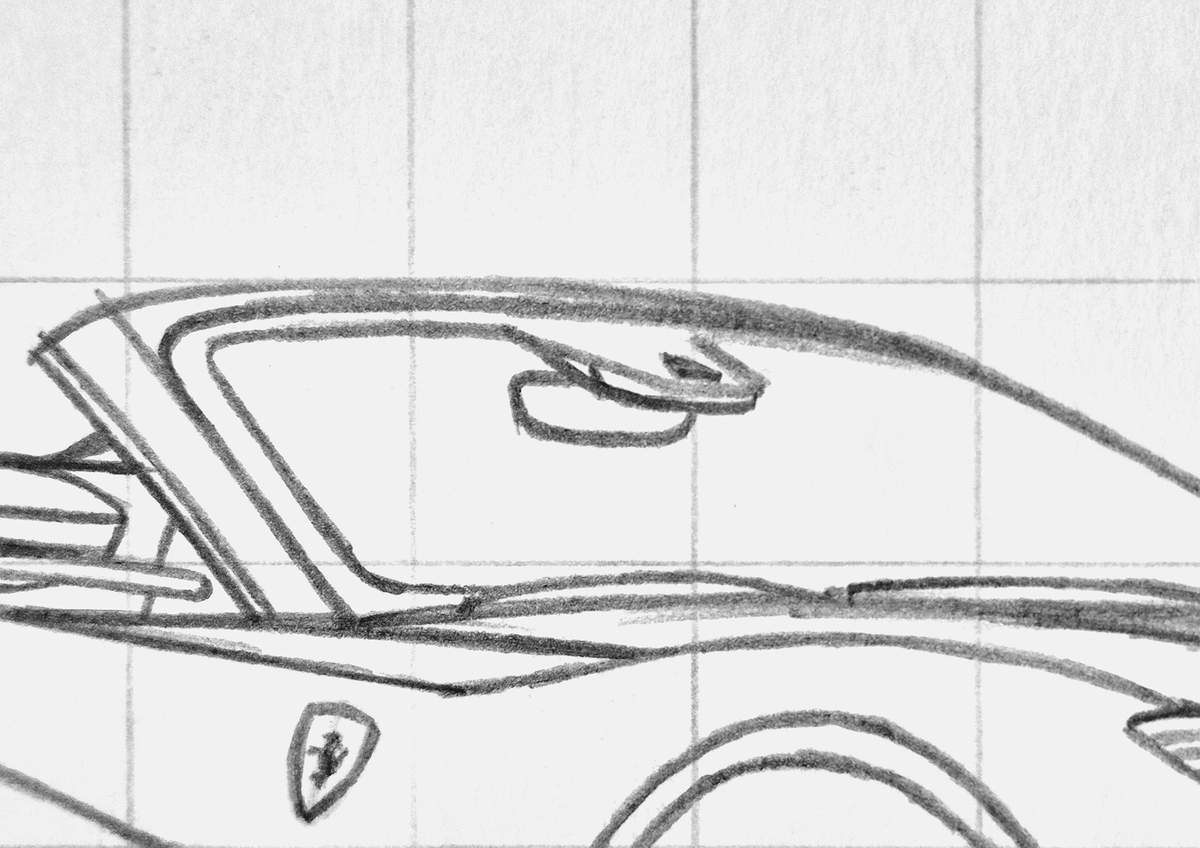
After that, I added the A-pillar lining on the other side of the car and a bit of the roof lining.
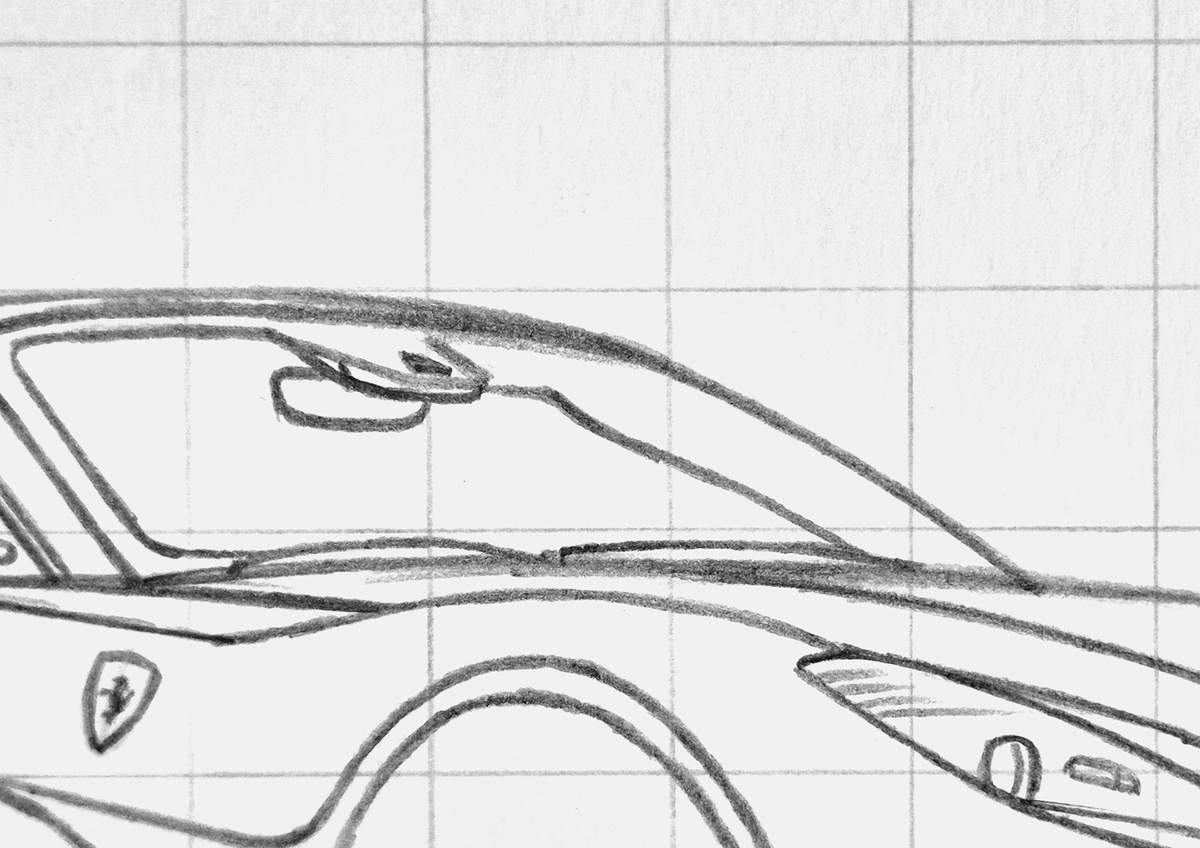
Then, I added the dashboard.
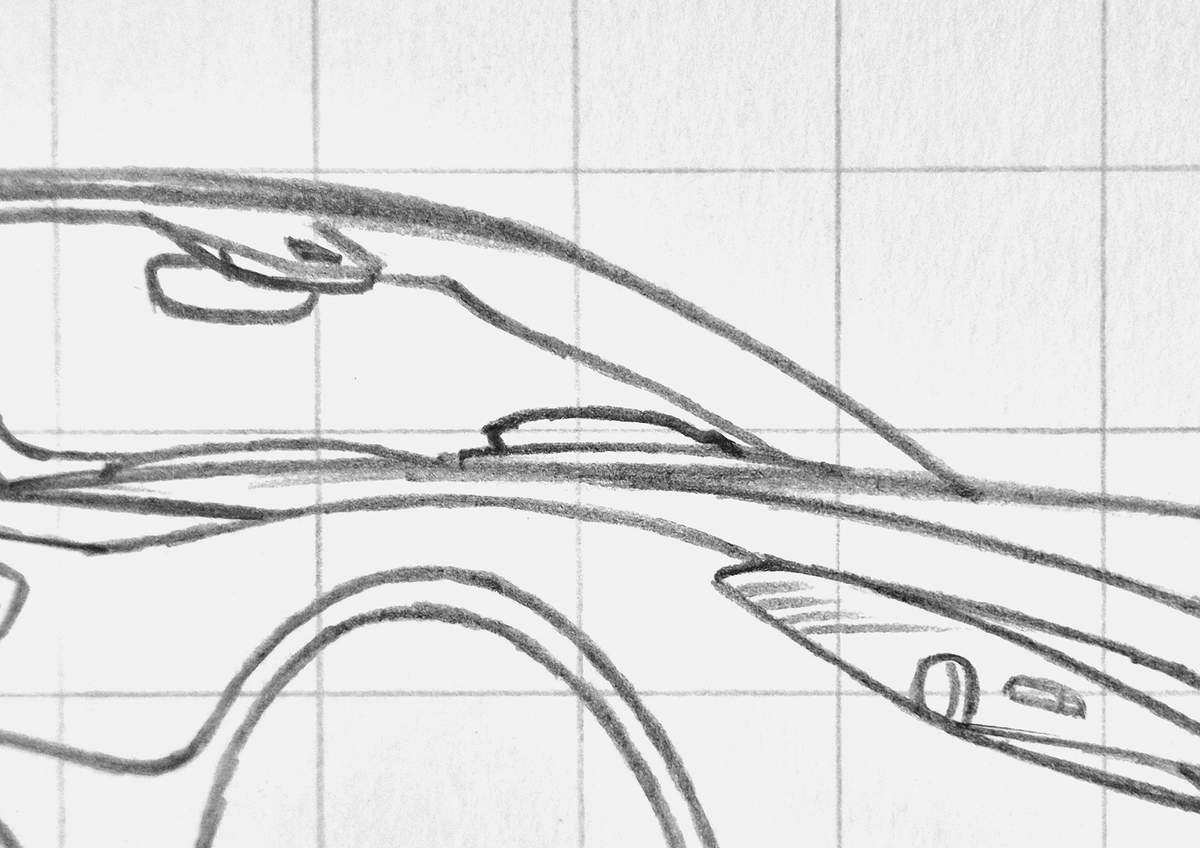
And the steering wheel.
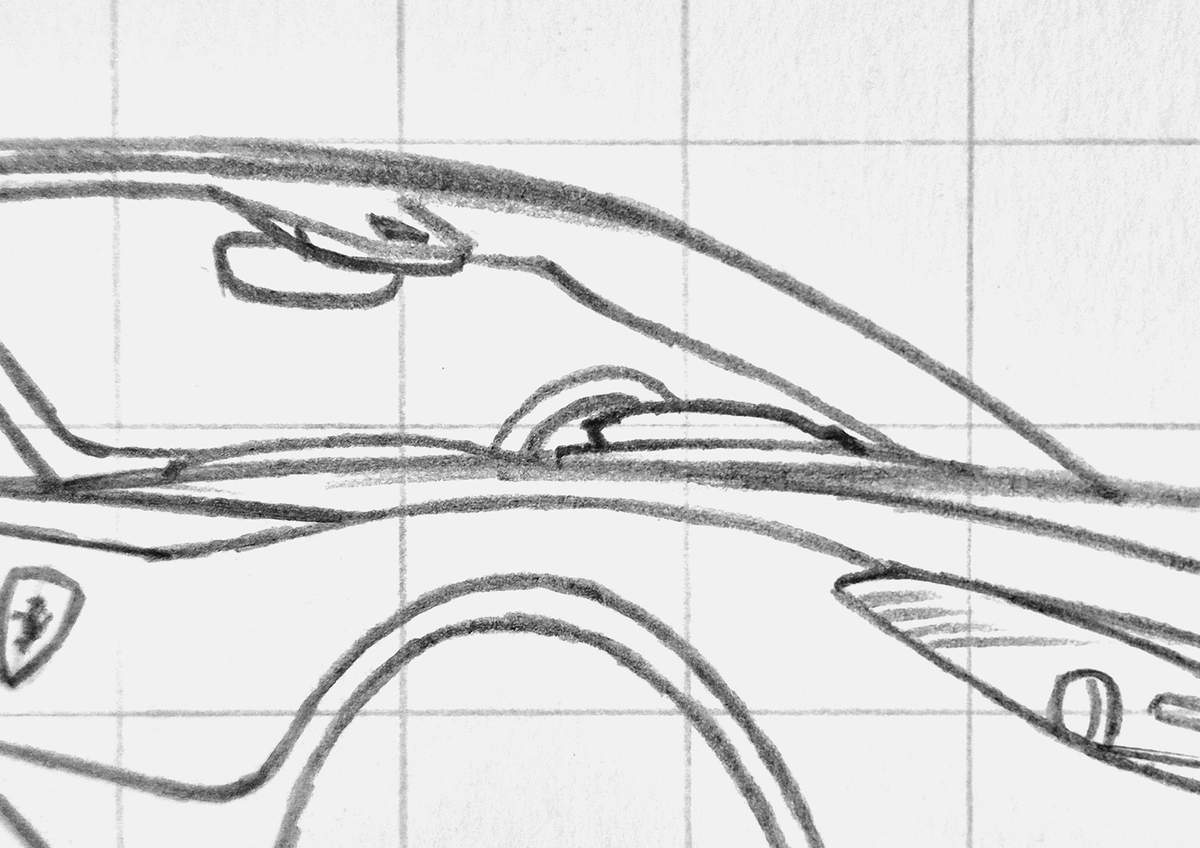
Next, I added this reflection on the bottom left corner of the windshield. Usually, I would sketch the reflections last. But this one actually helps us sketch what comes next.
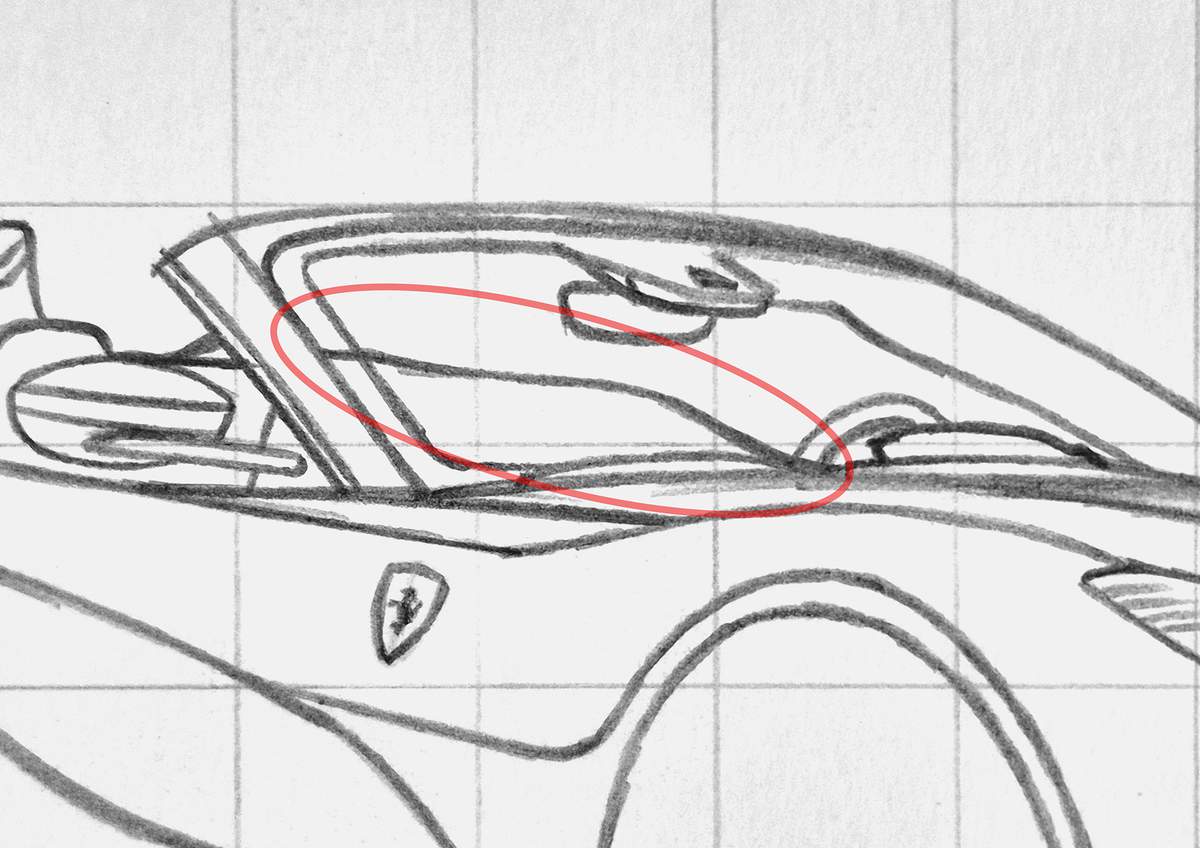
Below the rearview mirror, I sketched the far right edge of the buttress on the other side of the car, and I drew the tiny bit of roof lining below the top edge of the windshield frame.
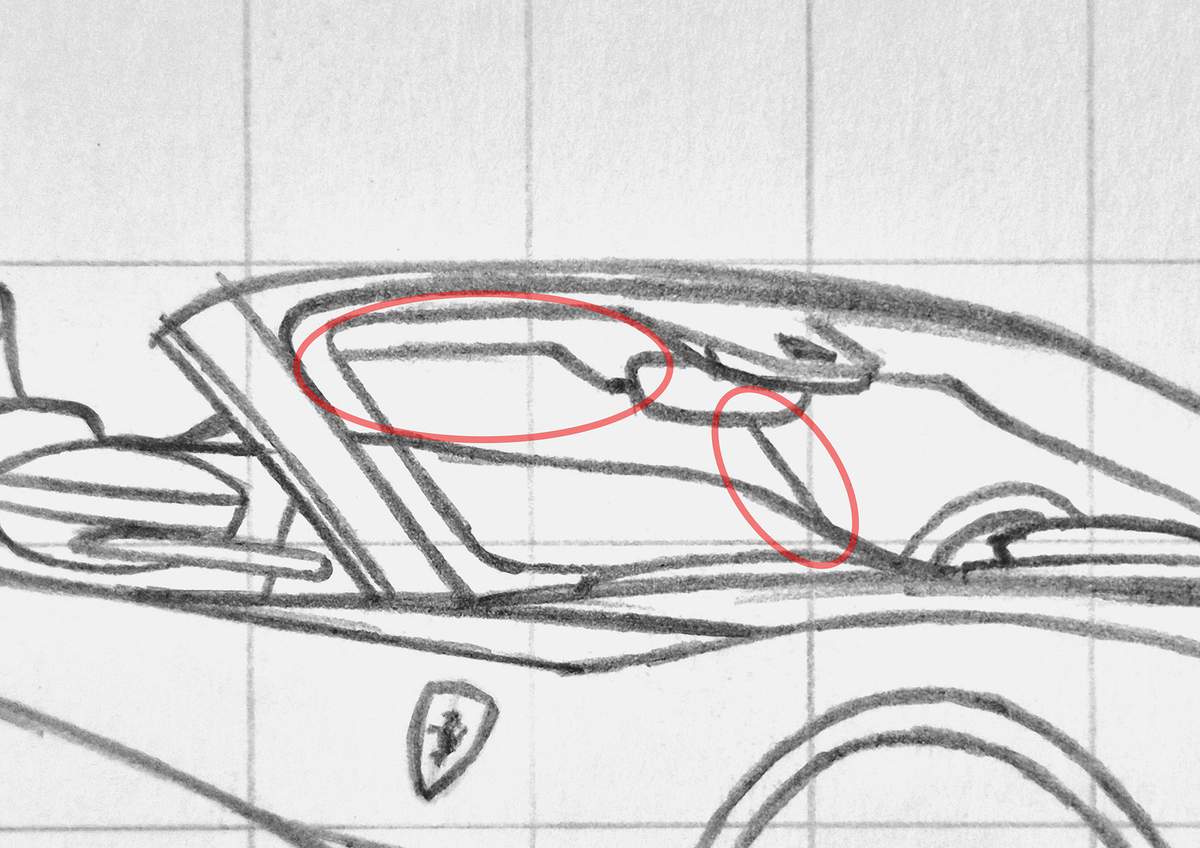
And to complete the buttress, I added the little bit you can see of the top edge in the top left, and I added the left edge of the front-facing side.
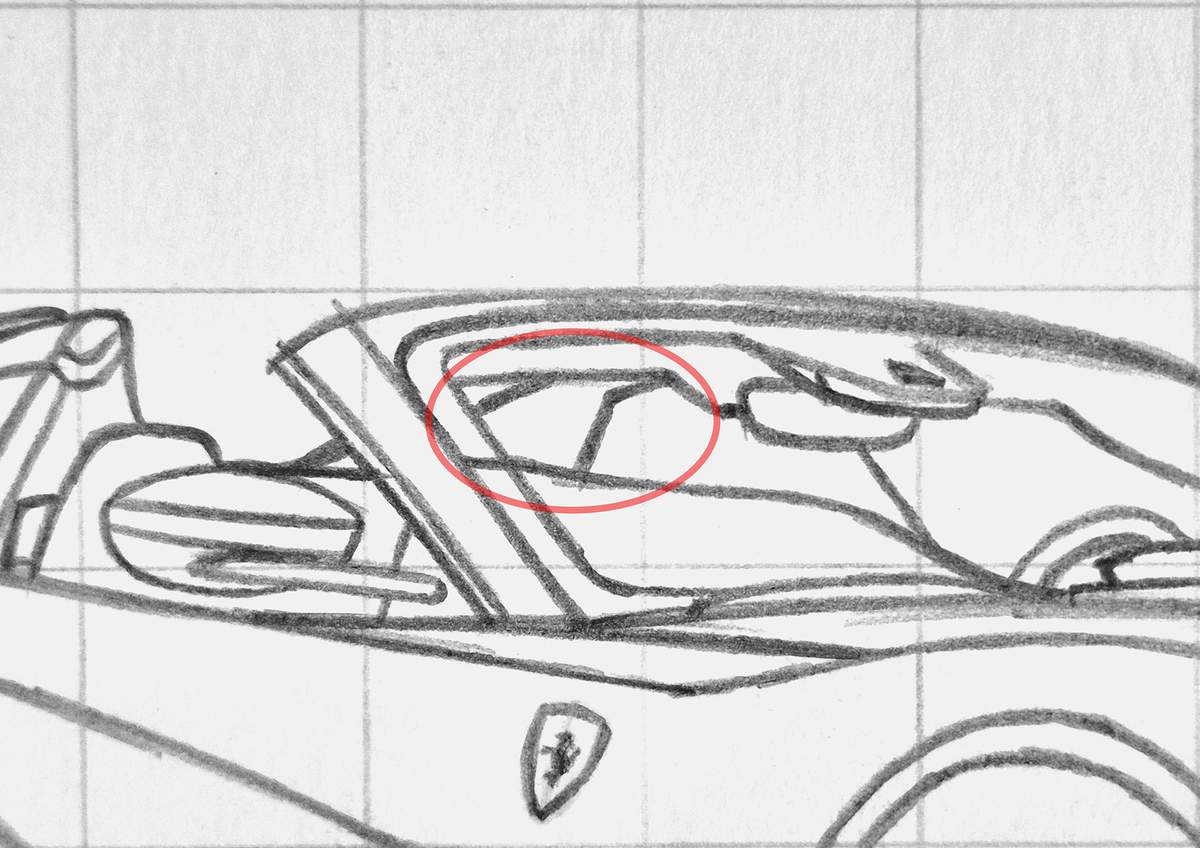
And that's all the interior done.
Step 8: Sketch the other door mirror
We've already sketched the door mirror on this side of the car, but we can also see a bit of the door mirror on the other side of the car,
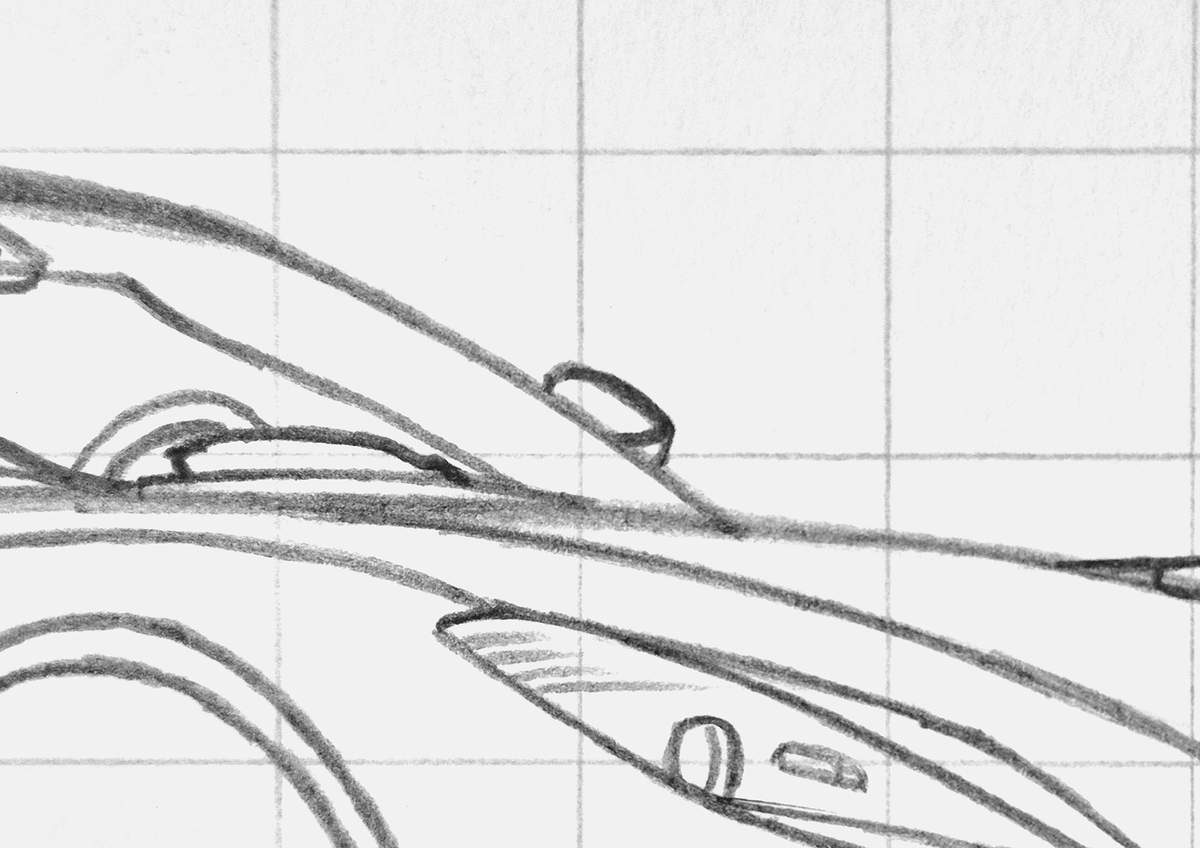
To sketch it, I first sketched the outline. It has a curved slope at the top and a short diagonal line at the right edge. That's basically all you can see.
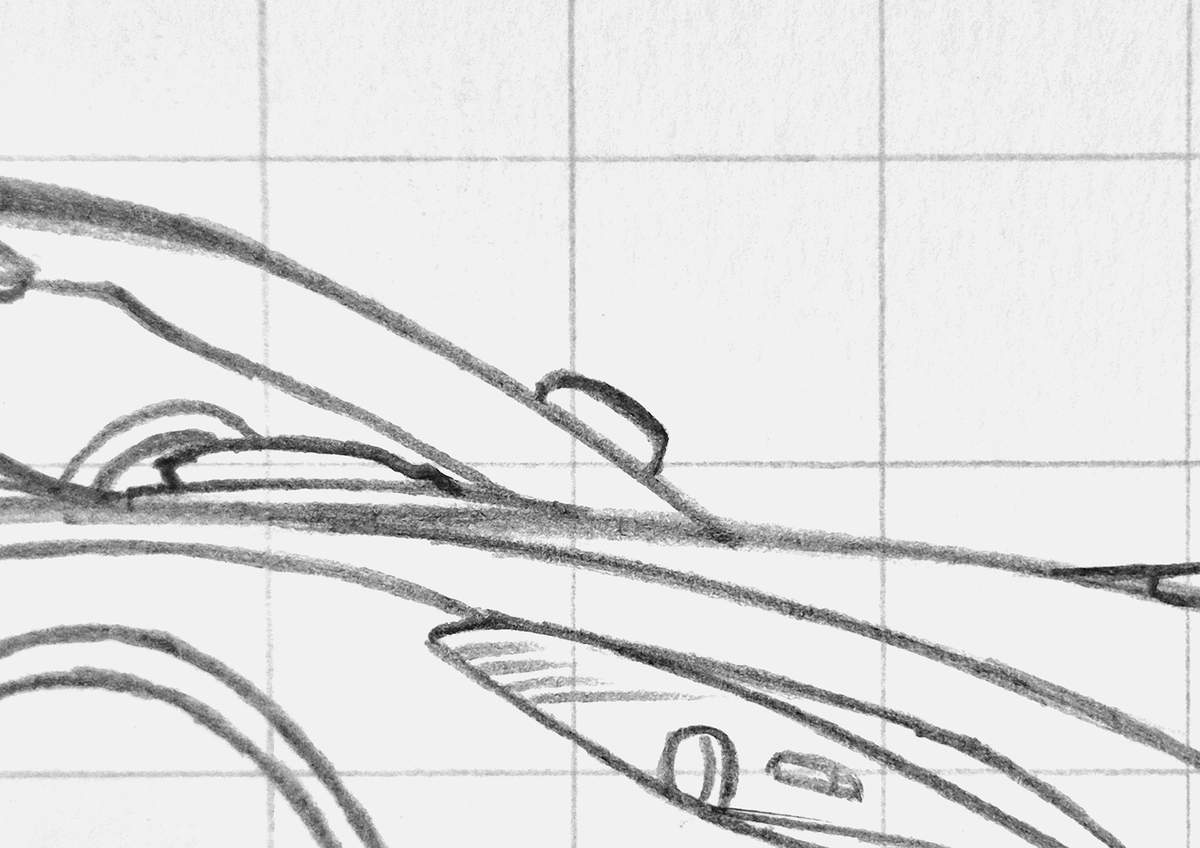
I also added the line on the mirror cap on this side.
Step 9: Add the aero pieces on the bottom of the front bumper
When drawing the front of the car, I forgot to sketch the aero bits on the bottom edge of the front bumper.
But now, I've finally added them.
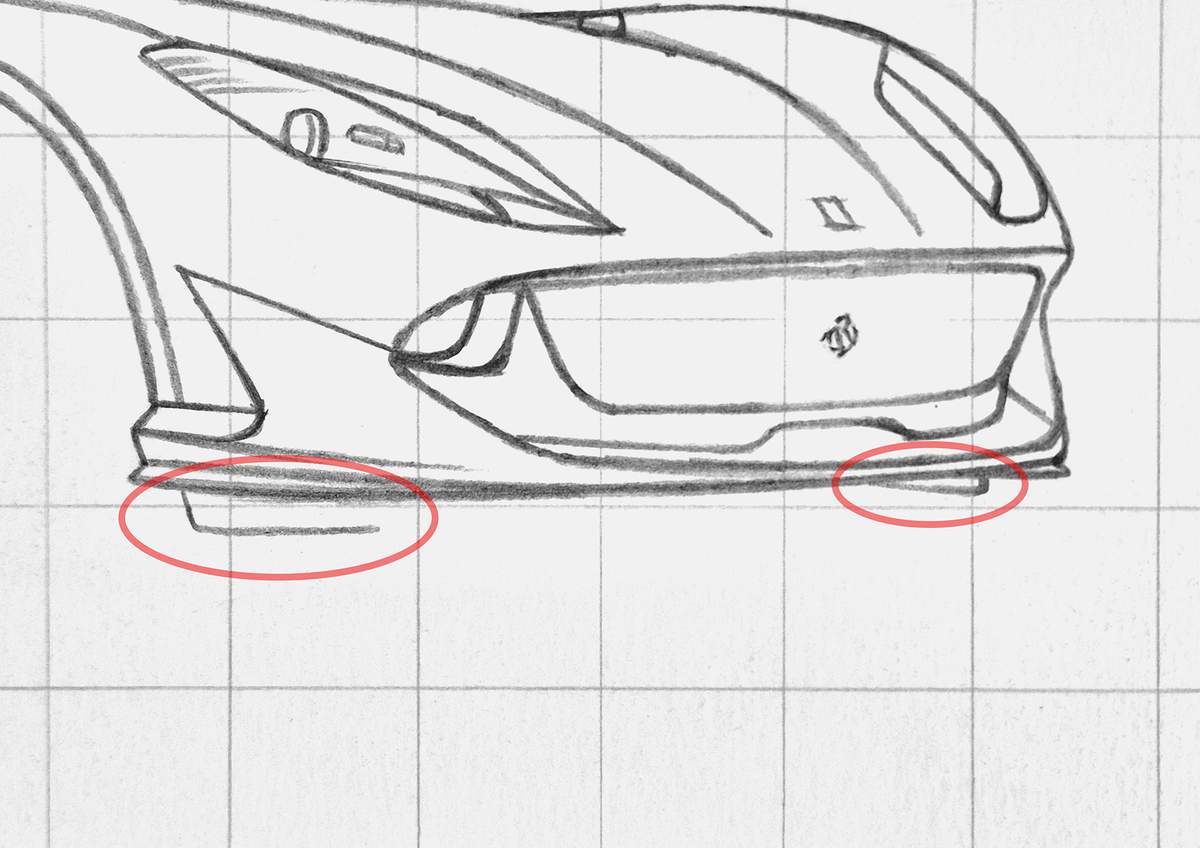
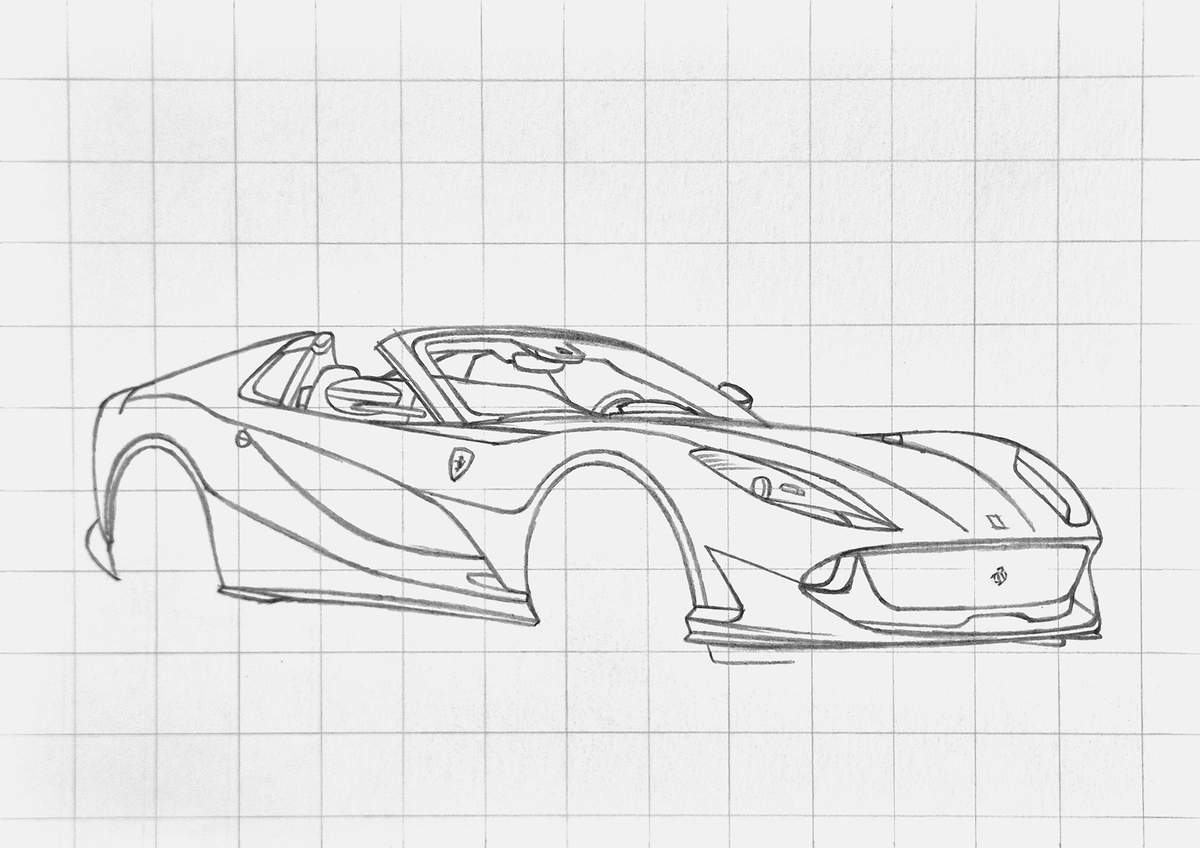
And that's most of the car done now! Just the wheels and the reflections left.
Step 10: Sketch the wheels of the Ferrari 812
Now it's time to sketch the wheels.
I started with the rear wheel, as that is the one on the left of the drawing.
I sketched the outline of the front face of the wheel first.
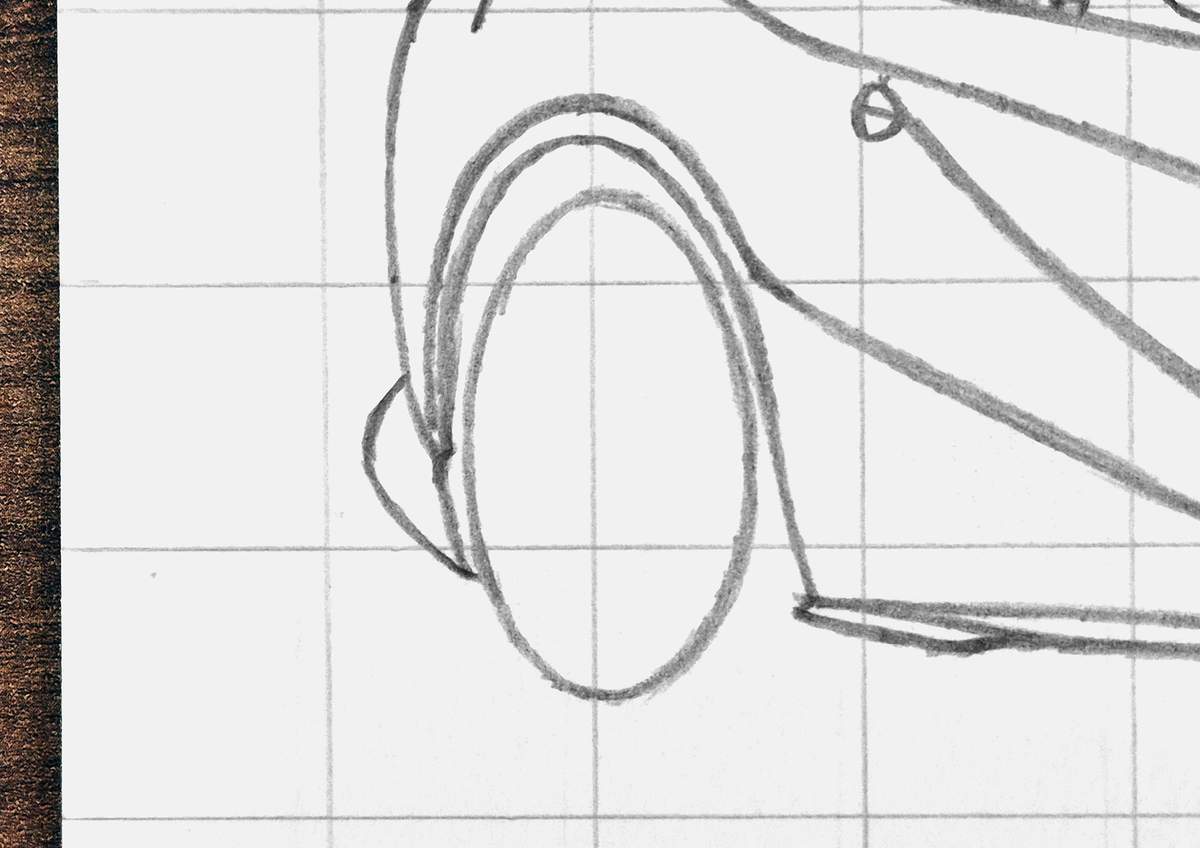
Then, I added the bottom edge and a tiny bit of the top edge of the tire. This makes the wheel look like it has a width.
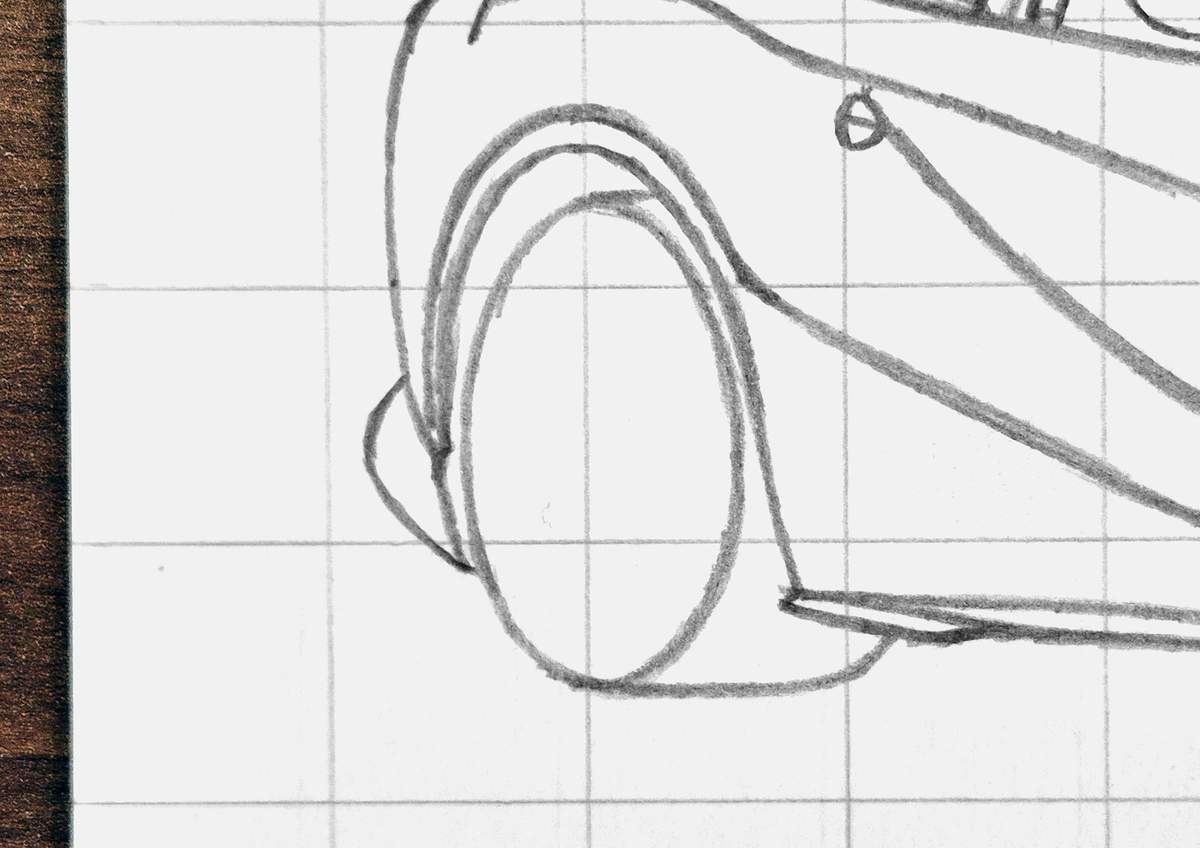
Next, I sketched the inner edge of the tire, and I marked the center with a small ellipse. The center point of the wheel is slightly right of the actual center as it is slightly inset into the wheel.
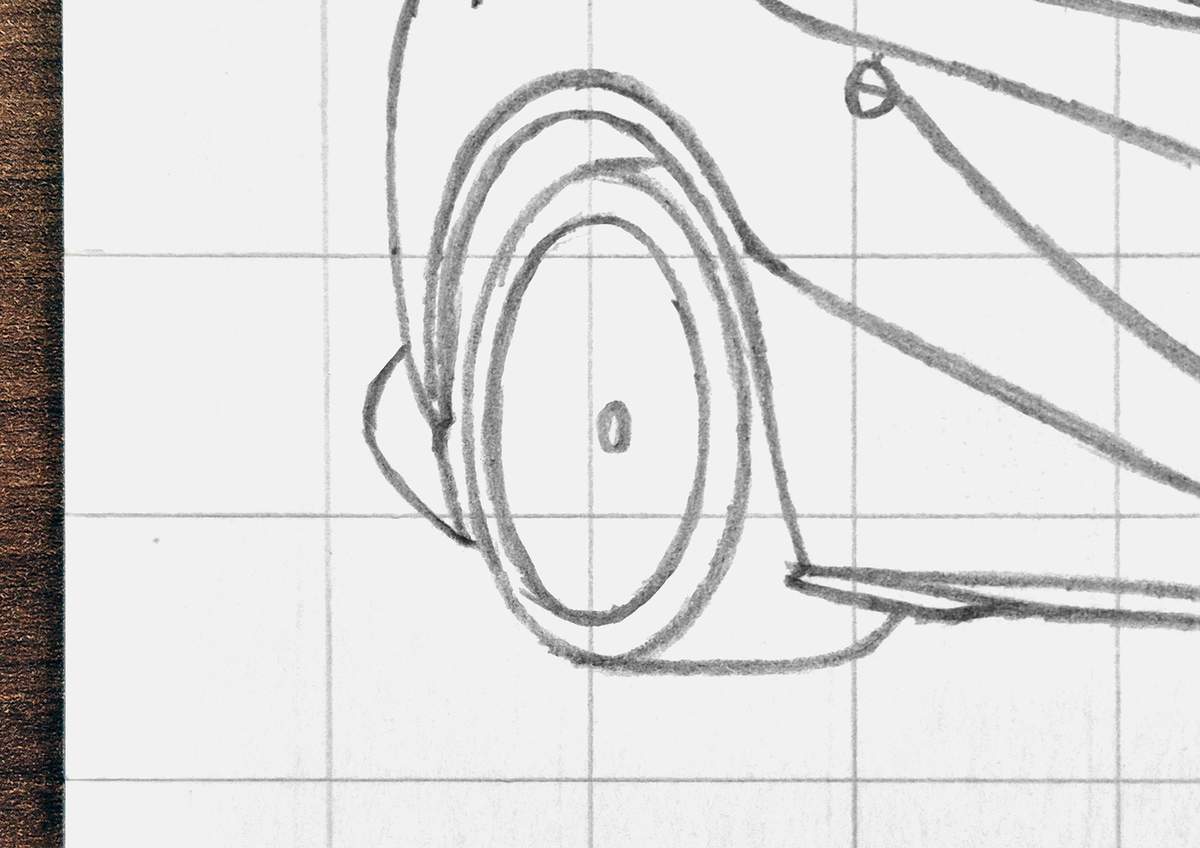
On this ellipse, I marked the starts of the spokes, five in total.
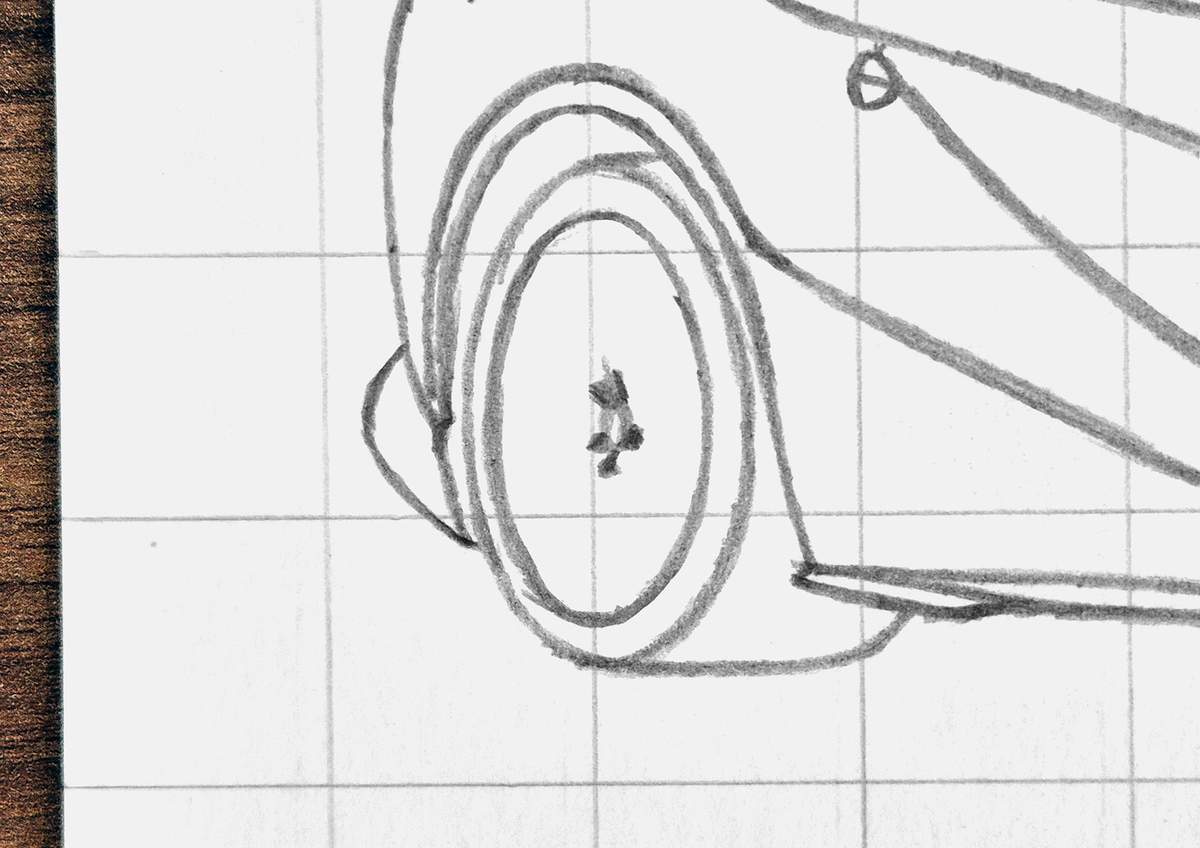
From each of the five spoke starts, I added 2 spokes in a V-shape. They curve to attach to the outer rim edge.
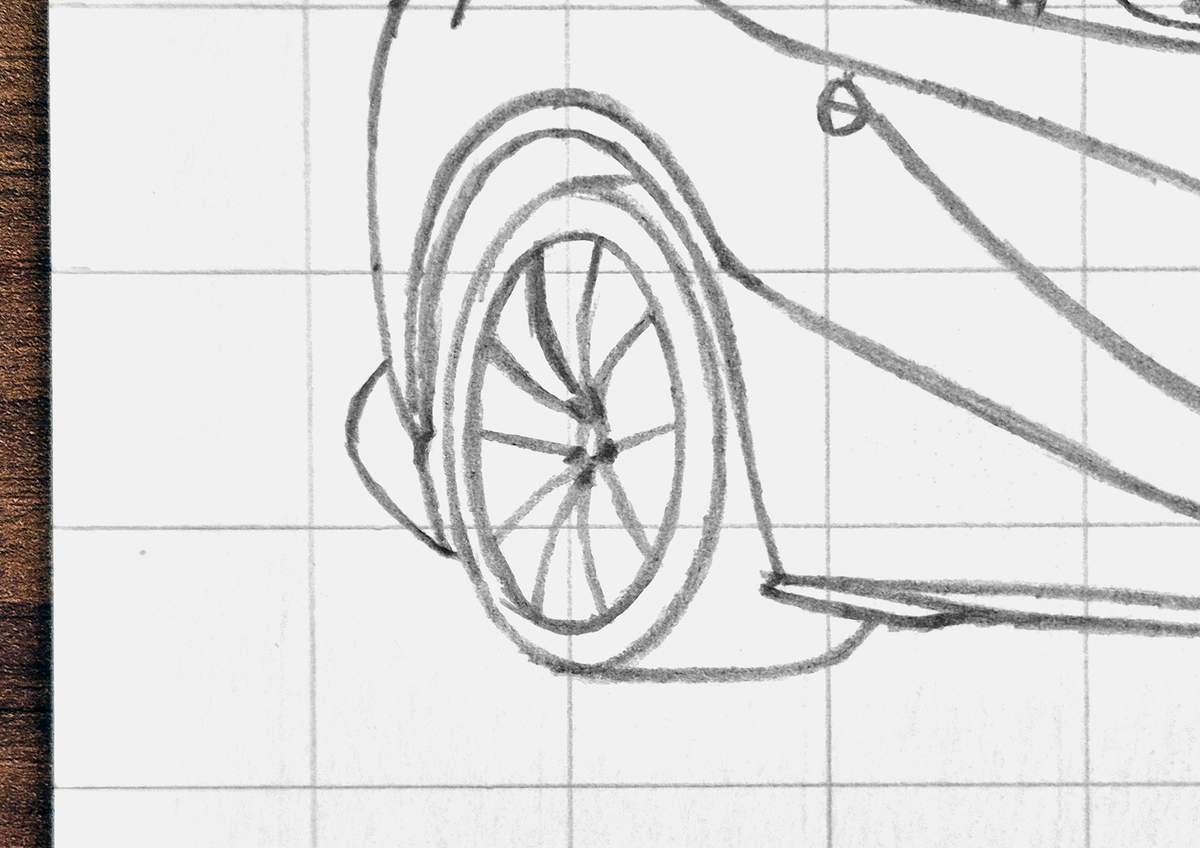
With the front-facing edges of the spokes in place, I then added the back edges of all the spokes. I also added the five bolts around the center.
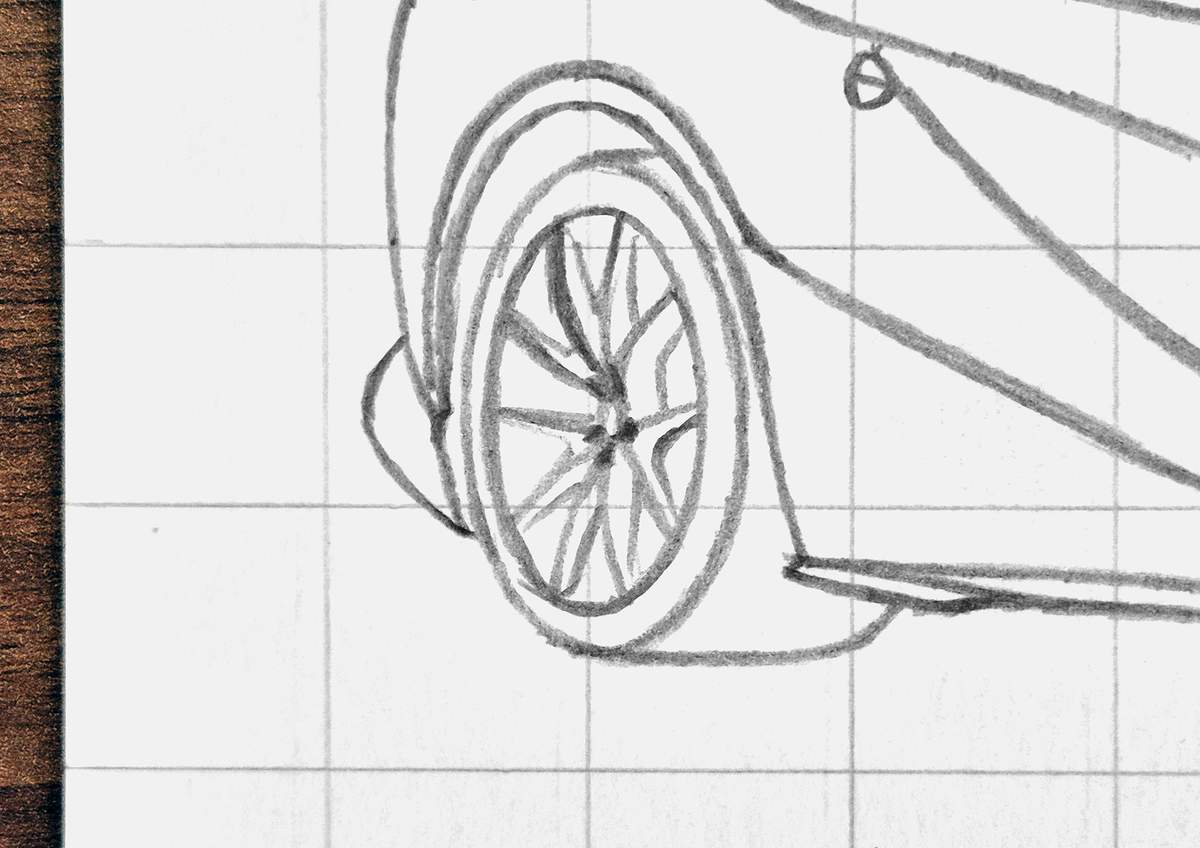
And to complete the rear wheel, I added two more rim lines on the left side of the wheel.
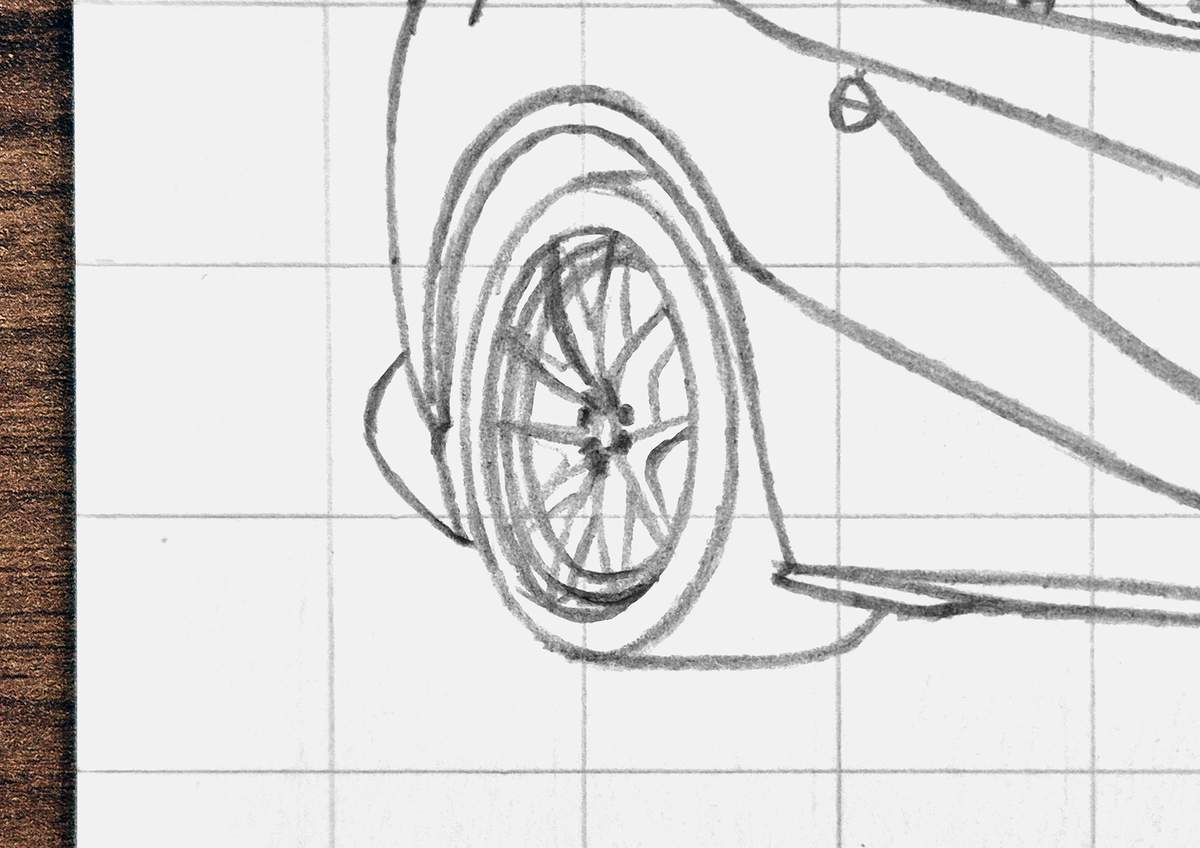
For the front wheels, I repeated the exact same steps.
I sketched the outline of the front face of the wheel.
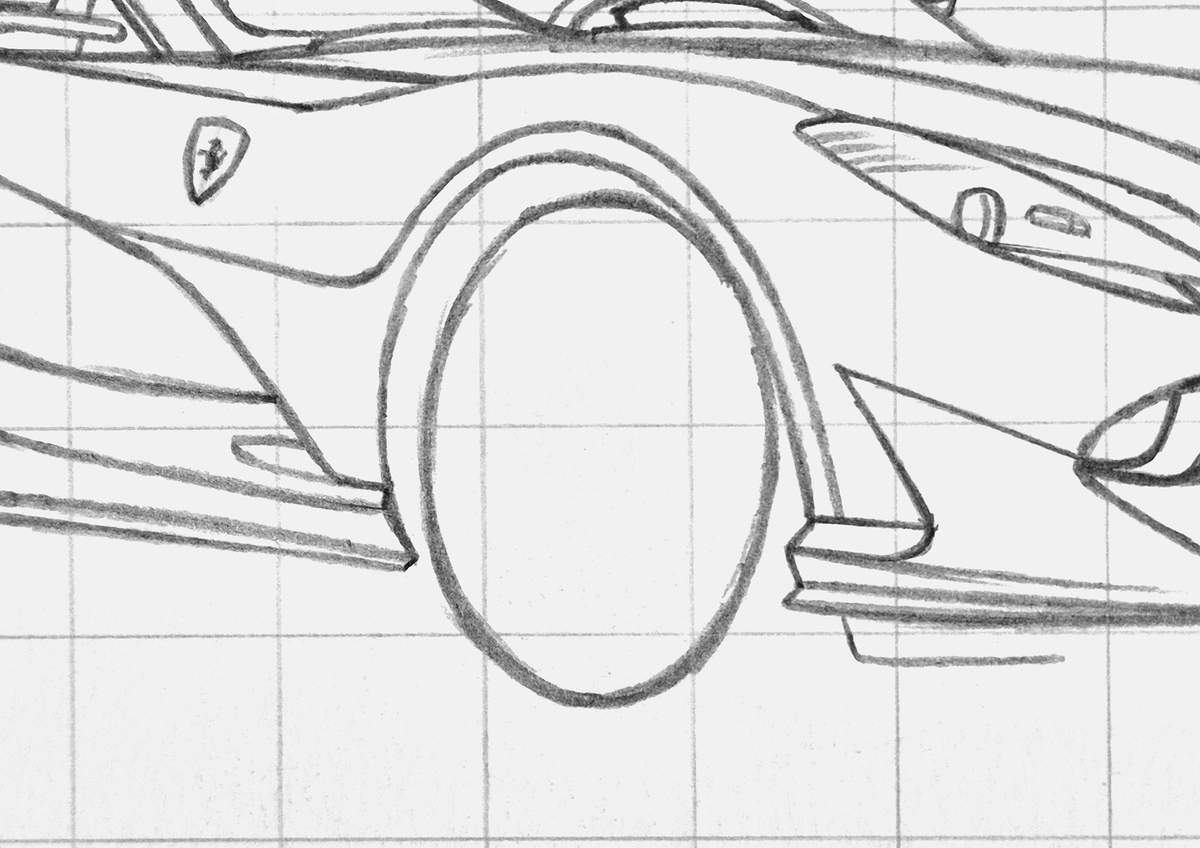
I added the width to the wheel by sketching the bottom and top edges.
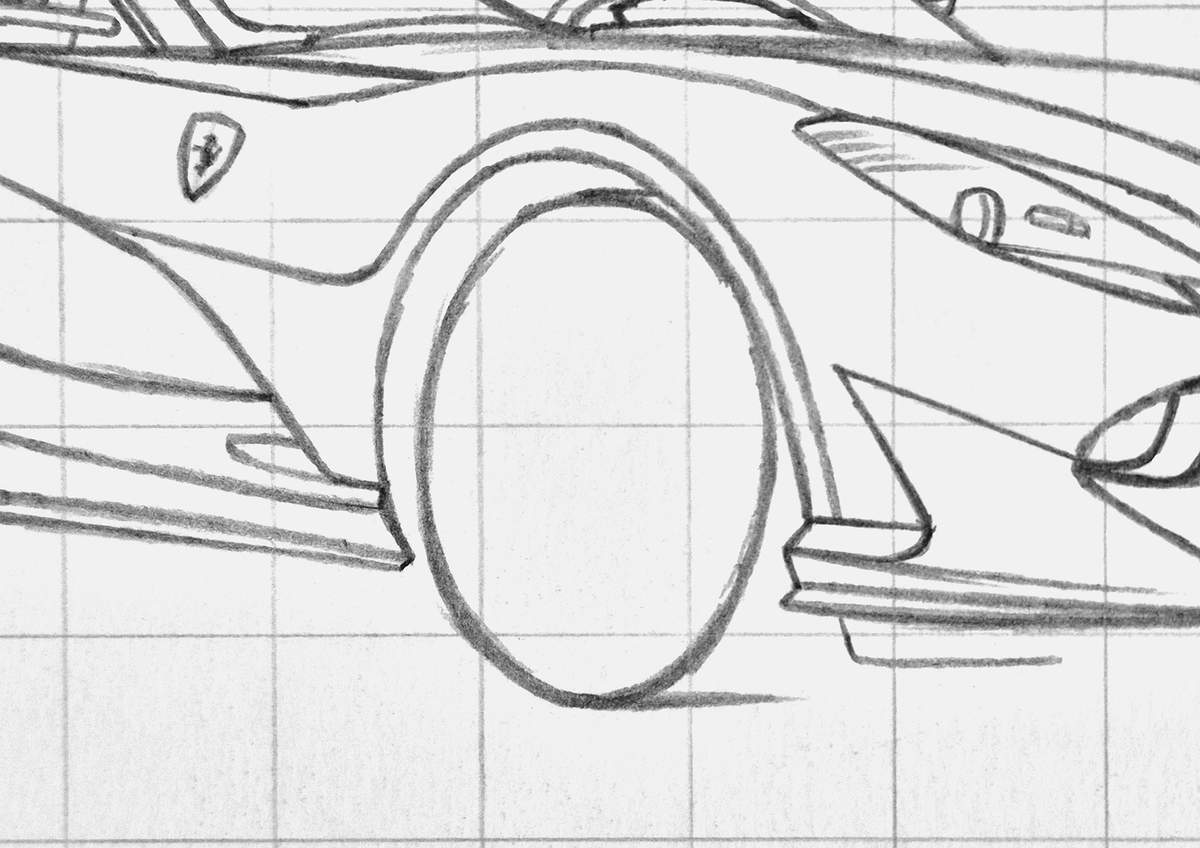
Then, I sketched the outer rim edge, aka the inner tire edge, and the center of the wheel.
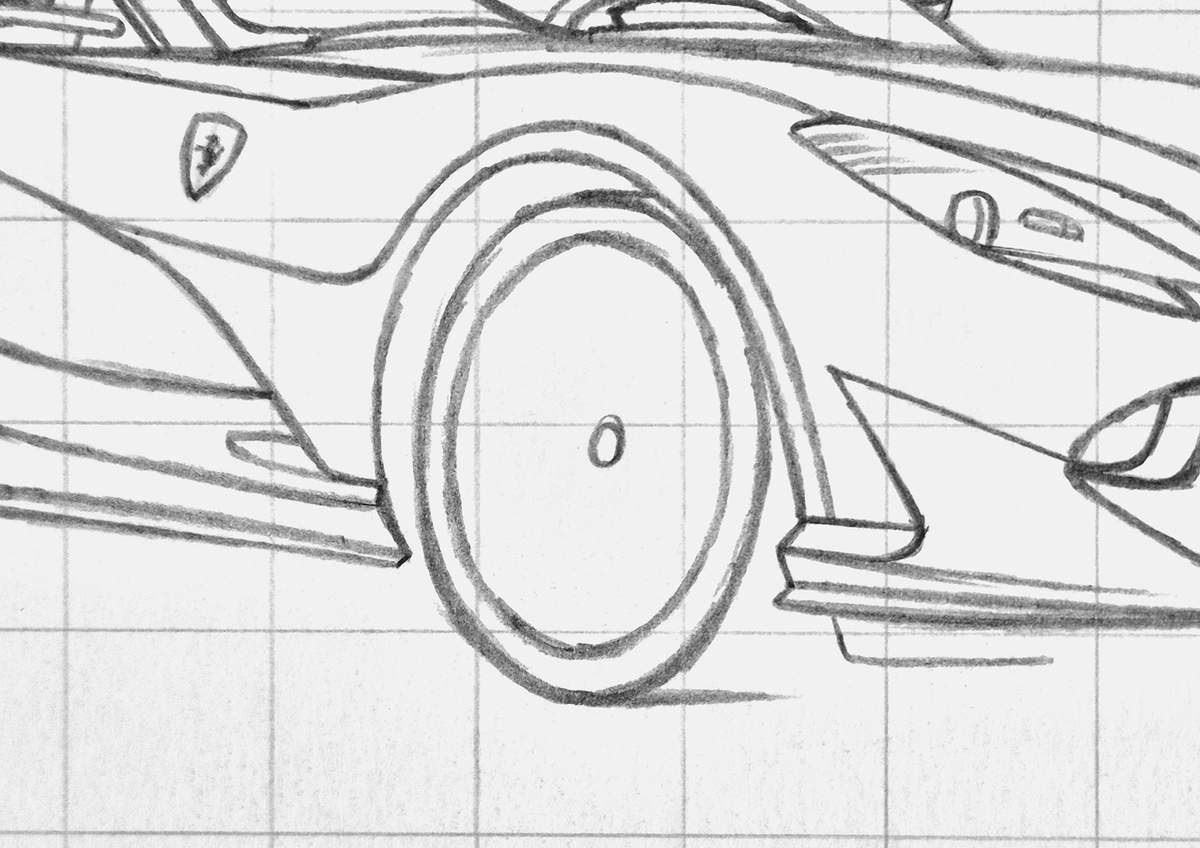
Instead of sketching the five spoke starts, I sketched the spokes in rounded V-shapes.
I started with the top one.
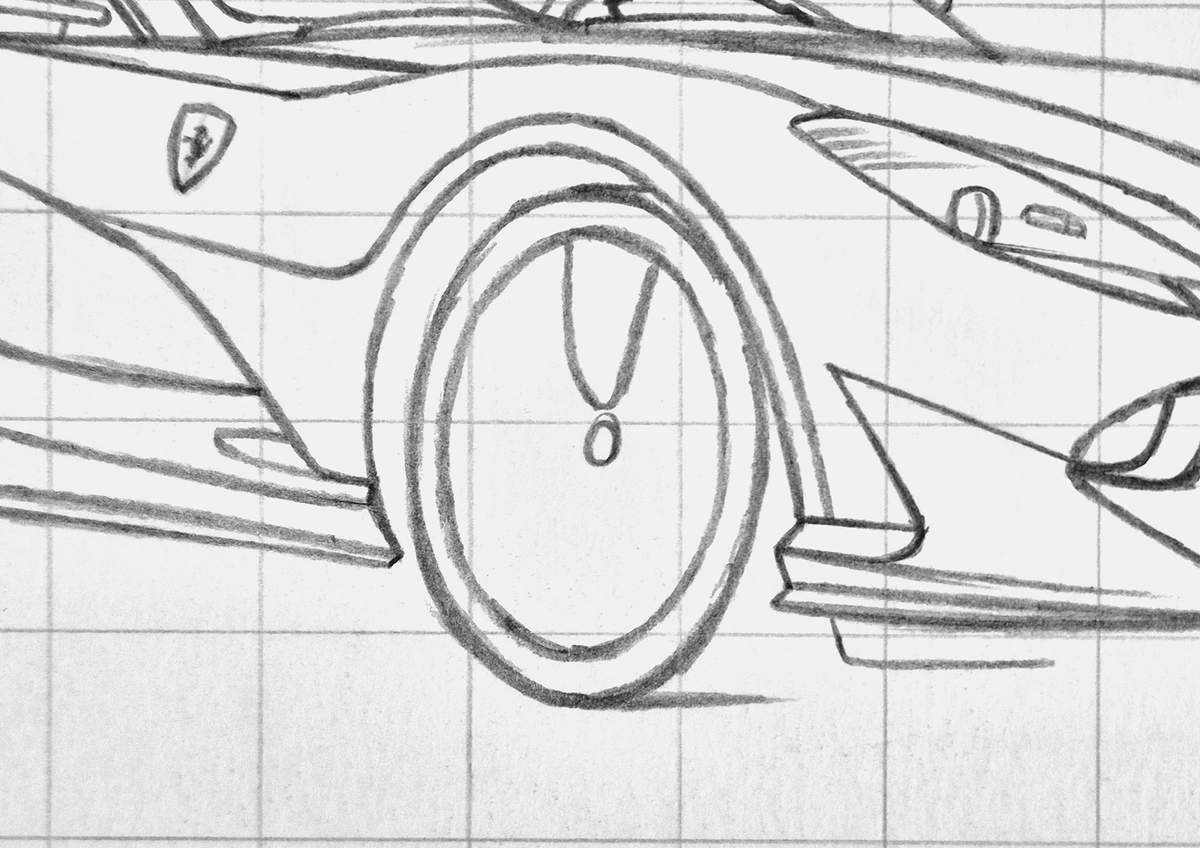
Then, I added the rest.
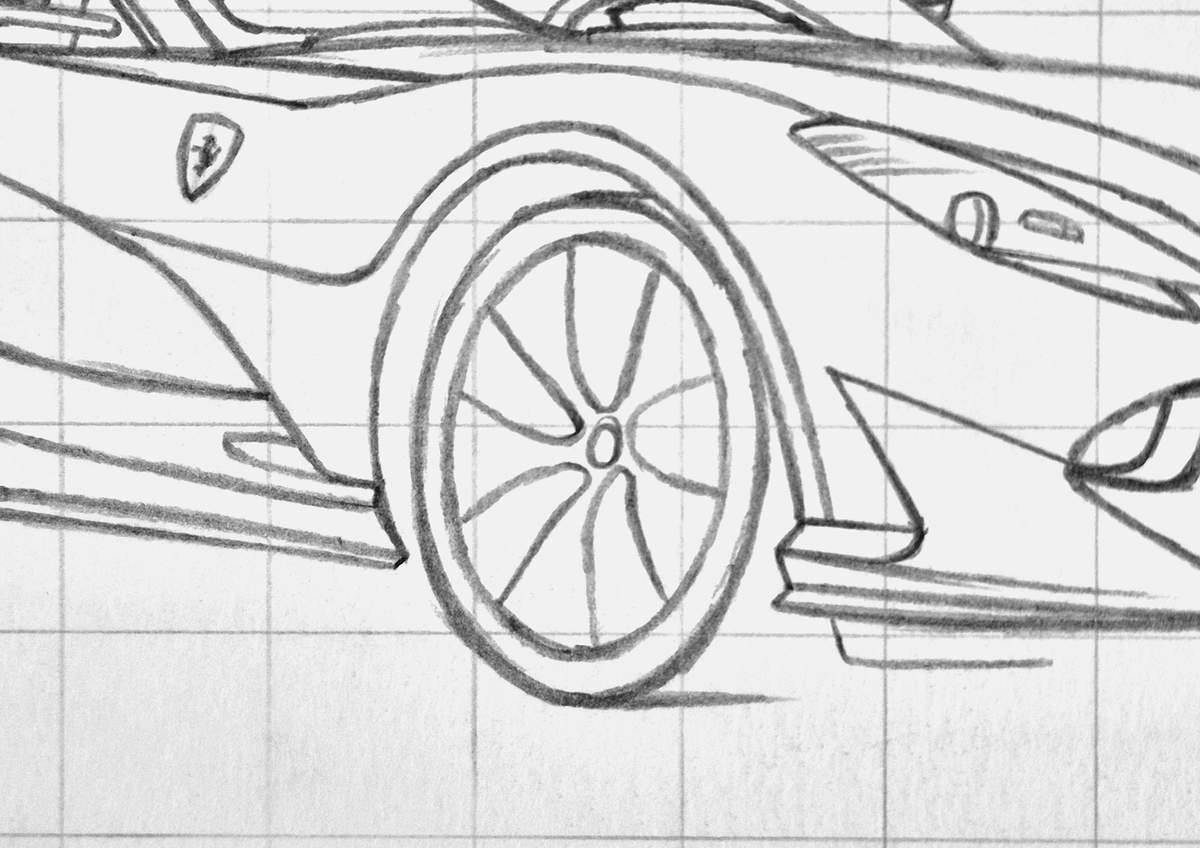
After that, I added the backsides of the spokes, and I marked the bolts around the center.
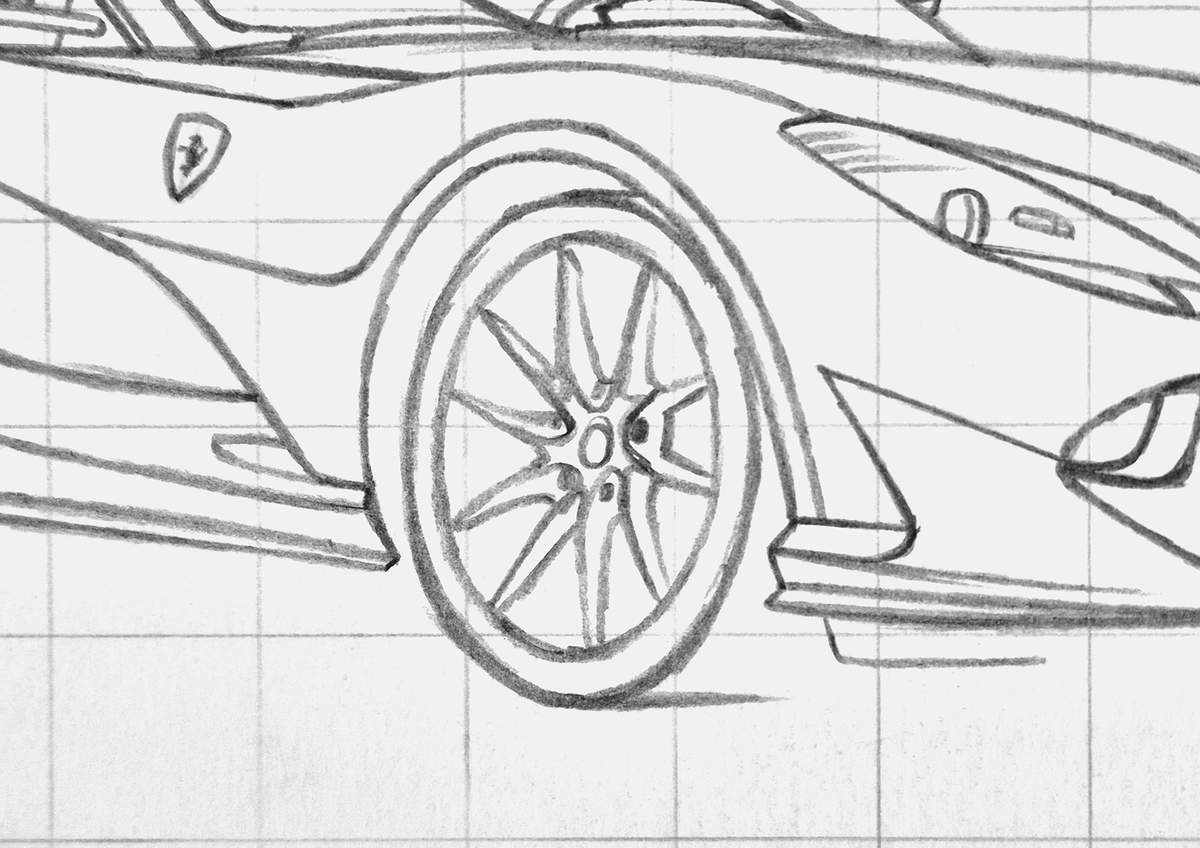
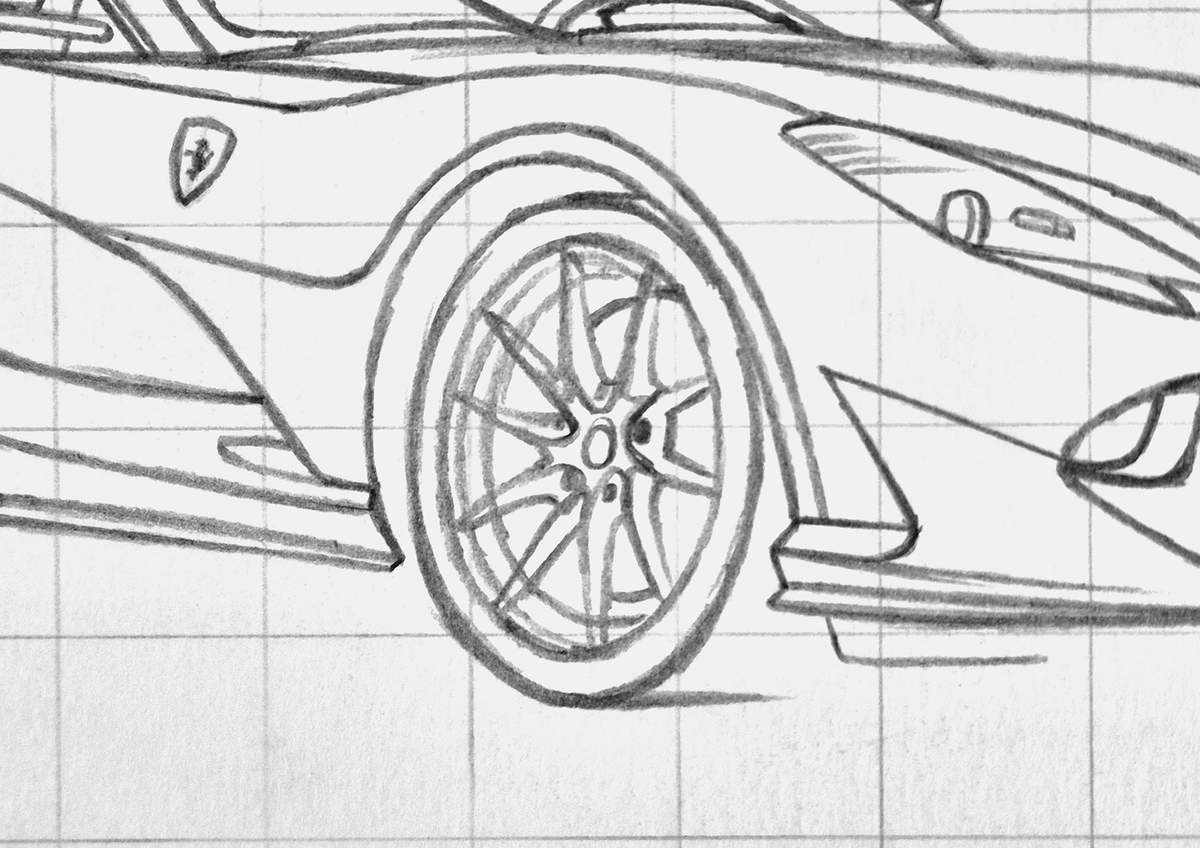
And to complete the front wheel, I added the two rim lines on the left side, plus I added the top and bottom edges of the brake disc. The rest of the brake disc is not visible.
Step 11: Sketch the outline of the shadow
After sketching the wheels, I added the outline for the shadow of the 812.
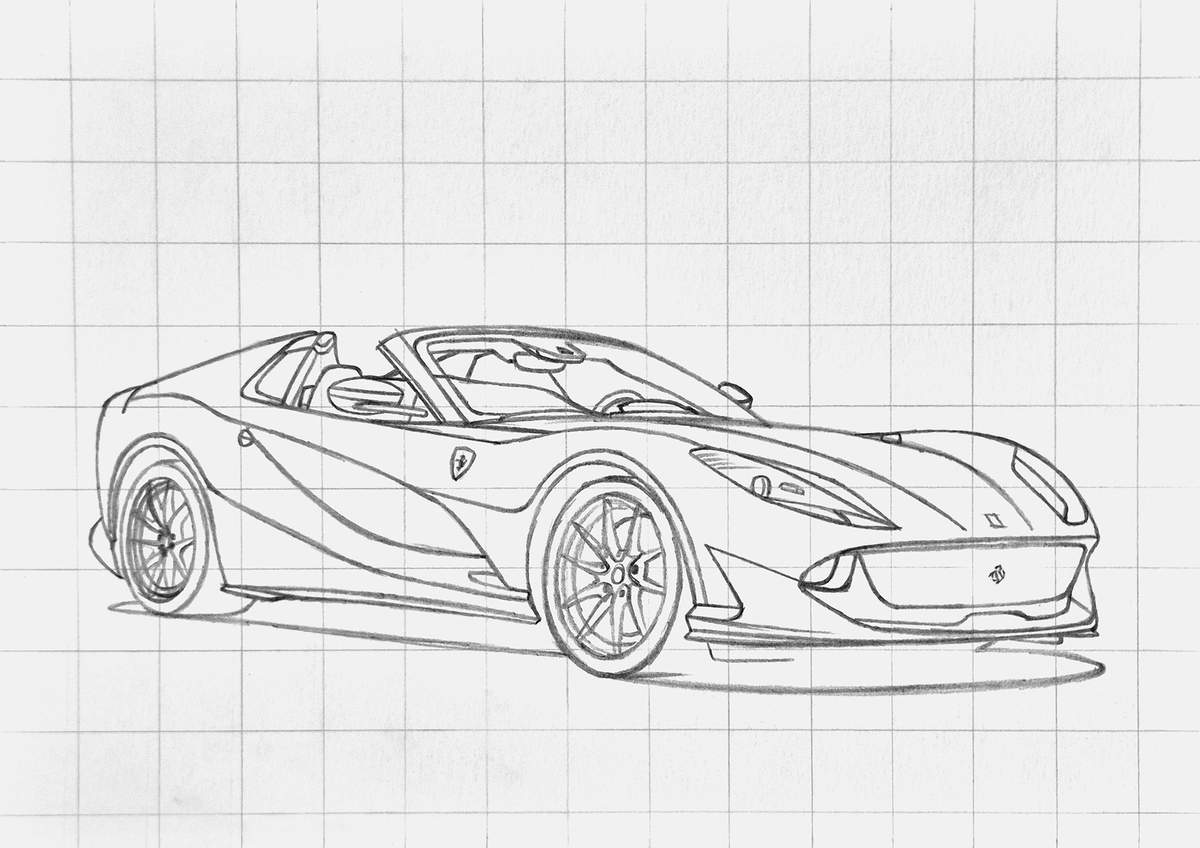
Step 12: Mark where the reflections will go
To finish the sketch of this Ferrari 812 GTS, I marked where the reflections will go.
All of the reflections are on the front except for this tiny one, which is on the top of the far back. It's tiny and not that necessary, but I marked it anyway.
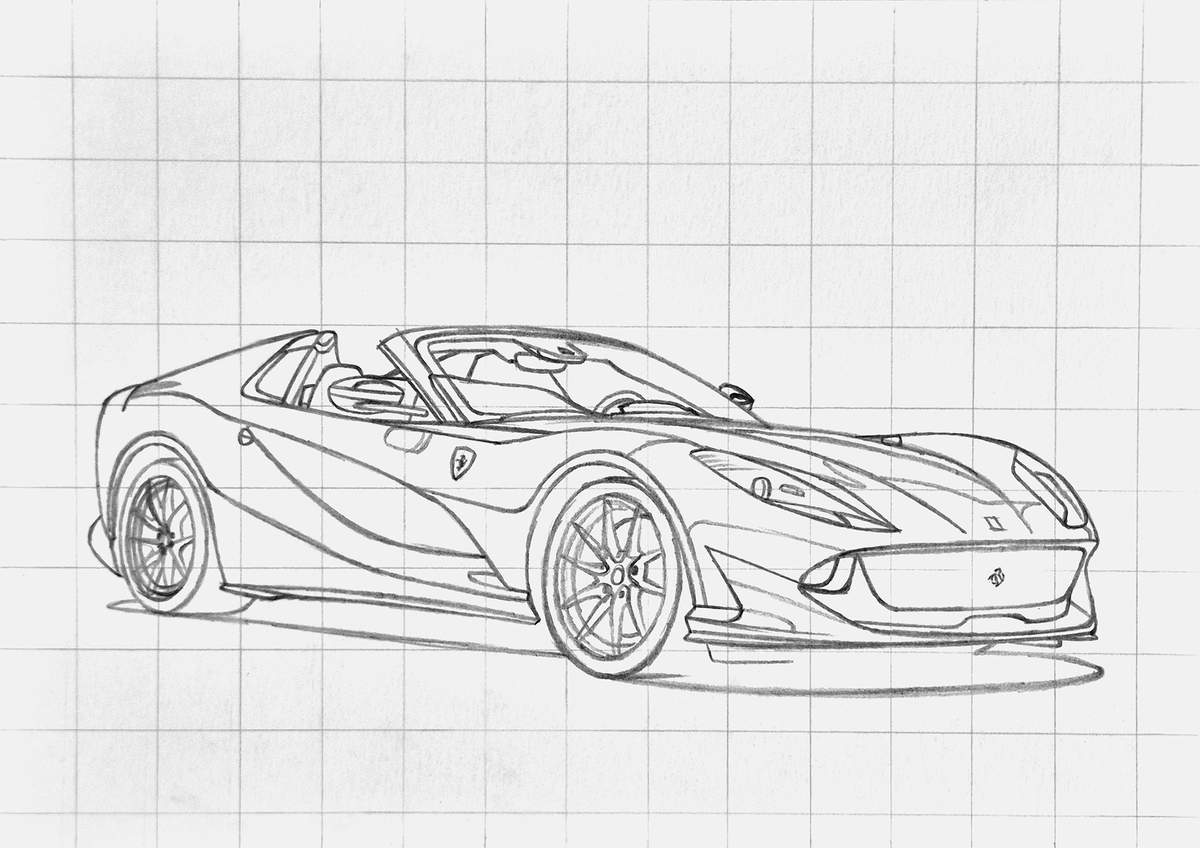
And with the reflections all done, the sketch of the Ferrari 812 GTS is complete and ready to be colored in!
Coloring the Ferrari 812 GTS
Step 13: Color all pure black parts
Just like any car drawing, I started coloring the pure black parts of this Ferrari 812 GTS first.
For my recent drawings, I wanted to be more precise than I was when creating the drawings for my blog. That's why I now first outline the black parts with a black fineliner.
The most important parts are the black parts in between the spokes of the wheels.
I also used the fineliner to add some black lines, like the top left edge of the left headlight.
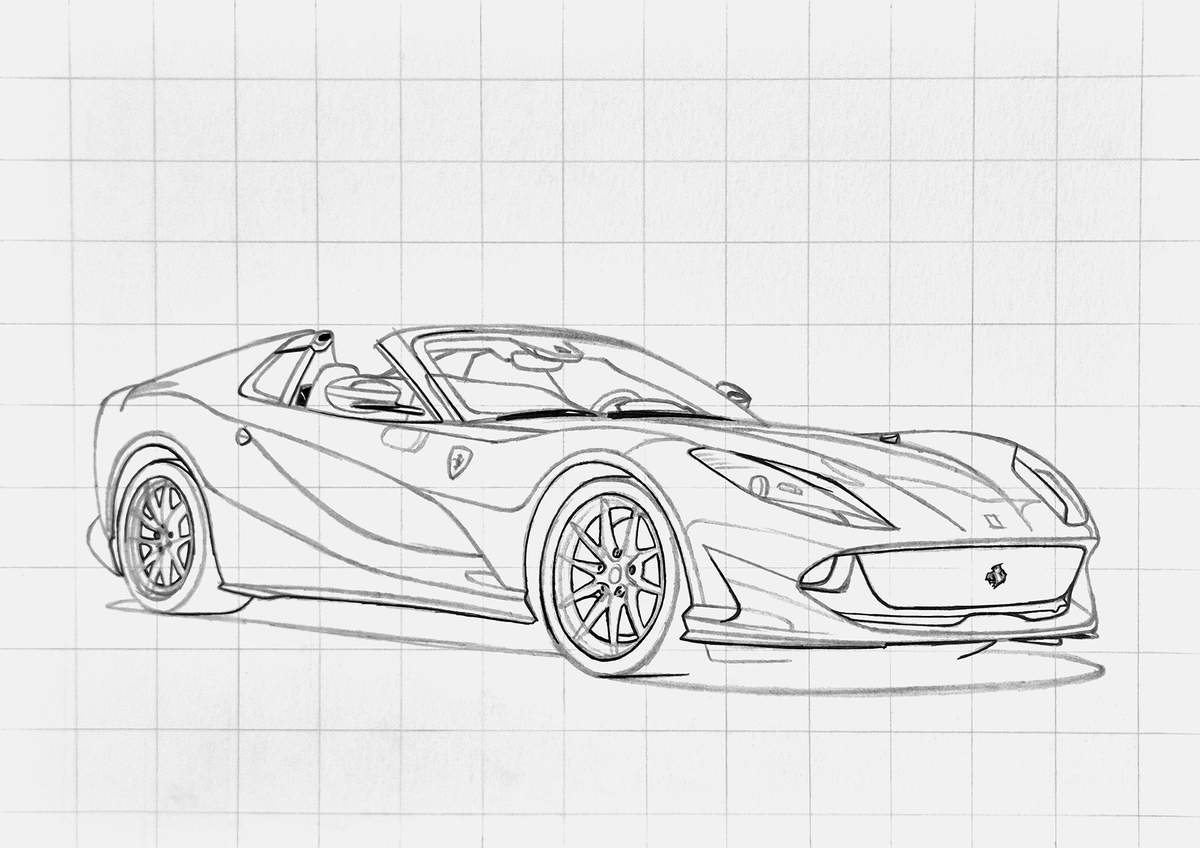
Next, I used my black Ohuhu Honolulu marker to color all the pure black parts in.
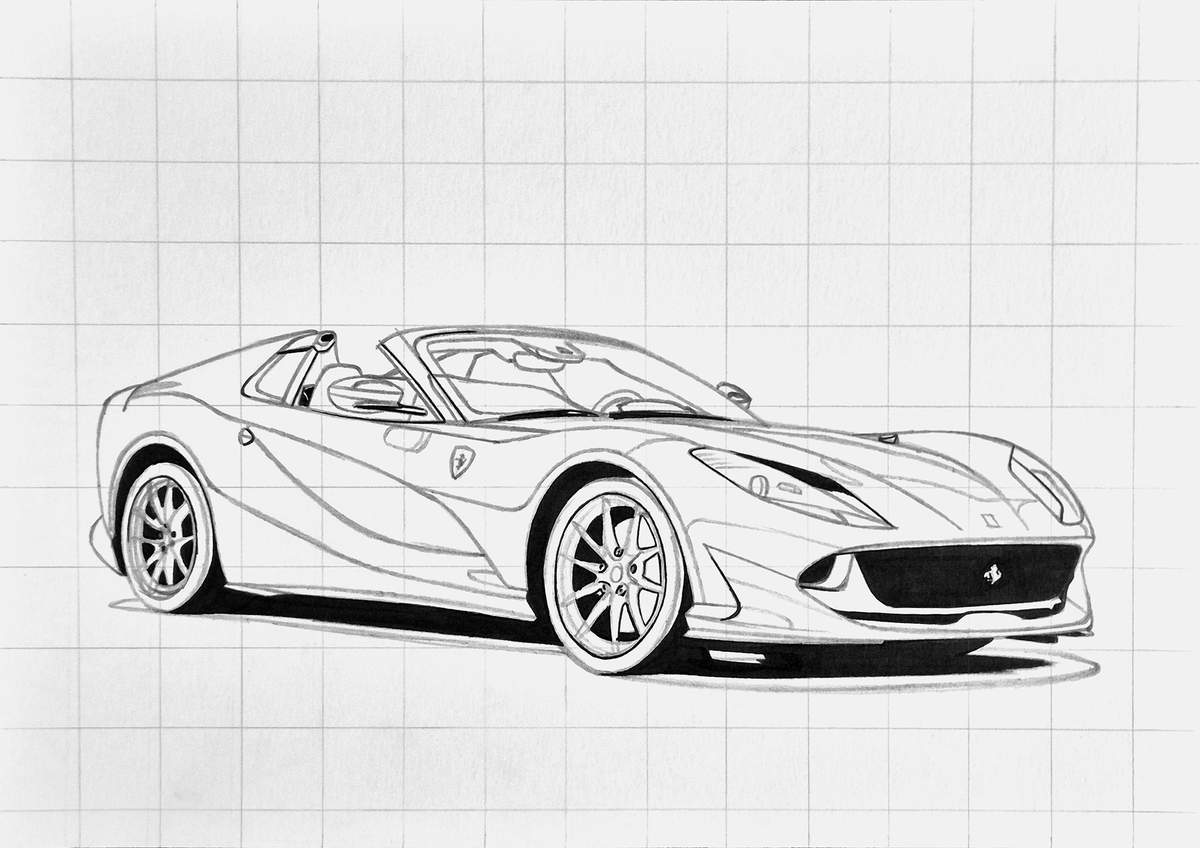
Coloring the black parts first makes the drawing more comprehensible for me and less overwhelming.
Step 14: Color the wheels
After coloring the black, I always color the wheels next. And this time it's no different.
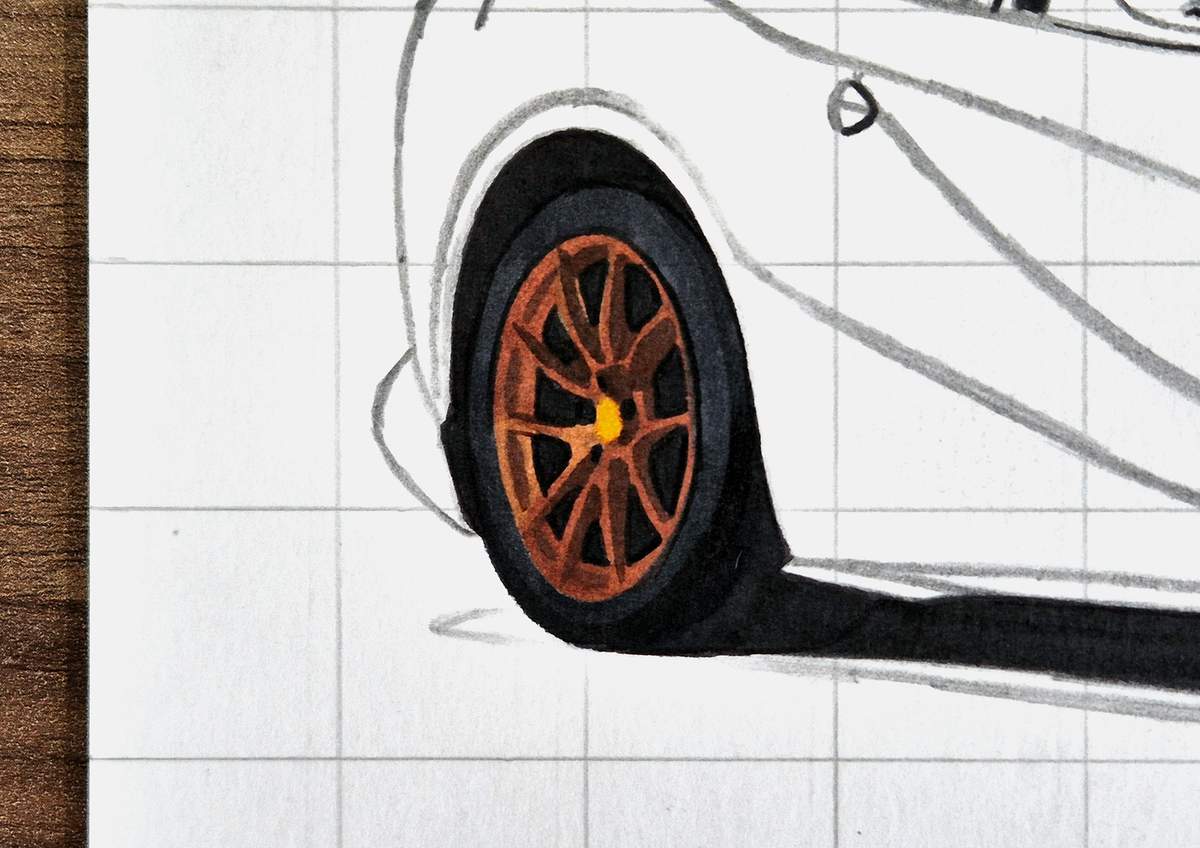
I started by coloring the rear wheel.
The first thing I colored was the tire, and I used Neutral Grey 6 (NG06) to do that.
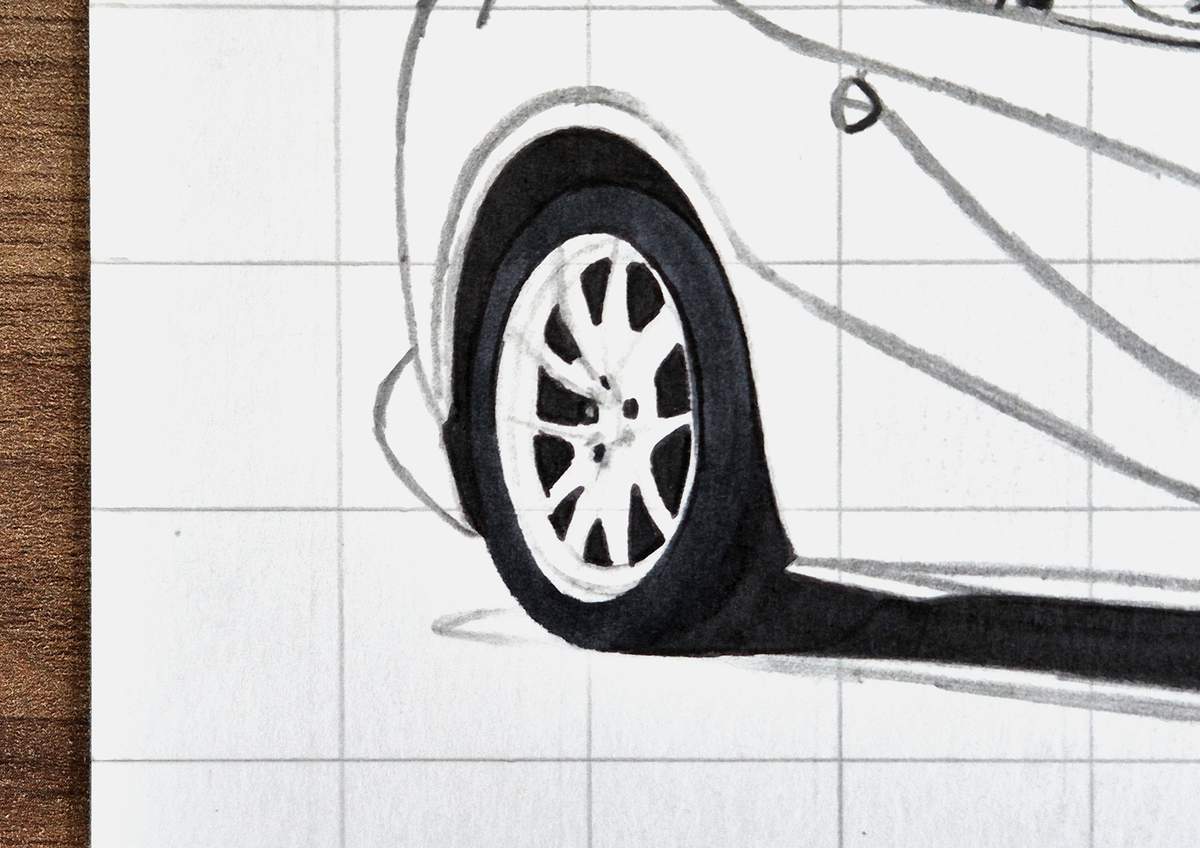
Since the wheels are this beautiful bronze color, I used a series of browns to color them.
I first colored the wheel with Dark Suntan (E110).
Make sure not to forget to leave the center uncolored, as it needs to be yellow. (I forgot to do that...)
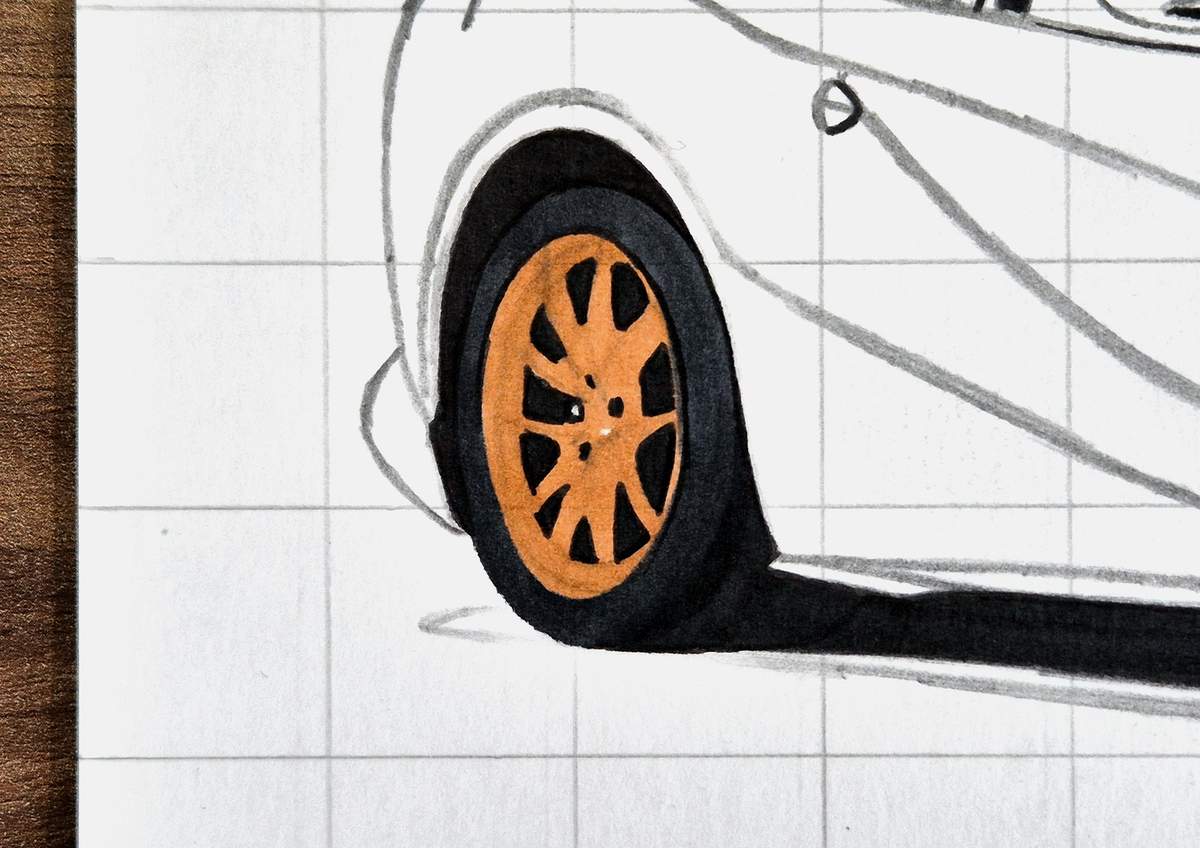
Then, I used a darker brown called Light Mahogany (E060) to darken most of the wheel, except for this part on the left (and the middle, since I remembered it needed to be yellow instead).
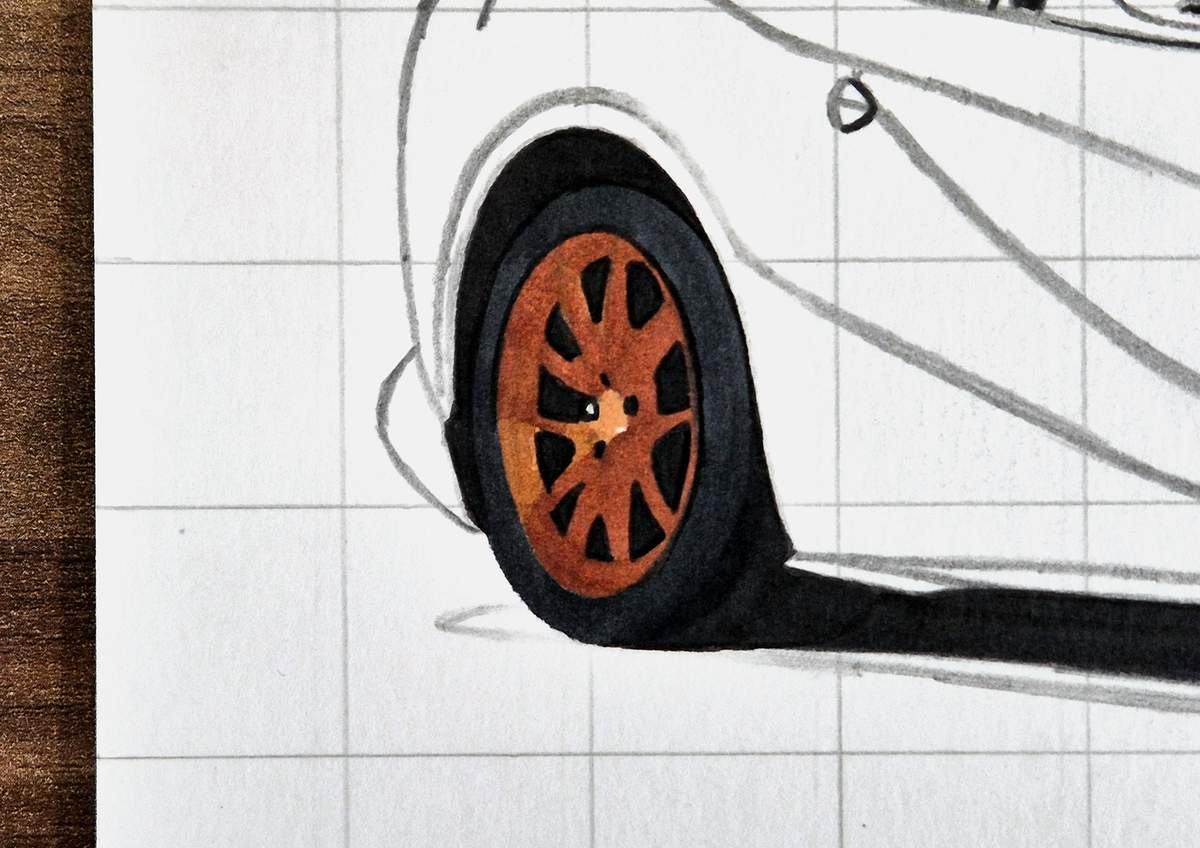
Next, I used the darkest brown called Copper (E130) to darken the sides of the spokes, the rim edge on the left, and the top right of the center.
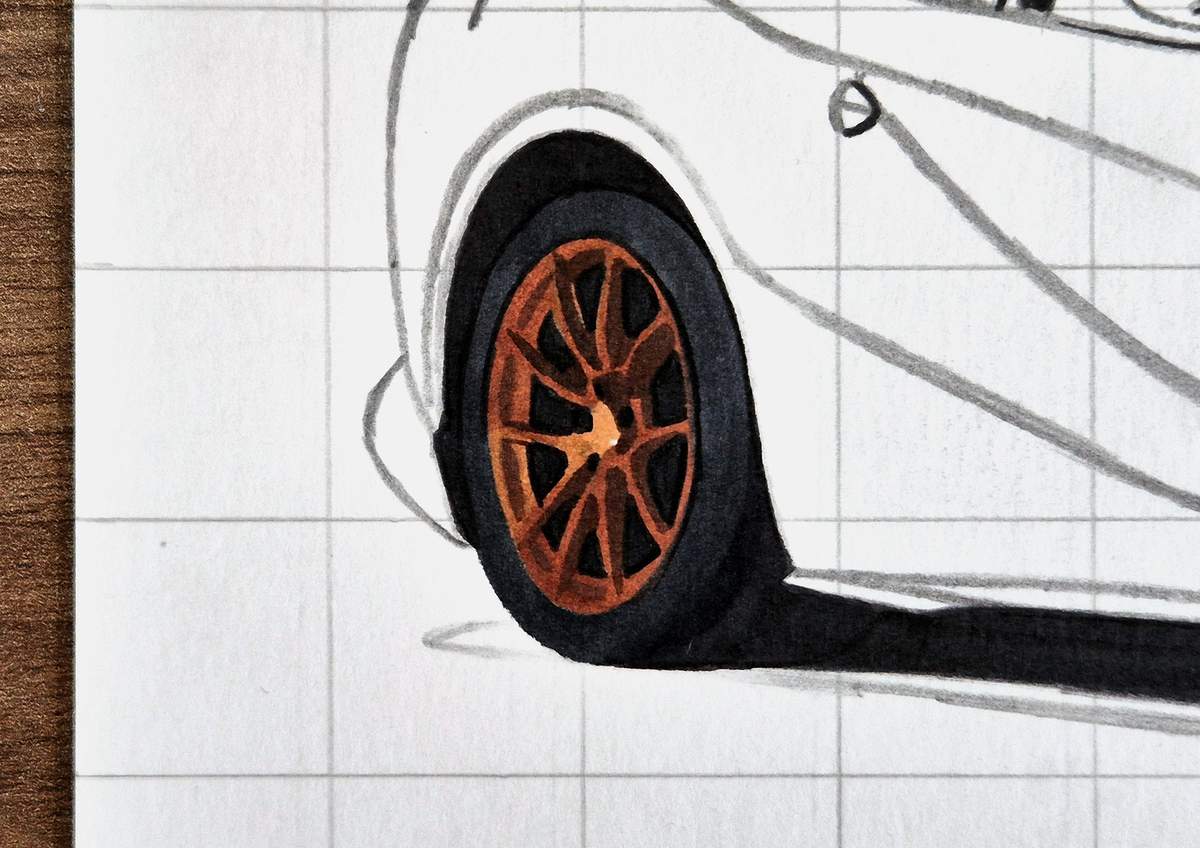
After that, I colored the center with Lemon Yellow (Y6).
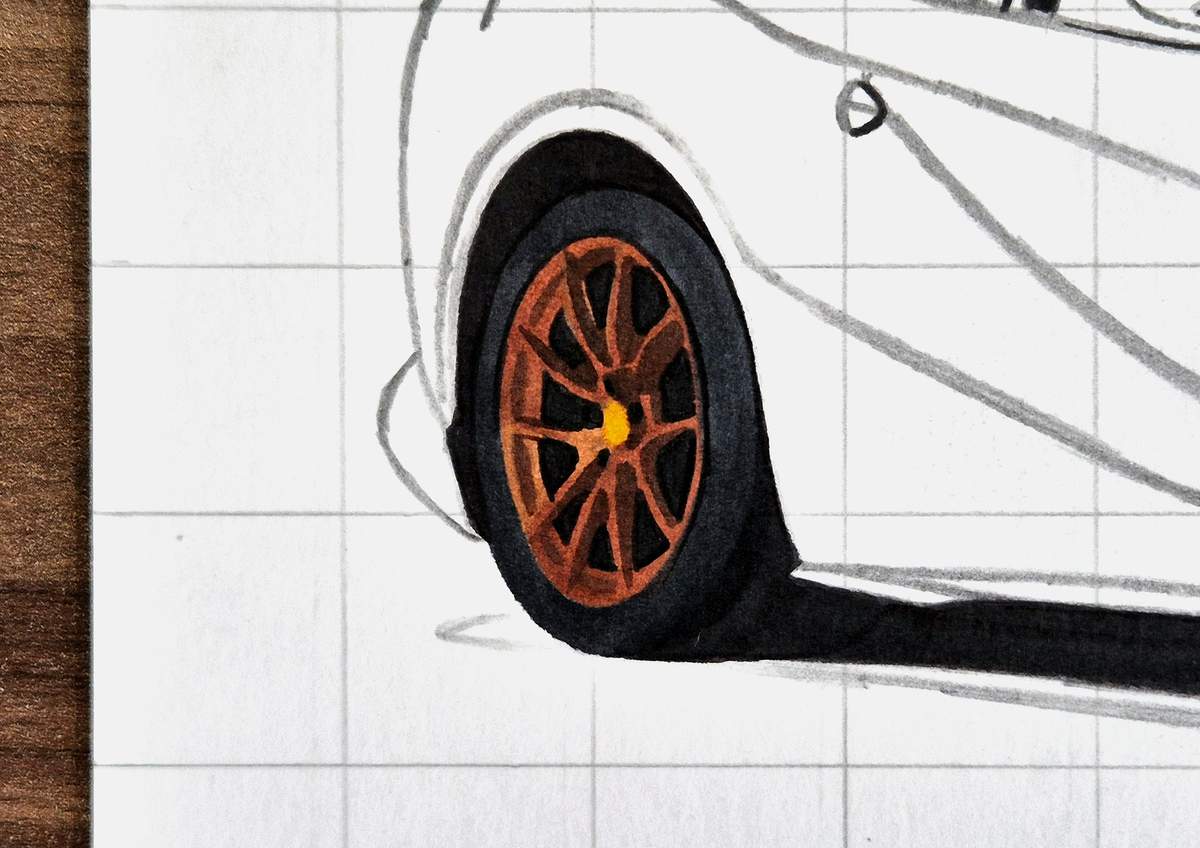
And to finish this rear wheel, I used black to darken the bottom and right edges of the tire, and I blended the black into the dark grey by coloring over it with Neutral Grey 6 (NG06).
Next up, I colored the front wheel, starting with the tire, the bolts, and the brake disc.
To color the tire, I used Neutral Grey 6 (NG06), and to color the brake disc and the bolts, I used Neutral Grey 07 (CG070).
Later on, I actually thought the CG070 looked too light for the brake disc, so I darkened it with NG06.
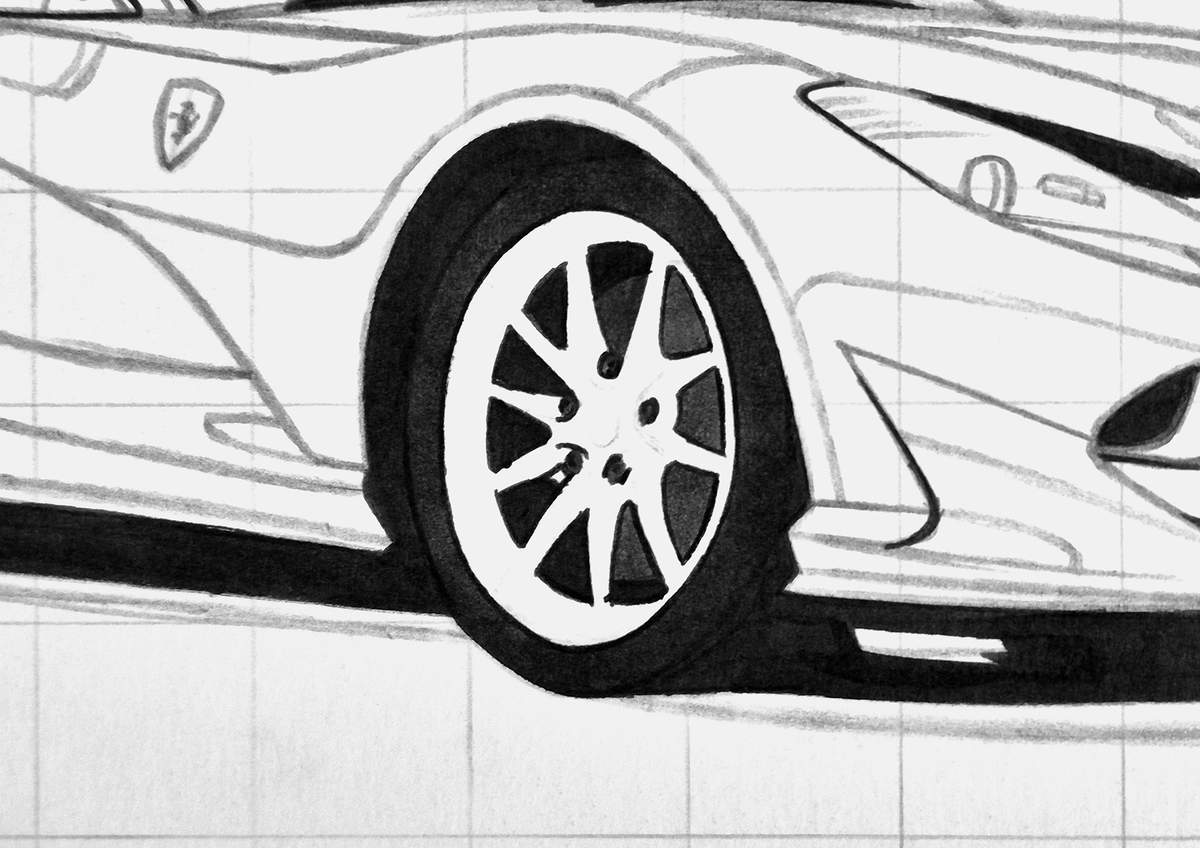
Then, I used Black (120) to darken the bottom 1/3 of the tire and blended that into the dark grey of the tire with Neutral Grey 6 (NG06).
I also added the shadows of the spokes on the brake disk with Black (120).
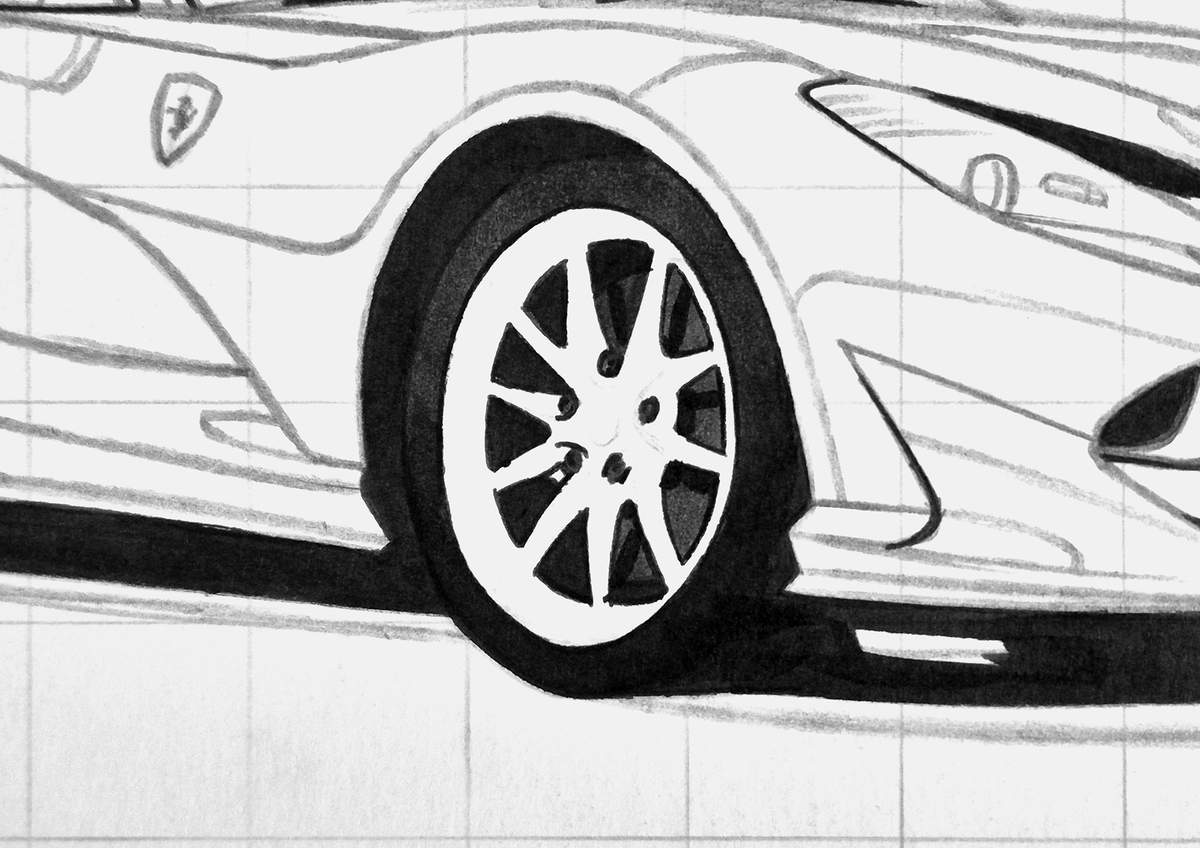
After that, I colored the center so I wouldn't forget when coloring the wheel bronze. To do that, I again used Lemon Yellow (Y6).
This is also the step where I darkened the brake disc to Neutral Grey 6 (NG06).
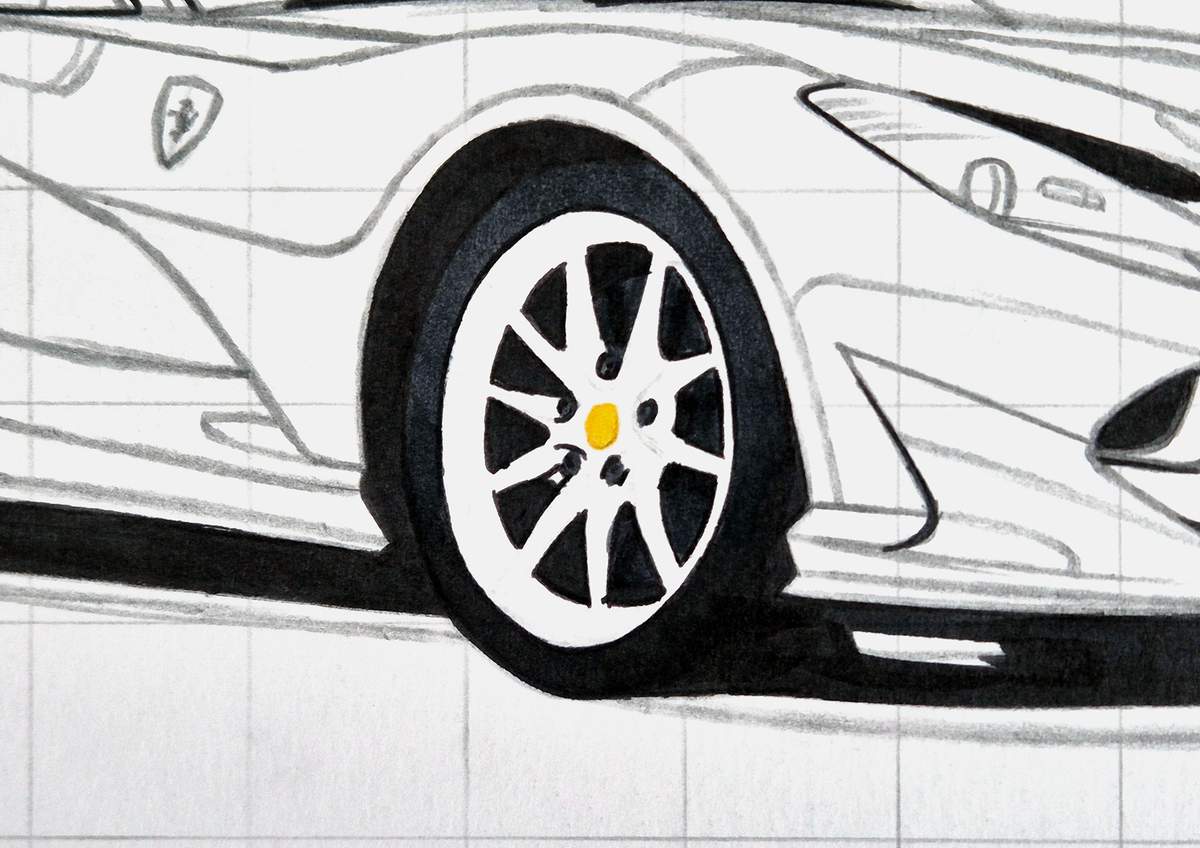
Next up, I colored the wheel bronze, again starting by coloring the whole thing with Dark Suntan (E110).
You might also have noticed this little white spot next to the bottom left bolt. That should've been colored black a while back. But I just noticed it, so I did it now.
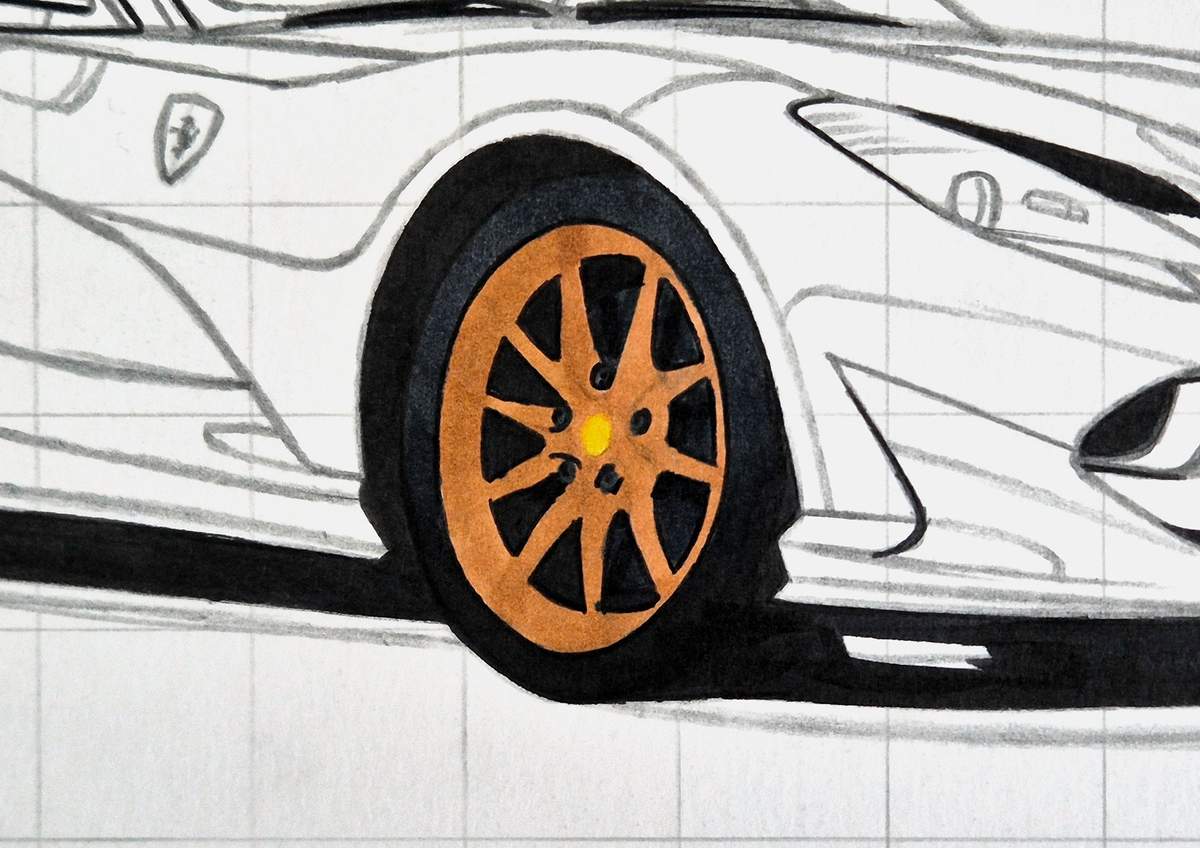
Then, I used Light Mahogany (E060) to darken most of the wheel, except for the bit to the bottom left of the center and the left edge of the wheel.
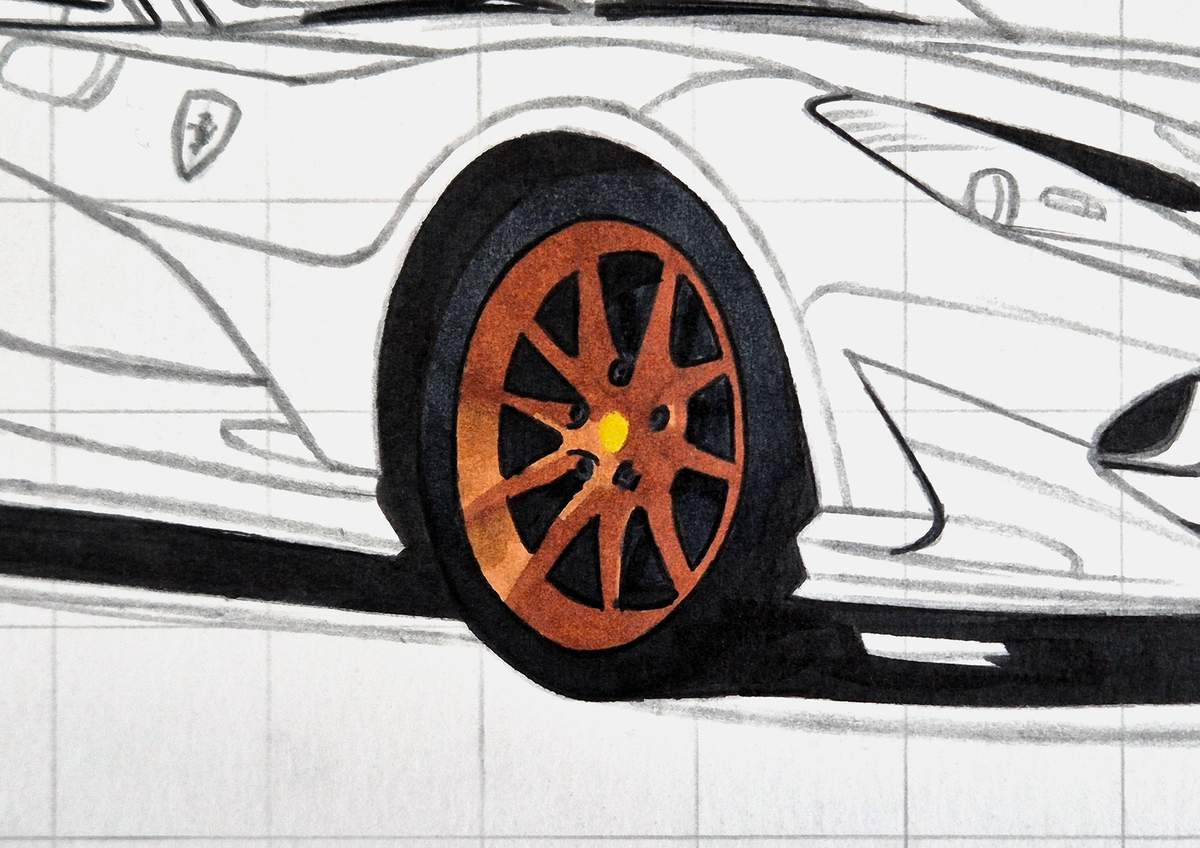
And to complete the front wheel, I darkened the sides of the spokes and the rim edge on the left.
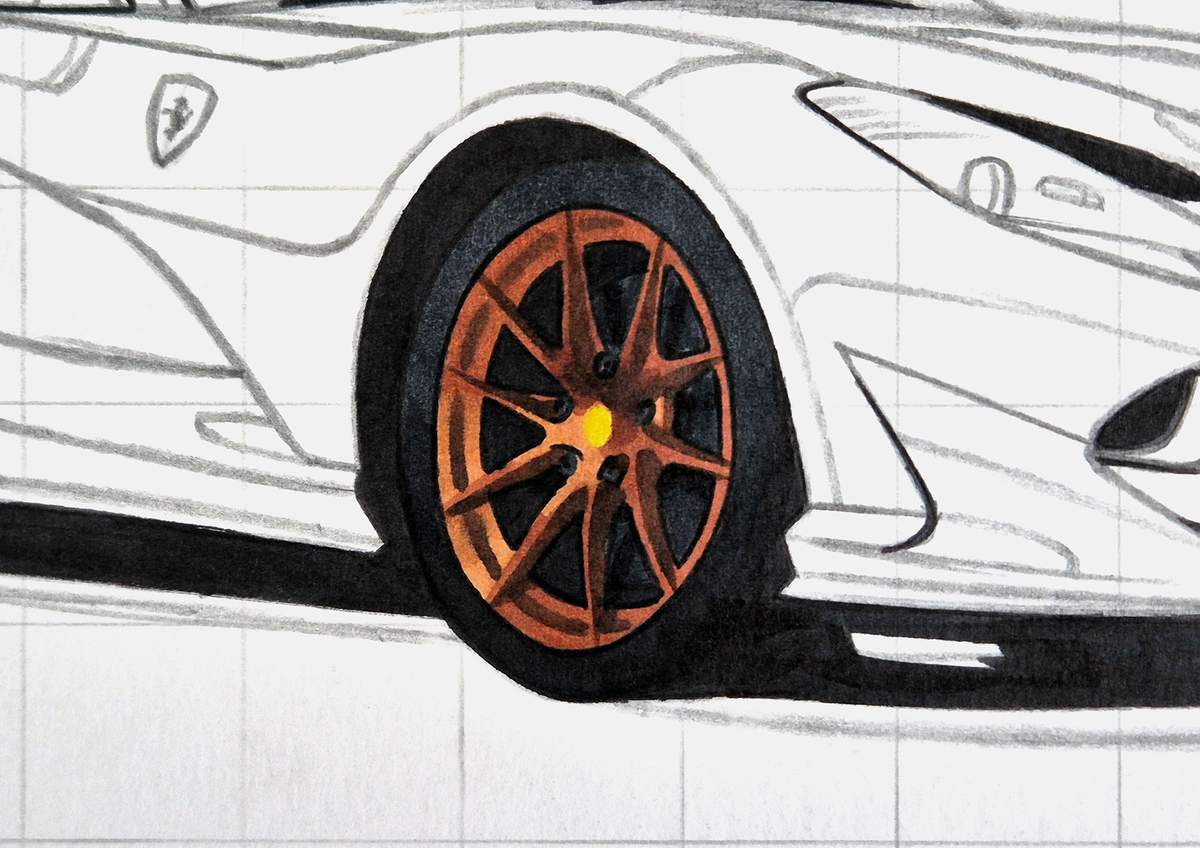
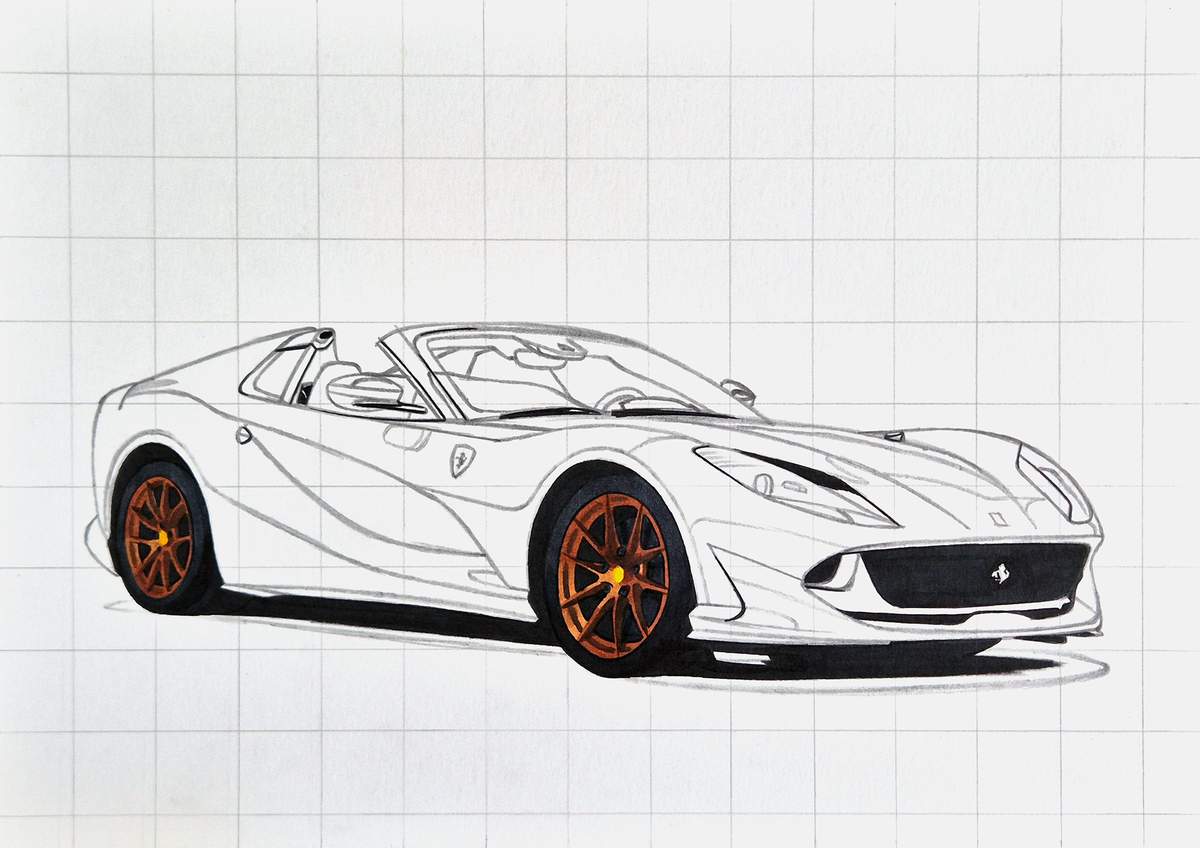
This was actually my first time coloring bronze wheels, and so far, the color turned out really well.
Step 15: Color the diffuser, the side skirt, the front splitters, and the prancing horse
Next, I colored the diffuser, the side skirt, and the splitters. They are super easy.
I first colored the diffuser with Neutral Grey 6 (NG06).
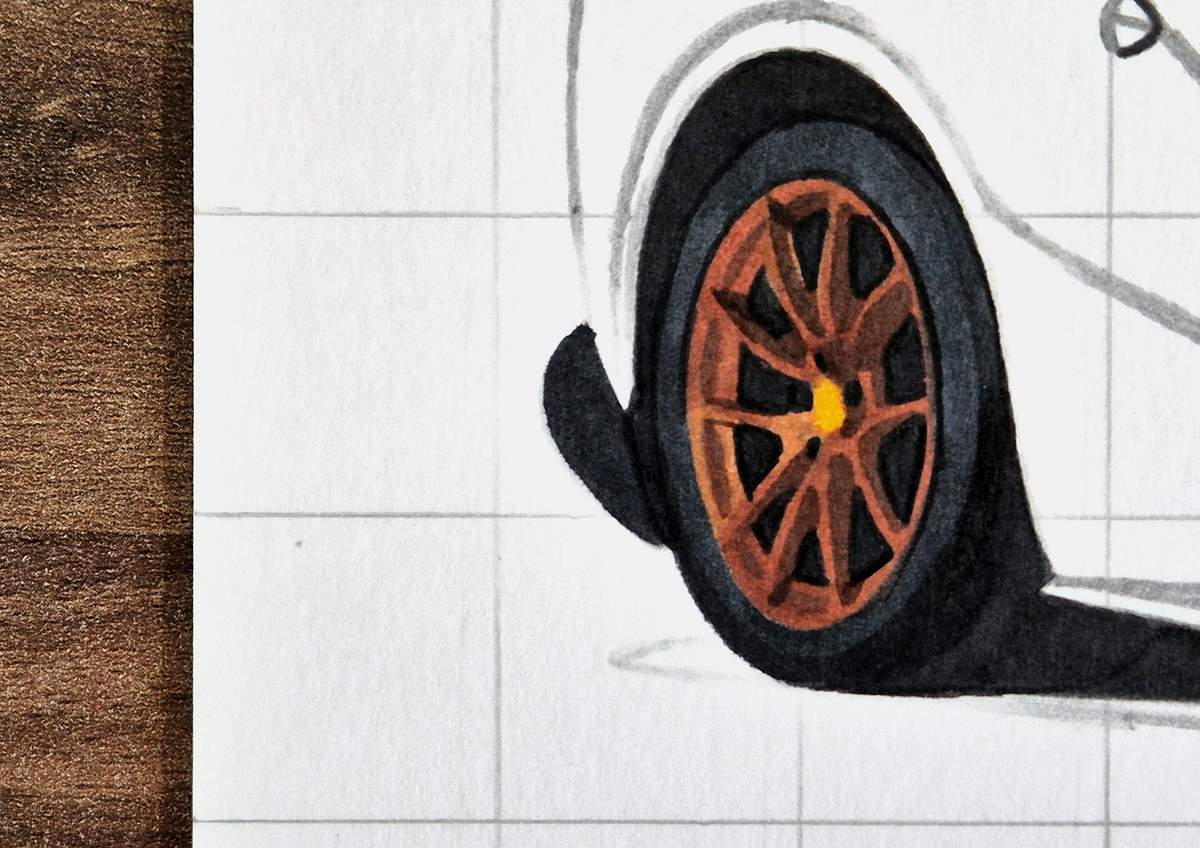
Then, I also colored the side skirt with Neutral Grey 6 (NG06), except for the far right.
I then used Neutral Grey 07 (CG070), which is slightly lighter, to color the far right bit. And to blend the colors together, I colored over the dark grey a bit.
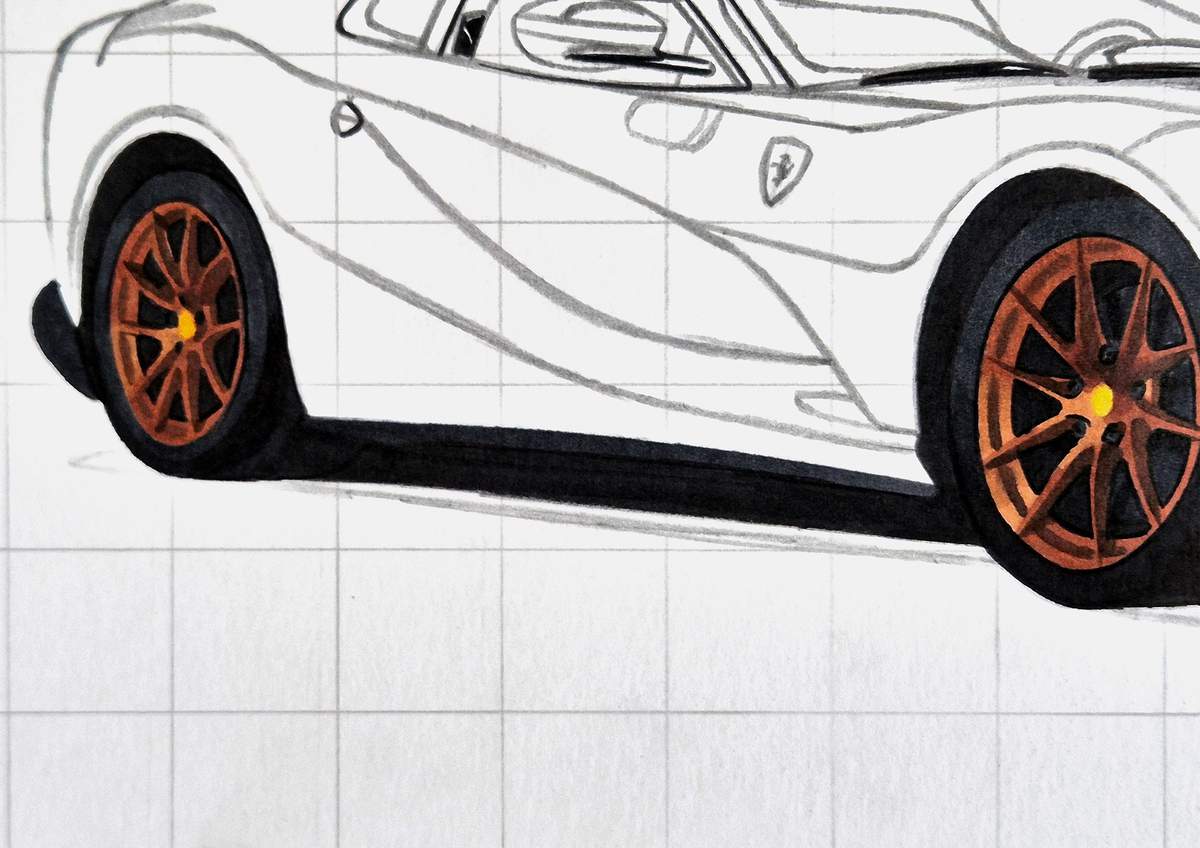
After that, I colored the left front splitter and the aero fin on the bottom of the bumper with Neutral Grey 6 (NG06).
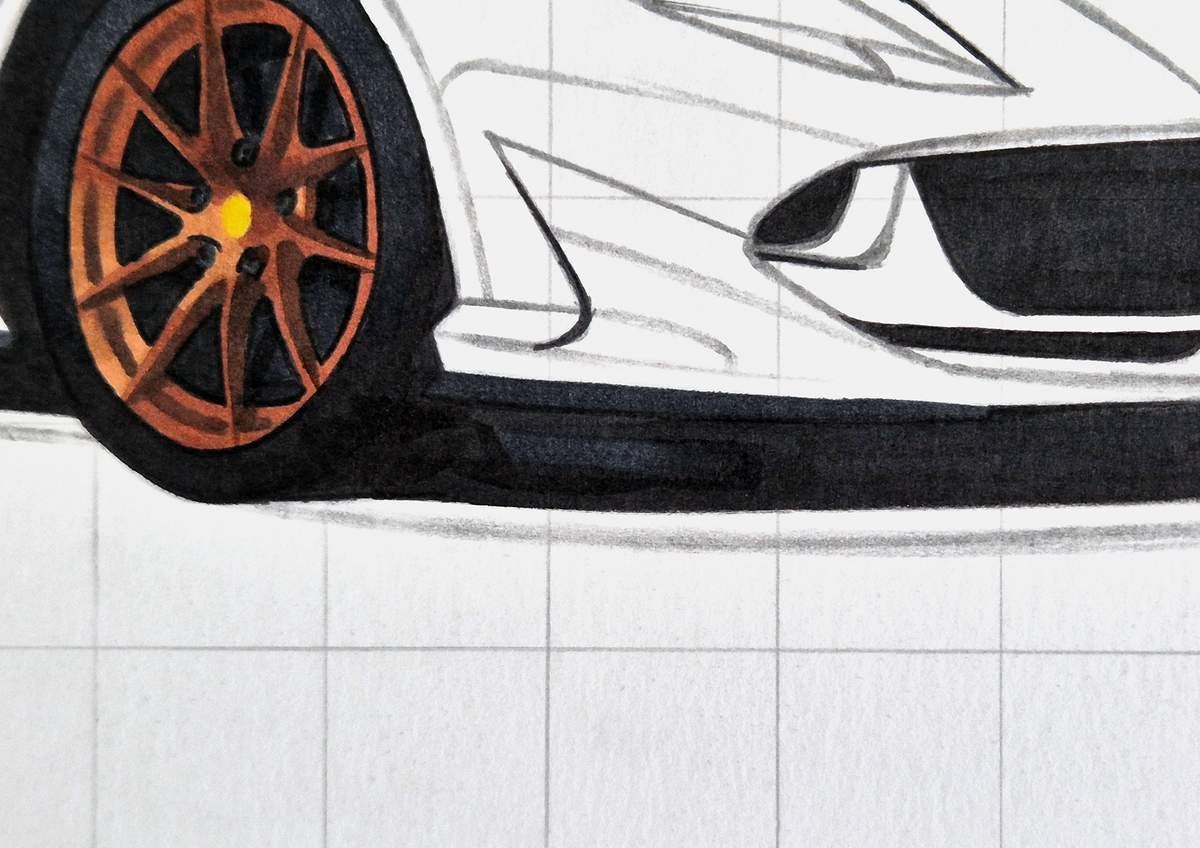
Lastly, I used Neutral Grey 3 (NG03) to color the far right bit of the right splitter and the prancing horse at the center of the grill.
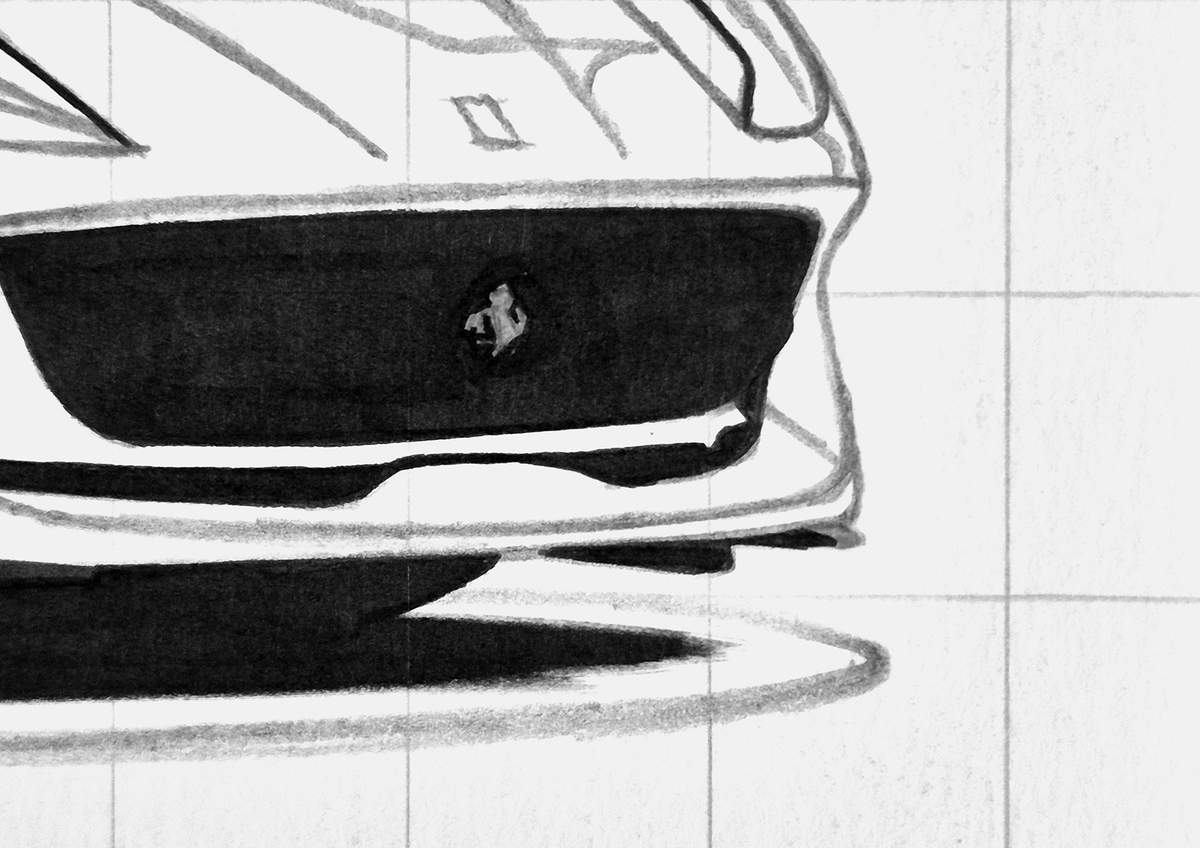
Step 16: Color the front grill
After that, I colored the remainder of the grill with Neutral Grey 6 (NG06).
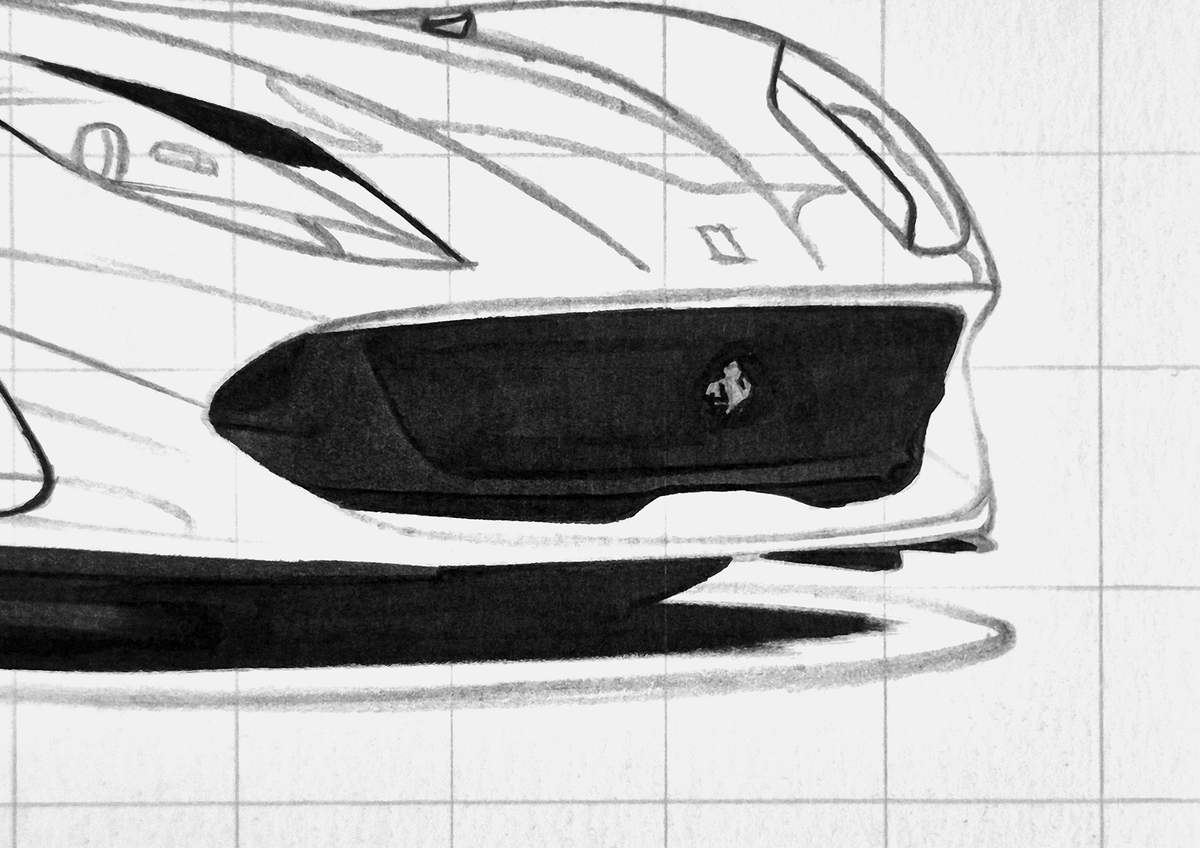
Here's an overview of the drawing so far:
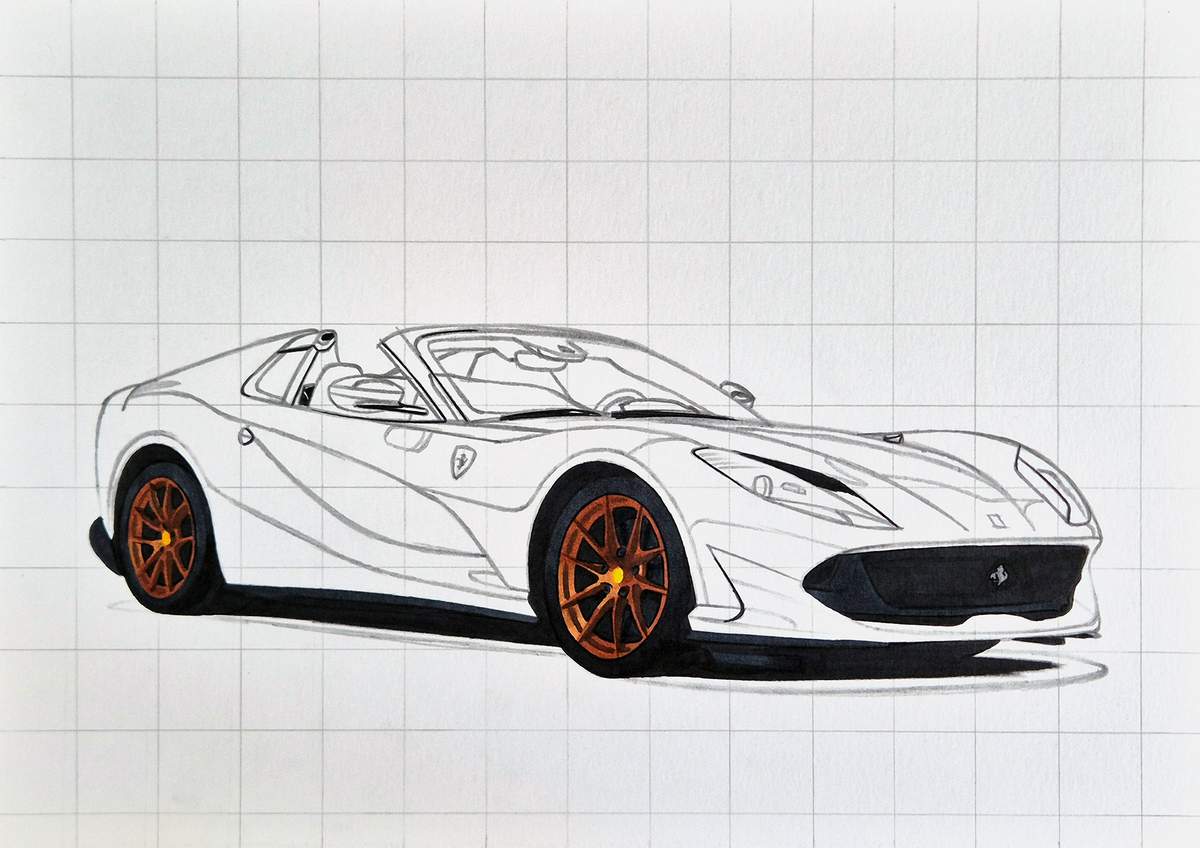
Step 17: Color the headlights of the 812
Next, I colored the headlights.
I first colored the left headlight with Neutral Grey 02 (CG020).
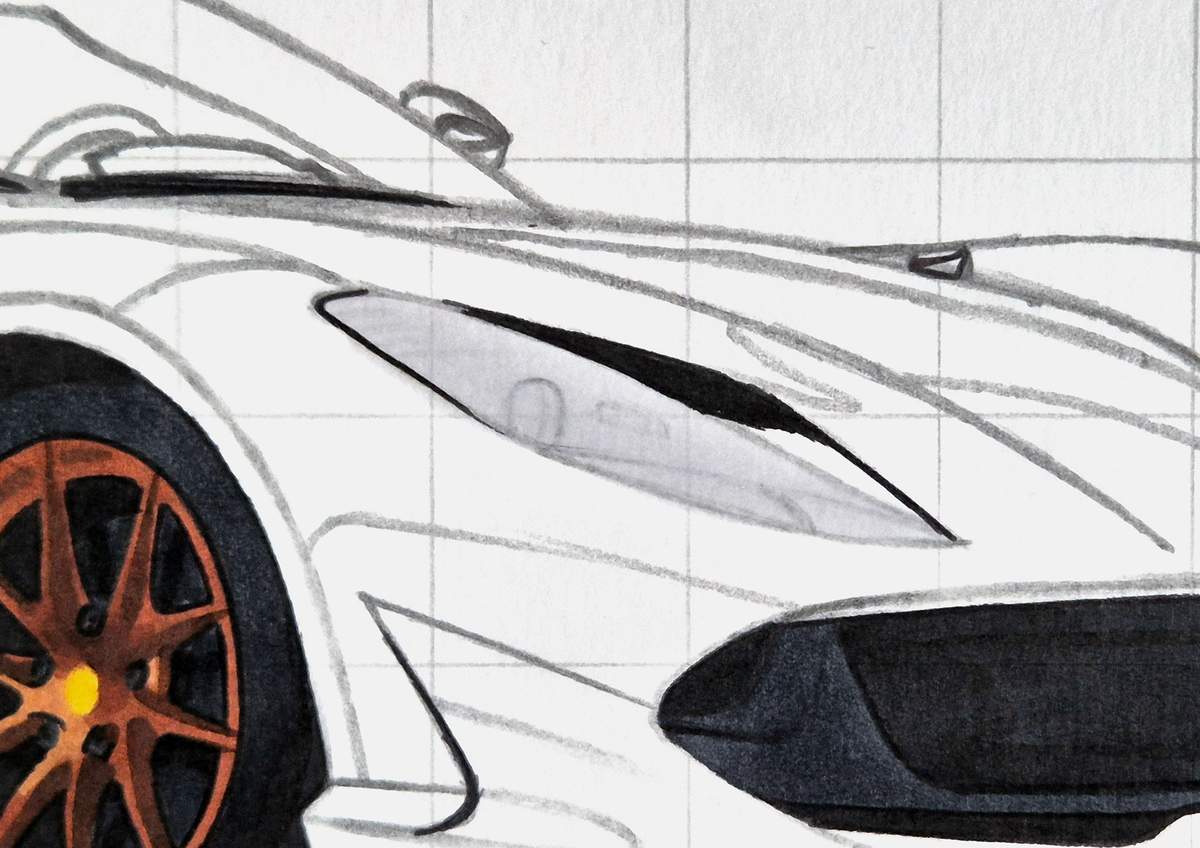
Then, I used Neutral Grey 03 (CG030) to darken most of the headlight except for the right edge.
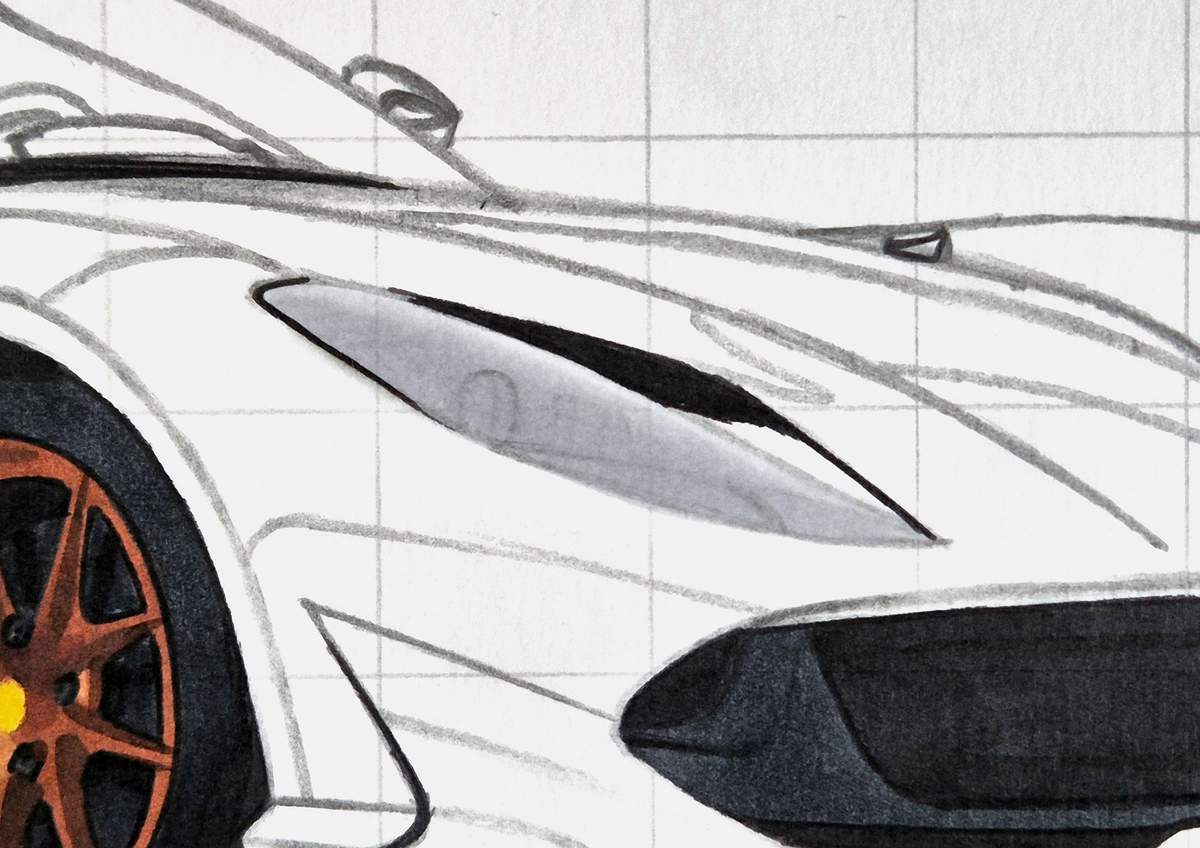
After that, I used Neutral Grey 3 (NG03) to add most of the details of the headlight. I added the stripes in the top left bit and a small darker patch on the bottom right.
I also colored around the light thing in the center of the headlight, and I left the right edge lighter.
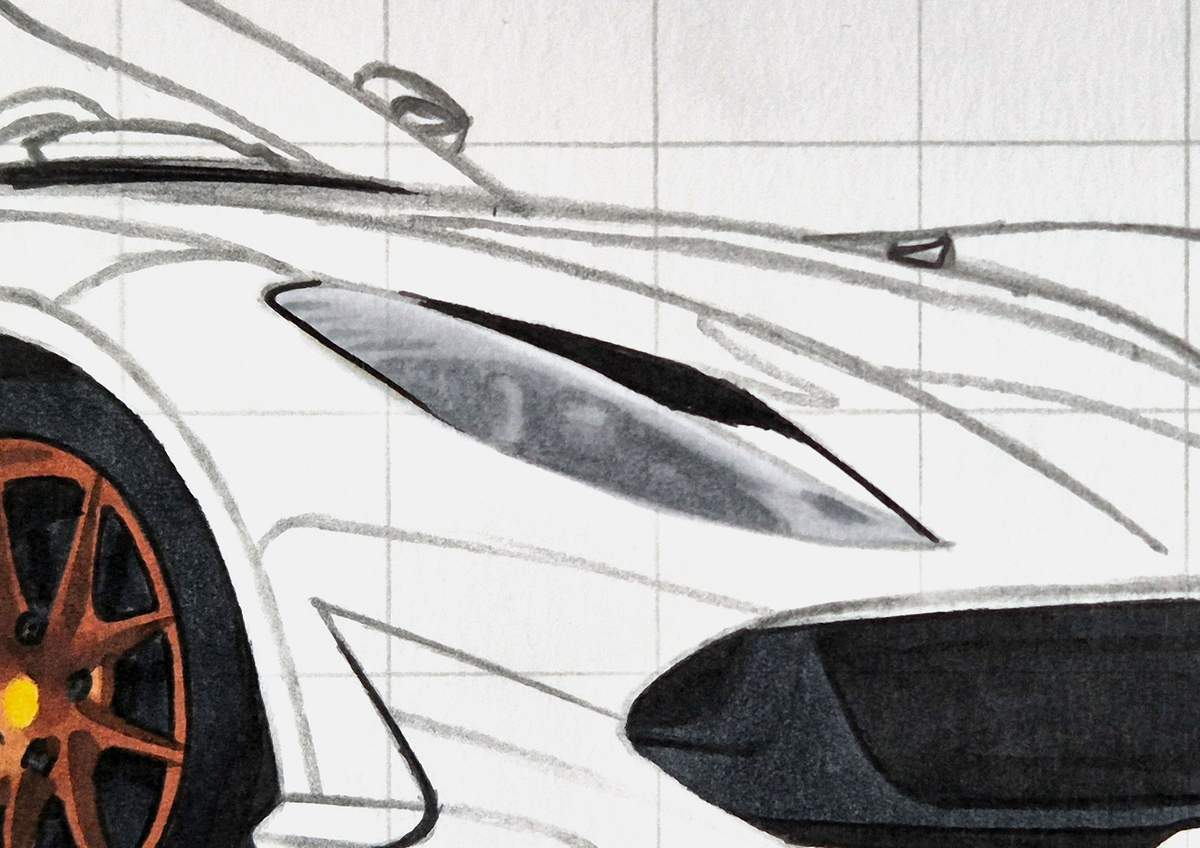
To deepen the shadows inside the headlight, I used Neutral Grey 07 (CG070). I did this mostly around the center.
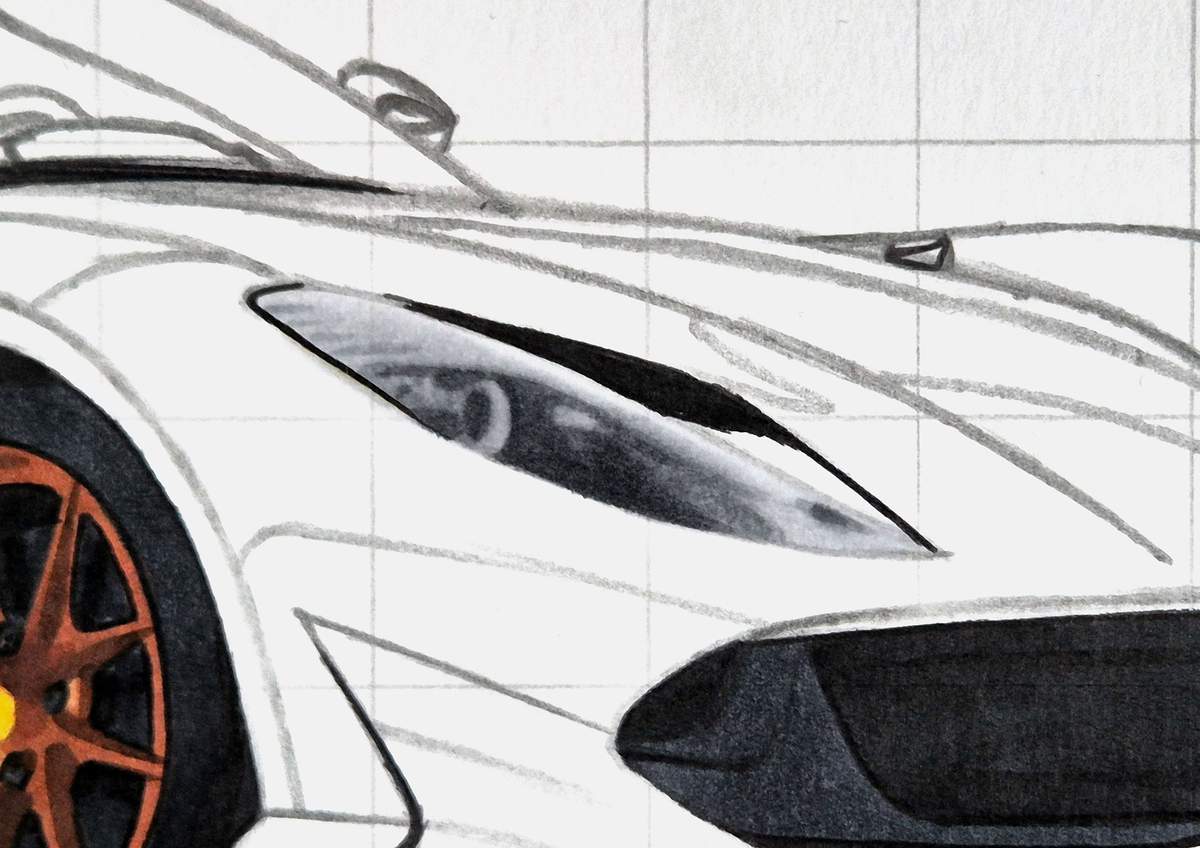
Lastly, I used Neutral Grey 6 (NG06) to add some really dark shadows to the bottom left and around the light in the center.
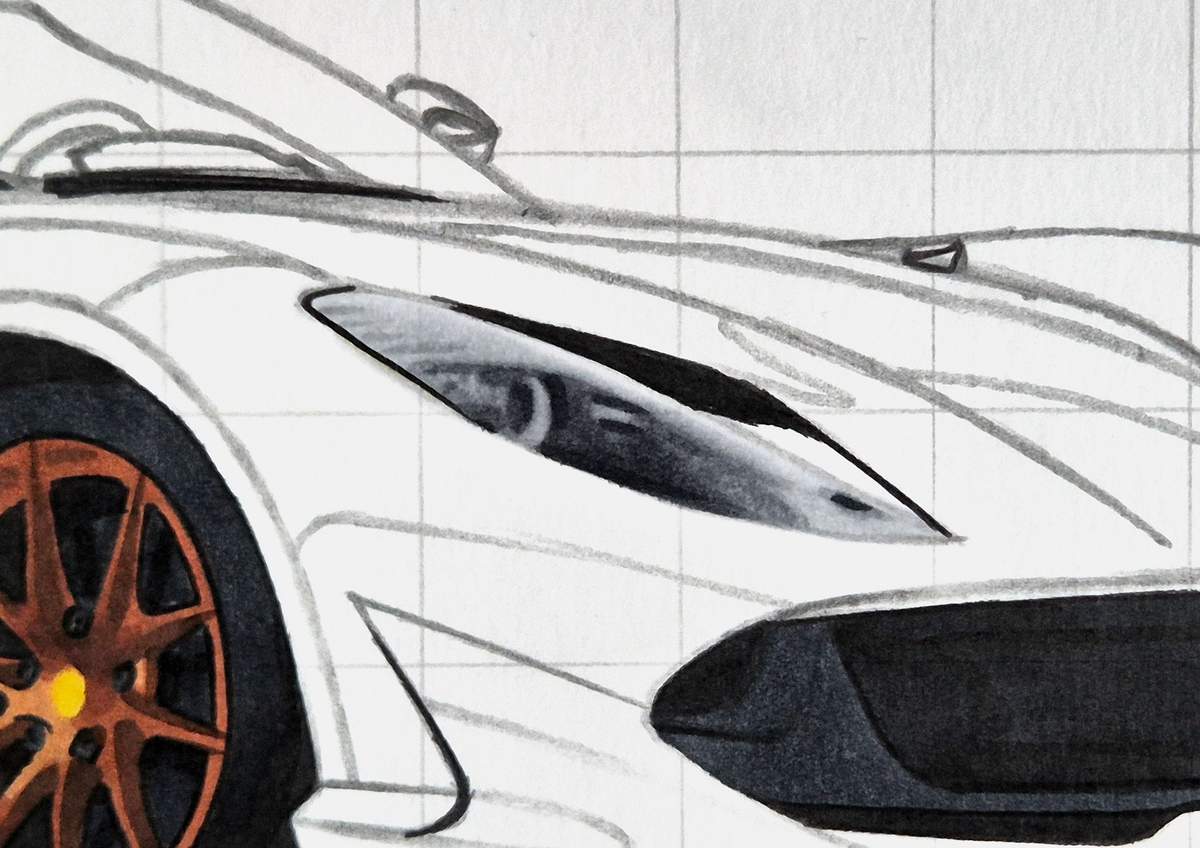
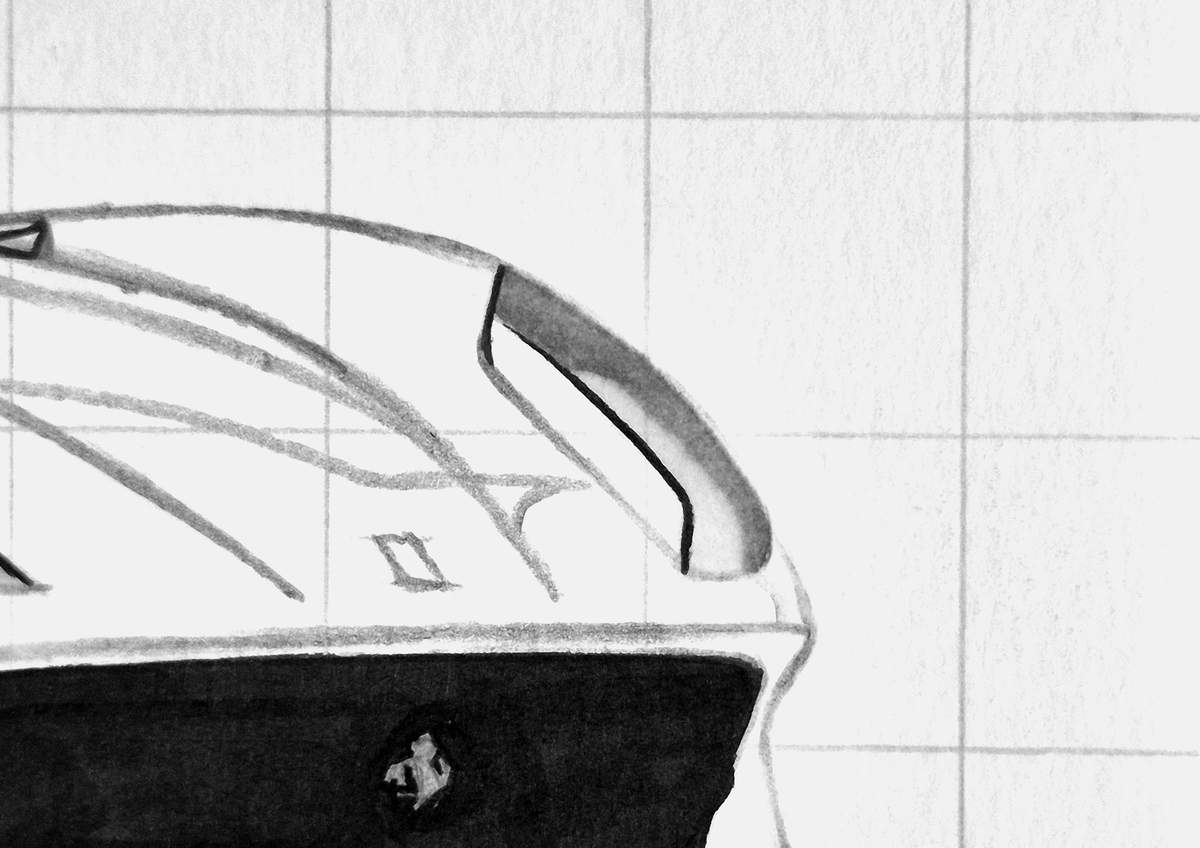
The right headlight is a lot less complex and only requires two simple steps.
First, I colored the whole thing with Neutral Grey 02 (CG020).
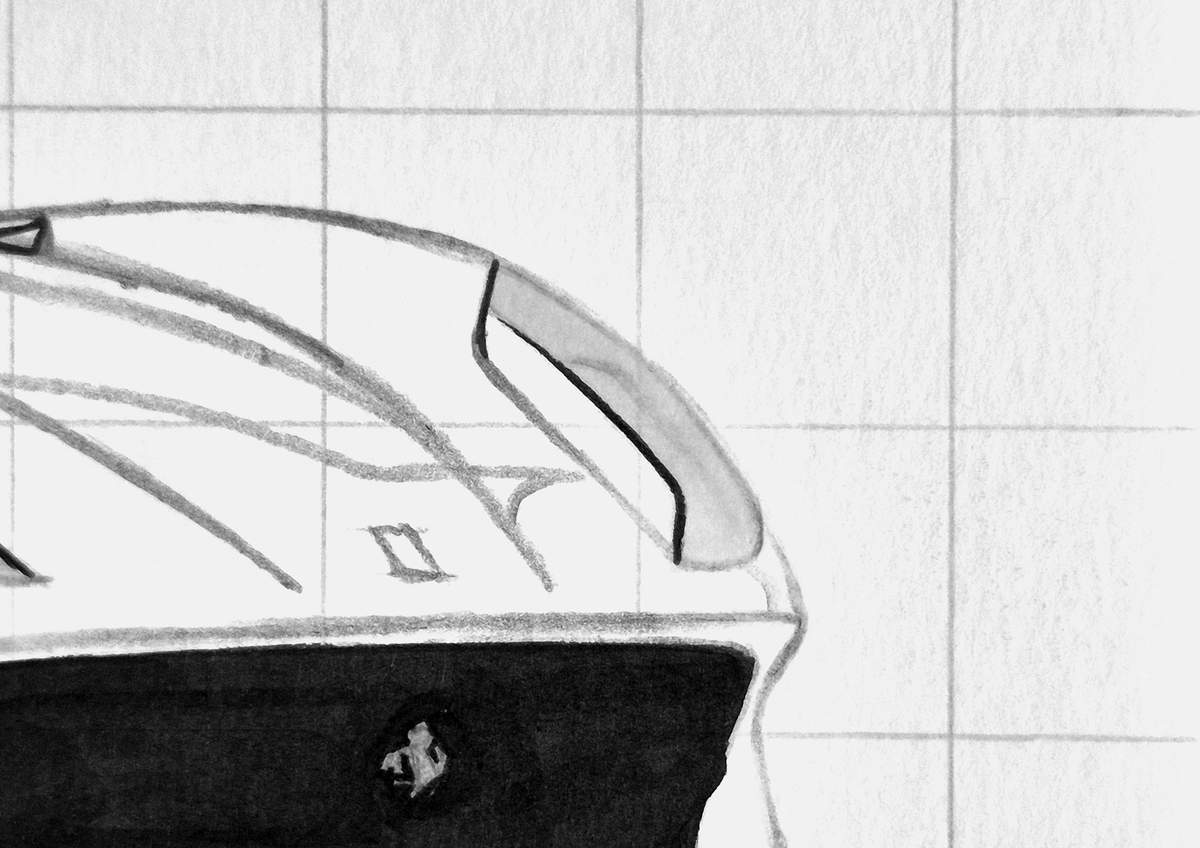
And to complete this headlight, I colored a darker reflection on the right and top sides with Neutral Grey 3 (NG03).
Here's an overview of the whole drawing again:
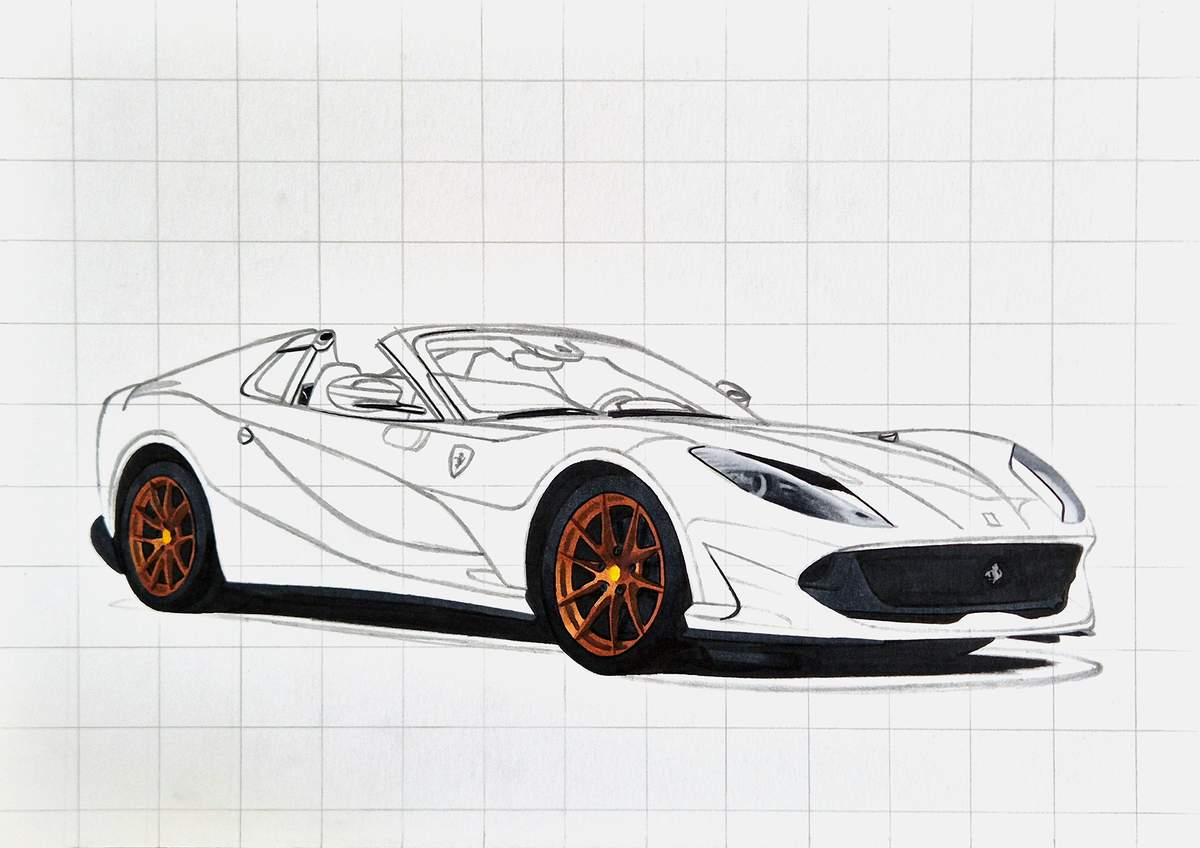
Step 18: Color the interior
After that, I colored the brown interior of this 812.
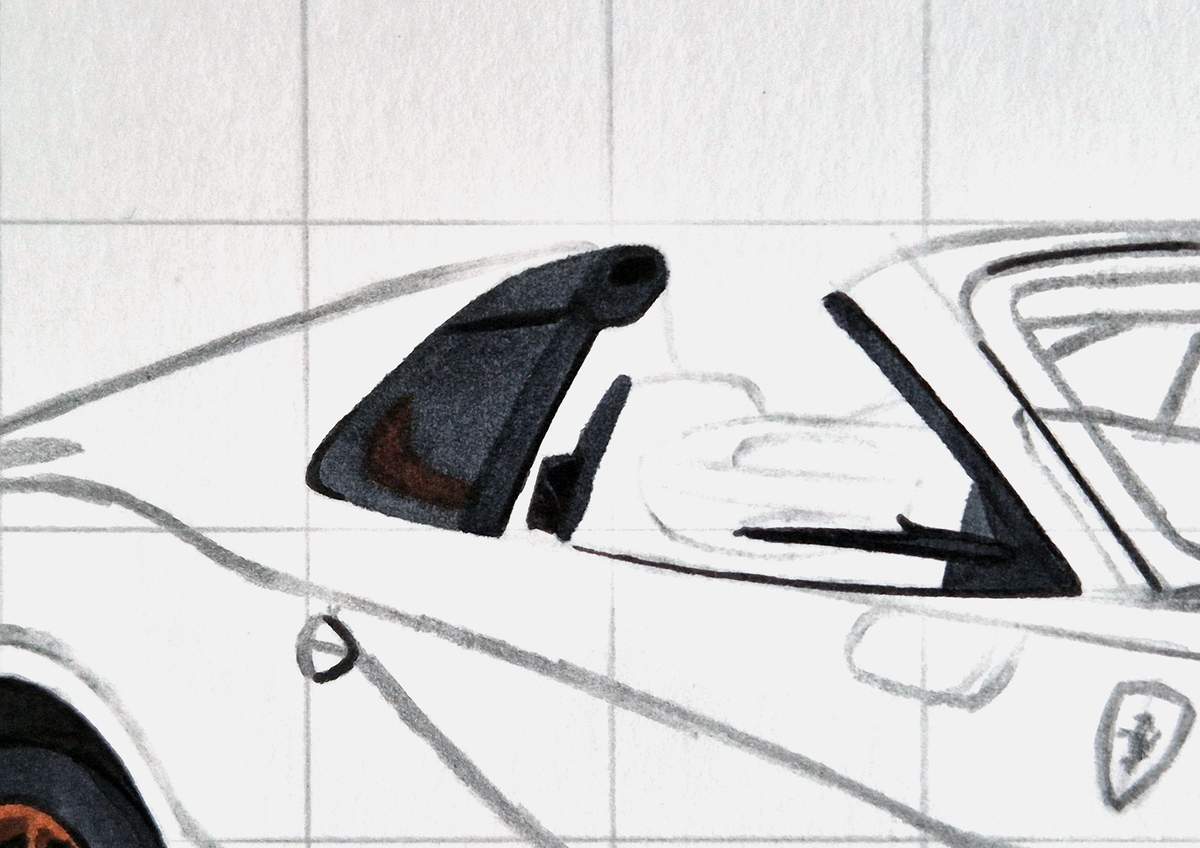
I used Neutral Grey 6 (NG06) and colored a bit to the left of the headrest, the seatbelt, the windowsill on the A-pillar, parts of the window triangle where the mirror attaches to, the top right part of the mirror arm, and the top and left edges of the buttress.
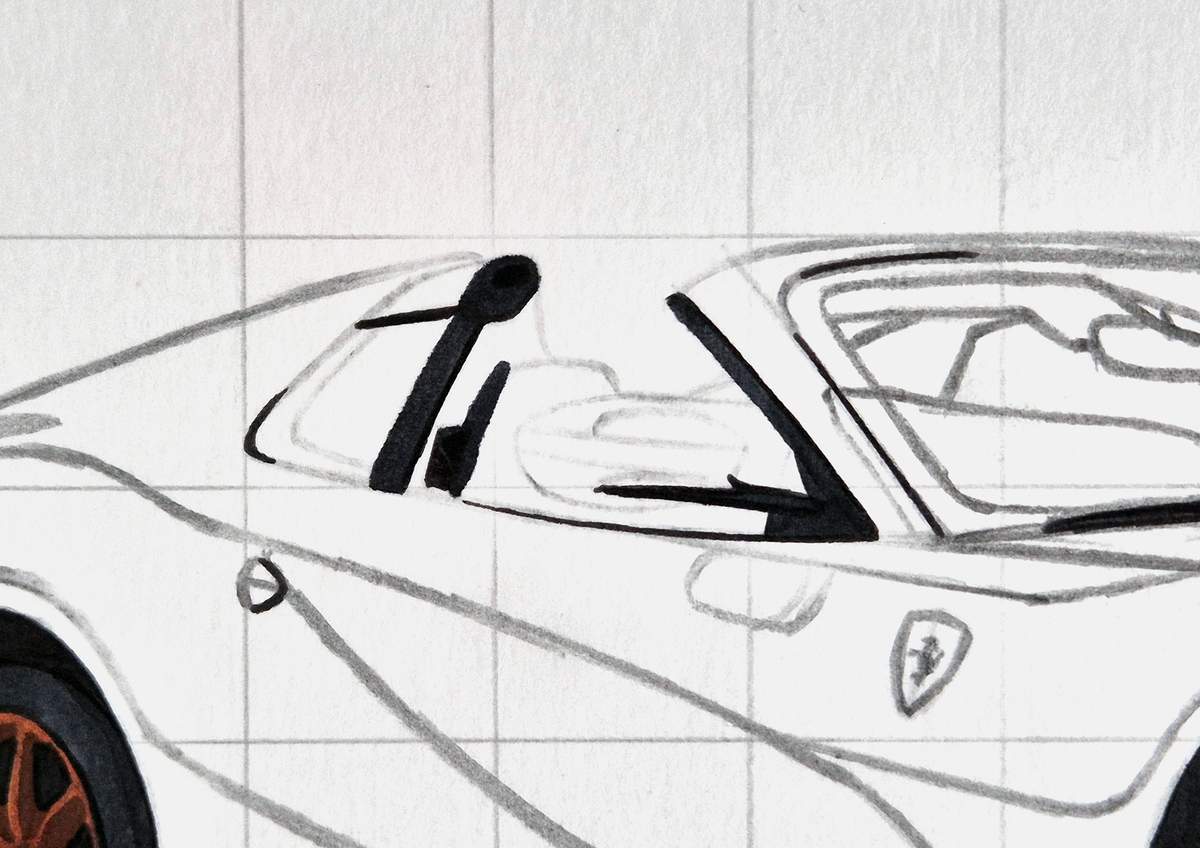
Next, I used Neutral Grey 07 (CG070) to color the side of the buttress and the top bit of the window triangle.
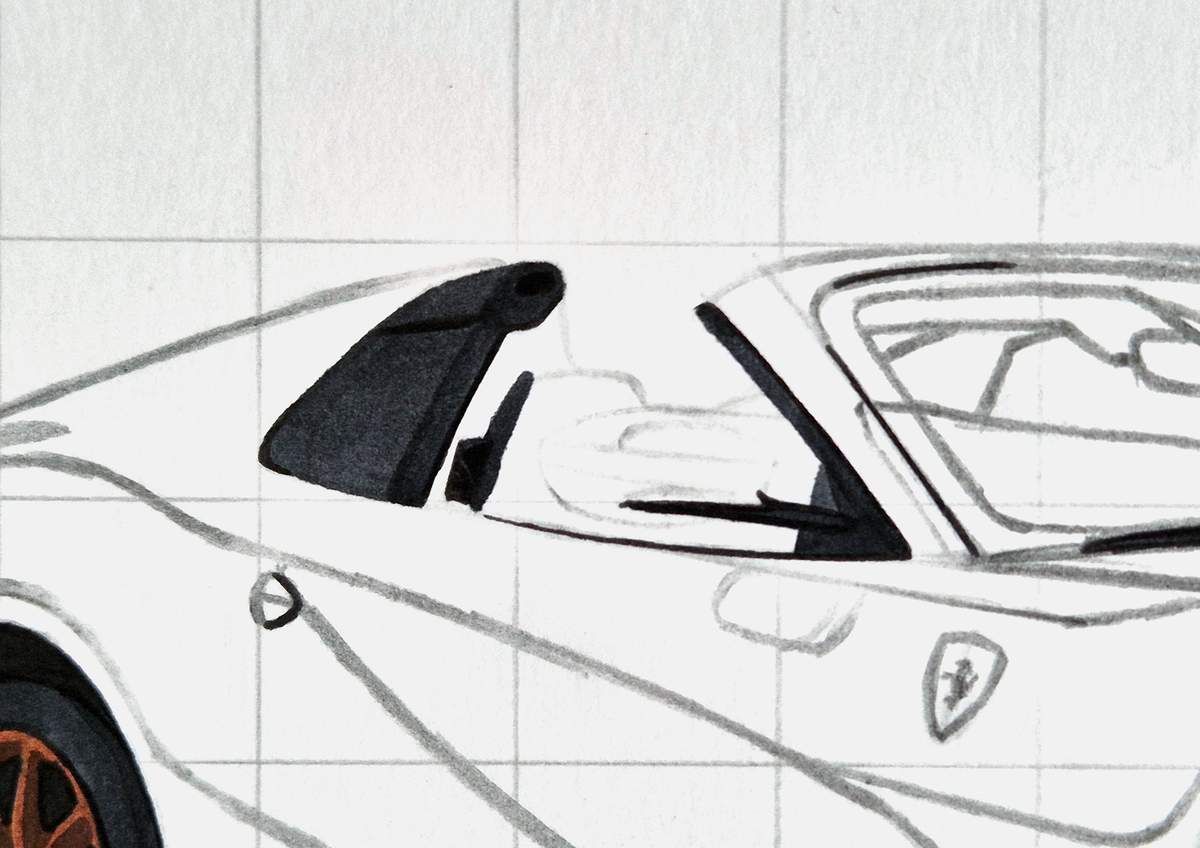
I also added a brown reflection to the side of the buttress. To do that, I used Copper (E130) and just colored over the grey. On the paper I use, the brown ink pushes the grey ink away.
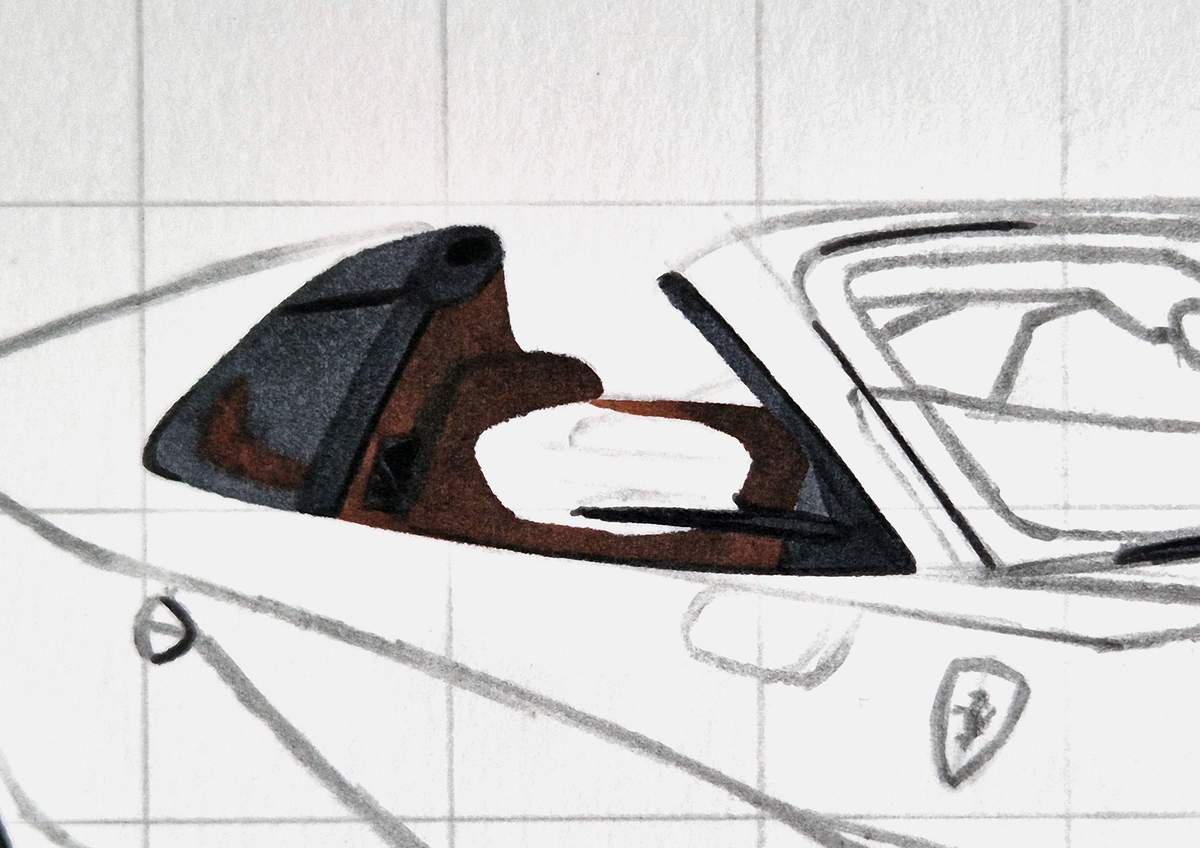
To color the interior, I used Copper (E130).
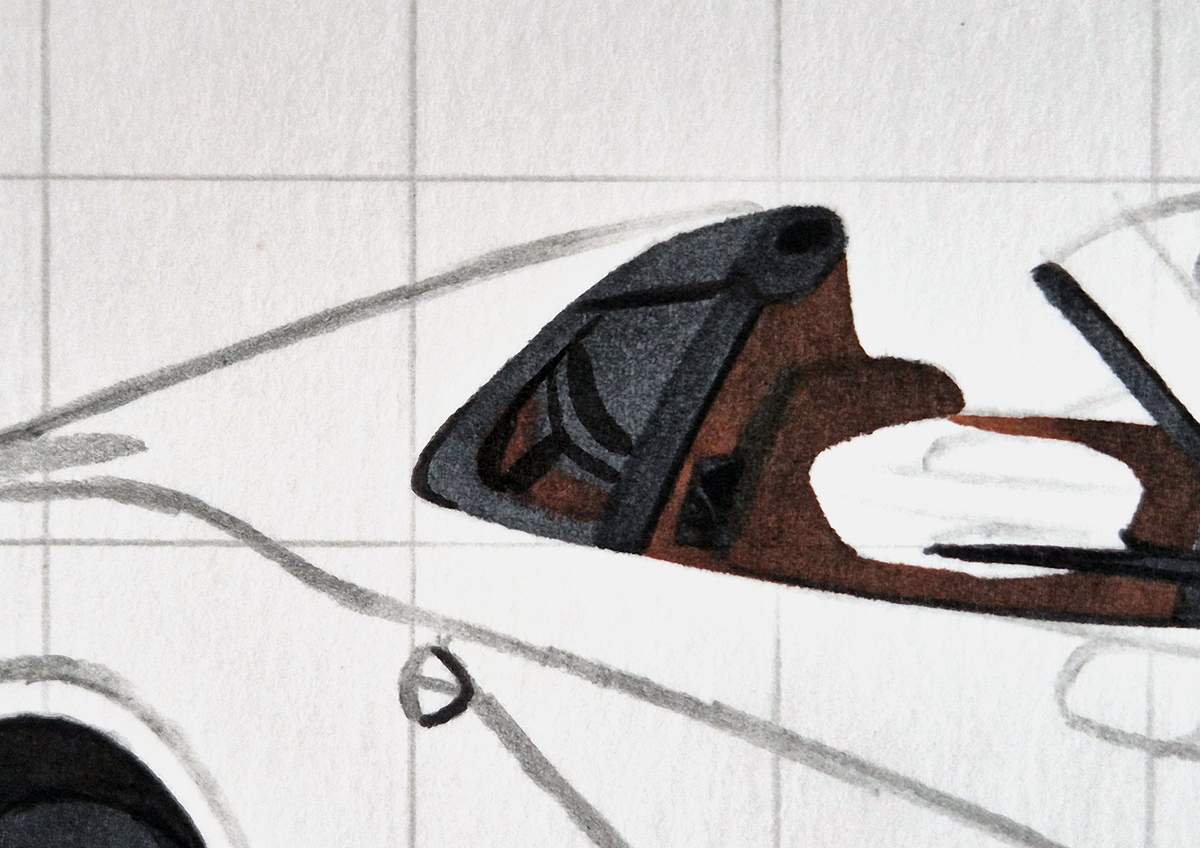
Lastly, I added a few black reflections on the side of the buttress.
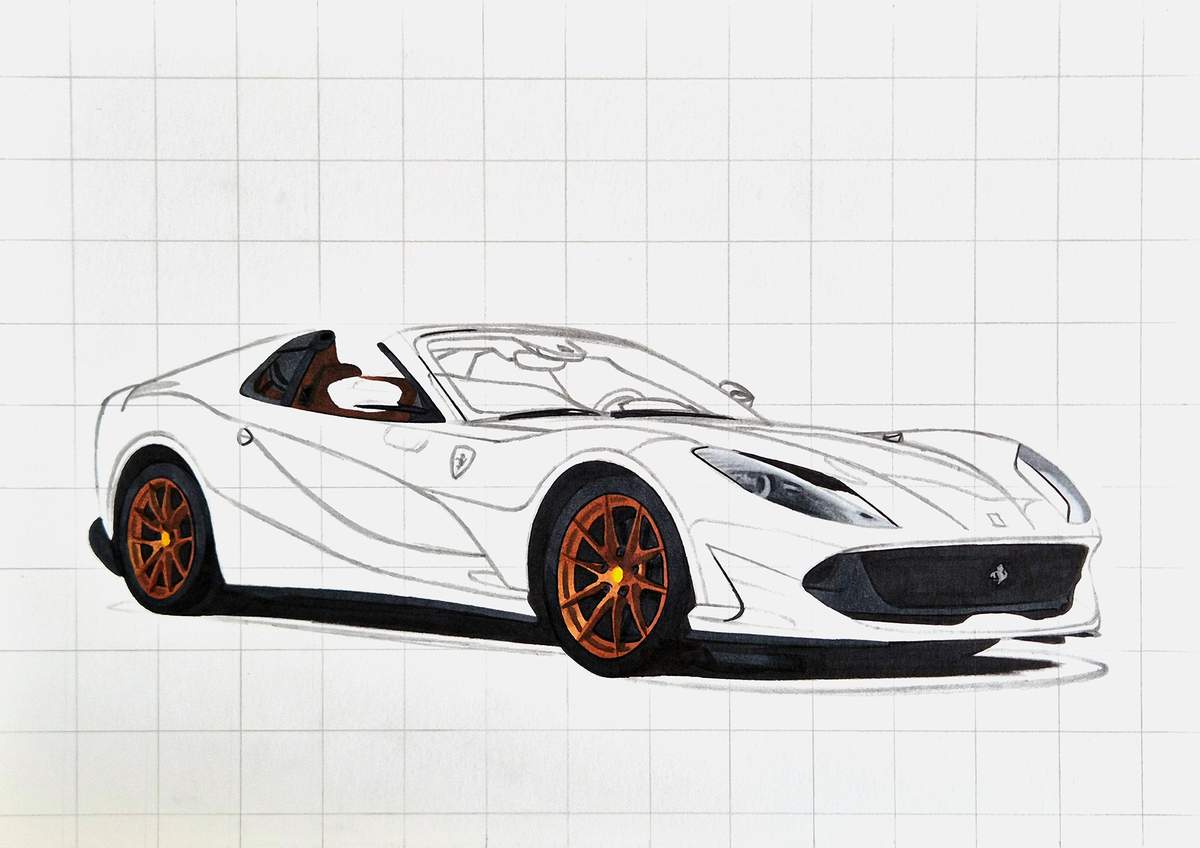
And here's another overview of what we've colored so far:
Step 19: Color the windshield
Next, I colored the windshield of the 812.
I used Neutral Grey 03 (CG030) to color the bottom left corner of the edge around the windshield, the view through the right side window, and a small bit on the top left.
I also used Neutral Grey 02 (CG020) to add cloud-like reflections to the light reflection on the bottom left.
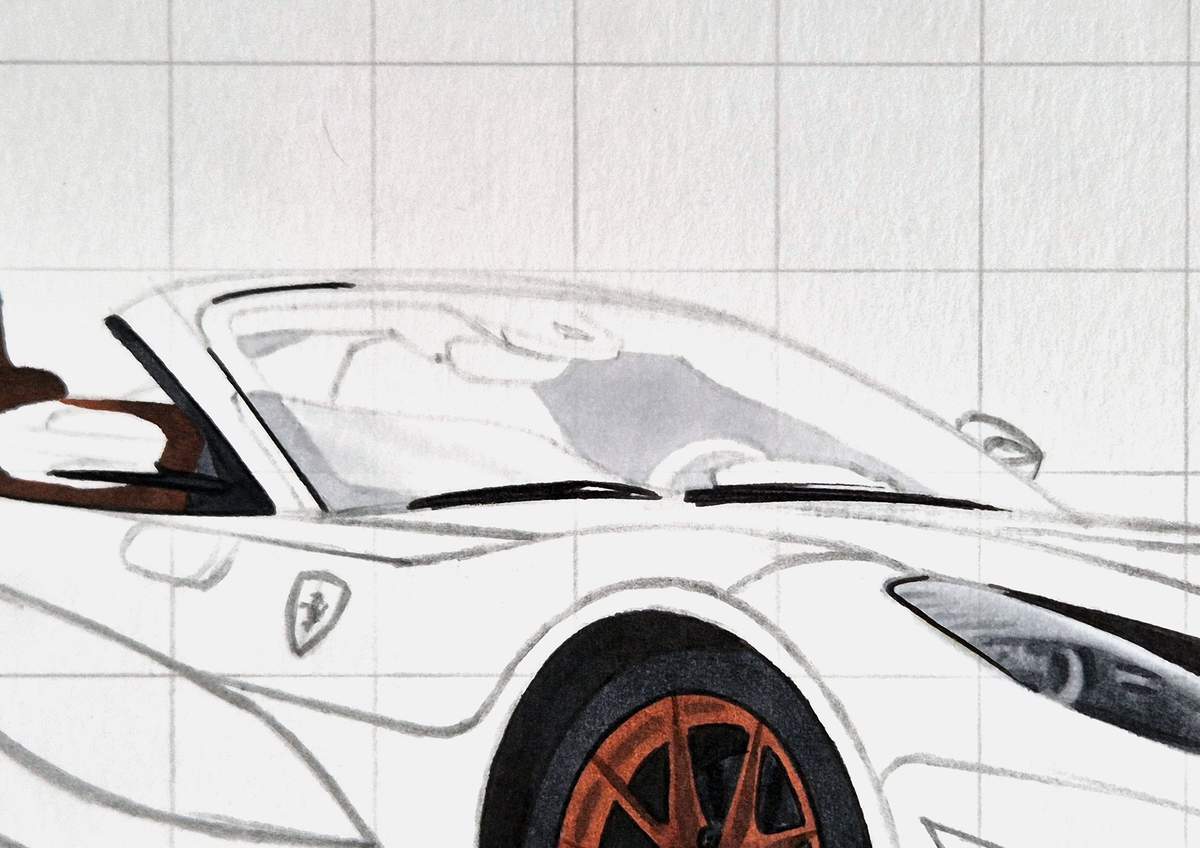
Then, I used Neutral Grey 3 (NG03) to darken the bottom left corner.
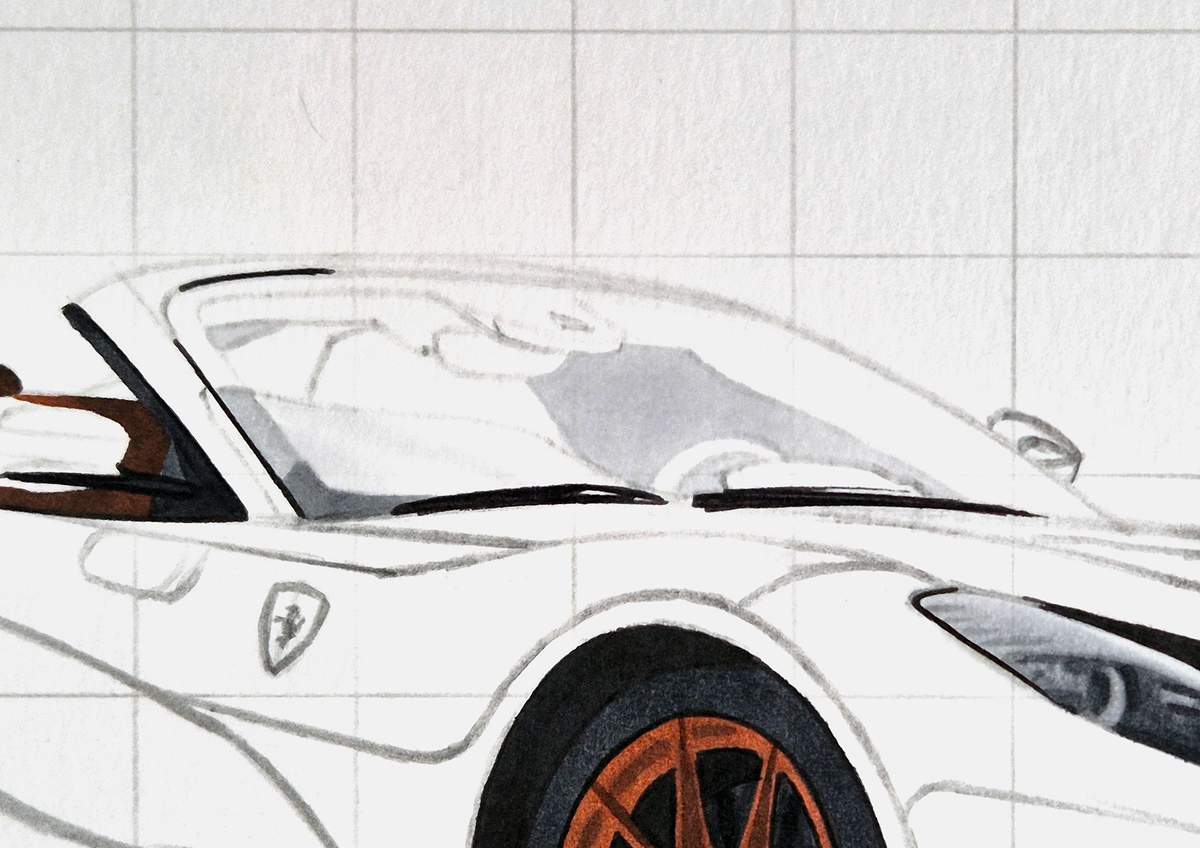
After that, I colored almost everything remaining with Neutral Grey 07 (CG070), except for the buttress and the thing where the rearview mirror mounts to on the top of the windshield.
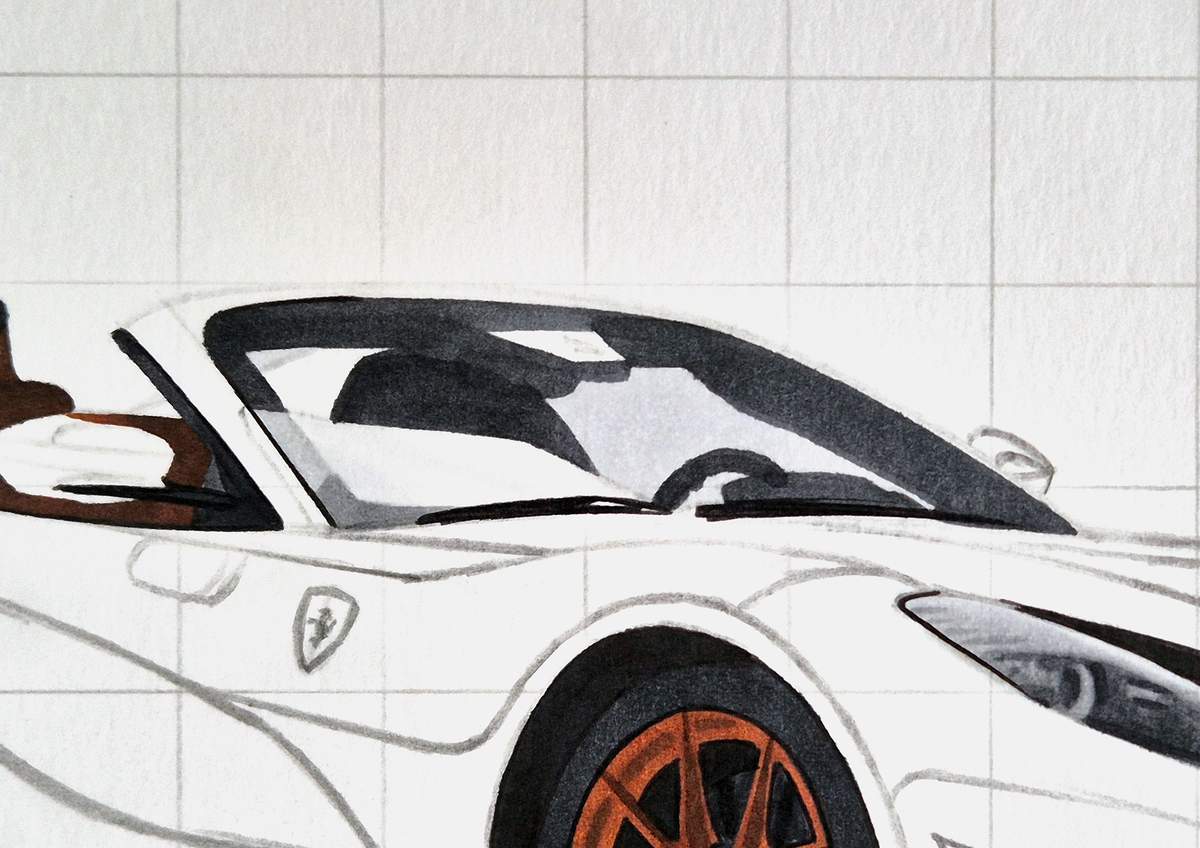
Next, I added the darkest shadows of the interior with Neutral Grey 6 (NG06). I darkened the left edge of the right A-pillar and the thingy at the top of the windshield we had left uncolored.
I also added a dark outline around the rearview mirror, and I darkened the edge to the left of the right side window and the bottom left of the steering wheel.
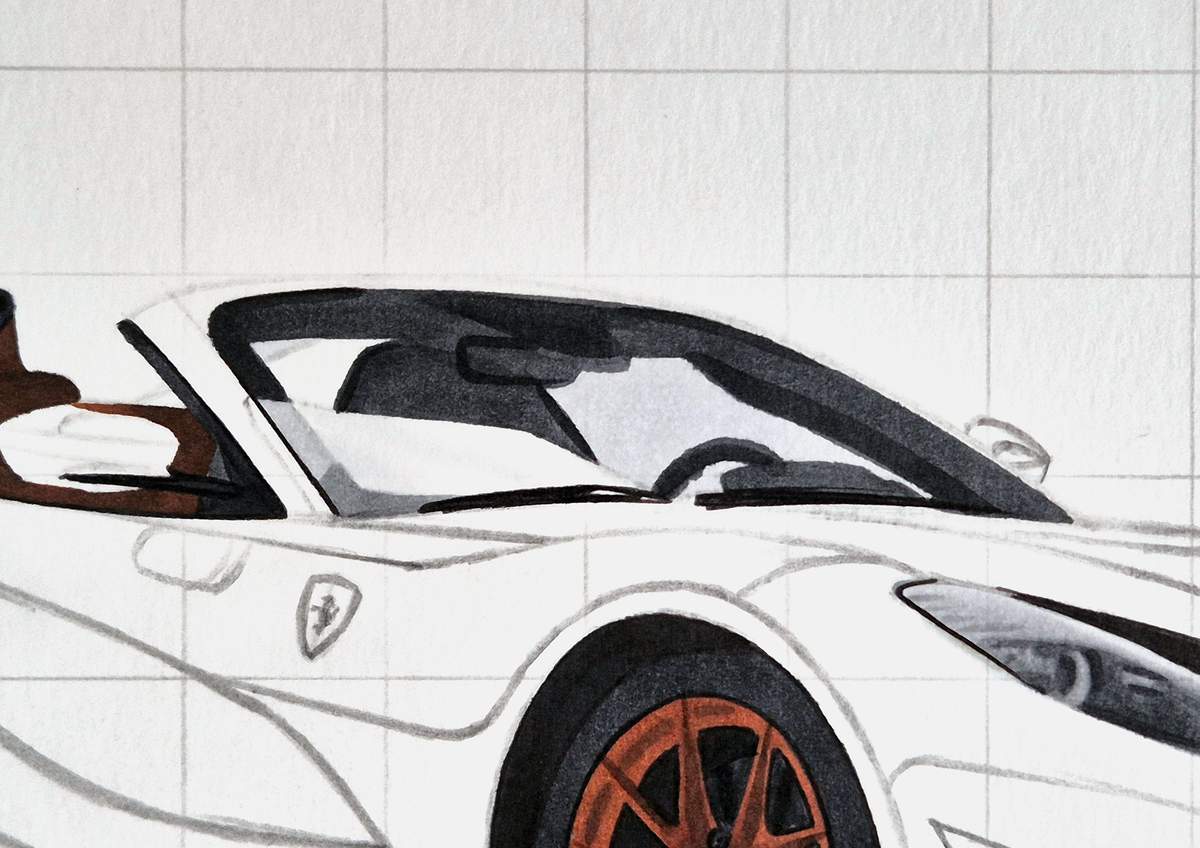
To complete the interior, I used Dark Suntan (E110). At least, I think it was that color...
I used it to add a brown tint to the interior bit below the rearview mirror and on the dashboard.
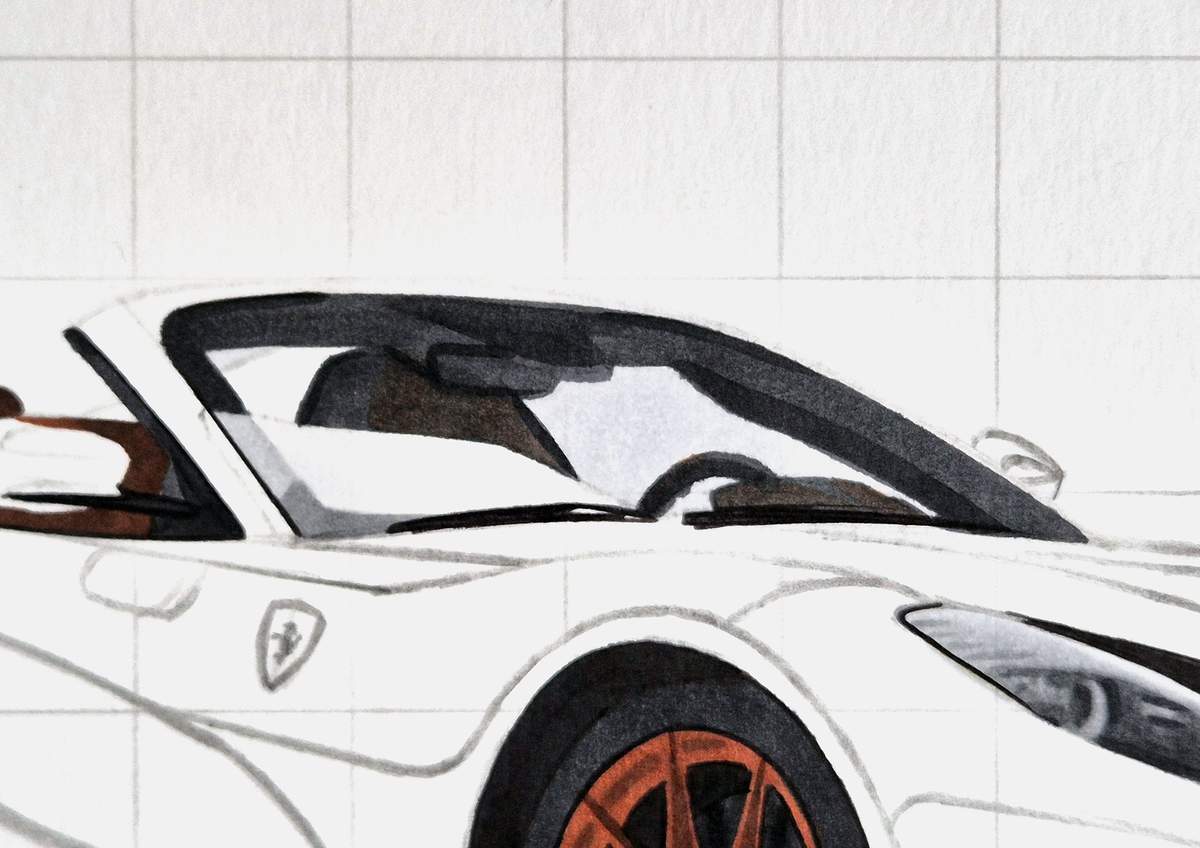
And that's the interior done for now.
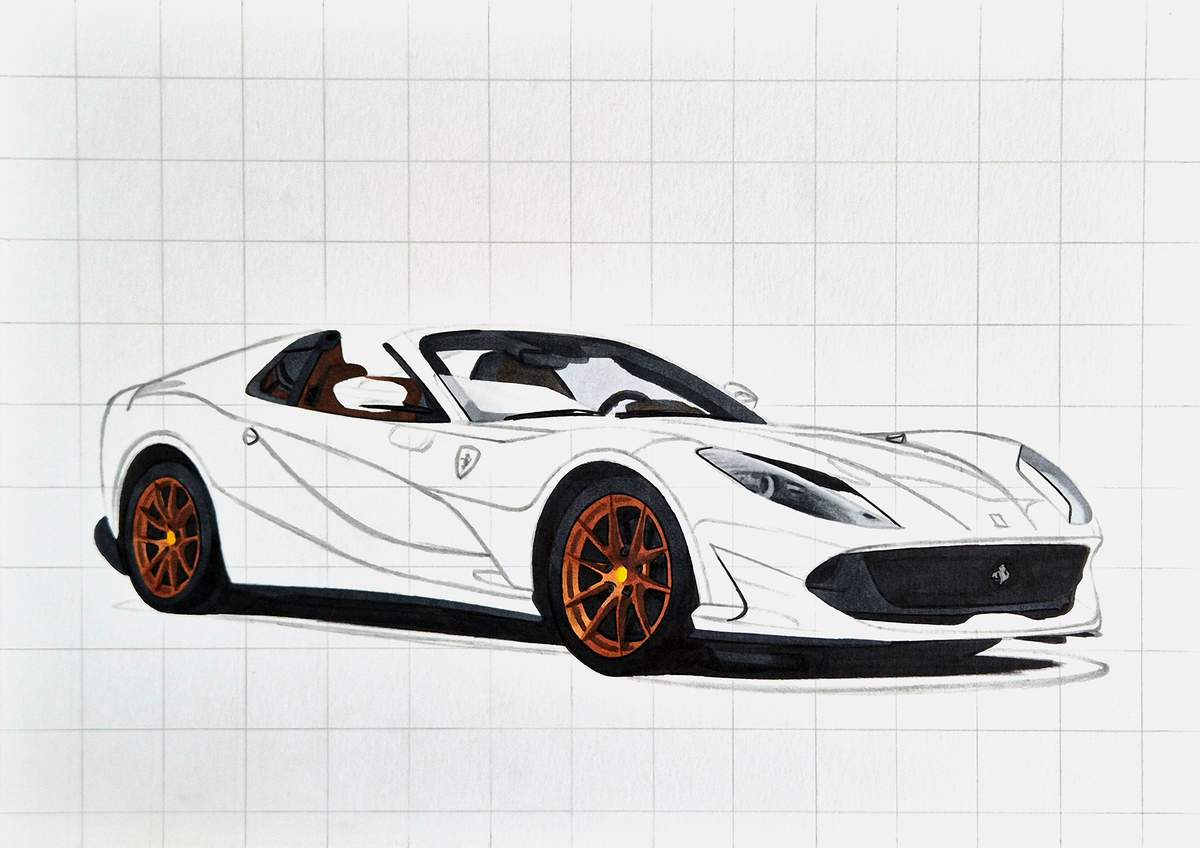
Step 20: Color the Ferrari badges
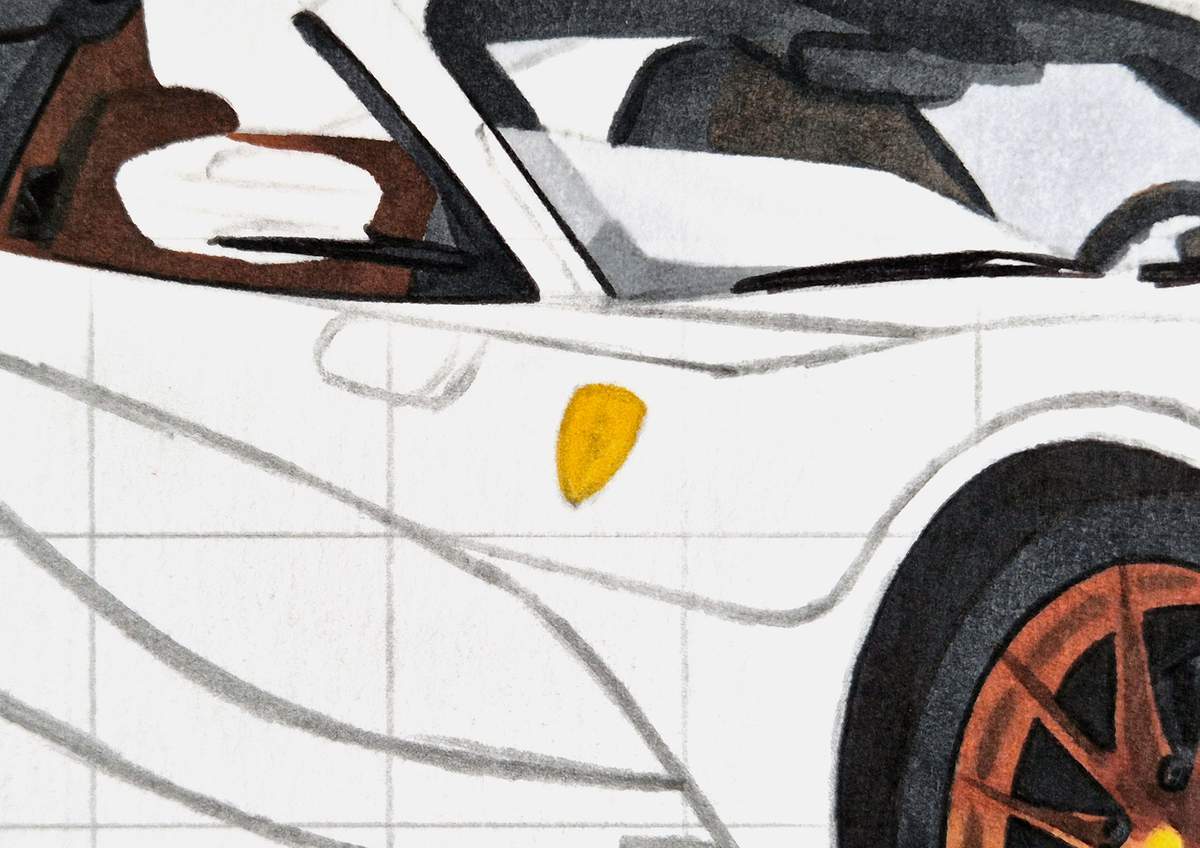
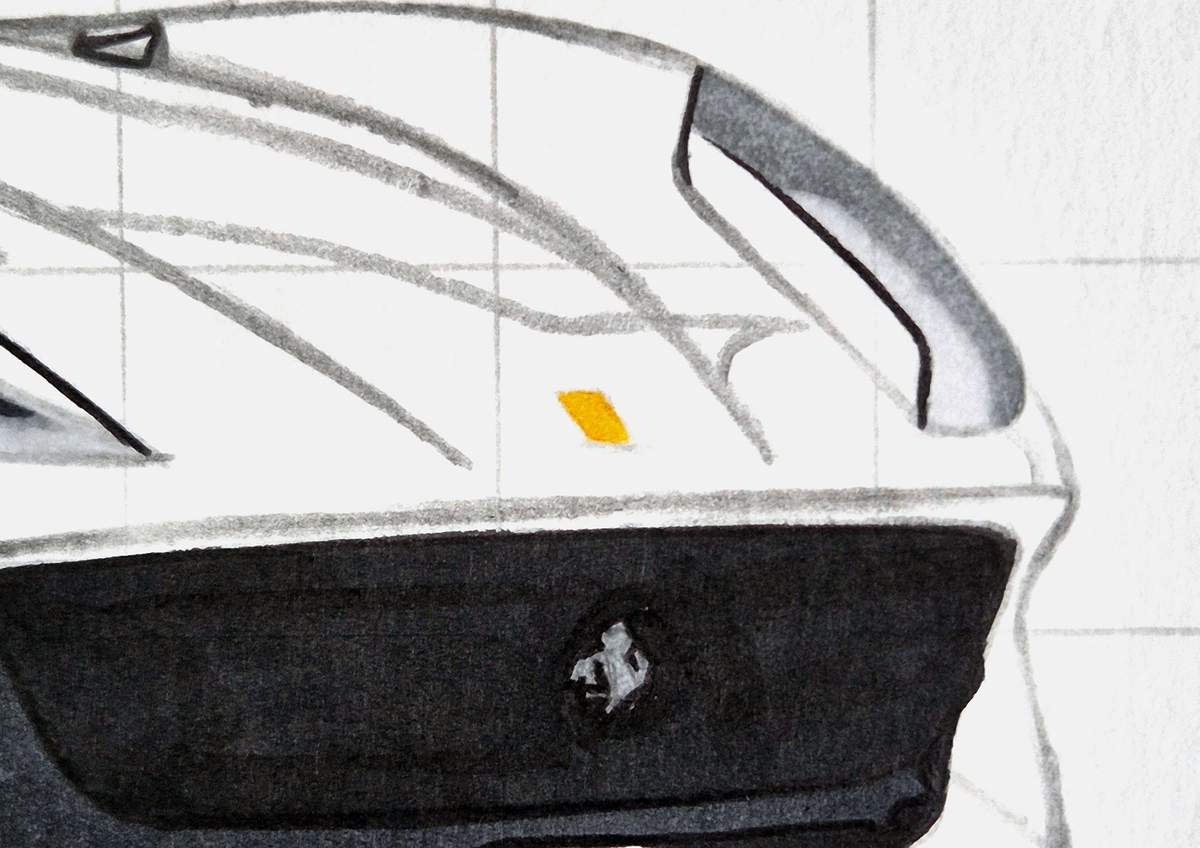
Next, I colored both Ferrari badges with Lemon Yellow (Y6).
Step 21: Color the shadow of the 812
Now only the shadow is left! (Plus a tiny bit on the hood that I almost forgot to color.)
To color the shadow, I first colored it with Neutral Grey 03 (CG030).
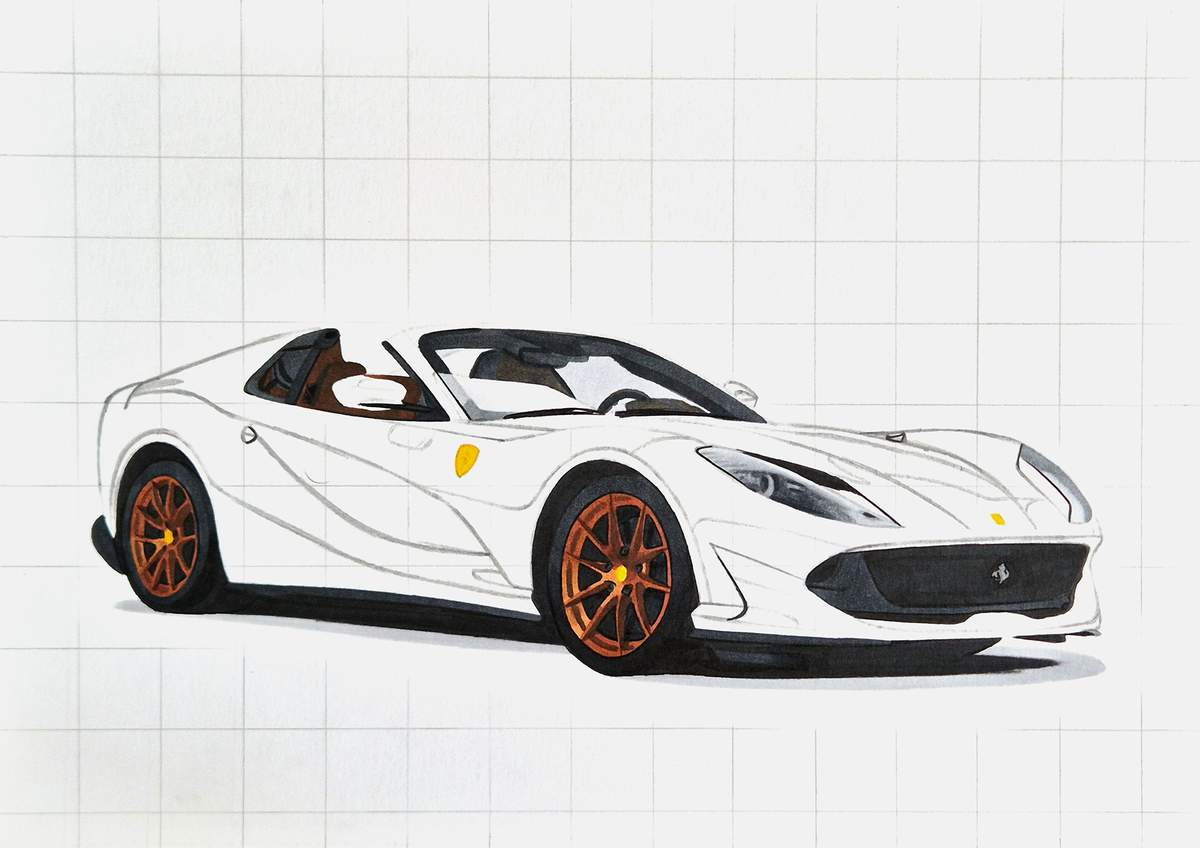
Then, I used Neutral Grey 07 (CG070) to color the inside of the shadow, leaving a lighter grey edge on the outer edge. I also colored over the black to make the CG070 and the black blend.
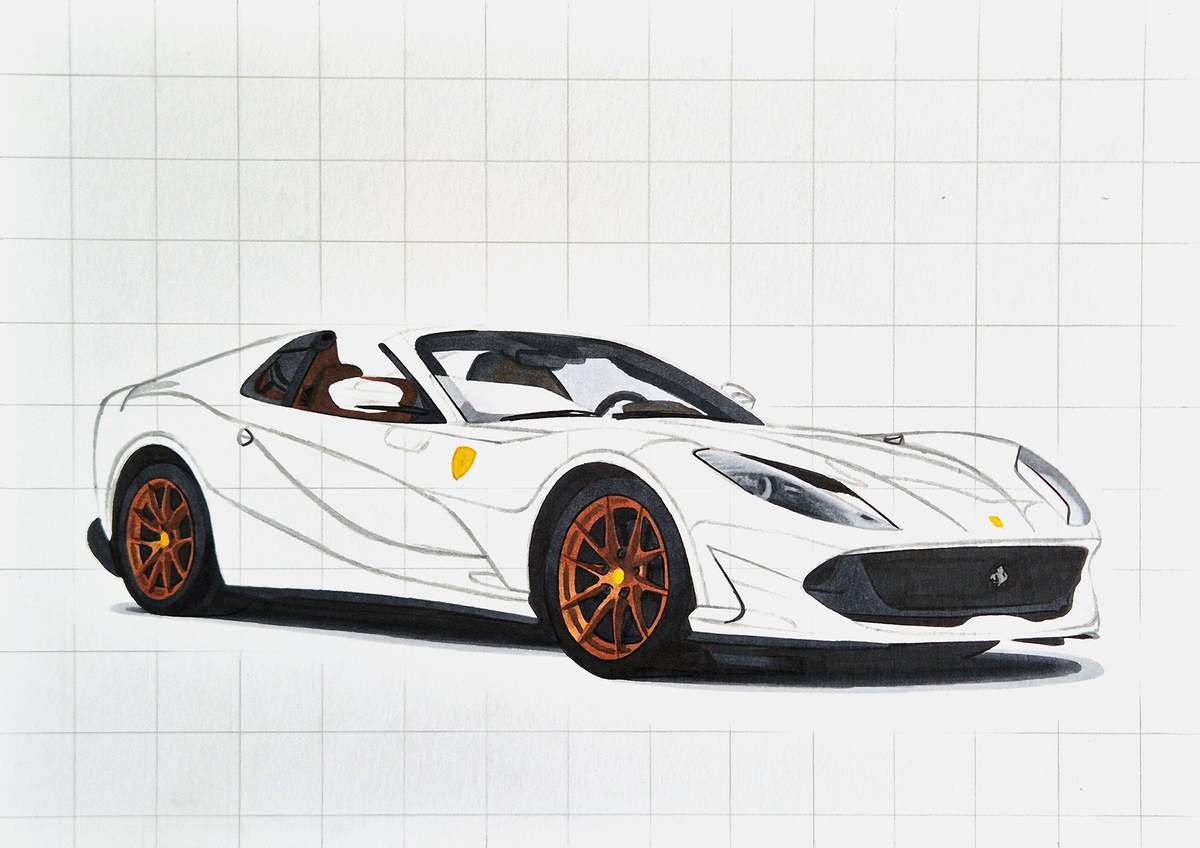
Lastly, I also blended the CG070 into the lighter grey by coloring over the edge of the CG070 with Neutral Grey 03 (CG030). And I blended the outer edge of the shadow with the Colorless Blender (0).
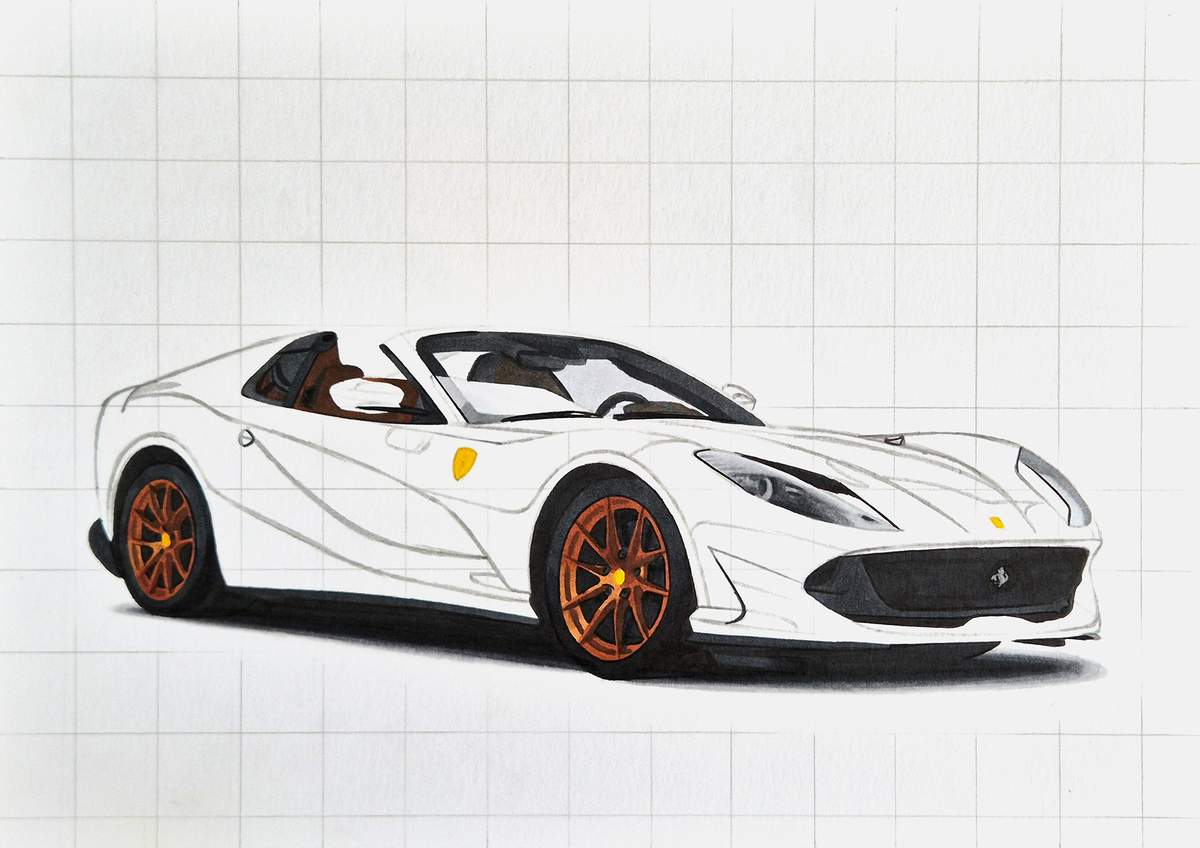
Step 22: Color the small air vent on the hood
I almost forgot to color this small vent on the hood, but just in time, I noticed it.
To color it, I just used Neutral Grey 6 (NG06). That's all.
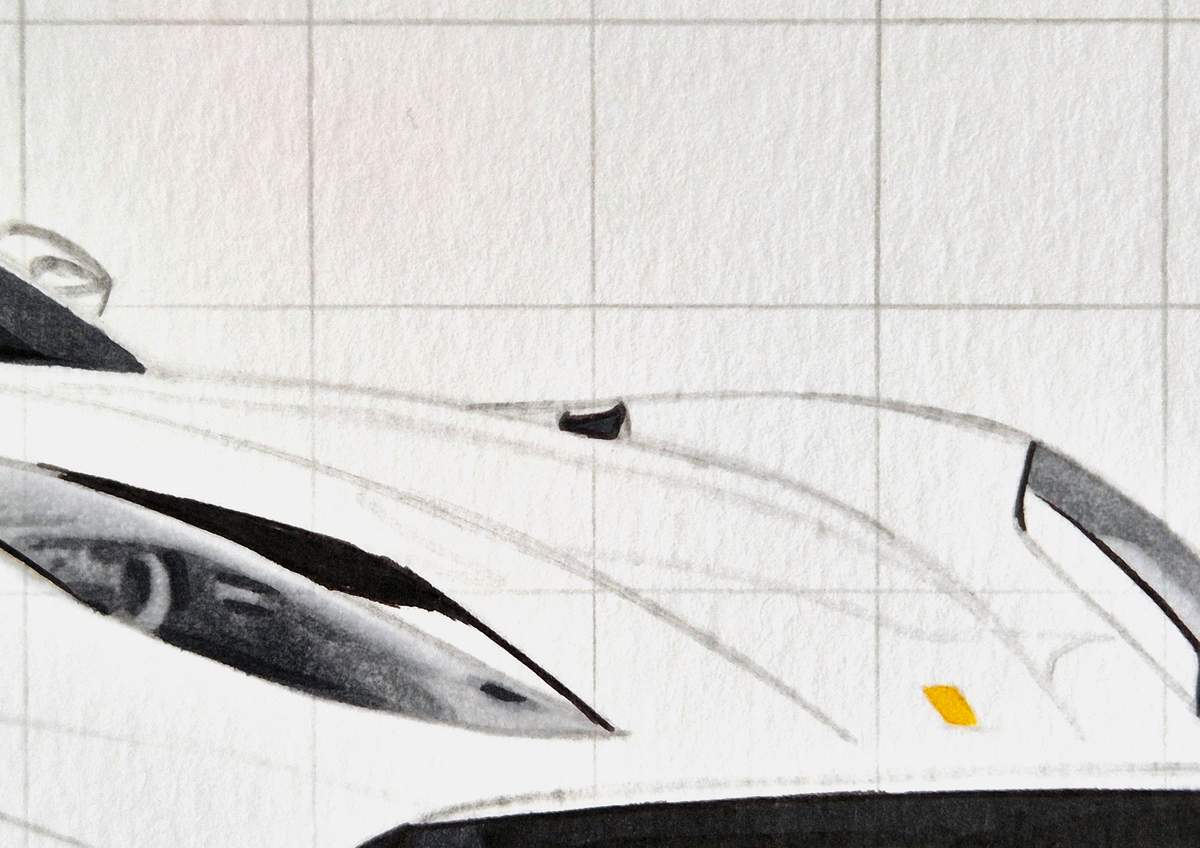
And that's everything but the body colored!
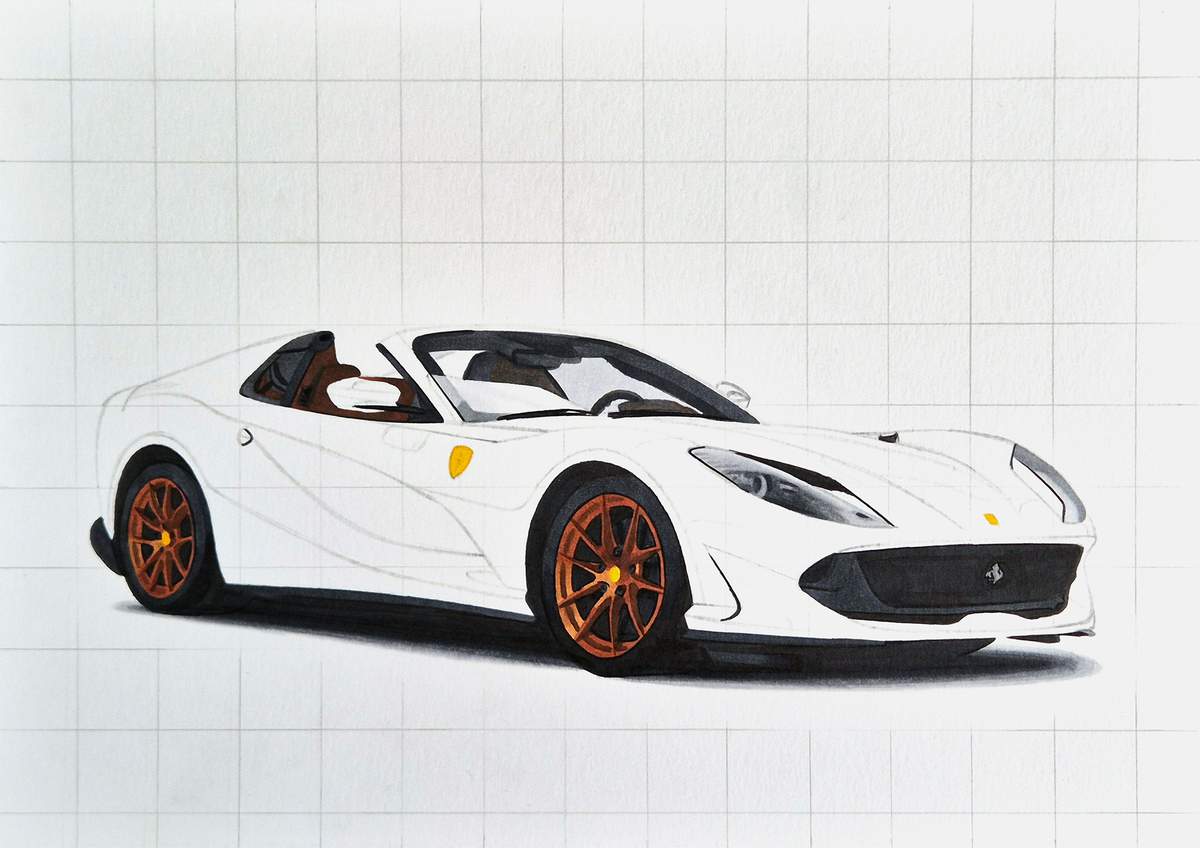
Coloring the Main Body of the Ferrari 812 GTS
Before we start coloring the main body, I just wanted to say that this is one of the most complex colors I've ever done with alcohol markers.
For my normal tutorials on my blog, I simplify the color a lot. But this time, I liked the color way too much to make it simple. Instead, I tried to create every unique color nuance that I saw in the paint.
This made this step a lot longer than usual. And it took me some figuring out what worked best when coloring.
Also, when looking at the reference photo, it has a lot of reflections on the dark areas. I could color these as I color the body with markers. However, this will make the process super complex, and it's very likely I will forget to leave a part lighter.
To make it easier for me, and because I think this is the best way to do it, I added those grey and black reflections afterwards with colored pencils.
Since coloring the body of this 812 took so many steps, I broke it up into smaller ones.
Step 23: Color the side of the Ferrari 812 GTS
As usual, I first lightened the sketch before I colored the paint color of the 812.
Then, I used the closest green I had and colored the darkest part of the main body. The color I used was Turquoise Ink Blue (G5).
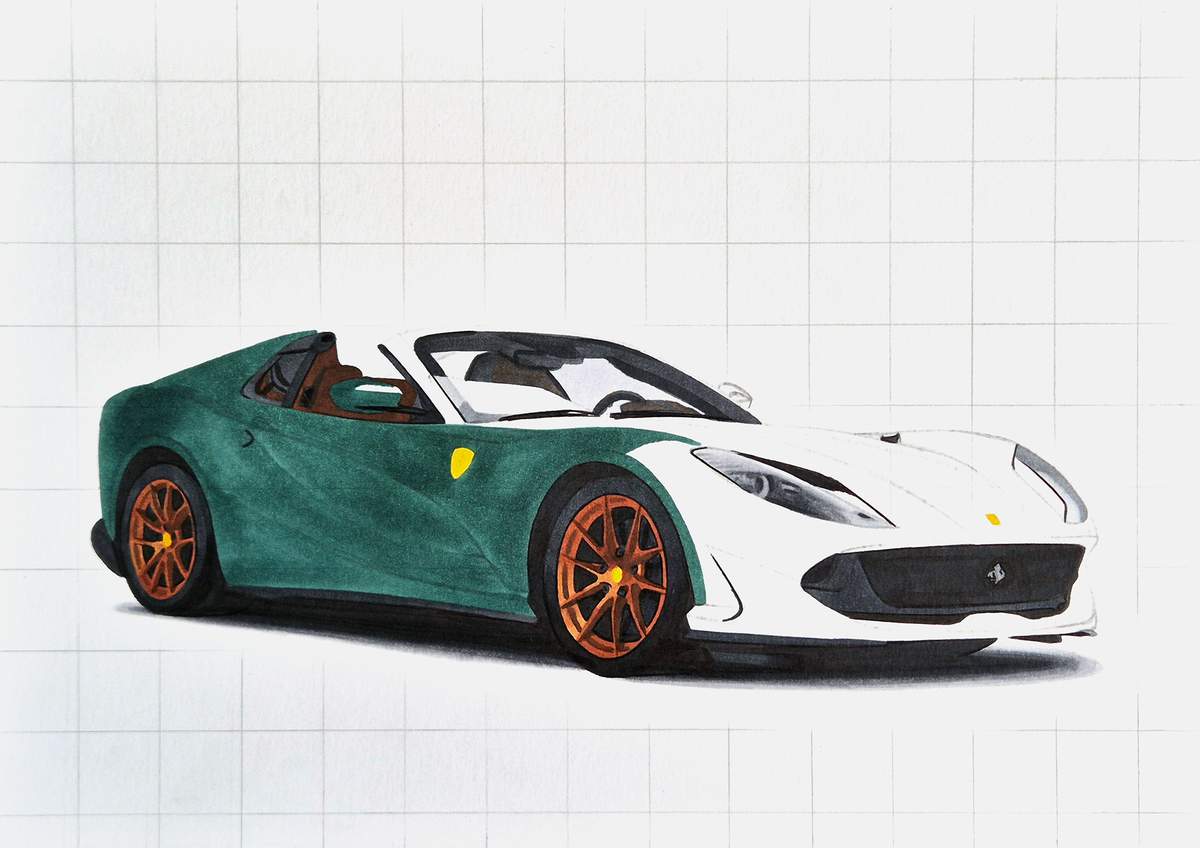
Then, I needed to make this color look a lot greyer and darker. To do that, I tried layering Neutral Grey 3 (NG03) over it.
You can see the difference in this photo below. I only colored the top half of the side.
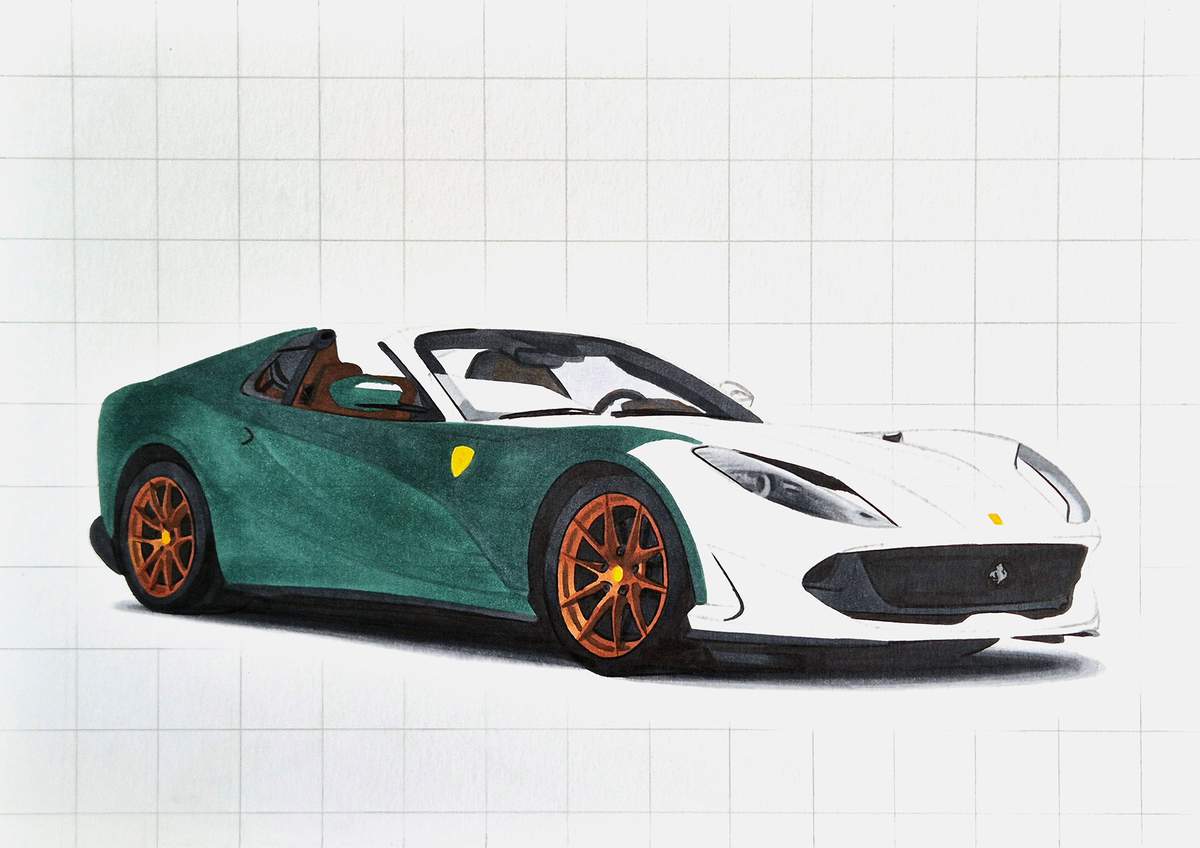
Here's a picture of the full side darkened with that grey color.
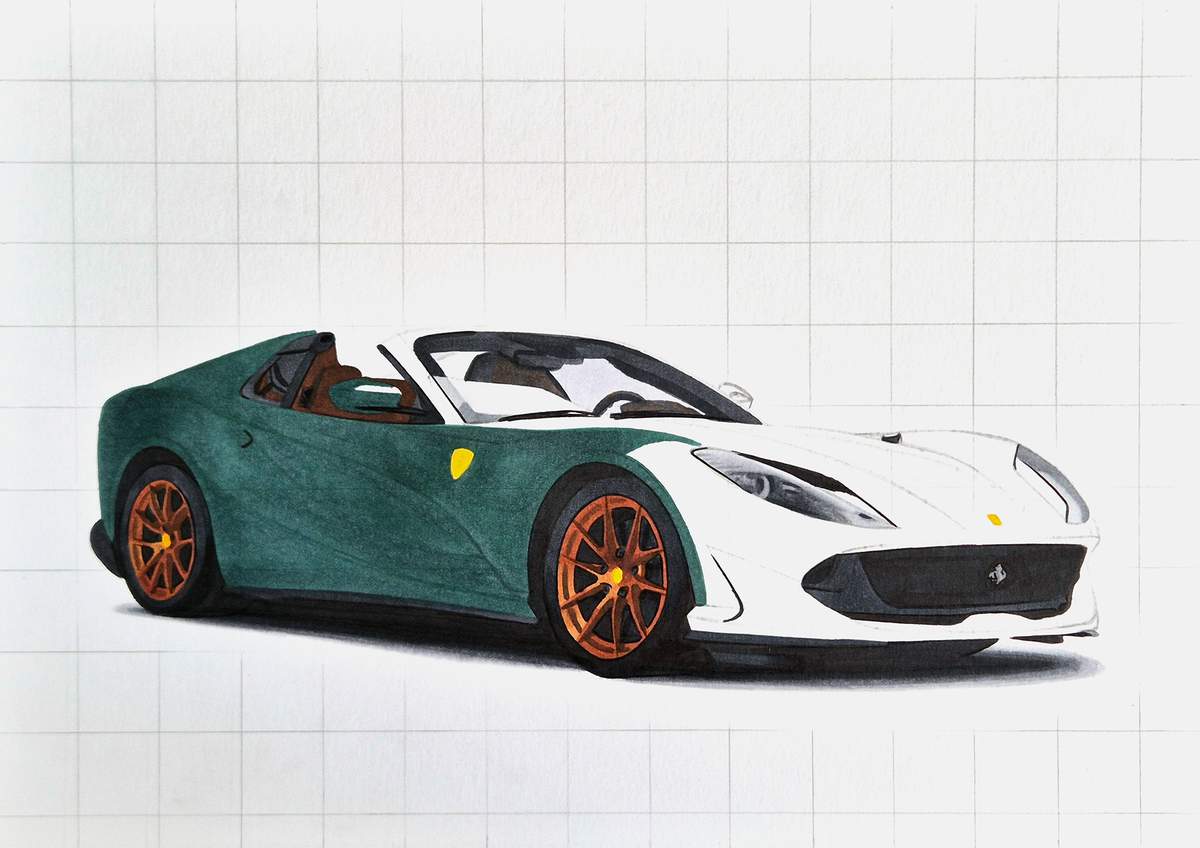
It kinda worked, but it wasn't enough.
Before I tried darkening it, I first wanted to see what the rest would look like when I added the deeper/dakrer shadows and reflections.
I added the dark reflections on the side with Neutral Grey 07 (CG070). One shade darker than NG03.
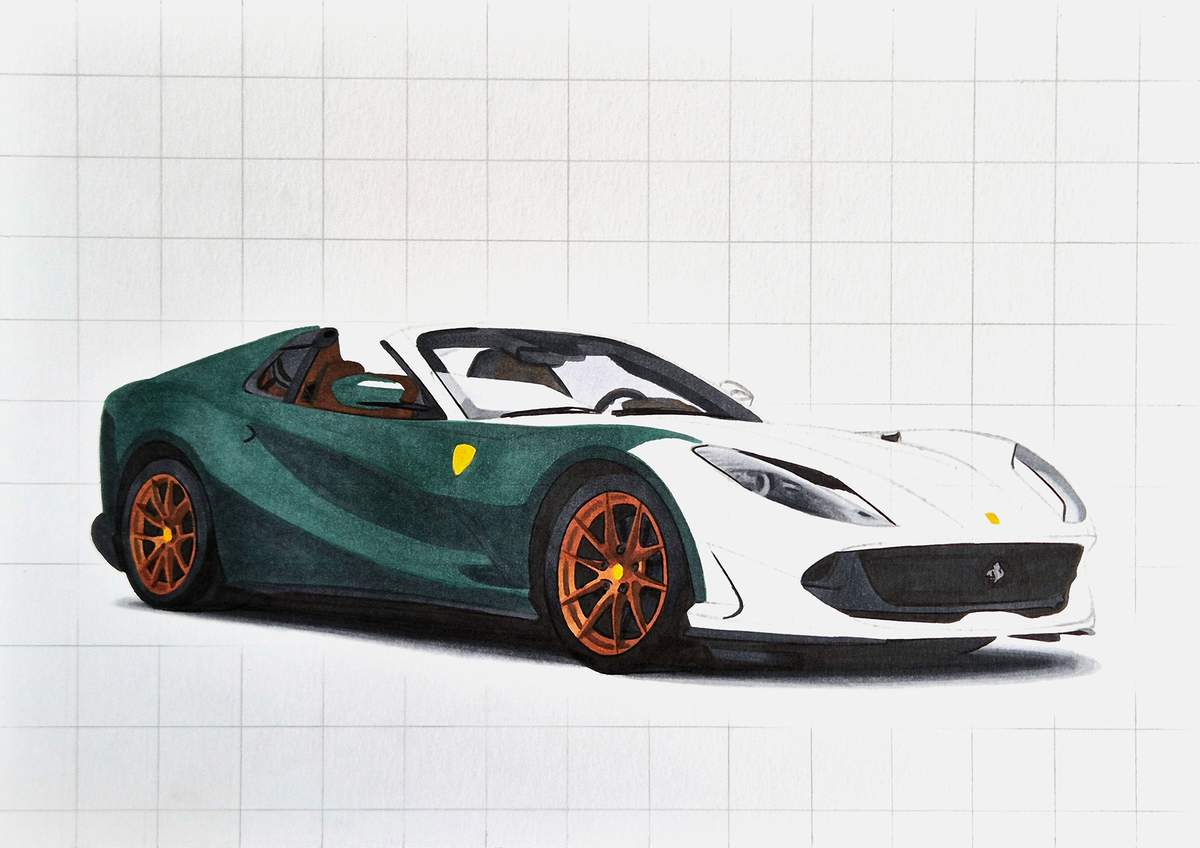
This was also too light for me, so I used the darkest grey I had and darkened those dark reflections on the side, except for the one next to the front wheel. The dark grey I used is called Neutral Grey 6 (NG06).
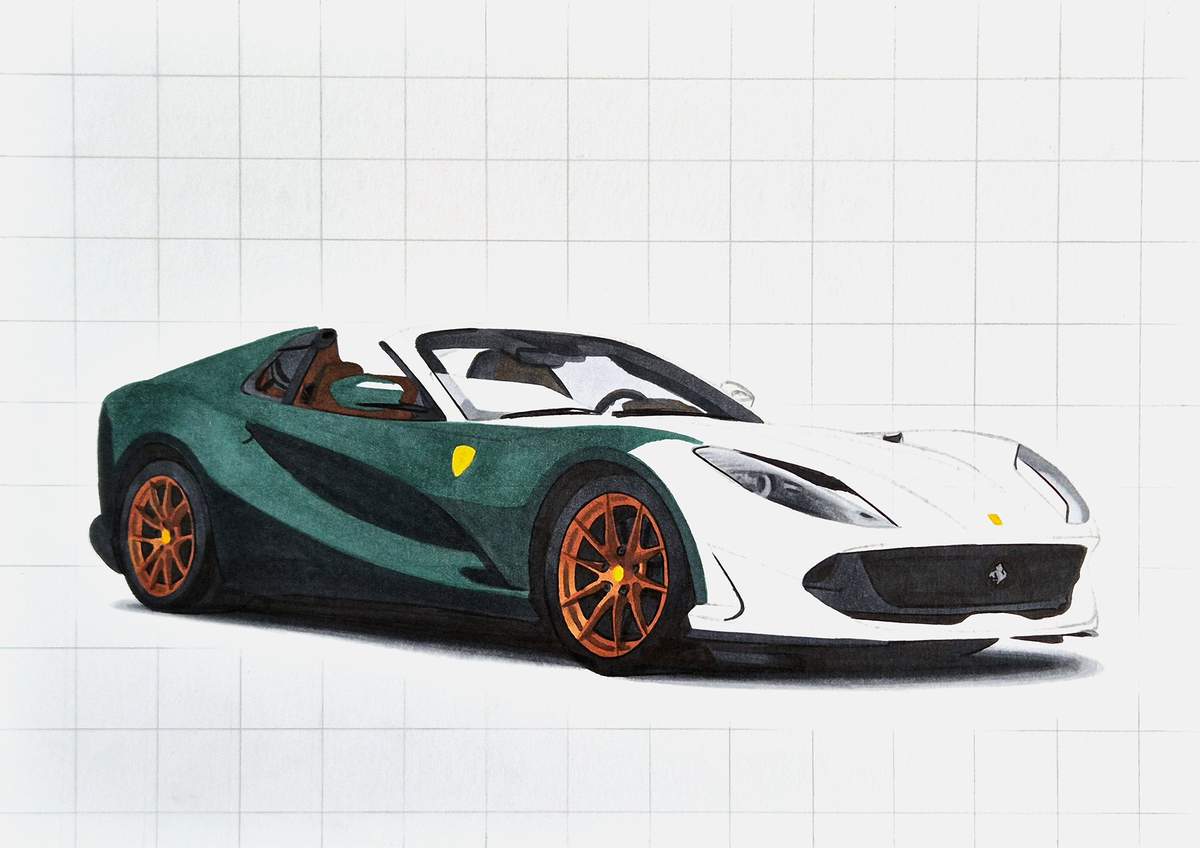
That looks more like it!
Now that it looks dark enough, I darkened the remainder of the green I had colored before. To do that, I used Neutral Grey 07 (CG070).
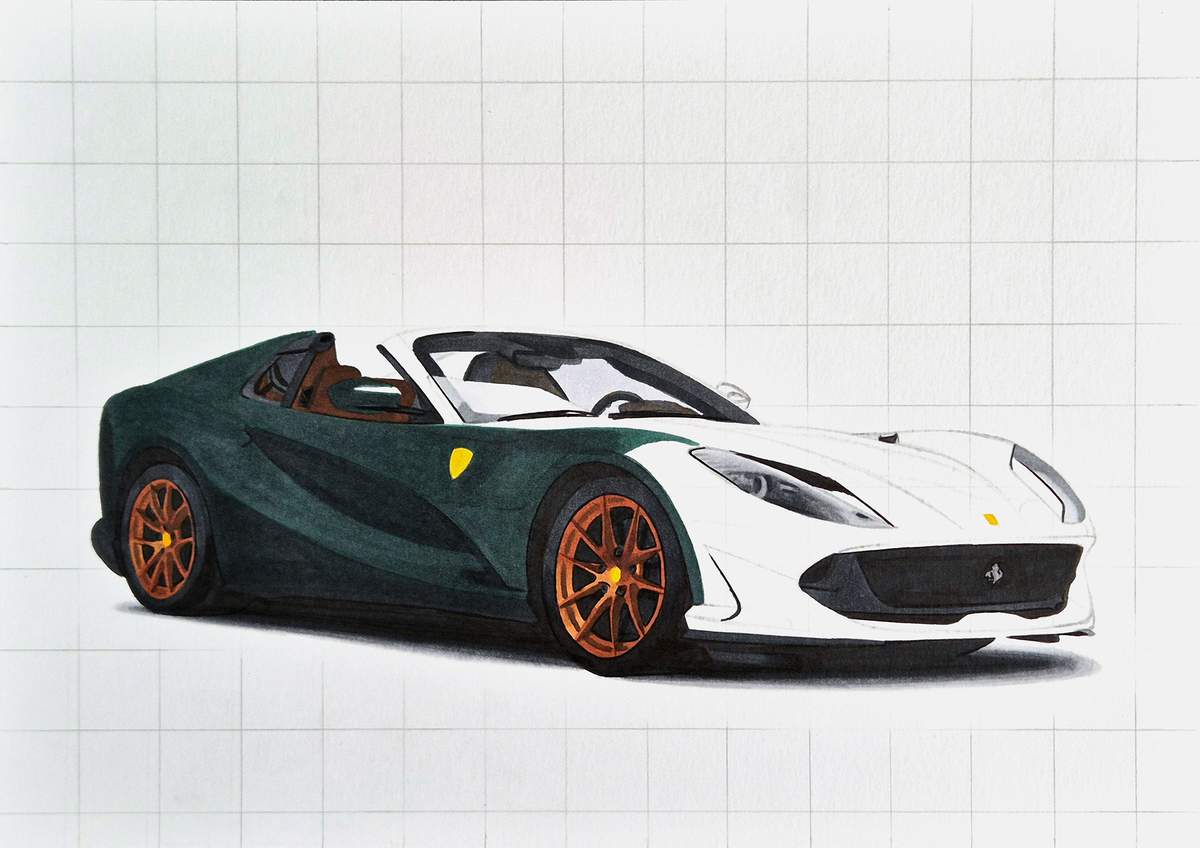
Now it looks dark enough and grey enough.
I then did the same for the bit surrounding the windshield.
I first colored it with Turquoise Ink Blue (G5) and then darkened it with Neutral Grey 07 (CG070).
Make sure to leave a small white part uncolored on the right of the A-pillar. There will be a light green reflection here.
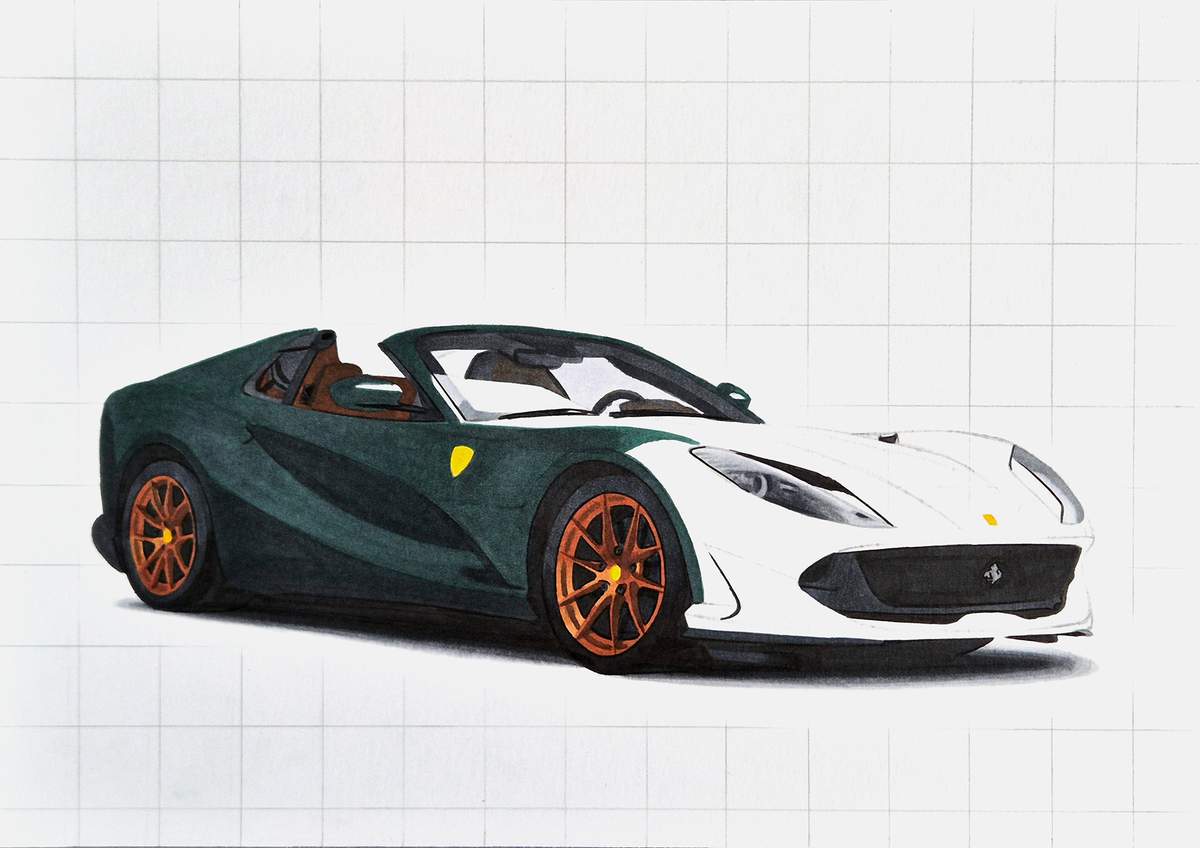
Step 24: Color the hood of the 812
With the side all colored, I started working on the front of the 812.
For the dark reflection on the hood, I used this yellow-grey-green color called Dragon Well Tea (E434).
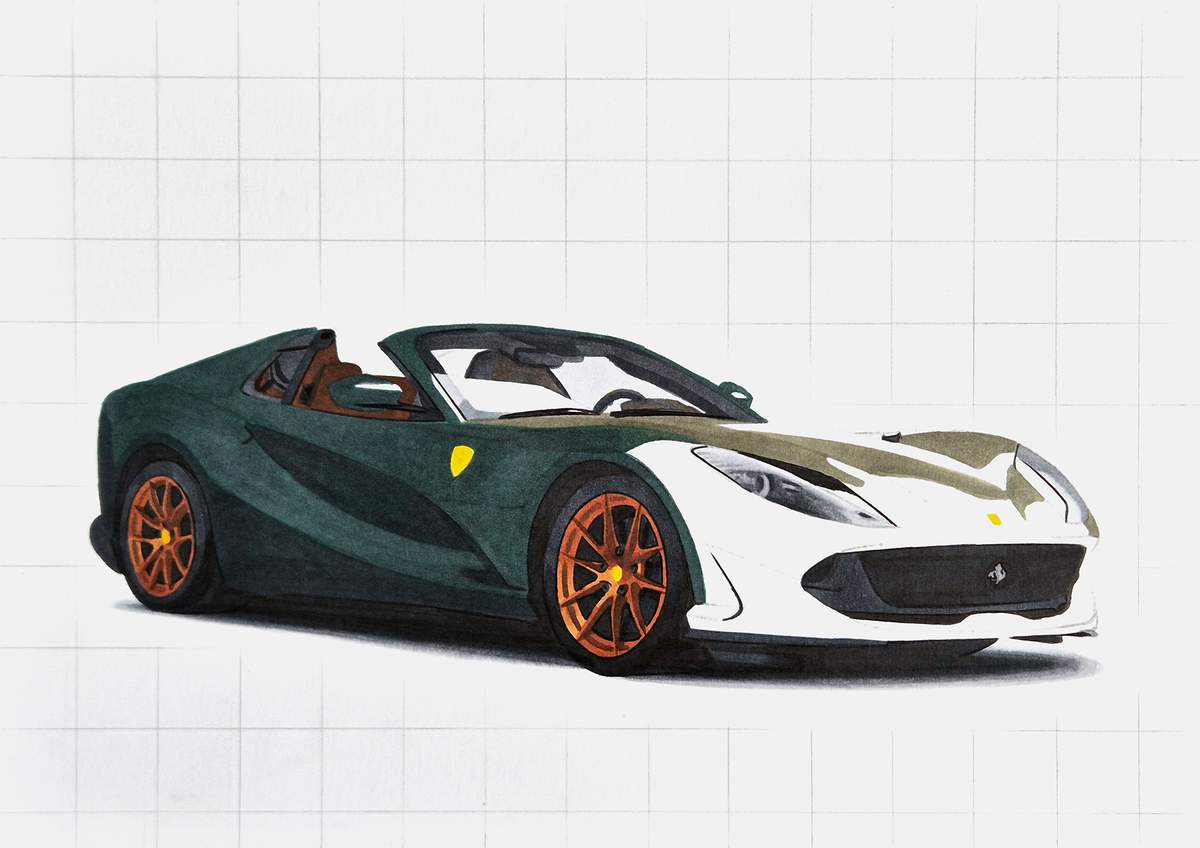
To make it not stand out as much next to the dark green, I colored over the bit that's right next to the dark green with a midtone green called Mineral Green (G330).
This helps it tie together a lot more.
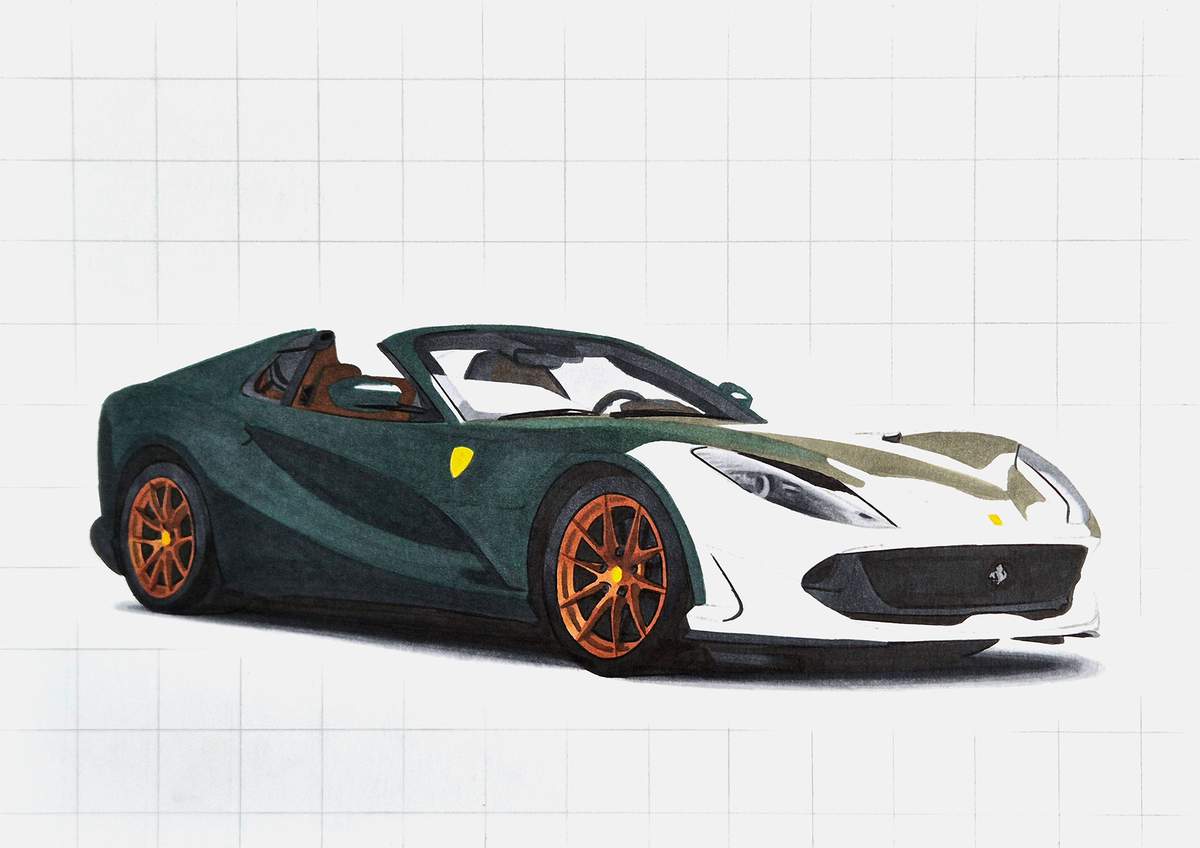
Next, I added the lighter reflection on the hood with a lighter yellow-green-grey color called Vert Celadon (E432).
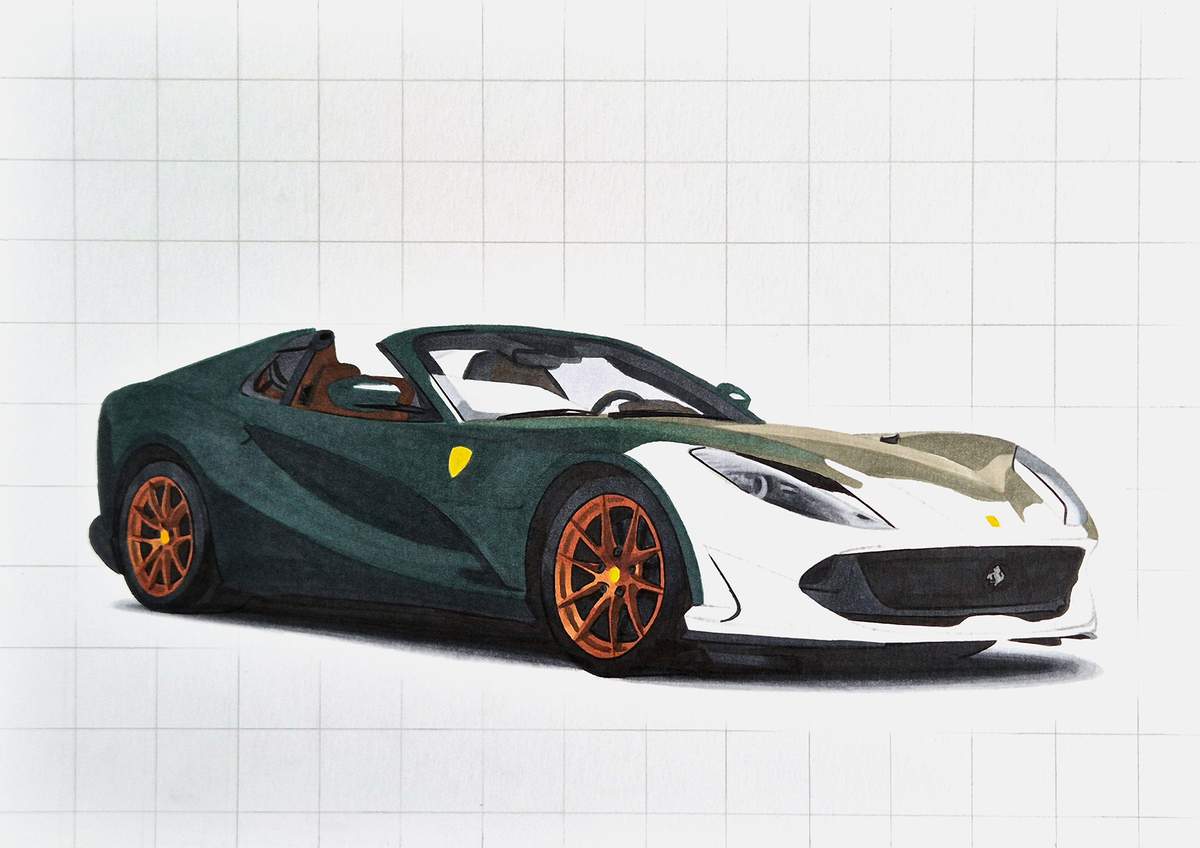
I overlaid some light green on the light reflection next to the right headlight with Jade Green (G320).
I also forgot to leave space for another light reflection in the darker reflection above the logo on the front. I still wanted it to be there, so I used more Jade Green (G320) and just colored over the part where I wanted it to be. After a few passes, the light green ink has pushed the other ink away, and this light green reflection appeared.
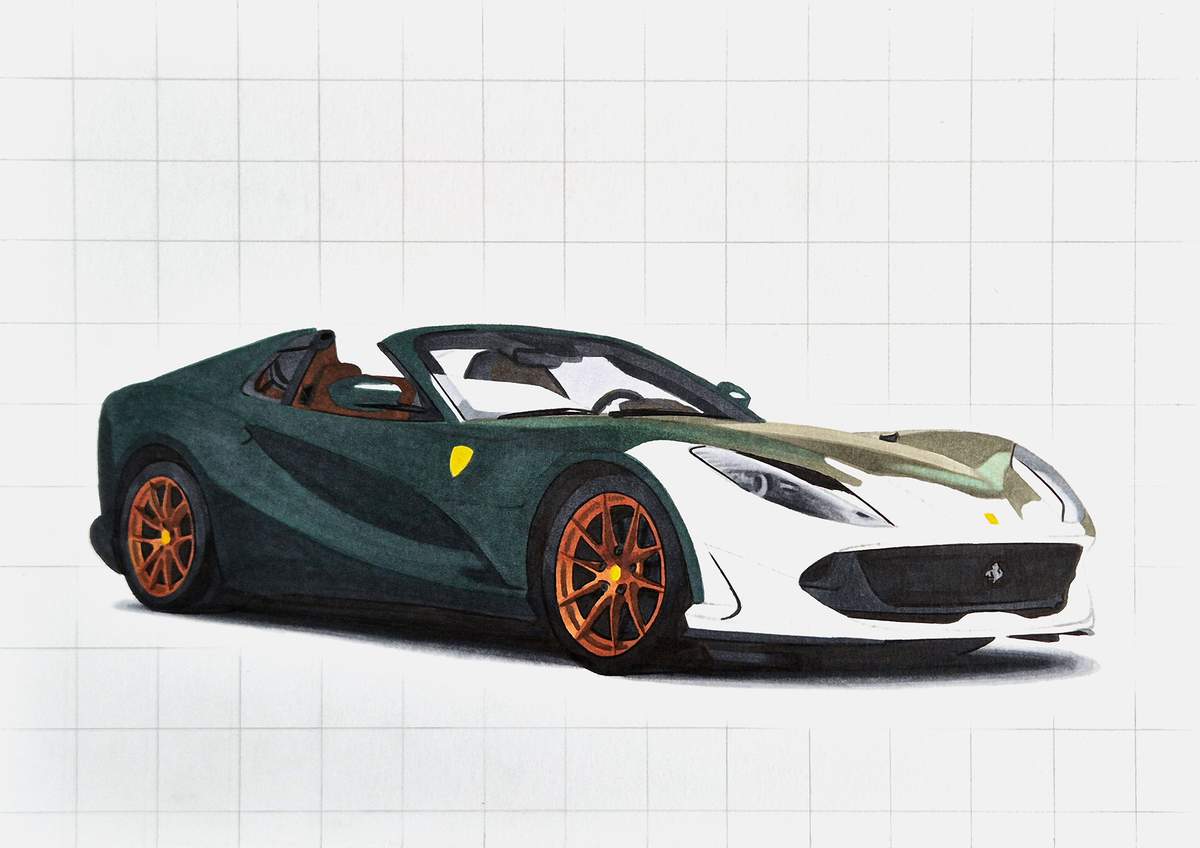
Step 25: Color the Front Bumper of the 812
With the dark part of the hood now done, I started working on the side of the front bumper.
I first colored this part with the light green, Jade Green (G320).
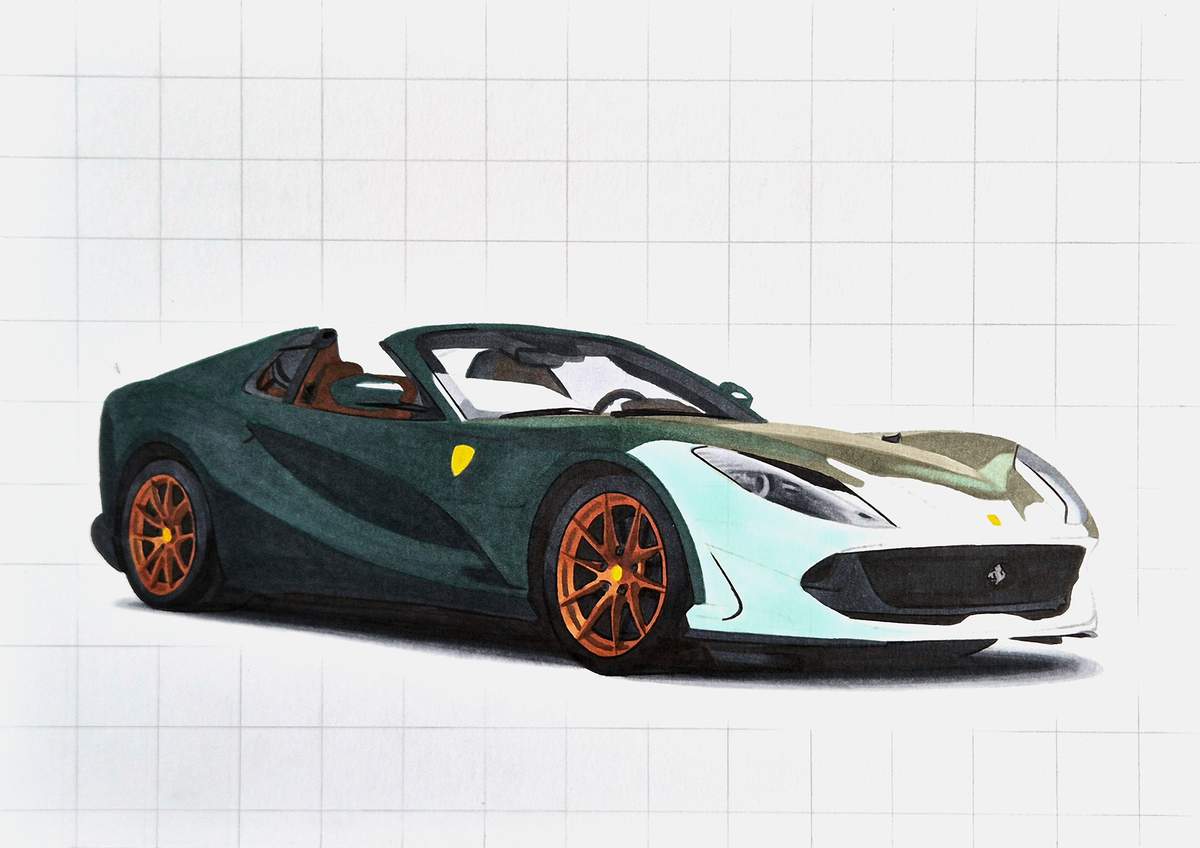
Next, I added some kind of cloud-like reflections to the bit below the headlight with Mineral Green (G330).
I made the right side the darkest and used dots with the brush nib to transition into the lighter bit and to create a cloud-like effect.
It did turn out way too dark on the left side and it scared me. To make it lighter, I layered a lot of the light green on top. This pushed the darker green more into the paper, making it look lighter.
And honestly, it looks really good now.
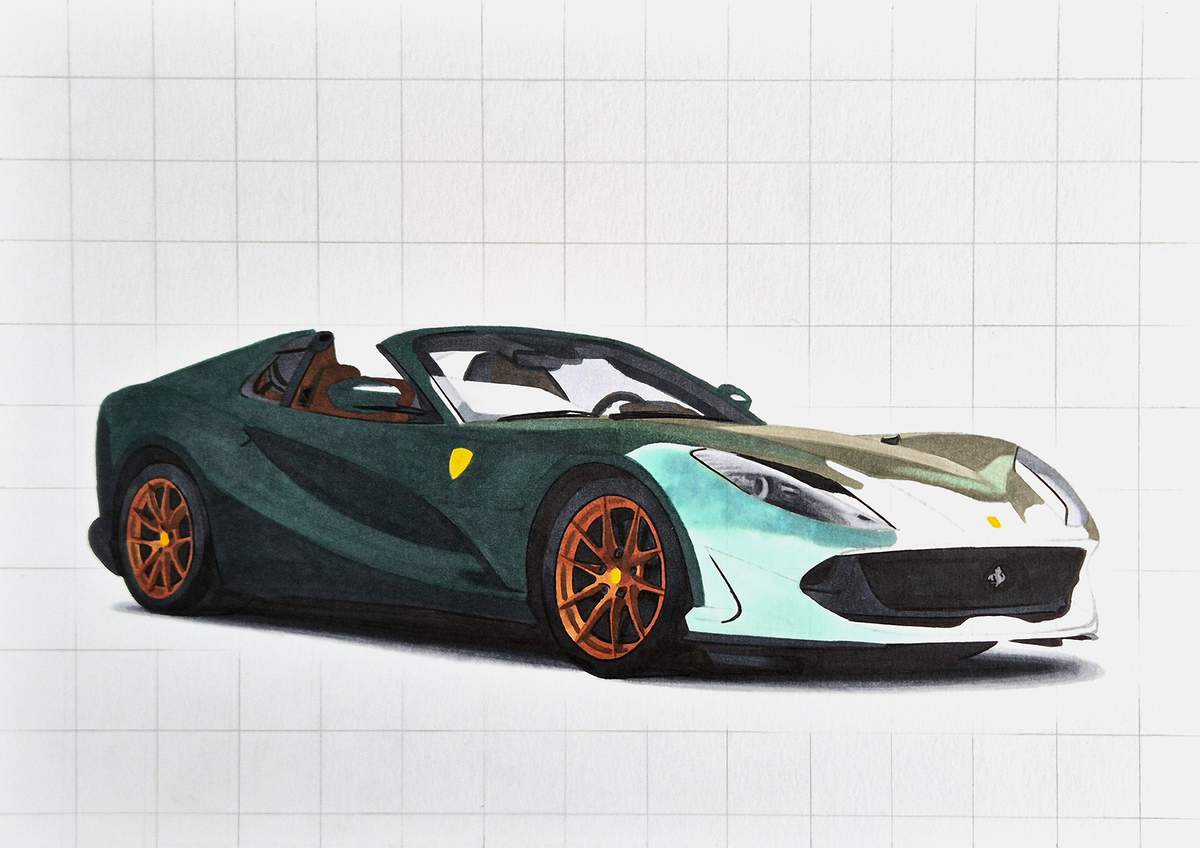
Next, I used the dark green, Turquoise Ink Blue (G5), to color all the dark reflections on the front bumper.
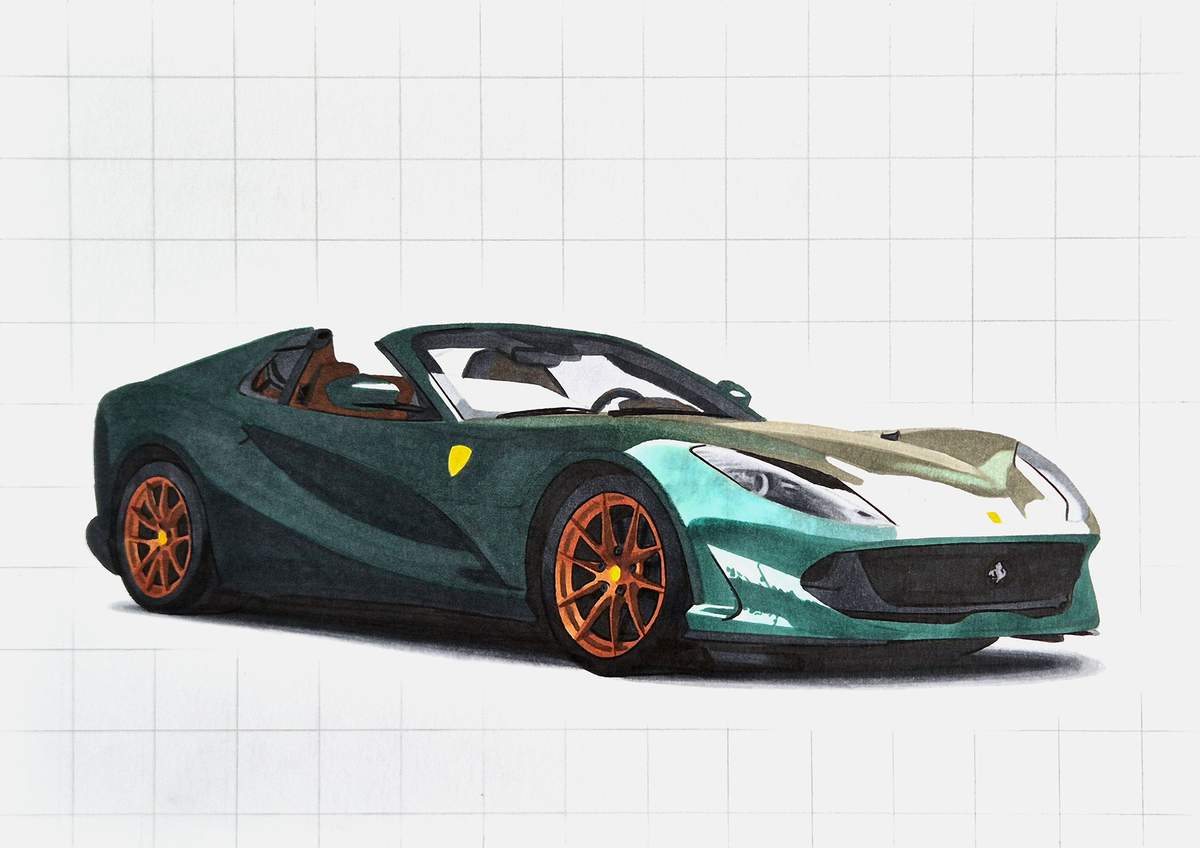
I then layered Neutral Grey 3 (NG03) over it to make it look greyer.
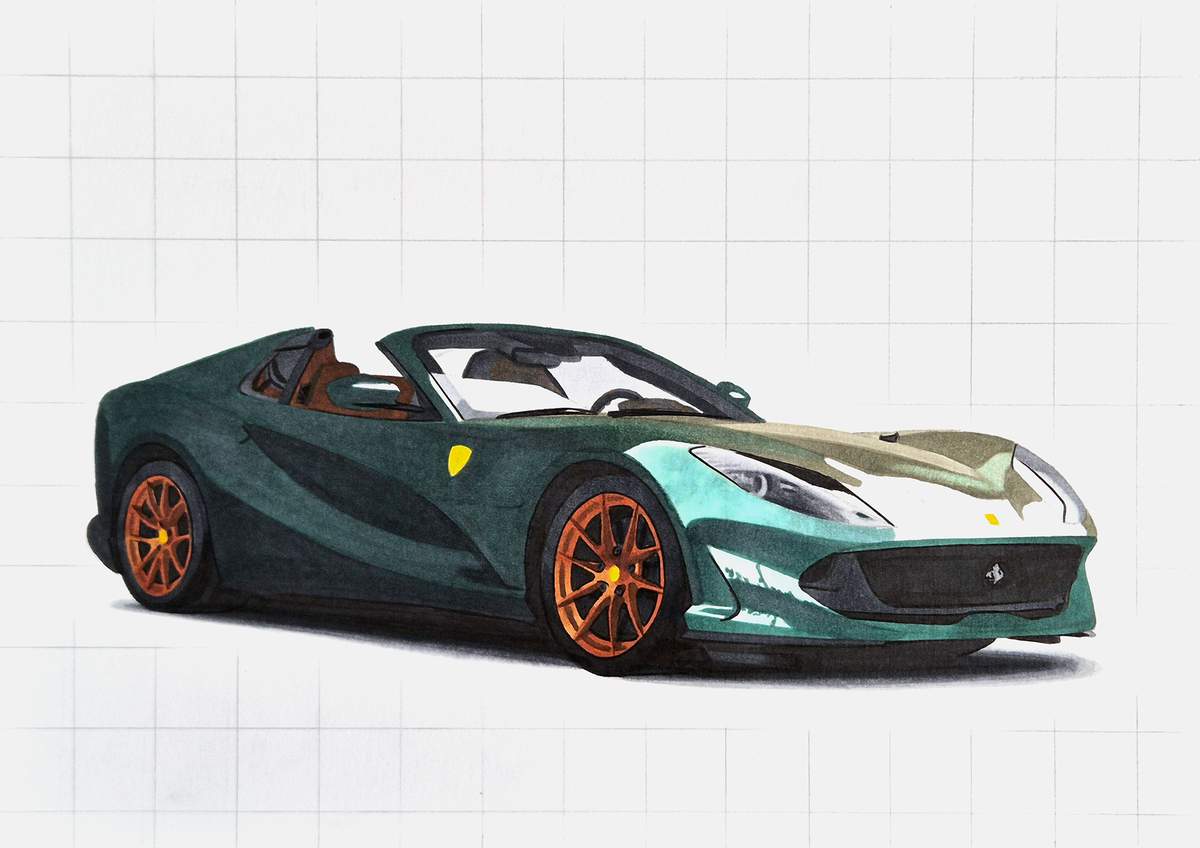
Then, I used Neutral Grey 07 (CG070) to darken most of these dark reflections, except for the one on the fin thingy in between the lighter reflections and the top left of the front bumper.
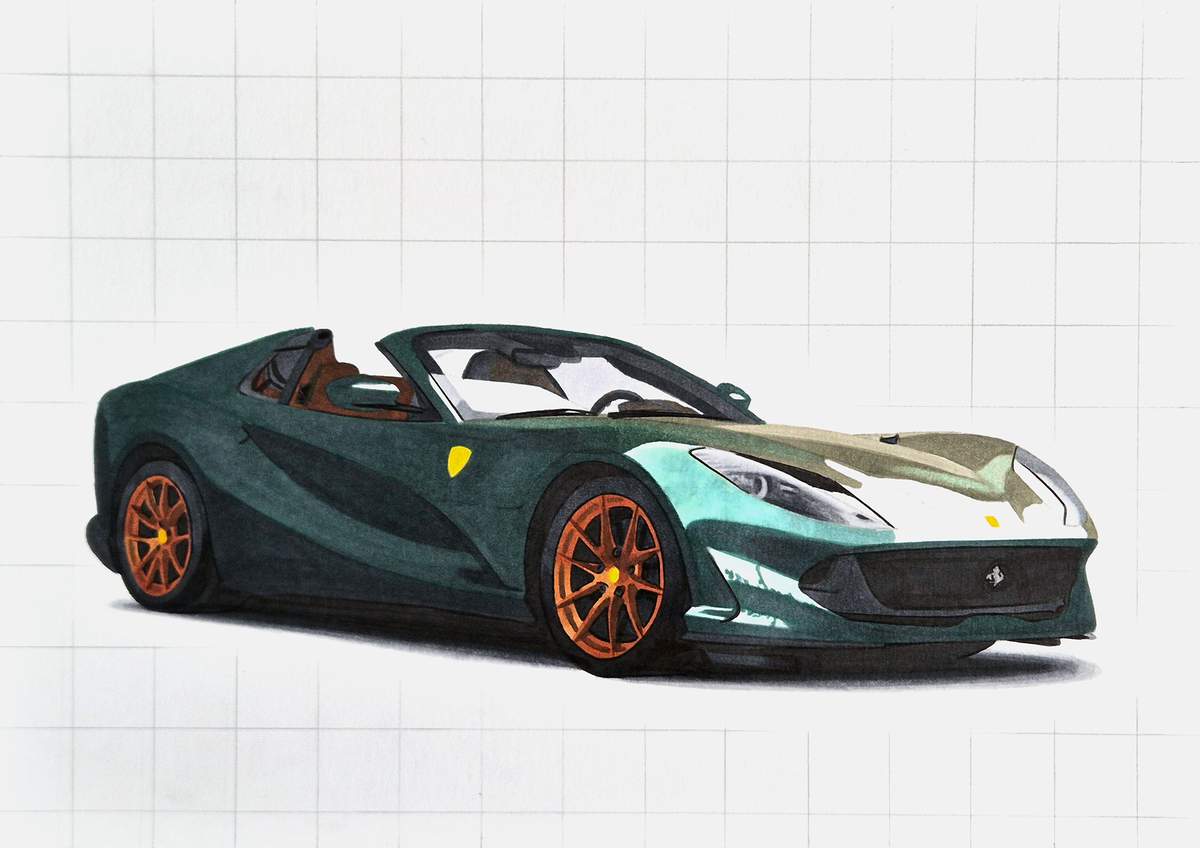
For some reason, I felt that I needed to fix the color of the light reflection below the headlight first before finishing the dark reflection on the bumper.
The light reflection below the left headlight looked way too bright green for me.
So, to make it more grey, I colored some grey over it. To be honest, I don't remember specifically what I did. (I made this drawing 5 weeks ago now.)
I think I layered Neutral Grey 03 (CG030) on top by using the brush nib and just pushing it on and off, if that makes sense, to keep the cloud-like look.
I mostly added the grey on the right and the left.
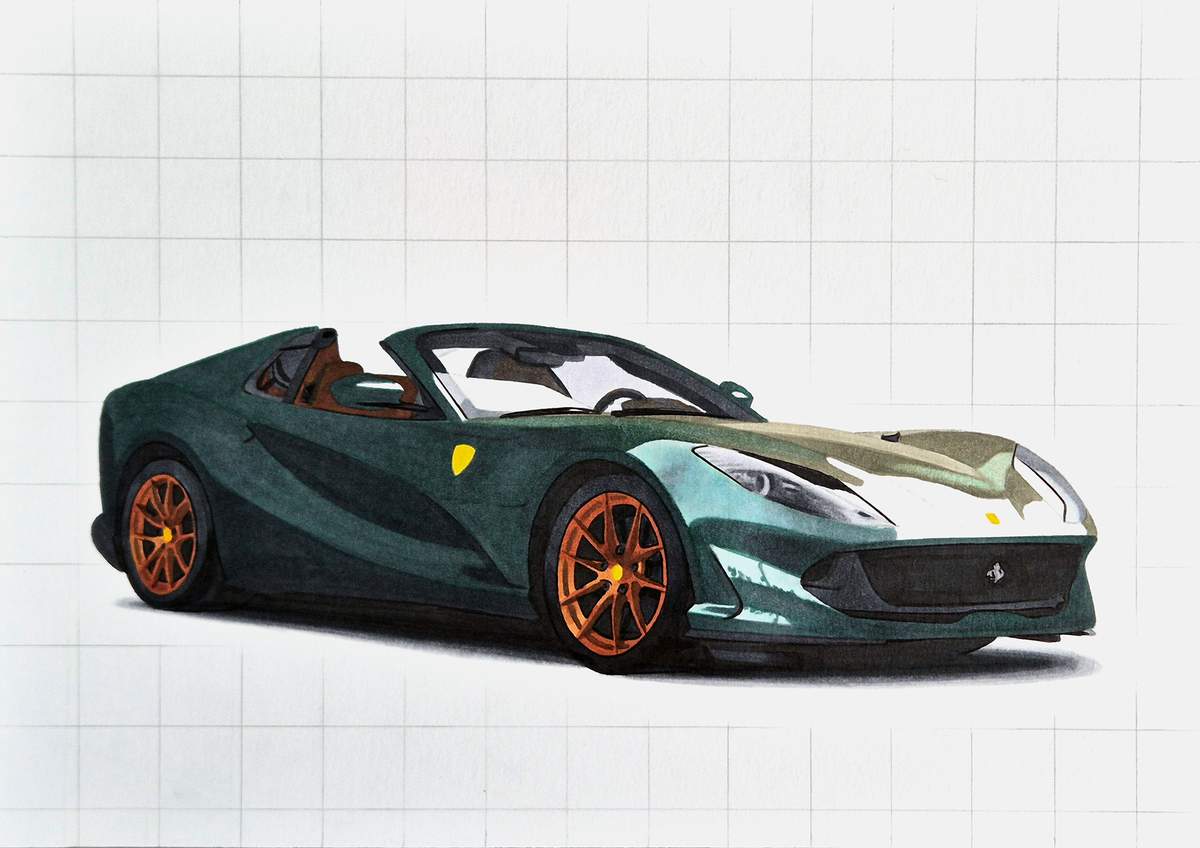
After that, I finished the front bumper by adding some dark grey over the green on the part below and to the right of the front grill, except for this thing in the middle.
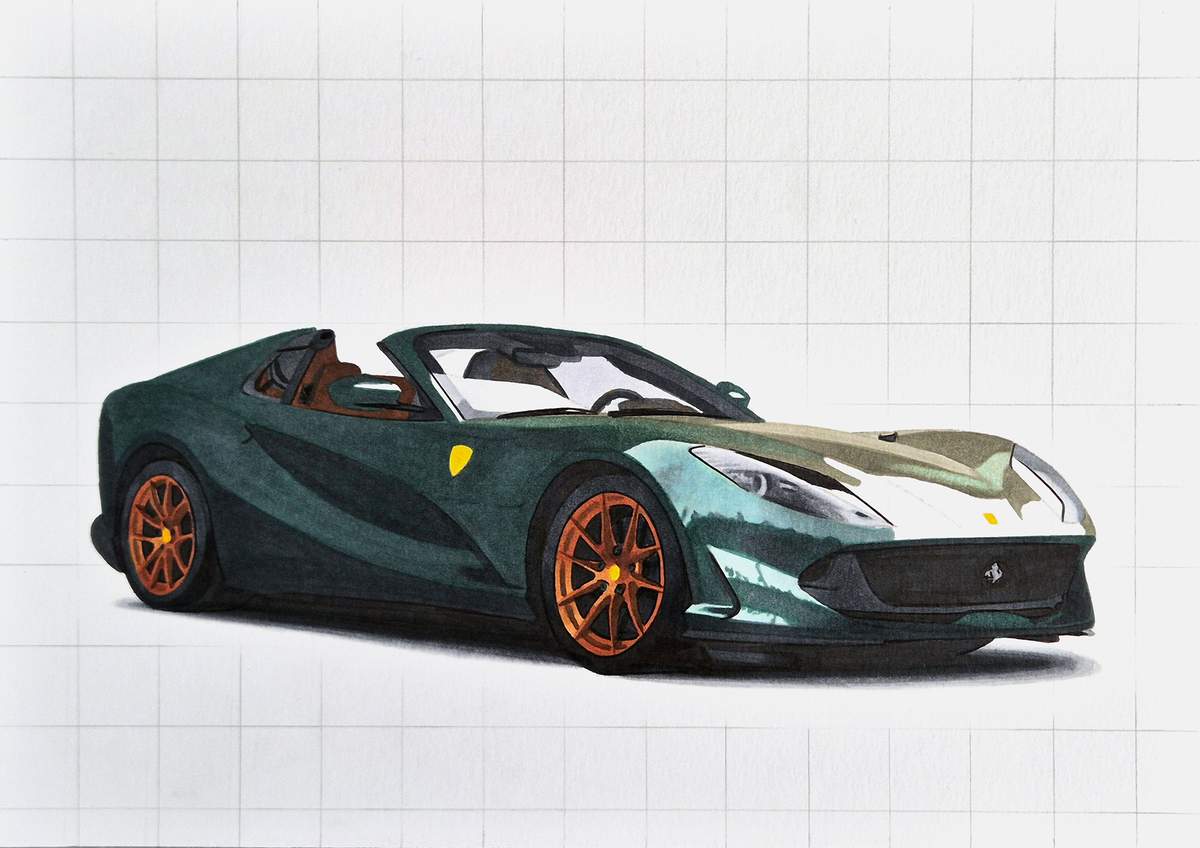
Step 26: Color the Light Reflection on the Front
Next, I worked on the last remaining bit of the hood: the light reflection on the front.
I started by coloring the colored part of the reflections with Vert Celadon (E432). I left a white border around the top of it to leave some space to blend it into the white.
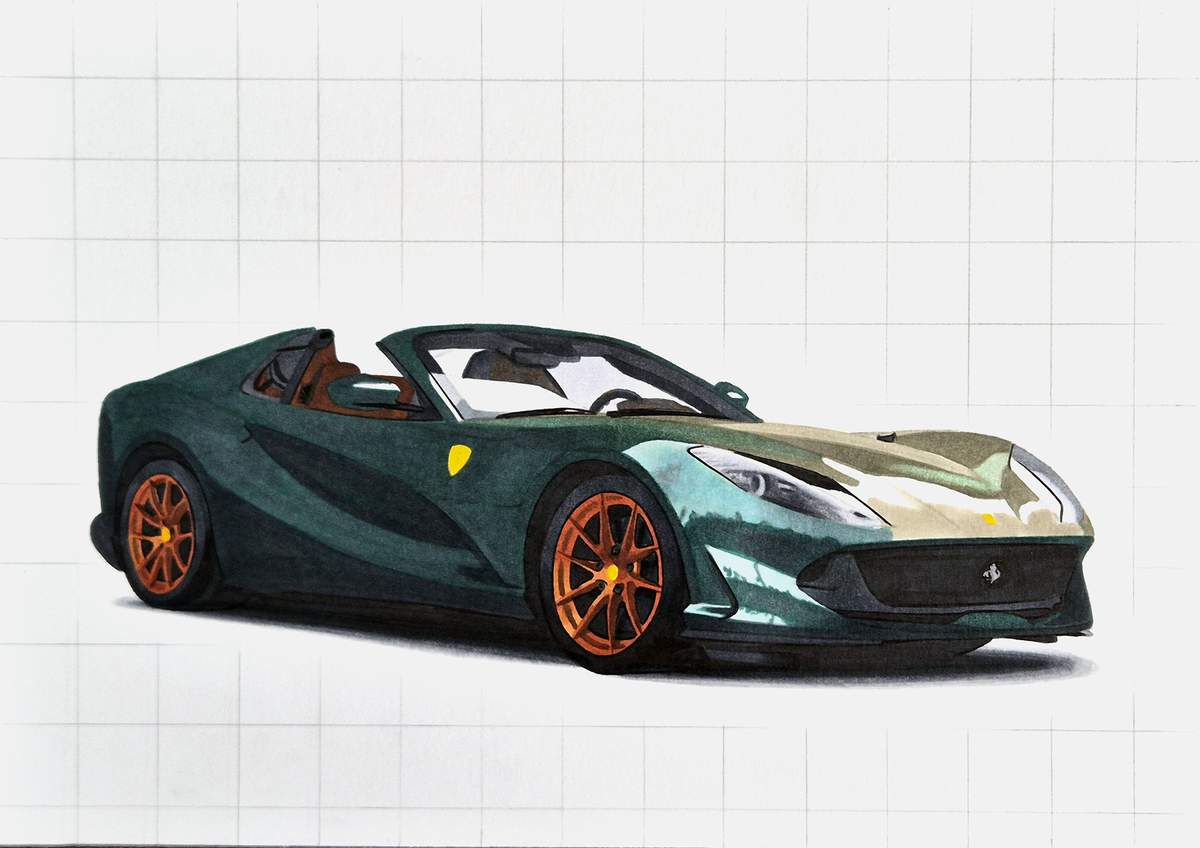
I then used the Colorless Blender (0) and blended the top edge into the white of the paper by coloring over it.
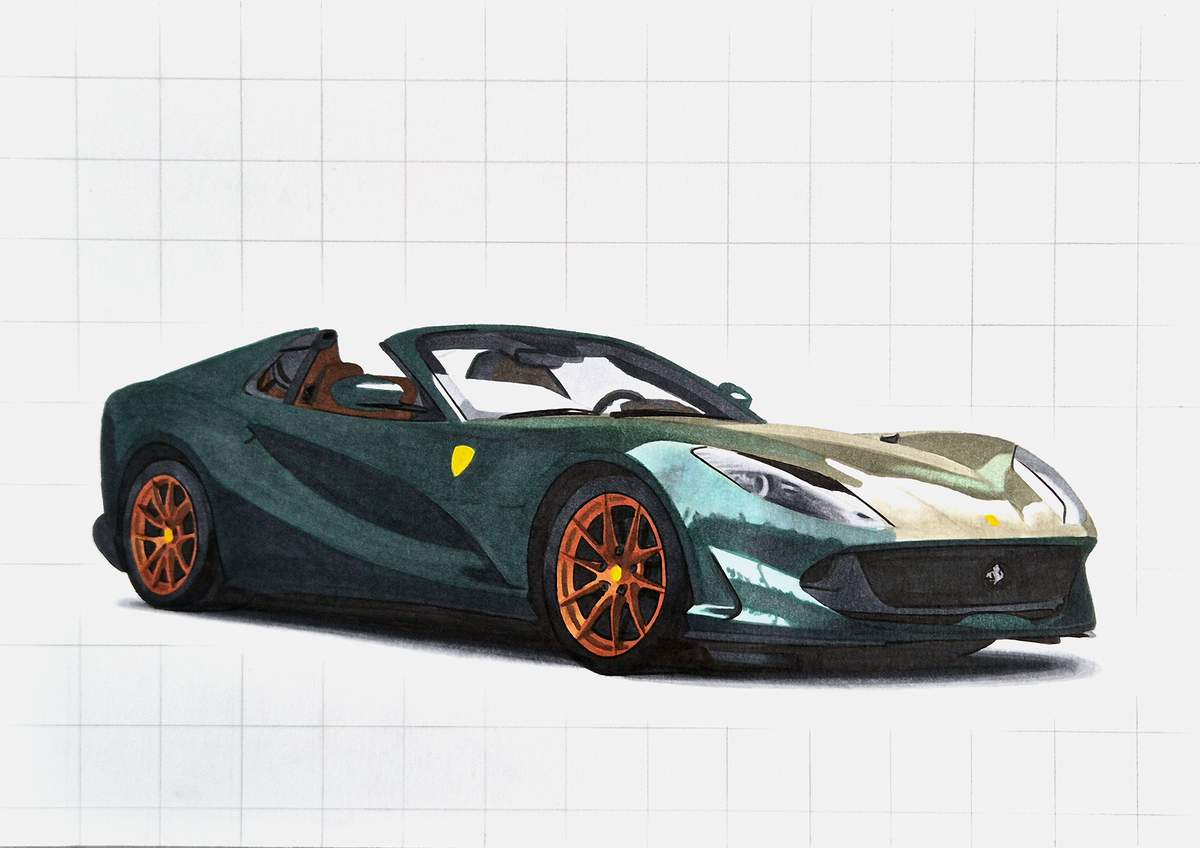
Next, I used Mineral Green (G330) to color the lower half of the reflections.
And to blend this into the light yellow-green-grey color, I used Vert Celadon (E432) to color over the edge of the Mineral Green (G330).
Step 27: Color Some Leftover Small Bits around the 812
Then, I colored this small piece next to the headlight, which is part of the intake.
I first colored it with Turquoise Ink Blue (G5) and then layered Neutral Grey 07 (CG070) over it to make it darker.
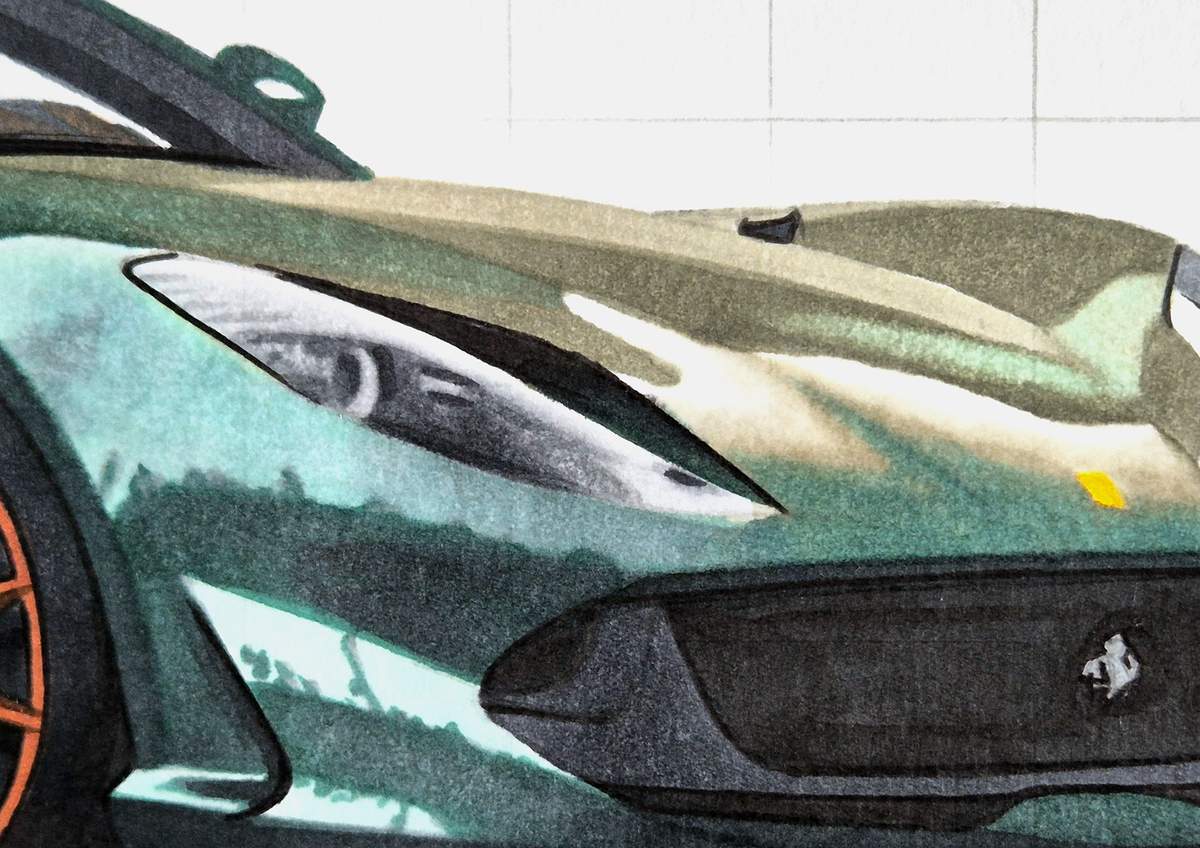
I also colored that part next to the other headlight. For that, I used Vert Celadon (E432) to color the bottom half, and I blended the top half out by coloring over it with the Colorless Blender (0).
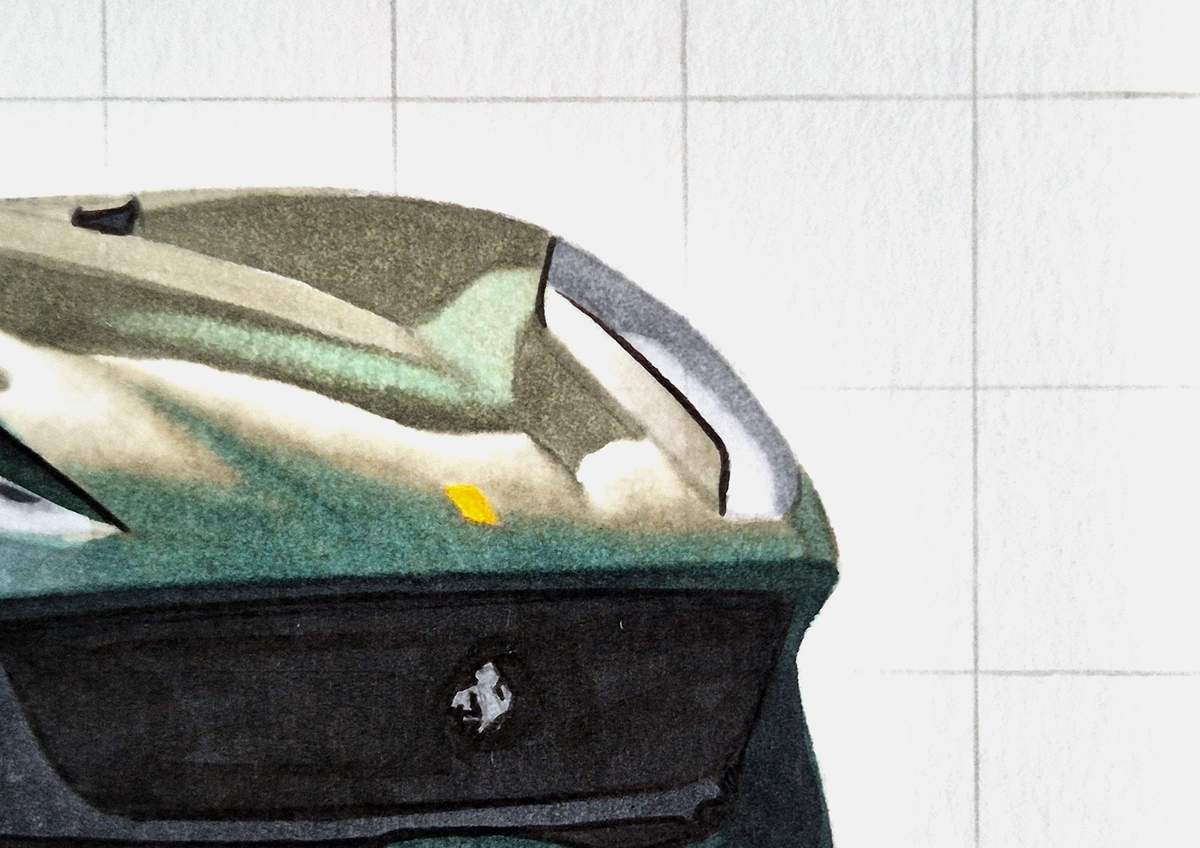
I kept looking at this yellow-green-grey reflection on the hood. It didn't look right to me.
It stood out too much.
To tie it all together, I used Mineral Green (G330) and layered it over the Dragon Well Tea (G434) on the hood.
This made such a big difference. It now looks like it was meant to be.
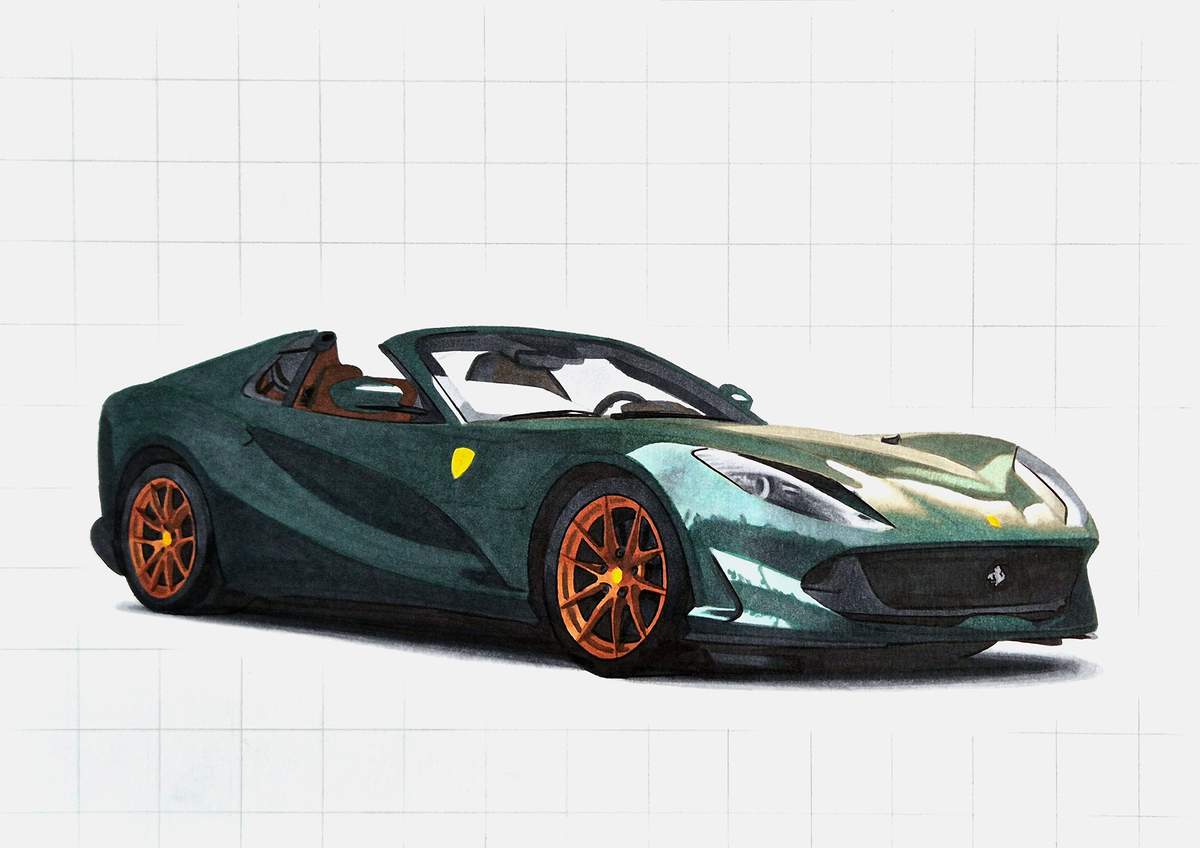
I then colored this small reflection on the left mirror.
I first colored it with Jade Green (G320), and then I darkened the bottom half with Mineral Green (G330) and blended it by coloring over it with Jade Green again.
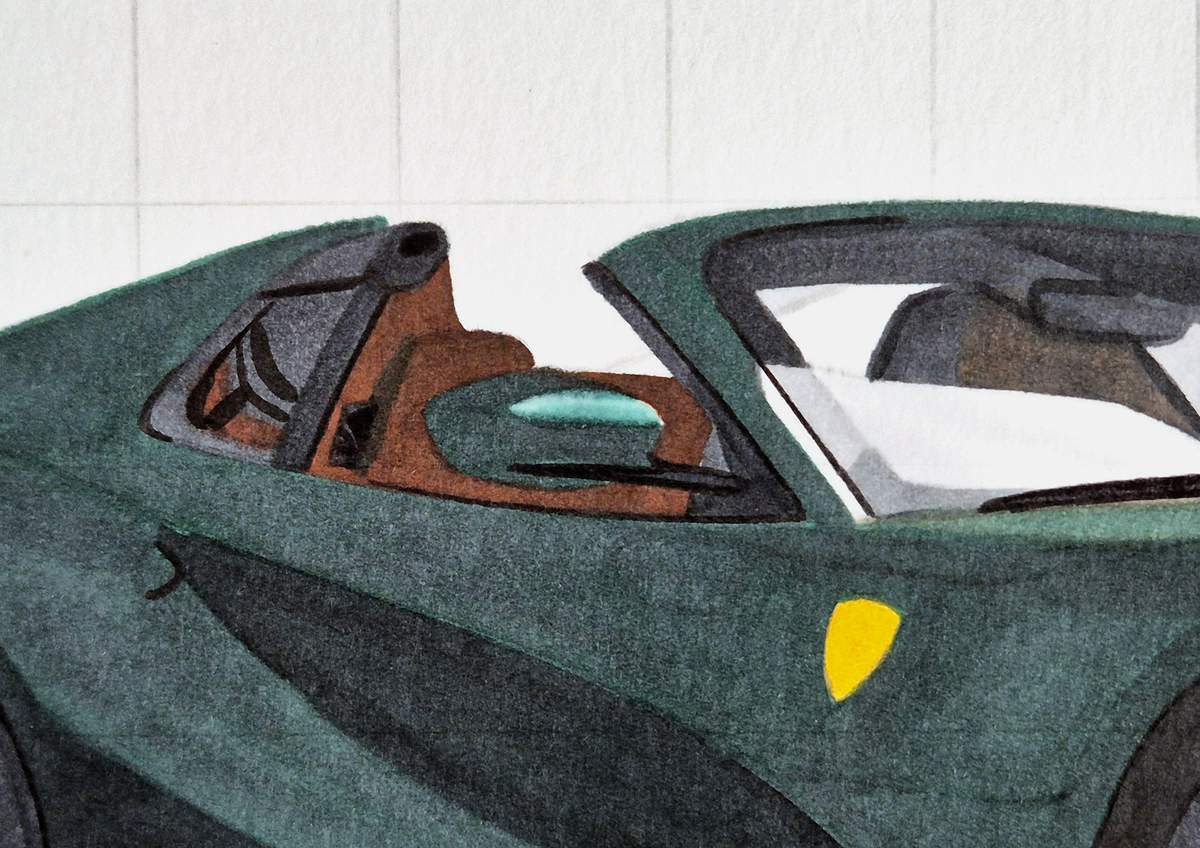
Next, I colored the light reflection on the right mirror.
For this one, I just colored the bottom half with Jade Green (G320).
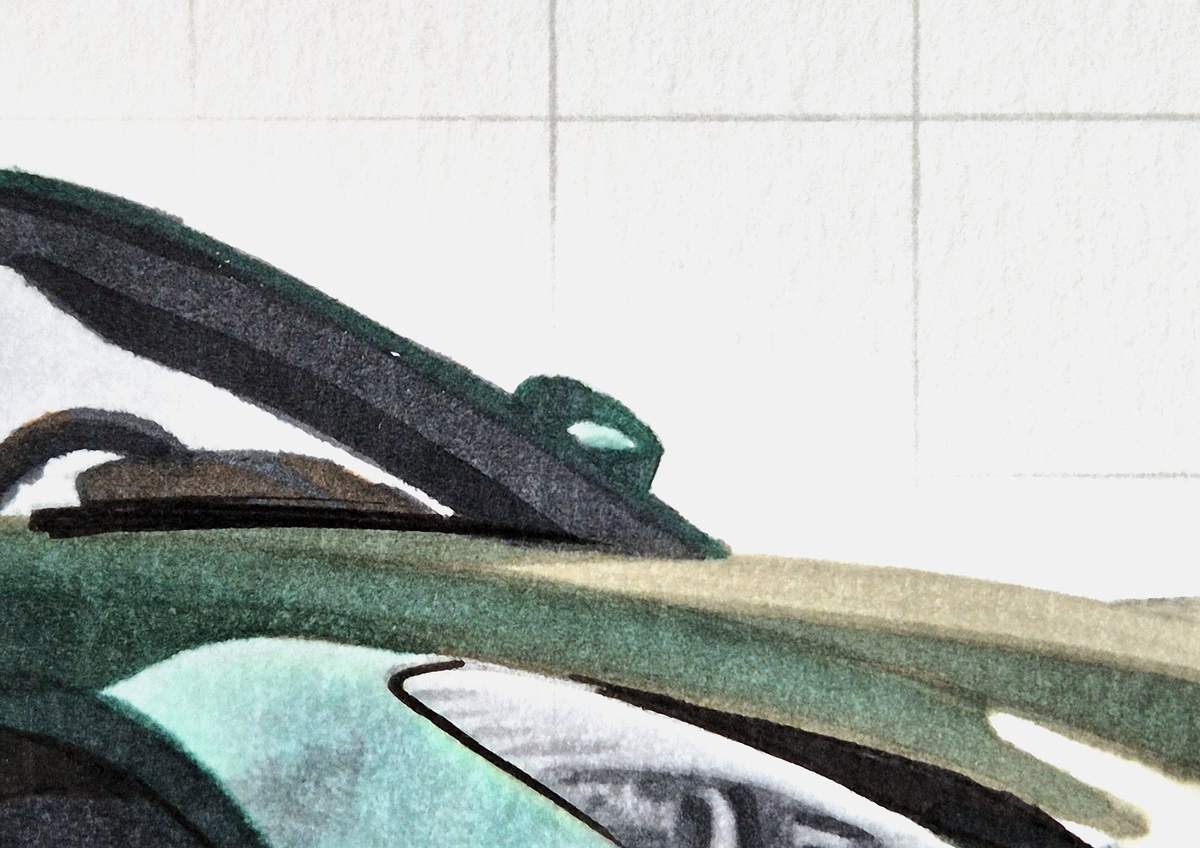
Then, I colored the buttress you can see through the windshield.
I first used Turquoise Ink Blue (G5).
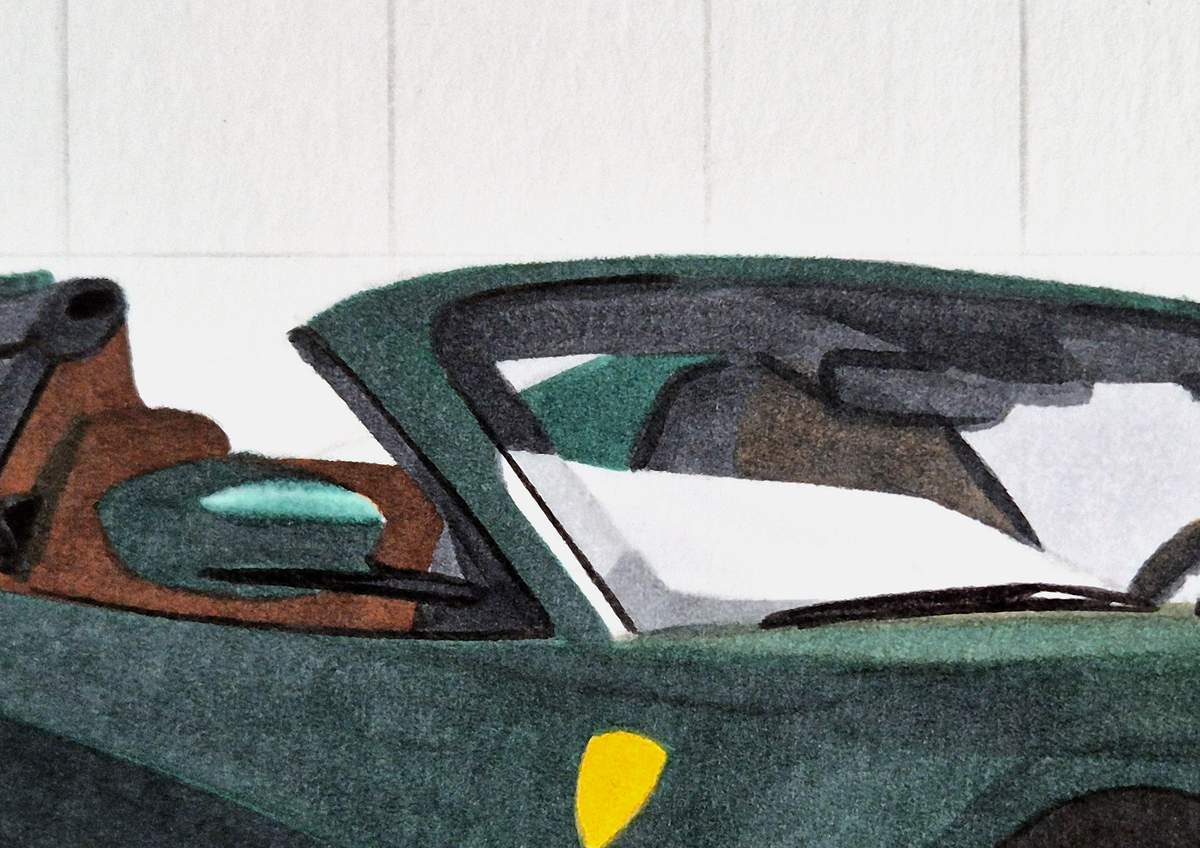
Then, I used Neutral Grey 07 (CG070) and colored over it.
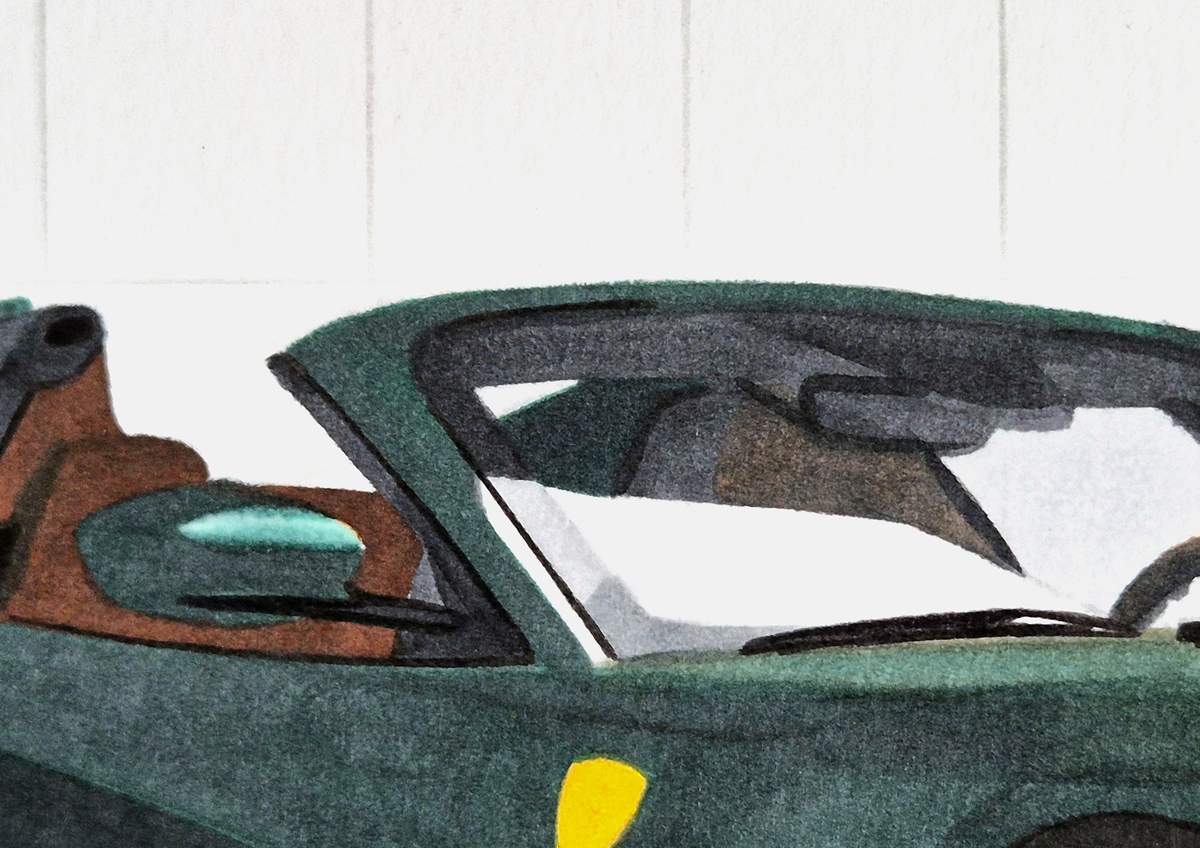
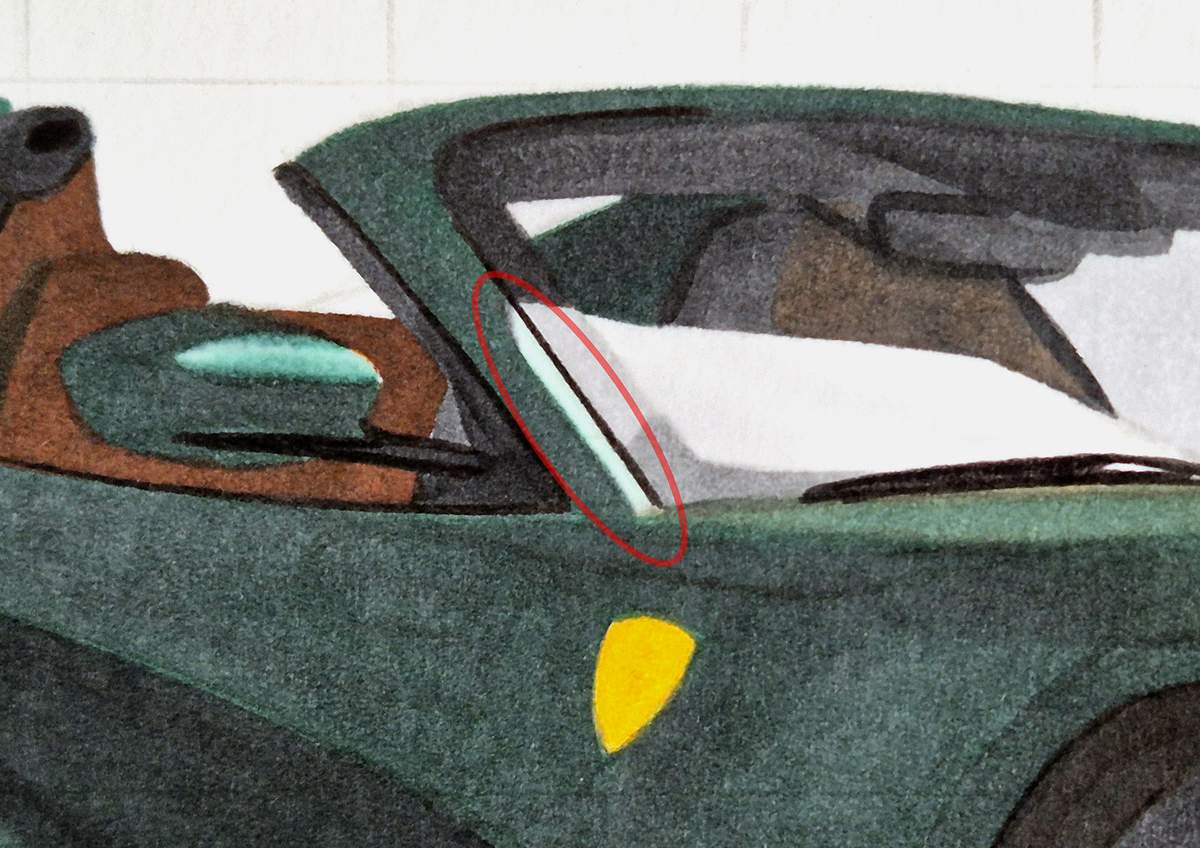
After that, I used Jade Green (G320) and colored this light reflection on the A-pillar we had left uncolored earlier.
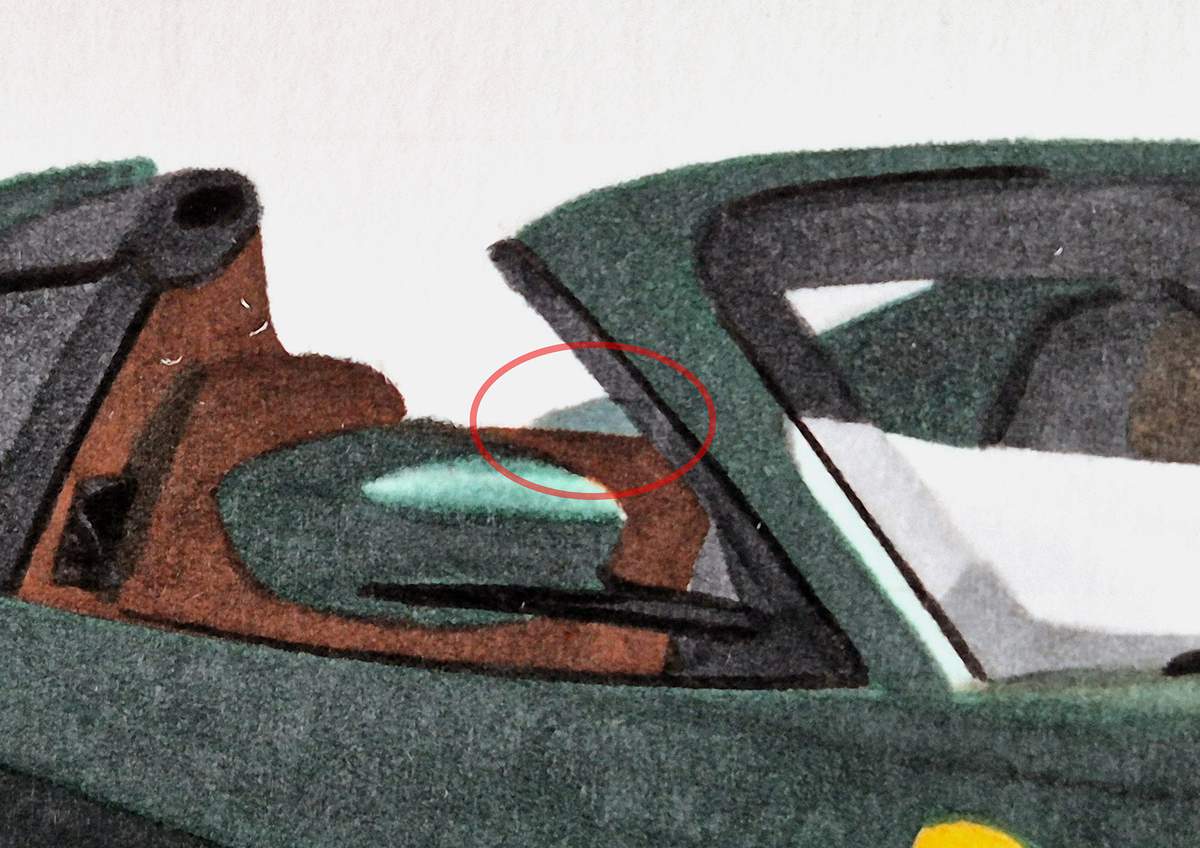
And lastly, I colored the last bit of the buttress above the interior.
I first colored it with Mineral Green (G330). And then I layered Neutral Grey 3 (NG03) on top of it.
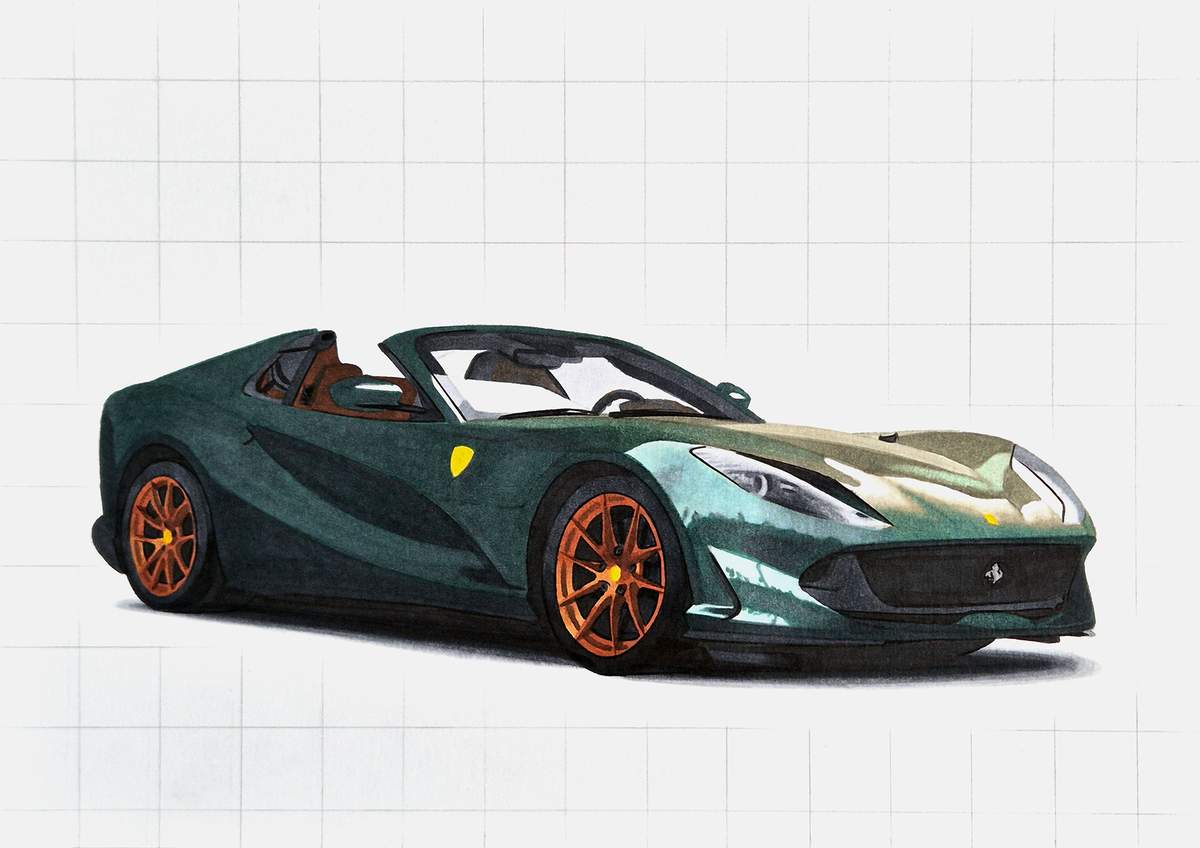
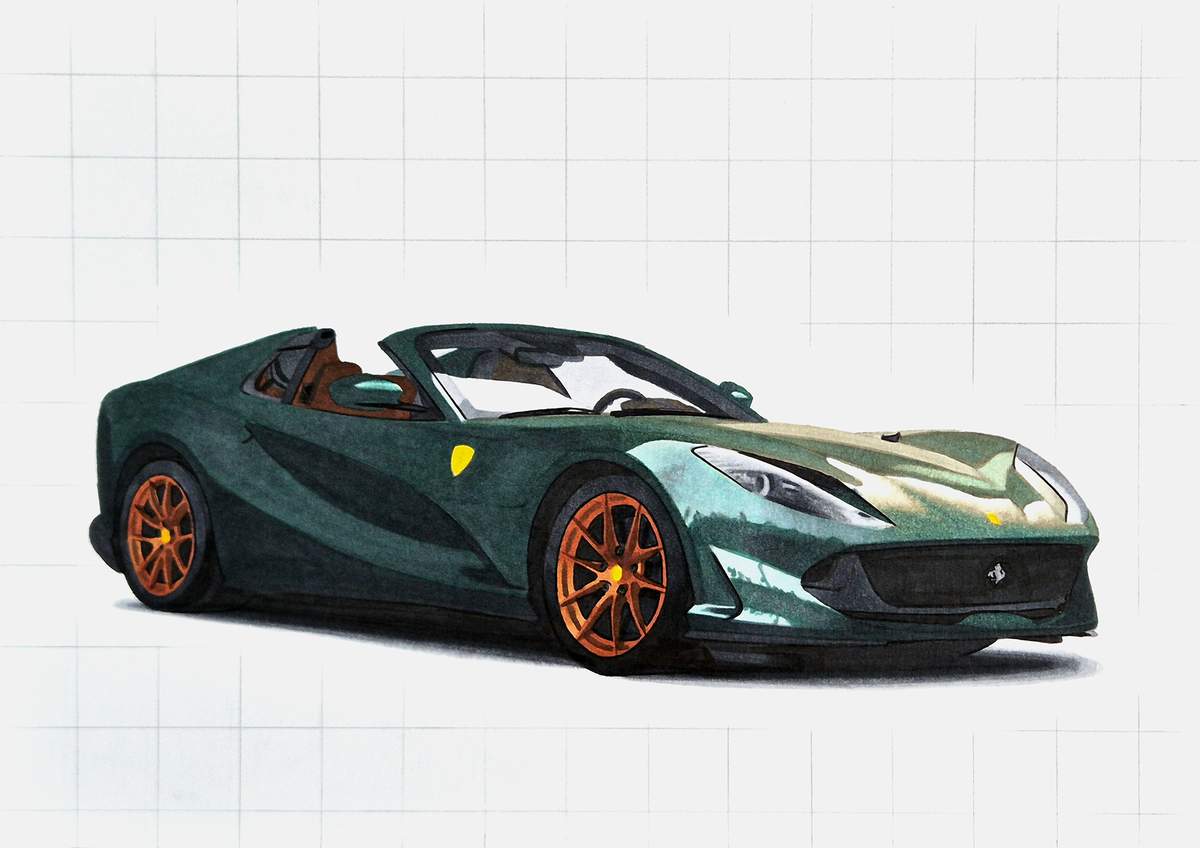
And that's the Ferrari 812 GTS all colored! Just some reflections to add now.
Adding Details to the Ferrari 812 GTS
For this drawing, I left out a ton of details and reflections when I colored it with markers.
It had the perfect reflections for coloring the car first with markers and then adding those reflections with colored pencils afterwards.
Before we go on to add all of those beautiful reflections, I first added details and highlights to the rest of the car, starting with the wheels.
Step 28: Add details to the wheels
Before I added details to the wheels, I first erased the remainder of the grid and the sketch. This is easiest to do now.
Then, I added the details to the wheels.
For the rear wheel, I used the black pencil to add a dark edge to the top left of the bronze rim, and I added some of the branding on the tire. It's just an impression.
I then used a light grey pencil to add some highlights on the tire. I highlighted the top right and the bottom.
I also used the light grey pencil to color the edges of the bolts around the center and to add the faint reflections on the brake calliper in the black parts on the right.
Next, I used the black pencil to darken the sides of the spokes and the rim edge on the left, and I outlined the yellow logo and drew a teeny tiny horse in the center. It's more like two short lines than a horse, but it does the trick.
And lastly, I used white to highlight some front edges of the spokes and the top right of the outer rim edge.
Here is a before and after of the rear wheel:
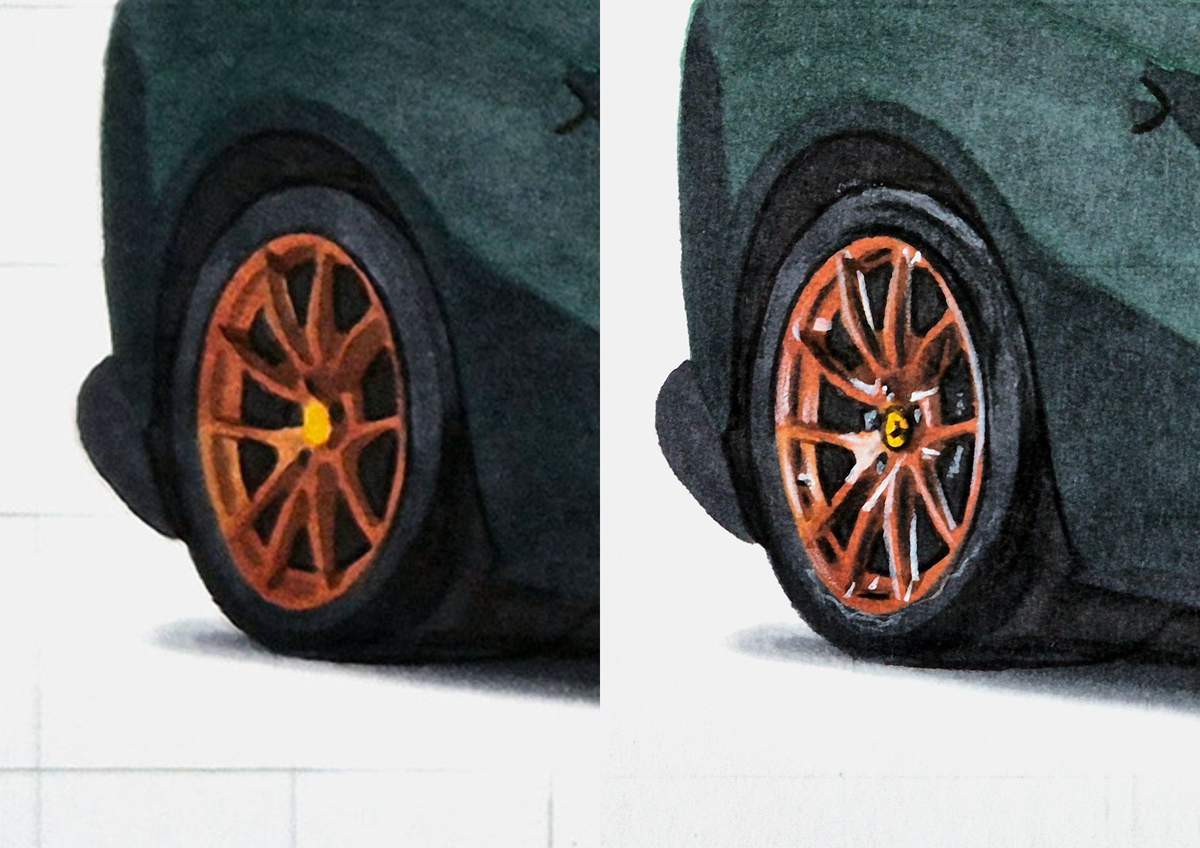
The front wheel is more or less the same as the rear one.
I used light grey to add some highlights on the tire, and I used black to add those darker markings on it as well.
I then used the black pencil to darken the sides of the spokes and the dark rim edge on the left.
After that, I used white to highlight some of the front-facing edges of the spokes.
And then I used the light grey pencil again to add the bolts around the center and to add those lighter bits in the top left black bits in between the spokes and the reflective bits you can see to the right of the center of the wheel, which is part of the brake disc.
Lastly, I used black again to outline the Ferrari logo and to add the teeny tiny horse. This time it's more like 3 lines. As long as there is a black marking and some yellow around it, it does the job.
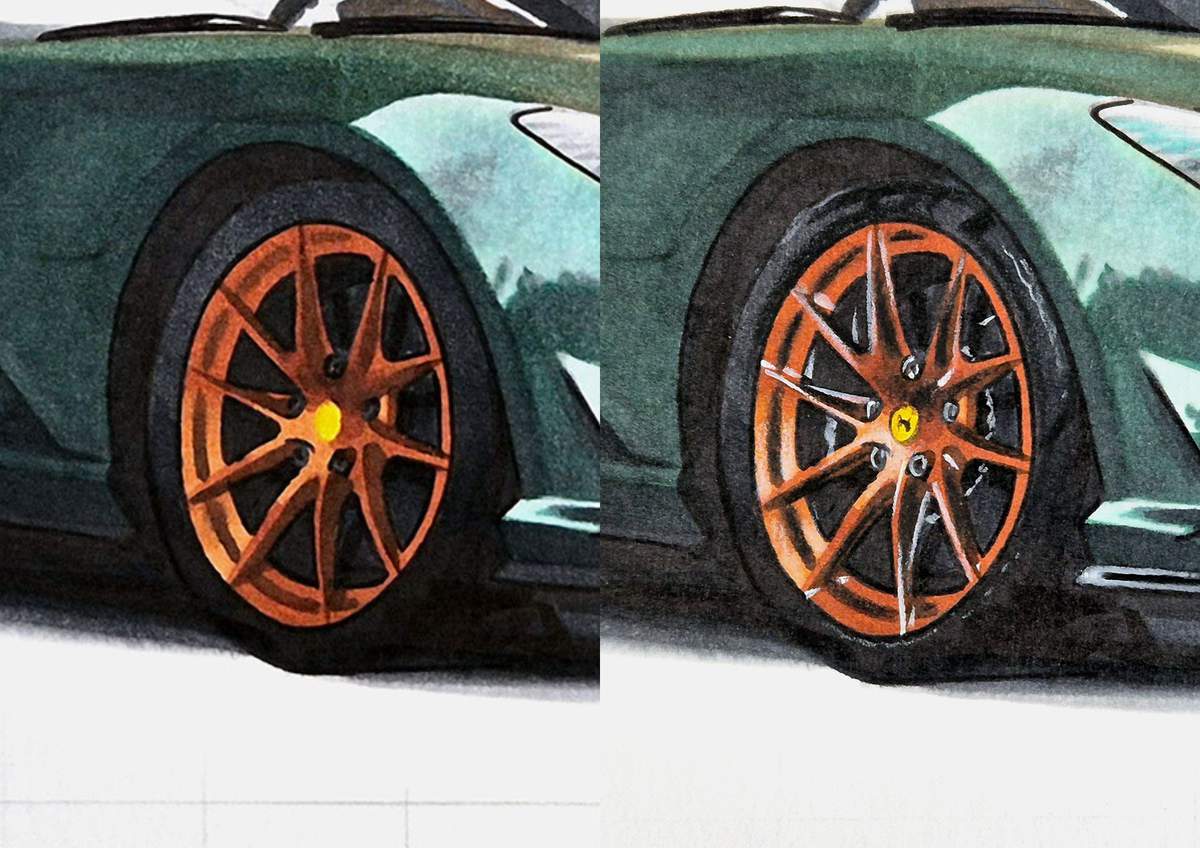
Step 29: Add details and reflections to the other parts of the 812
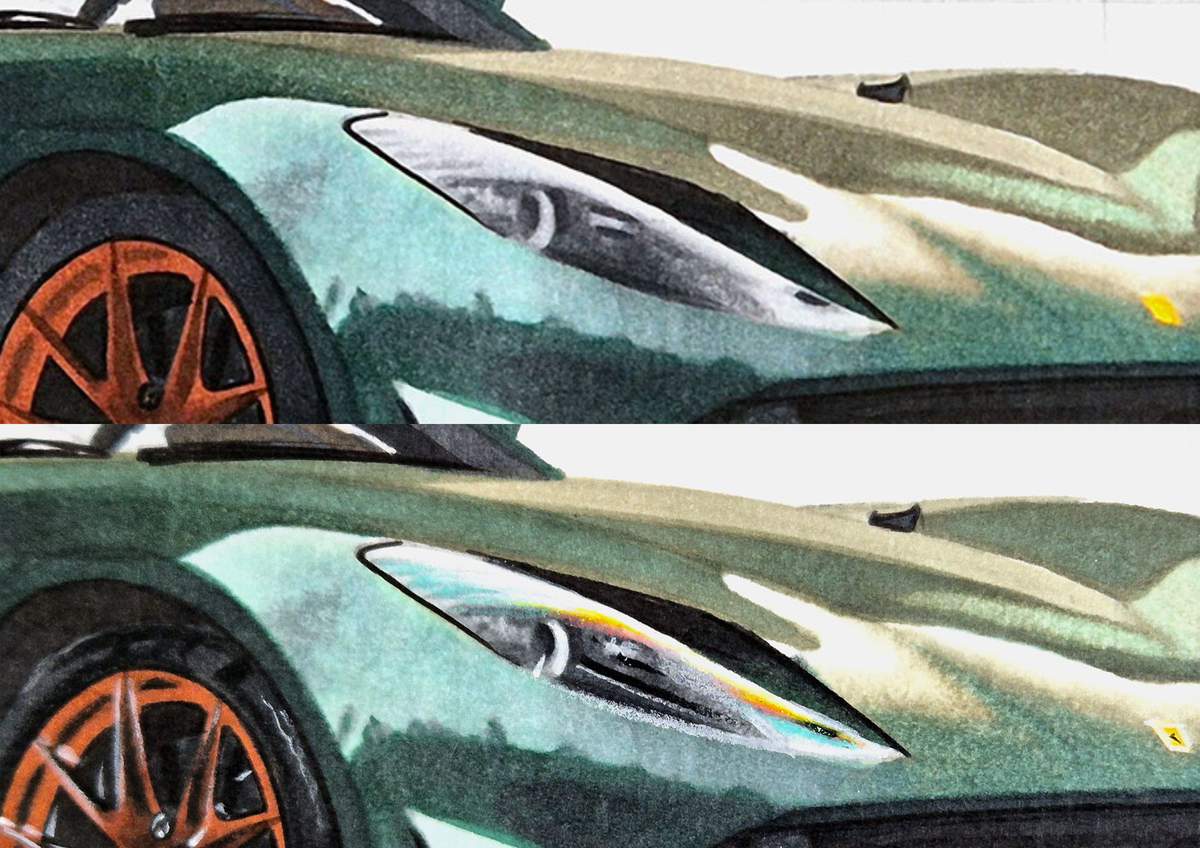
After that, I added details, highlights, and reflections to the left headlight. This was a fun one, actually.
I started off by adding the black details, which there aren't many of. You can just about see the two black lines in the center.
I then used the white pencil and added highlights on the lighter parts of the headlight and a few details in the middle.
And to complete this headlight, I added the colorful reflections.
In the reference photo, you can see that this 812 GTS has some beautiful colors in the headlight. You can skip them. They won't make your drawing that much more realistic. But this time, I wanted to capture them.
To do that, I picked out a light teal, a yellow, and a pinkish pencil. The Derwent Chromaflow colors I used are called Turquoise Green (1500), Sun Yellow (0100), and Blush Pink (0800).
I used the turquoise mainly on the top left and bottom right. The yellow next to that, around the top right. And some pink next to the yellow.
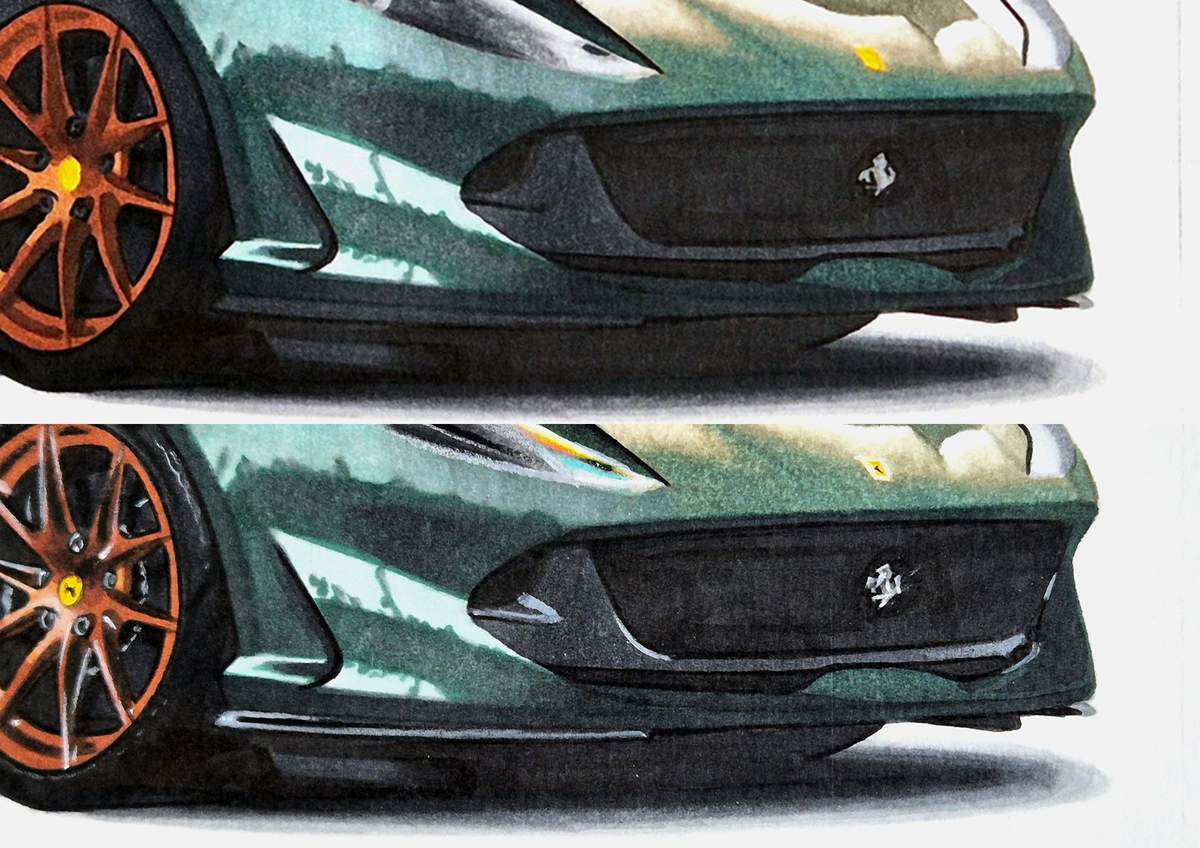
I then highlighted some edges on the front of the car.
I used the light grey pencil to add a highlighted edge around the left splitter, and to highlight this part on the left of the grill and the bottom right of the grill.
I also used the white pencil to make the prancing horse on the front look more like a horse. I just used a few strokes.
I colored the top of its head, the front of the neck, the back, the tail, and the hind legs.
Next, I worked on the logos of the Ferrari.
I added a white outline to the rectangular logo on the front of the car and a small black marking that is supposed to be the horse.
Again, this logo is way too small to actually draw a horse. So, this small marking will do.
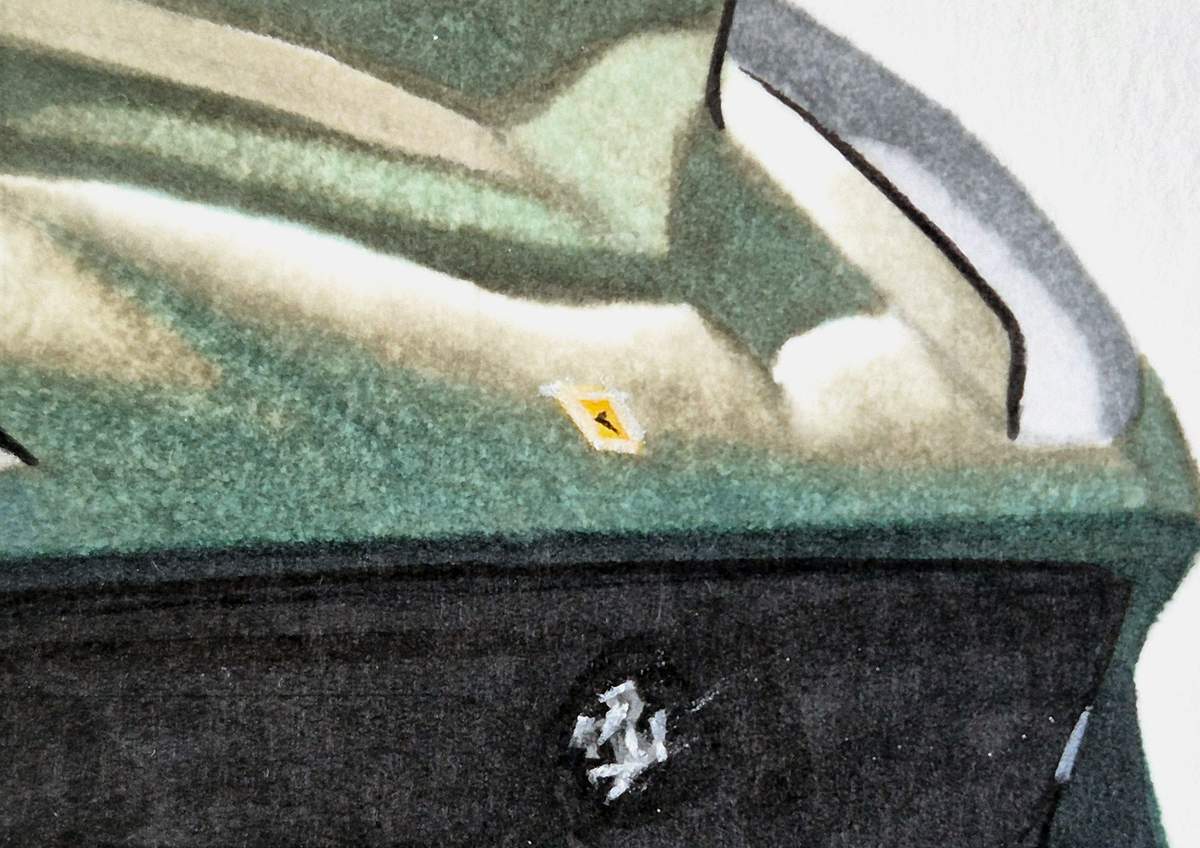
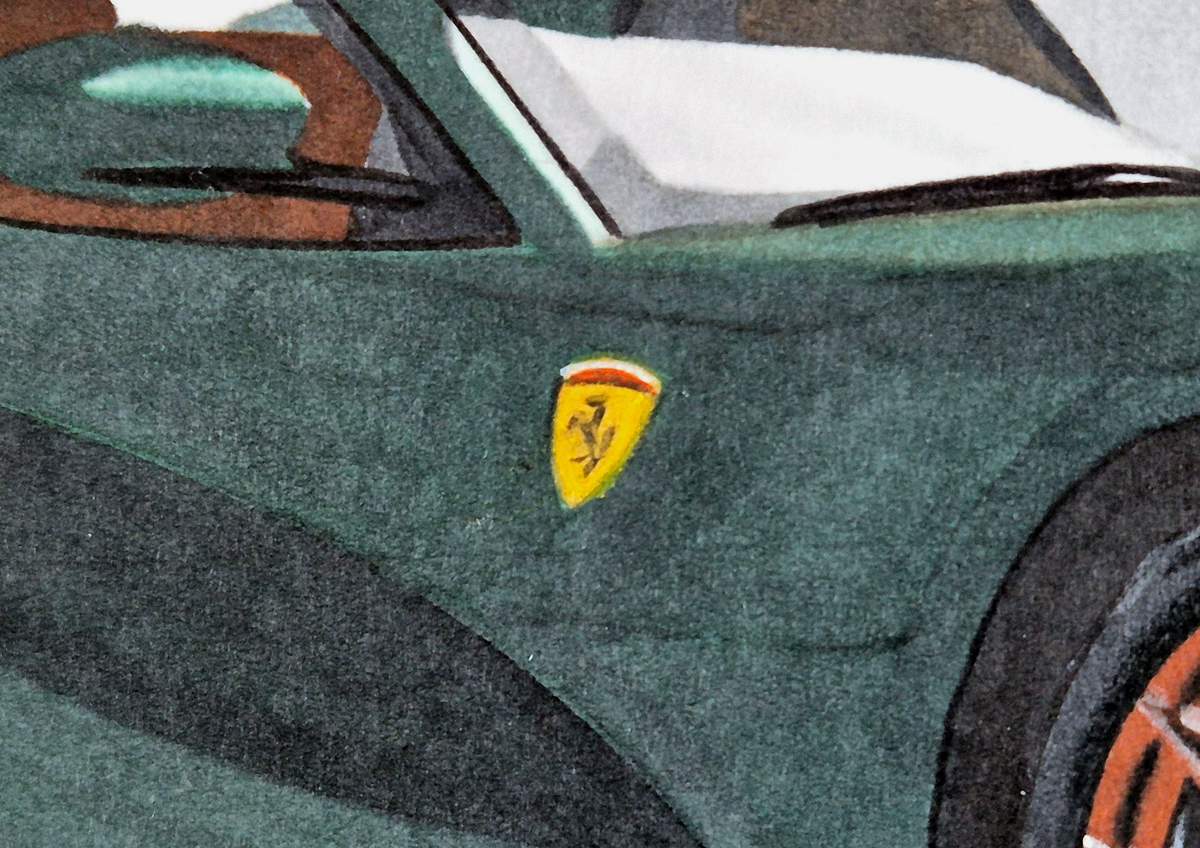
Then, I added the tricolore colors to the shield on the side of the car. I didn't color an extra green edge on the top since the whole car is already green.
I then used a red pencil (Scarlet (0500)) to color the edge right above the yellow part of the shield.
And lastly, I added a white stripe in between the green and the red to complete the Italian tricolore.
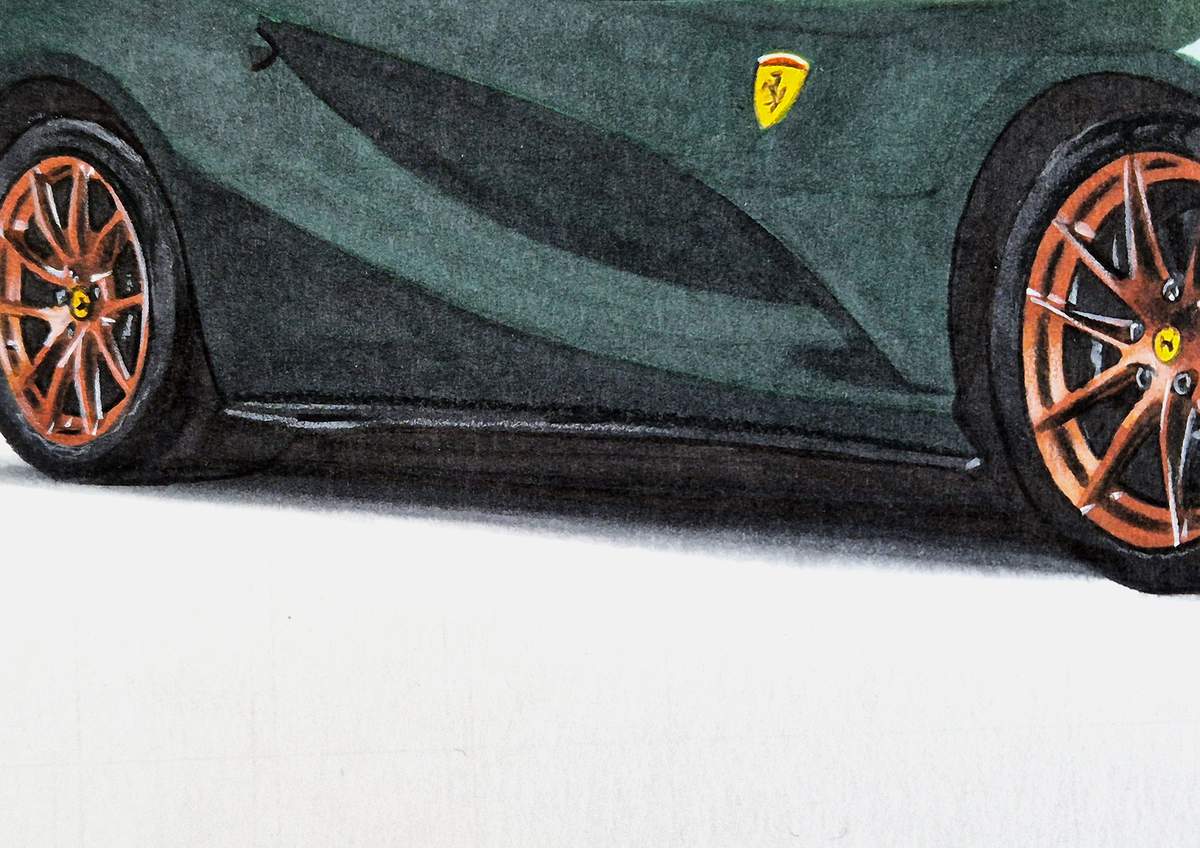
I also added some marking with a black pencil that should look like another prancing horse. This one is more detailed than the ones in the wheels.
Lastly, I used the light grey pencil to highlight the edges of the side skirt.
Step 30: Add reflections to the main body
With all the other parts done, now comes the most transformative part: adding the main reflections on the car.
I started by adding all the light grey reflections on the car. I used my light grey Derwent Chromaflow pencil called Platinum (2200).
These reflections are mainly on the side of the car and the side of the front bumper, but I also added some on the hood and on the top and right sides of the windshield.
To draw these reflections, I looked at the reference photo. I mostly looked at the shapes the reflections made.
Since the body has edges and curves, the reflections follow those shapes. The reflections are the most important element to convey the actual shape of the car. So getting the shapes right is important.
However, reflections can look a ton of different ways. If the photographer were standing 1 meter or 3 feet to the right, the reflections would look very different.
So while following the shape of the car is important when drawing these reflections, you don't actually need to be that precise.
If you compare the reflections I drew on the car to the one in the photo, you will see that they are similar. But when you look a little longer, you'll see that mine don't perfectly match the ones in the picture. And that's okay.
With the light grey colored pencil, I also added the door gaps.
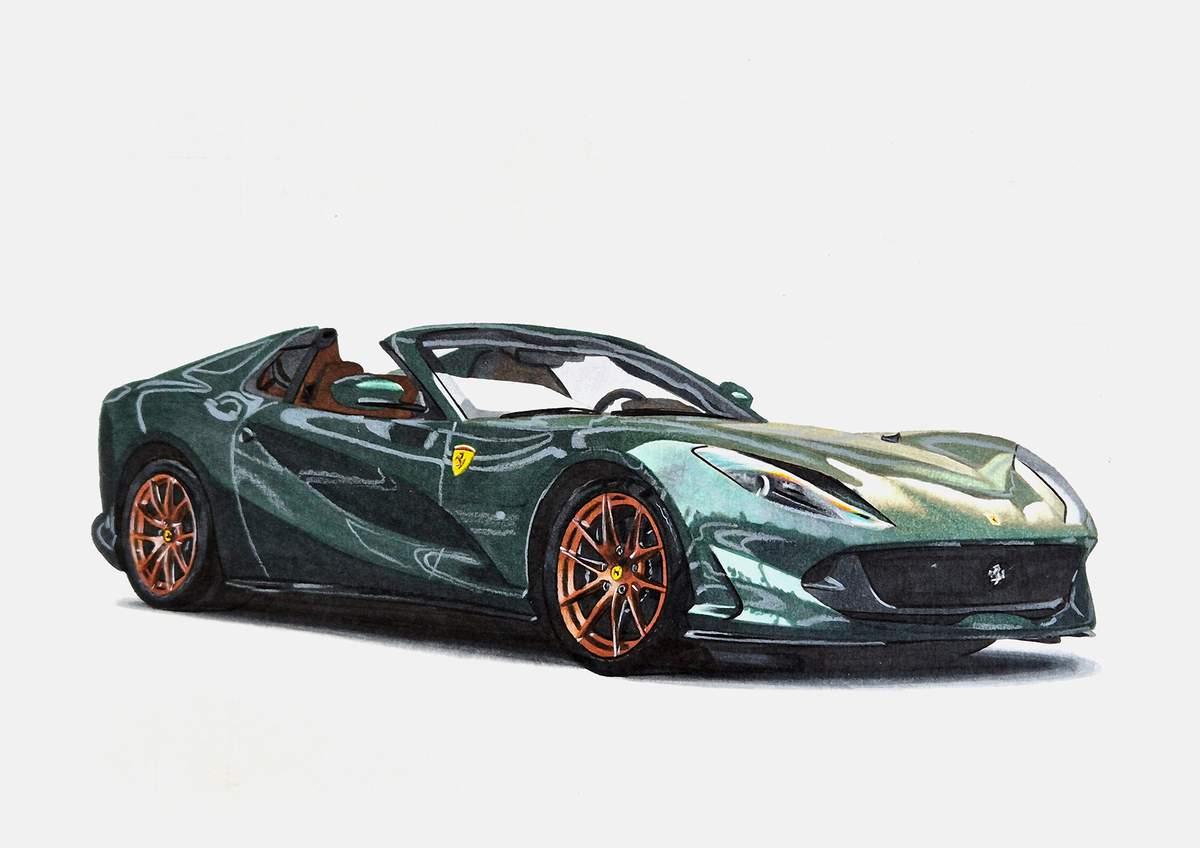
After adding the light grey reflections, I used my black Chromaflow pencil and added all the black reflections. They work the same way as the light grey ones.
I also added some black panel gaps. I added the bottom half of the edge around the filler cap. You can barely see it. I also added the panel gaps of the front bumper.
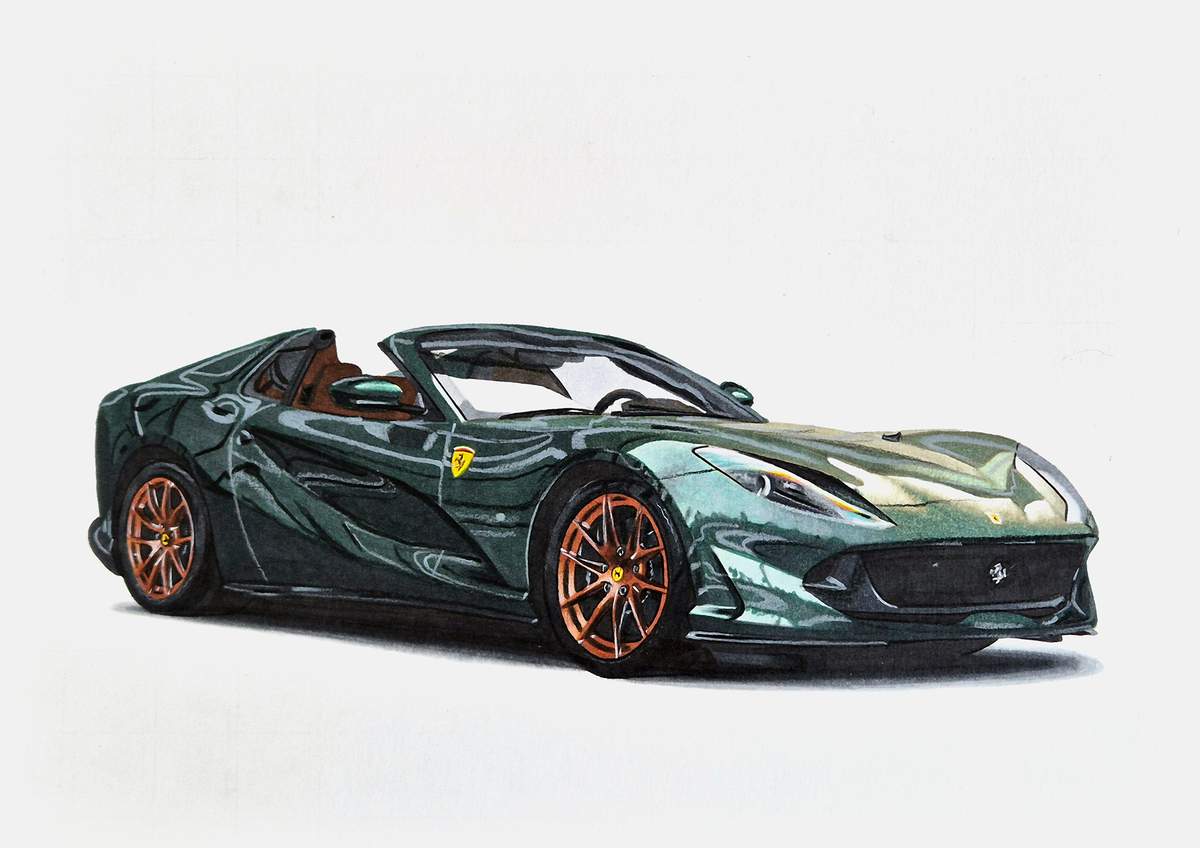
Lastly, I used my white colored pencil and added just a few white reflections on the car.
I mainly added them on the top of the side of the car.
I also made the back edge of the door gap a little lighter.
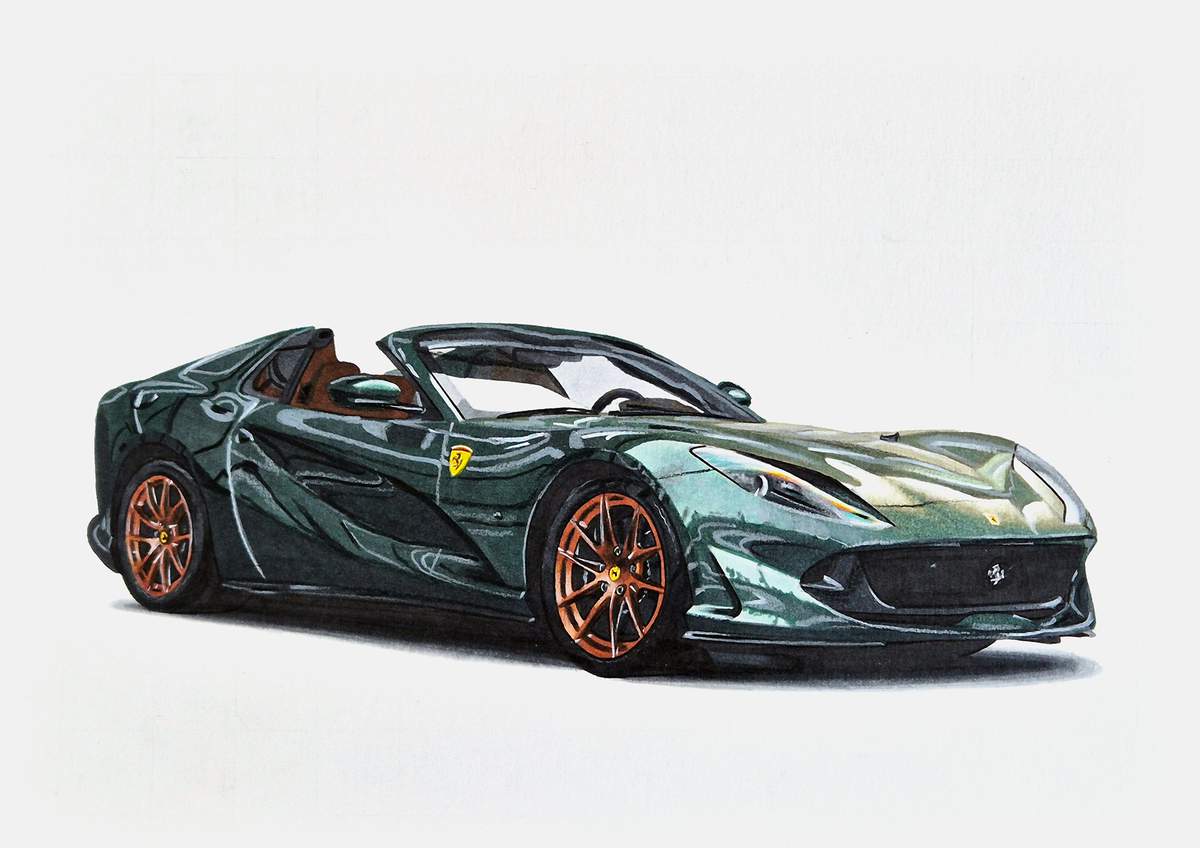
Step 31: Add a few white highlights to the Ferrari 812 GTS
We've finally come to the very last step of drawing this incredible Ferrari 812 GTS.
All that's left to do is add some pure white highlights with a white paint marker. The paint marker I used is the Posca PC-3M.
I added some highlighted reflections on the top of the side of the car. I also added highlights on the light part of the headlight. And I added some small highlights on the wheels.
Honestly, nothing much.
During this step, I also added some brown reflections on the car.
In the reference, you can see that the Ferrari has a patch of brown in the reflections above the rear wheel and a little bit on the side. They're barely noticeable, but brown works so well with this shade of green that I chose to add them.
To add those brown reflections, I used an orange-brown colored pencil; to be more specific, the Derwent Chromaflow Strawberry (0600).
The Final Result
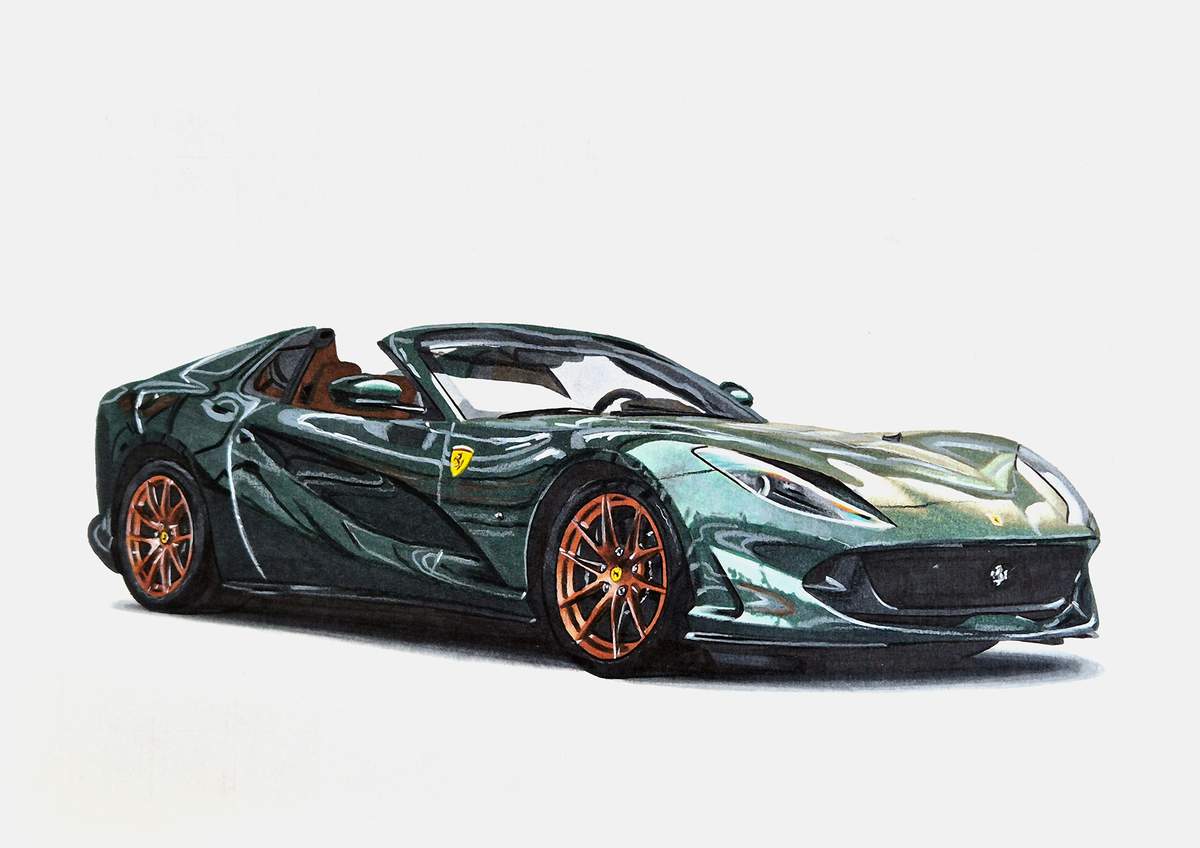
Now, after 174 images, the Ferrari 812 GTS drawing is done!
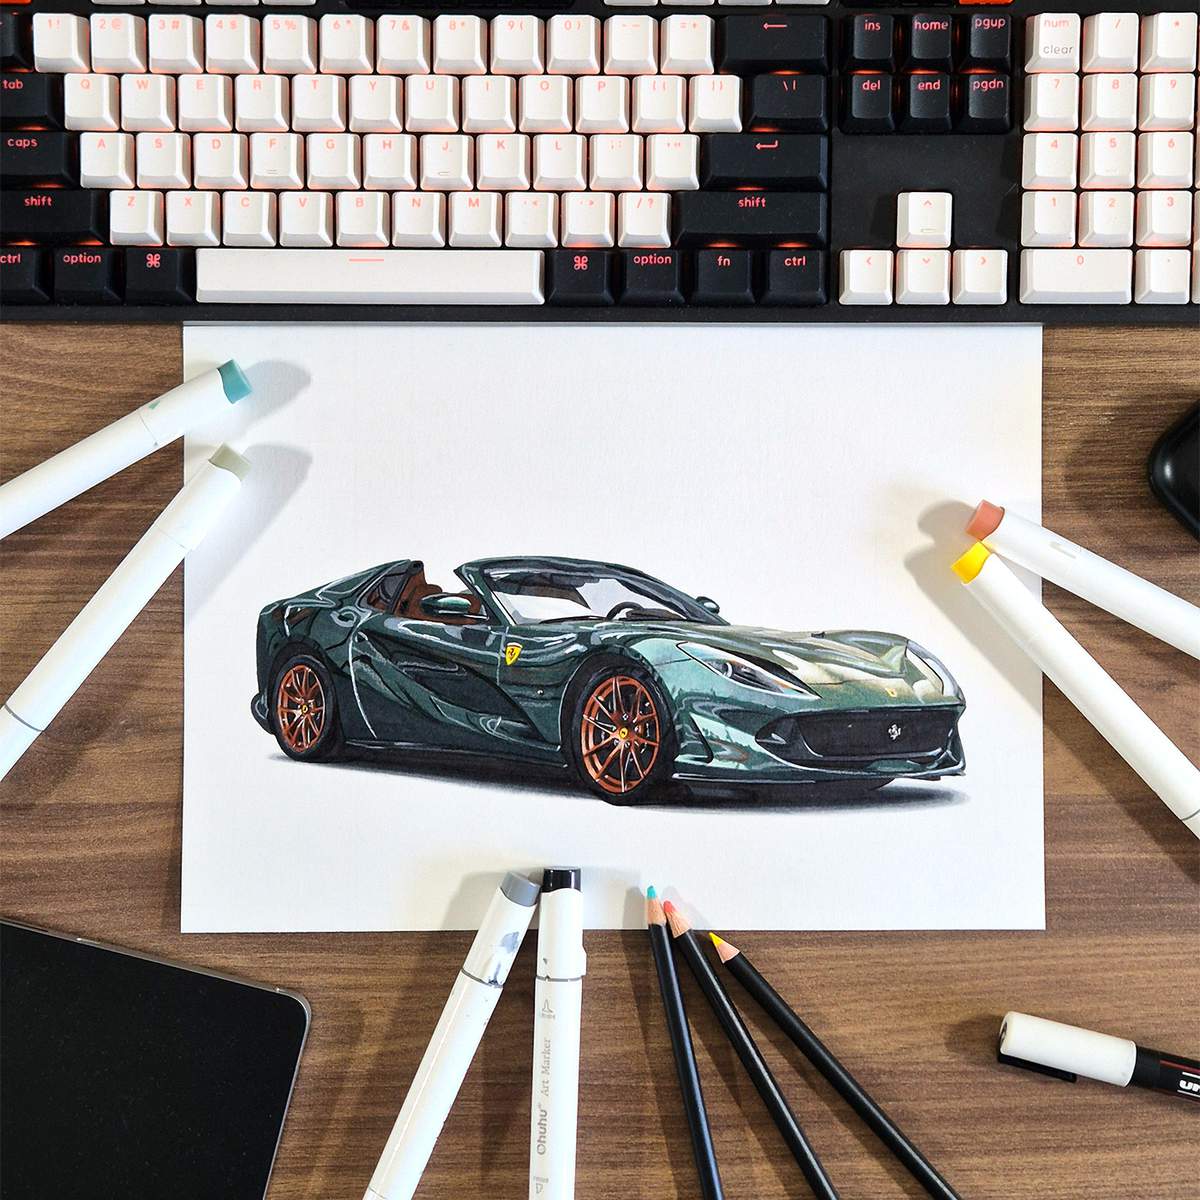
This one turned out way better than I thought before starting it. It was such a difficult shade to create and find marker colors for. And leaving the reflections to do last with colored pencils is always a slight risk. But it all worked out.
I think this is the best drawing that I have published on my blog yet.
What do you think?
I hope you enjoyed this drawing guide!
I did make one more that's as detailed as this one. You can check it out here. This is also where the next posts will be published.
Articles You Might Also Like

I love bringing cars to life with alcohol markers and colored pencils.
Whether you're just starting out or looking to improve your skills, I'm here to help!
Click here to learn more about me.


Be the first to comment!
Comments
There are no comments yet.