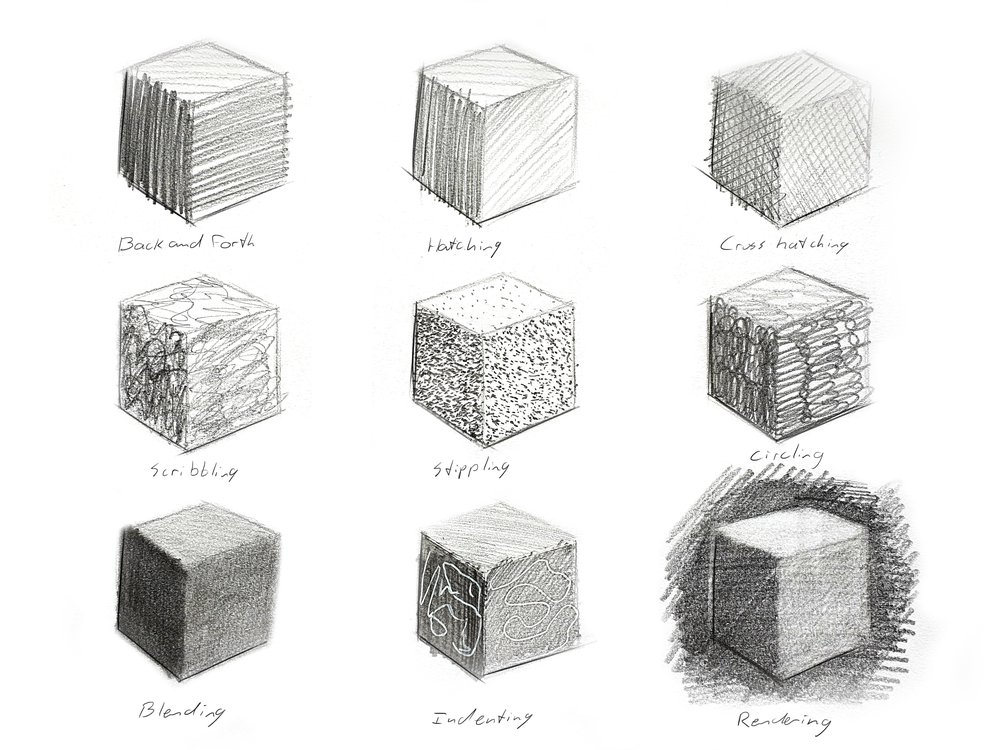
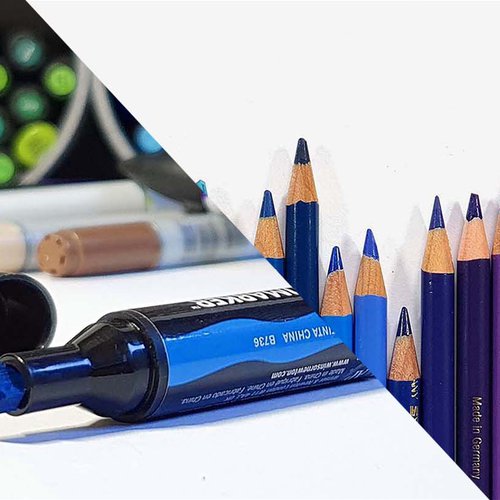
9 easy pencil drawing techniques to improve your art
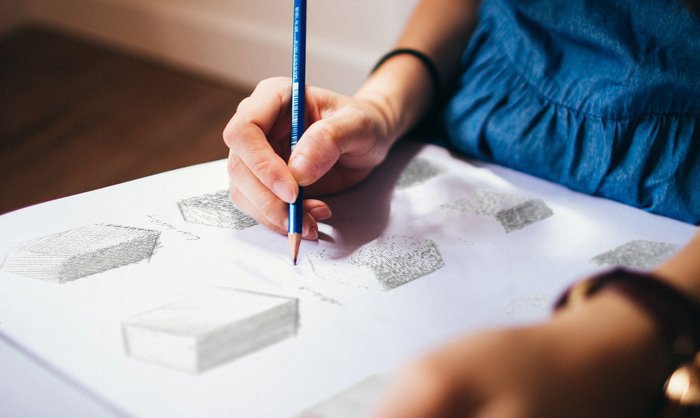
Drawing with a pencil is one of the most basic forms of creating art. It doesn't require much to start with, just a pencil and a piece of paper. Yet it is also one of the intricate and sophisticated art styles. Pencils have no limits to what you can do with them and there are countless techniques to use. You can make the most extremely detailed or amazingly realistic drawings or just doodle a bit and make fun shapes.
It might seem overwhelming at first but once you've learned the basics you can improve your art dramatically.
By learning just a few basic techniques you can instantly improve your work resulting in drawings with more depth, richer values and an overall more creative appearance. In this article you will learn 9 pencil drawing techniques to achieve this. So continue reading if you want to become a better artist.
What are some easy drawing techniques you can use in your pencil drawings?
1. Back and forth
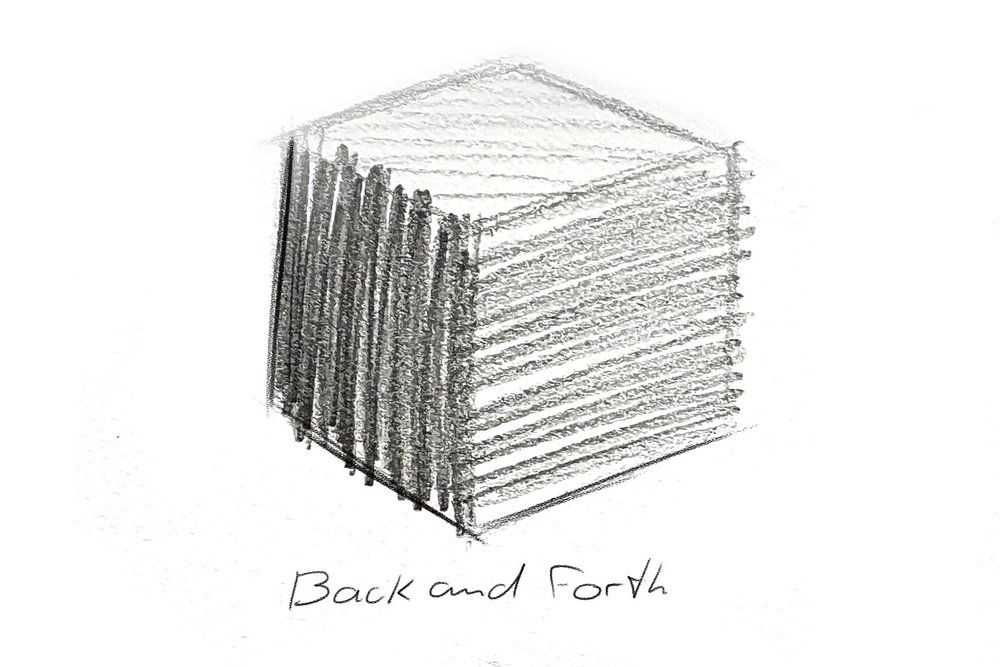
Most people already use this technique when coloring something. You just draw straight lines going back and forth closely next to each other to cover an area.
It is however very important that you control the amount of pressure you use. Use light pressure to create lighter shades and use more pressure to create darker shades. You can also create darker shades by going over the same area multiple times.
When using the back and forth method it is very important that you apply an even amount of pressure while drawing. You can more easily draw with a constant pressure when you hold your pencil more towards the end. By doing this you don't get unwanted harsh lines and you apply approximately the same pressure when going back and forth.
2. Hatching
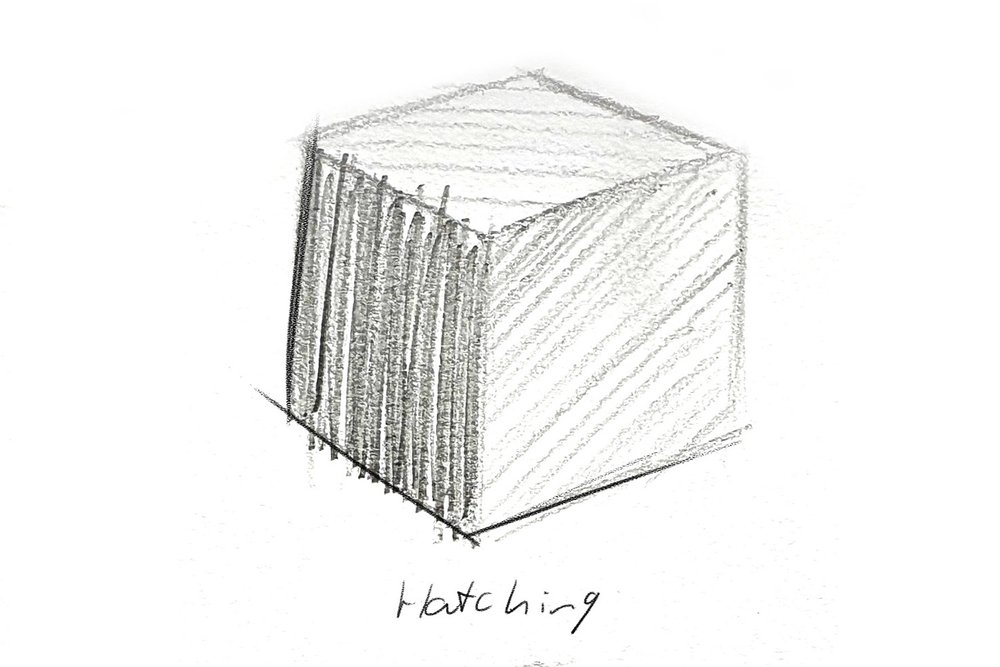
Hatching is kind of like the back and forth method, but instead of going back and forth you only sketch the lines in one direction. When hatching you often quickly sketch straight lines next to each other, but you can also use slightly curved lines.
The closer you sketch the lines the darker the area will become and the more white space you leave in between the lines the lighter it wil look. This is how you can create shadows (lines close to each other) and highlights (lines with much white space between each other).
3. Cross Hatching
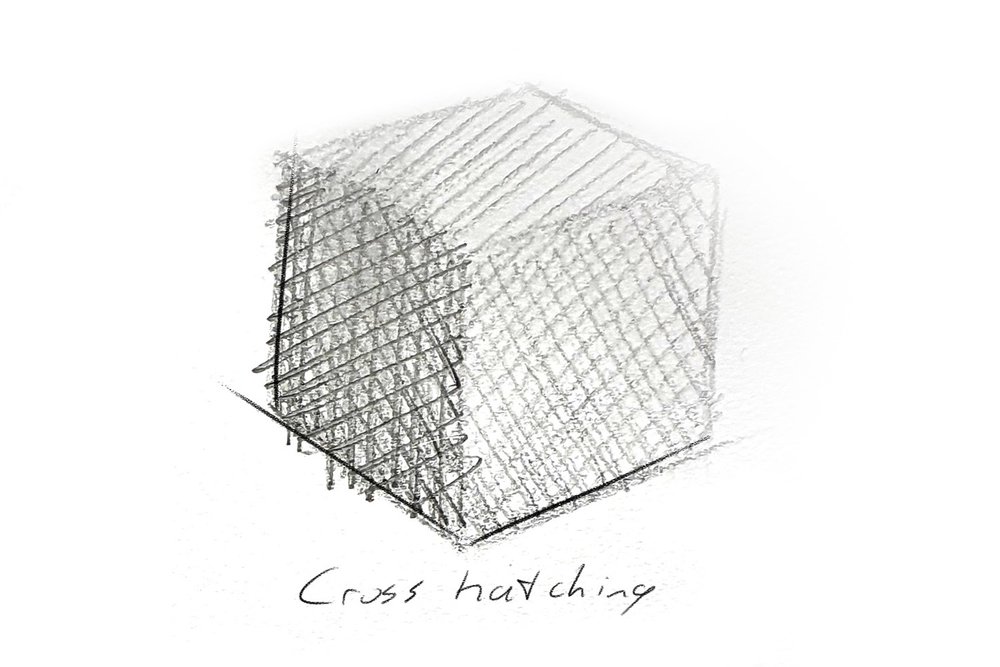
Cross hatching is similar to hatching but instead of only drawing parallel lines in one direction you sketch lines in 2 or more different directions, mostly perpendicular to each other. But you make the lines cross at different angles. And just like with the hatching method you can use straight lines, but also curved lines.
And like with hatching when you want to create highlights you leave more white space between the lines and when you want to create shadows you sketch them closer together. You can also make an area darker by crossing in more directions than just two.
4. Scribbling
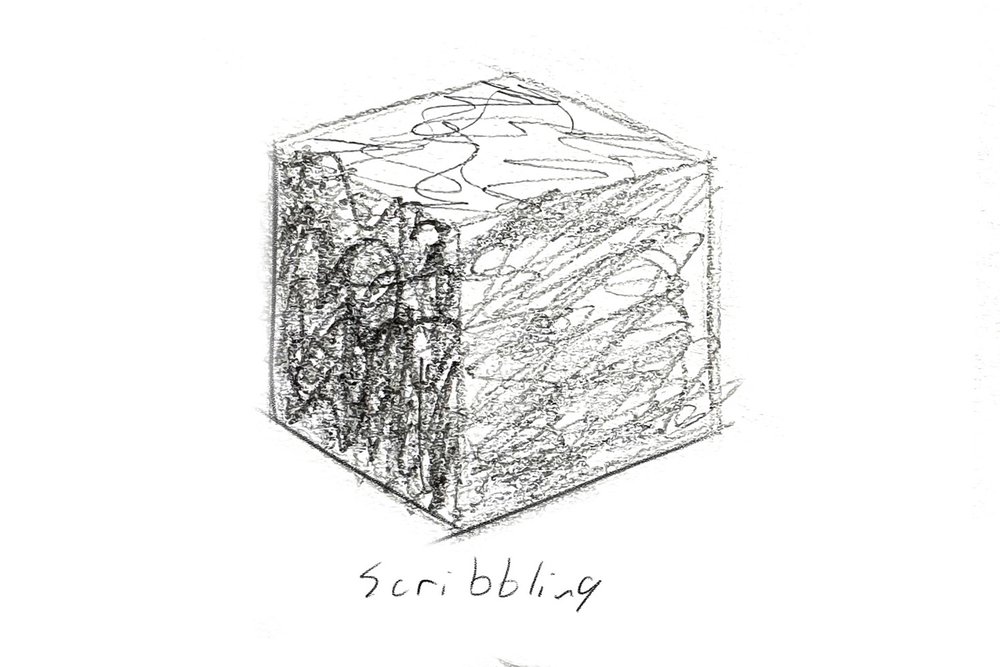
Scribbling might be one of the most fun techniques. You just hold your pencil on the paper and start moving it to your heart's content. Move it where ever it feels right. With the method you get a more impressionistic or abstract look.
Use the point of the pencil for fine lines or the side of the pencil for wider lines. A combination of the two will result in a drawing with more depth.
To create darker areas you can just go over it until you find it dark enough. You can preserve highlights by not drawing over them, but you can also add them later with an eraser or needed erased.
This technique works really well with charcoal and when you want to draw curly fur or hair or bushes and trees.
5. Stippling/pointillism
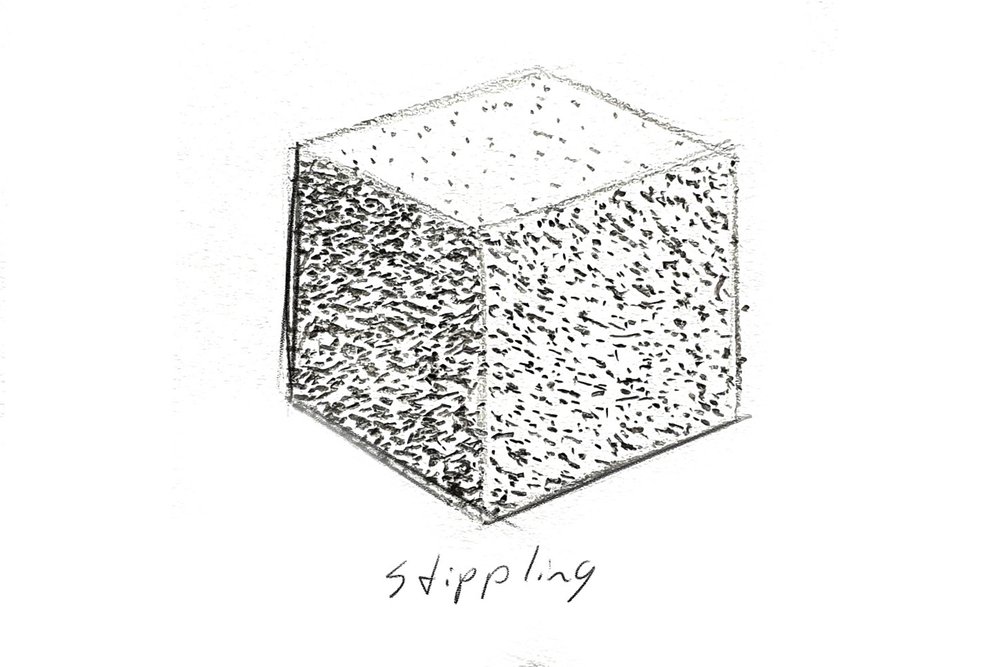
Stippling is a technique that consists of only drawing little dots on the paper. This is also know as pointillism.
To create highlights you leave more space between the dots and to create shadows you draw them close to each other.
This technique might be one of the most time consuming. Many pointillism drawings consist of more than 10000 dots. Yes, that sounds like a lot and you need to have a lot of patience for it. But the result will be amazing.
6. Circling
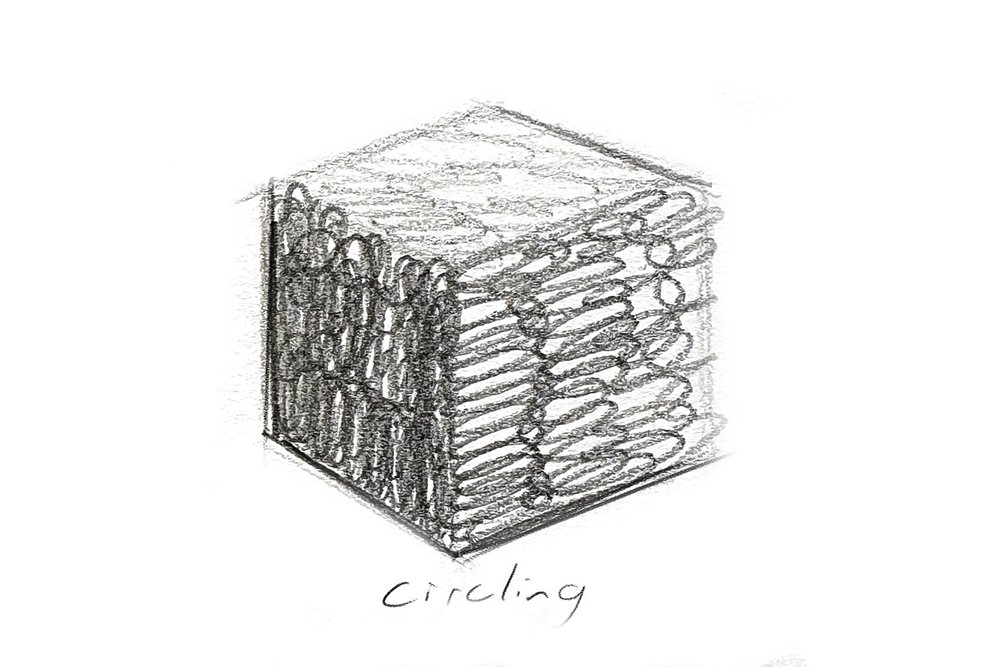
This technique is a bit of a counter technique to the back and forth method. But instead of going back and forth to color an area you draw little circles. By drawing little circles instead of lines you can more easily create solid colors and prevent unwanted harsh lines.
And just like with the back and forth method you can create darker areas by pressing harder or by going over the same area multiple times. The latter of the two will result in a more even finish. And to create highlights you press less hard or even don't draw over it at all and leave it white.
This technique works really wel if you need to color a large area, but if you use a varying amount of pressure you can also create a curly fur or hair like texture.
7. Blending
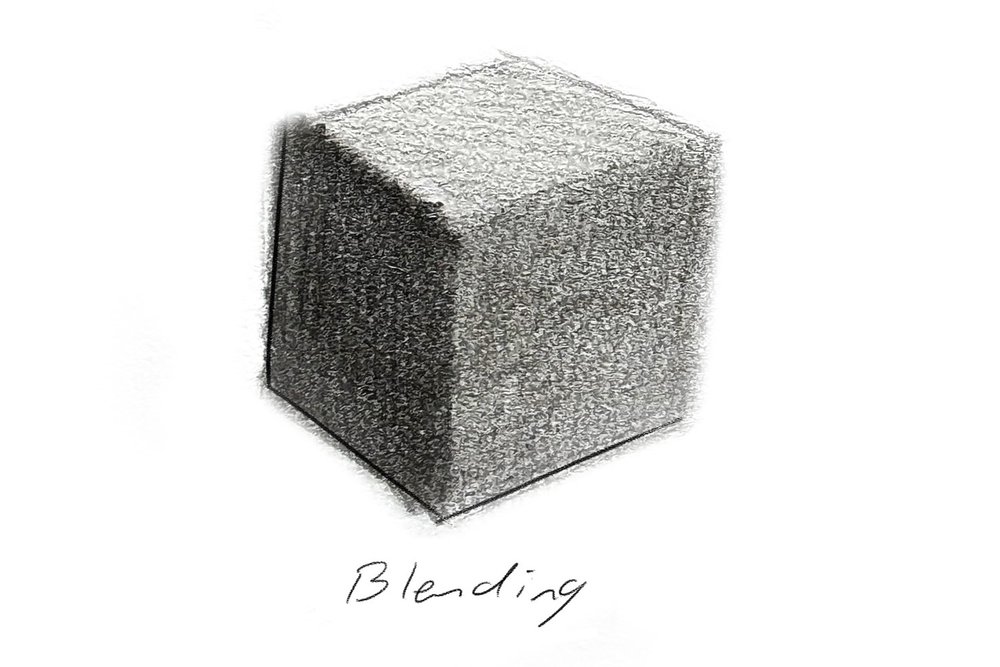
Drawing with graphite or charcoal pencils often result in a grainy finish containing many white dots of uncolored paper. By blending these areas you fill in those white spots which will result in a much smoother look.
To blend graphite and charcoal you just rub with your finger or a blending stump over the area you want to blend. If you're blending with your finger it is best if you first wrap your finger is a tissue. This prevents oils from your finger from getting onto the paper and resulting in a patchy look. By using the tissue instead of your bare finger the result will be much smoother.
When using a blending stump don't blend in straight lines, but use a circular motion instead. If you blend just by going back and forth you will get darker start and stop spots. By using a circular motion you don't have start or stop points resulting in a more even blending.
Apart from filling in all those white spots blending will also make your drawing look a lot softer, so if there are any hard lines or sharp details you want to keep you shouldn't blend those areas.
Blending is an amazing technique to easily create blurry and out of focus backgrounds, but it is also very handy to fill larger areas or to fill in the grain of the paper before adding details.
8. Indenting
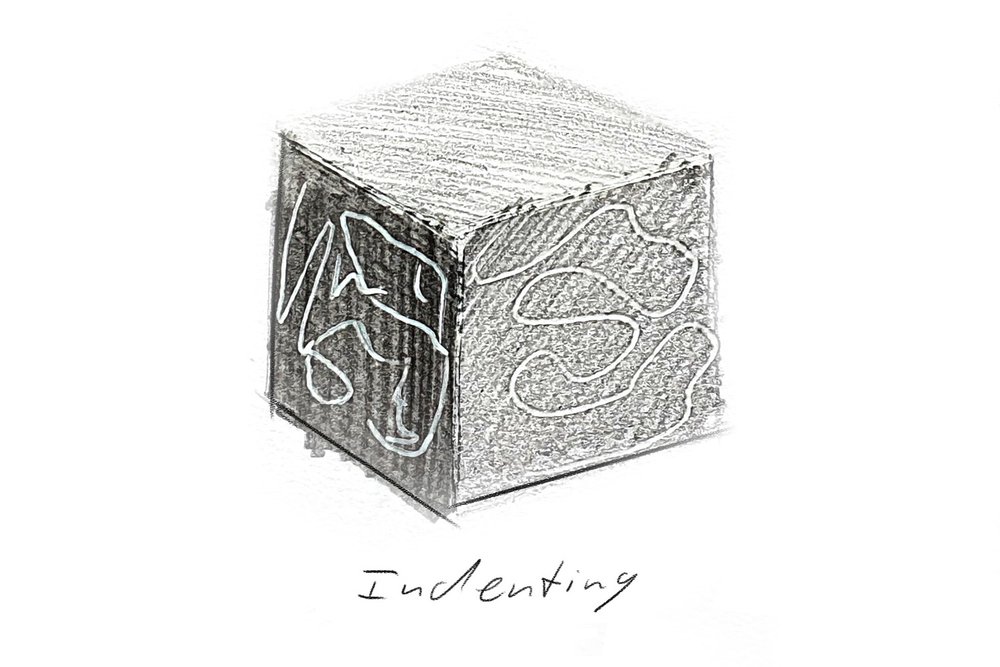
Often when drawing there are many white details you want to contain. Drawing around them can take a long time and you need to be very precise. But By indenting those details you don't have to worry about them. You can just color over them and they will stay as white as the paper.
By indenting the paper you can easily get lots of fine details really quickly. You do need to indent the paper before drawing over it. To indent the paper you can use an indenting tool or just an empty ball point pen.
Indent the paper wherever there are white details you want to preserve by pressing hard on the paper on that area. By doing this you create little indented grooves into the paper which prevents the lead of the pencil from going into those grooves, thus leaving them white. This works only if the details are lines or dots. If the details are to big the pencil can actually go into the grooves. And if the paper isn't thick enough you can't really indent the paper. Any paper that is heavier than 100 gsm or 70 lb should to the trick.
To actually see where you've indented the paper you can use a flashlight and lay it on the table so that it casts light sideways over your drawing surface. This makes it a lot easier to see the indentations as it casts small shadows in the indentations you're creating in the paper.
This technique is great for drawing light hair or even wheels of cars. The possibilities are endless.
In the beginning this method take a lot of practice to get right.
9. Rendering
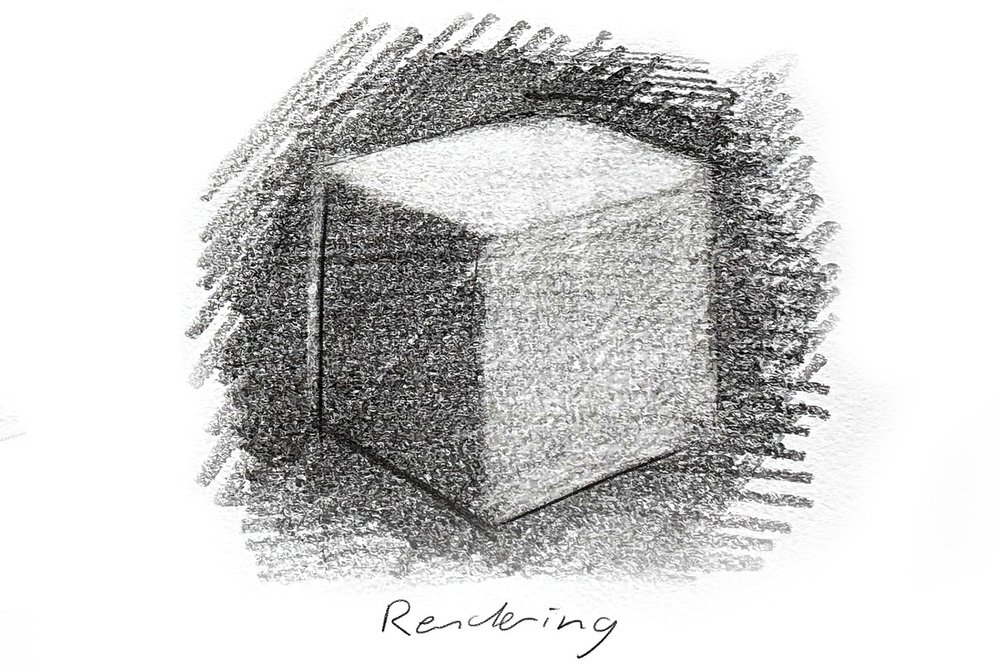
Rendering is the complete opposite of all other methods of drawing. Instead of drawing the shadows you draw the light. First you cover the paper fully in graphite or charcoal and then you slowly remove it with an eraser to create highlights.
You can use a normal eraser for harder highlights or a needed eraser for softer and less bright highlights.
To create very bright highlights press harder on the paper or you go over the same area multiple times and to create less bright highlights press lighter.
This technique will create a soft and almost blurry result which can be very useful for drawing blurred backgrounds.
Overview of all techniques
Tags
Articles You Might Also Like


I love bringing cars to life with alcohol markers and colored pencils.
Whether you're just starting out or looking to improve your skills, I'm here to help!
Click here to learn more about me.


Be the first to comment!
Comments
There are no comments yet.