How to Draw Headlights of Cars | Step-by-Step Guide
Drawing headlights might seem very complex and overwhelming. But honestly, it's not as difficult as it looks. There is a lot of room for mistakes and just doing whatever and they still end up looking realistic. But as with most things, you can make it as difficult as you like.
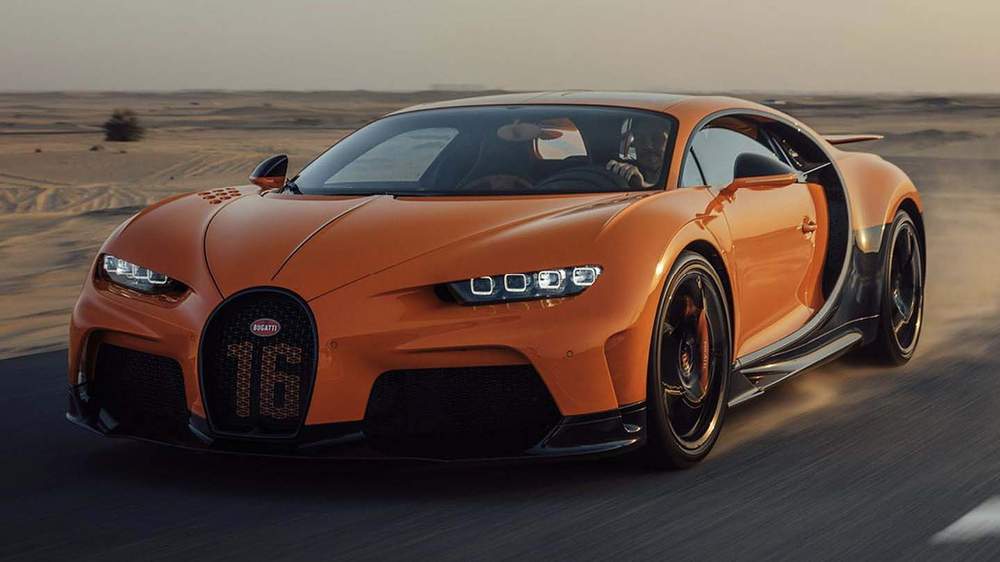
In this tutorial, I'm going to show you how I draw the headlights of cars. Specifically how to draw the headlights of a Bugatti Chiron.
If you're interested in learning how to draw a full car, make sure to check out this article.
How Do You Draw Car Lights?
To draw the headlights I used the photo below as a reference for the lighting and the reflections.
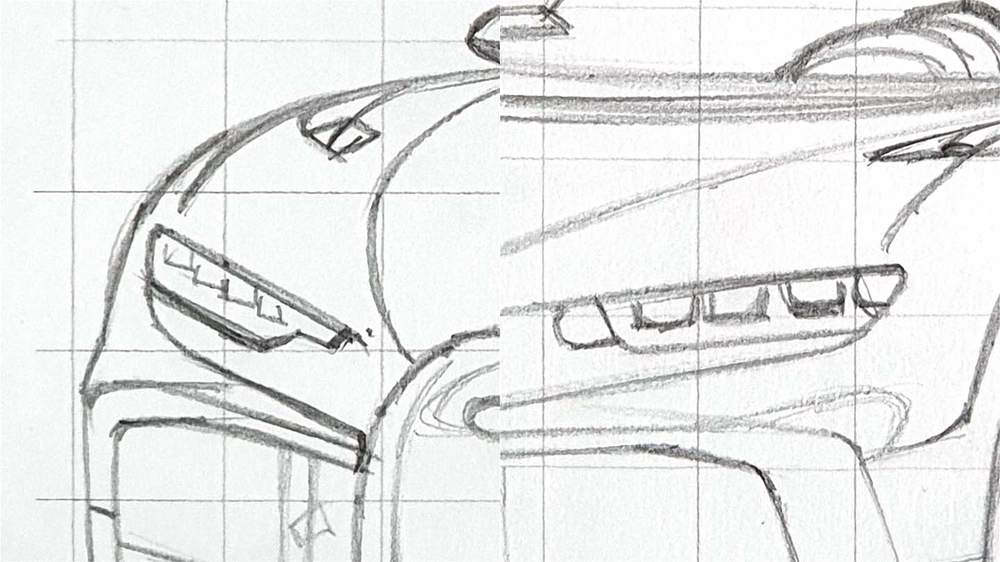
Step 1: Sketch the Headlights
The first step in drawing the headlights is the sketch them. Luckily they are pretty easy, and to make them even simpler I don't look at the details for now. I started by sketching the outer shape of the headlights and then I drew the 4 rounded squares in each headlight.
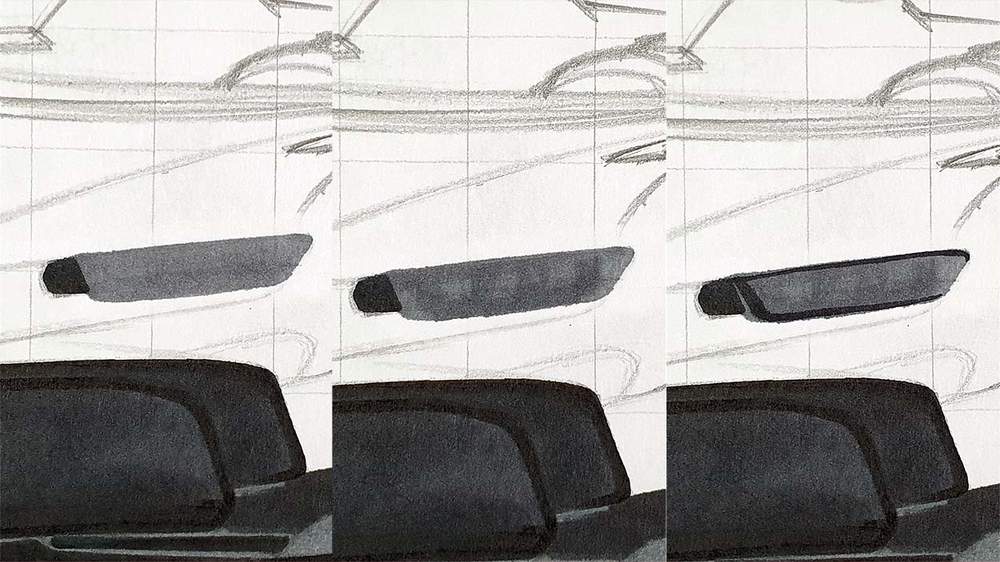
Step 2: Color the Basic Shapes
Next, I used alcohol markers to color the basic reflections and shapes that I saw in the headlights. You don't need to be very precise at all yet.
I started by coloring the left headlight with Ice Grey 2. After that, I darkened the left of the headlight a bit with Ice Grey 4. I also shaded the right half with Ice Grey 4. And lastly, I used Black to darken the left, bottom, and right edges.
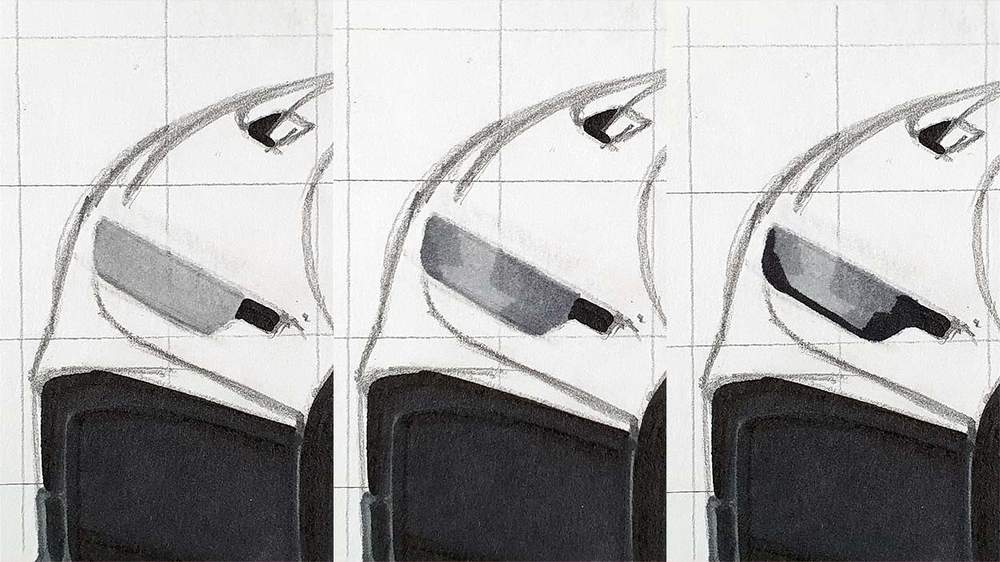
Next, I colored the right headlight. I first colored it fully with Ice Grey 4. Then I darkened most of it with Ice Grey 5, but leaving some square-ish shapes lighter. And lastly, I outlined the left, top, and bottom with Black.
Step 3: Add details with a Black and a White Colored Pencil
The headlights look very, eh, undetailed and unrealistic at this point. But that's where a black and a white colored pencil will come in handy.
I started by using the white colored pencil to add all the highlights in both headlights, which are mainly the rounded square-shaped light sources.
After I had colored those shapes with the white pencil, I added some dark details with the black colored pencil. When doing so I just looked at the reference photo and searched for places that needed to be darker. In the left headlight, I barely used the black pencil. I only colored the inside of the far left and far right squares. In the right headlight, I used it a bit more, mainly just below and above each square light source.
Step 4: Add Bright White Highlights
And to make the headlights really pop I used a white Posca paint pen to add bright white highlights. I highlighted the square light sources as well as a few small reflections in the right headlight.
Now, that didn't seem so difficult after all, did it?
Btw, if you're interested here is a full drawing tutorial for the Bugatti Chiron.
Some More Examples of Headlights
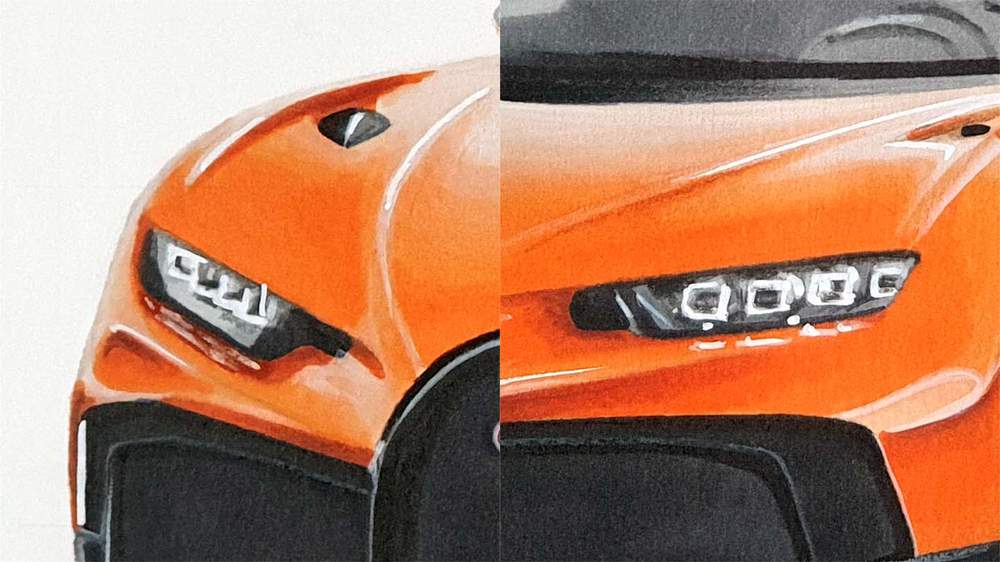
Colorful Headlights
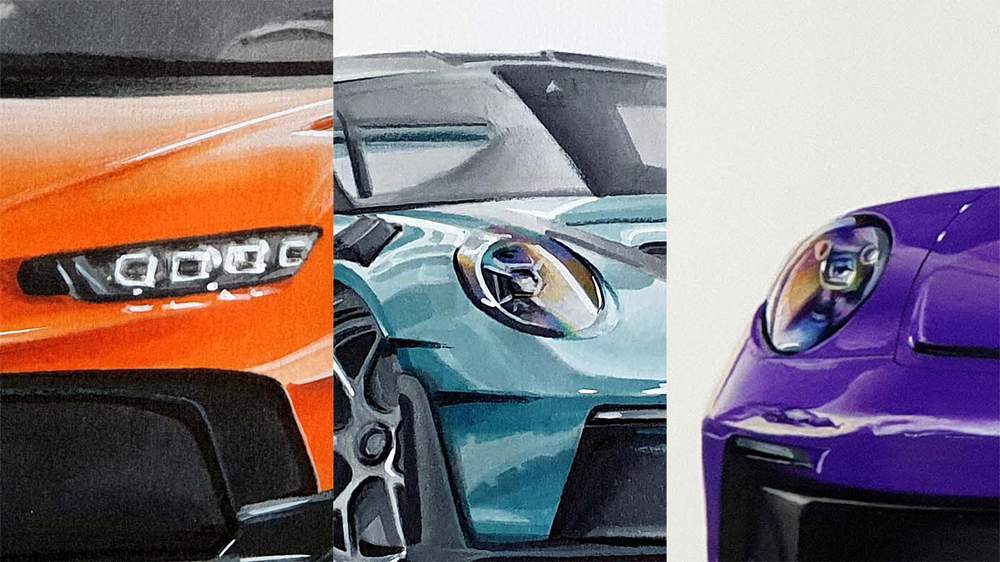
If you've been drawing cars for a bit now, or you just like looking at photos of cars, you might have noticed that some headlights have a ton of colors like the ones I drew below.
.jpg__1000x1000_q65_subsampling-2.jpg)
To draw headlights like this, I basically use the same techniques as I did for the headlights of the Chiron, but instead of using only grey tones I also use various colors to block in the basic shapes that make up the headlights. In this case, I used some yellow, orange, brown, green, blue, and purple.
I also have a full step-by-step tutorial for drawing this GT3 RS here.
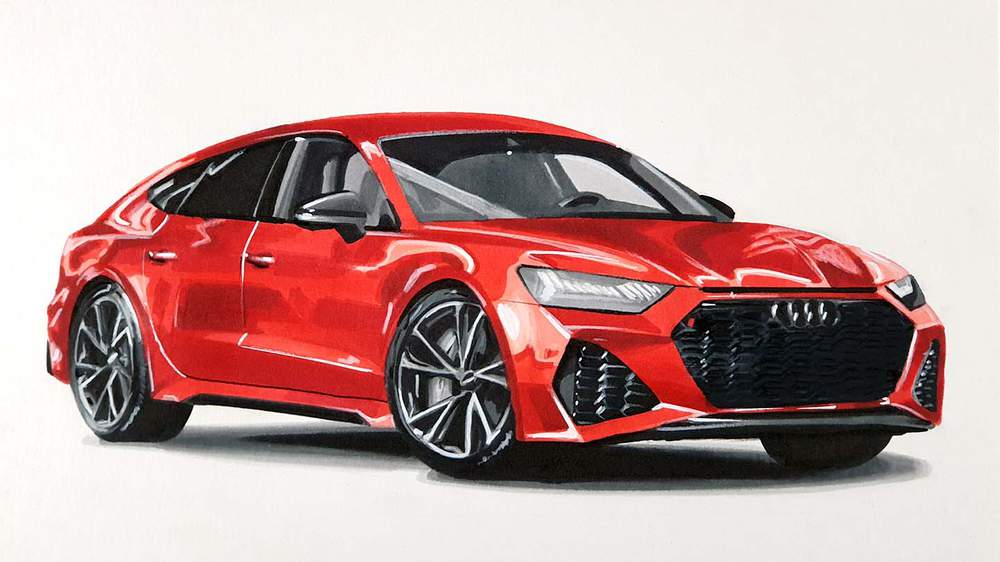
Dull and Light Headlights
Just like some headlights are very colorful, there are also many occasions where the headlights I drew are very light and don't have much more to them than just a bit of light grey like this headlight of an Audi RS7 I drew recently.

As you can see I just used 2 light grey markers and that's it. It might look unrealistic so close up, but when you see the full drawing it fits right in.
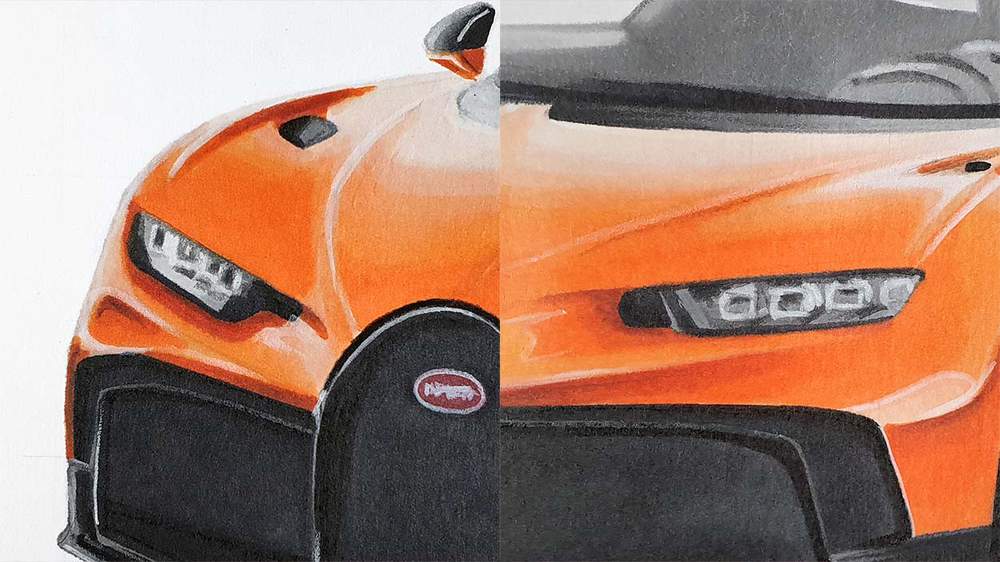
Photorealistic Headlights
As I said before, you can make the headlights as difficult as you like. Often times the more realistic you try to draw them, the more difficult that will be like these headlights I drew on a Porsche 992 GT3.
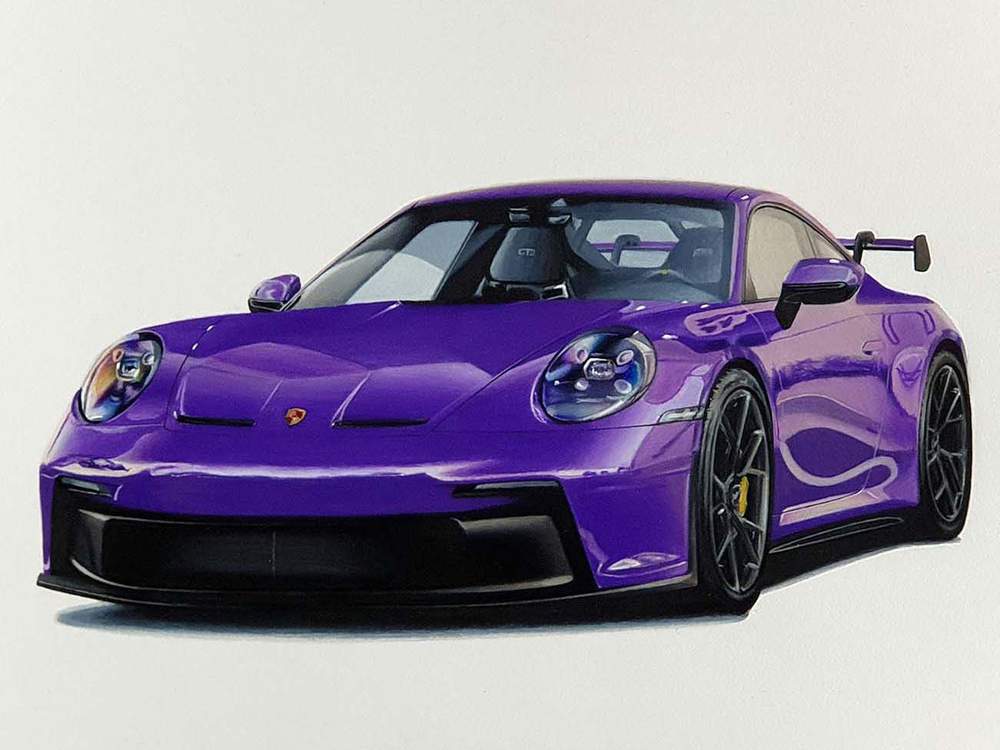
For these headlights, I used approximately the same techniques to color them, but instead of only using a black and a white colored pencil I used a lot more and I spent a lot more time refining them and adding details and contrast.
The headlights of the Chiron took about 5 minutes, these headlights took about 1 hour each. They do look a lot more realistic and detailed than the ones of the Chiron, but the Headlights of the Chiron are realistic too. It depends on what you want to achieve.
I used to really like to make my drawings as realistic as I could, but recently I found it more fun just to draw simpler drawings that I spend less time on, but that are still also realistic, just a bit more simplified.
Articles You Might Also Like
.jpg__500x500_q85_crop_subsampling-2.jpg)

I love bringing cars to life with alcohol markers and colored pencils.
Whether you're just starting out or looking to improve your skills, I'm here to help!
Click here to learn more about me.


Be the first to comment!
Comments
There are no comments yet.