How to Draw Hands - 2 Easy Techniques

If you've ever tried to draw hands you'll know that it's not the easiest thing in the world. But luckily there are a few techniques that make drawing a hand a lot easier.
In this article, I'll show you 2 techniques to draw hands more accurately and with ease.
Technique 1: The Bone Structure Method
For the first technique, we're going to use the bone structure of your own hand as a guide.
This is the best technique for more accurate proportions and more complex hand poses, but it involves more steps and time than the second method. This technique also isn't the best for sketching hands that appear very tiny on your drawing surface.
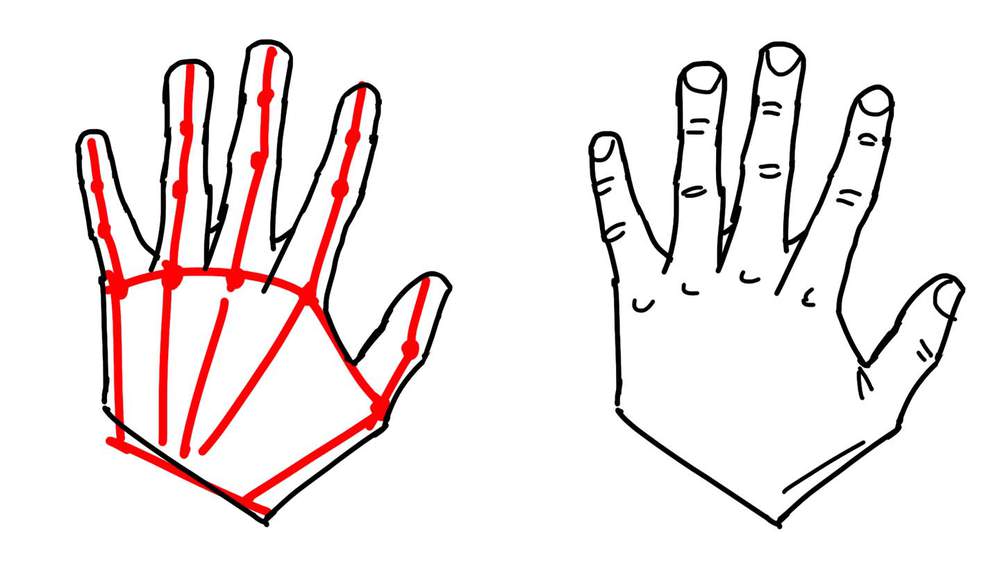
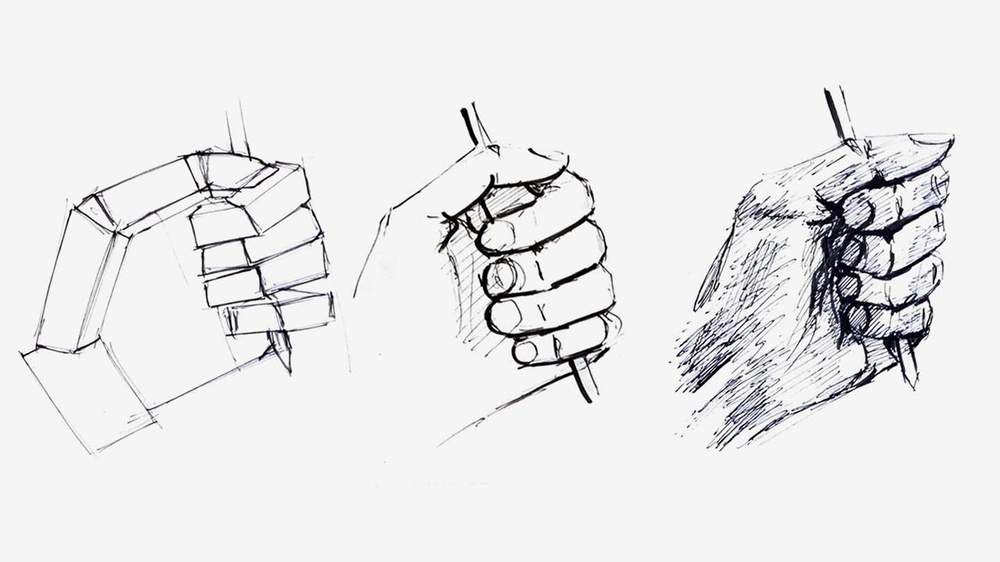
Step 1: Sketch the Bone Structure
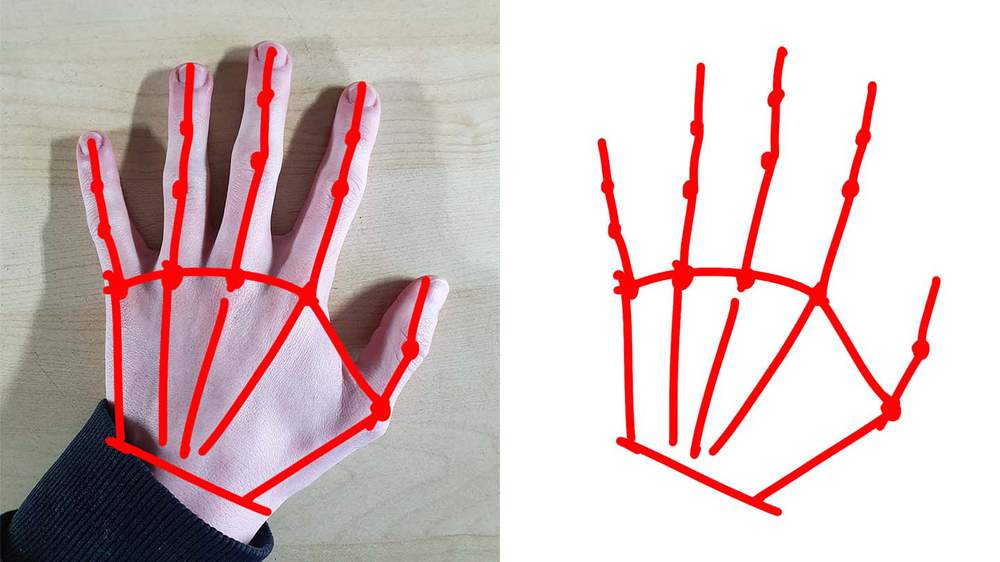
The first step is to sketch all the bones in the hand. In this example, I've used my hand as a guide.
Using a reference photo definitely makes this part a lot easier. And lucky for you (hopefully), you have one or even two hands of your own, so use them as a real-life reference. This makes it easier to get the proportions correct.
Step 2: Add Volume
Now we're going to add some dimension and volume to the hand, especially the fingers.
I first sketched the pentagonal shape of the back of the hand and then I sketched rectangular shapes for each of the phalanges.
After that, I refined the shape to look more organic and round to make it look more like my own hand.
Step 3: Refine Shape + Add Details
To finish it off I removed all construction lines and started adding details, mainly some wrinkles between each phalanx and C-shapes on each knuckle. I also sketched in the shape of the nails.
Some More Examples of this Technique
Technique 2: The Fan Method
For the second method, we're going to use the general shape of the hand to sketch it.
This technique is quicker and works better when the hands you're drawing are quite small on paper, but it might be a bit more difficult to get right. This method also works best when the fingers are not curled up too much or in some awkward pose.
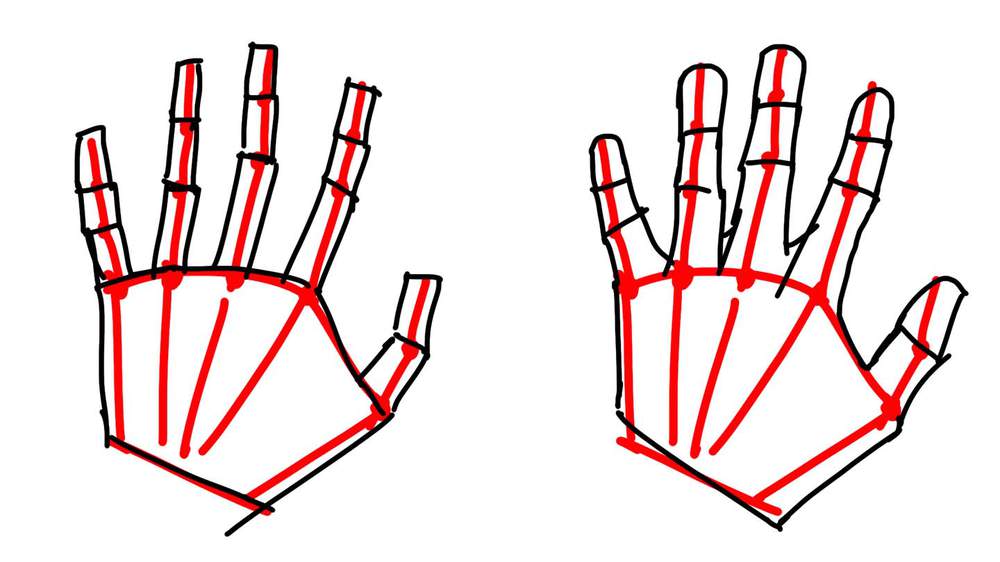
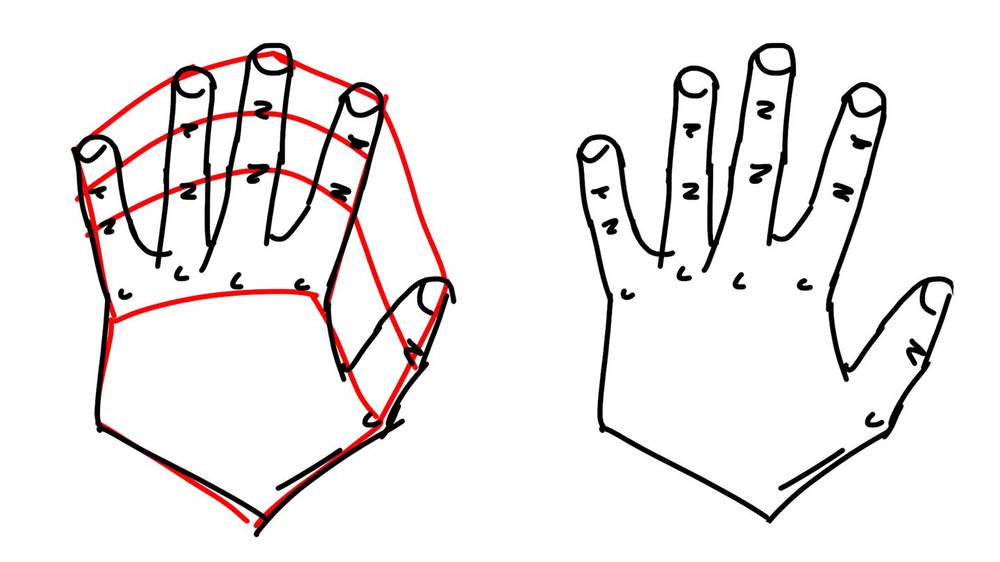
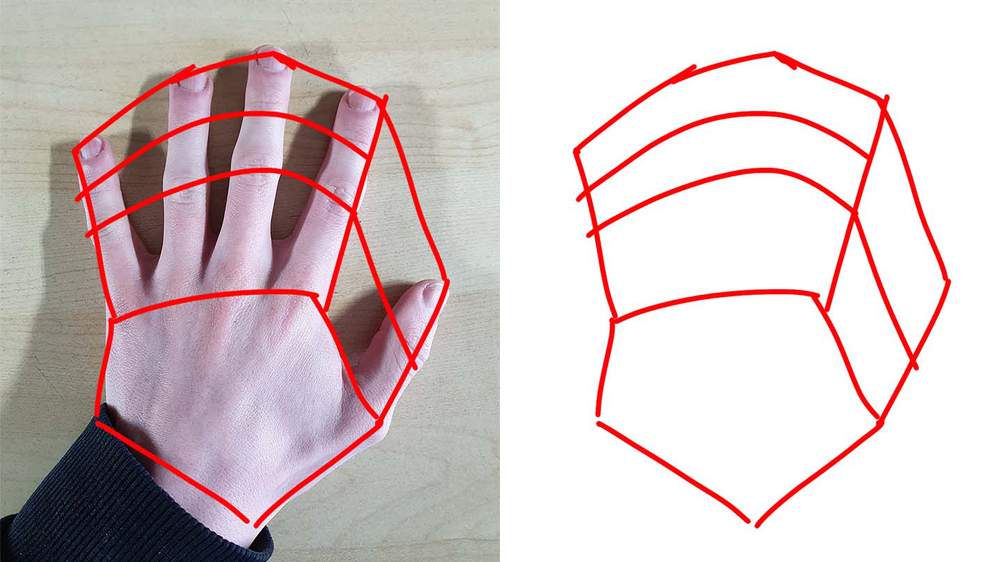
Step 1: Sketch Basic Shapes
To start we're going to sketch the shape of the back of the hand which is a crooked pentagon.
Next, we're adding a fan shape to the top of the back of the hand. I started by drawing a line the length of my pinkie just to the left of it. Next, I drew a line the length of my index finger just to the right of that.
After that, I sketched one line to connect the tips of each finger and 2 lines to connect the finger joints.
Lastly, I did the same for the thumb. I probably would just sketch my thumb the way I did in method 1. Don't know what I was thinking here... But I guess either way works fine.
Step 2: Sketch Hand Using the Basic Shapes
Next, it's time to sketch the hand using the mitten-like shape we have now.
By using the shapes we've just sketched as a guide it's easier to draw the fingers and phalanges with the correct length.
Once you've drawn the outline of the hand it's time to add details.
I sketched in the nails on each finger and I drew the wrinkles between each phalanx on the red construction lines. I also drew C-shapes to indicate the knuckles. No idea why I didn't draw the knuckles on the red line. They definitely should be on that line, but for some reason I drew 2 of them above it...
I hope these techniques will make drawing hands a bit easier for you. Good luck with drawing many hands!
Articles You Might Also Like


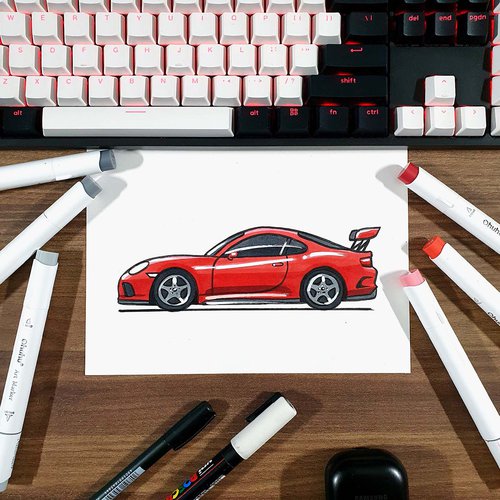


I love bringing cars to life with alcohol markers and colored pencils.
Whether you're just starting out or looking to improve your skills, I'm here to help!
Click here to learn more about me.


Be the first to comment!
Comments
There are no comments yet.