How to Draw a Cozy Winter House Scene Step by Step for Beginners
There’s something magical about a snow-covered cabin in the woods, especially when you get to draw it yourself!
In this easy step-by-step guide, I’ll show you exactly how I drew a cozy winter house scene, from the first sketch to the final layer of snowy marker shading.
This tutorial is perfect for beginners and intermediate artists who want to capture that warm winter feeling with just a few supplies and some simple techniques.
Let's get started!
Disclaimer: In the name of full transparency, please be aware that this blog post contains affiliate links and any purchases made through such links will result in a small commission for me (at no extra cost for you).
Drawing Supplies I Used for this Drawing
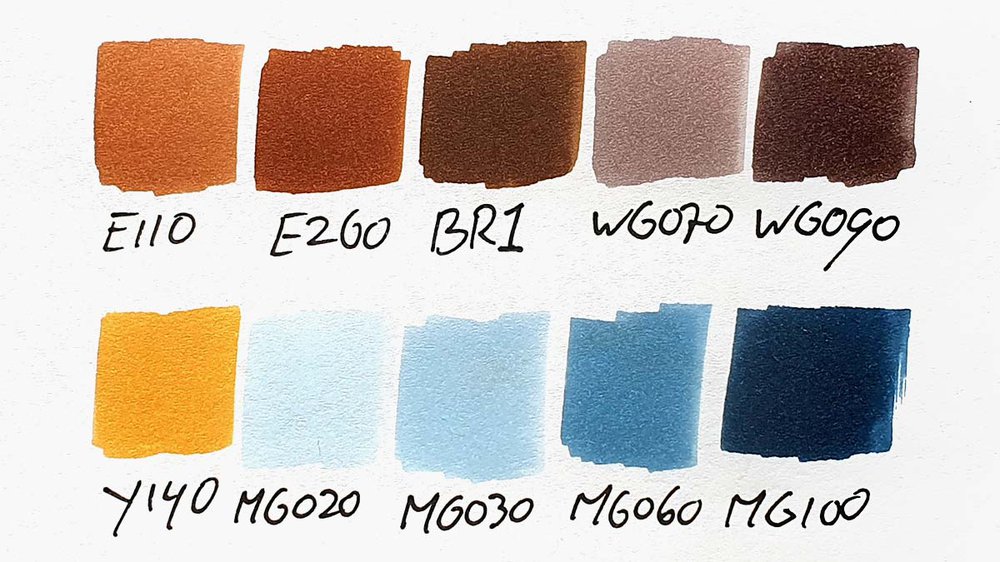
To make this drawing, I used Ohuhu Honolulu markers in the colors Nugget (Y140), Dark Suntan (E110), Leather (E260), Raw Umber (BR1), Warm Grey 07 (WG070), Warm Grey 09 (WG090), Blue Grey 02 (MG020), Blue Grey 03 (MG030), Blue Grey 06 (MG060), and Blue Grey 09 (MG100).
I used a Tombow Fudenosuke Brush Pen to outline the sketch.
And I made this drawing on Canson Illustration Manga Paper.
How Do You Draw a Cozy Winter House?
To draw this cozy winter house, start by sketching the basic house shape with a pointed roof. Add a snowy roof using wobbly lines, then draw a porch with an arched door. Add windows, a chimney, and simple textures like bricks and logs. Before finishing the house, sketch a snowy path, bushes, pine trees, and clouds in the background. Outline your sketch with a black pen, then color it using markers, warm browns for the cabin and cool greys and blues for the snow and sky.
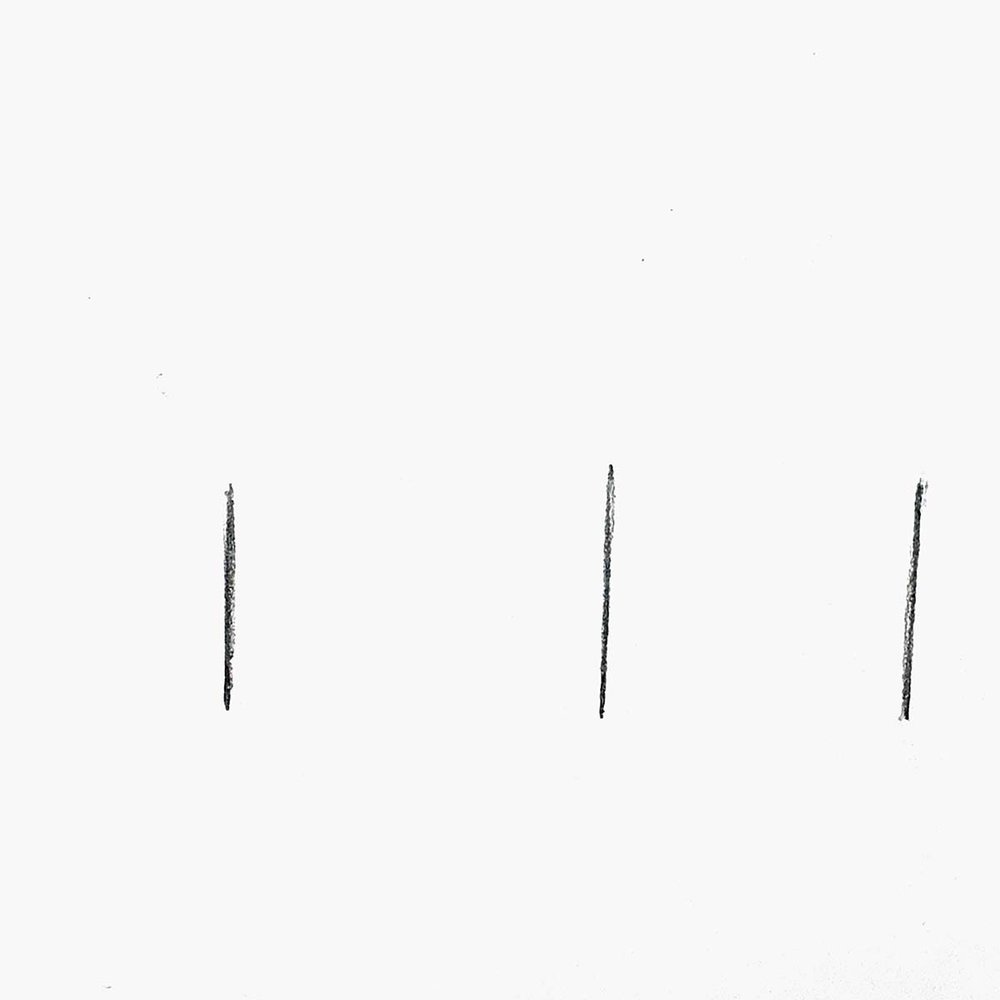
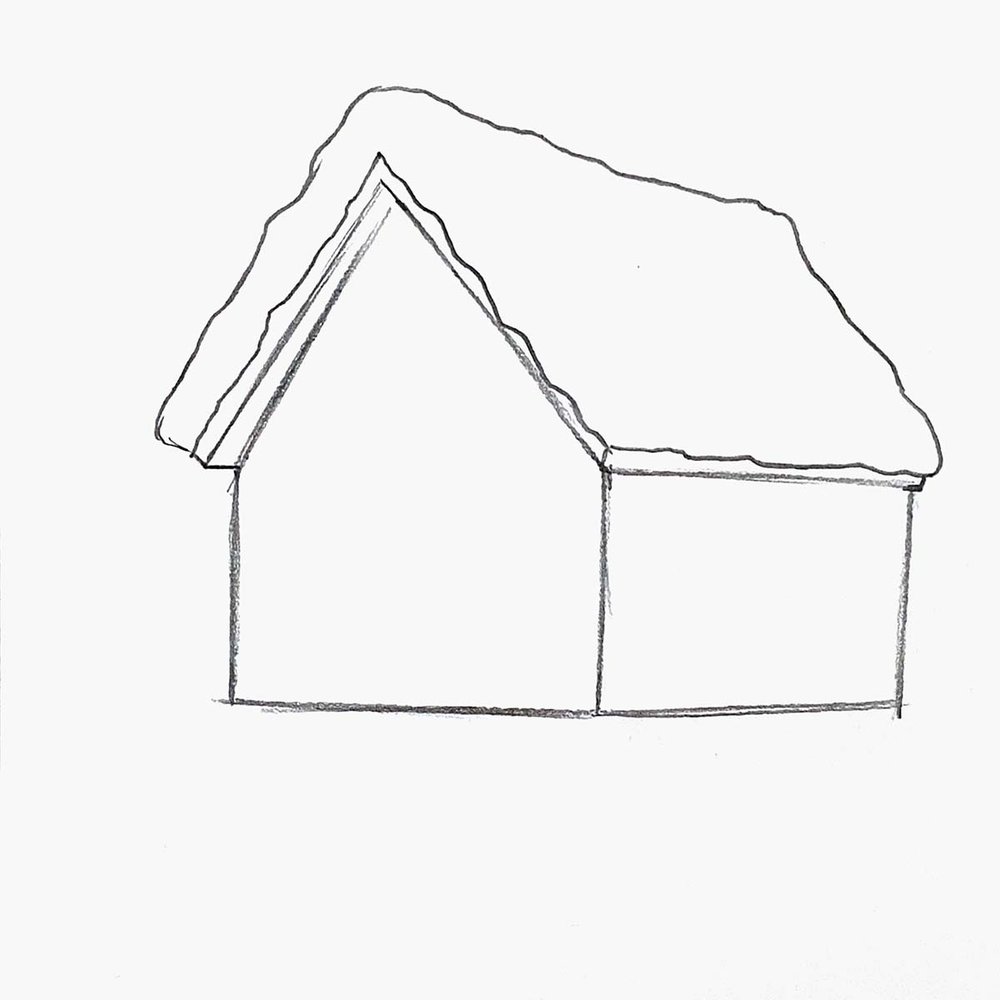
Step 1: Sketch the Basic Shape of the Cozy Winter House
To draw our cozy winter house, I first sketched the basic shape of the house.
I started by drawing 3 vertical parallel lines with equal spacing, a little below and to the right of the center of the paper.
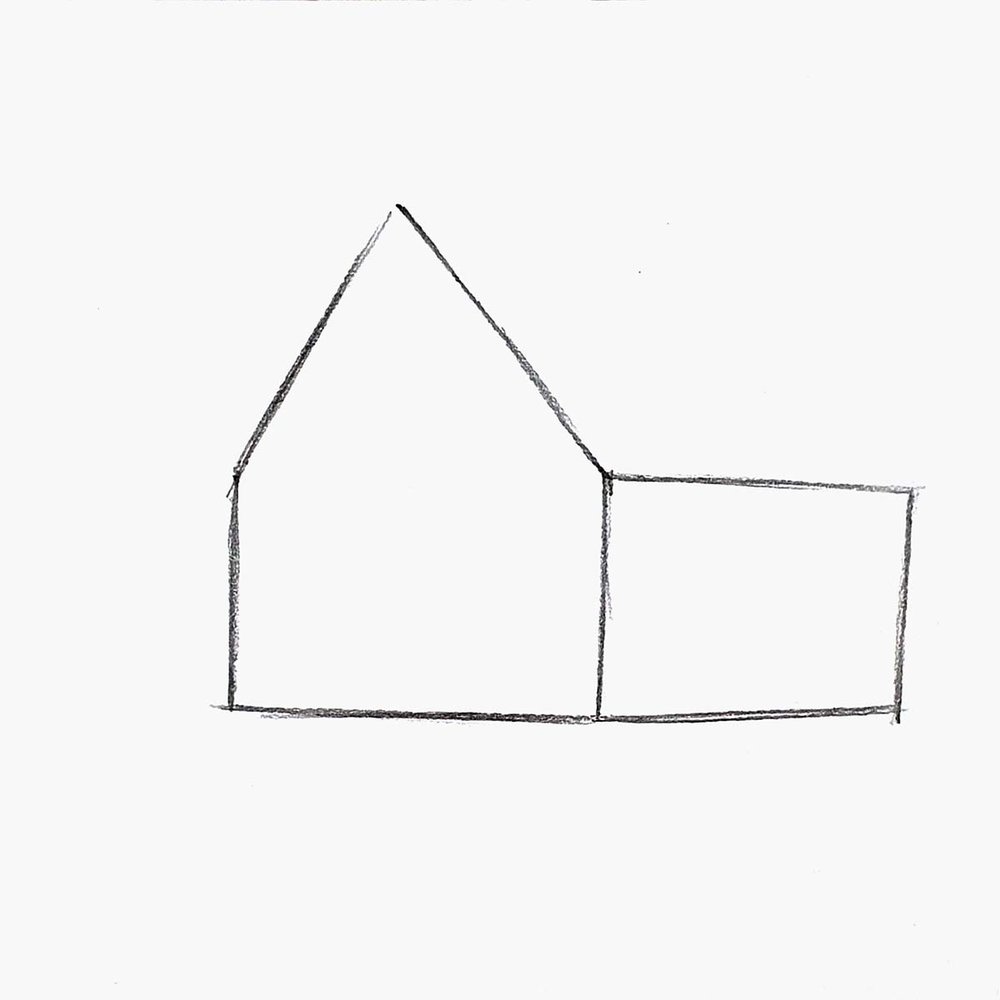
Next, I added a flat line connecting them at the bottom and sketched the classic pointed roof shape.
Step 2: Draw the Snow-Covered Roof on the Winter House
After that, I made the roof appear to stick out a bit by adding a parallel line to the left of the roof.
I created a wobbly line all around the bottom edge of the roof.
I made it wobbly because of the snow covering the roof.

Next, I added the top edge of the roof.
I made it quite thick and wobbly because of the snow.
With the basic structure now in place, we can start adding some more details.
Step 3: Add a Snowy Porch to the Front of the House
I first added a porch to the front of the house.
I sketched 3 vertical lines of about the same height.
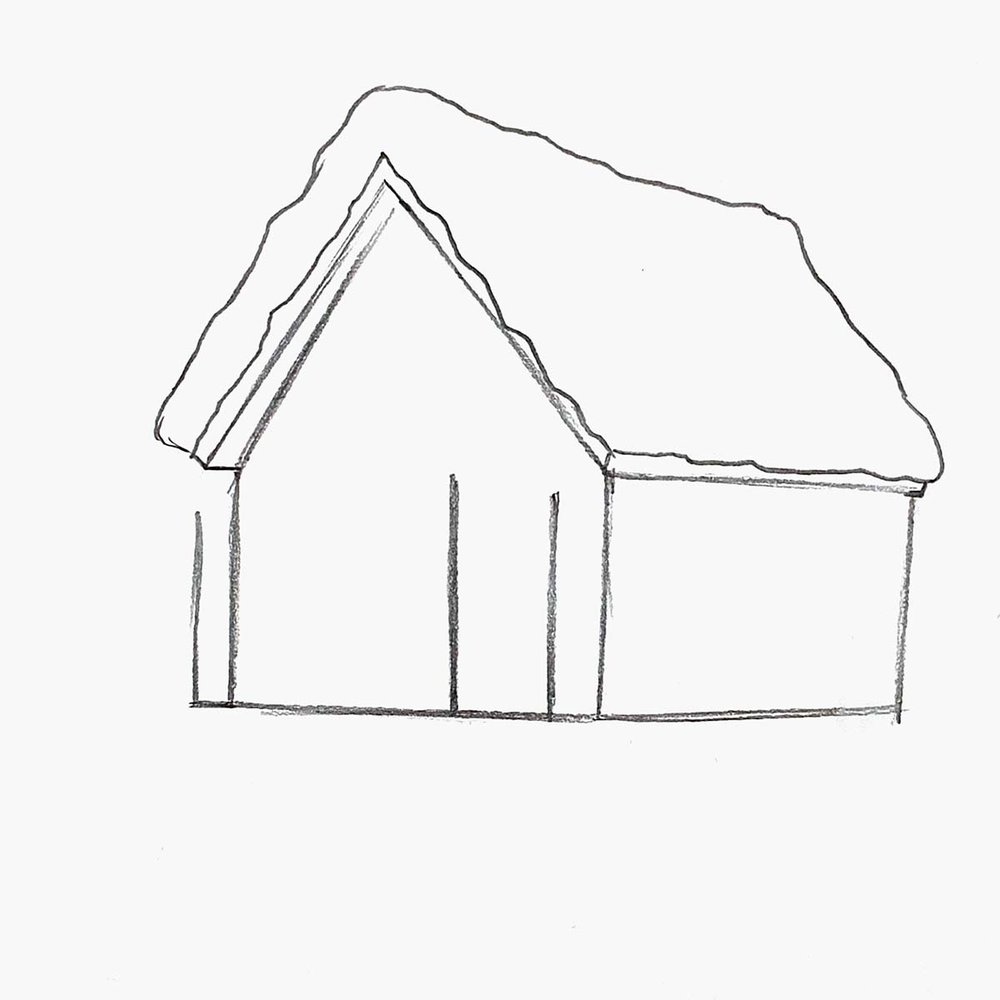
Then, I sketched the deck and the bottom edge of the roof, both made up of 2 lines closely together.
I made the top line of the roof part wobbly as it's also covered with snow.
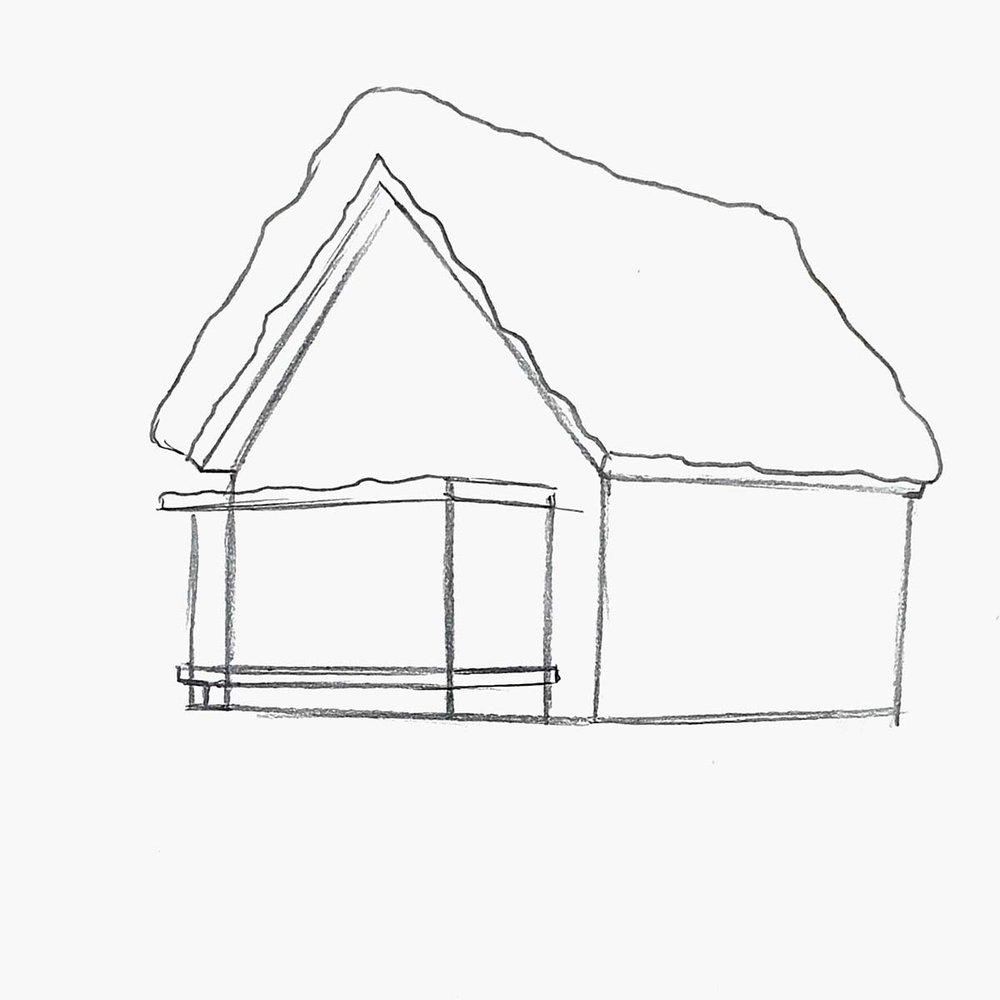
Next, I added the top edge of the roof.
I again made it thick and wobbly as it is covered in snow.
I also sketched 3 support posts and the start of the railing between them.

Lastly, I drew the arched door frame and a step to get onto the porch.
I also erased the small section of the roof that was overlapping the porch roof.
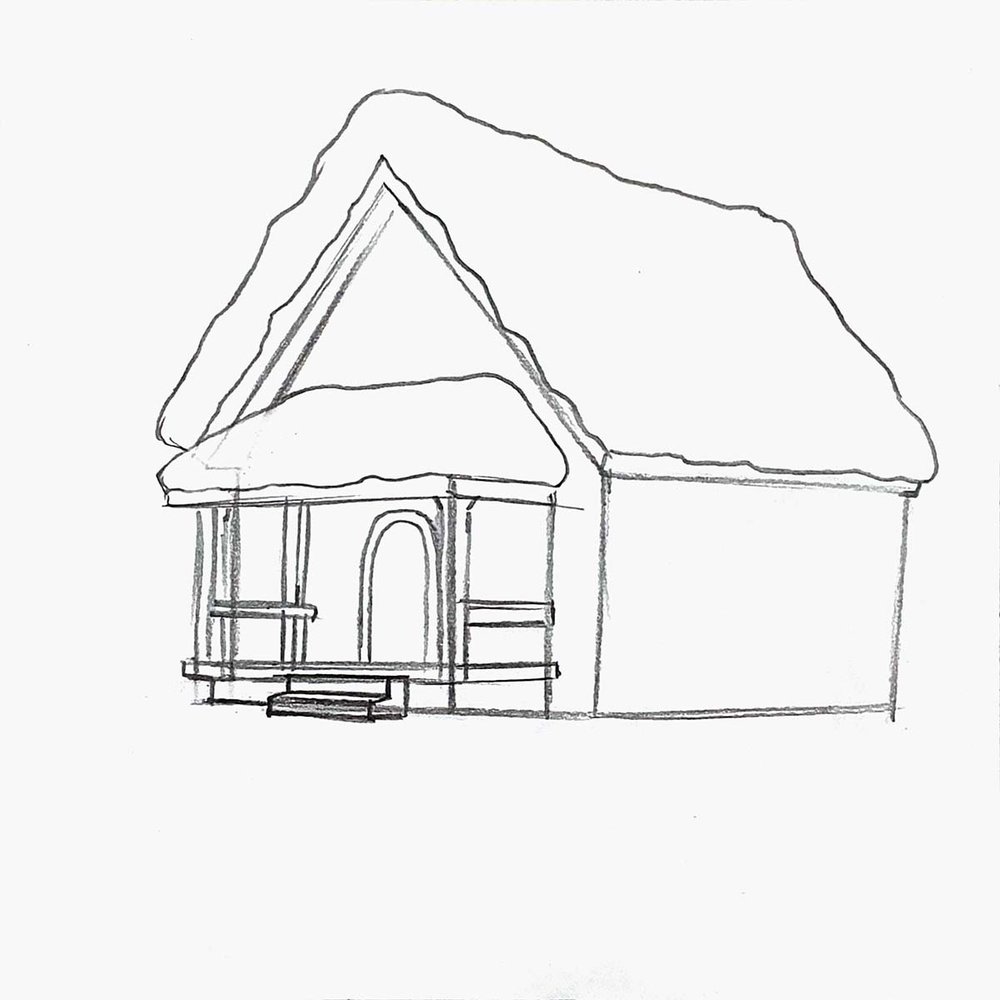
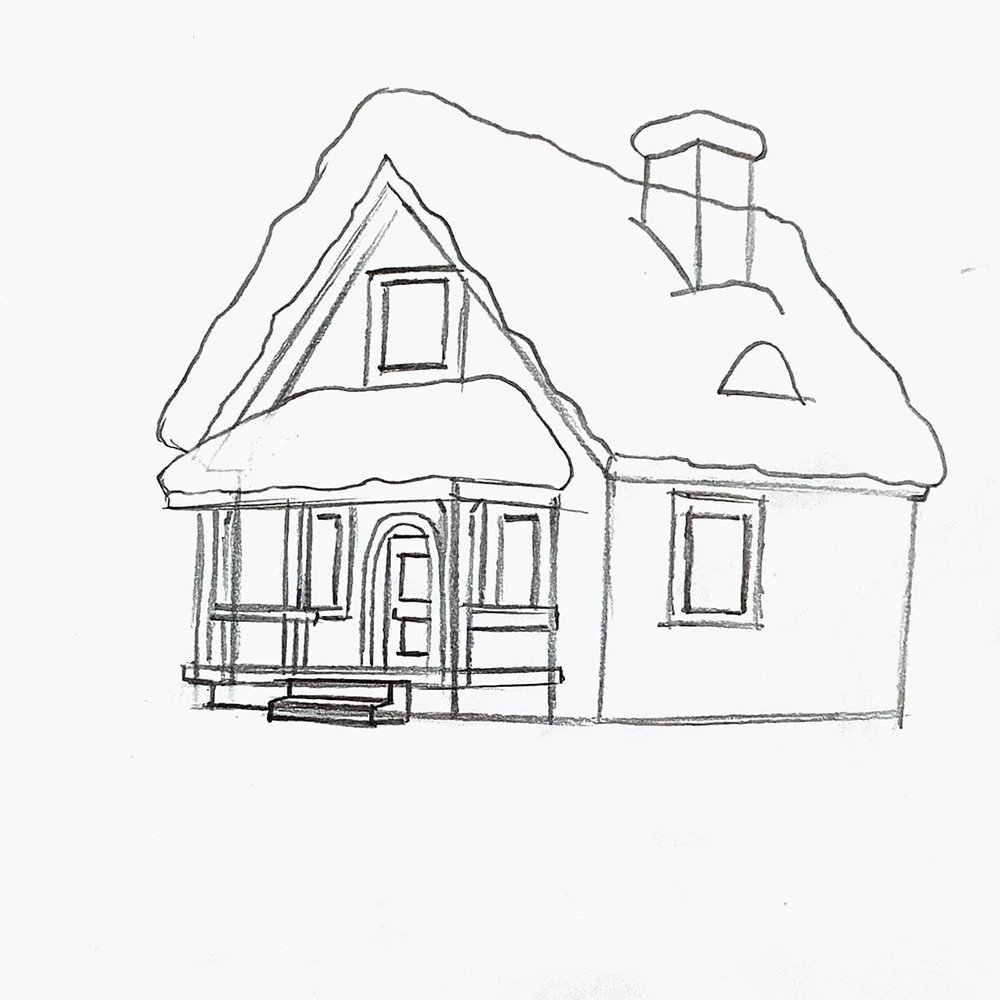
Step 4: Draw the Front Door, Windows, and Chimney Details
With the porch now done, I added the door which is made up of 1 rectangle with 2 squares inside it and a dot on the left for the door knob.
I also added two narrow windows on either side of it, and one square window on the side of the house and one above the porch.
I also added an arch-shaped roof window with a chimney above it.
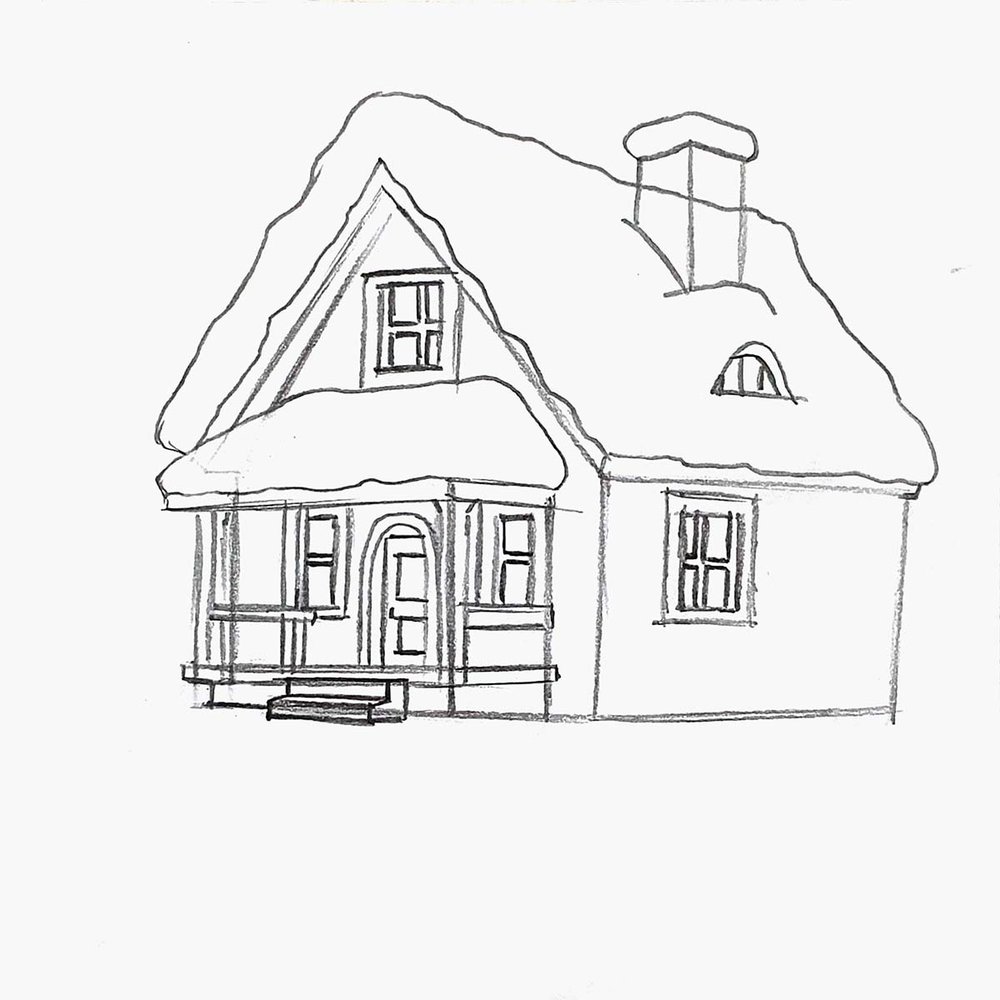
Next, I added the window grids, four squares in the square windows and two squares in the narrower rectangular windows next to the front door.
I also added some detailing/lines to the roof window.
Lastly, I added the brick texture to the chimney and vertical lines to the porch railing.
The brick texture is made up of parallel horizontal lines with here and there a vertical line connecting them.
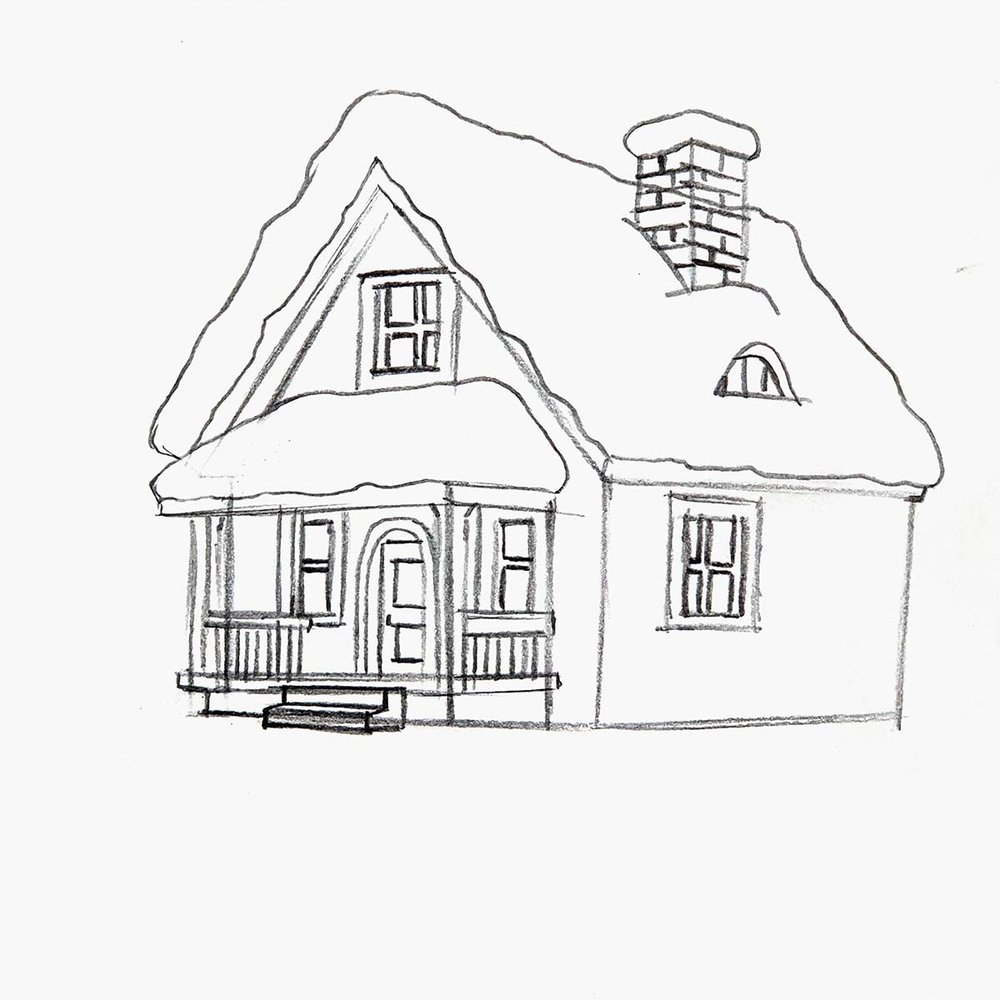
The house isn't finished yet (it still needs the log texture on the walls), but since trees and bushes will cover parts of it, I thought it was best to sketch the background first before completing the house.
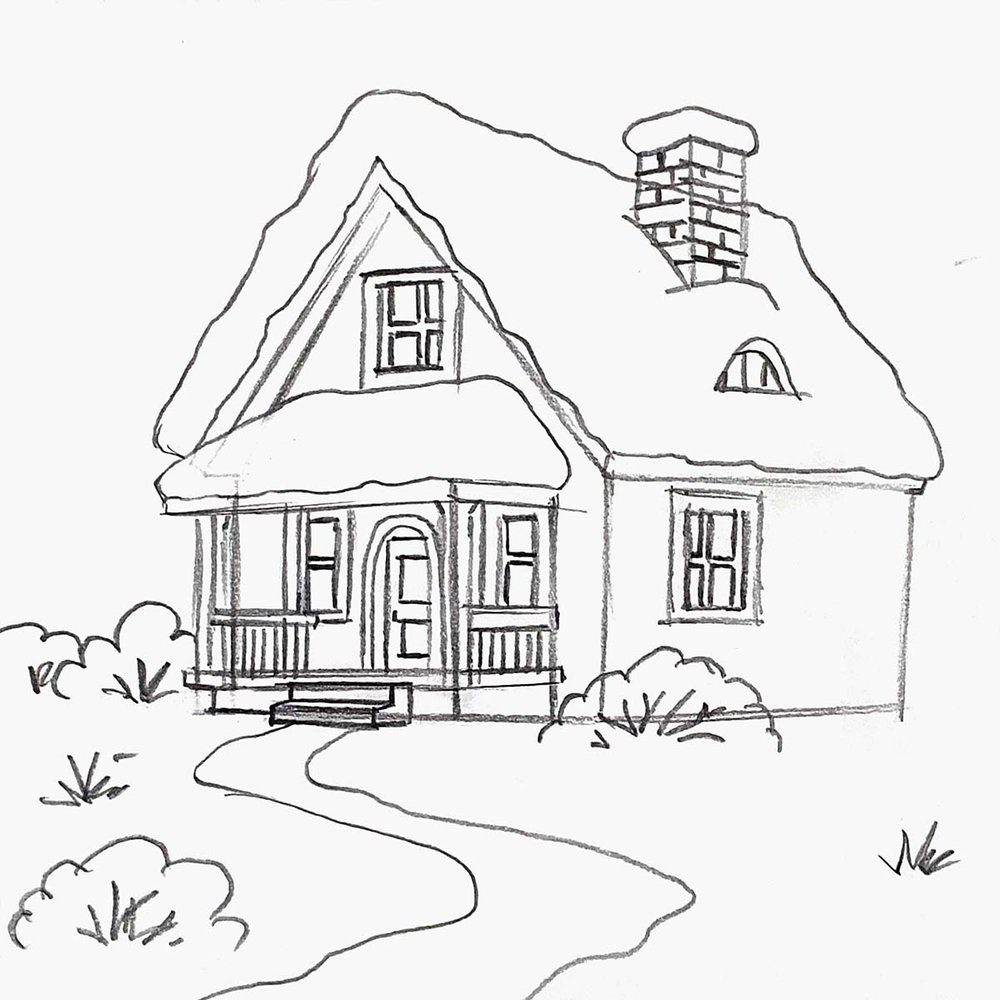
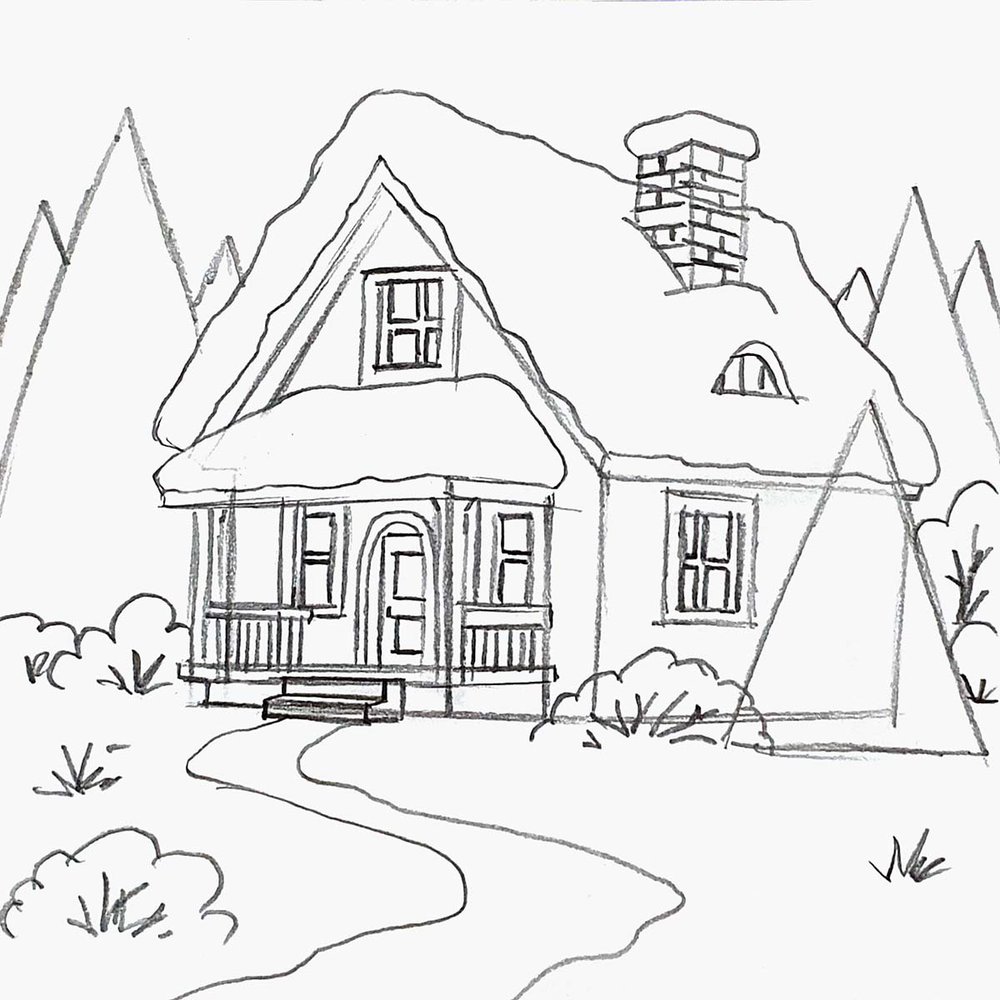
Step 5: Draw a Snowy Path Leading to the Front Door
I started the background with a simple path leading up to the front door.
The path has an S shape just because it looks good, and I made the edges wobbly because of the uneven snow.
I also added two small bare bushes made up of just a few lines and four snow-covered bushes, which are made up of the same lines with linked arches surrounding them.
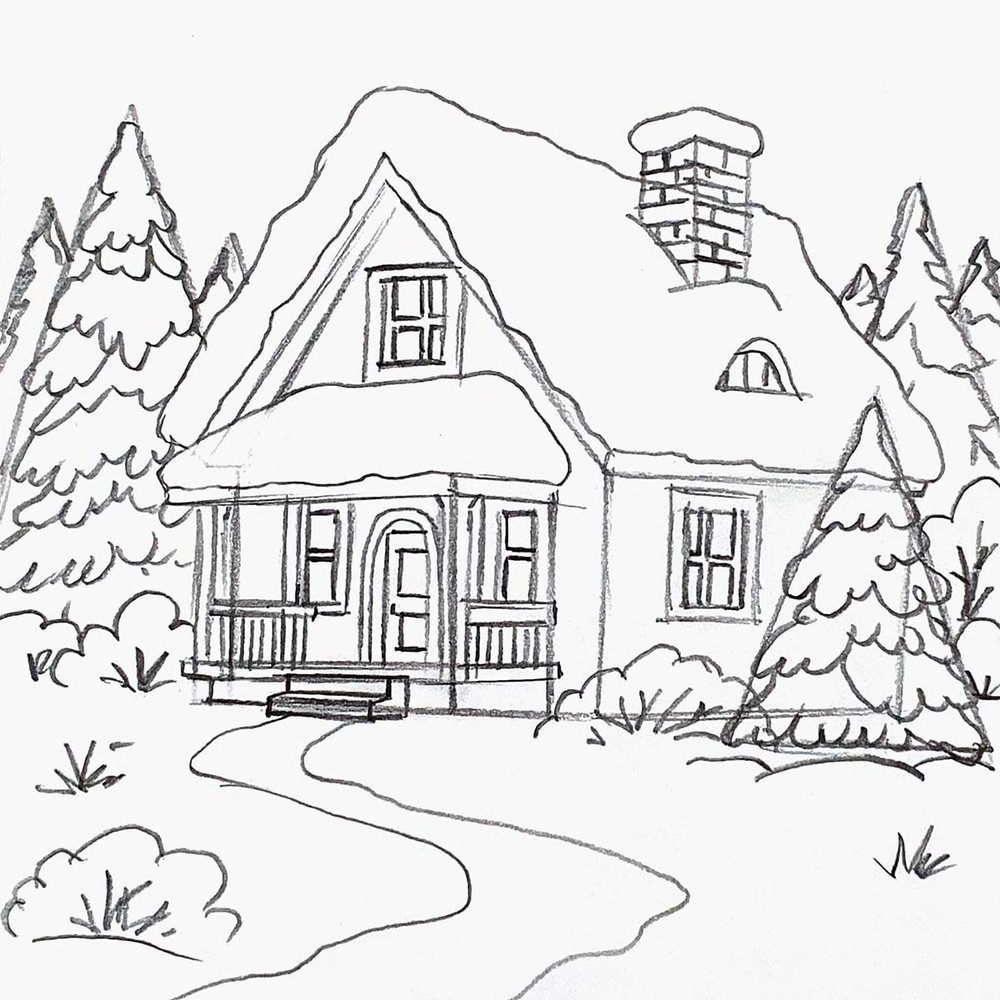
Step 6: Add Pine Trees and Snowy Background Elements
Next, I marked out where I wanted to place pine trees in the background (and one in front of the house on the right), and I did this by drawing large pointy triangles in the foreground.
For the ones in the back, I just drew a small tip poking through.
I also added a bigger bush to the right side of the house.
Next, I gave the front pine trees this drooping texture to make them look like they are covered in snow.

The trees in the back didn't need this much detail, so I just added a few scribbly lines.
Lastly, I added some big fluffy clouds in the sky.

Step 7: Draw the Log Walls of the Cozy Winter Cabin
With the background now done, we can finish the walls of the house.
I first drew the ends of the logs on the front corners of the house. They kinda look like ( ).
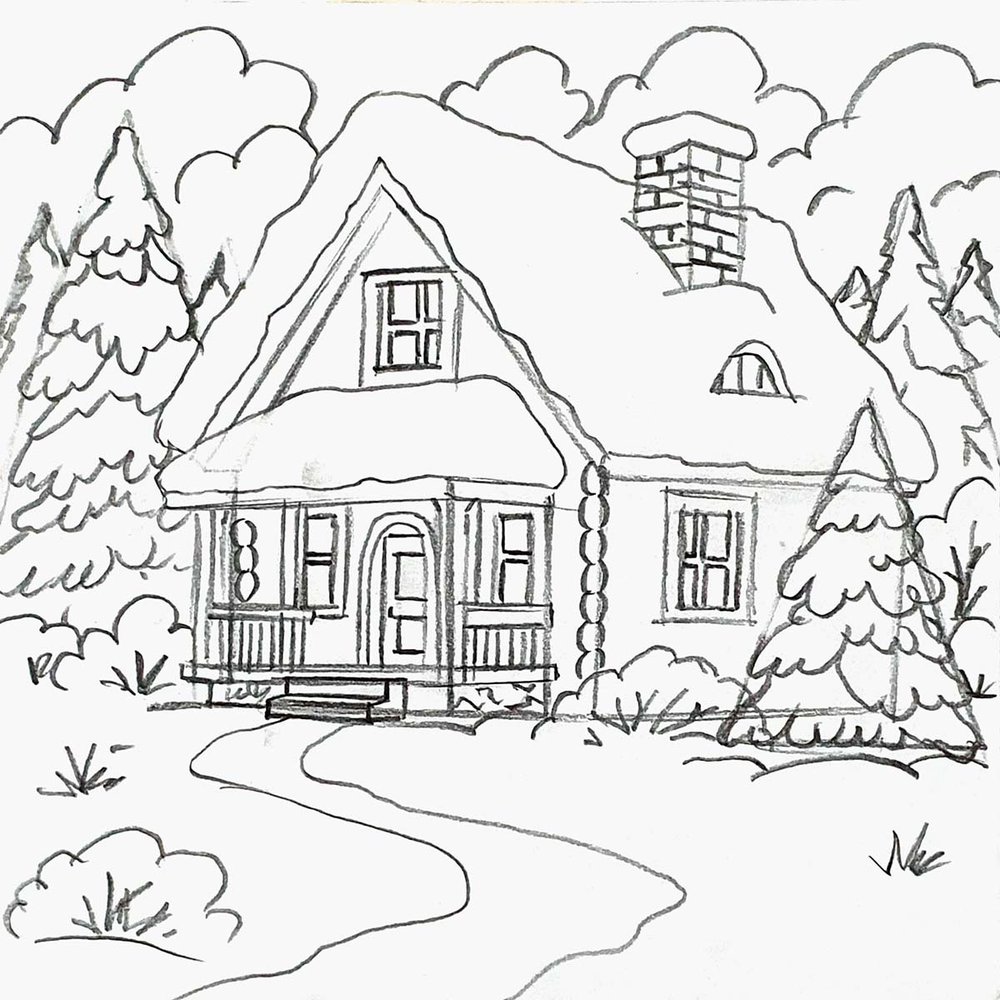
Then, I added parallel lines to divide the wall into logs.
And that completes the sketch!
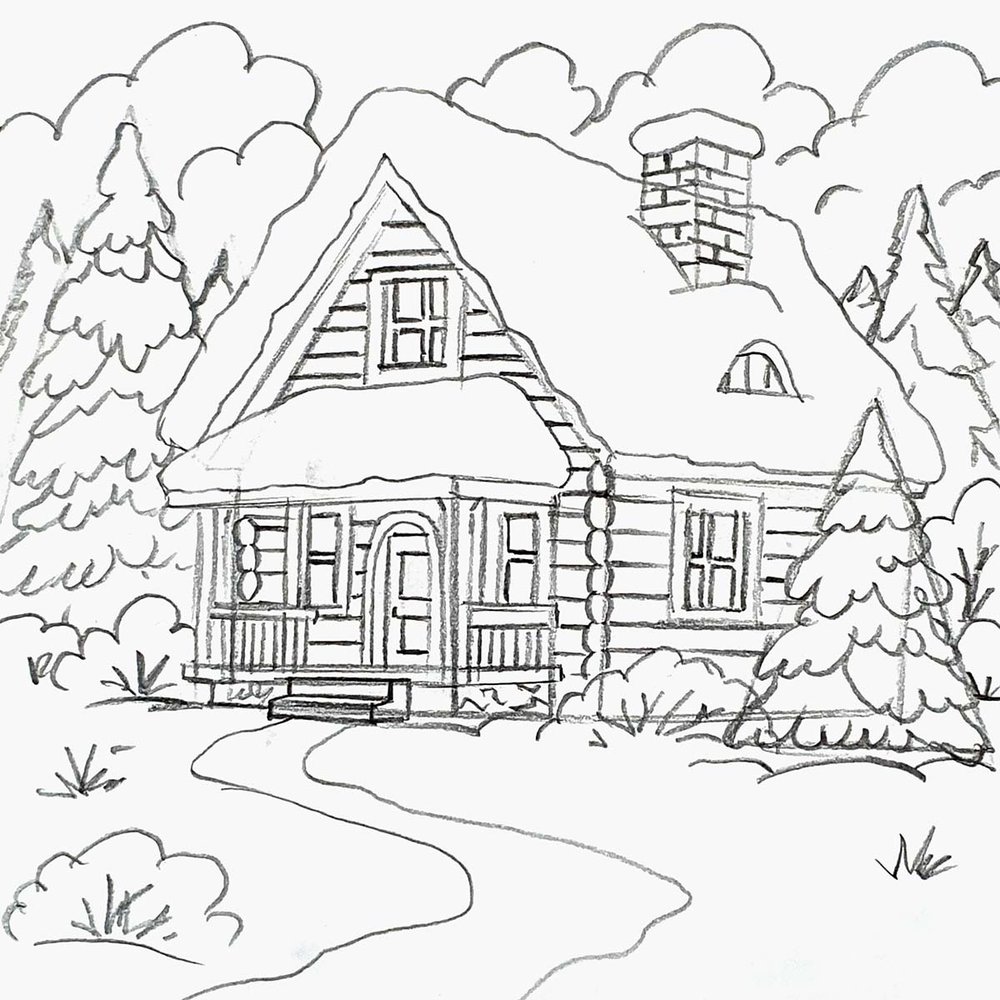
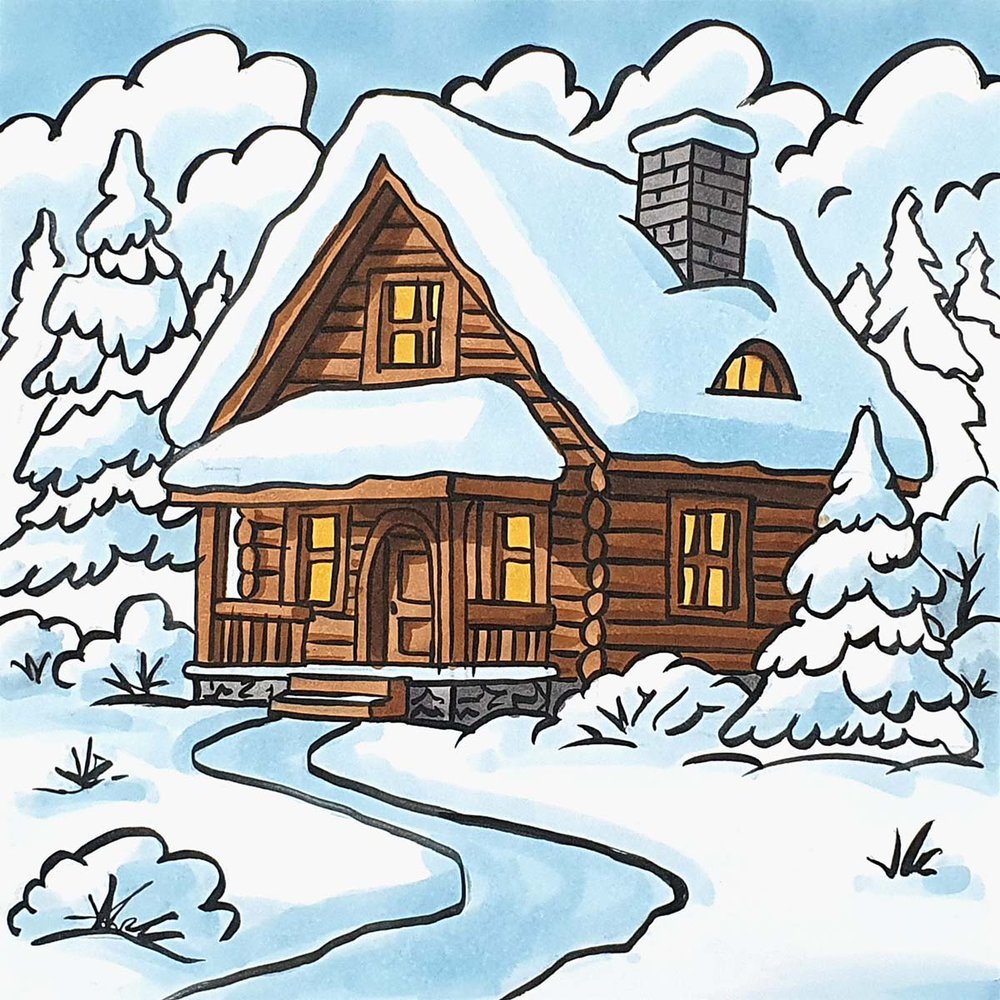
Step 8: Outline Your Winter House Sketch with a Black Pen
To prepare the sketch for coloring, I like to outline it with a black brush pen.
If you don't have one, you can use a black fineliner too.
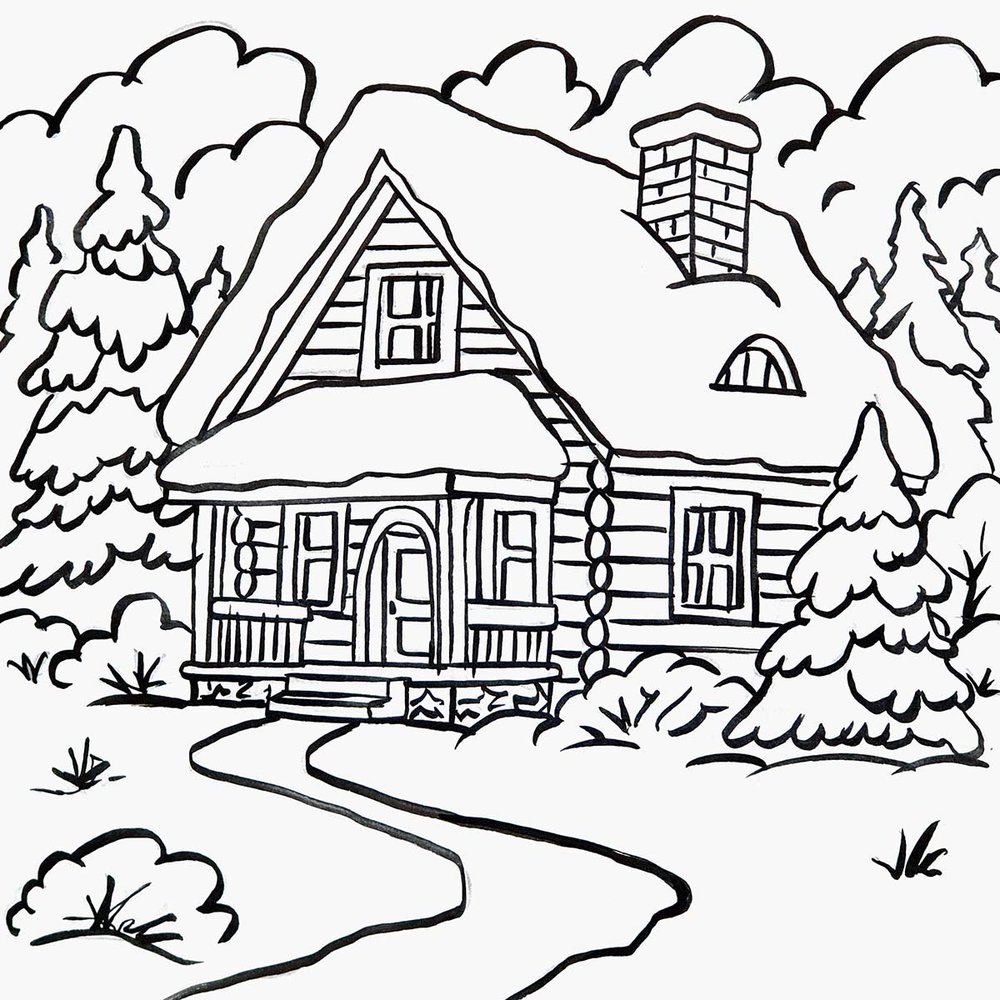
Now, our cozy winter house drawing is ready to be colored.
Step 9: Color Your Cozy Winter House Drawing with Markers
To color this drawing, I used Ohuhu Honolulu alcohol based markers.
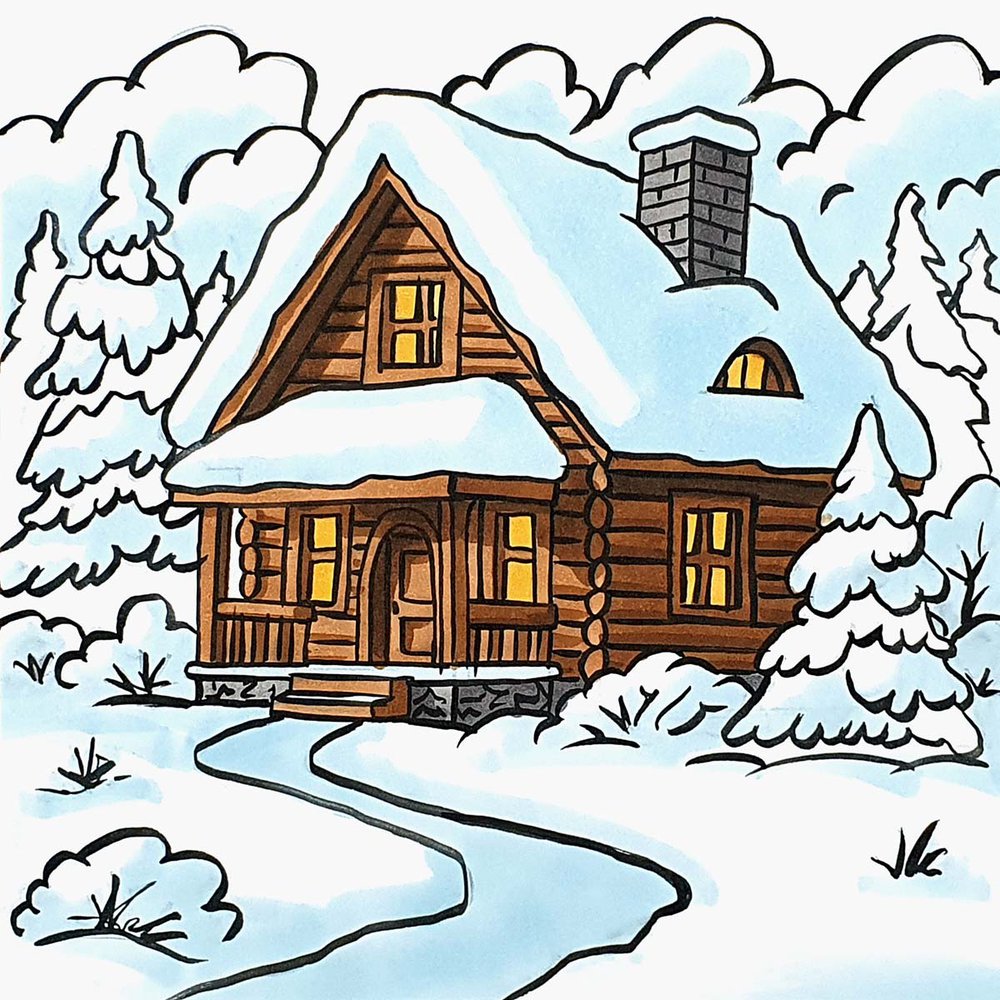
I first colored all the wood of the house, the stone base of the porch, and the chimney.
For the wood I used Dark Suntan (E110) and for the chimney and the porch Warm Grey 07 (WG070).
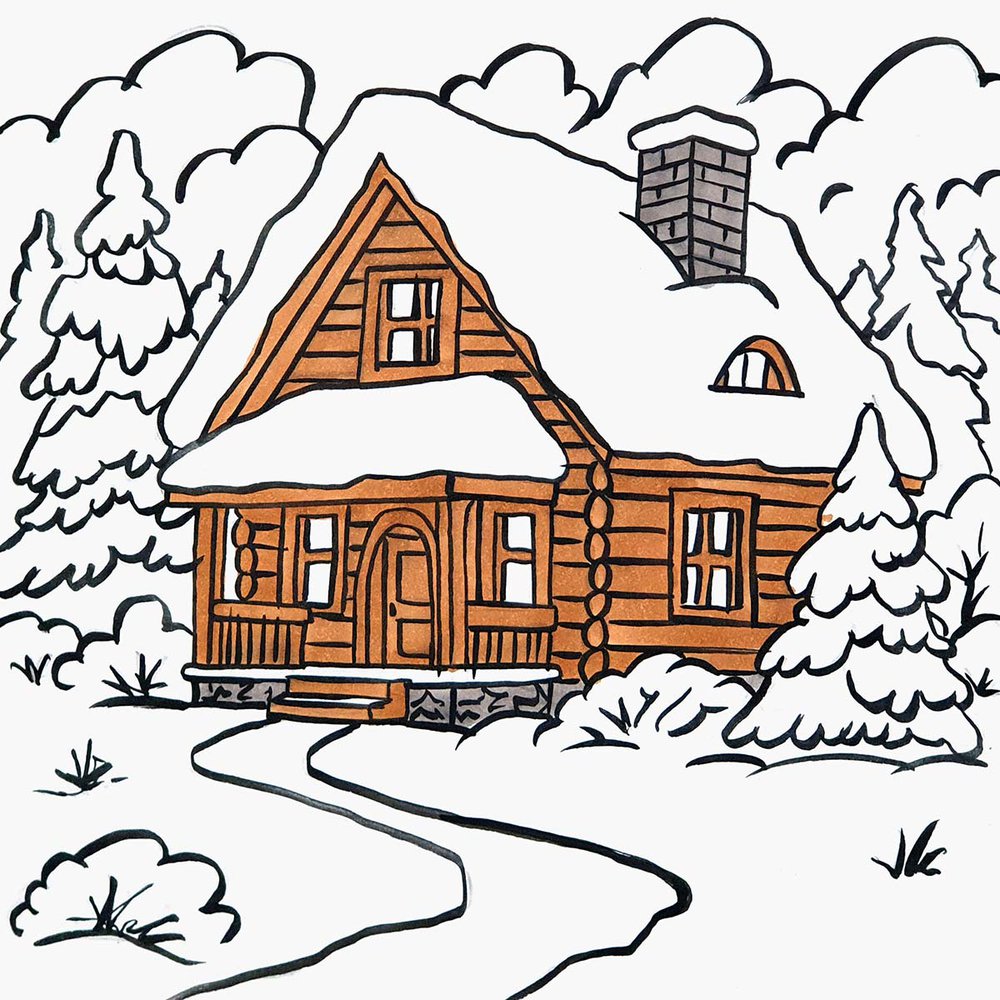
Next, I added shading to the side and the front of the house with Leather (E260) and to the right side of the chimney and the porch with Warm Grey 09 (WG090).
I also colored the windows with Nugget (Y140).
Then, I added some darker shading below the roof edge and the door frame with Raw Umber (BR1).
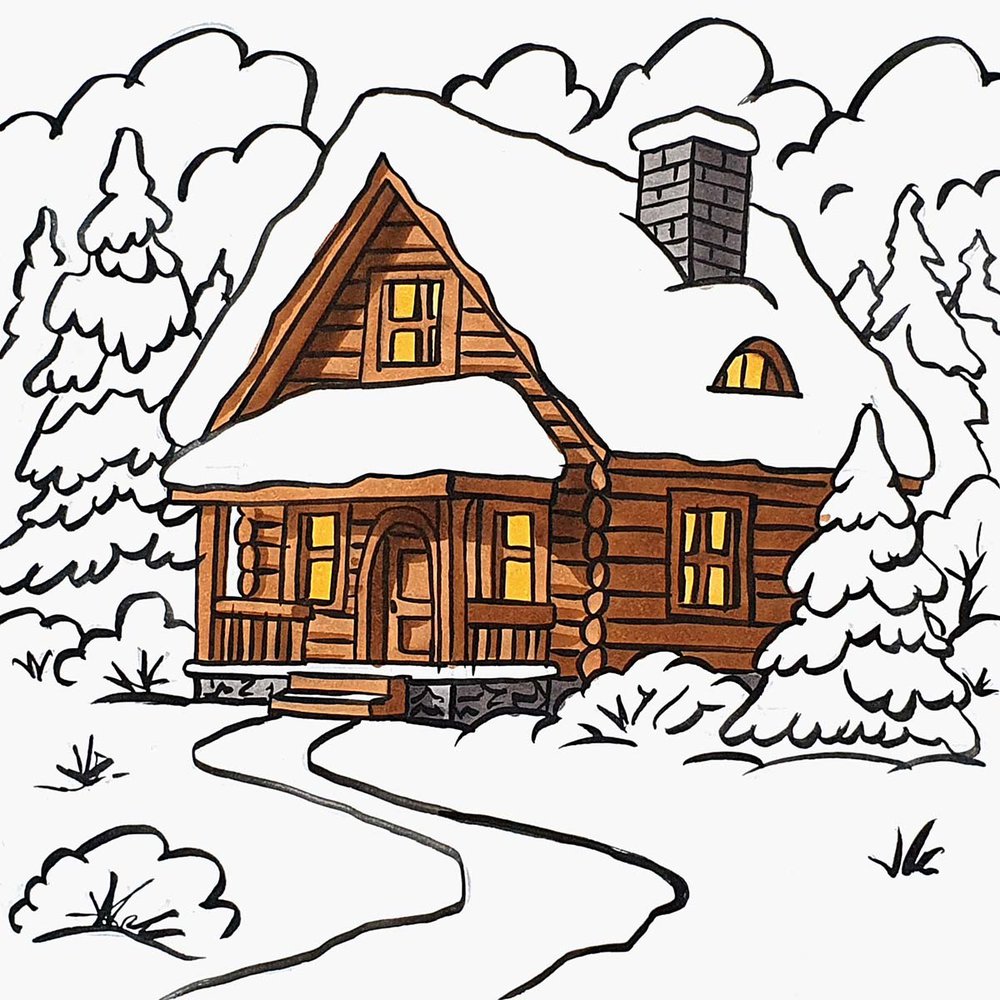
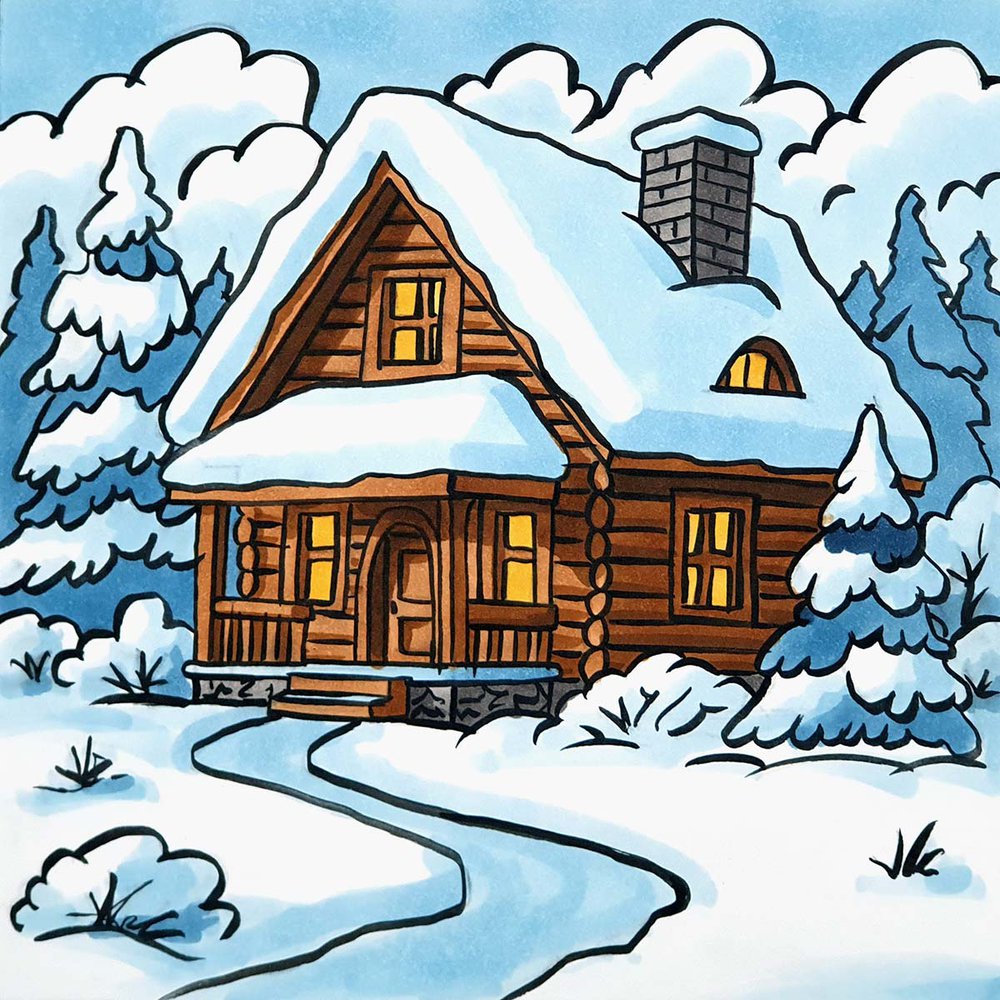
After that, I used Blue Grey 02 (MG020) to color:
- the clouds while leaving the top edges white;
- the lightest parts of the trees in the foreground;
- the bushes, except for the top left part;
- the shadow below the bushes and trees;
- the path and the sides of the path;
- the roofs (I did leave the front-facing parts white);
- the deck and the top of the chimney.
Next, I used Blue Grey 03 (MG030) to:
- color the bottom of most bushes;
- add shading to the lightest parts of the trees;
- color the sky;
- color the bottom right edge of the roof;
- add shading to the side of the path;
- and to add streaks on the path.
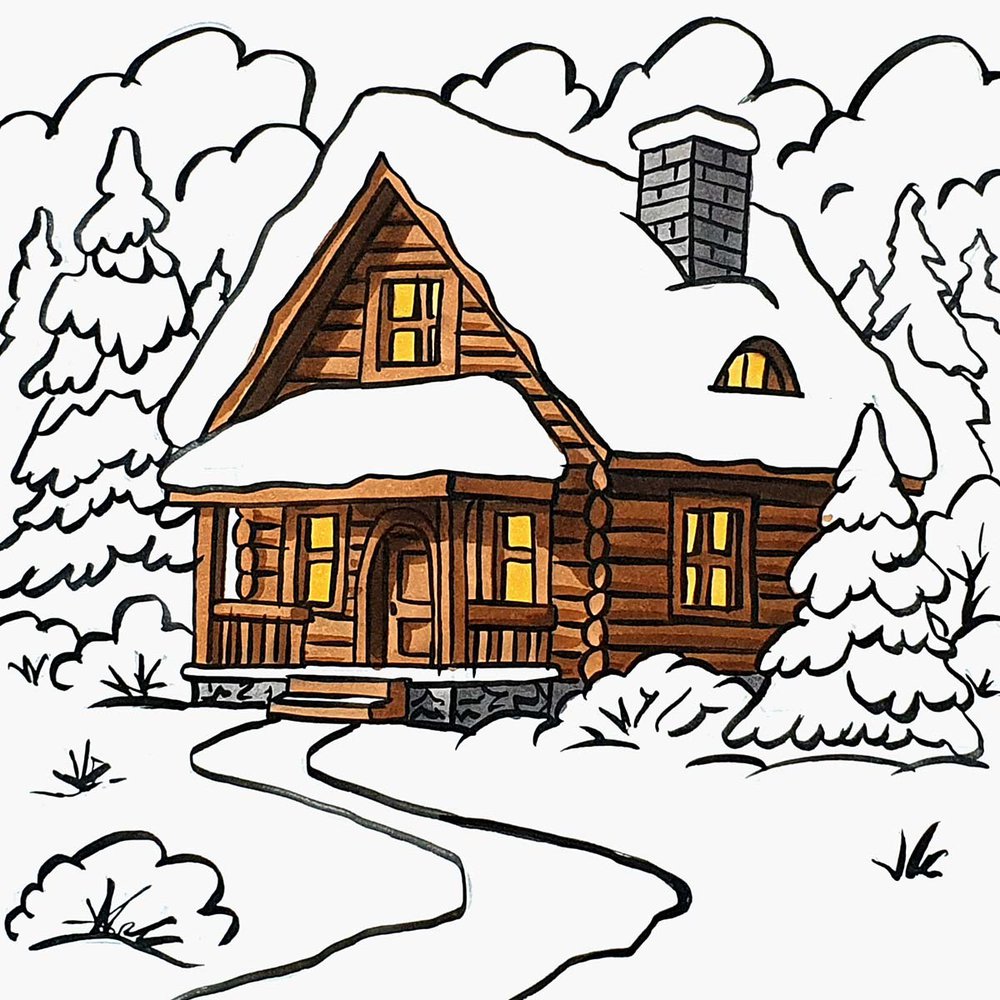
After that, I used Blue Grey 06 (MG060) to color the darkest parts of the trees in the foreground and the full trees in the background.
Lastly, I used Blue Grey 09 (MG100) to add shading to the dark parts of the trees in the foreground.
I also used Blue Grey 06 (MG060) to add some more streaks on the path.
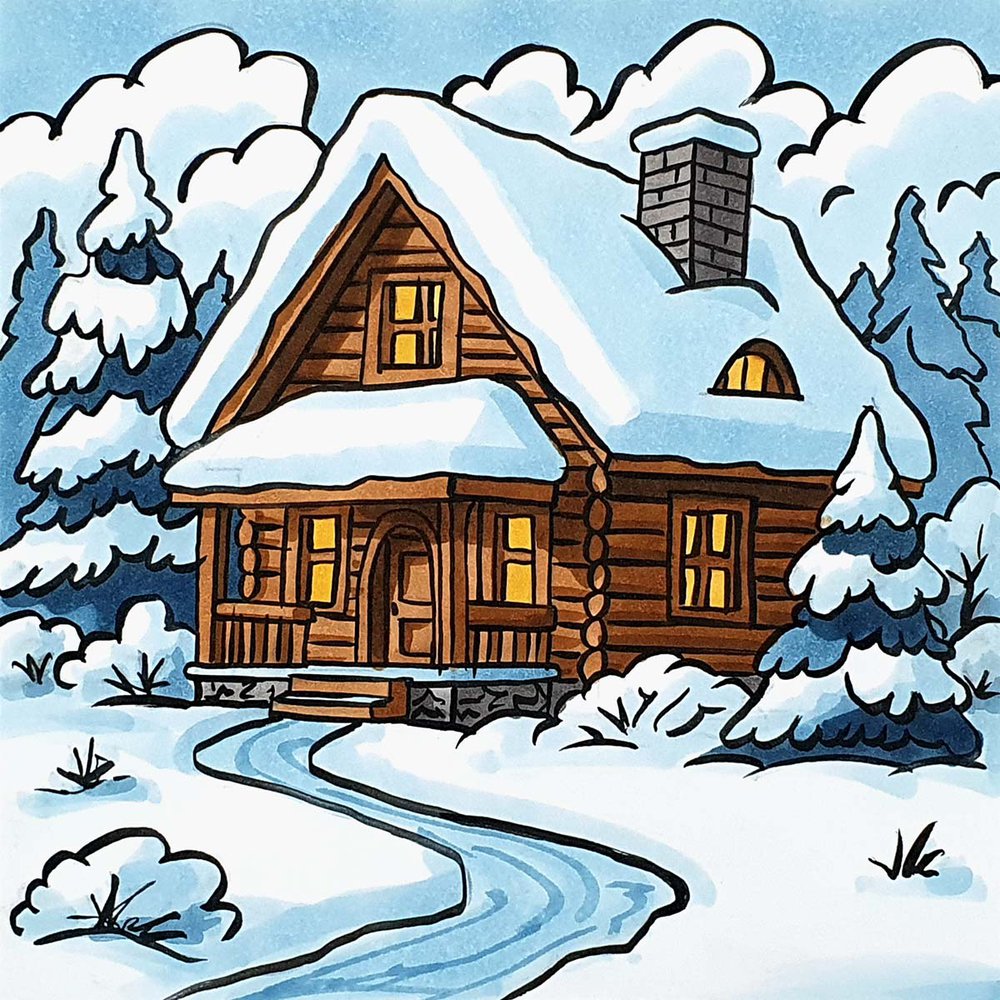
And That's How I Drew This Cozy Winter House Scene.
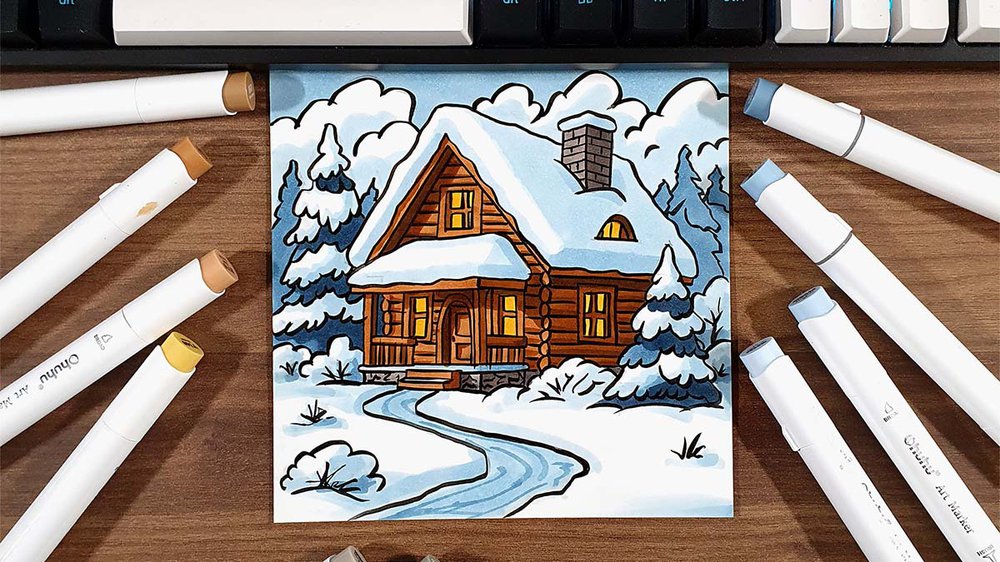
Completed Winter House Drawing
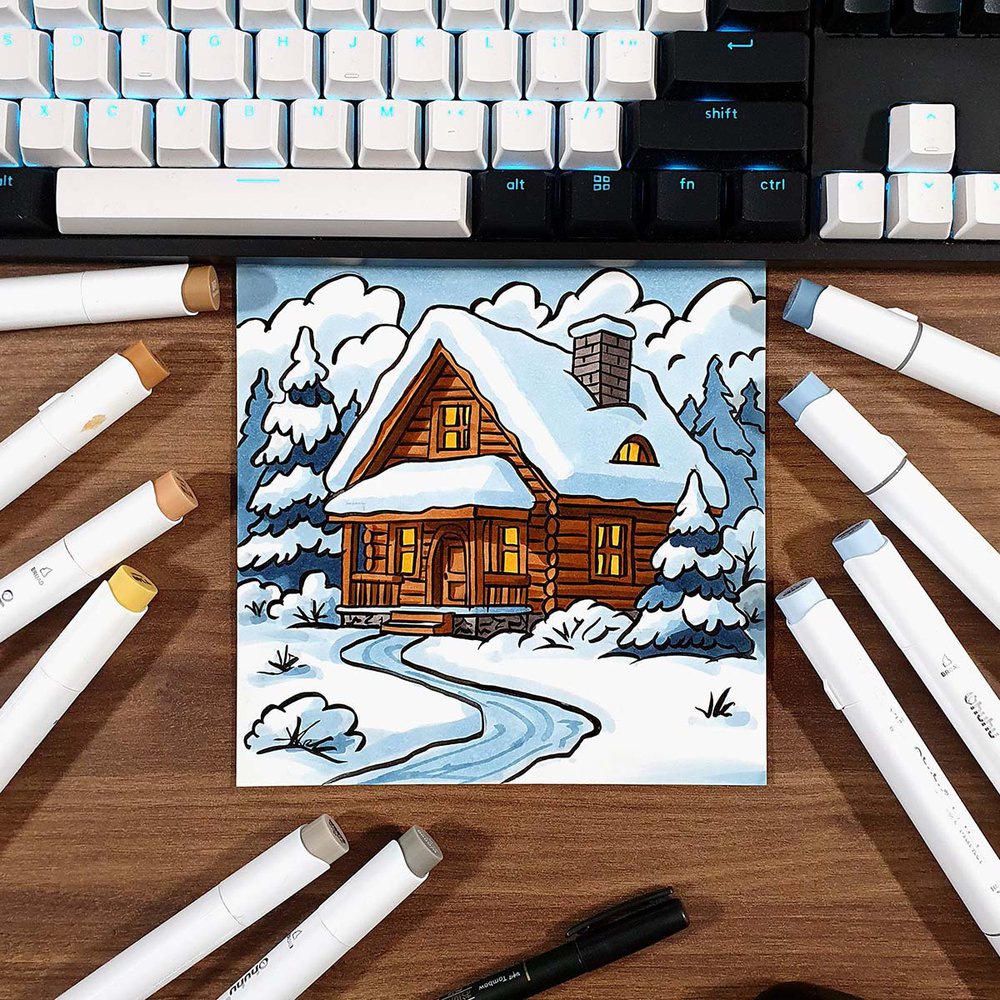
And that’s how I drew this cozy winter house scene, complete with log walls, snowy trees, and a winding path leading up to the front door.
Whether you followed along exactly or added your own creative twist, I hope this tutorial helped you bring a little winter magic to your sketchbook.
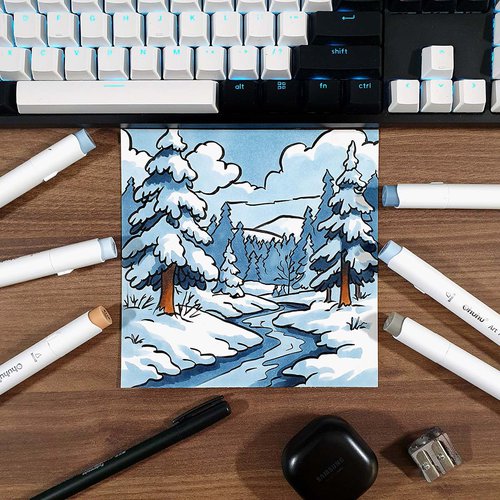
If you enjoyed this guide, feel free to share your drawing with me or check out my other winter-themed step-by-step drawing tutorials!
Tags
Articles You Might Also Like


I love bringing cars to life with alcohol markers and colored pencils.
Whether you're just starting out or looking to improve your skills, I'm here to help!
Click here to learn more about me.


Be the first to comment!
Comments
There are no comments yet.