How to Draw a Lamborghini Huracán Evo - Easy Step-by-Step Tutorial
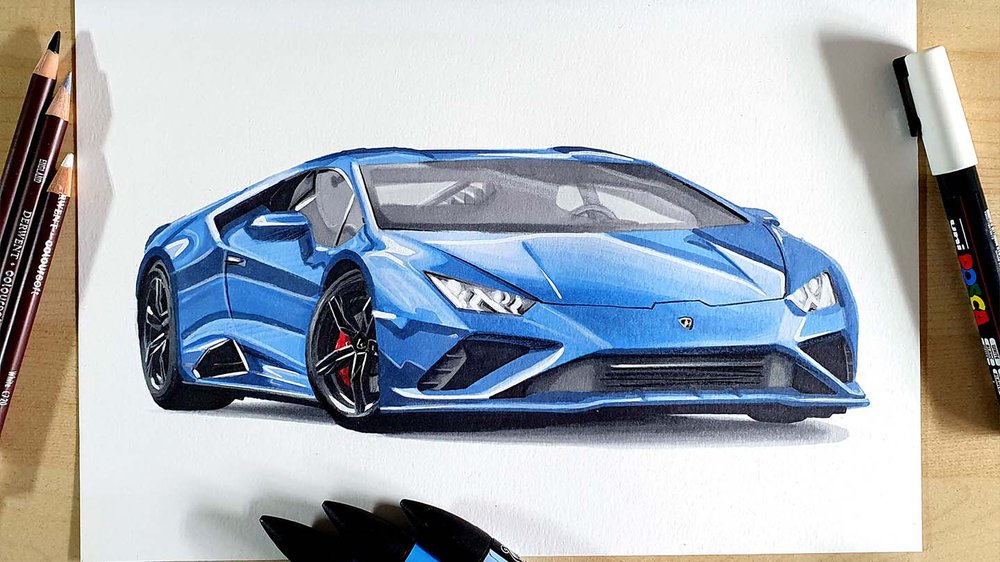
In today's car drawing tutorial, I'm going to show you how to draw a Lamborghini Huracán Evo in my dream spec: Blu Cepheus Pearl with red calipers.
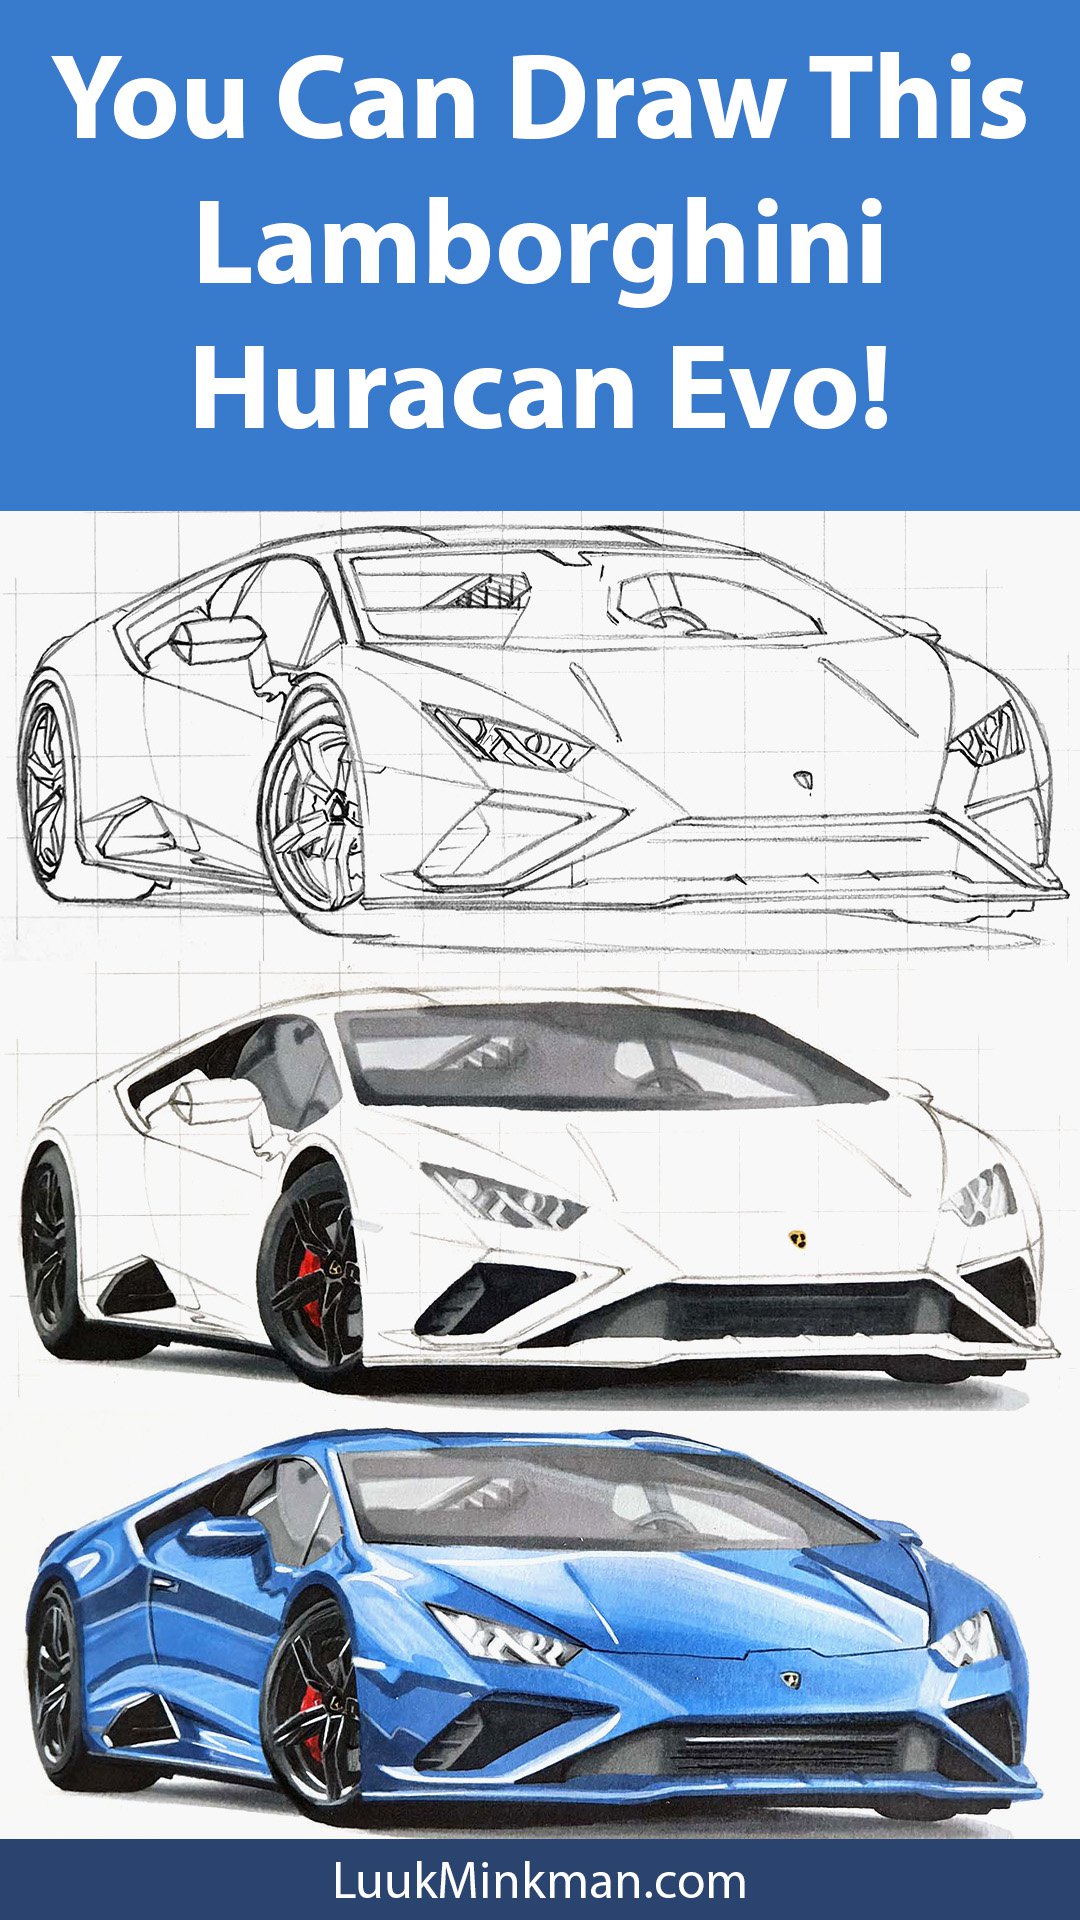
I've broken the drawing process up into 14 easy-to-follow steps so you can follow along and create your own Lamborghini Huracán Evo drawing.
Disclaimer: In the name of full transparency, please be aware that this blog post contains affiliate links and any purchases made through such links will result in a small commission for me (at no extra cost for you).
Drawing Supplies I Used to Draw this Lamborghini Huracán Evo
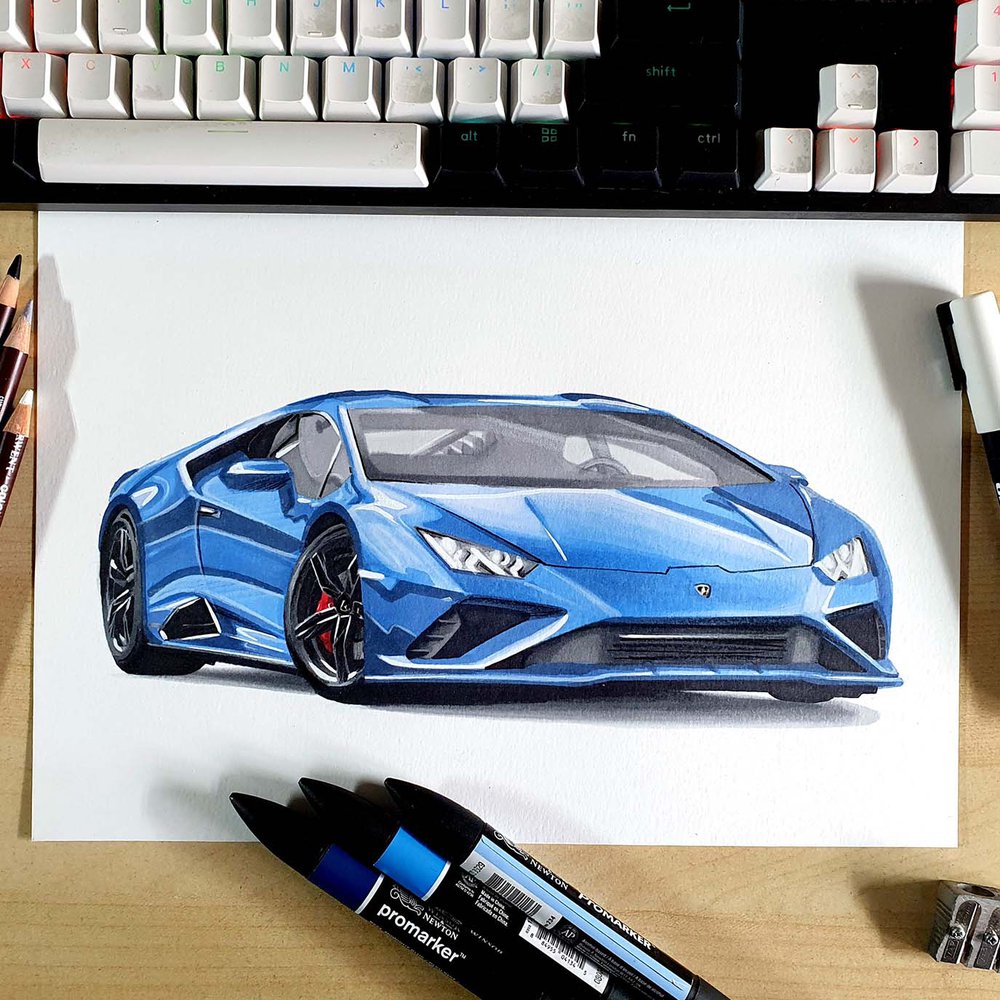
To draw this Lamborghini, I used the following art supplies:
A4-sized Canson Illustration Manga paper (my favorite marker paper);
A graphite pencil, a ruler, a kneaded eraser, and a regular eraser;
Ohuhu Honolulu markers in the colors Neutral Grey 02 (CG020), Neutral Grey 03 (CG030), Neutral Grey 05 (CG050), Neutral Grey 07 (CG070), Neutral Grey 6 (NG06), Black (120), Yellow Dahlia (Y260), Zinnober (R150), Vermilion (R2), Geranium (R8), Pale Greyish Blue (B220), Light Blue (B250), Vivid Blue (B270), and Antwerp Blue (B290);
Derwent Coloursoft pencils in the colors White, Dove Grey, and Black;
And a white Posca PC-3M.
Reference Photos I Used to Create this Huracán Evo Drawing
To make this drawing I used 3 reference photos.
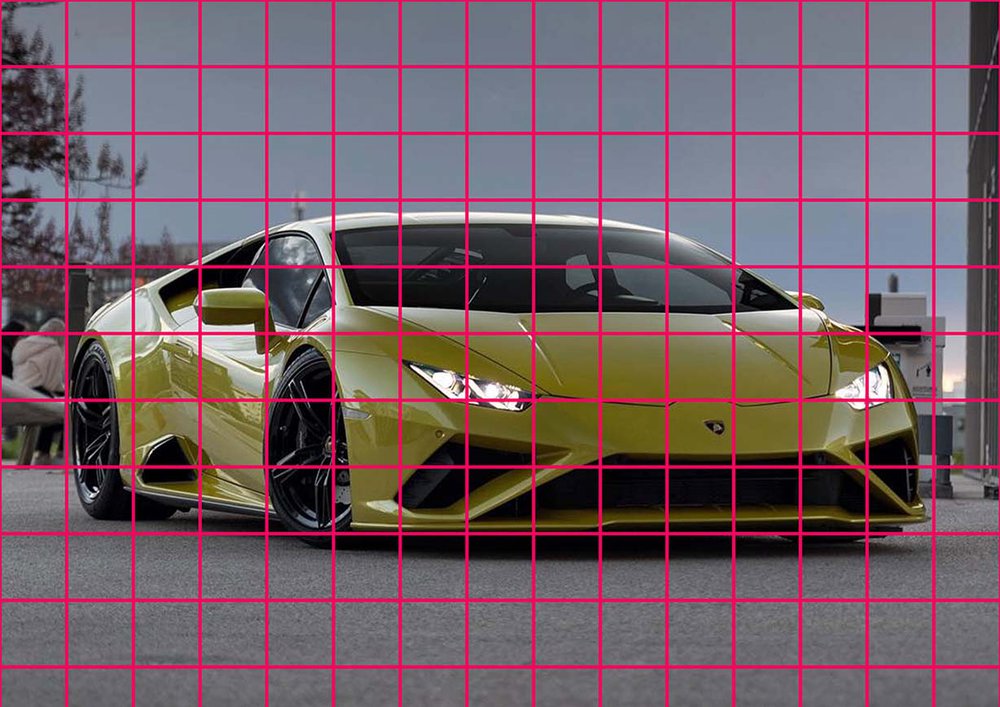
I used the photo below (2nd slide) to get the proportions of the car right.
I used this image (2nd slide) as a reference for the reflections on the car.
And I used this image as a color reference.
How to Draw a Lamborghini Huracán Evo?
To draw a realistic Lamborghini Huracán Evo I like to start by gathering a few reference photos with different aspects that I like. Next, I sketched the car using the grid method. After that, I started coloring. I first colored the black parts to make the drawing less overwhelming and then colored the rest of the car. Lastly, I added details with a few colored pencils and white highlights with a Posca paint marker.
Step 1: Sketch the Outline of the Lamborghini Huracán
The sketch is by far the most important part of your drawing. Everything after this step builds on your sketch.
If your sketch isn't fully correct or there are some things unclear, coloring it will be more difficult, and it will result in a less realistic-looking Lamborghini in the end.
So, take your time and carefully sketch every single thing.
Start with the more general shape and outline of the car before adding details like the headlights and the reflections.
As freehanding a car can be quite difficult, I use the grid method all the time. It's a great way to sketch cars more accurately.
But if you don't like this method, here are some other techniques you can use.
I first overlay a grid of 15 by 10.5 squares over the reference photo which I've resized to be A4 size.
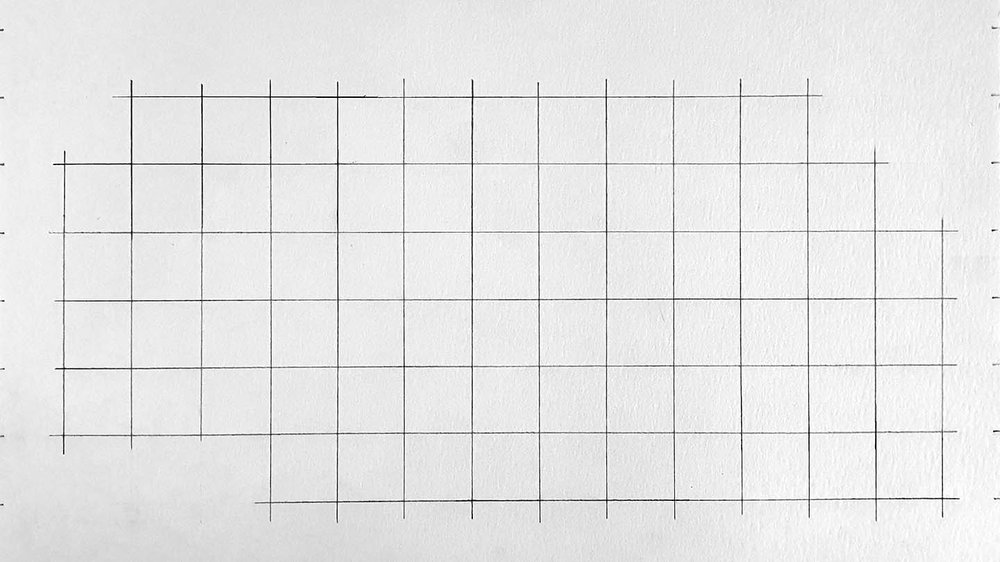
Next, I sketched the same grid on my A4-sized piece of paper. The squares on the grid are 2 by 2 cm in this case.
To minimize the lines that need to be erased when the drawing is done, I actually only sketched the necessary squares to sketch the Lamborghini Huracán Evo.
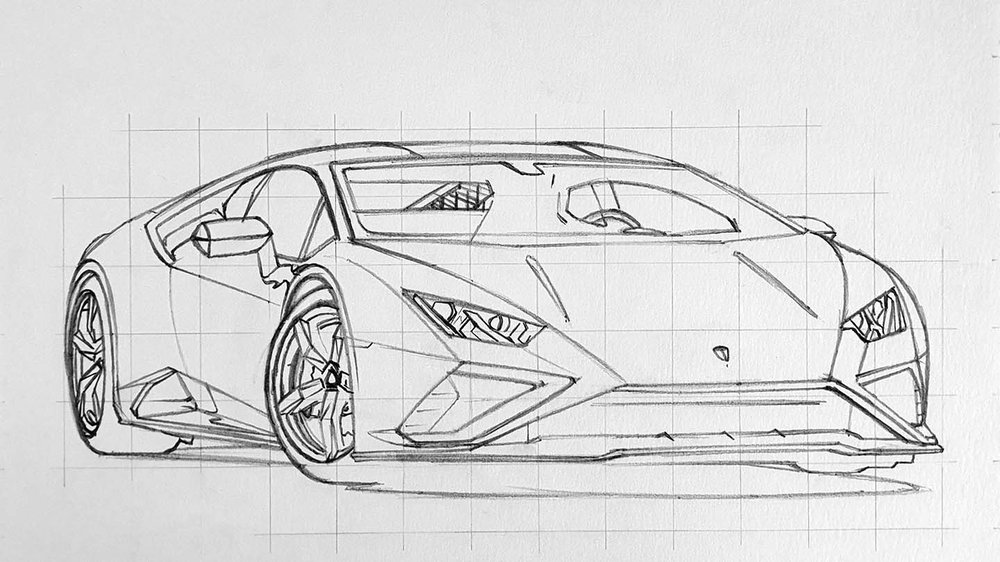
When the grid was done, I started sketching the car. I first sketched the outline and the basic shapes. After that, I added in all the details.
My go-to alcohol markers for blending, rich color payoff, and amazing value. The brush tips feel super natural to draw with — a must-have for smooth gradients and realistic shading!
- Brush + chisel tips
- Great for beginners & advanced artists
- Budget-friendly alternative to Copics
Step 2: Color All Pure Black Parts
Now that the sketch is done, it might look a bit intimidating (at least it does for me).
To make it look less overwhelming, I like to start by coloring all pure black parts first. It's an easy task and it will make the drawing look easier.

Step 3: Color the Wheels of the Huracán Evo
After all the black parts, the first parts I like to color are the wheels.
But before I colored the wheels, I erased the sketch until it was barely showing. This prevents the sketch from showing through the ink of the marker and ruining the end result. You'll need to do this for every step.
I used to leave these til the end as they are the most difficult and important parts of the car, but today we're going to draw them first to get them out of the way.
I started by coloring the spokes and the rim of both wheels with Neutral Grey 03 (CG030).

Next, I colored the tire with Neutral Grey 05 (CG050) and darkened most of the spokes. I also colored the brake disk of the front wheel.

After that, I darkened the lower half of the tires and a few parts of the spokes a bit more with Neutral Grey 07 (CG070).

Now the rear wheel is done, but the front wheel needs a bit more work.
I colored the brake caliper with Zinnober (R150) first, and I added some darker tones with Vermilion (R2) and Geranium (R8).
I also colored the logo on the center cap. I first colored the whole logo with Yellow Dahlia (Y260). Then, I added the black parts with Black (120). However, using a fineliner would probably be a better idea.

Step 4: Color the Shadow of the Car
Now it's time to color the shadow below the Lamborghini.
I start by coloring the shadow with Neutral Grey 02 (CG020).

Next, I colored the part between the light grey and the black that we colored before with Neutral Grey 05 (CG050).

Lastly, I blended the Neutral Grey 05 (CG050) into the black with Neutral Grey 07 (CG070), and I blended Neutral Grey 05 (CG050) into the Neutral Grey 02 (CG020) with Neutral Grey 03 (CG030).

Step 5: Color the Side Skirt and the Side Intake of the Lambo
The next thing to color is the side skirt.
I colored the whole side skirt with Neutral Grey 05 (CG050) as well as the side intake

After that, I darkened the bottom half of the side skirt with Neutral Grey 6 (NG06).

Step 6: Color the Front Grills and Intakes of the Huracán
Next up is the front of the car: the grills/radiators, aero fins, and intakes.
I started by coloring the fins on the left and the right of the front with Neutral Grey 05 (CG050), as well as the horizontal line in the middle, and two things I don't know what they are to either side of the line.

After that, I colored the remainder of the center part of the front with Neutral Grey 07 (CG070), and I darkened the edges of the unclear grey parts. I also darkened the left part of the left aero fin, and I colored most of the right fin.

Lastly, I colored the left grill/intake with Neutral Grey 6 (NG06) and darkened the left edge of the left aero fin.
I also darkened the front radiator behind the horizontal line.

Step 7: Color the Headlights of the Huracán Evo
The next parts on the list to color are the headlights.
I first colored both headlights fully with Neutral Grey 02 (CG020).

Next, I darkened everything but the light sources with Neutral Grey 03 (CG030) and Neutral Grey 05 (CG050).

Step 8: Color the Windshield and the Interior of the Huracán
Net up is the windshield and parts of the interior that you can see through it.
I started by coloring the rear window and the side window with Neutral Grey 02 (CG020).

After that, I colored the remainder with Neutral Grey 03 (CG030).

Lastly, I added some darker reflections with Neutral Grey 05 (CG050) and Neutral Grey 07 (CG070).

Step 9: Color the Side Windows
For the side window, I did the same thing.
I first colored the side window with Neutral Grey 03 (CG030).

After that, I added some reflections with Neutral Grey 05 (CG050).

And lastly, I added some darker reflections with Neutral Grey 07 (CG070). I also colored the edge of the intake that's barely visible in the black area just behind the side window.

Step 10: Color the Front Side Marker of the Huracán
Next up is the side marker, the light grey reflector/blinker thing on the front bumper just in front of the front wheel.
I colored it with Neutral Grey 02 (CG020).

Step 11: Color the Lamborghini Logo on the Front of the Car
The last thing we need to color before we move on to the main body is the logo on the front.
I started by coloring the logo with Yellow Dahlia (Y260).

After that, I added in the black parts with Black (120), but as I said before, it's probably easier and more accurate if you use a black fineliner.


Step 12: Color the Main Body and Reflections of the Lamborghini Huracán Evo
Now that all the non-body colored parts are done, it's finally time to color the main body of the Lamborghini Huracán Evo.
I started by coloring the lightest blue parts with Pale Greyish Blue (B220). I would've colored the whole car, but my marker was almost empty... But you can also just color the necessary parts to save some ink.

After that, I colored the rest of the body with Light Blue (B250) and I blended that in some parts on the hood into the lighter blue by going over the edges with Pale Greyish Blue (B220).

Next, I darkened most of the side and I added some reflections following the shape of the car with Vivid Blue (B270). I also darkened the bottom left part of the hood, as well as the top right reflections on the hood, and some parts around the front grills and intakes.

Lastly, I added some dark tones and reflections with Antwerp Blue (B290).

Step 13: Add Details and Refine the Drawing with Colored Pencils
The car is now fully colored, but it does lack some details. That's what we're going to add now.
I used the White colored pencil to add some white highlights and details all around the car. I refined the spokes, lightened the light part on the top right of the hood, lightened the light sources of the headlights, and added a few reflections on the side of the car.
I used the Dove Grey pencil to refine the spokes of the wheels a bit more, I lightened the top left part of the tire a bit, and added the lines of the left aero piece in the front of the Huracán.
I used the Black pencil to add the lines of the radiator on the front, some lines around the side window and the headlights, the door line, and the door handle.

Step 14: Add Bright White Highlights
Now that all the details are in it's time to make this drawing fully come to life. And to do that we're going to add a few white highlights using the Posca PC-3M paint marker.
I added some highlights on the spokes of the wheels and the bottom of the rims.
I also made the light sources in the headlight white, outlined the light reflection on the front of the car, and added some more highlights all around the car.
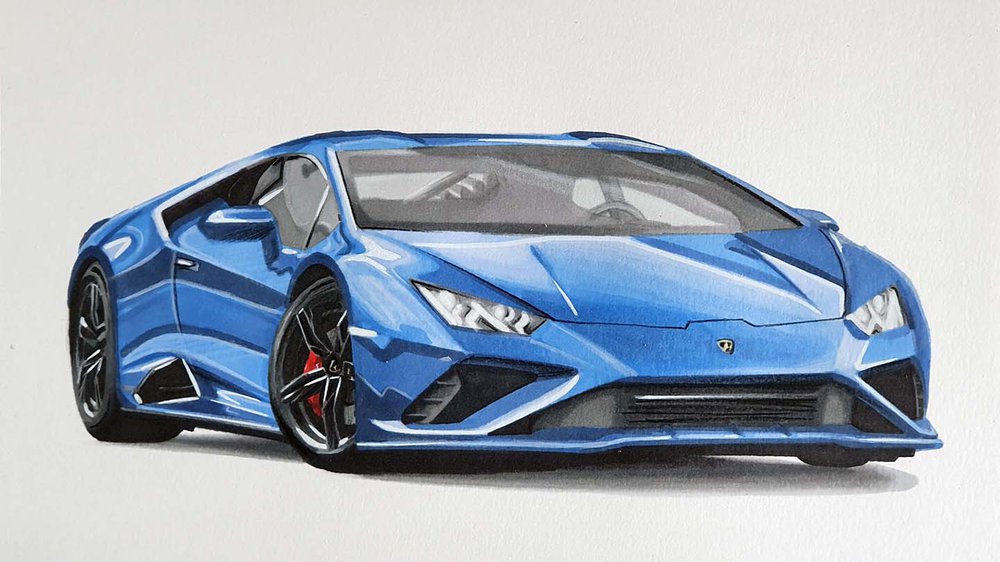
And That's How You Draw a Lamborghini Huracán Evo
Well, it's the way I like to draw cars like these.
There are plenty of workflows to create realistic drawings of cars like the Lamborghini Huracán Evo, but the way I described in this article works very well for me and it's a great balance between time spent on the drawing and how realistic it looks.
I hope you found this helpful! If so, I'd really appreciate it if you'd share this tutorial with other people who might like it. It would help me out a lot!
And if you followed along with my tutorial and decide to share your drawing, please tag me on Instagram (@luukminkman). I'd love to see it!

.jpg__500x500_q85_crop_subsampling-2.jpg)



Be the first to comment!
Comments
There are no comments yet.