Easy Christmas Present Drawing Guide for Beginners
Looking for a fun and festive drawing project this holiday season?
In this step-by-step tutorial, I’ll show you how to draw a classic Christmas present, complete with a ribbon, bow, and cute decorations.
Whether you want to create handmade cards or just feel like sketching something seasonal, this guide is perfect for artists of all levels.
Let’s get started!
Disclaimer: In the name of full transparency, please be aware that this blog post contains affiliate links and any purchases made through such links will result in a small commission for me (at no extra cost for you).
Drawing Supplies I Used To Draw This Christmas Present
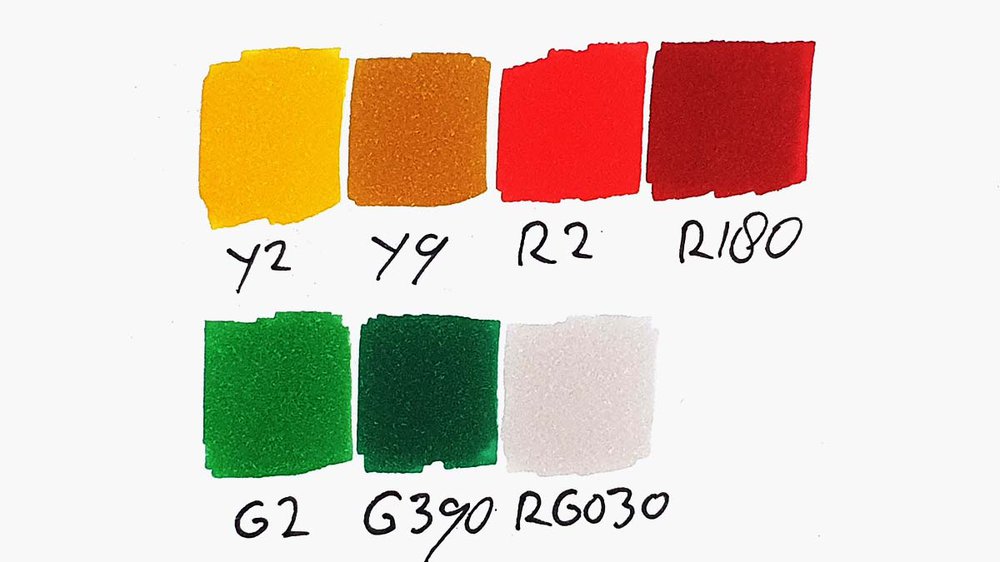
To make this drawing, I used Ohuhu Honolulu markers in the colors Red Grey 03 (RG030), Sunflower (Y2), Yellow Orche (Y9), Vivid green (G2), Green (G390), Vermilion (R2), and Bright Red (R180).
I used a Tombow Fudenosuke Brush Pen to outline the sketch.
And I made this drawing on Canson Illustration Manga Paper.
How Do You Draw A Christmas Present
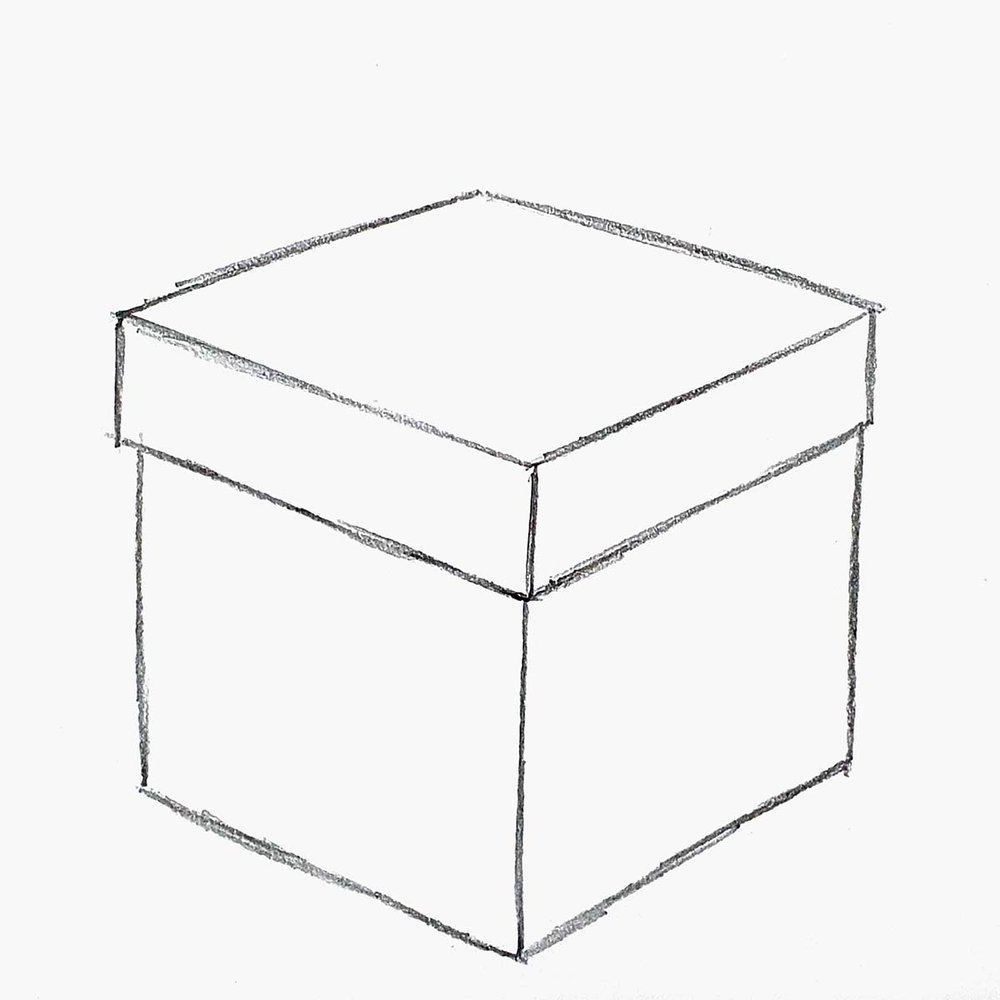
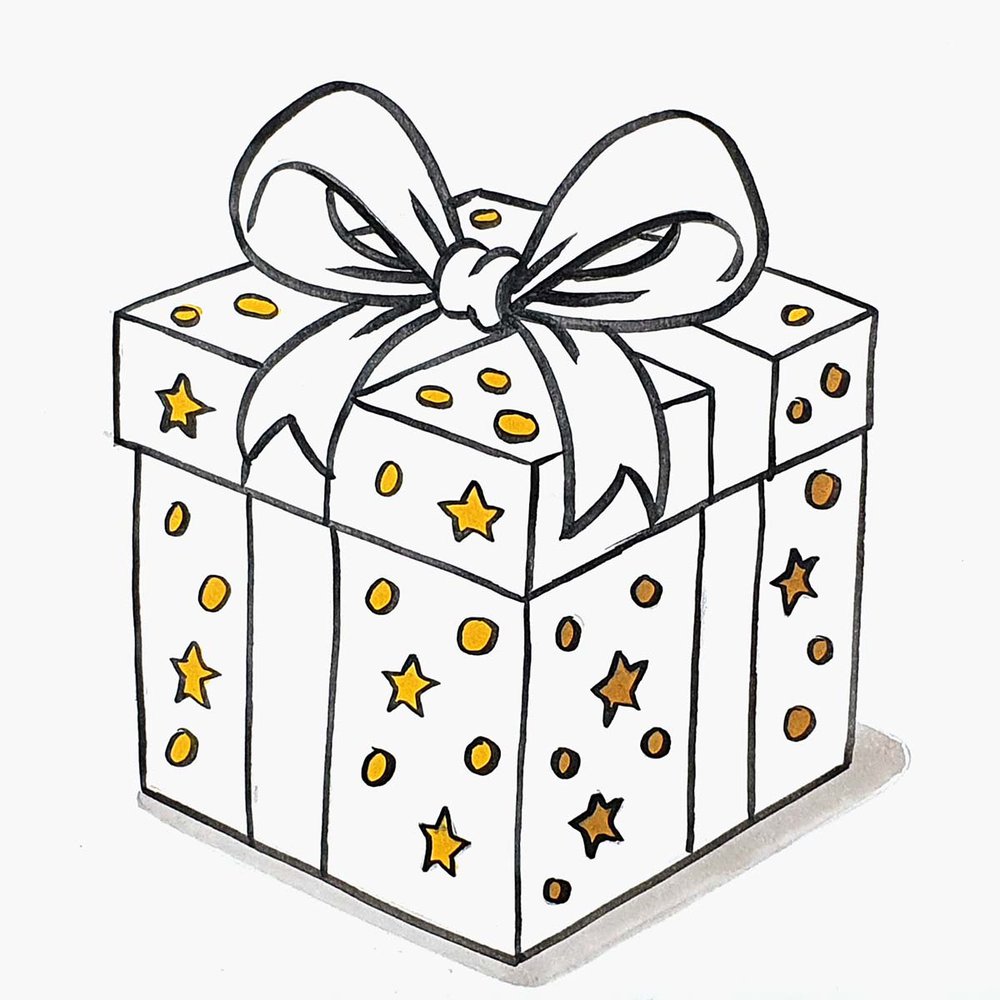
Step 1: Sketch The Outline Of The Box
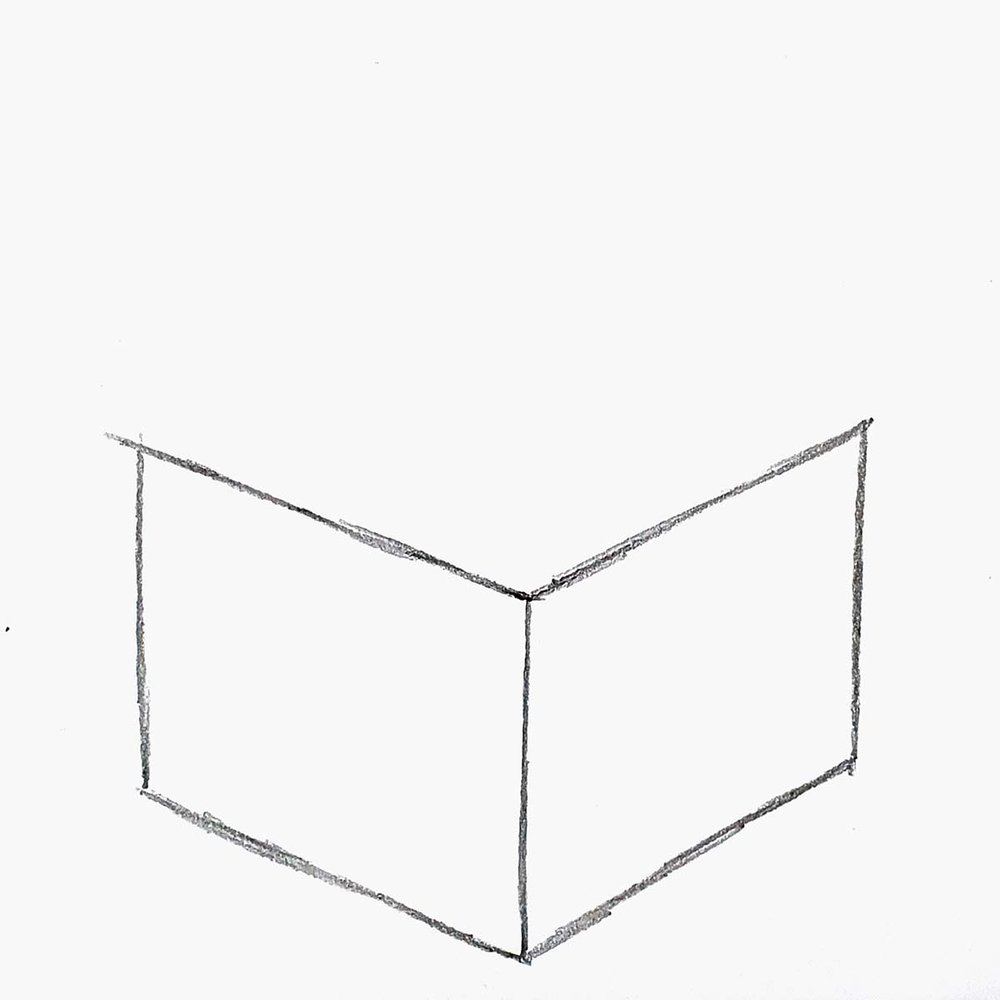
To draw a Christmas present, I started by sketching the box.
Start by sketching three vertical lines: one in the middle at the bottom of the paper, and one slightly higher on both the left and right sides.

Next, I connected the ends of the lines with 4 more lines.
I made the top two lines a little longer as they are part of the lid of the box.
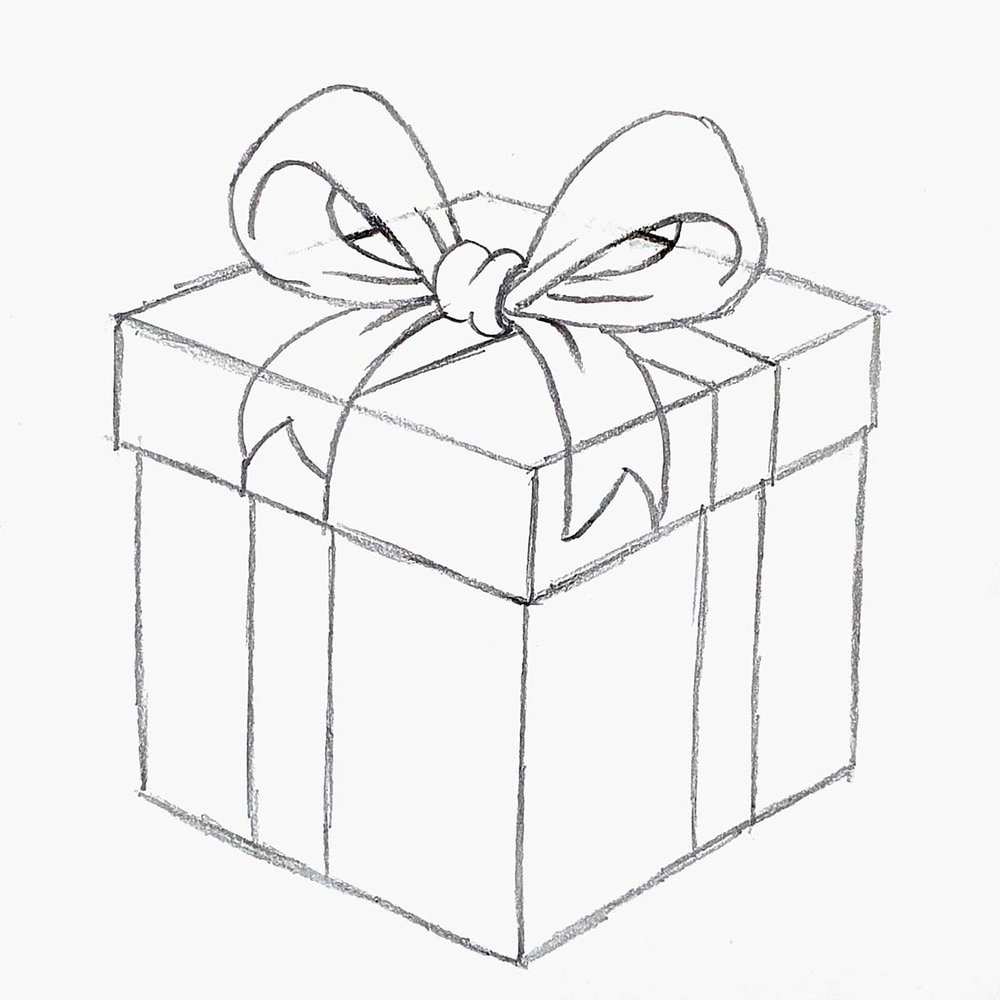
After that, I added 3 short vertical lines.
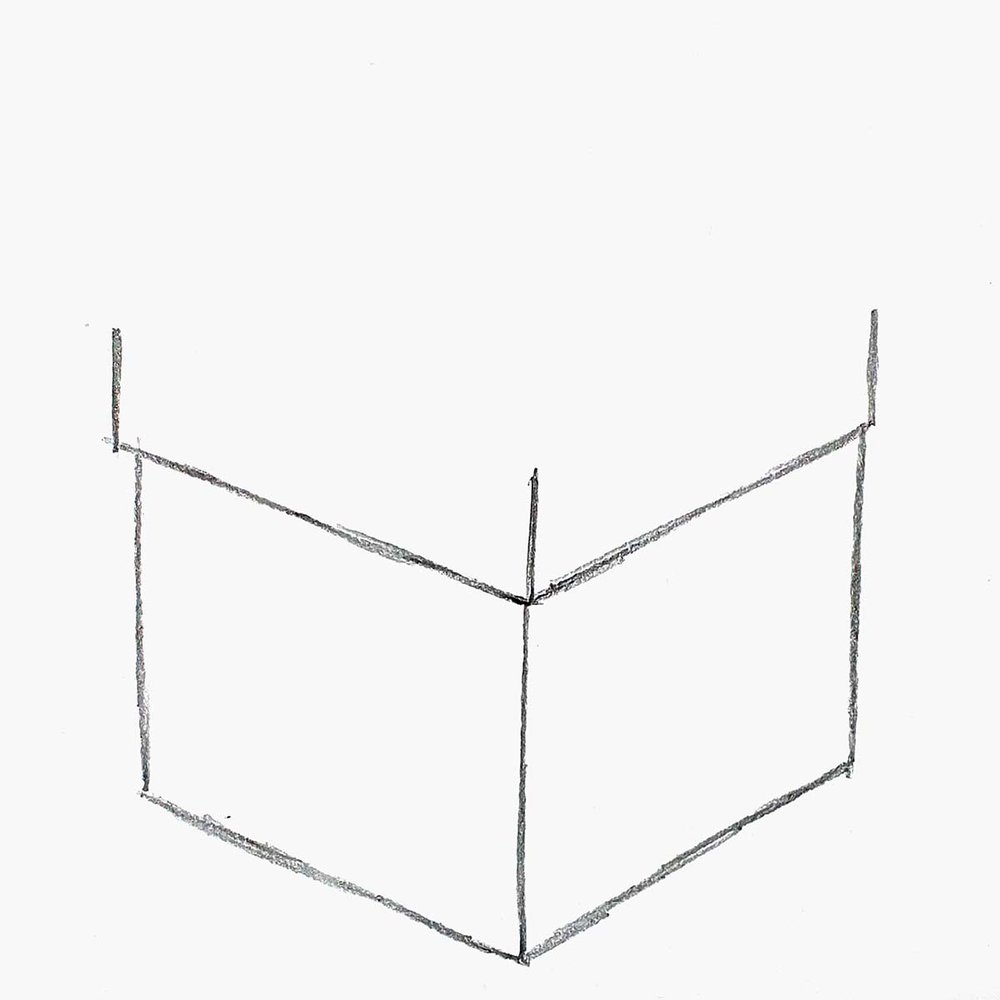
Lastly, I added a diamond shape on the top to complete the basic box shape.
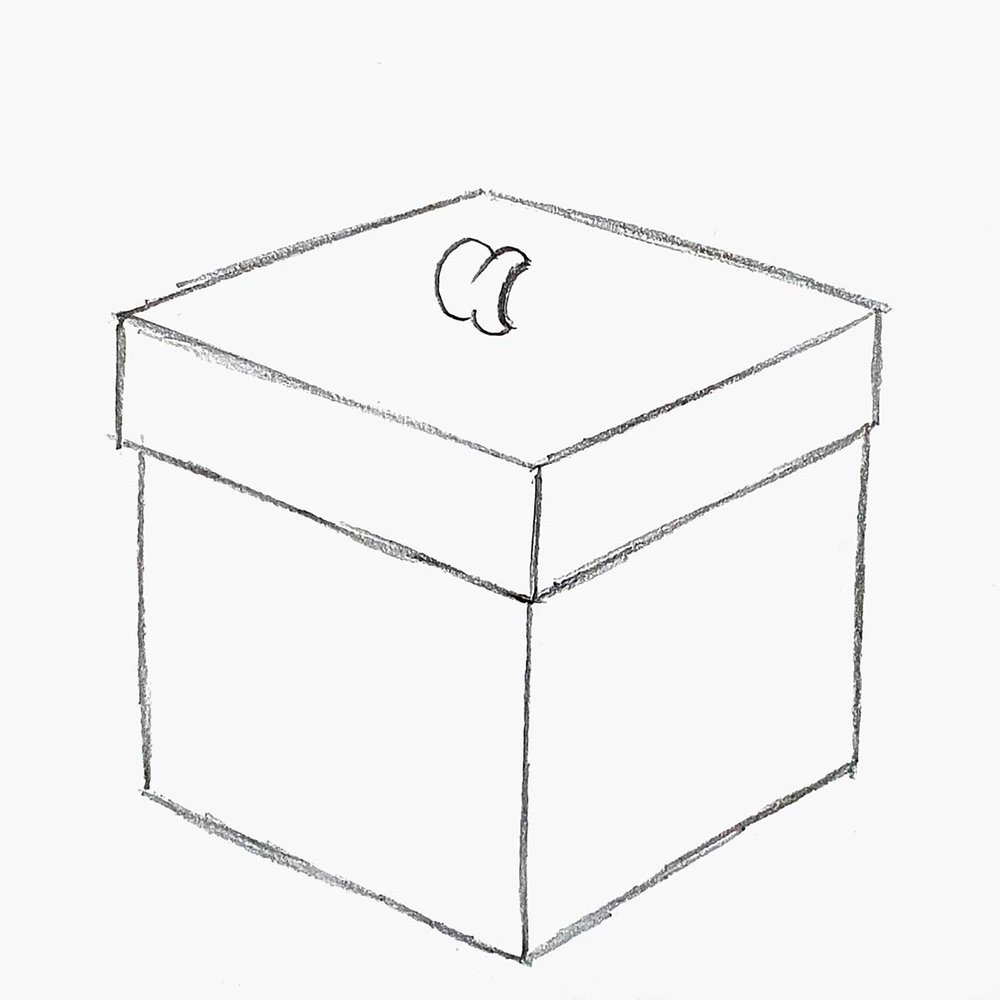
Step 2: Sketch The Bow On Top Of The Christmas Present
Presents usually have a cute decorative ribbon bow on them, which we're going to sketch now.
I started by sketching the front of the knot and placed it in the center of the top of the lid.
Next, I added two large, slightly wonky loops on either side of the knot.
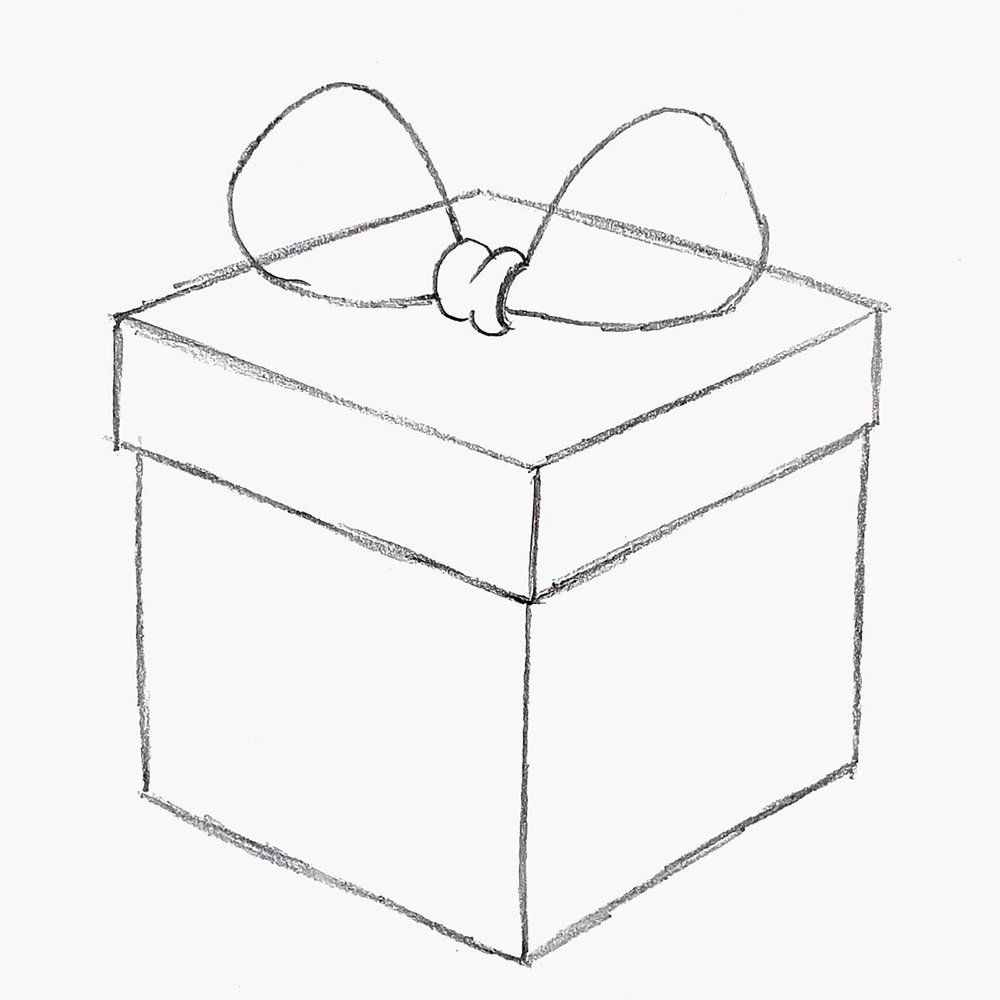
After that, I added the tails of the ribbon with a triangular cut at the end.
I also sketched a candy cane shape in both loops.
Then, I added some wrinkles and a line inside each loop to give the bow more depth.
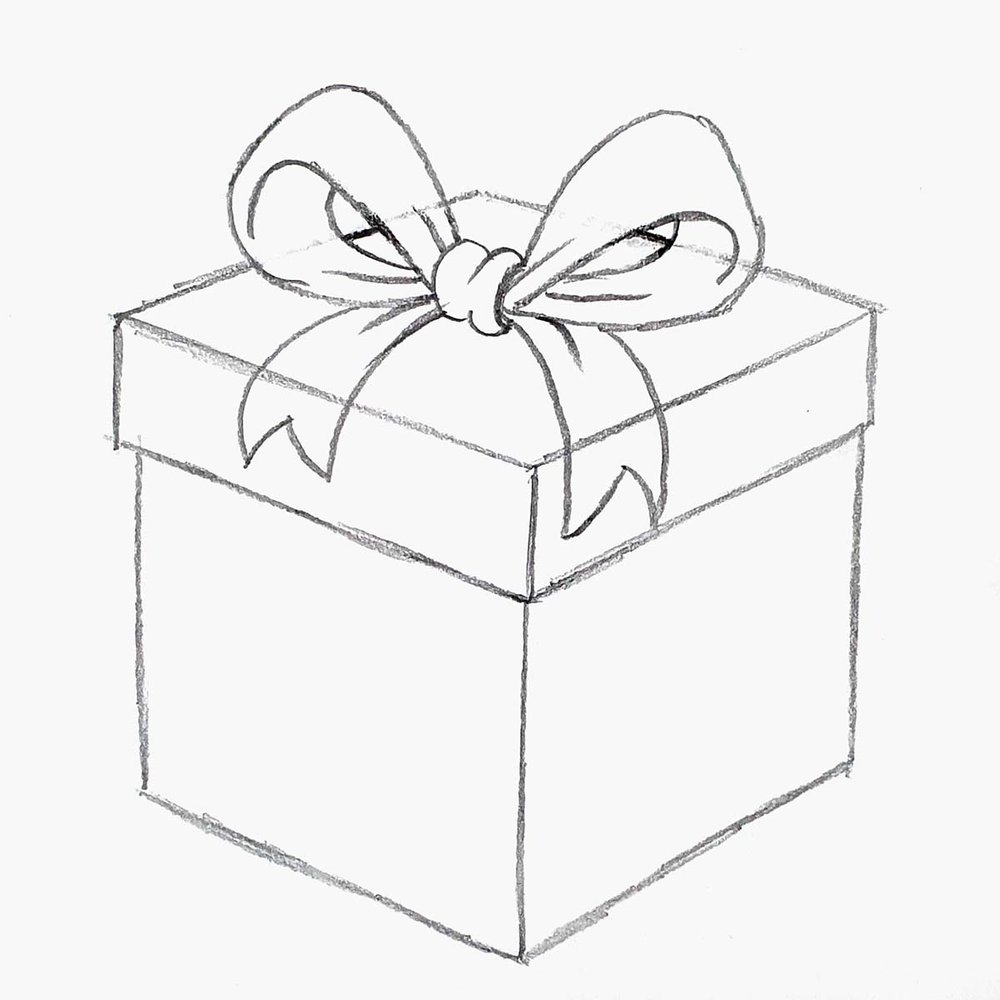
Lastly, I drew the ribbon band on the box.
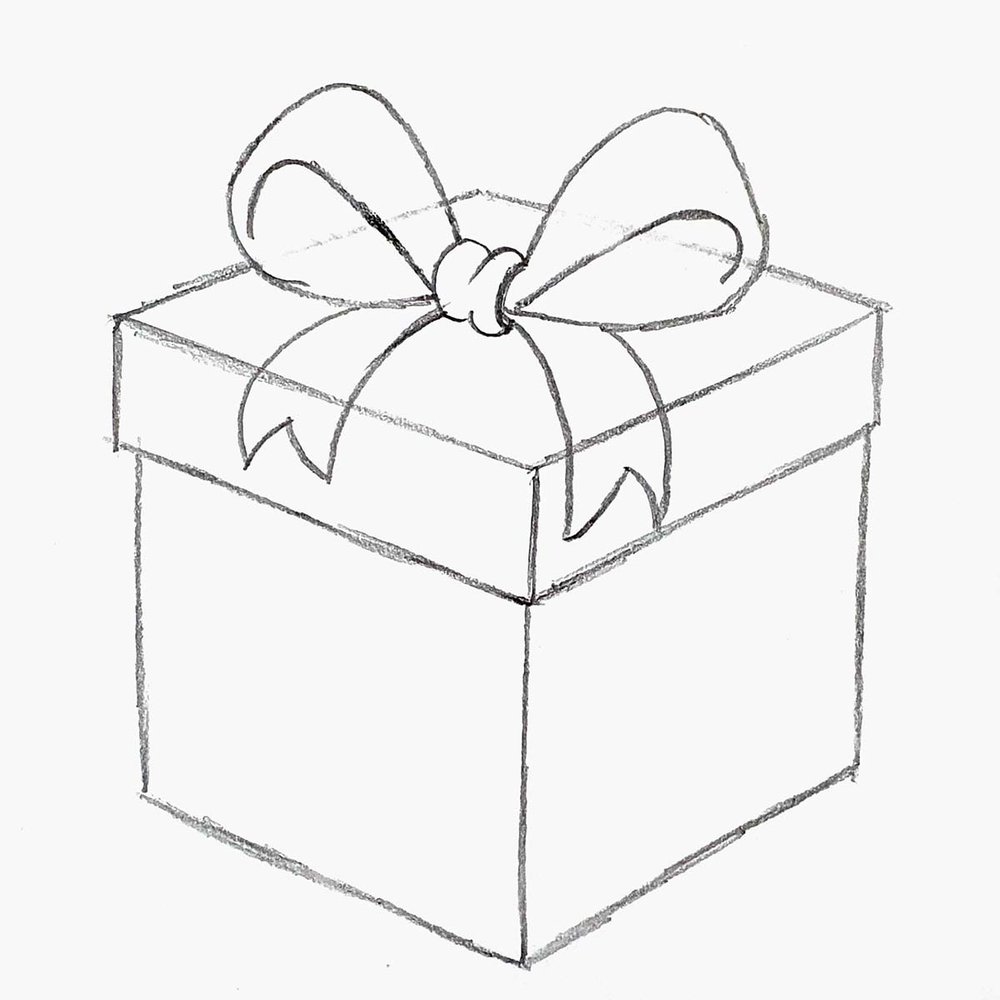
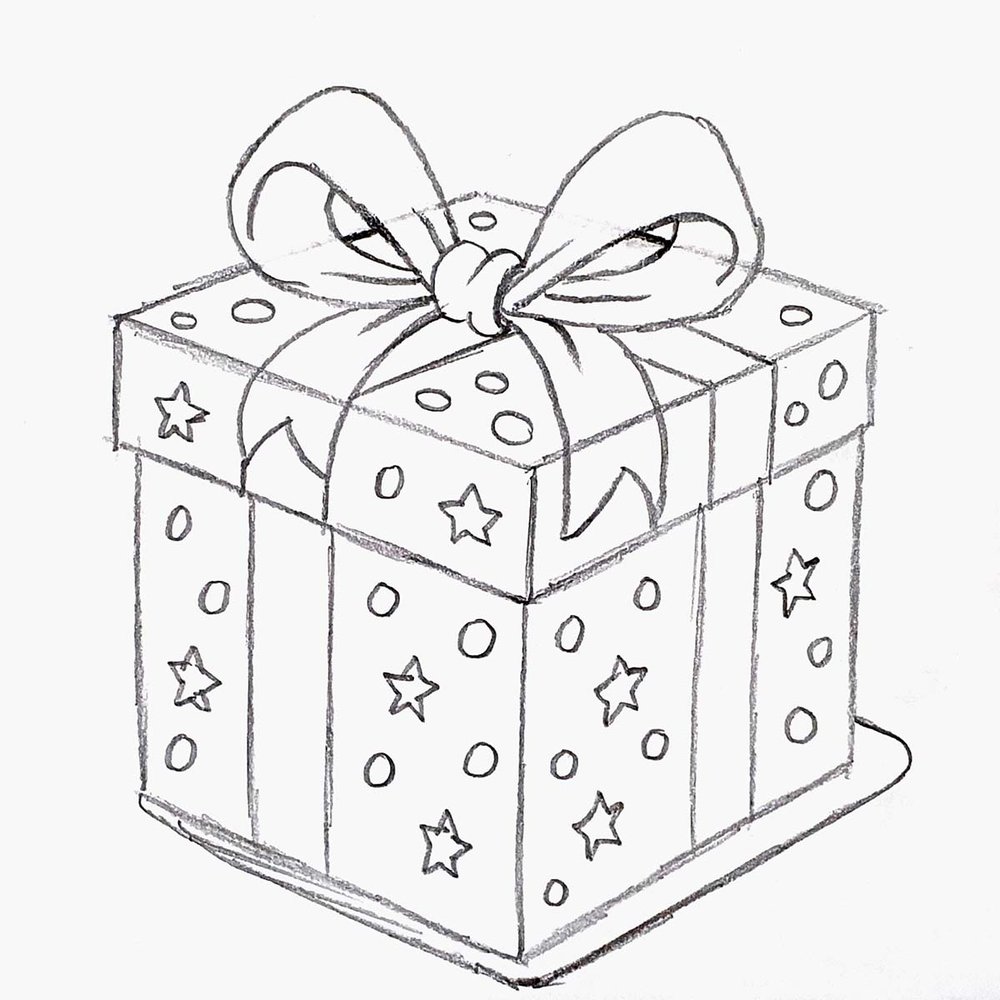
Step 3: Decorate Your Christmas Presents With Stars And Circles
To complete the sketch of the Christmas present, I added decorative stars and circles on the box.
Don't worry if the stars or circles are wonky. It makes them more personal, in my opinion.
I also marked out the shadow of the present.
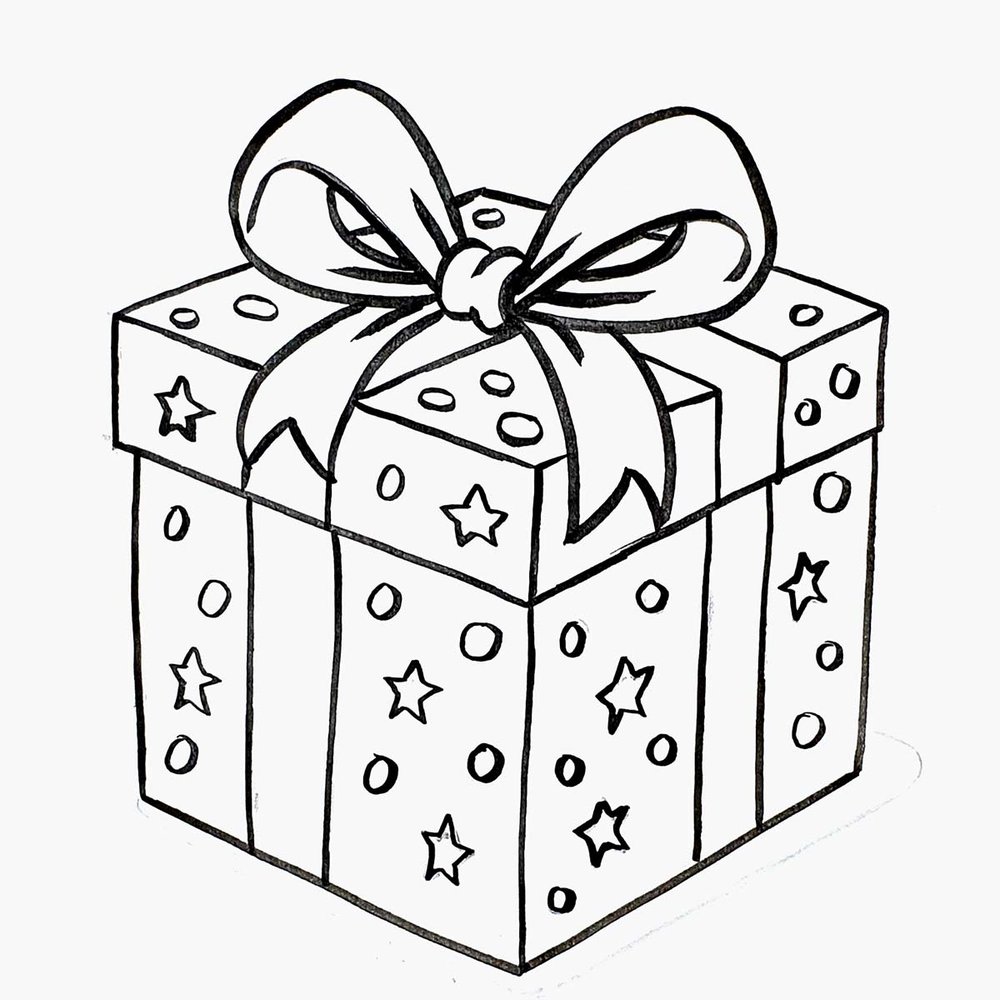
Step 4: Outline The Christmas Present With A Black Pen
Next, I outlined the sketch with a black brush pen.
You can also use a fineliner if you do not have a brush pen.
I did not outline the shadow as it feels weird to add a dark outline to a shadow.
Step 5: Color The Christmas Present With Markers
Now, the fun part: color your Christmas present!
I started by coloring the stars and circles first.
I used Sunflower (Y2) to color the stars and circles on the left and top of the present, and I colored the shadow of the box with Red Grey 03 (RG030).

Next, I colored the stars and circles on the right side of the box with Yellow Orche (Y9).
Next, I colored the ribbon with Vermilion (R2) and colored the shadows on it with Bright Red (R180).


Lastly, I colored the left and top sides of the box with Vivid green (G2).
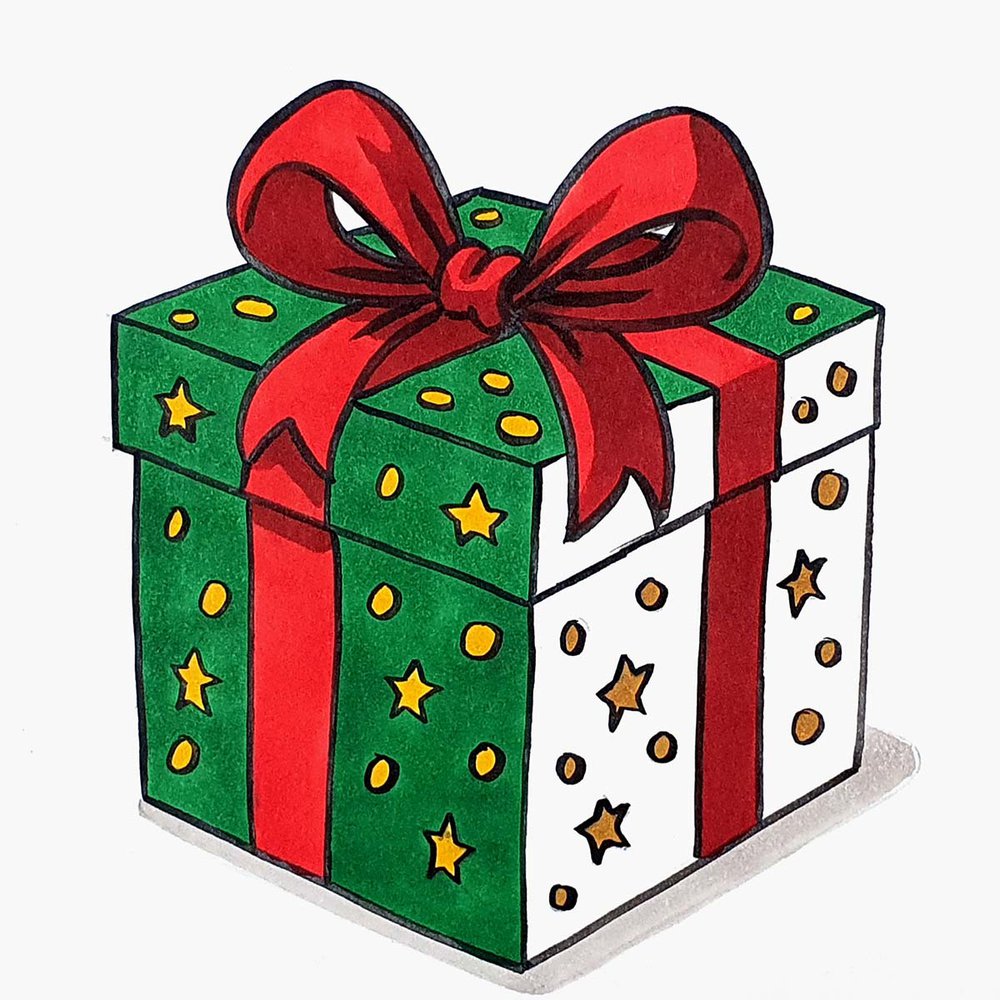
Then, I used Green (G390) to color the right side and the shadows cast by the box and the lid of the box.
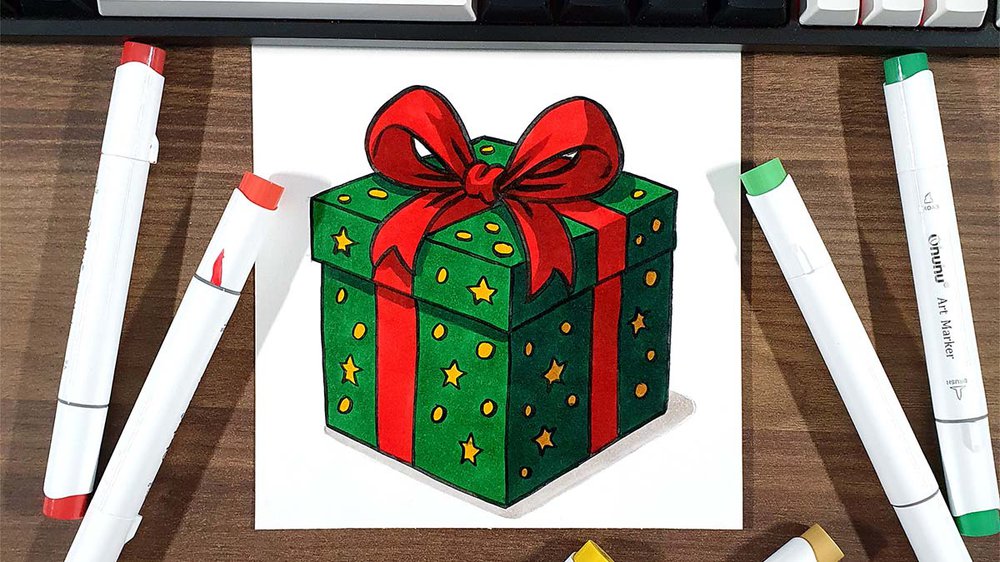
Final Result
And that's it! That's how you draw a festive Christmas present.

I hope you had fun following this festive tutorial. If you’re up for a creative challenge, try drawing a whole stack of presents, adding different patterns like stripes, snowflakes, or holly leaves.
If you share your drawing on Instagram, make sure to tag me @luukminkman. I’d love to see your version and how you personalized it!
Want to keep drawing Christmas-themed stuff? Check out my other step-by-step holiday tutorials for more cozy ideas.
Tags
Articles You Might Also Like


I love bringing cars to life with alcohol markers and colored pencils.
Whether you're just starting out or looking to improve your skills, I'm here to help!
Click here to learn more about me.


Be the first to comment!
Comments
There are no comments yet.