How to Draw a Simple Bugatti | Bugatti Chiron Pur Sport Drawing Tutorial

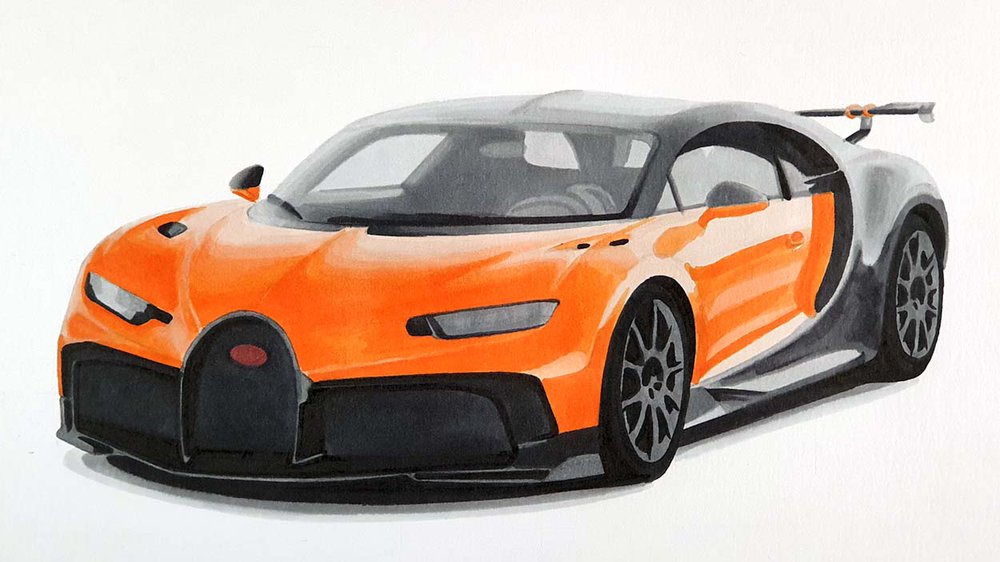
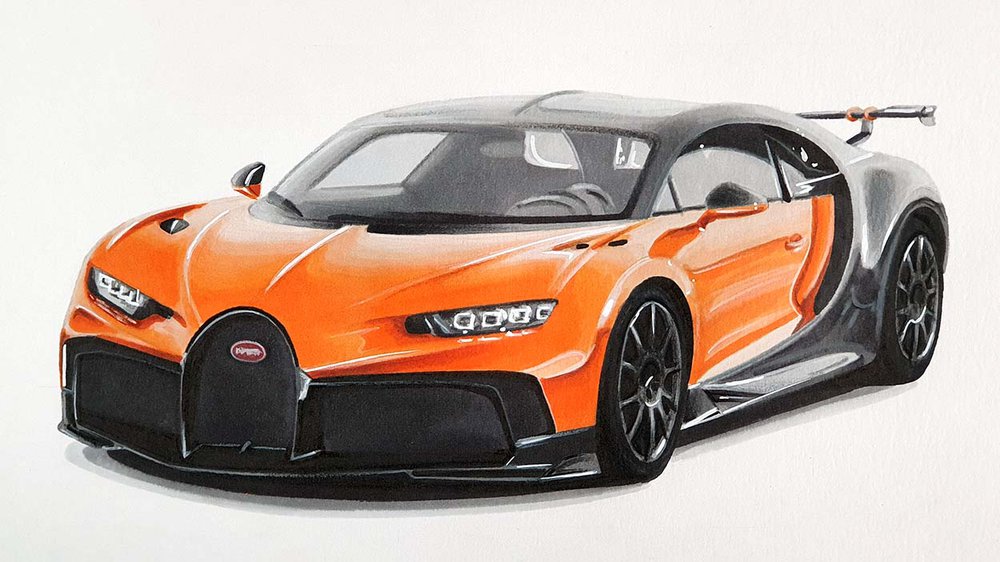
In this step-by-step car drawing tutorial, we're going to draw a simple and realistic Bugatti Chiron Pur Sport.
Disclaimer: In the name of full transparency, please be aware that this blog post contains affiliate links and any purchases made through such links will result in a small commission for me (at no extra cost for you).
Art Supplies I used in this Tutorial
To make this drawing, I used the following art supplies:
- A4-sized Canson Illustration Manga paper (in my opinion the best paper for alcohol markers)
- A graphite pencil
- A ruler
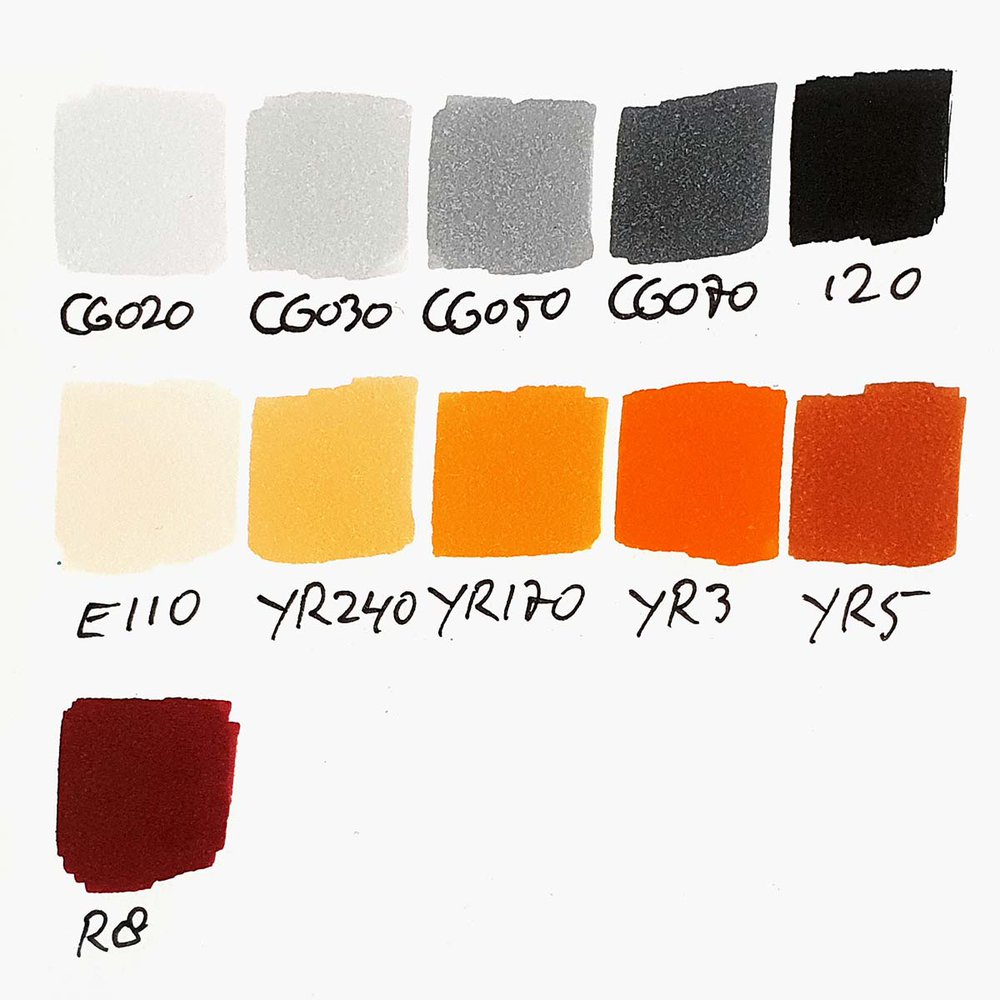
- Ohuhu Honolulu markers in the colors Neutral Grey 02 (CG020), Neutral Grey 03 (CG030), Neutral Grey 05 (CG050), Neutral Grey 07 (CG070), Black (120), Geranium (R8), Pale Fruit Pink (E010), Cream (YR240), Chrome Orange (YR170), Orange (YR3), and Terra Cotta (YR5)
- Derwent Coloursoft colored pencils in the colors White, Dove Grey, and Black
- A white Posca PC-3M paint marker
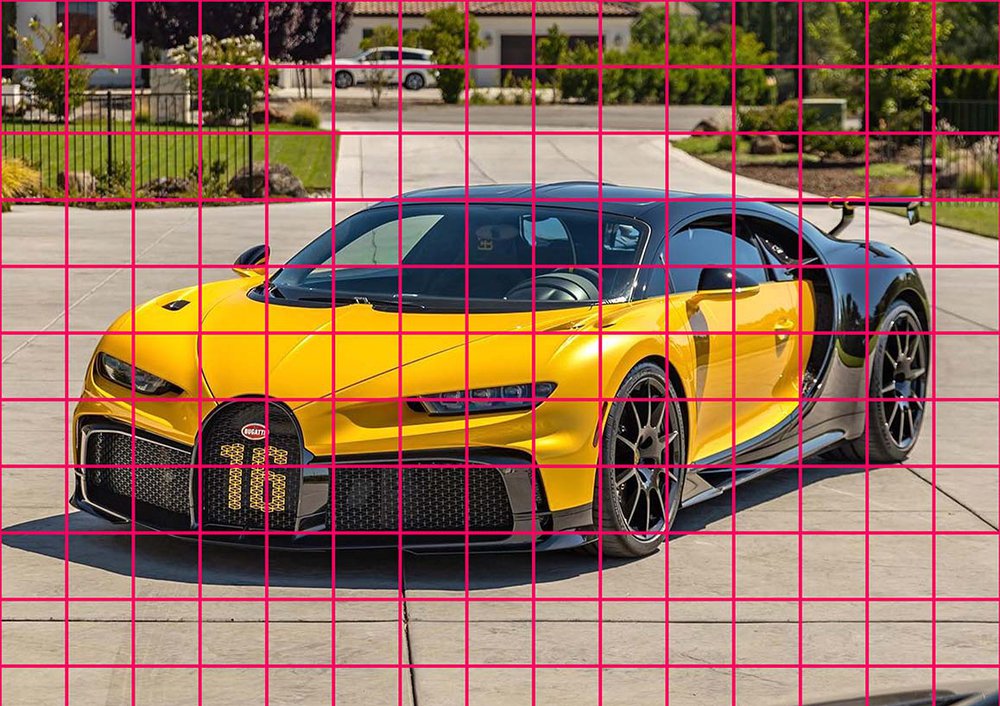
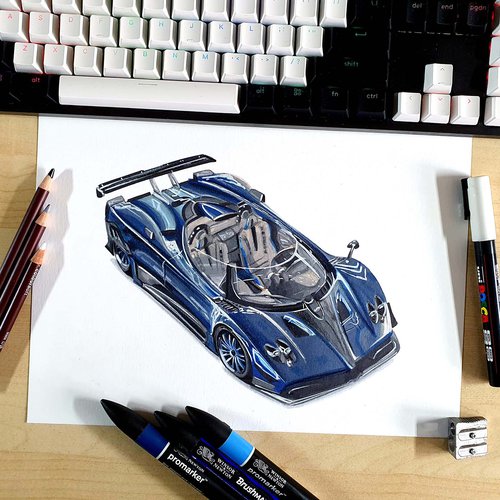
The Reference Photo I Used to Create this Drawing
To make this drawing I used the photo below (3rd slide) to reference the proportions. This photo was posted on Instagram by @mikeynoga.
Without further ado, let's get drawing!
How to Draw a Simple Bugatti Chiron Pur Sport?
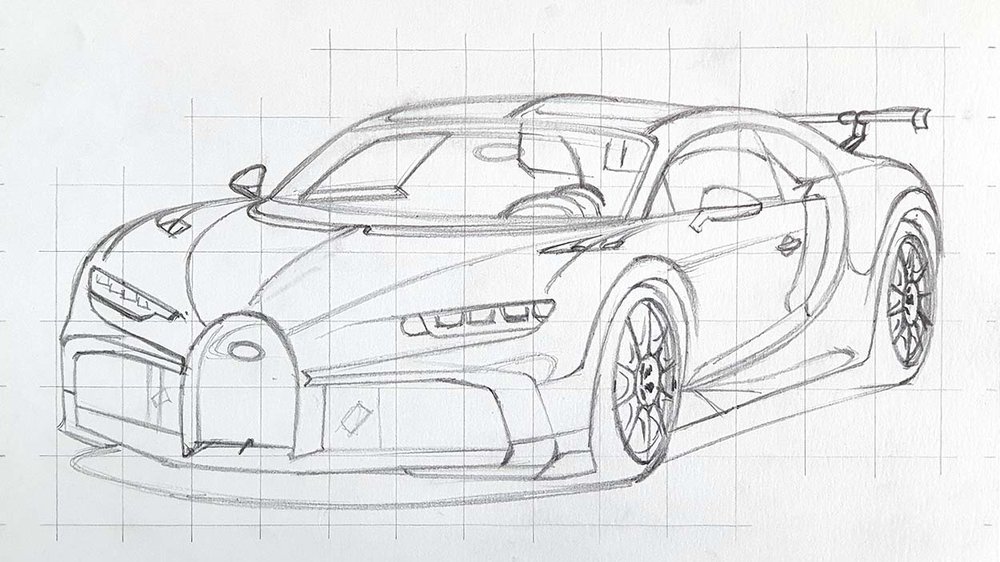
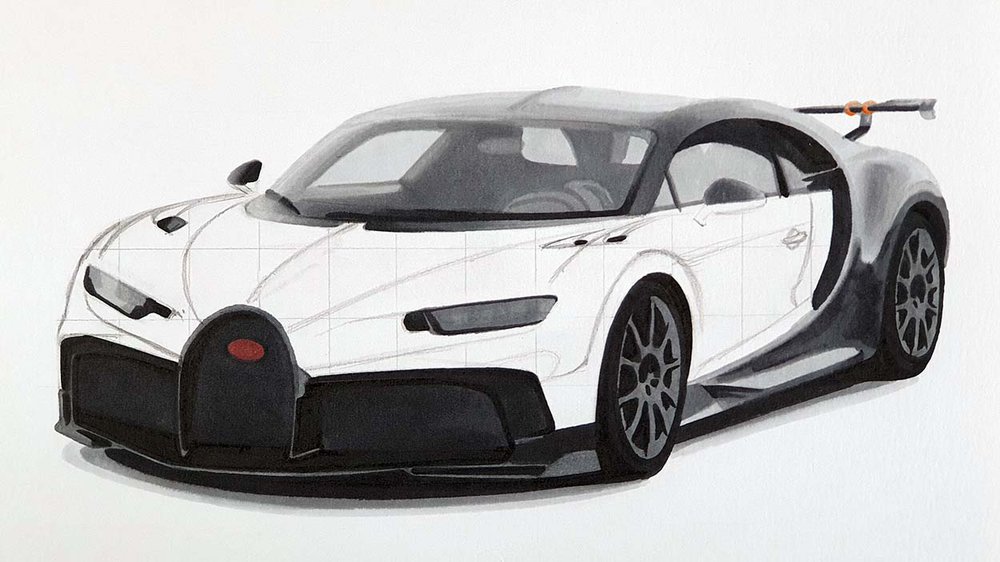
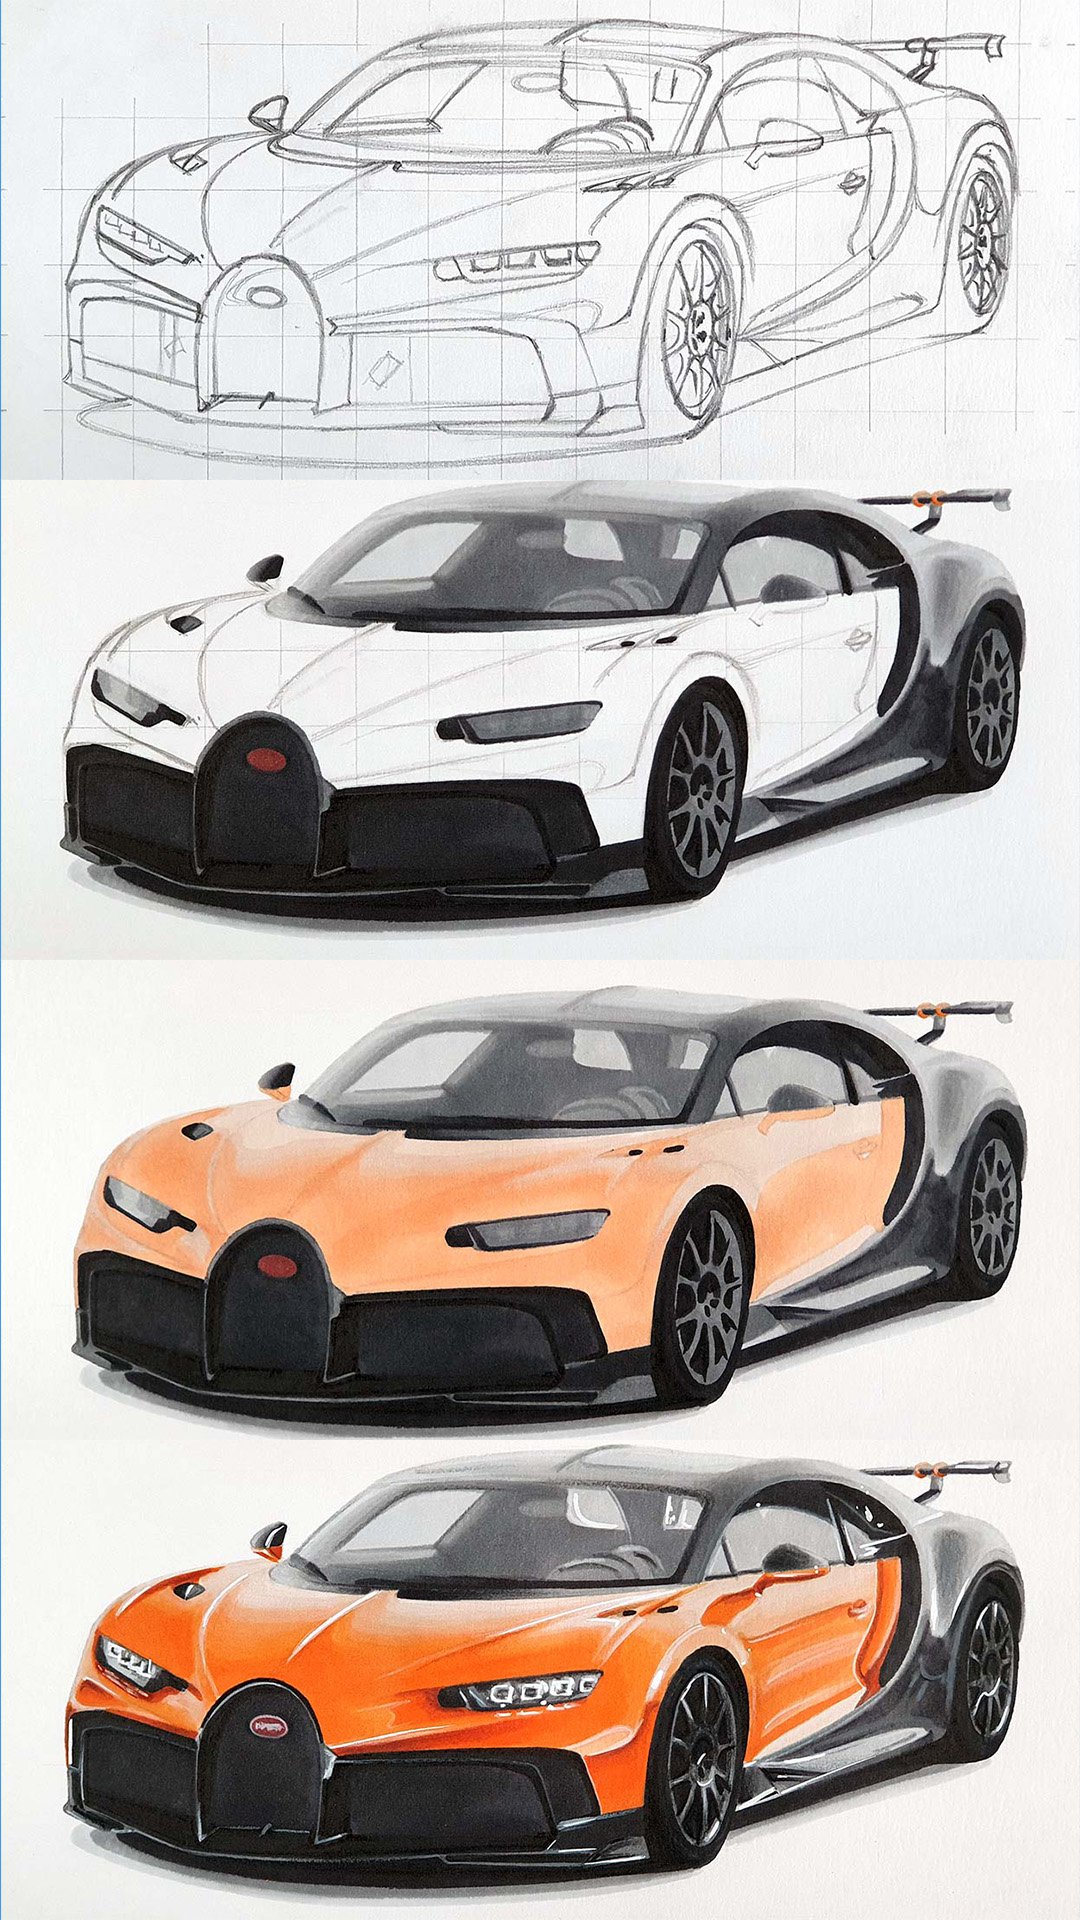
Step 1: Sketch the Outline of the Bugatti
To make sure the proportions of the Chiron were accurate, I used the grid method to sketch it.
First I placed a grid over the reference photo in Photoshop on an A4-sized canvas. I made each square 2x2cm.
You can also use my grid overlay tool to add a grid overlay on your reference photo.
Then I sketched that same grid on my piece of paper.
After I had done that, I started by sketching the basic shapes of the Bugatti. And finally, I added all the details.
The sketch is by far the most important part of your drawing, so spend as much time on it as you need to make it as good as possible. It took me 1 to 2 hours to make this sketch.
If your sketch seems off, but you don't know what's wrong you can hold it in front of a mirror which changes the way you look at it. You might find some things that you didn't notice before, but now are more obvious.
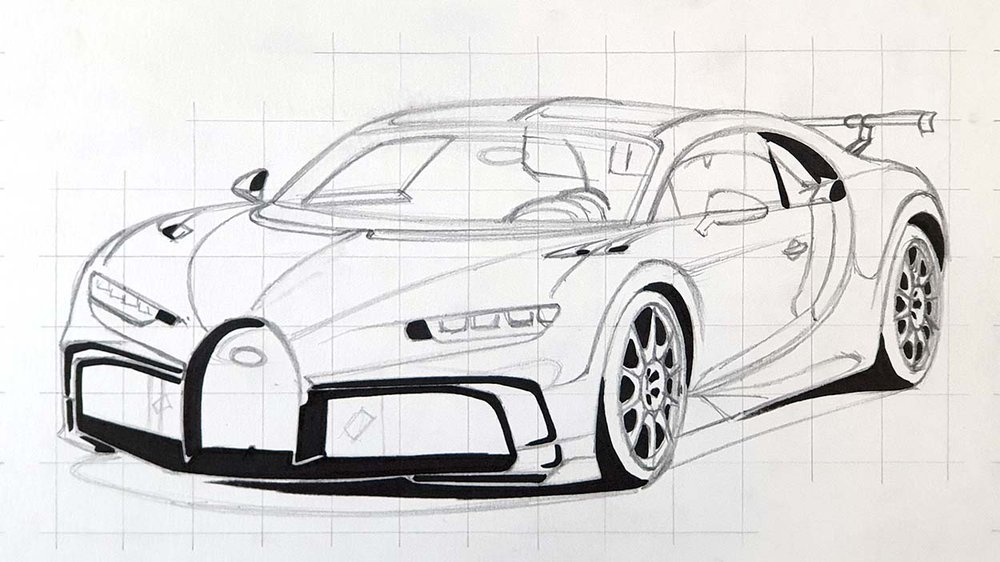
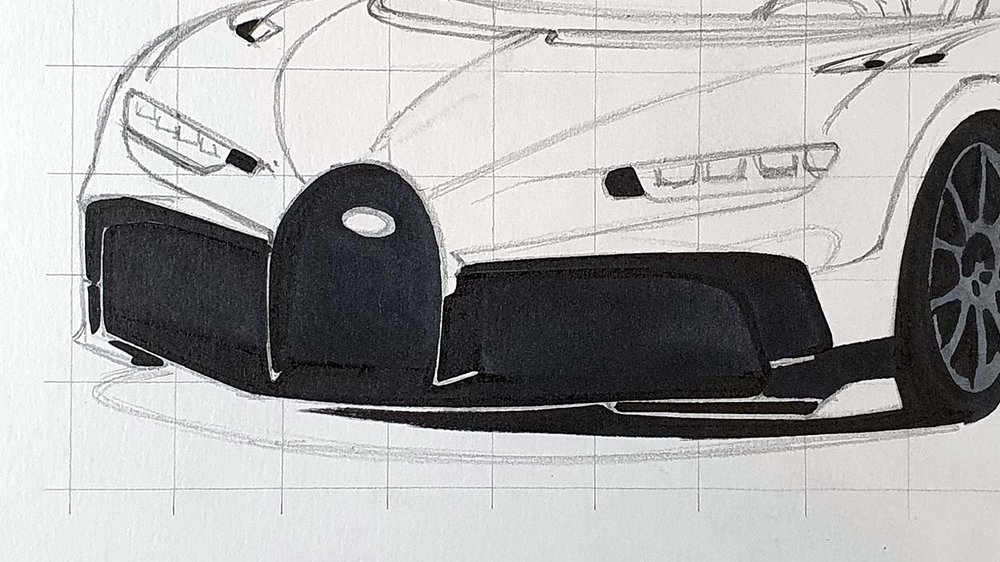
Step 2: Color All Pure Black Parts
To make the drawing look less complicated, I like to color all pure black parts first.
I first colored all pure black parts with Black (120).
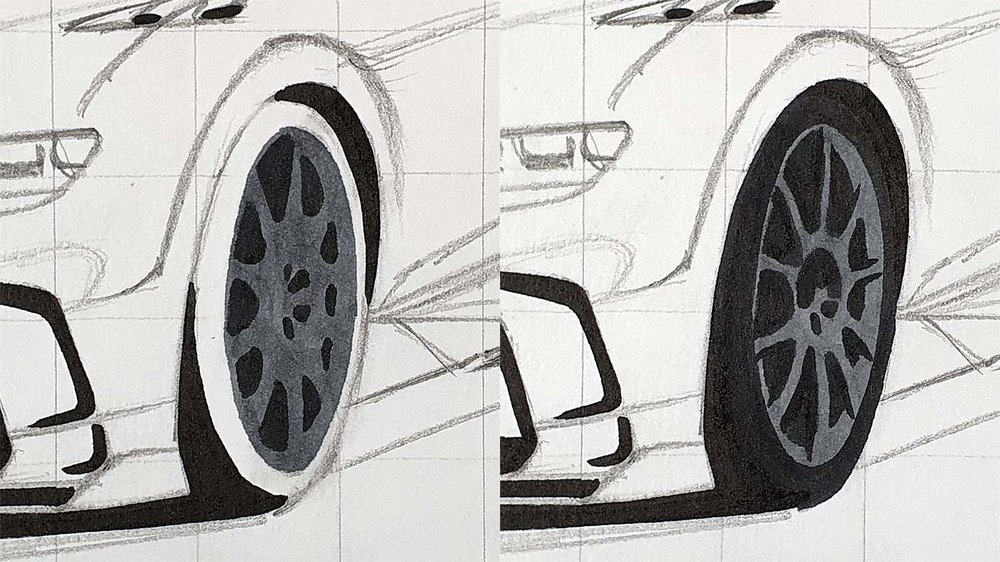
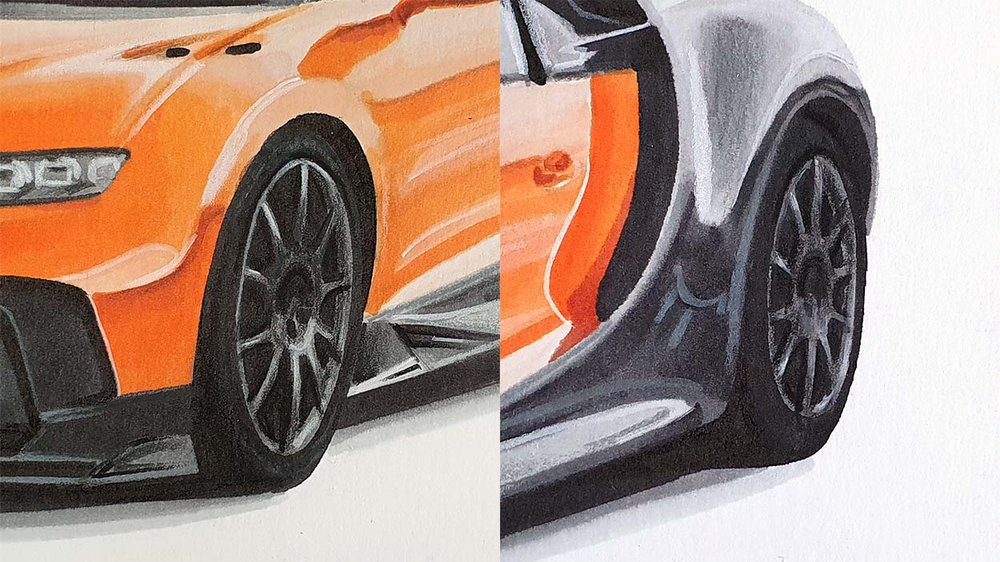
Step 3: Color the Wheels
The wheels on this Bugatti are surprisingly easy.
I first colored the wheel with Neutral Grey 07 (CG070). Then I colored the tire black. I also refined the spokes with the black marker.

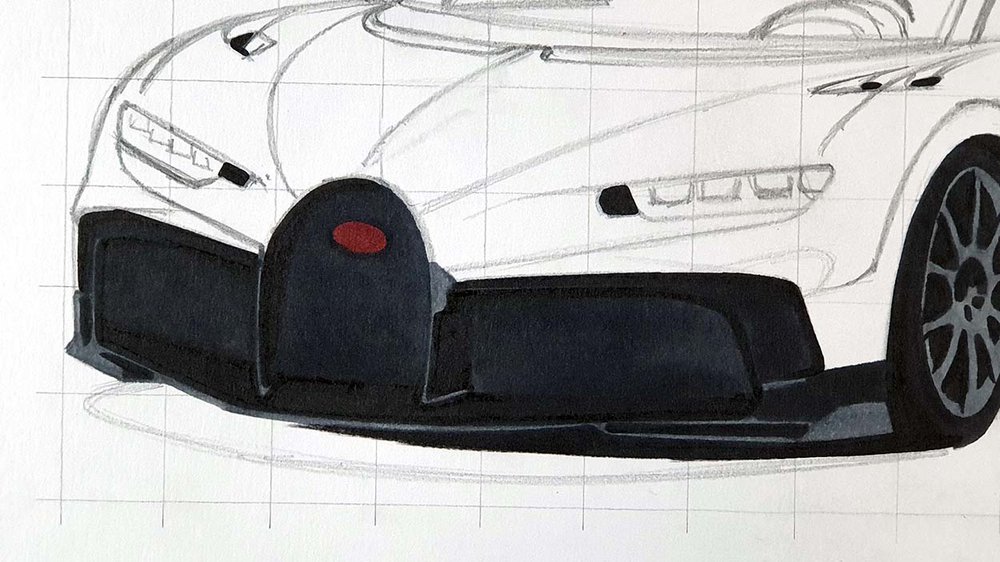
Step 4: Color the Front Grills
The front grills are mainly black with some lines and details that are slightly lighter.
To color the grills, I started by coloring the black parts. Then I colored the remainder with Neutral Grey 07 (CG070) and the logo with Geranium (R8).
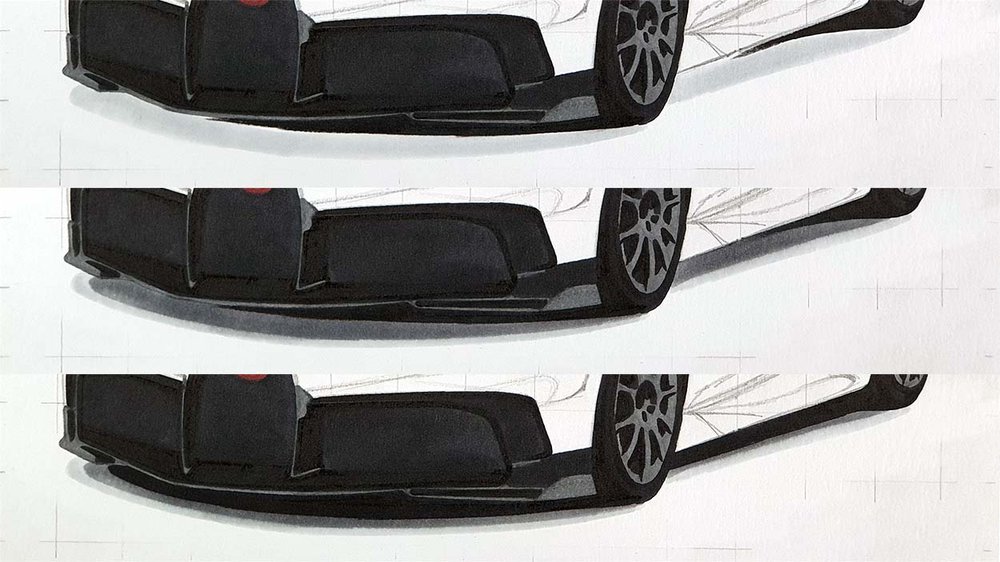
Step 5: Color the Shadow of the Bugatti
To draw the shadow, I started by coloring the outside of the shadow with Neutral Grey 02 (CG020). Then I colored the middle with Neutral Grey 05 (CG050). And finally, I colored the inside of the shadow with black.
You could blend those colors by going over the edges with the lighter markers, but I like how it looks unblended.
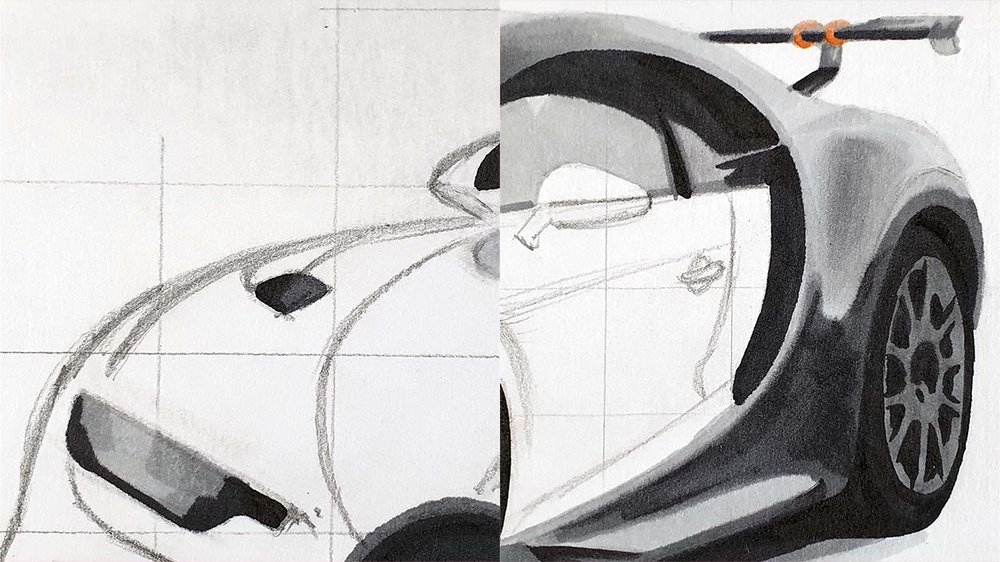
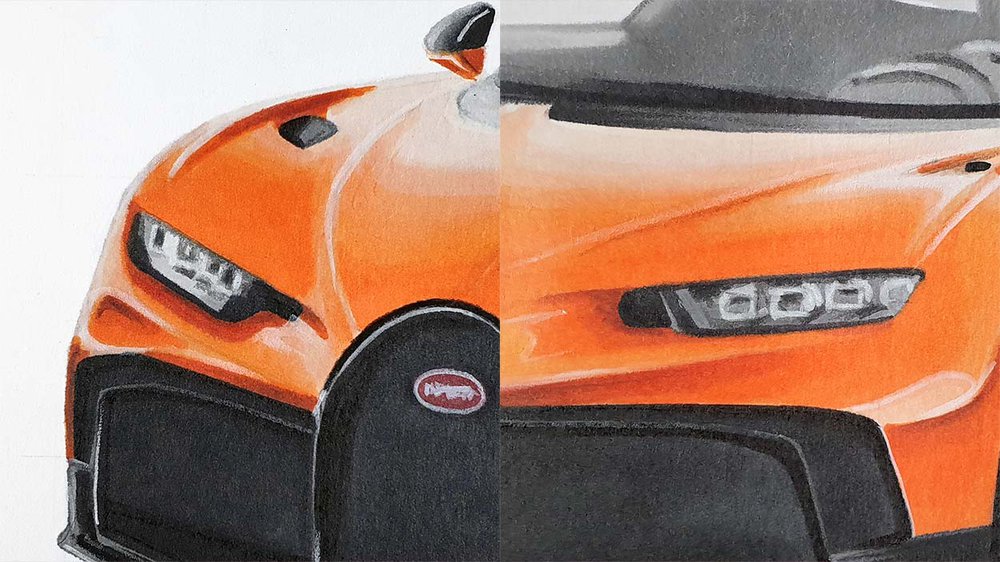
Step 6: Color the Headlights
The headlights of the Bugatti Chiron are pretty complex. For now, we'll simplify them a lot. The details will come later.
I started with the left headlight by coloring it with Neutral Grey 03 (CG030). Then I added some Neutral Grey 05 (CG050) to the left and the right side. Lastly, I added some black to the left, the bottom, and the right.
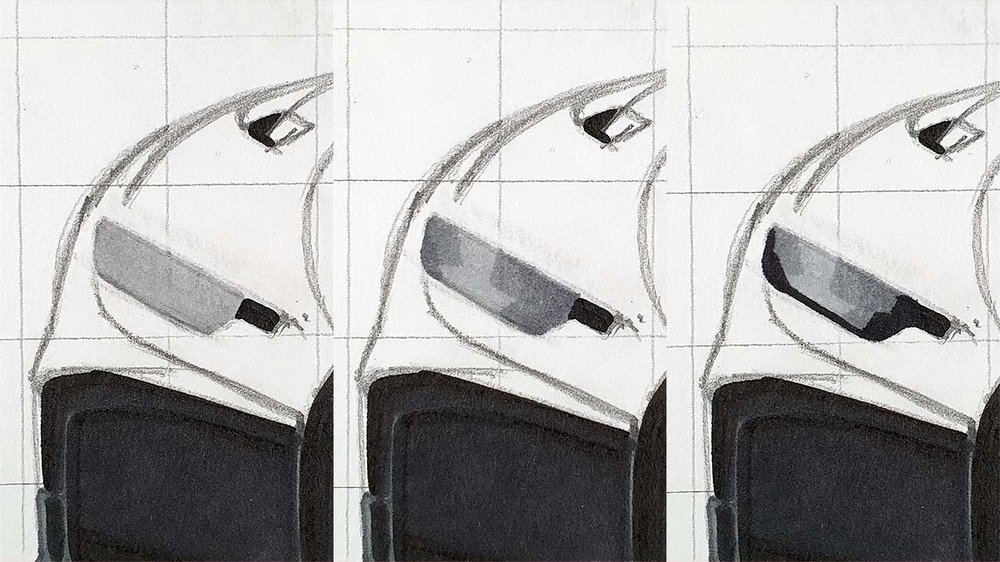
I colored the right headlight with Neutral Grey 05 (CG050). Then I darkened some parts with Neutral Grey 07 (CG070). And finally, I added a black line to the top, the left, and the bottom of the headlight.
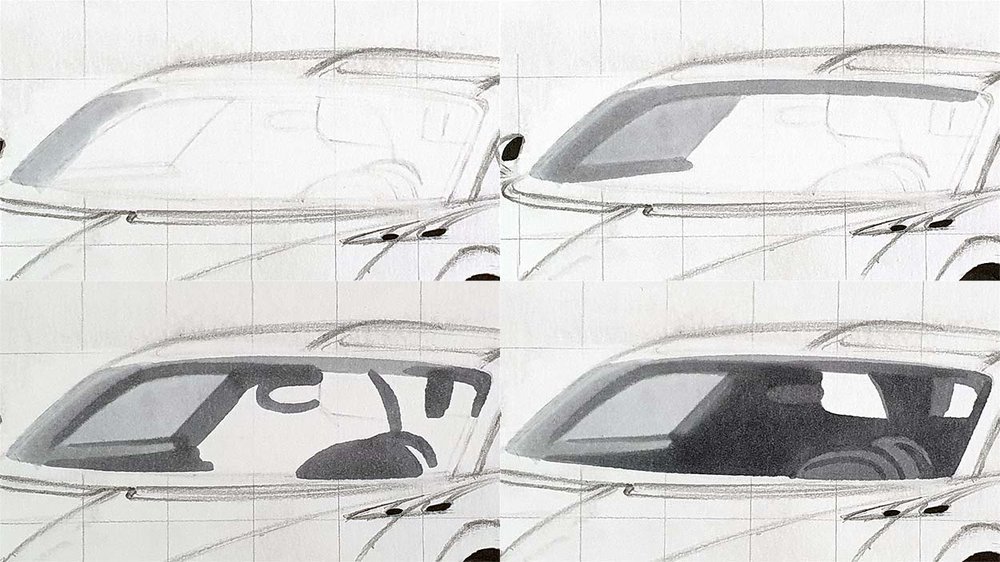
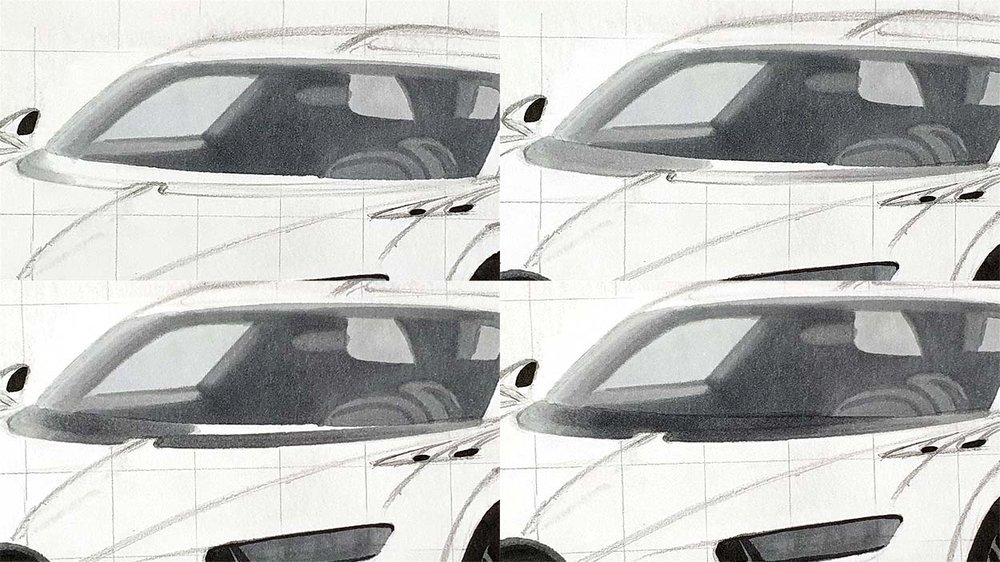
Step 7: Color the Windshield
To draw the windshield, I started by coloring the a-pillar on the far left with Neutral Grey 02 (CG020).
Then I added some Neutral Grey 03 (CG030) to the inside of the A-pillar, just below the side window and the top part of the windshield. I also colored the side window with Neutral Grey 02 (CG020) as I forgot to do that in the previous step...
Next, I colored some parts with Neutral Grey 05 (CG050).
After that, I colored most of the remaining parts with Neutral Grey 07 (CG070) and I colored the rearview mirror with Neutral Grey 05 (CG050).
And lastly, I colored the spots to the top right of the front window with Neutral Grey 03 (CG030).
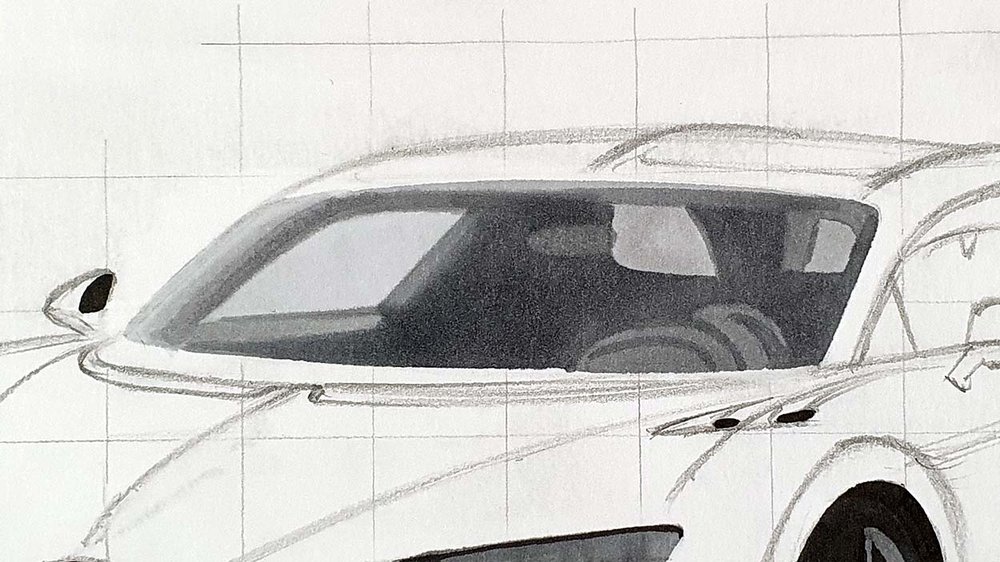
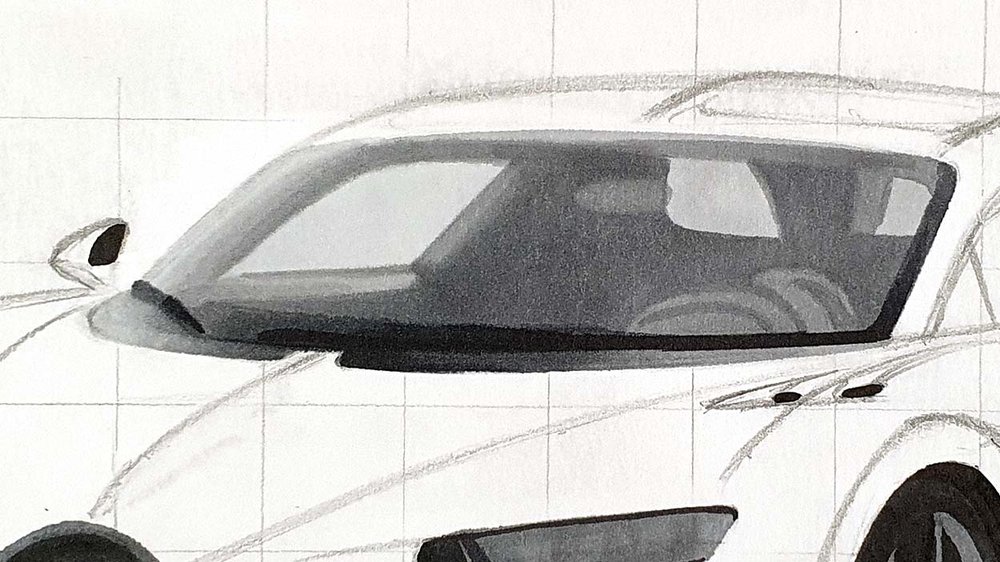
Next, I colored the part just below the windshield.
I started by coloring the far left with Neutral Grey 02 (CG020) and blended that into Neutral Grey 03 (CG030). I also colored the far right with Neutral Grey 03 (CG030).
Then I added some Neutral Grey 05 (CG050) to most of the bottom part and to the left.
After that, I darkened the middle with Neutral Grey 07 (CG070).
Lastly, I used some black to add the windshield wiper and to darken the top middle and top right.
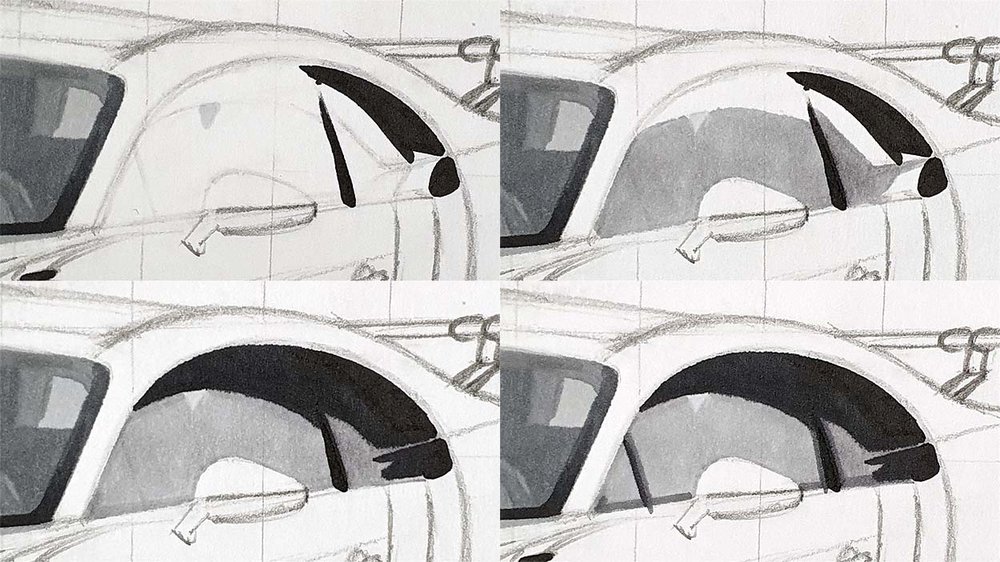
Step 8: Color the Side Window
Next up is the side window. I started by coloring a small triangle with Neutral Grey 02 (CG020).
Then I colored most of the side window with Neutral Grey 03 (CG030), but leaving the part where there will be a reflection uncolored.
After that, I colored the reflection with black.
And lastly, I added the window sills with Neutral Grey 07 (CG070) and black.
Step 9: Color the Black/Grey Part of the Main Body
Now it's time to color a big part: the black part of the main body.
I started by coloring the top half with Neutral Grey 02 (CG020).
Then I added some Neutral Grey 03 (CG030) in a few specific areas: the A-pillar, just above the side window and the windshield, the bottom part of the C-shape, a bit on the side skirt, and a bit toward the top left of the rear wheel.
Next, I colored the areas that weren't colored yet with Neutral Grey 05 (CG050). I also added some Neutral Grey 05 (CG050) toward the top left of the rear wheel, the a-pillar, and just above the side window.
After that, I used Neutral Grey 07 (CG070) to darken some parts, mainly the A-pillar and the darker parts on the lower half of the car.

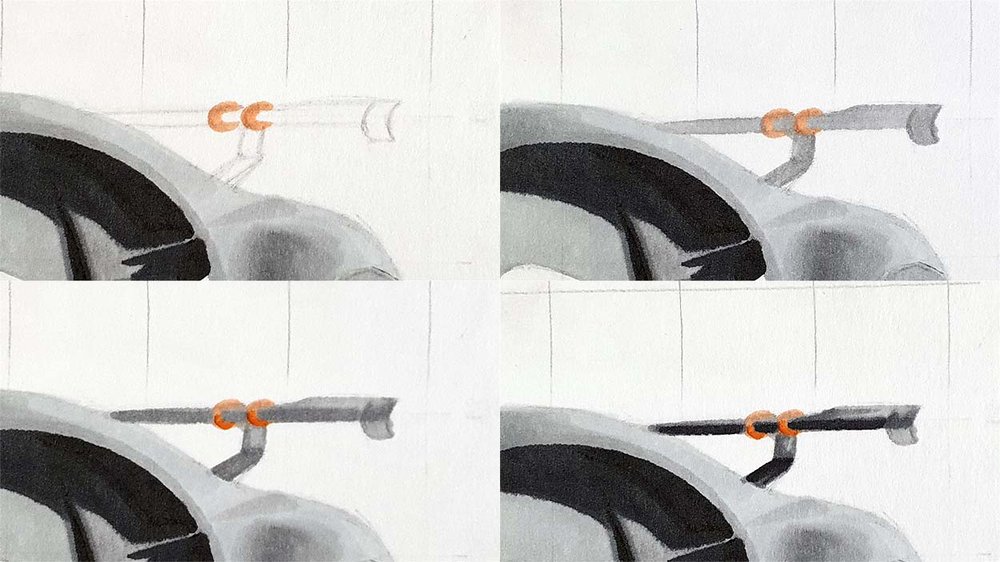
Step 10: Color the Rear Wing
To color the rear wing, I first colored the drop-shaped fins with Cream (YR240).
Then I colored the whole wing with Neutral Grey 03 (CG030) except for the orange fins.
Next, I darkened the bottom of the fins with Orange (YR3), and I darkened some parts of the wing with Neutral Grey 05 (CG050).
Lastly, I darkened the bottom of the wing even more with black, and I also darkened the bottom half of the wing holder.
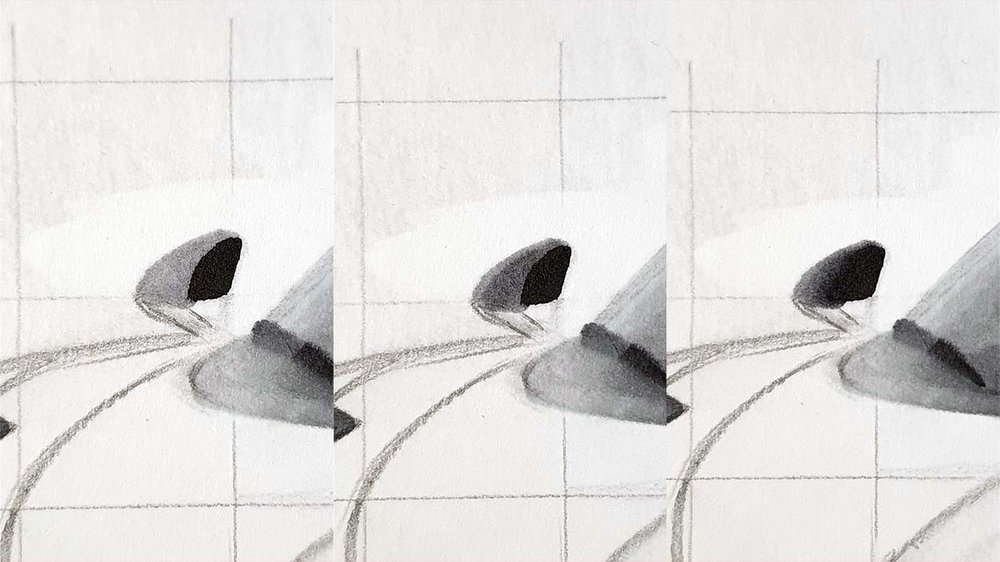
Step 11: Color the Side Air Intake and the Air Vents on the Hood
Now it's time to color 2 things that didn't fit in any of the other steps: the side intake and the vents on the hood.
I started with the side intake and colored that fully black.
Then I colored the remainder of the left air vent on the hood with Neutral Grey 07 (CG070).
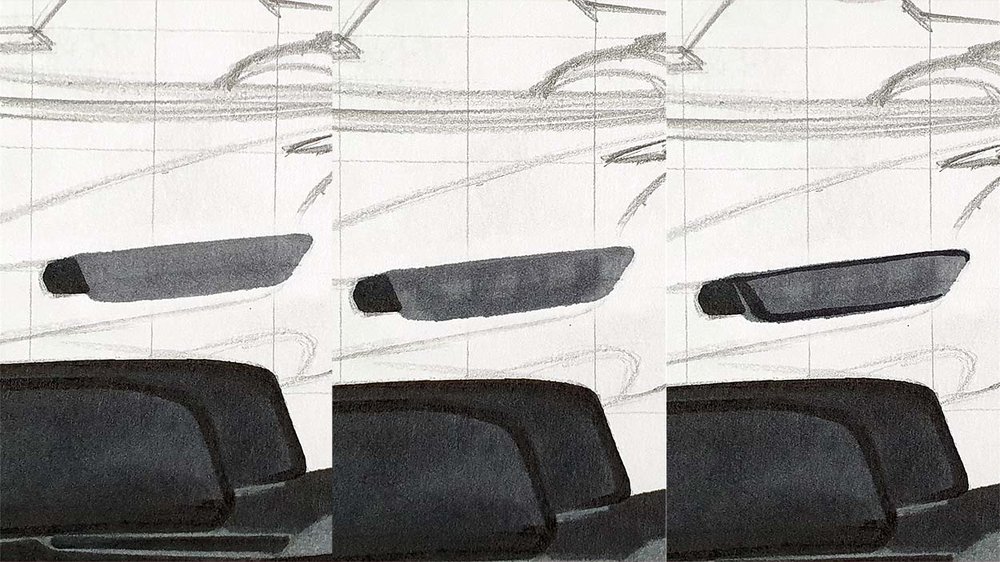
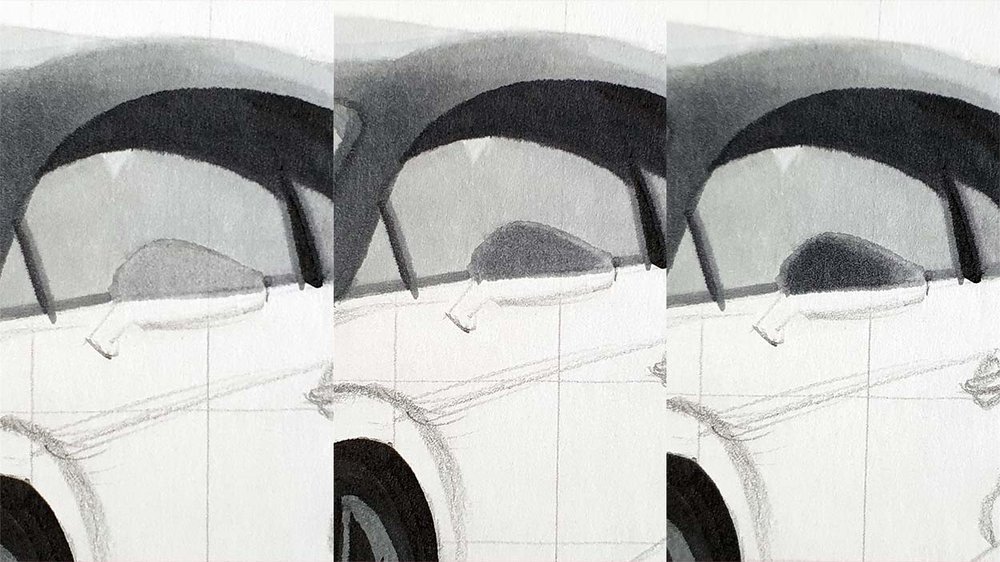
Step 12: Color the Door Mirrors
Next up are the door mirrors, the last grey/black part before we start adding some color.
I started by coloring the right mirror with Neutral Grey 03 (CG030).
Then I colored most of it with Neutral Grey 05 (CG050), but I left a bit of lighter grey showing on the top and the right.
Lastly, I added some Neutral Grey 07 (CG070) to darken the middle left part.
I started the left mirror by coloring with Neutral Grey 03 (CG030).
Then I added some Neutral Grey 05 (CG050) in the middle.
And lastly, I blended the black into the lighter grey with Neutral Grey 07 (CG070) and black.
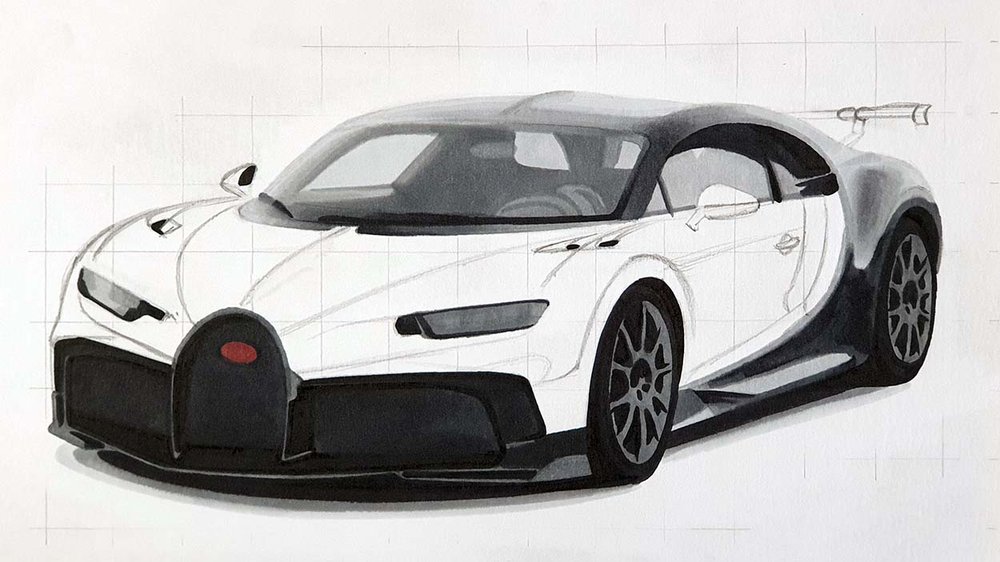
Step 13: Color the Orange Part of the Main Body
Now it's time to add some color!
I started by coloring the lightest parts with Pale Fruit Pink (E010). You could color the whole main body that color, but I chose to only color the lightest parts.
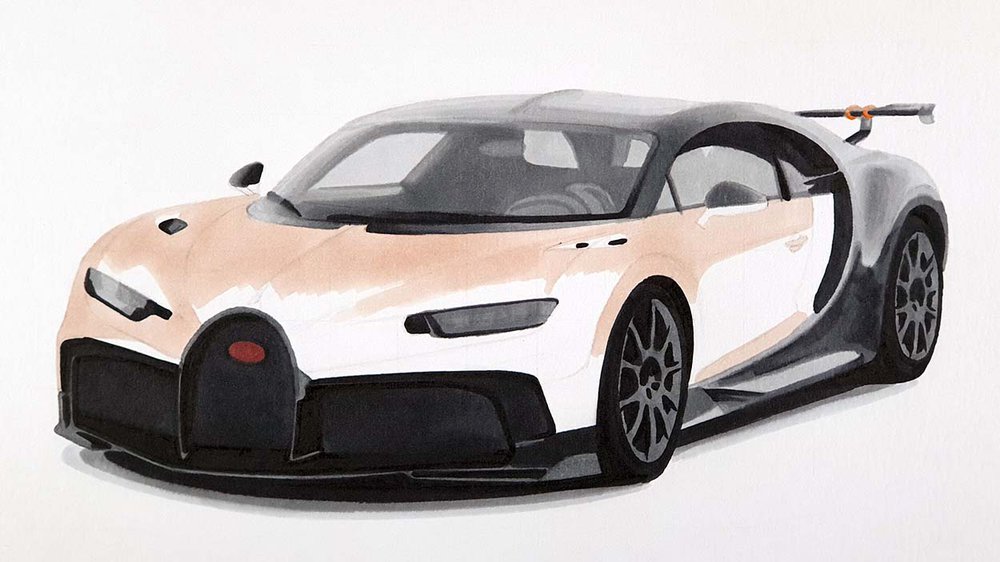
Next, I colored the remainder of the main body with Cream (YR240) and blended that in some places into the Pale Fruit Pink (E010) by going over the edges with Pale Fruit Pink (E010).
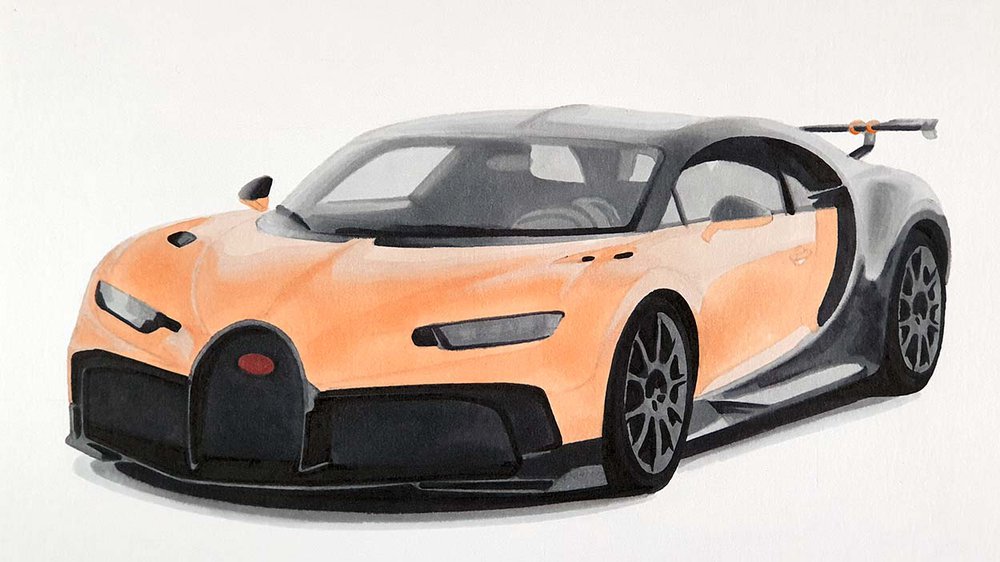
Then I used Chrome Orange (YR170) to darken most of the parts where I colored Cream (YR240) and blended that into it in some places.
After that, I darkened most of the front and a few bits on the side even more with Orange (YR3).
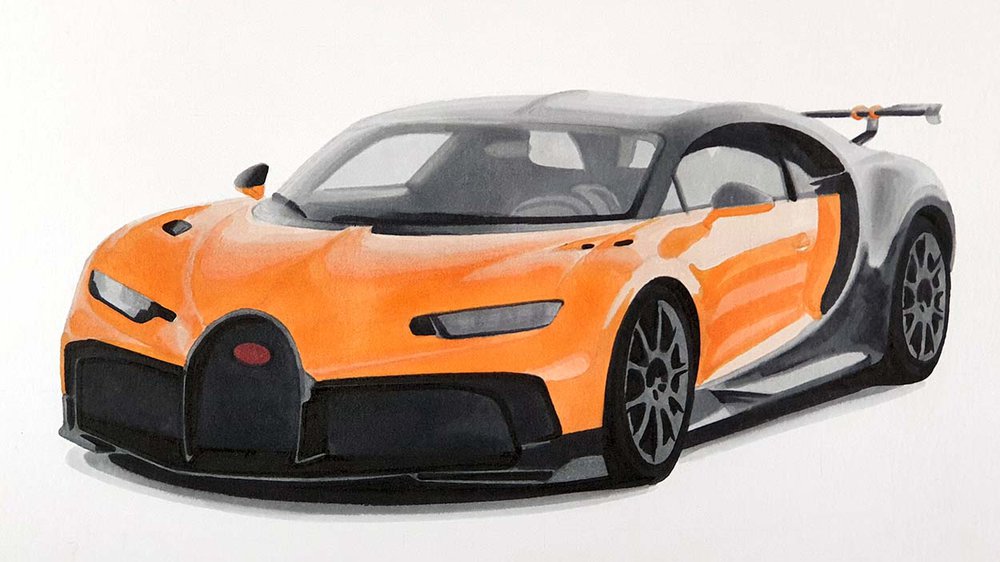
Lastly, I used Terra Cotta (YR5) to darken a few places, mainly the top part of the reflection of the door mirror, the reflection of the side air intake, and a few bits below both headlights.
Step 14: Add Details with Colored Pencils
The drawing looks a bit dull at the moment, so we're going to add a lot more details with colored pencils.
I used white to outline some of the parts on the front including the logo, the hood, and the headlights. I also refined the wheels with black, Dove Grey and white.

Step 15: Add Highlights with the Posca Paint Marker
Your drawing is almost done already! We just need to add some pure white highlights with the Posca paint marker to make the drawing really pop.
I added some highlights on the wheels, and a few around the front grills and I accentuated some of the lines on the hood.
I also used the Posca marker to color the lights so that it looks like they're illuminated.
Then I added some bigger highlights just towards the top left of the front and rear wheels and I added a few dots on the side window and the right door mirror.
And that's it!

My go-to alcohol markers for blending, rich color payoff, and amazing value. The brush tips feel super natural to draw with — a must-have for smooth gradients and realistic shading!
- Brush + chisel tips
- Great for beginners & advanced artists
- Budget-friendly alternative to Copics
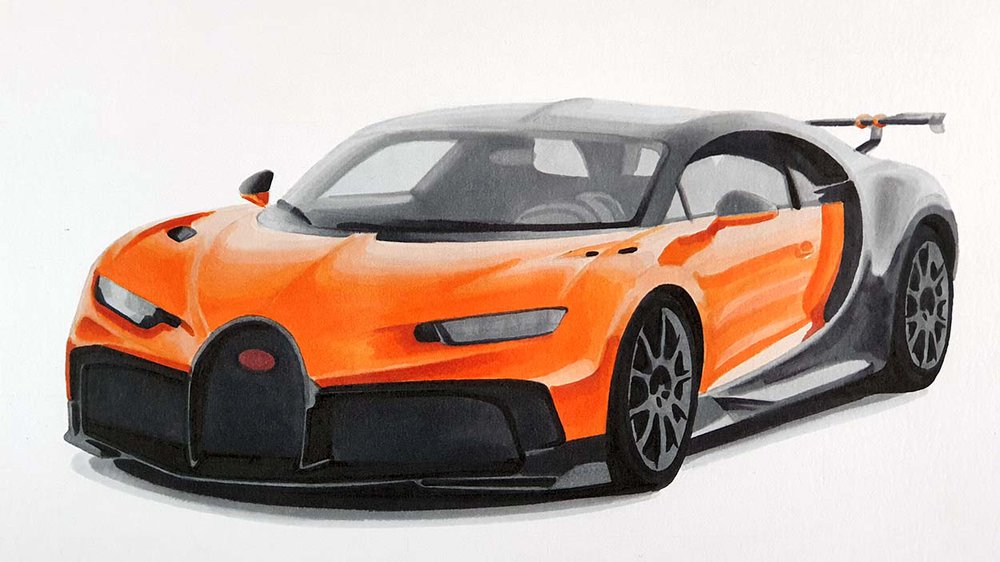
Your Bugatti Chiron Drawing is Finished!
Your drawing is now done!
If you've followed along with this tutorial and you want to share your drawing on Instagram, make sure to tag me (@luukminkman). I'd love to see how your drawing turned out!
Hungry for more in-depth car drawing tutorials? Click here to get started.
Thank you!!
Tags
Articles You Might Also Like


.jpg__500x500_q85_crop_subsampling-2.jpg)


I love bringing cars to life with alcohol markers and colored pencils.
Whether you're just starting out or looking to improve your skills, I'm here to help!
Click here to learn more about me.


Add a comment
Comments
I really like your perspective and your 3D shape of the bugatti chiron
Awsome
Thank you!
This is so cool! My friends were so impressed!!!
Thank you! I'm glad you and your friends liked it!
nice bro
Thank you, Riley!