Draw Your Own Realistic Porsche 992 Targa 4S
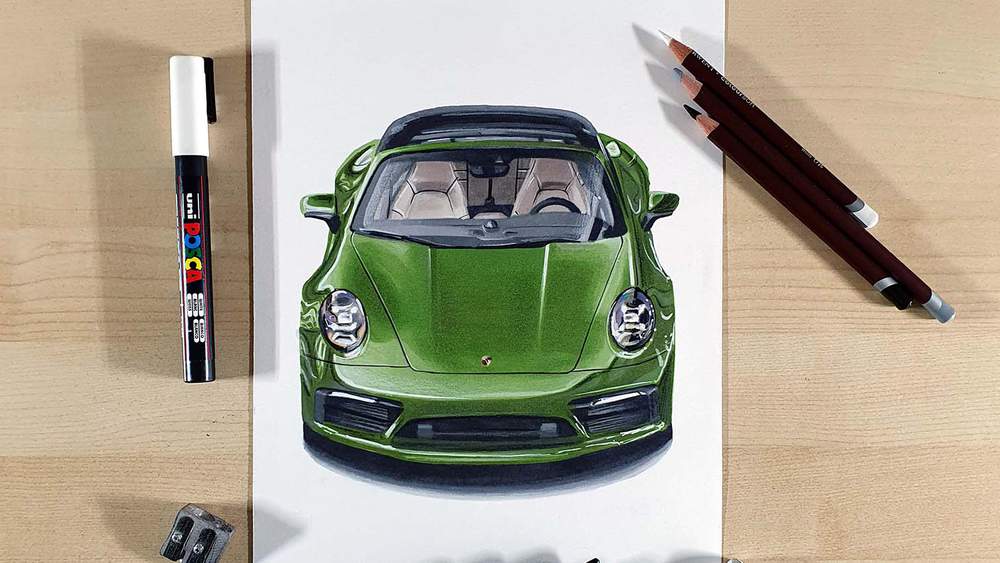
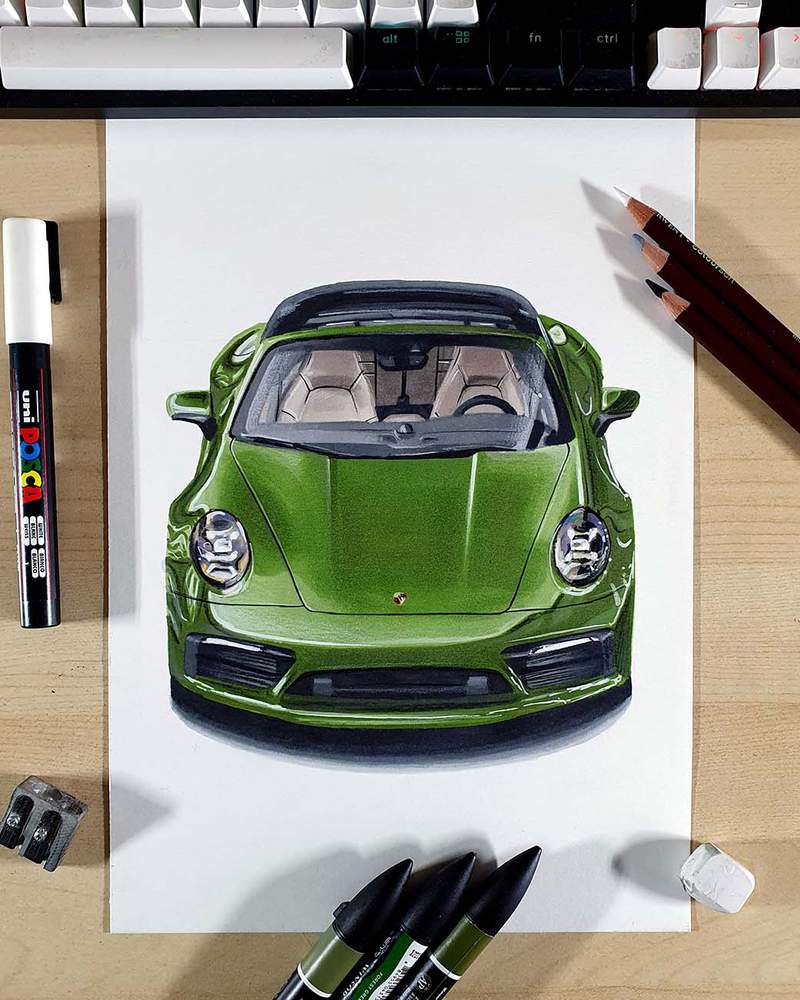
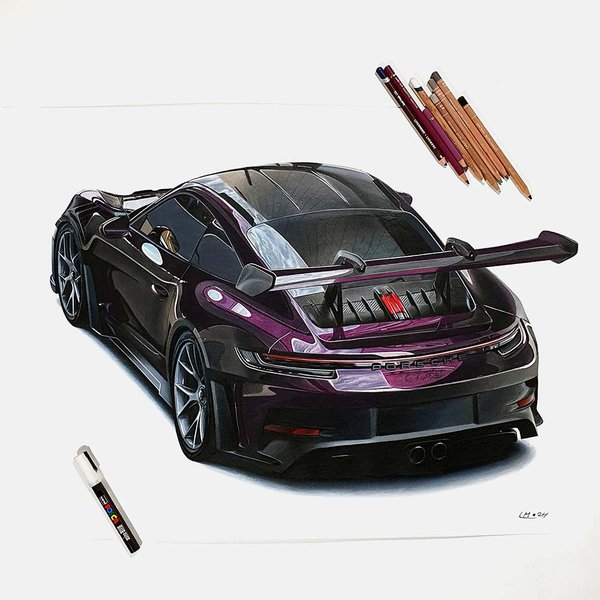
In this car drawing tutorial, I'm going to show you how to draw a Porsche 992 Targa 4S.
I've broken the whole drawing up into simple and easy-to-follow steps so you can follow along and create your own realistic Porsche drawing.
Disclaimer: In the name of full transparency, please be aware that this blog post contains affiliate links and any purchases made through such links will result in a small commission for me (at no extra cost for you).
Let's dive right in!
Drawing Supplies I Use in this Tutorial
For this tutorial, I used the following art supplies:
- A4-sized Canson Illustration Manga paper;
- A graphite pencil and a ruler;
- Winsor & Newton Promarkers in the colors Ice Grey 1 (IG1), Ice Grey 2 (IG2), Ice Grey 4 (IG4), Ice Grey 7 (IG7), Blue Black (XBB), Black (XB), Warm Gery 1 (WG1), Warm Grey 2 (WG2), Warm Grey 3 (WG3), Warm Grey 4 (WG4), Warm Grey 5 (WG5), Marsh Green (G136), Forest Green (G356), Pesto (Y923), Mustard (O948), Raw Sienna (646), Amethyst (V626), Violet (V245), Turquoise (247), and Burgundy (R424);
- Derwent Coloursoft pencils in the colors White, Dove Grey, and Black;
- And a white Posca PC-3M.
Reference Photos I Used in this Tutorial
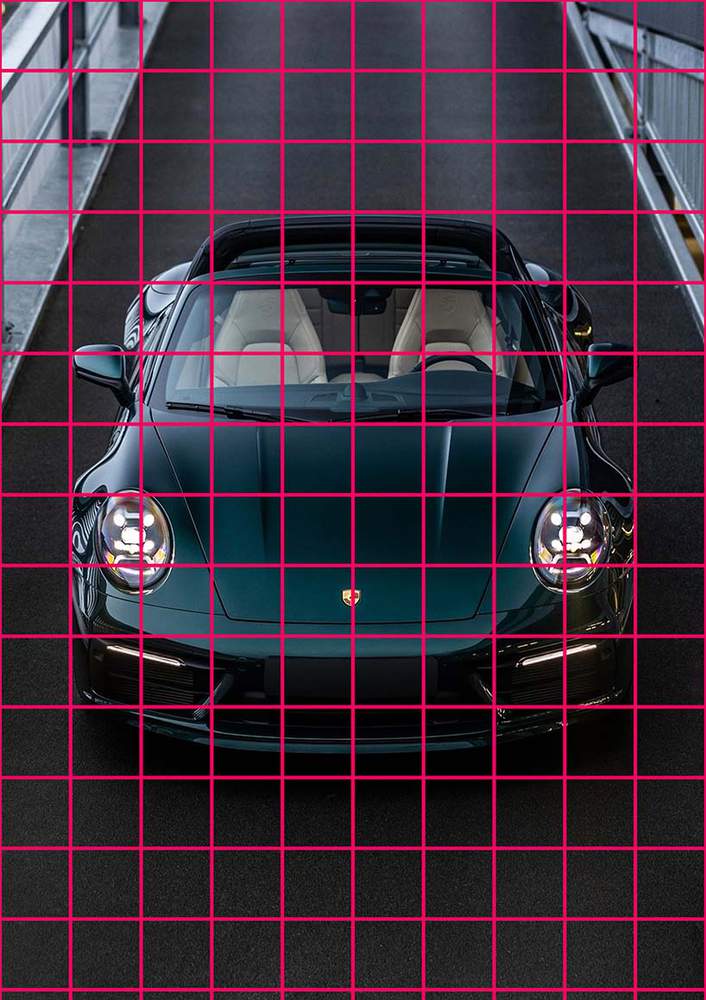
For this tutorial, I used 2 reference photos. 1 for the color and 1 for the proportions and perspective.
I used this photo (3rd slide) for the proportions of the Porsche.
And I used this photo as a color/spec reference for the Porsche.
How to Draw a Porsche 911 Targa?
To draw a Porsche you start by making a details sketch of the car. I use the grid method to make this part easier and more accurate. After that, it's time to color the car. Color all black and grey parts first. This makes it easier to judge the value and shade of the main body. Next color the main body and all the reflections. Lastly, add some details with black, grey, and white colored pencils and add white highlights with a Posca paint marker.
Step 1: Sketch the Outline of the Porsche
The first step in drawing a car is always the sketch. Sketching the outline of a car can be very difficult if you try to freehand it.
Luckily there are multiple techniques you can use to make this easier.
For this tutorial I'll be using the grid method.
I first added a grid over the reference photo in Photoshop. The grid I'm using is 10 by 14 and a bit squares of 2.1 by 2.1 cm. This fits well with the width of the paper size I'm using which is A4 (21 by 29.7 cm / 8.3" by 11.7").
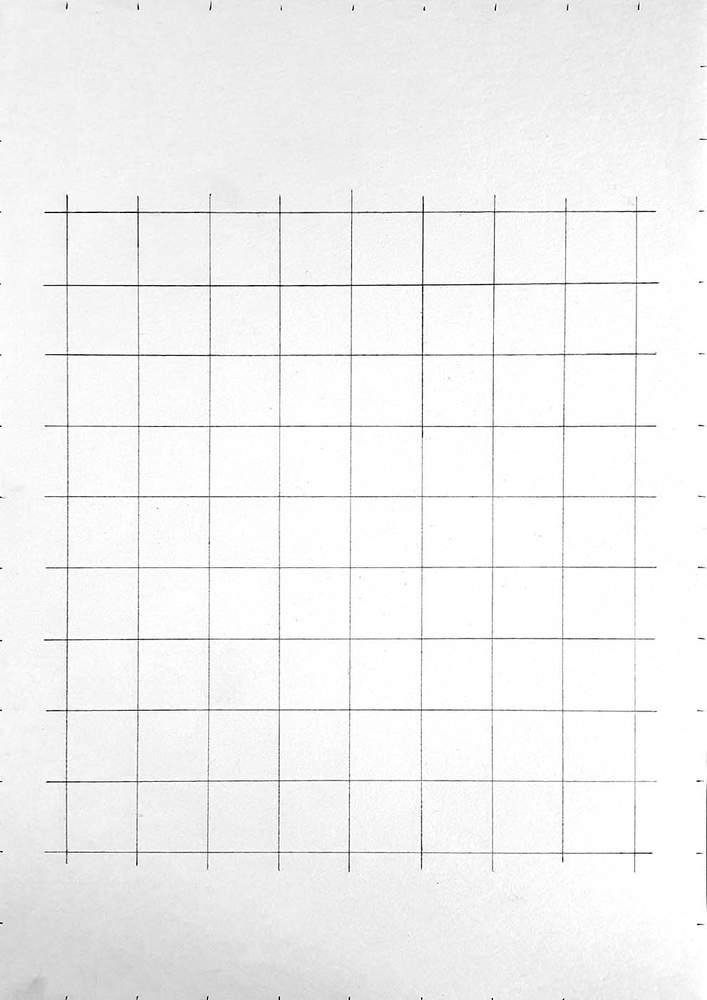
Next, I replicated that grid on my paper but I only drew the squares I needed for the sketch.
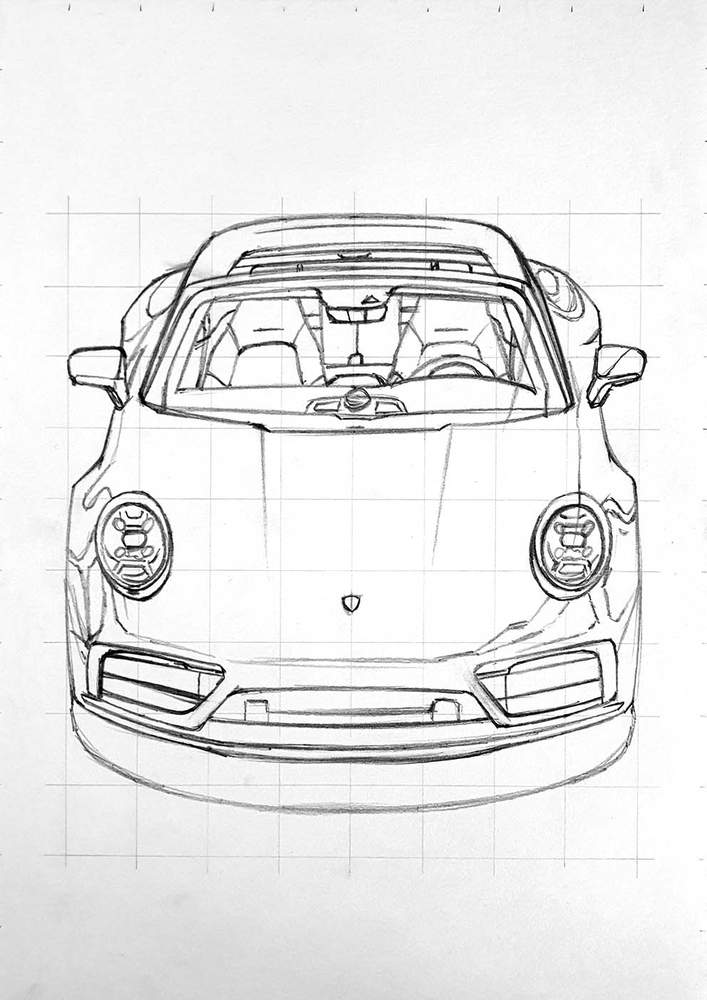
After that, I started sketching. First the general outline and then adding more and more details.
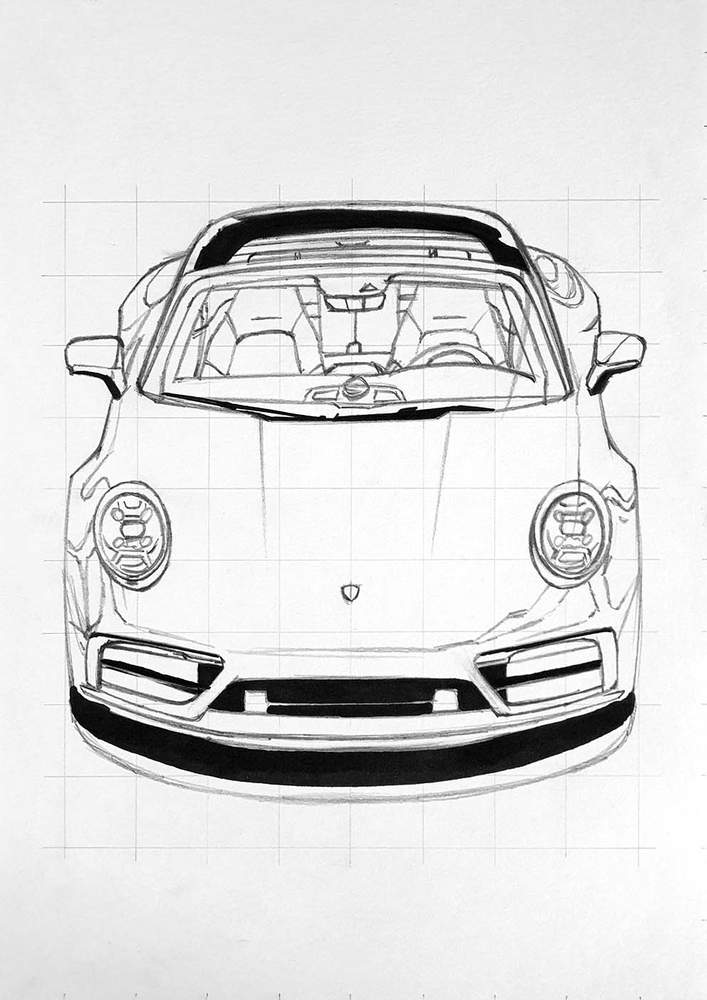
Step 2: Color All Pure Black Parts
I always like to start by coloring all pure black parts. This makes the drawing look less overwhelming and adding the darkest value first makes it easier to judge the rest of the values and colors.
Step 3: Color the Shadow
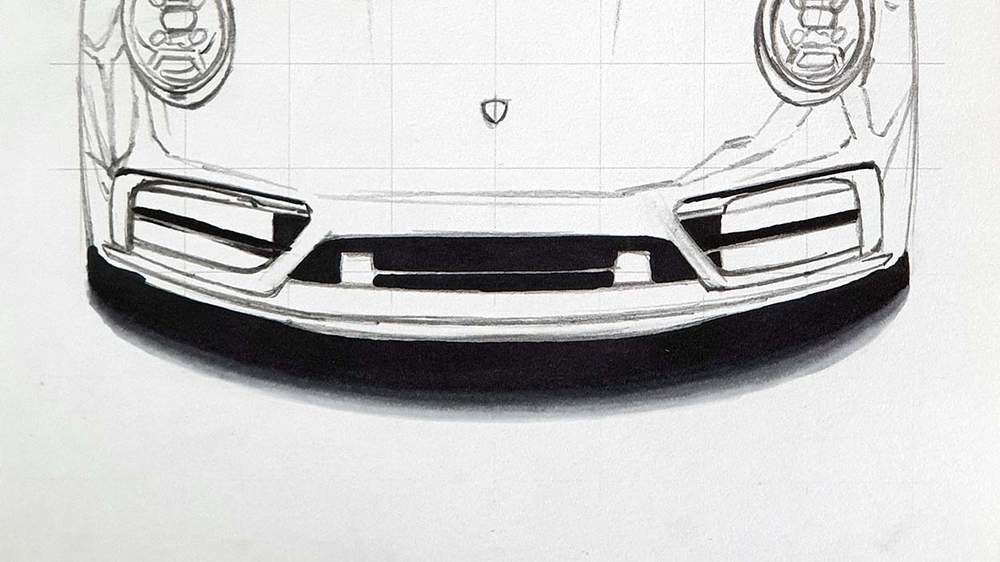
After coloring the darkest parts I started working my way up from the bottom, starting with the shadow.
I first colored the remainder of the shadow with Ice Grey 1.

Next, I added Ice Grey 4 in between the black and the light grey.

Lastly, I blended the Ice Grey 4 into the black using Ice Grey 7 and I blended the edge between Ice Grey 1 and 4 with Ice Grey 2.
Step 4: Color the Front Grills of the Porsche
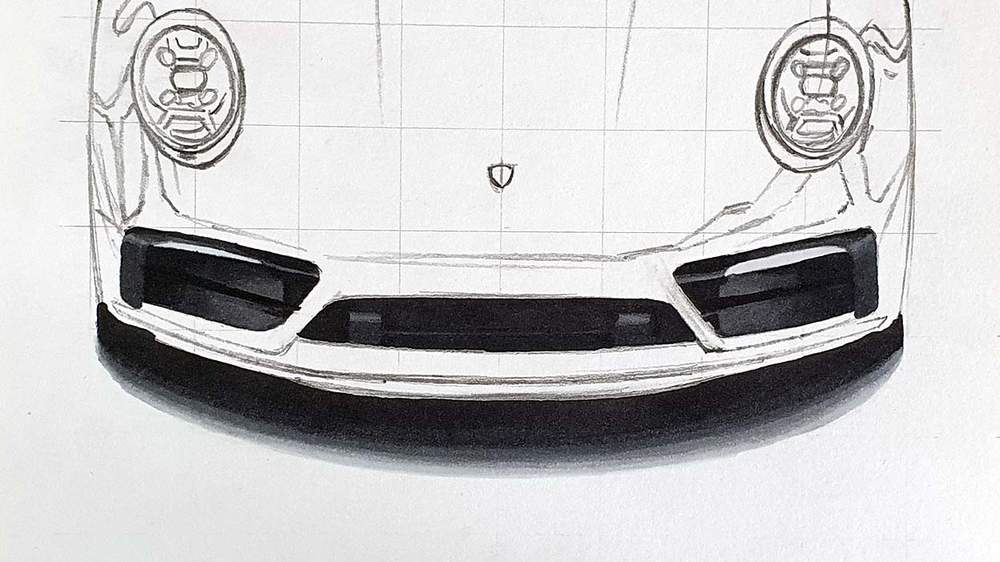
Next up are the front grills.
I started by coloring everything with Ice Grey 4 except the daytime running lights which I colored with Ice Grey 1.

After that, I added some depth by darkening some parts with Ice Grey 7 and Blue Black.
Step 5: Color the Headlights of the Porsche
The next parts to color are the signature Porsche 911 headlights.
I started by coloring the left headlight with Ice Grey 1.
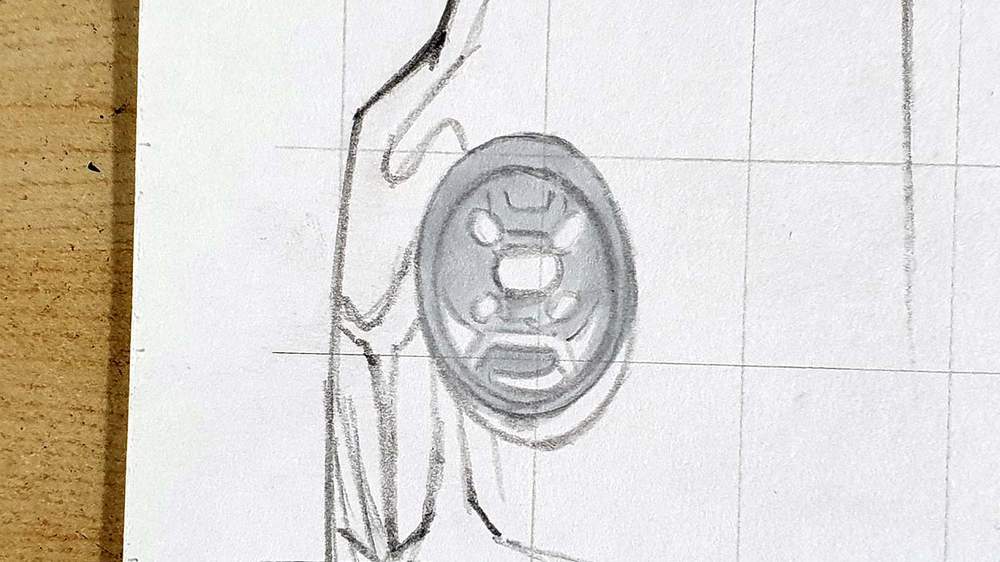
Then I darkened some parts with Ice Grey 4 and Ice Grey 7.
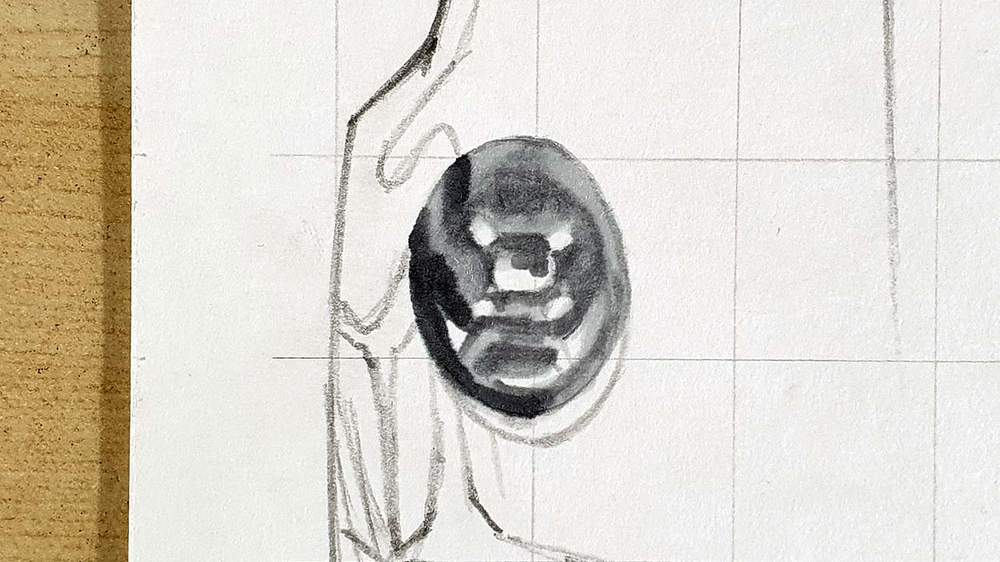
And to finish it off I used Mustard, Raw Sienna, Amethyst, Violet, and Turquoise to add the colorful reflections.
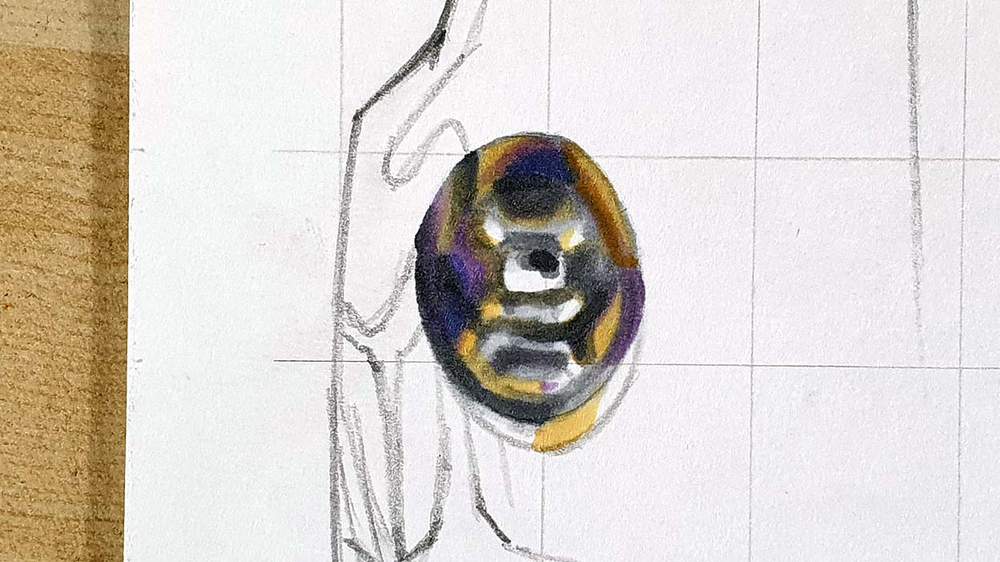
Next, I repeated these steps to color the right headlight.

The headlights are far from perfect right now, but we'll fix that later on.
Step 6: Color the Windshield and the Interior
Next on the list are the interior and the windshield.
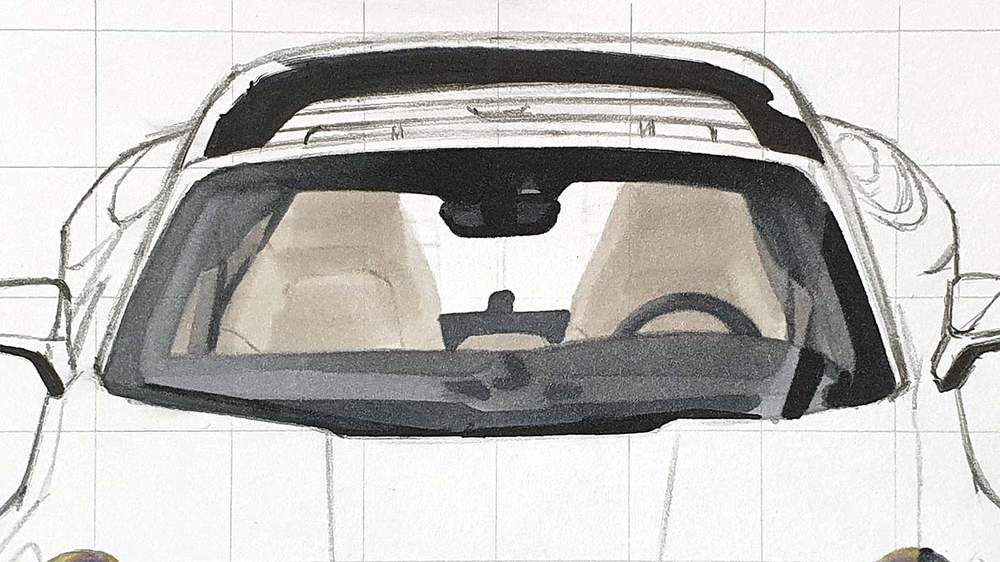
I first colored the seats with Warm Grey 1 and I colored the lightest parts of the windshield and the rest of the interior with Ice Grey 2.
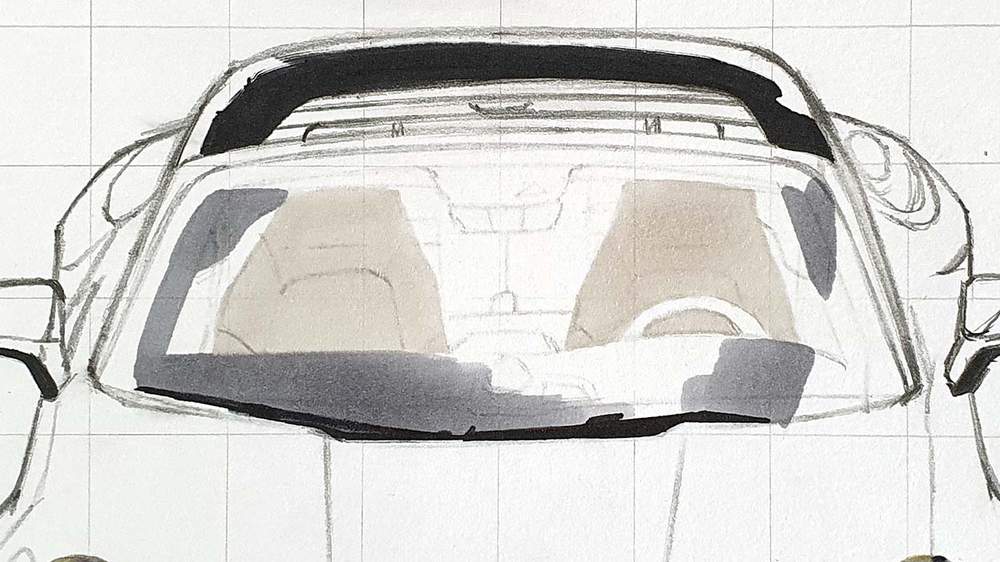
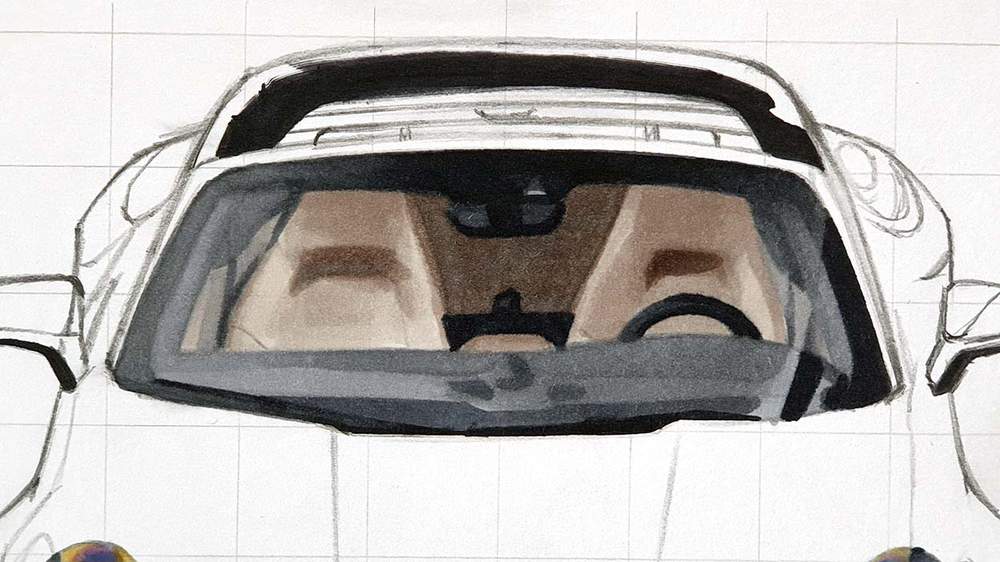
After that, I darkened some parts of the seats with Warm Grey 2 and colored some other bits of the interior with WG2 as well.
I also colored the darker strip around the windshield and some parts of the interior including the uncolored parts of the dashboard with Ice Grey 4.
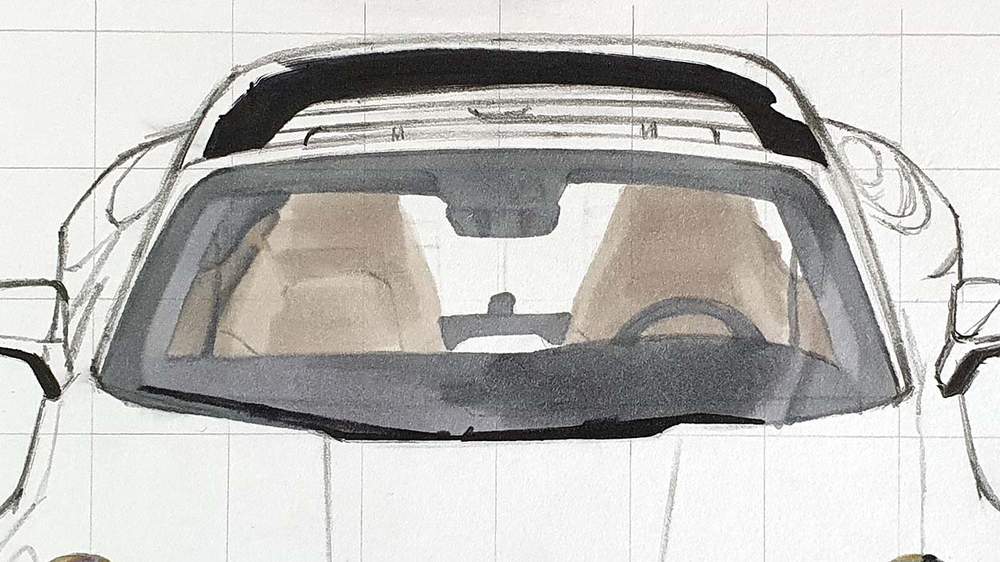
Next, I used Ice Grey 7 and Blue Black to darken the edge of the windshield more as well as some details in the interior like the fans, the steering wheel, and the part below the rear seats.
Lastly, I colored the rear seats by layering Warm Grey 5 and Ice Grey 4 and I darkened some parts of the front seats with Ice Grey 4.
Step 7: Color the Targa Roll Bar
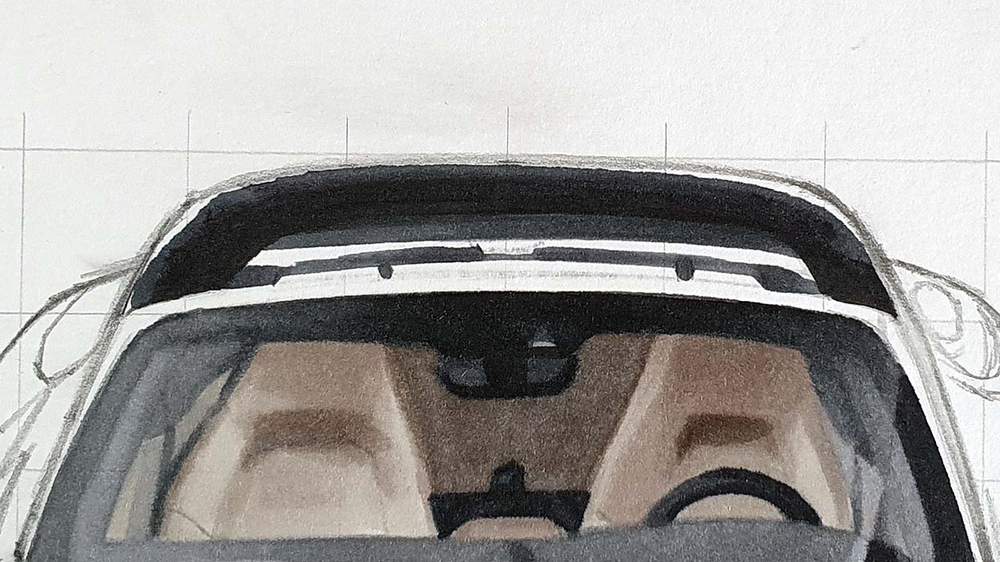
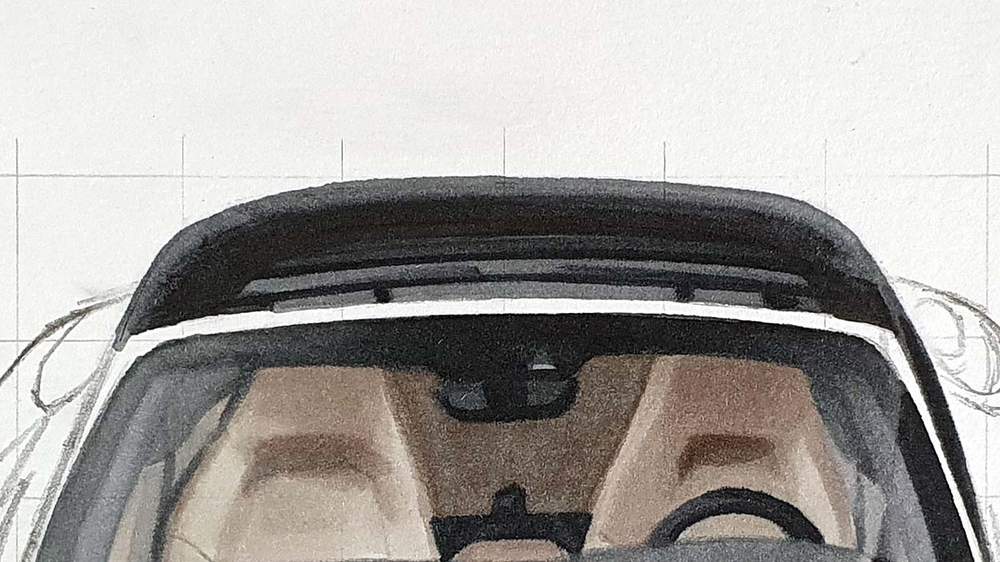
Next, I colored the Targe roll bar and the bits you can see through the Targa window.
I first used Ice Grey 7 to color most of the inside of the roll bar. I left a narrow outside edge uncolored for now. I also colored a few things in between the roll bar and the windshield with IG7.
After that, I colored the remainder of the roll bar and the rear window with Ice Grey 4.
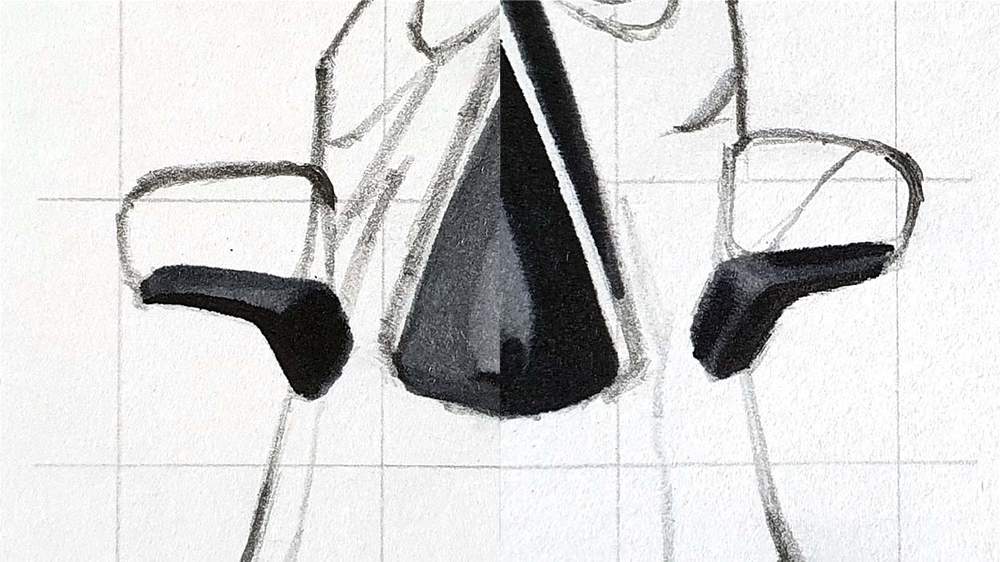
Step 8: Color the Door Mirrors
Now it's time to color the door mirrors.
I used Ice Grey 4 to color the lightest parts of the mirrors and Ice Grey 7 and Black for the darker parts.
There's not really much more to it than this.
Step 9: Color the Porsche Logo
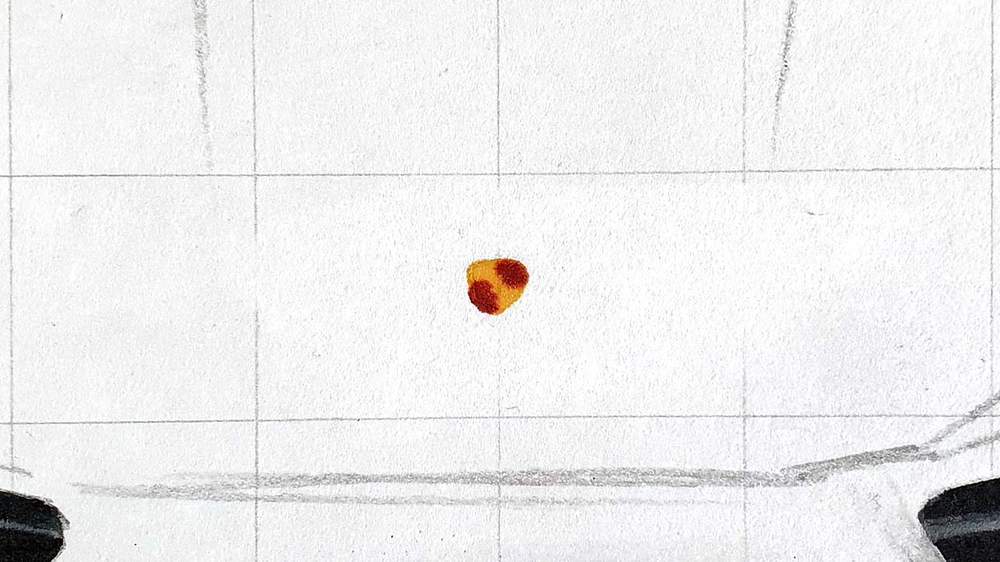
And the last thing to color before we start coloring the main body is the logo on the hood.
I first colored the whole logo with Mustard and then I darkened the top right and bottom left corners with Burgundy.
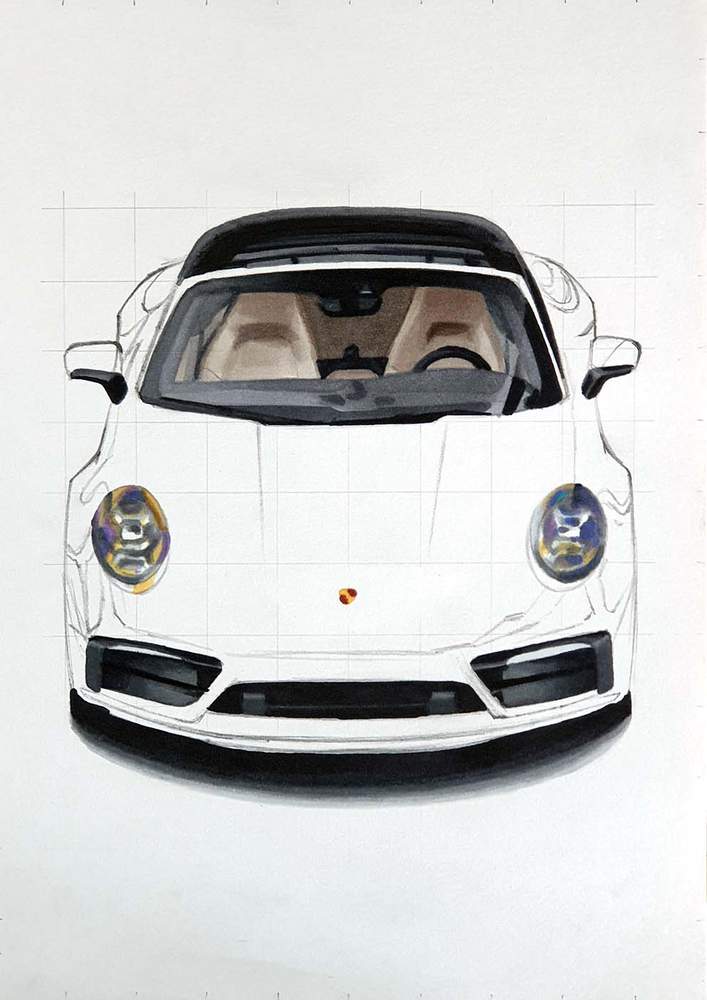
Step 10: Color the Main Body of the Porsche
Now that all non-body colored parts are colored it's finally time to color the main body of the car and add some color to this drawing.
I started by coloring the whole main body of the car with Marsh Green. It does look a bit uneven now, but that's not a problem.
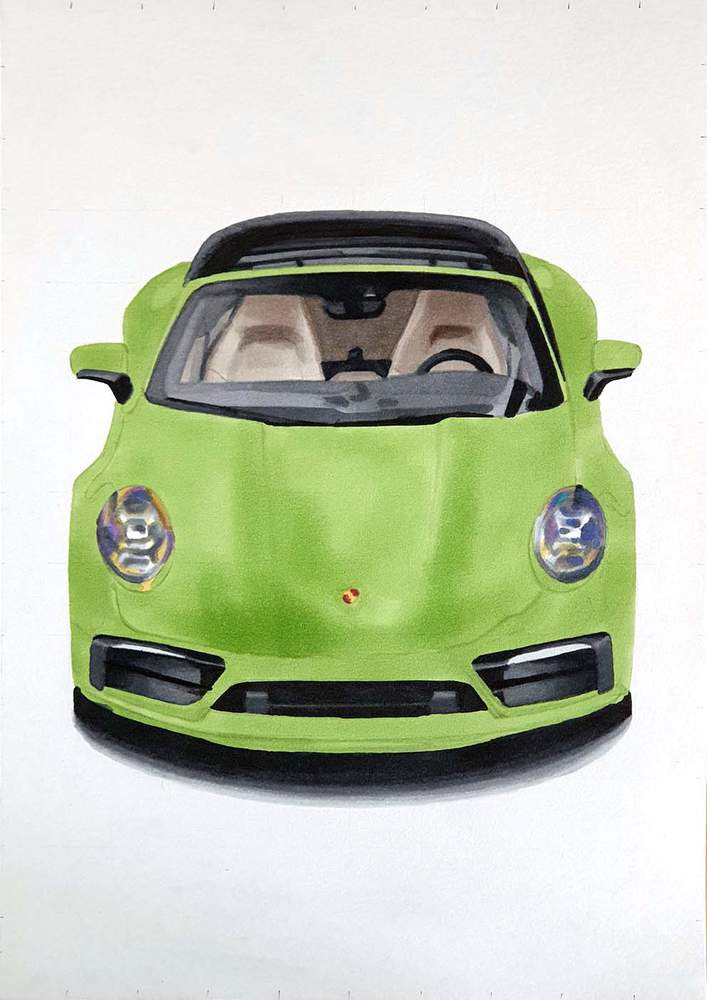
After that, I colored all reflections on the body with Forest Green and I darkened the middle part of the hood too.
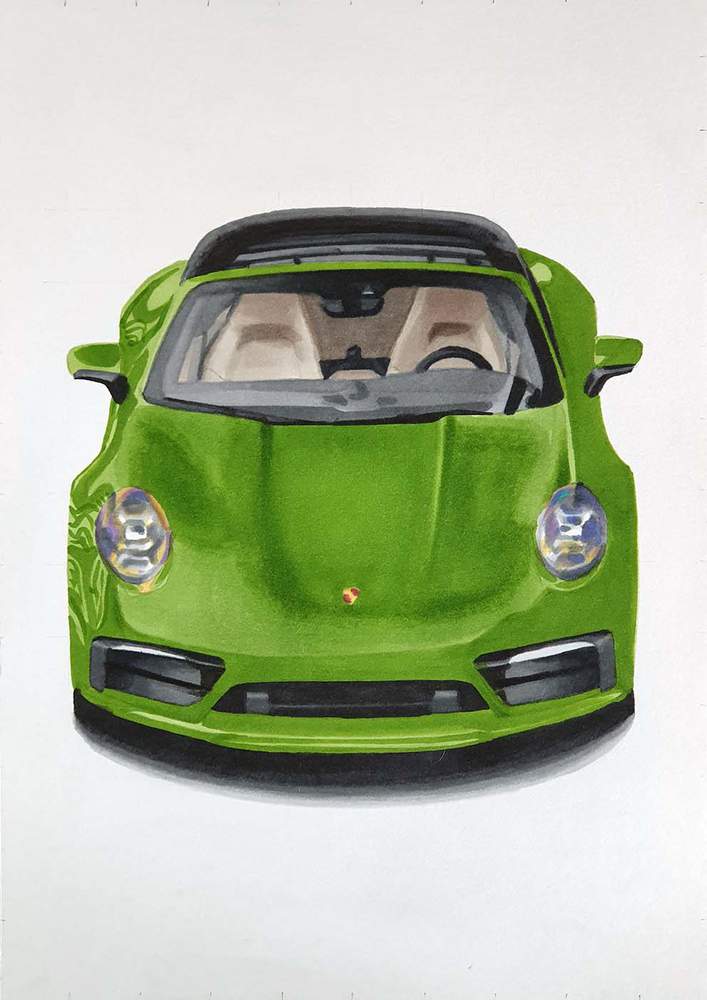
And lastly, I darkened all reflections with Pesto as well as the center of the darker spots on the hood.
Pesto isn't really the right color for this drawing as it is way too yellow, but it's the closest Promarker I could find. To make it look less yellow I layered Forest Green over it.
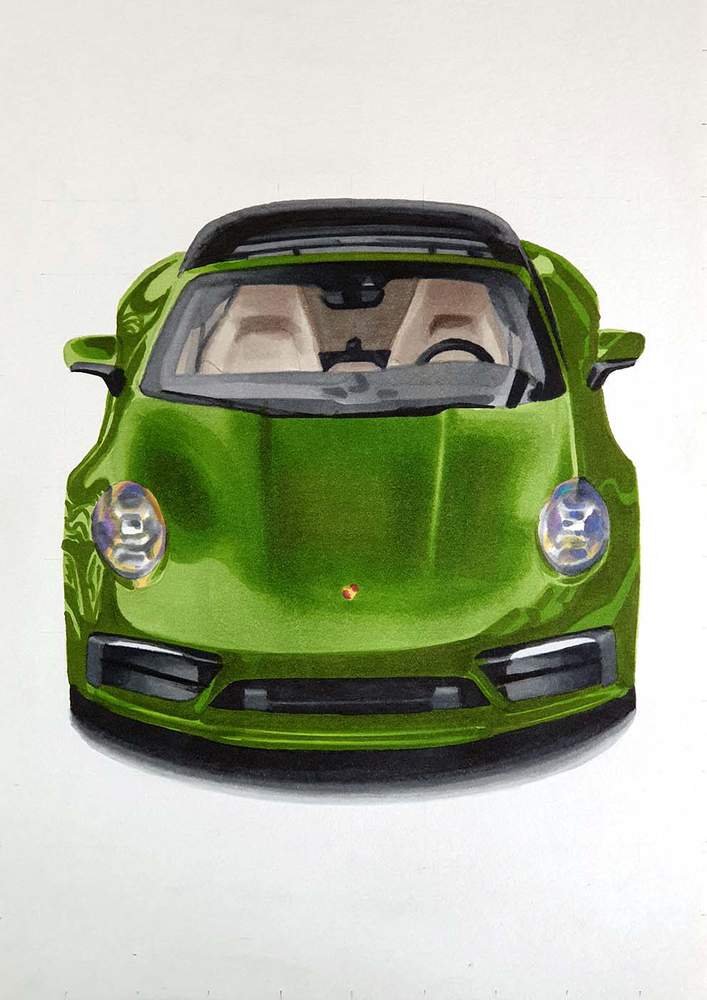
And now the body's fully colored already.
Step 11: Add Details with Colored Pencils
The next thing we need to do is add details. This will make the whole drawing come together and look less messy.
I added some white and black details to the daytime running lights and the headlights. I also added some black lines on the left and right front grills. I refined some reflections with Black, White, and Dove Grey. And I refined the hood lines with White.
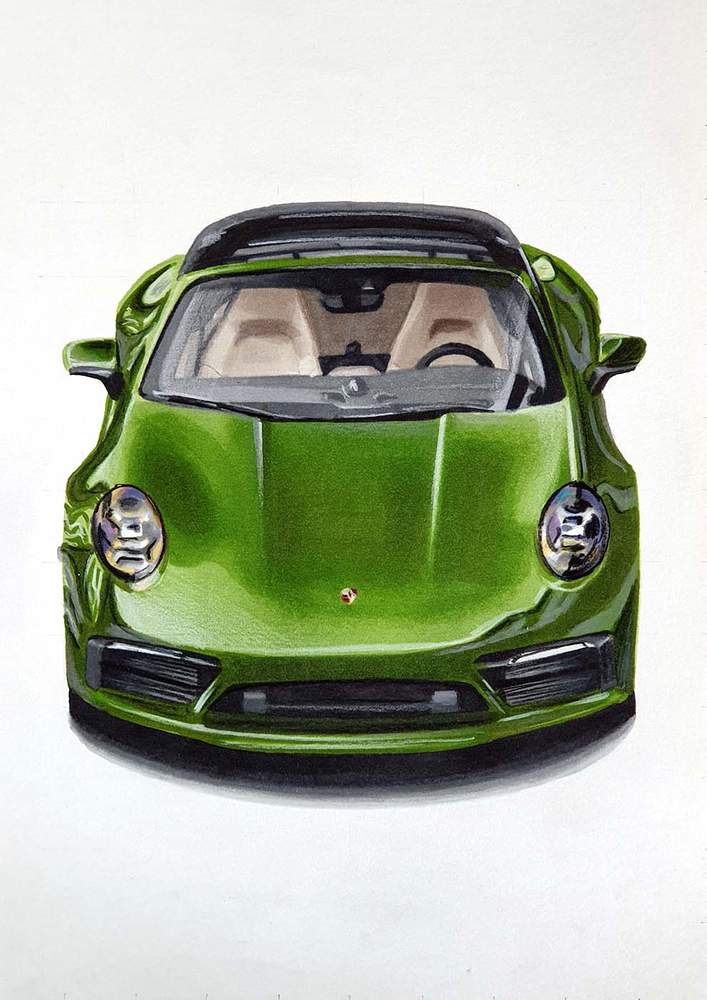
I forgot to draw the hood lines and other panel gaps as well as the details on the seats... I've added those later, but I just noticed I messed them up a bit so I'll have the fix them...
Step 12: Add White Highlights
And the last thing to do is add some white highlights with a Posca paint marker to make the drawing fully come to life.
I added white in the headlights and the daytime running lights and added a few reflections on the paintwork as well.
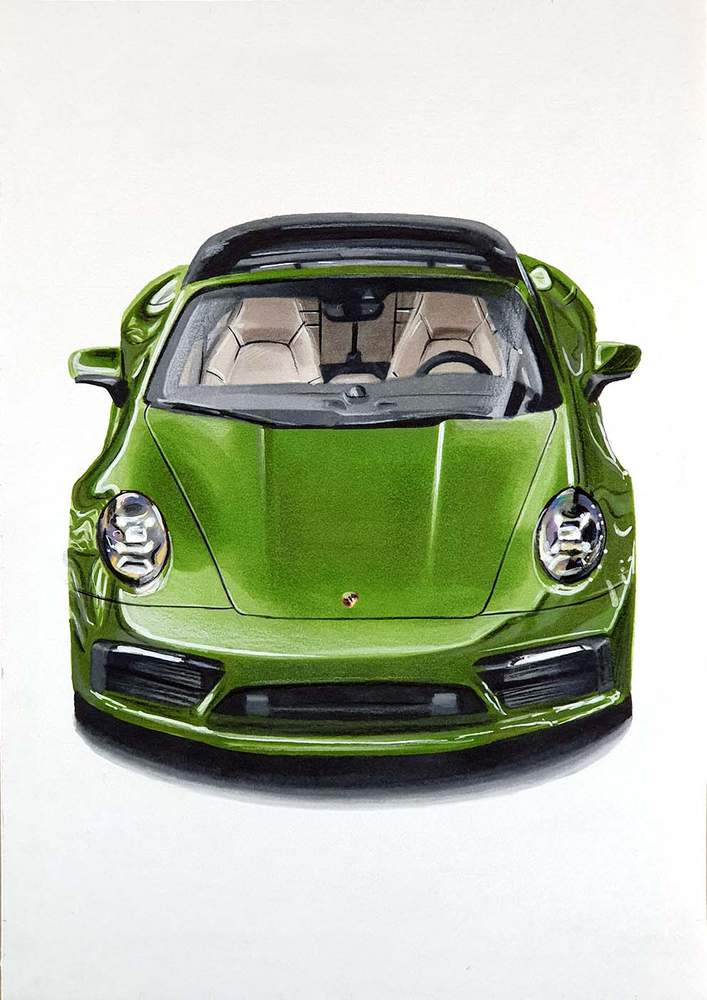
And That's How You Draw a Porsche
At least that's how I like to draw Porsches. There are many techniques and other ways you can draw it, but this is for me the best balance between easiness and realism.
I hope this was helpful to you!
If you followed along with me and decide to share your drawing on Instagram, I love to see it, so please tag me (@luukminkman) in your post.
I'd really appreciate it if you could share this with someone who might also like this tutorial. It would help me out a lot.
.jpg__500x500_q85_crop_subsampling-2.jpg)



Be the first to comment!
Comments
There are no comments yet.