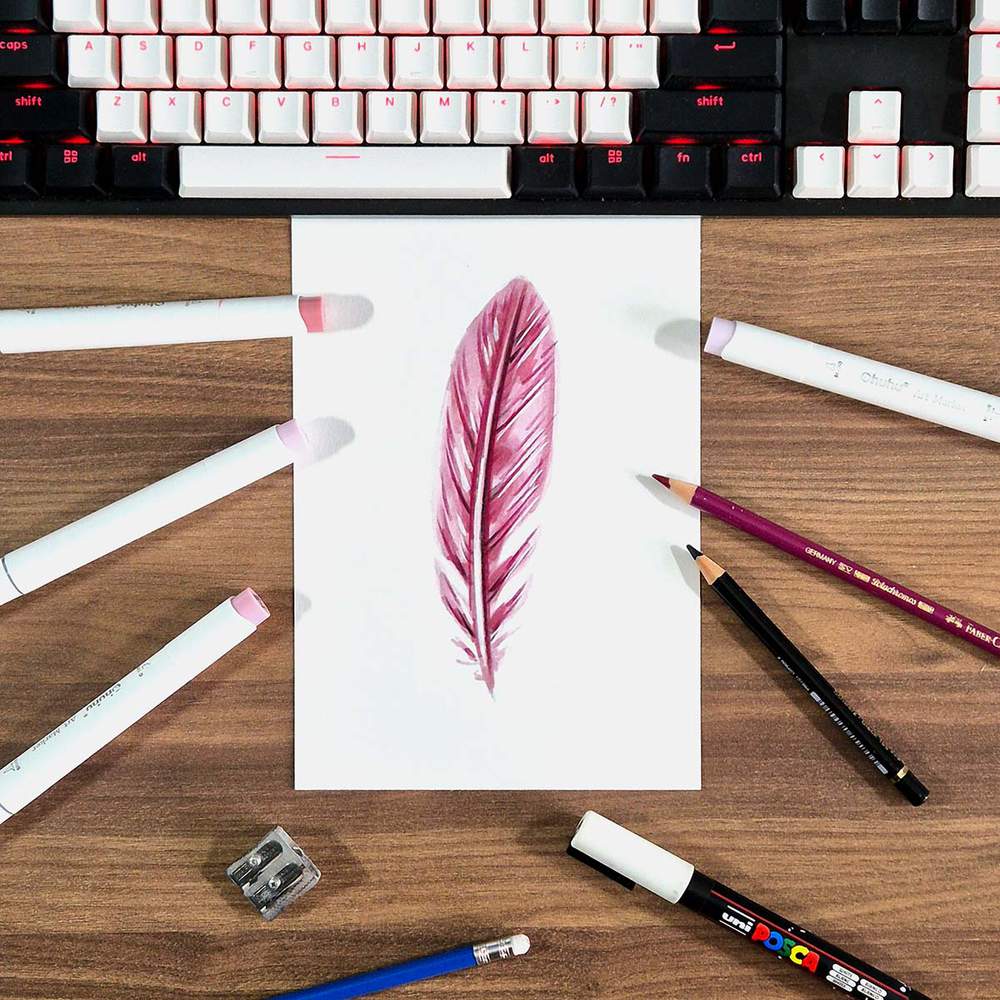
How to Draw a Feather - Step by Step Guide for Beginners
In this drawing guide, I'll show you an easy way to draw a feather step by step with just a few art supplies.
From shaping your feather to coloring and adding details to make it look more realistic, I'll cover it all in this guide.
Let's get started!
Disclaimer: In the name of full transparency, please be aware that this blog post contains affiliate links and any purchases made through such links will result in a small commission for me (at no extra cost for you).
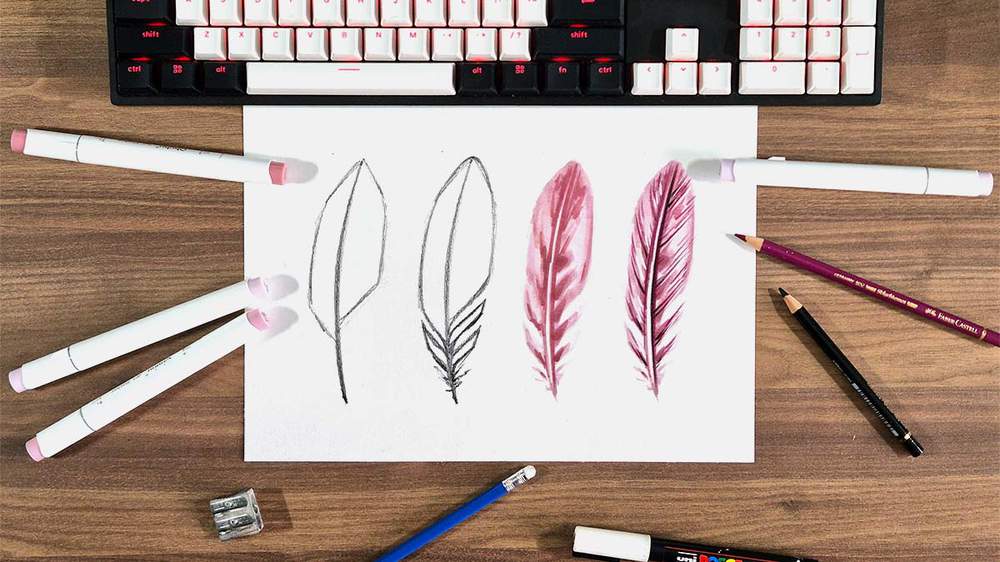
Drawing Supplies I Used in This Guide
To make this feather drawing, I used Ohuhu Honolulu markers in the colors Grayish Cherry (R242), Baby Blossoms (R270), and Currant (R280).
You can also buy these colors individually on their website.
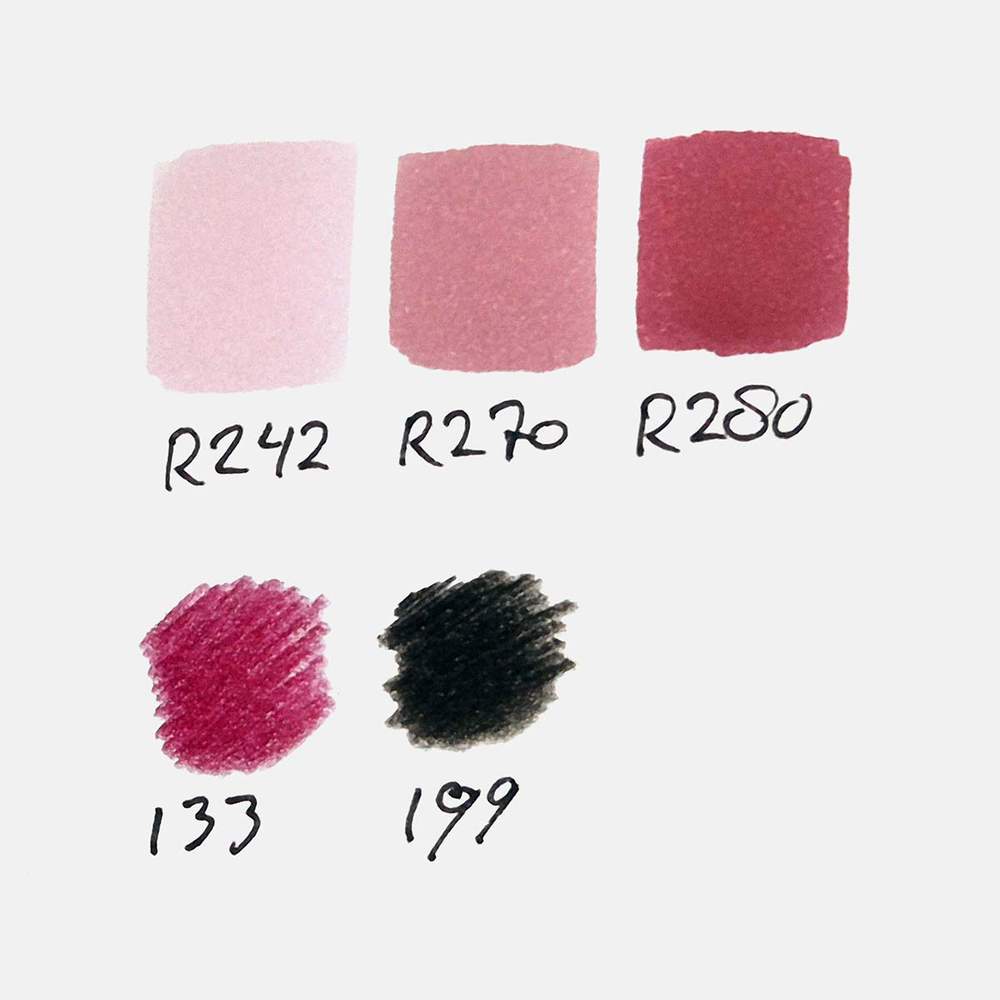
To add the feather texture, I used the Faber-Castell Polychromos in the colors Black 199 and Magenta 133.
I also used a white Posca PC-3M paint pen to add white highlights.
And I made this drawing on Canson Illustration Manga Paper.
I also used an eraser and a regular pencil.
How to Draw a Feather Step by Step?

Step 1: Draw a Long Curved Line for the Base of the Feather
To start a feather drawing, it's easiest if you sketch the base of the feather first, which consists of the quill at the bottom and the shaft at the top.
I sketched mine as one long, slightly curved line in the middle of my paper.
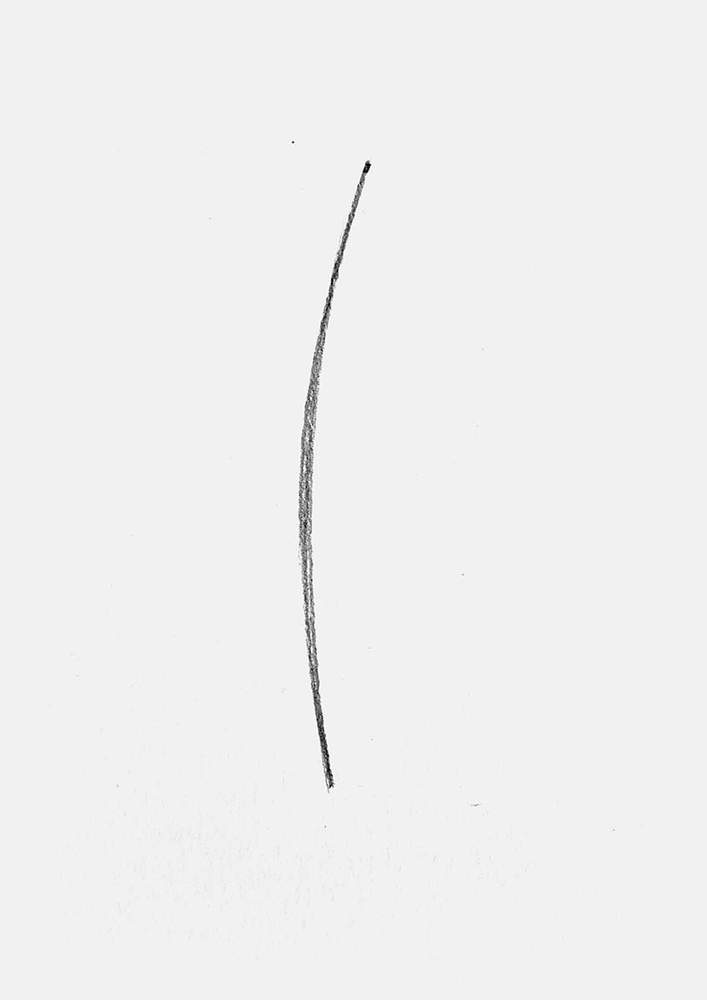
Next, I wanted to add some thickness to the quill at the bottom and make it end in a sharp point. But I forgot to take a photo... You can see it in the next step.
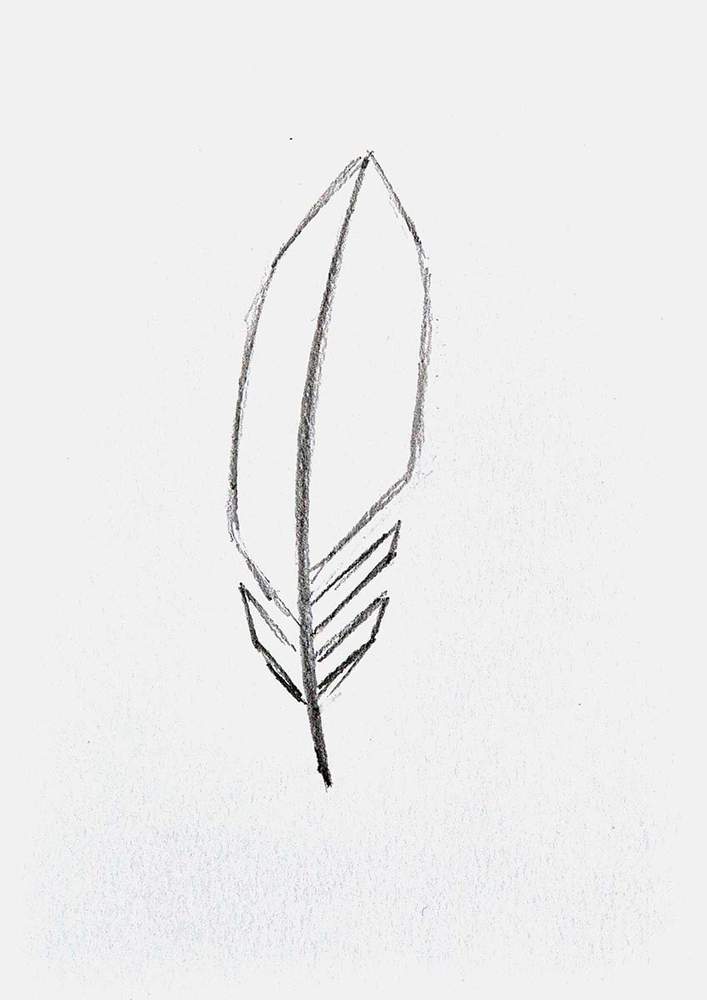
Step 2: Mark Out the Basic Shape of the Feather Outline
With the shaft now in place, we can start to add the barbs.
I started with a simple feather-like shape on each side.
From the top, I drew a line diagonally down away from the shaft, then a line parallel to the shaft, and at about 2/3 of the way down, I connected it back to the shaft.
I made one side longer than the other to make the feather look more interesting.
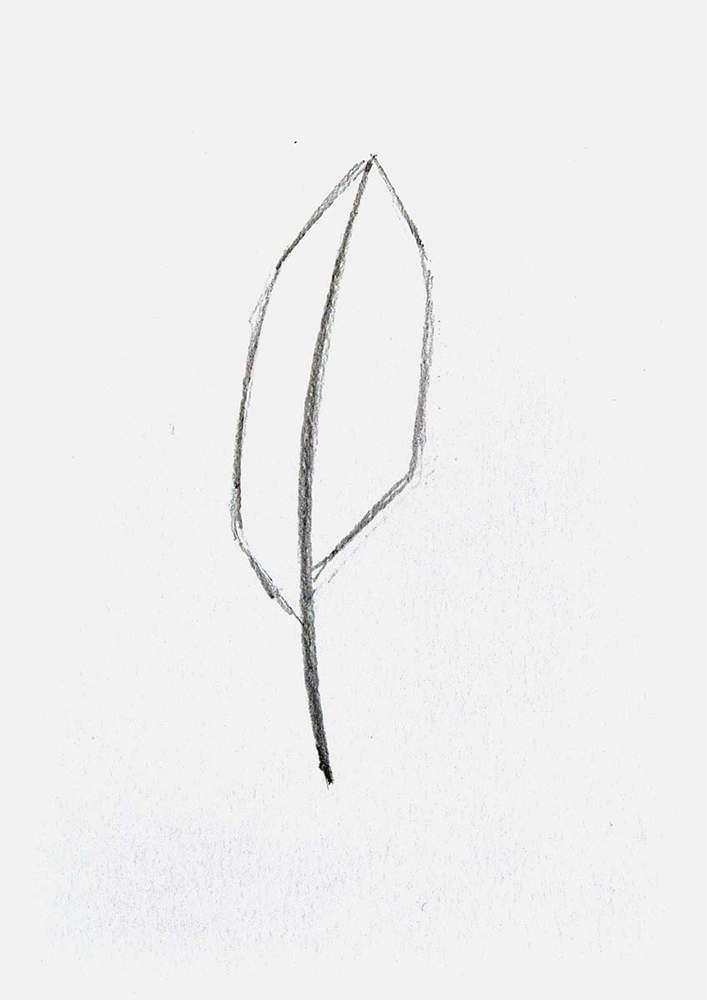
In the image above, you can also see the little sharp point on the bottom end of the quill.
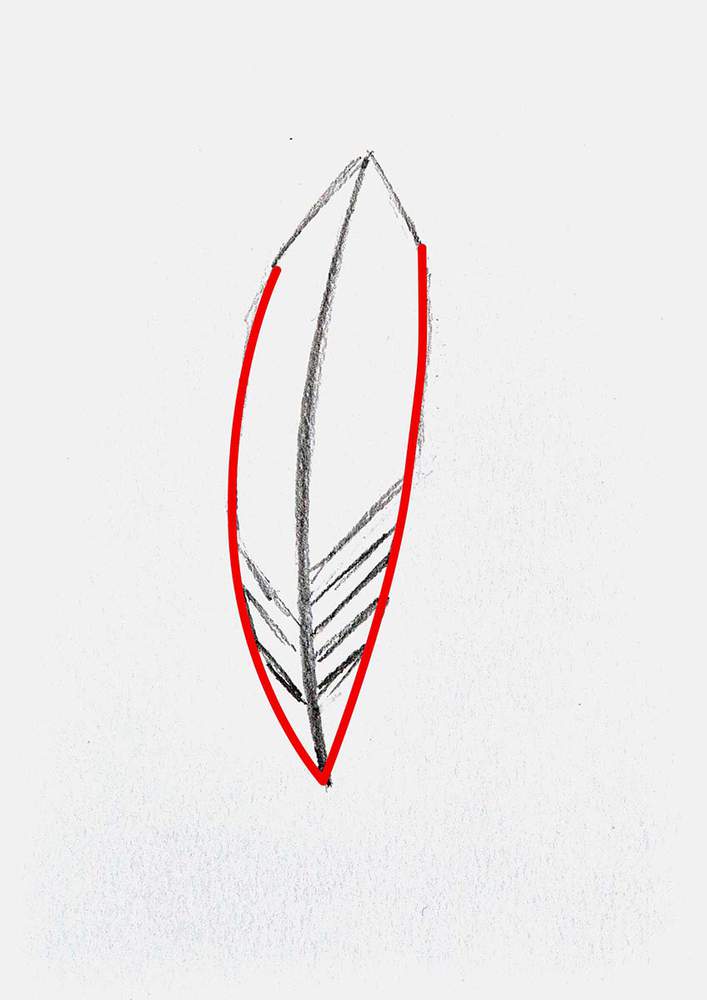
Step 3: Add Some Loose Feather Barb Patches
No feather is perfect. They always have some barbs come loose from the others.
To replicate this, I added 1 loose barb patch on the left and 2 on the right.
I made sure to make the edges follow the shape of the feather, which I marked in red in the image below.
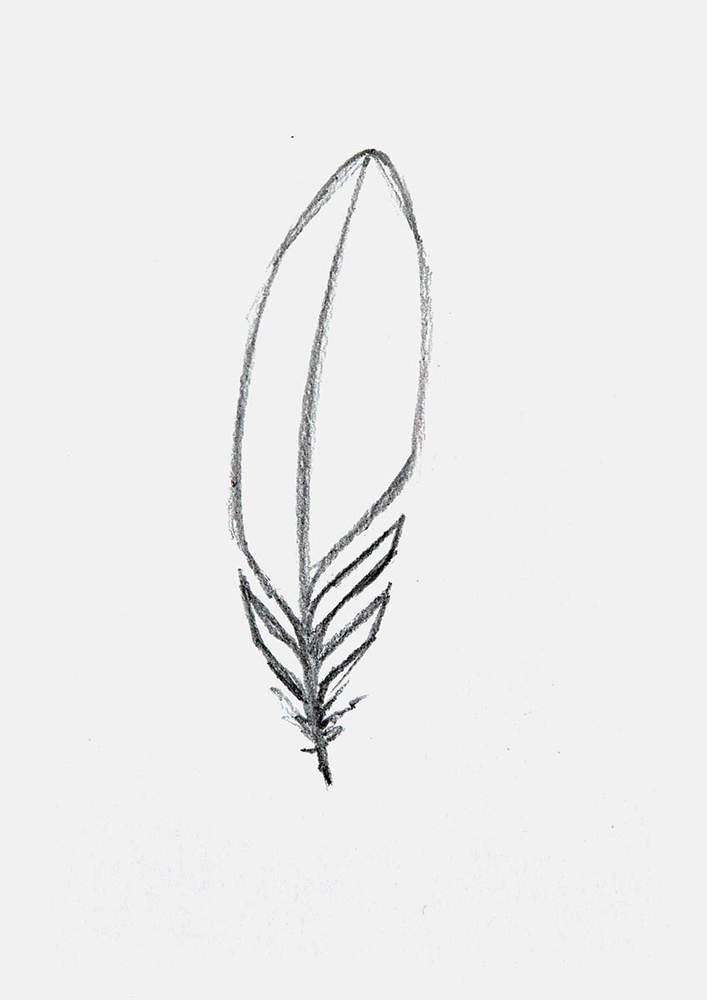
Step 4: Round the Feather Shape
To make the feather's edges less harsh, I rounded them.
And to complete the sketch, I also added some of those soft afterfeathers on the bottom end of the feather.
Step 5: Color & Shade the Feather with Markers
With the sketch now complete, we can start to bring it to life with some color.
To do this, I used my go-to alcohol-based markers: the Ohuhu Honolulu markers.
I used 3 different shades of this old pinkish red called Grayish Cherry (R242), Baby Blossoms (R270), and Currant (R280). You can buy these colors individually here.
Before I colored the feather, I first lightened the sketch with an eraser.
Then, I colored the whole feather with the lightest red: Grayish Cherry (R242).
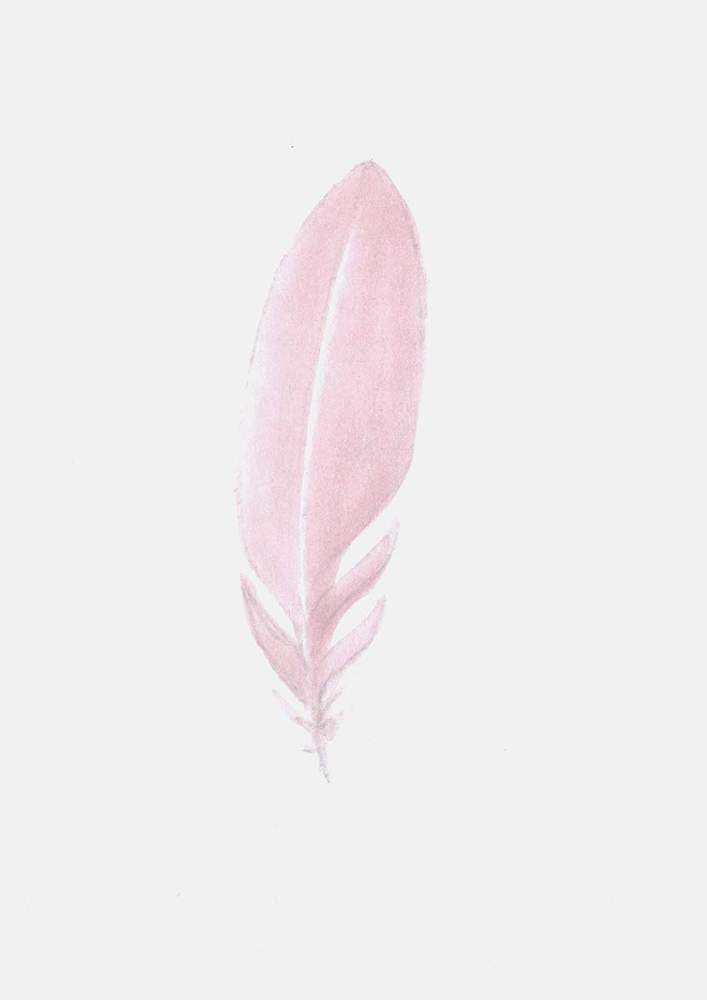
Next, I added some shading to the top and the right edges, and I added this stripy pattern along the shaft of the feather with Baby Blossoms (R270).
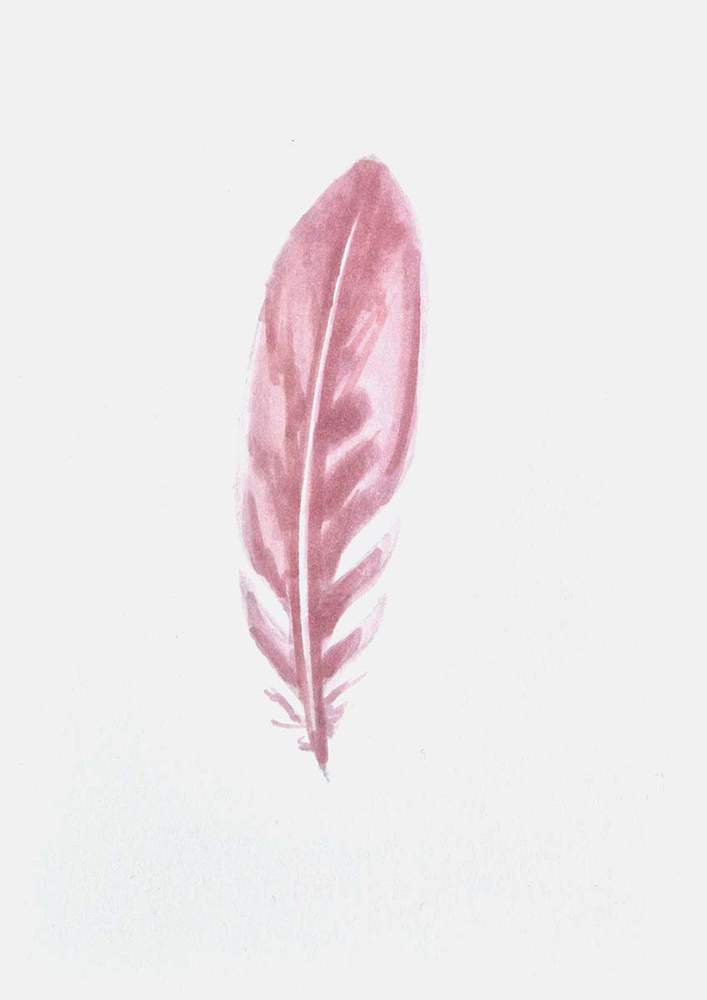
And lastly, I used the darkest red, Currant (R280), to add some final shading and details. I mainly darkened the stripy pattern and the top of the feather.
For the top, I made sure to use light pressure and create these scribbly lines.
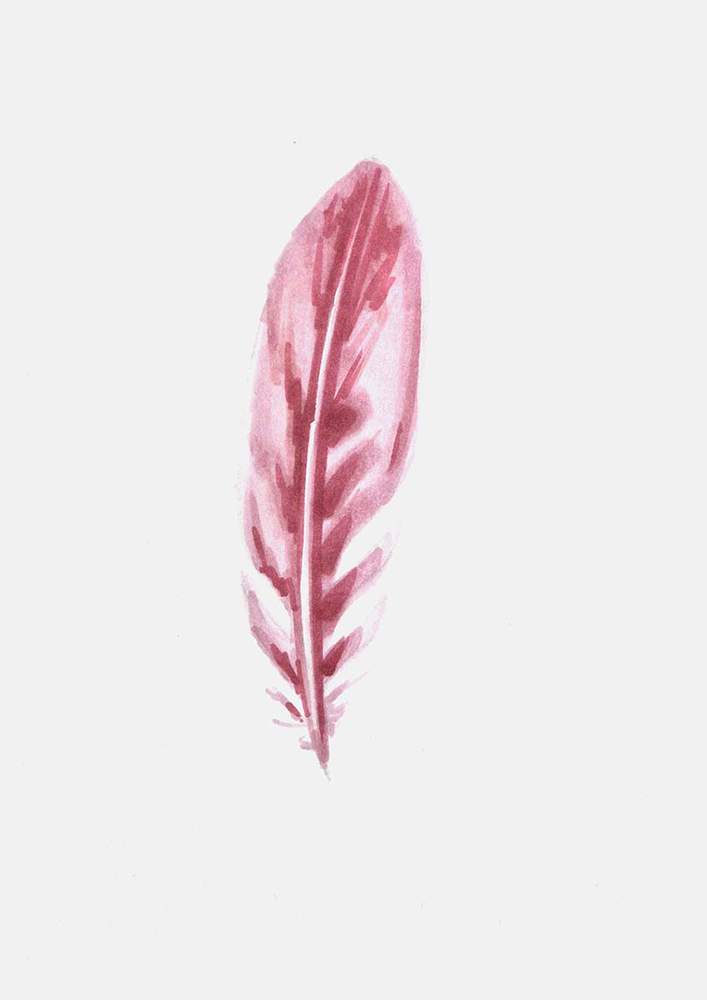
Step 6: Add Colored Pencil Details for a More Realistic Look
The feather drawing looks really soft at the moment, and it has no detail.
But there is an easy fix for this: colored pencils.
With just 2 colored pencils, you can easily draw the feather details and give it a realistic feather texture
I used my Magenta Faber-Castell Polychromos colored pencil to add a few parallel lines along the barbs, careful to not overdo it.
I also used my Black Polychromos pencil to add some more depth to the feather by adding just a few black lines in the barbs, and I drew a black line to the right of the shaft.
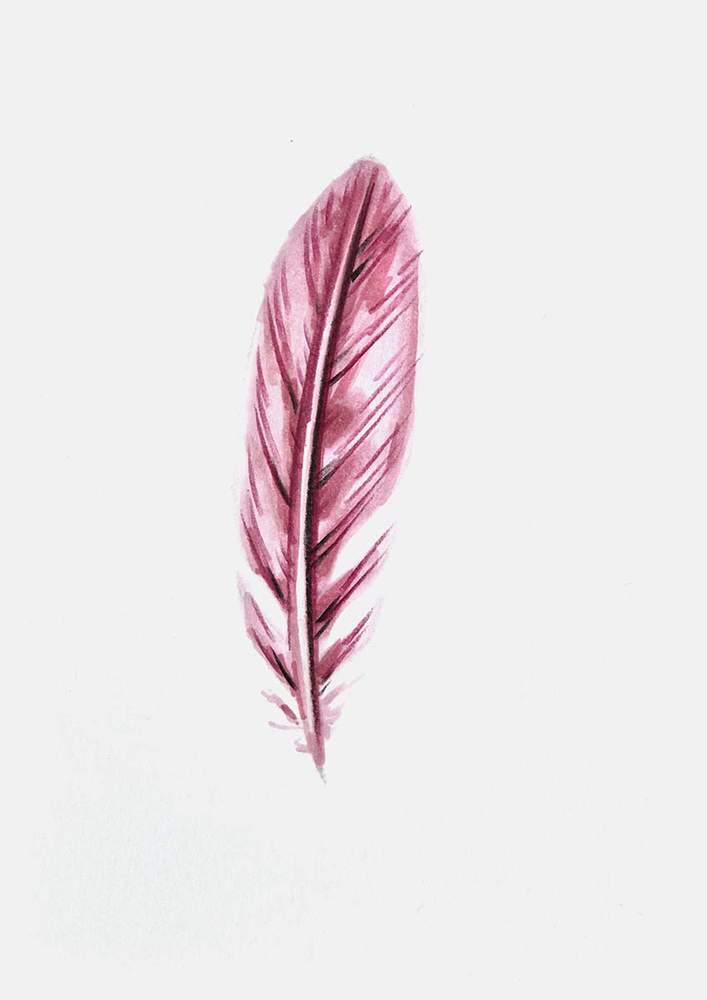
Just doing these simple things made the feather drawing look so much more realistic and complete.
But there is one simple thing we can do to make it look slightly better.
Step 7: Add Some Final Highlights to the Feather Drawing
To finish off this feather drawing, I added just a few white highlights to the barbs.
On the right side, I added them mostly to the right edge of the feather, and on the left half, I added them close to the shaft.
I also added a highlight along the shaft.
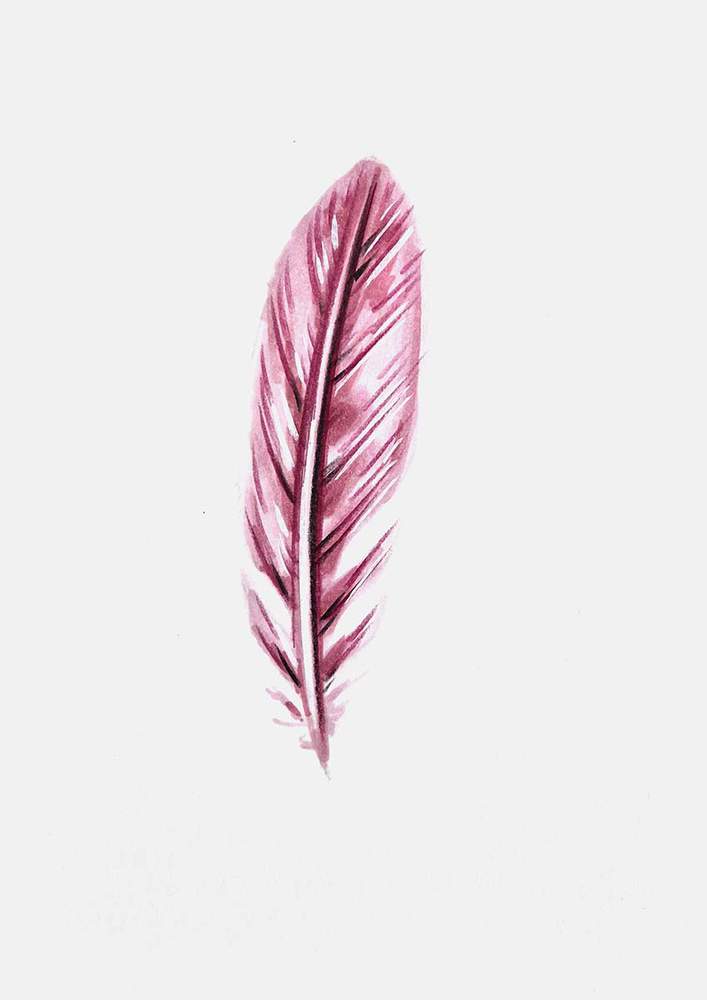
And that's the feather drawing all done!
I hope you liked this simple and semi-realistic feather drawing guide. How did your drawing turn out?
If you enjoyed this drawing tutorial, you might also like my other step-by-step guides.
Thank you!
Articles You Might Also Like


I love bringing cars to life with alcohol markers and colored pencils.
Whether you're just starting out or looking to improve your skills, I'm here to help!
Click here to learn more about me.


Be the first to comment!
Comments
There are no comments yet.