Stunning Butterfly Drawing Guide for Beginners
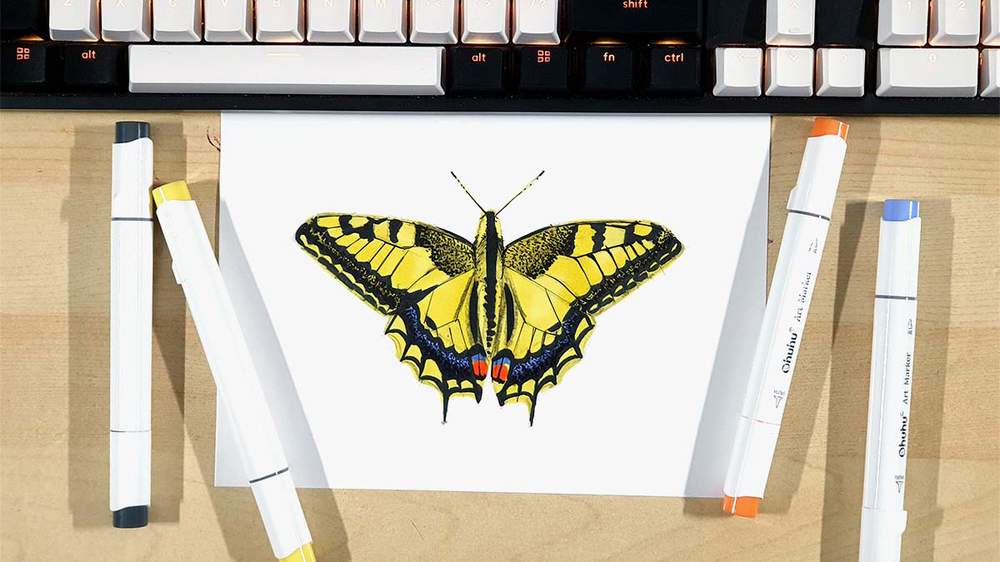
In this step-by-step guide, I'm going to show you how to draw a beautiful butterfly with this intricate pattern on its wings.
This drawing isn't as difficult as it might seem at first, but I've broken everything up into easy-to-follow steps so you can draw a butterfly just as well as I did.
Let's get drawing!
Disclaimer: In the name of full transparency, please be aware that this blog post contains affiliate links and any purchases made through such links will result in a small commission for me (at no extra cost for you).
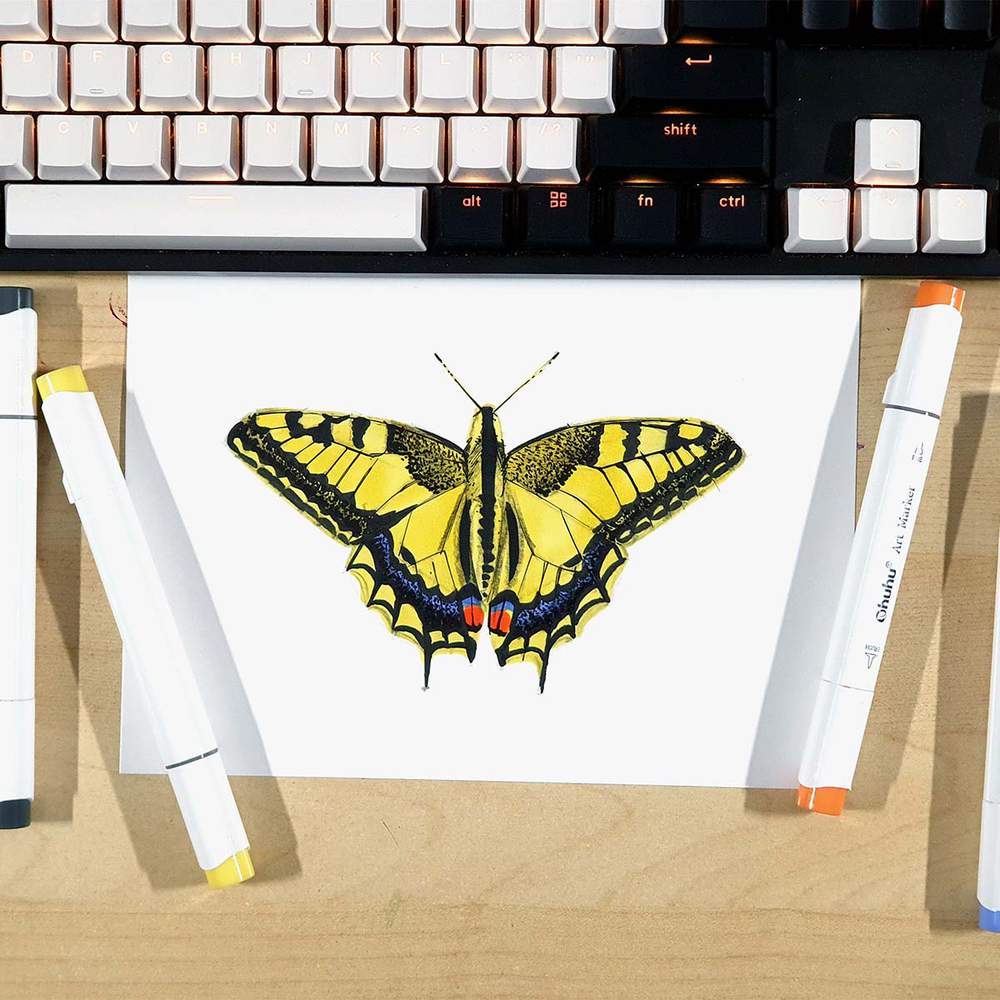
Drawing Supplies I Used To Draw This Butterfly
To draw this butterfly, I used Ohuhu Honolulu markers in the colors 120 Black, B350 Cornflower Blue, YR190 Cadmium Orange, and Y050 Summer Lemon.
If you're on a tighter budget, these Caliart markers seem like a good and cheap alternative.
I also used a black fineliner for the finer black details.
And I made this drawing on Canson Illustration Manga paper.
How Do You Draw A Butterfly?
To draw a butterfly, you first mark some key points of the wings and the body. Then you sketch the body and the wings. Next, you add texture to the wings and start planning out the patterns. After that, you color the butterfly with markers. Lastly, you add a few details with a black fineliner.
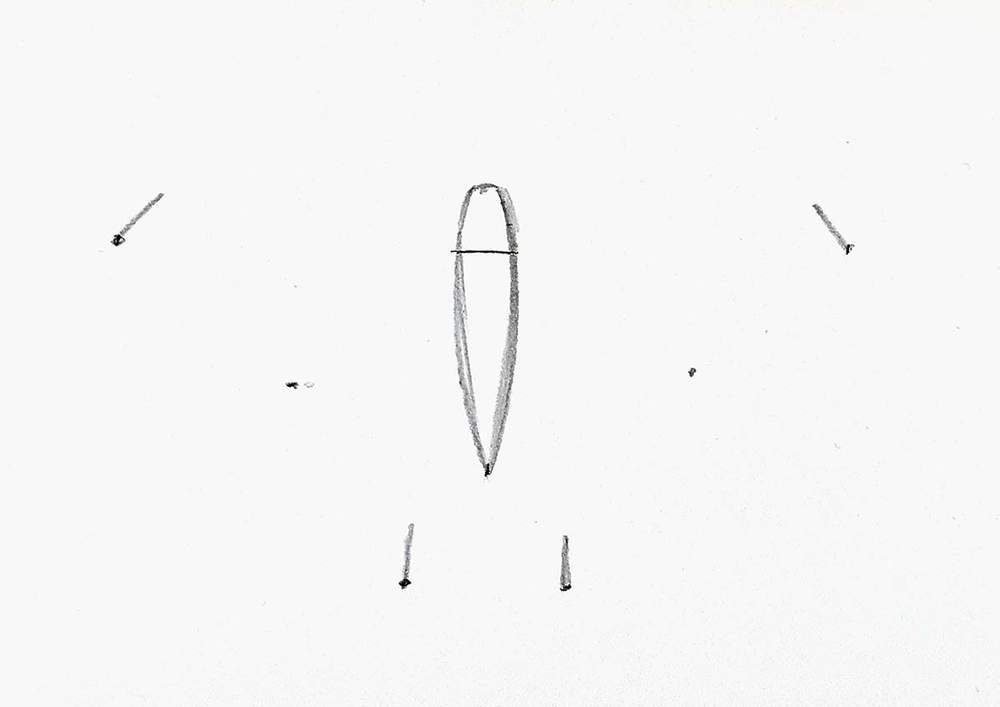
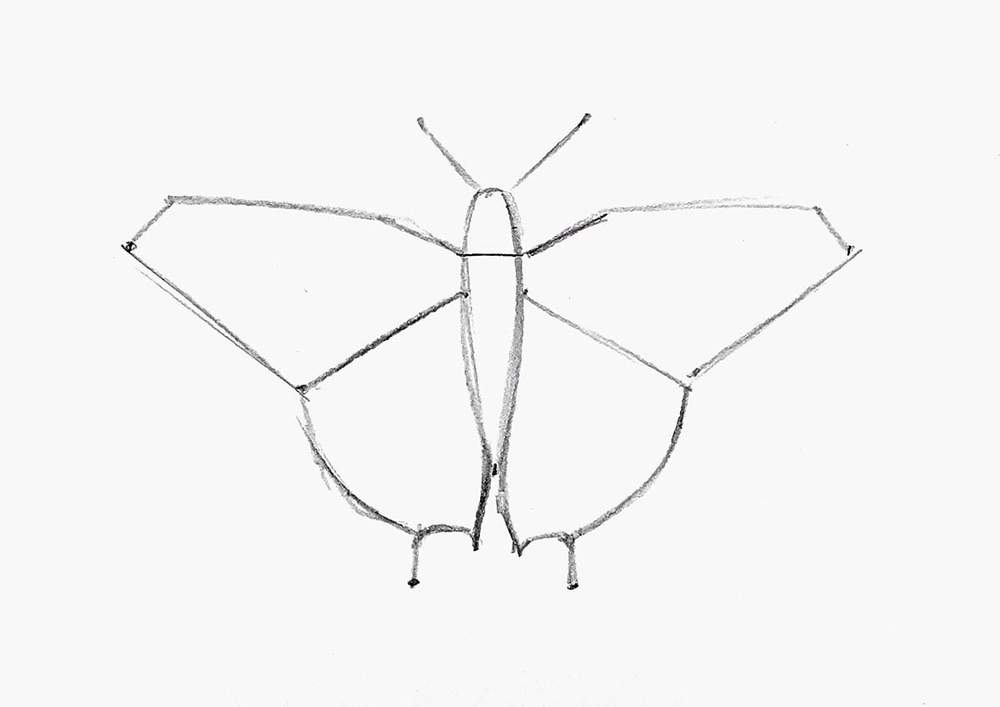
Step 1: Mark Some Key Points
To draw this butterfly, I started by marking some key points.
I first marked the thickness of the body of the butterfly with a short horizontal line just above the center of the paper.
Next, I marked the far left and right tips of the wings and the two tips on the bottom.
I also marked the bottom of the body of the butterfly.

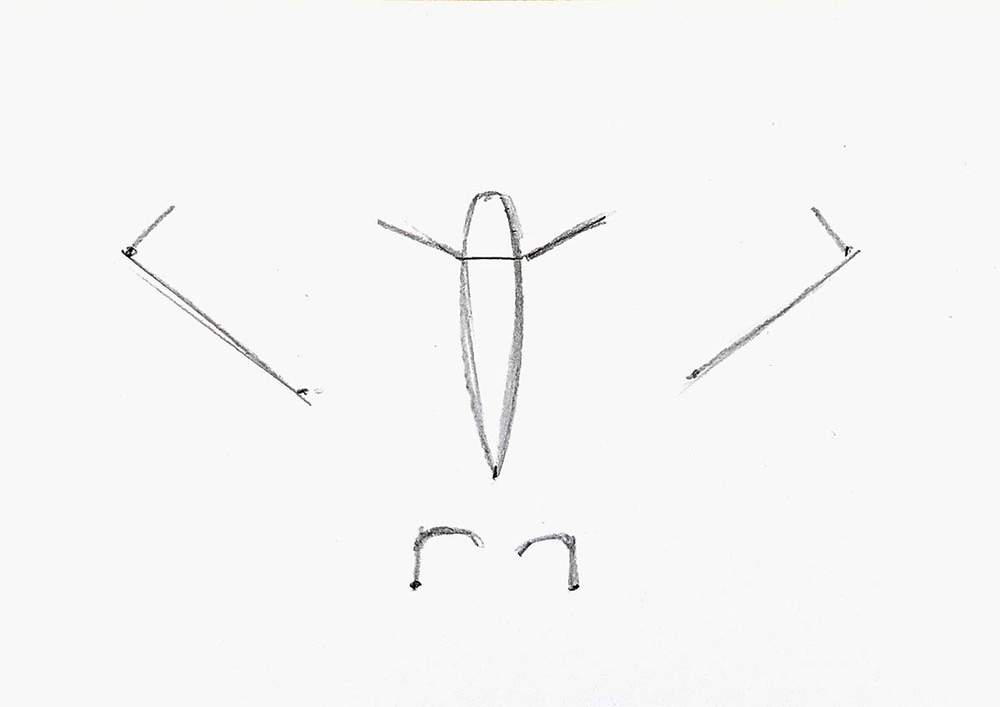
Step 2: Sketch The Body Of The Butterfly
Next, I sketched the body of the butterfly.
And I sketched the start of the wings on the right and on the bottom.
I also added a dot to either side of the body where the 2 wings intersect.
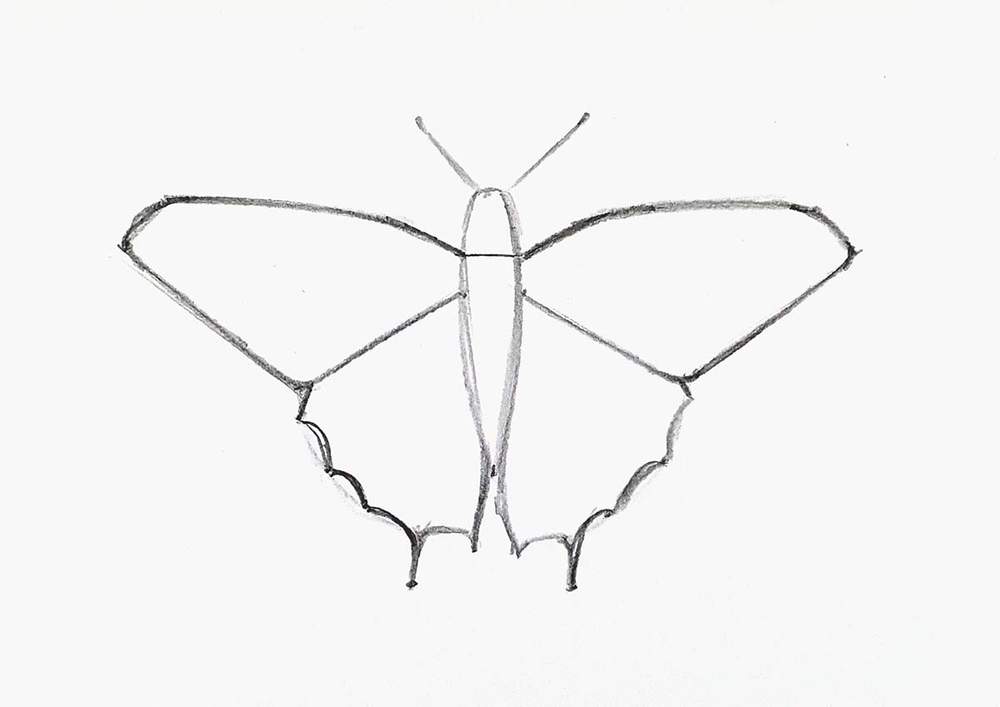
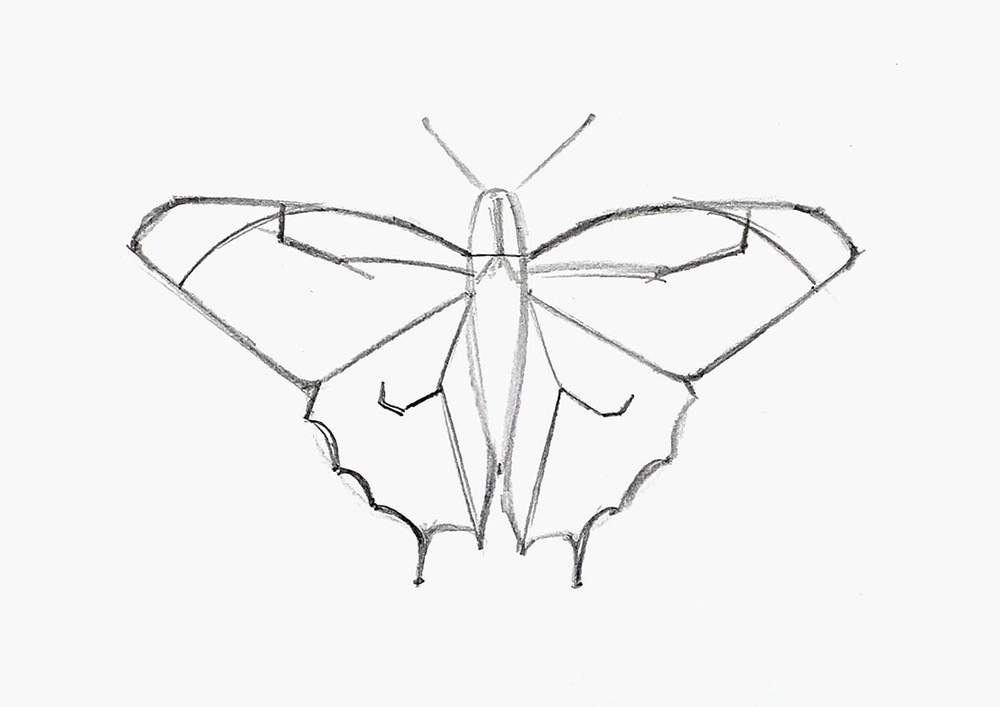
Step 3: Sketch The Outline Of The Wings Of The Butterfly
After that, I sketched the start of the wings from the body of the butterfly and I connected the tips to the dots we just placed.
I also sketched a line to either tip on the bottom that curves up and inwards.
Next, I connected the top set of wings to the body and added a line to connect the top bits.
I also connected the tips on the bottom the the body of the butterfly and I sketched the antennas.
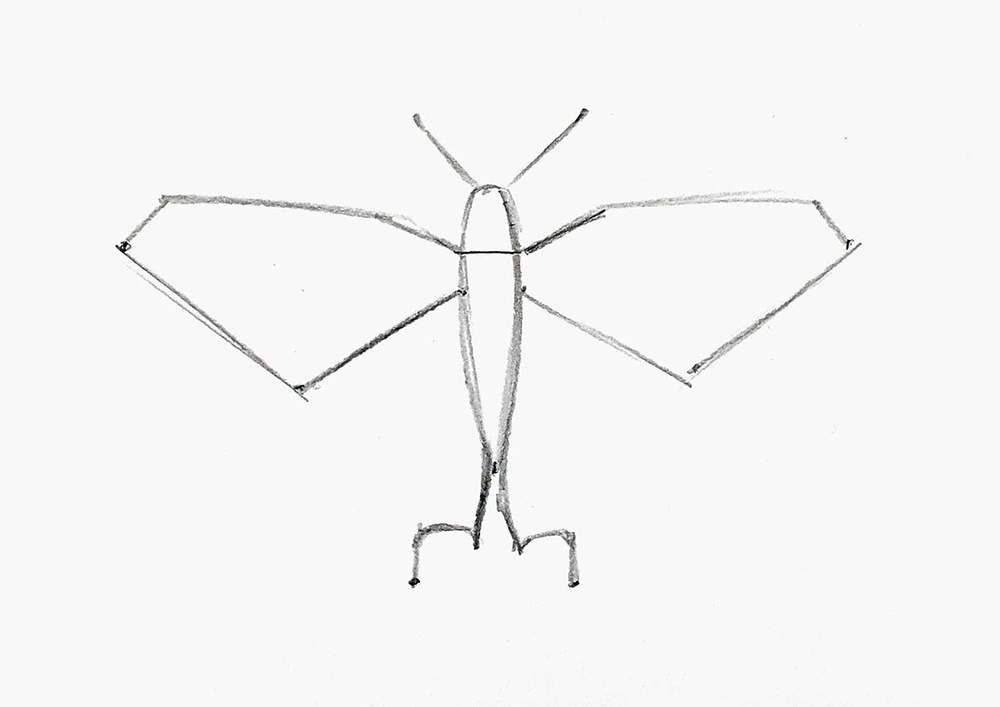
Then, I connected the lower tips to the upper wing with a curved line.
Lastly, I refined the outline of the wings.
I rounded the upper wings and I added this serrated edge to the lower wings.
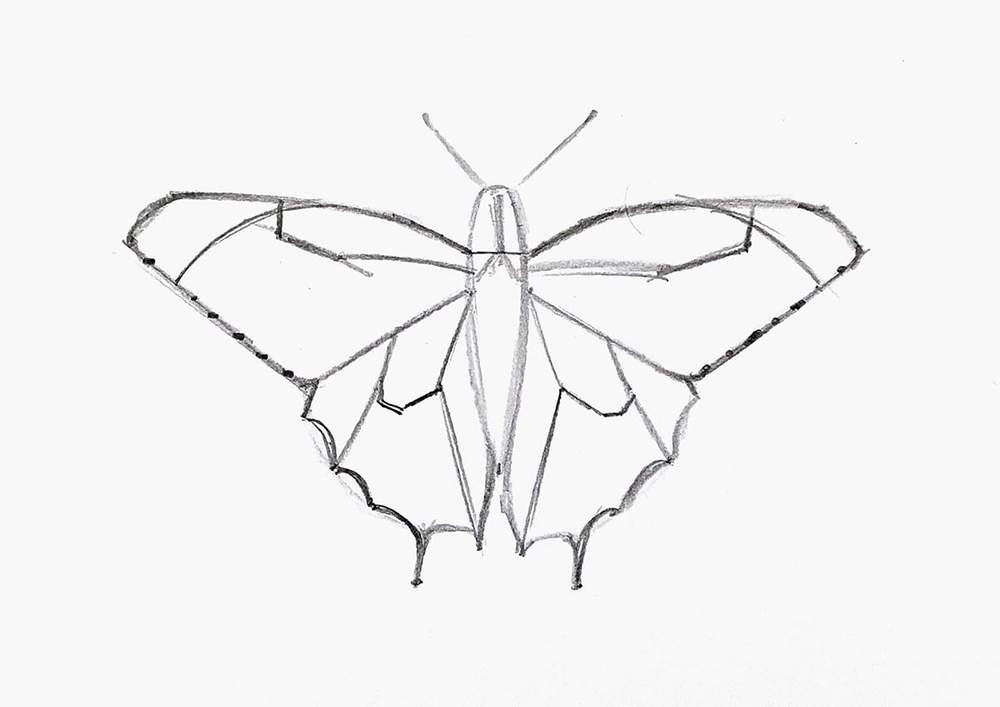
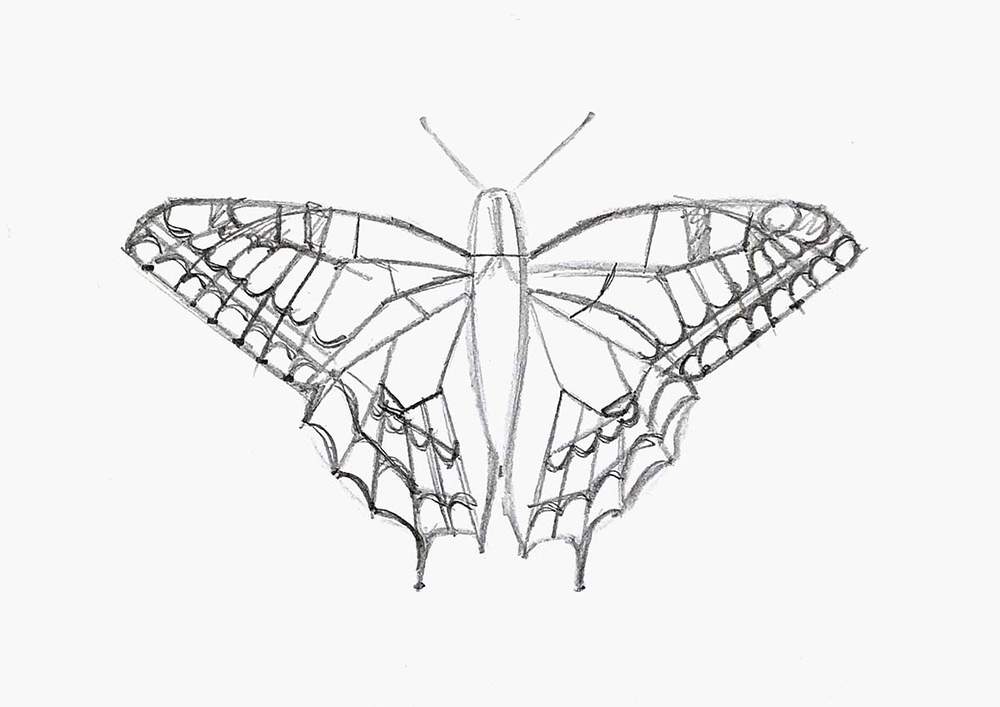
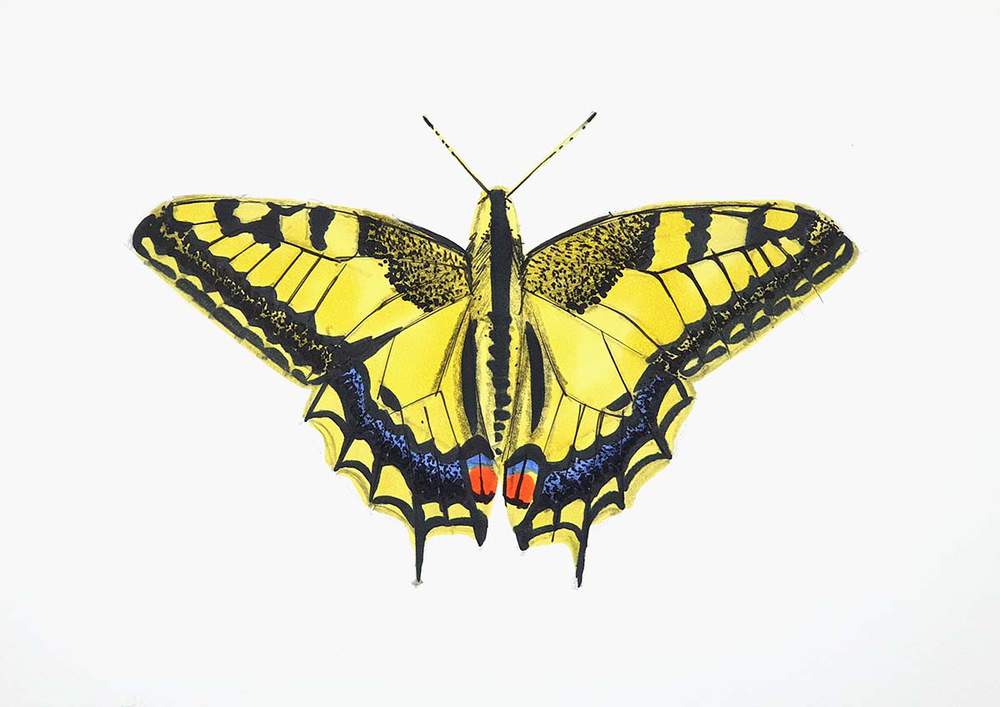
Step 4: Sketch The Pattern On The Butterfly's Wings
After that, I sketched the pattern on the wings of the butterfly.
I started by sketching a line starting from the base of the wings and pointing towards the center of each wing.
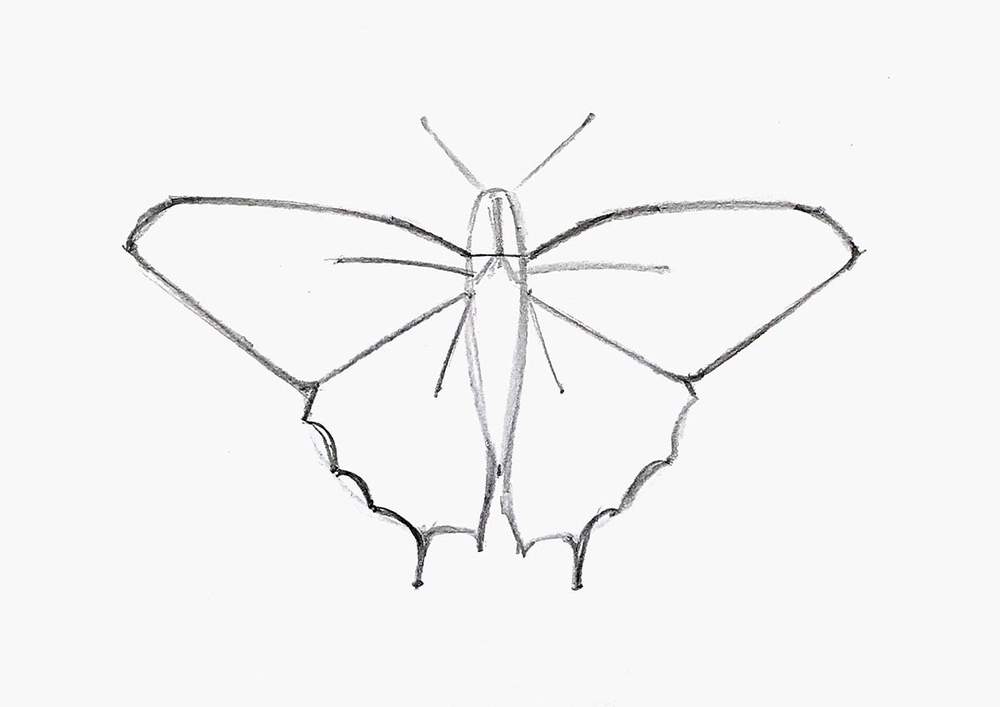
Next, I added a diagonal line that points outwards and up on the upper wings.
And I added 2 lines on the bottom wings: one connecting the first line toward the inner tip and a short one pointing down and outwards.
Next, I added a short vertical line on the ends of the line on the upper wing and I added 2 curved downwards lines.
I also added a short horizontal line on the corner of the lines in the bottom wings, and a short line from that line pointing up.
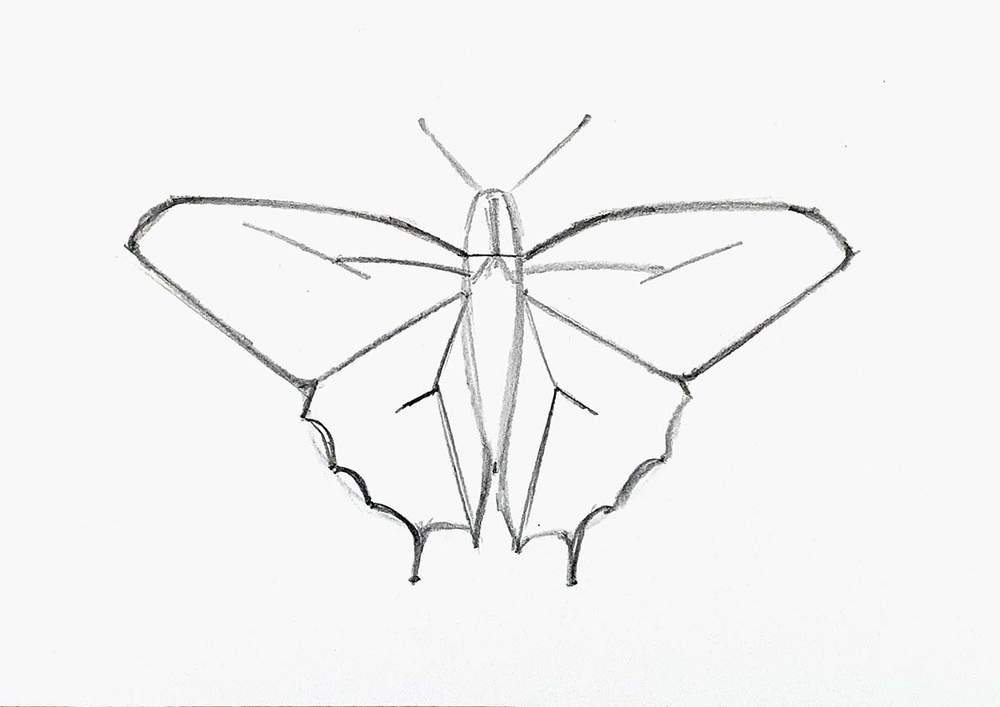
After that, I sketched a curved line from the middle of the bottom edge of the top wings towards the second most left point on the bottom left wing and the second most right point on the bottom right wing.
I also marked the points on the bottom left edge of the top left wing and the bottom right edge of the top right wing where the lines of the pattern will connect.
Then, I sketched the lines connecting the lines we just sketched on the upper wings to the dots we marked on the lower outer edges.
I also sketched the lines connecting each point/corner on the outer edge of the lower wings to the inner line structure we just sketched.
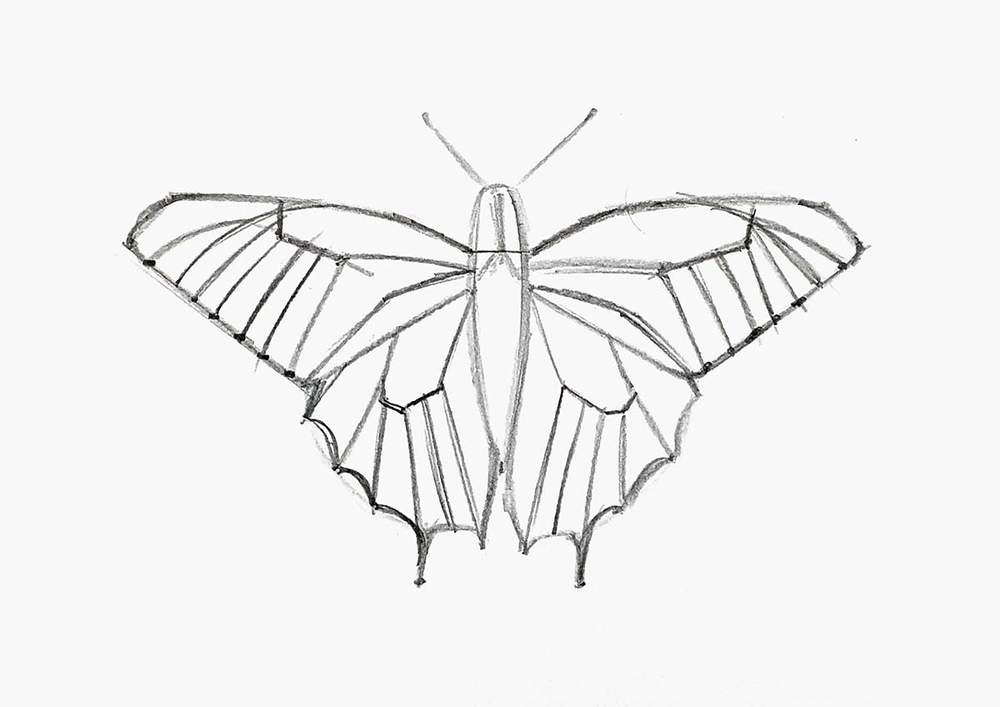
Next, I sketched 2 parallel lines on the upper wings parallel and close to the lower outer edge.
I also added some lines intersecting the lines on the lower wings.
After that, I made those lines look serrated by adding U-shapes to the top lines and upside-down U-shapes to the bottom lines.
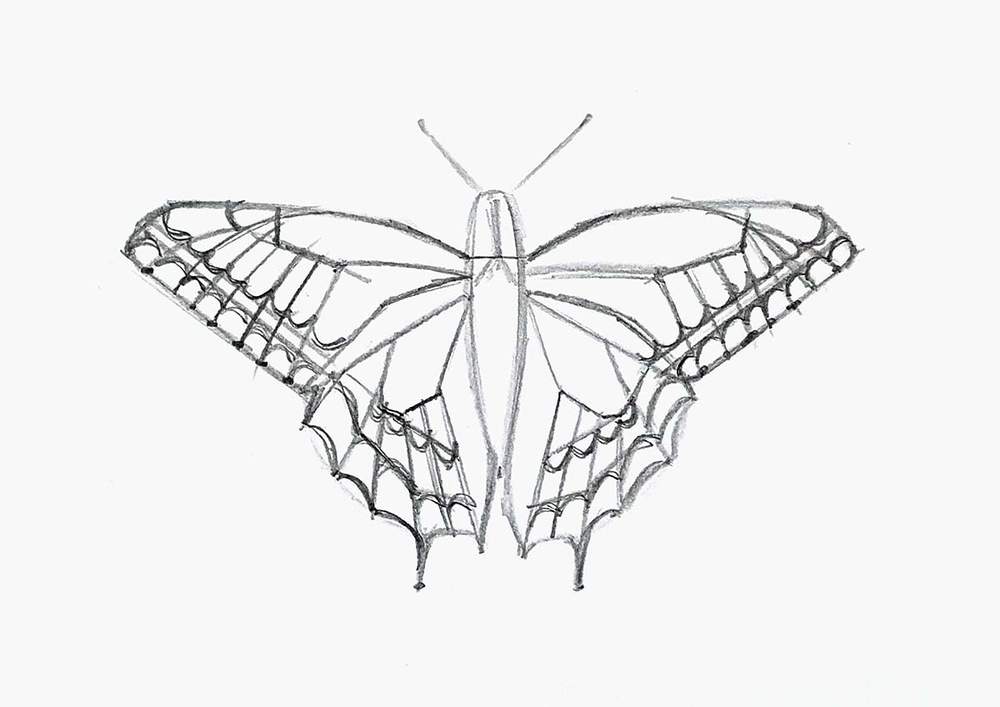
Lastly, I marked some black parts on the top of the upper wings
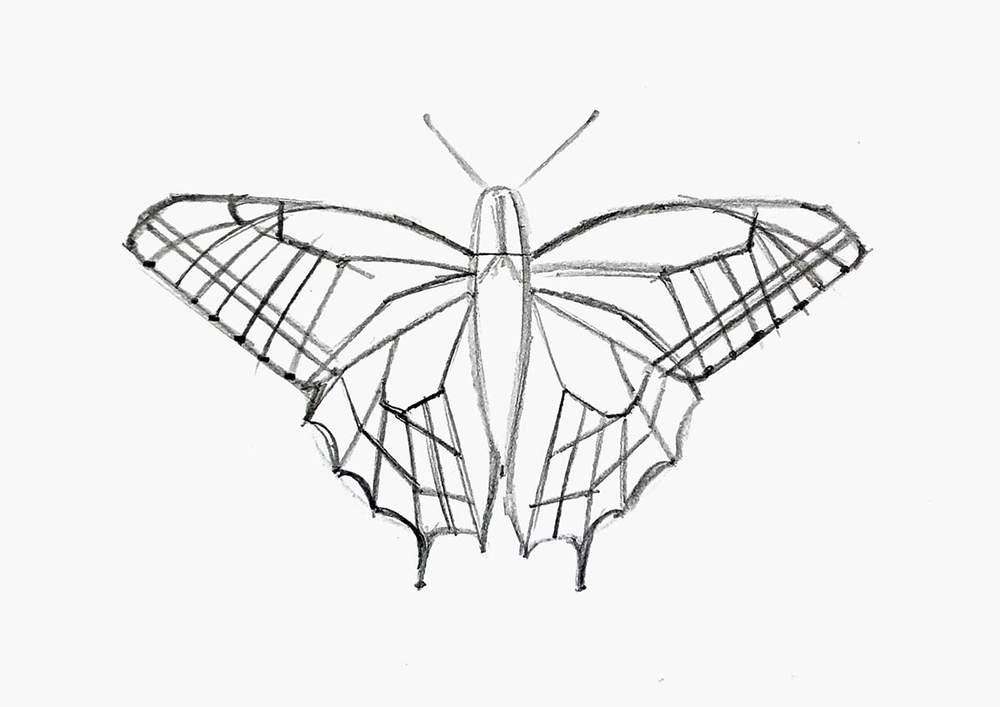
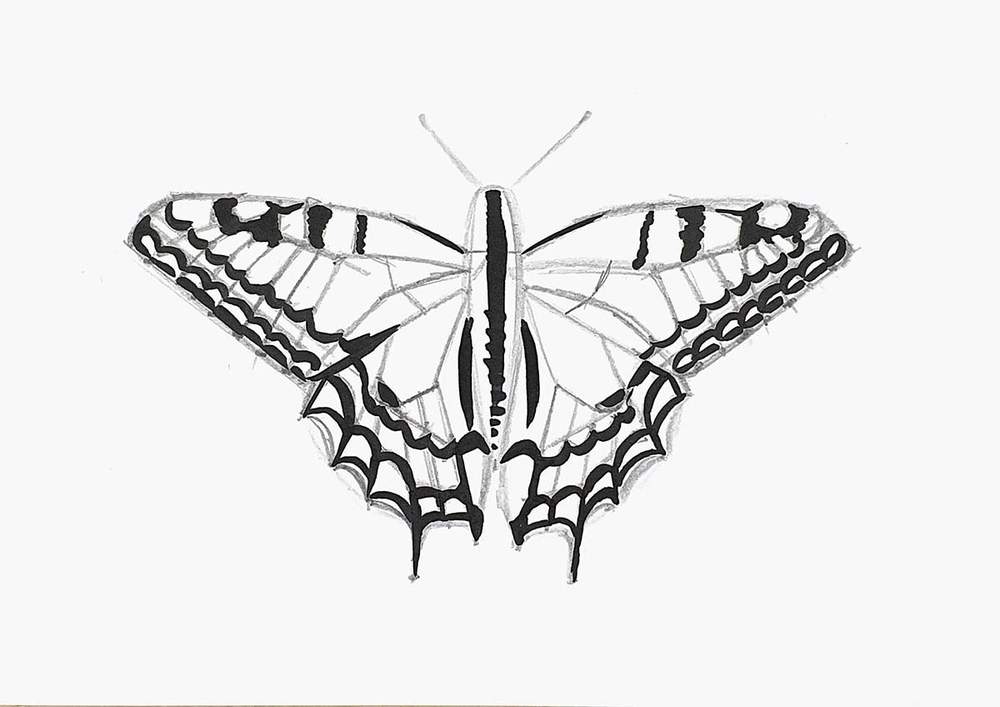
Step 5: Color The Black Parts Of The Butterfly
Now that the sketch is done, we can start coloring it.
I started by coloring the thicker black lines and parts with the 120 Black marker.
Step 6: Color The Blue & Orange Parts Of The Wings
Next, I colored the bright blue bits with B350 Cornflower Blue and the bright orange dots with YR190 Cadmium Orange.
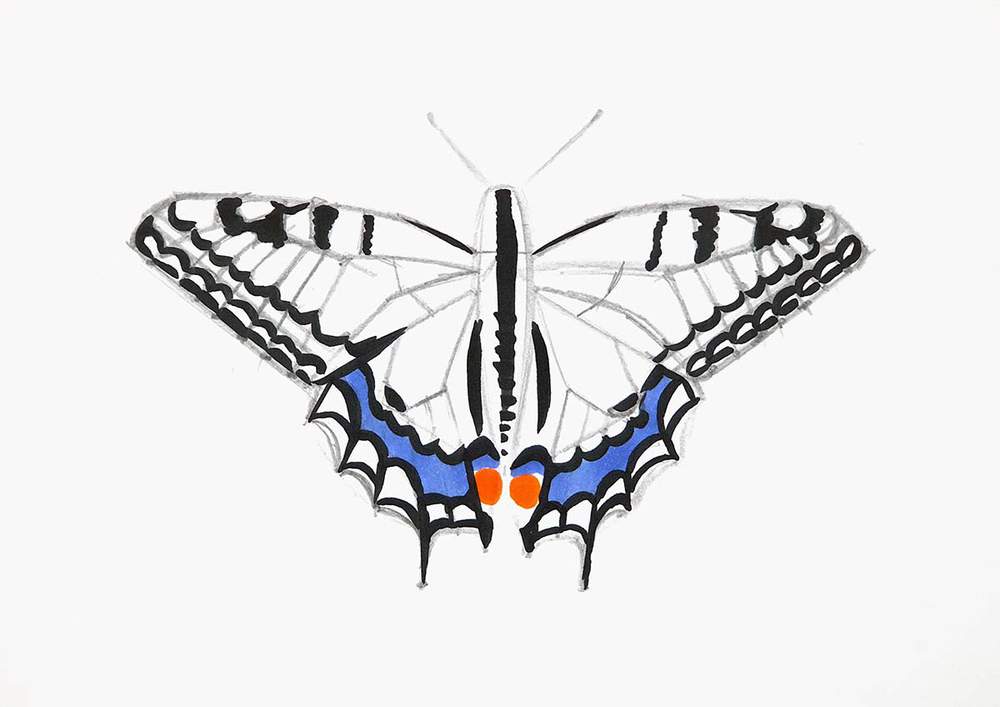
Step 7: Color The Remainder Of The Butterfly Yellow
After that, I colored the remainder of the butterfly with Y050 Summer Lemon.
Step 8: Add Black Dots & Lines To The Butterfly's Wings
To finish the drawing off, I added some details with a black fine liner.
I used it to sketch the lines on the wings and the antennas.
I also used it to create that dot pattern on the blue and some yellow parts of the wing.
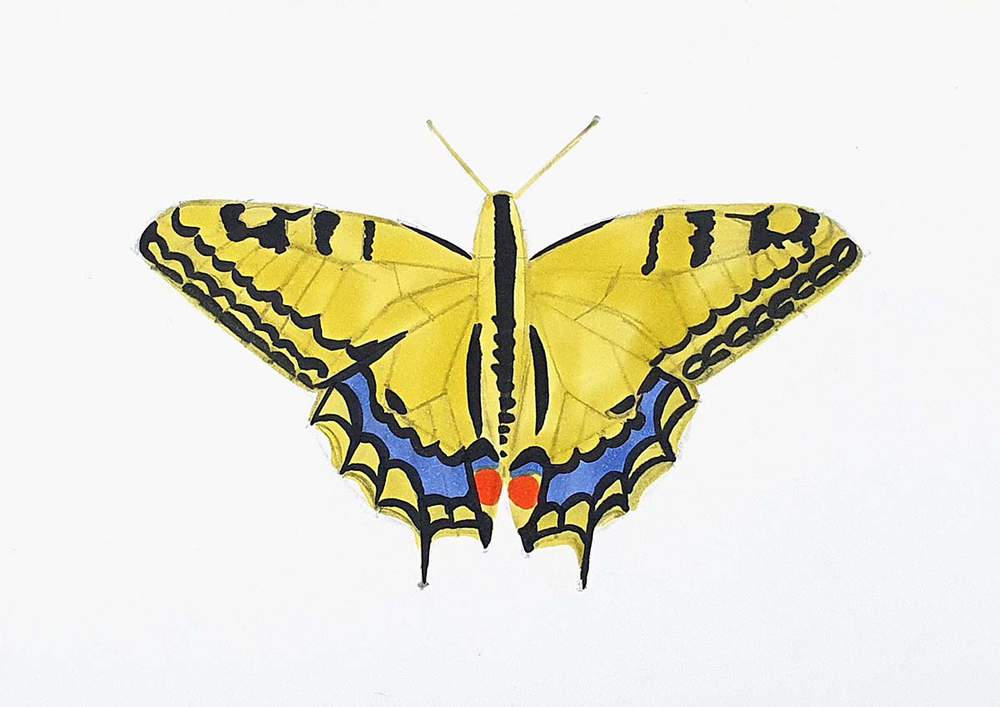
And That's How You Draw A Beautiful Butterfly
This butterfly turned out absolutely beautiful!
I hope you enjoyed my tutorial and found it helpful.
Let me know how your butterfly drawing turned out.
Thank you for following along and I'll see you in my next tutorial!
Tags
Articles You Might Also Like


I love bringing cars to life with alcohol markers and colored pencils.
Whether you're just starting out or looking to improve your skills, I'm here to help!
Click here to learn more about me.


Be the first to comment!
Comments
There are no comments yet.