How To Draw Realism With Colored Pencils

Drawing with realism is an art form that challenges and inspires countless artists around the world.
Through careful observation, precise technique, and a nuanced understanding of materials, artists can create works that are virtually indistinguishable from the subjects they depict.
Whether you're an aspiring artist eager to explore this captivating style or a seasoned professional looking to refine your skills, this comprehensive guide will walk you through the tools, techniques, and concepts you need to master realism with colored pencils.
What is Realism?
Realism is the practice of creating artworks that closely mimic the appearance of real objects, scenes, or subjects. It emphasizes accurate representation, capturing the intricate details, textures, and colors of the subject, striving to depict them as they appear in real life. Realism challenges artists to observe closely and translate those observations onto paper, resulting in a lifelike and convincing portrayal.
What Materials Do You Need For Drawing Realism With Colored Pencils?

The journey toward realism in colored pencil drawings begins with selecting the right materials. The pencils, paper, and supplementary tools you choose form the foundation of your artwork, playing a crucial role in the final appearance and quality.
From the types of colored pencils, whether oil-based or wax-based, to the texture of the paper and the use of solvents, each element has its unique characteristics and applications.
Understanding these materials and how they interact with each other will enable you to achieve the desired effects and elevate your drawings to a higher level of realism.
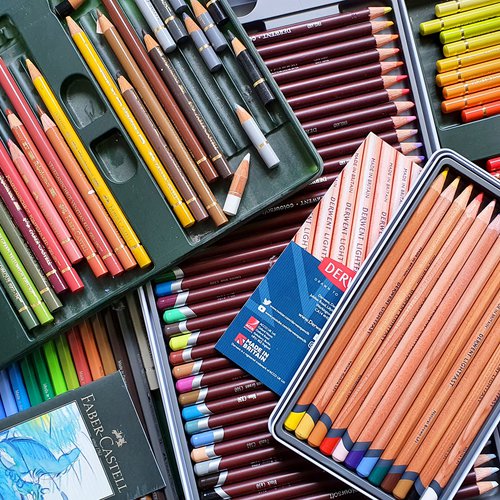
1. What Colored Pencil Should You Use?
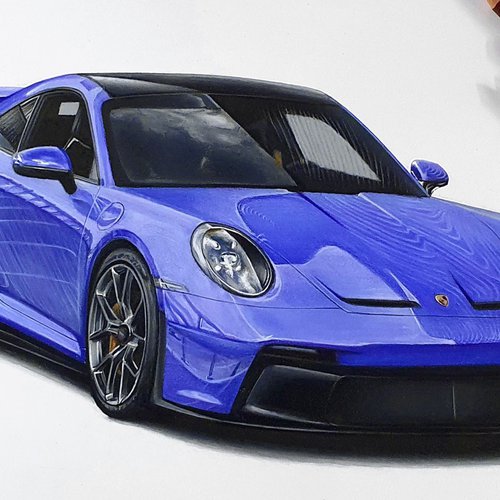
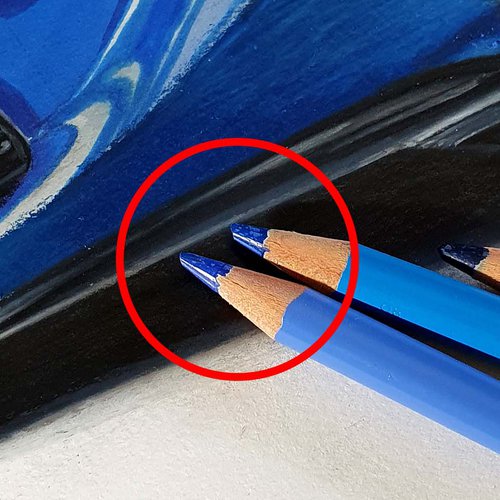
Oil-based, like Faber-Castell Polychromos pencils, are great for details, but not the easiest to blend. These pencils are great for drawing fur or hair, detailed cars, and landscapes.
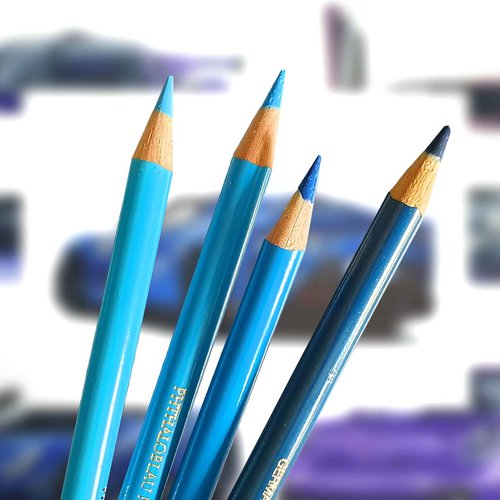
Wax-based colored pencils, like the Caran d'Ache Luminance and Prismacolor Premier Soft Core pencils, are great for achieving seamless blending, but they are not the best for drawing details. These colored pencils are great for drawing portraits, clouds, sunsets, and other things that require smooth color transitions. An added benefit of these pencils is that you can draw lighter colors over darker ones, even if they're already burnished. This is something you can't do with oil-based colored pencils.
So depending on what you want to draw, both are great options. I use a combination of the 2. I use Faber-Castell Polychromos for the details as they hold their point very well, and I use Caran d'Ache Luminance pencils for most other things as they cover the paper so effortlessly and blend very well. I also like to use a white watercolor pencil for the highlights.
It's easier to create realistic drawings when you have many colored pencils to choose from, but you can definitely make realistic drawings with only the smallest set (often the set of 12 pencils). Though, having a limited color selection can make it more difficult to get your drawings to look very realistic.
For a full list of the best colored pencils for drawing realism, check out this article.
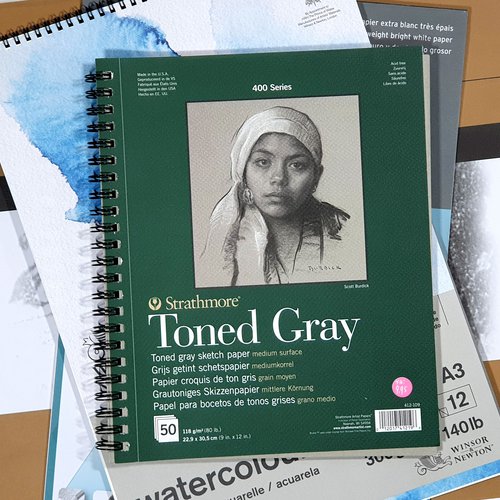
2. What Paper Should You Use?
I would say that the paper you use is more important than what pencils you use.
What paper you use will define how your drawing will turn out.
Your pencils' texture and the techniques you use will respond differently depending on the paper's grain and weight. Let's delve into a few types that work well with colored pencils:
Bristol Vellum Paper: If smooth color transitions and subtle blending are what you're after, Bristol vellum paper might be your best bet. This paper has a slightly textured surface, which is perfect for portraits and intricate shading.
Light-Grain Drawing Paper: Ideal for those who love layering and detailing, light-grain drawing paper provides enough tooth to hold several layers of pencil without losing the integrity of the pencil strokes. It's a versatile choice for many types of drawings.
If you want to know more about this, be sure to check out my article on how to choose paper for colored pencils.
Also, make sure to check out my favorite brands of paper for colored pencils.
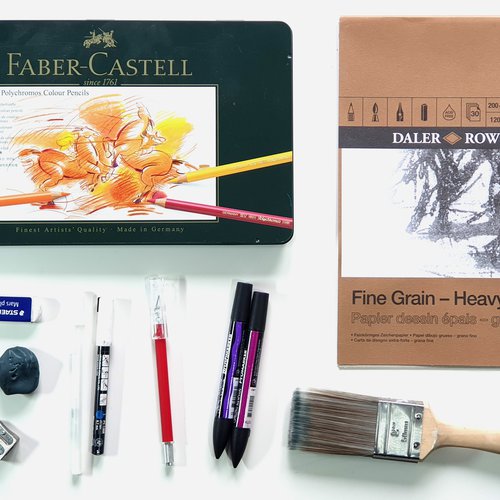
3. Other Things You Might Need
Creating a realistic colored pencil drawing is not just about pencils and paper. There are other tools and supplies that can help you in achieving that lifelike appearance. Here's a list:
Pencil Sharpener: A good quality sharpener will help keep your pencils sharp and ready for detailed work.
Erasers: A kneaded eraser can lift color without damaging the paper, while an electric eraser can help create highlights or erase tiny mistakes.
Ruler: For precise lines and geometric shapes, a ruler will come in handy.
HB Graphite Pencil: Having a graphite pencil is helpful for sketching out your initial design.
- Solvents: Solvents like mineral spirits or odorless turpentine can be used to dissolve the colored pencil, creating smooth blends and adding depth to your drawing.
Getting Accurate Proportions When Sketching
1. Use a Reference
Using a reference image or a live model is akin to having a roadmap for your drawing. It can guide you by providing exact proportions and intricate details, helping you achieve a more accurate depiction.
Whether you're drawing from a photograph or observing a live subject, closely studying the reference will allow you to identify key lines, shapes, and proportions that guide your sketch.
If you're struggling with a particular aspect of your drawing, frequently referring back to your reference can assist in resolving inconsistencies.
It's an essential tool for both beginners and seasoned artists who want to ensure that their drawings will turn out realistic.
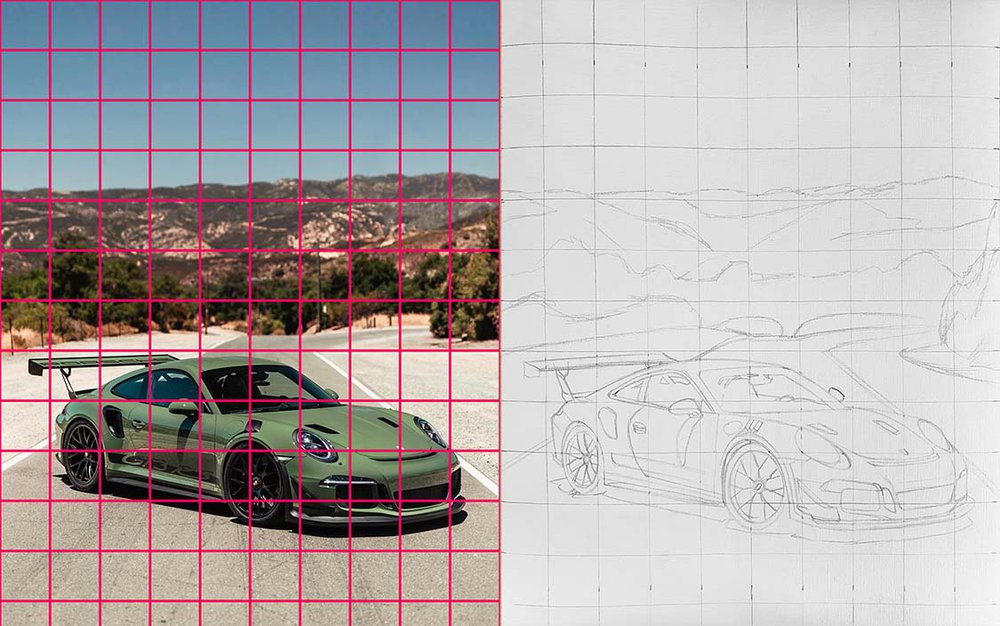
2. Using the Grid Method
The grid technique is a time-honored method that artists use to break down complex images into manageable parts.
By drawing a series of intersecting horizontal and vertical lines that divide your drawing and reference image into equal squares, you can more easily observe where lines and shapes fall within each square. This helps maintain accuracy throughout the drawing process.
Creating a grid on both your reference image and your drawing paper allows you to focus on one square at a time, effectively translating the content of that square from the reference to your drawing.
I always use this technique as it enables me to concentrate on smaller sections, ensuring that the proportions and alignments are correct.
I wrote a full article on how to use the grid method, so give it a read if you'd like to know more.
3. Other Sketching Techniques
Tracing: If you are a beginner, tracing an image can help you understand the shapes and contours of your subject.
Proportional Dividers: This tool can measure distances and proportions in a reference image and transfer them accurately to your drawing.
Sight-Sizing: This method involves placing your drawing next to the reference and drawing it the same size, carefully comparing the two.
Using Negative Space: Observing and drawing the space around an object can often be as useful as drawing the object itself in getting proportions right.
Freehand Drawing with Guidelines: Practice sketching freehand but use light, guiding lines to help you keep proportions in check.
Here's a list of more techniques you can use to get accurate proportions when sketching.
Coloring Techniques for Drawing Realism with Colored Pencils

Creating a realistic drawing with colored pencils involves more than simply filling in shapes with color. The way you apply and manipulate the pigment can have a profound impact on the lifelike appearance of your drawing. Here's a closer look at some essential coloring techniques:
1. Blending
Blending is a cornerstone technique in colored pencil art, allowing you to merge colors seamlessly and create smooth transitions.
By layering different shades and using tools like blending stumps, tortillons, or even your fingers, you can achieve a painterly effect that eliminates harsh lines and distinctions between colors.
Solvents can also be used to break down the wax or oil in the pencil, aiding in a smoother blend.
Blending takes practice, but mastering it can elevate your work to a new level of realism, allowing you to mimic the subtle variations in tone and hue found in real life.
2. Burnishing
Burnishing is a method that involves applying heavy pressure with a colorless blender or a colored pencil to create a polished, smooth appearance.
It pushes the pigment into the tooth of the paper, filling in any gaps and producing a smooth, shiny surface.
Burnishing is often used in the later stages of a drawing to add depth and intensity to the colors.
While it can enhance the appearance, it's essential to approach burnishing with caution, as overdoing it can damage the paper and make further layering difficult.
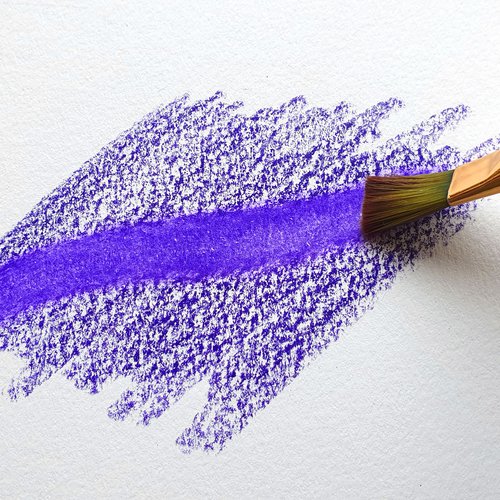
3. Using Solvent
Solvents are a powerful tool in the colored pencil artist's arsenal.
By applying a solvent like mineral spirits or odorless turpentine to the colored pencil, you dissolve the binder, allowing the pigment to spread across the paper more fluidly.
Here is a more in-depth guide on how to use solvent to blend colored pencils.
This can create soft, ethereal effects, ideal for backgrounds, skies, or any area requiring a smooth transition of color.
When using solvents, it's crucial to follow safety guidelines and work in a well-ventilated area.
Experimenting with different applications and quantities can lead to a wide array of effects and is often the key to unlocking new artistic possibilities.
My favorite solvent to blend colored pencils is Gamblin Gamsol. I initially bought it for oil painting, but it works really well when blending colored pencils. For more solvents, check out this article listing 10 of the best solvents.
4. Indenting with an X-acto knife
When drawing intricate details like hair or fur, the indenting technique can be incredibly useful.
By using a sharp tool like an X-acto knife to create fine lines and indentations in the paper before coloring, you create a barrier that the pencil can't reach. This leaves the indented areas white or a lighter color, allowing for detailed, realistic textures.
This method requires careful handling and planning, as the indents are permanent and can't be erased.
Coloring techniques such as these bring life, depth, and realism to your colored pencil drawings. Through blending, burnishing, using solvents, and indenting, you can manipulate your medium in various ways to mimic the complexity of the real world.
Experimenting with these techniques and understanding when to apply them will enrich your art and bring a professional touch to your work.
Whether you're depicting the soft glow of a sunset or the intricate strands of a subject's hair, these methods offer the control and flexibility needed to achieve realism.
Here are some more techniques you can use to create realistic colored pencil drawings.
Creating Depth in Your Colored Pencil Drawings

Creating depth is one of the essential aspects of drawing that can elevate a flat, two-dimensional image into a lifelike, three-dimensional representation. It adds richness and realism, making the viewer feel as though they could reach out and touch the objects within the drawing.
Here's how you can achieve depth in your colored pencil drawings:
1. Value and Contrast
Understanding and employing value and contrast is crucial for achieving depth. Value refers to the lightness or darkness of a color, and by varying these values, you can create a sense of form and space.
Value Scale: Utilizing a value scale, which is a gradation of a color from its lightest value to its darkest, helps in understanding how to apply different tones in the drawing.
Contrast: Creating contrast, or strong differences between light and dark areas, can emphasize the three-dimensional form of the subject. It highlights the parts of your drawing that would naturally catch the light and casts others into shadow, giving a sense of volume.
Experimenting with different values and contrasts can help you convey the way light interacts with the subject, creating an illusion of depth and form.
2. Perspective
Perspective is the technique used to represent three-dimensional objects on a two-dimensional surface in a way that looks natural and realistic.
Linear Perspective: This involves using converging lines that meet at one or more vanishing points to represent objects as they appear to recede into the distance. The classic example is a straight road that appears to get narrower as it extends into the distance.
Atmospheric Perspective: This technique involves changing the color and clarity of objects intended to be perceived as distant. The colors of distant objects are often lighter and less distinct.
Mastering perspective requires practice and understanding of how objects relate to each other within a space. Whether drawing landscapes or objects, the correct use of perspective will add realism and depth to your drawing.
3. Depth of Field
Depth of field is a concept borrowed from photography that can also be applied in drawing. It refers to the range within a scene where objects appear sharp and in focus.
Focal Point: By choosing a focal point and rendering it with sharp, clear details, while keeping other areas softer or less detailed, you can guide the viewer's eye and create a sense of depth.
Blurring Background: Softening or blurring the background, while keeping the foreground sharp, is another technique to create depth of field, giving an impression of distance.
Using depth of field in your drawings can create a dynamic focus, adding to the overall realism.
Creating depth in colored pencil drawings is a multifaceted process that involves understanding and manipulating value, perspective, and depth of field. While there are more ways to add depth into your drawing, these are in my opinion the most important.
By applying these principles, you can create a sense of three-dimensionality, making your subjects come to life on the page.
Experiment with these techniques, and observe how they change the appearance of your drawings, adding richness and complexity.
As you grow more comfortable with these concepts, you'll find that they become integral to your process, allowing you to create drawings that resonate with realism and depth.
Conclusion
Realism in colored pencil drawings is a pursuit that marries observation, technique, creativity and a profound understanding of the materials at hand.
From selecting the right combination of pencils and paper to mastering complex methods like blending, burnishing, and creating depth, each step of the journey offers opportunities for growth and discovery.
As we've explored in this guide, achieving realism is not merely a matter of reproducing what you see; it's about understanding the essence of the subject, manipulating light and perspective, and crafting an image that resonates with lifelike detail and emotional depth.
Whether you're just beginning your artistic journey or seeking to refine and expand your existing skills, the tools, and techniques discussed here can serve as a valuable roadmap.
Remember, the path to realism is filled with experimentation, patience, and continual learning. Don't hesitate to explore new methods, practice with purpose, and allow yourself to see the world through a different lens.
Tags
Articles You Might Also Like
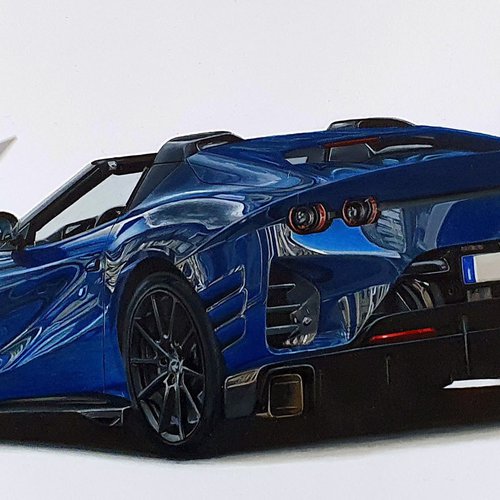

I love bringing cars to life with alcohol markers and colored pencils.
Whether you're just starting out or looking to improve your skills, I'm here to help!
Click here to learn more about me.


Be the first to comment!
Comments
There are no comments yet.