Realistic Aston Martin Vantage Drawing Guide - Complete Step by Step
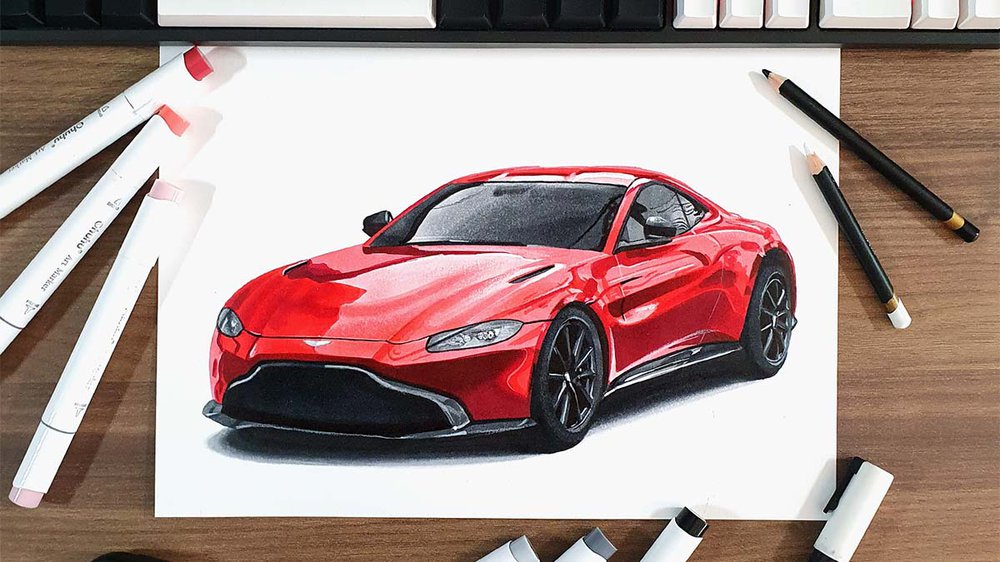
In this car drawing guide, I'm going to show you how to draw a realistic Aston Martin Vantage that you can also draw with just a few drawing supplies.
This guide is more realistic than any other guide you can find on the internet for free.
So, without further ado, let's get started!
Disclaimer: In the name of full transparency, please be aware that this blog post contains affiliate links and any purchases made through such links will result in a small commission for me (at no extra cost for you).
Art Supplies I Used in this Aston Martin Drawing Guide
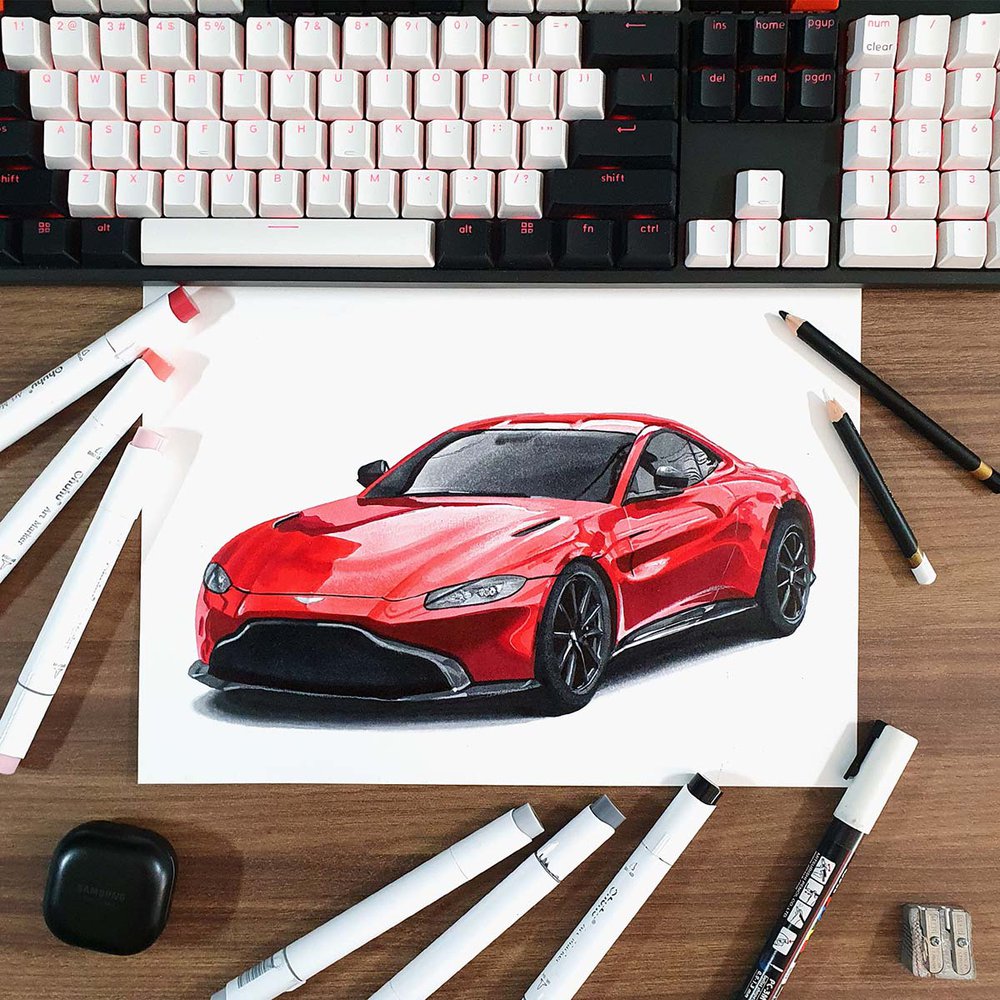
To make this drawing, I used Ohuhu Honolulu markers in the colors Colorless Blender (0), Neutral Grey 03 (CG030), Neutral Grey 3 (NG03), Neutral Grey 07 (CG070), Neutral Grey 6 (NG06), Black (120), Shadow Pink (RV270), Pastel Rose (R9), Zinnober (R150), Lipstick Red (R170), and Geranium (R8).
You can also buy these colors separately on their website.
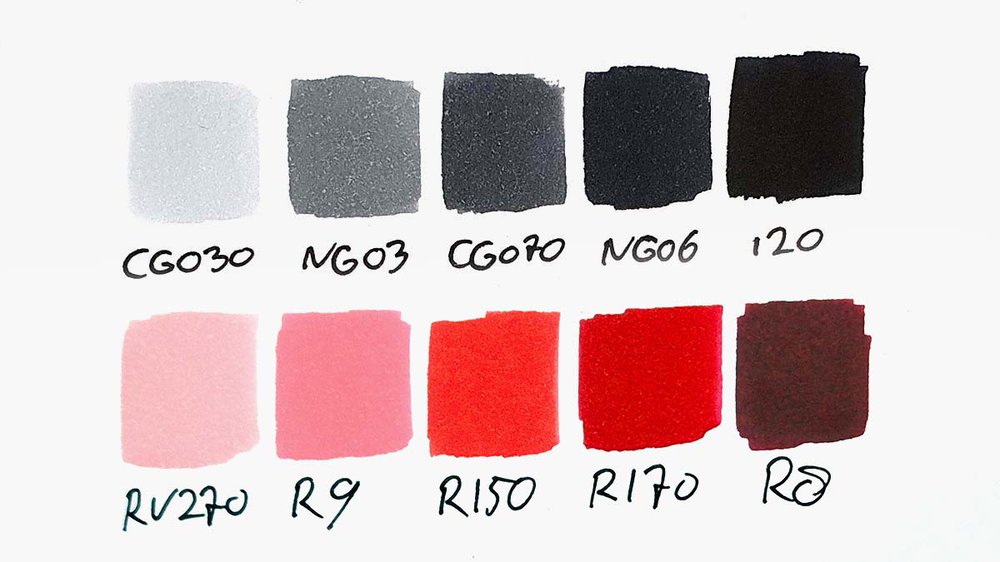
I also used some Derwent Chromaflow colored pencils to add details. I used White 2400 and Black 2300.
I used a white Posca PC-3M paint marker to add white highlights.
And I used an HB pencil, a ruler, an eraser, and a kneaded eraser.
I made this drawing on A4 size Canson Illustration Manga Paper.
How Do You Draw an Aston Martin Vantage Step by Step?
To create a realistic Aston Martin Vantage car drawing, you'll first need to find a good reference photo.
Next, you sketch the outline of the car.
After that, you color the Aston Martin, part by part, until it is fully colored.
And to finish it off, you add a few details with colored pencils and a few highlights with a white paint marker.
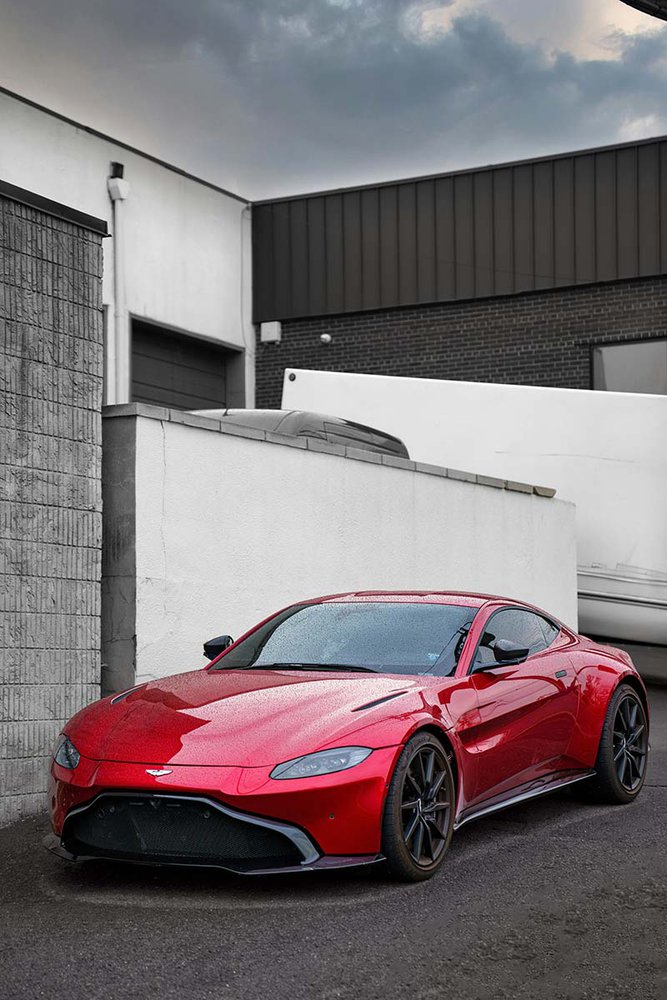
Step 1: Find a Reference Photo of an Aston Martin Vantage
To draw any car realistically, I like to first look for a reference photo of it.
Unsplash and Pexels are great places to find some good photos of cars.
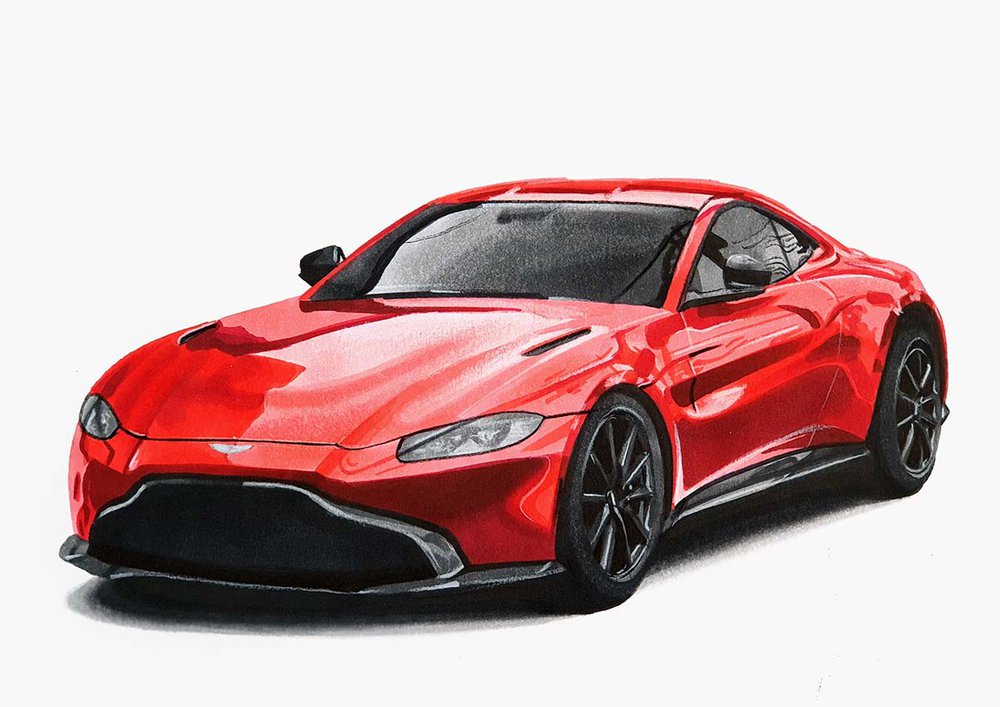
For this Aston Martin Vantage drawing tutorial, I'll be using this photo I found on Pexels.
Now that we've found the reference photo, we can start using it to sketch the Aston Martin in detail.
Step 2: Sketch the Outline of the Aston Martin Vantage
When sketching a car, I like to draw the full outline first and then add the parts and details.
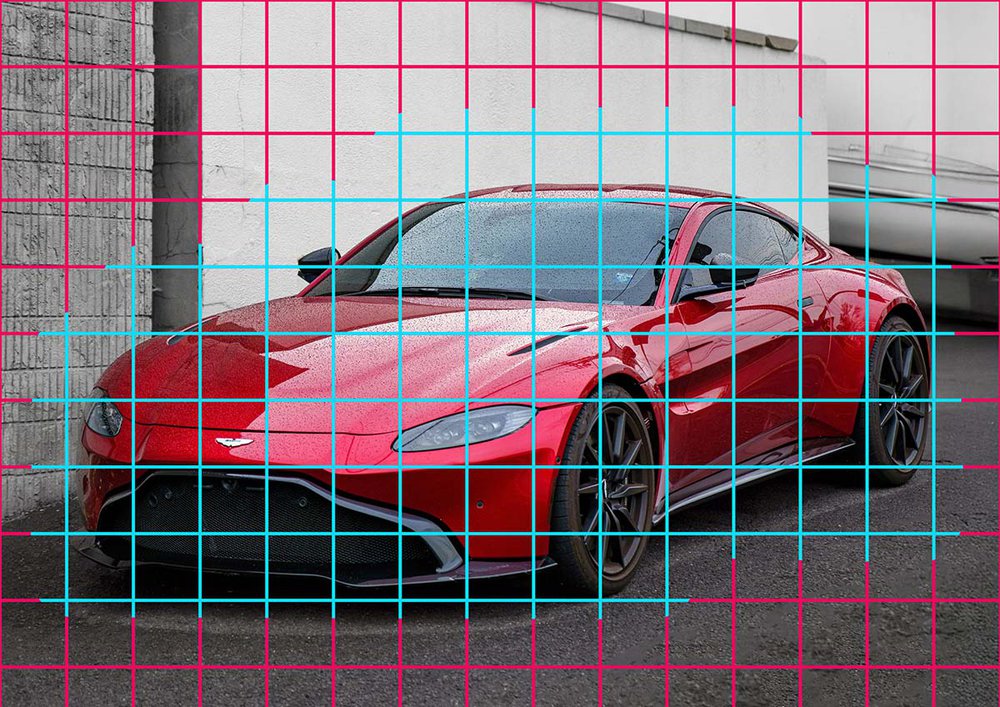
To sketch the outline with accurate proportions, I used the grid method.
If you're new to this method or if you're unsure how to use it, I highly recommend you check out this step-by-step guide I created.
I first resized the reference photo to the same size as my paper, which is 29.7 by 21 cm or 3508 by 2480 pixels. I also positioned the car just a little below the center.
I then added a grid overlay and marked the squares that contain parts of the Aston Martin with light blue.
After that, I recreated that grid on my drawing paper.
To make sketching the car a little easier, I only sketched the light blue part of the grid, the squares that contain parts of the car.
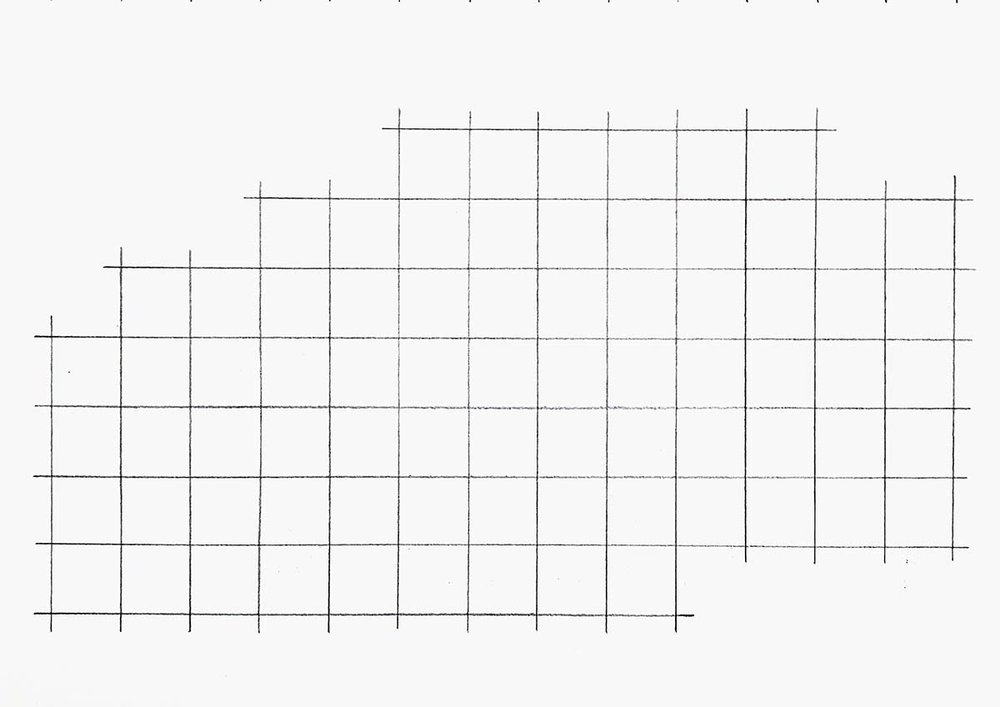
With the grid now sketched, I started sketching the outline of the Vantage.
I broke the outer edge of the car up into a bunch of simple lines.
For each line, I marked the start, end, and where it crosses grid lines, before I sketched it in one swift motion.
I did this until the outline was fully done.
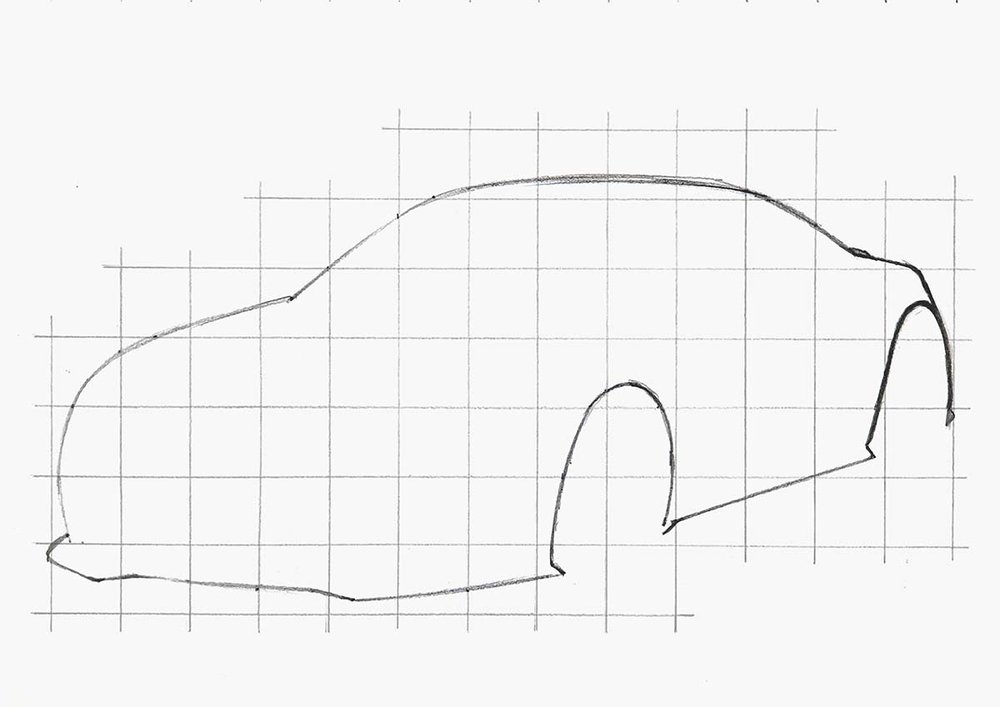
I left the outline of the wheels for later.
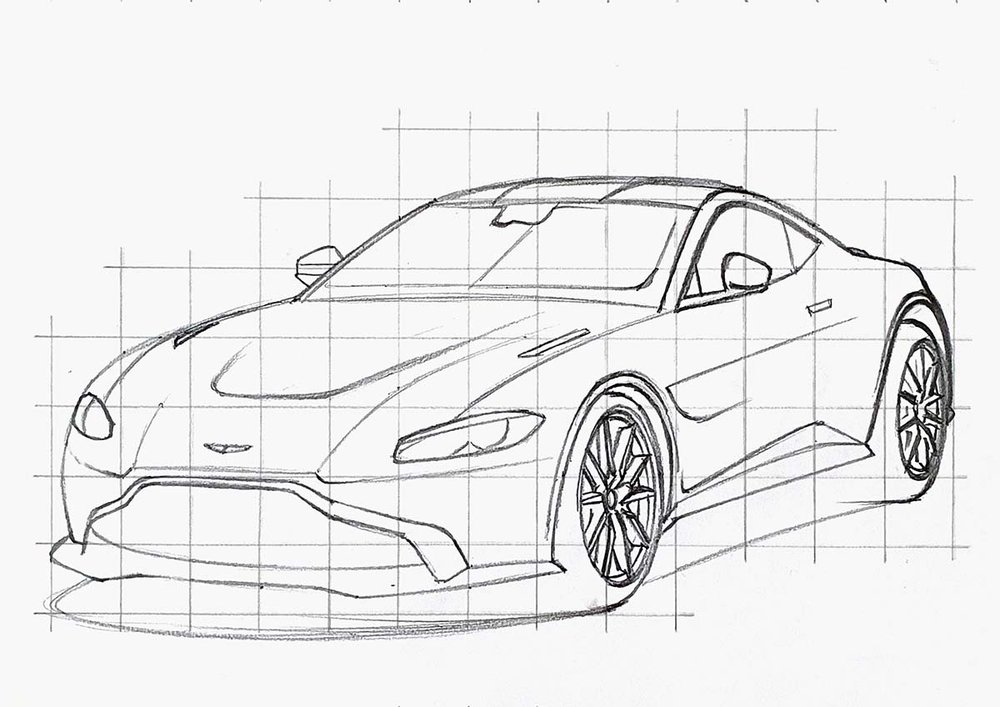
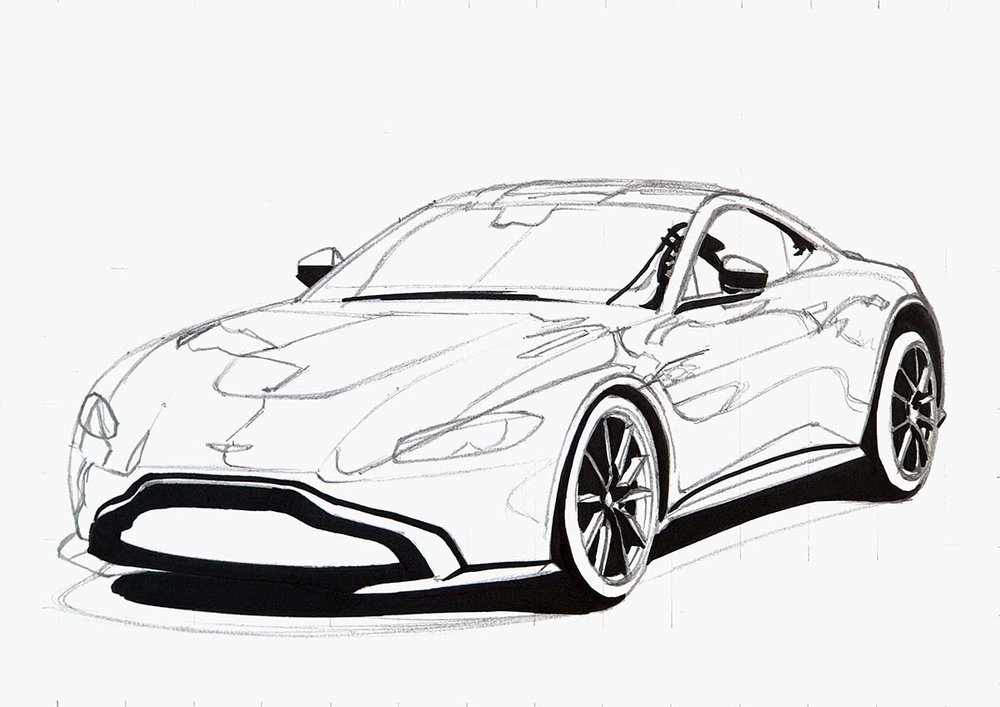
Step 3: Add All the Parts and Details to the Aston Martin Vantage Sketch
Next up, I added all the bigger parts of the car, like the outline of the headlights, the windows, the grill, and some lines on the side.
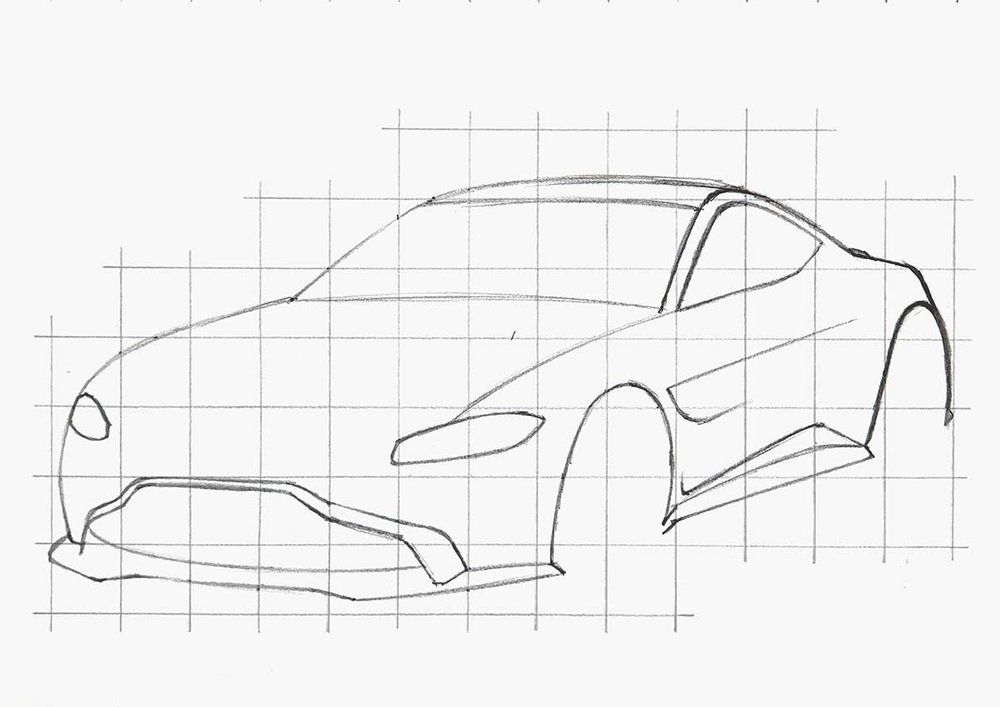
After that, I sketched all the details on the car, like the logo, the vents on the hood, the body lines, etc.
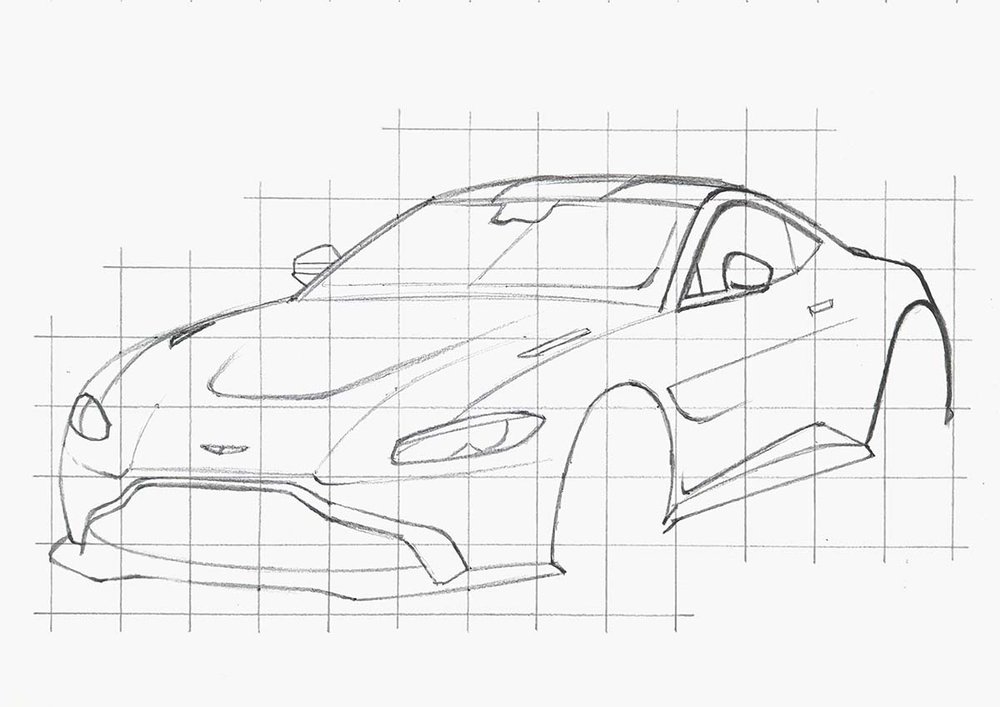
Just the wheels left to sketch now.
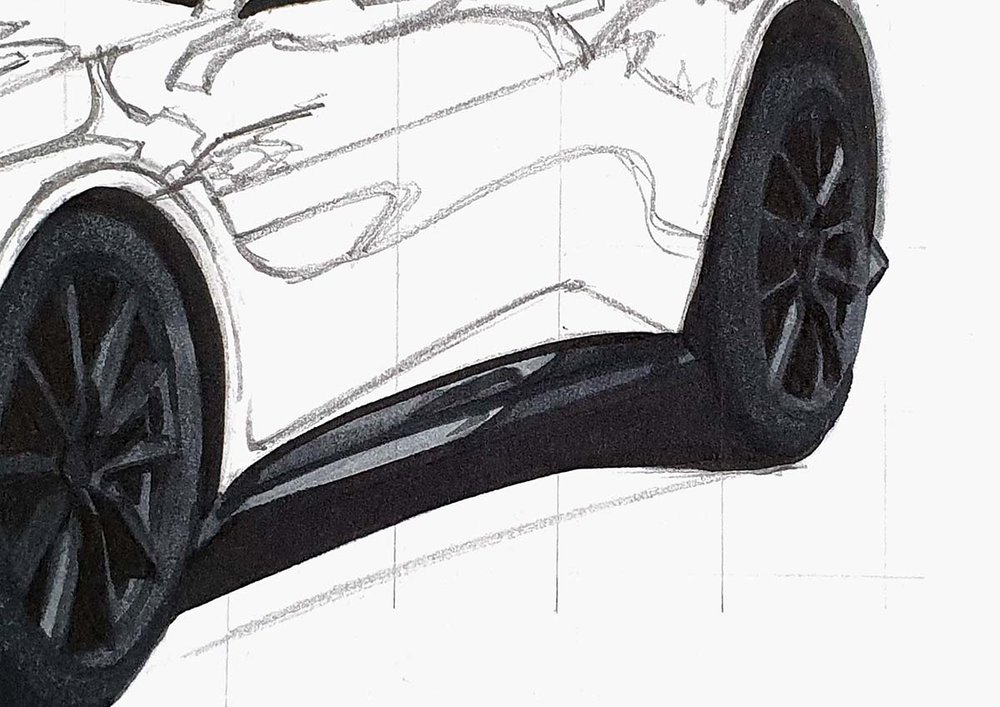
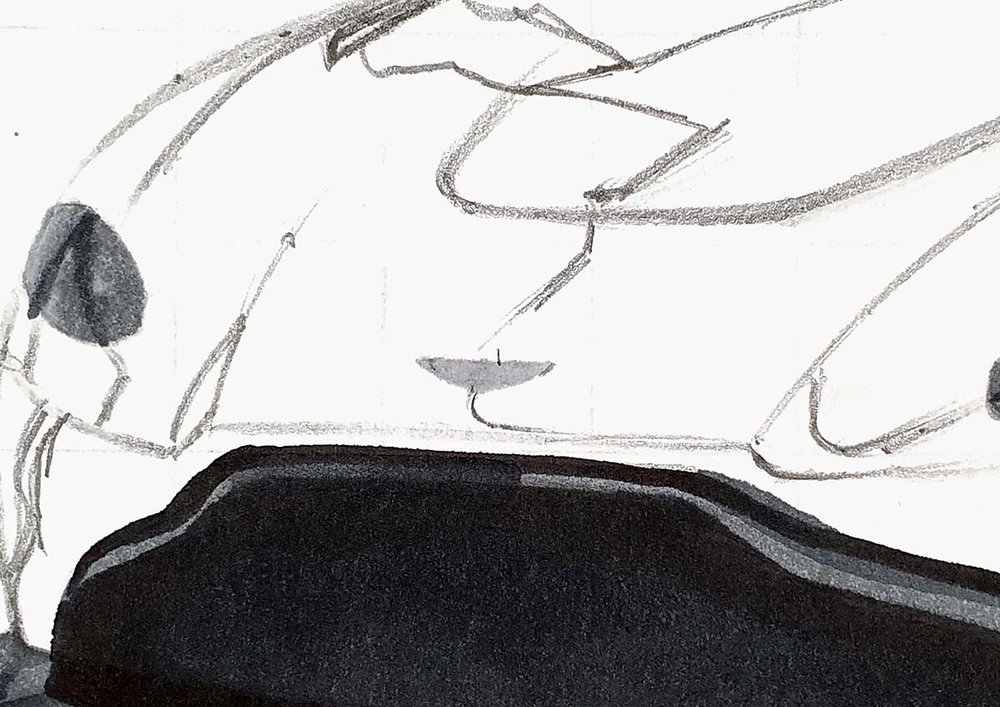
Step 4: Sketch The Wheels of the Aston Martin
Sketching wheels can be a little bit tricky. If they look wonky, you're whole drawing will feel off, so it's crucial to take your time and try to make them as good as you can.
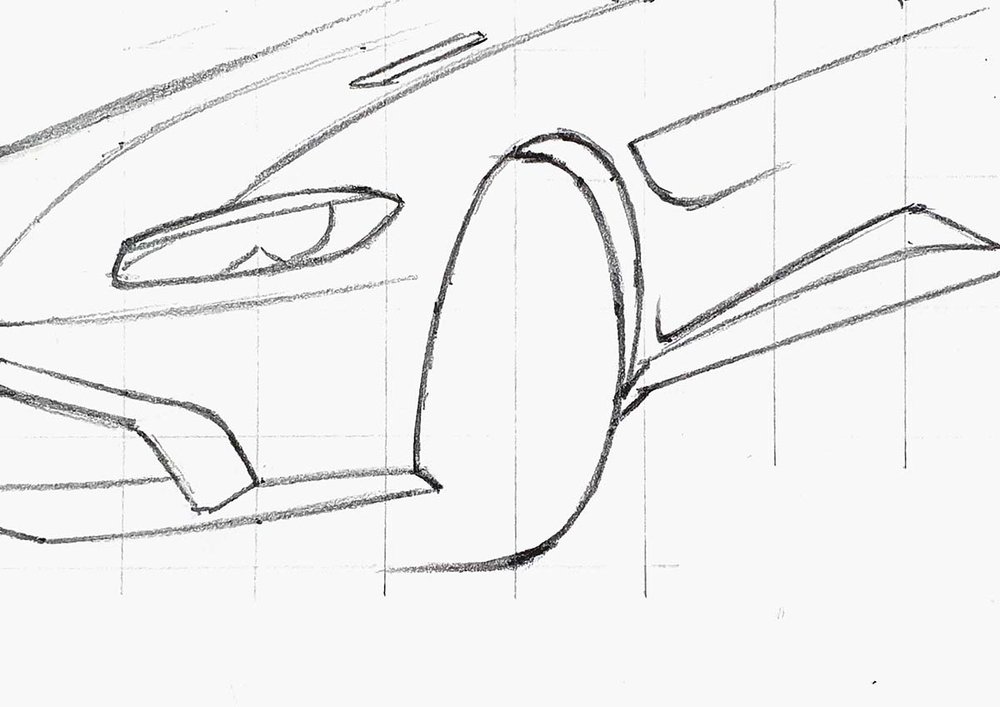
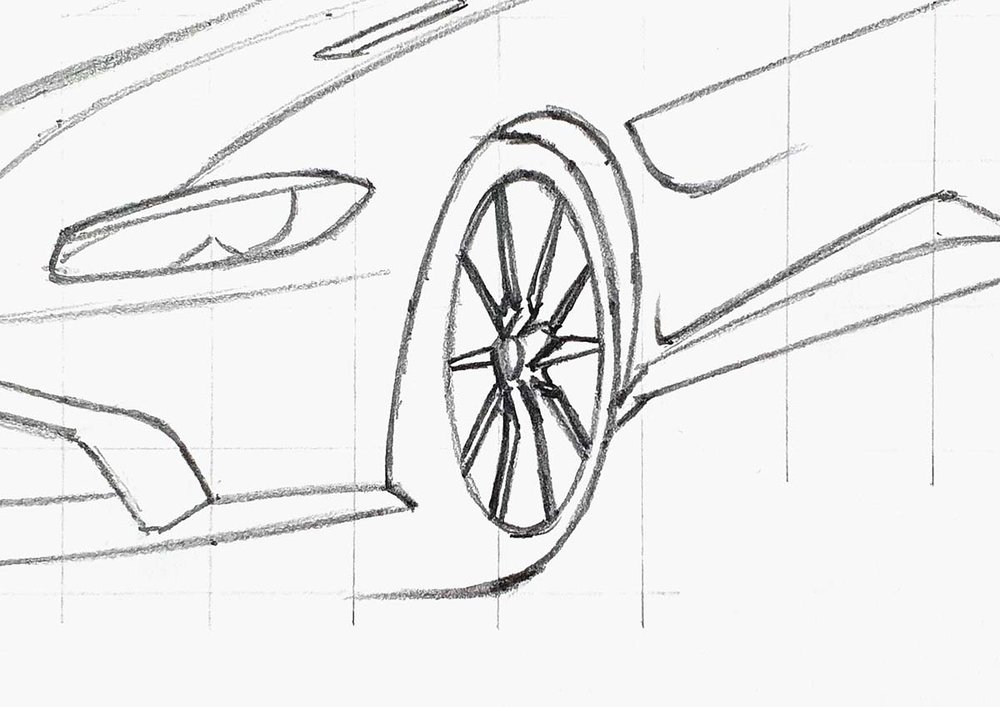
When sketching the outer edge of the tire, I don't always sketch the full front face of the wheel as the front left edge is not harsh but very soft and round.
To sketch the outer edge of the wheel, I marked the top and bottom edges of it and where it crosses grid lines.
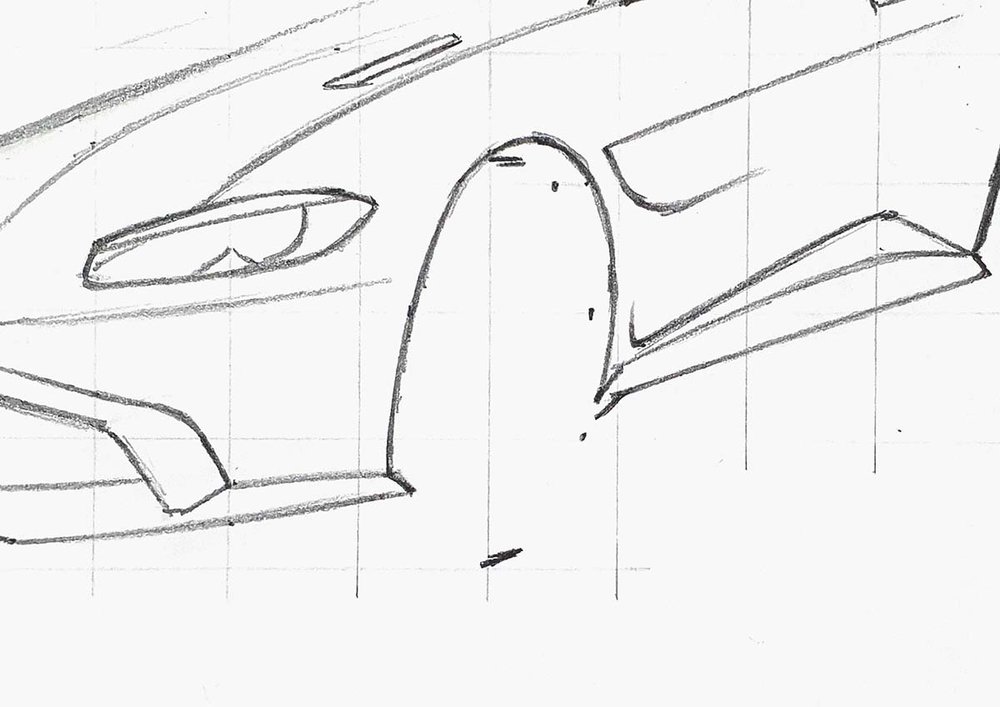
After that, I sketched a line through those points.
At the bottom of the wheel, I just stopped the line where the tire is going to melt into the shadow of the car.
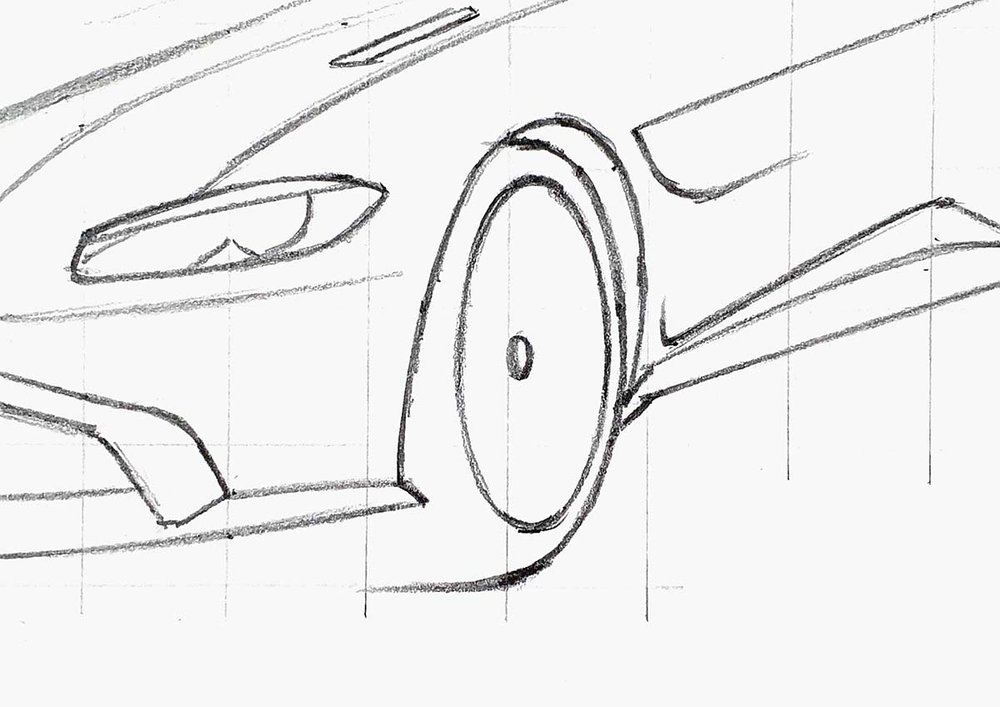
Next, I marked the center with a small ellipse and sketched the outer edge of the rim using the same technique as before.
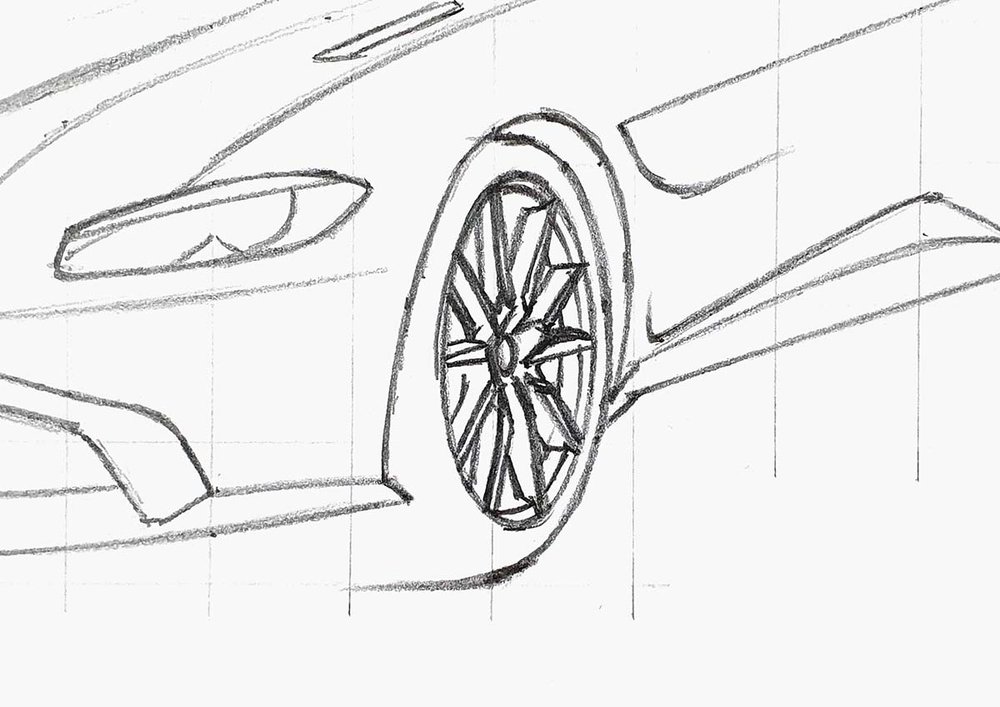
Then, I sketched the wheel design.
The wheels of this Aston Martin are not symmetrical, which makes them more difficult to draw (and explain) systematically...
To sketch them, I would suggest carefully looking at the reference photo with the grid overlay and marking the key points of the spokes before you sketch them.
I sketched just the basic shapes of the spokes with one line.
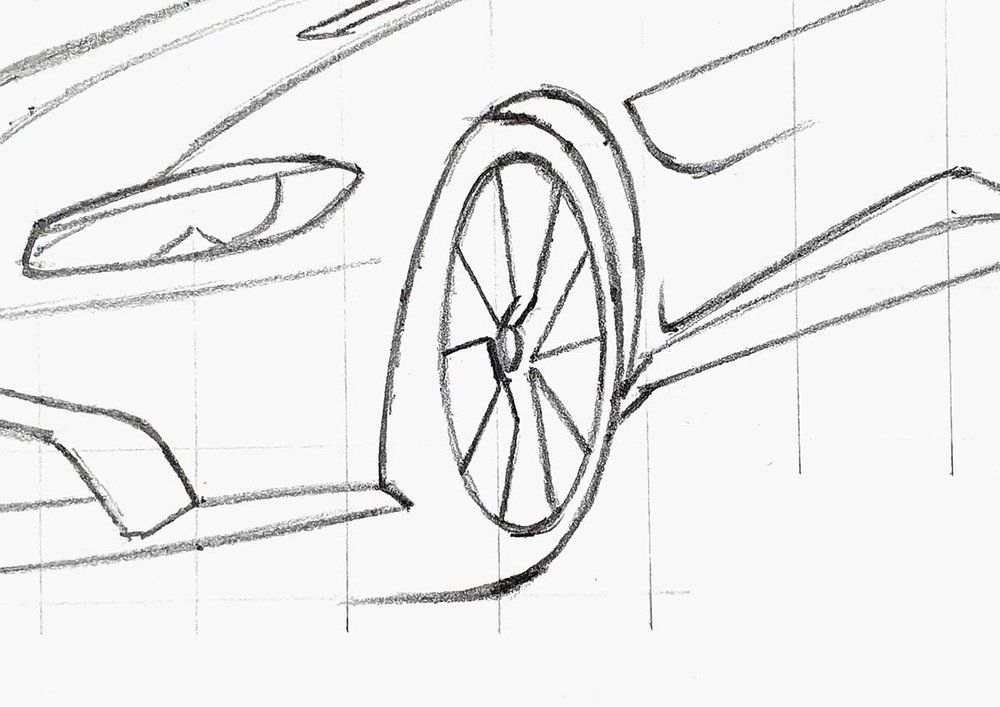
After that, I added the more detailed front face of the spokes and where they attach to the center and each other.
Honestly, there is a lot of room for error in this part, so there's no need to stress over making them look perfect.
To finish the wheels off, I gave the spokes some thickness by adding a line to the left of each spoke.
I also added an extra rim line to the right and bottom.
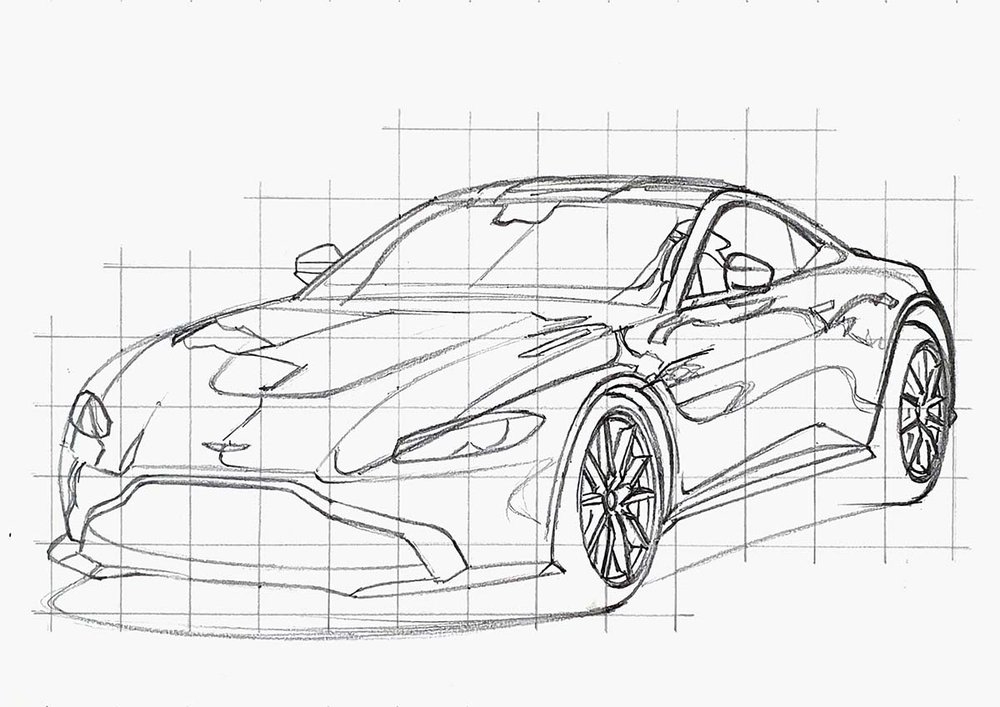
And after doing the rear wheel and the outline of the shadow of the Aston Martin Vantage, it looked like this:
The sketch is now almost done.
Step 5: Mark Out Where the Reflections are on the Body of the Vantage
I'm sure you've noticed the number of reflections on the Aston Martin in the reference photo.
I LOVE drawing reflections on cars. It makes them look so much more interesting and beautiful.
To complete the sketch, we're going to roughly mark out where those reflections are going to be on the car.
I again used the reference photo as a guide and carefully looked at how the reflections were shaped.
Though you don't need to be super precise. Reflections can look a ton of ways, and they depend on you're viewing angle.
If the photographer of this photo wasn't standing upright, but instead sat down on the ground, the reflections would look totally different.
So, you can do whatever you want. You can even just not draw some reflections if you don't like them.
Though using a reference photo as a guide will make them look more realistic.
Here's my sketch with the reflections roughly marked out:
Now that the sketch is fully done, we can start coloring the Aston Martin with some markers.
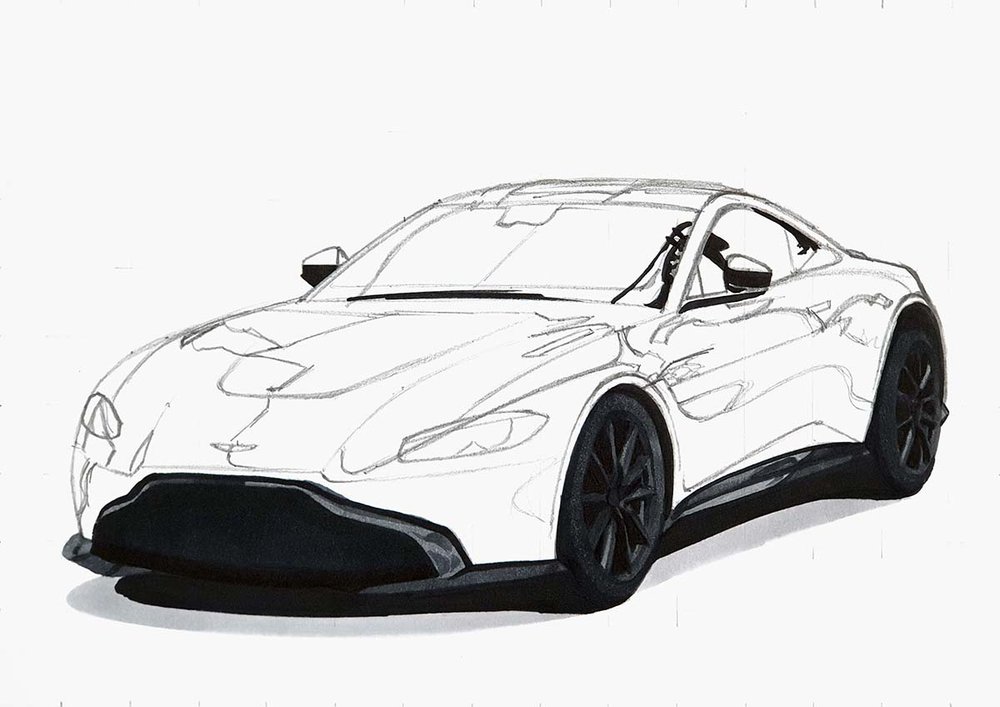
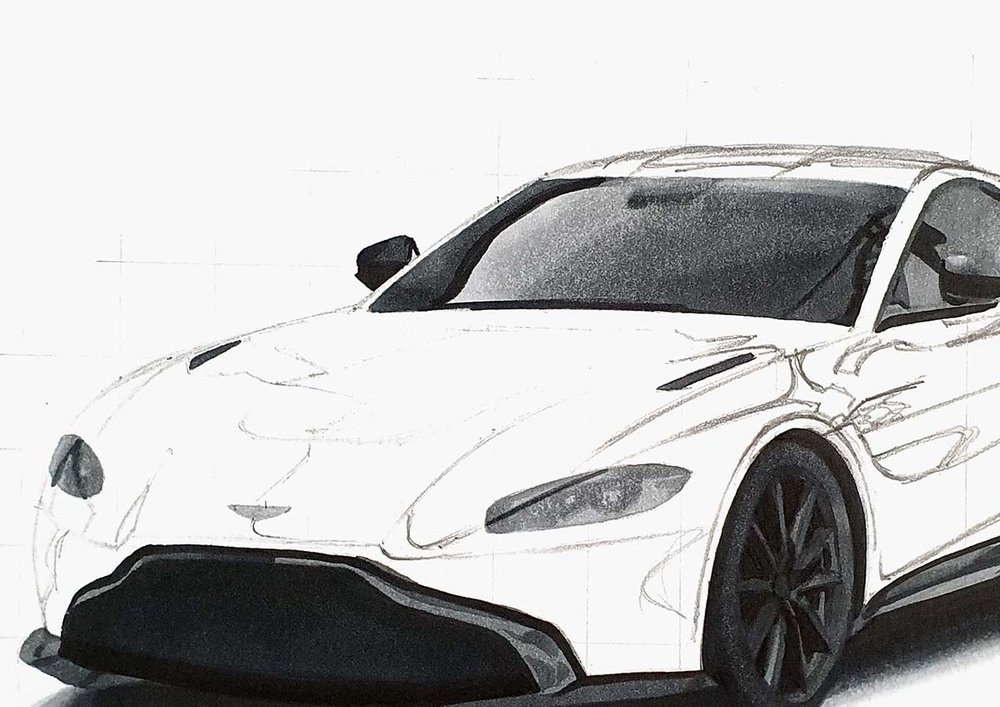
Step 6: Color All Pure Black Parts of the Aston Martin
I always like to color all the black parts of the car first. This is super easy to do and makes the drawing look a lot less daunting in my opinion.
I just look at the reference photo and look for the parts that are completely black and color those in on my drawing.
After this step, every time I colored something, I first lightened that part of the sketch with an eraser to prevent it from showing through the ink of the markers.
So, make sure you do the same if you don't want your sketch to be visible through the markers.
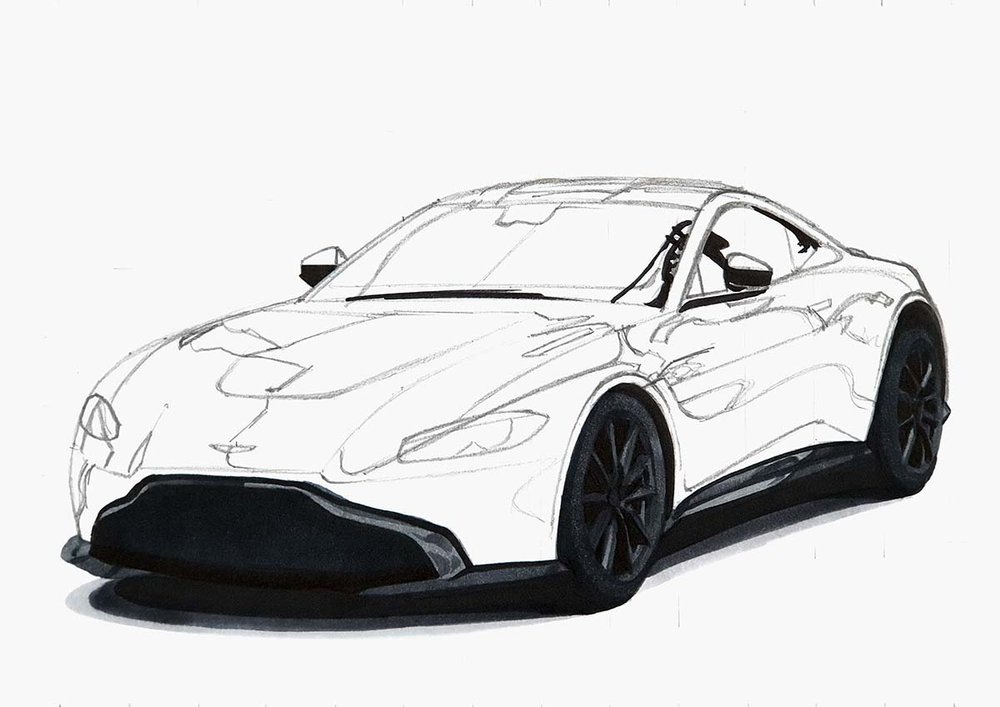
Step 7: Color the Wheels of the Vantage
Next, I colored the wheels.
They are actually quite simple.
I used Neutral Grey 3 (NG03) to color the sides of two spokes that are lighter than the rest.
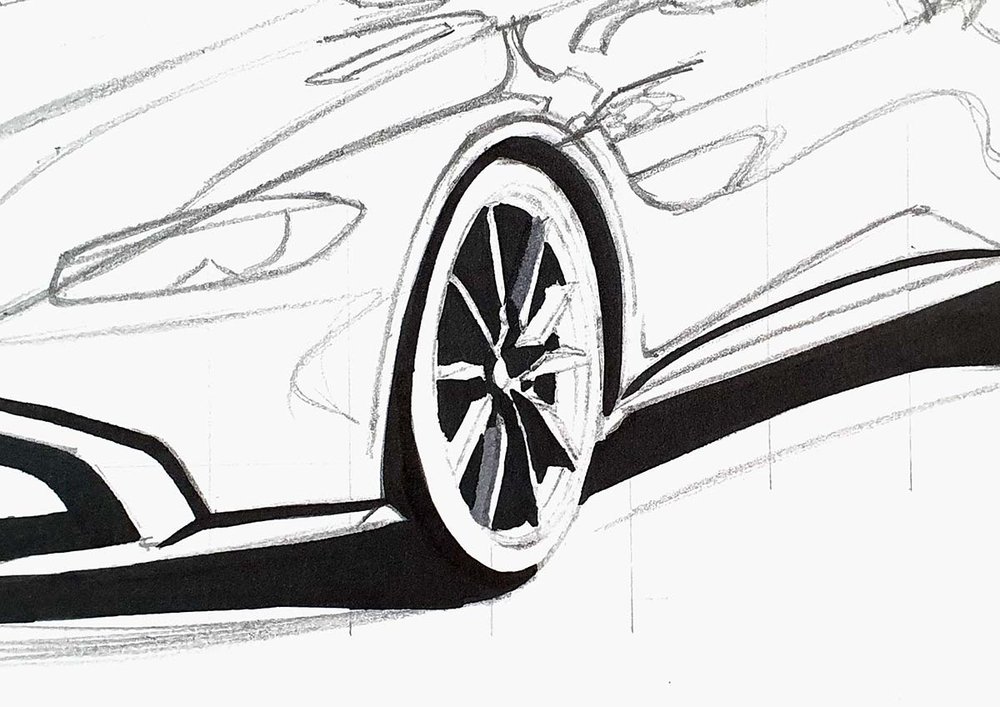
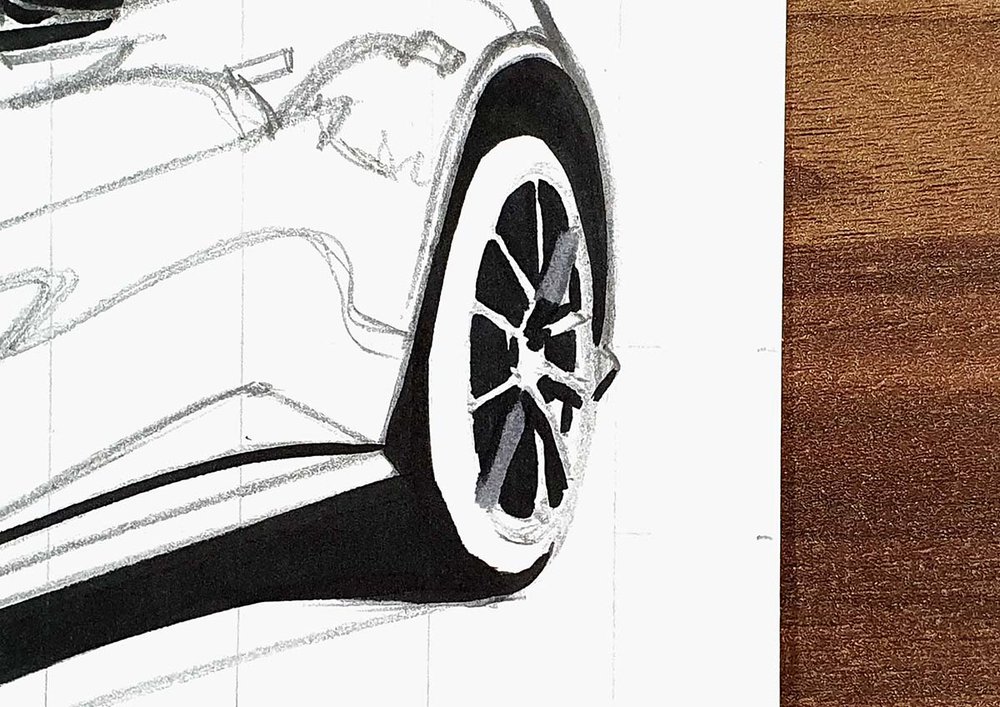
And then, I used Neutral Grey 07 (CG070) to color the remainder of the wheels.
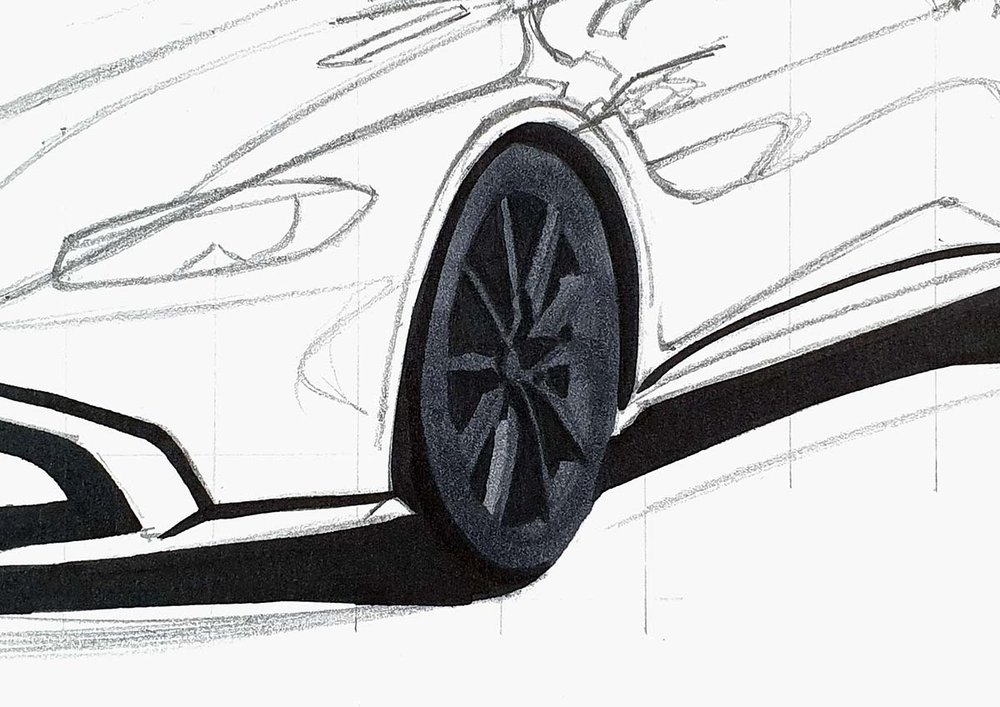
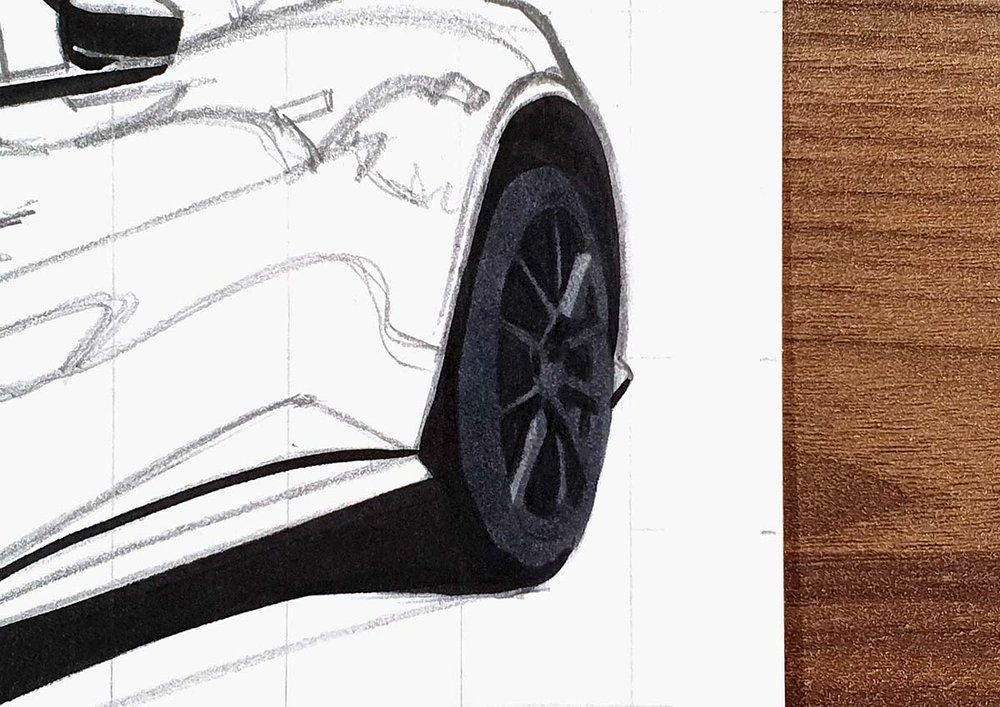
Lastly, I used Neutral Grey 6 (NG06) to blend the grey into the black I had previously colored and added some shading to the wheels and spokes.
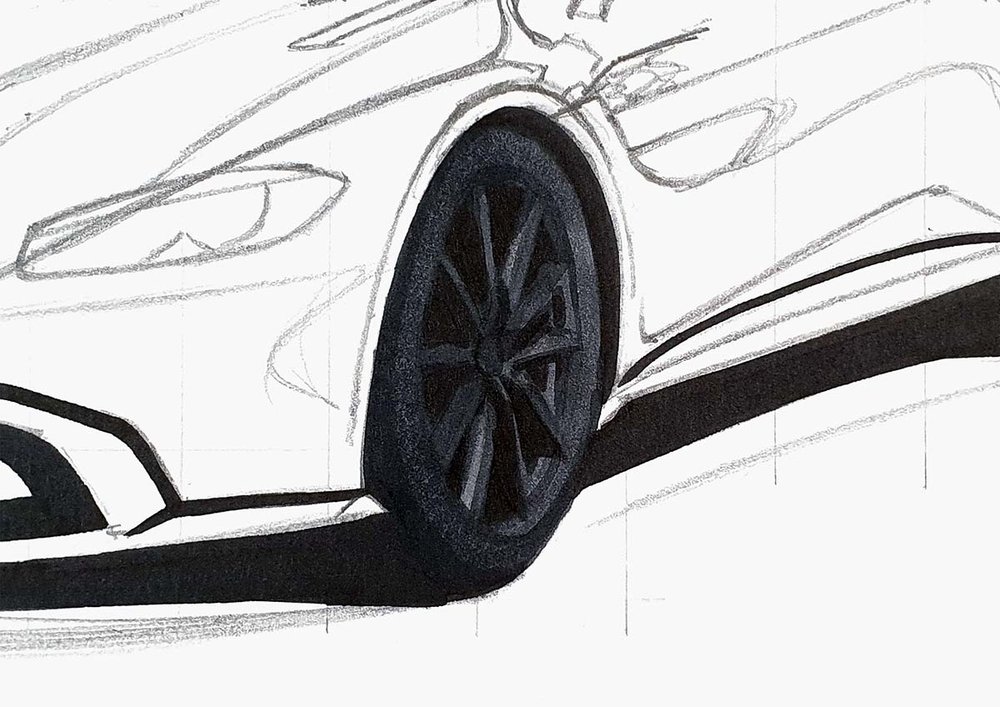
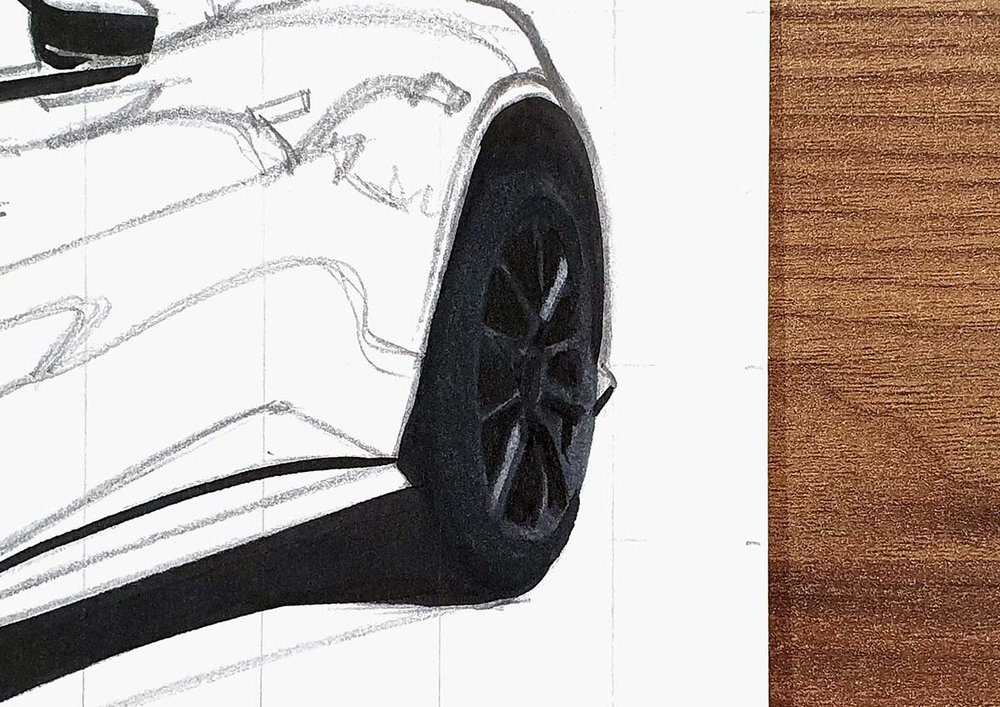
The details and highlights will be added towards the end.
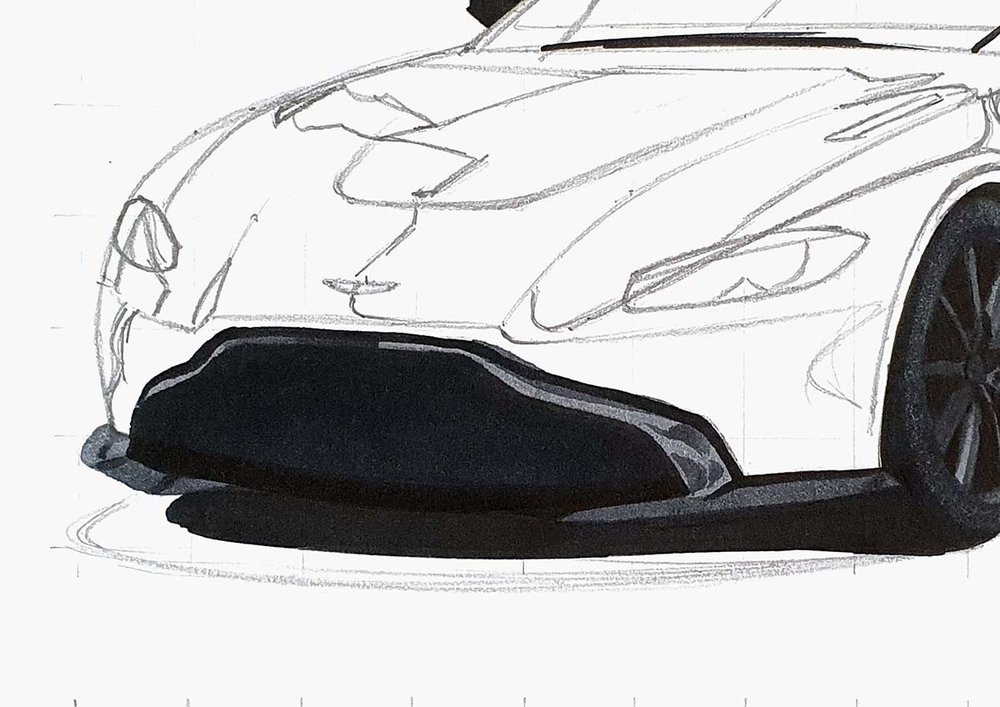
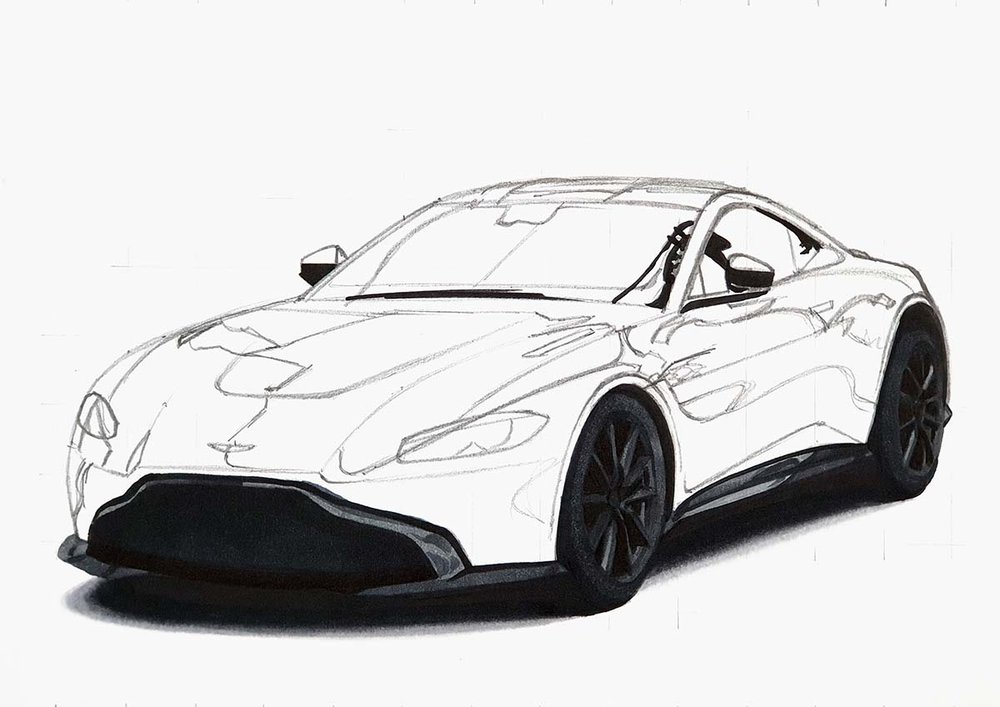
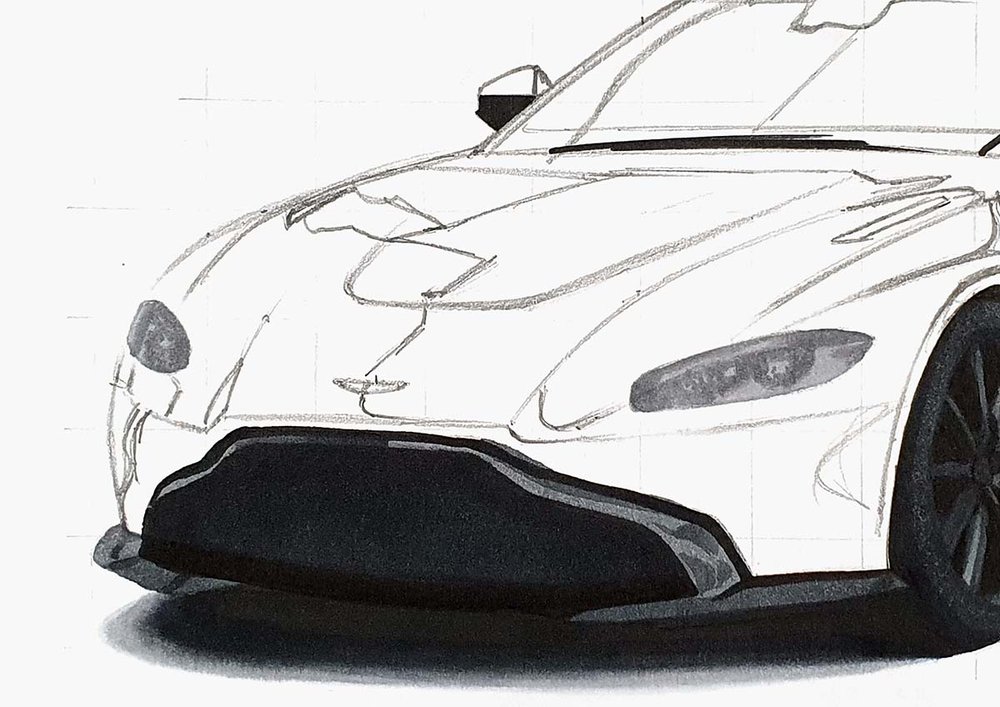
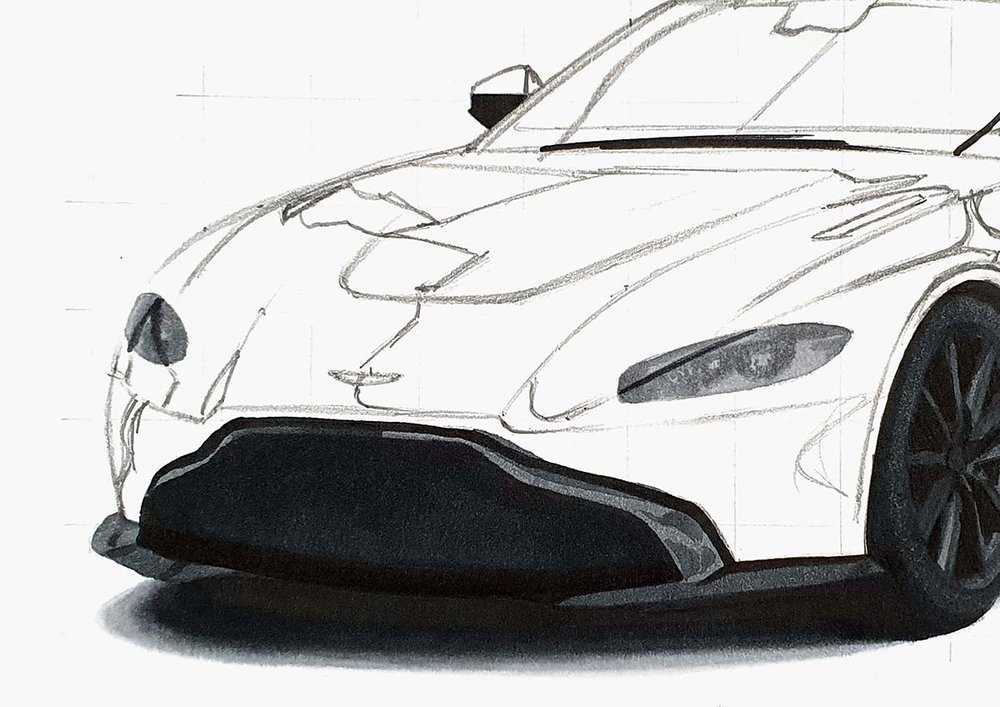
Step 8: Color the Front Grill and Splitter of the Aston Martin
After that, I used Neutral Grey 3 (NG03) to color the left side of the splitter and the grill surround thingy.
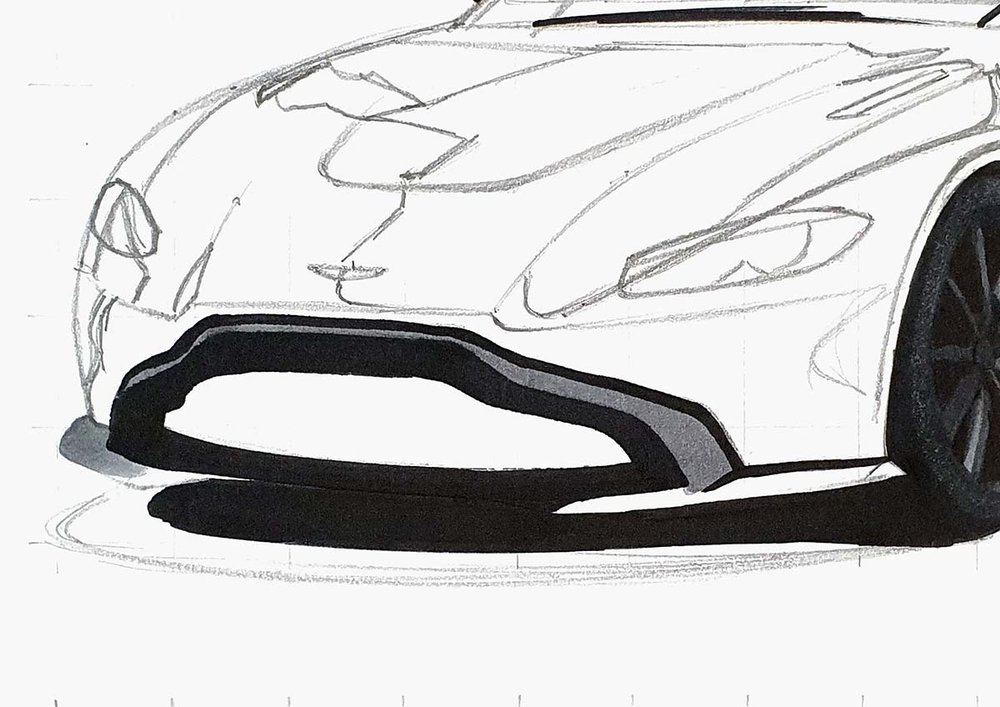
Then, I used Neutral Grey 07 (CG070) to color the rest of the splitter and I added a darker reflection on the top left of the grill surround piece.
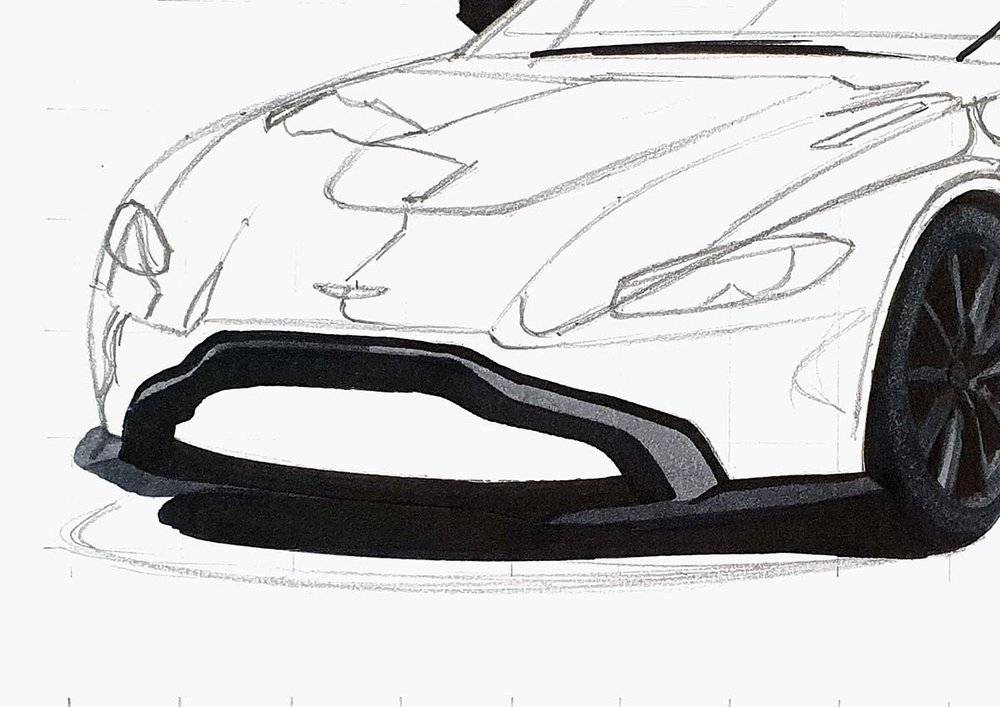
Lastly, I used Neutral Grey 6 (NG06) to color in the grill and add a few dark details.
I also used Neutral Grey 07 (CG070) again to add some reflections on the right side of the grill surround.
Step 9: Color the Side Skirt of the Aston Martin Vantage
After that, I sort of followed the same steps for the side skirt.
I first used Neutral Grey 3 (NG03) to color the whole thing, plus the little bit of the diffuser behind the rear wheel.
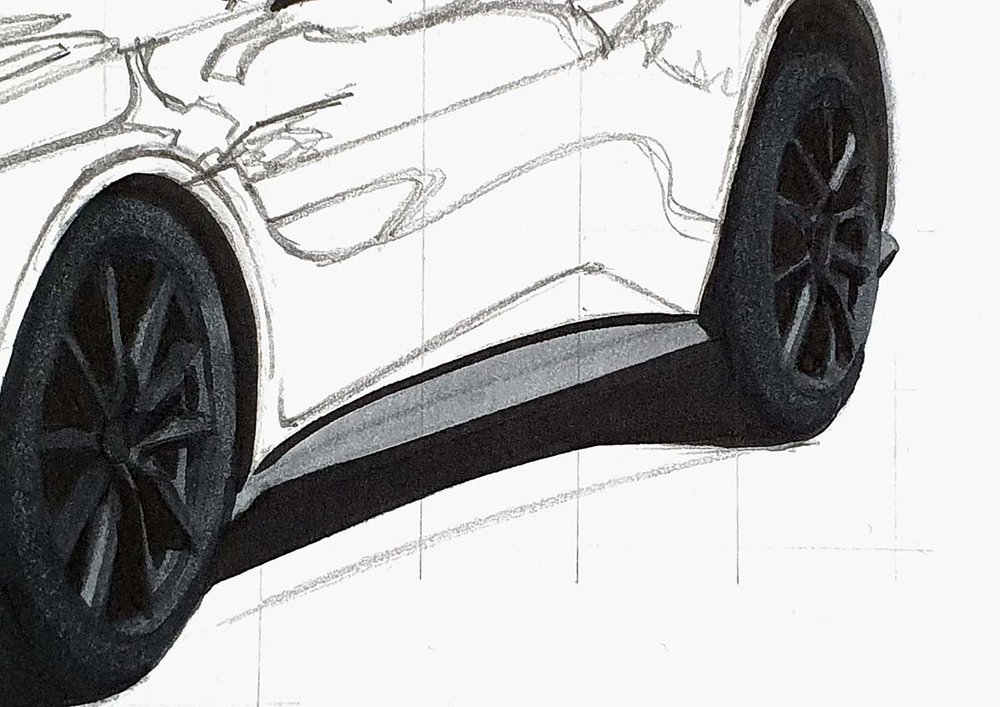
Next, I used Neutral Grey 07 (CG070) to add reflections and shading, replicating how it looks in the reference.
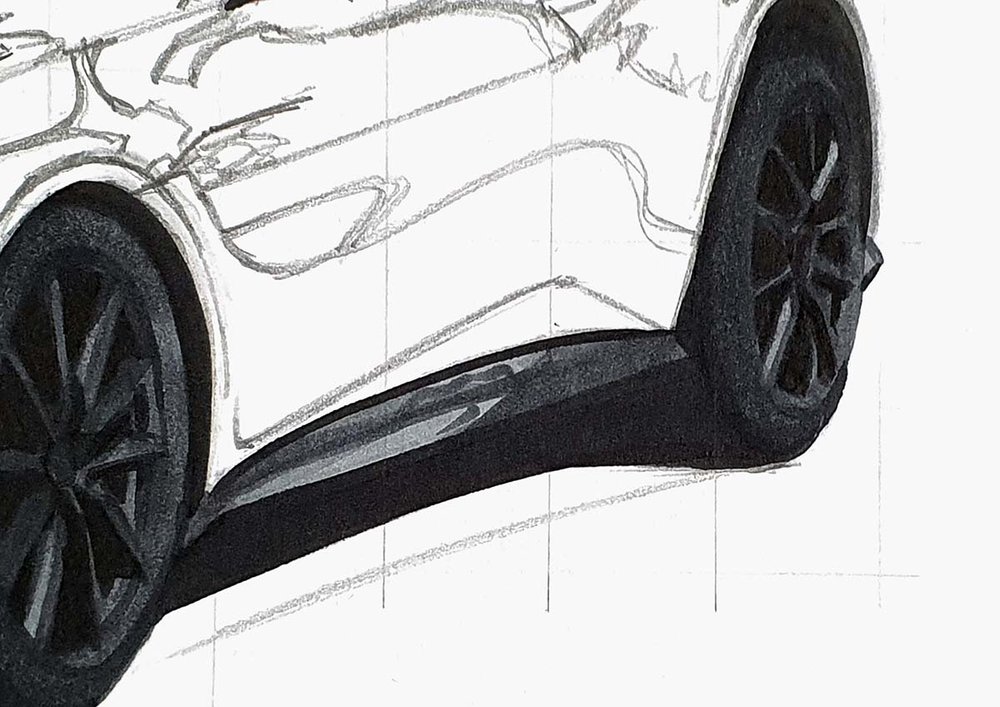
Lastly, I used Neutral Grey 6 (NG06) to add the darkest reflections and shadows.
Step 10: Color the Shadow of the Aston Martin
Now the shadow. This gets a little more complicated, but it's still super easy.
I started by coloring the remainder of the shadow with Neutral Grey 03 (CG030).
Next, I colored a stroke of Neutral Grey 07 (CG070) in between the black and the light grey.
And lastly, the tricky part, making these grey tones blend seamlessly. This is easier than you might think.
To make the black blend into the Neutral Grey 07 (CG070), I just colored over the edge of the two colors with Neutral Grey 07 (CG070), and the colors will blend themselves.
To blend the Neutral Grey 07 (CG070) into the Neutral Grey 03 (CG030), I colored over the edge of the two colors with Neutral Grey 03 (CG030).
And to blend the Neutral Grey 03 (CG030) into the white of the paper, I used the Colorless Blender (0).
Step 11: Color the Headlights of the Aston Martin Vantage
Next up are the headlights.
These are also pretty easy to color, mainly because I just skipped all the details for now, as I thought they would be easier to add in later with pencils and the white paint marker.
I first colored both headlights with Neutral Grey 03 (CG030).

Then, I used Neutral Grey 3 (NG03) to add shading and roughly marked out the shapes inside the headlights.
Lastly, I used Neutral Grey 07 (CG070) and Neutral Grey 6 (NG06) to add these line reflections on the headlights.
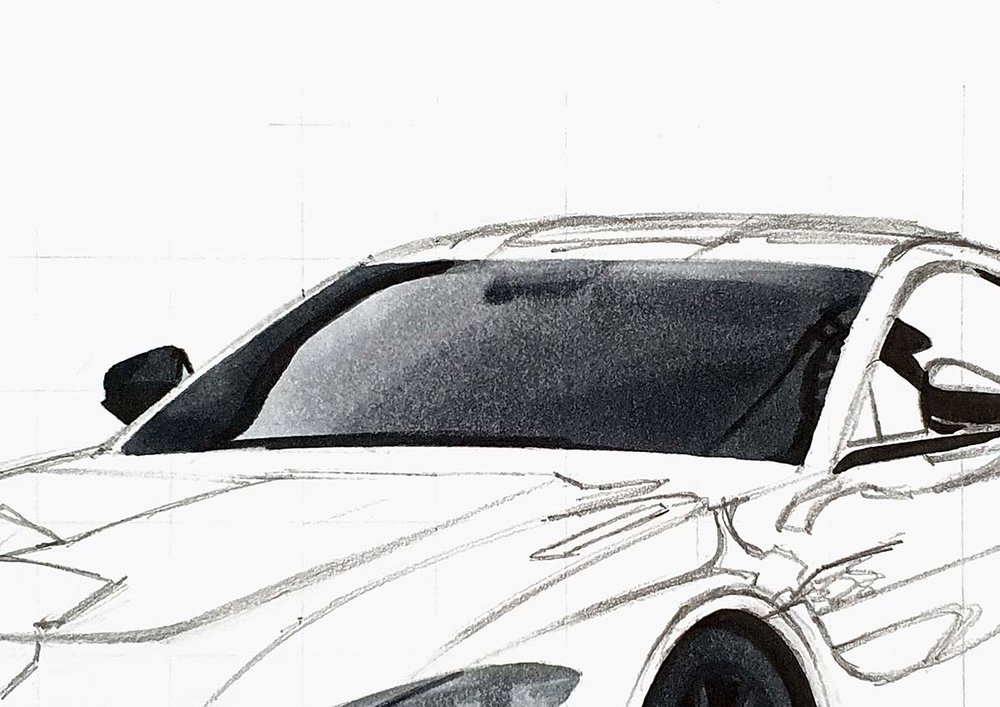
Step 12: Color the Windshield of the Aston Martin
After that, I colored the front windshield.
I started by coloring the lightest parts with Neutral Grey 03 (CG030).
I also colored the mirror part of the folded mirror on the left.
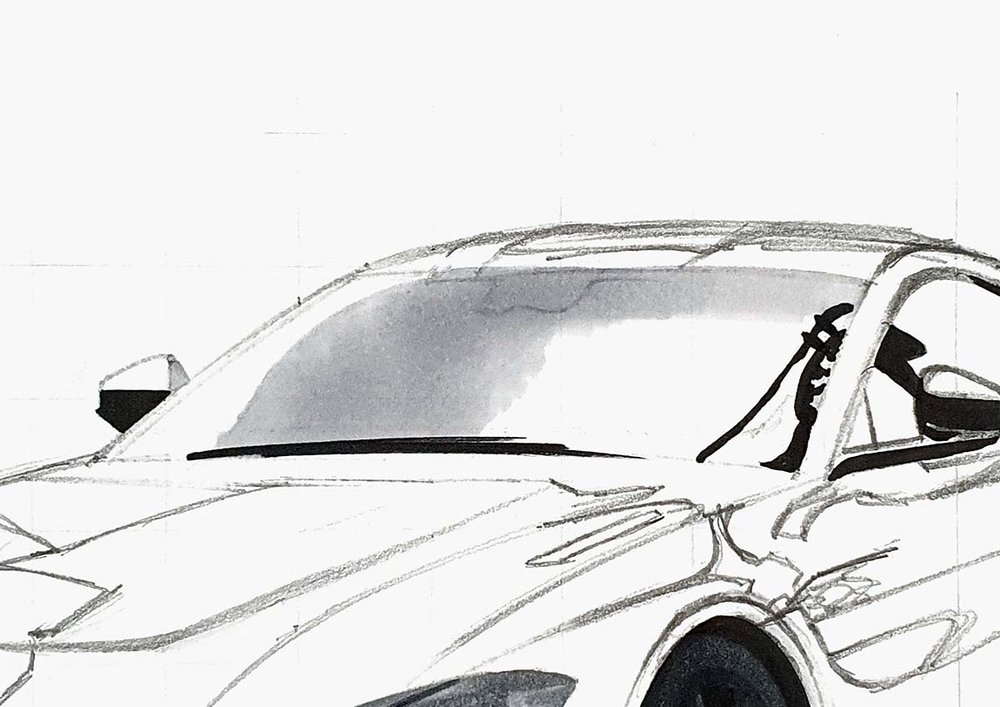
Next, I used Neutral Grey 3 (NG03) to color the reflections on the left side of the windshield, and I darkened the middle right part and blended it into the lighter grey using the same technique as before.
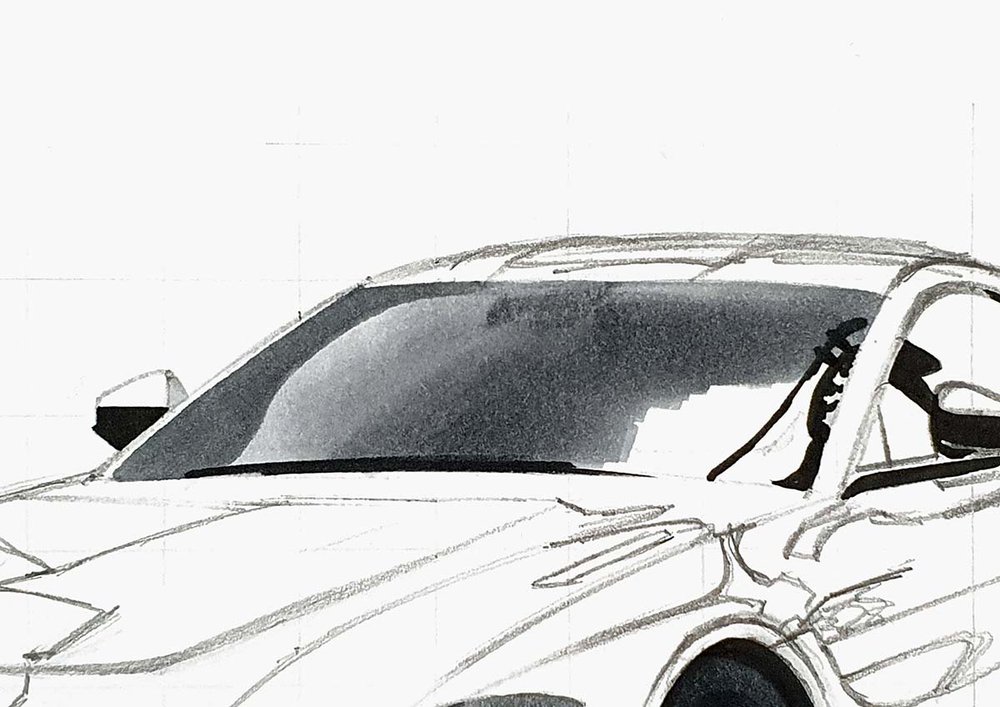
Then, I used Neutral Grey 07 (CG070) to color the remainder and blended it into the rest of the windshield.
I also colored the mirror cap.

Lastly, I used Neutral Grey 6 (NG06) to add a dark line on the right edge of the reflections on the windshield, and I darkened the left side of the mirror cap.
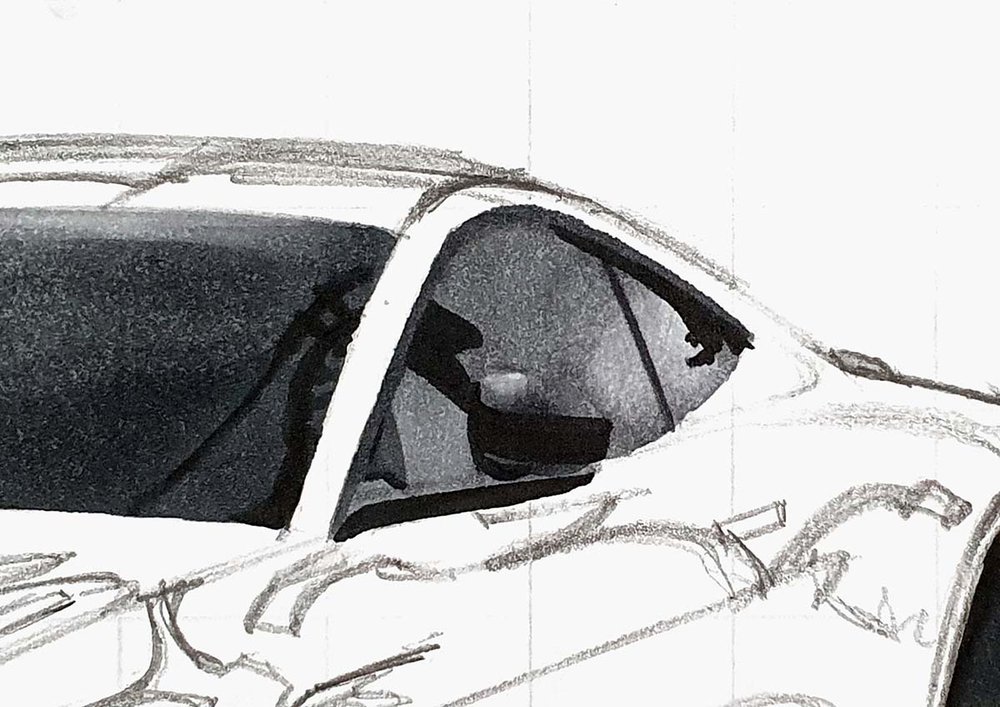
Step 13: Color the Side Windows of the Vantage
After coloring the windshield, I colored the side windows.
I started by coloring the rear half of the windows with Neutral Grey 03 (CG030), as well as the top of the mirror cap.
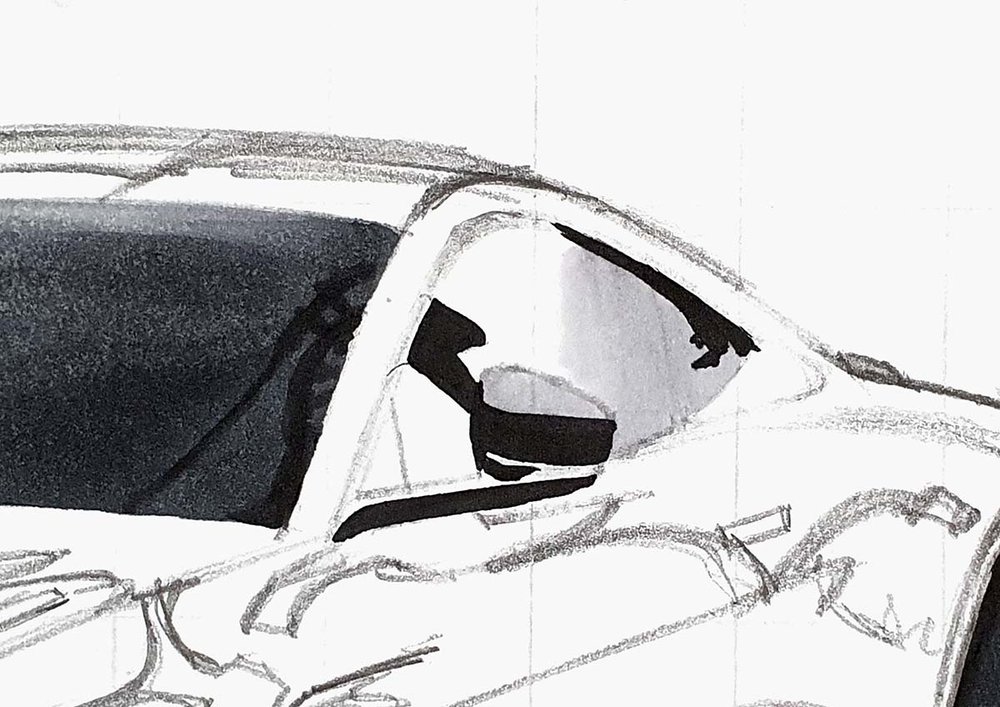
After that, I colored the remainder of the windows and the mirror with Neutral Grey 03 (CG030) and blended that into the light part on the right.
I also darkened the mirror cap except for the top left.
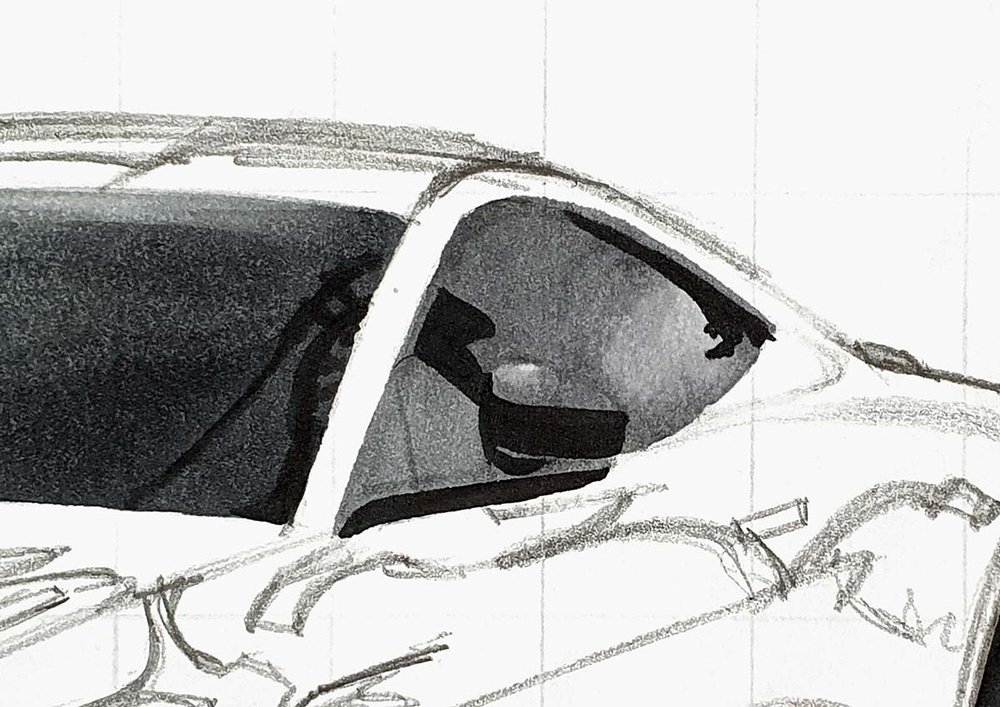
Lastly, I used Neutral Grey 07 (CG070) to color the window sills, the edge between the front and the rear windows, and the window triangle.
I also darkened the bottom bit of the mirror cap and added a darker spot on the bottom of the light reflection on the top of the mirror cap and blended it out.
Step 14: Color the Logo and the Vents on the Hood of the Aston Martin
Next, I colored the Aston Martin logo with Neutral Grey 03 (CG030) and the vents on the hood with Neutral Grey 07 (CG070).
I almost forgot to color the vents... I only noticed them when I was lightening the markings for the reflections to color the main body of the Vantage.
Now all the grey parts are colored.
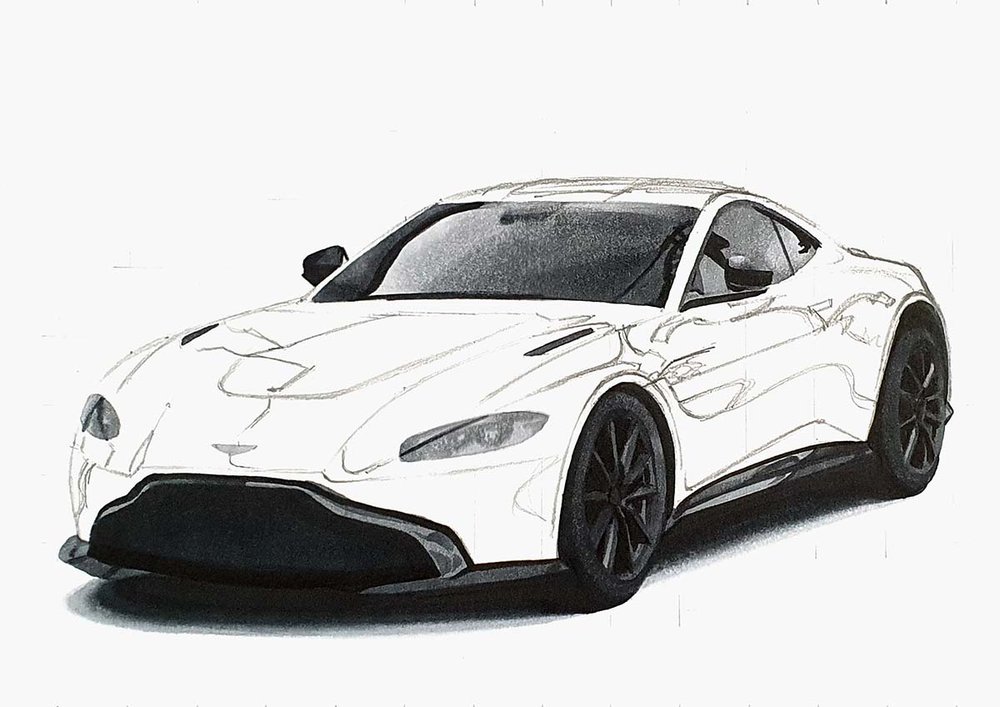
Time to color the main body and the reflections on it!

My go-to alcohol markers for blending, rich color payoff, and amazing value. The brush tips feel super natural to draw with — a must-have for smooth gradients and realistic shading!
- Brush + chisel tips
- Great for beginners & advanced artists
- Budget-friendly alternative to Copics
Step 15: Color the Main Body of the Aston Martin Vantage
Coloring the body is often my favorite part of any car drawing. Though it can also be one of the most difficult parts.
To color the body of this Vantage, I started by coloring the lightest parts first.
To do this, I used Shadow Pink (RV270).
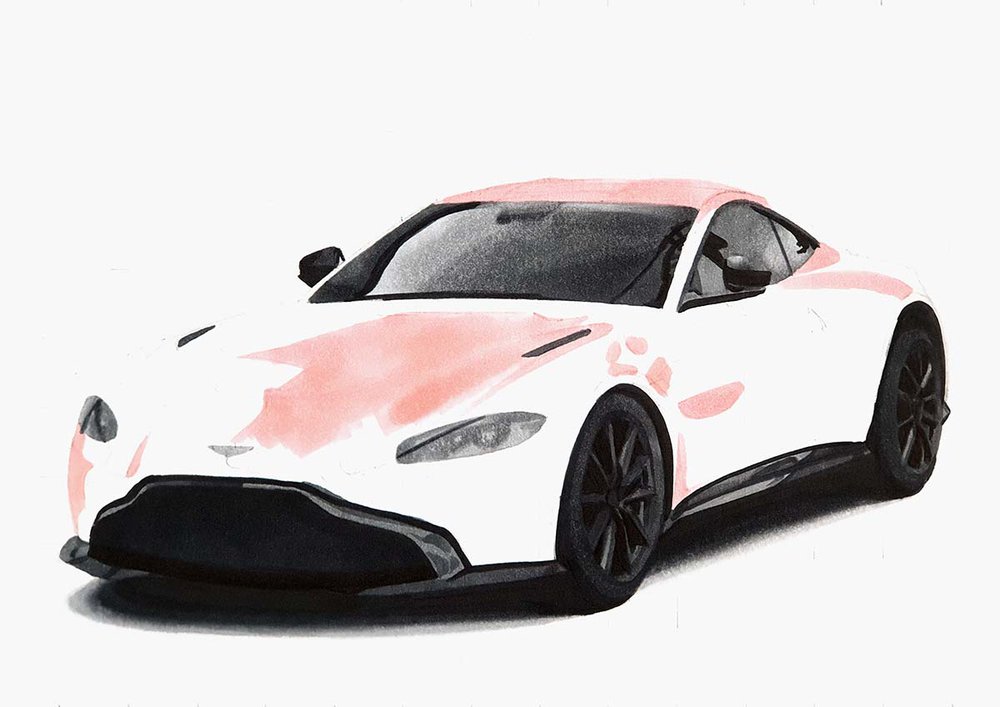
Next, I used Pastel Rose (R9) to color the second lightest parts.
I also used it to add shading to the light pink part around the hood lines and to add the reflections on the roof.
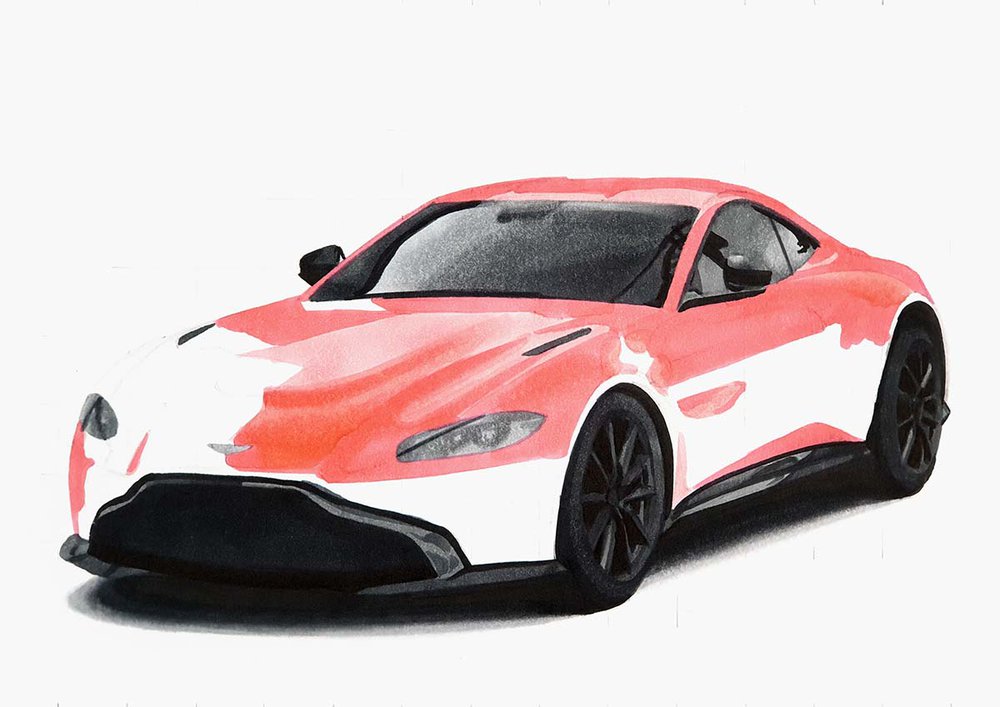
After that, I colored most of the remainder of the body with Zinnober (R150). I left two spot on the hood uncolored.
I also added tons of tiny reflections on the side of the Aston Martin.
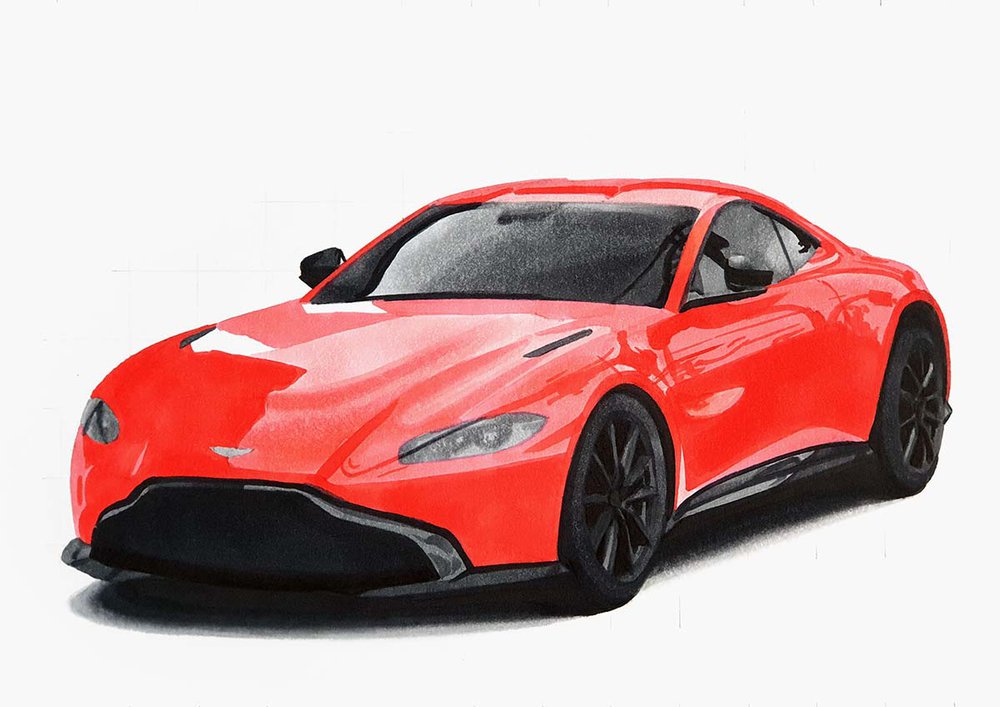
Then, I used Lipstick Red (R170) to add darker shading on the areas I just colored with Zinnober (R150).
I also colored the two spots that were still white.
Lastly, I used Geranium (R8) to add the darkest reflections and shading on the front and the side of the car.
I also added just a few darker reflections on the hood and the roof.
Now, the Aston Martin Vantage is fully colored, and it's already looking pretty good.
Although it could use some more details and highlights.
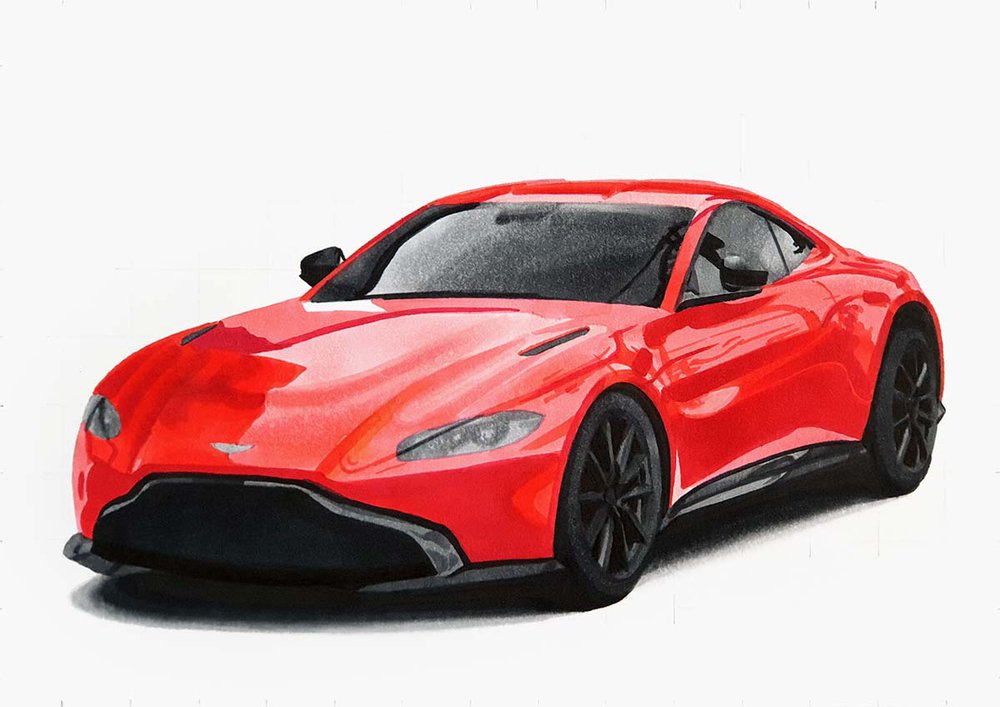
Step 16: Add Some Details to the Aston Martin Vantage Drawing with Colored Pencils
To add the details, I used a white and a black colored pencil.
I used the black to add the gap around the hood and to color a line around the headlights and the top of the windshield.
I used the white pencil to add highlights and details to the wheels and the headlights, and I used it to add the door gaps.
I also used the white pencil to make the top bit of the light reflection on the hood lighter and to add just a few highlighted lines on the reflections on the side of the car, the splitter, side skirt, and grill surround piece.
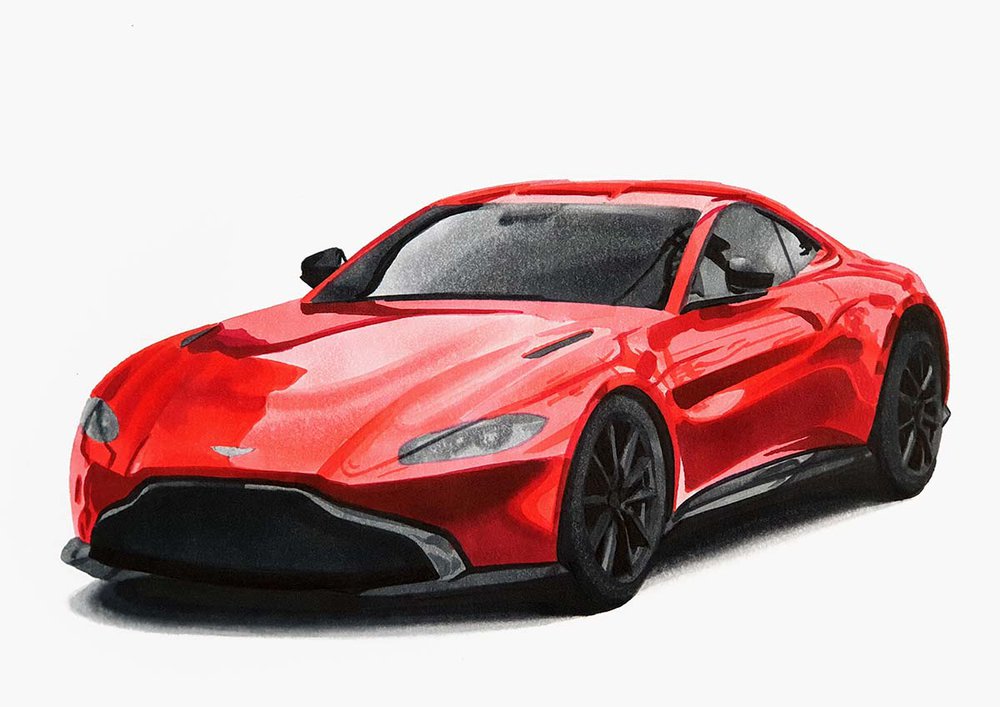
Step 17: Add Some Final Highlights on the Aston Martin drawing
The Aston Martin is already looking a whole lot better now, but there is one simple thing we can do to make it look even better: adding a few pure white highlights with a paint marker.
With my Posca paint marker, I added just a few highlights on the wheels, the side skirt, the front, and the roof.
I also added some dots in the headlights and dabbed my finger on them to fade them out a bit.
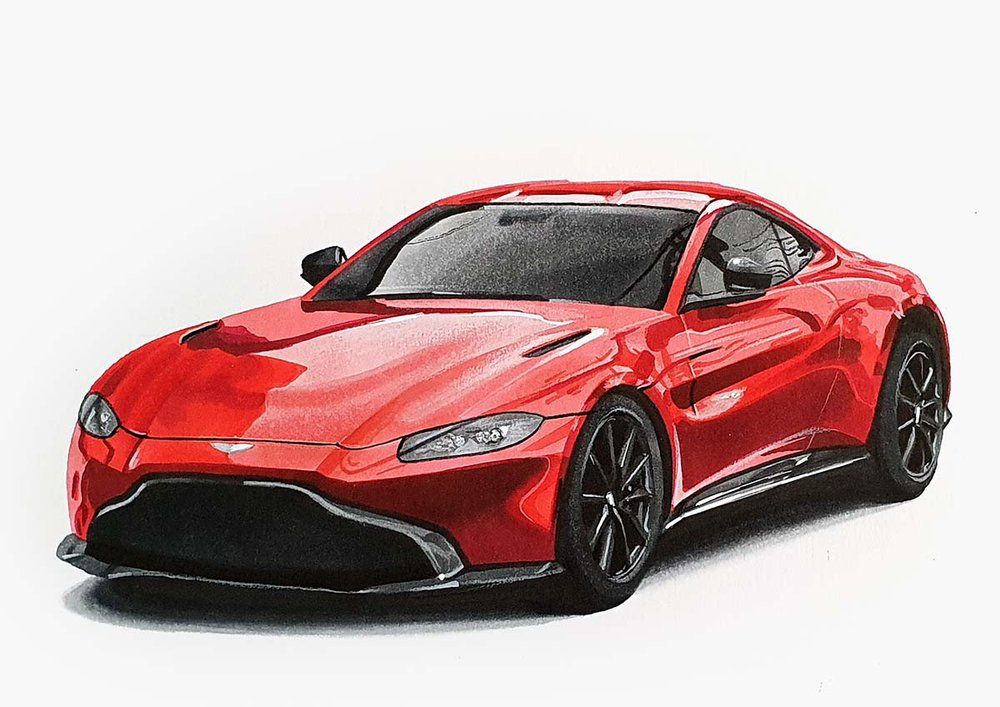
Final Result: Finished Realistic Aston Martin Vantage Drawing
And that's how I drew this realistic Aston Martin step-by-step.
I hope you enjoyed this car drawing guide and learned how to draw a realistic Aston Martin.
Want insider tips, tutorials, and mini-courses for car drawing? Click here.
Tags
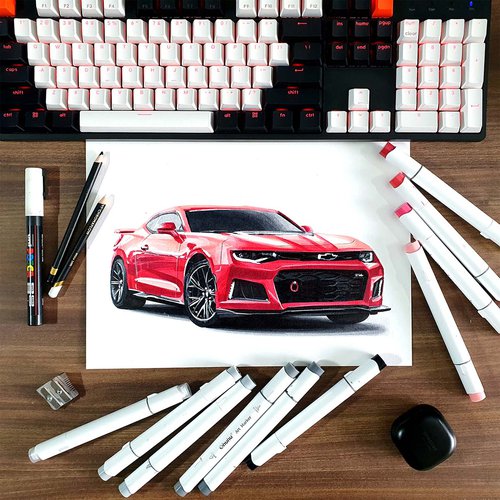
Articles You Might Also Like


I love bringing cars to life with alcohol markers and colored pencils.
Whether you're just starting out or looking to improve your skills, I'm here to help!
Click here to learn more about me.


Be the first to comment!
Comments
There are no comments yet.