How to Draw a Porsche 918 Spyder - Easy Step-by-Step Tutorial
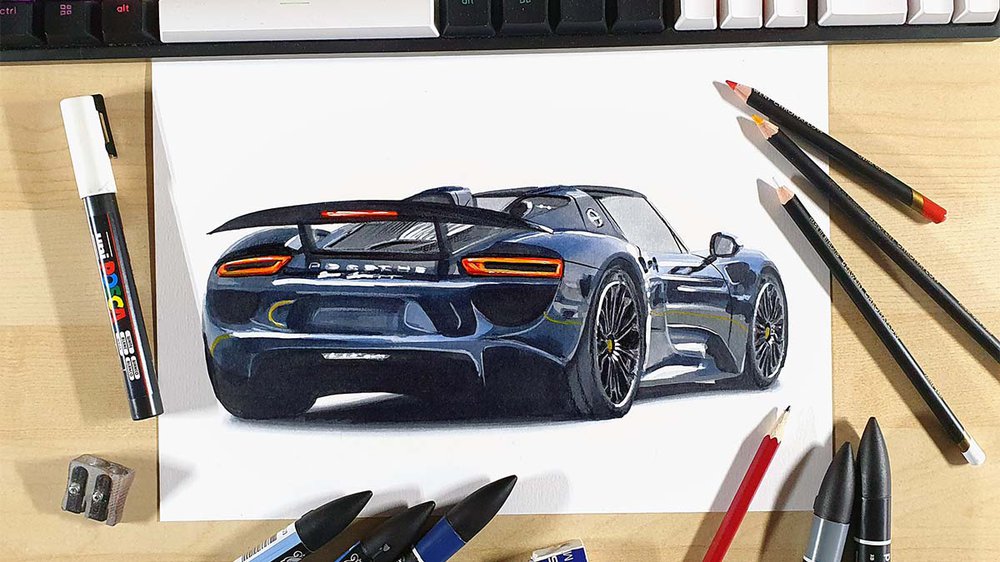
In today's car drawing tutorial, I'm going to show you how to draw this beautiful Porsche 918 Spyder.
I've wanted to draw a 918 Spyder for a long time now, especially one in this deep blue color. And today, I finally did it!
Continue reading to learn the exact steps I took to make this Porsche 918 Spyder drawing!
Disclaimer: In the name of full transparency, please be aware that this blog post contains affiliate links and any purchases made through such links will result in a small commission for me (at no extra cost for you).
How to Draw a Porsche 918 Spyder?
To create a realistic Porsche 918 Spyder drawing, you'll first need to find a good reference photo. Next, you sketch the outline of the car. After that, you color the car, part by part until it is fully colored. And to finish it off, you add a few details with colored pencils and a few highlights with a white paint marker.
Step 1: Look for a Reference Photo for Your Drawing
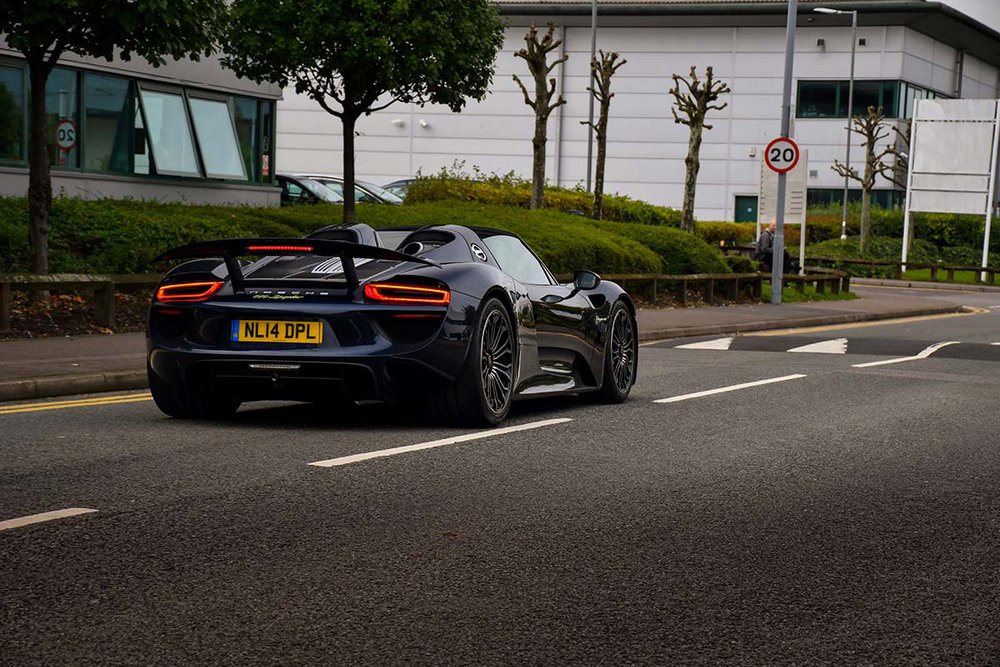
The first step in making a realistic Porsche 918 drawing is looking for a good reference photo of the car.
I found this photo on Unsplash. This is the photo I'll be using as a reference throughout this step-by-step drawing guide.
Step 2: Gather the Art Supplies You Need to Draw a Porsche 918 Spyder
Now that we've found our reference photo, it's time to decide what drawing supplies we're going to use.
I wanted to keep this drawing simple, so I used alcohol markers.
To be more specific, I used the Winsor & Newton Promarkers in the colors Ice Grey 1 (IG1), Ice Grey 2 (IG2), Ice Grey 4 (IG4), Ice Grey 7 (IG7), Blue Black (XBB), Black (XB), Pumpkin (O467), Lipstick Red (R576), Cornflower (B617), China Blue (B736), and Midnight Blue (B624). I also used the Colorless Blender.

To add details, I used 3 Derwent Chromaflow colored pencils in the colors White, Platinum, and Black.
To add some final highlights, I used a white Posca PC-3M paint marker.
I also used an HB pencil, a ruler, an eraser, and a kneaded eraser.
And I made this drawing on A4-sized Canson Illustration Manga paper.
Step 3: Sketch the Outline of the Porsche 918 Spyder
Now that we have the reference photo and our art supplies ready to use, it's time to start the drawing.
The first step of drawing a car like the Porsche 918 Spyder is to sketch the outline and all the parts of the car.
This can be a difficult task, especially if you don't have much experience drawing cars yet.
Luckily there are a few sketching techniques that can make this a lot easier, like the grid method which I'll be using in this tutorial.
If you're not sure what the grid method is and how to use it, I highly recommend taking a look at this guide.
Now, to get started with the grid method we first need to resize our reference photo to have the same size as our piece of paper. I'm using A4-sized paper which equals 3508 by 2480 pixels. So I resized the photo to 3508 by 2480 pixels.
Next, I added a grid overlay of 15 by 10.5 squares.
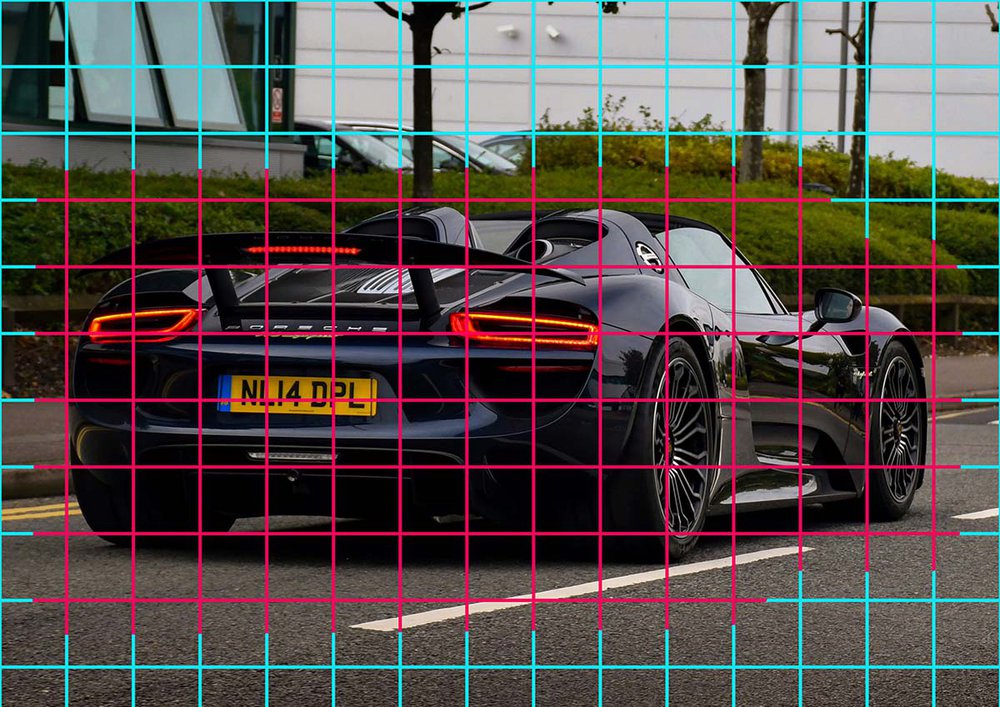
Now, the reference photo is ready to be used.
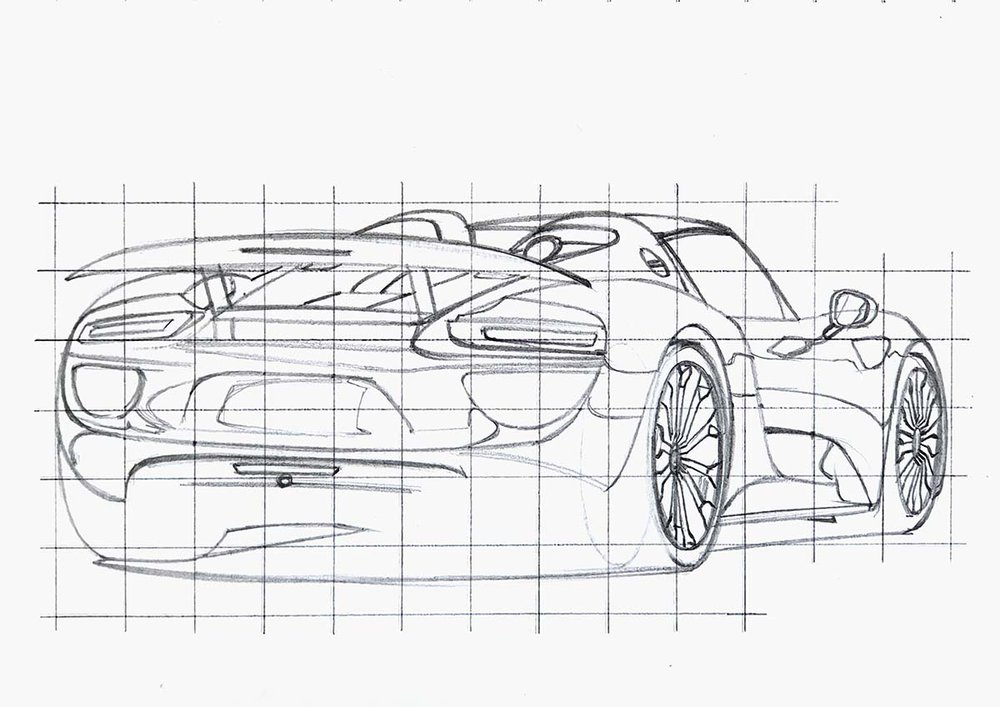
Next, I sketched the grid on my paper sketching the same amount of grid lines and squares. Each square has a height and width of 2 cm. This fits the paper pretty well.
I only sketched the squares necessary to sketch the Porsche 918 Spyder.
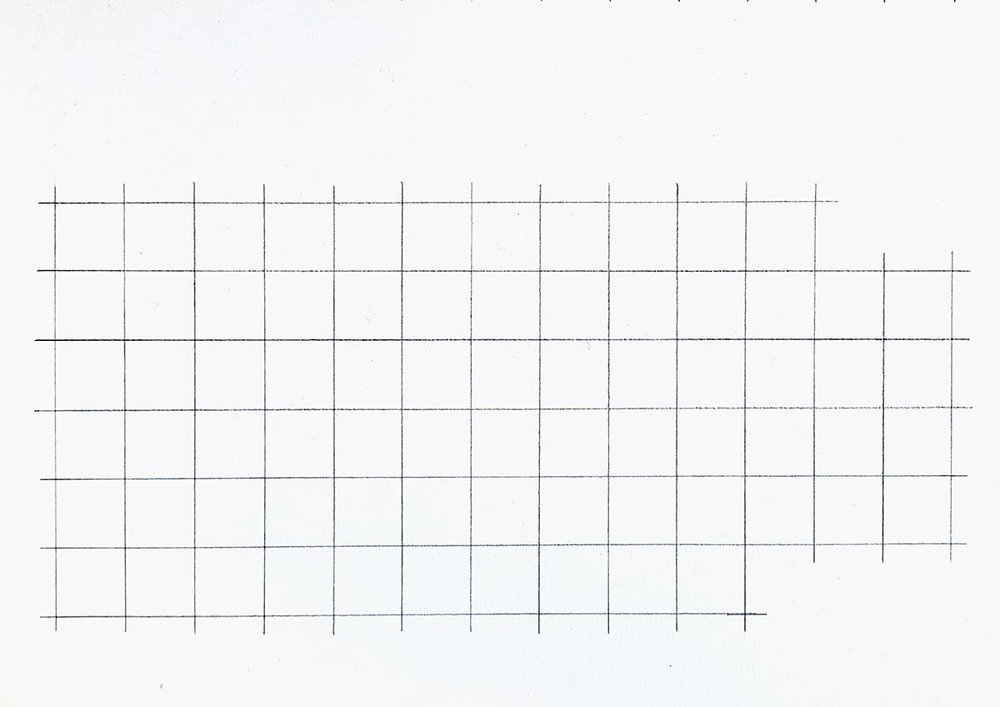
Now that the grid is done, we can start sketching the outline of the Porsche 918.
I like to start on the left and pick an easy line to sketch. Then I mark where it starts and ends, and where it crosses grid lines.
Next, I sketch the line in one quick motion.
I did this for all the lines on the outside of the 918 Spyder until I covered the whole outline.
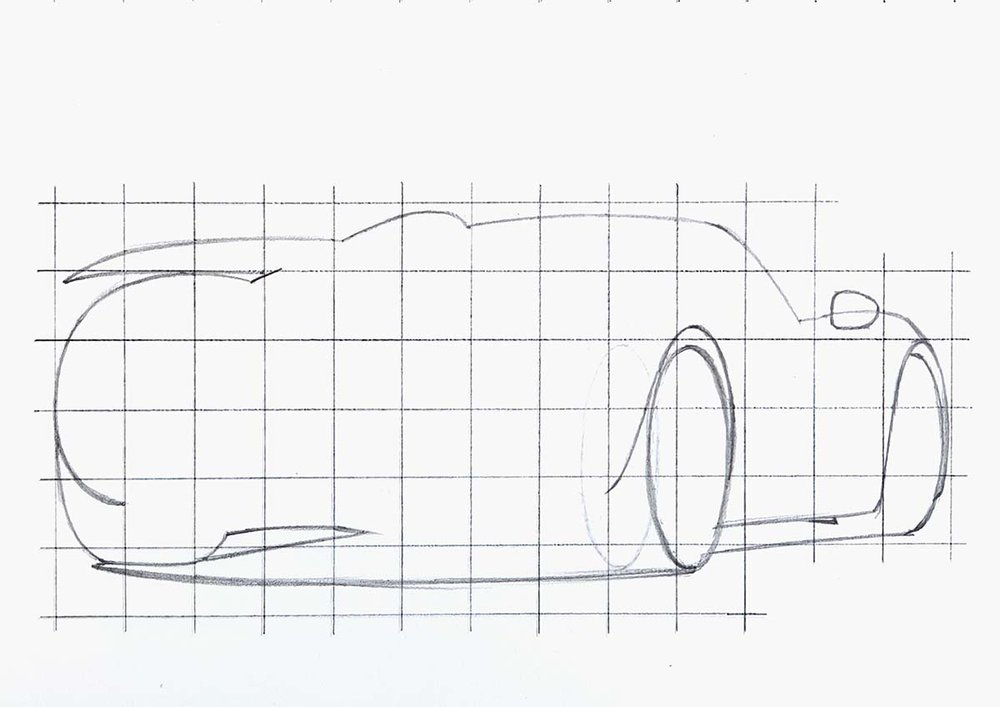
Now that the outline is done, it's easier to sketch in all the basic shapes of the car.
I started sketching all the bigger parts and lines like the grills, the rear deck, the body lines, etc.
I again first marked where each line/shape starts and ends, and where it crosses any of the grid lines before sketching it.
I did this for all the bigger shapes and parts of the car first. After that, I added in all the smaller details.
I left the wheels to do for later as they can be a bit tricky.

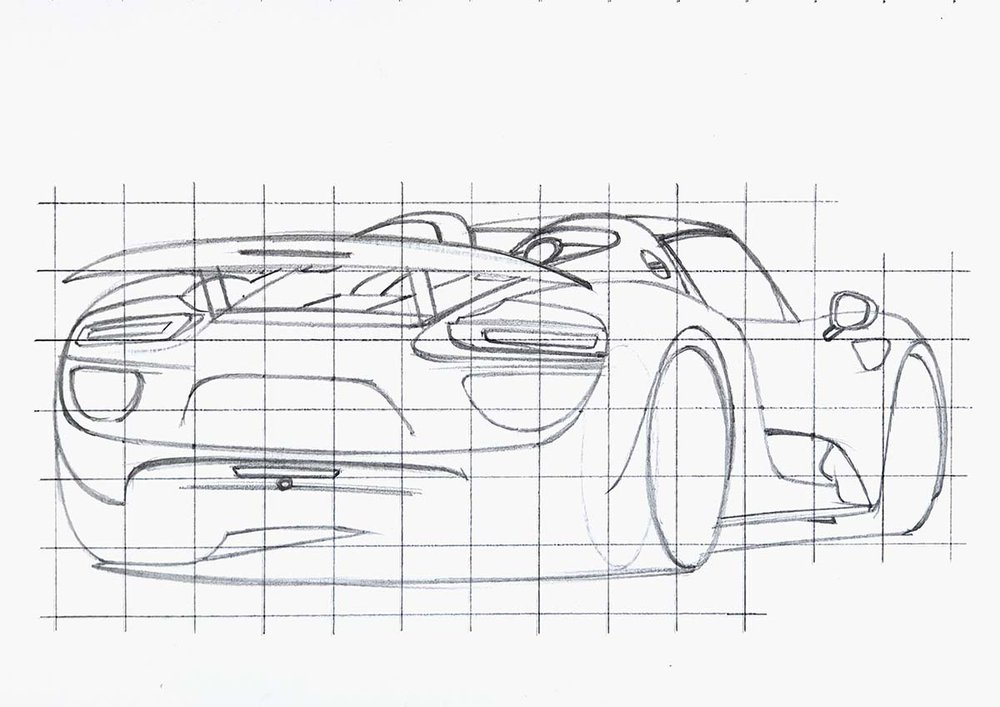
Next, I sketched all the reflections on the body of the car. Just the basic shapes.
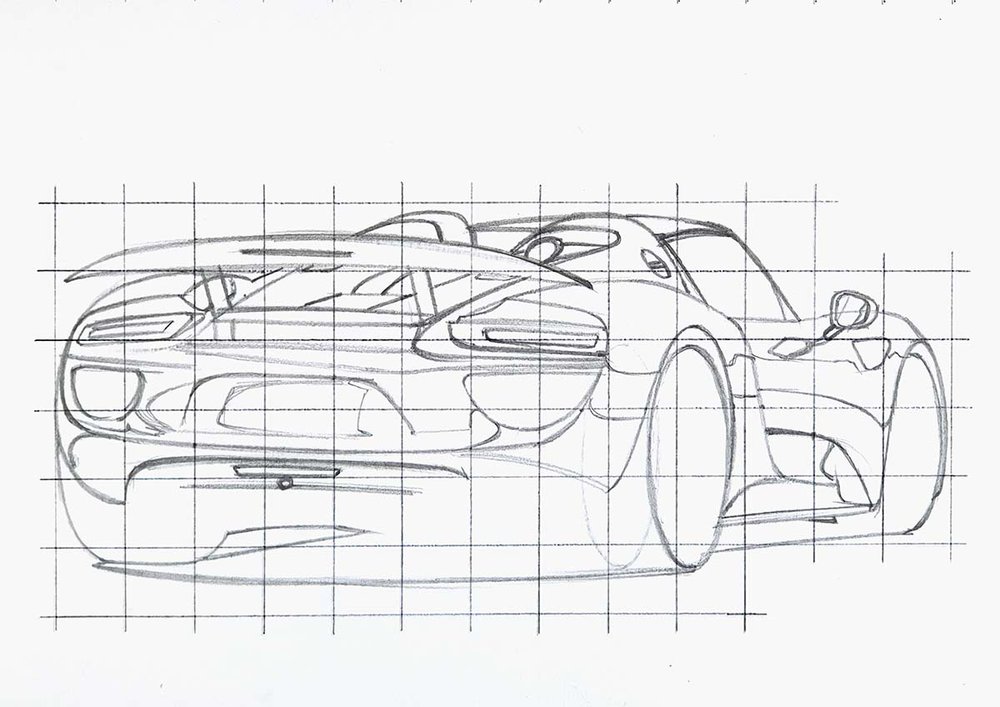
Now the whole sketch is done except for the wheels.
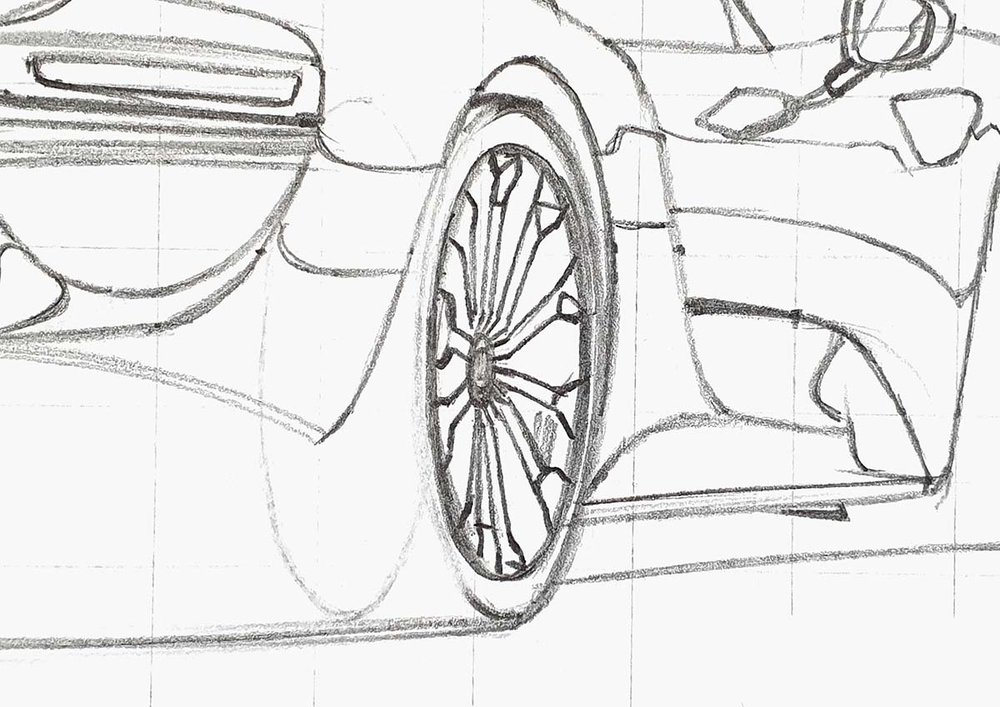
To sketch the wheels accurately, I first sketched the outer rim and marked the center.
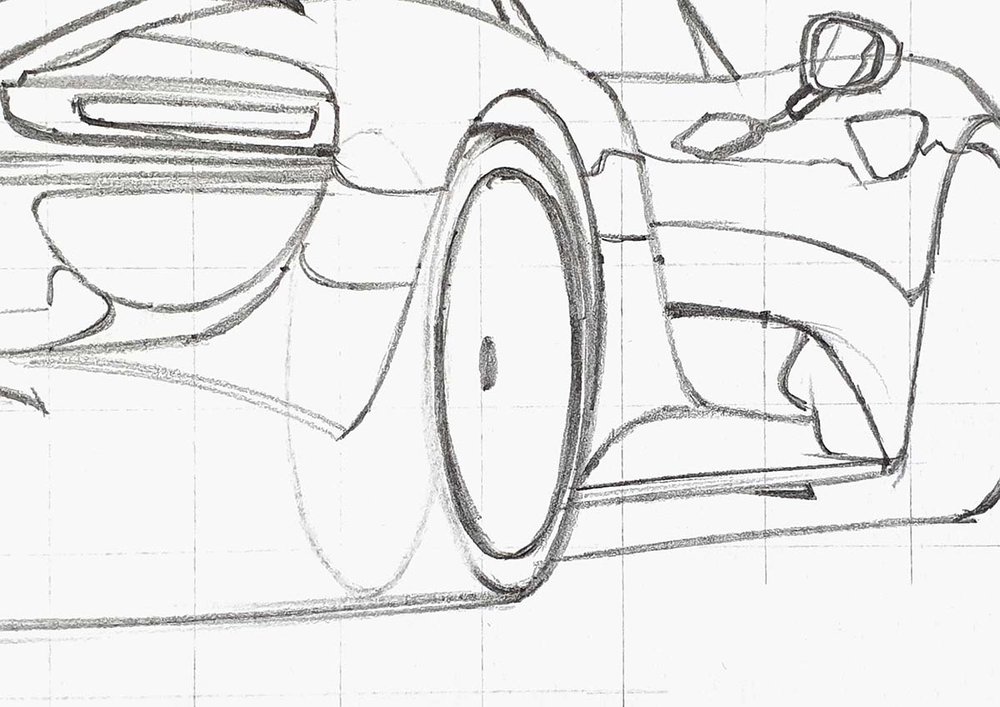
Next, I added an ellipse shape around the right half of the center to mark where the beginnings of the spokes should point towards.
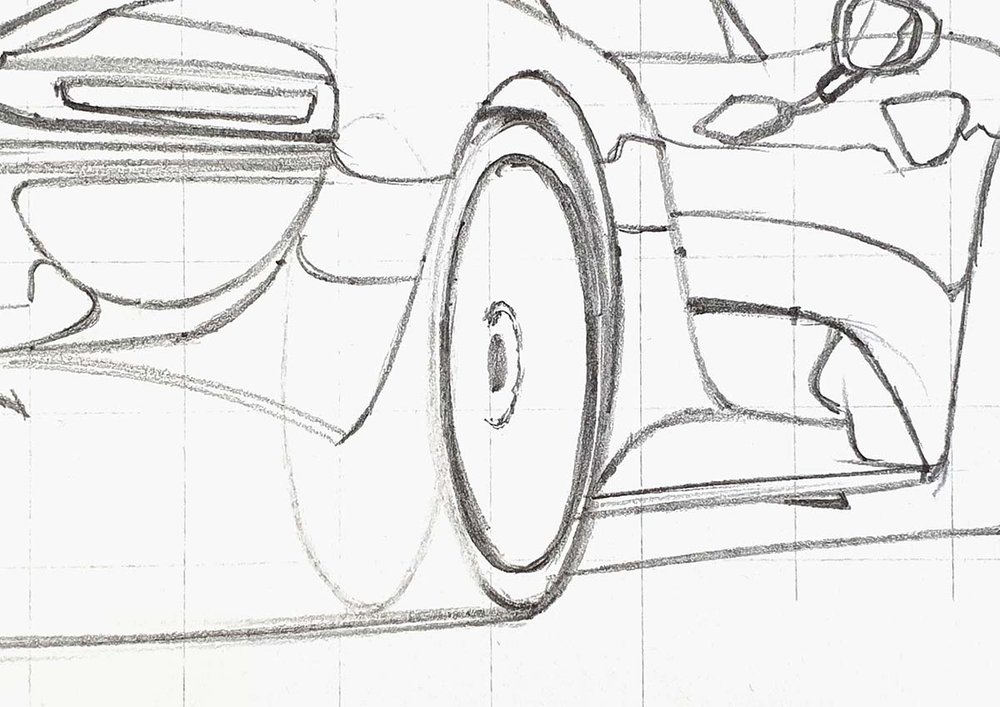
After that, I lightened the ellipse and sketched in the start of each of the spokes on the right half of the wheel.
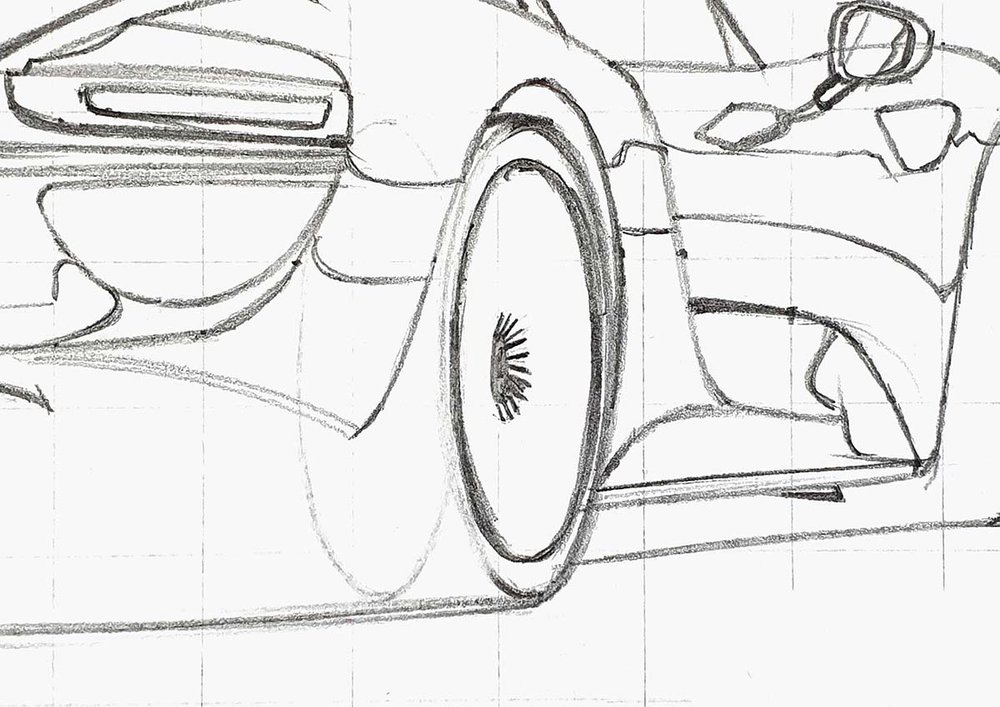
Then, I sketch the middle part of each of the spokes, also the ones to the left of the center. I didn't connect them to the outer rim yet.
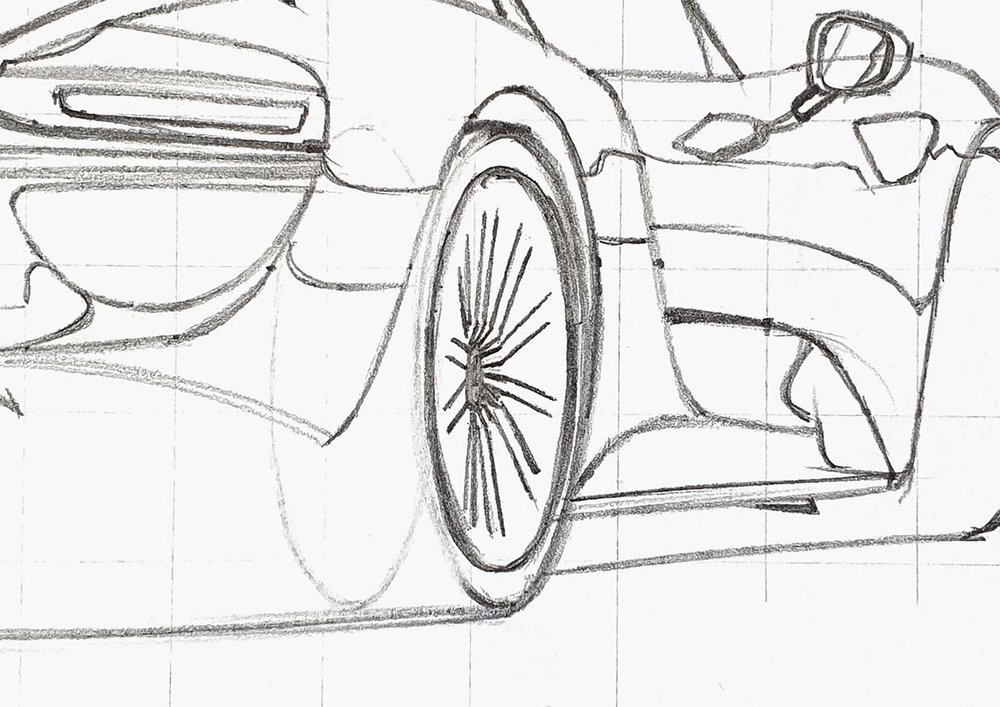
Next up, I sketch the end parts of the spokes. These are weird curvy lines that look different for each spokes because of the perspective. I carefully looked at the reference photo to see how each of the spokes were shaped before I sketched them.
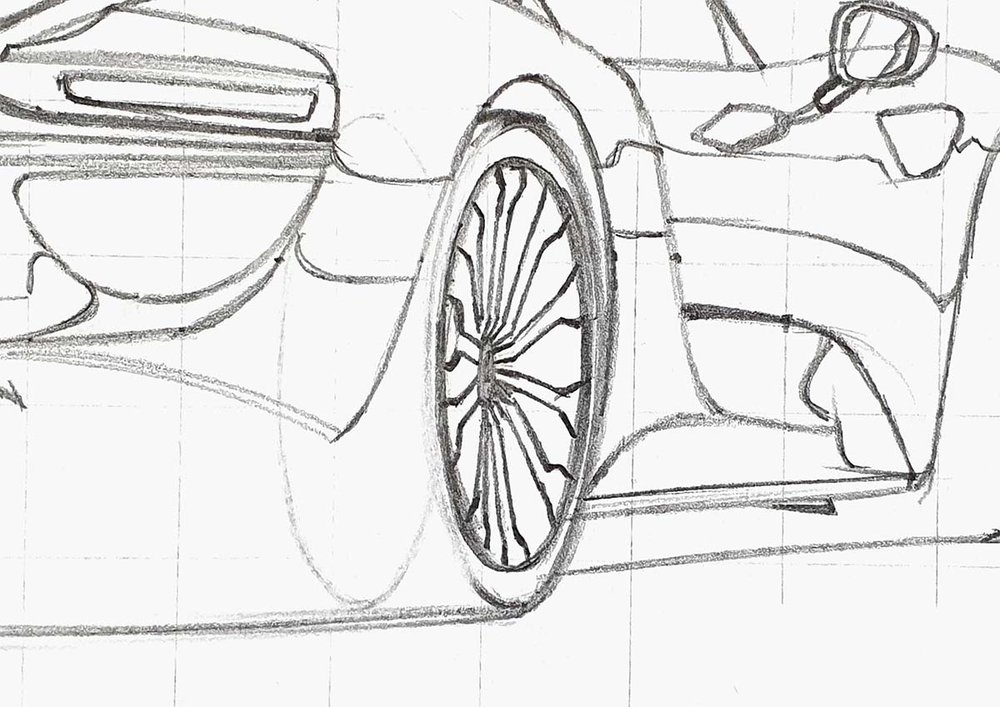
Lastly, I added a few details and marked some lighter spots.
Step 4: Color All Black Parts of the Porsche 918 Spyder
Now that the sketch is done, I like to color all pure black parts first.
This is super easy to do and it makes the drawing look a lot simpler.

Before I started coloring the rest of the 918 Spyder, I first erased the sketch lines for each part so that they wouldn't show through the ink.
Step 5: Color the Wheels of the Porsche 918 Spyder
Next up, I'd like to get the wheels done straight away.
Now that the black parts are already filled in this is a lot easier.
I first colored all the spokes with Ice Grey 4.

Next, I colored the tires with Ice Grey 7.

Step 6: Color the Shadow Underneath the Porsche 918 Spyder
After that, I colored the shadow below the Porsche.
I started by coloring the whole shadow with Ice Grey 1, at least, what remained of the shadow.

Next, I used Ice Grey 4 to color in between the black and the Ice Grey 1.

Lastly, I blended the shadow into a smooth gradient.
To do this, I first blended the black into the grey by coloring over the edge where the black meets the grey with Ice Grey 7.
Next, I colored over the edge of the Ice Grey 7 and the Ice Grey 4 with Ice Grey 4.
After that, I used Ice Grey 1 to color over the edge of the Ice Grey 4 and the Ice Grey 1 to blend them together.
And lastly, I used the Colorless Blender to blend the Ice Grey 1 into the white of the paper by coloring over the edge of the Ice Grey 1.

Step 7: Color the Reverse Light and the Wing Arms of the Porsche 918 Spyder
Next up, I colored the reverse light at the top of the diffuser.

I also colored the wing arms with Ice Grey 7.

Step 8: Color the Taillights of the Porsche 918 Spyder
After that, I colored the rear lights.
I first colored them with Pumpkin.

Next, I used Lipstick Red around the edges and the whole brake light.

Step 9: Color the Rear Deck of the Porsche 918 Spyder
Next, I colored the lightest parts of the rear deck (or engine cover) and the rear window with Ice Grey 2. I forgot to color the edge of the right exhaust tip...

Next, I colored the 2 tiny rectangular of the rear deck just below the rear wing with Ice Grey 4 and I accidentally colored the edge around the right exhaust too dark.

Lastly, I colored the remainder with Ice Grey 7.

Step 10: Color the Side Window of the Porsche 918 Spyder
Next up, I colored the side window with Ice Grey as well as either the fuel cap or the charging cap. Not sure which.

Then, I used Ice Grey 4 to color the bit just to the left of the window and the inside of the fuel cap except for a horizontal line through the middle.

Lastly, I used Ice Grey 7 to color the top edge of the inside of the windshield.

Step 11: Color the Inside of the Door Mirror of the Porsche 918 Spyder
After that, I colored the mirror part of the door mirror.
I first colored it with Ice Grey 2.

Next, I colored the left 3/4 with Ice Grey 4, leaving a light reflection on the right.

Lastly, I added a dark reflection on the far left with Ice Grey 7.


Step 12: Color the Main Body of the Porsche 918 Spyder
Now all the grey parts are colored, kind of.
Although the Porsche 918 is dark blue, I first colored it grey.
The 918 is this beautiful deep blue and I wanted to do my best to accurately represent that color. However, I don't have a single marker in that specific dark greyish blue...
So I decided to experiment and mix some colors.
So, I first colored the show car grey, starting with the lightest parts first. To do this I used the Ice Grey 1 marker.

Next, I used Ice Grey 2 to color the second lightest parts.

After that, I used Ice Grey 4 to color the more dark grey parts.

And lastly, I used Ice Grey 7 to color the remainder.

Now it's time or my little experiment.
I colored over all the lightest grey parts with Cornflower.
I colored over the mid-tone greys with China Blue.
And I colored over the dark grey parts with Midnight Blue.
I did leave the reflection on the lower half of the side mostly grey (and not blue).

Now, the whole car is colored but I thought it lacked the deepest darkest blue reflections so I added those with the Blue Black marker.
To make these parts look less harsh I colored Over them with the Midnight Blue marker.

Now the whole car is all colored!
But it's not done yet.
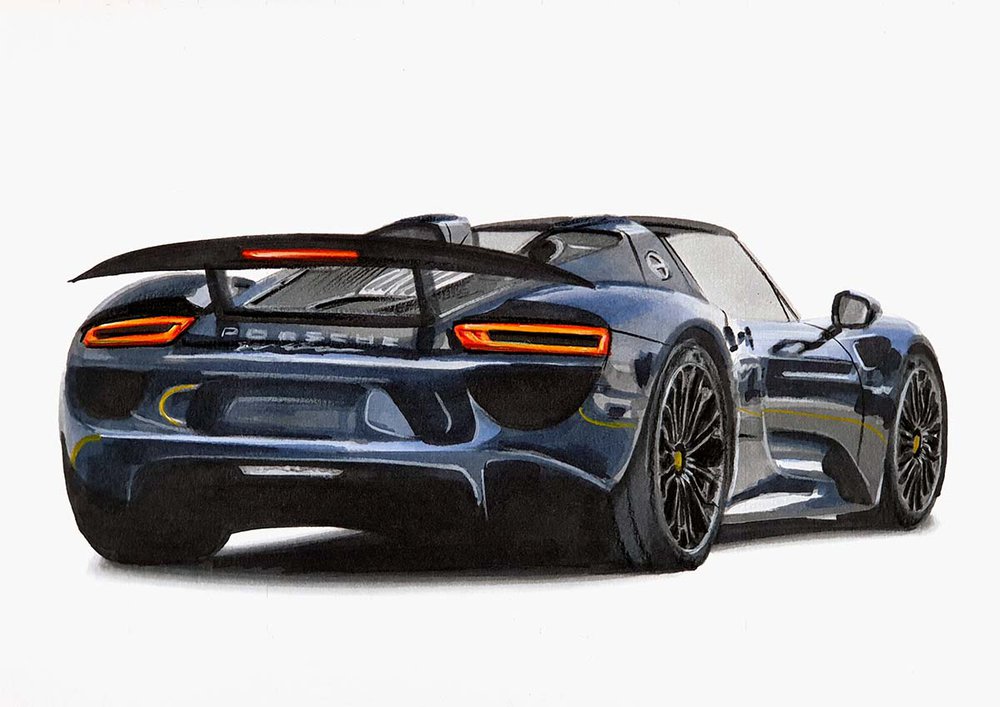
Step 13: Add Details to Your Porsche 918 Spyder Drawing
It's lacking pretty much all the details.
To add these, I used a white, a grey, and a black colored pencil. I also used a yellow colored pencil this time.
I used the yellow colored pencil to bring out the yellowishness of the rear light a bit more. I also used it to add the reflections of the yellow road markings on the body of the car.
I used the white to add a few highlights here and there, especially on panel edges and a few bits on the wheels. I also used this pencil to (roughly) add the "PORSCHE" and the "918 Spyder" lettering on the back of the car.
I used the grey pencils to color some details on the tires and I should've used it to color each of the spokes of the wheels so that they look a little better.
And lastly, I used the black pencil to add the panel gap and some details on the tires.
Step 14: Add Highlights to Your Porsche 918 Drawing
Now, to finish the drawing off and make it look the part, I used the white Posca PC-3M paint marker to add some final bright white highlights.
I used it to highlight the "PORSCHE" and "918 Spyder" lettering on the back, the brake light on the rear wing, the reverse light in the diffuser, a few bits in the taillights, the wheels, and the lightest reflections on the car.
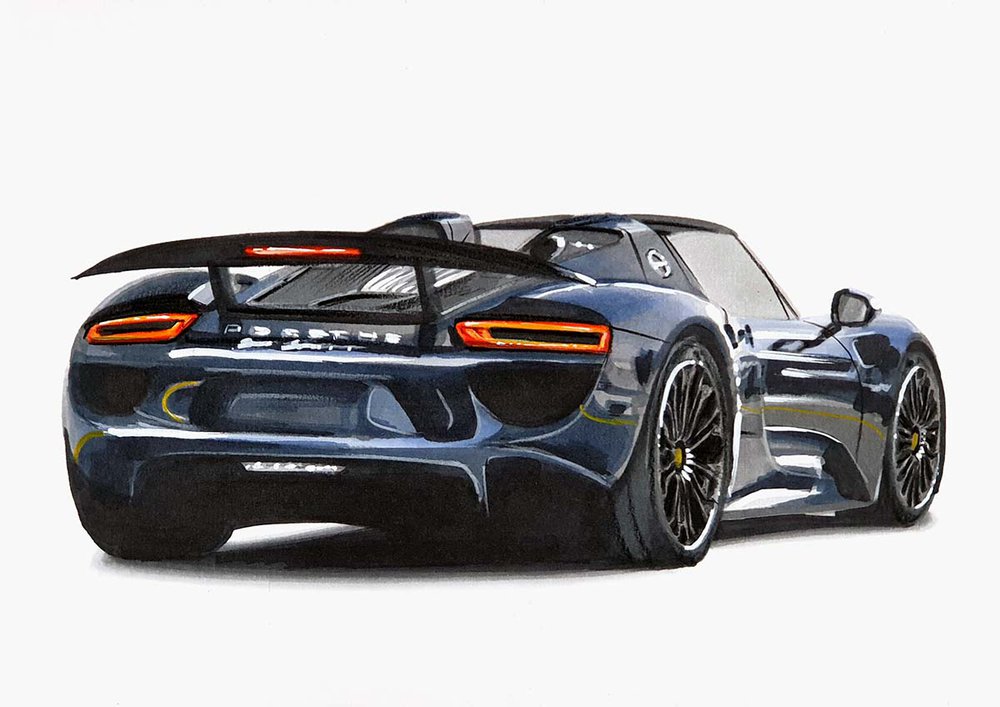
And now it's done!!
And That's How You Make a Realistic Porsche 918 Spyder Drawing

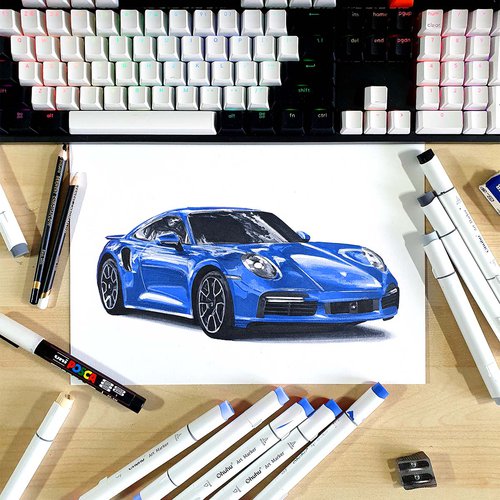

.jpg__500x500_q85_crop_subsampling-2.jpg)



Be the first to comment!
Comments
There are no comments yet.