How To Draw A Porsche 911 Turbo S - Exact Step-By-Step Guide
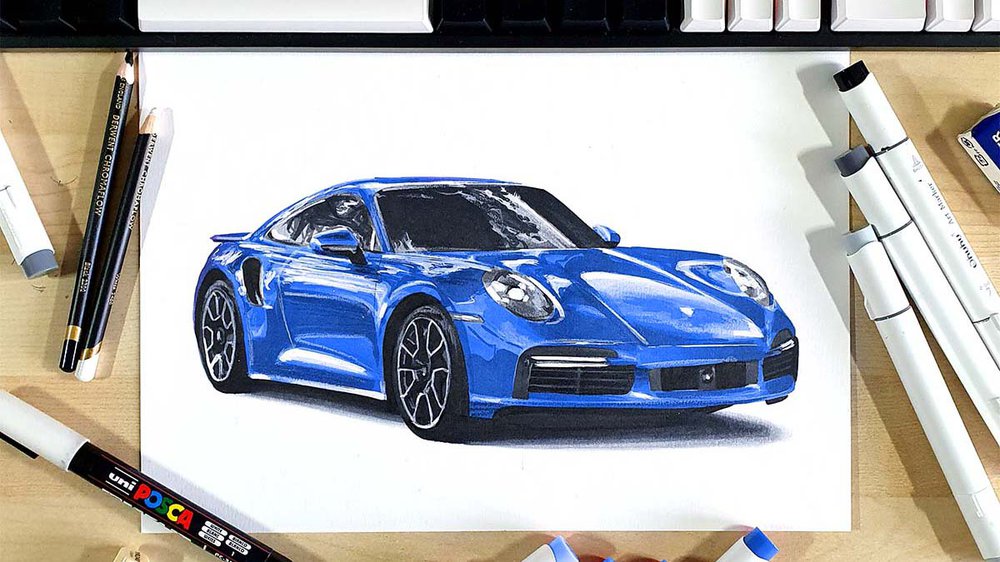
In this car drawing tutorial, I will show you how to draw a Porsche 911 Turbo S.
I've divided each part into simple steps so you can easily follow along and create your own realistic Porsche 911 Turbo drawing.
Let's get started!
Disclaimer: In the name of full transparency, please be aware that this blog post contains affiliate links and any purchases made through such links will result in a small commission for me (at no extra cost for you).
How To Draw A Porsche 911 Turbo S?
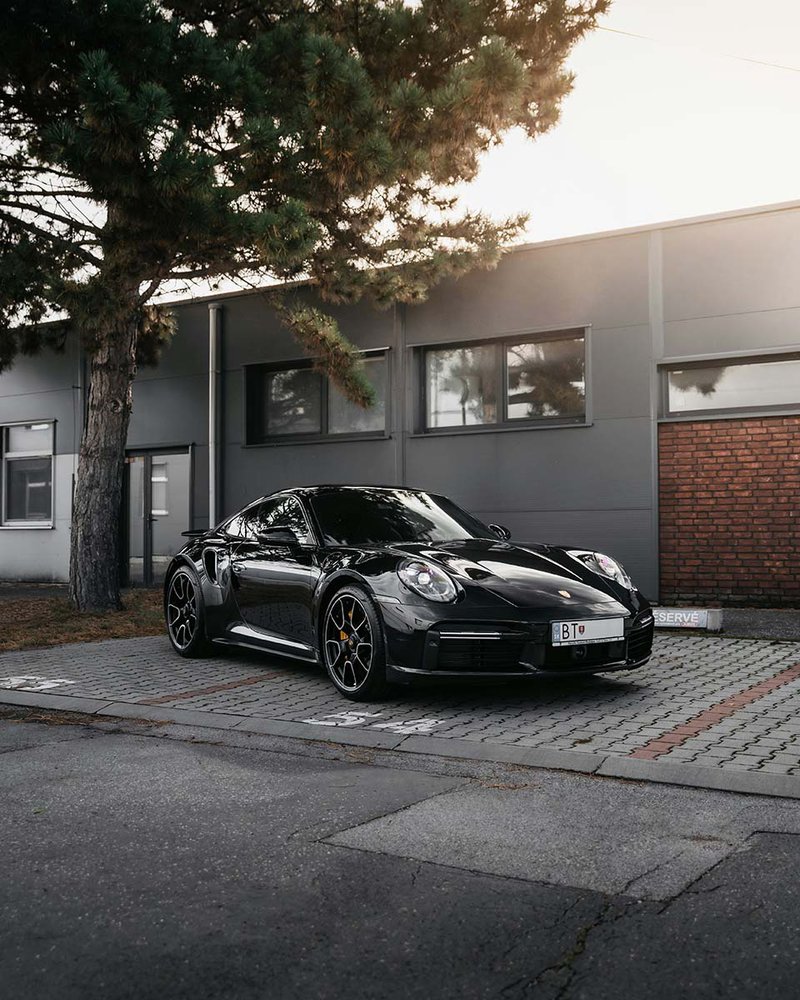
To create a realistic drawing of a Porsche 911 Turbo S, I first searched for a reference photo that I liked.
After that, I sketched the outline of the 911 Turbo S using the grid method.
Next, I colored the car with alcohol markers, starting with the black and gray areas before moving on to the main body of the car.
Finally, I added details with colored pencils and highlights using a Posca paint marker.
Step 1: Find A Reference Photo You Like
When drawing a realistic car, using a reference photo is a must.
I found this photo I really like on unsplash.com:
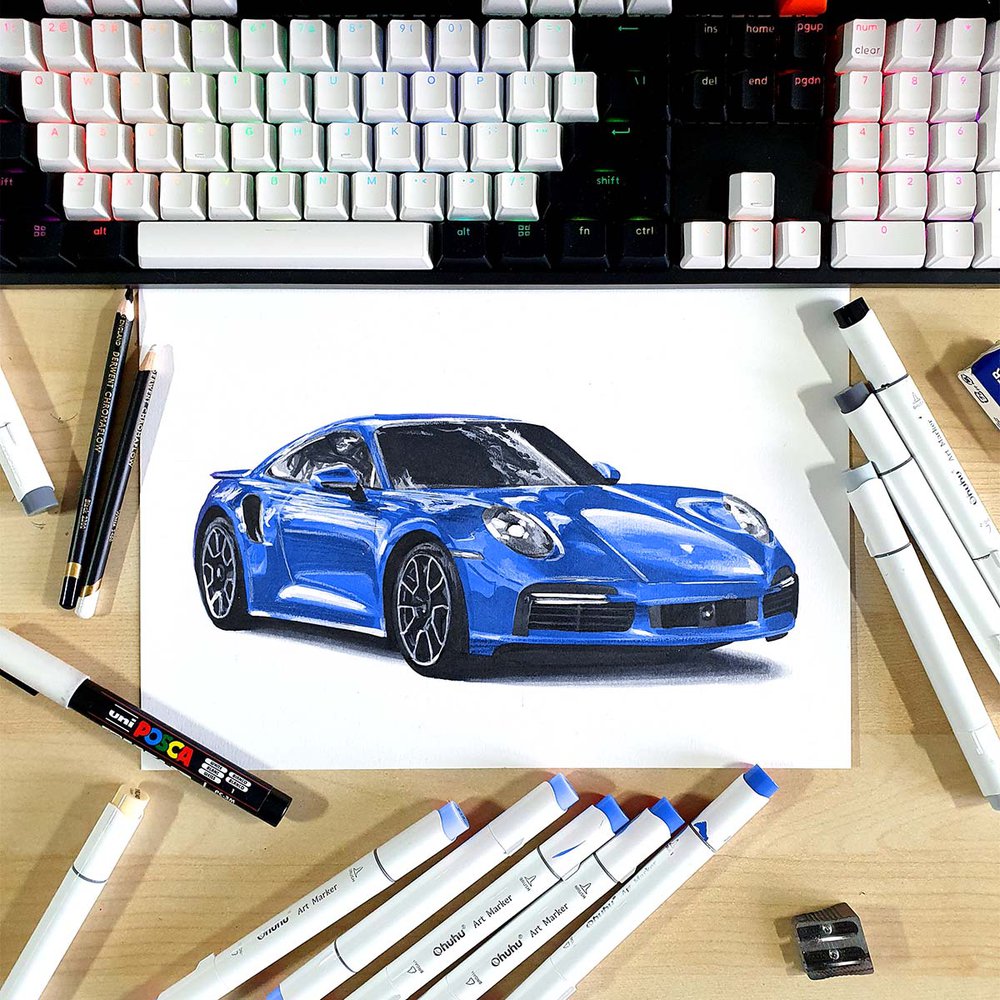
Step 2: Choose What Drawing Supplies To Use And What Colors
To make this drawing, I used Ohuhu Honolulu markers in the colors Colorless Blender (0), Neutral Grey 03 (CG030), Neutral Grey 3 (NG03), Neutral Grey 07 (CG070), Neutral Grey 6 (NG06), Neutral Grey 7 (NG07), Black (120), Cream (YR240), Lavender Mist (B340), Cornflower Blue (B350), and Clematis (R13).

I also used the black and white Derwent Chromaflow colored pencils.
And to add white highlights, I used a white Posca PC-3M paint marker.
I made this drawing on A4-sized Canson Illustration Manga paper.
Step 3: Sketch The Outline Of The Porsche 911 Turbo S
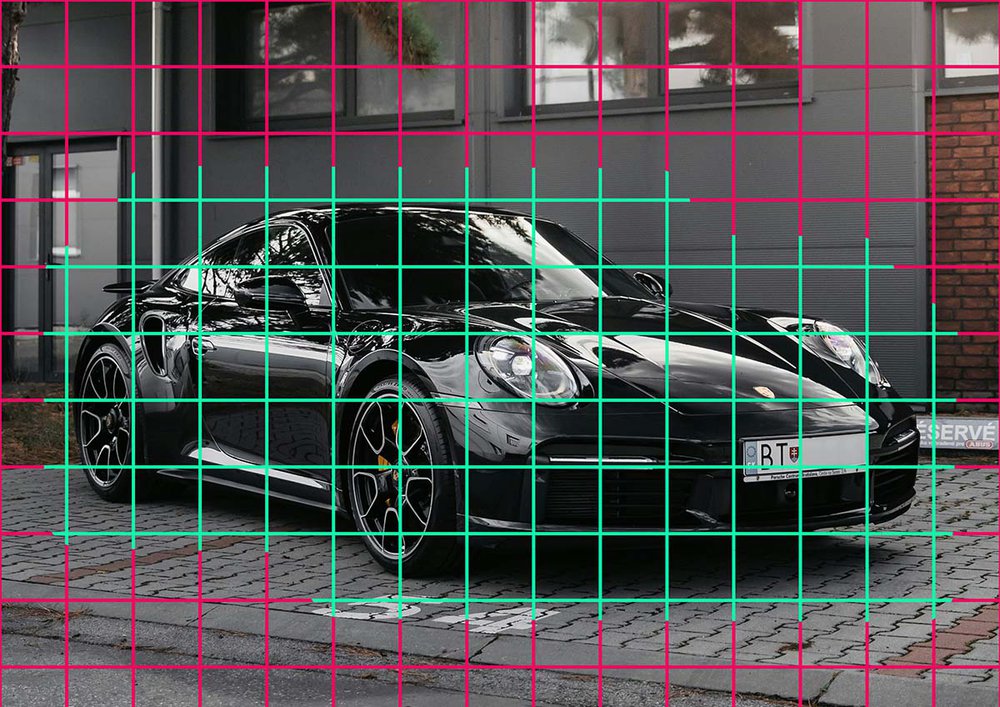
To sketch the outline of the Porsche 911 Turbo S, I used a sketching technique called the grid method. This makes sketching the car accurately a lot easier.
If you're new to this technique or want to learn more about it, check out this guide I wrote about it.
To use the grid method, I first resized the reference photo to the same size as my piece of paper, which translates to 3508 by 2480 pixels.
Next, I added a grid overlay to it and marked the squares that contained parts of the Turbo S in green.
Next, I recreated the grid on my piece of paper. I only sketched the squares I needed, but if you're new to this method it's a lot easier to just sketch the whole grid.
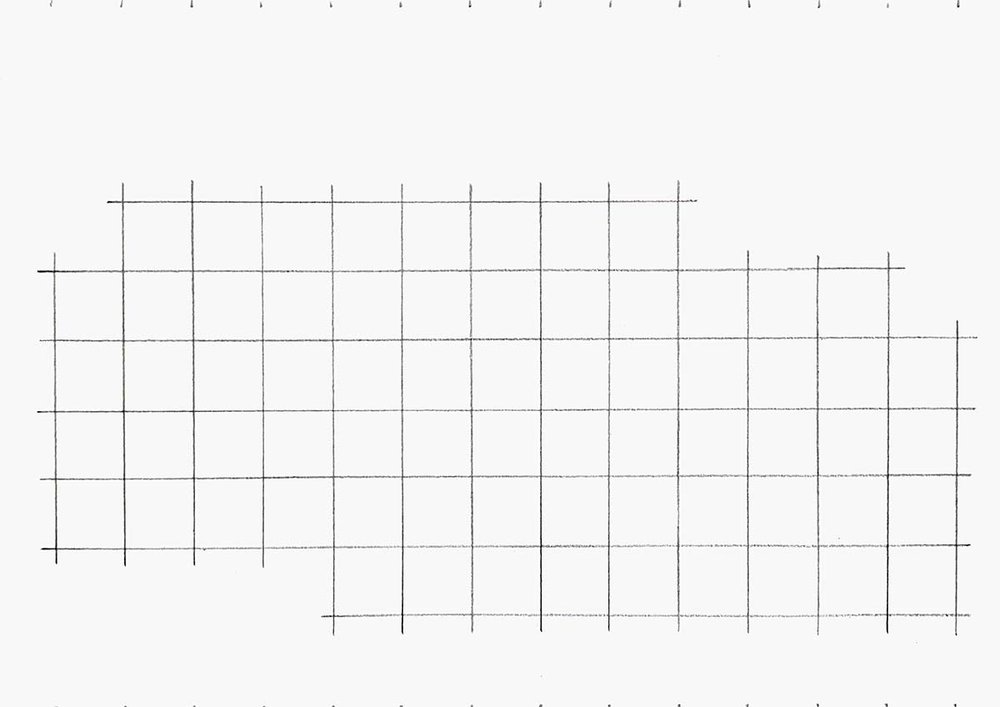
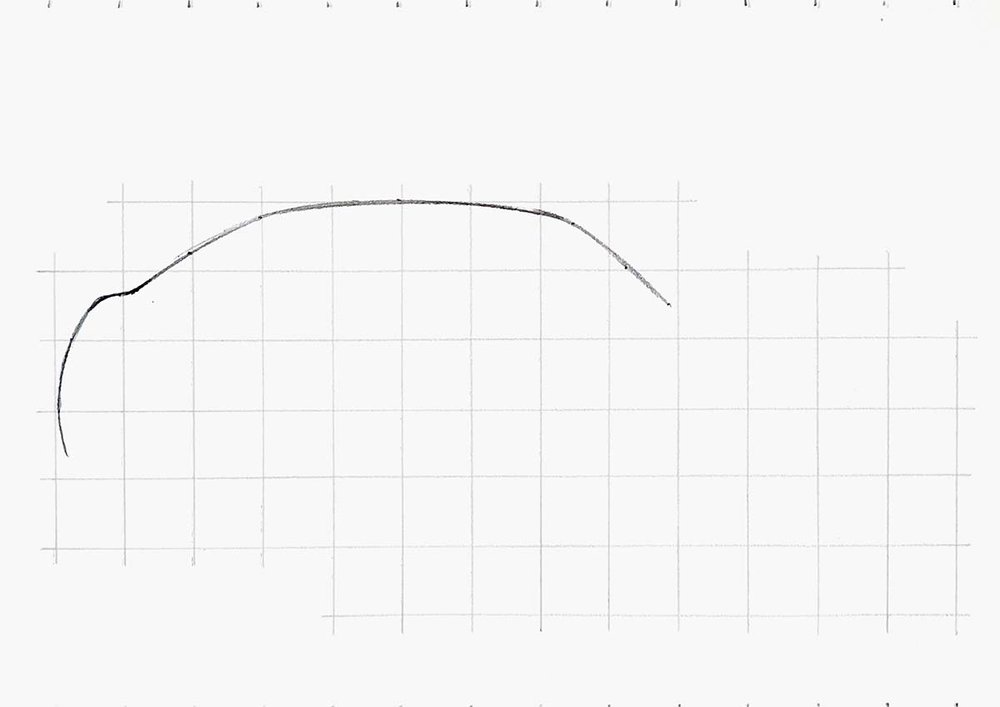
Next, I lightened the grid and started sketching the outline.
I started on the left and worked my way up and around the car.
I broke each section up into simple lines. Then marked where those start and end, and where the cross grid lines. Then, I sketched the lines in one swift motion.
I repeated these steps for the whole outline of the car.
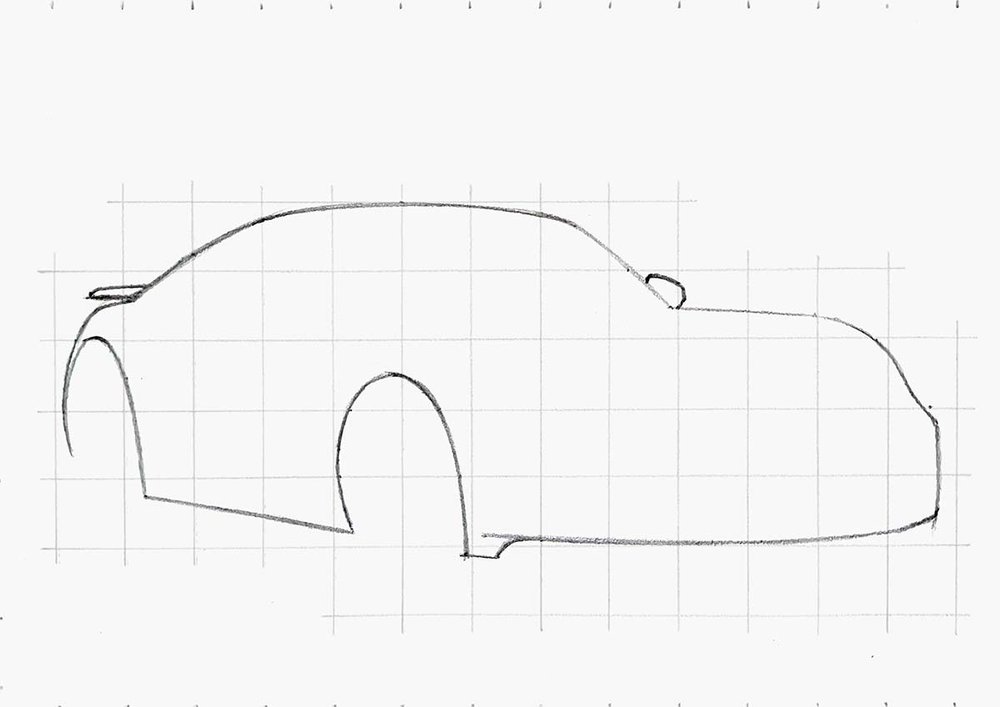
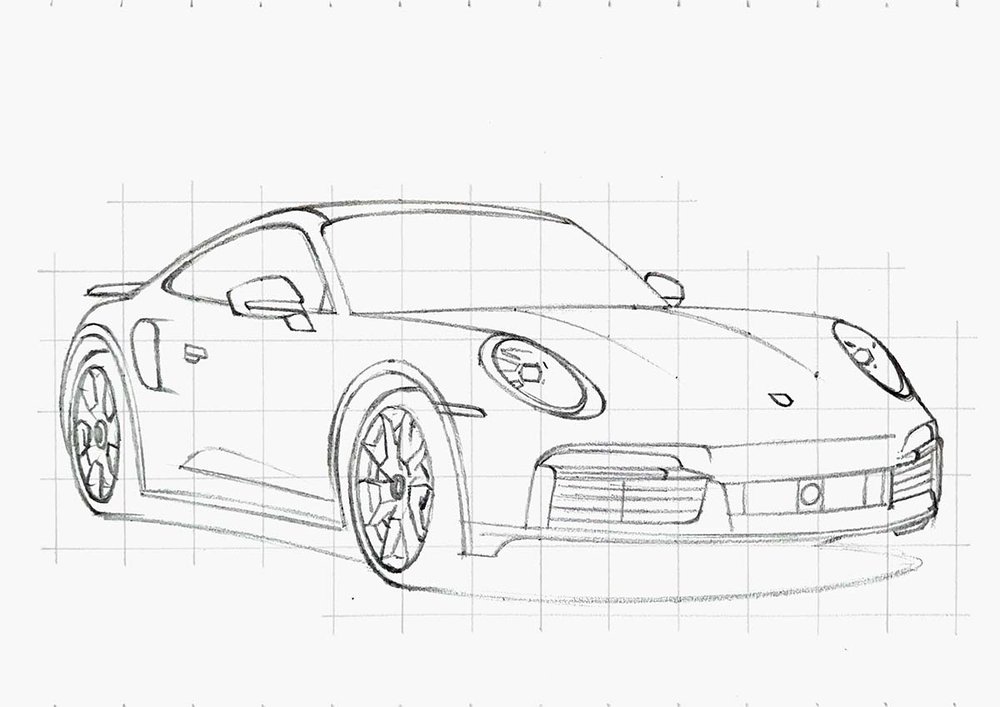
Step 4: Sketch The Parts And Details Of The Porsche 911 Turbo S
After that, I started sketching in the parts of the Turbo S.
First the bigger parts like the outlines of the headlights, the windows, the grills, etc.
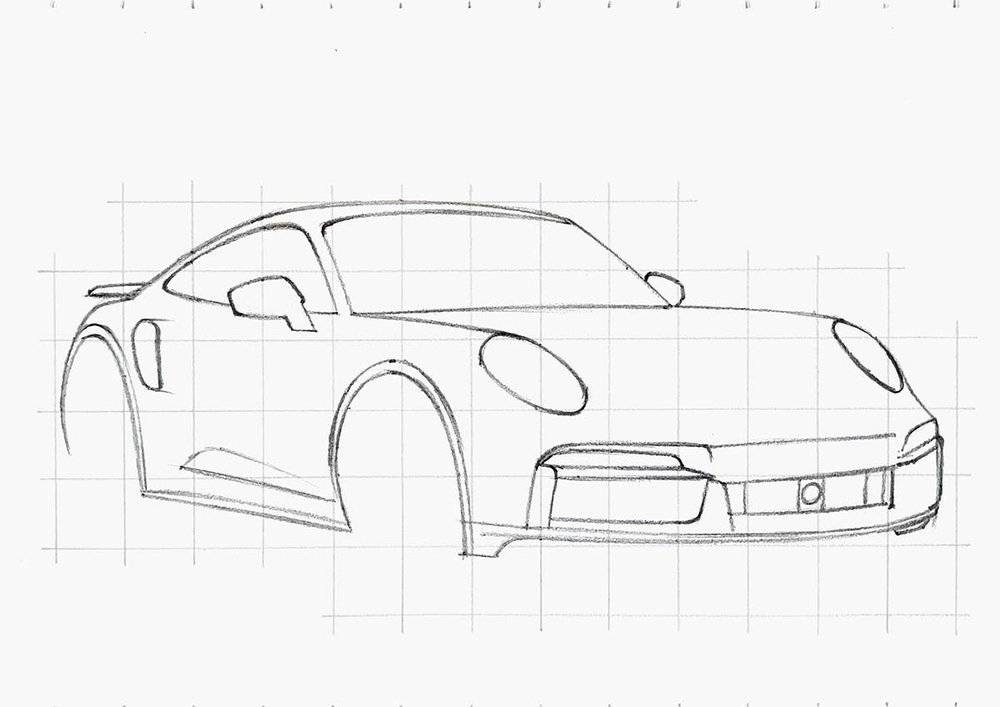
After that, I added in all the details, but I left the wheels for the next step.
Step 5: Sketch The Wheels Of The Porsche 911 Turbo S
Next, I sketched the wheels.
They can be a bit tricky.
In the 4th step, I already sketched the outline of the wheels and in this step, I'll cover the rest of the wheel.
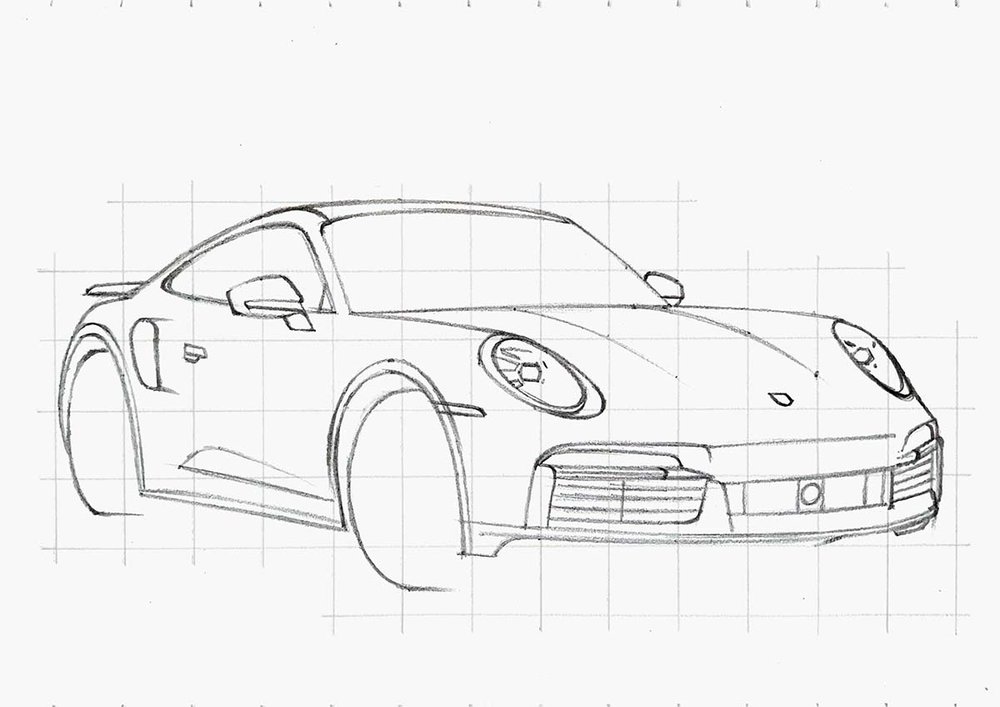
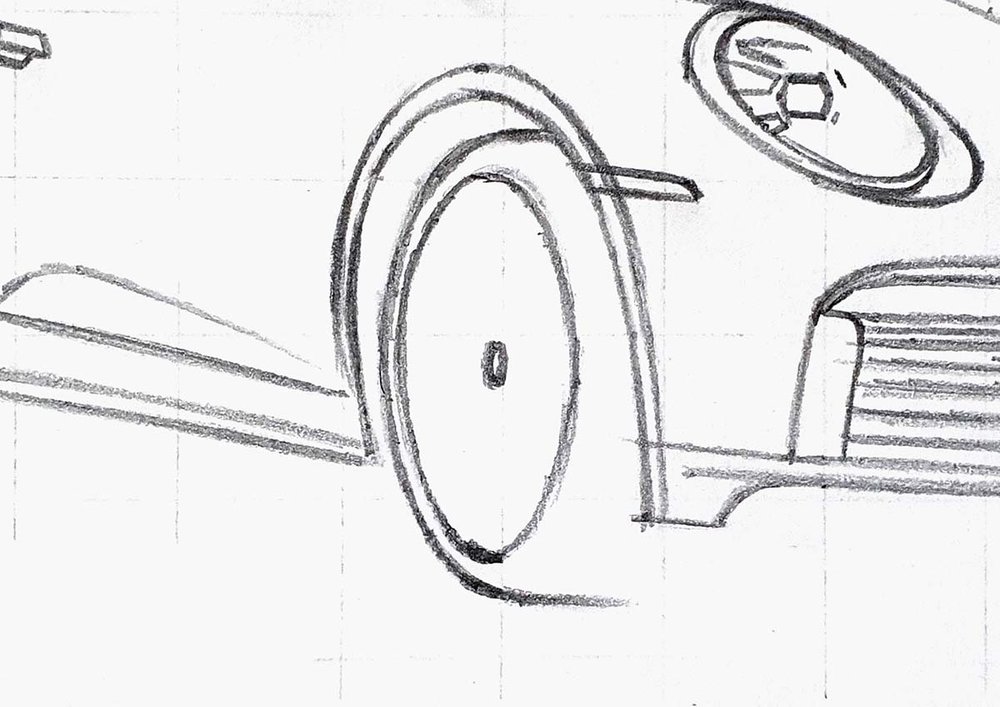
I started by sketching the outer edge of the rim.
I did this by first marking the top, right, bottom, and left edges of it. Next, I marked where it crosses grid lines. Then, I sketched it as smoothly as possible.
I also marked the center with a small ellipse.
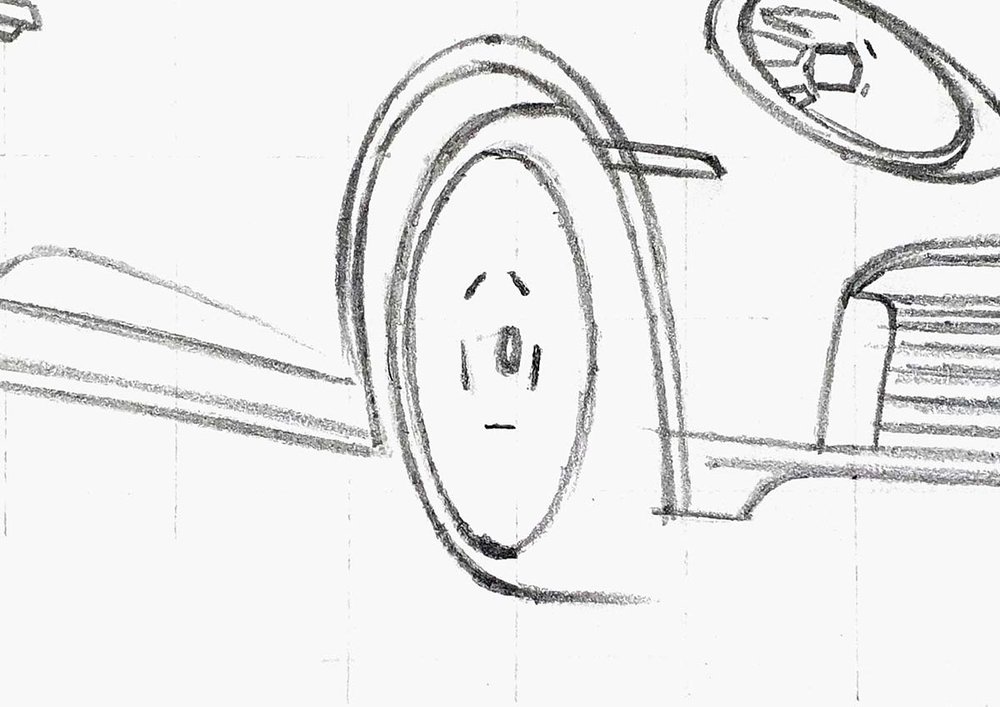
Next, I marked the "base" of the spokes with 5 short lines kind of in a circle around the center.
After that, I added the spokes to either end of the 5 short lines. From the center they go in a straight line, but the ends are angled a little bit inwards.
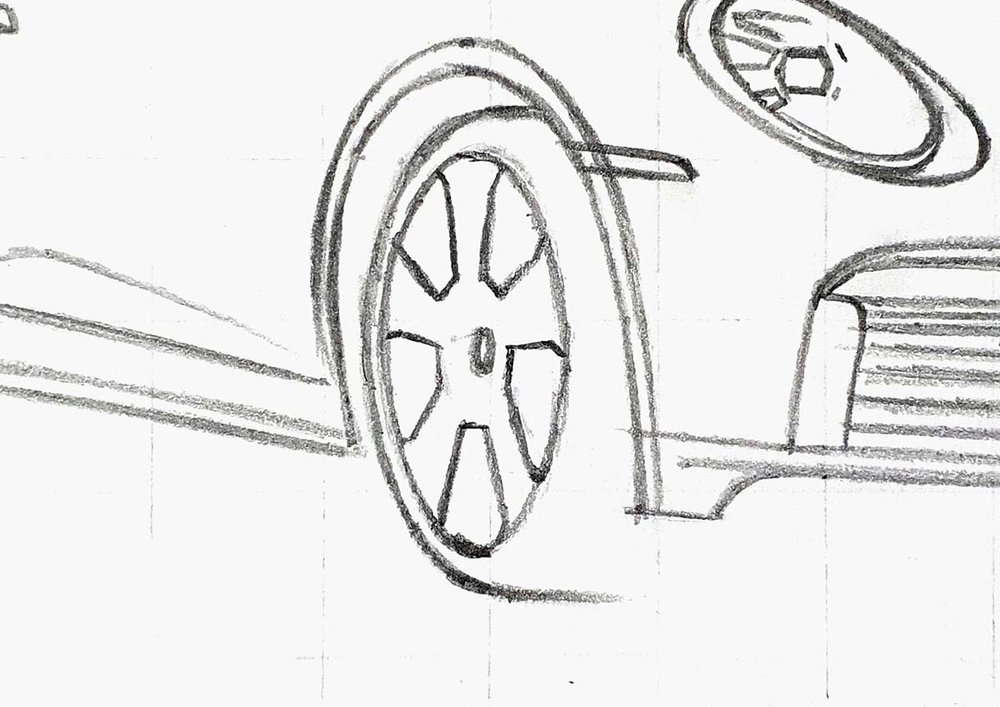
Next, I added the thickness to the spokes by sketching some lines to the right of each of the spokes.
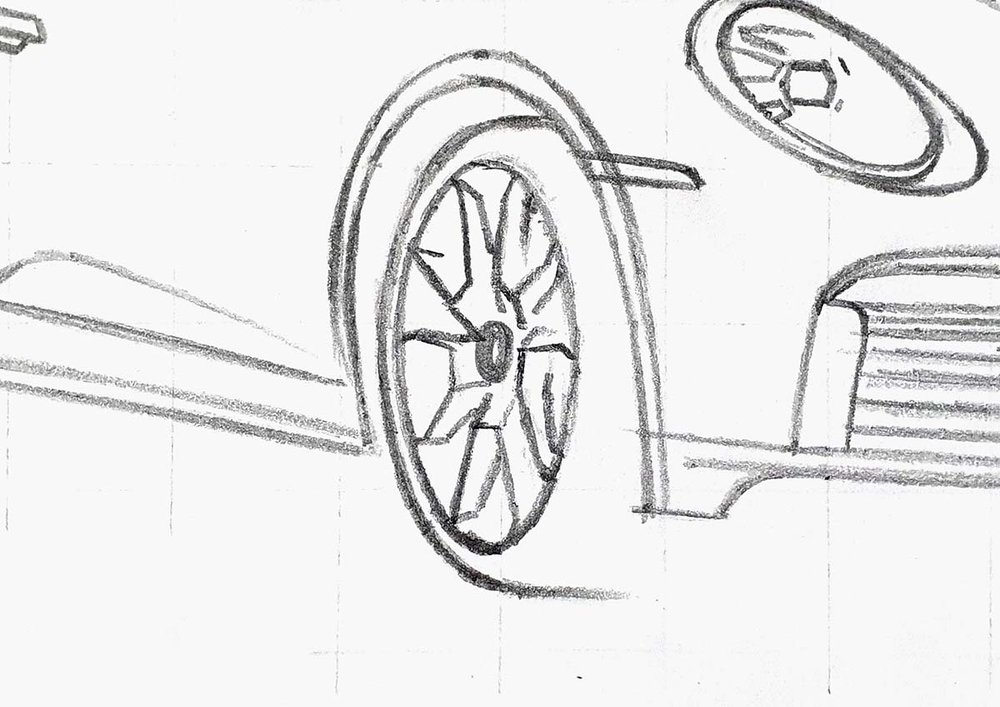
Lastly, I added one more rim line on the left and some lines to the right of the center.
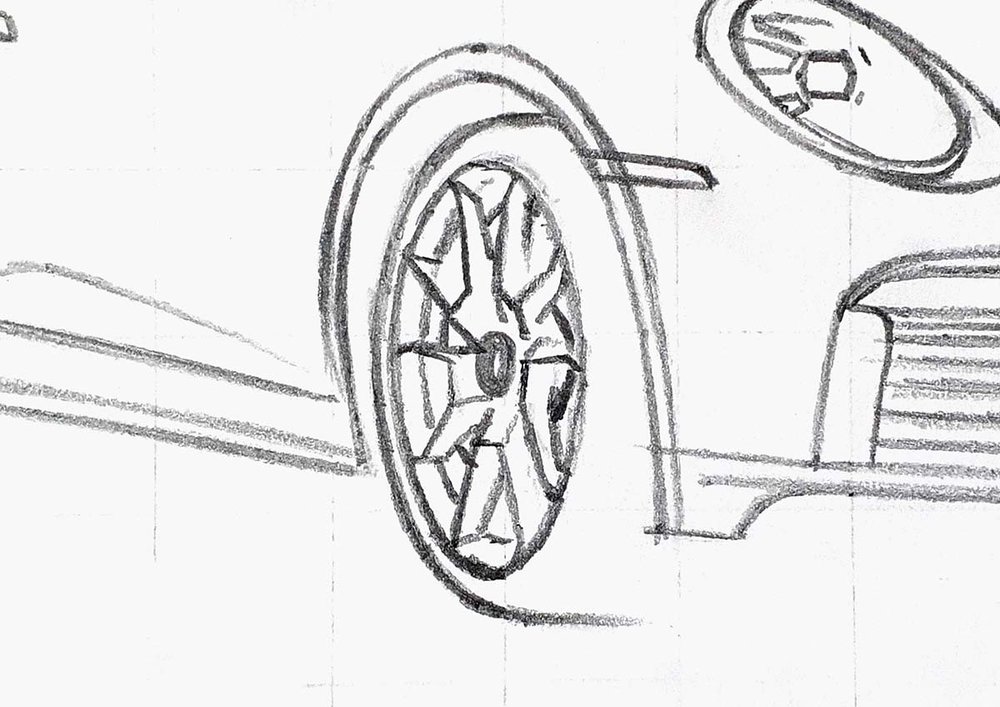
Next, I repeated this step for the rear wheel and I sketched the outline of the shadow.
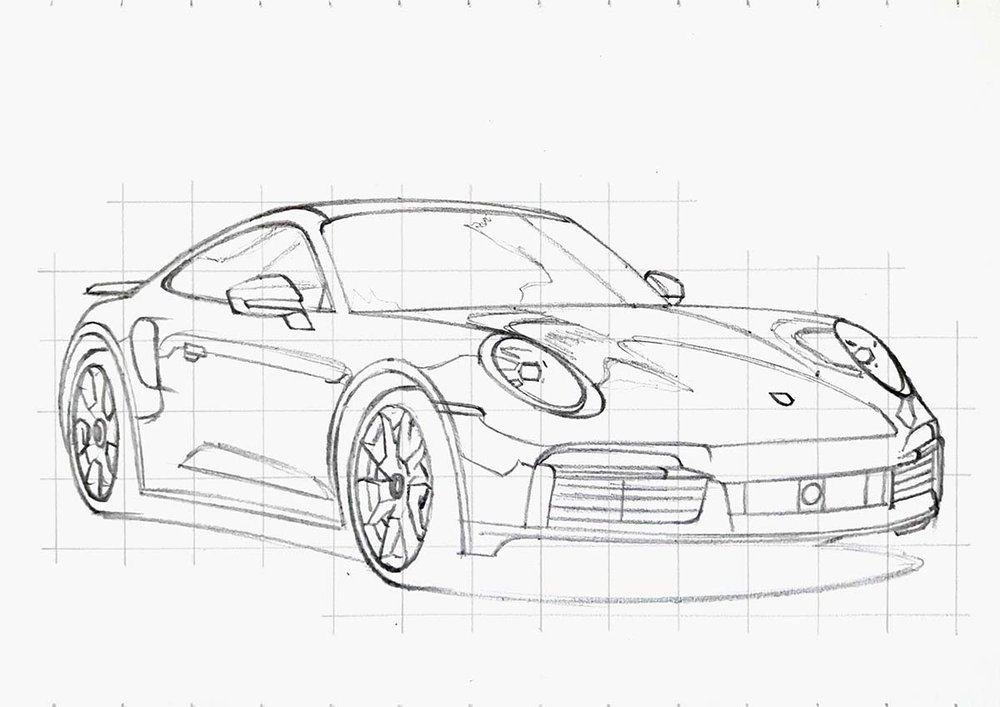
Step 6: Mark Where The Reflections Are Going To Be On The Porsche 911 Turbo S
To finish the sketch off, I added the basic outlines of the reflections on the car.
Step 7: Color All Pure Black Parts Of The Porsche 911 Turbo S
After completing the sketch, I colored all the pure black parts.
This makes coloring the rest of the car easier.

Step 8: Color The Wheels Of The Porsche 911 Turbo S
After that, I colored the wheels.
I first colored both wheels with CG030.

Next, I used NG03 darken everything except for the spokes and the outer edge of the rim.

After that, I used CG070 to add some shading to the tires and I darkened the rest except for the spokes.

Lastly, I used NG06 to blend the black of the bottom half of the tires into the grey on the top half of the tires. I did this by coloring over the edge where the 2 colors meet, which is about halfway up the wheel.

Step 9: Color The Shadow Of The Porsche 911 Turbo S
Next, I colored the shadow of the Turbo.
I first colored the whole shadow with CG030.

Then, I used CG070 to color around the black.

Lastly, I blended the grey tones together to form a smooth gradient.
To do this, I used CG070 to color over the edge of the black.
I used CG030 to color over the edge of the CG070.
And I used the colorless blender to color over the edge of the CG030.
By doing this, the edges get softer and blend out.

Step 10: Color The Front Grills Of The Porsche 911 Turbo S
After that, I colored the daytime running lights in the grills with CG030 and I colored the grills with NG06.

Step 11: Color The Headlights Of The Porsche 911 Turbo S
Next, I colored the headlights.
I started by coloring both of them with CG030.

Then, I used NG03 to add the shadows and darker reflections while leaving the parts that need to be lighter uncolored.

After that, I added a bit of shading using CG070.
I also added some dark reflections on the top and the bottom left and bottom right of the left headlights with NG06.

Step 12: Color The Windshield Of The Porsche 911 Turbo S
Then, I colored the windshield starting with the light reflections on the right side which I colored with CG030.

Next, I used NG03 to color some tree-like reflection on the bottom of that reflection and I colored the reflection in the bottom left corner.

After that, I colored the remainder with NG07.

Step 13: Color The Side Windows Of The Porsche 911 Turbo S
After that, I colored the side windows with CG030 and I colored the window sills on the bottom and the window triangle with NG03.

Next, I used CG070 to add tons of branches and tree-like reflections on the windows.
I also color the grey bit of the door mirror with CG070.

Lastly, I used NG06 to add some darker lines in the tree reflections.

Step 14: Color The Grill, The Front Marker Light, And The Porsche Logo On The 911 Turbo S
Next, I added a tiny edge around the side intake with CG070.

I also colored the front marker light with NG03.

Lastly, I colored the Porsche logo on the hood with YR240.


My go-to alcohol markers for blending, rich color payoff, and amazing value. The brush tips feel super natural to draw with — a must-have for smooth gradients and realistic shading!
- Brush + chisel tips
- Great for beginners & advanced artists
- Budget-friendly alternative to Copics
Step 15: Color The Main Body Of The Porsche 911 Turbo S
After that, it's finally time to color the main body of the car and instead of the black from the reference, I wanted to make it blue.
I started by coloring the lightest bits with B340.

Next, I used B350 to color the rest of the car and add some reflections on the lighter parts.

Lastly, I used R13 to add some darker reflections and shadows on the car.

Step 16: Add Details To The Porsche 911 Turbo Drawing
After that, I started adding some details with a black and a white colored pencil.
I used the black colored pencil to add some details to the tires and the front door edge.
I used the white pencil to add tons of highlights in the reflections, to refine the spokes and rim edges of the wheels, and to color the other door edges and other panel edges.
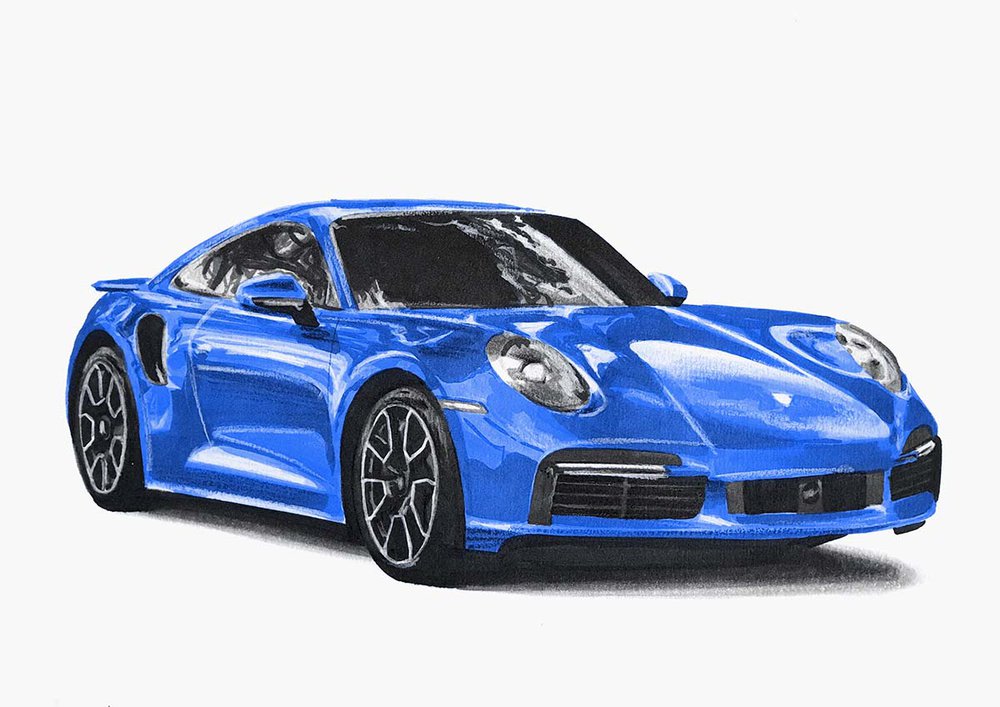
Step 17: Add Highlights To Your Porsche 911 Turbo S Drawing
To finish this drawing off, I added some highlights with a white paint marker.
I added highlights on the lightest parts of the headlights, the daytime running lights, and the reflections.
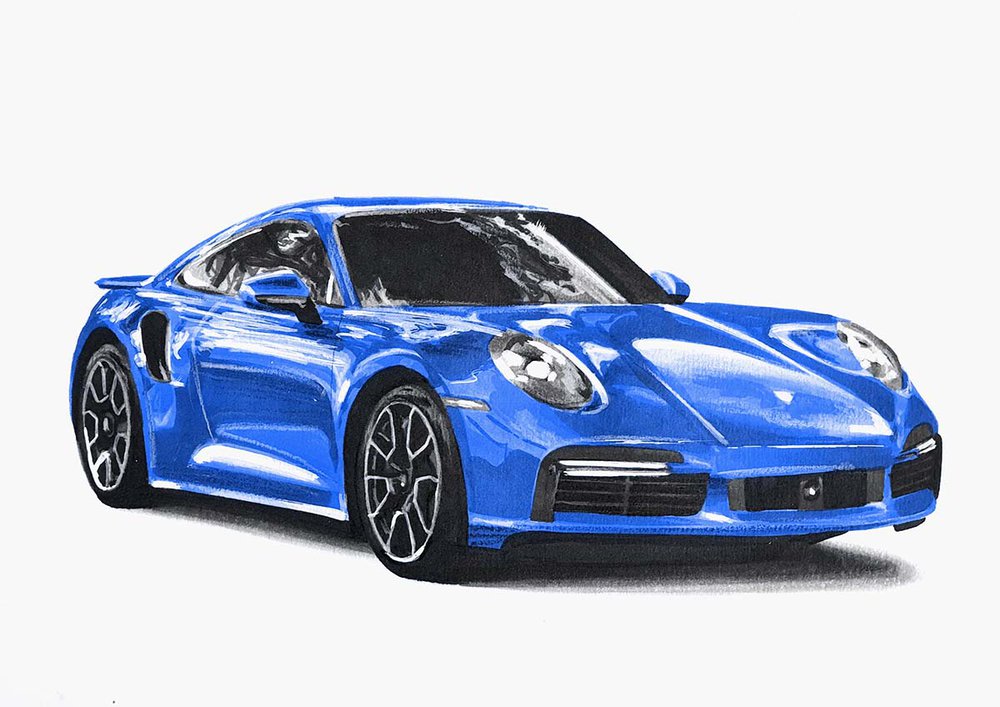
And that's how to draw a realistic but still quite simple Porsche 911 Turbo S.
I hope you enjoyed this tutorial and learned something.
I'll see you in my next car drawing tutorial.
Want insider tips, tutorials, and mini-courses for car drawing? Click here.
Thank you!
Tags
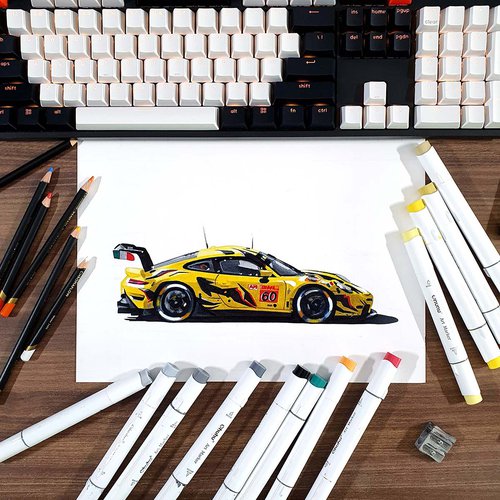
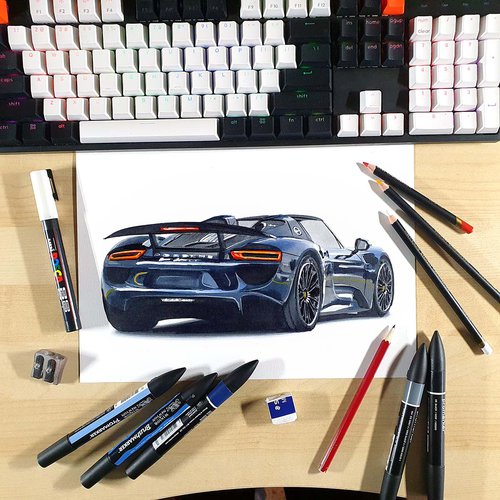
Articles You Might Also Like

.jpg__500x500_q85_crop_subsampling-2.jpg)


I love bringing cars to life with alcohol markers and colored pencils.
Whether you're just starting out or looking to improve your skills, I'm here to help!
Click here to learn more about me.


Add a comment
Comments
Hi! I'm from India. I'm a beginner artist and into cars but somehow the drawing of cars are complicated for me but then i got to know about this website through pinterest and followed your steps and boom now i know how to draw my dream car.......