How to Draw a McLaren Senna GTR - McLaren Senna Drawing Tutorial
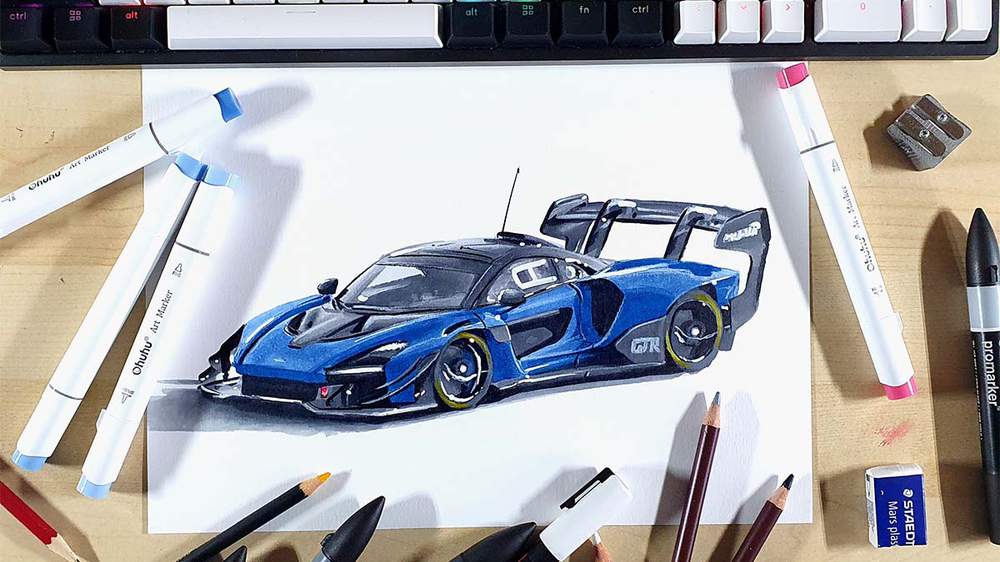
In this week's car drawing tutorial, I'm going to show you how to draw the most extreme McLaren on the planet: the McLaren Senna GTR.
Yes, you can draw this too!
I did my best to explain every step in great detail so you can easily follow along and create your own McLaren Senna GTR drawing.
Let's get drawing!
Disclaimer: In the name of full transparency, please be aware that this blog post contains affiliate links and any purchases made through such links will result in a small commission for me (at no extra cost for you).
How Do You Draw a McLaren Senna GTR?
To draw a realistic-looking McLaren Senna GTR, you first need to look for reference photos. Once you've got one you like, you can sketch the car using the grid method to make the process a little bit easier. After that, You color the car using alcohol markers. And lastly, you add details with a white, grey, and black colored pencil and you add a few white highlights with a white paint marker.
1. Look for Reference Photos
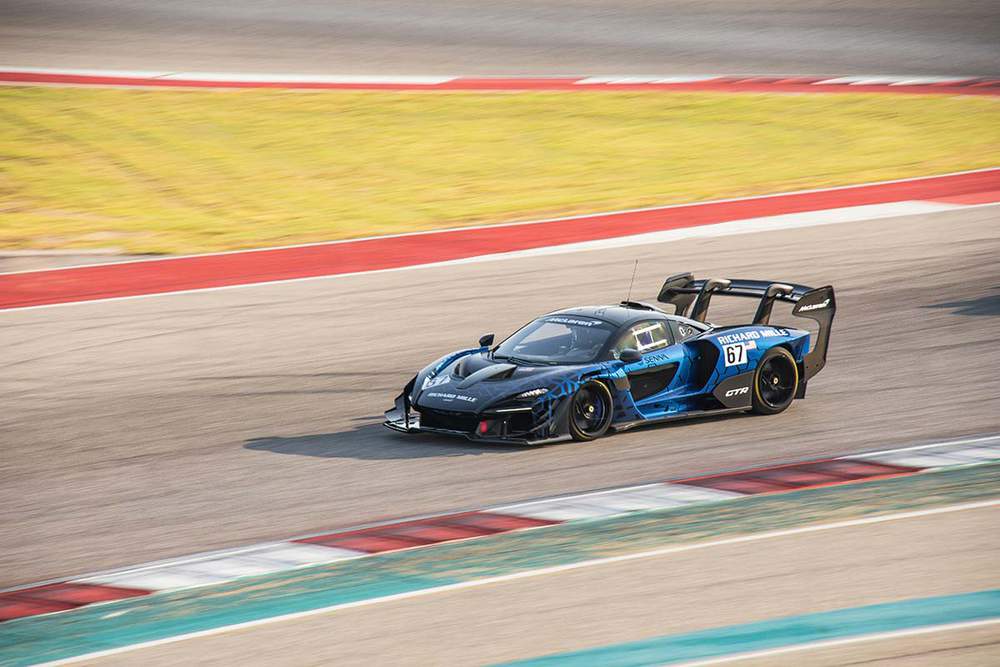
The first thing I did when I decided I wanted to draw a McLaren Senna was look for good reference photos.
Unsplash is a great source for this. For example, I found this photo on there which is the one I'll be using in this tutorial.
2. Choose Your Drawing Supplies
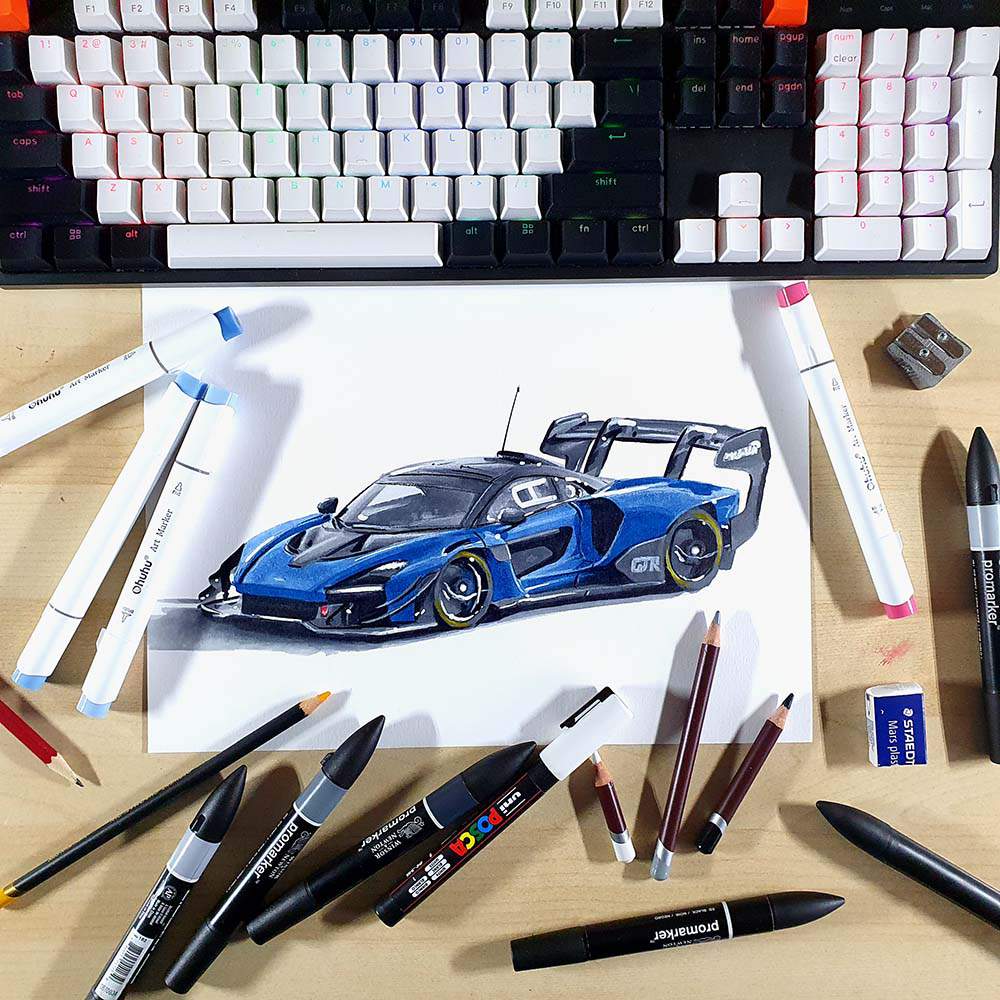
After I had found a good reference photo, I needed to choose what drawing supplies I was going to use.
I wanted to keep this tutorial simple, so I used alcohol-based markers.
I used the Ohuhu Honolulu markers in the colors Cadmium Red (R160), Smoky Blue (B260), Vivid Blue (B270), and Antwerp Blue (B290). Get a 10% discount code here.
I also used the Winsor & Newton Promarkers in the colors Ice Grey 1 (IG1), Ice Grey 2 (IG2), Ice Grey 4 (IG4), Ice Grey 7 (IG7), and Black (XB).
To add details to the drawing, I used Derwent Chromaflow colored pencils in the colors White, Platinum, Black, and Amber Gold.
To add highlights to the drawing, I used a white Posca PC-3M paint marker.
I also used an HB graphite pencil, a ruler, a kneaded eraser (to lighten my sketch before coloring), and a regular eraser.
And I made this drawing on A4-sized Canson Illustration Manga paper.
3. Sketch the Outline of the McLaren Senna GTR
Sketching a car like the McLaren Senna GTR accurately can be a bit tricky.
Luckily there are many techniques that you can use to make this process easier.
Personally, I'm a big fan of using the grid method. This is also the method I'll be using in this tutorial.
The grid method makes sketching cars precisely a lot easier. Here's an in-depth guide on how to use it if you're interested.
To prepare for sketching the car, I started by resizing the reference photo to the same size as my paper, which is 29.7 by 21 cm or 3508 by 2480 pixels.
Then, I added a grid overlay of 15 by 10.5 squares on top of the photo and I marked the squares that contained parts of the McLaren Senna GTR.
With my grid overlay tool, you can easily add a grid overlay on your reference photo.
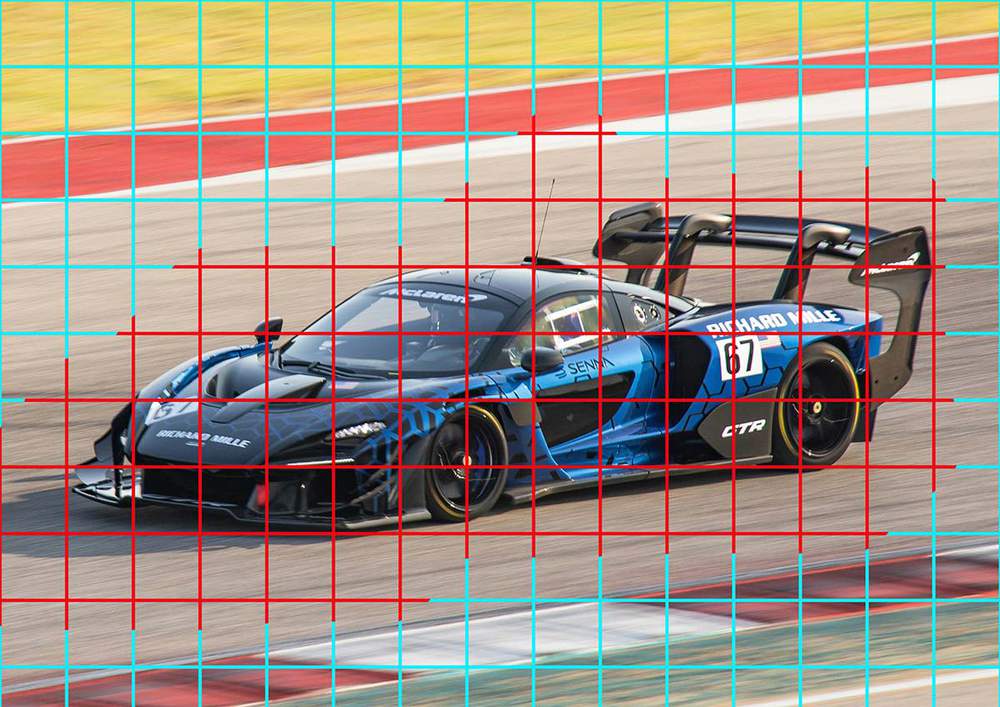
After that, I recreated that same grid on my piece of paper.
Each grid line is 2cm apart starting from the top left.
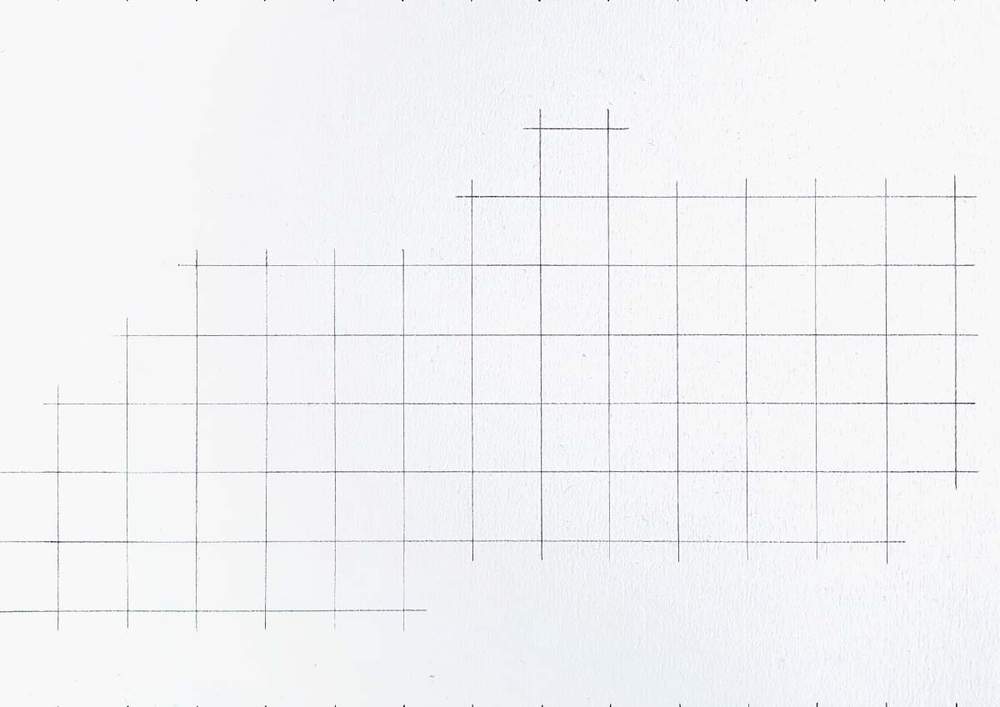
Now that the grid is done, it's time to start sketching the Senna GTR.
I started by picking any line on the outside edge of the car. I then marked where it starts, where it ends, and where it crosses grid lines. After that, I sketched the line in one swift motion.
I repeated these steps until I had sketched all the lines on the outside edge of the car to form a complete outline.
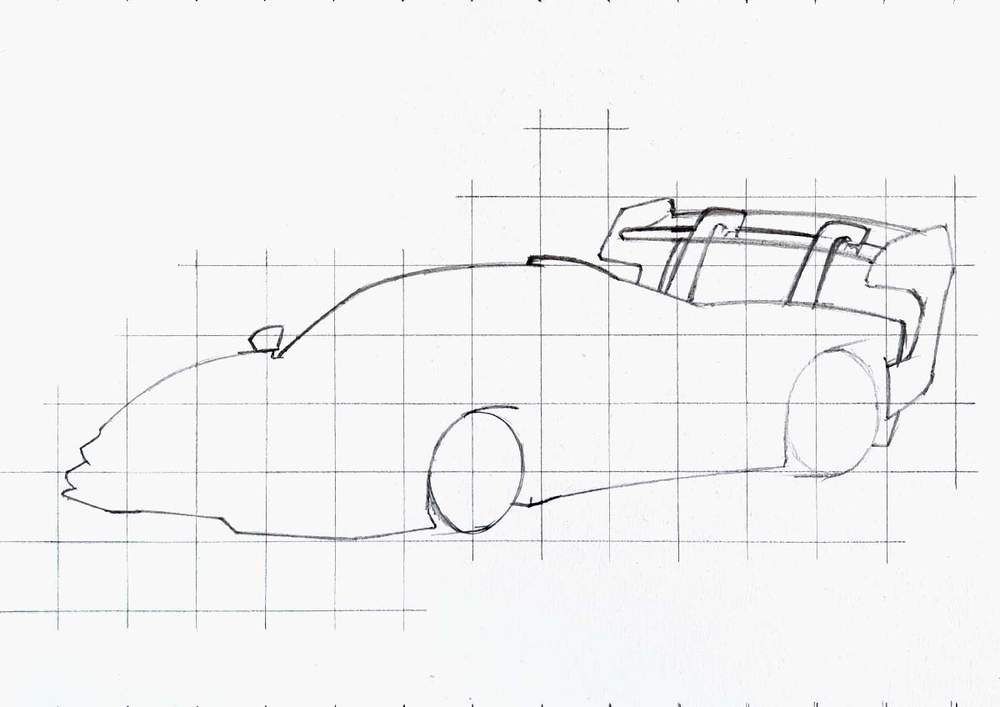
4. Sketch the Details of the McLaren Senna GTR
Now that the outline is in place it is a lot easier to sketch the rest of the parts and details.
I started by sketching the basic parts of the car, like the windshield, the headlights, the front splitter, etc.
To sketch each part I used the same technique as I did to sketch each section of the outline.
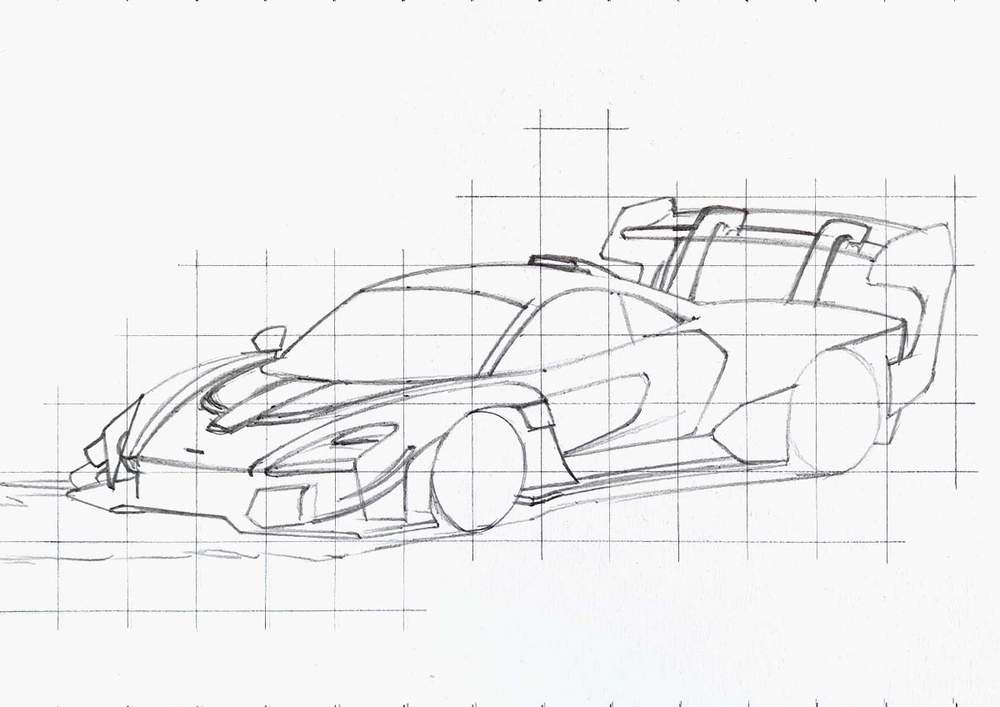
After the basic shapes and parts were in place, I started adding the finer details like the wheels, the interior, the vents, etc.
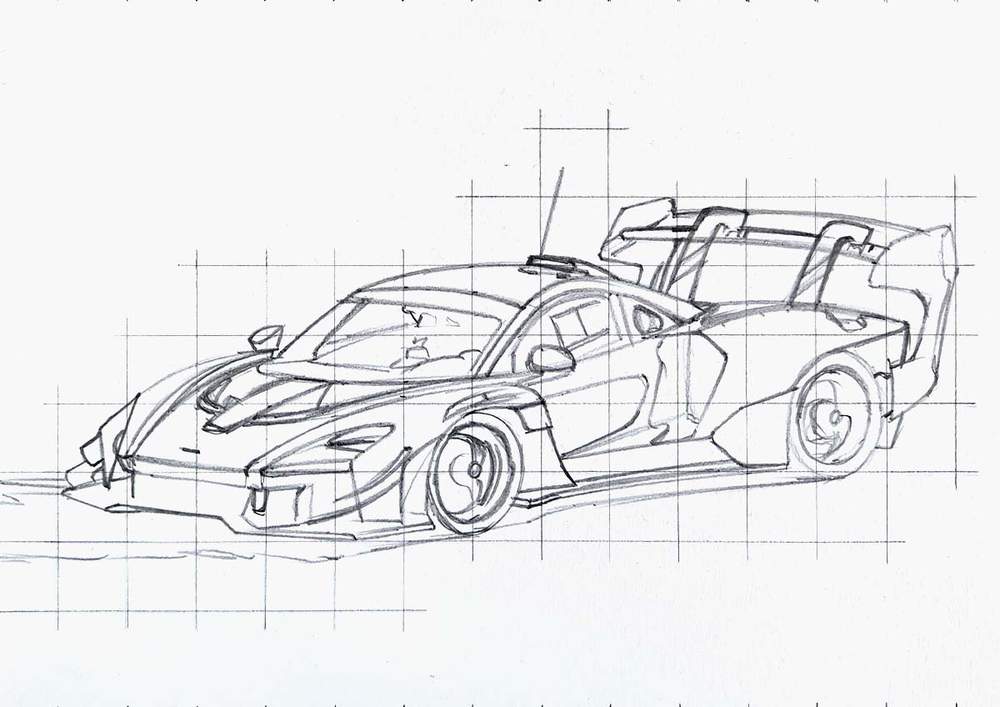
5. Color the Black Parts of the McLaren Senna
Now that the sketch is done, it's time to start coloring the Senna GTR.
I like to start by coloring all pure black parts first.
This makes the drawing look a lot simpler.
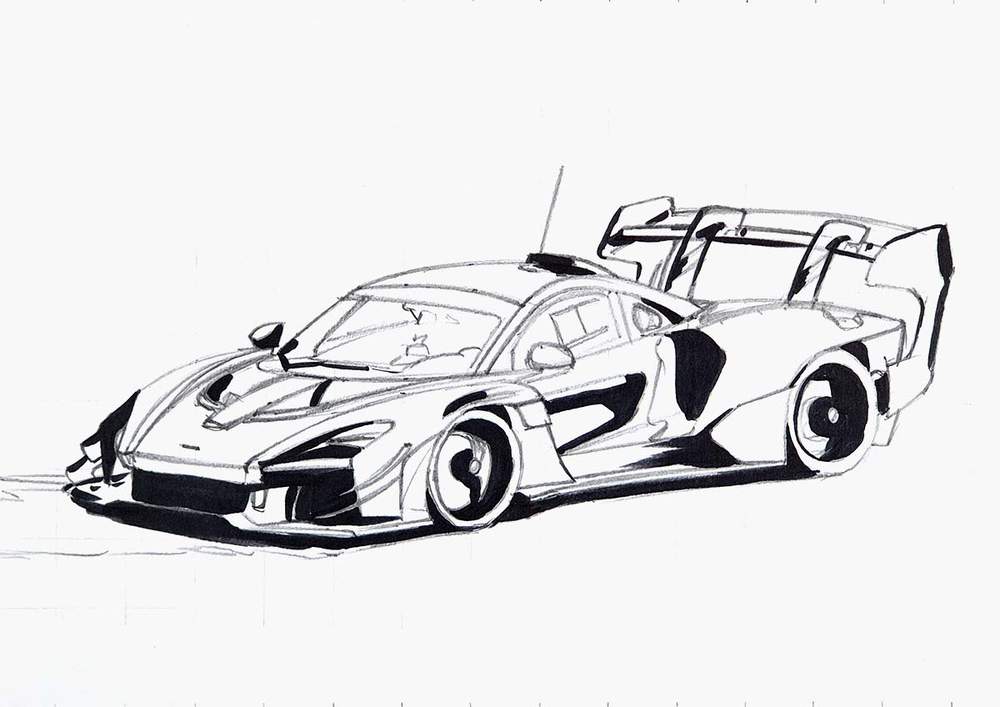
6. Color the Front Splitter of the Senna GTR
After that, I colored the front splitter, headlights, and other aero parts.
I started by coloring everything I just mentioned with Ice Grey 2, except for the tow strap.

Next, I went in with Ice Grey 4 and darkened almost everything except for a few edges and reflection on the left side of the splitter I kept a lighter grey.
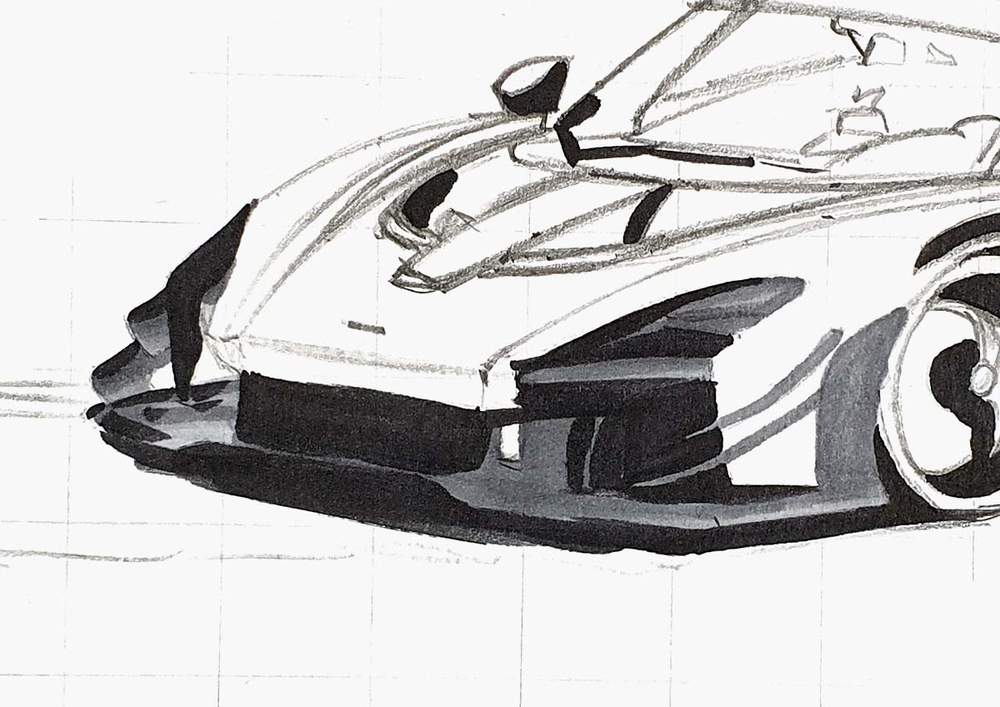
Lastly, I used Ice Grey 7 to add the darkest shadows and reflections on the splitter and the aero parts. This is mainly on the right side of the front.
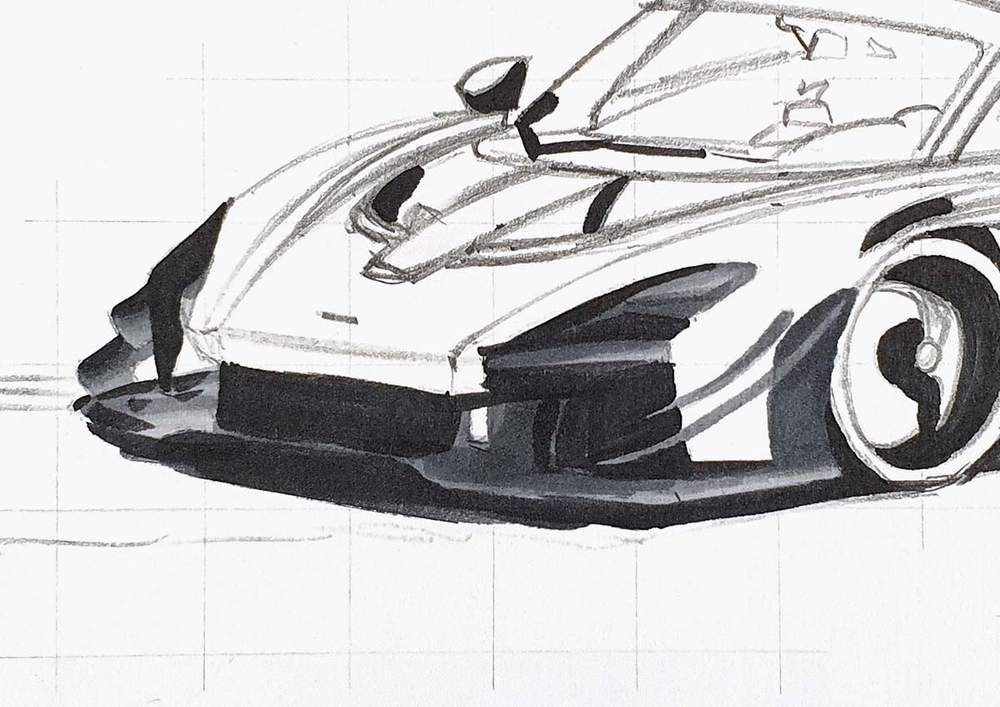
I forgot to color the towing strap, but later on I colored it with Cadmium Red.
7. Color the Air Vents on the Front of the McLaren Senna GTR
Next up, I colored the air vents on the hood of the car.
I first colored all the grey bits with Ice Grey 2.
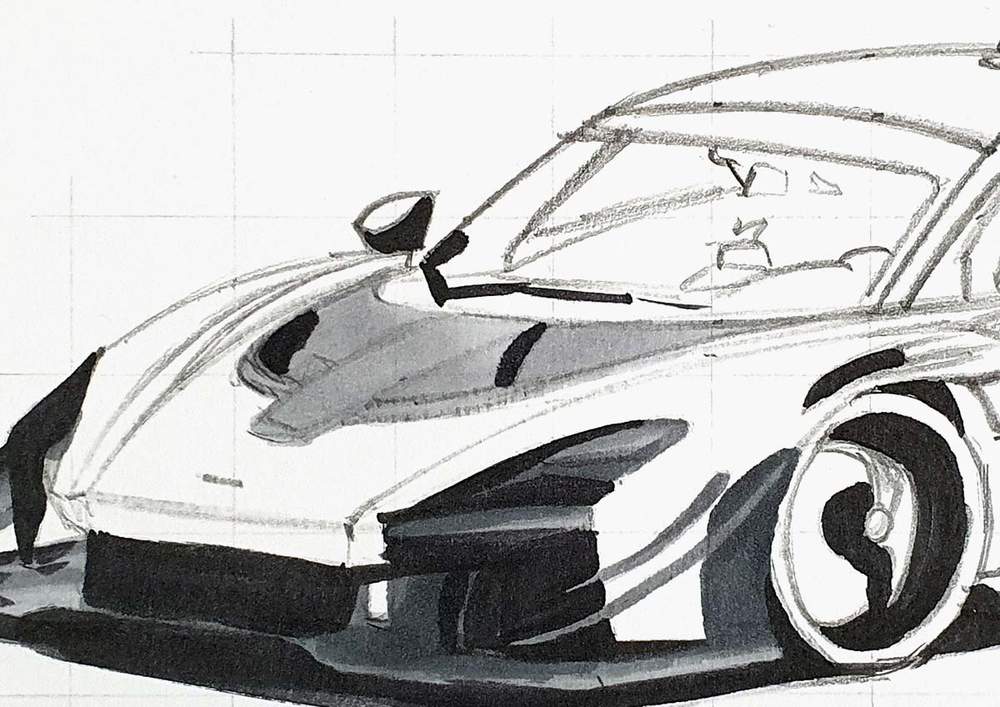
Then, I used Ice Grey 4 to color the darker grey parts on the bottom right and in the middle from bottom to top on the left air vent.
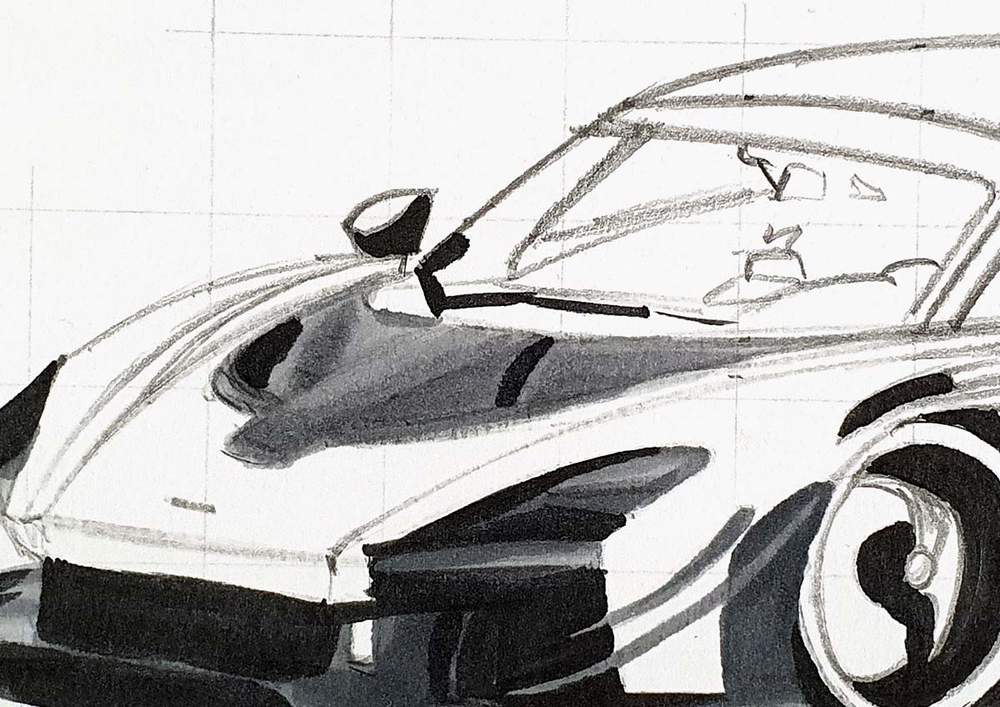
To finish it off, I used Ice Grey 7 to add more shadows and reflections, also mainly on the bottom left and in the center of the left vent.

8. Color the Wheels of the McLaren Senna
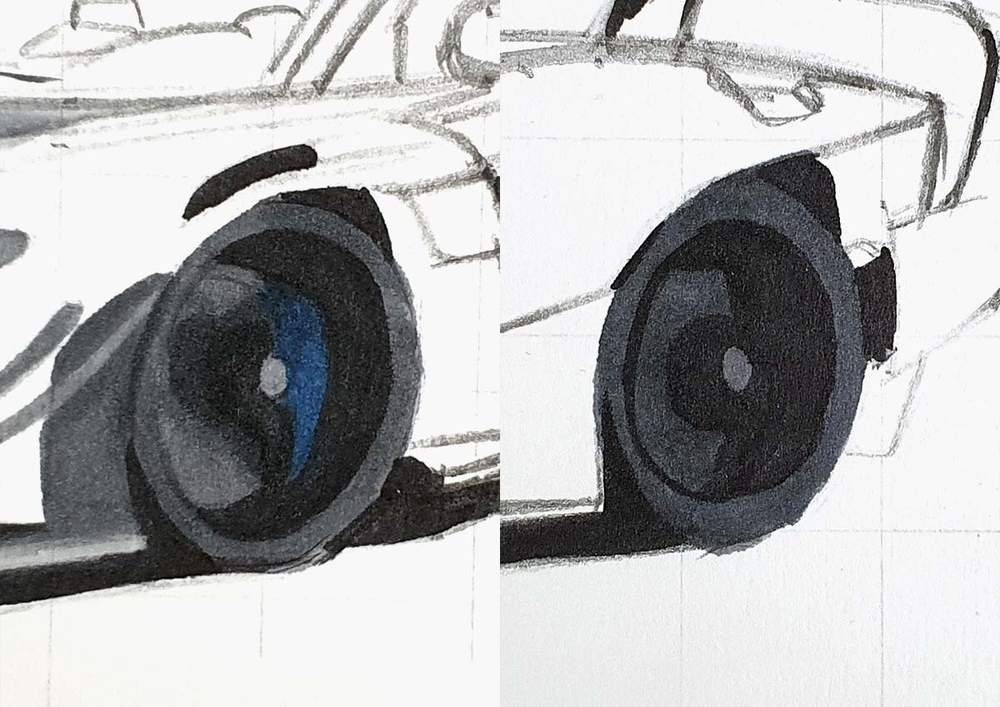
After that, I colored the wheels. They are pretty simple.
As the car is driving you can't really see the spokes.
I started by coloring both wheels fully with Ice Grey 4.
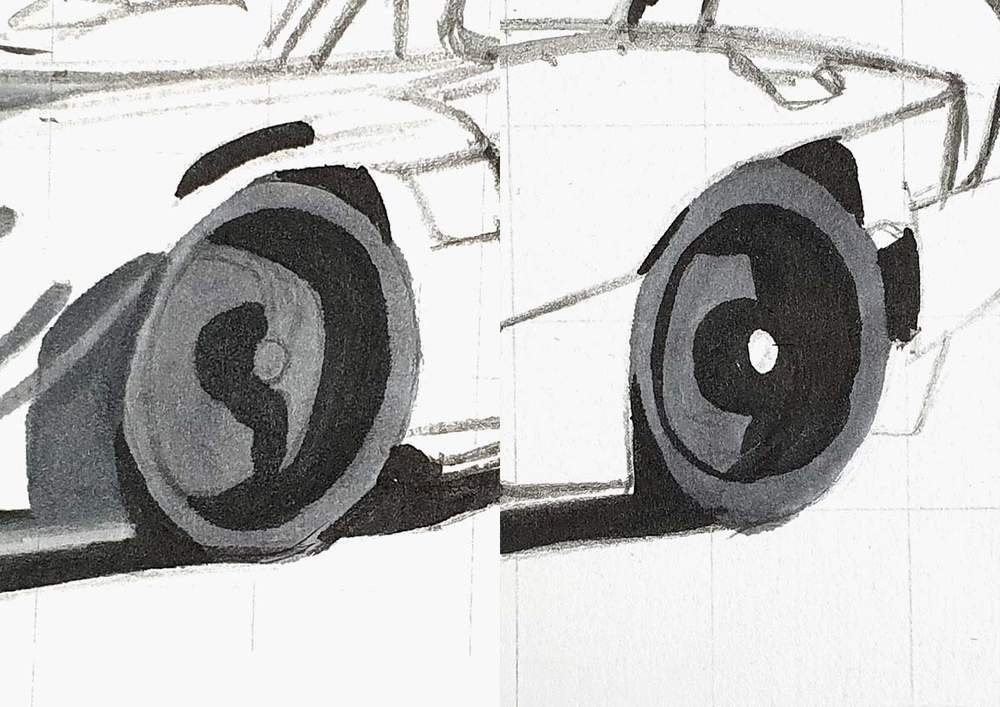
Next, I used Antwerp Blue to color the front brake caliper and I used Ice Grey 7 to color the tire and the bit around the center of the front wheel.
I also used the IG7 to color the whole rear wheel.
9. Color the Side Skirt of the Senna GTR
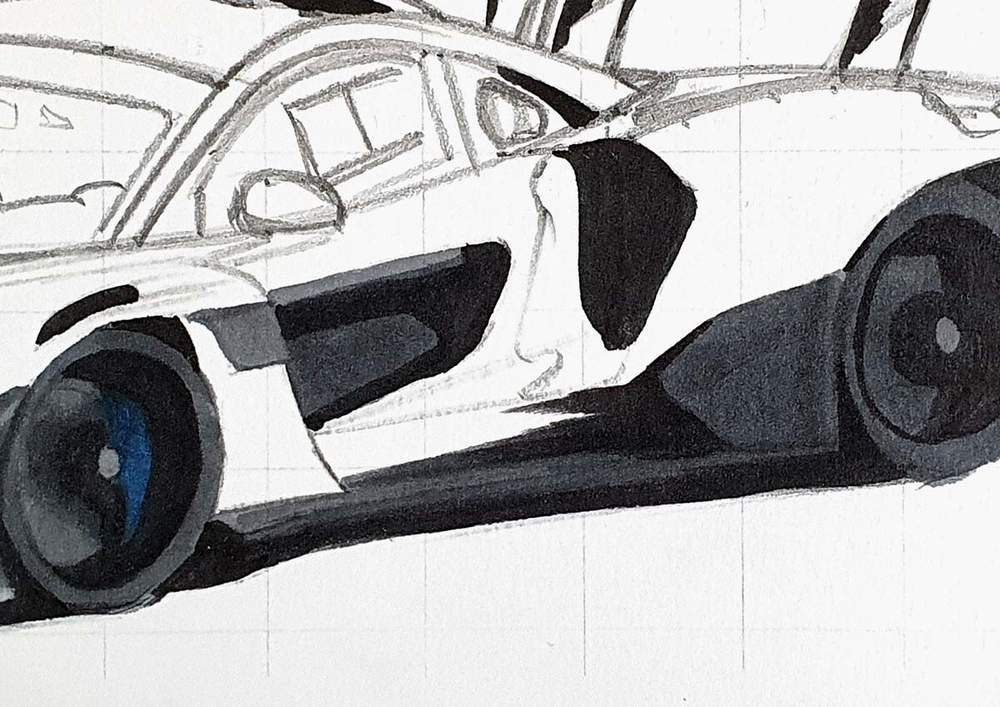
Next up, I colored the side skirt and other grey parts on the side of the Senna.
I started by coloring all these parts with Ice Grey 4.

After that, I used Ice Grey 7 to color the lower light part of the window piece in the door and almost the whole side skirt except for a tiny bit on the left.
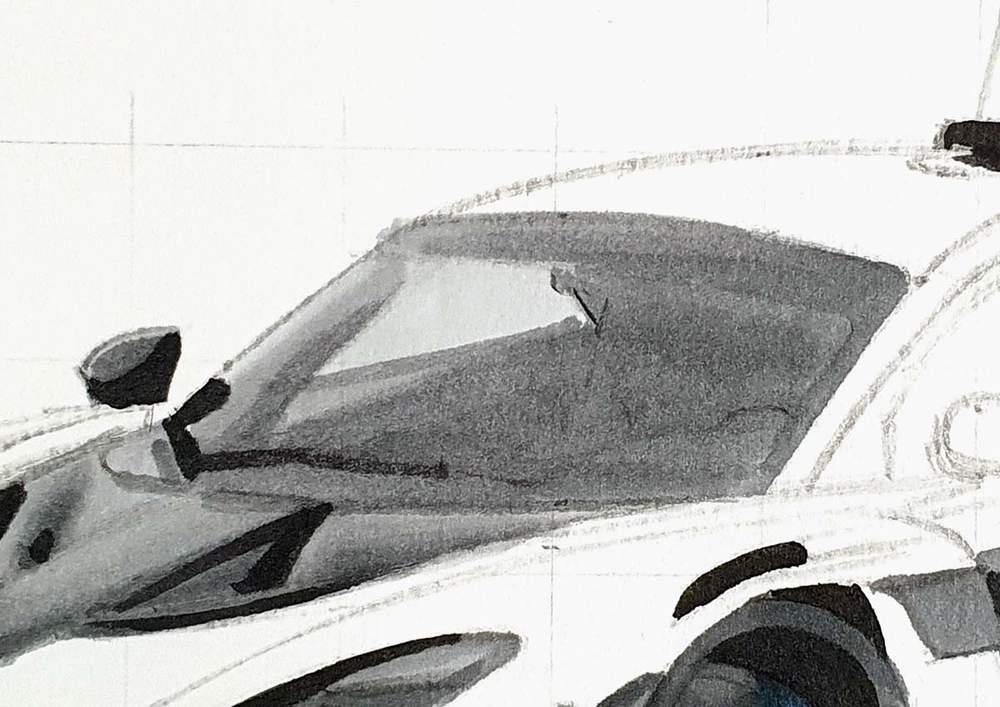
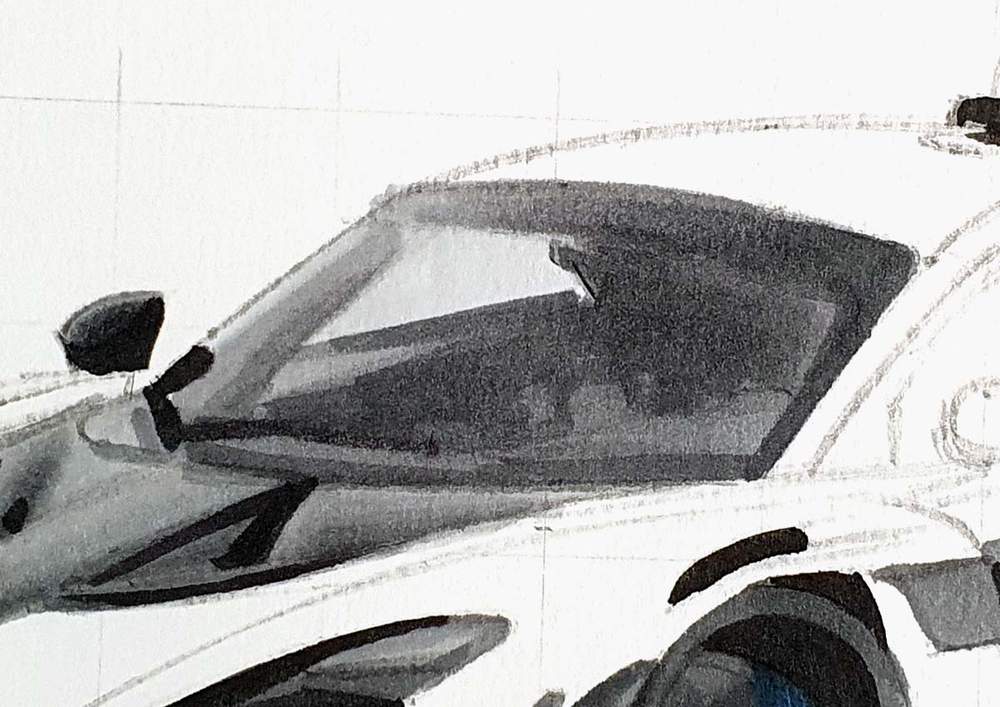
10. Color the Windshield of the McLaren Senna GTR
Next, I colored the windshield.
I started by coloring the lightest parts which are on the top left with Ice grey 1.
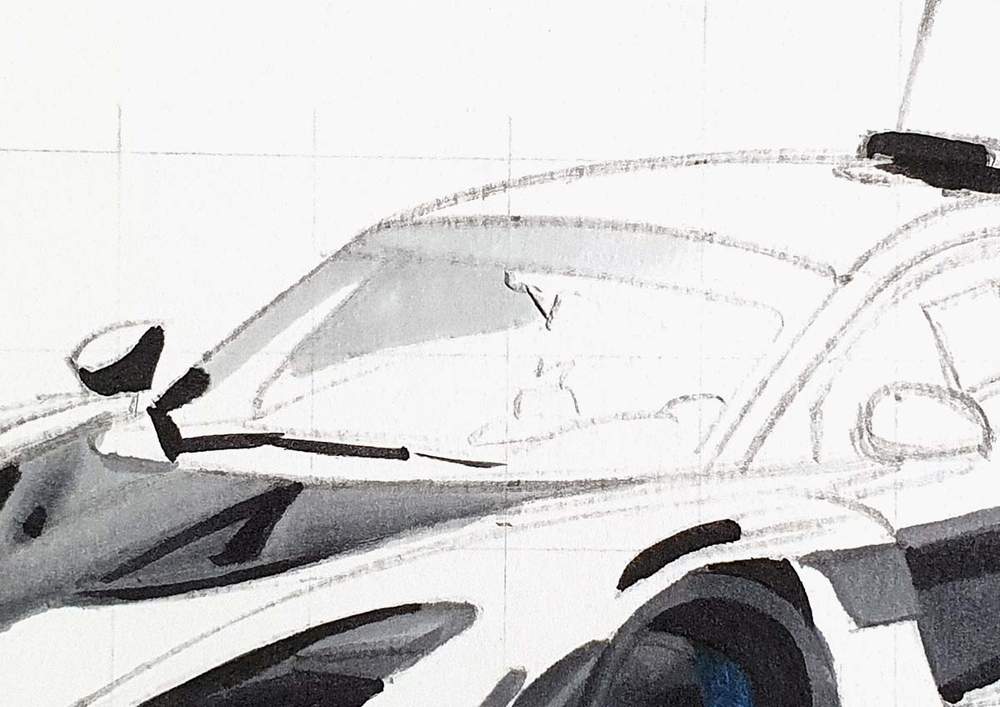
Next, I used Ice Grey 2 to color the inside of the left A-pillar and the edge below the side window as well as the top middle edge and the top right of the interior.
I also colored the left mirror cap with IG2.

After that, I used Ice Grey 4 to color the rest of the windshield and I added a darker edge on the A-pillar just to the left of the side window. And I colored the center of the mirror with it.
Lastly, I used Ice Grey 7 to color the right edge of the windshield and the interior and to darken the center of the mirror.
11. Color the Side Windows of the McLaren Senna
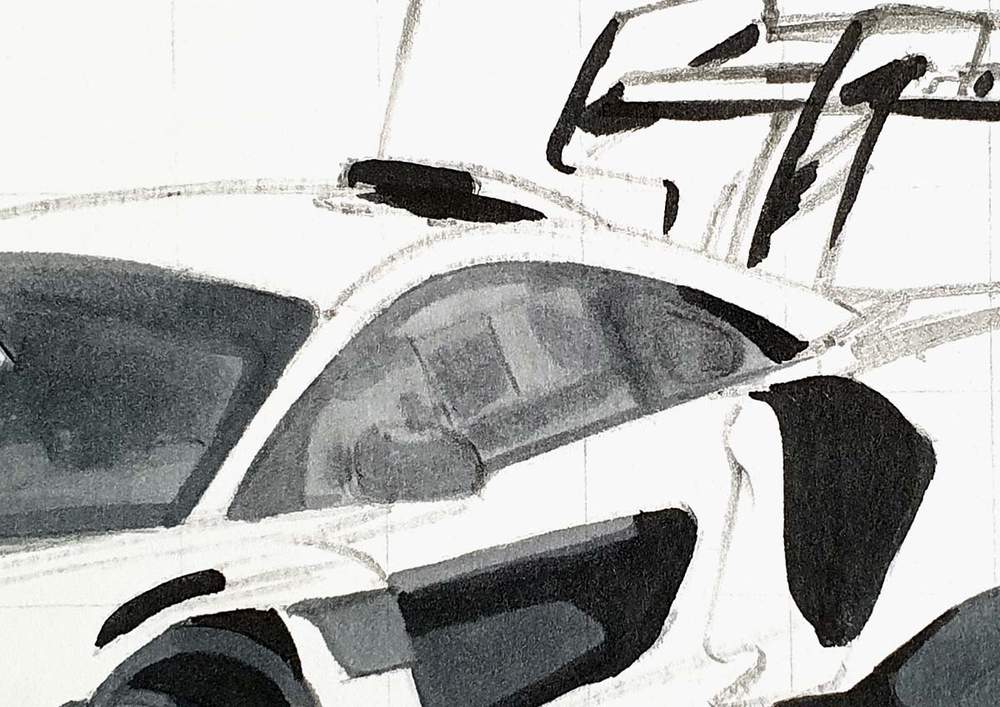
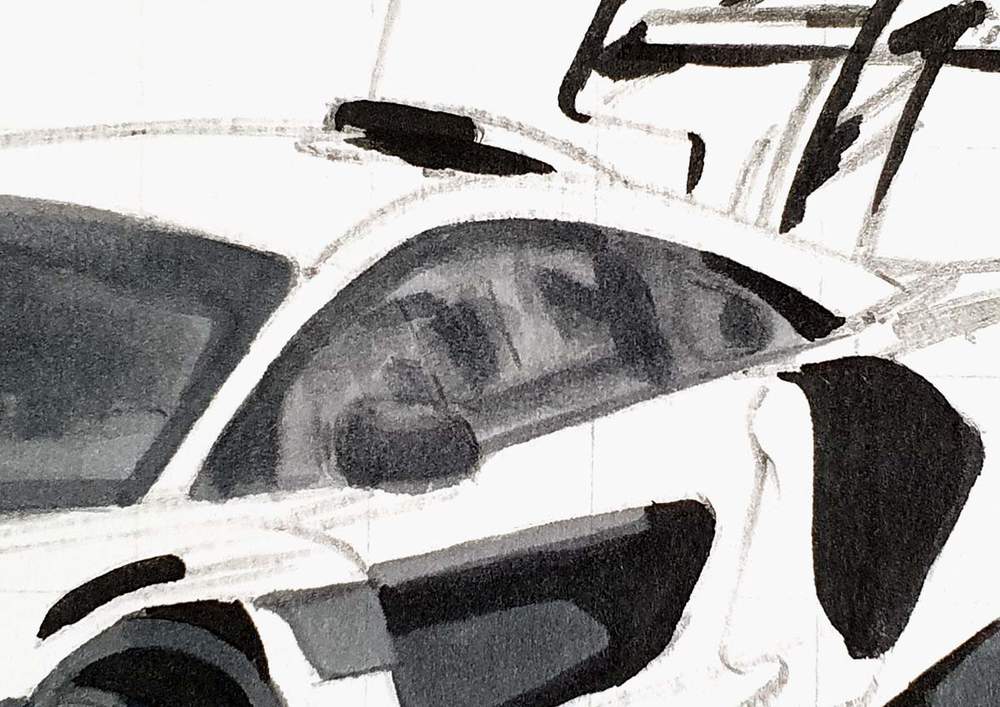
Next up, I colored the side windows.
I started by coloring them with Ice Grey 2 first.

Next, I used Ice Grey 4 to add some reflections and to darken the window sills.
I also darkened to bottom 3/4 of the mirror.
Lastly, I used Ice Grey 7 to add more dark reflections all over the side windows and the top left of the window edge as well as the bottom half of the mirror cap.
12. Color the Roof of the McLaren Senna GTR
Next, I colored the roof and the roof scoop with Ice Grey 1 first.
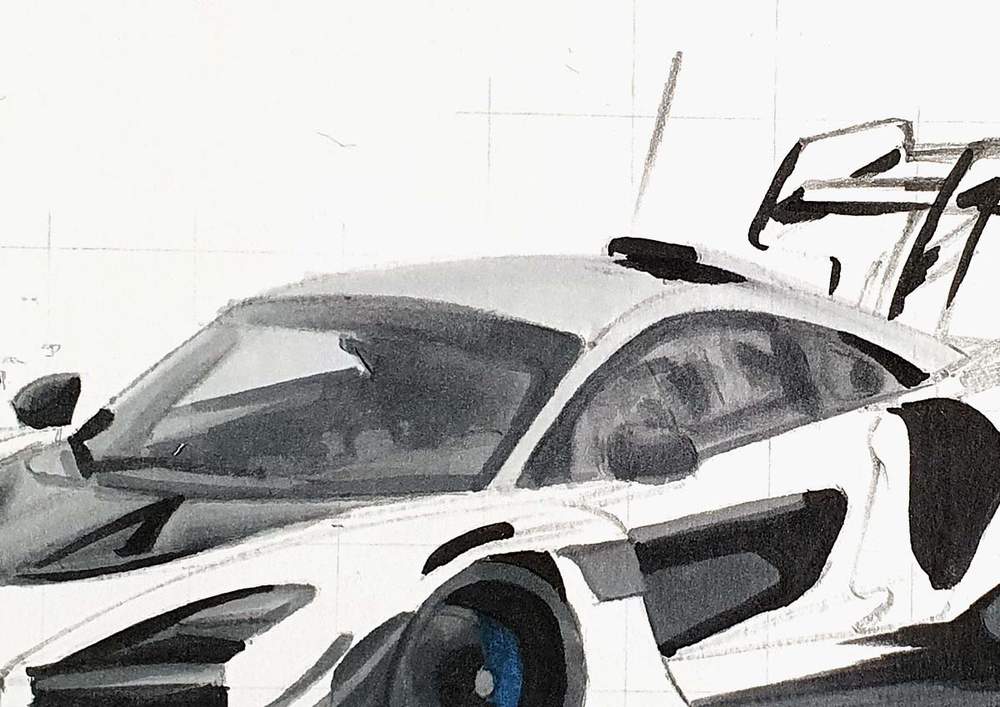
Then I used Ice Grey 2 to darken almost everything except for the top left and the bottom right end.
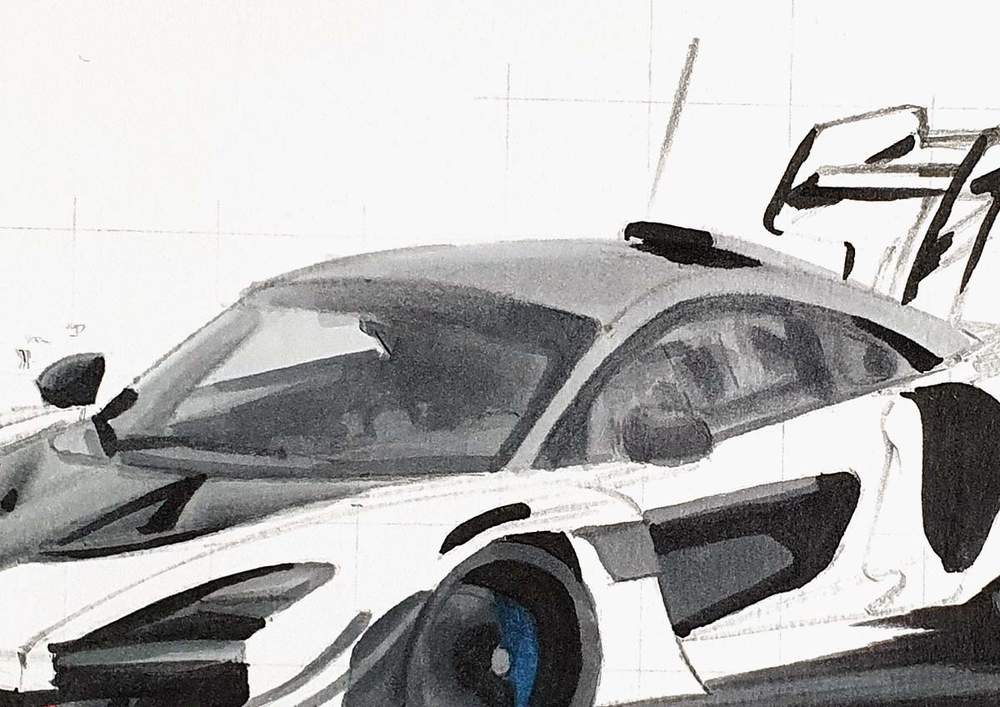
Next, I used Ice Grey 4 to darken the bottom middle part of the roof and the A-pillar.
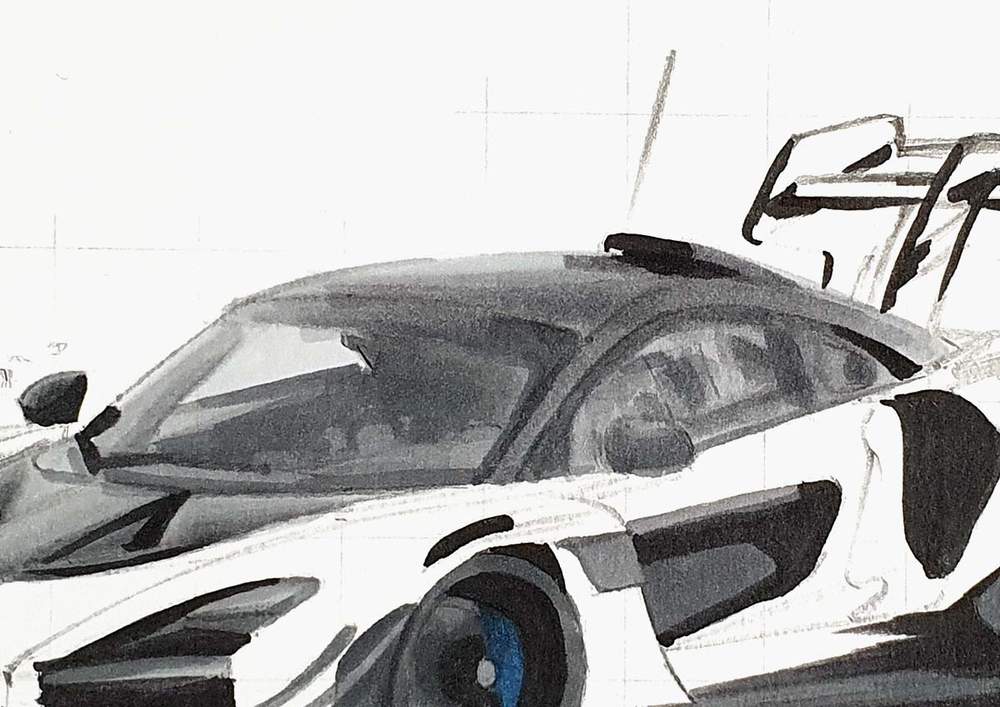
Lastly, I used Ice Grey 7 to color the A-pillar, the edge above the top right of the windshield, and the reflection below the roof scoop.

13. Color the Rear Wing of the McLaren Senna GTR
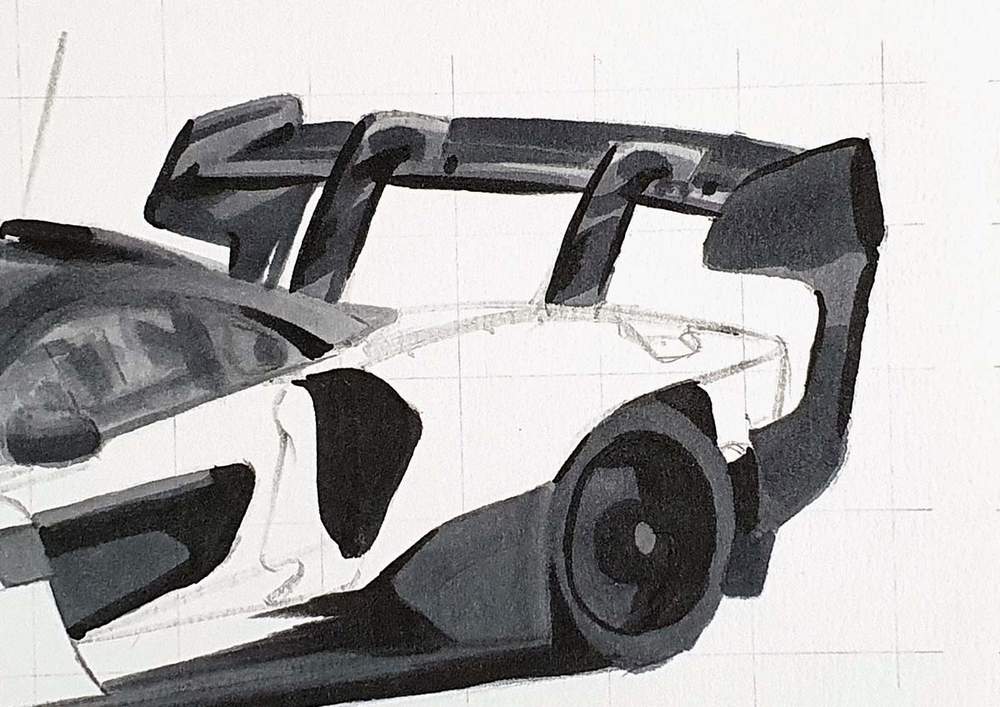
Next up, I colored the enormous rear wing of the McLaren Senna GTR.
I started by coloring the lightest parts with Ice Grey 2.

Next, I used Ice Grey 4 to color the rest of the wing.
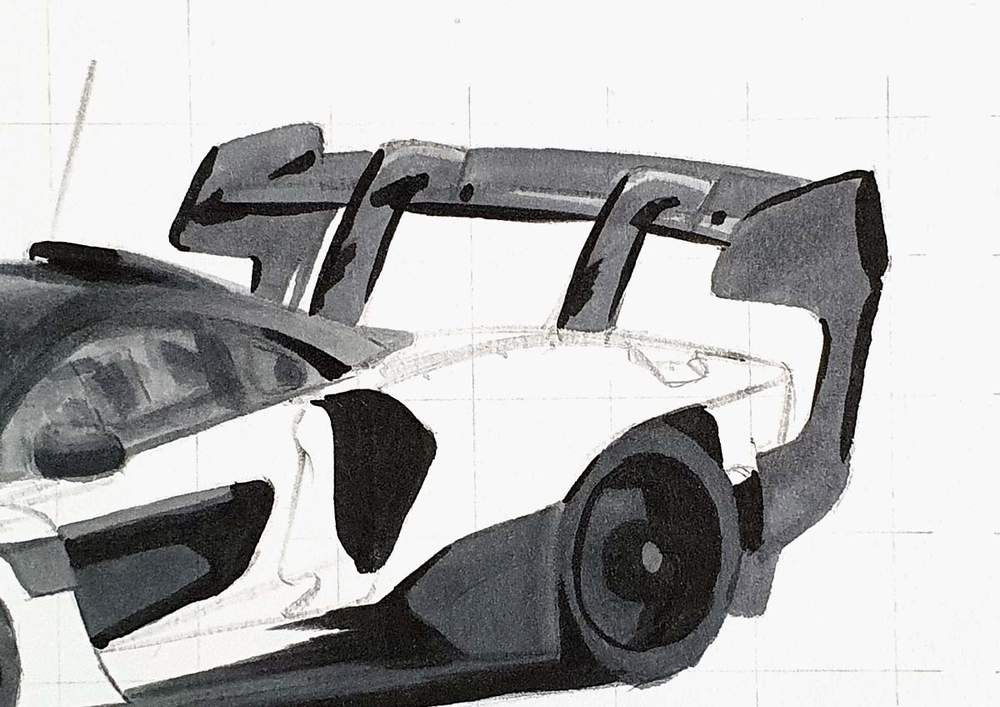
Lastly, I used Ice Grey 7 to add some shadows and dark spots on the wing arms and the wing itself.
14. Color the Shadow of the Senna GTR
After that, I colored the shadow of the car on the ground.
I started by coloring the whole shadow with Ice Grey 2.
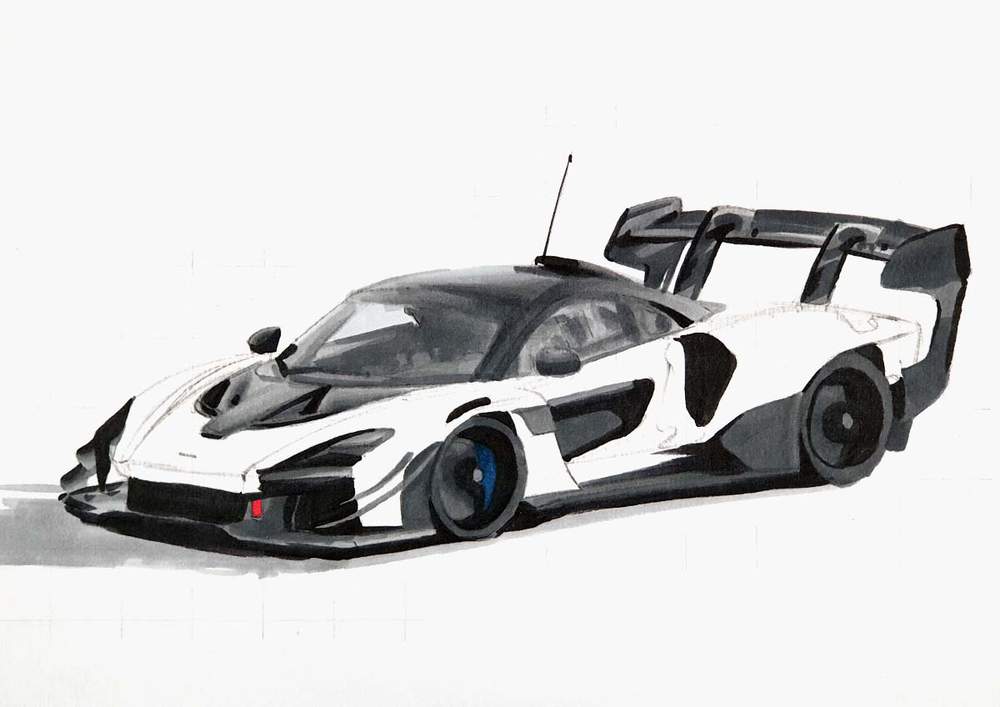
Next, I darkened the inside of the shadow with Ice Grey 4.
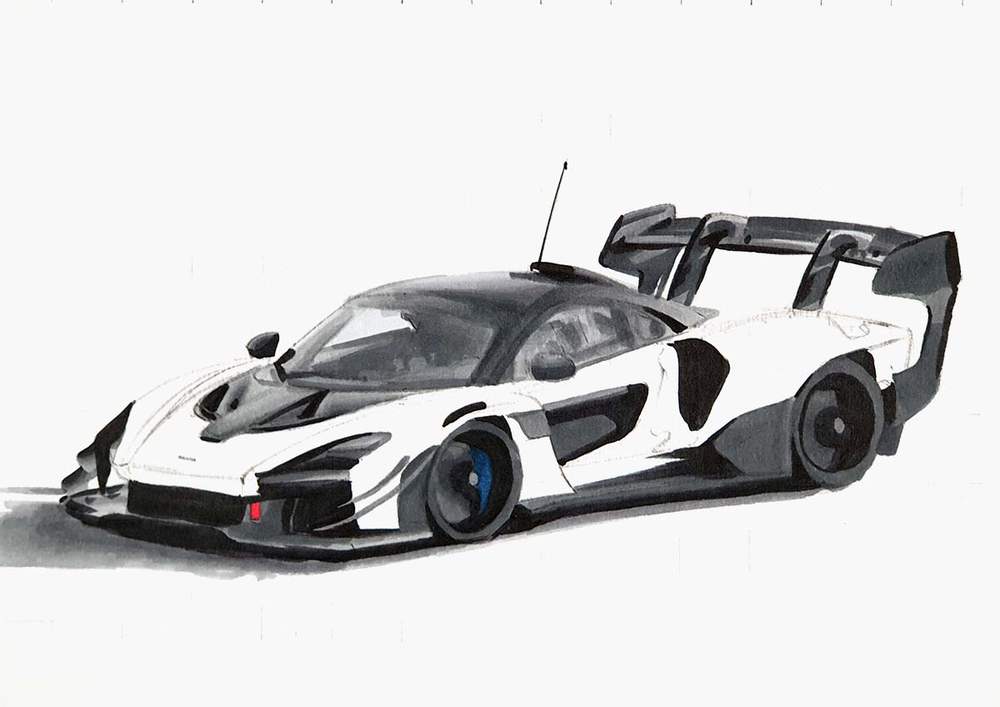
Lastly, I blended the Ice Grey 4 into the black using Ice Grey 7.
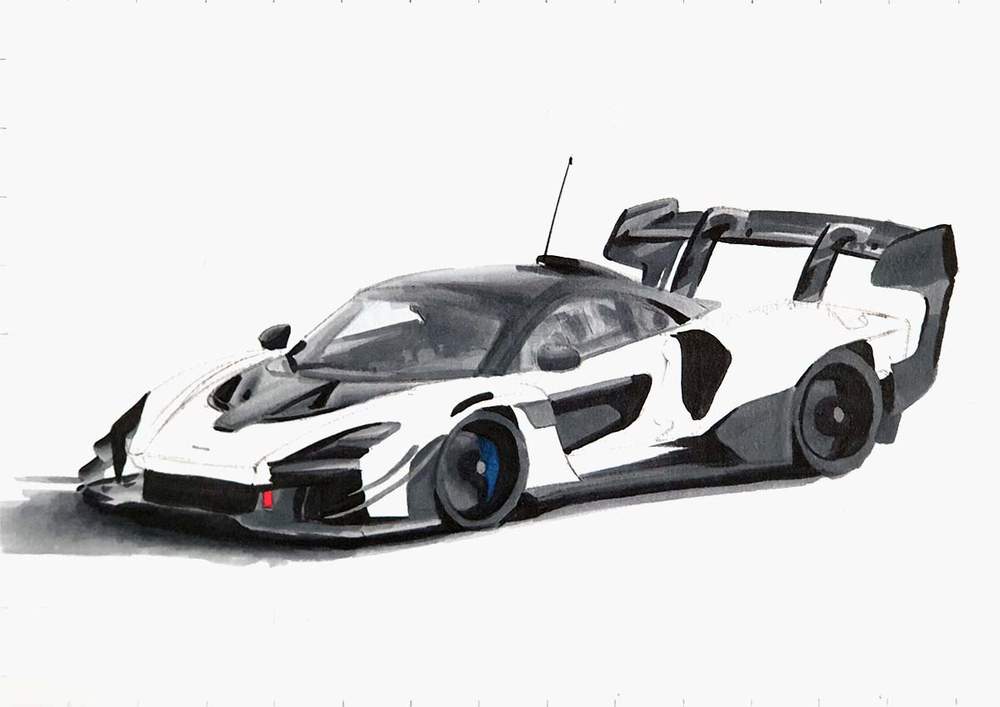
15. Color the Main Body of the McLaren Senna
Next up, I colored the main body of the McLaren Senna.
I colored the lightest parts first with Smoky Blue.
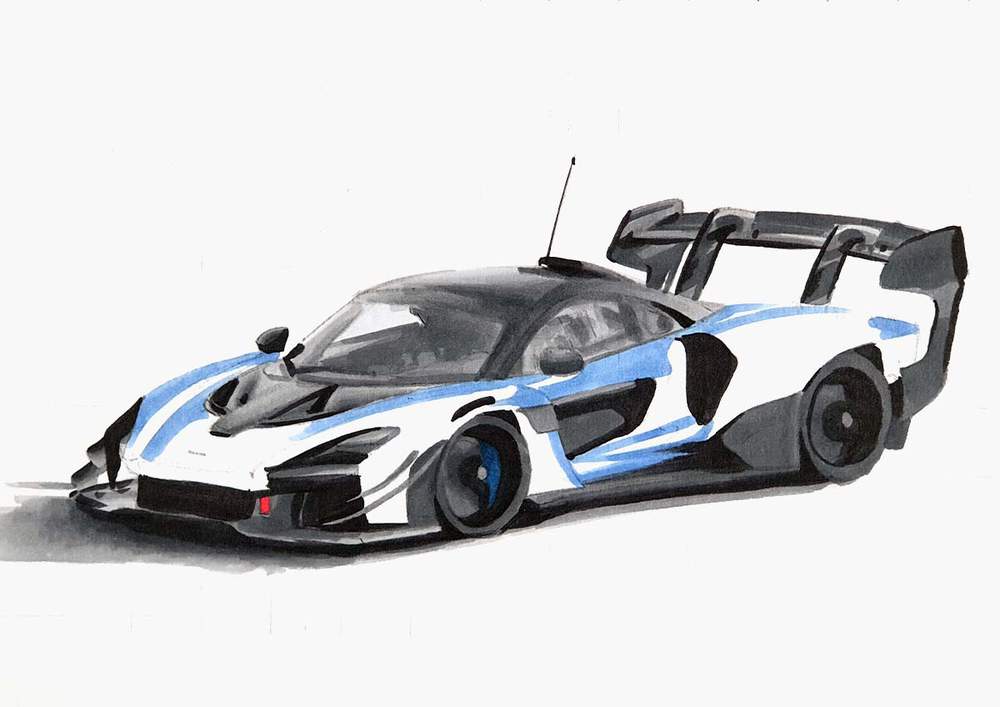
Next, I used Vivid Blue to color in the rest of the body.
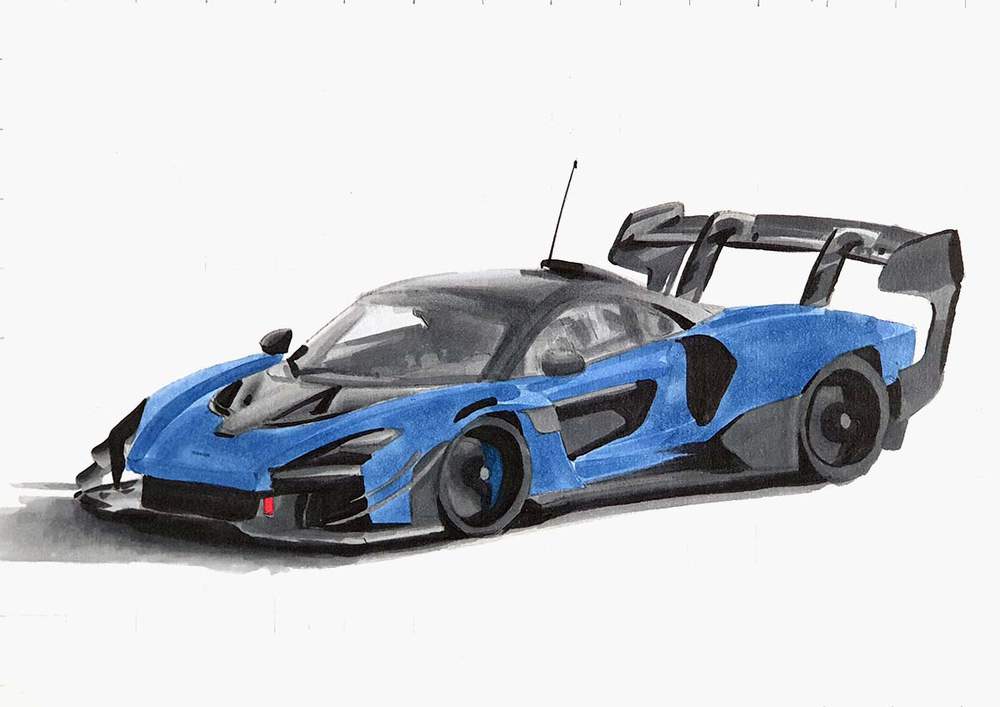
Lastly, I used Antwerp Blue to add the dark parts and reflections on the car.
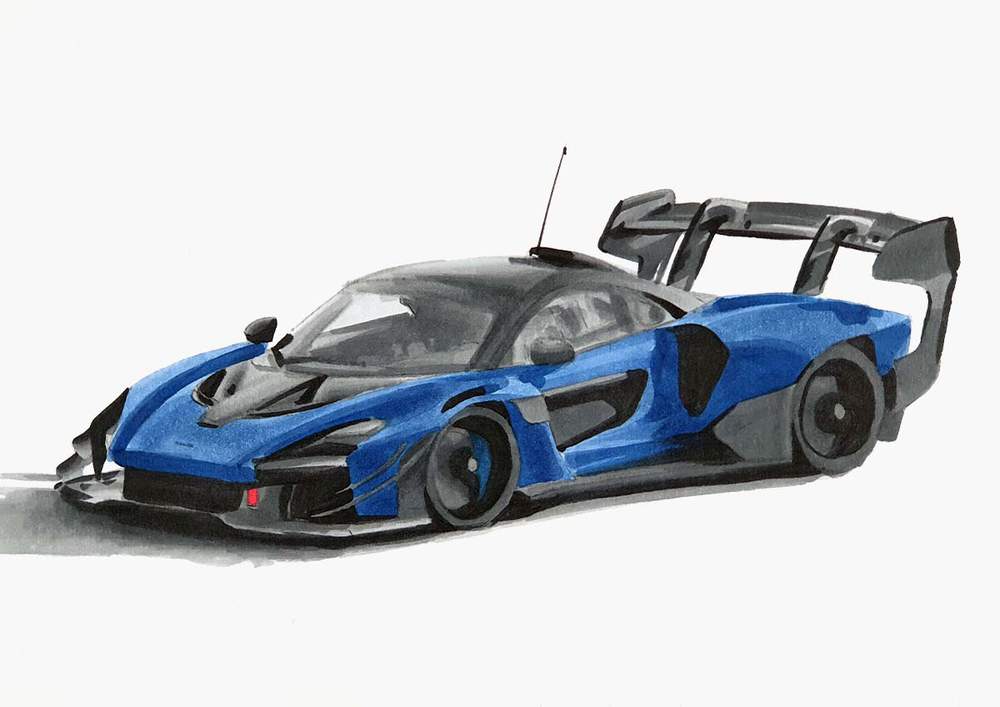
16. Add Details to Your McLaren Senna Drawing
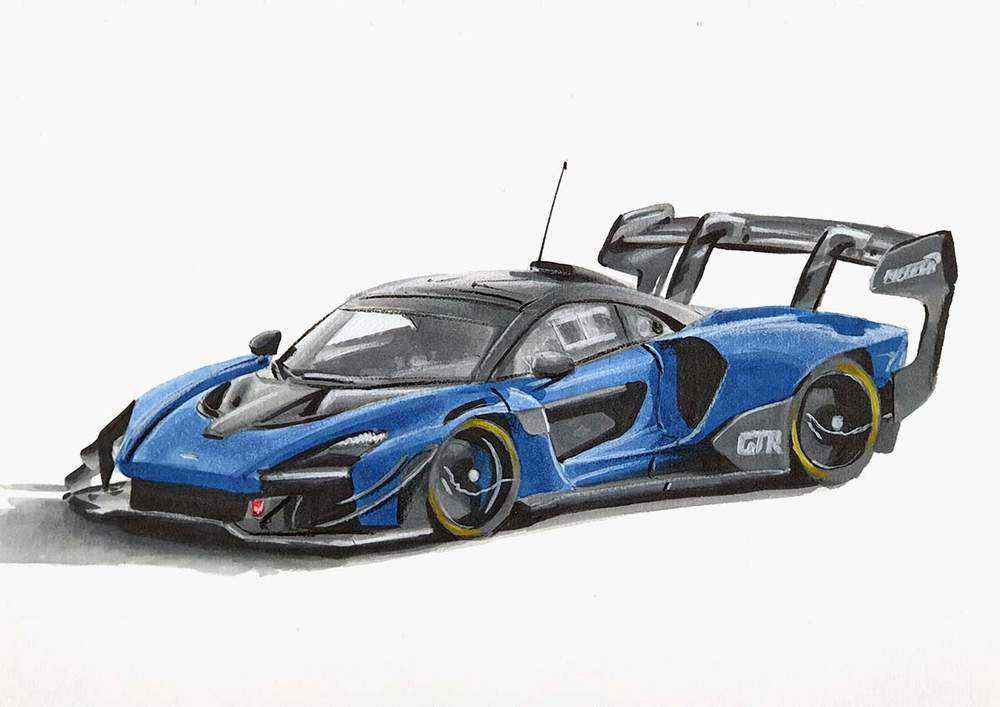
Your McLaren Senna GTR is now fully colored, but it's lacking the details.
To add in all the details I used 4 colored pencils: a white, a grey, a black, and a yellow one.
I used the white pencil to add highlights on all the panel edges and to add reflections all over the car and the wheels.
I used the black pencil to add in the really dark shadows and reflections and the panel gaps.
I used the grey pencil to add in some light grey details and reflections on the car.
And I used the yellow pencil to add in the yellow striping on the tires.
17. Add Highlights to Your McLaren Senna GTR Drawing
Your McLaren Senna GTR drawing is now almost done.
There is just one small thing to do that will make a big difference: Adding pure white highlights on the car.
To do this I like to use the Posca PC-3M paint marker.
I added a few reflections all over the car where it would make sense and where they are on the reference photo.
Now the car looks really finished!
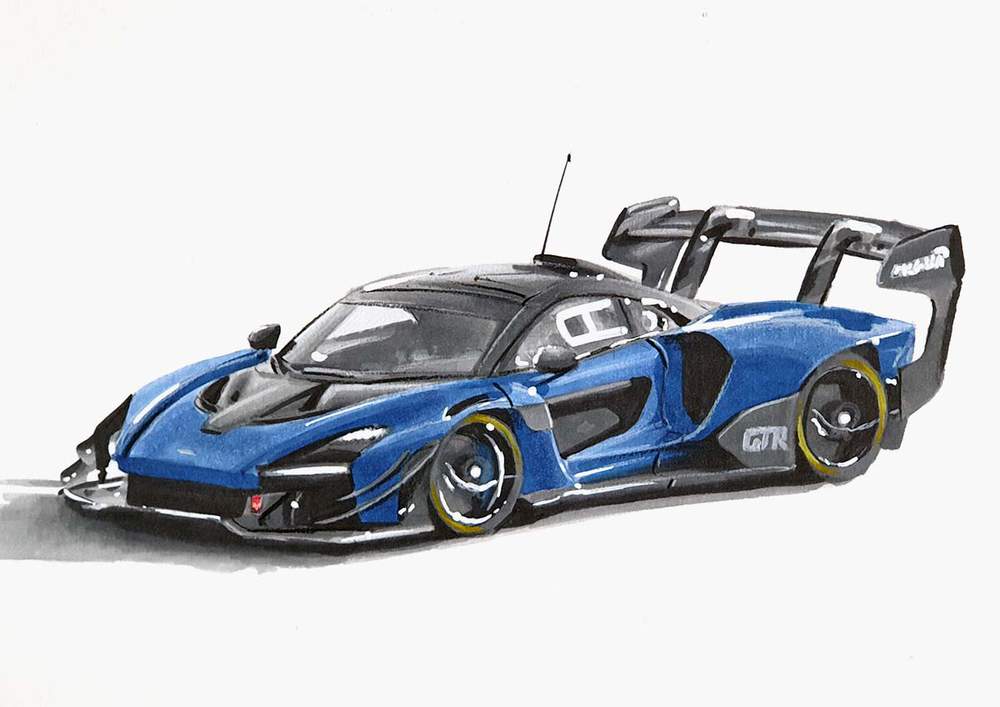
And That's How You Draw a McLaren Senna GTR
This was my full process of drawing a car like the McLaren Senna GTR.
I hope you liked it and were able to follow along!
Let me know what you think of it!
Thank you for reading and following a long with my tutorial!



Be the first to comment!
Comments
There are no comments yet.