How To Draw A Land Rover Defender - A Complete Step-By-Step Guide
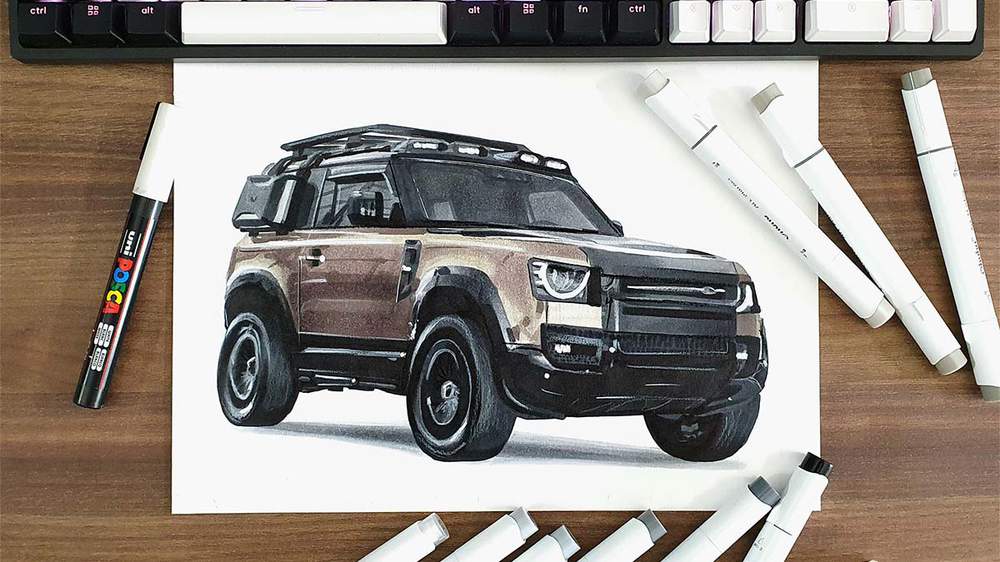
In this week's car drawing tutorial, I'm going to show you step-by-step how I drew this beautiful rolling shot of a Land Rover Defender.
Here's exactly how I made it! Explained as simple and straightforward as possible.
Let's get started!
Disclaimer: In the name of full transparency, please be aware that this blog post contains affiliate links and any purchases made through such links will result in a small commission for me (at no extra cost for you).
Drawing Supplies I Used In This Tutorial
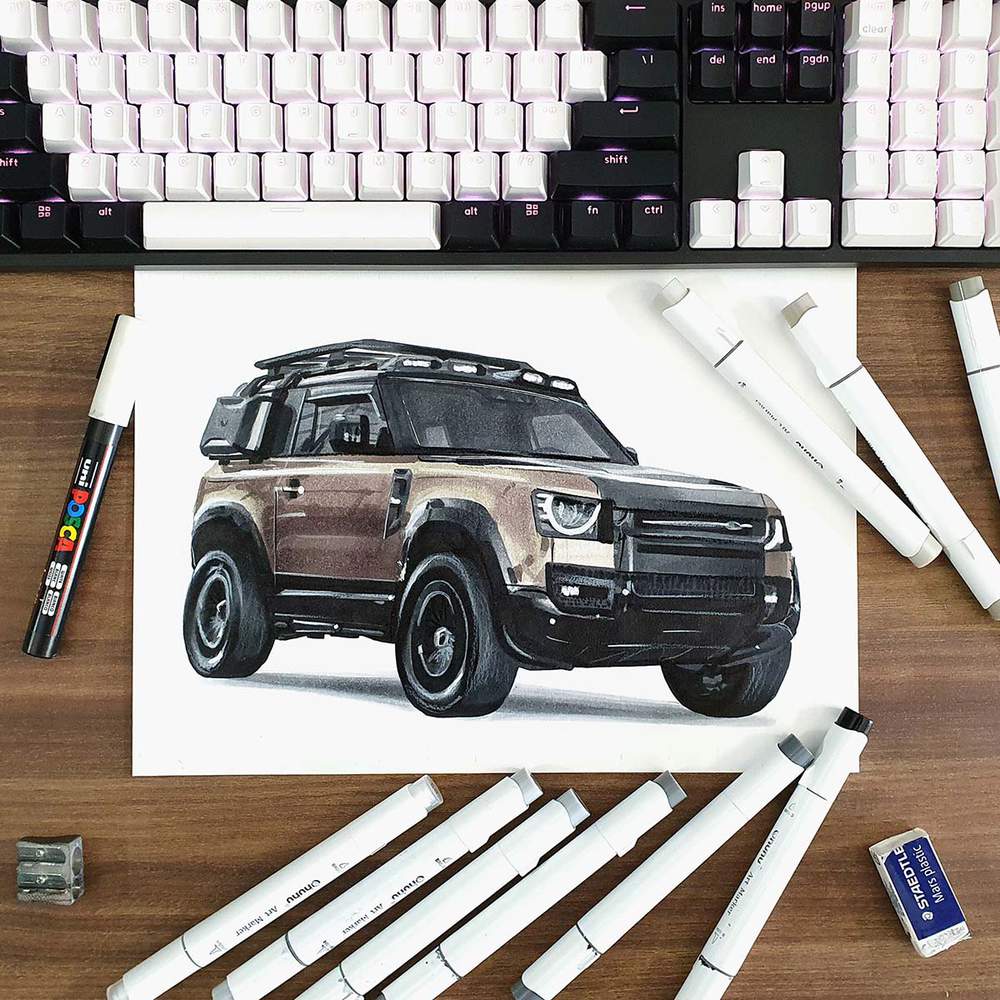
To make this drawing, I used Ohuhu Honolulu markers in the colors Colorless Blender (0), Neutral Grey 03 (CG030), Neutral Grey 3 (NG03), Neutral Grey 07 (CG070), Neutral Grey 6 (NG06), Black (120), Warm Grey 05 (WG050), Warm Grey 07 (WG070), and Warm Grey 09 (WG090).

I also used the black and white Derwent Chromaflow colored pencils.
And to add white highlights, I used a white Posca PC-3M paint marker.
I made this drawing on A4-sized Canson Illustration Manga paper.
How To Draw A Land Rover Defender?
The first step in drawing a Land Rover Defender is choosing which one you want to draw and look for reference photos.
Once you find a photo you like, you start sketching the outline of the car using the grid method to make it a bit easier.
After that, you color the car using markers.
And to finish it off, you add a few details with a white and black colored pencil, and you add some highlights using a white paint marker.
Step 1: Look For A Reference Photo Of A Land Rover Defender You Like
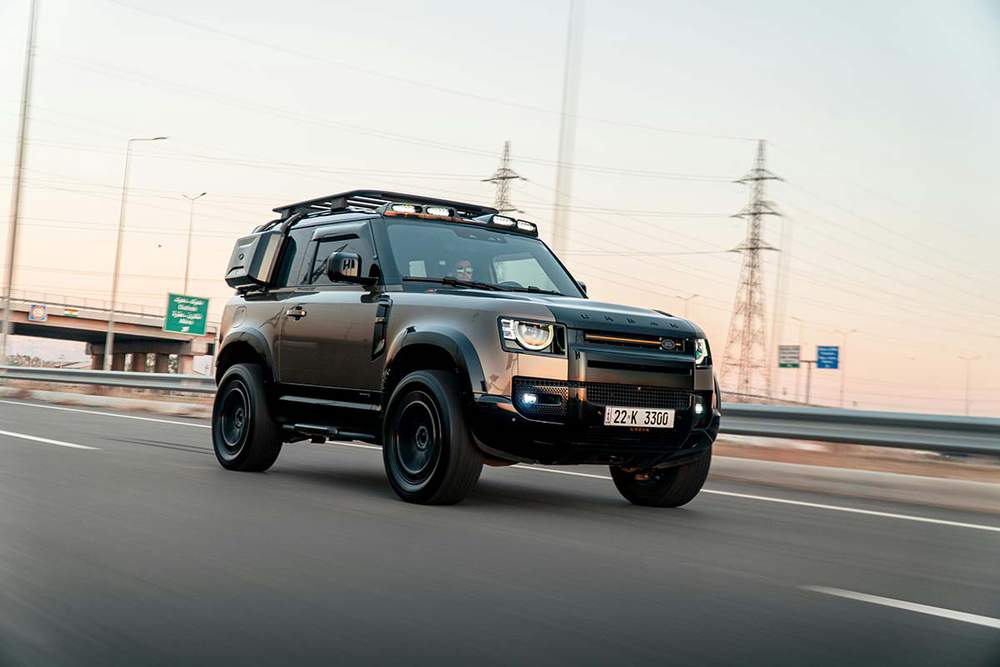
The first step to drawing a realistic-looking Land Rover Defender is to search for a reference photo.
I found this one on Pexels that I really liked.
Step 2: Sketch The Outline Of The Land Rover Defender
Next up, I started the sketch.
I always like to start by sketching the outline first before adding in all the parts and details.
To make it a bit easier to sketch the proportions accurately, I used the grid method.
If you're new to this method or unsure about its use, I highly recommend checking out this guide I've created on the grid method.
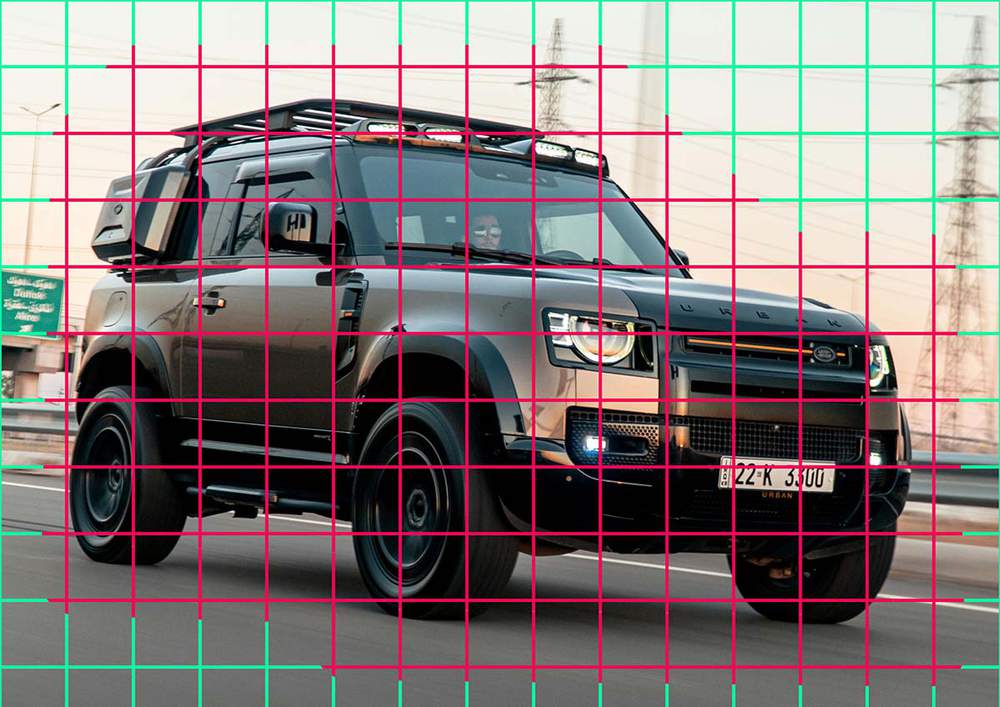
First, I resized the reference photo to the same size as my paper, which is 29.7 by 21 cm or 3508 by 2480 pixels.
Then, I added a grid overlay and I marked the squares with parts of the car in it in red.
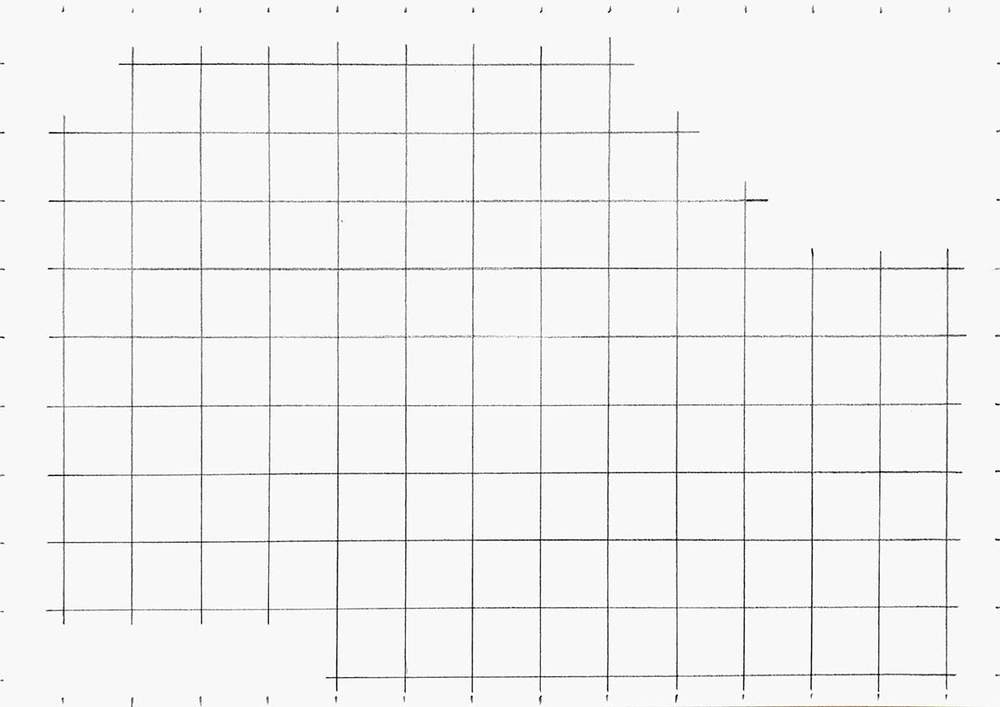
Next, I recreated that same grid on my paper. Each square is 2 by 2 cm, and I only sketched the squares marked in red.
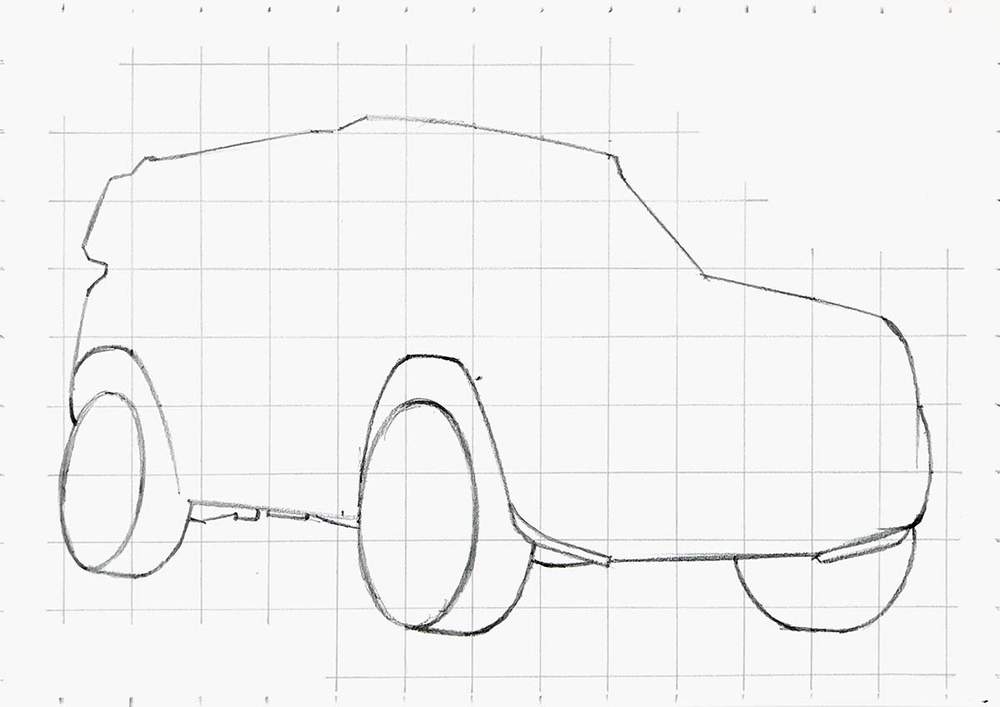
After that, I sketched the full outer edge of the car.
I broke the outline up into simple lines, picked a line, marked where it starts, ends, and where it crosses grid lines, and then sketched the line in one motion.
I did this for every line on the outer edge of the Defender, plus a few extra little bits here and there where it made sense.
Step 3: Sketch All The Parts Of The Land Rover Defender
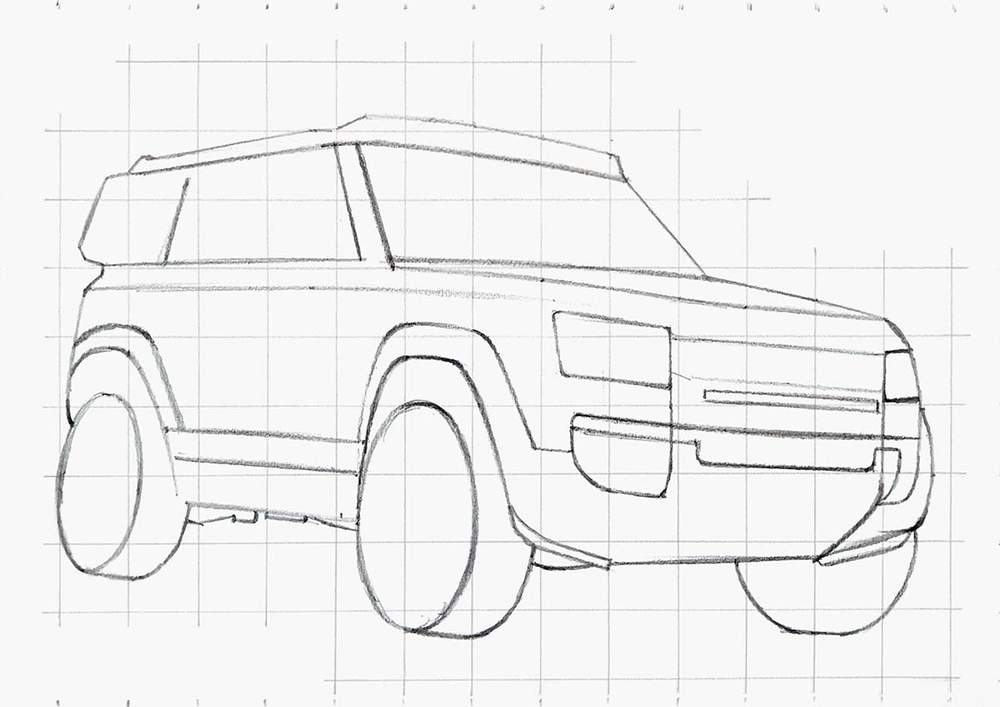
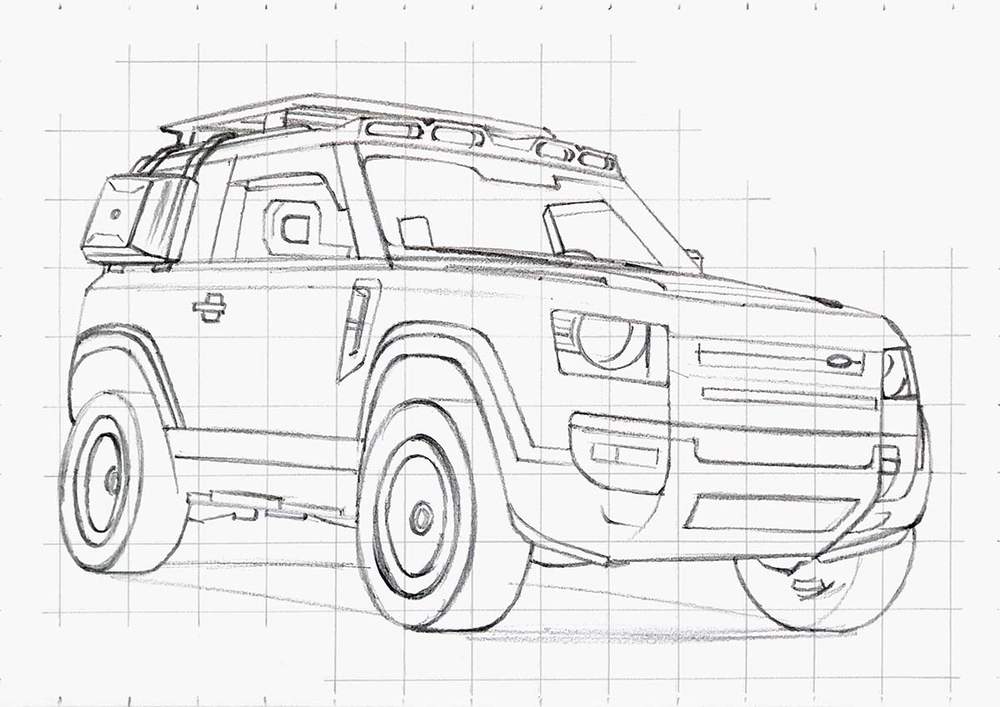
After that, I sketched all the parts and shapes of the defender.
I first sketched the bigger shapes like the outlines of the headlights, the windows, the front bumper, etc, and the bigger body lines.
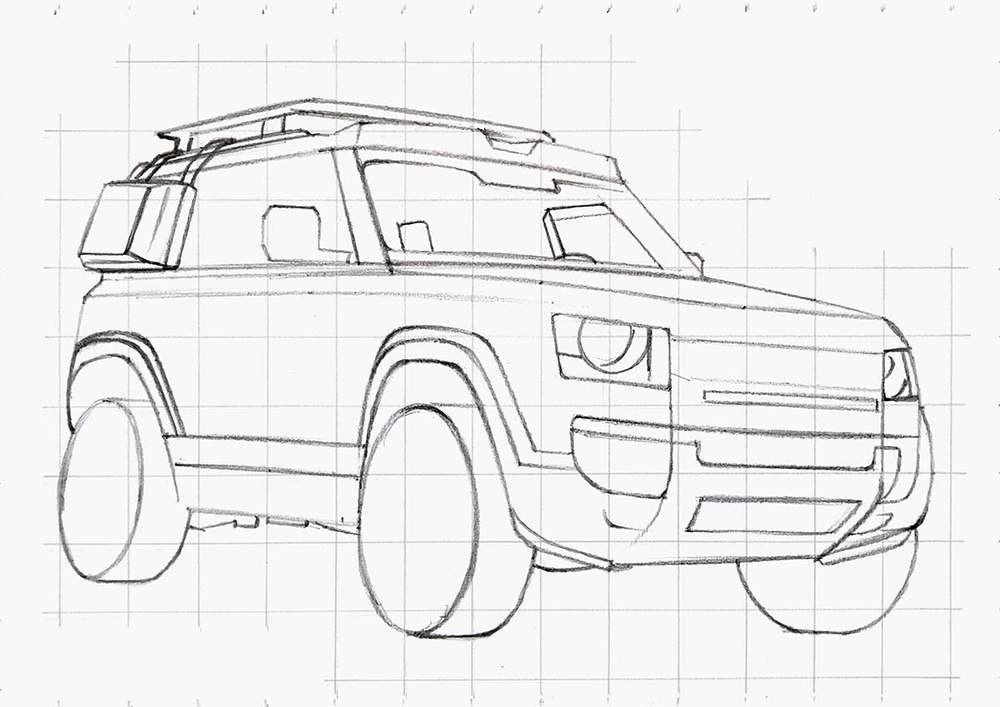
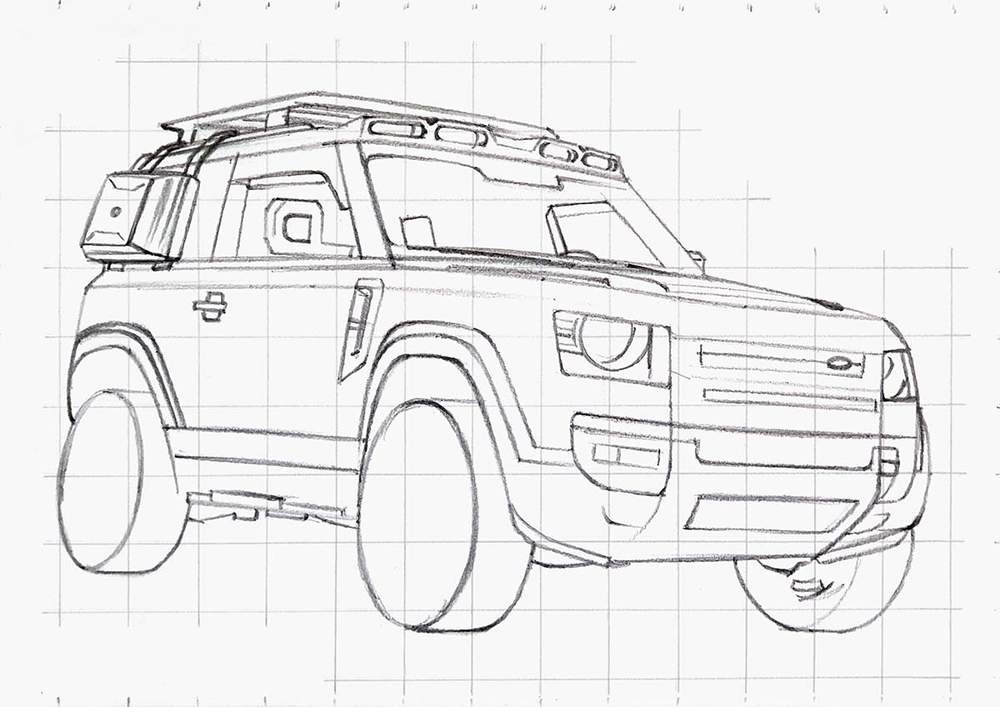
Then, I started adding more details to the parts, starting with the bigger details again, and then moving towards the smaller ones.
Step 4: Sketch The Wheels Of The Land Rover Defender
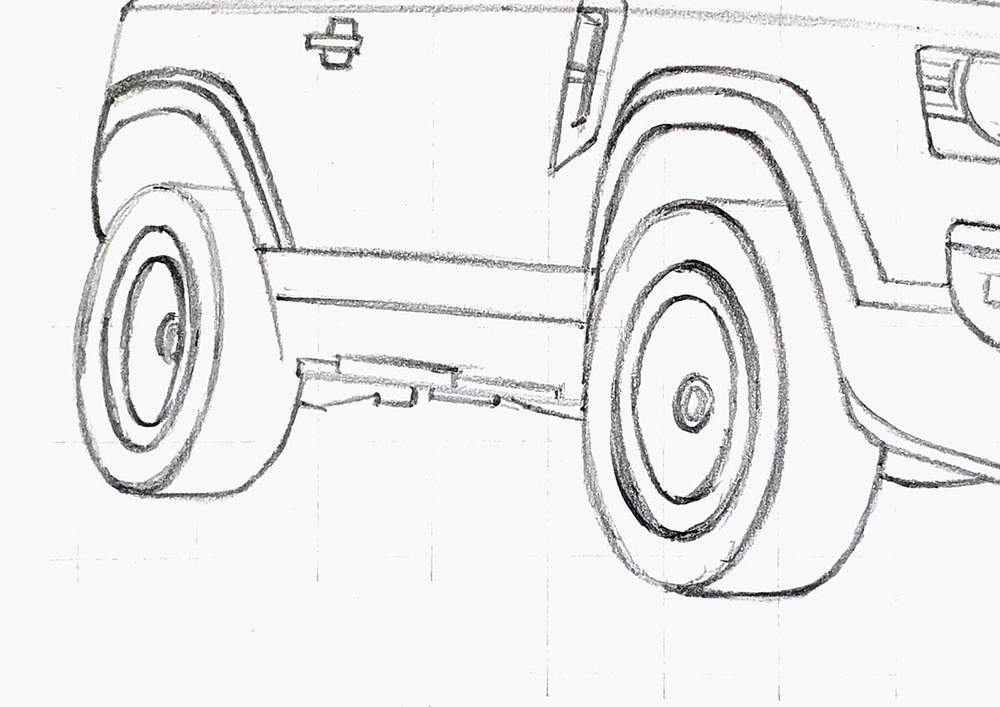
Next, I sketched the wheels.
In this case, the wheels are super simple because the motion of the wheels makes them lose all their details.
They're just 5 ellipses now.
I first marked the center of the wheel with a small ellipse, and I sketched the thickness of the tire with another bigger ellipse.
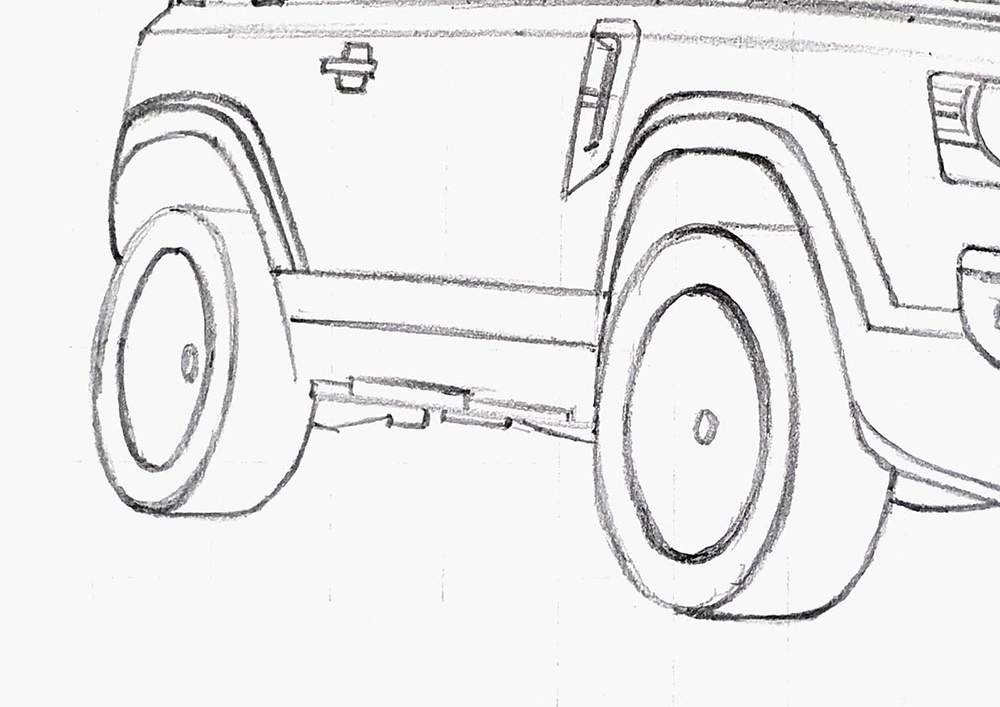
Next, I sketched a slightly bigger ellipse around the center and a bigger one that's slightly smaller than the outer rim edge.
And that's it.
Step 5: Color All Pure Black Parts Of The Land Rover Defender
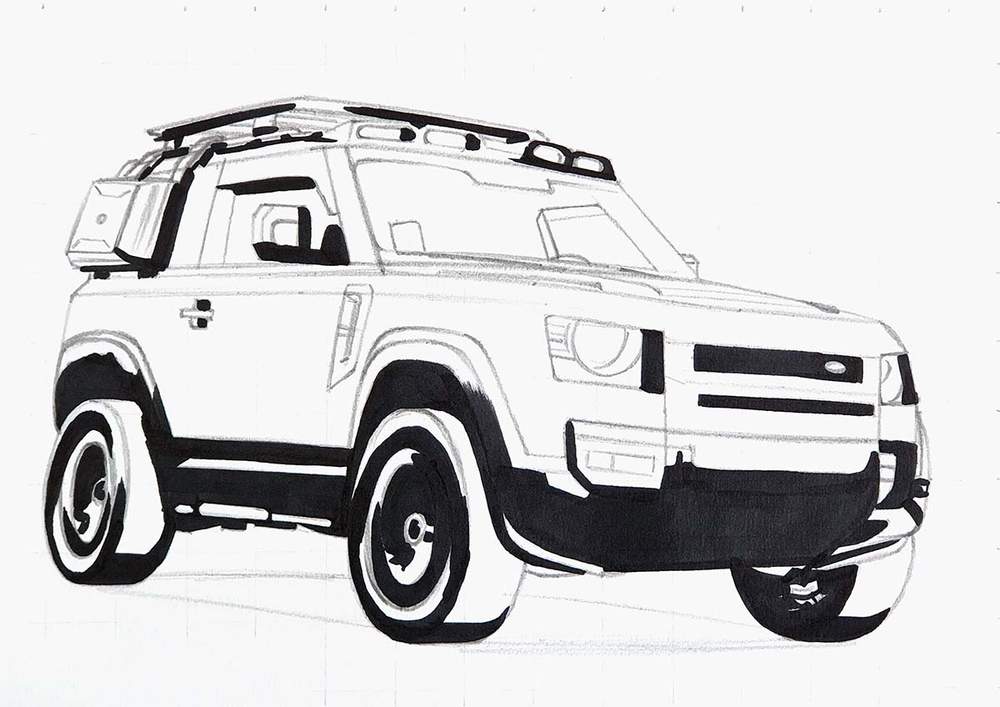
Now that the sketch is all done, we can move on to coloring it.
I like to start by coloring all pure black parts first, as it makes the car look simpler to color.
Step 6: Color The Wheels Of The Land Rover Defender
Next, I colored the wheels.
I first used NG03 to color the side of the wheels.
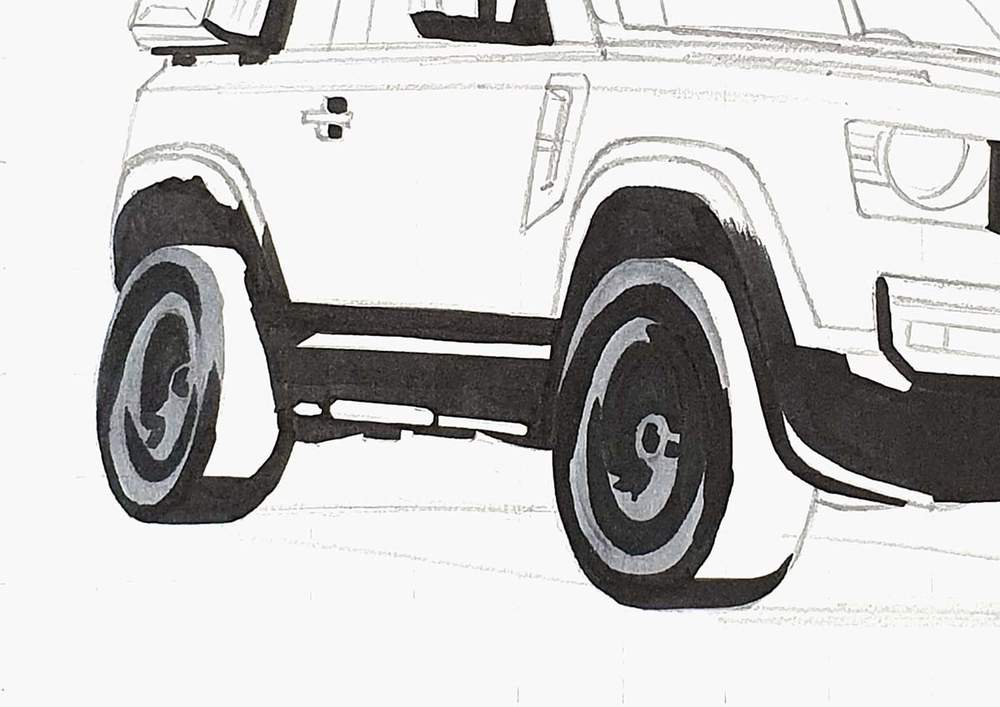
Then, I used CG070 to color the tires and to add depth to the rims while leaving some edges lighter grey.
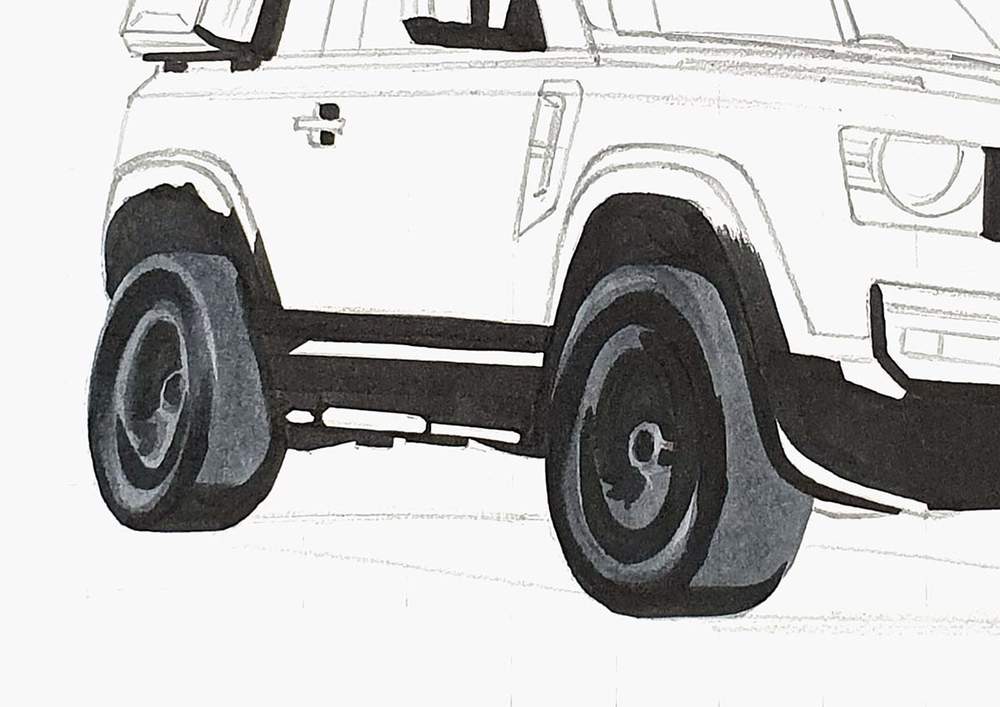
Next, I used NG06 to color most of the tires and to add some shadows on the rotating rims.

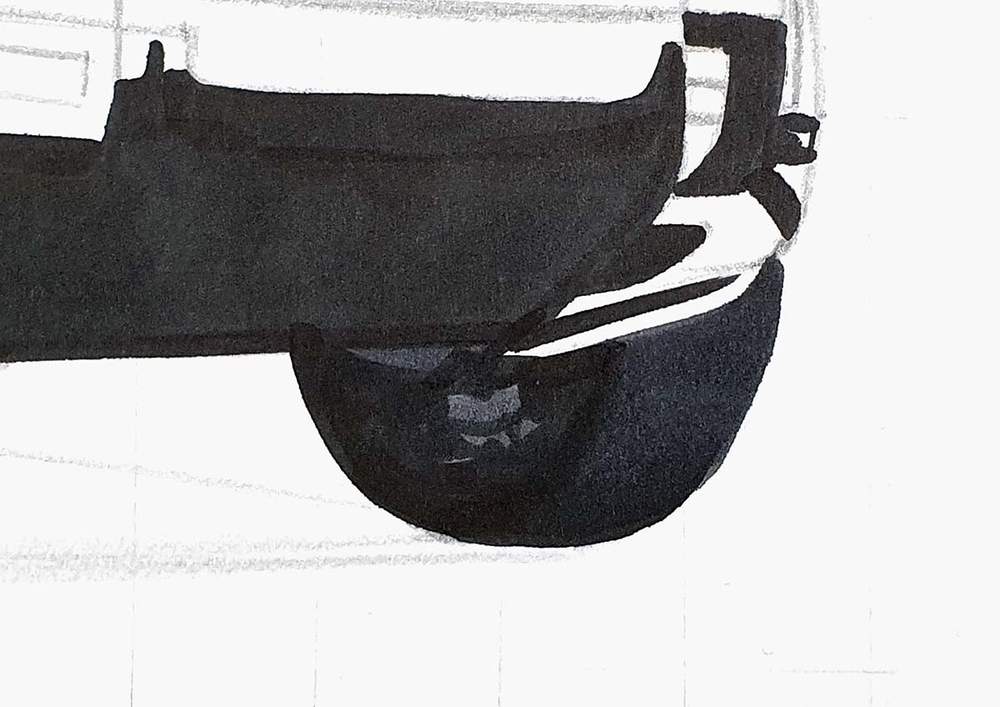
Lastly, I colored the wheel on the right with CG070 and NG06 for the tire.
Step 7: Color The Wheel Arches And The Lower Side Of The Land Rover Defender
Next, I moved on to the wheel arches and the lower part of the side.
I started by coloring the rear arch with CG030.
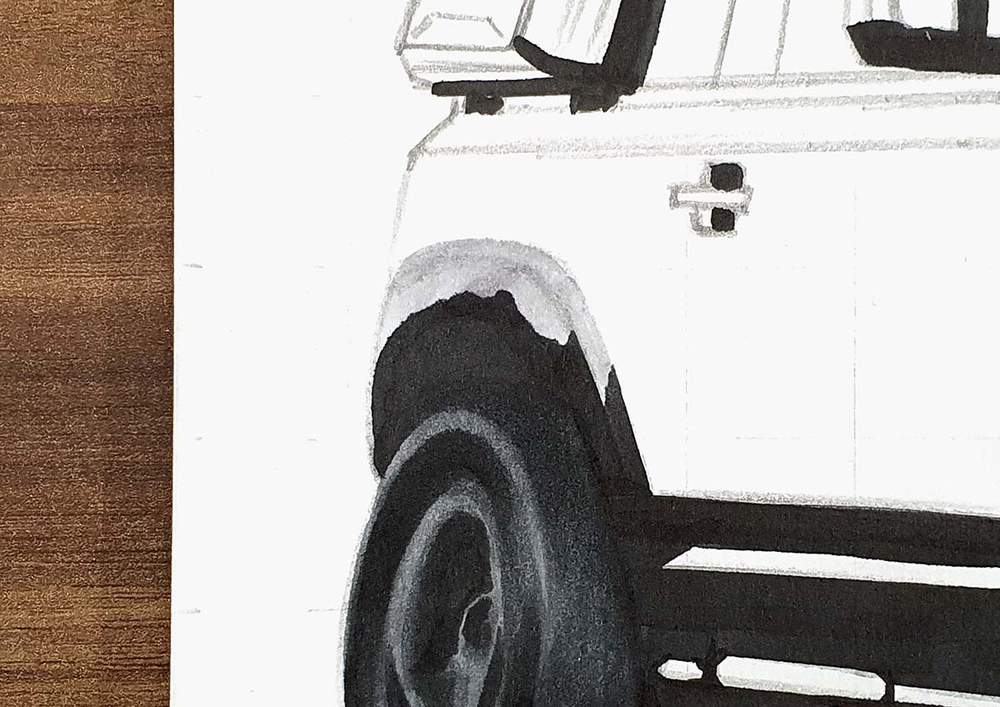
Then I used NG03 to color the wheel arch, while leaving the top left edge lighter, and I colored the lower side parts.
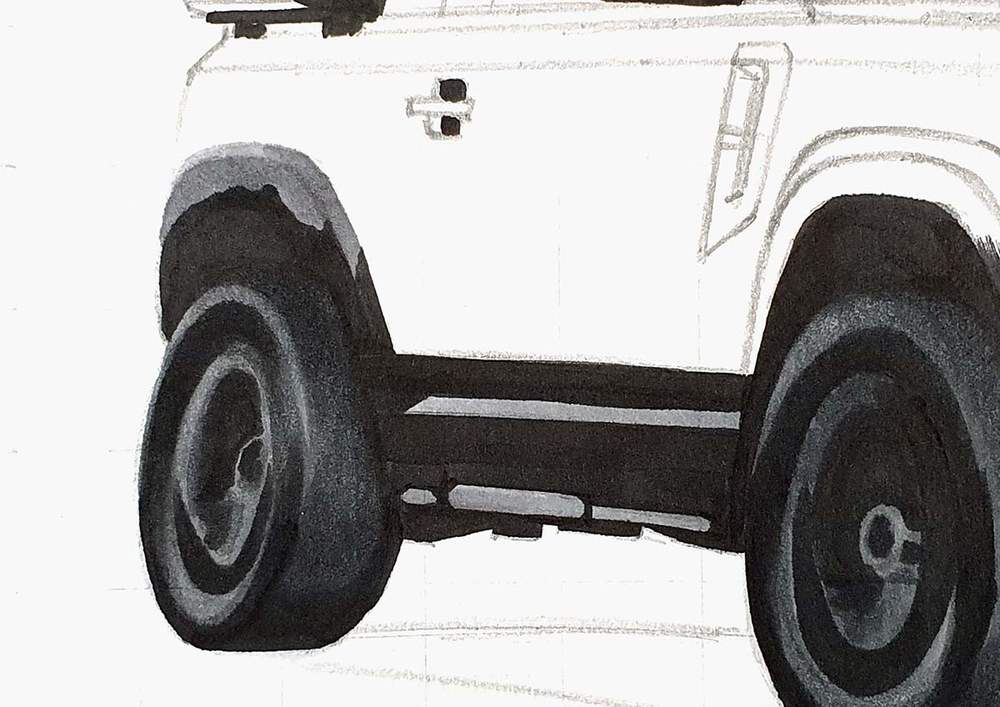
Next, I used CG070 to color the bottom right of the wheel arch and to darken most of the parts on the side.
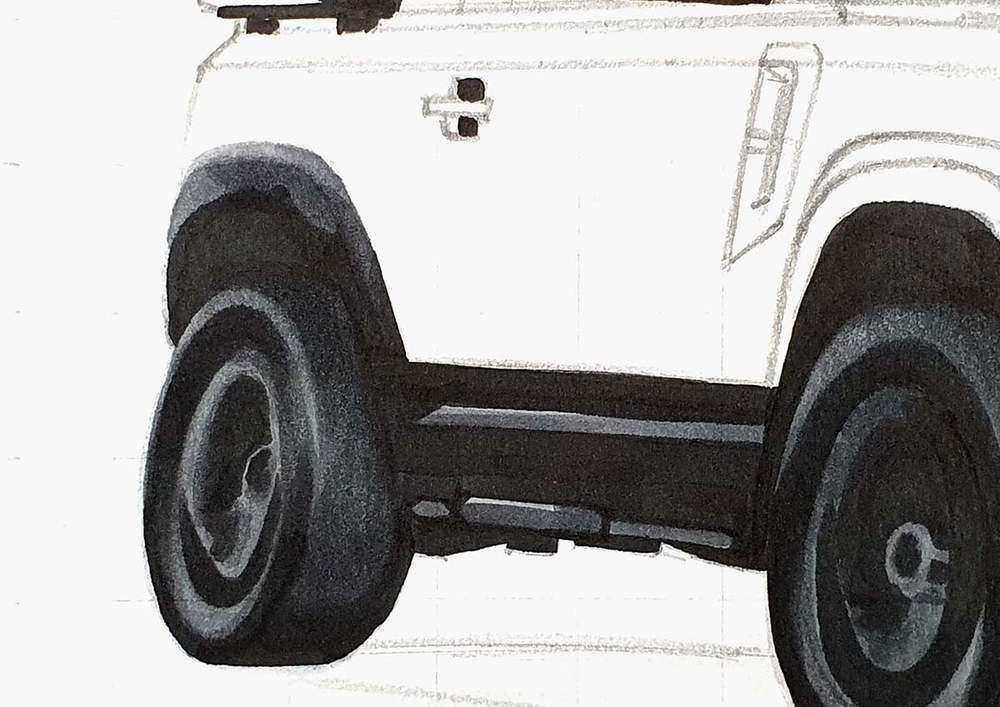
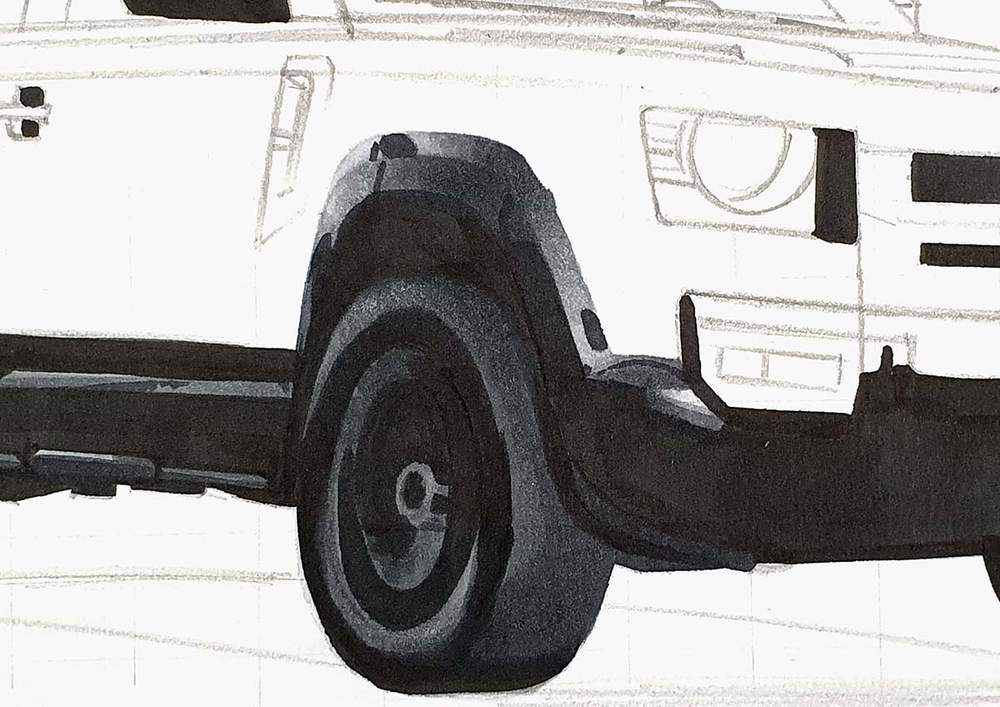
After that, I used NG06 to add a few dark details on the wheel arch and the lower side.

After that, I used these same steps to color the front wheel arch.


Step 8: Color The Front Of The Land Rover Defender
After that, I colored the lightest parts of the front with NG03.
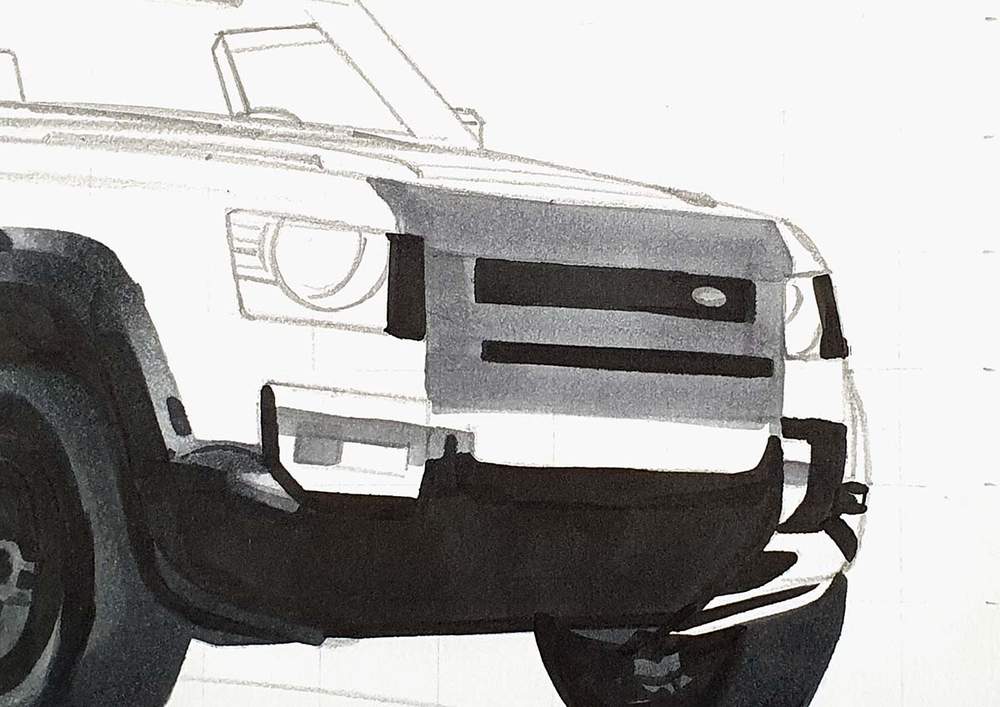
Then, I used CG070 to color most of the remaining parts except for a few on the bottom right.
I also used it to add some darker grey shading on the lighter grey bits.
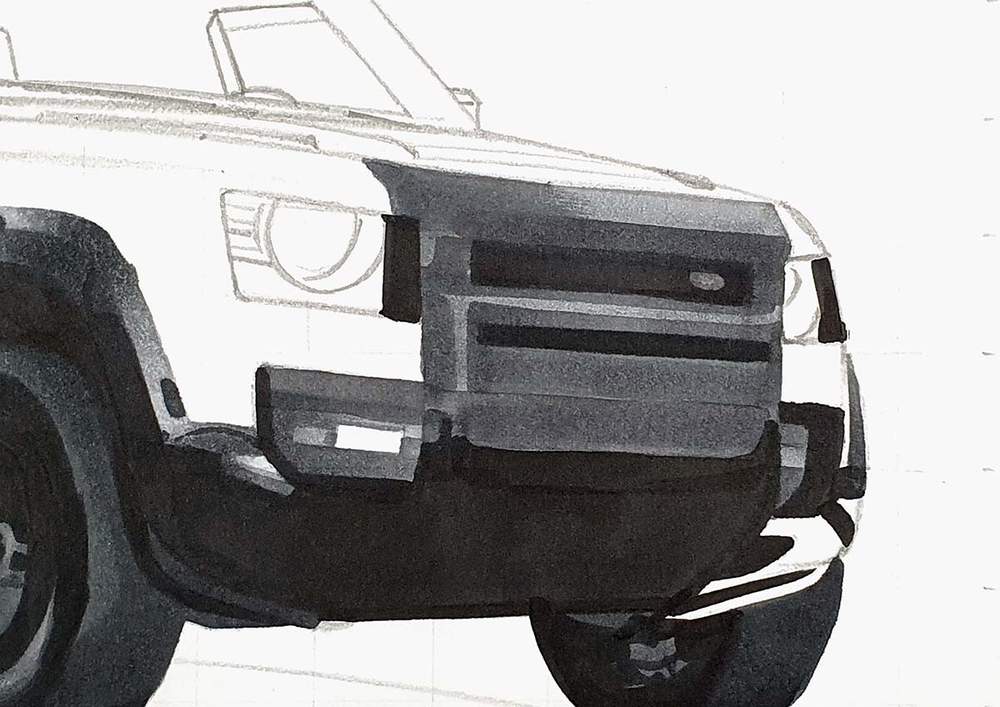
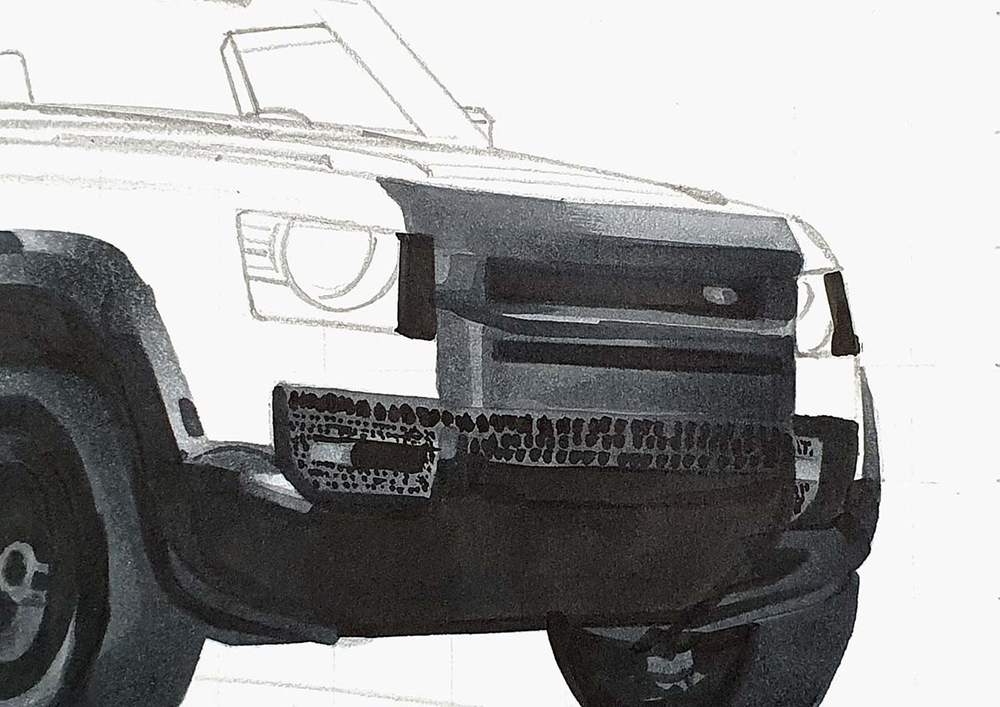
Lastly, I used NG06 to add more shading and details and to color the bottom right parts.
I also used Black to add the grill details, which I probably should've done more precisely... I did color over it with CG070 later on to blend the black a bit into the grey, which made it look more subtle.
Step 9: Color The Headlights Of The Land Rover Defender
Then, I colored both headlights.
I first used CG030.

Then, I used NG03 to add some details while leaving the lightest parts light.
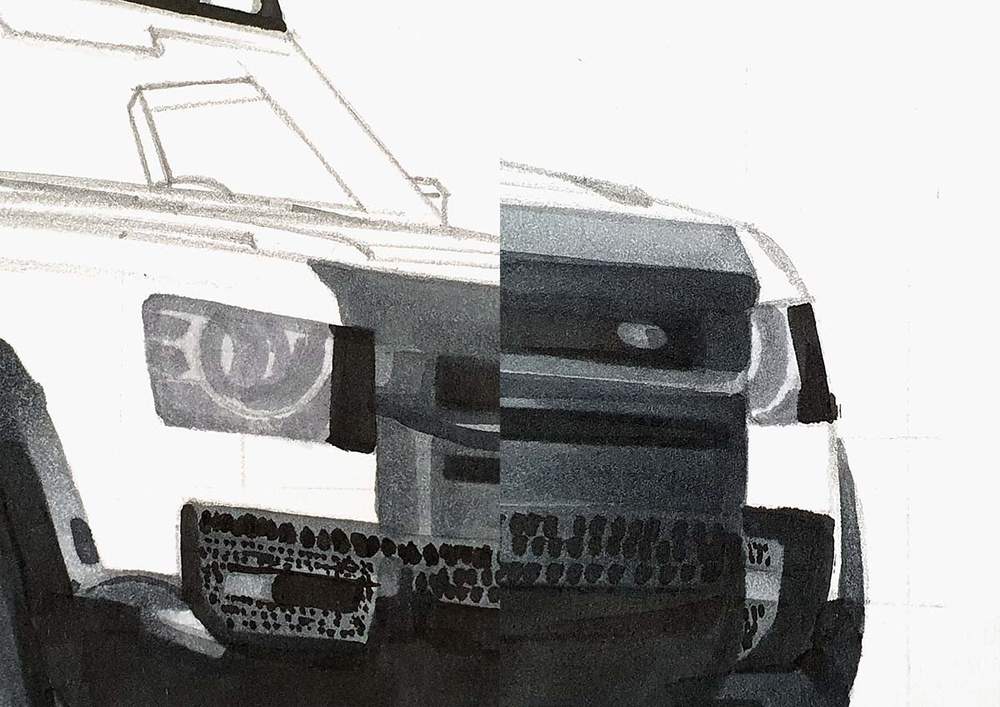
Lastly, I outlined the headlights with CG070 and added some details with CG070 and NG06.
Step 10: Color The Hood And The Windshield Of The Land Rover Defender
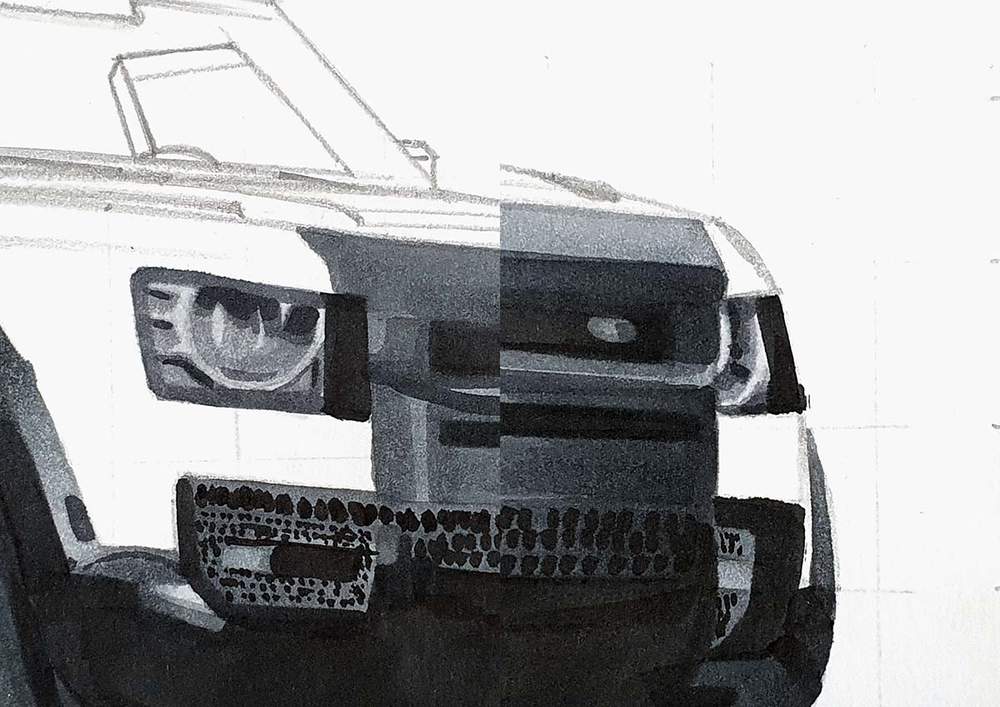
Next, I moved onto the hood and the windshield.
I started by coloring the hood with CG030.
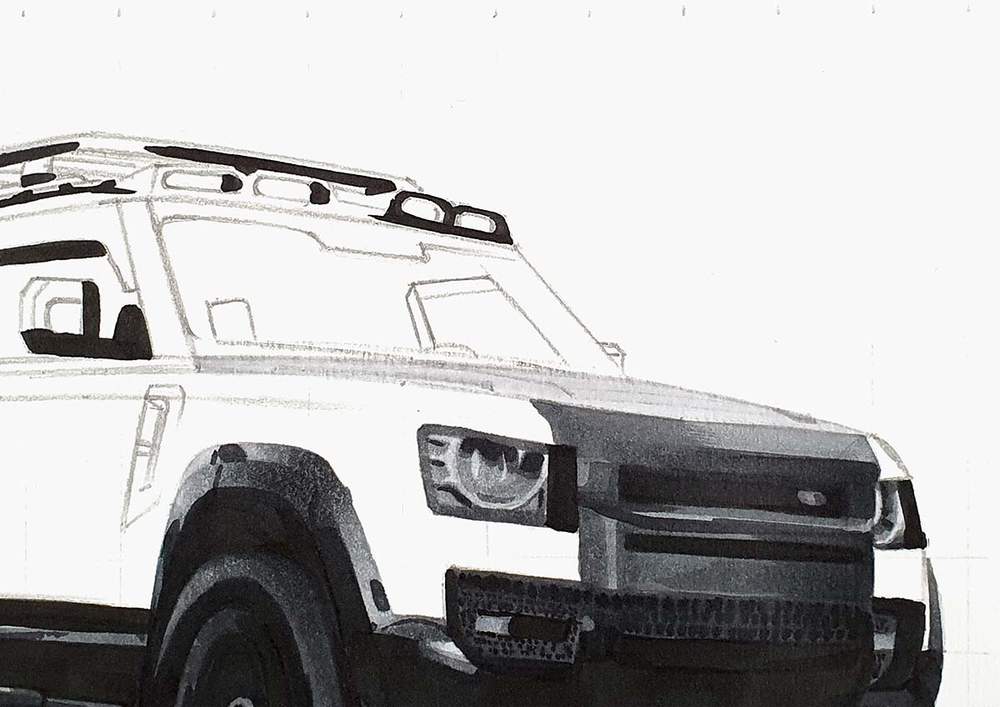
Next, I used NG03 to add some shading, and I colored the side windows through the windshield and the top of the door mirror on the right.
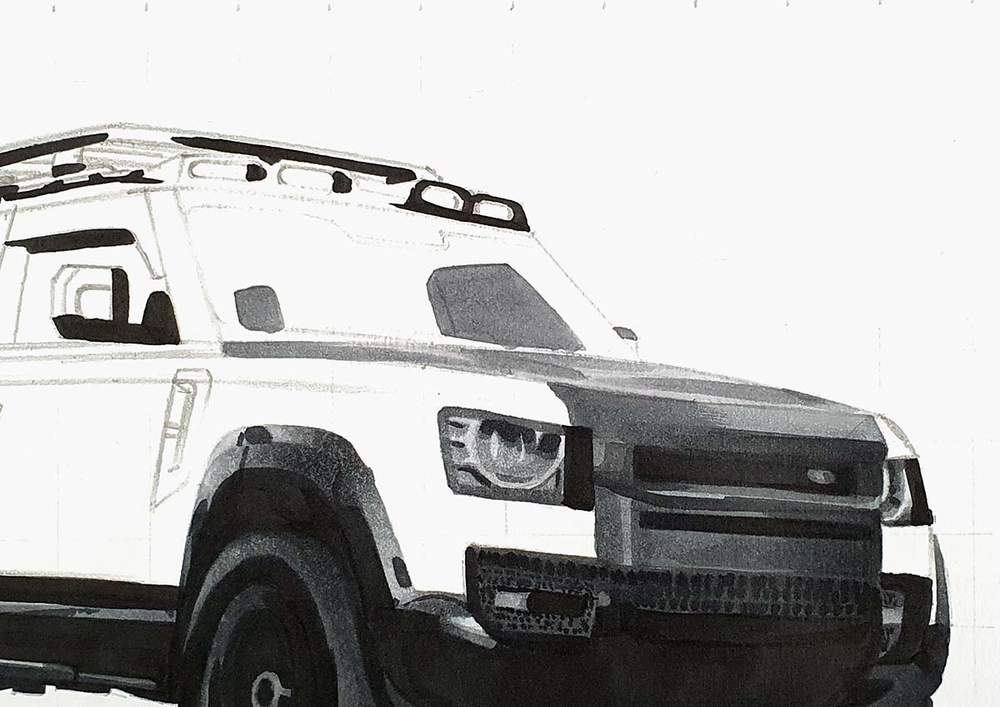
After that, I used CG070 to color most of the remainder of the windshield except for the top edge.
I also colored the bottom of the door mirror on the right, and I added some shading to the hood.
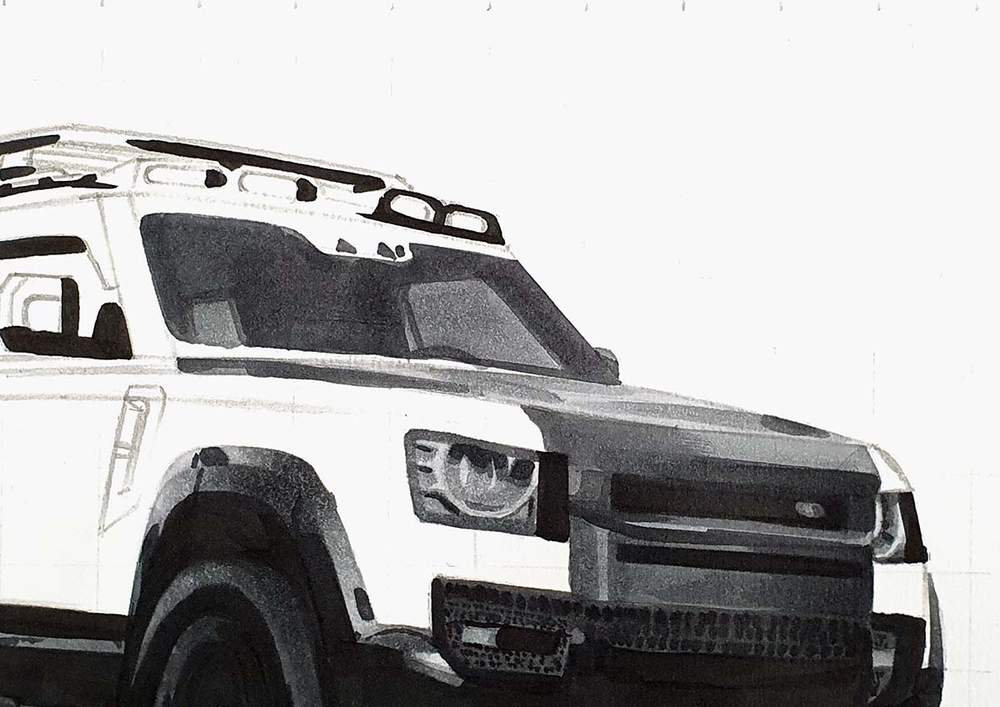
Lastly, I used NG06 to color the A-pillar and the top and bottom edges of the windshield, and I added 2 darker spots on the hood, one on the right and one on the left.

Step 11: Color The Side Air Vent Of The Land Rover Defender
After that, I colored the side vent with NG03.
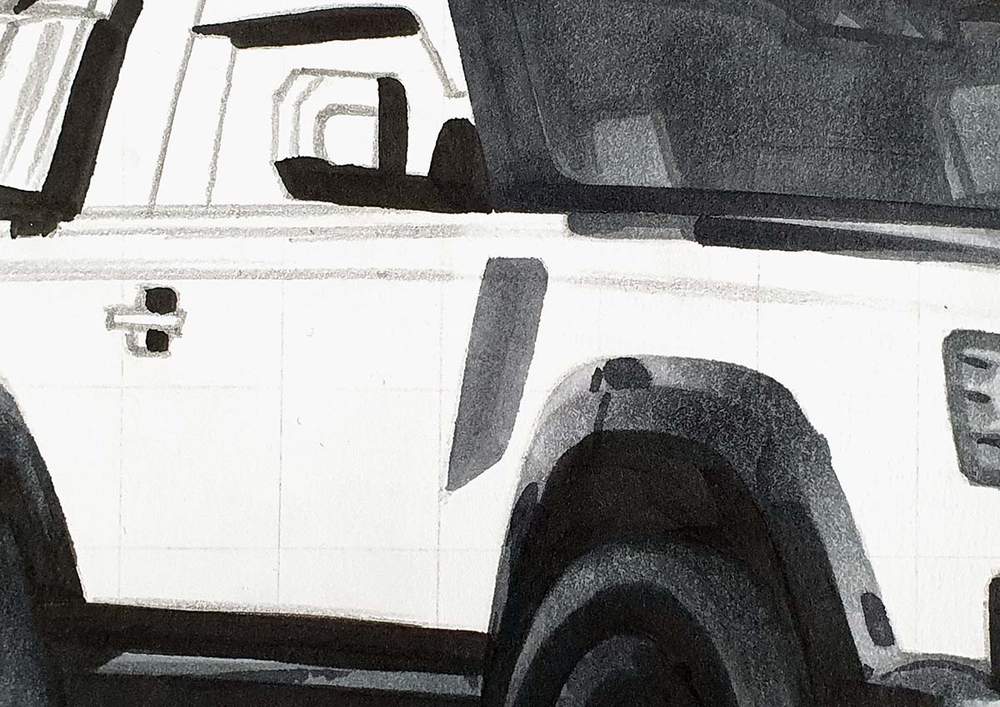
Then, I added some shading with CG070.
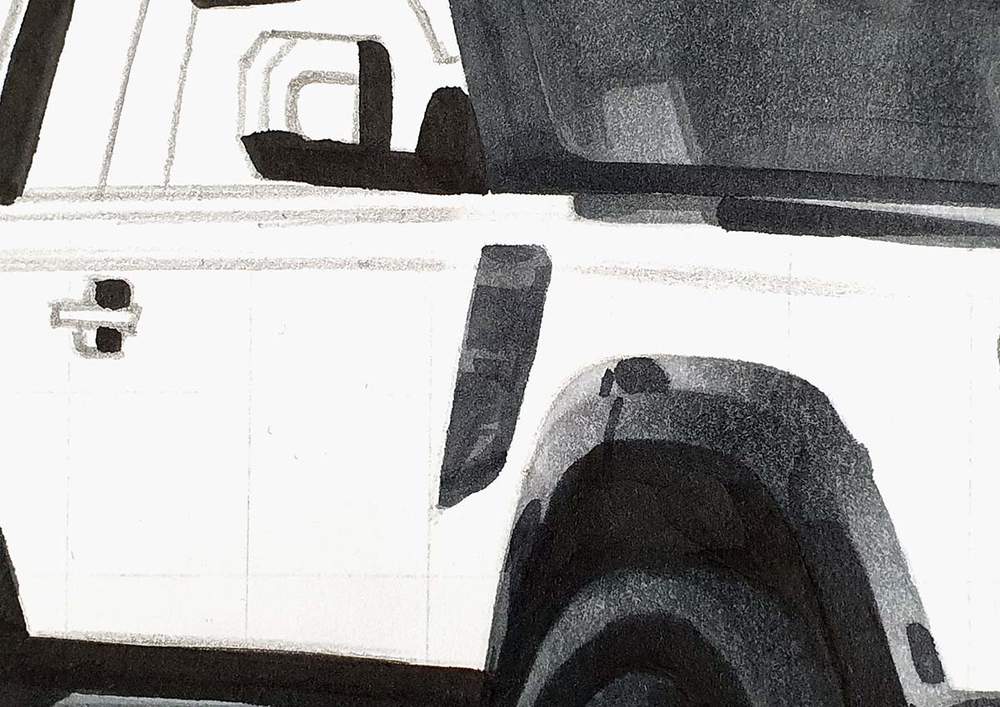
Lastly, I used NG06 to add a few dark shadows.

Step 12: Color The Side Windows And The Accessories Of The Land Rover Defender
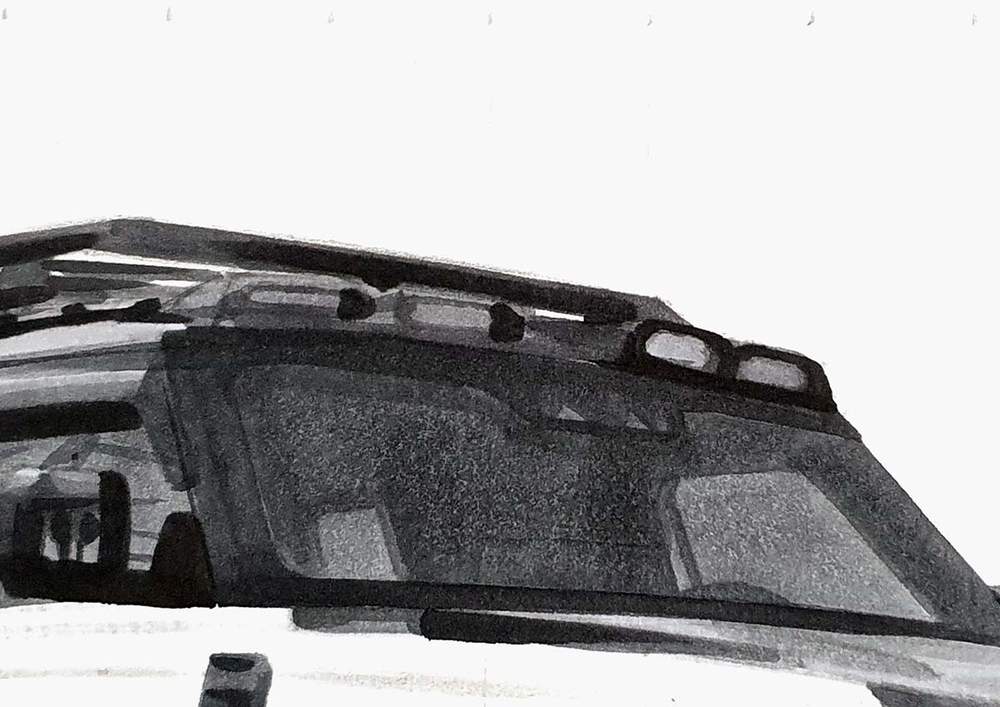
Next, I colored the side windows and the box thingy on the side.
I first colored the lightest parts, which are the roof, the top half of the front side windows, and some parts of the box, with CG030.
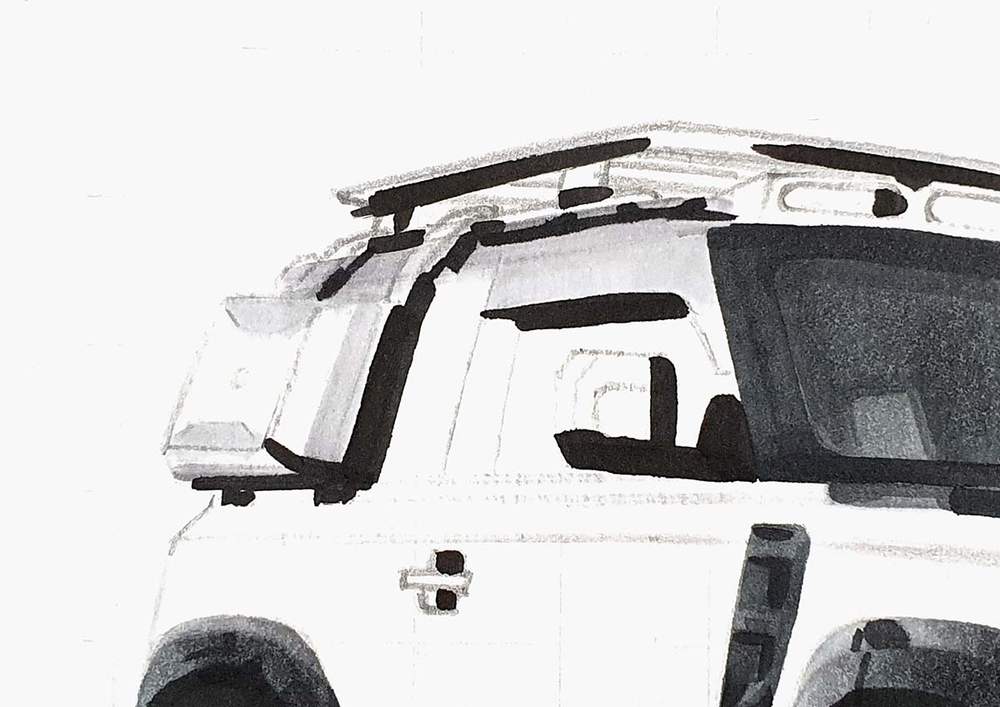
Next, I used NG03 to color the remainder.

After that, I used CG070 to add some shading, tons of details, and reflections. I also used it to color the roof rack.

Lastly, I used NG06 to add a few darker reflections on the side windows and the door mirror.
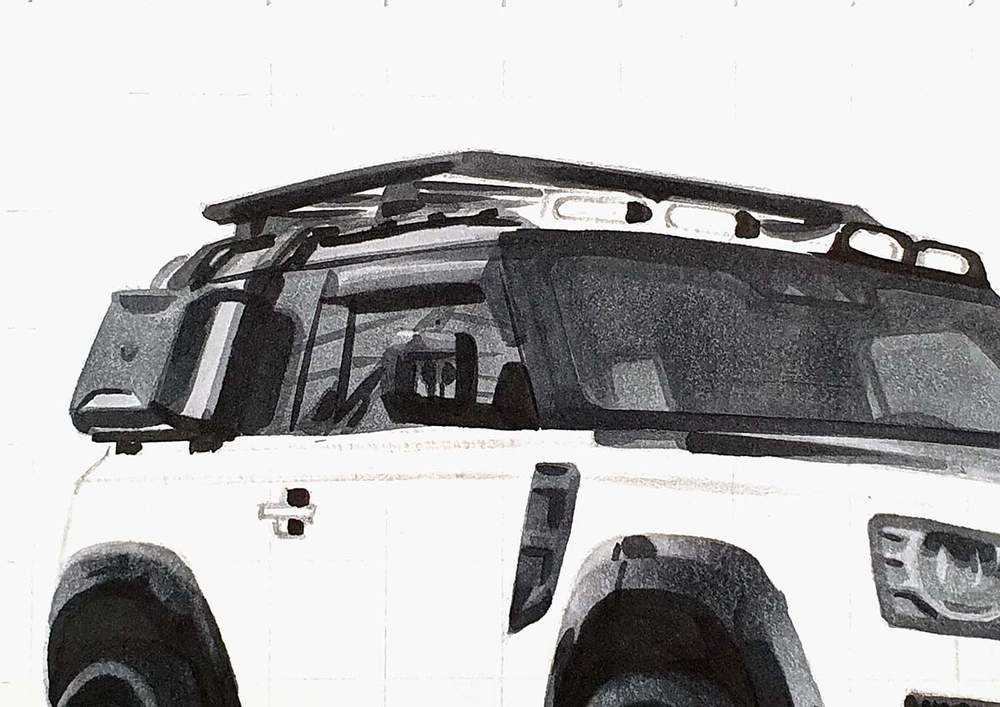
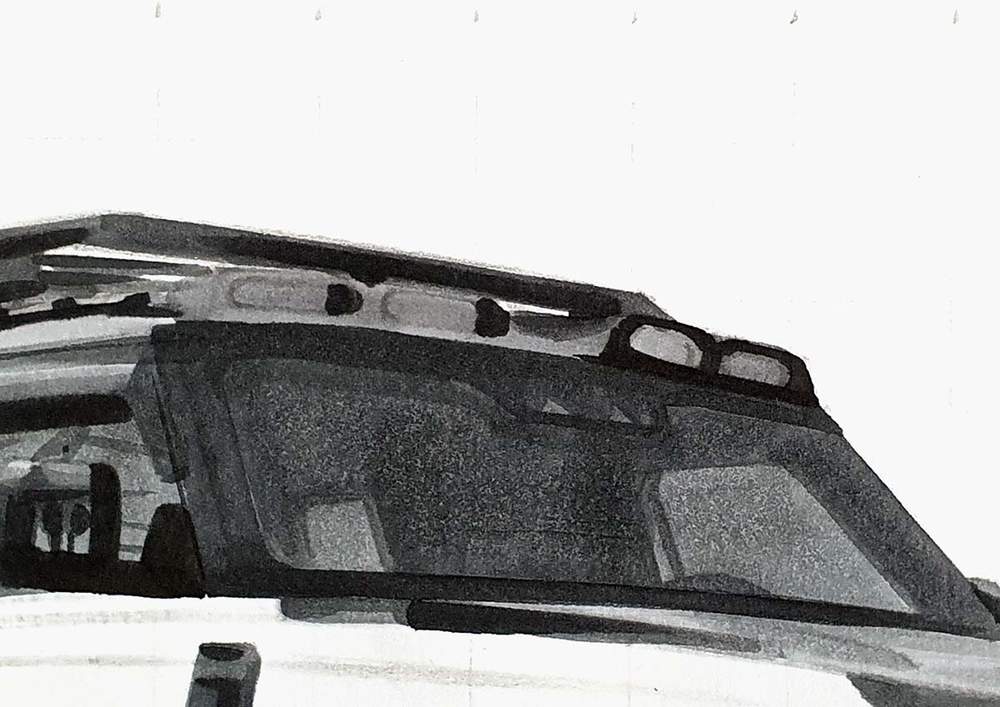
During this step, I also colored the lights above the windshield.
I first colored them and the surrounding area with NG03, and then I used CG070 to add just a bit of shading.
Step 13: Color The Shadow Underneath The Land Rover Defender
Before moving on to the main body, I colored the shadow of the car.
I first colored the outer edges with CG030.

And then, I used NG03 to color the middle bit.
I used CG030 to color over the edges of the two colors to blend them together, and I used the colorless blender to smoothen the outer edge of the shadow.

And that leaves us with the last part to color.
Step 14: Color The Main Body Of The Land Rover Defender
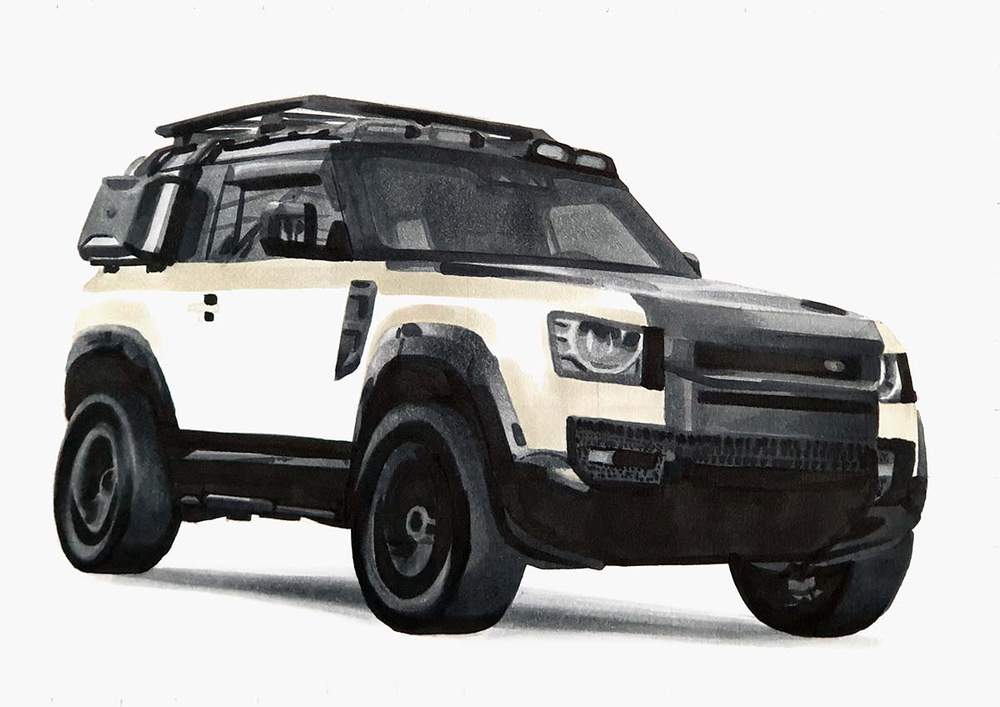
I first colored the lightest parts of the body with WG01. These parts include the parts above the wheel arches, the "shoulder line", and most of the front.
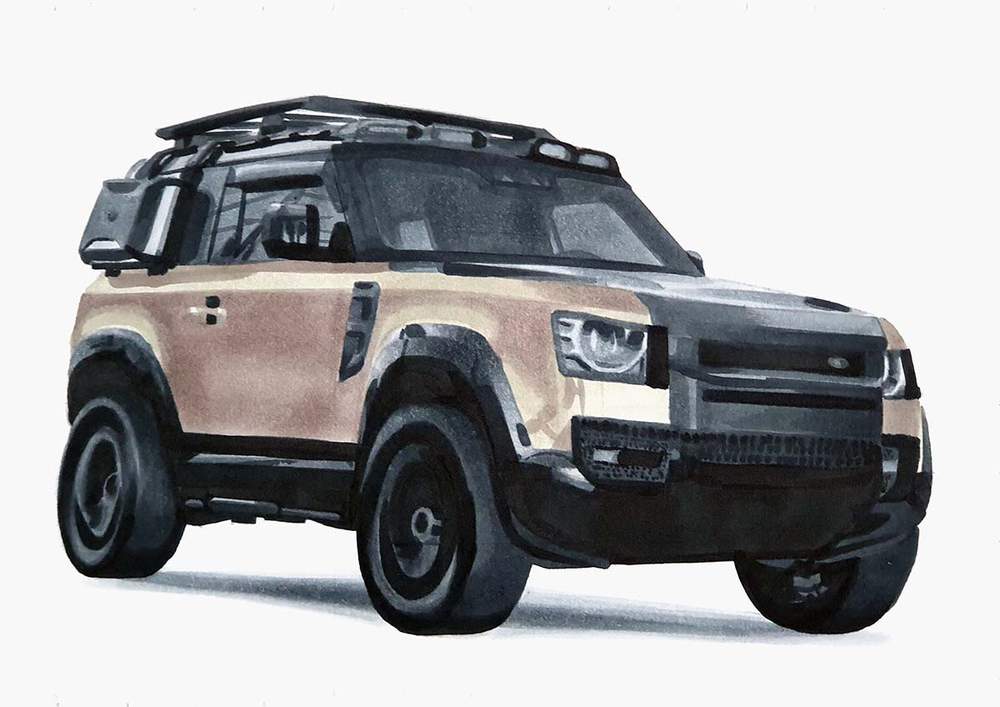
Next, I used WG050 to color the remainder of the body of the Defender, plus I added some reflections and shading on the lighter parts.
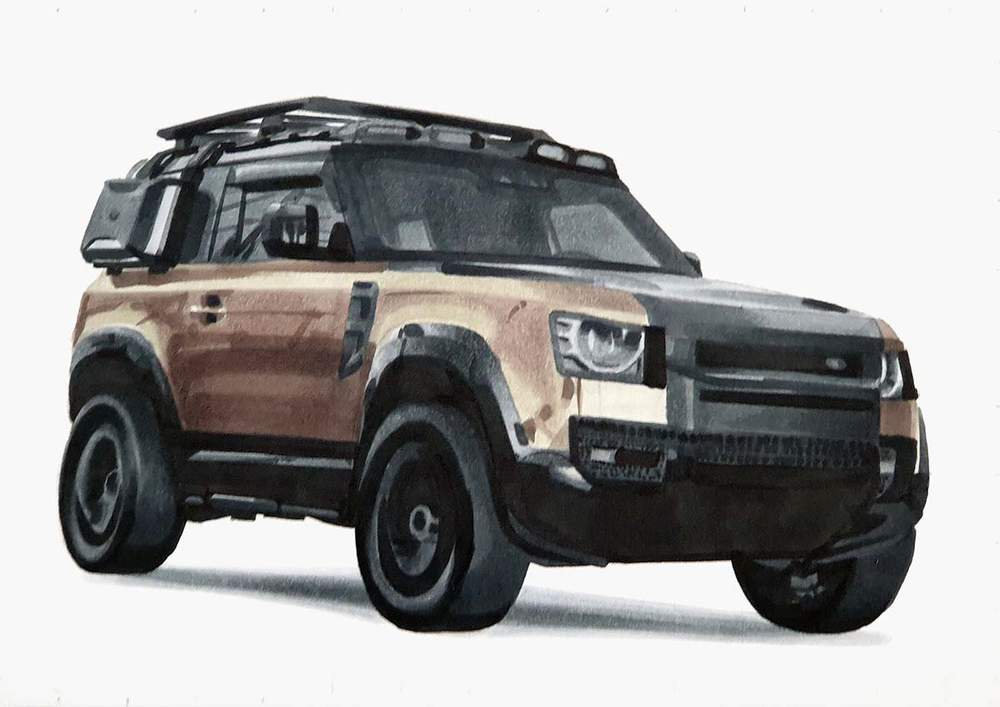
And to finish it off, I used WG070 to add some darker reflections, mostly on the side, but also on the front of the car.
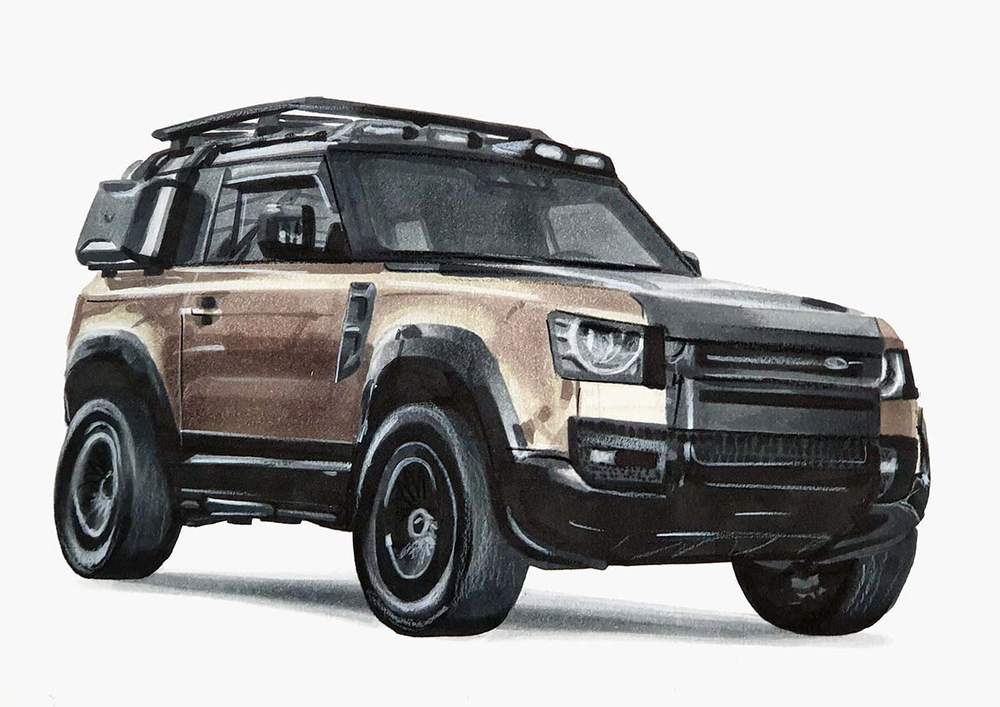
Step 15: Add Details To The Land Rover Defender Drawing With A Few Colored Pencils
The Land Rover Defender is all colored now, but it's not done yet.
By adding a few details with a white and a black colored pencil, it will look so much better.
I used the white pencil to add highlights on panel gaps and edges, the ellipses in the wheels, the headlights, some bits on the bottom of the front, and a few more things here and there.
And I used the black pencil to mark just a few panel gaps, mainly around the doors, the hood, and the headlights.
Step 16: Add Some Highlights To Your Land Rover Defender Drawing
To fully finish this Defender drawing off, I used a white paint marker to add a few highlights on the car.
I added highlights to the headlights, the lights in the front bumper, a few bits of the wheels, and some more bits here and there.
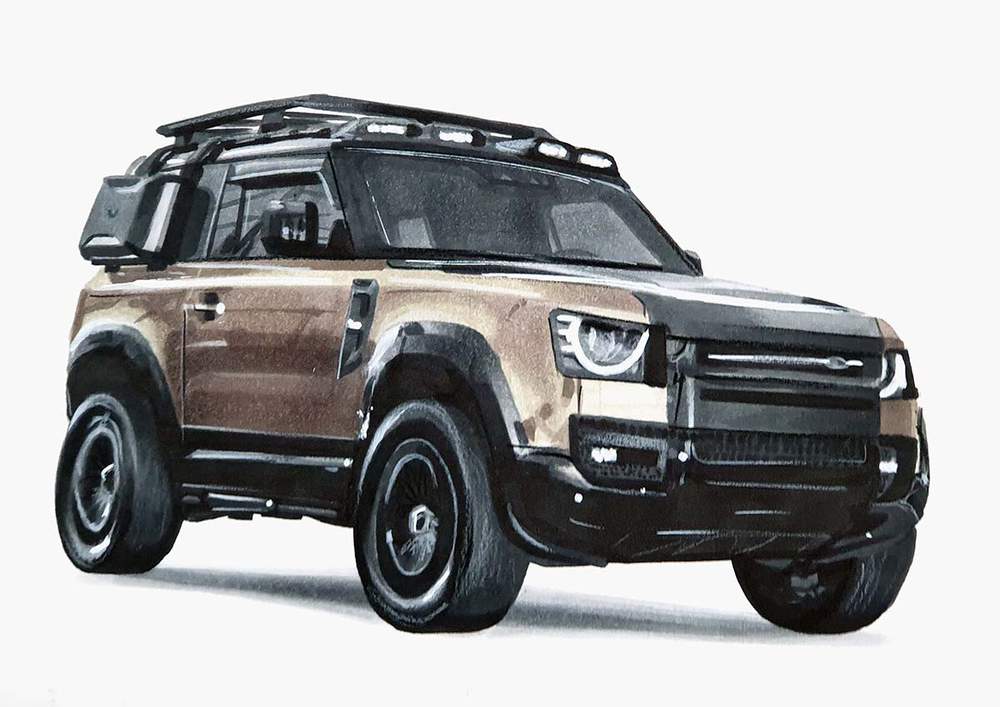
Honestly, I didn't think the Land Rover Defender would turn out this great while also keeping it relatively simple.
I hope you enjoyed this tutorial and learned something!
Thank you for following along (if you did).




Be the first to comment!
Comments
There are no comments yet.