How To Draw A Chevrolet Camaro ZL1 - Step-By-Step Tutorial For Car Enthusiasts
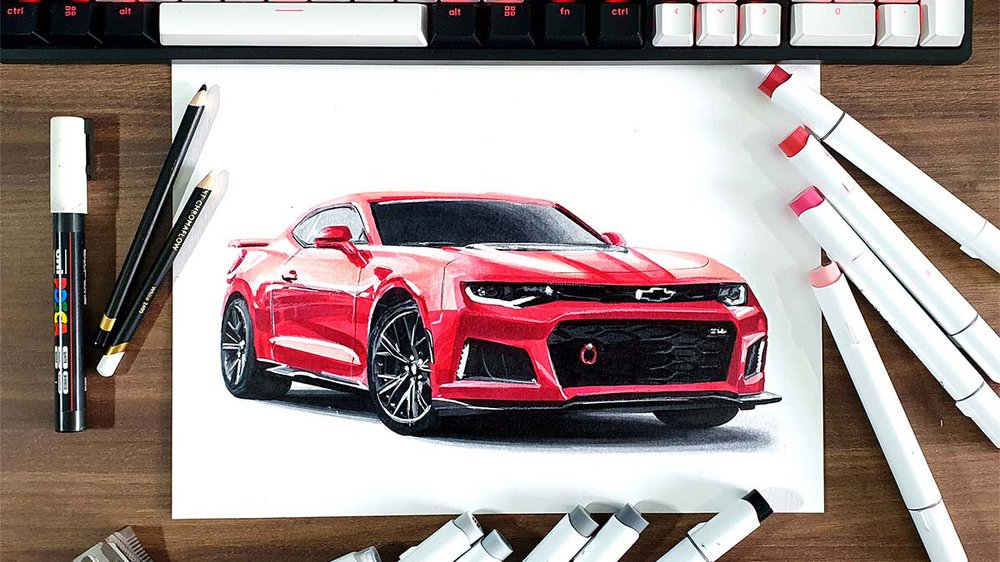
In this car drawing tutorial, I'm going to show you how to draw a Chevrolet Camaro ZL1 step by step.
This car has been on my list for a long time, as it's one of my favorite American muscle cars. I love it!
In this tutorial, I'm going to show you exactly how I made this drawing. I've broken each part up into simple and easy-to-follow steps so you can easily follow along and create your own realistic Chevrolet Camaro ZL1 drawing.
Let's get started!
Disclaimer: In the name of full transparency, please be aware that this blog post contains affiliate links and any purchases made through such links will result in a small commission for me (at no extra cost for you).
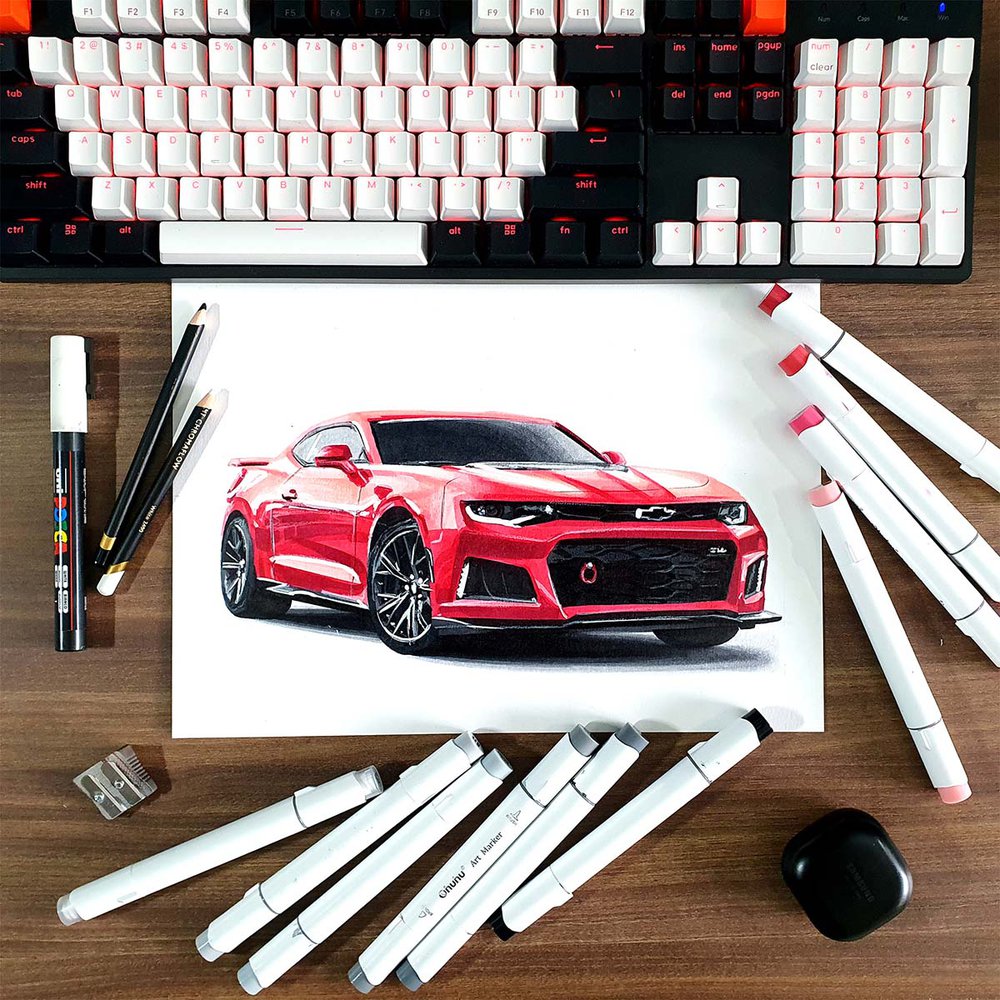
Draw Materials I Used In This Tutorial
To make this drawing, I used Ohuhu Honolulu markers in the colors Colorless Blender (0), Neutral Grey 03 (CG030), Neutral Grey 3 (NG03), Neutral Grey 07 (CG070), Neutral Grey 6 (NG06), Black (120), Tender Pink (RV300), Light Prawn (R120), Cadmium Red (R160), Lipstick Red (R170), and Garnet (R240).
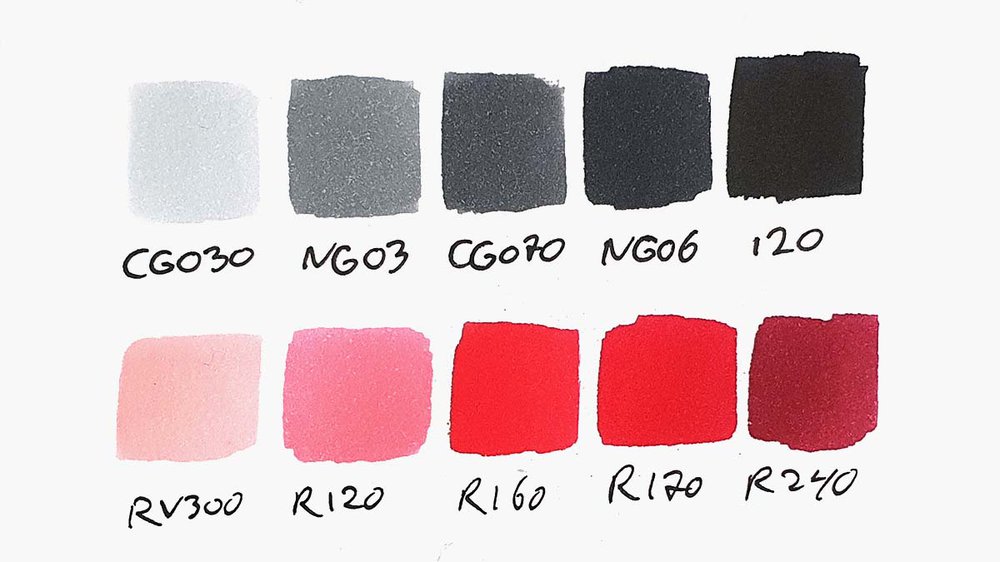
I also used some Derwent Chromaflow colored pencils to add details. I used the White, Platinum, and Black pencils.
I used a white Posca PC-3M paint marker to add white highlights.
And I used an HB pencil, a ruler, an eraser, and a kneaded eraser.
I made this drawing on A4 size Canson Illustration Manga Paper.
How To Draw A Chevrolet Camaro ZL1
To create a realistic Chevrolet Camaro ZL1 drawing, you'll first need to find a good reference photo.
Next, you sketch the outline of the Camaro.
After that, you color the Chevrolet Camaro, part by part, until it is fully colored.
And to finish it off, you add a few details with colored pencils and a few highlights with a white paint marker.
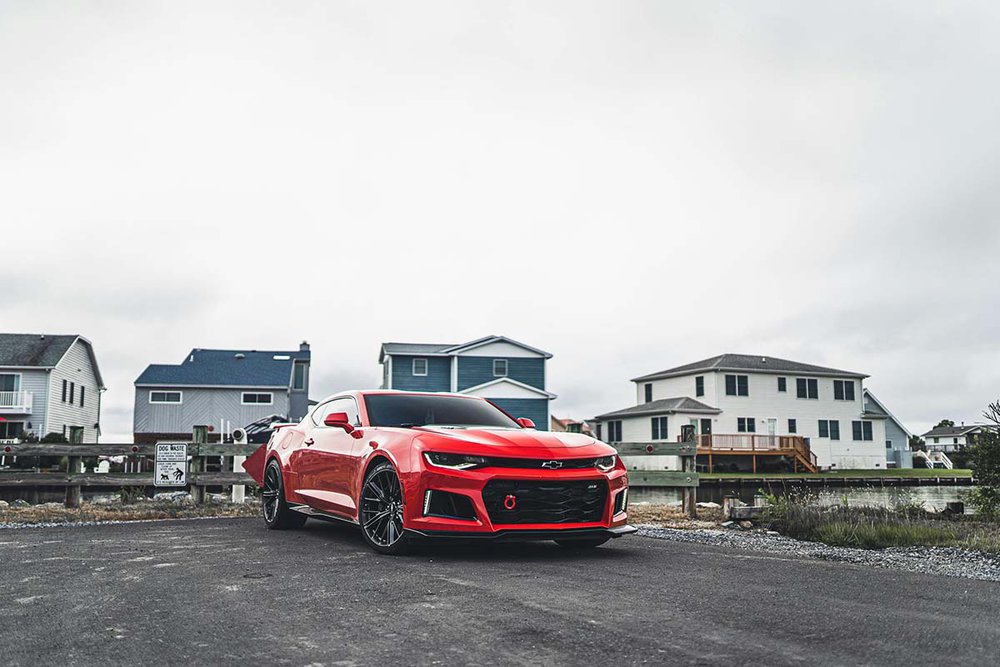
Step 1: Find A Reference Photo Of A Chevrolet Camaro ZL1
The first thing I like to do before drawing any realistic car is to look for reference photos.
I found this photo on Pexels.com that I really like and will be using as the reference throughout this tutorial.
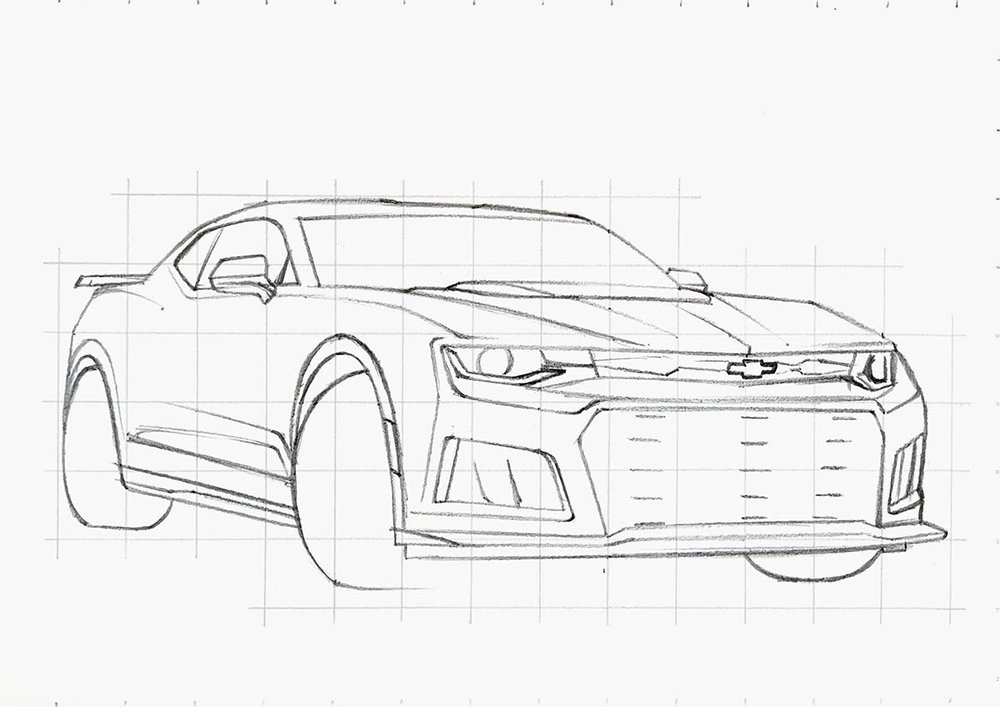
Step 2: Sketch The Basic Outline Of The Chevrolet Camaro ZL1
Next, we're going to sketch the basic outline of the car based on the reference photo.
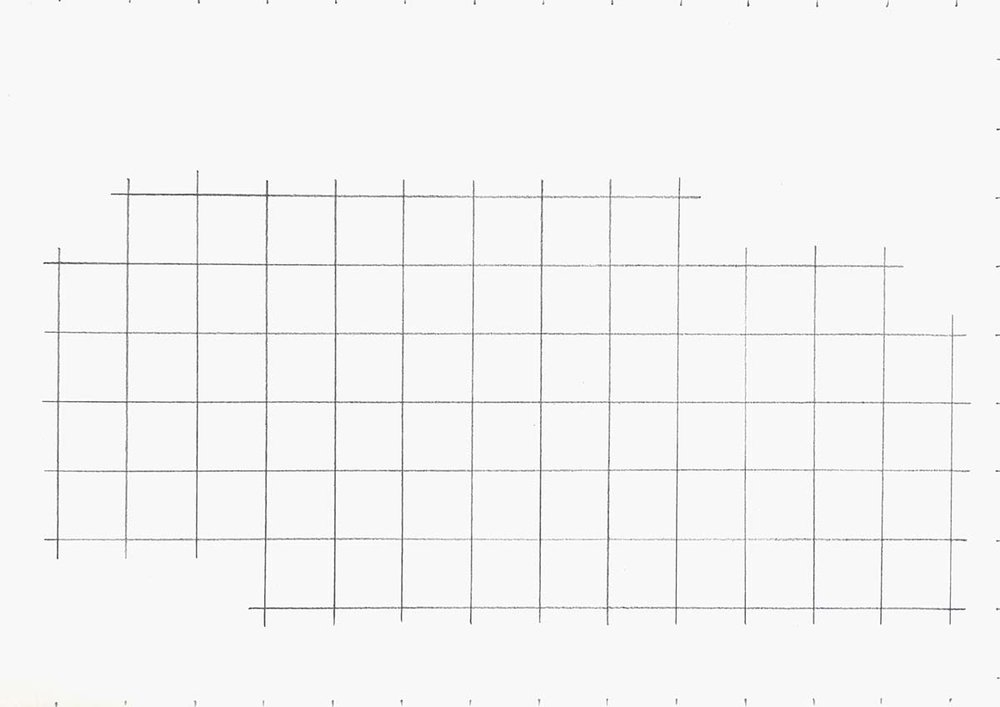
To do that, I like to use the grid method. This makes getting the proportions accurate a lot easier.
If you're new to the grid method or if you're not sure how to use it, I highly recommend you check out this detailed guide I made.
The first thing we need to do is to resize the reference photo and position the car so that it looks nice on the paper.
I use A4-sized paper, so I'll need to resize the photo to be A4-sized, which is 3508 by 2480 pixels.
Next, I added a grid overlay to the photo of 15 by 10.5 squares from the top left. This fits well on my paper as each square will be 2 by 2 cm or 0.8 by 0.8 inches.
I marked the squares containing parts of the Camaro in light blue.
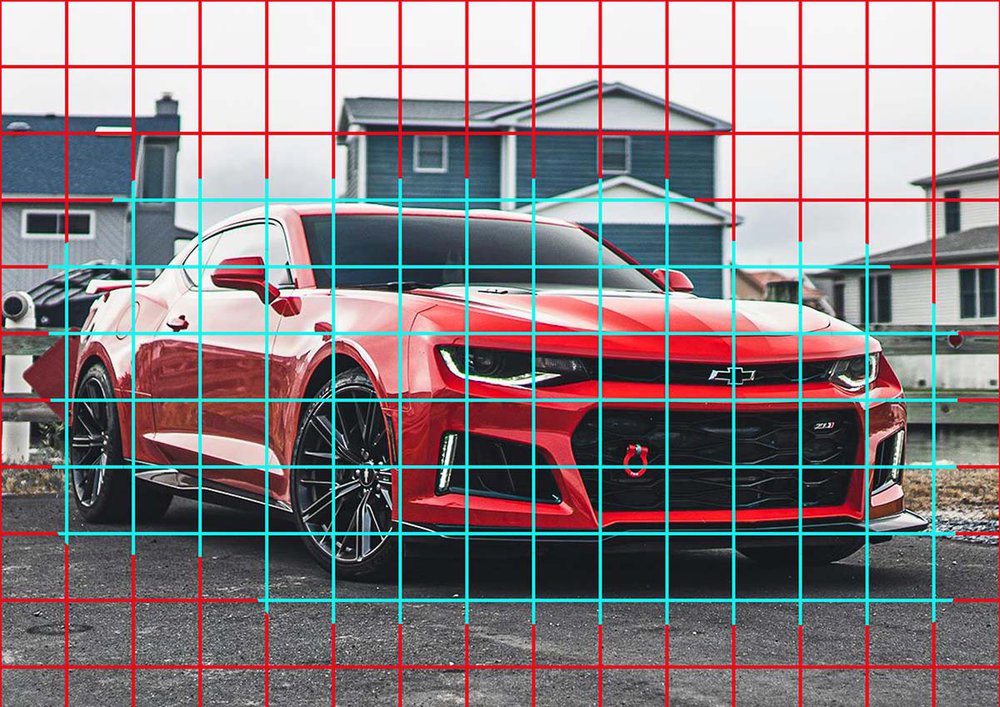
Next, I recreated this grid on my paper. I only sketched the squares marked in blue as I find that it makes sketching the car a little bit easier.
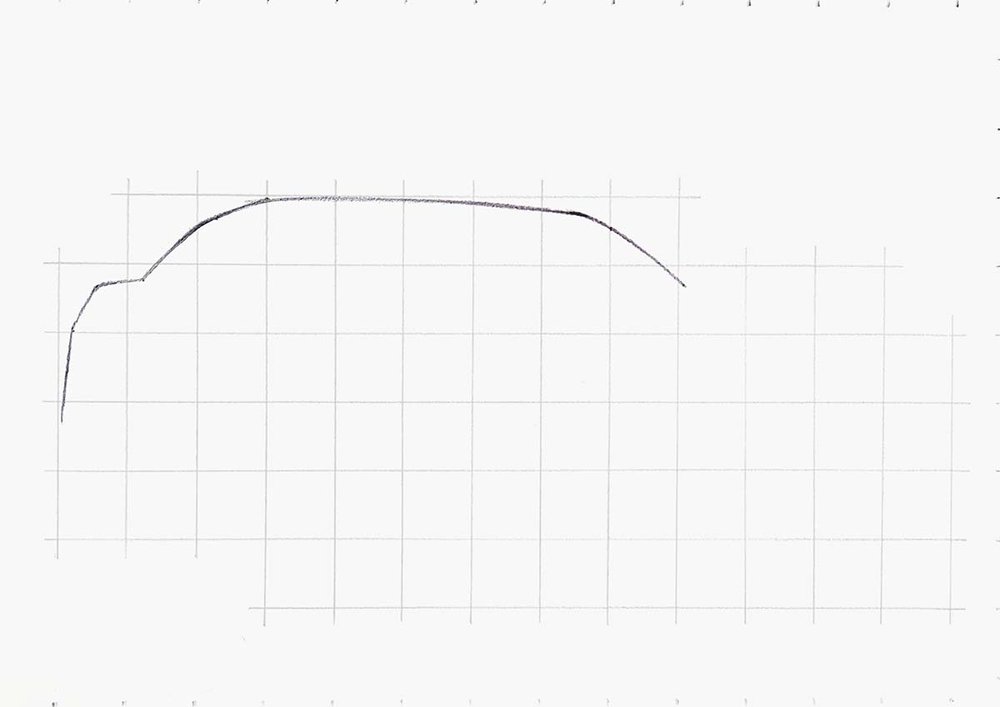
After that, I lightened the grid with an eraser and started sketching the outline of the Camaro ZL1.
I broke the whole outline up into simple lines and sketched them one by one.
For each line, I marked where it starts, ends, and crosses grid lines before sketching the lines in a single smooth motion.
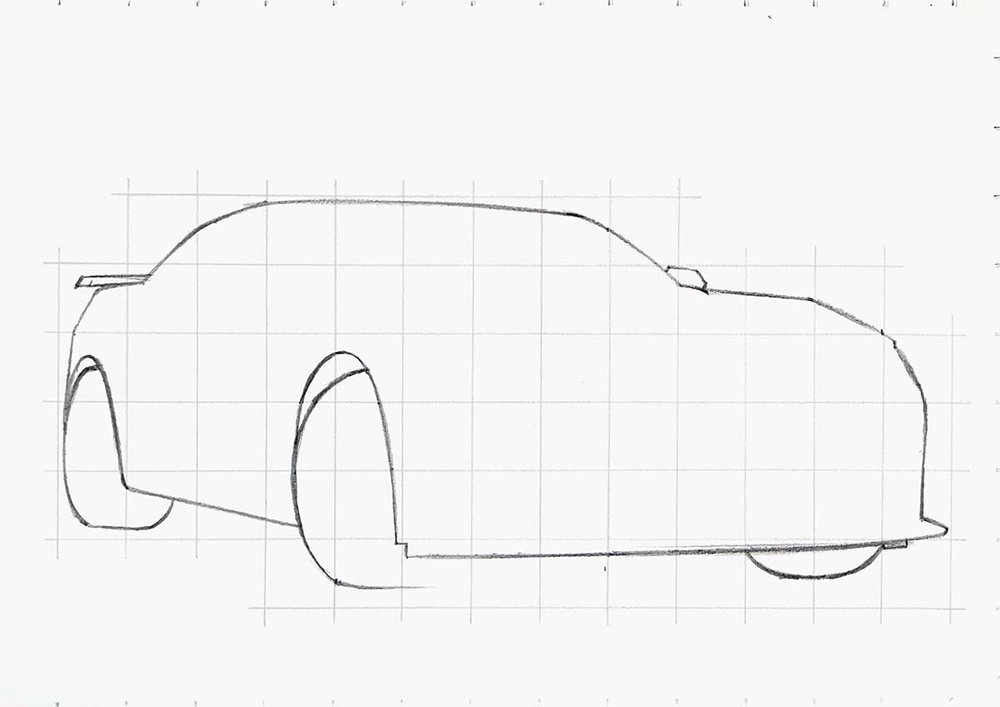
Step 3: Sketch The Parts Of The Chevrolet Camaro ZL1
With the outer edge of the car in place, we can start sketching all the parts and details of the car.
I first sketched the basic shapes and outlines of the parts, like the outer edge of the headlights, the grills, the windows, etc.
To sketch these parts, I again broke the parts up into simple lines and marked the start, end, and where it crosses grid lines before sketching each line.
Next, I added all the details, but I left the main grill and the wheels unsketched as I wanted to spend a little more time explaining how to sketch them in the next steps.
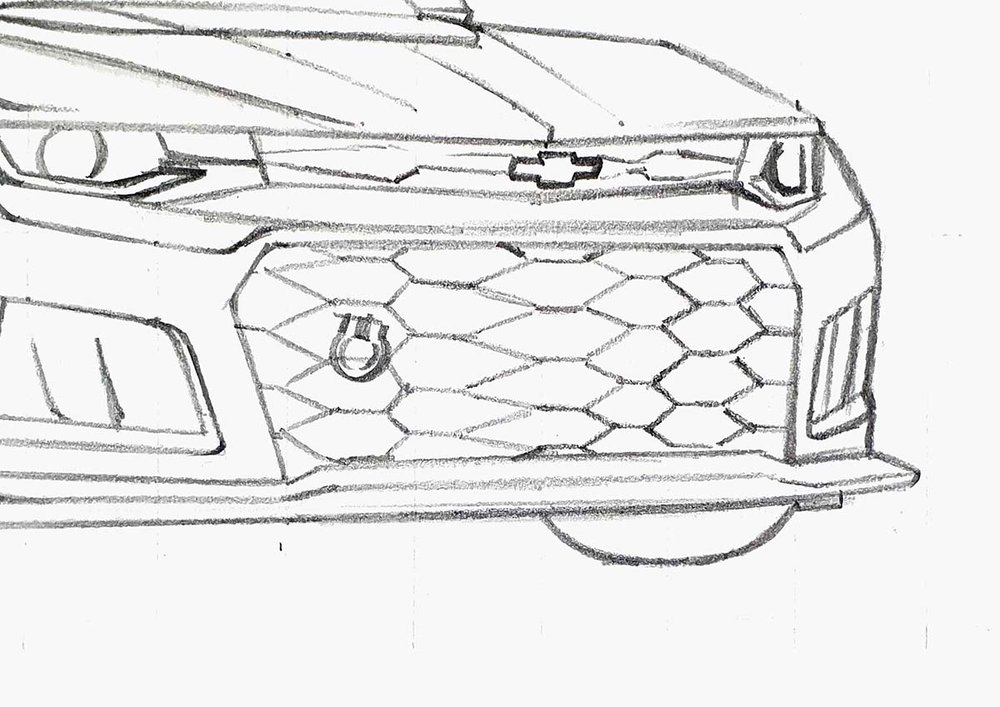
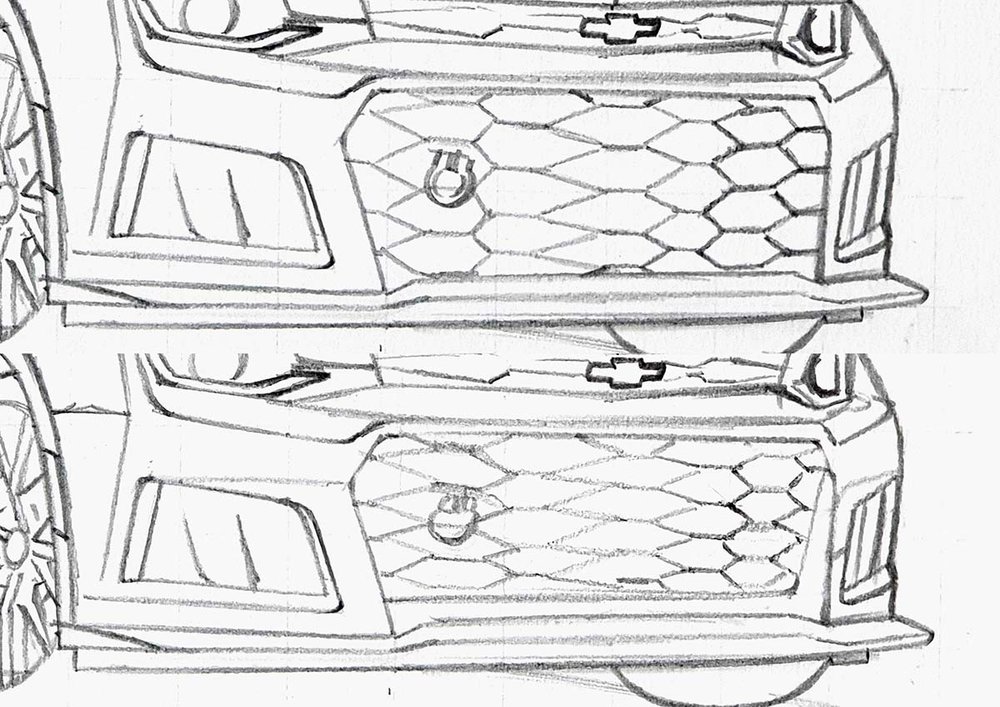
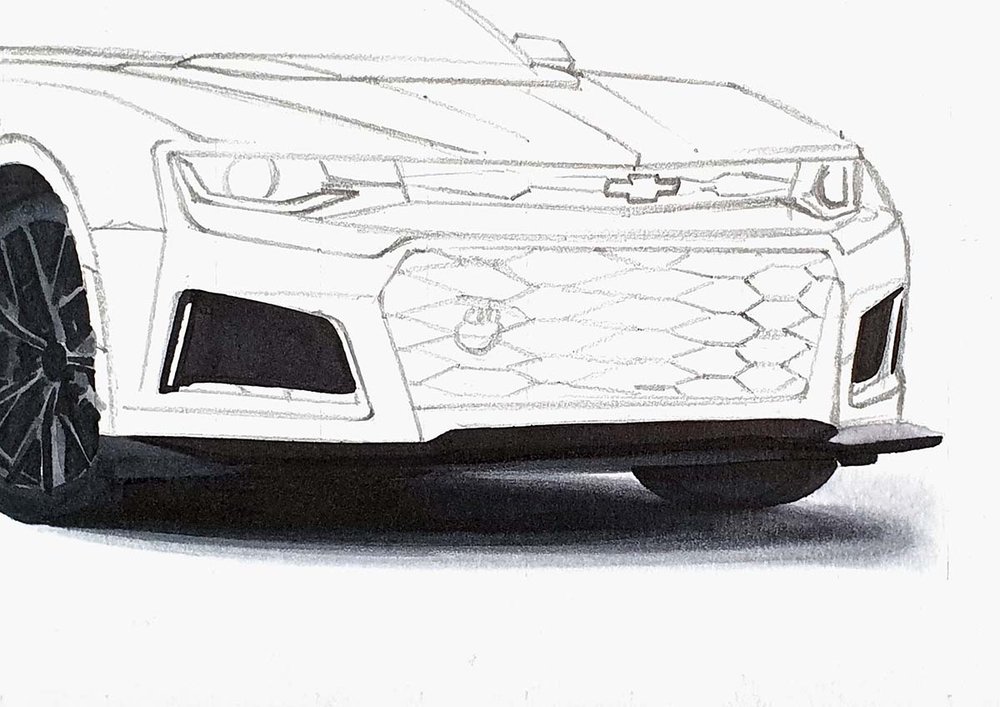
Step 4: Sketch The Front Grill Of The Chevrolet Camaro ZL1
After that, I sketched the grill of the Camaro.
However, I made a stupid mistake when doing this...
In the reference photo, the grill has a second line on the right and bottom edges that is more inset into the front bumper (I marked it in light blue in the photo below).
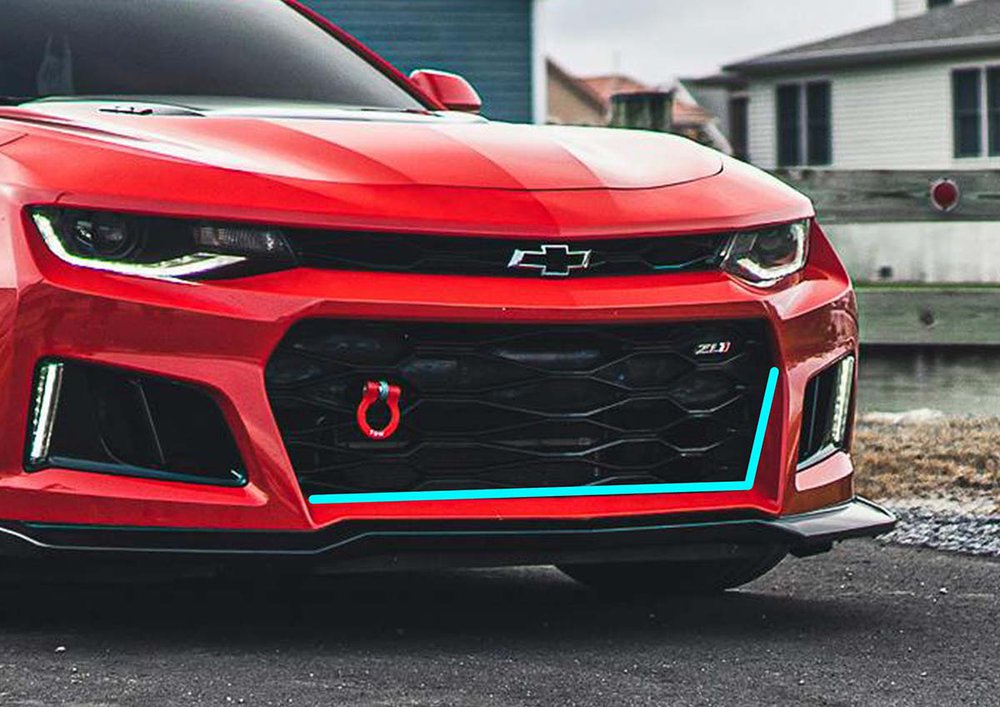
I forgot to sketch this which made the front grill look weird, and I had to resketch it later on.
However, the technique I used stays the same, just make sure you did sketch the second edge on the right and the bottom of the grill before sketching the hexagonal pattern.
Now that that's out of the way, let's start sketching the grill.
I first marked 3 rows of 5 horizontal lines. 1 row in the center directly below the logo; 1 on the left of the grill with about twice as much space to the right of it as to the left; and one row on the right starting just to the left of the headlight above it and going on a slight diagonal down and to the left.
The placement of the right row of lines will be different from what I did if you sketched that second edge I forgot. It will be more toward the left.
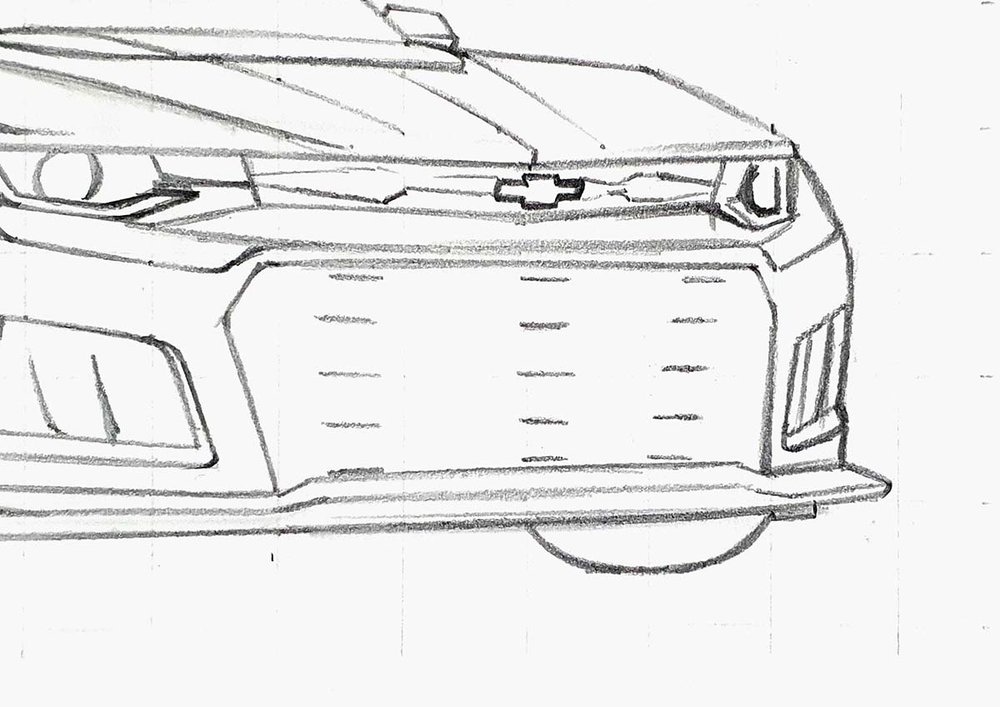
After that, I added 4 more rows of horizontal lines, but this time each row has 4 lines instead of 5, and the lines are shifted downwards a bit.
I added one row on the far left which is mostly hidden by the bumper; one row between the 1st and 2nd row with little space to the left and more space to the right; a row in between the 2nd and 3rd row with about equal spacing; and a row on the right that is attached to the right edge of the grill.
Lastly, I connected each end of the horizontal lines up and down to the next line, creating this hexagon pattern.
It looks a bit odd, but this is the technique I used to resketch it once I had fixed my mistake.
I also added the towing eye to the grill.
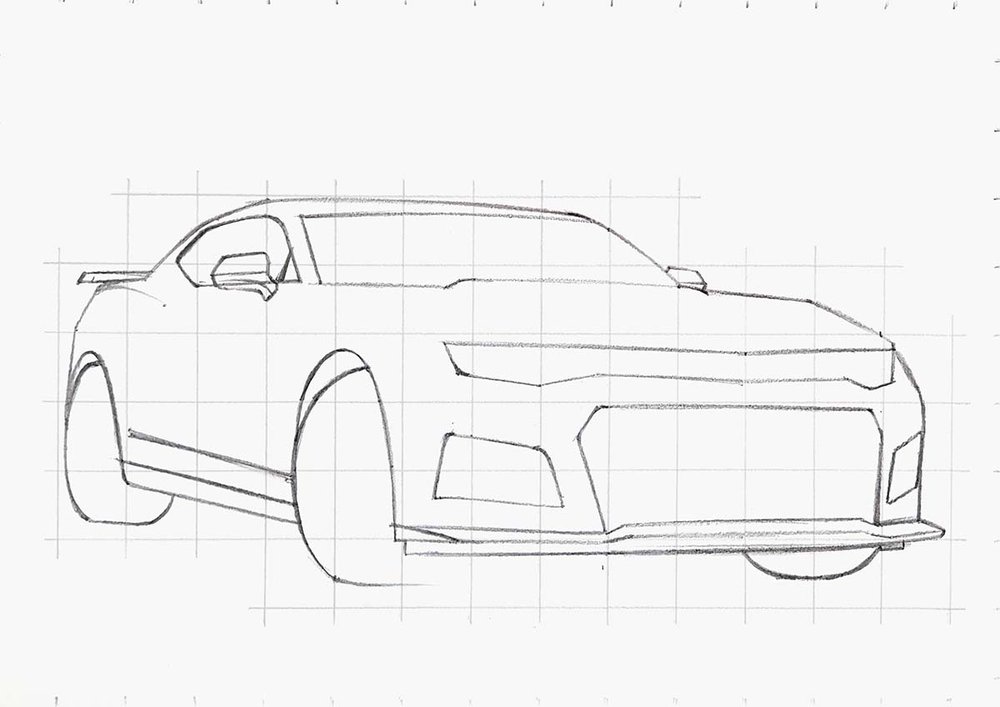
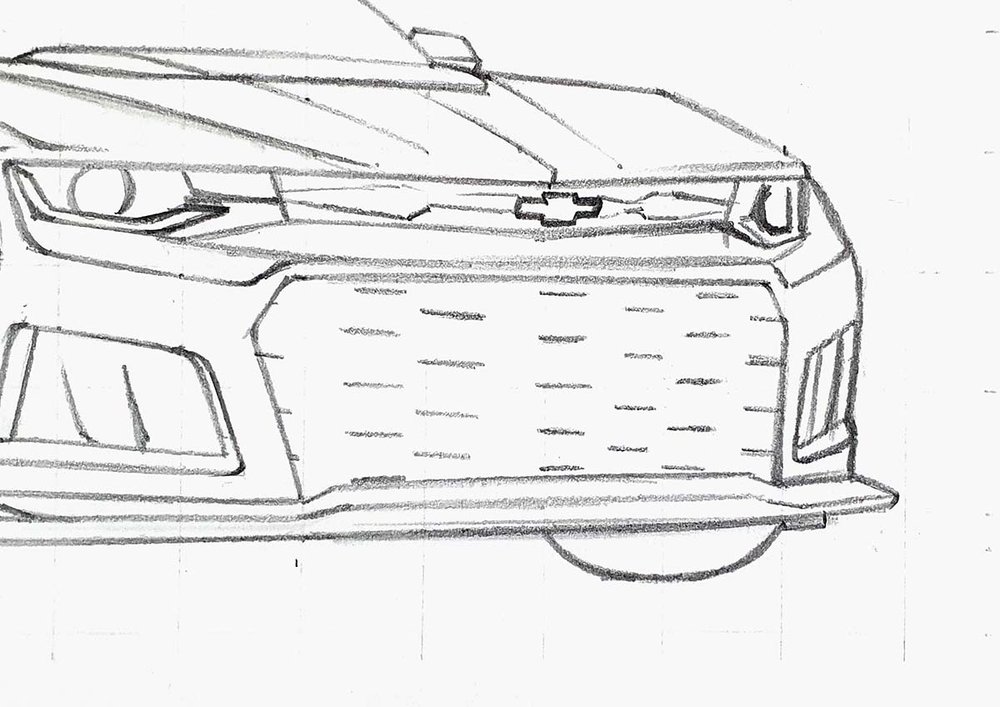
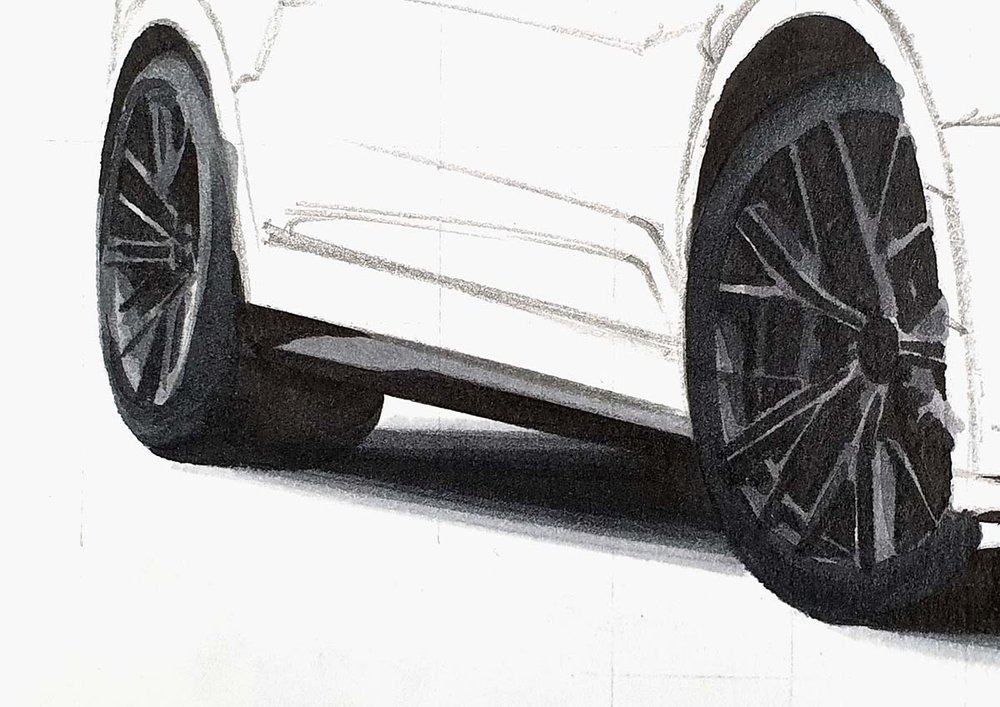
Step 5: Sketch The Wheels Of The Chevrolet Camaro ZL1
Next, I sketched the wheels.
I first sketched the inner edge of the tire and marked the center with a small ellipse.
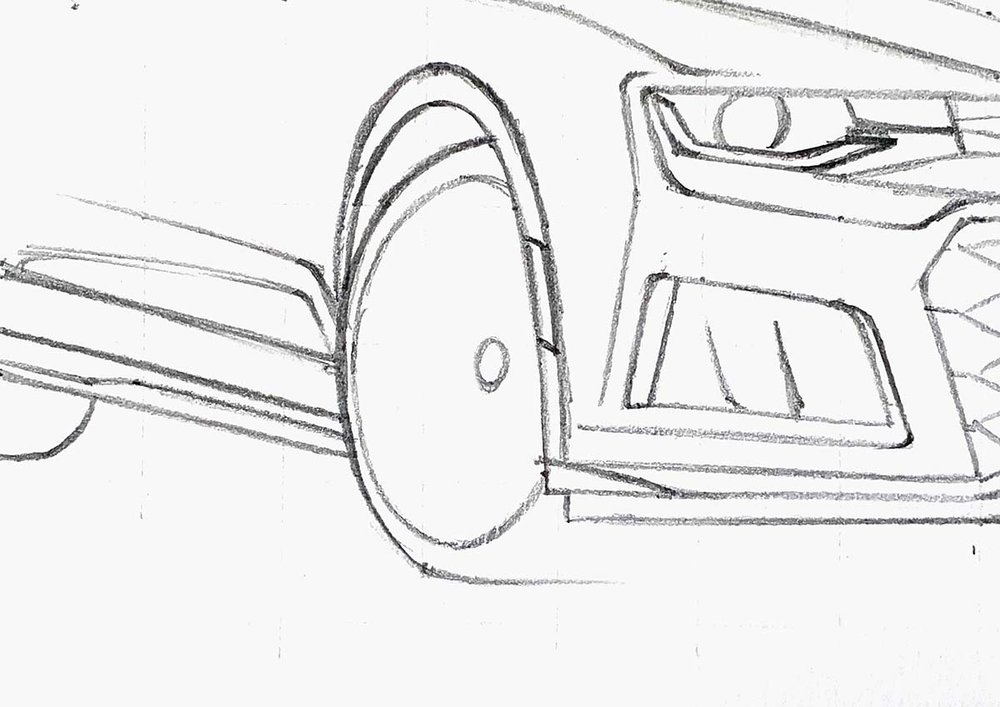
Then, I added 5 double spokes.
The spokes consist of 2 parts: 2 parallel short lines from the center and 2 longer parallel lines that connect to the outer rim edge.
In the reference photo, I look to where the starts of the spokes (the short lines attached to the center) point towards and sketch those first.
Next, I look at where the spokes connect to the outer rim and then sketch the parallel lines connecting the short lines to where the spokes should connect to the rim.

Next, I added 2 lines on each double spoke. Each line connects to the corner of the spoke and to the rim, and each of these spokes is parallel to the extra spoke of the neighboring double spoke.
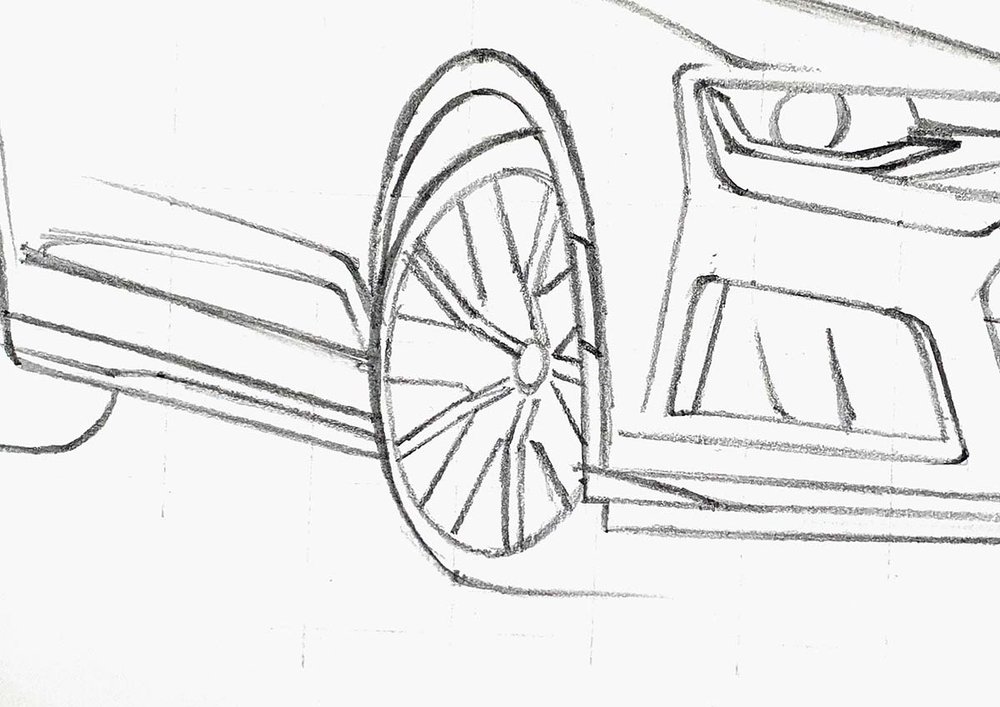
Lastly, I added a few details to the spokes like one extra rim line on the left and the thickness of the spokes.
Then, I repeated those steps for the rear wheel and I sketched the outline of the shadow of the car.
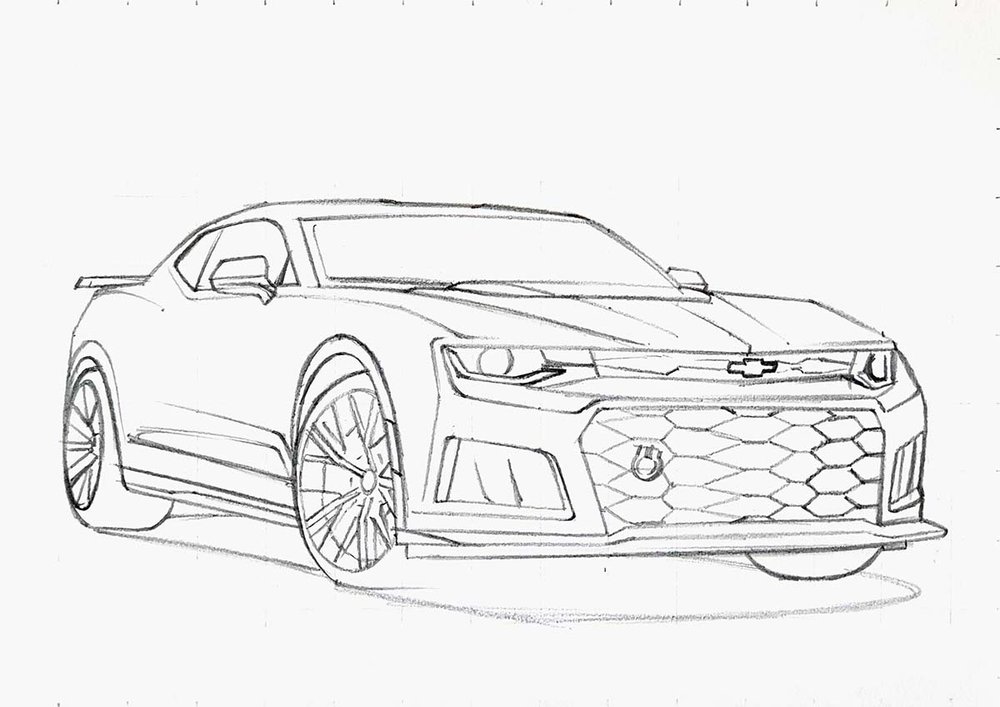
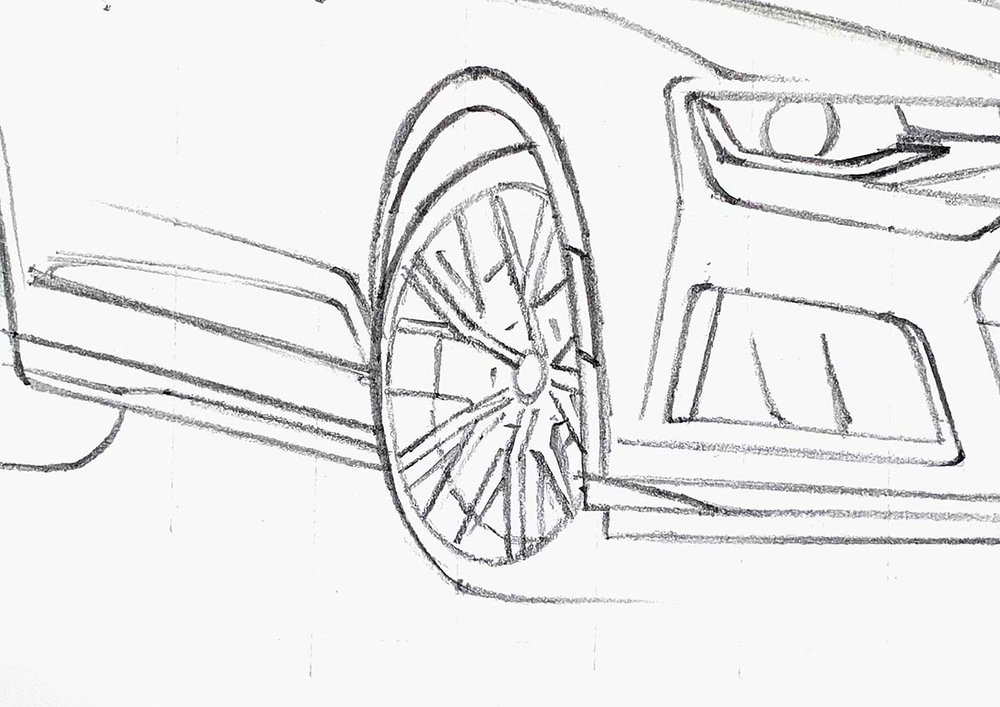
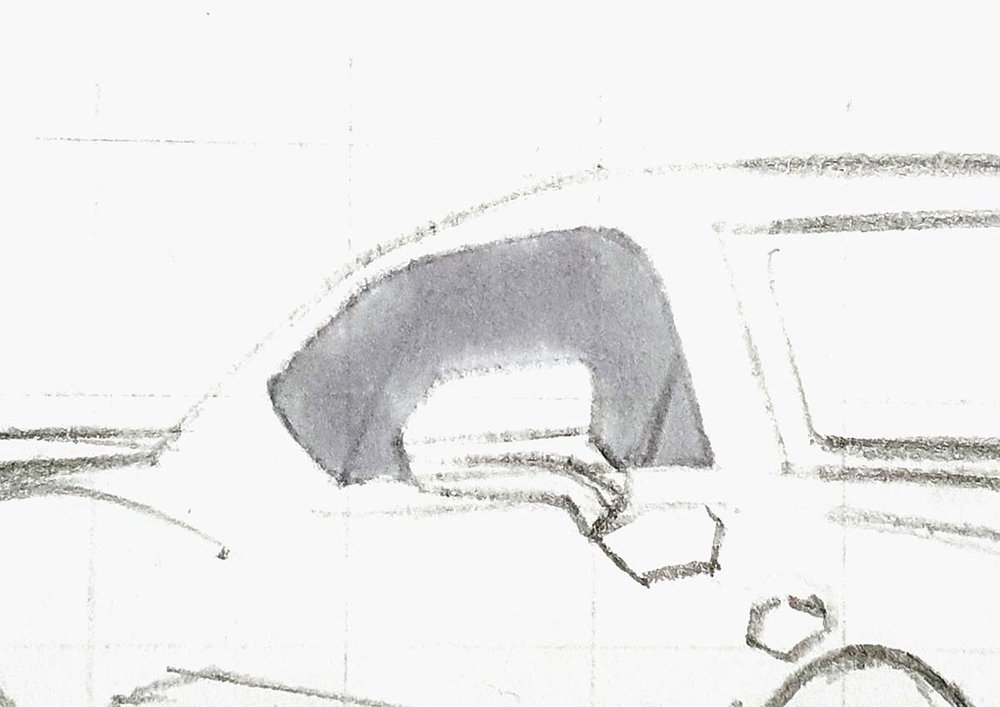
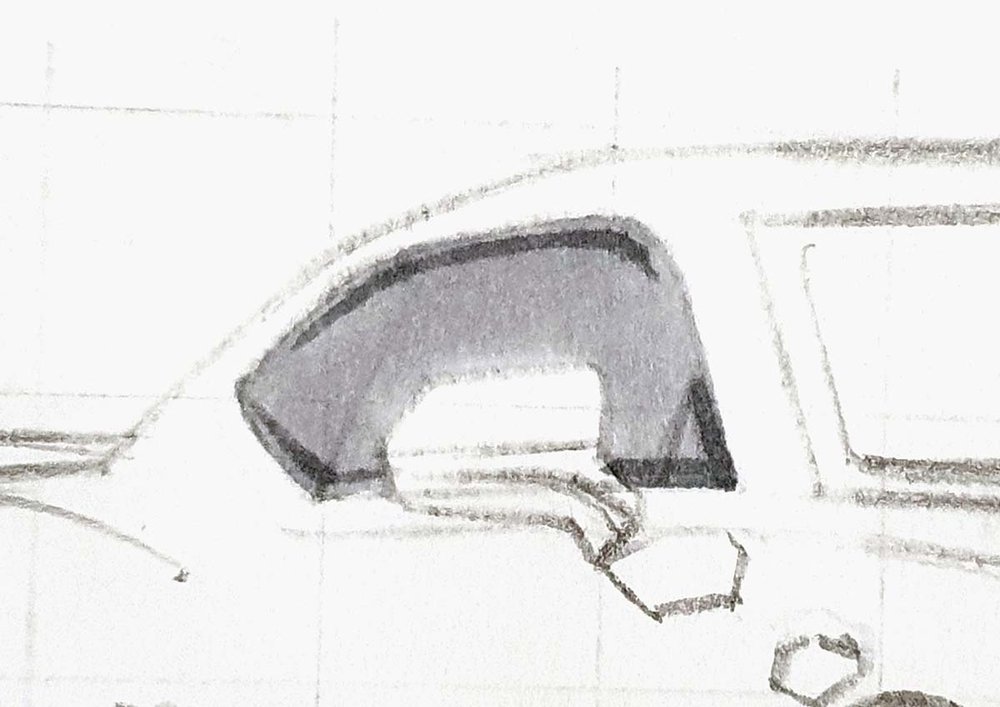
Step 6: Sketch The Reflections & Fix The Grill
After that, I marked the reflections on the Camaro, which are a line on the side of the car, the reflection of the mirror to the bottom right of the mirror, and a line roughly between the headlight and the front wheel.
But more importantly, I fixed my stupid mistake.
I erased the grill, added the extra line on the bottom and the left, and resketched the grill.
Here's a before and after:
Now the sketch is done and ready to be colored!
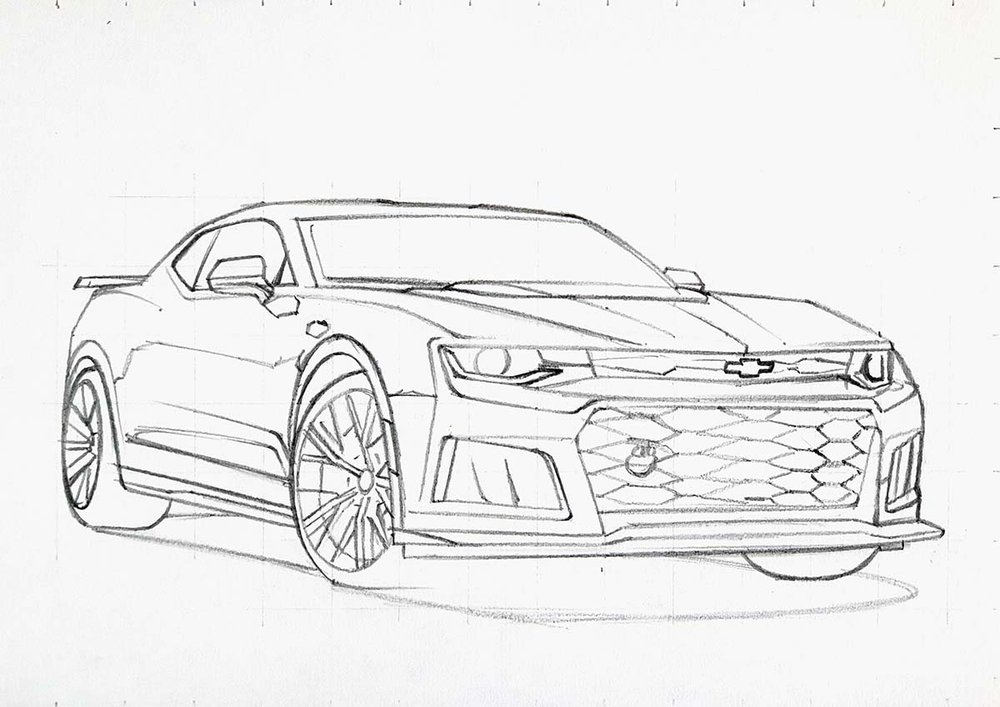
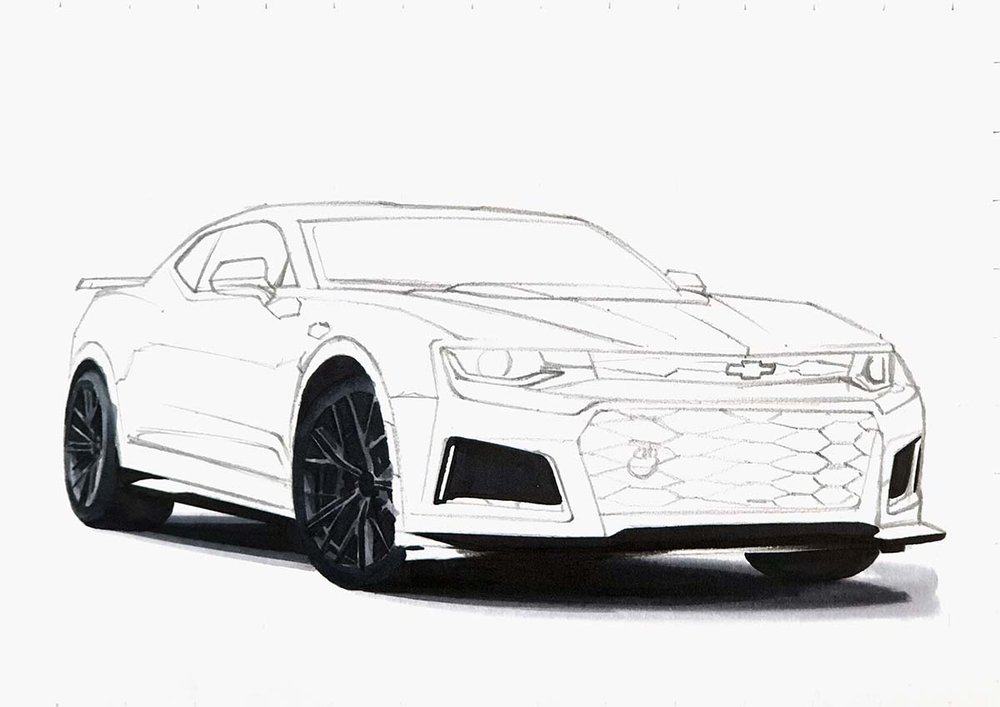
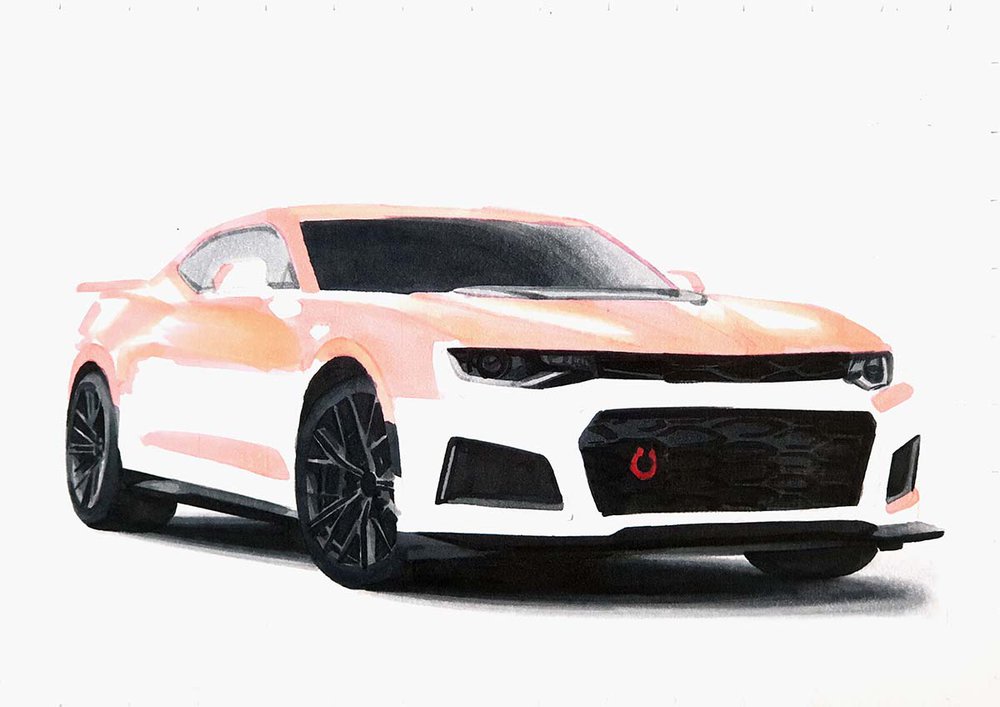
Step 7: Color All Pure Black Parts Of The Chevrolet Camaro ZL1
To color any car, I like to color all the pure black parts first.
But with this car, I wanted to experiment a bit.
Usually, I also color the whole grill black to avoid drawing all the details, but with this Camaro, I wanted to actually draw the details of the grill.
So I left the main grill and the grill between the headlamps uncolored for now.
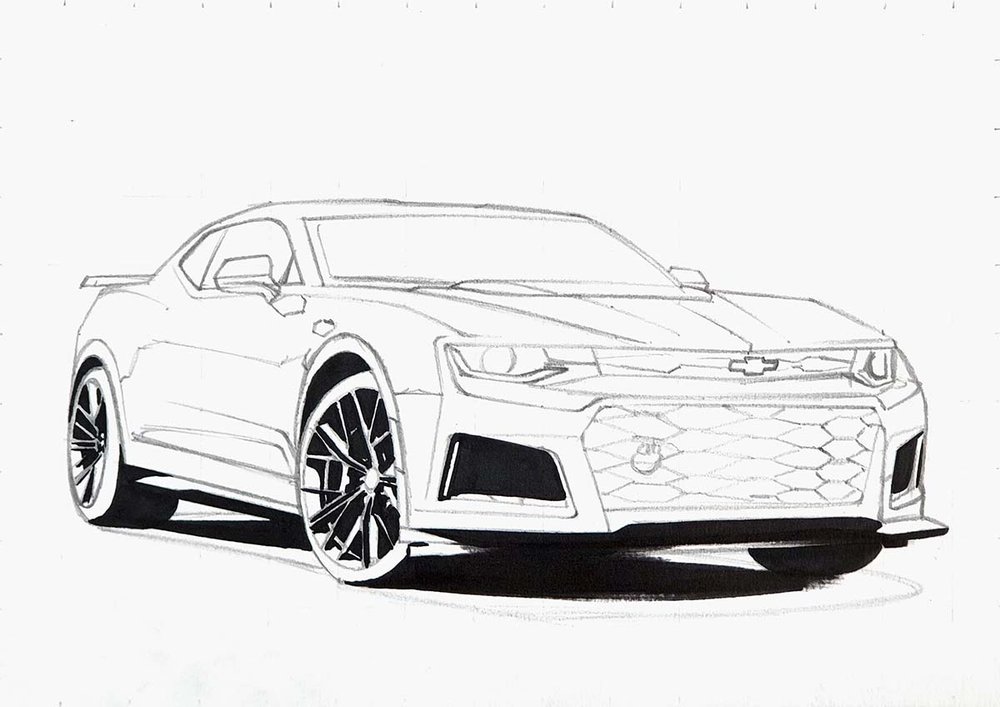
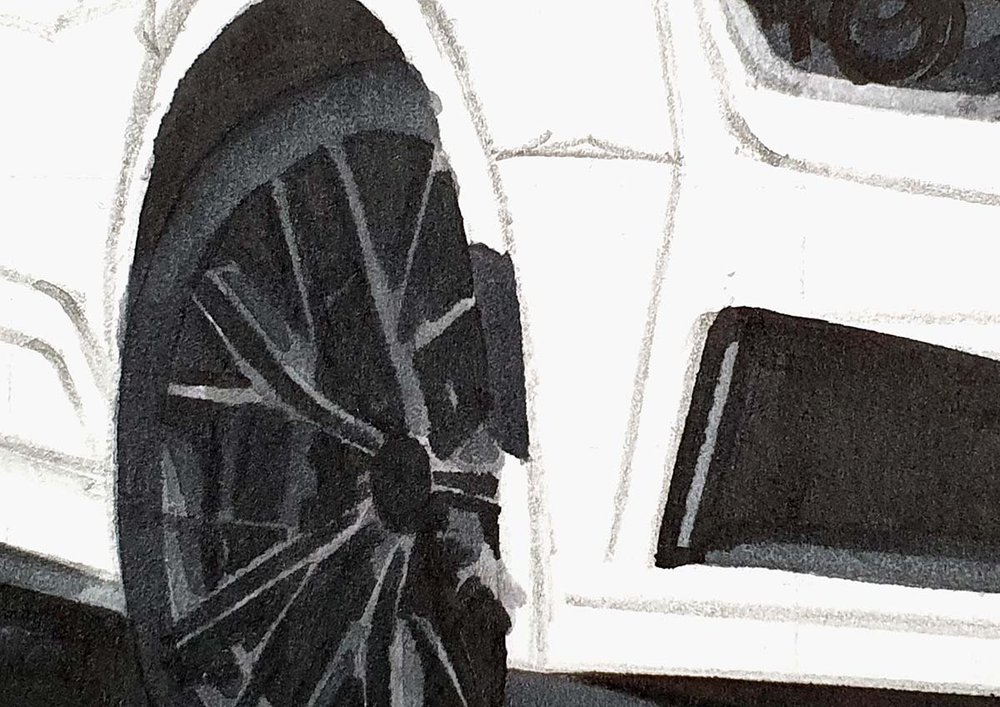
Step 8: Color The Wheels Of The Chevrolet Camaro ZL1
Next, I colored the wheels.
I started by coloring the rims with CG030.
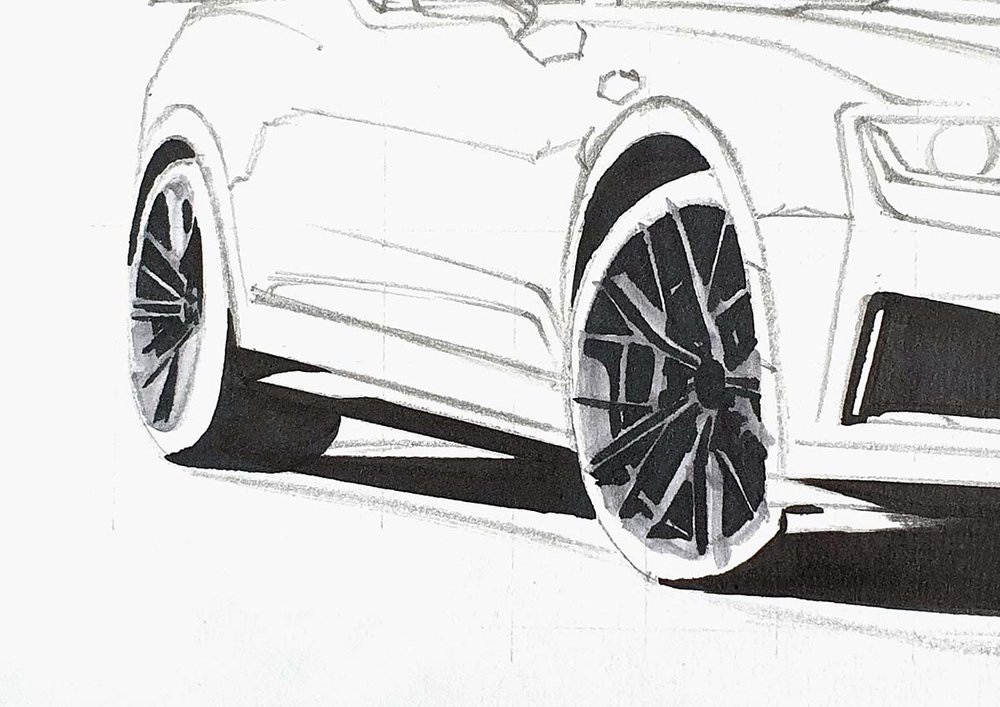
Then, I used NG03 to color most of the wheels (rims + tires) while leaving a few spokes and edges lighter grey.

Next, I used CG070 and roughly did the same thing.
Lastly, I used NG06 to add dark shadows, particularly on the front wheel, and darkened the lower half of the tire on the rear wheel.
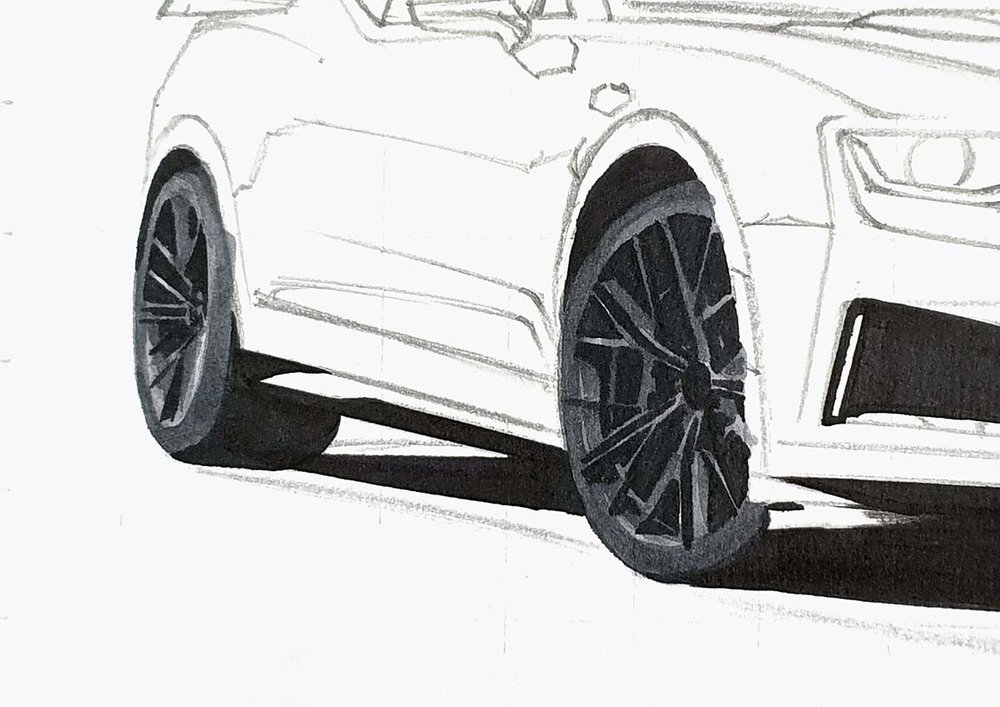
Step 9: Color The Shadow Of The Chevrolet Camaro ZL1
After that, I colored the shadow below the Camaro with CG030.
However, I did go a little bit too high on the right. That's why it looks so weird, but I made it less visible later on.

Next, I used CG070 to color in between the light grey and the black and blended it into the black by coloring over the edge.
Then, I used CG030 again to blend out the CG070 by coloring the edge of the two colors.
And I used the colorless blender to smoothen the edge of the CG030 by coloring over it and to lighten my mistake on the right.

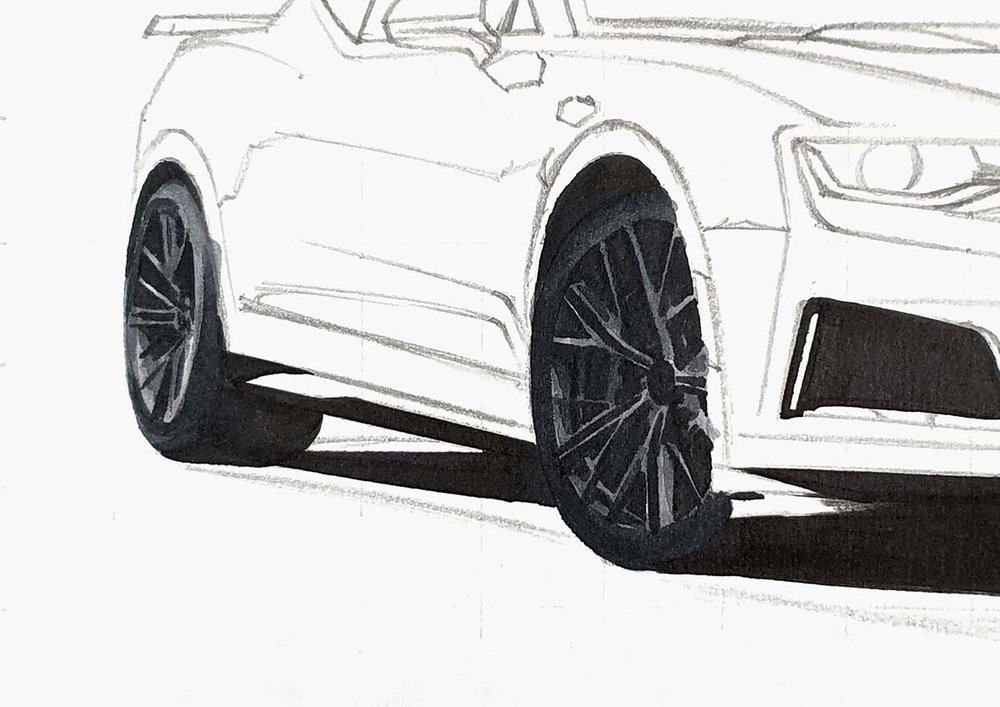
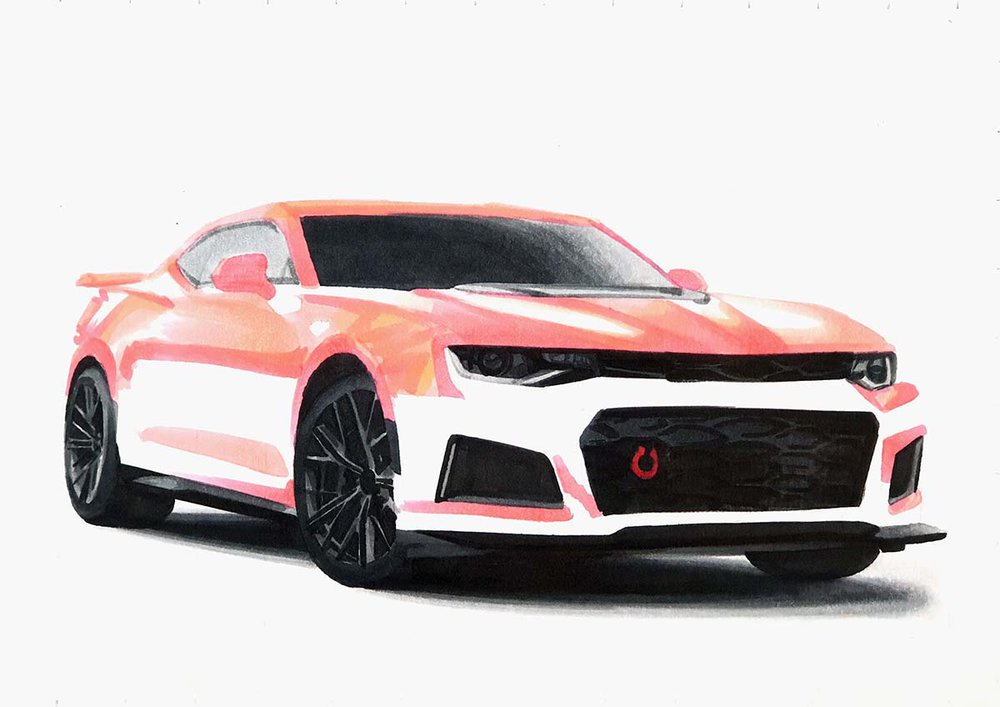
Step 10: Color The Side Skirt & The Front Splitter Of The Chevrolet Camaro ZL1
Next, I colored the side skirt with NG03.
And then, added a big reflection in the middle with CG070.
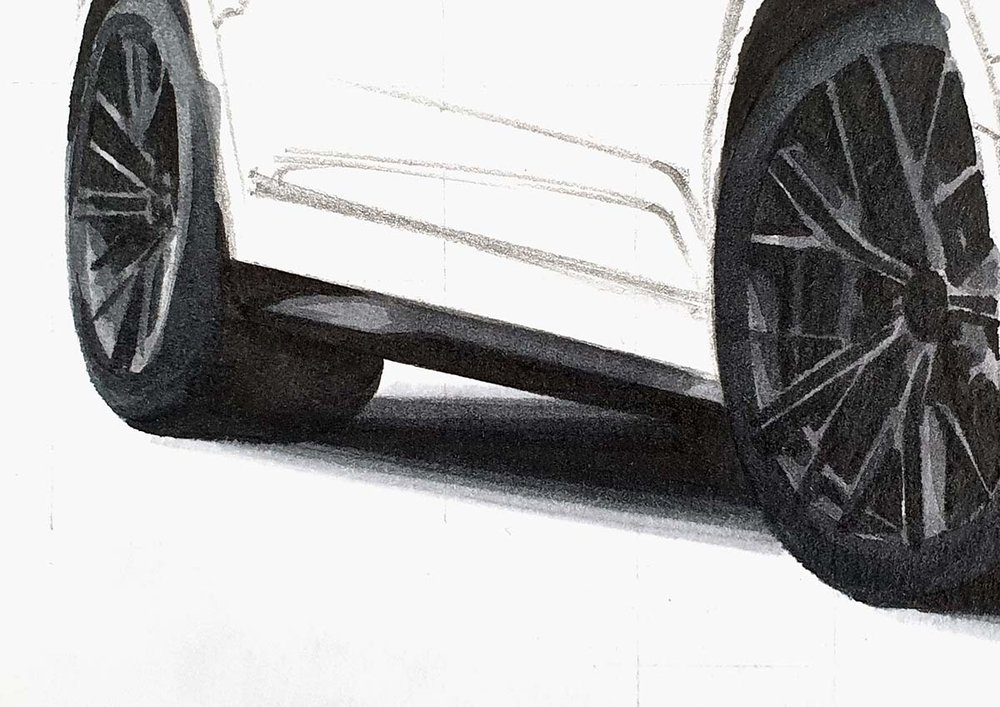
I also colored the front splitter. I colored the bit on the right with CG030 and the rest with NG06.
Lastly, I darkened the left half of the lighter bit with CG070 and blended it out into the lighter grey by coloring over the darker edge with CG030.
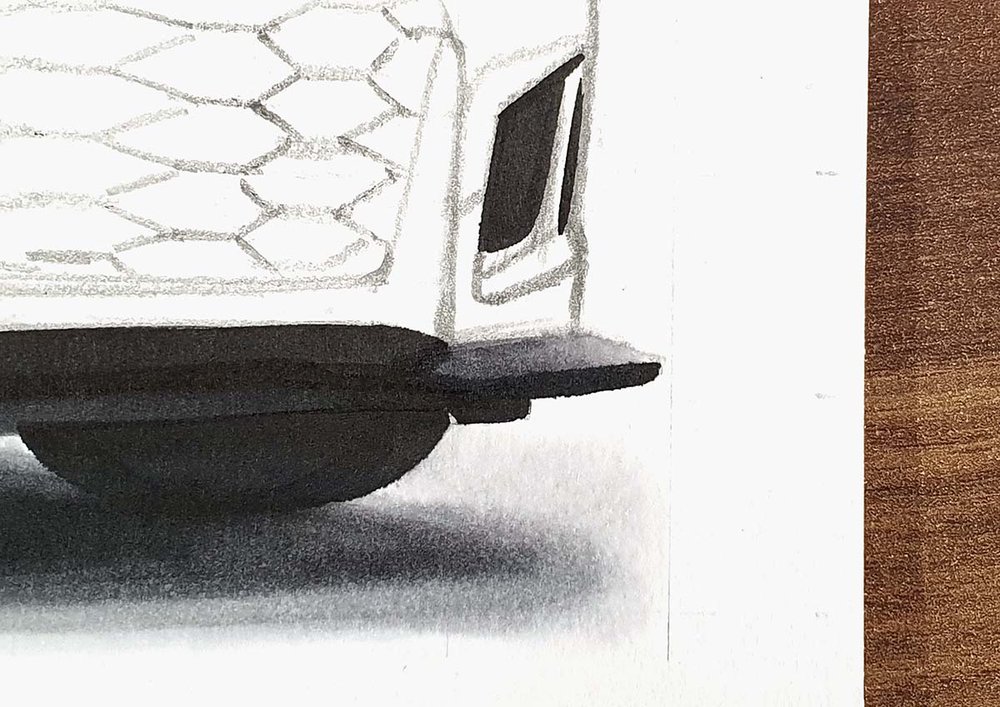
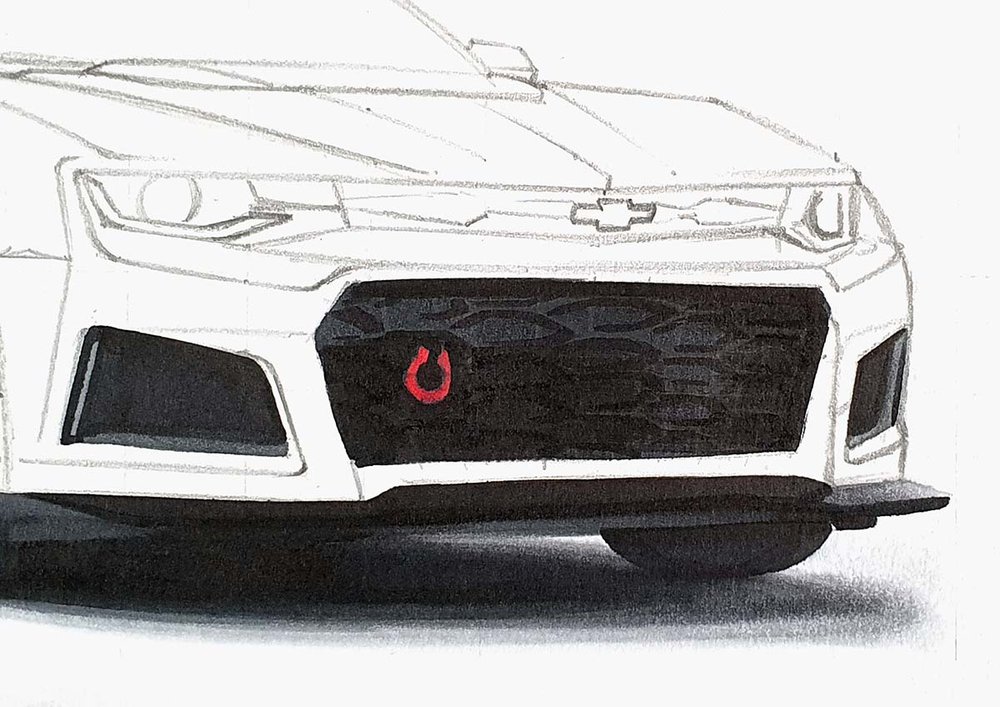
Step 11: Color The Front Grills & The Headlights Of The Chevrolet Camaro ZL1
After that, I used NG03 to color the remainder of the lower side grills and used CG070 to color the lower bit of the left grill.
I also colored the big main grill with NG06 and the towing eye with R160.
I hoped I could see my sketch through the dark grey of the grill, but I couldn't so I had to sketch the grill again to add the details...
But if you darken the sketch before coloring it with NG06, I think you should be able to see it through the dark grey.

Next, I added shading to the front grill with black.
After that, I first darkened the sketch of the grill piece between the headlights and then colored that and some bits of the headlight on the left with NG06.
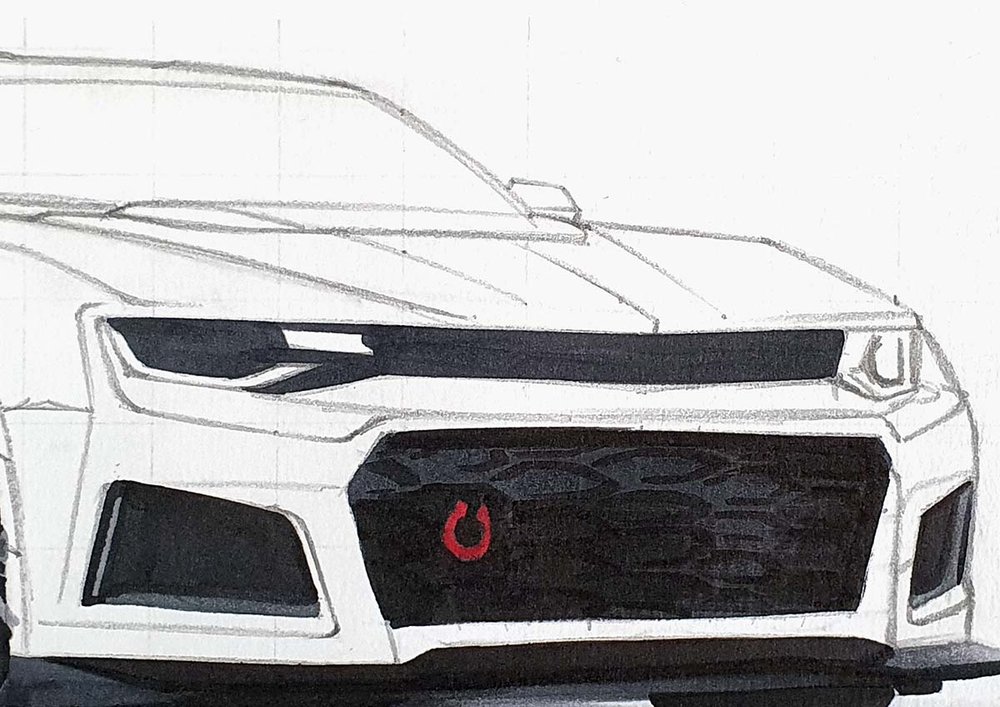
Next, I used CG030 to color the light parts on the bottom of both headlights, NG03 to color the rest of the headlight on the right, and CG070 to add some darker shading to the right headlight and to color the rectangular piece on the left headlight.
And to finish it off, I used black to add details to the grill bit and the headlights. I also used NG06 to add some details to the headlights.
Step 12: Color The Front Marker Light
Next, I colored the front marker light with NG06.
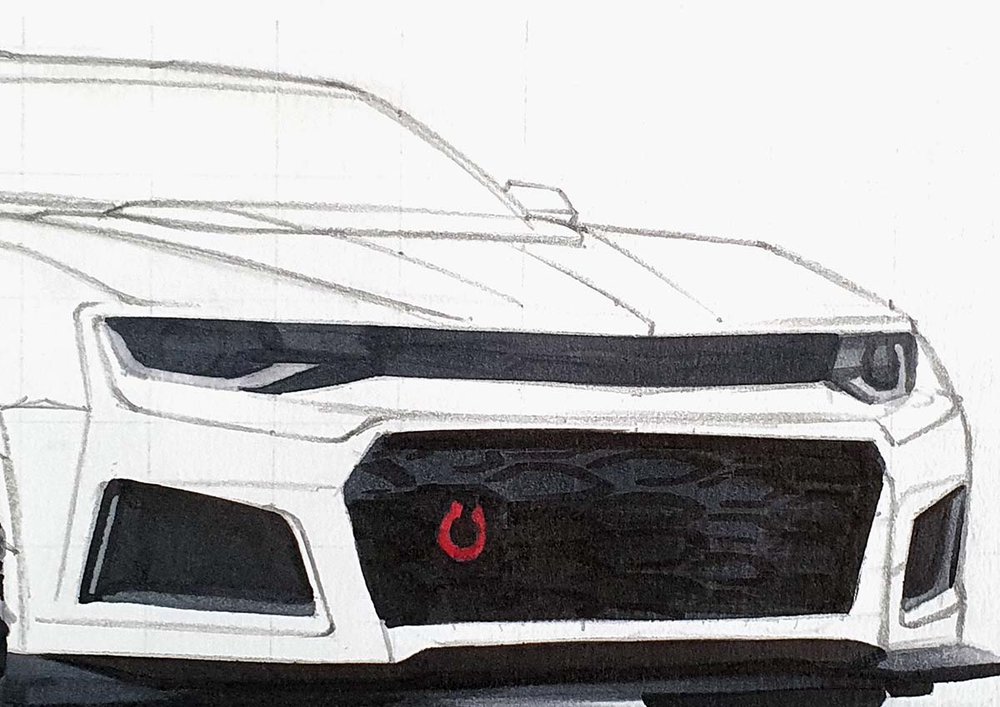
Step 13: Color The Side Windows Of The Chevrolet Camaro ZL1
After that, I colored the side windows with CG030.
And then, I added the shadows of the window sills with NG03.
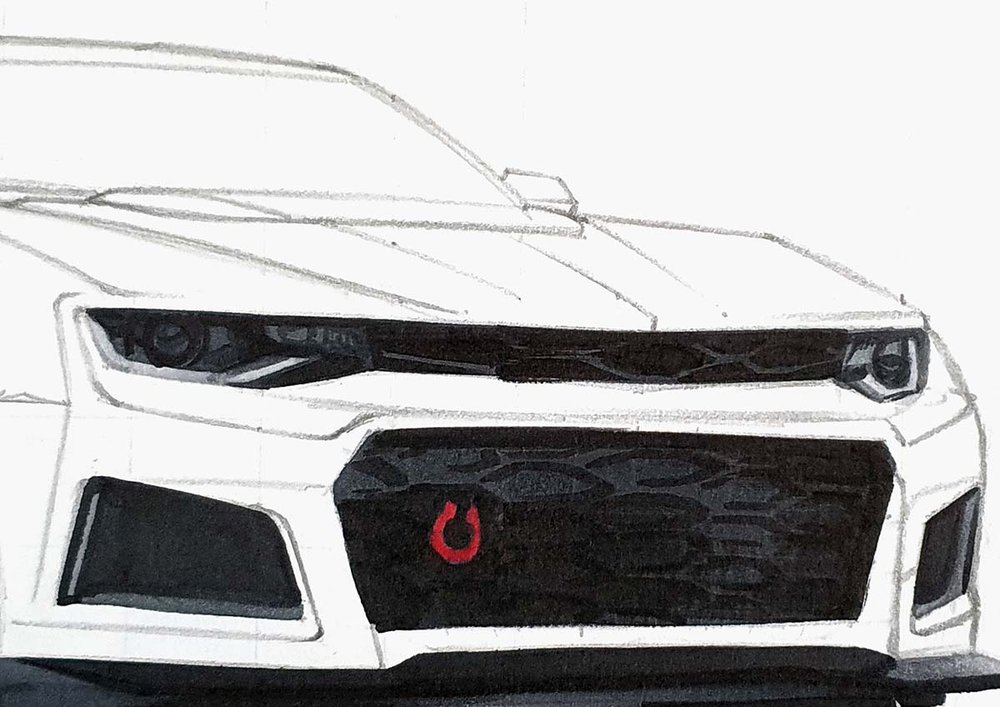
Step 14: Color The Windshield Of The Chevrolet Camaro ZL1
Next, I colored the windshield.
I first used CG030 to color the right third or so and the grey part of the hood.
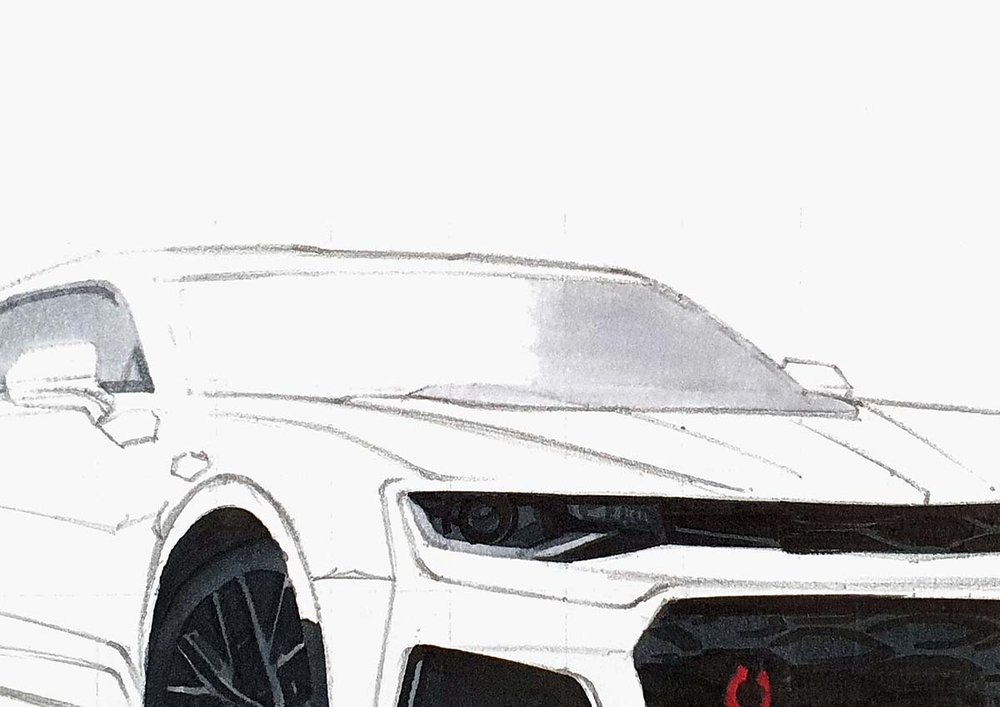
Then, I used NG03 to add some shading to the hood and to color the middle right and the top of the windshield.
I blended the NG03 into the CG030 by coloring over the edge where the two colors meet with CG030.
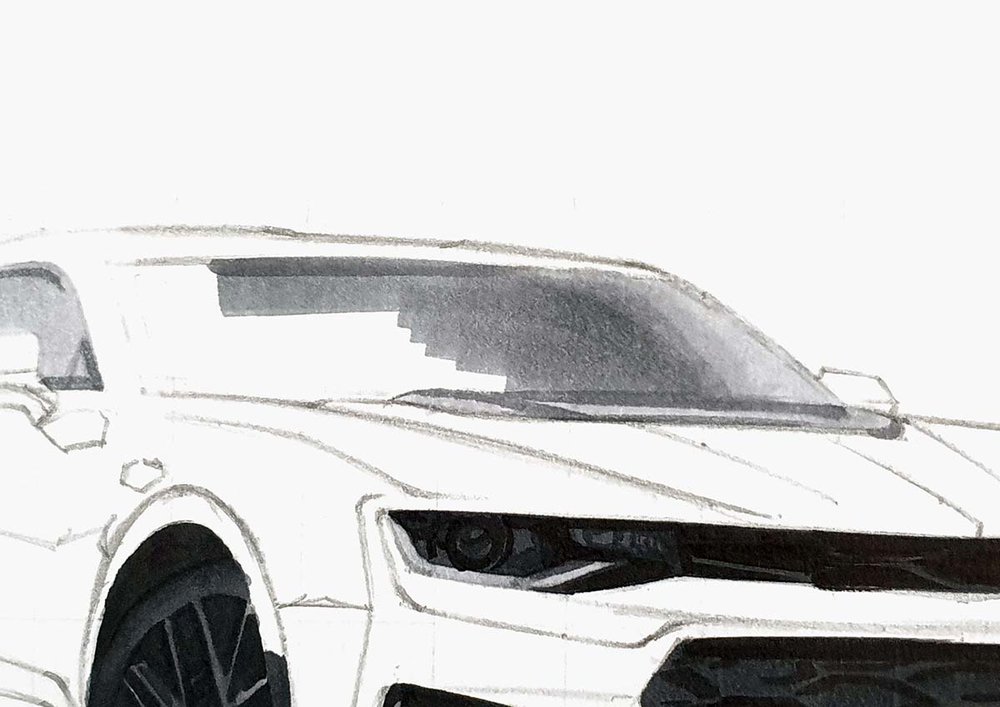
Next, I colored CG070 in the middle and the top left of the windshield, and again blended that into the lighter grey by coloring over the edge with NG03.
I also added just a few dark spots on the grey hood thing.
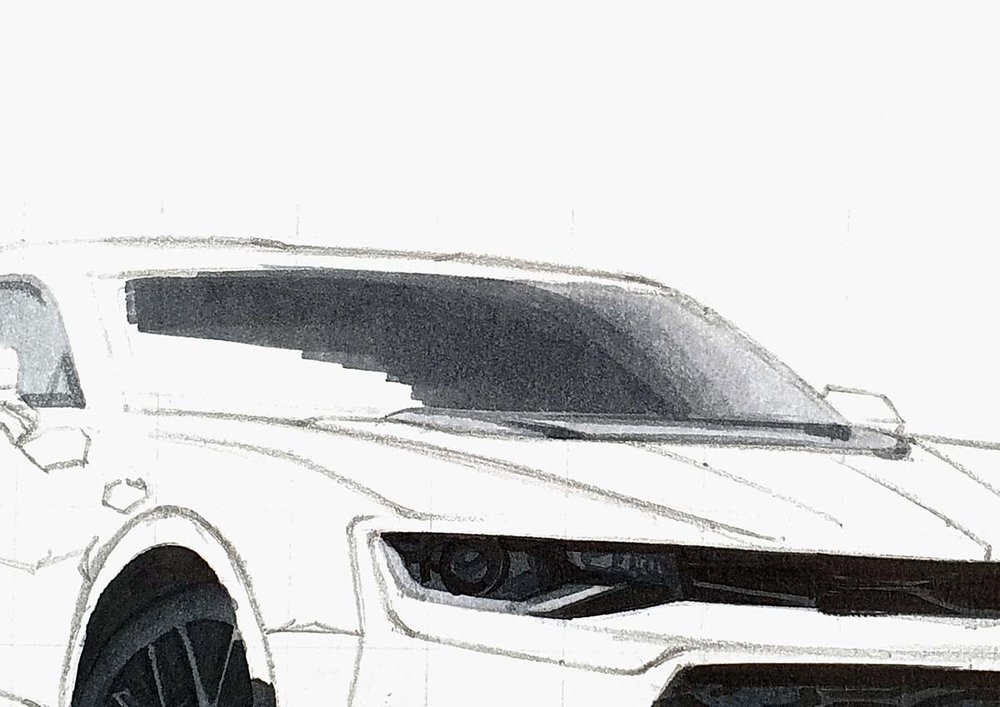
Lastly, I used NG06 to color the rest of the windshield and blended that into the lighter greys by coloring over the edge with CG070.
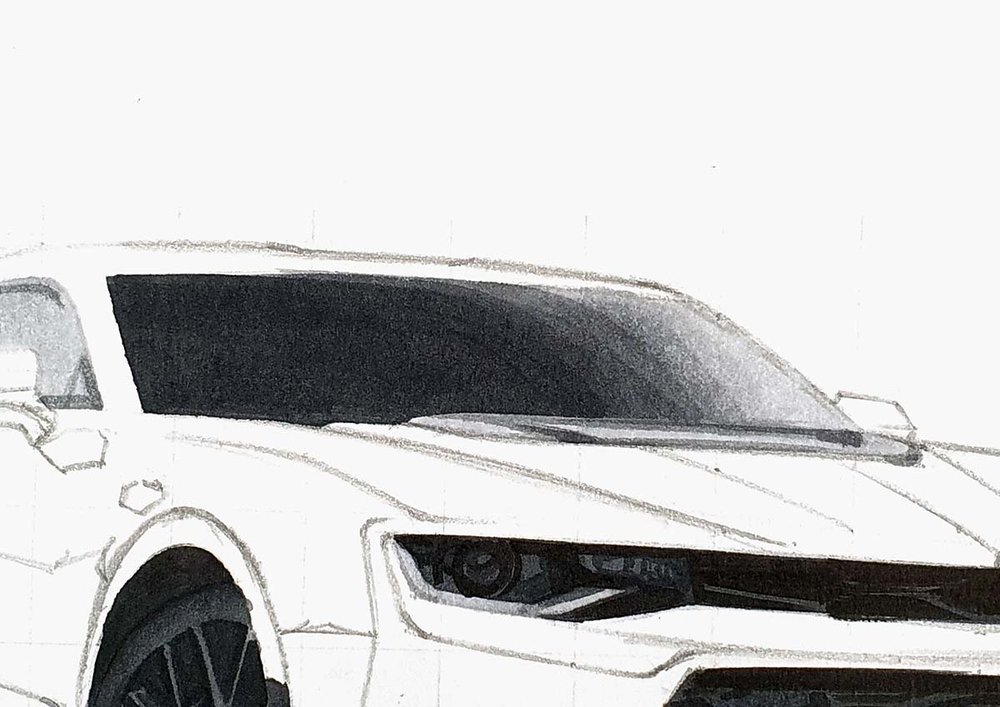
Now, all grey parts of the Camaro ZL1 are colored, and it's time to move onto the main body of the car (my favorite part).
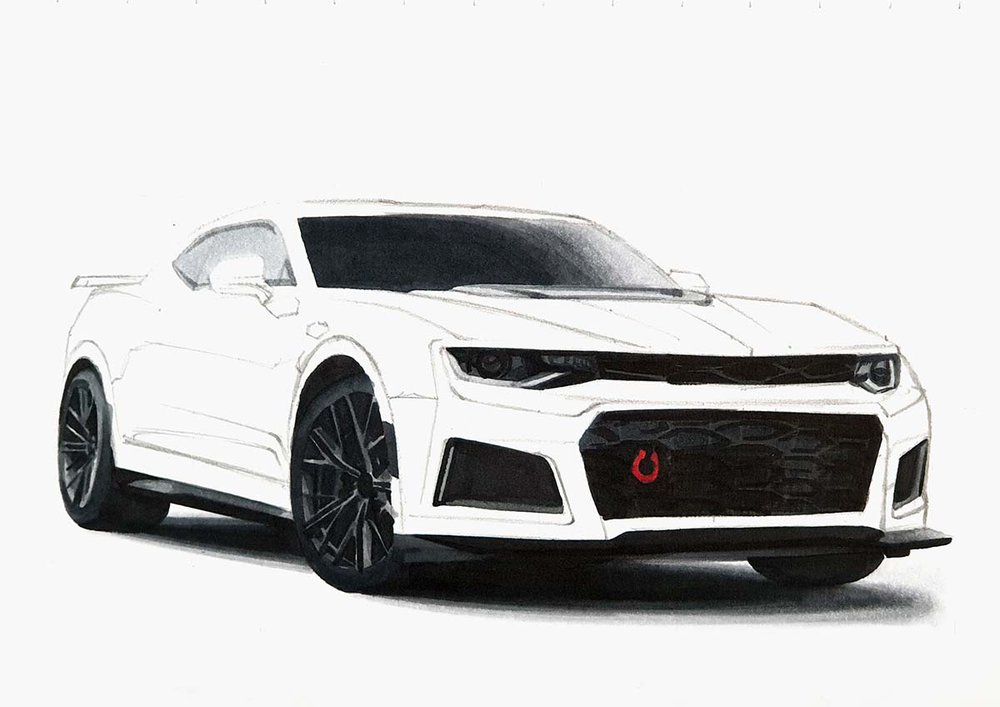
Step 15: Color The Main Body Of The Chevrolet Camaro ZL1
To color the main body, I worked from light to dark.
I started by coloring the lightest parts with RV300.
On the hood, I used the colorless blender to blend the light grey into the white of the paper.
Next, I used R120 to add some darker pink shading on the lighter pink parts and some other parts.
Then, I used R160 to color the remainder of the body and to darken some pink parts.
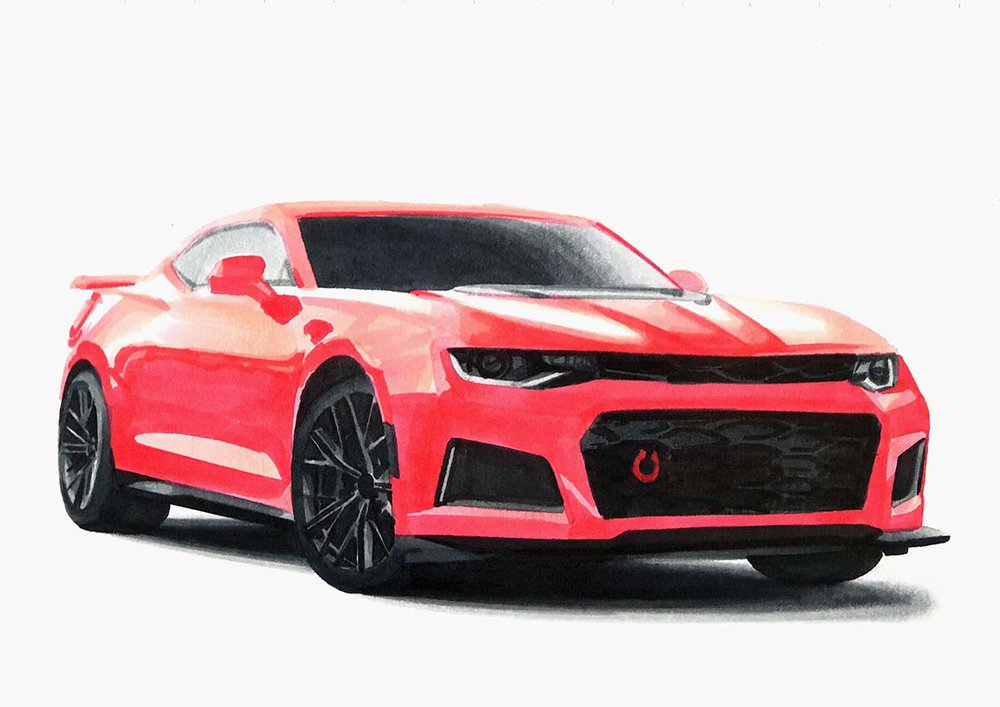
After that, I used R170 to add just a little bit of shading and reflections on the red parts.

Lastly, I used R240 to add the darkest red shadows and reflections.
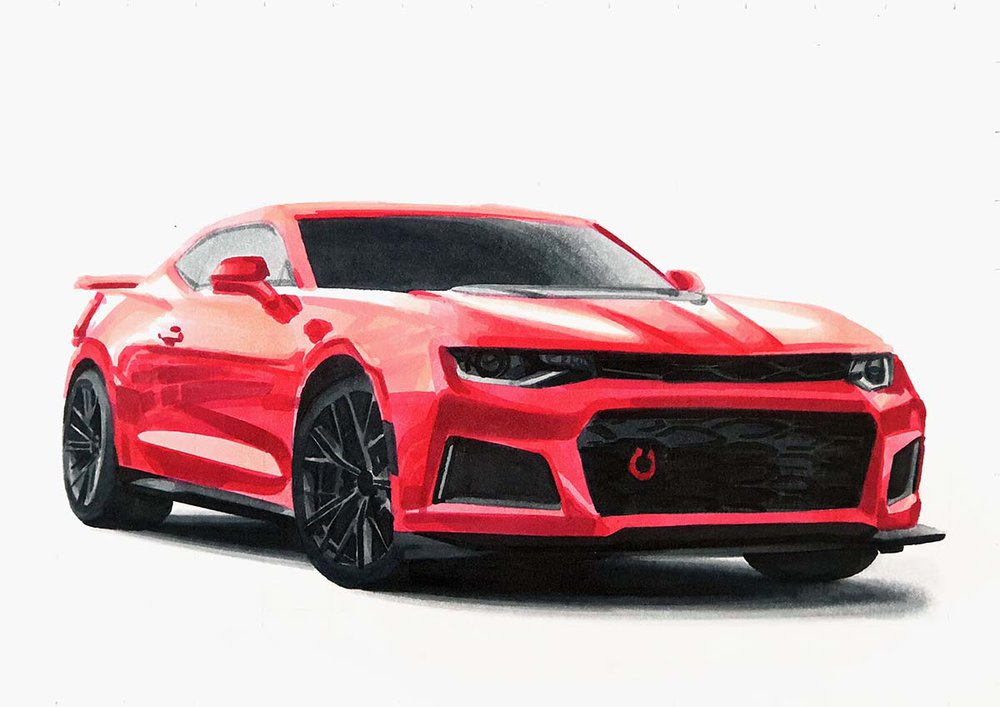
Step 16: Add Details To The Chevrolet Camaro Drawing With Colored Pencils
Although the car is now fully colored, it is not done yet.
It's lacking a lot of details. And we can add those with just a white and a black colored pencil.
I used the white pencil to highlight panel edges and the spokes of the wheels, and to add details and highlights to the headlights and the logo.
And I used the black pencils to add panel gaps of the hood, the doors, the front bumper, etc, and to add details to the side window sills.
Step 17: Add White Highlights To Your Chevrolet Camaro ZL1 Drawing
To finish the Camaro ZL1 drawing off, I used a white paint marker to add highlights all over the car.
I added highlights to the wheels, the headlights, the lights in the lower grills, the logo, the lightest reflections, and some panel edges and body lines.
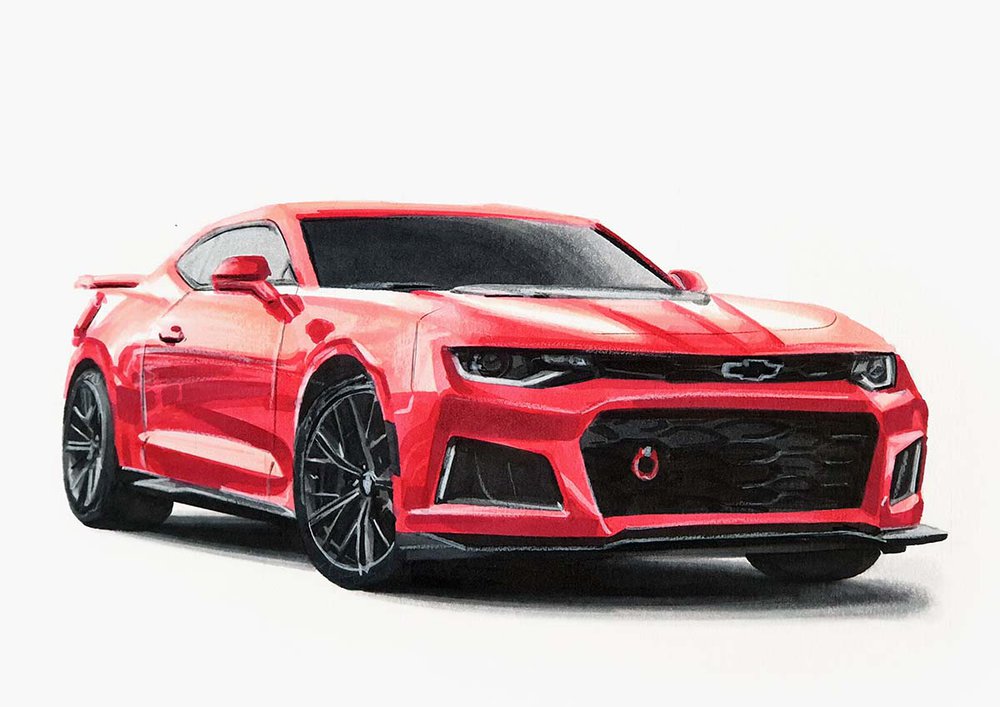
And that's how to draw a realistic Camaro ZL1 with markers.
I hope you enjoyed this Camaro ZL1 drawing tutorial and were able to follow along.
Thank you!
Tags
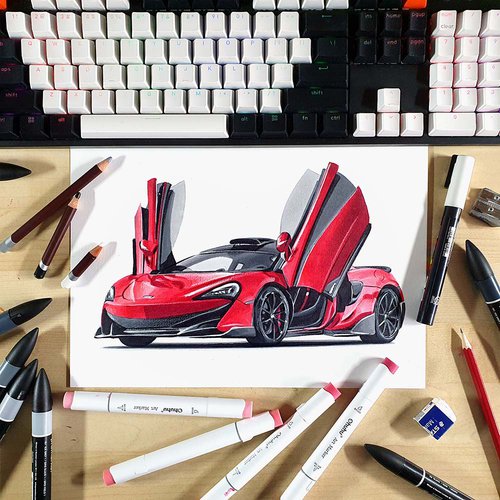
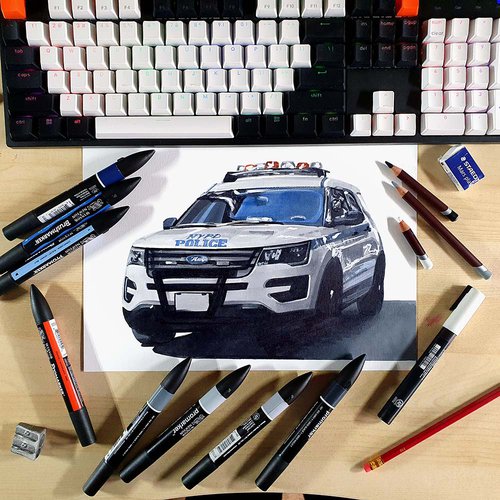
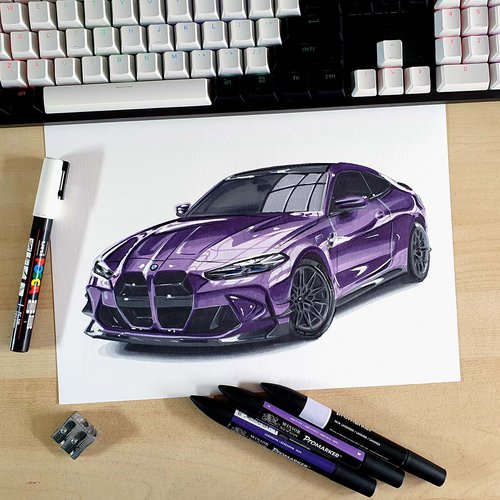
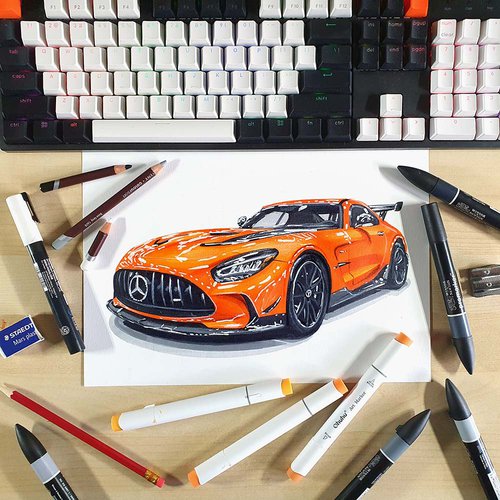
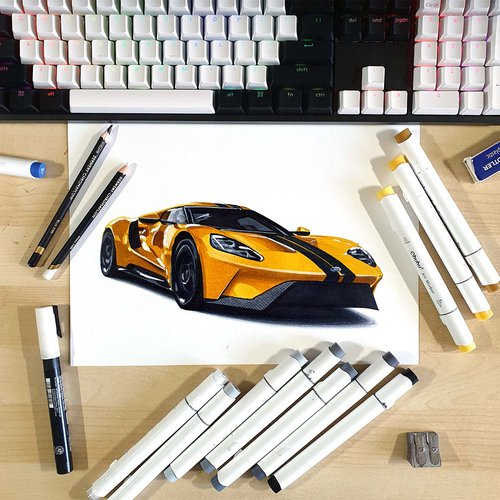
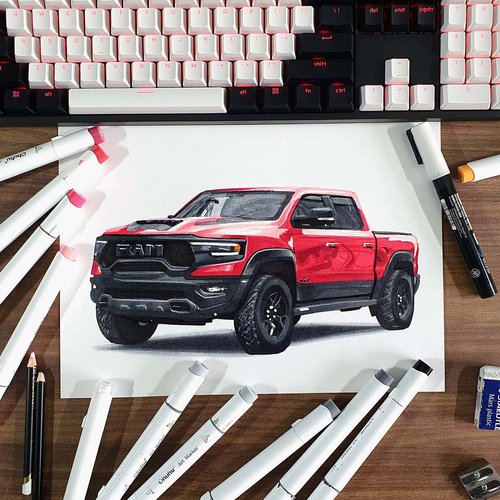
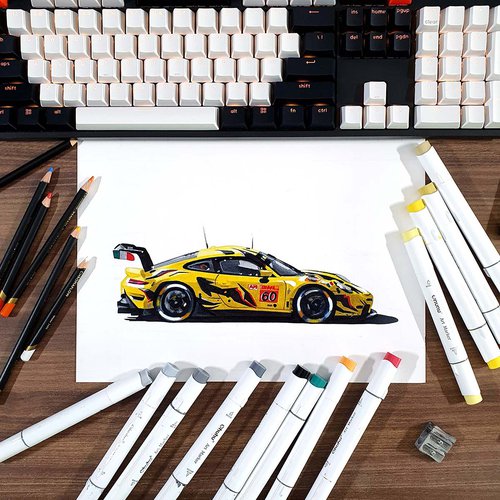
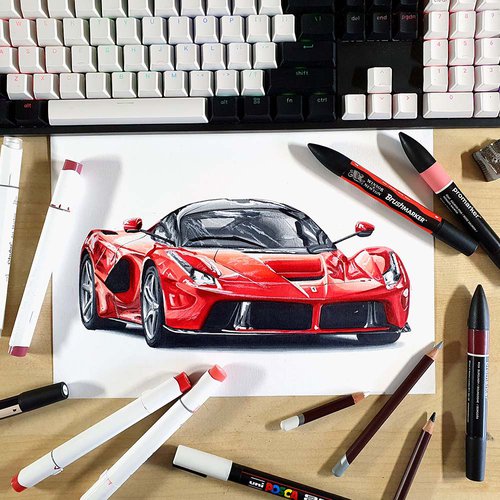
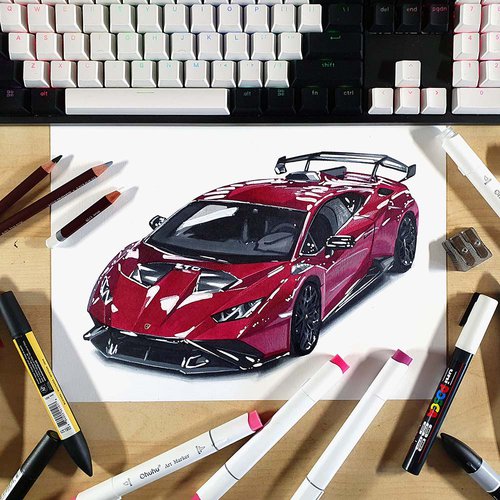
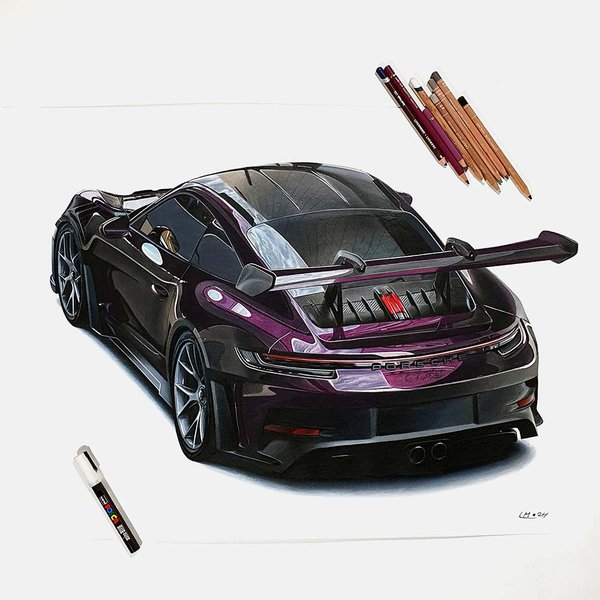
Articles You Might Also Like


I love bringing cars to life with alcohol markers and colored pencils.
Whether you're just starting out or looking to improve your skills, I'm here to help!
Click here to learn more about me.


Add a comment
Comments
Great tutorial! Very Helpful!