How to Create a Drawing from a Photo: A Step-by-Step Guide
Do you have a favorite photograph that you'd love to transform into a beautiful, hand-drawn piece of art?
Or maybe you're looking to level up your drawing skills by practicing on more complex and visually appealing subjects.
Either way, this step-by-step guide is perfect for you.
Drawing from a photograph can be a rewarding way to practice and hone your artistic skills. It allows you to capture intricate details, realistic textures, and a wide array of colors that you might find challenging to depict from memory or imagination alone. From selecting the right photograph to adding the final touches to your masterpiece, this guide will take you through the entire process of creating a stunning colored pencil drawing from a photograph.
Whether you're a seasoned artist or an enthusiastic beginner, this guide will provide you with insights, tips, and techniques to help you improve your colored pencil drawings.
Let's dive in and start bringing those photos to life on paper!
How Do You Make a Drawing from a Photo?
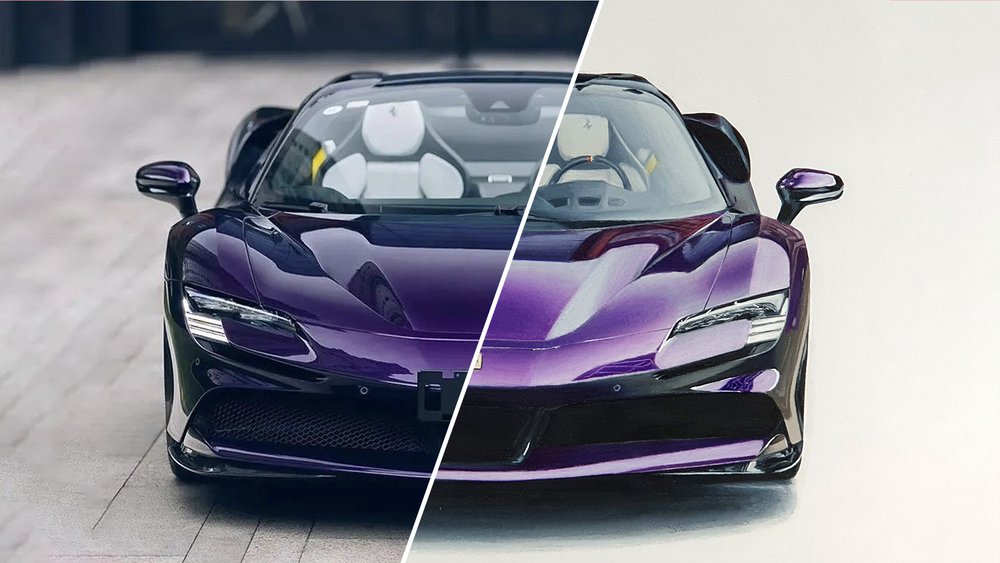
Step 1: Select a Photo

Before you delve into the exciting world of colored pencil drawing, the first step is choosing the perfect reference photo. It's not just about finding a visually striking image, but also ensuring that it ticks all the necessary boxes for a high-quality drawing. Remember, the better your reference photo, the better your finished piece will be.
When choosing a photo, consider the following key factors:
Quality and Resolution
Select a high-resolution photograph where details are crisp and clear. A high-resolution photo will provide you with the minutiae necessary to create a realistic drawing. Be sure to avoid blurry or pixelated images, as they make it challenging to discern details accurately.
Lighting and Shadows
The photo should have good lighting, creating a clear distinction between light and dark areas. Well-defined light and shadows will guide you in replicating the play of light and the depth of shadows in your drawing, ultimately enhancing its three-dimensional effect.
Composition
A well-composed photo is visually appealing and balanced. It should guide the viewer's eye toward the main subject. Choose a photo with a clear focal point and interesting elements that will make your drawing engaging.
Colors and Tones
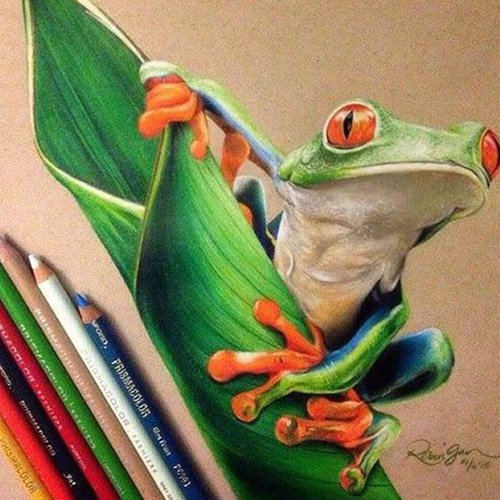
Choose a photo with a variety of colors and tones. A wide range of colors will give you a chance to experiment with your colored pencils, allowing you to create depth and volume. Moreover, these varying hues and shades will lend vibrancy and life to your drawing.
Specific Elements
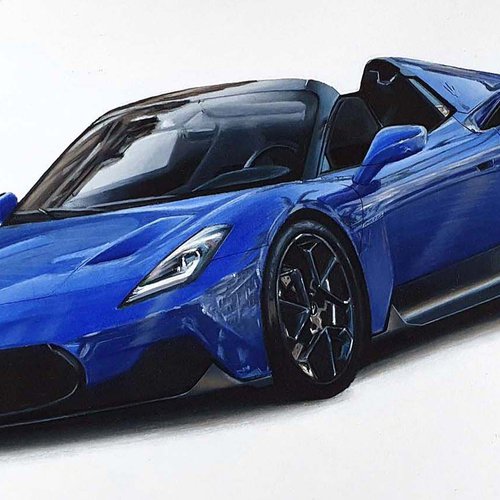
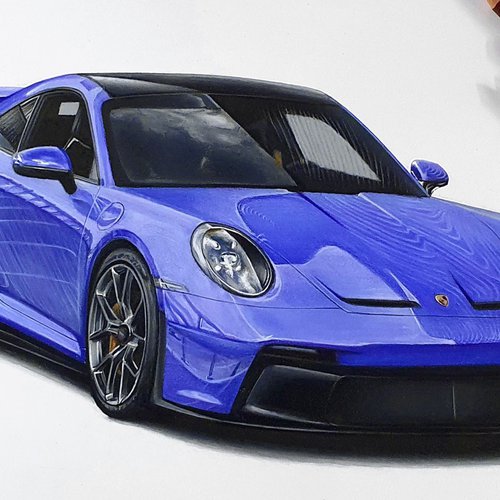
If you're drawing a specific subject, such as a car, pay attention to unique aspects of the photo. For instance, you may love the challenge of capturing the reflections on a car's shiny surface like I do.
Selecting the right photo is the cornerstone of your drawing journey. With a high-quality, well-lit, and interesting photo in hand, you can embark on your artistic journey with confidence.
Step 2: Gather Your Materials
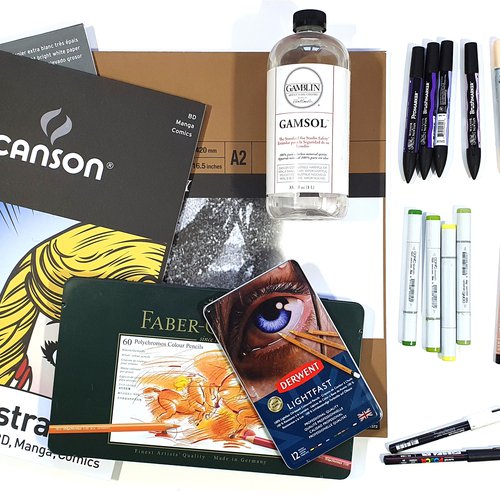
After choosing the ideal photo, the next step is to gather the necessary materials for your colored pencil drawing. The quality of your materials can greatly affect the outcome of your artwork, so it's essential to choose them wisely.
Colored Pencils
Invest in a good set of colored pencils with a wide range of hues and shades. There are different types, such as wax-based, oil-based, or watercolor pencils. Choose the one that suits your drawing style and the effect you want to achieve. You will need various shades for capturing the array of colors in your reference photo.
Drawing Paper
The choice of paper can greatly affect the look of your colored pencil drawing. Choose a good-quality drawing paper that is thick enough to withstand multiple layers of color. There are specialized colored pencil papers available that have a texture or "tooth" which grips the pencil better, allowing for more vibrant and layered colors.
Pencil Sharpener
A good pencil sharpener is essential to keep your pencils sharp for detailed work. Manual sharpeners are often preferred by artists as they offer more control and less breakage than electric sharpeners.
Eraser
Eraser is a necessary tool for fixing mistakes or lightening areas of your drawing. A kneaded eraser is often preferred for colored pencil drawings as it can lift color without damaging the paper.
Blending Tools
For blending colors smoothly, you may need tools like a blending stump, a tortillon, or solvents. These tools can help you achieve smooth transitions and gradients in your drawing.
Other Tools
Depending on your drawing style and the techniques you use, you might need additional tools. For example, a white paint pen, such as a Posca pen, can be used for adding highlights.
Gathering all your materials beforehand allows you to focus solely on the creative process once you start drawing. Making sure you have all the right tools at your disposal will also help ensure that your drawing process runs smoothly and effectively.
Step 3: Study the Photo
Once you've selected your photo and gathered your materials, it's time to study the photo in detail. This step is crucial in preparing yourself to translate a two-dimensional image into a three-dimensional drawing. This careful examination will allow you to understand the photo's colors, values, and composition before you even touch your pencil on the paper.
Colors
Identify the main colors present in your photo. Also, look for less obvious colors that might be more subtle or hidden within the shadows or highlights. Take note of how these colors relate to each other. Are they complementary, analogous, or do they perhaps form a triadic color scheme?
Values
Look closely at the range of values in your photo, from the darkest darks to the lightest lights. These variations in tone are key to creating the illusion of depth and form in your drawing. Note where the light source is and how it affects the value distribution.
Composition
Analyze the composition of your photo. Where is the focal point, and how do the other elements lead your eye toward it? Understanding this will help you to create a compelling drawing that captures your viewer's interest.
Textures and Patterns
Take note of any textures or patterns in the photo. Whether it's the soft fur of an animal, the shiny reflection on a car, or the rough bark of a tree, capturing these textures can add a lot of realism to your drawing.
Unique Features
Identify any unique or distinguishing features that you want to capture in your drawing. This could be a particular reflection on a car, a person's distinctive facial feature, or a striking shadow cast by a building.
Studying the photo is a significant step in the process that sets you up for success. Take your time during this stage to really understand the photo and how you can best represent it in your drawing. Remember, your goal is not to reproduce the photo exactly but to interpret it in your own artistic style.
Step 4: Sketch the Basic Shapes
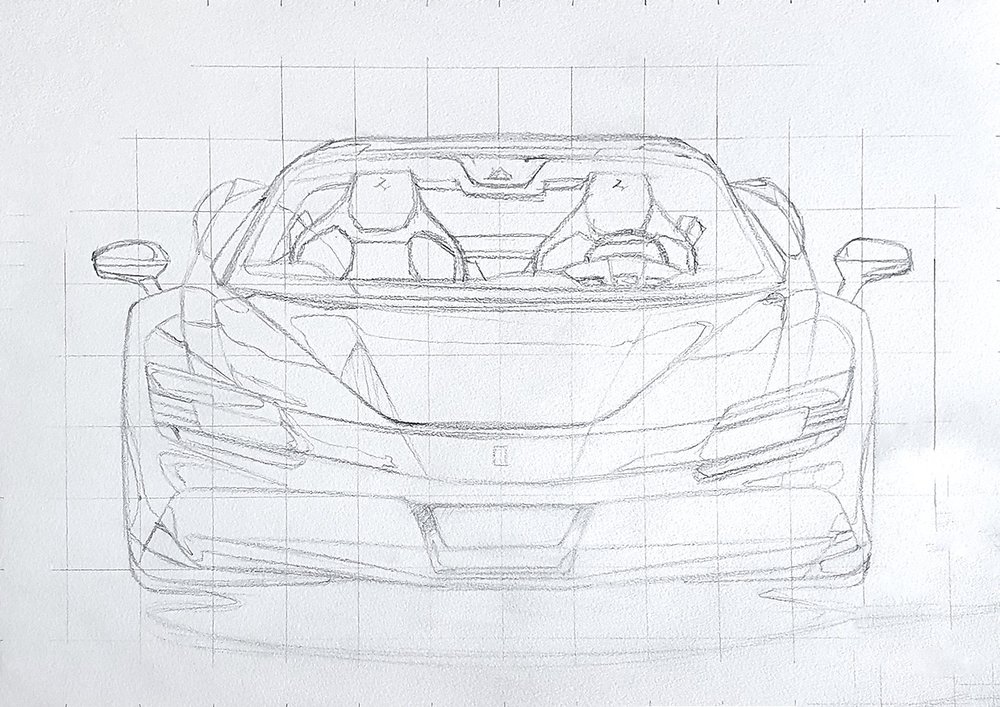
After studying the photo and familiarizing yourself with its elements, it's time to start sketching. Begin by lightly sketching the basic shapes and proportions of the main subjects in the photo. This foundational sketch serves as the skeleton for your colored pencil work, establishing the composition and ensuring the accuracy of your drawing.
Use a Light Colored Pencil or a Graphite Pencil
Using a light-colored pencil or a graphite pencil, create a loose outline of the overall composition. Sketch lightly, as these lines are just guides that will be built upon later. Heavy lines might show through your final layers of colored pencil.
Sketch Basic Shapes
Start by breaking down the objects in the photo into basic geometric shapes. Whether you're drawing a car, a person, or a landscape, you can simplify the subjects into circles, squares, triangles, etc. This helps in getting the proportions and placement right.
Proportions
Ensure that the sizes of different elements in your drawing correspond correctly to their sizes in the photo. Pay attention to the relative sizes of the objects and their distances from each other.
Use a Guideline
There are several methods you can use to help with accuracy in your sketch. One common method is the grid method which I use all the time. This involves drawing a grid over your reference photo and a corresponding grid on your drawing paper, then drawing the image square by square. This can be especially helpful for beginners or more complex drawings.
Freehand Sketching
If you're more experienced, you might prefer to freehand your sketch. This can give your drawing a more spontaneous and personal touch.
Creating an accurate preliminary sketch is crucial, as it guides your later work. Remember to work lightly and avoid focusing on details at this stage. Your goal is to capture the overall shapes, proportions, and composition. Once you've done that, you're ready to dive into the world of color!
Step 5: Layer and Blend Colors

After sketching the basic shapes, the next step is to add color to your drawing. This process involves layering and blending colors, which adds depth and realism to your artwork. Working in small sections at a time can make the task more manageable and keep the process enjoyable.
Begin with Light Strokes
Start by applying your colors lightly. This allows you to gradually build up the color intensity and makes it easier to erase or adjust colors if necessary.
Layer Colors
Layering colors is an essential technique in colored pencil drawing. It involves applying multiple layers of different colors to create rich, complex hues and tones. Begin with lighter colors and gradually build up darker tones. Each new layer should be applied in a different direction to the previous one to help create a uniform texture.
Create Different Values and Depths
By varying the pressure you apply with your pencils, you can create a range of values (darker and lighter areas) that give your drawing depth. Use light pressure for lighter values and harder pressure for darker values.
Blend Colors
To create smooth transitions between colors, use blending techniques. You can blend using a blending stump or a tortillon, which are tools made of tightly rolled paper. They work by smoothing out the pencil strokes and merging the colors together. You can also use a solvent, such as odorless mineral spirits, to dissolve the pencil pigment and achieve smoother gradients.
Work in Sections
It's often easier to work in small sections at a time, especially for complex or larger drawings. This allows you to focus on one area at a time and prevents smudging completed sections.
Layering and blending colors requires patience and practice, but it is key to achieving a realistic look with colored pencils. The aim is to create a seamless integration of hues and tones that closely mimic the colors and values found in your reference photo. Remember, it's not about matching the colors exactly, but about capturing the essence of the photo in your own unique artistic style.
Step 6: Pay Attention to Values and Shading
In this next step, your focus should be on understanding and implementing values and shading in your drawing. Values, in art, refer to the lightness or darkness of colors. Shading is the technique of varying these values to depict light and shadow, which adds depth and volume to your artwork.
Light and Shadow Areas
Observing the interplay of light and shadow in your reference photo is crucial for creating a realistic drawing. Identify the areas with more light and those with deeper shadows. Lighter shades are used for areas with more light, while darker shades create shadowed areas.
Creating Three-Dimensional Effect
By accurately portraying the values and shades present in the photo, you can add a three-dimensional effect to your drawing. For instance, if you're drawing a car, the reflections, bright highlights, and deep shadows all contribute to making the car appear three-dimensional on a two-dimensional surface.
Subtle Variations in Values
Pay attention to the subtle variations in values within both the light and shadow areas. Sometimes, a shadow isn't just one flat color - it can contain different shades and even reflected light. Similarly, highlighted areas may have subtle variations in brightness.
Contrast
Contrast between light and dark areas can make your drawing more visually striking. A common mistake is to make the darks not dark enough and the lights not light enough. Don't be afraid to really push the range of values in your drawing.
Paying attention to values and shading is one of the most critical aspects of realistic drawing. With practice, you'll improve your ability to see and replicate the range of values in your reference photo, greatly enhancing the realism of your colored pencil drawings.
Step 7: Add Details and Textures

With your basic colors, values, and shading in place, the next step is to focus on the finer details and textures of your drawing. This stage truly brings your artwork to life, adding complexity and richness to your creation.
Adding Finer Details
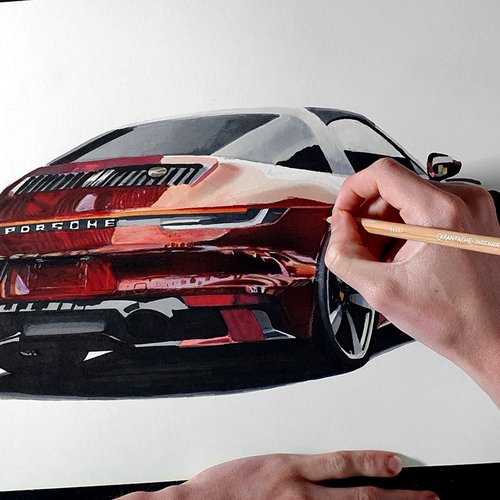
To create fine details, use a sharp pencil and carefully add precise lines and points of color. This could be the intricate design on a car, the patterns on a piece of fabric, or the unique features of a person's face. Pay close attention to your reference photo and try to capture these elements as accurately as possible.
Creating Textures
Textures play a big part in making your drawing look realistic. Different objects have different textures, and accurately depicting these can make your drawing more convincing. Experiment with different pencil techniques to simulate various textures:
Cross-hatching: This involves drawing intersecting sets of parallel lines to create a textured look. This can be used to depict various textures, from the roughness of a tree bark to the shadowed areas of an object.
Stippling: This technique involves creating a pattern with small dots. The closer the dots are, the darker the area appears. This is great for creating textures like fur or sand.
Glazing: This involves layering very light strokes of color on top of one another to create a deep, luminous effect. This technique is excellent for creating shiny or reflective textures like glass or metal.
Be Patient
Adding details and creating textures is a time-consuming process. Be patient with yourself and take breaks if necessary. The effort you put into this stage can significantly enhance the final outcome of your drawing.
By adding details and textures, you can make your subjects appear more lifelike. Remember, observation is key in this stage. Look closely at your reference photo and take the time to understand the details and textures you see before trying to replicate them in your drawing.
Step 8: Work on the Background
The background can play a significant role in your colored pencil drawing. It can help to set the mood, enhance your focal point, and provide context for your main subject. However, its treatment can vary depending on your personal preference and the requirements of the drawing.
Should You Draw a Background?
In some cases, like when drawing a car, you might prefer to leave the background out altogether. This puts the full focus on the car and allows you to concentrate your effort and detail on the car itself. However, keep in mind that a well-executed background can enhance the overall appeal of your drawing.
Choosing the Background Elements
Consider the elements present in the photo's background. You can choose to include them as they appear in the photo, or you can simplify or abstract them based on your artistic judgement. A simplified or abstract background can often prevent your subject from getting lost amidst too many details.
Blending and Layering Colors
Whether you're creating a detailed background or a simple one, the techniques of blending and layering colors apply here as well. Blend the colors to create smooth transitions and layer them to achieve the desired depth and intensity.
Considering Tones and Values
Just like your main subject, your background should also have a range of tones and values. However, to keep the focus on your subject, you might want to keep the contrast in your background lower than that in your main subject.
Remember, the goal of the background is to complement your main subject and enhance the overall composition of your drawing. Whether you choose to include a detailed background or leave it out altogether, make sure it aligns with the artistic vision you have for your artwork.
Step 9: Continuously Refine and Adjust
As your drawing progresses, it's important to periodically step back and assess the overall look. This allows you to see the drawing as a whole rather than focusing solely on the small area you are working on. Refining and adjusting is a crucial part of the drawing process that ensures the colors, values, and proportions accurately represent the reference photo.
Assessing the Overall Progress
Viewing your drawing from a distance can help you see the bigger picture. Look for areas that need more work or areas that stand out too much. You might also find it helpful to look at your drawing in a mirror or view it upside down. These different perspectives can help you see inaccuracies or inconsistencies that you might not notice otherwise.
Making Necessary Adjustments
Based on your assessment, make necessary adjustments. This could mean darkening the shadows, intensifying the colors, or correcting the proportions. Don't be afraid to make these changes. They're part of the process and can greatly improve the final result.
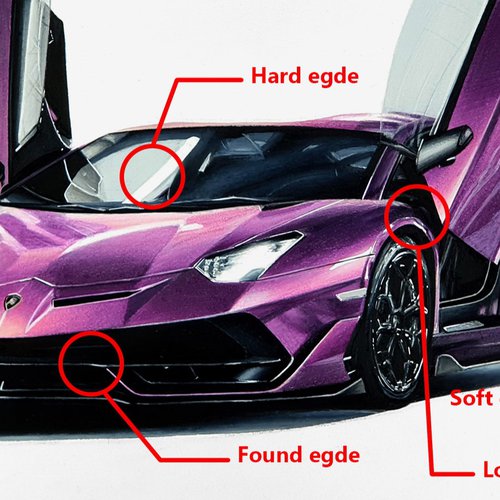
Refining Details
As you move towards the final stages of your drawing, pay attention to refining the details. This could involve sharpening edges, adding fine textures, or enhancing the highlights.
Layering and Blending
Continue layering and blending colors until you achieve the desired result. This might take many layers, but the depth and richness of color you can achieve are worth the effort.
Remember, refining and adjusting your drawing is an ongoing process. It's not something you do just at the end. By continuously assessing your work and making necessary changes, you can improve the quality of your drawing and achieve a result you're proud of.
Step 10: Add Highlights
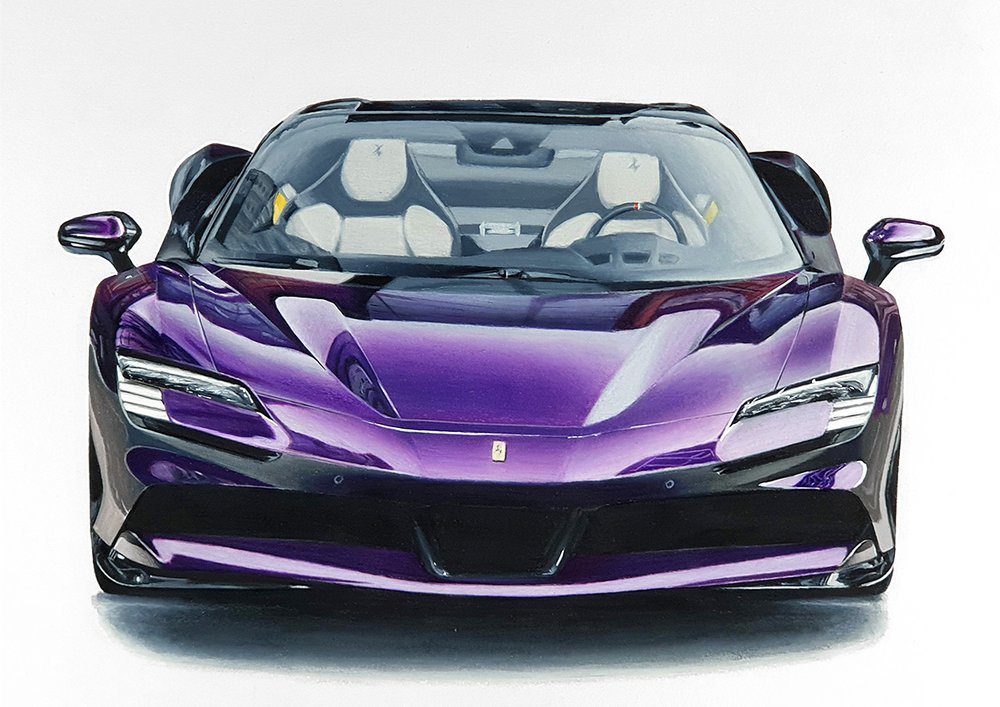
Highlights are the lightest areas in your drawing, the spots that light hits directly. They play a crucial role in making your drawing look three-dimensional by showing the form and texture of the subject. However, creating highlights with colored pencils can be challenging since the color often covers the white of the paper, which would naturally create highlights.
Preserve Highlights
While working with colored pencils, one strategy is to try and preserve the highlights from the beginning by leaving those areas of the paper untouched. This requires careful planning and a good understanding of your subject's form and lighting.
Add Highlights Later
If preserving highlights proves challenging or the highlights get covered accidentally, you can add them later using a white paint pen, like a Posca pen. The bright, opaque white can create powerful highlights that really pop.
Apply the Paint Pen
Use the paint pen to add highlights to the areas of your drawing that are directly hit by light. This could be the shiny spots on a car, the light reflecting in someone's eyes, or the sunlit edges of a cloud. A little goes a long way, so use it sparingly.
Let it Dry
After applying the paint pen, make sure you give it enough time to dry before moving on to the next step. This will prevent smudging and ensure your highlights stay bright.
Adding highlights can be the cherry on top of your drawing, giving it a final touch of realism and depth. This step might require some practice and experimentation, but the result can greatly enhance the overall look of your colored pencil drawing.
Step 11: Final Touches and Cleaning Up
Once you've added your highlights, your drawing is almost complete. However, there are a few final touches you might want to consider to give your artwork a polished look.
Clean Up Smudging
If you chose not to draw a background, there might be some smudging or stray marks on the paper in the areas you didn't color. Use an eraser to clean these up. Be careful not to erase any of your colored pencil work in the process. A kneaded eraser can be particularly useful for this because you can shape it to fit into small spaces.
Enhance Contrast or Color Vibrancy
Take a final look at your drawing. Do any areas need more contrast? Could some colors be more vibrant? If so, go back and add another layer of color or darken your shadows. Remember, your darkest darks and lightest lights give your drawing depth and dimension.
Sign Your Artwork
If you're happy with your artwork, don't forget to sign it. Your signature is your mark of pride and ownership on the piece.
Consider Framing
Lastly, consider framing your drawing to protect it and enhance its presentation. If you plan to display your artwork, a frame can make it stand out.
Completing a drawing is a satisfying experience. By taking the time to add these final touches and clean up any smudging or stray marks, you can ensure your artwork looks its best. This final stage is an opportunity to take pride in your work, refine any last details, and present your artwork in a way that reflects the effort and creativity you've put into it.
Tags
Articles You Might Also Like

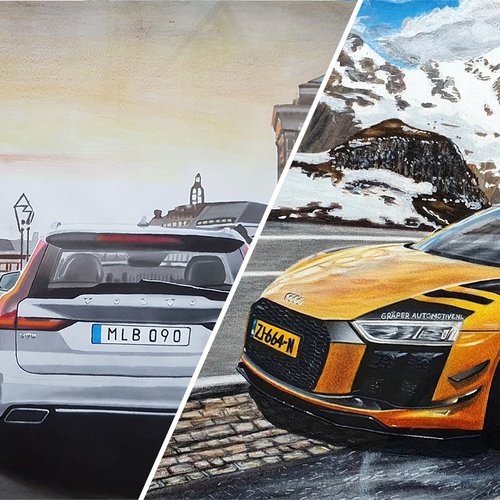


I love bringing cars to life with alcohol markers and colored pencils.
Whether you're just starting out or looking to improve your skills, I'm here to help!
Click here to learn more about me.


Be the first to comment!
Comments
There are no comments yet.