7 Tips for Drawing Realism
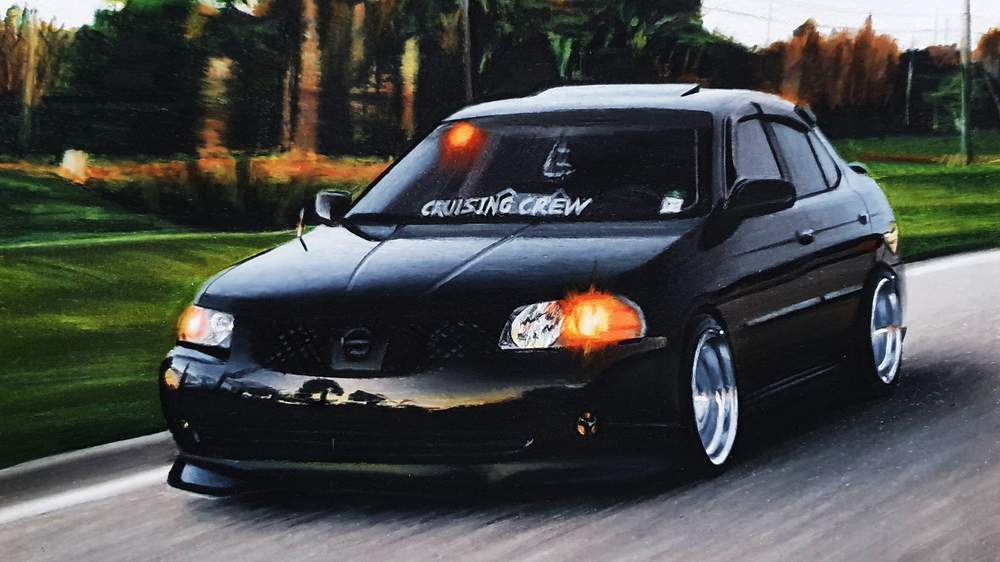
Whether you're a seasoned artist or a budding novice, the journey toward mastering the art of realism in drawing is a rewarding pursuit filled with discoveries.
It's about seeing the world around you in greater detail and translating it onto paper in a way that breathes life into your creations.
However, capturing realism can be a challenging task. It requires a keen eye for detail, a patient hand, and a deep understanding of light, shadow, and color.
In this article, I'll share with you seven valuable tips that I've learned on my journey as an artist. They've helped me transform my own artwork from simple sketches to deeply realistic drawings.
So, whether you're just starting out in your drawing journey or you're looking to refine your existing skills, these tips are sure to provide valuable insights. Grab your sketchbook, and let's dive into the world of realism together!
Looking to enhance your realistic drawings? My blog article about the 5 Best Colored Pencils For Realistic Drawings is a must-read.
What Can You Do To Create More Realistic Artwork?
1. Use a Reference Photo

When aiming to capture the essence of realism in your art, one invaluable tool at your disposal is a reference photo.
By studying a photo, you can gain insights into how light reflects off various surfaces and how shadows interact with different textures. This observational exercise aids you in accurately sketching proportions, laying the groundwork for your realistic drawing.
Remember, a reference photo isn't meant to confine your creative expression. It merely serves as a guide, offering you a faithful depiction of reality to base your artwork on. You aren't bound by the constraints of the photograph. So, feel free to explore your artistic liberty and add, alter, or eliminate elements as your creative intuition sees fit.
When drawing from a reference, I often choose 2 or 3 reference photos that I combine into one to make it exactly what I want it to be. And when something doesn't fit my vision or I just want it to look different I just change it.
So, don't hesitate to incorporate your artistic intuition while using a photo as your base guide.
Understanding the dynamics of light, shadow, and proportions from a photo reference and translating that onto your canvas will surely help you elevate your art to a whole new level of realism. Keep observing, keep practicing, and let your art speak your unique language of realism.
Using a reference photo helps achieve accurate proportions and understand light dynamics.
2. Draw What You See, Not What You Think You See
One of the most critical and somewhat counterintuitive aspects of drawing realistically is to draw what you actually see, not what you think you see.
This distinction might seem insignificant at first glance, but it is a cornerstone in achieving true realism in your art.
Why is this important, you may ask?
Our minds have a fascinating way of simplifying complex objects into basic shapes and symbols.
For instance, when we think of an eye, we might envision it as an almond shape with a circle inside.
However, if you closely observe an eye, you'll see it's much more than just that simple image. It has unique curves, asymmetries, and reflections that make each eye unique.
The key to overcoming this mental shorthand is observation.
Take your time and study your reference photo, or if you're drawing from life, the object or scene in front of you. Notice the small details, the shifts in light and color, the nuanced shapes that you might otherwise overlook.
Drawing what you see instead of what you think you see will drastically improve the realism of your art, as it allows you to capture the uniqueness of your subject. It's a technique that requires practice and patience, but the results are well worth the effort.
Observation is key in capturing the unique details of your subject.
3. Be Patient, Work Slowly
As with any form of art, patience is absolutely crucial when drawing realism.
It's a process that can't be rushed.
Each stroke of your pencil contributes to the overall image, so it's important to be mindful and work slowly.
From personal experience, I can attest that impatience often leads to avoidable mistakes, especially when it comes to mixing or blending colors. There were countless times when I hastily tried to achieve the perfect color transition, only to end up with an harsh blend that didn't do my vision justice.
Each layer of color you add, every line you sketch, and every blend you make takes time and precision to perfect.
Realism is about capturing detail, and these details take time to get right. Rushing through these details can lead to a lack of depth and an image that feels flat or incomplete.
Additionally, using less pressure can often be beneficial.
Drawing with a heavy hand can lead to harsh lines and uneven colors that detract from the realism you're aiming for. Lighter strokes, on the other hand, allow for gradual build-up of colors and facilitate better blending.
So, the next time you find yourself rushing through your artwork, take a step back.
Breathe.
Remember that your art isn't a race against time.
Allow yourself the patience to meticulously create each portion of your drawing, and I promise, the end result will be something truly spectacular.
Patience and mindfulness in each stroke contribute to achieving realism.
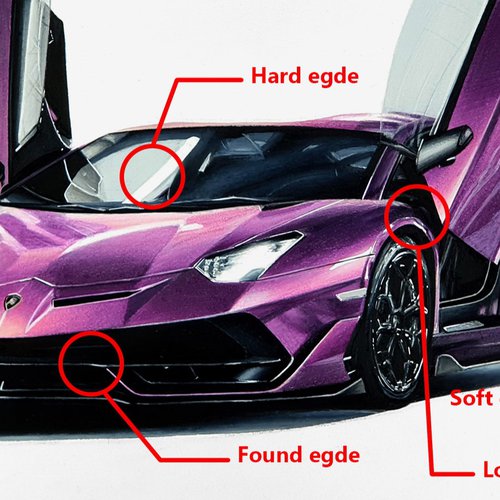
4. Avoid Visible Lines
When striving for realism in your artwork, avoiding visible lines is a tactic you should embrace.
In real life, objects don't come outlined; instead, they are defined by changes in color, tone, and texture.
Incorporating visible lines or outlines in your drawing, particularly around parts with soft or fuzzy edges, can often distract from the realistic image you're trying to portray.
For instance, consider a fluffy cloud against a clear sky. It doesn't have a hard, defined line separating it from the sky but rather a gradient of colors that softly transitions into the blue. Drawing a hard line around such objects would diminish their realism.
Instead of relying on lines to define your shapes, focus on contrasts and gradients.
Light and shadow play a crucial role here. Areas of your drawing where objects meet will have contrasting shades or colors, creating a natural edge without the need for an explicit line.
To replace lines, practice the technique of value drawing. This method focuses on the different shades and tints in an image rather than its lines, resulting in a more realistic depiction.
Taking the time to transition away from lines and toward value drawing can significantly enhance the realism of your artwork, allowing the viewer to feel more immersed in the image.
Contrasts and gradients replace visible lines for enhanced realism.
5. Create Smooth Color Transitions

Smooth color transitions are a crucial element in achieving a realistic drawing. They help emulate the way light interacts with various surfaces, creating a convincing illusion of depth and form.
Imagine looking at a shiny red apple.
The color on its surface isn't uniformly red. You'll see gradients of dark red blending into lighter hues, and perhaps even spots of reflective light appearing almost white.
Such smooth transitions in color give the apple its rounded, three-dimensional appearance.
To capture this realism in your drawing, you need to replicate these color transitions.
Smooth color transitions can be challenging to achieve, but with the right techniques, it becomes manageable. The key is in the blending. You can begin by lightly laying down your colors, gradually building up the intensity. The goal is to have a seamless transition between different colors or shades, eliminating any harsh lines.
A more detailed explanation of blending and different blending techniques can be found in this article I wrote a while ago. I delve into various methods to achieve smooth color transitions, giving you all the knowledge you need to make your realistic drawings pop.
Remember, like any skill, creating smooth color transitions takes practice. But the reward of seeing your artwork come alive with realism is absolutely worth the effort.
Smooth color transitions help to capture the subtleties of light and form.
6. Don't Be Afraid to Go Too Dark

When drawing with realism in mind, it's crucial to remember the importance of contrast, particularly the role of darkness.
Many artists shy away from going too dark, fearing that it may overpower the lighter elements.
However, it's precisely this strong contrast that adds depth and dimension to your drawings, bringing them to life.
I remember a time when I needed to draw a forest in the background of a drawing. Initially, I was hesitant to make the forest as dark as it needed to be. I redrew it three times, each time ending up with a forest that was too light. Once I started drawing the rest of the elements, it became clear that my fear of going too dark had compromised the overall depth and realism of my drawing.
I've learned from this experience that darkness is not to be feared in art. It's an integral part of creating contrast and adding realism to your drawings. Without dark, the light loses its impact.
So, how can you overcome the fear of drawing too dark?
Start small.
Begin by adding darker tones in less critical areas of your drawing. As you grow more comfortable, you can begin to incorporate these darker tones in more prominent parts of your artwork.
Also, consider using a higher grade pencil when adding darker tones. These pencils are softer, allowing for a deeper, richer shade of black.
But remember, it's easier to darken a light area than it is to lighten a dark area, so build up your dark tones gradually.
Drawing realistically involves understanding and harnessing the power of contrast. Don't let the fear of darkness hinder your art; instead, let it deepen the realism of your creations.
Embrace darkness in your drawings to create depth and contrast.
7. Start Out With the Darkest Color
A useful strategy to avoid value misjudgment and create a more balanced and realistic drawing is to start out with the darkest color in your artwork.
Why is this important?
It's because our perception of color and value is relative. The way we perceive a color or a shade depends heavily on the colors and shades surrounding it.
By establishing the darkest point in your artwork first, you set a reference point for all other values in the piece. This can help you gauge how light or dark the other colors or shades should be in relation to the darkest point, preventing value misjudgment.
Reflecting on the story I shared earlier about the forest scene, had I started by setting the darkest tone in the forest first, it would have likely guided my hand better in laying out the rest of the piece. With the darkest point as my reference, I could have better judged the relative values of the other elements, leading to a more realistic depiction.
Remember, this doesn't mean that you need to fill in all the darkest areas first, but rather to establish the darkest value somewhere on your piece to serve as a guide.
Once you have that, you can more accurately judge the rest of the values in your drawing, enhancing the overall realism.
This approach may feel a bit unconventional, especially if you're used to working from light to dark, but give it a try. You might find that it provides a helpful new perspective and improves your realism skills.
Starting with the darkest color helps guide the value balance in your drawing.






Be the first to comment!
Comments
There are no comments yet.