How to Draw a Toyota Supra MK4 - Realistic Step by Step Guide
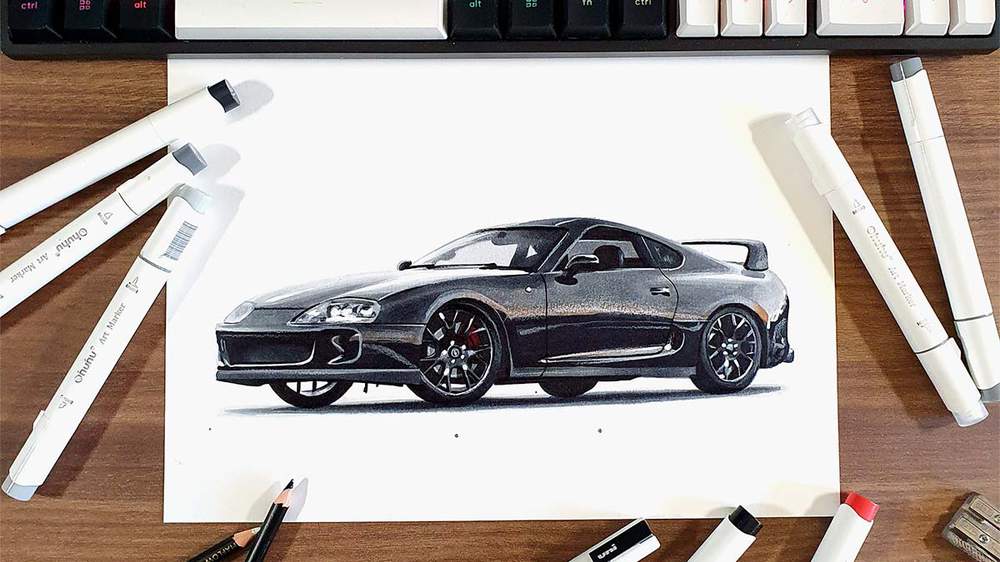
In this week's car drawing guide, I will show you how I drew this realistic Toyota Supra in 17 simple and easy-to-follow steps.
It's been a few months since I last drew a car, but I'm super excited to draw one again after such a long time. And what better car to start with than the legendary Toyota Supra!
Without further ado, let's get started!
Disclaimer: In the name of full transparency, please be aware that this blog post contains affiliate links and any purchases made through such links will result in a small commission for me (at no extra cost for you).
Drawing Materials I Used to Draw this Toyota Supra
To make this drawing, I used Ohuhu Honolulu markers in the colors Colorless Blender (0), Neutral Grey 02 (CG020), Neutral Grey 03 (CG030), Neutral Grey 3 (NG03), Neutral Grey 07 (CG070), Neutral Grey 6 (NG06), Neutral Grey 9 (NG09), Black (120), Bright Red (R180), and Rose Beige (BR3).
You can also buy these colors separately on their website.
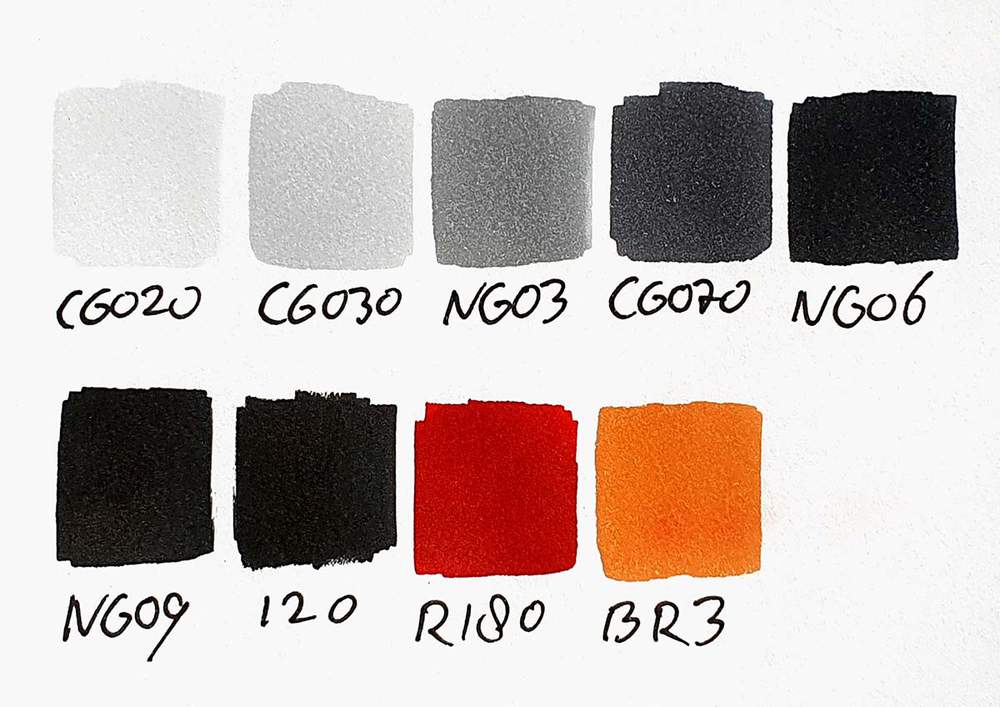
I also used some Derwent Chromaflow colored pencils to add details. I used White 2400 and Black 2300.
I used a white Posca PC-3M paint marker to add white highlights.
And I used an HB pencil, a ruler, an eraser, and a kneaded eraser.
I made this drawing on A4 size Canson Illustration Manga Paper.
How Do You Draw a Toyota Supra Step by Step?
To create a realistic Toyota Supra car drawing, you'll first need to find a good reference photo.
Next, you sketch the outline of the car.
After that, you color the Supra, part by part, until it is fully colored.
And to finish it off, you add a few details with colored pencils and a few highlights with a white paint marker.
Step 1: Find a Reference Photo of a Toyota Supra You Like
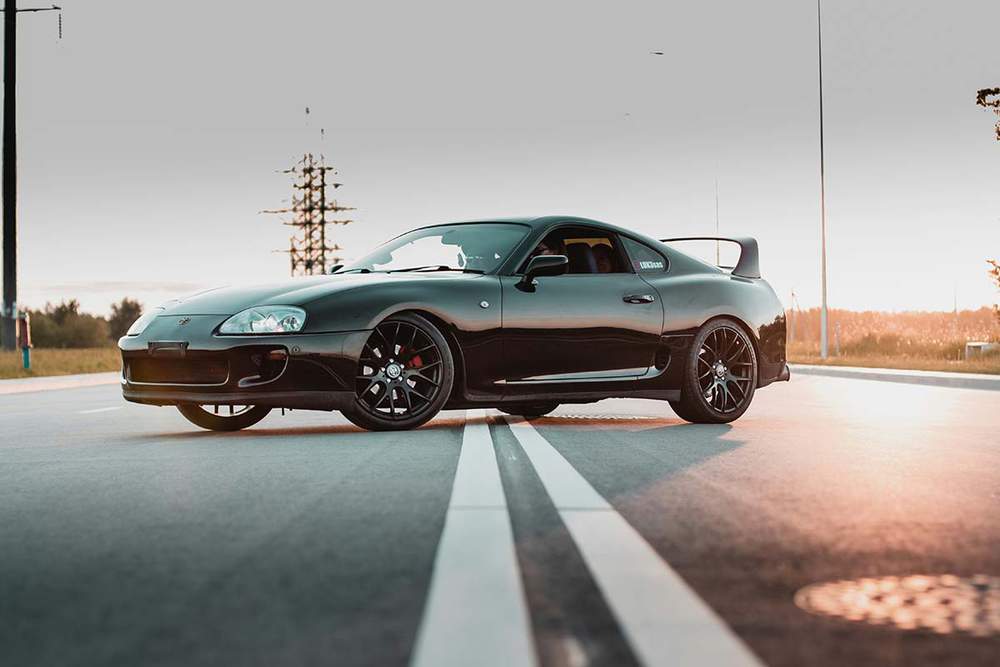
As usual, I started this Toyota Supra car drawing off by looking for a good reference photo.
Unsplash is a great place for this, and that's where I found this photo I really liked.
Step 2: Sketch the Outline of the Toyota Supra
Now that we've found a good reference photo, we can start using it to sketch the basic outline of the Supra.
To do this, I will be using the grid method.
If you're new to this method or unsure how to use it, I highly recommend you check out this detailed guide I wrote about using the grid method to sketch a car.
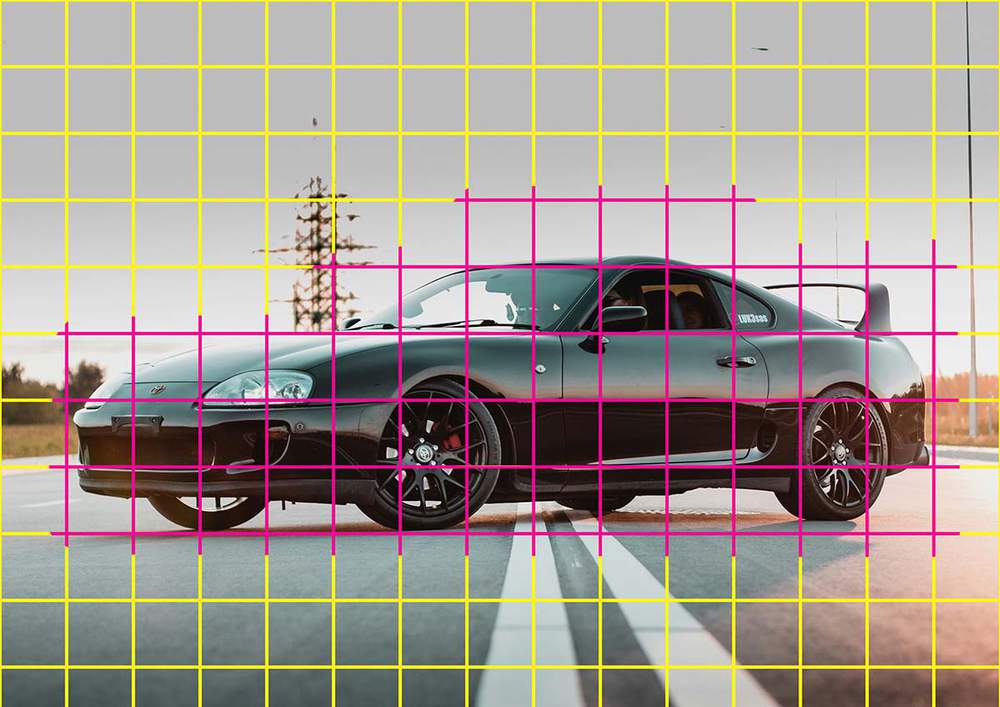
I first resized the reference photo to the same size as my paper, which is 29,7 by 21 cm or 3508 by 2480 pixels.
Then, I added a grid overlay on top of the photo.
The grid I used is 15 by 10.5 squares, which works well with A4-sized paper, as the squares will be 2 by 2cm or about 4/5" by 4/5".
I marked the squares containing parts of the car in pink.
During this step, I also positioned the Toyota Supra where I wanted it to be on my paper. Horizontally centered and vertically just below the center.
Next, I recreated the grid on my paper.
I only sketched the squares I marked in pink before.
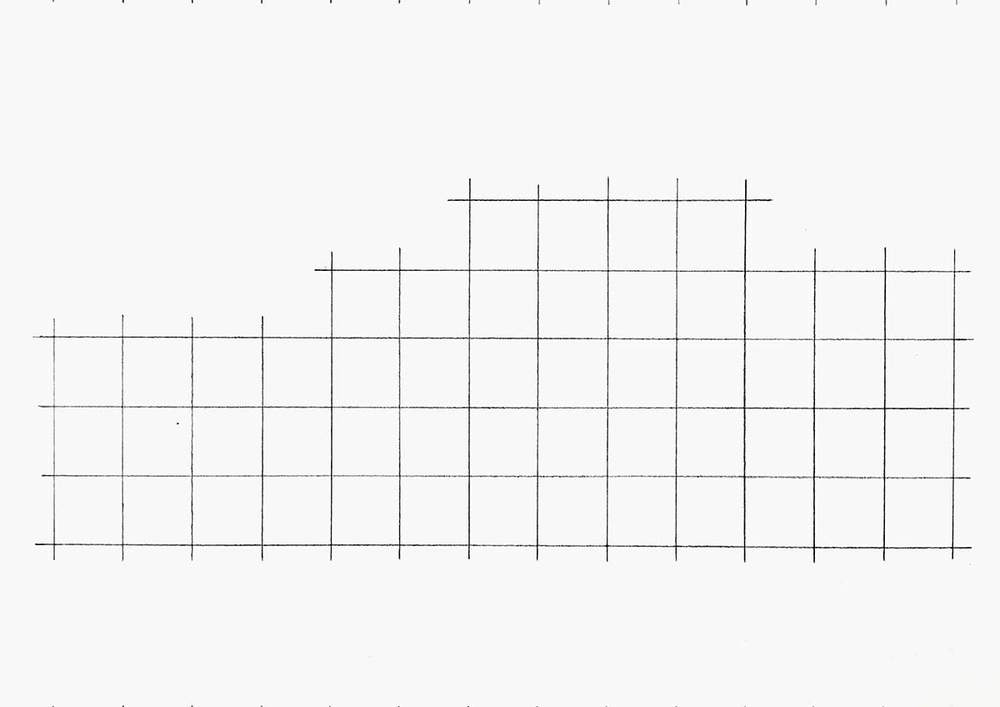
With the grid now done, we can start sketching the actual car.
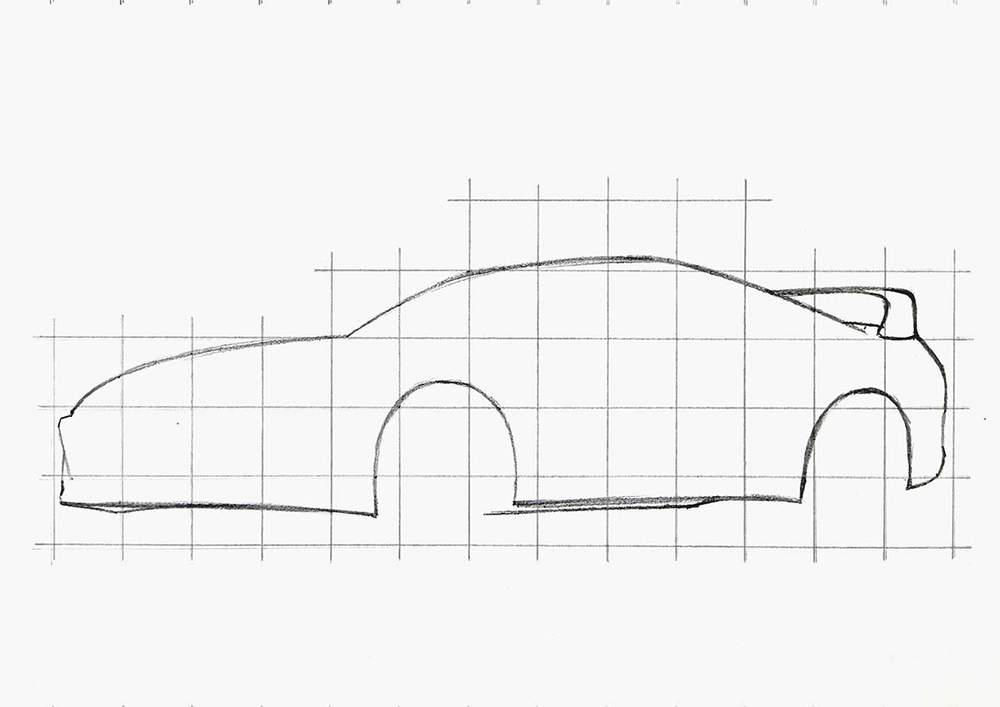
I like to start with the outline first.
I break the outline up into simple parts. Every harsh angle is a new section.
For each section, I mark where it starts, where it ends, and where it crosses grid lines. Then I sketch the line in on smooth motion (or sometimes multiple lines when it's more complex).
I repeat these steps for all sections until I've completed the whole outline.
During this process (and the rest of the sketching process), I carefully look at the reference photo with the grid overlay to see where I need to sketch stuff.
I didn't sketch the wheels yet, as I wanted to spend a little more time explaining them.
Also on the bottom, there is this loose line that's supposed to connect to the front wheel. But I haven't drawn that yet, so it's just hanging there for now.
Step 3: Add More Parts and Details to Your Toyota Supra Sketch
After the outline is complete, I started sketching the rest of the car.
I first added the outlines of the bigger parts, like the windows and the headlights.
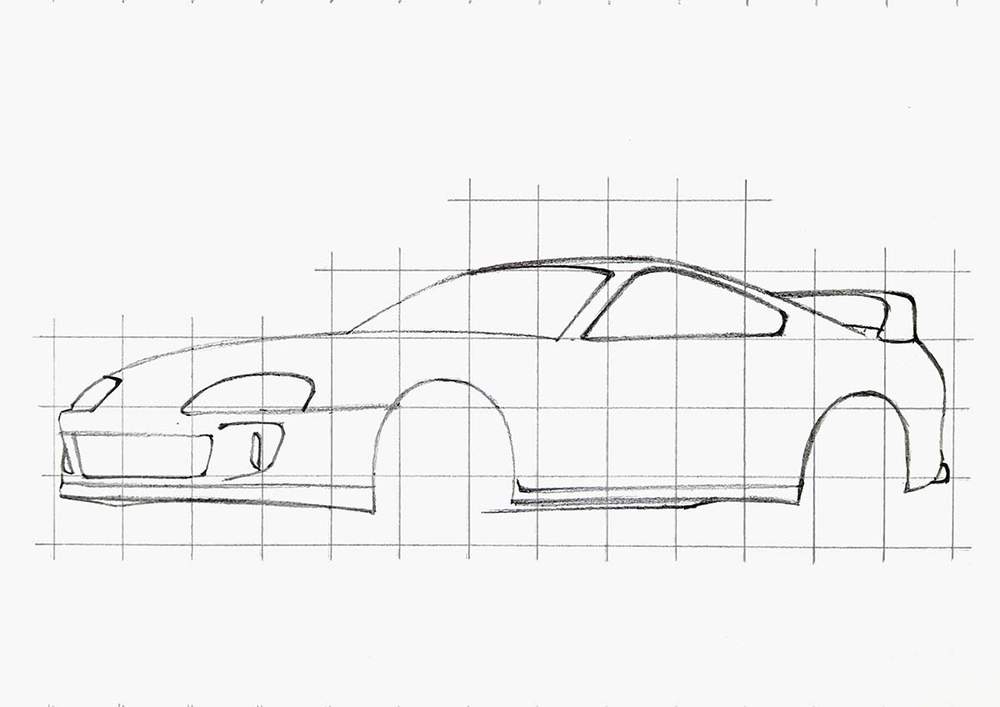
Then, I added the smaller parts and the details to the bigger parts.
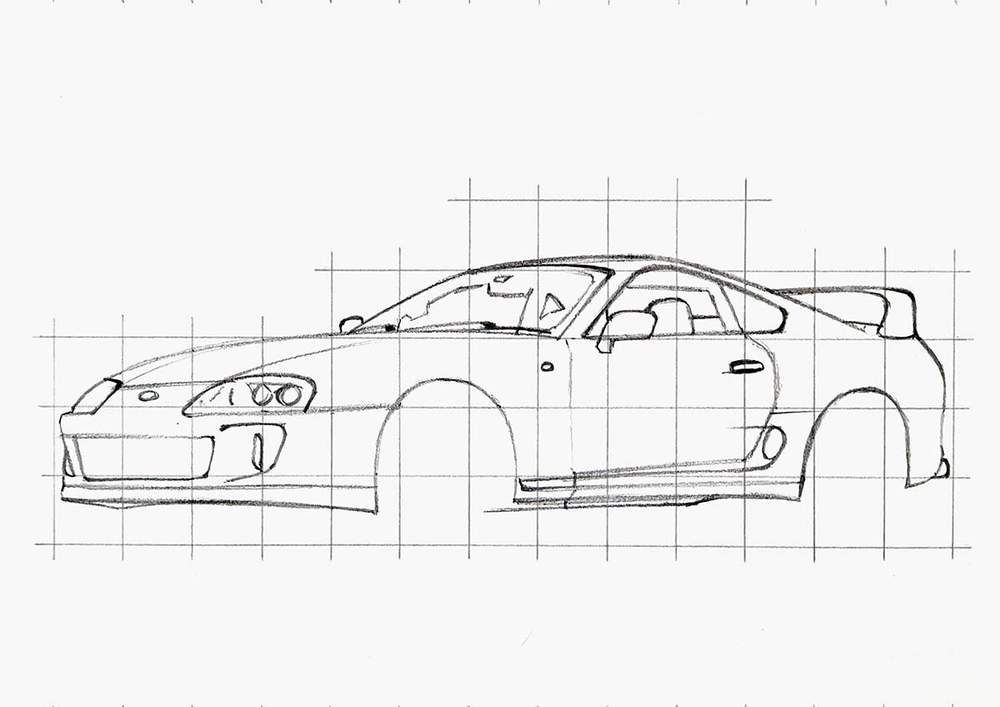
Step 4: Sketch the Wheels of the Toyota Supra
Next, I sketched the wheels.
A wheel can be quite complex, and these are not the easiest. But they can be easily broken up into simple steps.
I started by marking where the outer edge of the tire crosses the grid lines with dots.
Then, I connected the dots with a smooth-ish line.
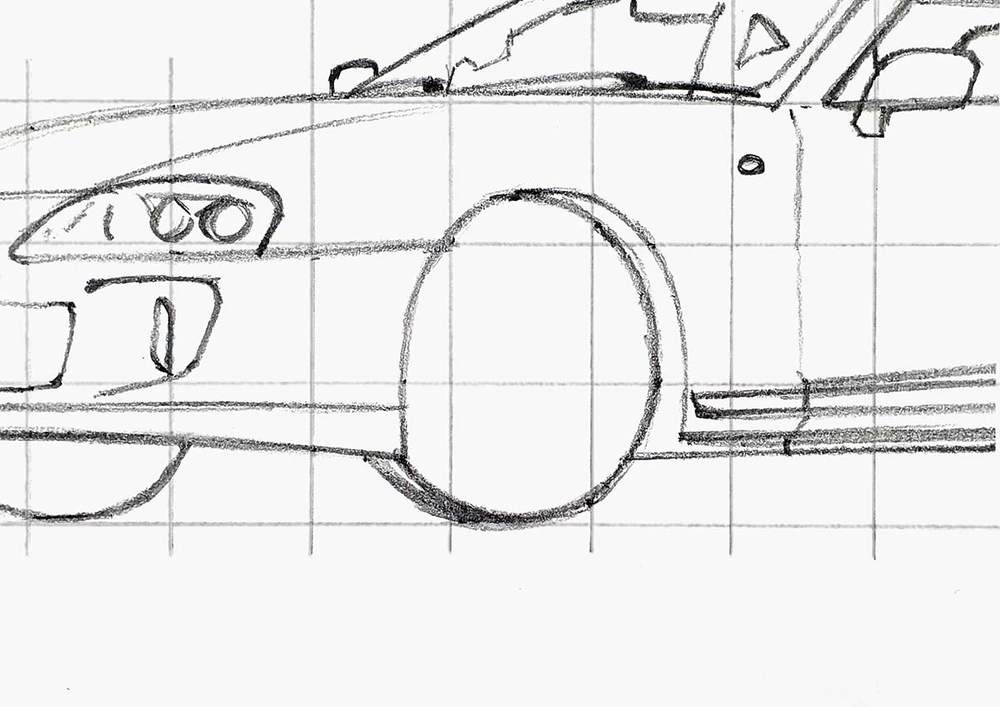
After that, I added the inside edge of the tire and a circle at the center of the wheel.
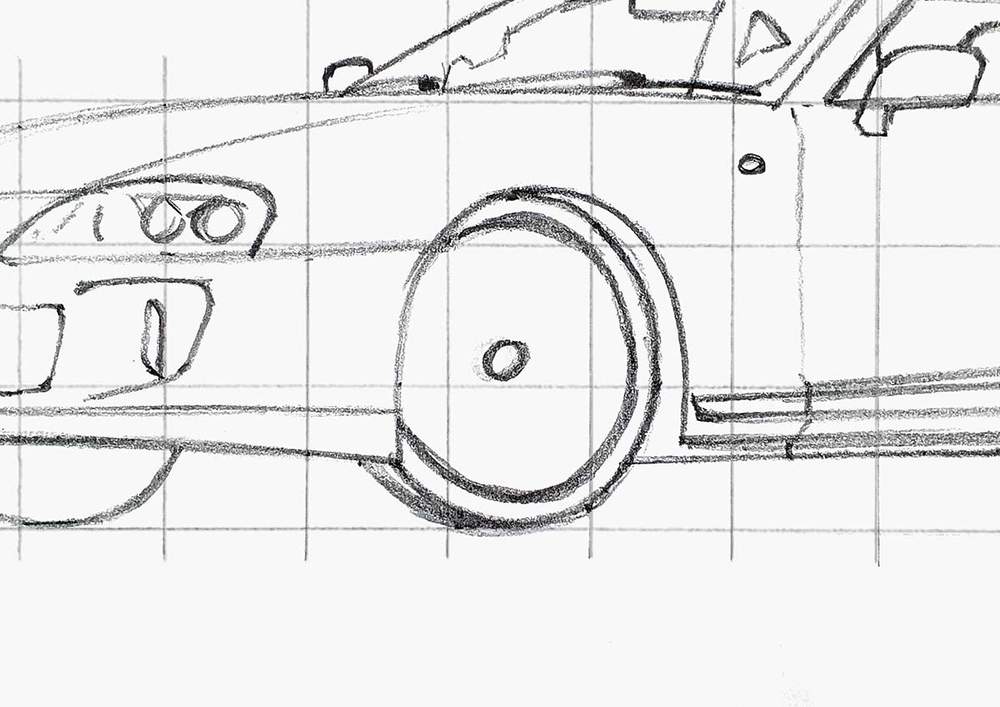
Now comes the hardest part of these wheels: the spokes.
I started by marking 7 dots around the center circle, and then connected each dot to the bigger circle with V shapes.
Each line of the V shape is parallel to the V shape next to it.
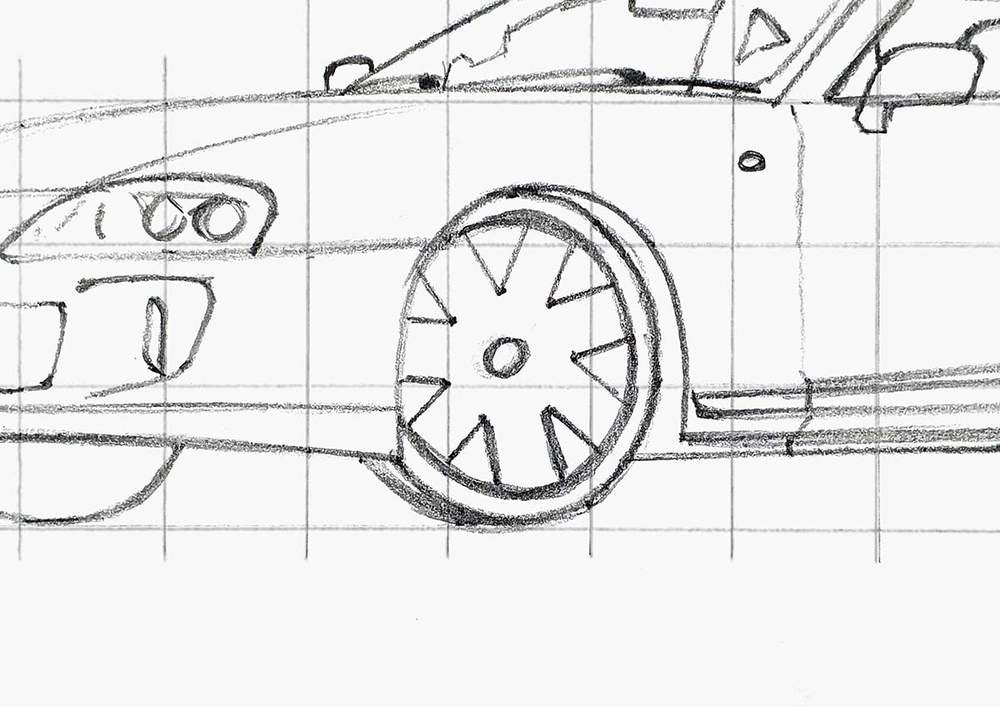
Next, I connect the V shapes with inward-pointing arches.
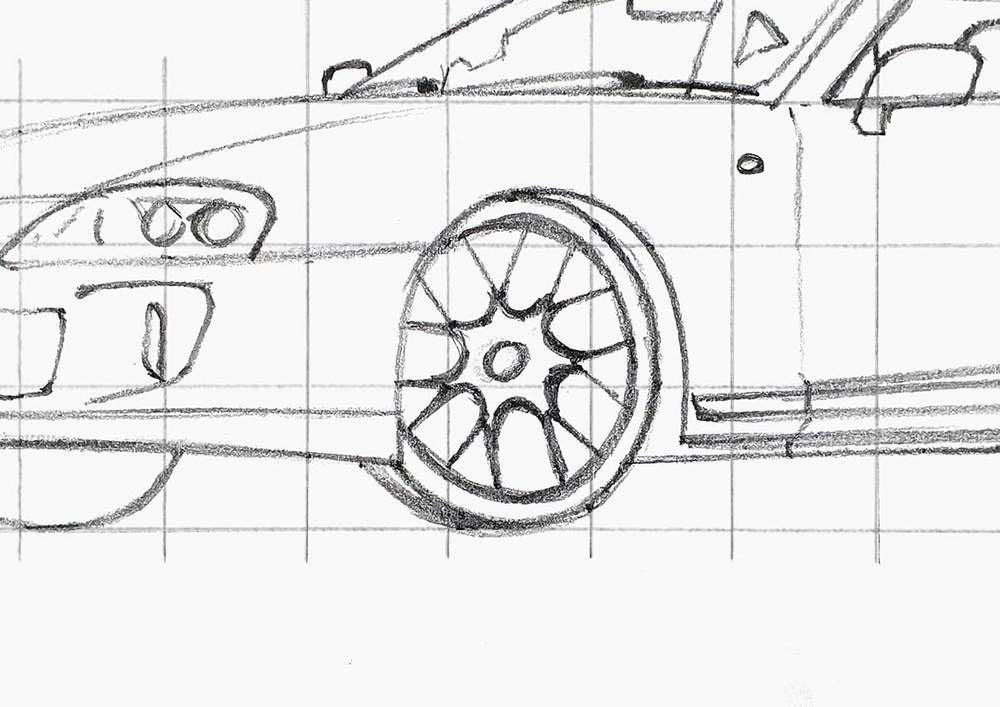
And to finish off the spokes, I added a line to the left of each spoke to give the wheel some dimension.
I also marked where the 5 bolts go.
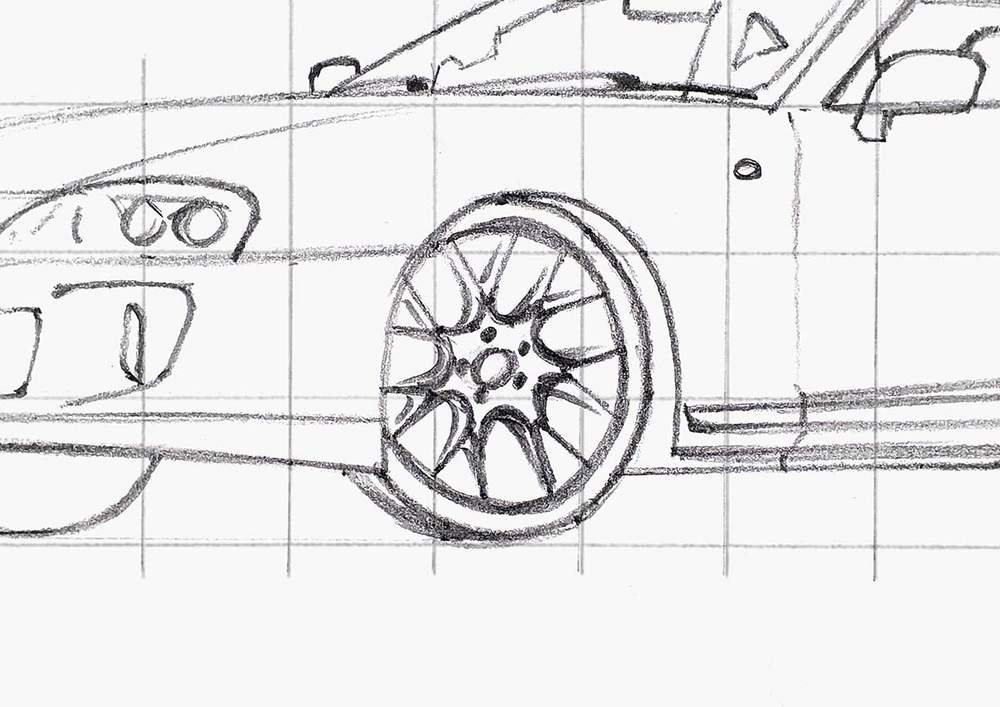
To finish off the wheel, I added the brake disc, the brake caliper, and an extra edge at the bottom right of the wheel.
And that's the front wheel done!
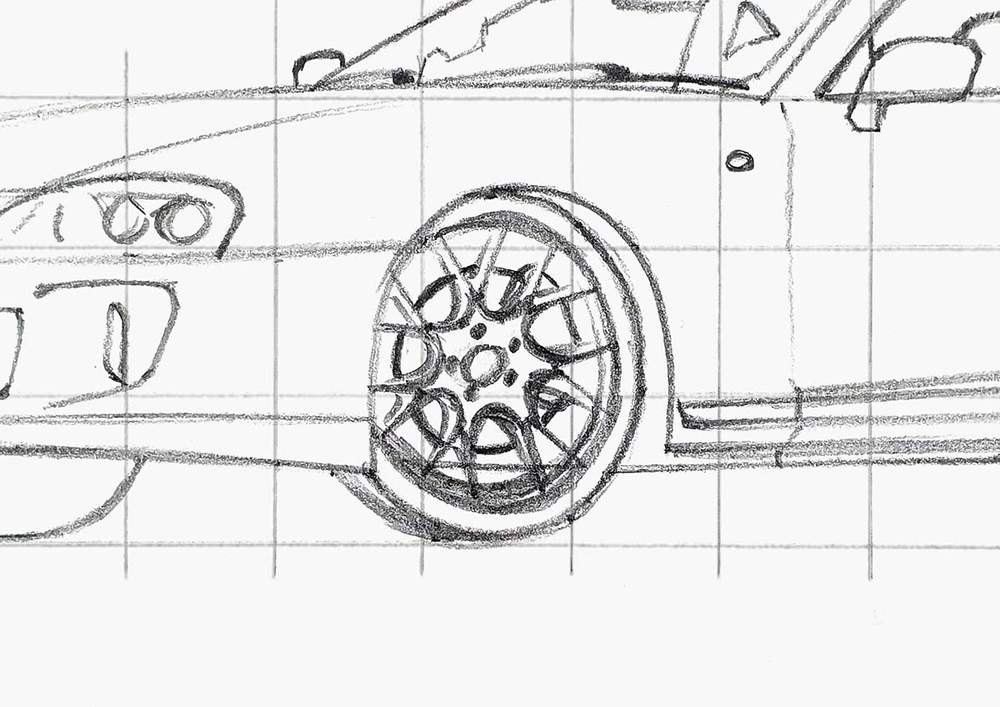
After that, I repeated these steps for the rear wheel and sketched the visible parts of the wheels on the other side of the car, along with the shadow underneath the vehicle.
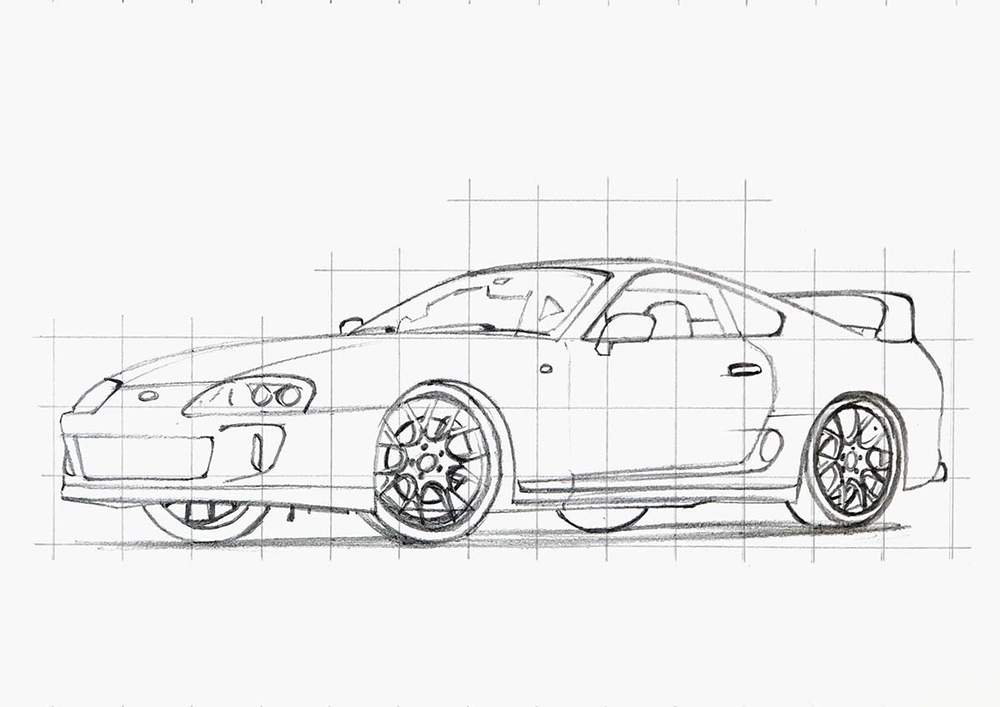
Step 5: Sketch some Reflections on the Toyota Supra
The sketch is now almost done.
To complete it, I added just a few markings where the reflections are going to be on the side of the car.
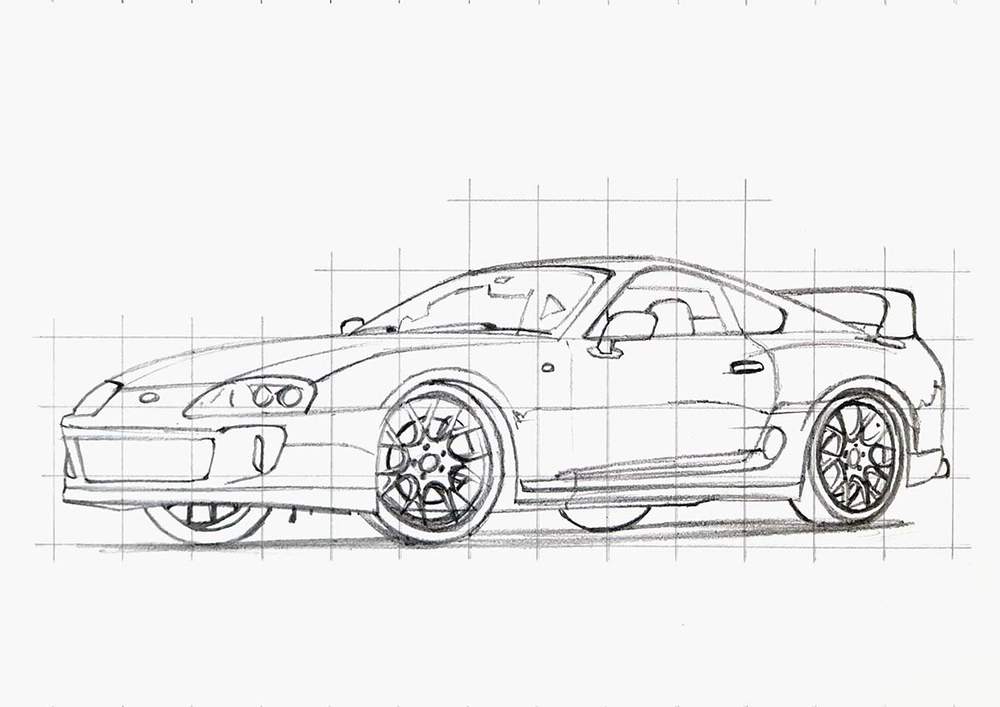
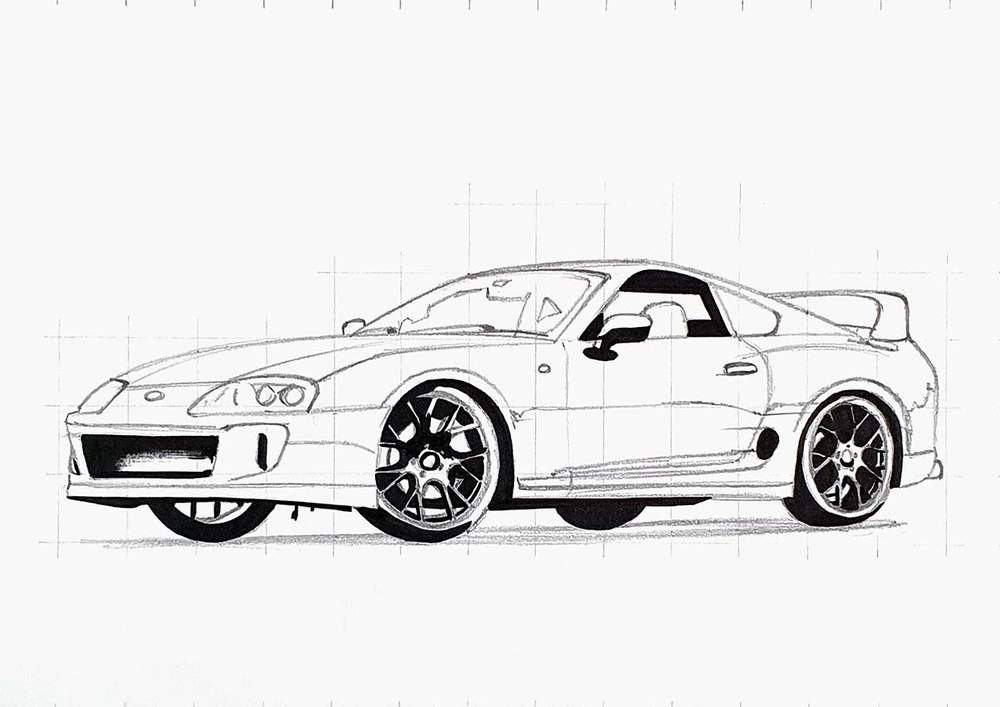
Step 6: Color All Pure Black Parts
With the sketch now done, we can start coloring it.
To do this, I like to use my alcohol-based Ohuhu Honolulu markers. They are by far my favorite markers.
My go-to alcohol markers for blending, rich color payoff, and amazing value. The brush tips feel super natural to draw with — a must-have for smooth gradients and realistic shading!
- Brush + chisel tips
- Great for beginners & advanced artists
- Budget-friendly alternative to Copics
I start by coloring the black parts first, as it makes coloring the rest of the car a lot easier, in my opinion.
Step 7: Color the Wheels with Markers
After that, I colored the wheels.
I first colored the front wheel. I used Neutral Grey 02 (CG020) for the disc, Bright Red (R180) for the caliper, and Neutral Grey 3 (NG03) for the rest.
I did notice that I missed a spot directly to the left of the brake disc that should have been black... I fixed it later.
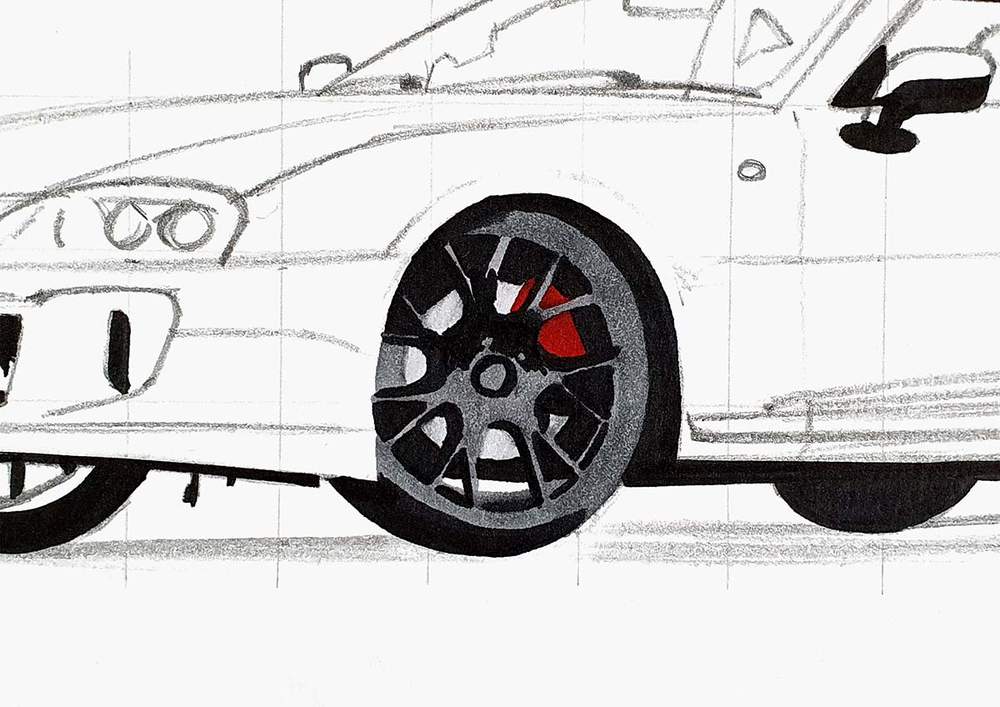
Then, I used Neutral Grey 07 (CG070) to darken the tire and the bottom spokes, as well as the bottom half of the top spokes. I also darkened the brake disc with Neutral Grey 03 (CG030) as I thought it looked too light.

Lastly, I used Neutral Grey 6 (NG06) to darken the bottom and the top of the tire.
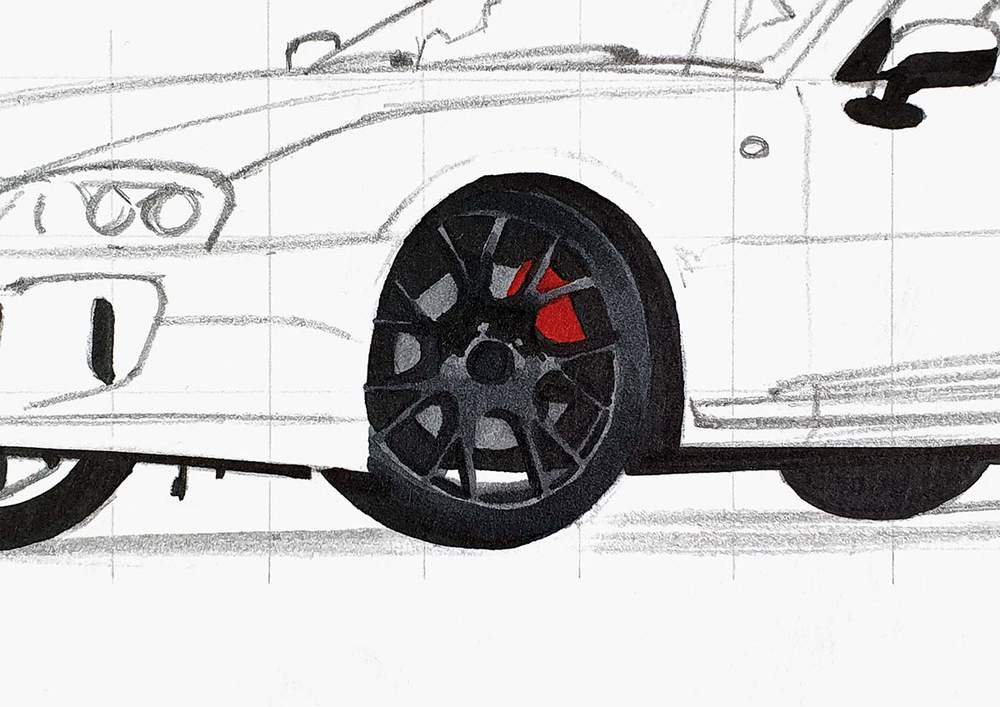
After that, I colored the front wheel on the other side of the Supra. Though I did not take any photos of the process...
I colored the spokes with Neutral Grey 6 (NG06), the inside of the wheel with Neutral Grey 03 (CG030), and the reflections on the inside with Neutral Grey 3 (NG03) and Neutral Grey 07 (CG070).
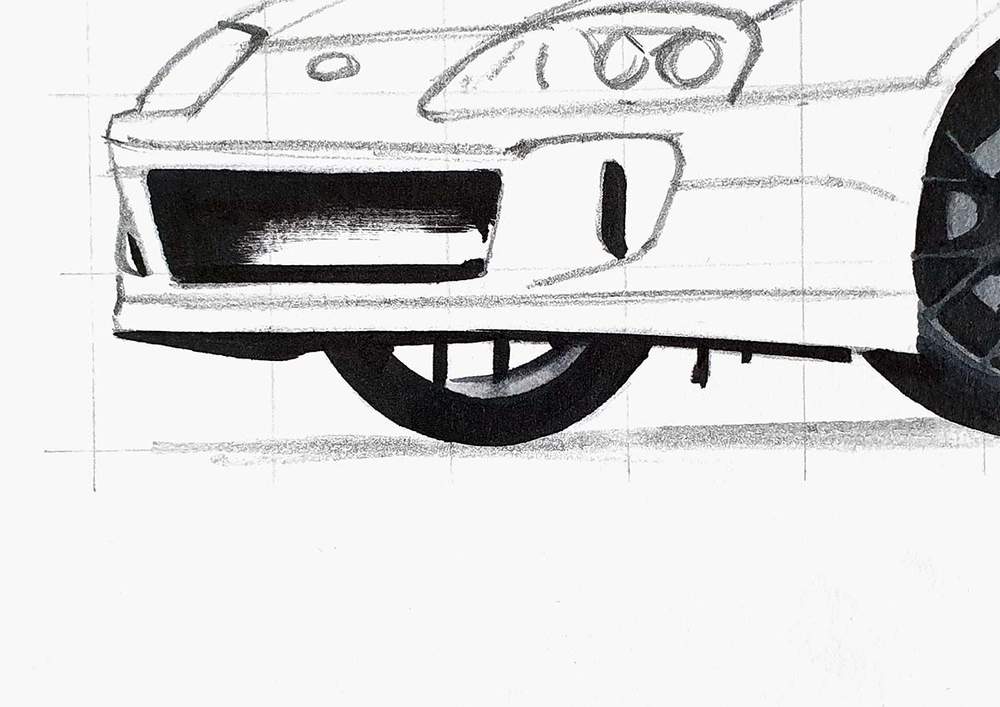
Next, I colored the rear wheel with Neutral Grey 3 (NG03).

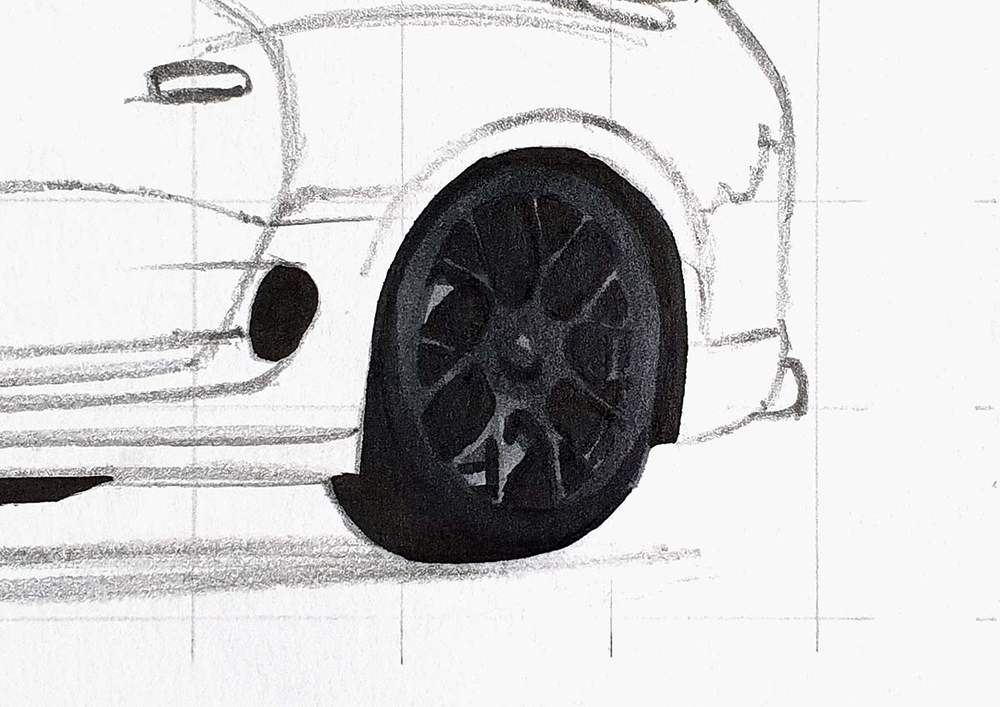
Then, I darkened the tire and the top left, center, and bottom right of the wheel with Neutral Grey 07 (CG070).
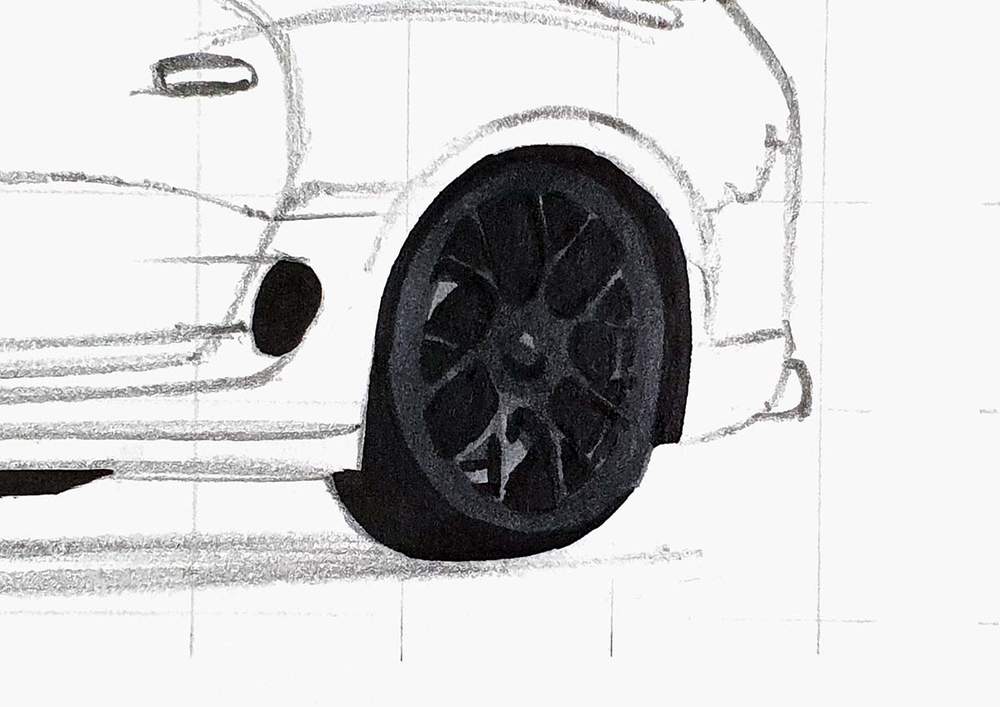
And I finished it off by darkening the bottom edge of the tire with Neutral Grey 6 (NG06).
Step 8: Color the Front Grill with Markers
With the most difficult parts now done, we can start coloring the rest of the Toyota Supra.
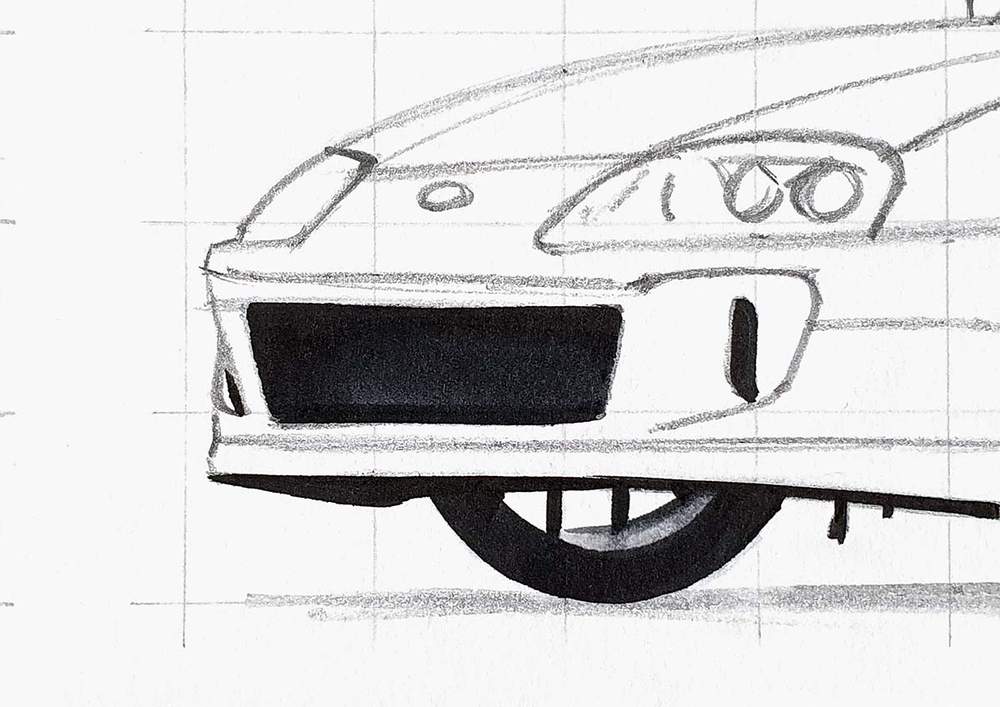
First, I colored the remainder of the front grill with Neutral Grey 6 (NG06).
Step 9: Color the Headlights of the Toyota Supra
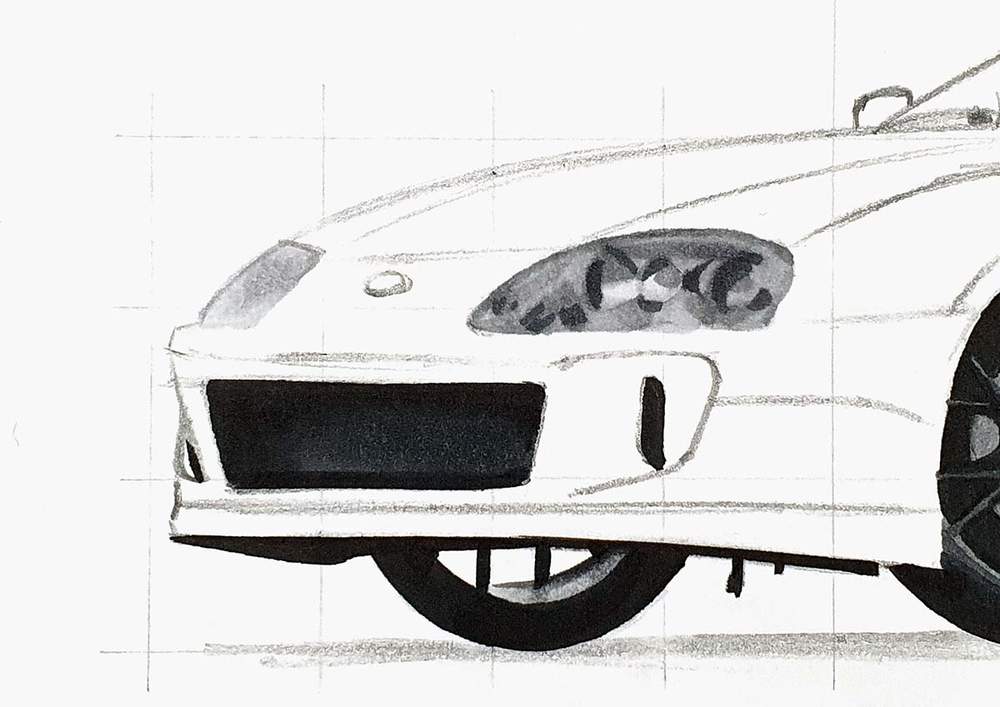
Next, I colored the headlights.
I first used Neutral Grey 02 (CG020) to color both headlights fully.

Then, I used Neutral Grey 03 (CG030) to add some shading toward the top on the left headlight, and I darkened most of the right headlight except for a few bits in the center.
The left headlight is now done.

Continuing with the right headlights, I used Neutral Grey 03 (CG030) to add some weird shapes kind of all over the headlight, but I made sure to darken the top and left edges of the 3 circle shapes.
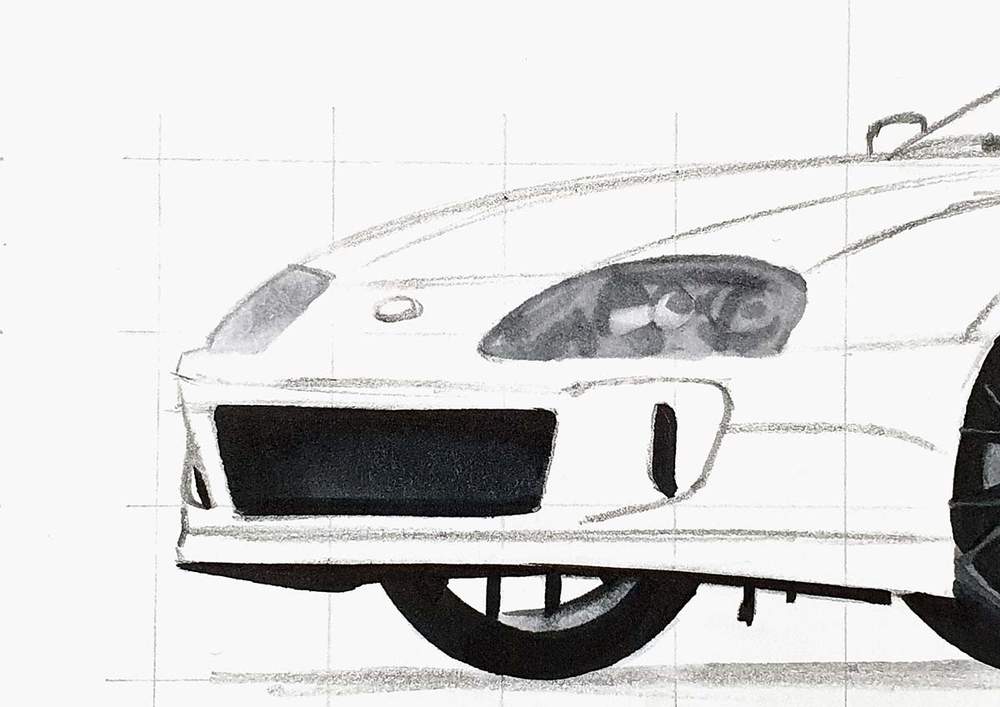
To finish off, the right headlight, I used Neutral Grey 07 (CG070) to add just a few dark spots, mainly in and around the 3 circle shapes.
Step 10: Color the Windshield of the Toyota Supra
After that, I colored the windshield.
I colored the far left side (the A-pillar) and the side windows you can see through it with Neutral Grey 02 (CG020).
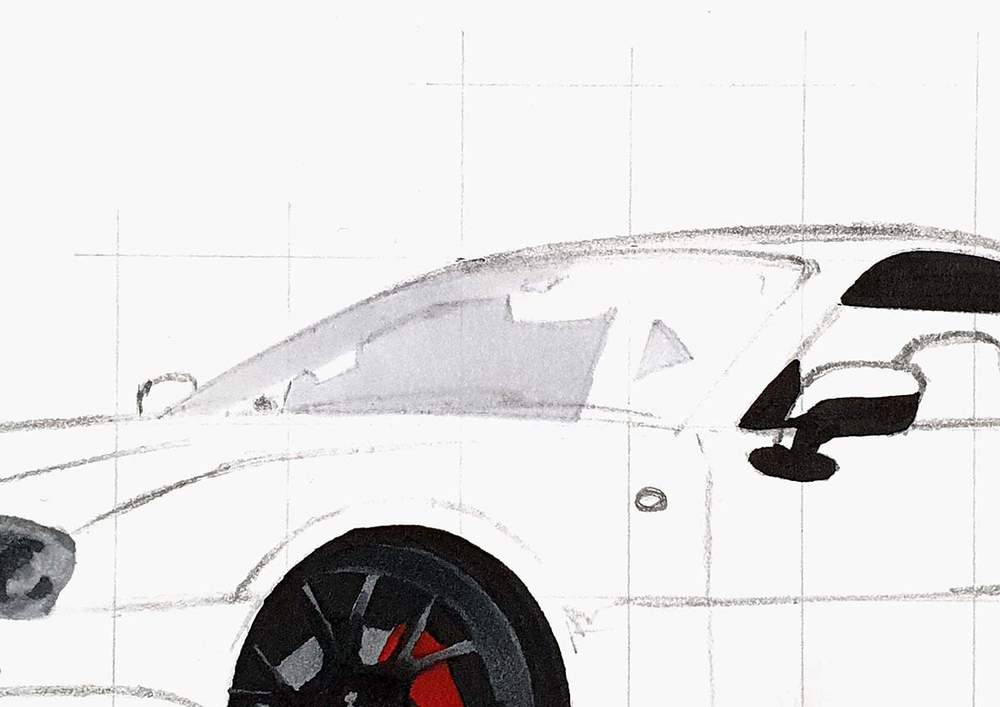
Next, I used Neutral Grey 03 (CG030) to color the right edge of the A-pillar and part of the top edge of the windscreen.

Then, I colored the remainder of the window with Neutral Grey 3 (NG03) as well as a tiny bit on the right edge of the A-pillar.
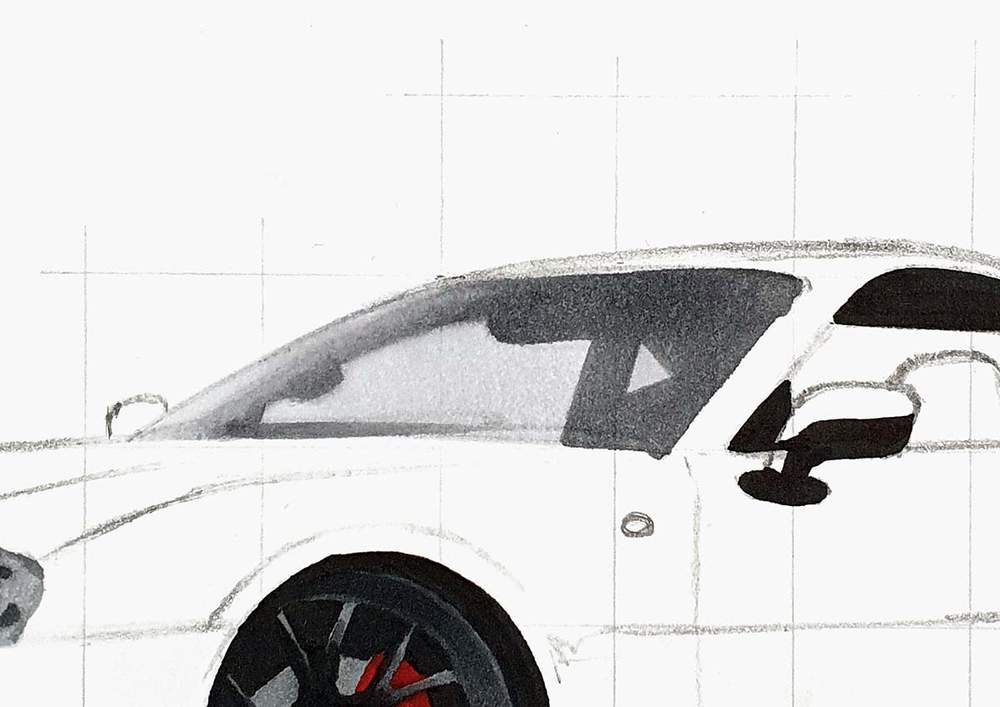
And to finish it off, I darkened the top right and bottom right corners with Neutral Grey 07 (CG070), and I added a dark grey edge around the right half of the window with Neutral Grey 6 (NG06).
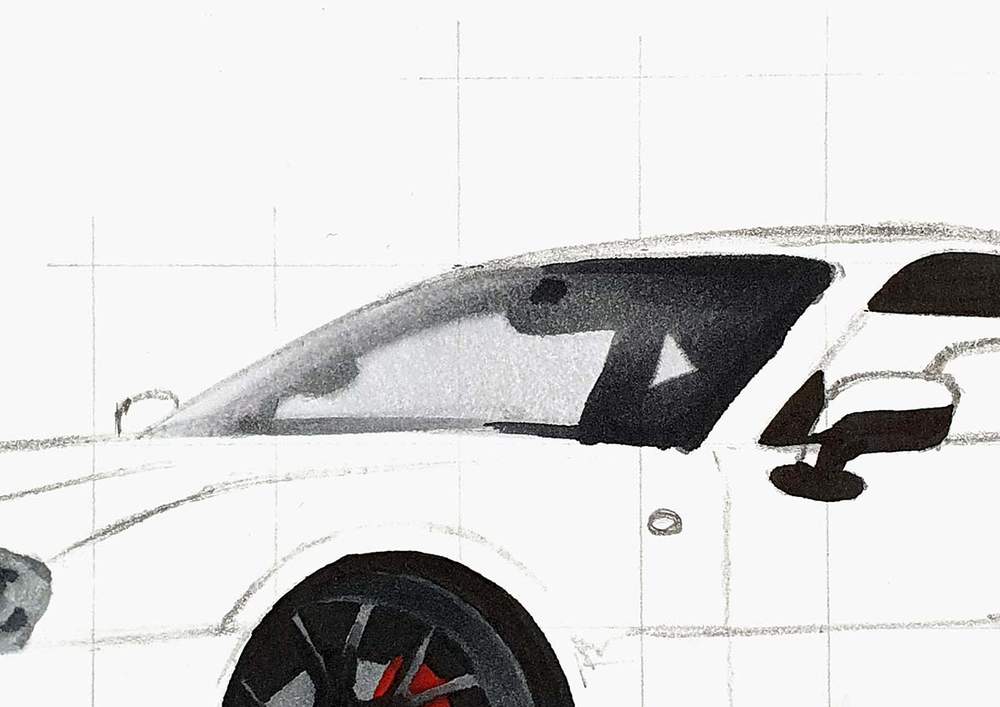
I was also planning to add the windshield wipers with Neutral Grey 9 (NG09), but I forgot...
Step 11: Color the Interior and Side Window with Markers
Next, I colored the interior and the little rear side window.
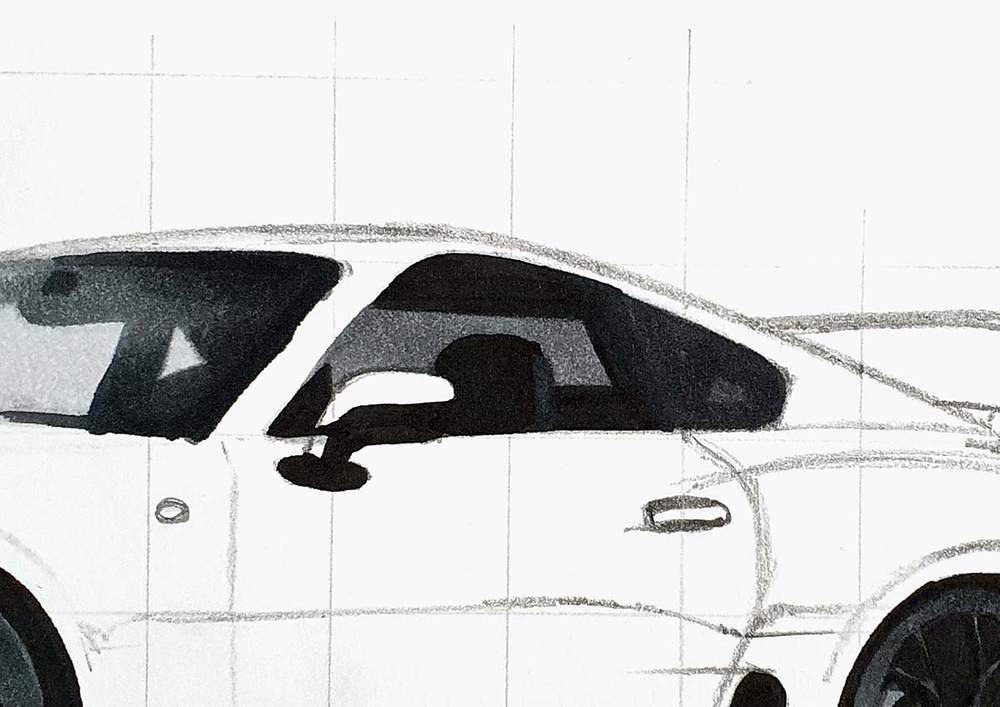
I used Neutral Grey 3 (NG03) to color the rear window and the rear side window, and the headrest with Neutral Grey 6 (NG06).
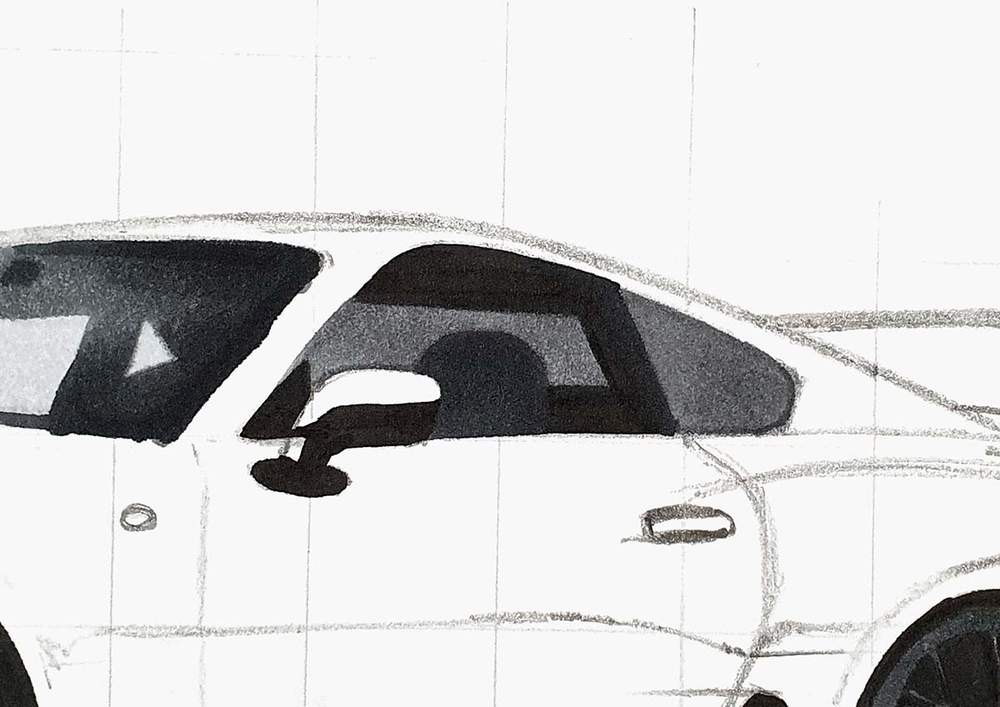
Next, I darkened the front of the headrest with Black (120), and I used Neutral Grey 07 (CG070) to add a thick edge on the small side window and color the part of the wing that you can see through the side window.
Step 12: Color the Exhaust Tip of the Toyota Supra
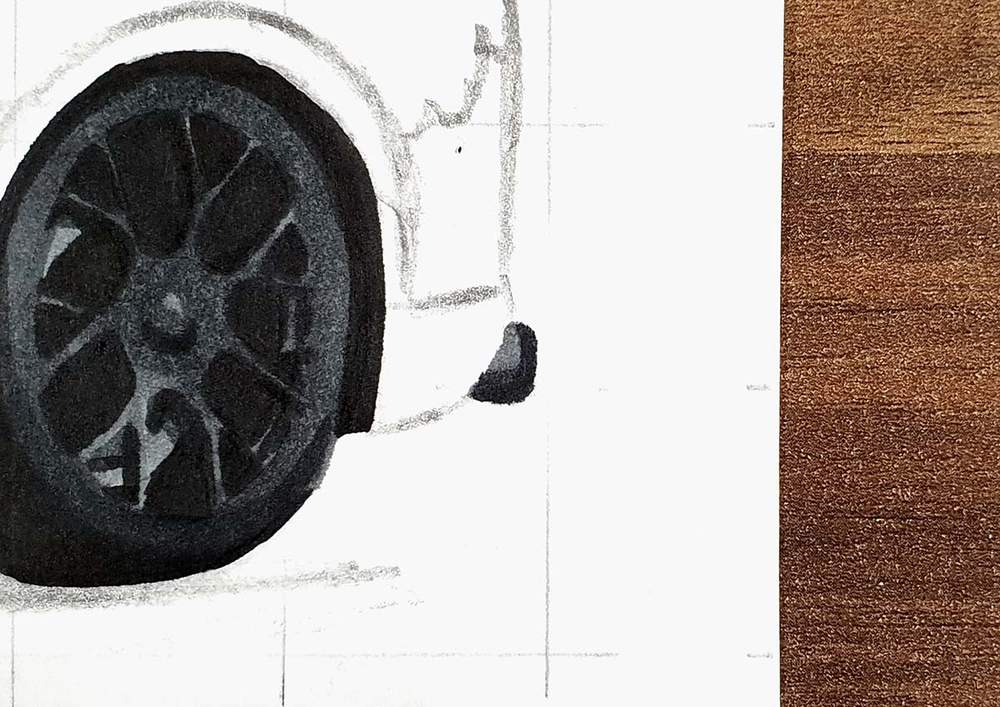
After that, I colored the exhaust tip with Neutral Grey 3 (NG03).

Then, I darkened the bottom half with Neutral Grey 07 (CG070) and added a dark edge on the right and the bottom with Neutral Grey 6 (NG06).
Step 13: Color the Side Skirt and the Front Splitter of the Supra
Next, I colored the side skirt and the front splitter with Neutral Grey 3 (NG03).
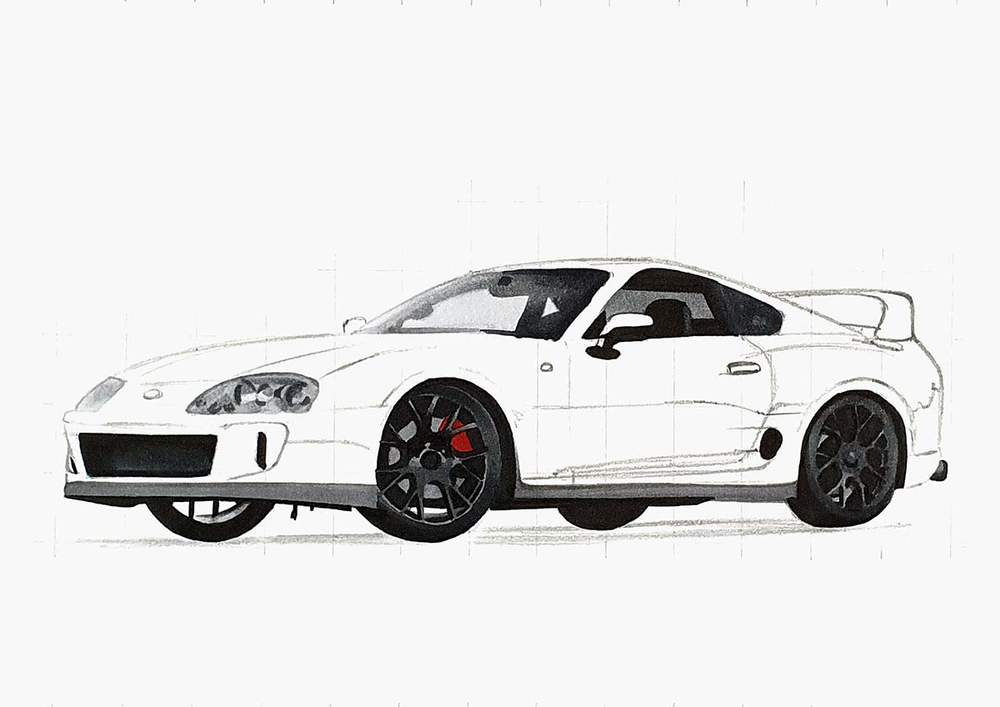
And then, I darkened the bottom edge of the splitter and the left and middle right part of the side skirt with Neutral Grey 07 (CG070).
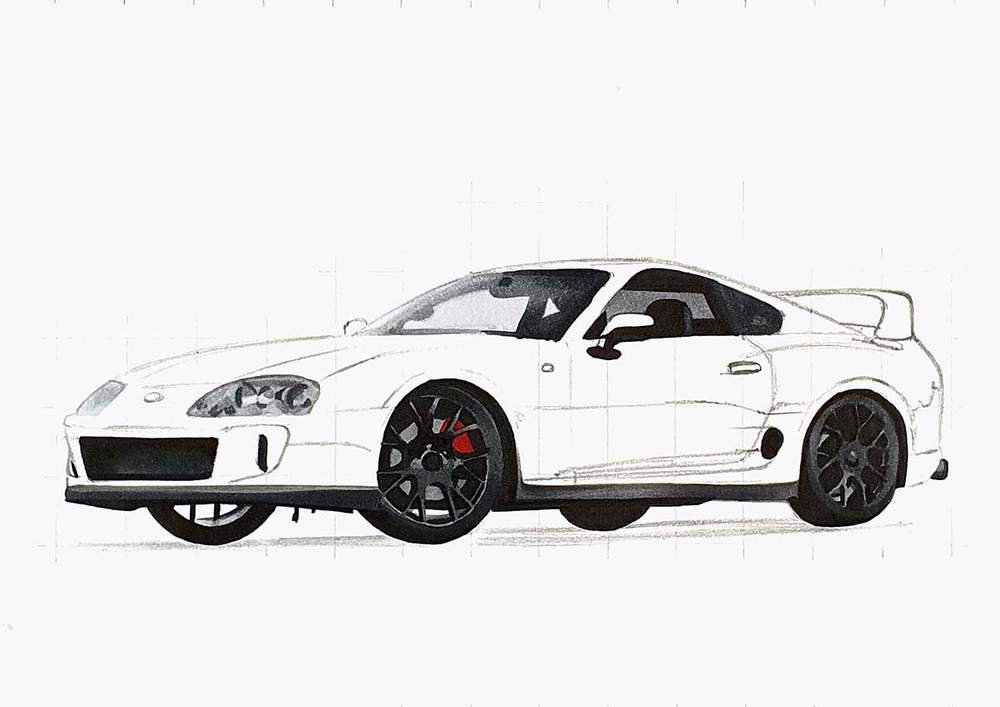
Step 14: Color the Shadow Below the Supra
After that, I colored the shadow of the Toyota Supra.
I first colored the whole shadow with Neutral Grey 02 (CG020).
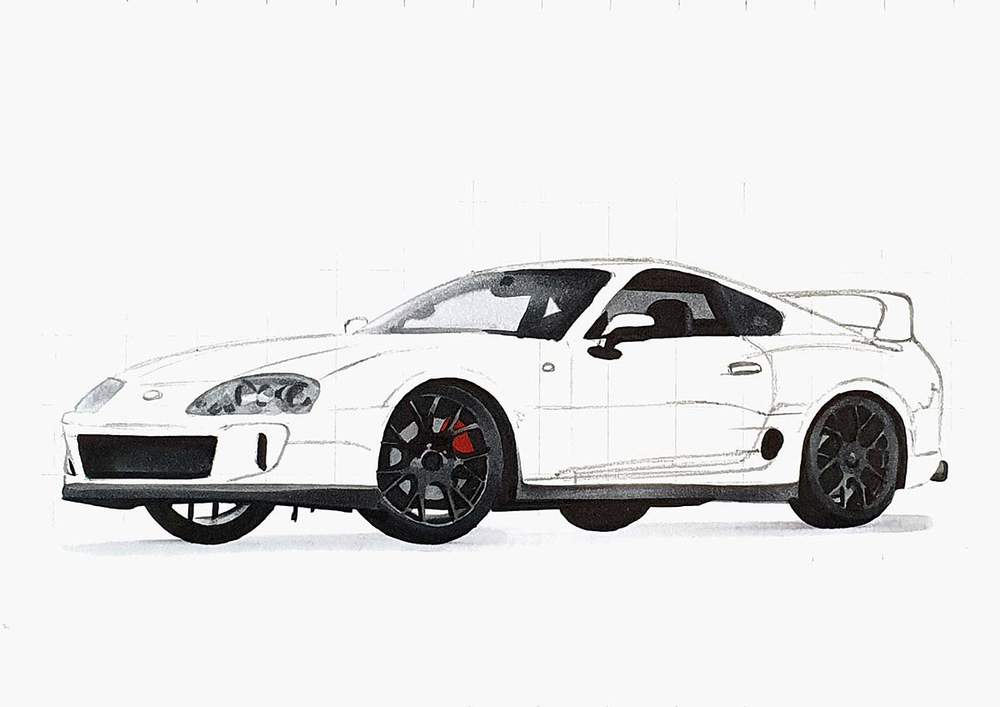
Then, I used Neutral Grey 3 (NG03) to darken the center of the shadow while leaving a tiny light grey edge around it.
After that, I did the same with Neutral Grey 6 (NG06).

Lastly, I blended all the grey tones into a smooth-ish gradient.
I did this by blending the Neutral Grey 6 (NG06) into the Neutral Grey 3 (NG03) by coloring over the edge of the two colors with Neutral Grey 3 (NG03).
Then, I blended the edge of the Neutral Grey 3 (NG03) and the Neutral Grey 02 (CG020) by coloring over it with Neutral Grey 02 (CG020).
And finally, I used the Colorless Blender (0) to blend out the outer edge of the shadow.
During this step, one marker decided to take the initiative and add some surprise ink drops below the car... Oh well.
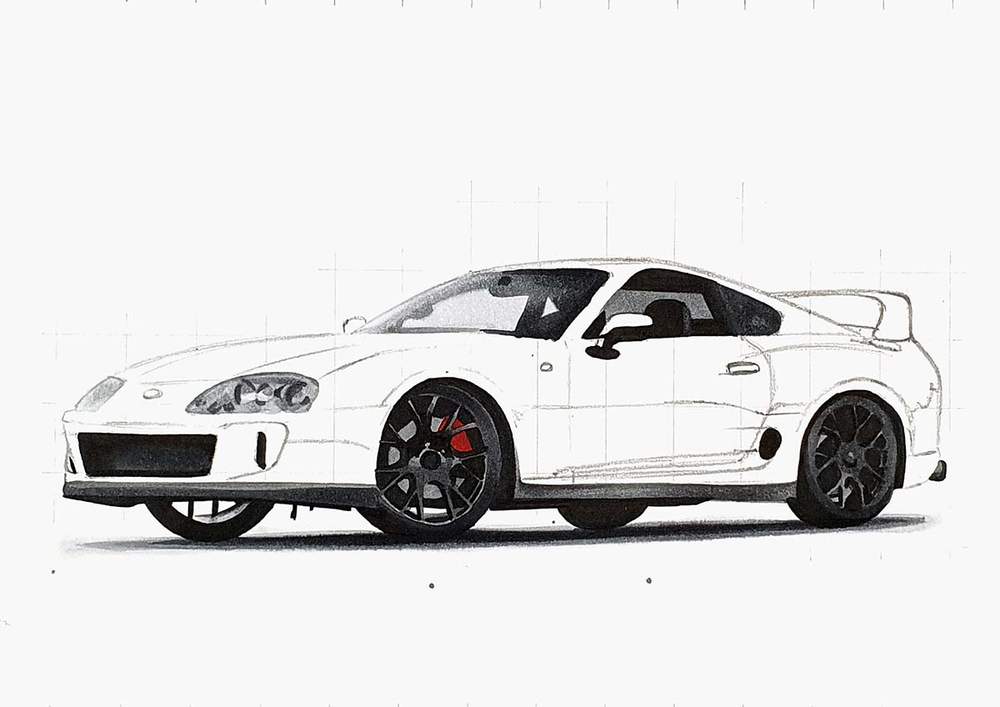
Normally, I would say that all black and grey parts are now done, but the whole car is black, so...
Step 15: Color the Main Body of the Toyota Supra
Before I started coloring the main body of the car, I first lightened the sketch with my kneaded eraser.
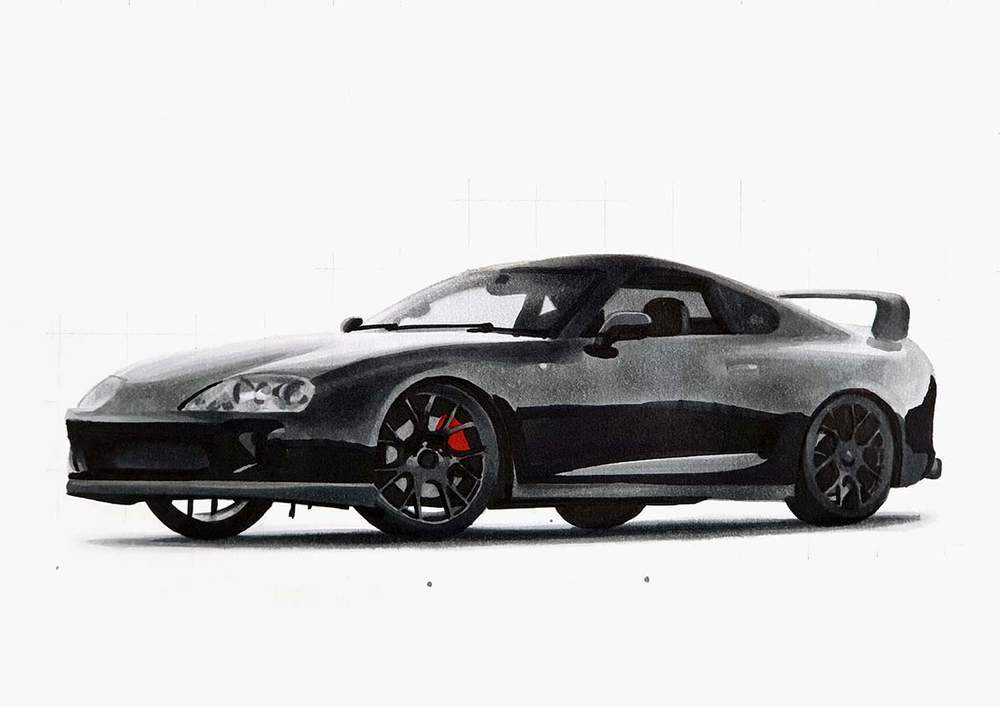
After it was light enough not to shine through the ink, I colored the lightest parts (the hood, the rear quarter, and the wing) with Neutral Grey 02 (CG020) and the dark reflections on the front and on the side with Neutral Grey 9 (NG09).
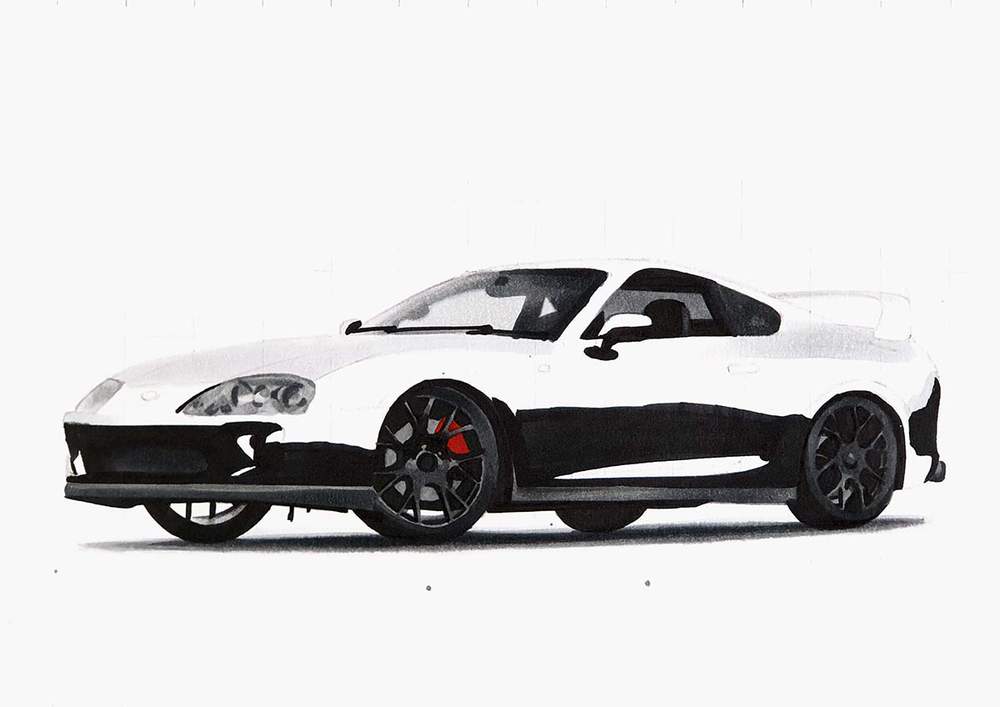
After that, I used Neutral Grey 03 (CG030) to color the remainder of the main body and to add some shading to the hood of the Supra.

Next, I used Neutral Grey 3 (NG03) to darken most of the side and the front of the Supra. I should've left an edge directly above the big dark reflection on the side lighter, but I didn't...

Then, I added some dark shading to the part around the front wheel, the A-pillar, the wing, and the lower part of the rear bumper with Neutral Grey 07 (CG070).
And lastly, I used Rose Beige (BR3) to add some orange sunset reflections around the dark reflections on the side of the Supra.
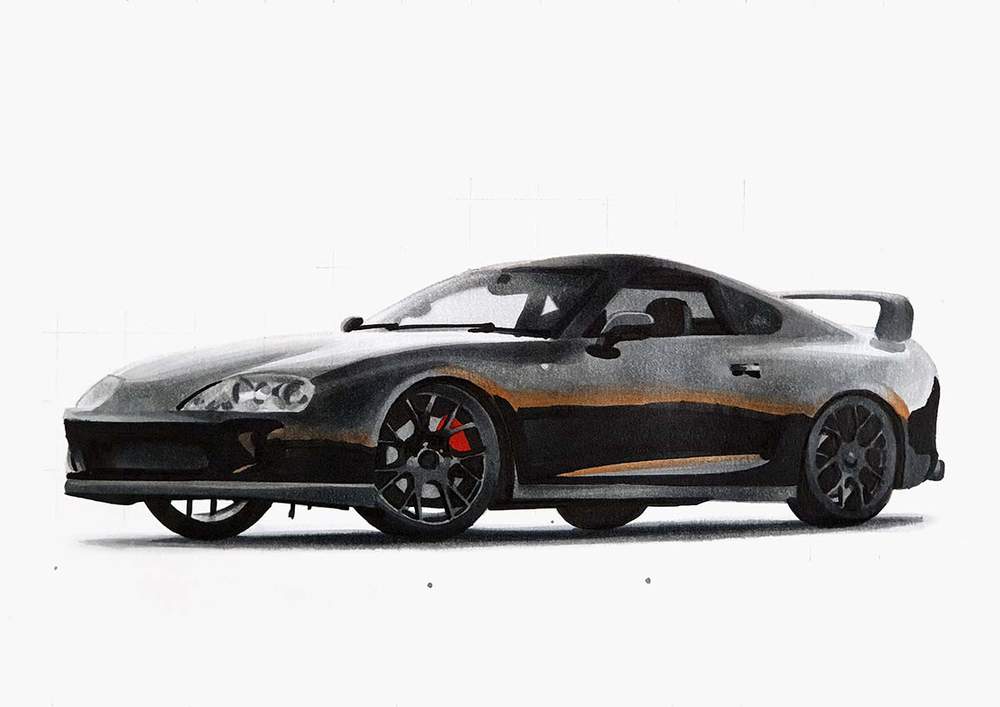
The car is now fully colored, but it's lacking a lot of its details.
Step 16: Add Details to the Toyota Supra Drawing with 2 Colored Pencils
To add the details to the Toyota Supra car drawing, I like to use colored pencils, and in this case, a white and a black pencil will do the trick.
I used the white colored pencil to add highlights to the headlight, the spokes of the wheels, and the edges around the car.
I also used it to lighten the sunset reflections, as I made them too dark, and I added some lighter reflections on the really dark ones on the front, the side, and the rear.
I used the black pencil to add the panel gaps, the door lines, and this one line on the red brake caliper.
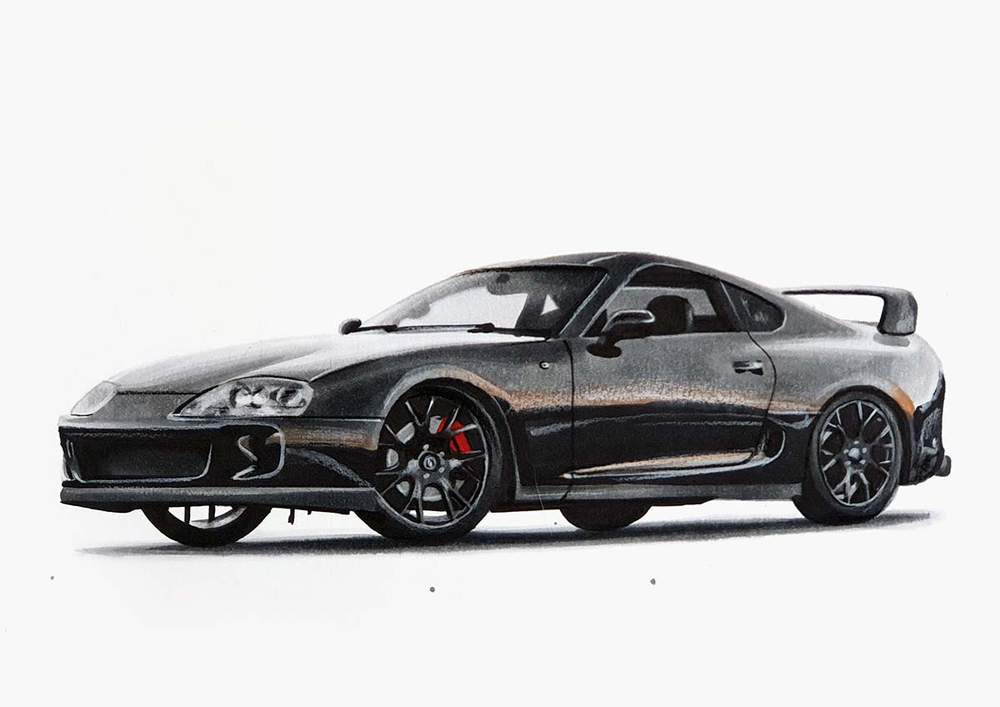
It's now really close to being done, but there is one last step that will make this drawing look even better.
Step 17: Add White Highlights to the Toyota Supra Drawing with a Paint Marker
And to finish the Toyota Supra drawing off, I added a few white highlights on the car with my white Posca paint marker.
I added highlights on the headlight, the wheels, and some edges of the car.
I tried not to overdo it. Just a few highlights here and there will already make this drawing look so much better.
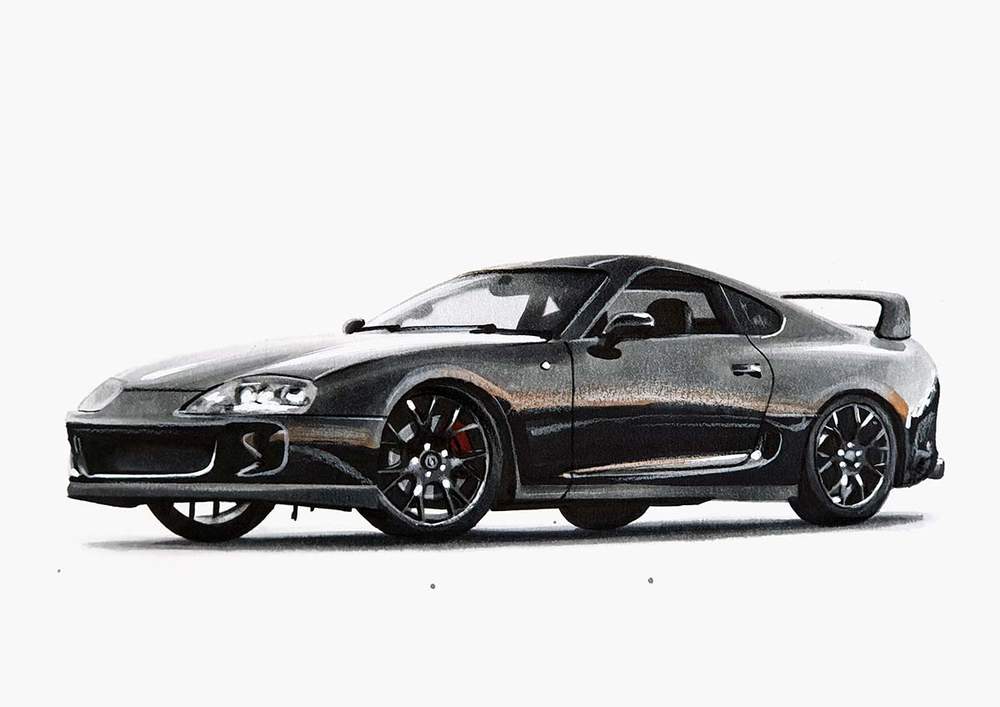
Final Result!
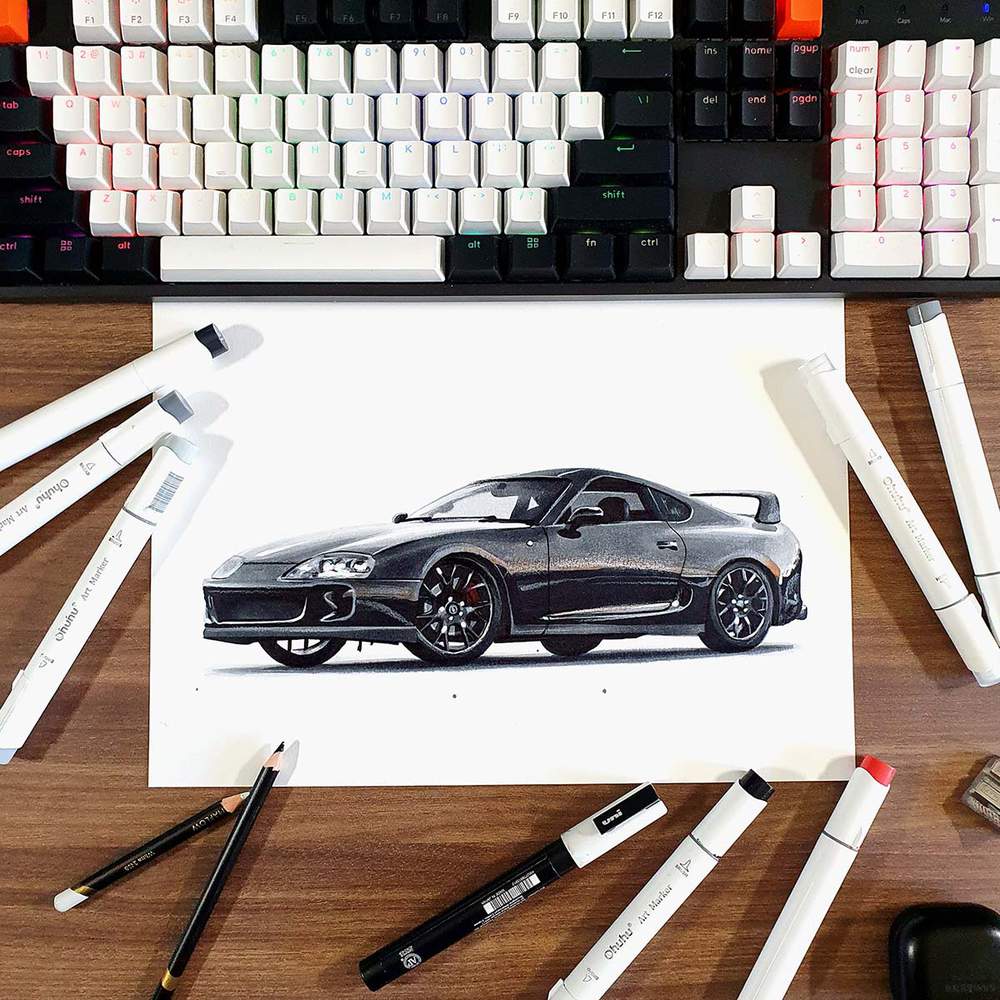
And that's how you draw a simple yet realistic-looking Toyota Supra MK4 with markers and 2 colored pencils.
Want to know how to draw other cars, too? Click here to view all my step-by-step car drawing guides.





Be the first to comment!
Comments
There are no comments yet.