How to Draw a Lamborghini Race Car | Step-by-Step Car Drawing Tutorial
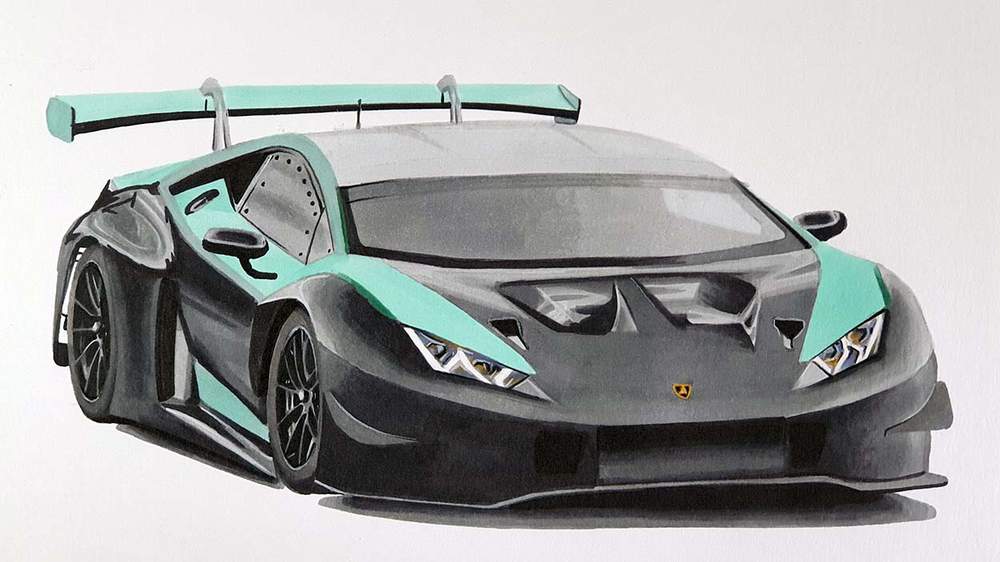
In this step-by-step car drawing tutorial, we're going to make a relatively simple realistic drawing of a Lamborghini race car: The Lamborghini Huracán GT3 Evo.
Disclaimer: In the name of full transparency, please be aware that this blog post contains affiliate links and any purchases made through such links will result in a small commission for me (at no extra cost for you).
Art Supplies Used in this Tutorial
To make this drawing I used the alcohol-based Winsor & Newton Promarkers (these are my favorite markers). For the grey tones, I used IG1, IG2, IG4, IG5, and XB (black). For the green colors, I used G829 and G724. For the colors in the headlights, I used O646, V626 and B736. And lastly, I should've used Y156 for the logo, but I didn't...
The paper I made this drawing on is Canson Illustration Manga paper, which is in my opinion by far the best paper to use for alcohol markers.
I also used the Black C650, Steel Grey C690, and White C720 Derwent Coloursoft colored pencils to add the finishing touches.
The Reference Photo for this Drawing
To make this drawing I used a photo (6th slide) posted by @gtopen.official on Instagram as a reference and simplified it.
Without further ado, let's get started!
How Do You Draw a Lamborghini Race Car?
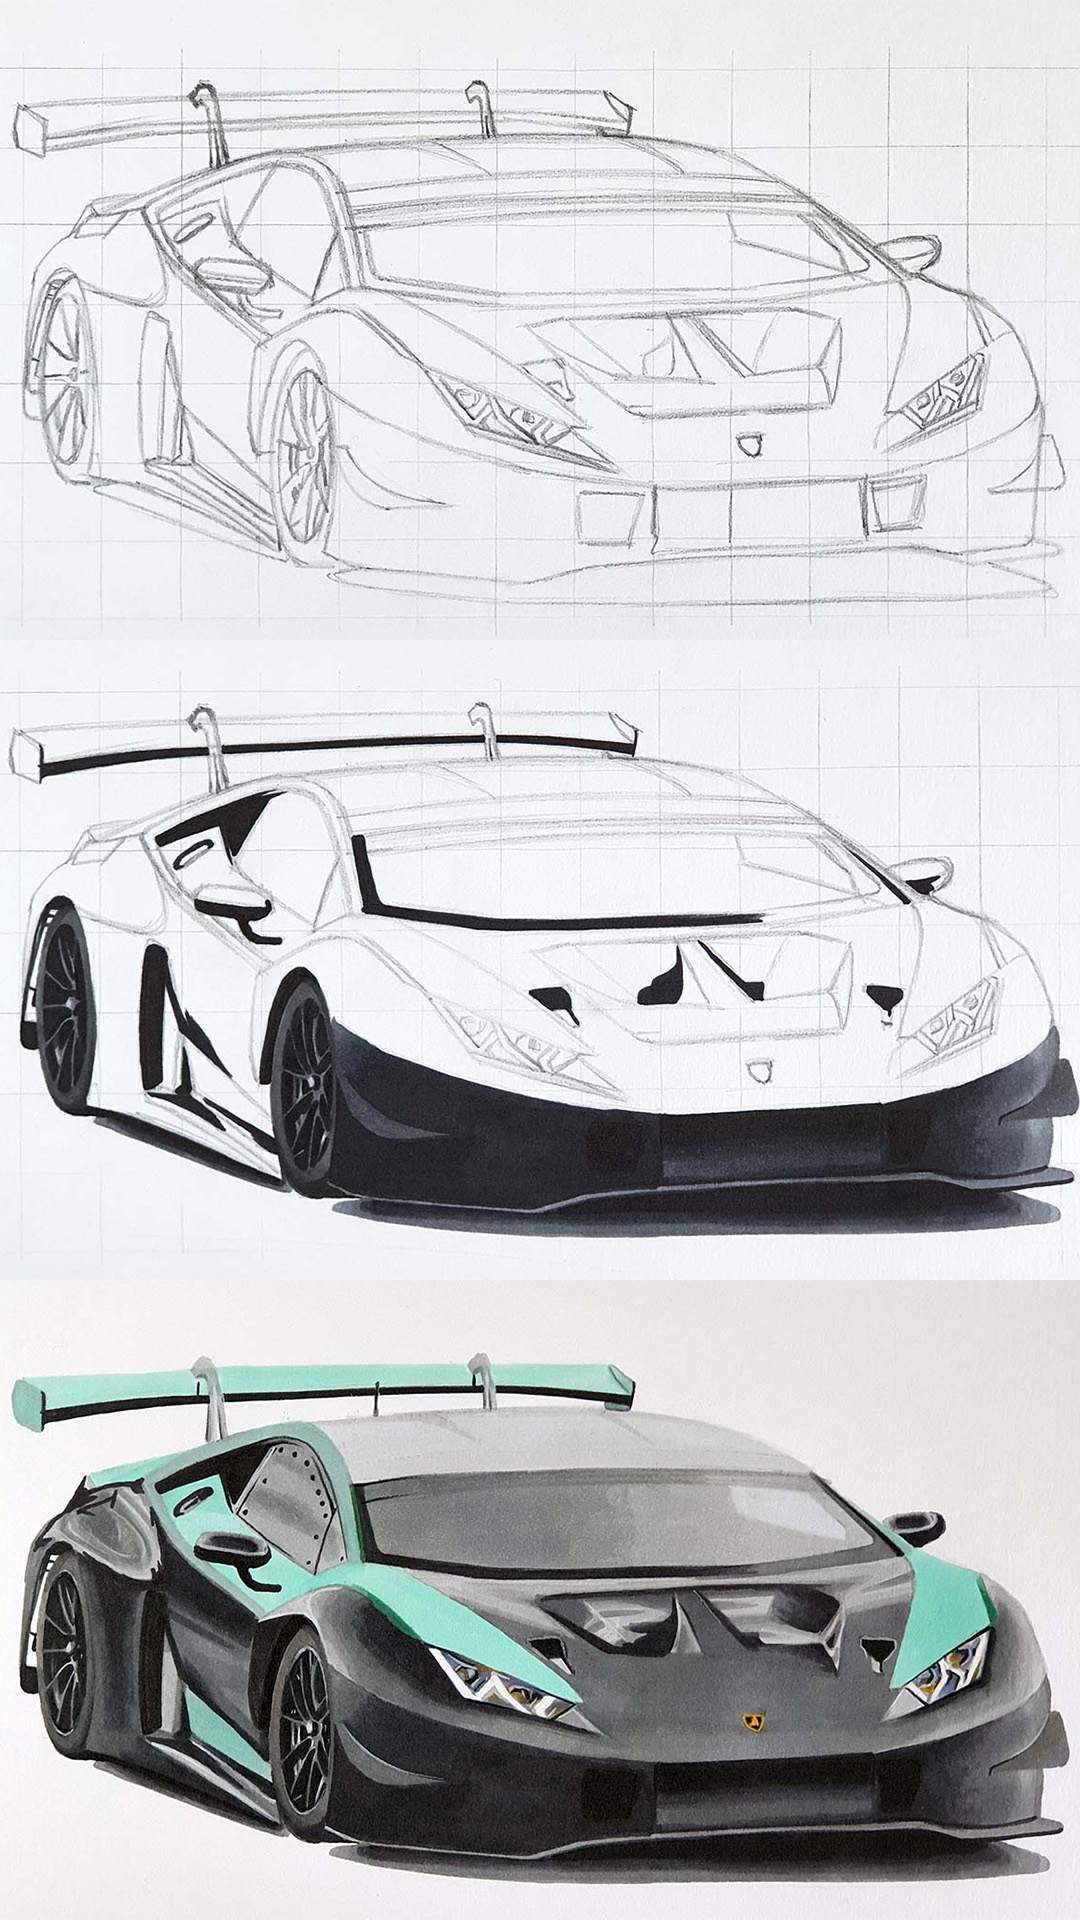
Step 1: Sketching the Outline of the Car
To sketch this car I used the grid method (more on that here). I first placed a grid over the reference photo in Photoshop. Then I drew that very same grid with the same amount of squares on my A4-sized paper.
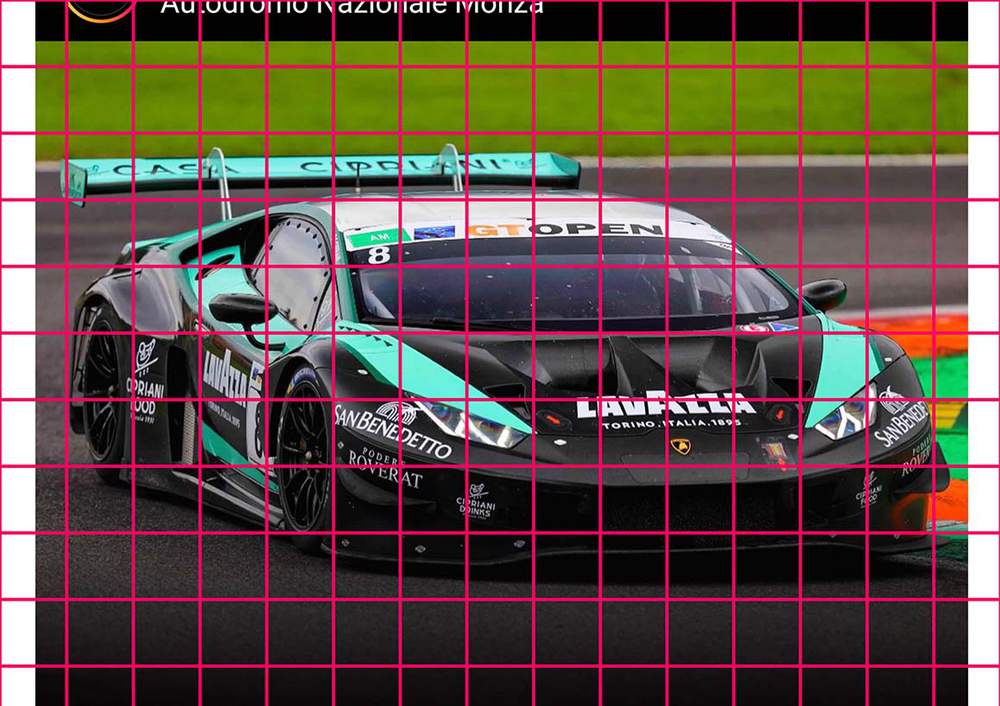
After I had done that I started sketching all the basic shapes.
The sketch is the most important part of the drawing in my opinion. If the proportions in your sketch are off then the whole drawing will feel off. So take your time when sketching the Lamborghini, especially when sketching the wheels.
Step 2: Coloring the Rear Wheel
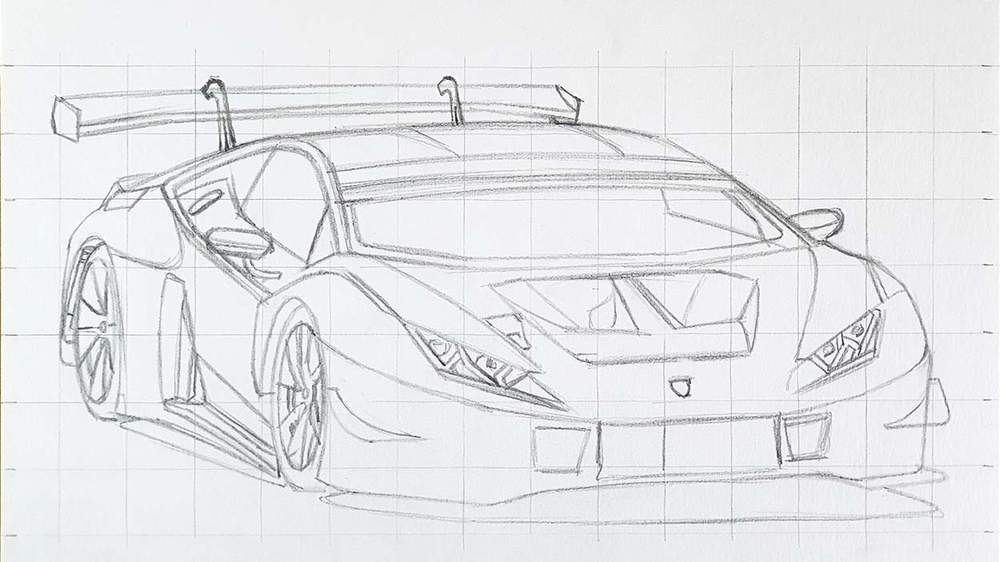
I first started by coloring every black part with the black Promarker. This always makes it look a lot less overwhelming and as most of this wheel is black, it's already 90% done.
But before you start coloring, it's important to erase your sketch until you can only barely see it. By doing this, the sketch lines won't show through the markers when it's finished.
After that, I added Ice Grey 5 on the darkest parts of the spokes.
Then I colored the remaining with Ice Grey 2.
Next up is the tire. First I used CG5 to color the whole tire and then I added some black around the top and the bottom and blended that with the CG5 again. Although I used Cool Grey 5 for the tire, I think it would look better to just color it Ice Grey 5 instead.
And that's already one wheel done.
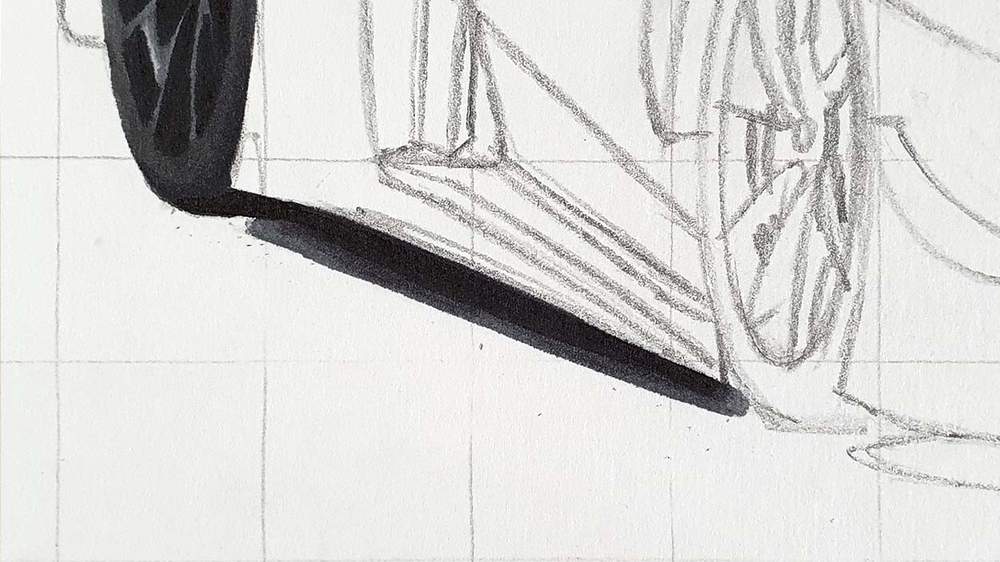
Step 3: Coloring the Shadow on the Side
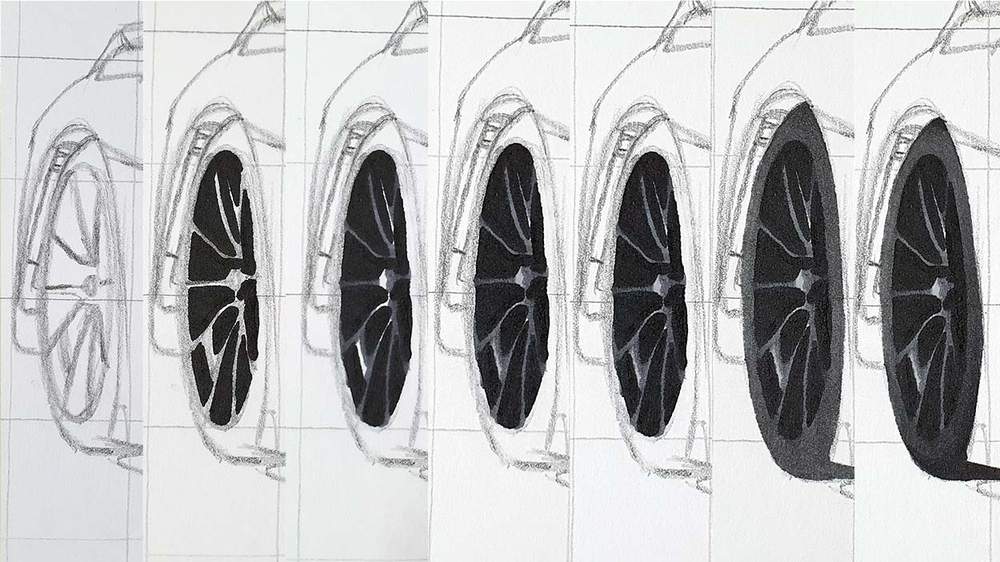
The shadows are pretty easy to color. For this shadow part, I first colored everything with Ice Grey 4 and then added some black to the area closest to the car. Then I blended the grey and the black with Ice Grey 4 to make the transition a little smoother.
Step 4: Coloring the Front Wheel
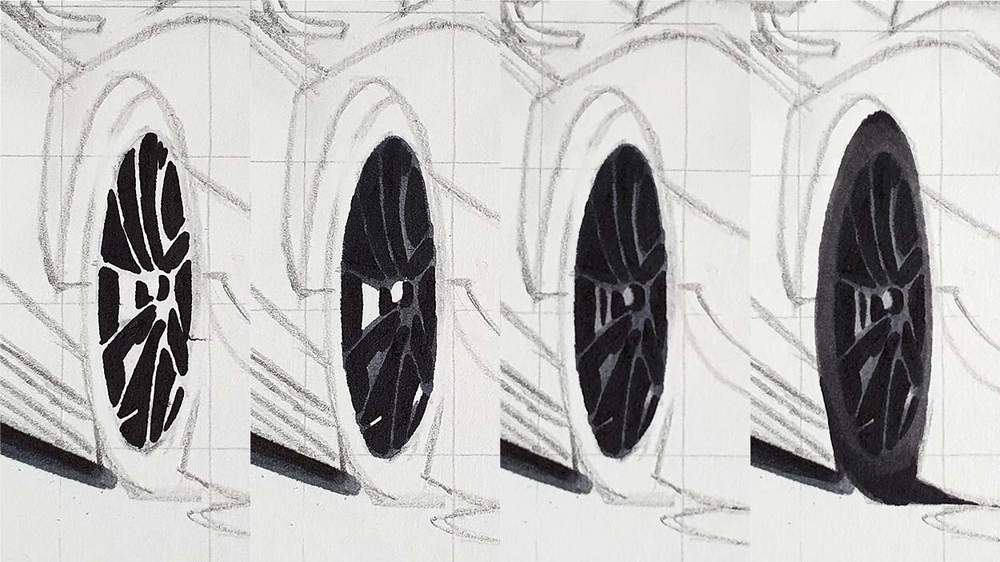
To color the front wheel I used the same steps as I did when coloring the rear one.
First I colored everything black, then I added Ice Grey 5 to the darkest grey parts and after that, I used Ice Grey 2 to color the rest.
For the tire, I again used CG5 to color the whole tire. Again I think it would've looked a little better with Ice Grey 5 instead. Then I added some black to the top and bottom of the tire and blended it with CG5.
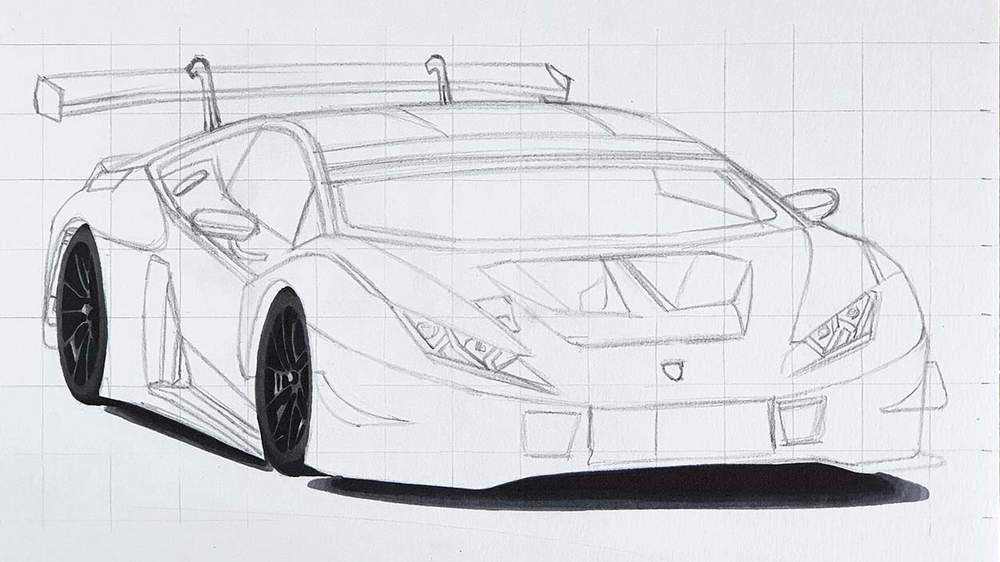
Step 5: Coloring the Shadow on the Front
To color the shadow on the front I first colored it with Ice Grey 4. Then I added black to the parts closest to the car and blended it with Ice Grey 4.
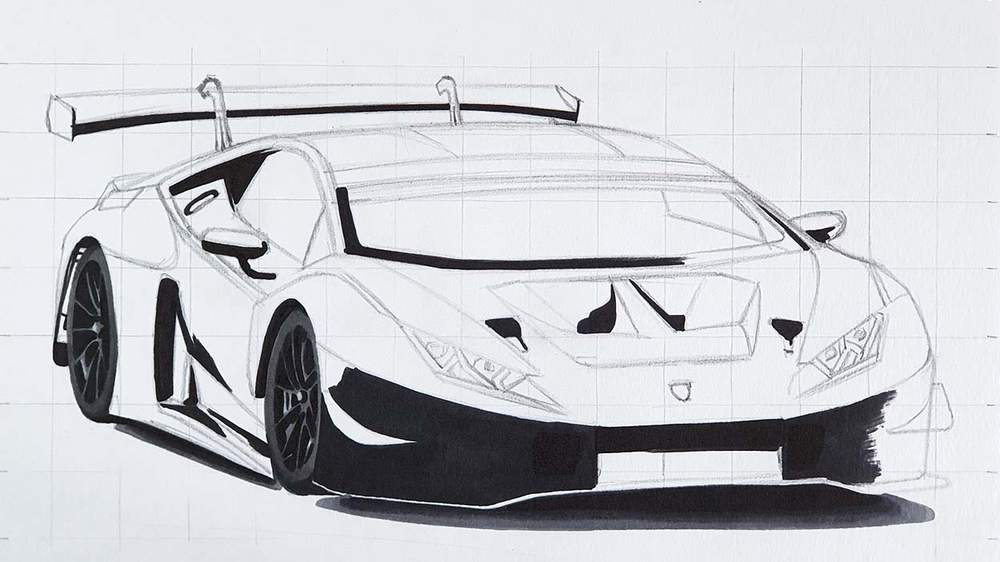
Step 6: Coloring All Black Parts
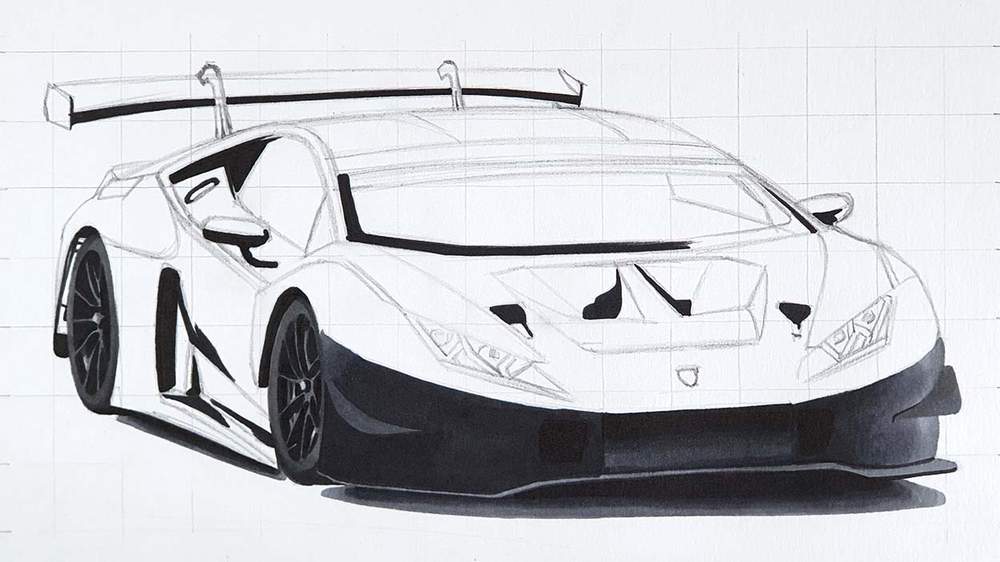
Next up I colored all the parts that are black. A big part of the front, some areas around the air vent on the hood, a bit of the window, some parts around the air intake on the side, Parts of the door mirrors, the air intake behind the side windows, parts of the filler cap, some parts behind the rear wheel and the lower part of the ginormous wing.
Step 7: Coloring the Front Bumper
Let's start with the lower part of the front. A big part of it is already colored, but there are some tiny parts left to do.
I first colored both canards (those tiny wing-like pieces to the left and right of the front bumper) with Ice Grey 5. Then, on the right, I colored the far right part with Ice Grey 4 and then I used Ice Grey 5 to blend the IG4 and black together. I also used Ice Grey 5 to color the small part on the left side and blended that into the black by just going over the edges with it.
Step 8: Coloring the Hood
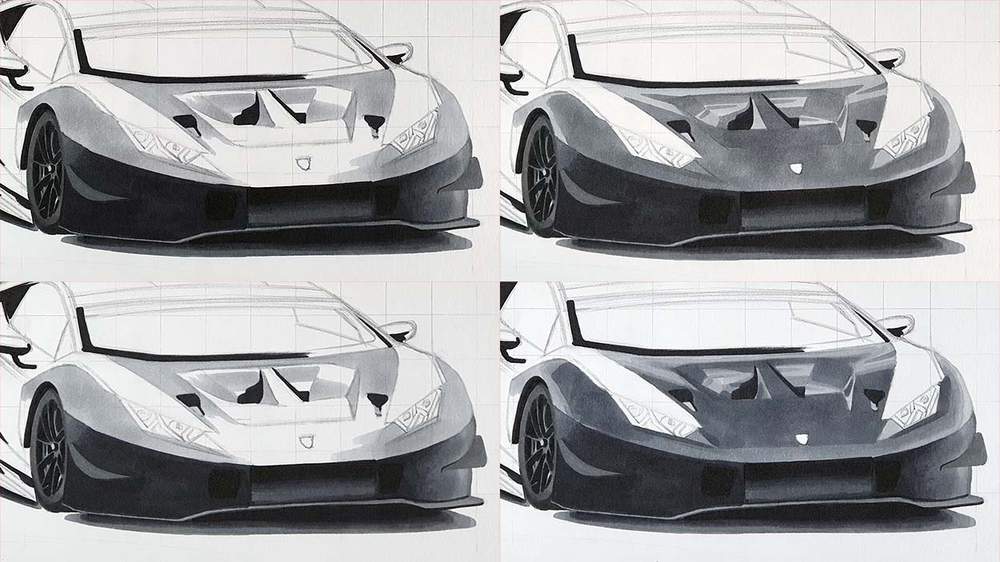
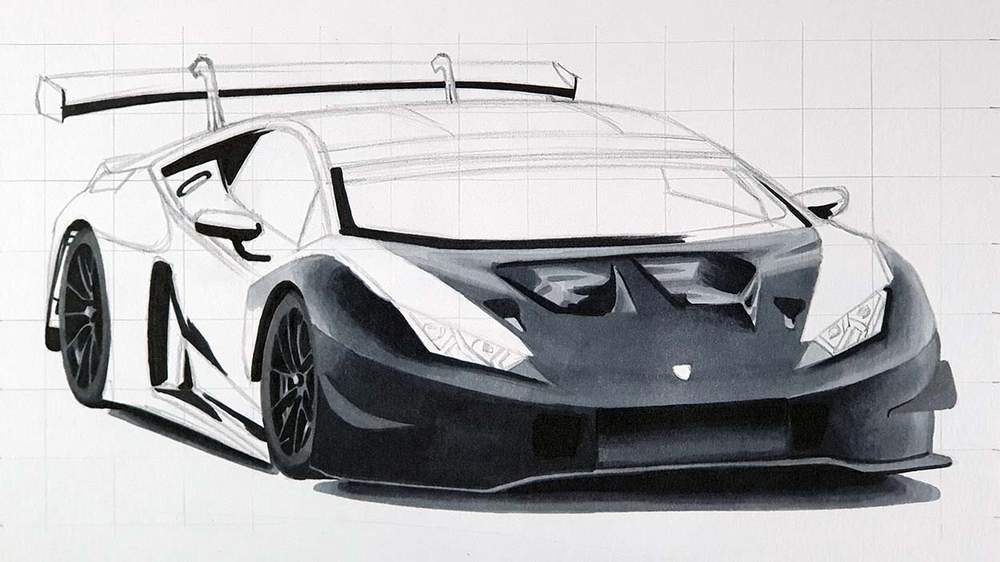
To color the hood, I started with the lightest parts and colored those with Ice Grey 2. Then I colored the remaining with Ice grey 4. After that, I added some more depth with Ice Grey 5 and I blended most of the edges with Ice Grey 4. Lastly, I added some black to the darkest parts; Some parts around the headlights and around the air vents.
Step 9: Coloring the Windshield
The windshield of this car has a dark edge surrounding it, which is the first part we're going to color.
For the bottom of the windshield, I used Ice Grey 5 the color in the remaining. For the top part of the windshield I used Ice Grey 5 again on the top left, but as I got closer to the right I started using Ice Grey 4, and to the right I used Ice Grey 2.
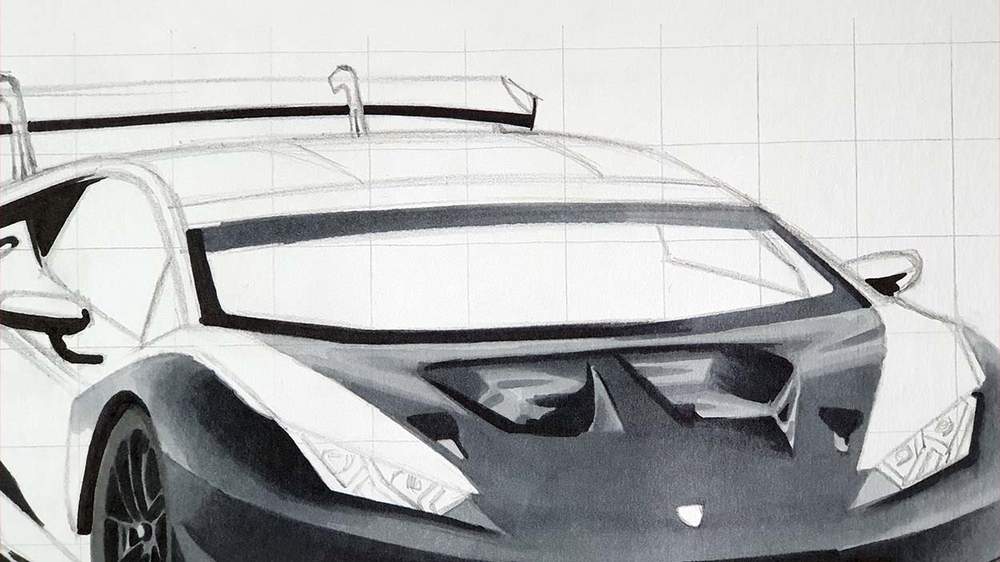
On the right of the front window, there's a small part through which you can look also through the side window, so I colored that part with Ice Grey 1. Then I colored the remaining of the front windshield with Ice Grey 4 on the left half and blended that into Ice Grey 2 on the right half.
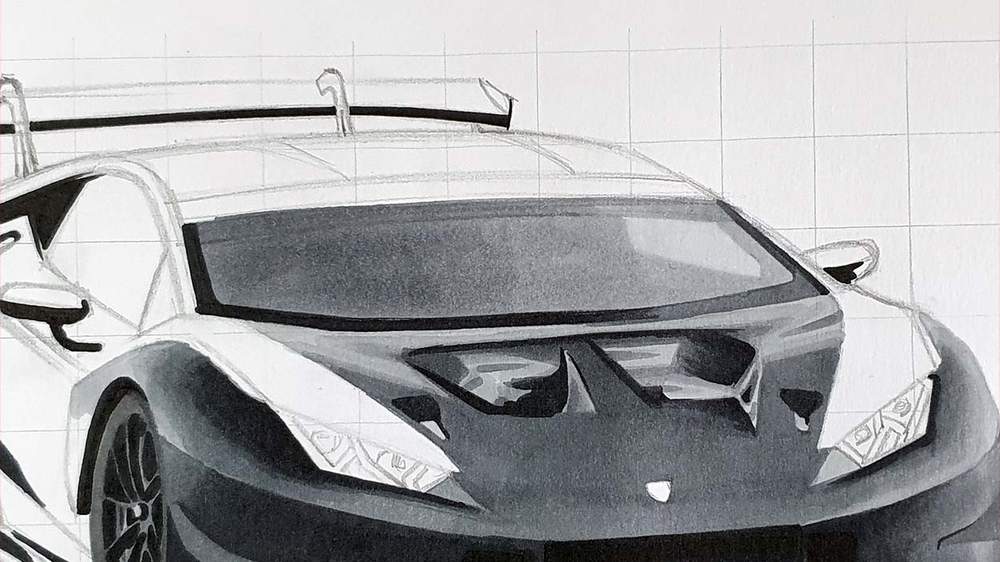
Step 10: Coloring the Roof
The roof is quite simple. I first colored it fully with Ice Grey 1 and then I added some Ice Grey 2 to the very top part and the two grooves on the roof going into a sharp point towards the windshield.
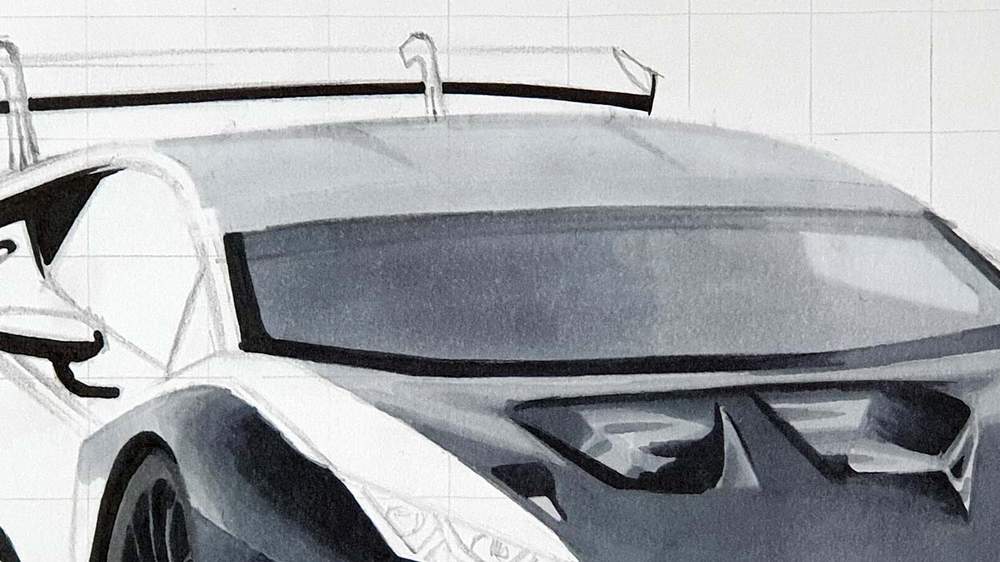
Step 11: Coloring the Door Mirrors
Coloring the mirrors is very straightforward. First I continued the dark part at the bottom with Ice Grey 5 and curled that a bit up towards the right edge. Then I colored the remaining with Ice Grey 2. After that, I layer Ice Grey 5 and black in the center and blended the edges with Ice Grey 2.
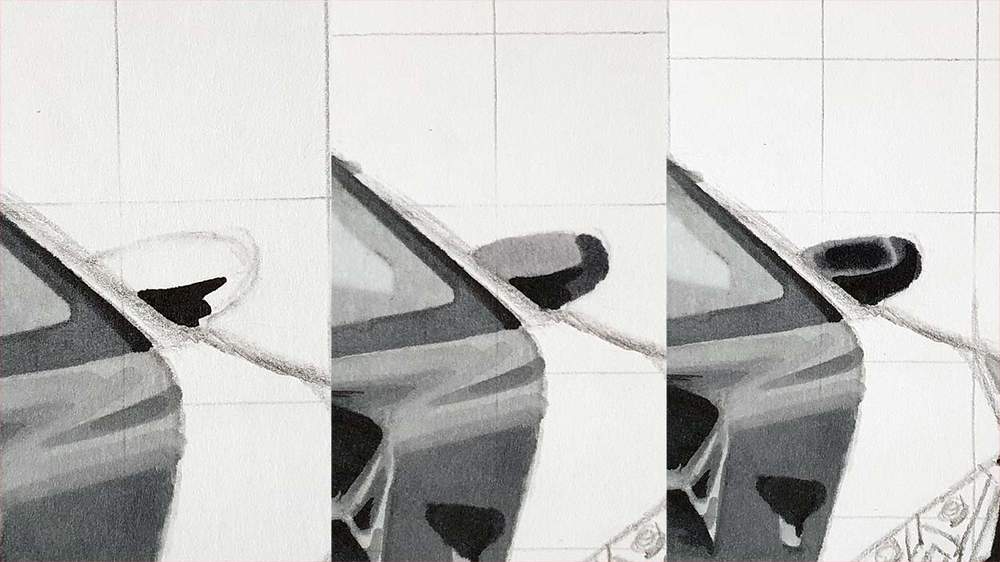
Then I did the same for the other mirror.
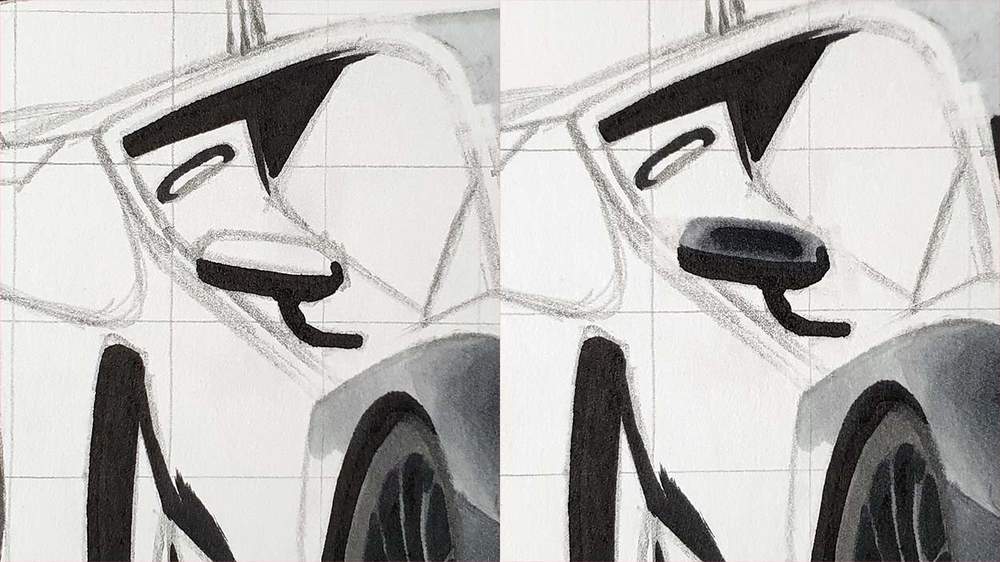
Step 12: Coloring the side
When drawing the side of the Lamborghini I noticed I had missed a small part of the cofango right behind the front wheel, so I colored that with black first.
Now let's start coloring the actual side of the car.
I started by coloring the darkest parts with Ice Grey 5. Then I added some black towards the top of that part and in the center of the part to the left of the air intake and blended that all together with Ice Grey 5 to make it smoother.
Then I colored the lightest Parts with Ice Grey 2.
Make sure to leave the bottom part of the door uncolored as we'll color that later on.

Coloring the Reflections of the Clouds
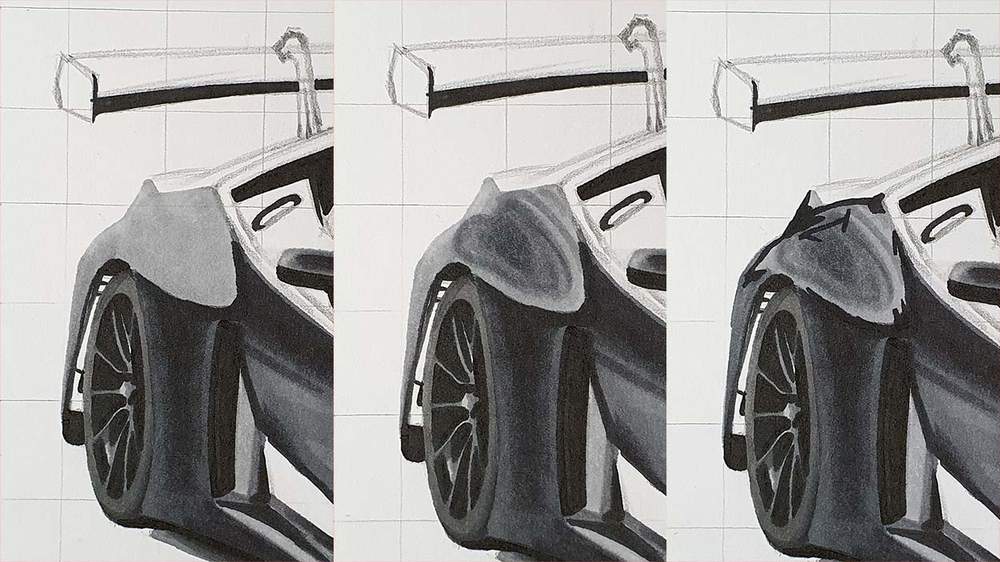
Now it's time to color the cloud reflections above the rear wheel.
First I colored that whole part with Ice Grey 2 as a base. Then I darkened the middle part of the reflection with Ice Grey 4 and then a bit of Ice Grey 5. I also added some circling lines around that dark part with Ice Grey 4. And lastly, I added some more reflections with black and Ice Grey 5.
Step 13: Coloring the Side Window
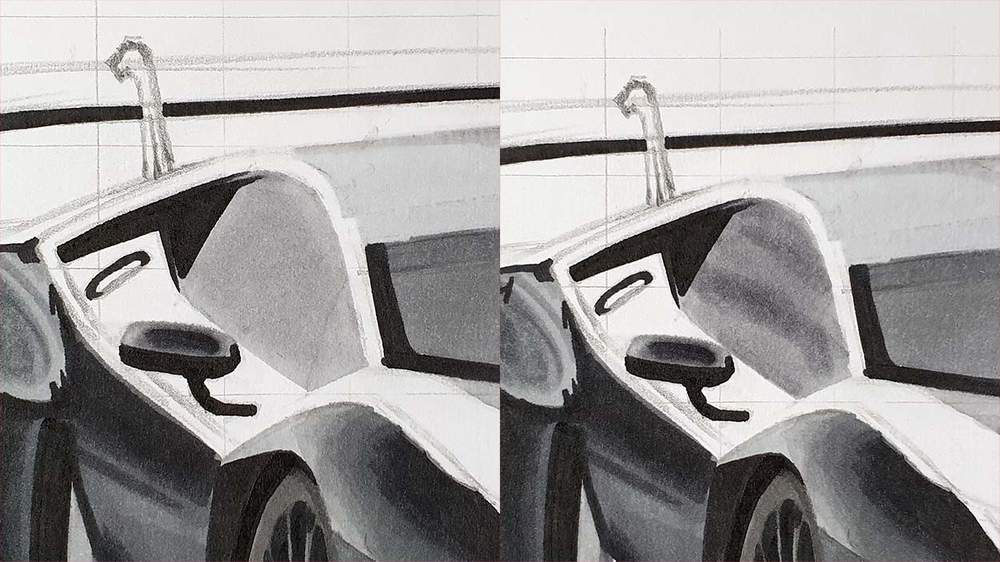
To color the side window I started by coloring it fully with Ice Grey 2. Then I added some thick lines with the Ice Grey 4 marker and blended those with the Ice Grey 2 to make them appear softer like the clouds.
Step 14: Coloring the Filler Cap
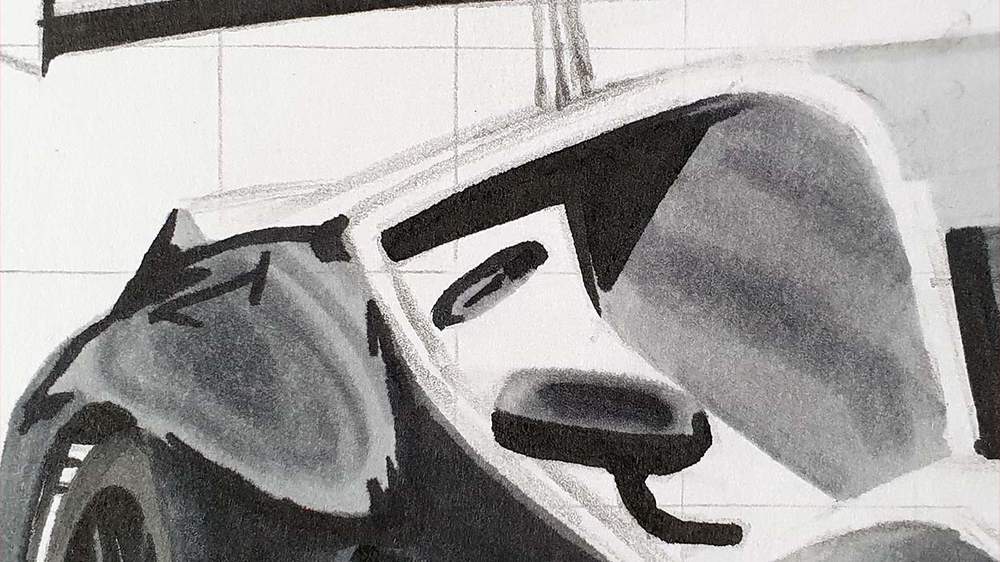
To draw the filler cap I just colored it with Ice Grey 2 and added some black towards the top and a diagonal line. And that's it for the filler cap.
Step 15: Coloring the Headlights
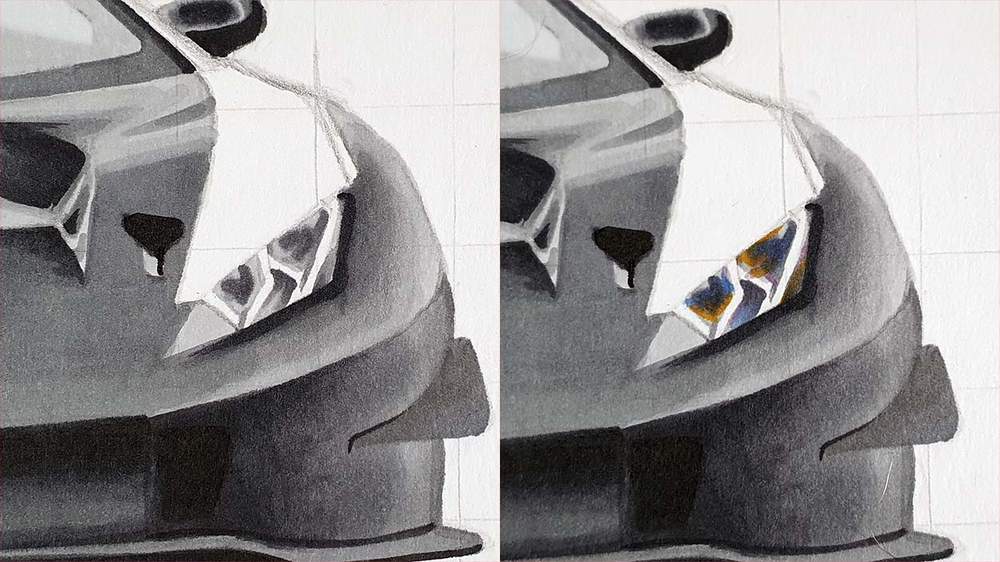
Now comes my favorite part: coloring the headlights. If you look closely at the reference photo you can see some beautiful light fragmentation resulting in some colorful reflections in the headlights which I really like.
Let's start by coloring the left headlight with Ice Grey 2, but leaving the y-shaped lights white. Then I added some details with the Ice Grey 4 marker to give an indication of the lights.
Now it's time to add those colors. I added some Raw Sienna (O646) to the parts that looked a bit orange in the photo. Then I did the same with Amethyst (V626) and China Blue (B736). It doesn't look perfect yet, but we'll fix that later.
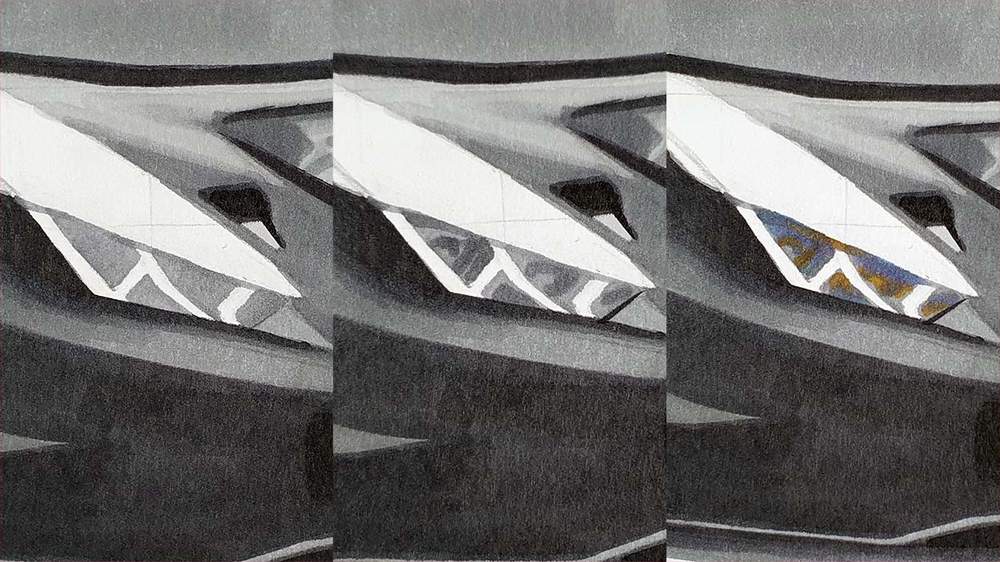
Now it's time to do the same for the right headlight. Again I started by coloring it Ice Grey 2 and Ice Grey 4 and 5 to add some details, but leaving the y-shaped white lights. And finally, I added some colors, just like in the other headlight.
Step 16: Coloring the Green Parts
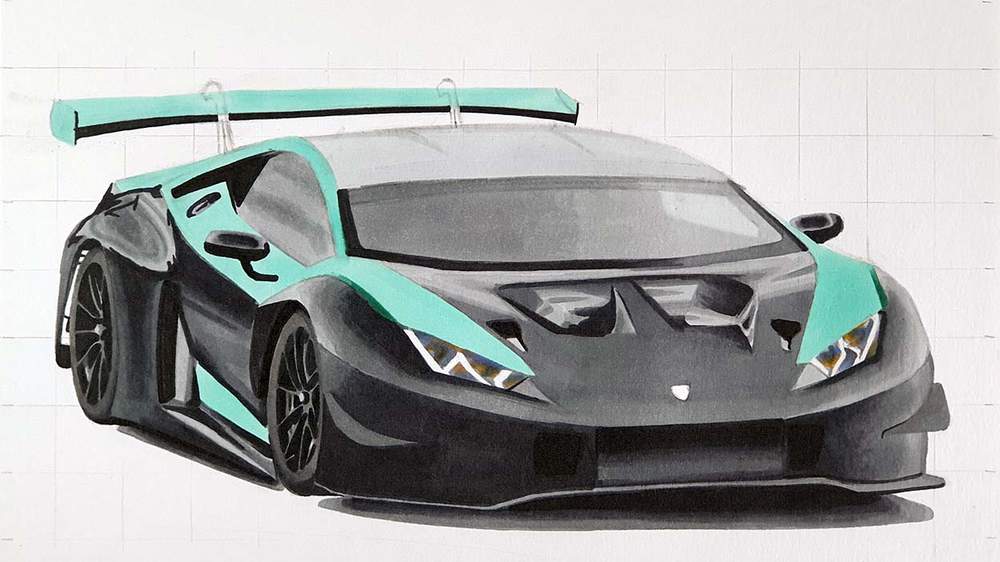
It's time to add some color to this drawing! I used Pastel Green (G829) to color every green part of the car. Then I used Holly (G724) to add the tiny darker green stripes above the headlights and blended them at the top into the Pastel Green.
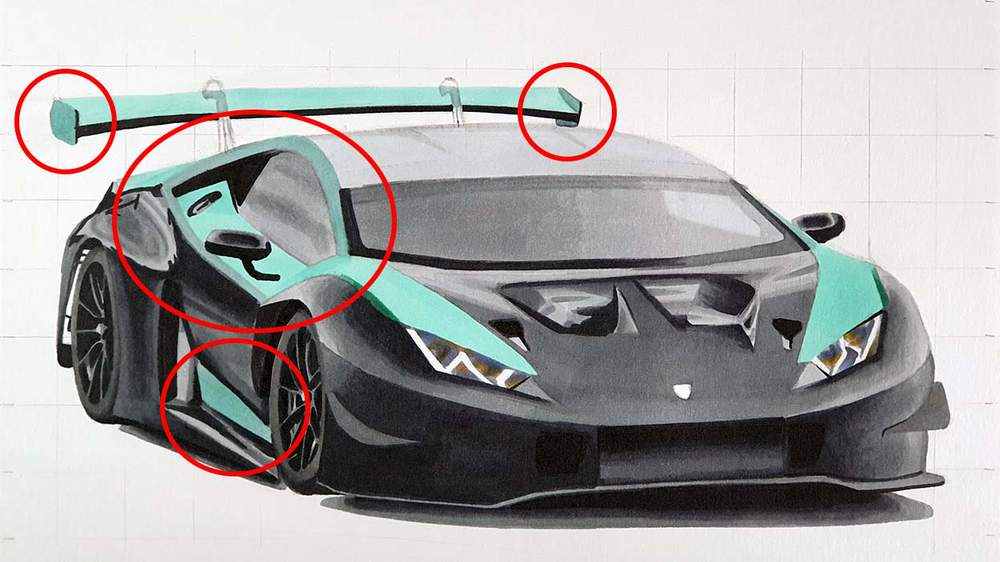
Now it's time to make some green parts more greyish.
Some green parts (the lower part of the door, the edge around the side window, and the endplates of the wing) need to be a bit greyer, so I layered some Ice Grey 2 over the Pastel Green.
Step 17: Coloring the Wing Stands
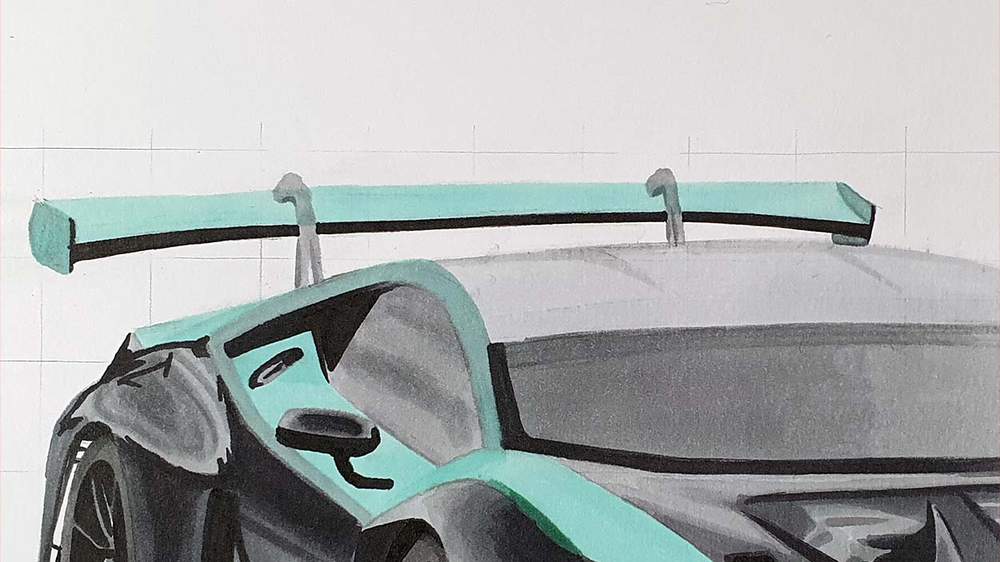
There are just a few things left to draw now. One, eh, two of those are the wing stands holding the wing.
To color those, I colored each of them fully with Ice Grey 2 and then I added some Ice Grey 4 lines on the bottom and the rear of each wing stand.
Step 18: Coloring the Lamborghini Logo
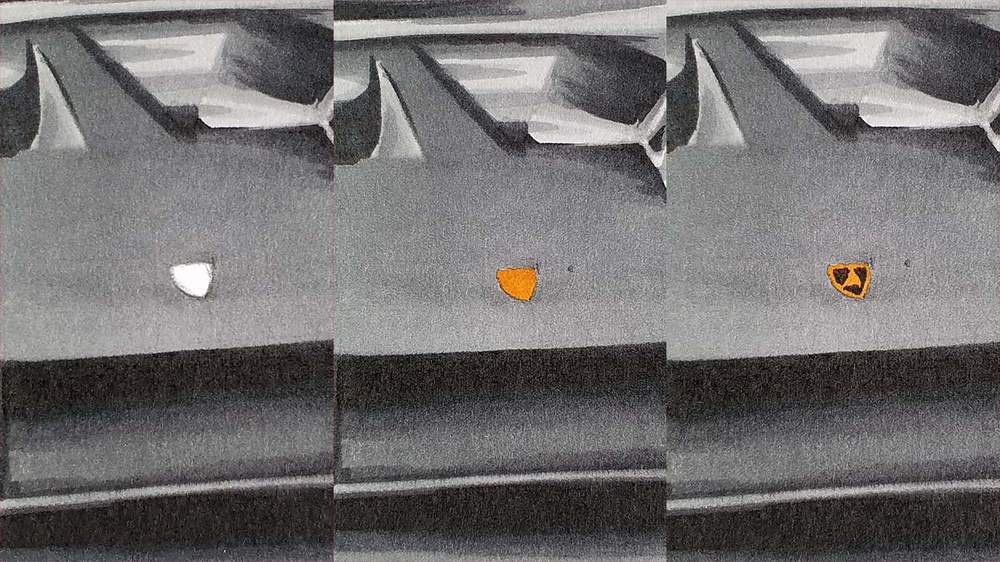
The final thing to color is the Lamborghini logo on the front of the car.
I first colored it with Raw Sienna, but it looked way too dark and brown, so I suggest you use Sunflower (Y156) instead. Then I added the black parts with a Black Stabilo fineliner leaving the rectangular-shaped bull in the center uncolored.
Step 19: Adding Details with Colored Pencils
You could call it done now, but I like to add and refine some details with some colored pencils to make it look just that little bit better.
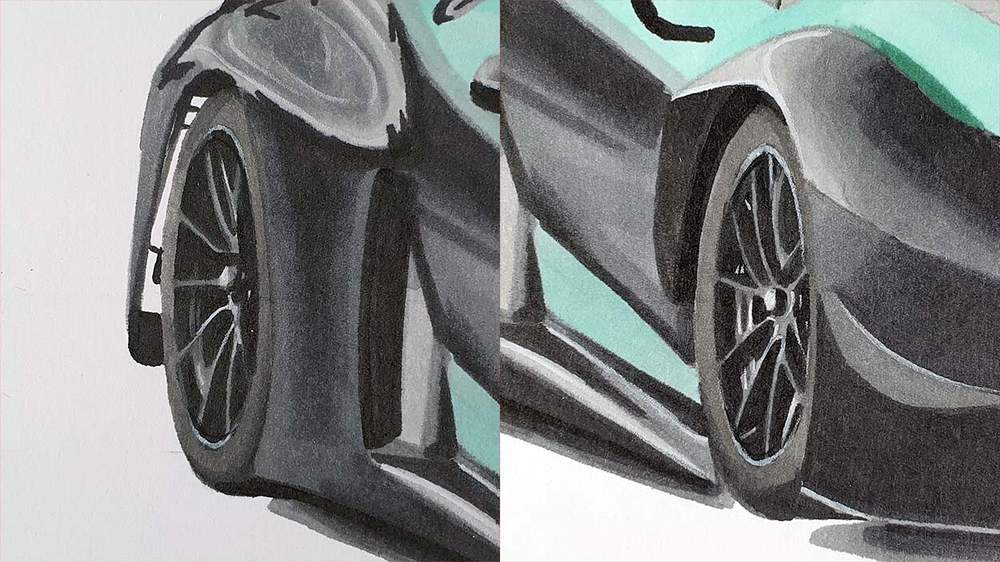
First I refined the wheels, starting with the rear one. I added some Steel Grey and White lines to refine the spokes. Then I did the same for the front wheels.
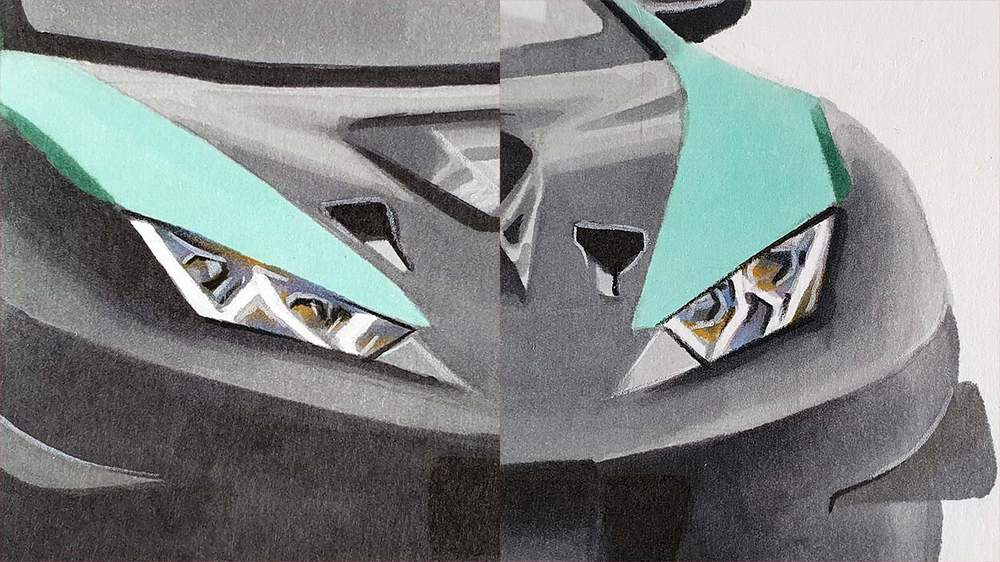
I also added some white highlights and black lines to the headlights to refine the light shapes a bit that were lost when adding the colors.
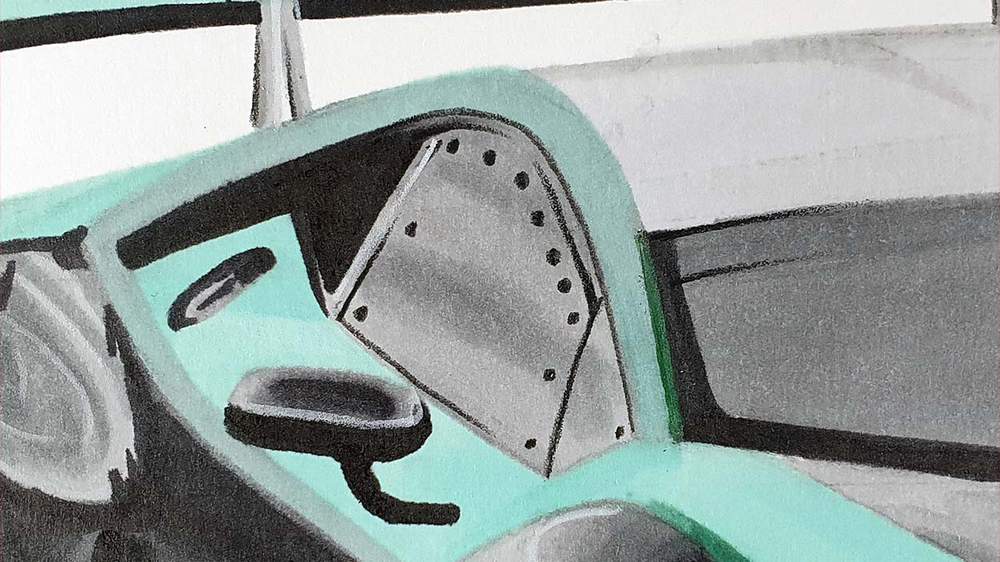
Then I added some black details to the side window and I added the antenna on top of the car.
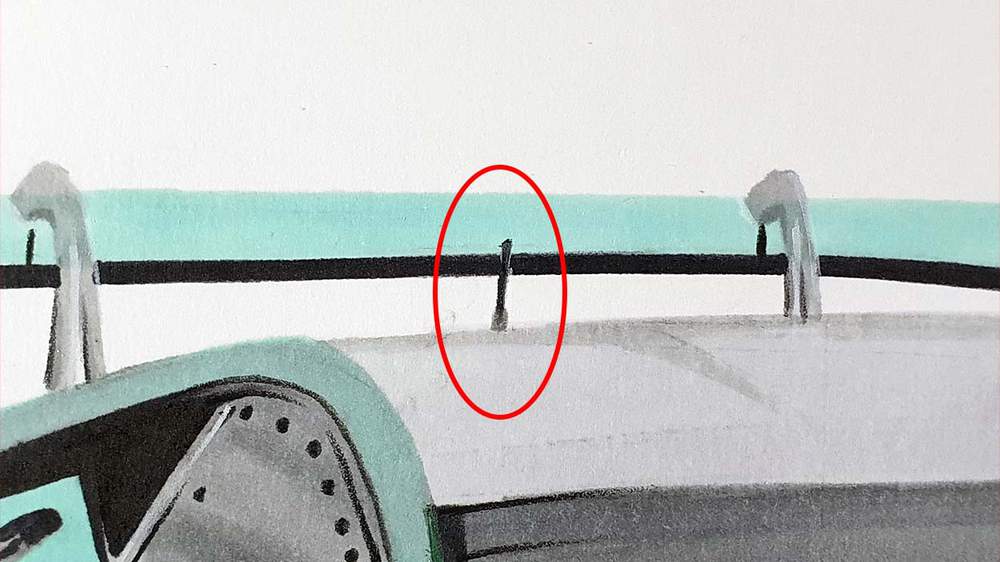
I could go on and on with adding those small details, but it has to be done.
It's finished!
And that's it. Your Lamborghini Huracán GT3 Evo race car is done!
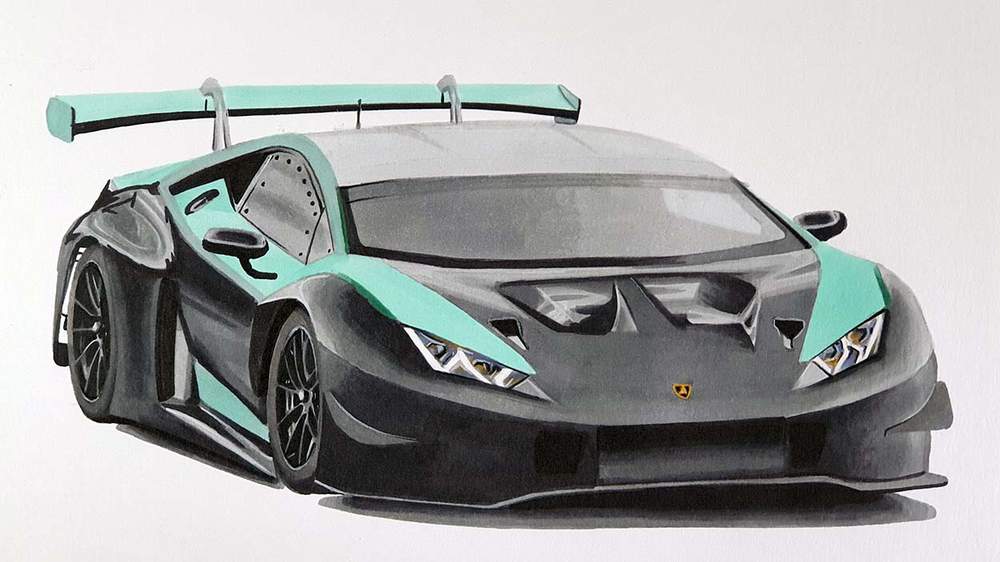
If you've followed along with this tutorial and you want to share your drawing on Instagram, make sure to tag me (@luukminkman)! I'd love to see how your drawing turned out!



Add a comment
Comments
this is cool
Damn this is sick!! I'm using this for one of my Art scholarship drawings; huge thanks to you :)