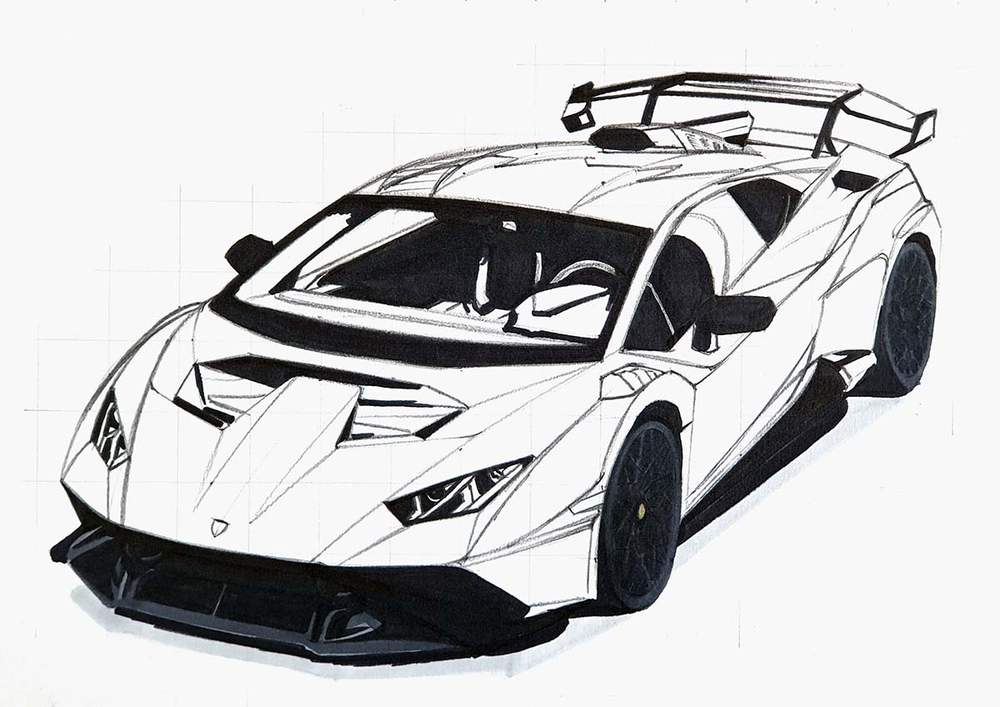
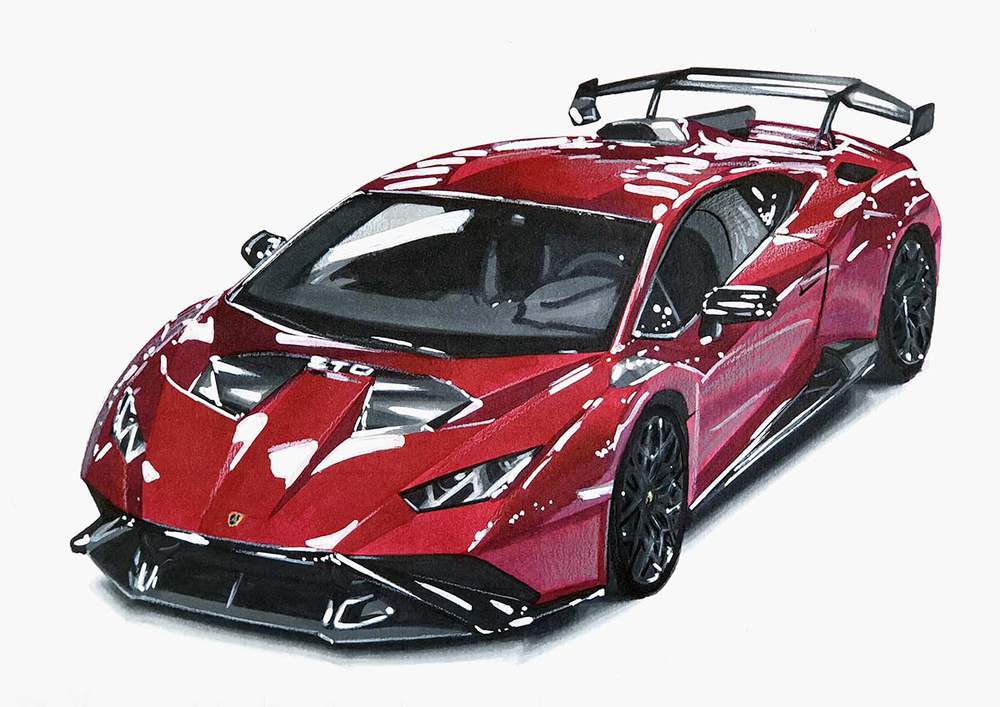
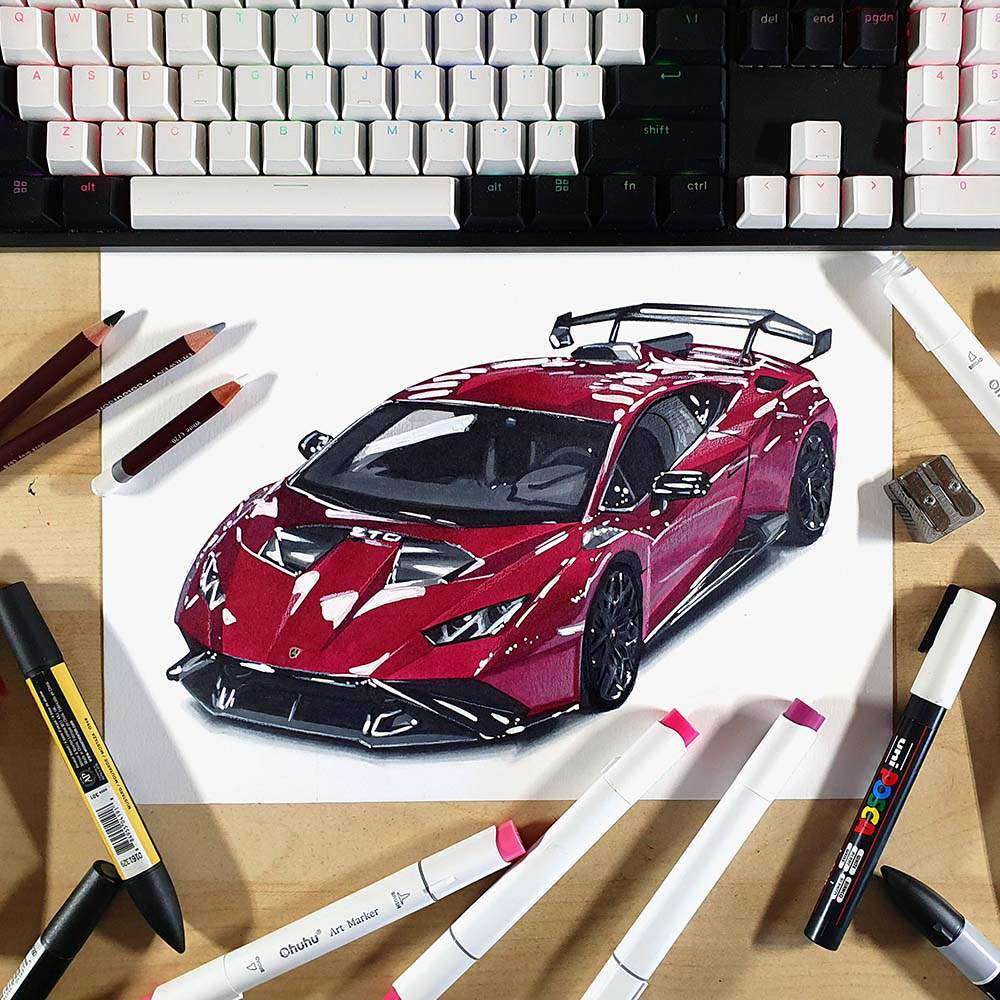
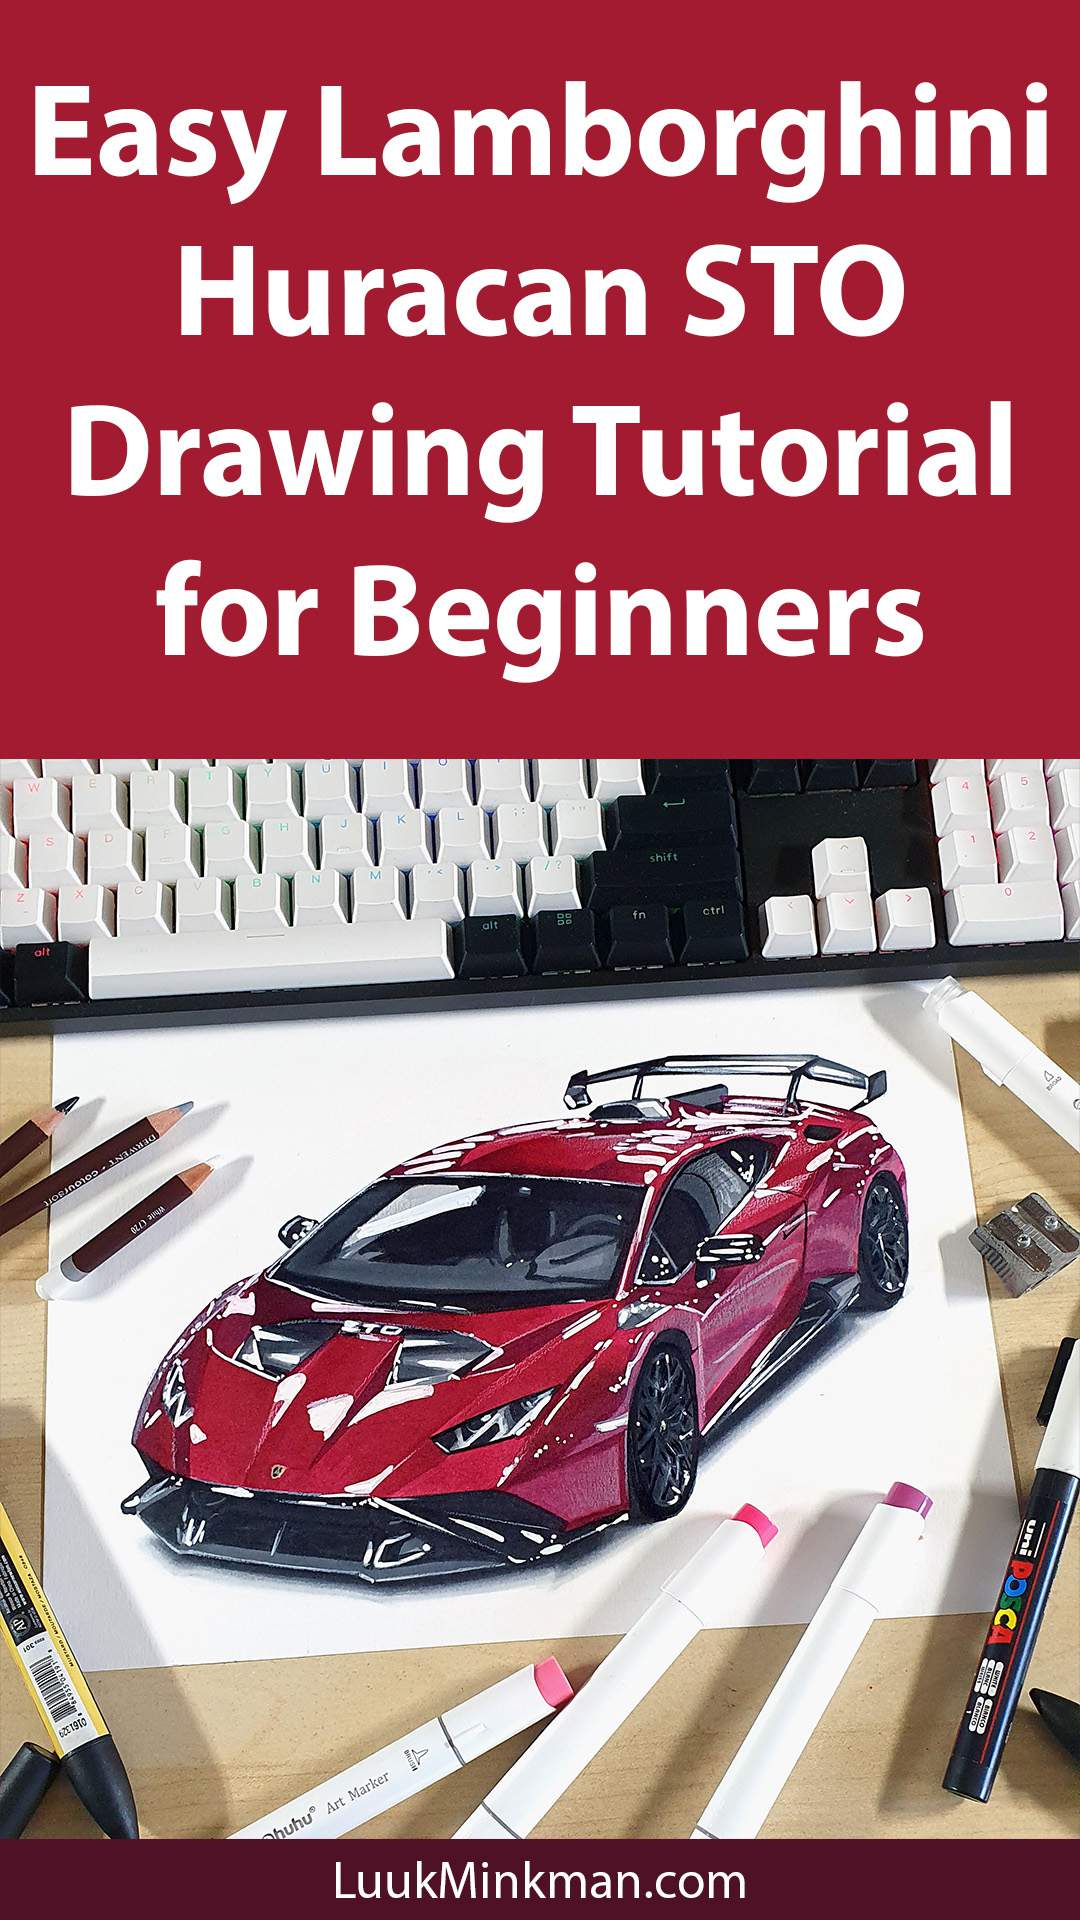
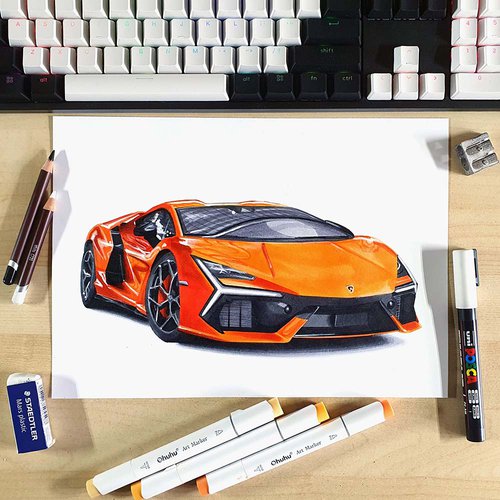
How to Draw a Lamborghini Huracan STO - Easy Tutorial
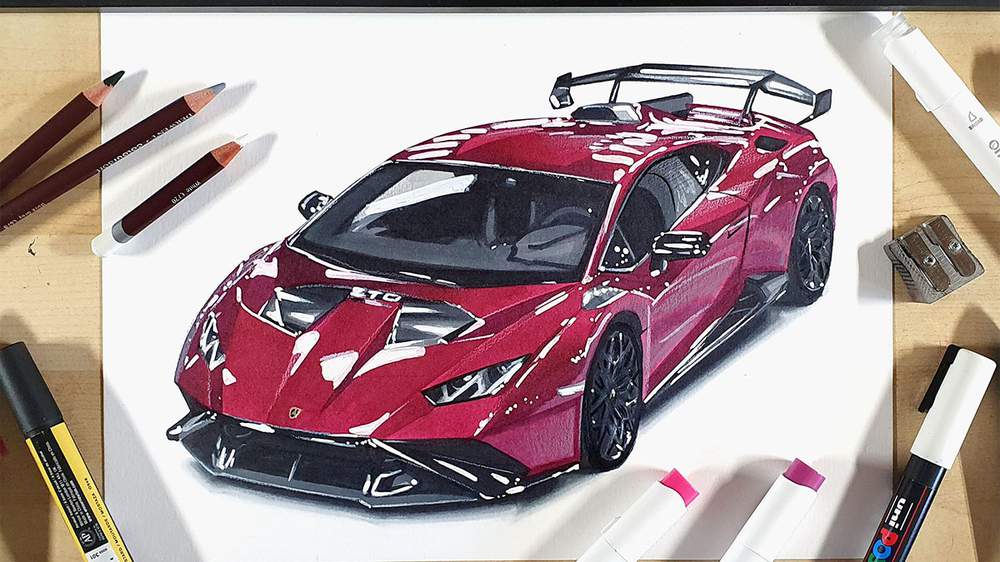
In this week's car drawing tutorial, I'm going to show you how to draw a Lamborghini Huracan STO in this beautiful magentaish color called Viola Bast.
Each part of the drawing is broken up into simple and easy-to-follow steps so you can make an amazing and realistic drawing of the STO yourself!
Disclaimer: In the name of full transparency, please be aware that this blog post contains affiliate links and any purchases made through such links will result in a small commission for me (at no extra cost for you).
Drawing Supplies I Used to Draw the Lamborghini Huracan STO
To draw this Huracan STO, I used the following art supplies:
A4-sized Canson Illustration Bristol paper;
A graphite pencil, a ruler, a kneaded eraser, and a regular eraser;
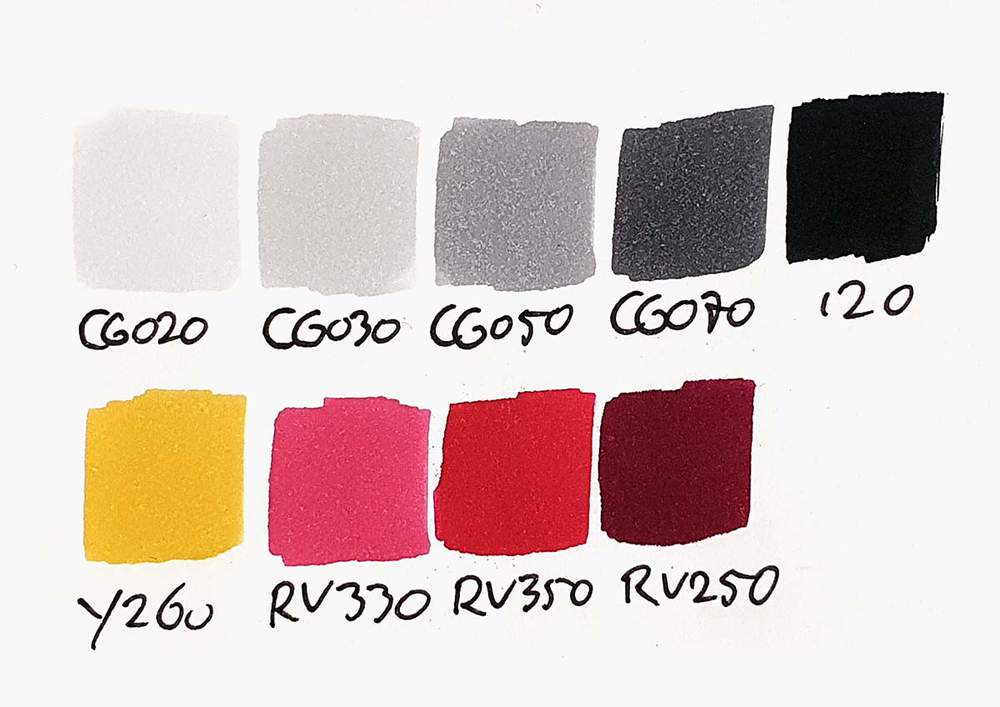
Ohuhu Honolulu markers in the colors Neutral Grey 02 (CG020), Neutral Grey 03 (CG030), Neutral Grey 05 (CG050), Neutral Grey 07 (CG070), Black (120), Yellow Dahlia (Y260), Strawberry Pink (RV330), Crimson (RV350), and Peony (RV250). I also used the colorless blender. You can also buy each color individually here;
Derwent Coloursoft pencils in the colors White, Dove Grey, and Black;
And a white Posca PC-1MR.
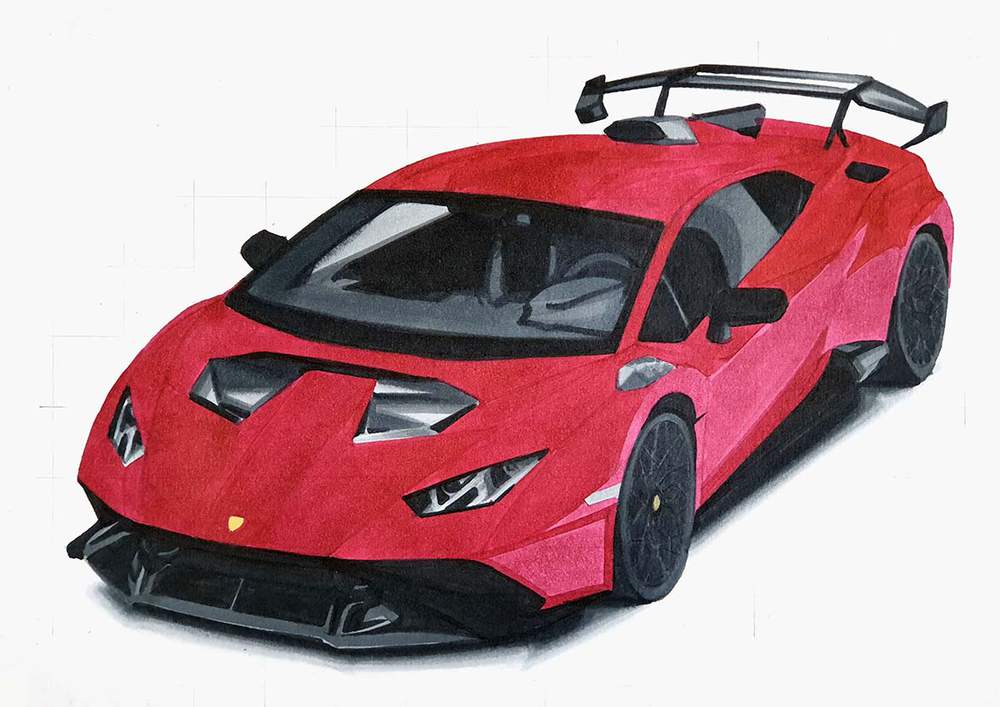
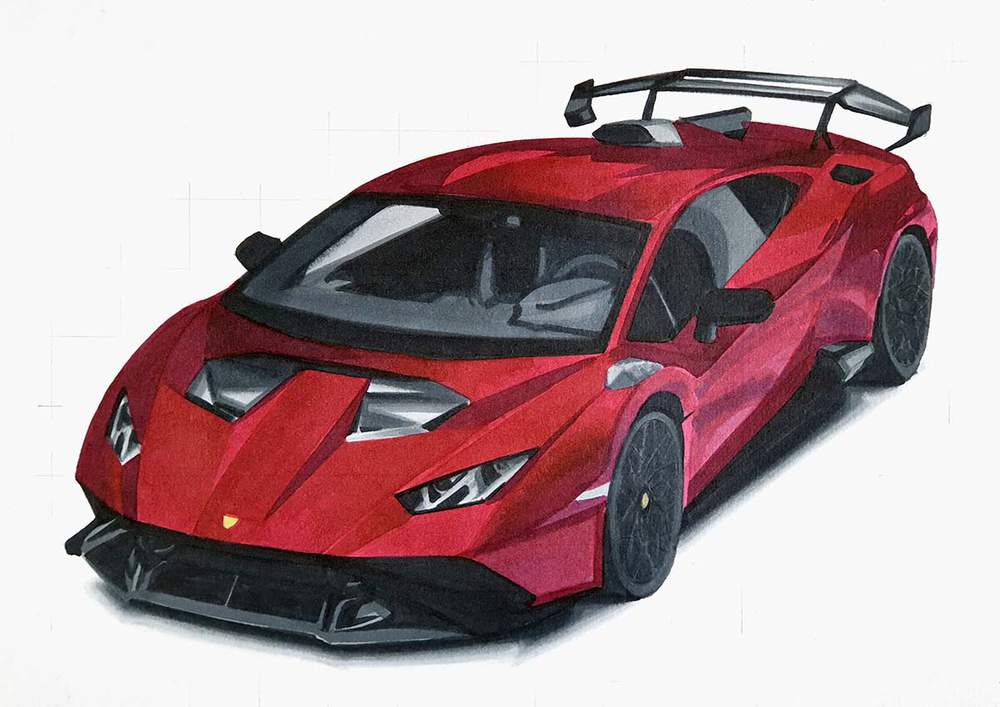
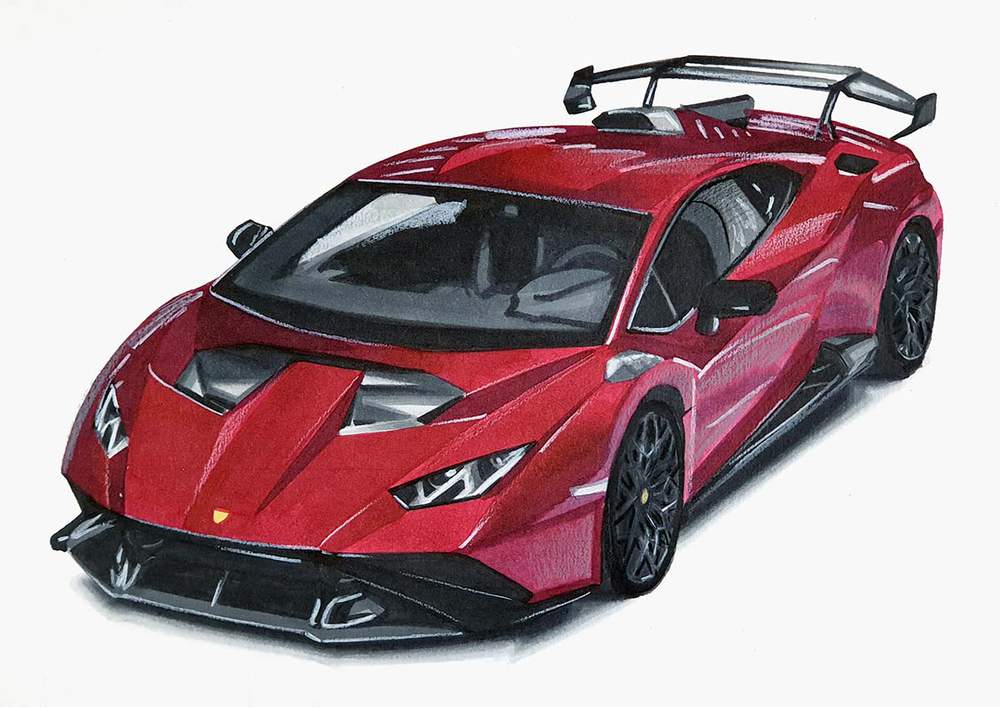
Reference Photos I Used to Draw this Lamborghini Huracan STO
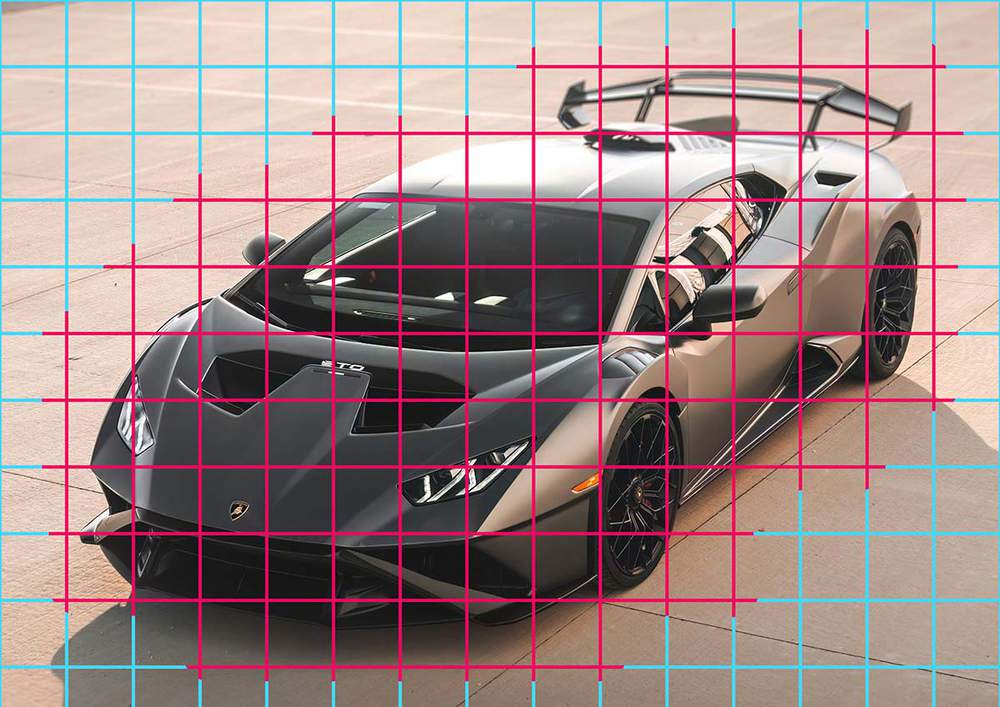
To make this drawing of the Lamborghini STO, I used 3 reference photos. 1 for the proportions and the perspective, 1 for the lighting and the reflections, and 1 for the color.
I used this photo for the perspective.

I used this photo for the reflections.
And I used this photo as a color reference.
How Do You Draw a Realistic Lamborghini STO?
To make a realistic drawing of a Lamborghini STO, first gather a few reference photos for the perspective, proportions, lighting, reflections, and color.
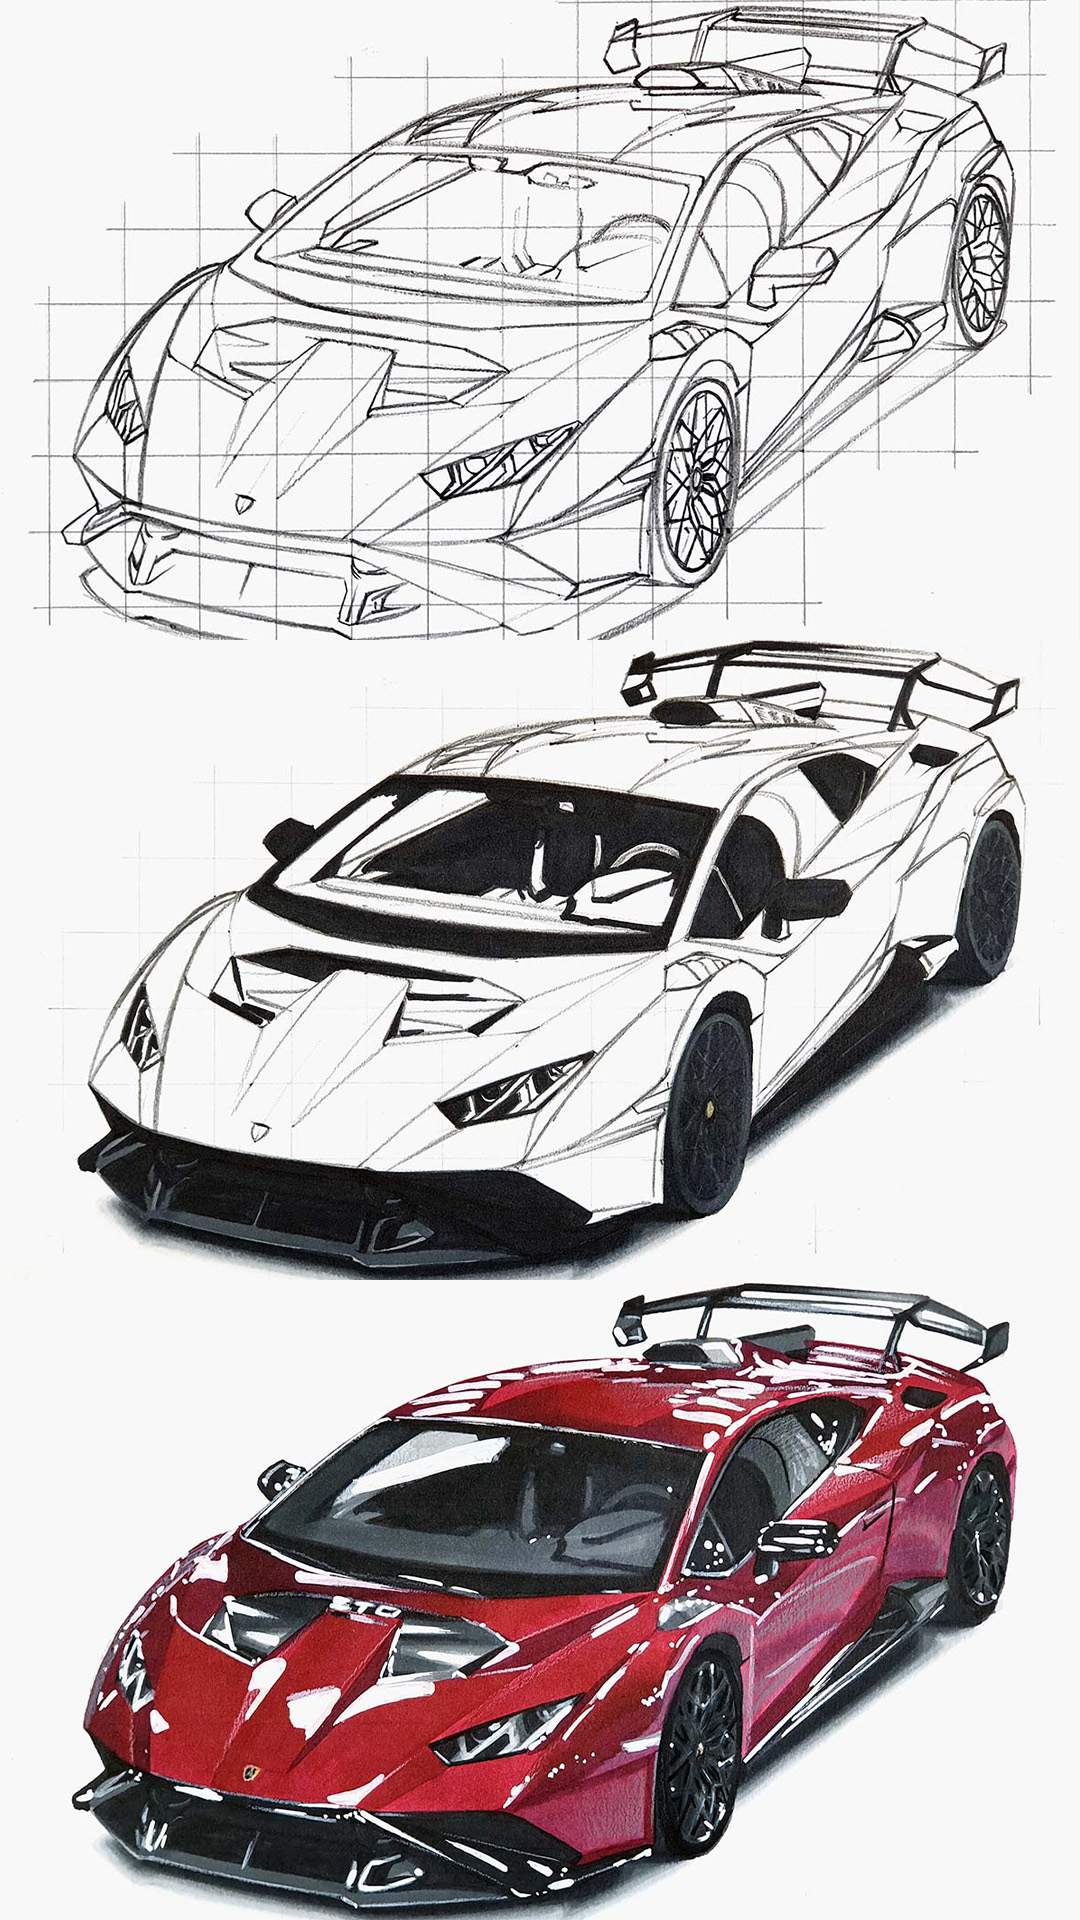
After that, create a sketch of the outline of the car using the grid method.
Next, color the car with alcohol markers starting with the black and the grey parts, before moving on to the main body of the Huracan STO.
Lastly, add some details with colored pencils and highlights with a Posca paint marker.
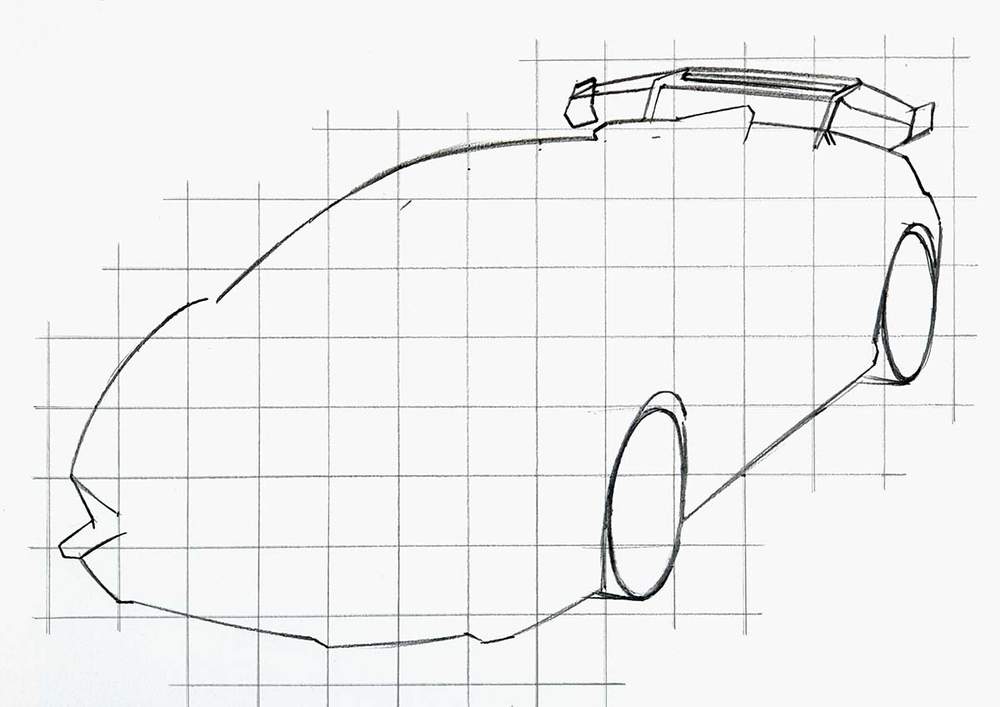
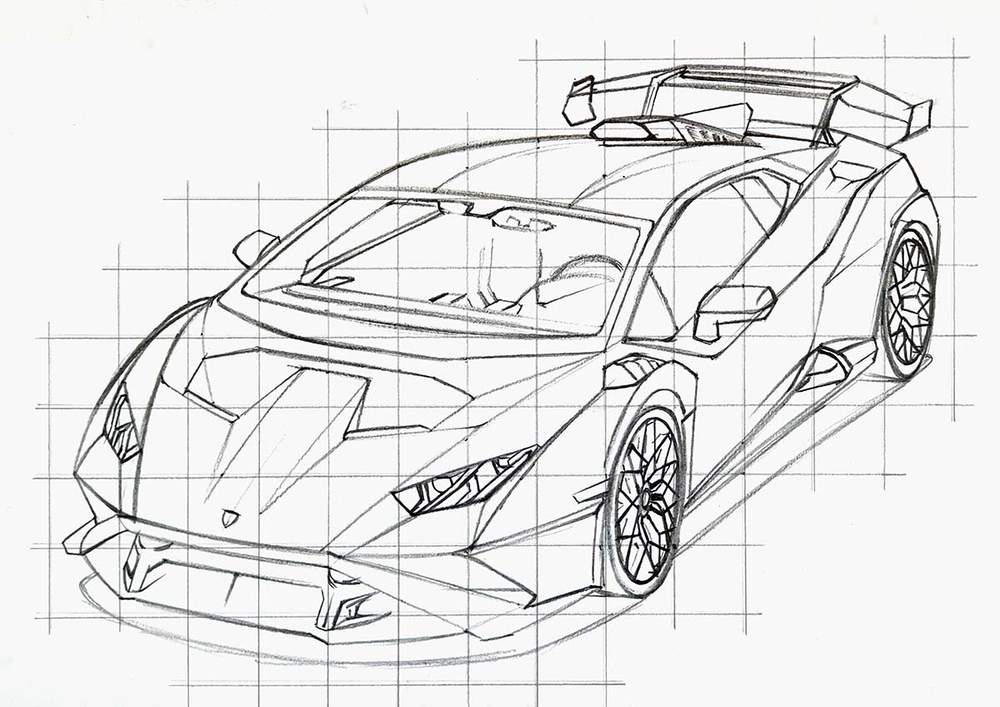
Step 1: Sketch the outline of the Lamborghini STO
To sketch the outline of the Lamborghini Huracan STO, I like to use the grid method. This technique makes sketching cars' proportions accurately a lot easier. Here's a more in-depth tutorial on how to use this technique.
1. Resize the reference photo for the proportions to have the same size and aspect ratio as your paper.
I use A4-sized paper which is 3508 by 2480 pixels.
2. Add a grid overlay on top of our reference photo.
I use a grid of 15 by 10.5 squares resulting in squares of 2 by 2 cm which works well with A4-sized paper.
3. Recreate the grid on your paper.
Each grid line is 2 cm apart in my sketch and I only sketched the grid lines necessary to sketch the car.

4. Sketch the basic outline of the Lamborghini STO.
Pick any part of the outline, mark where it starts and ends, mark where it crosses grid lines, and then sketch the line in one big motion.
Do this until you sketched the whole outline.
I like to start on the left of the car and work my way up and around the car.
5. Sketch the basic shapes of the car.
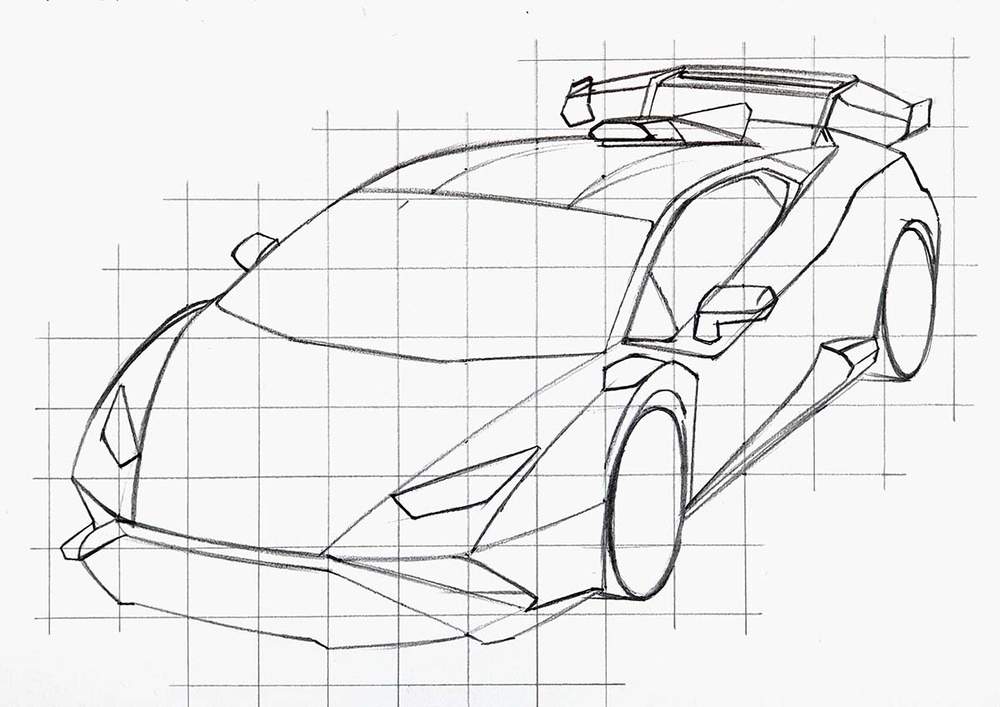
6. Sketch the details of the car like the inside of the headlight and the front splitter aero parts.
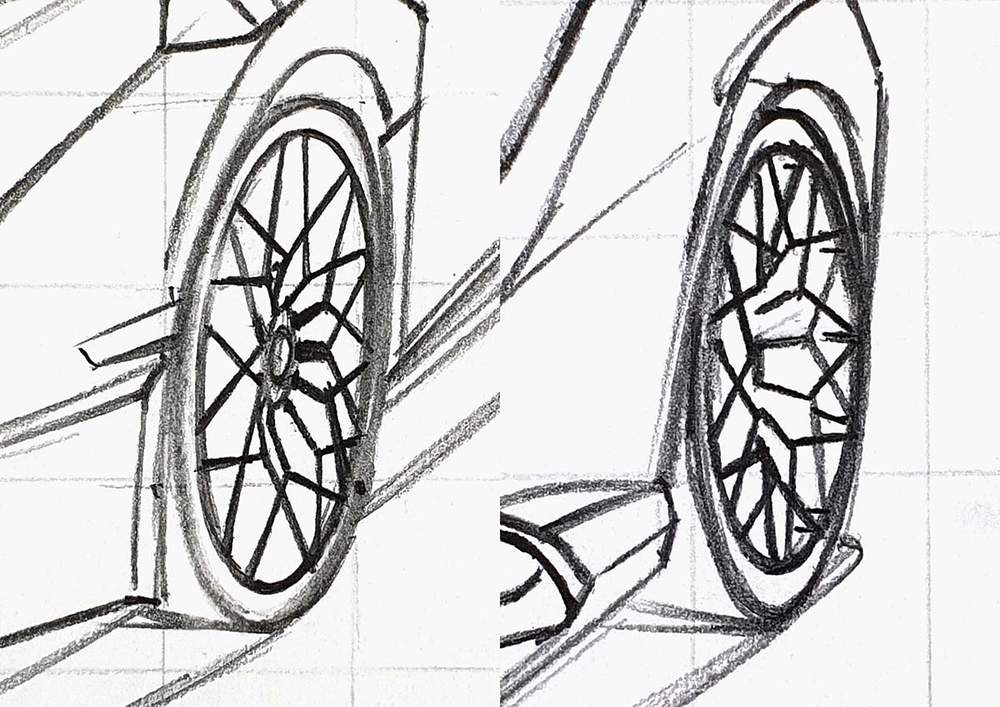
7. Sketch the wheels of the Lamborghini STO.
They are quite complex wheels. I started by marking the center where all the spokes come together.
Then I sketched the lines coming out from the center. These lines are only visible on the right side of the wheels.
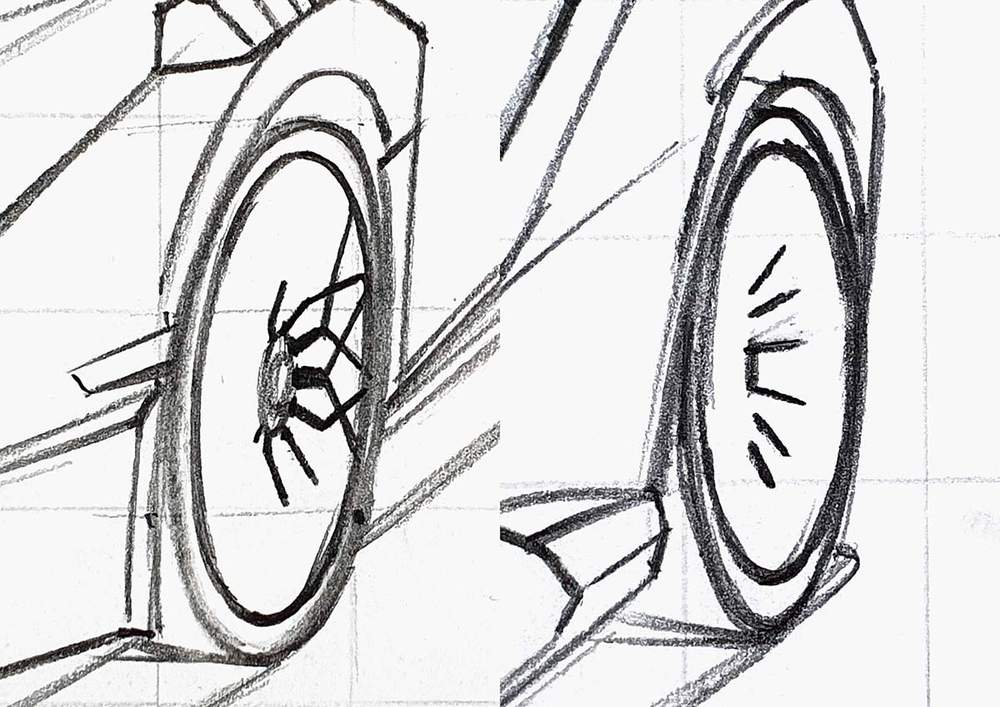
After that, I sketched the remainder of the spokes while carefully looking at where they should attach to the outer rim.
8. Sketch the interior of the Lamborghini STO.
9. Lastly, sketch the reflections onto the car.
Look at the reference photo for the reflections as a guide to where to mark the reflections in your sketch.
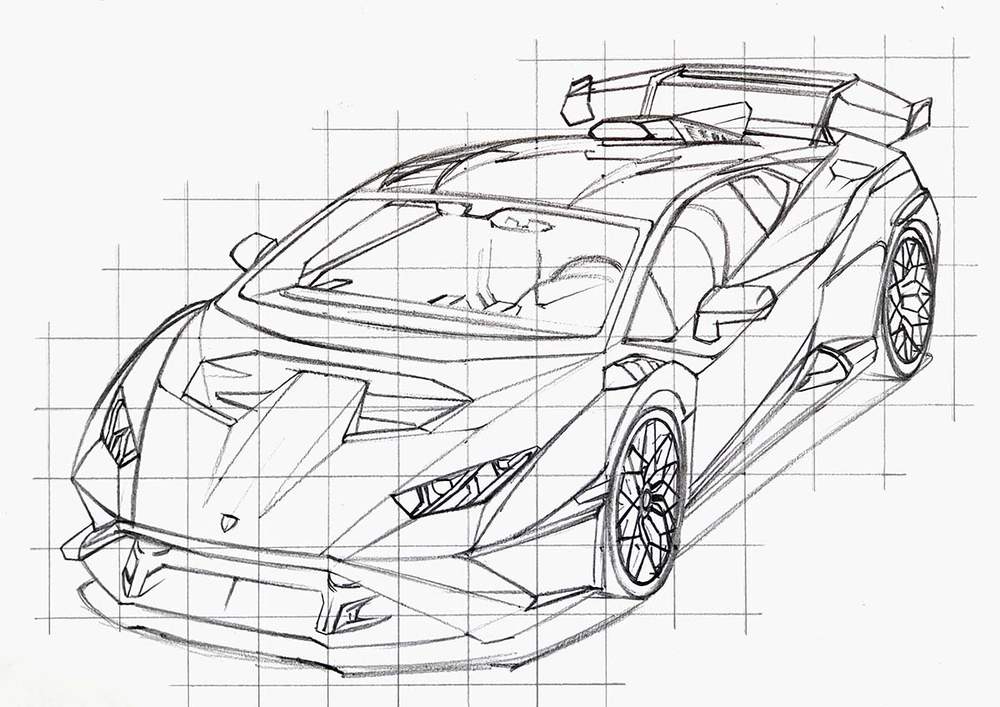
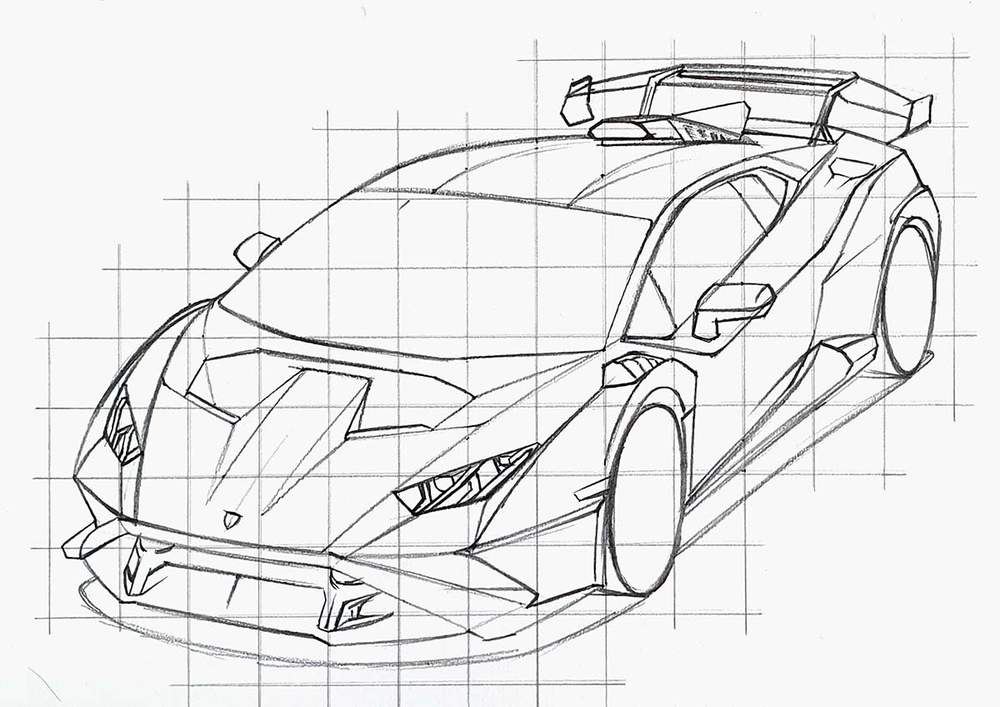
Make sure you erase your sketch until you can only barely see it before you're going to color each part of the drawing.
If you don't do this your sketch will show through your drawing making it look less realistic.

My go-to alcohol markers for blending, rich color payoff, and amazing value. The brush tips feel super natural to draw with — a must-have for smooth gradients and realistic shading!
- Brush + chisel tips
- Great for beginners & advanced artists
- Budget-friendly alternative to Copics
Step 2: Color All Pure Black Parts of the Lamborghini Huracan STO
10. Use the Black Ohuhu marker to color all pure black parts on the car.
This helps make the drawing look simpler and makes it easier to color.

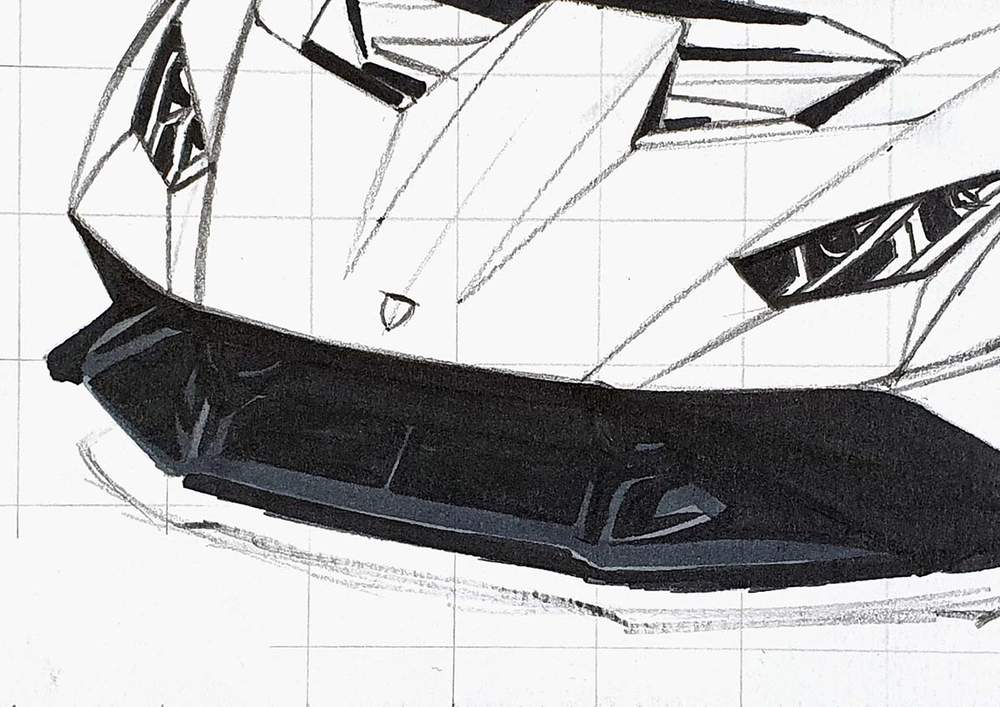
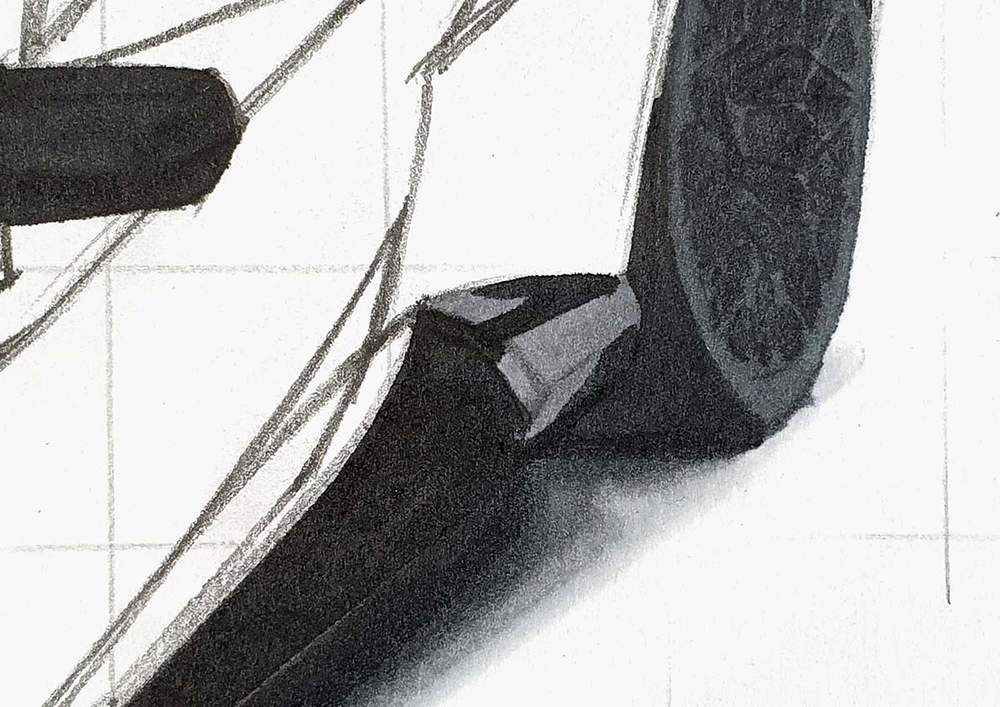
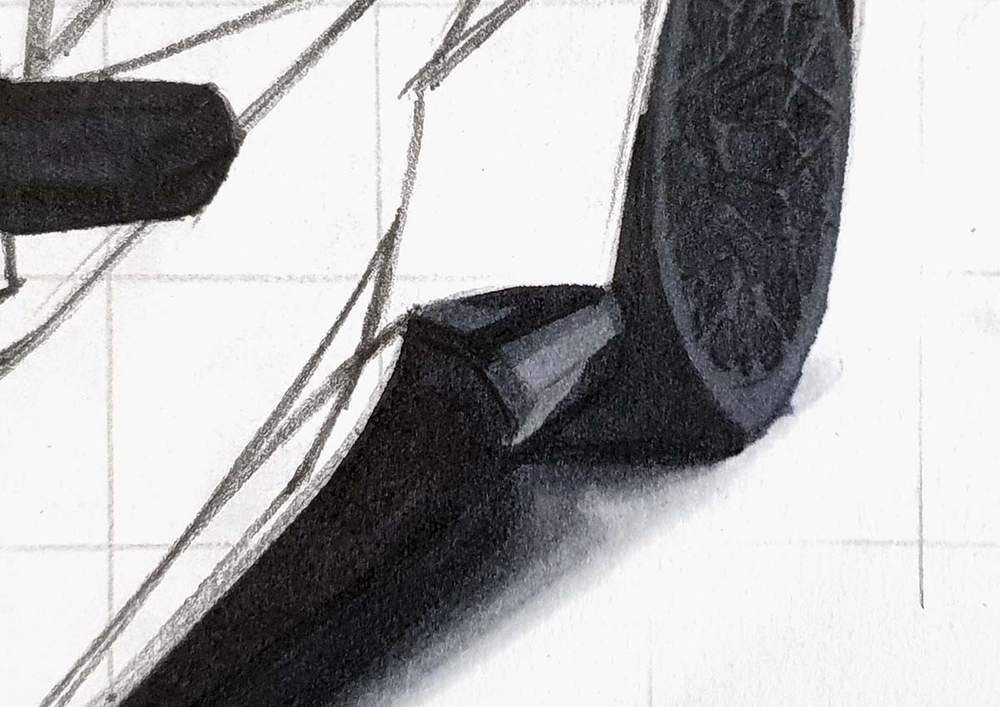
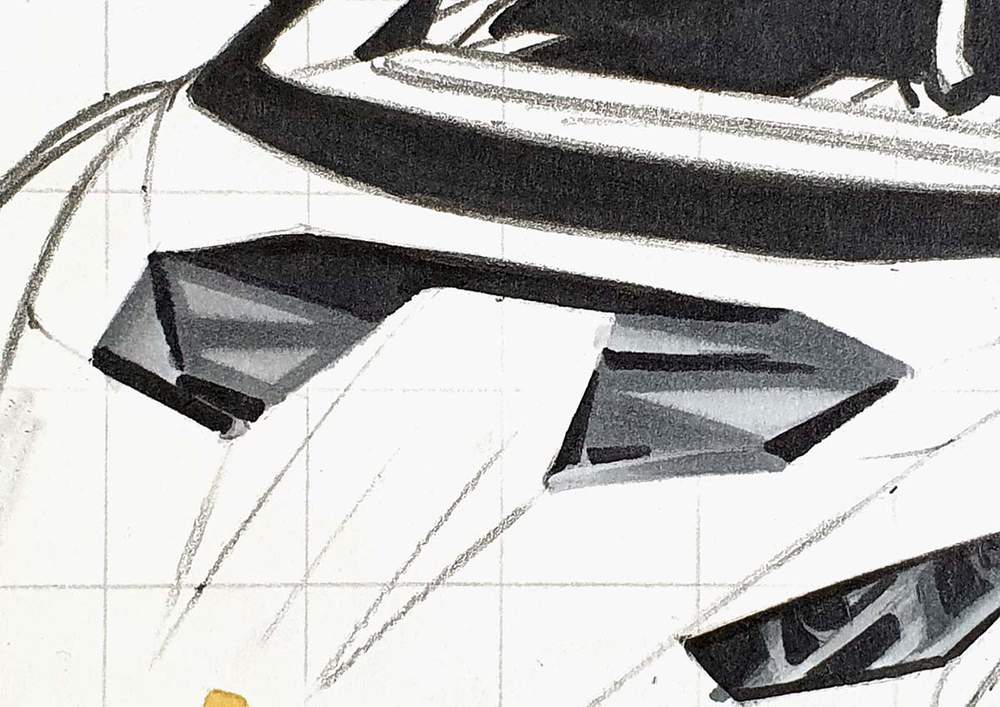
Step 3: Color the Front Splitter and Aero Parts of the Lamborghini STO
11. Use Neutral Grey 05 (CG050) to color the front splitter and other aero parts.
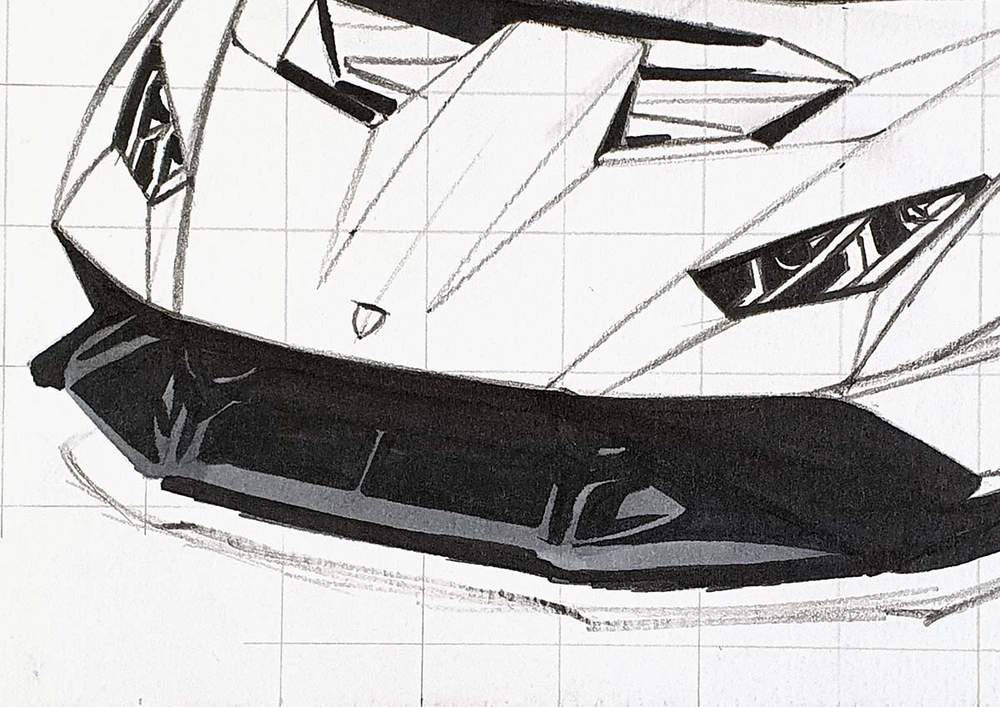
12. Use Neutral Grey 07 (CG070) to color most of the front splitter and aero parts while leaving some lighter edges and reflections.
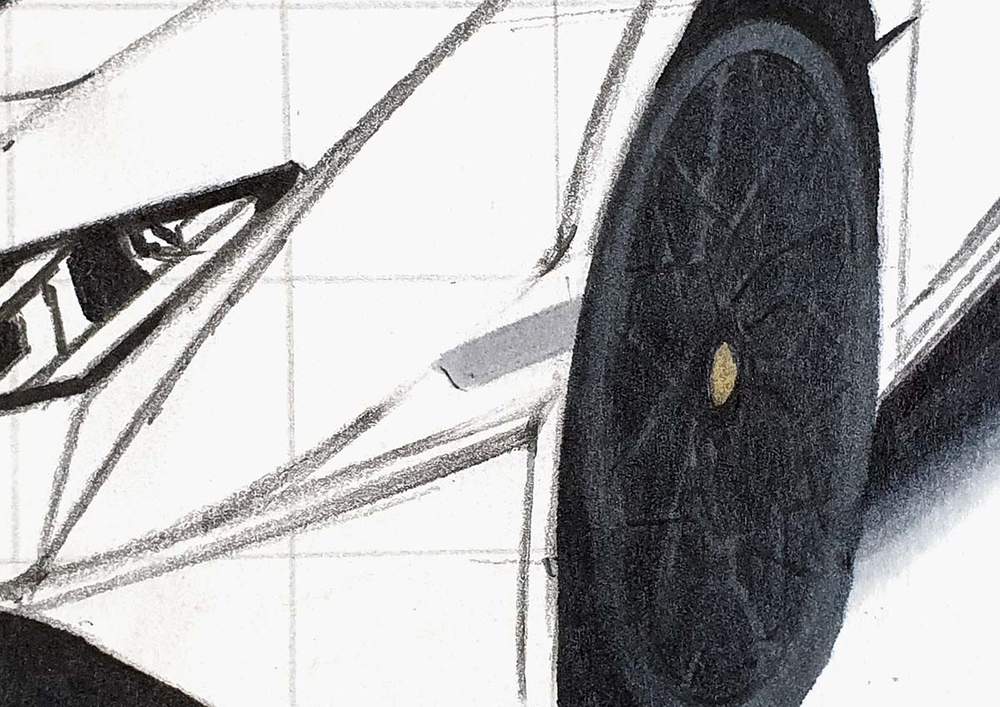
Step 4: Color the Wheels of the Lamborghini Huracan STO
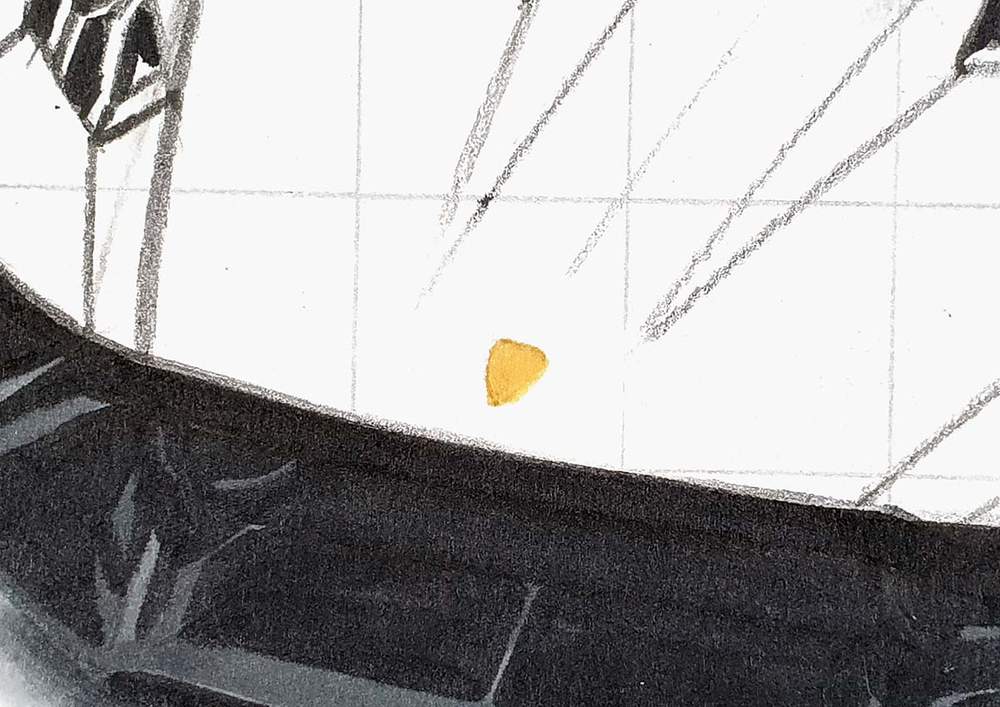
13. Use Yellow Dahlia (Y260) to color the center cap of the front wheel.
14. Use Neutral Grey 07 (CG070) and color the remainder of the front wheel and the rear wheel.

Step 5: Color the Shadow of the Lamborghini STO
15. Use Neutral Grey 02 (CG020) to color the shadow underneath the STO.
16. Use Neutral Grey 05 (CG050) to color the inside half of the shadow underneath the car.

17. Use Neutral Grey 07 (CG070) to blend the black of the shadow into the lighter Neutral Grey 05 (CG050) by coloring over the edge of the two colors.
18. Use Neutral Grey 05 (CG050) to blend the Neutral Grey 07 (CG070) into the Neutral Grey 05 (CG050) by coloring over the edge where the two colors meet.
19. Use Neutral Grey 02 (CG020) to blend the Neutral Grey 05 (CG050) into the Neutral Grey 02 (CG020) by coloring over the edge of the two colors.
20. Use the colorless blender marker to blend the Neutral Grey 02 (CG020) into the paper by coloring over the outside edge of the shadow.

Step 6: Color the Side Intake of the Lamborghini Huracan STO
21. Use Neutral Grey 03 (CG030) to color the side intake of the STO.
22. Use Neutral Grey 05 (CG050) to add some darker reflections on the top of the intake.
Step 7: Color the Front Marker Light of the Lamborghini STO
23. Use Neutral Grey 03 (CG030) to color the front marker light.
Step 8: Color the Lamborghini Logo on the Front of the Huracan STO
24. Use Yellow Dahlia (Y260) to color the Logo on the front of the STO.
Step 9: Color the Headlights of the Lamborghini STO
25. Use Neutral Grey 02 (CG020) to color both headlights.
26. Use Neutral Grey 05 (CG050) and Neutral Grey 07 (CG070) to add dark shadows and reflections in the headlights and add a dark grey line to the top and the bottom of each of them.
Step 10: Color the Air Vents on the Front of the Lamborghini Huracan STO
27. Use Neutral Grey 02 (CG020) to color the lightest reflections on the vent surroundings.

28. Use Neutral Grey 03 (CG030) to color the rest of the grey vent surrounding.
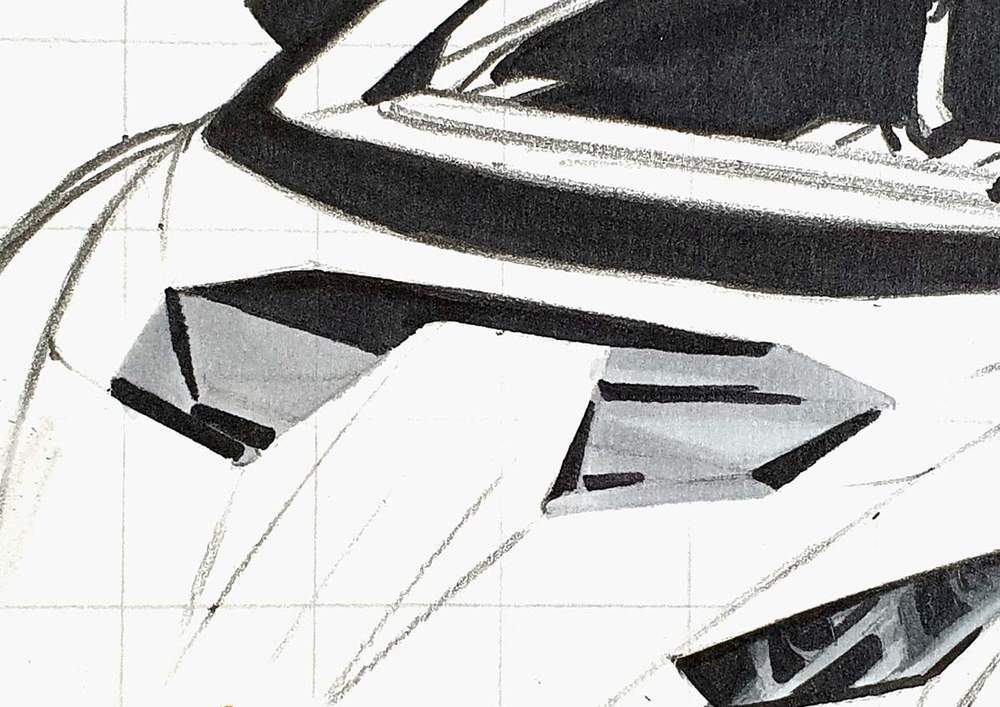
29. Use Neutral Grey 05 (CG050) to mark where the shadow parts and darker reflections are.
30. Use Neutral Grey 07 (CG070) to color the darkest shadows and reflections.

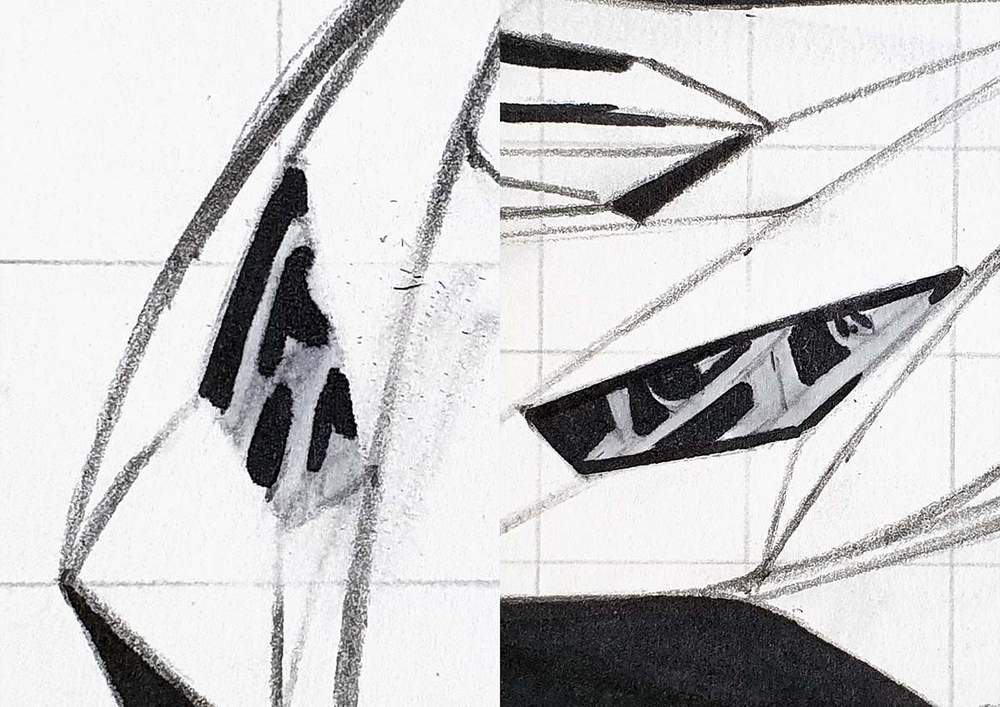
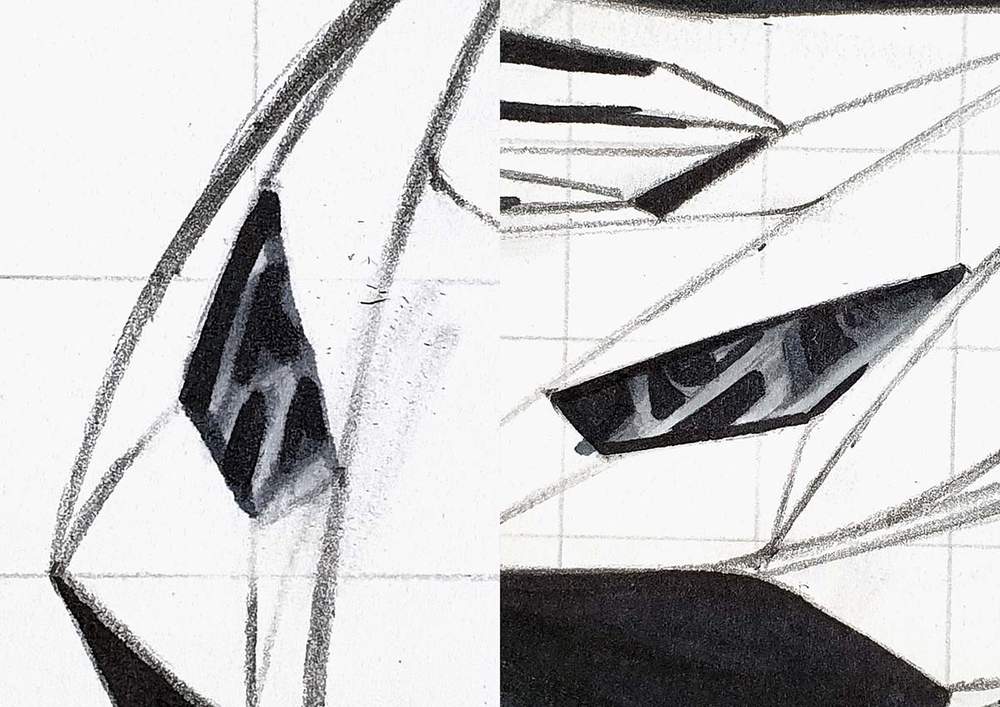
Step 11: Color the Louvers above the Front Wheel of the Lamborghini STO
31. Use Neutral Grey 03 (CG030) to color the louvers above the front wheel.

32. Use Neutral Grey 05 (CG050) to color the bottom right half of each louver and the top edge.

33. Use Neutral Grey 07 (CG070) to color the bottom right of the first louver and the bottom right edge of the others.
Step 12: Color the Windshield and the Interior of the Lamborghini Huracan STO
34. Use Neutral Grey 03 (CG030) to color the left side window.
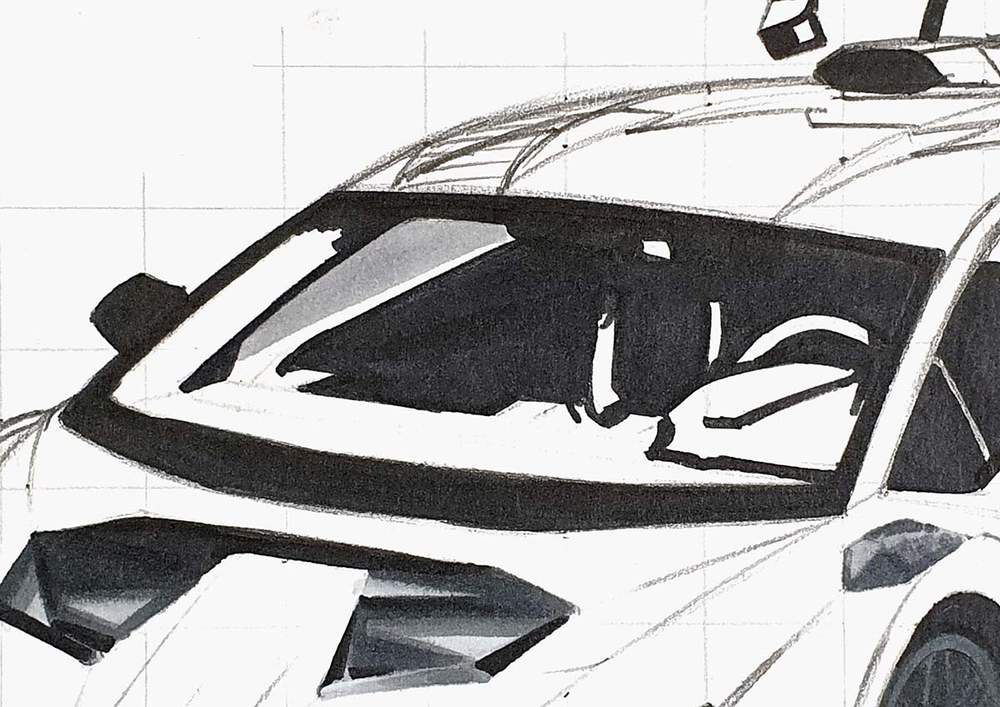
35. Use Neutral Grey 05 (CG050) to color the bottom left part of the dashboard in front of the steering wheel and the part below the left side window.
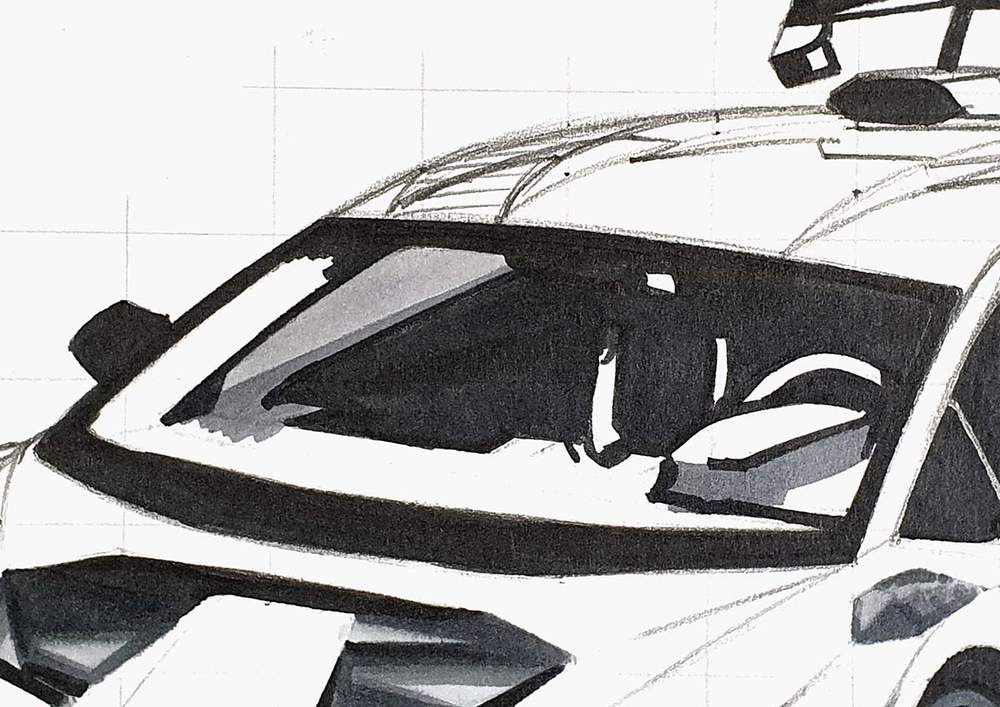
36. Use Neutral Grey 07 (CG070) to color the rest of the windshield and the interior.
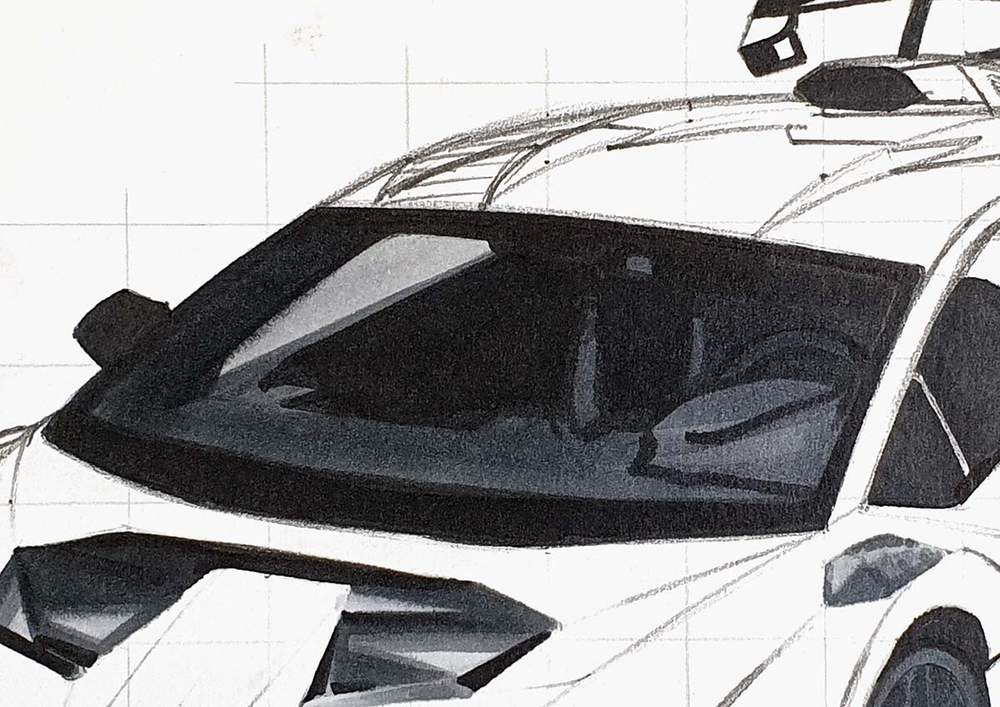
Step 13: Color the Side Windows of the Lamborghini STO
37. Use Neutral Grey 05 (CG050) to color the remainder of the side windows.
38. Use Neutral Grey 07 (CG070) to color the darker reflection to the left of the lighter one on the side window.
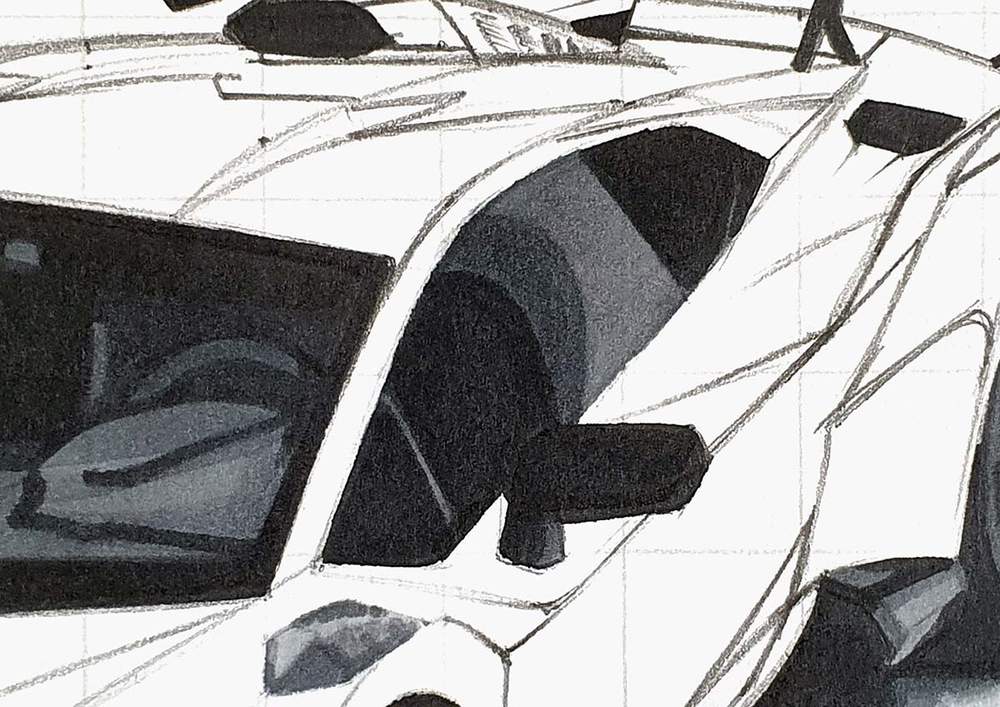
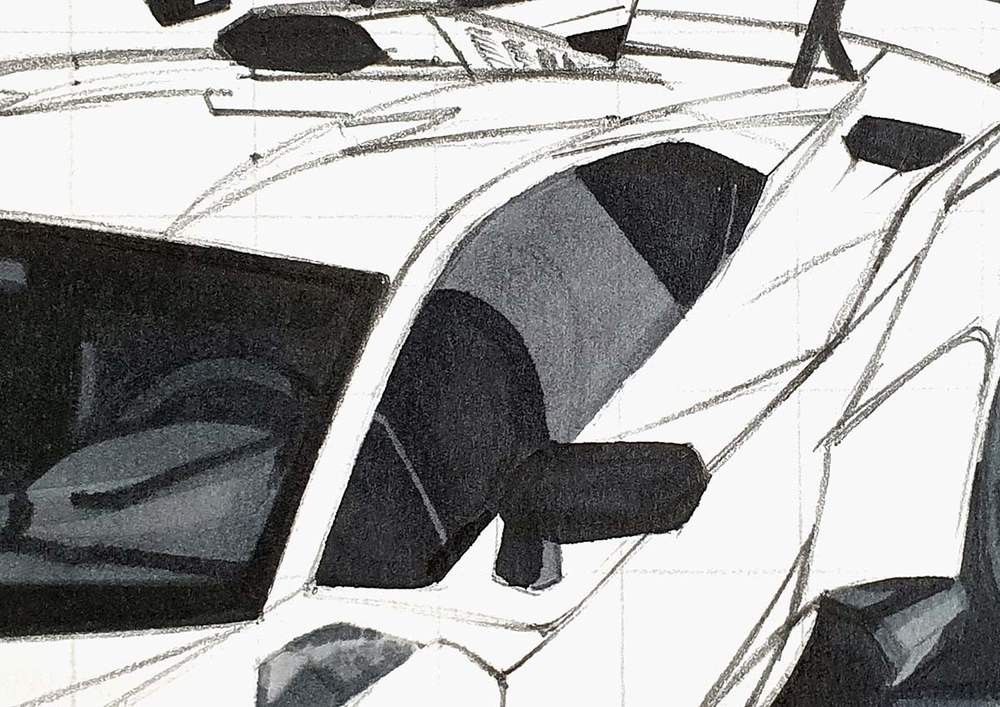
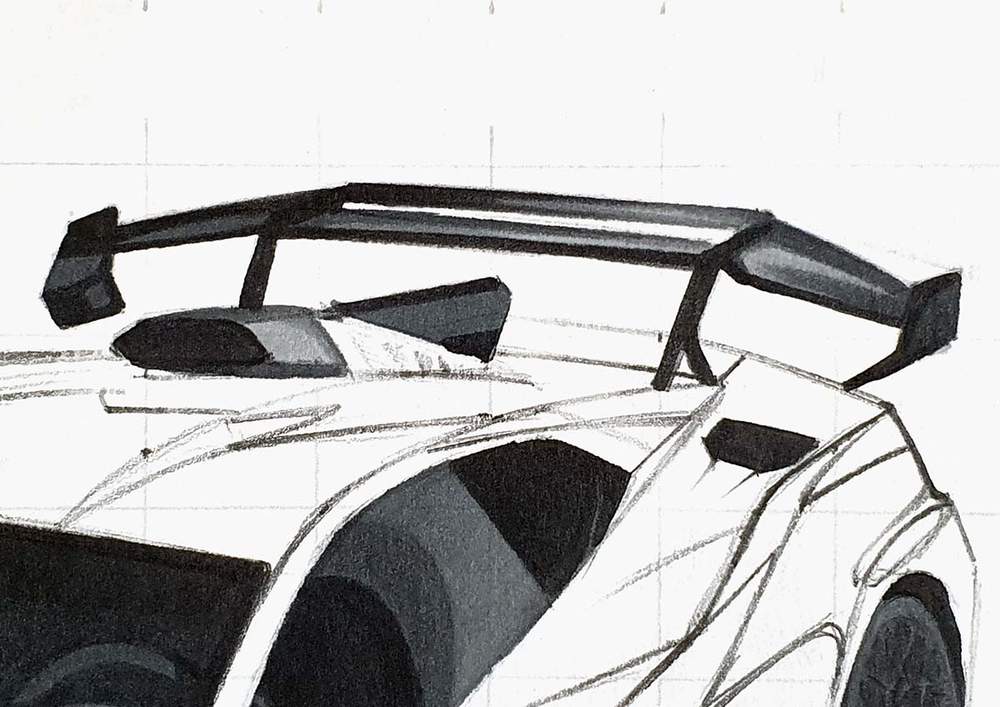
Step 14: Color the Roof Scoop and the Fin of the Lamborghini Huracan STO
39. Use Neutral Grey 03 (CG030) to color the right side of the roof scoop.
40. Use Neutral Grey 07 (CG070) to color the bottom and the top of the roof scoop and the side of the fin behind it.
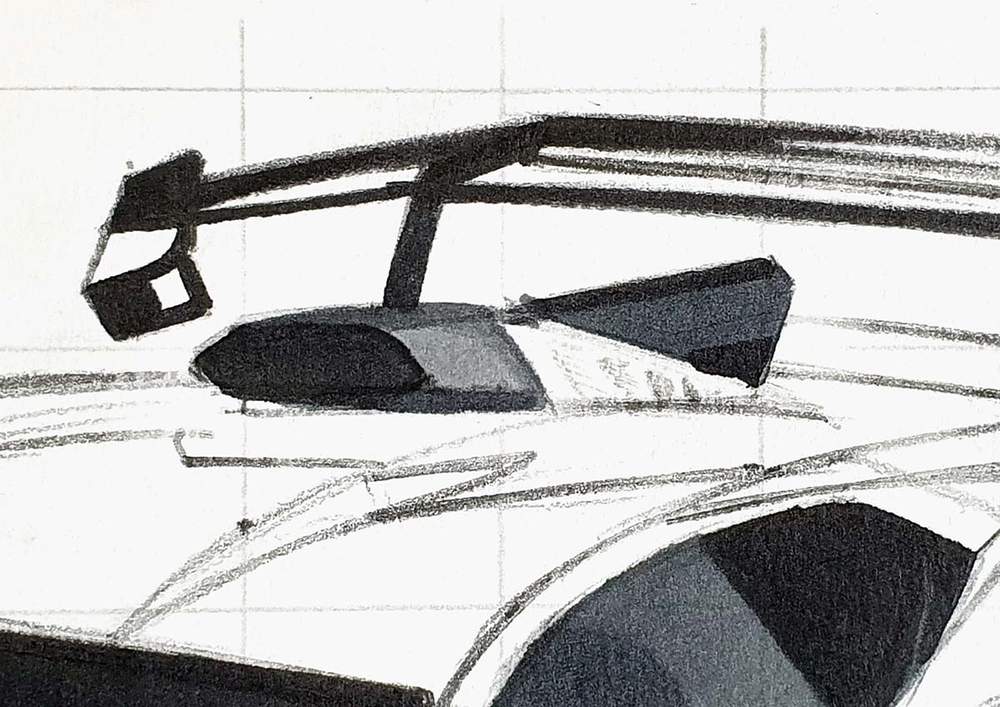
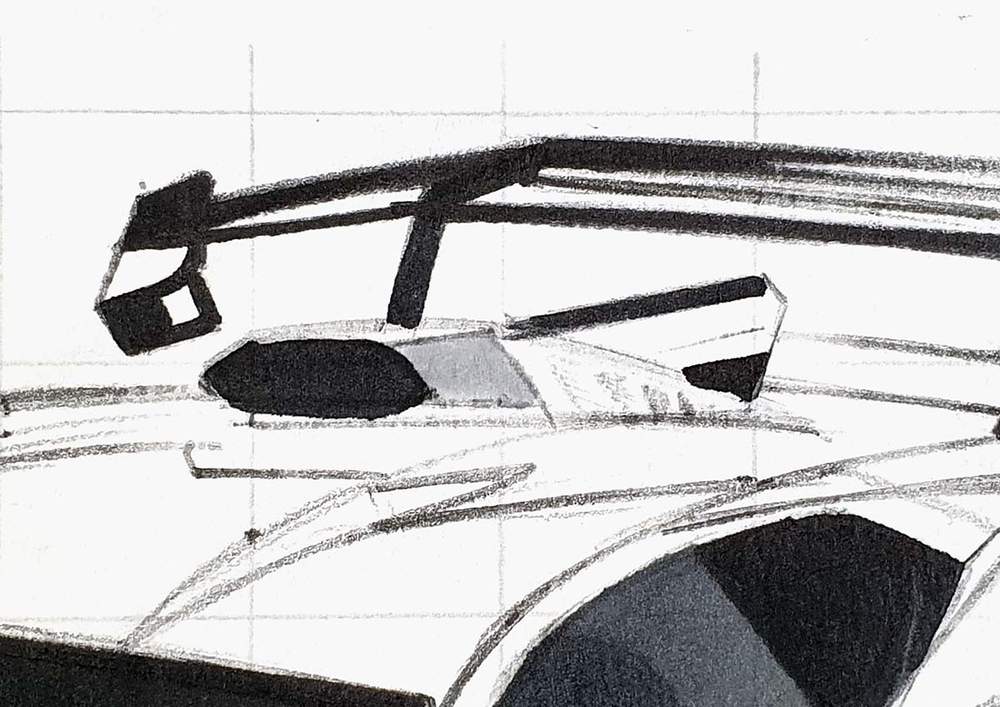
Step 15: Color the Rear Wing of the Lamborghini STO
41. Use Neutral Grey 03 (CG030) to color the whole rear wing.
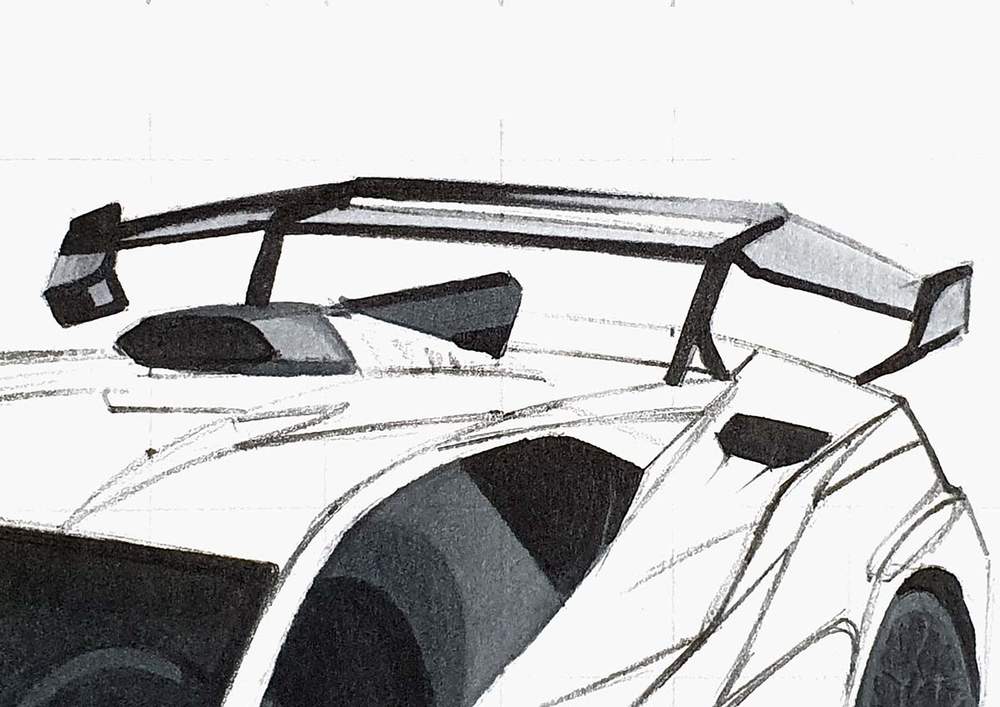
42. Use Neutral Grey 05 (CG050) to color the full left side of the wing as well as both end plates and the bottom and top of the two-layered part and the right part of the wing.

43. Use Neutral Grey 07 (CG070) to color over the same parts as in the previous step while leaving an edge of Neutral Grey 05 (CG050) visible.
Step 16: Color the Main Body of the Lamborghini Huracan STO
44. Use Strawberry Pink to color the lightest reflections on the car. These are all on the right side of the car.
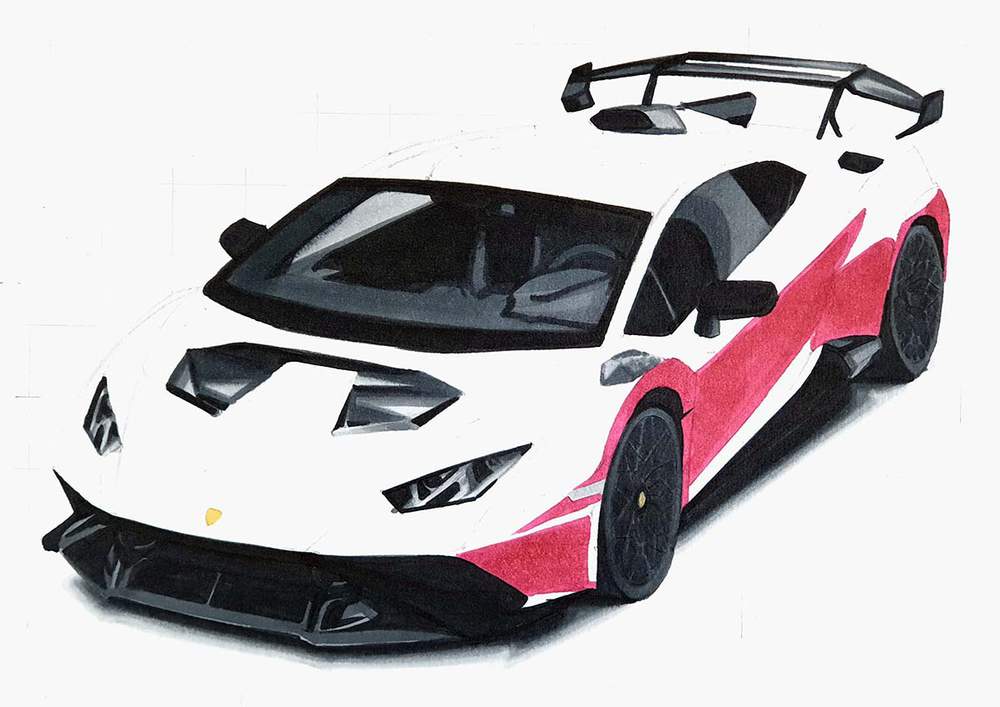
45. Use Crimson to color the rest of the main body of the STO.
46. Use Peony to color the darkest reflections on the car. These are mainly on the left-facing panels.

47. Use Neutral Grey 05 (CG050) to add some grey reflections to the lightest pink parts following the shape of the main body, going horizontal and curving down toward the right.
Step 17: Add Details to the Lamborghini STO Drawing
48. Use the White Coloursoft pencil to add white details and highlights on:
- the front splitter and aero parts
- the headlights
- the reflections on the roof and the rear
- the reflections on the side
- and edges of panels on the front of the STO
49. Use the Black colored pencil to add panel gaps and the black details in the logo. (I forgot to do this in this step...)
50. Use the Dove Grey pencil to add grey reflections to the light reflections on the side of the STO and to refine the spokes of the wheels.
Step 18: Add White Highlights to the Lamborghini Huracan STO Drawing
Now it's time for my favorite step of this whole drawing. This is what will make the drawing come to life.
51. Use the White Posca paint marker to add tons of white highlights all over the car. Carefully look at the reference photo for the reflections and color every white reflection you can see in their corresponding places.
When you're done, your drawing will look so much more realistic and lively than it did before.
And That's How You Draw a Lamborghini Huracan STO
I hope this was helpful to you!
Thank you for taking the time to read (and follow) this tutorial!
Leave a comment with what other cars you want me to make tutorials for!
Also, make sure to check out my other car drawing guides!
Thank you!
Tags
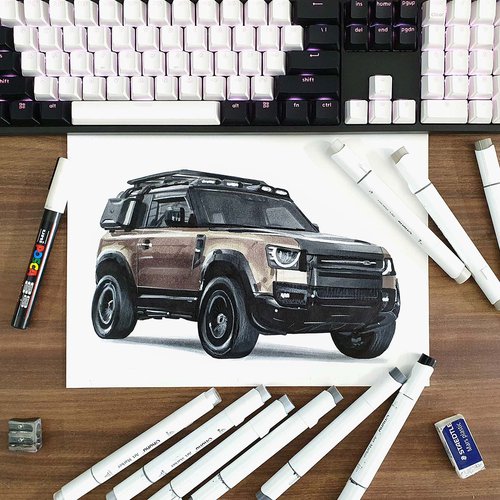
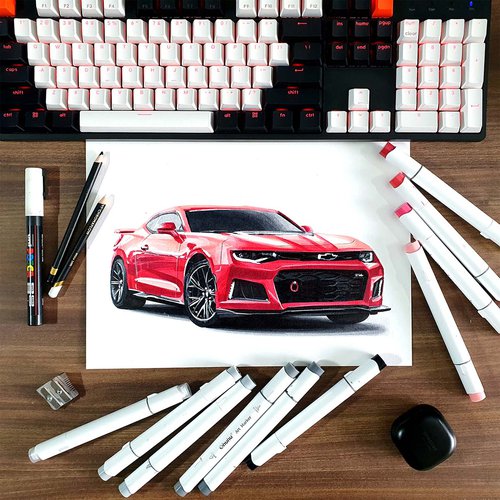
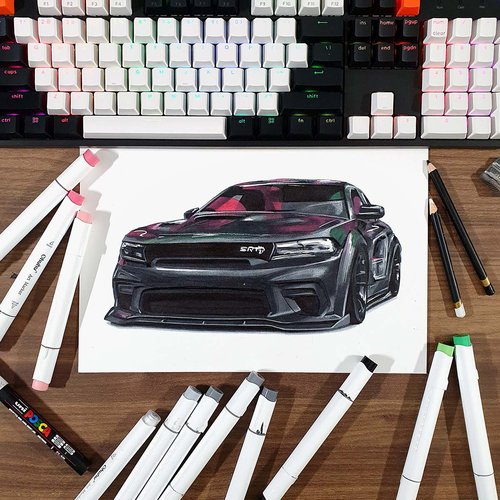
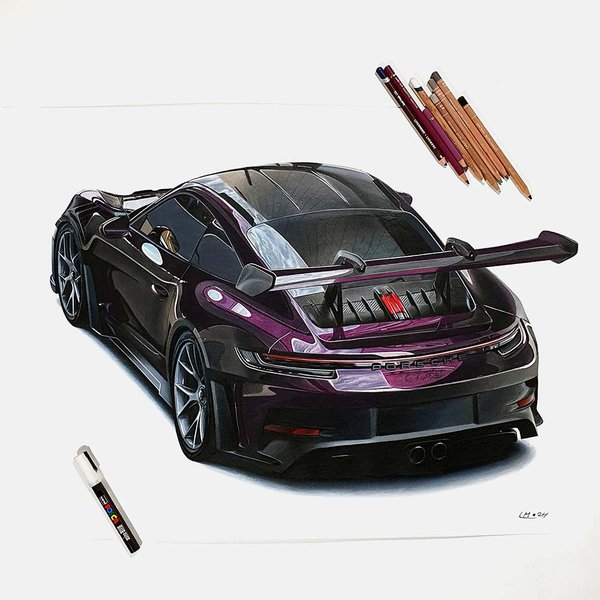
Articles You Might Also Like

I love bringing cars to life with alcohol markers and colored pencils.
Whether you're just starting out or looking to improve your skills, I'm here to help!
Click here to learn more about me.


Add a comment
Comments
Very nice work!